Lyonsden Blog

Tag - Commodore 64

SIDPlayer+ Review

SIDPlayer+

The SIDPlayer+ is a neat little hardware music player made by Arananet that is able to play C64 SID audio tracks. They have a strong tendency to be perpetually out of stock but you can register your interest and receive an email when a new batch is ready which is how I got mine.

I’ve actually been meaning to post about this for a while but only just got around to it. Anyway after ordering the device I received small package in the post containing a transparent cassette case with full colour J-card, the SIDPlayer+ PCB and a small A5 instruction sheet.


SIDPlayer+

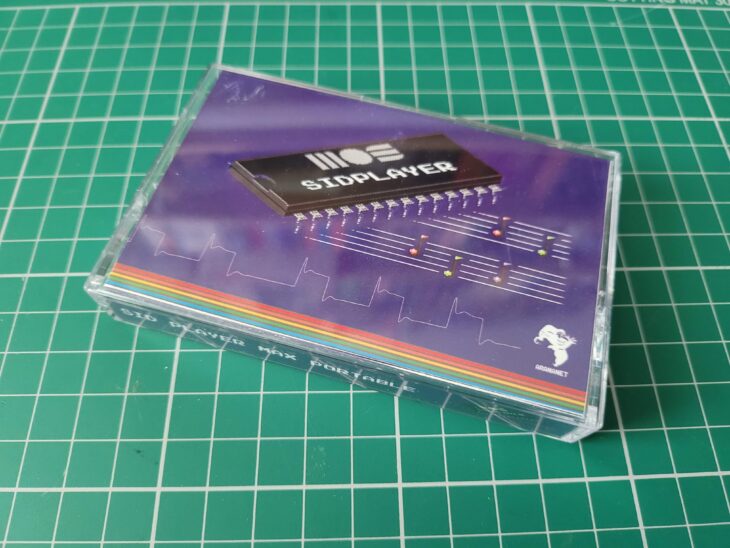
The SIDPlayer+ in cassette storage case.


The PCB has been created in the style of a compact cassette and the case provided offers a very practical means of storing it safely.


SIDPlayer+

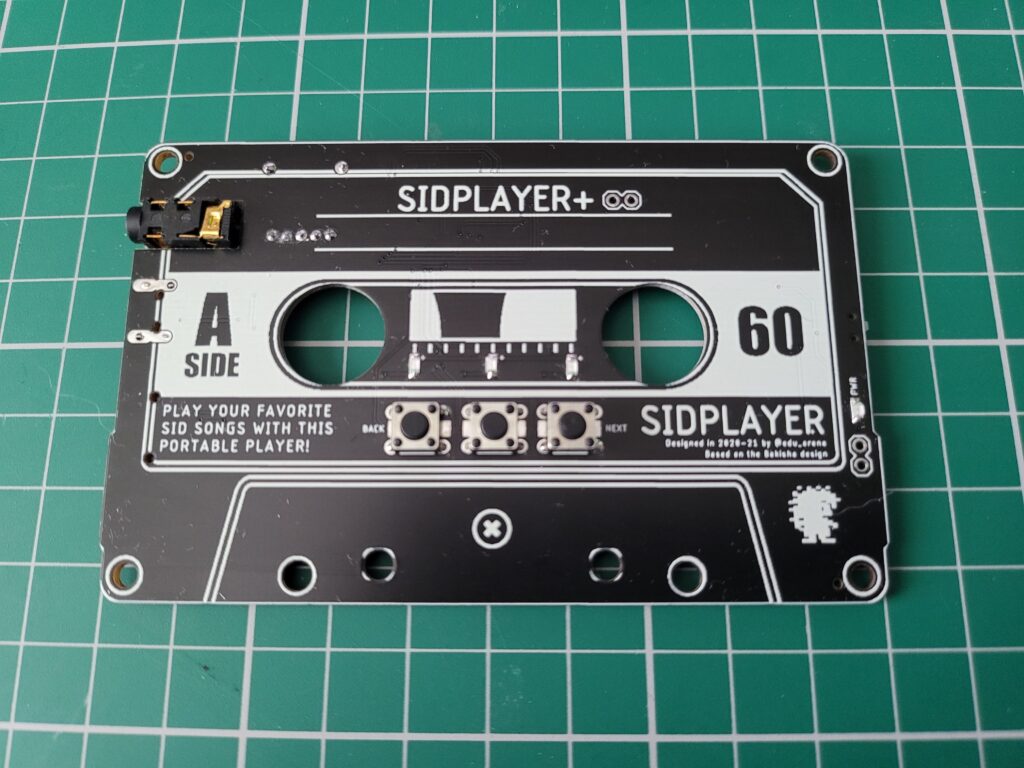
Front of the SIDPlayer+ PCB.


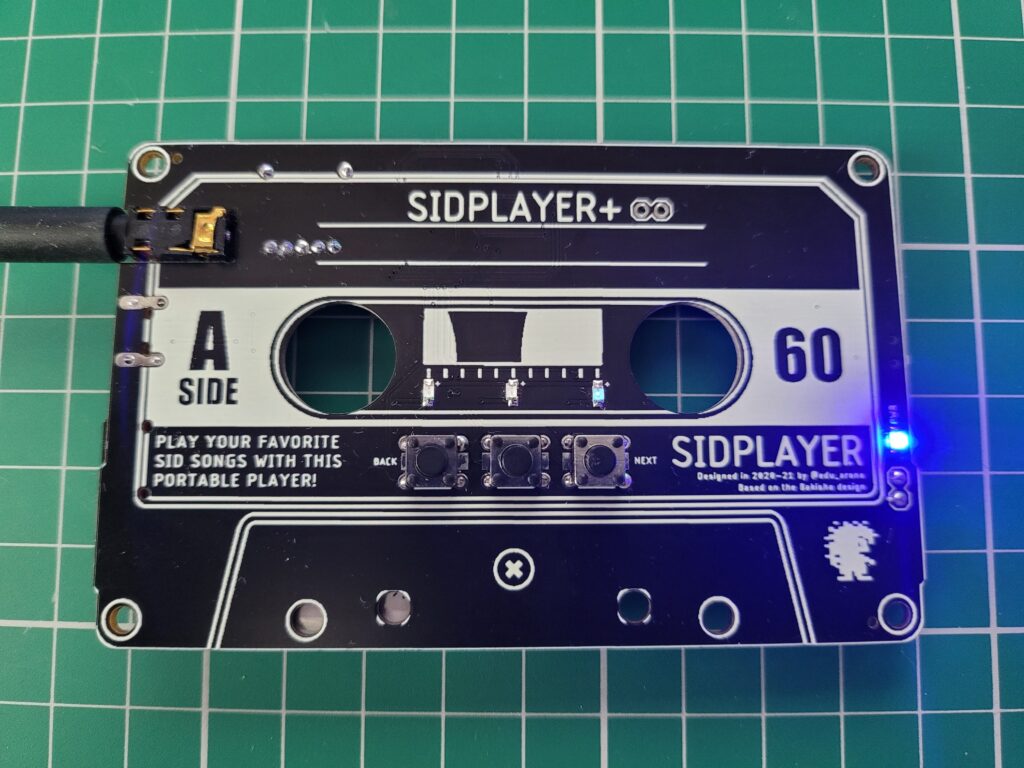
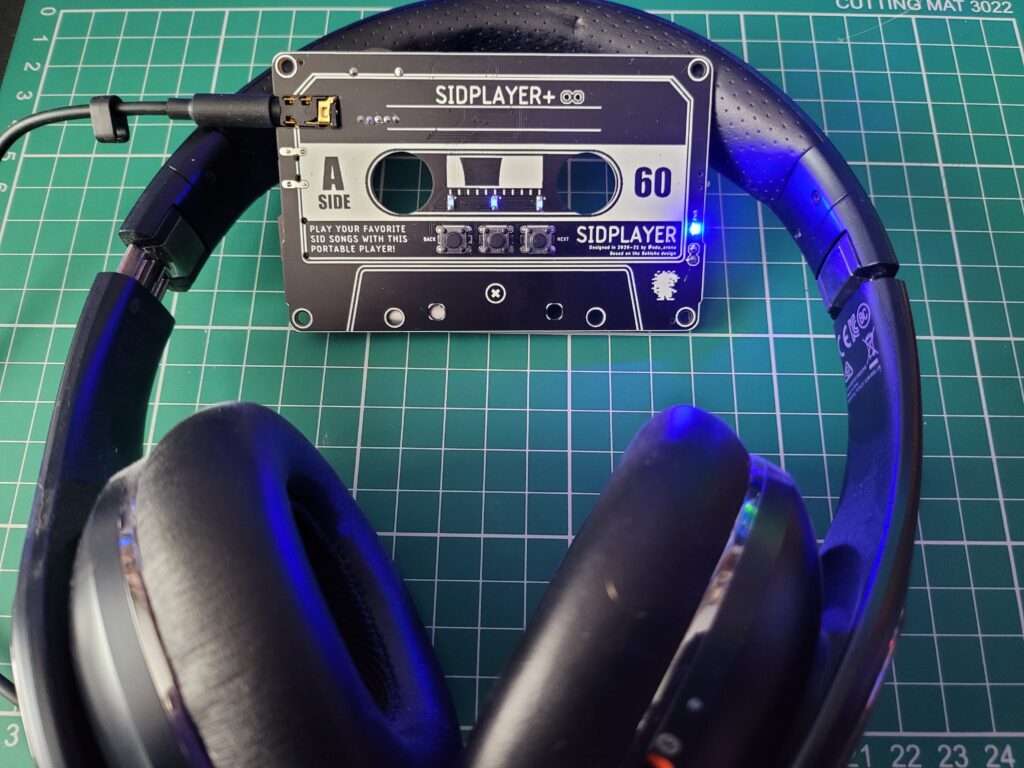
The front of the PCB features three physical buttons; back, stop/play and next which function exactly as you would expect. On the right-hand edge there is a small power LED which indicates whether the device is switched on or not. On the left edge is the 3.5mm stereo headphone socket (the player outputs mono sound so you get the same channels in both ears). In the centre there are three additional LED’s that light up when the corresponding sound channels are in use.


SIDPlayer+

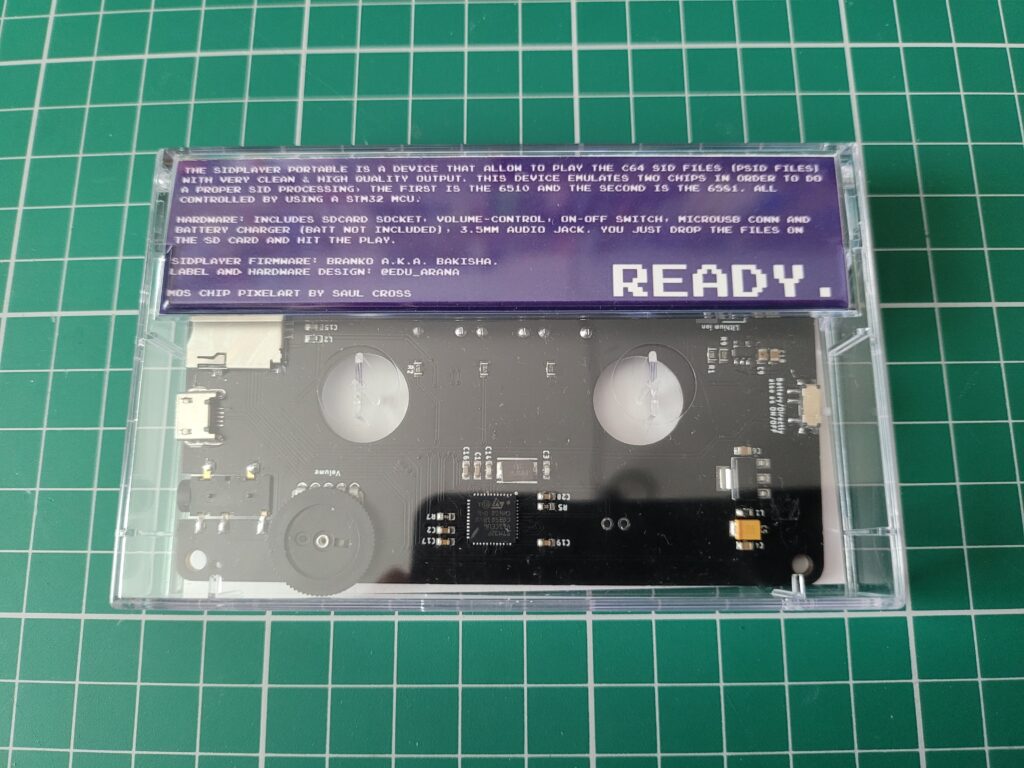
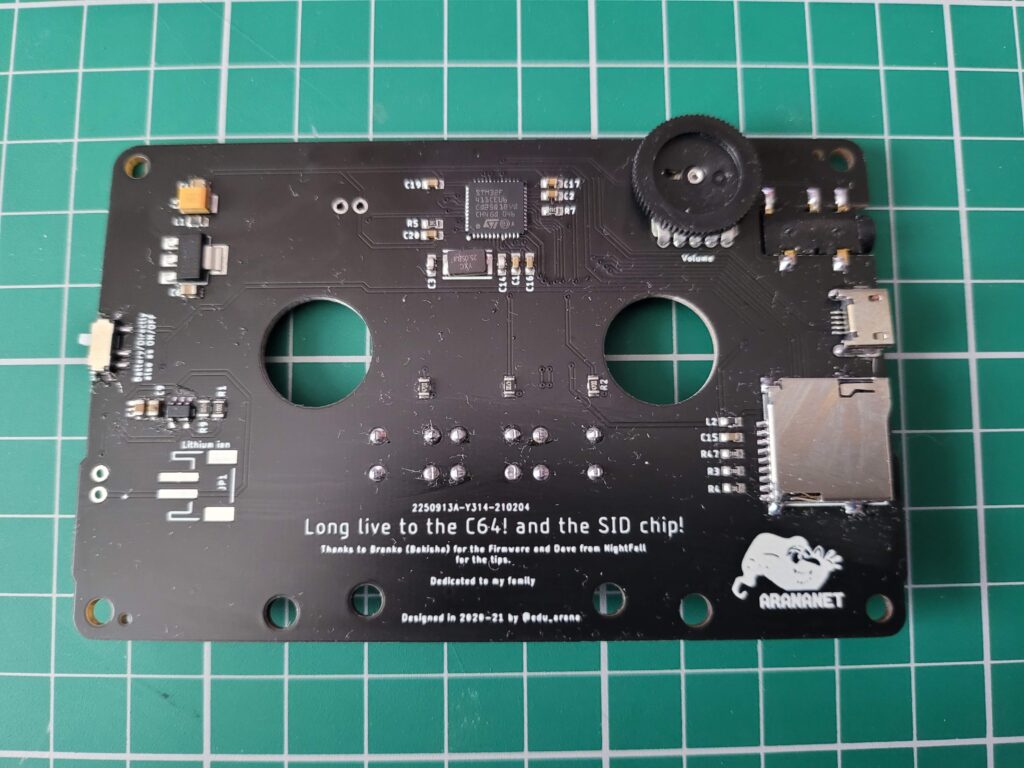
Back side of the SIDPlayer+ PCB.


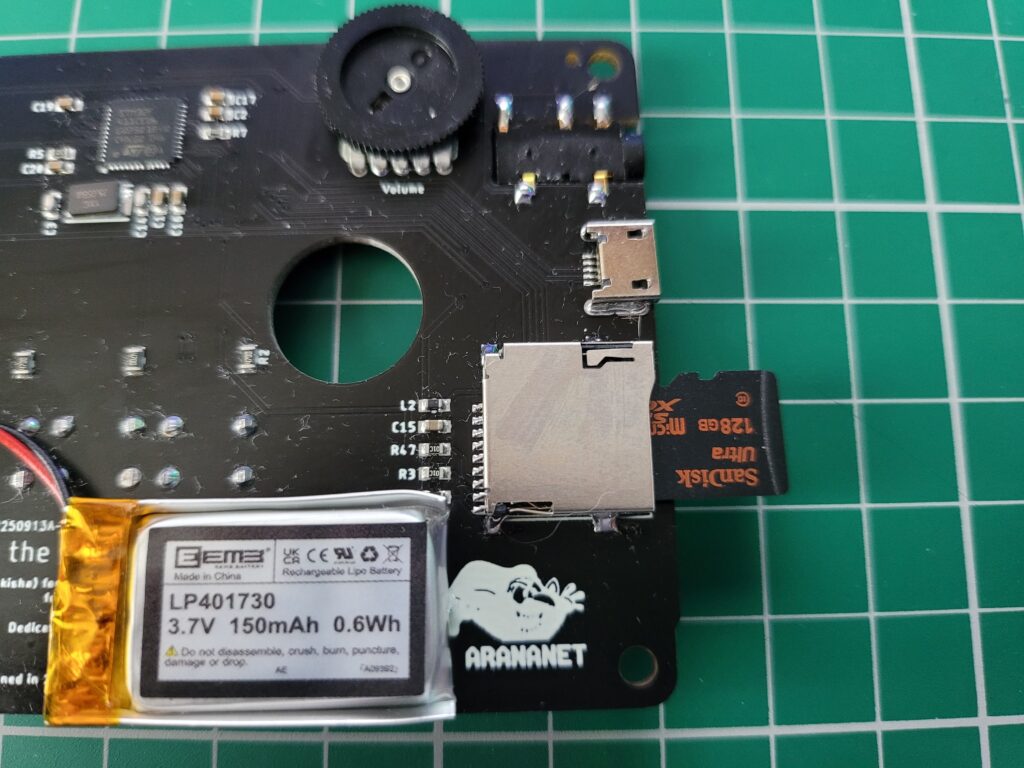
Flipping the PCB over to the back side reveals an on/off switch on the left, rotary volume control along the top whilst on the right can be found a Micro USB power socket and the MicroSD memory card slot. There’s also shout outs to some of the people that helped to create the player printed on the board itself which is a cool touch.


SIDPlayer+

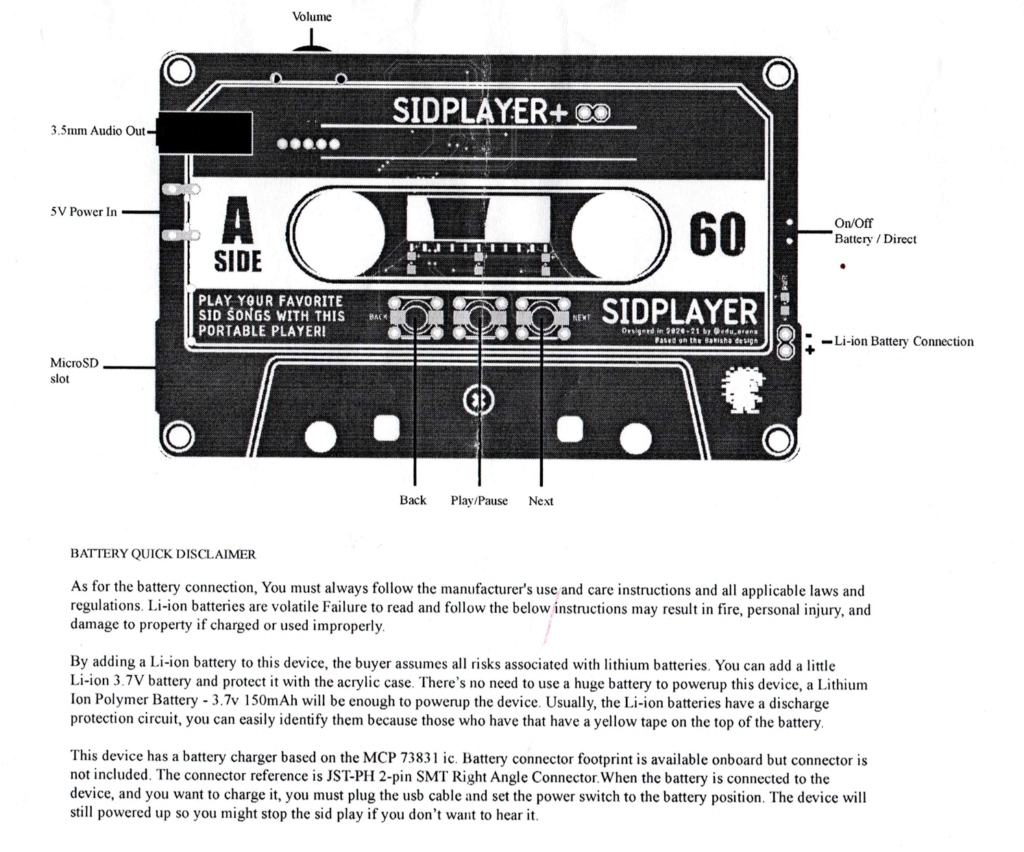
SIDPlayer+ Instructions.


Adding a Battery

The instruction sheet (pictured above) provides a useful annotated diagram of the player showing where all the important parts are located and gives some guidance towards adding a battery.

The player can be used as is, straight out of the packaging by simply plugging in a micro USB cable to power it. However I wanted it to be portable, just like a Walkman, so I ordered myself a compatible battery off Amazon (it doesn’t come supplied with either a battery or micro USB cable).


LI-ION Battery

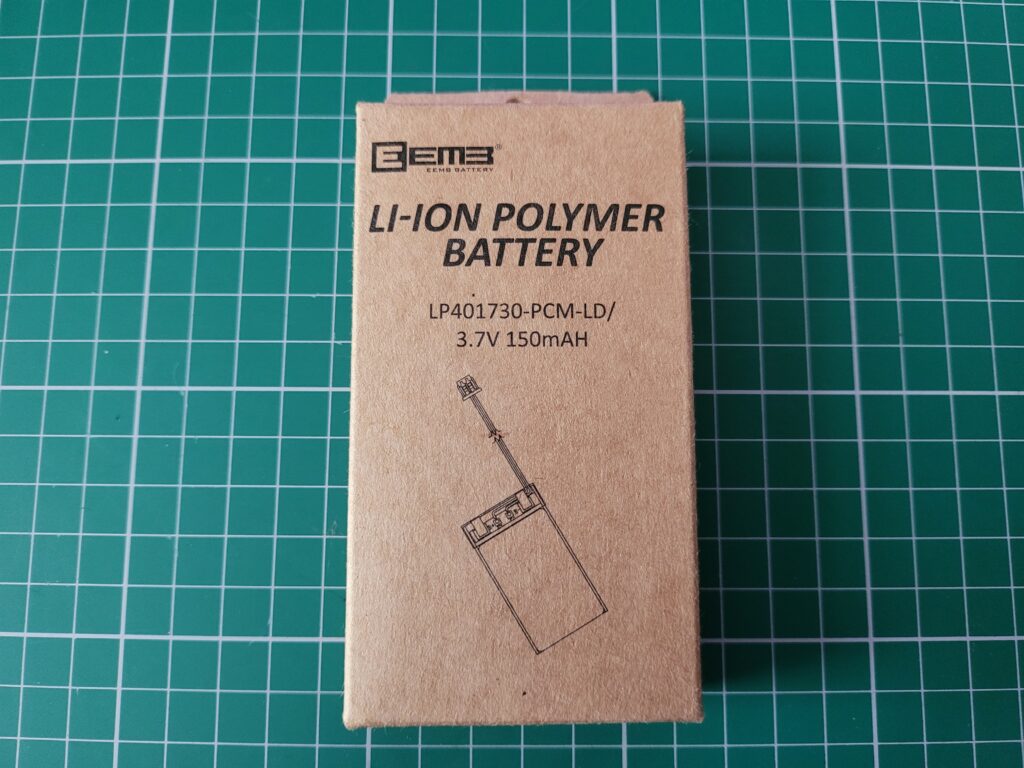
LI-ION Battery.


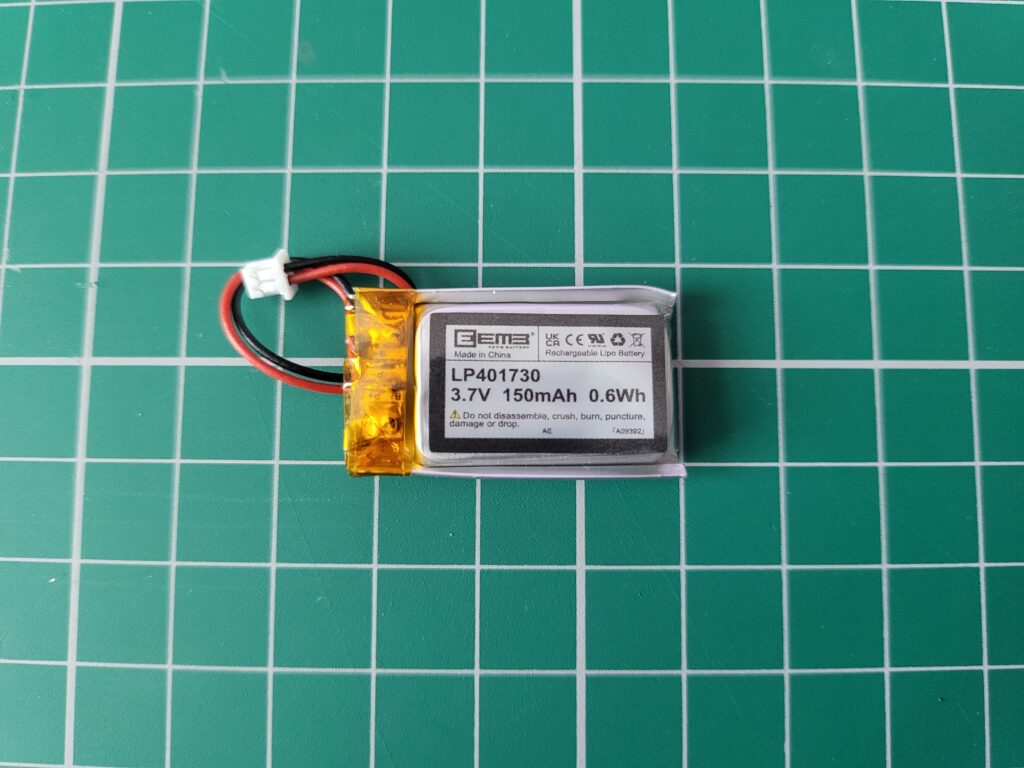
The battery needs to be rated at 3.7V 150mAh and came supplied in oversized box displayed above. The battery itself is tiny, measuring just 30mm long, about 15mm wide and a couple of mm thick.


Battery with supplied connector plug.


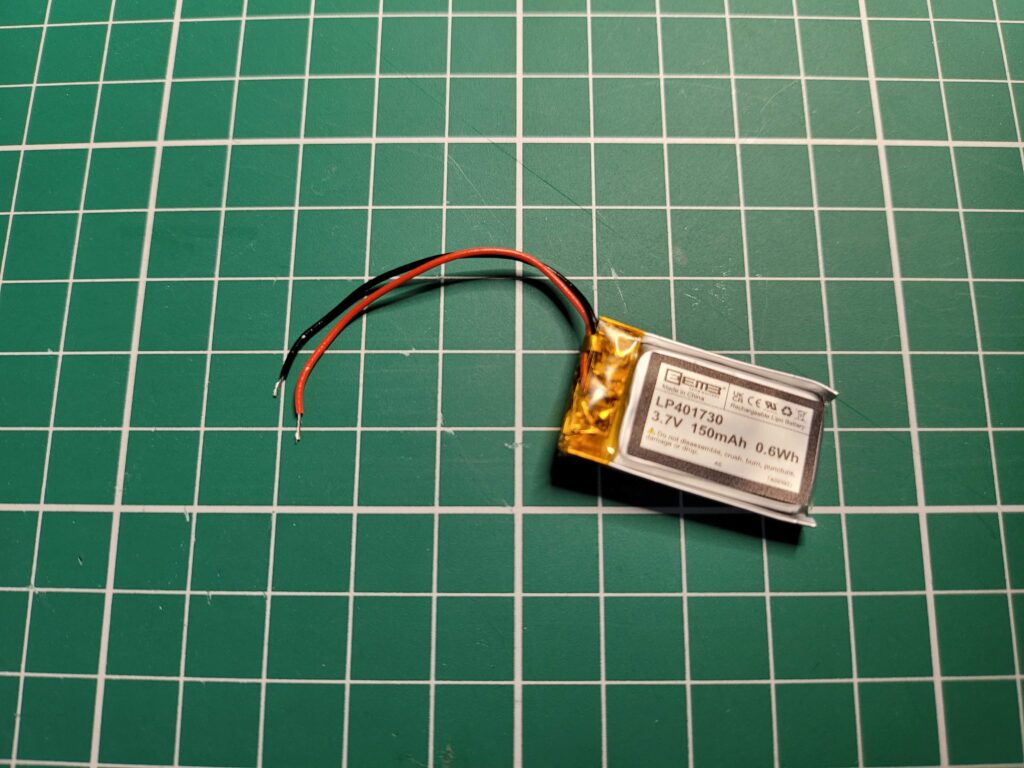
There’s no connector on the board to plug the battery into but there are a couple of solder points for the wires so I just cut off the plug and soldered them in position.


Battery with connector removed and ends stripped ready to be soldered on the board.


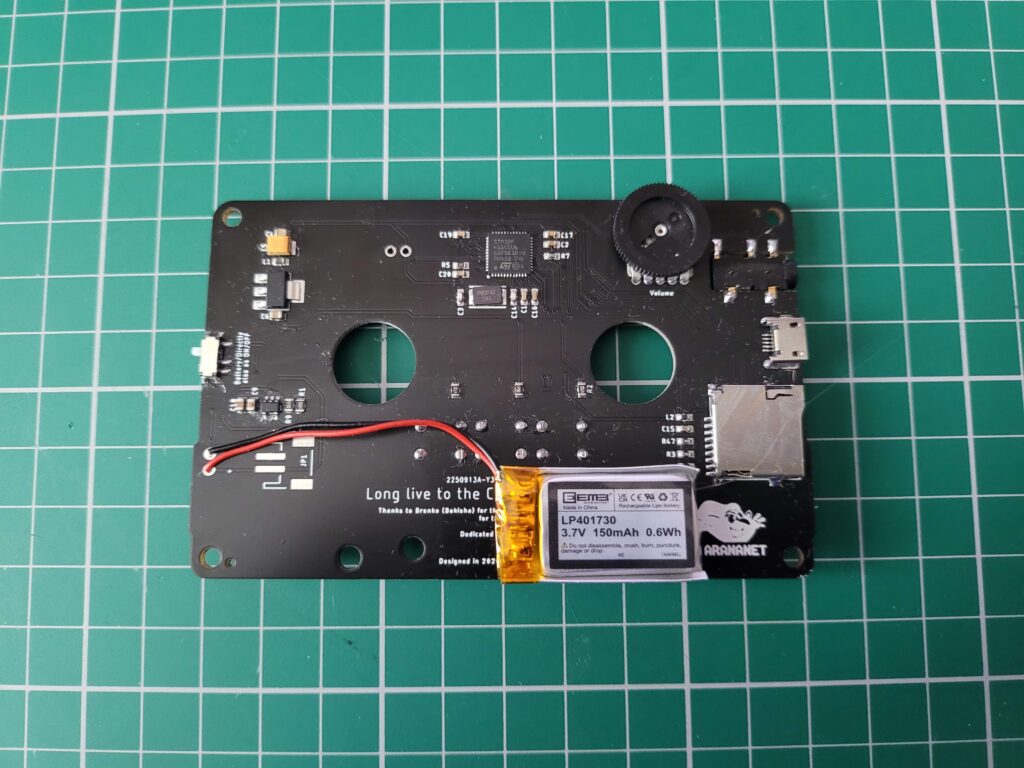
I also used a couple of blobs of hot glue to hold the battery in place on the board to keep things neat and tidy.


SIDPlayer+

Battery glued to PCB and wires soldered in position.


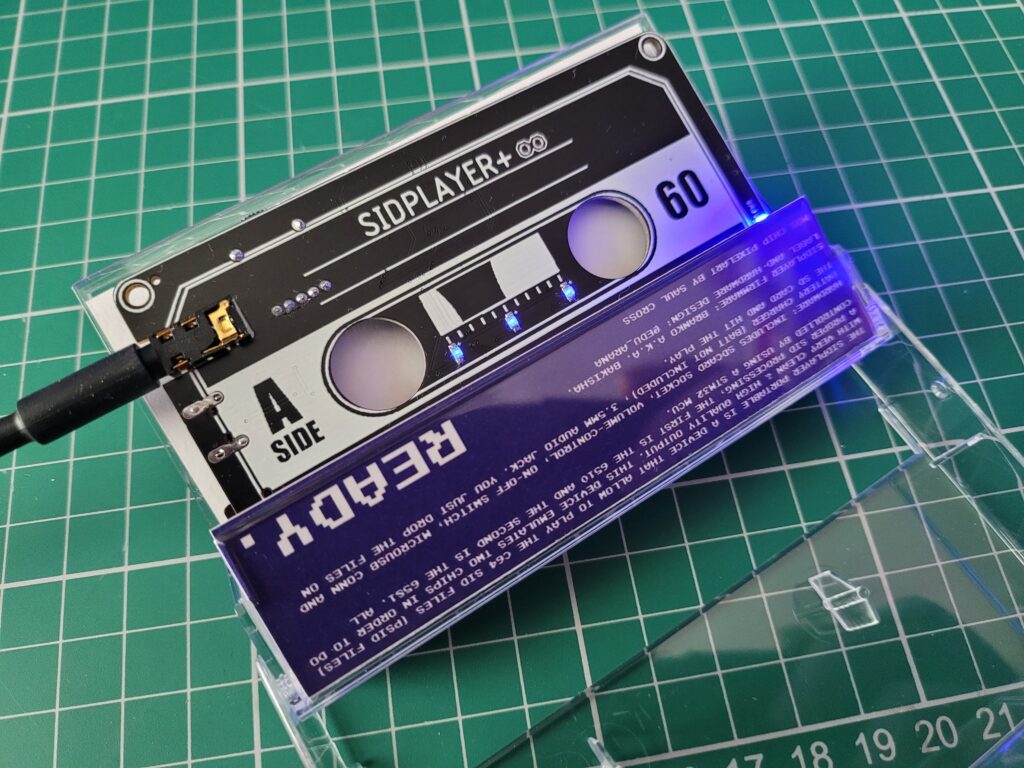
I gave it a quick test by flipping the switch to the ‘on’ position and the blue power LED lit up which was a reassuring sign.


SIDPlayer+

SIDPlayer+ Powered on and headphones plugged in.


The board also incorporates the necessary circuitry to charge the battery. To achieve this you need to supply power via a Micro USB cable and set the on/off switch to the ‘battery’ position. One thing to note is that it continues to play music whilst charging so you need to press the ‘stop’ button to silence it.

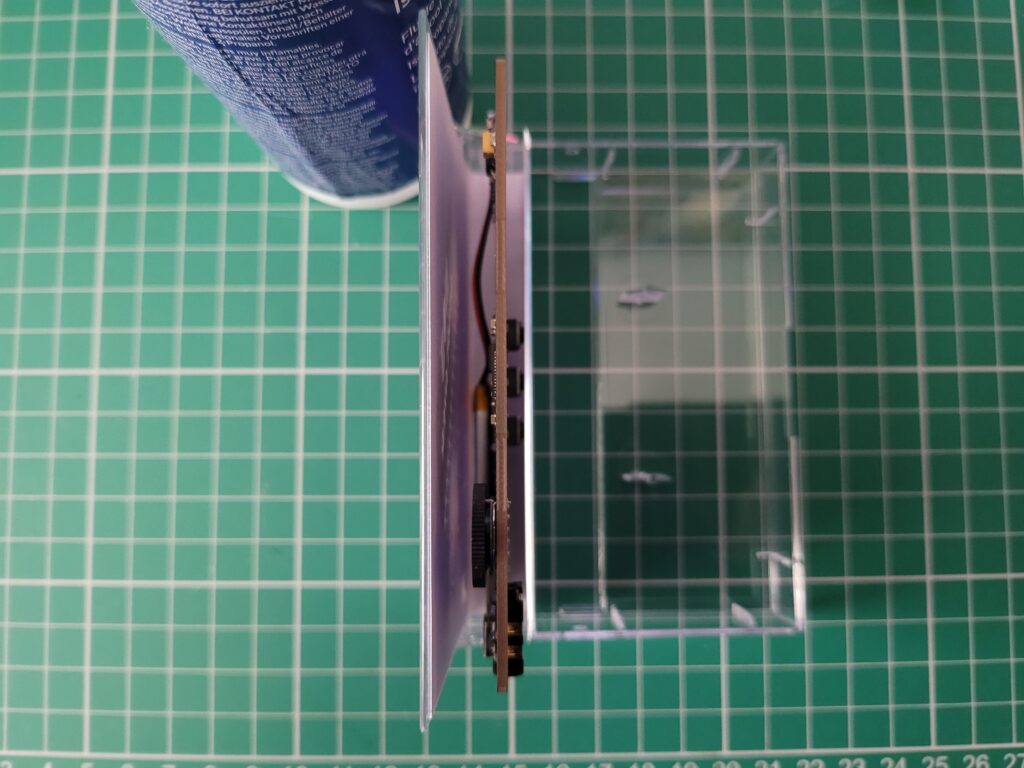
As can be seen in the photo below, the board still fits nicely into the cassette case with room to spare, even with the battery attached.


Tucked away neatly into the cassette box.


Prepping the Card

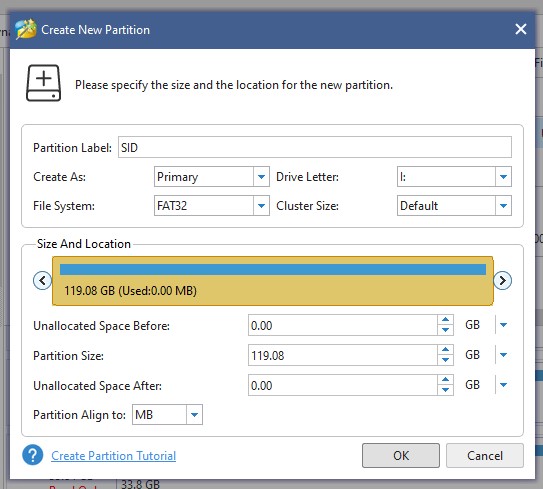
With the SIDPlayer+ now powered it was time to turn my attention to sorting out a memory card to use with it. I didn’t bother buying one as I’ve built up quite a collection of memory cards of all types and sizes over the years. A quick rummage around the bottom of my desk drawer elicited a 128GB SanDisk card which was overkill really but would certainly do the job. It had been partitioned and formatted for something else in the past so I deleted all the partitions and formatted it as one big FAT32 drive using MiniTool Partition Wizard.
 

MiniTool Partition Wizard

Partitioning and Formatting the MicroSD card.


I then copied a handful of some of my favourite SID tracks onto it and popped it into the card slot on the SIDPlayer+. The files have to be placed in the root of the card and it’s worth pointing out that it can only play the older style PSID files and not the more recent RSID ones.


SIDPlayer+

Popping the MicroSD card into the slot.


Listening to Some SID Music.

With the headphones attached and the player powered on I was finally able to put the player through its paces. I played through a number of tracks and they all sounded terrific. It had plenty of power and I never needed to turn it up fully to get a decent sound level.

Although the player can be used ‘naked’ my preferred option was to keep it inside the cassette case at all times – in fact I will probably cut a small slot in the side of the case to accommodate the headphone jack. That way I can listen to the player with the case closed, maybe in my shirt pocket for example.


SIDPlayer+

Playing some music with the card in the case.


Navigating from one track to the next was easy enough using the buttons but without a screen to show the track names it did get a little tricky at times. This is because many SID files actually contain a number of subtunes and/or sound effects within them so unless you make a note beforehand you can often find yourself clicking through all manner of unexpected tracks before reaching the one you want. Not a dealbreaker but definitely something to be aware of.


SIDPlayer+

Listening to some music.


I recorded a couple of videos of the SIDPlayer+ belting out a two of my favourite C64 tunes. These were just recorded on my phone with the the sound playing through the headphones but it’s loud enough for you to hear what it sounds like. Obviously it’s miles better quality when listening directly through the headphones. The device is supposed to be capable of emulating both the original 6581 SID and the newer 8550.


Name that tune! I picked this particular track not just because it’s one of my all-time favourites but because the intro should make it easier to see the individual channel LED’s flicker on and off.


Sound Quality


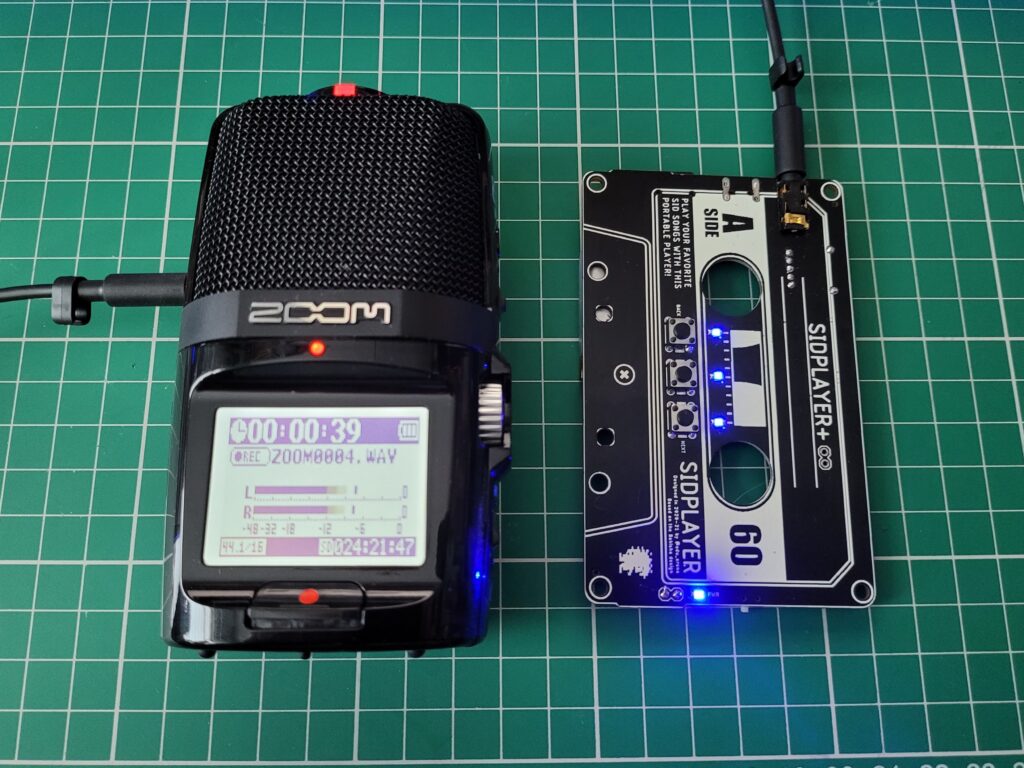
The sound quality from the SIDPlayer+ is impressive for such a compact and inexpensive device but understandably falls a little short of the real deal. To give some idea of the difference I recorded the same track (Cybernoid by Jeroen Tel) into my digital sound recorder from both my real C64 and the SIDPlayer+. If you are able to, listen to them both whilst wearing headphones to get the best impression of the sound quality.


SIDPlayer+ and Zoom H2n

Zoom H2n hooked up to SIDPlayer+.


First off here’s a clip I recorded directly from my C64 via my SIDFX 3.5mm stereo output jack.


And here’s the same clip recorded directly from the headphone socket of the SIDPlayer+.


Initially they do sound very similar but between the 10-20 second mark you can hear a clear difference. I’m no audio expert and lack the vocabulary to describe the sound properly but the SIDPlayer’s rendition of this section of the the track sounds awkward with audible clicks and pops as it struggles to produce the right sounds. Reading through the specs of the player it does say; ‘Some filters are enabled but due to the hardware limitation, they do not cycle exact’. I’d hazard a guess that this is the reason for the issue.


Verdict

So the sound isn’t quite as good as a real Commodore 64 but to fixate on that alone kind of misses the point of this device. A C64 doesn’t fit in my shirt pocket and I can’t mow the lawn whilst listening to some classic Rob Hubbard tracks on it either. The SIDPlayer+ is an inexpensive and fun little gadget and if, like me,  you adore C64 SID music then it’s definitely worth picking up to have a play around with.

It’s worth pointing out also that since I bought mine last year an updated version has now been introduced. This new version includes a Bluetooth module so you can listen to it with wireless headphones making it even more convenient!

The SIDPlayer+ is available to purchase from here. Just create yourself an Arananet account then sign-up for a notification of when the next batch is ready for sale.

Rogue64 Review

Rogue64

It’s been a good while since I reviewed a game but after recently picking up Rogue64, a new game that has just launched for the Commodore 64, I suddenly felt the urge to write one.

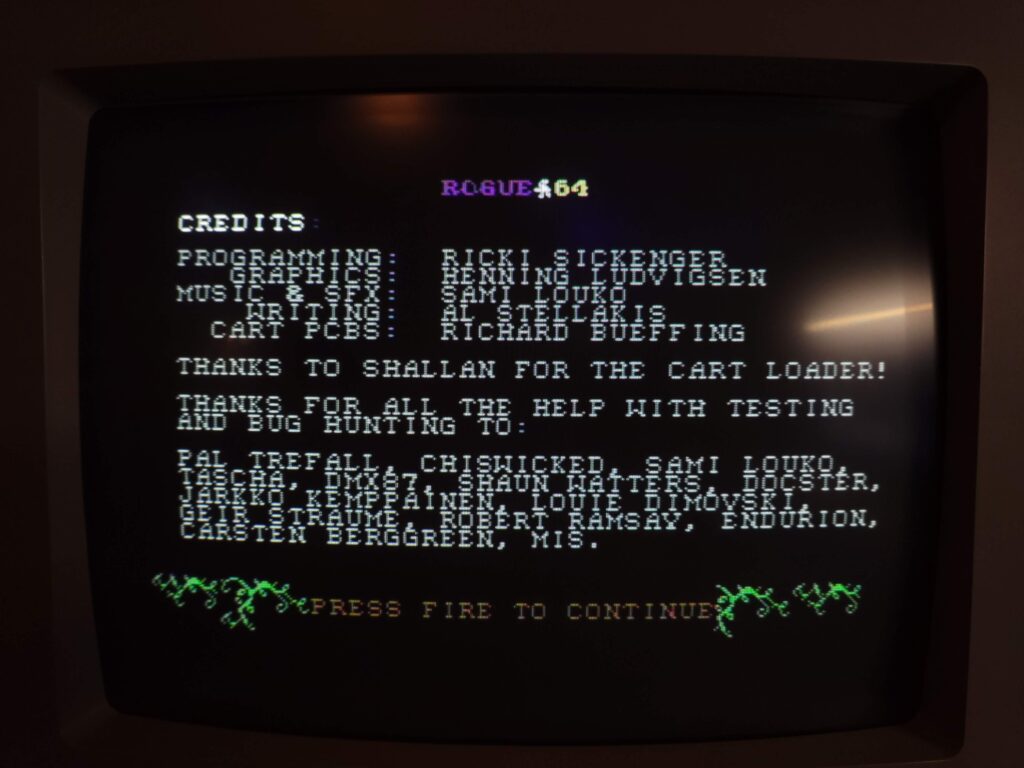
The game, created by Badgerpunch Games (credits in the image below), is available both physically (from Bitmap Soft) and digitally from Itch.io. priced at £35 and £4.60 respectively. I picked up my copy of the game digitally.


Rogue64 Credits

Rogue64 Credits


The download included a CRT cartridge image along with a very attractive PDF instruction booklet. An Easyflash cartridge version is also available to download. At the time of writing the game is only available in cartridge form (whether that be physically or digitally).


Rogue64 Instructions

Rogue64 Instructions


I ran the game via my 1541 Ultimate II+ cart (and via emulation) and it worked without a hitch.


Story

The story, according to the games Itch.io page, goes like this: “You are Zendar the explorer, looking for treasure and fame in the dungeons of Mordecoom! Rumour has it that there is a magic item at the bottom of the dungeon, and you want it! The only problem is that there are evil cave dwellers lurking in the dark, waiting to attack as you travel deeper and deeper into this cube-like tentacle terror maze. The dungeons of Mordecoom are waiting!”


First Impressions

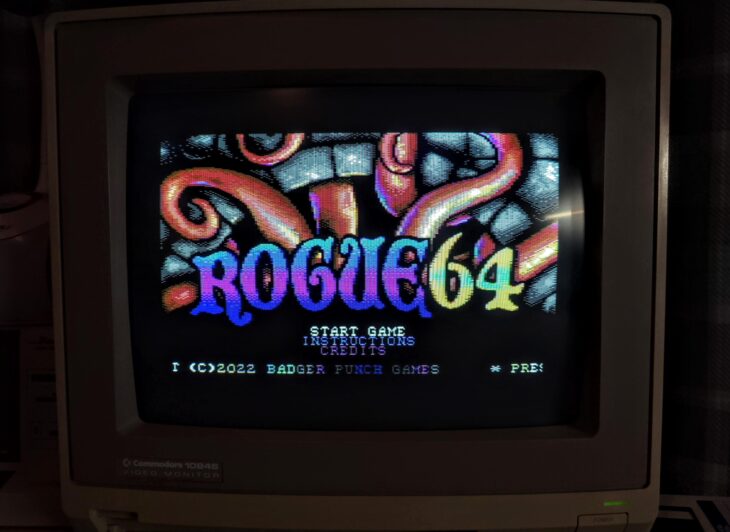
On first running the game there’s a ‘Bitmap Soft Presents’ screen complete with digitised speech before reaching the main title screen. From here you can choose to see the game credits, some instructions or begin your descent into the dungeons of Mordecoom…


Rogue64

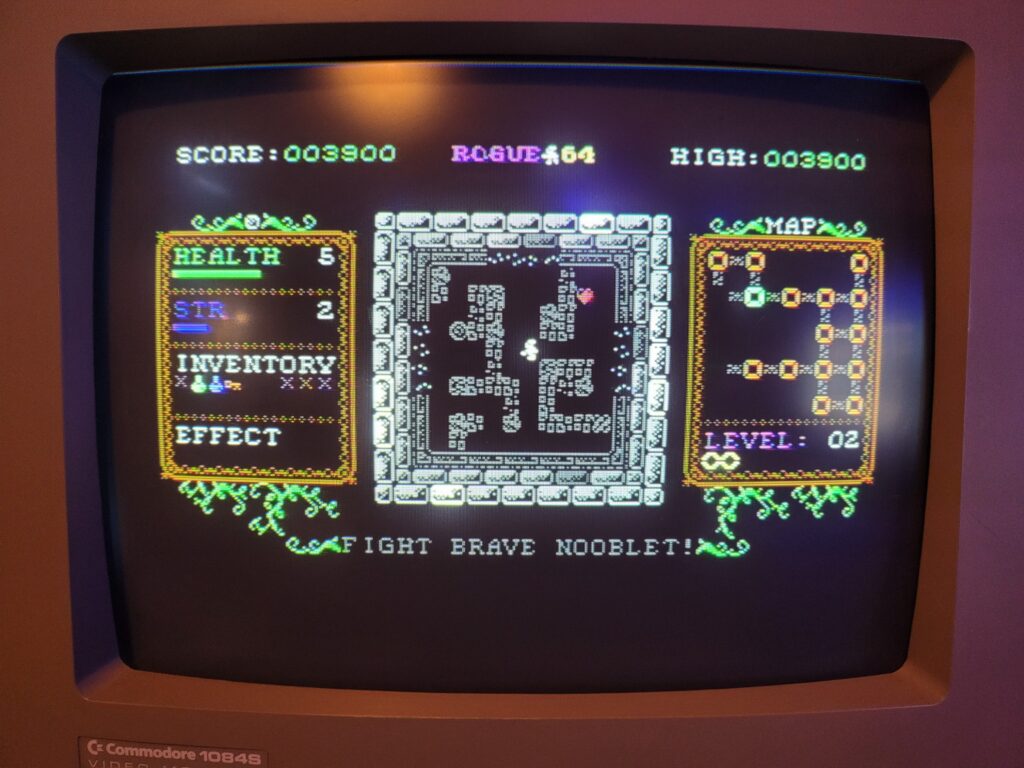
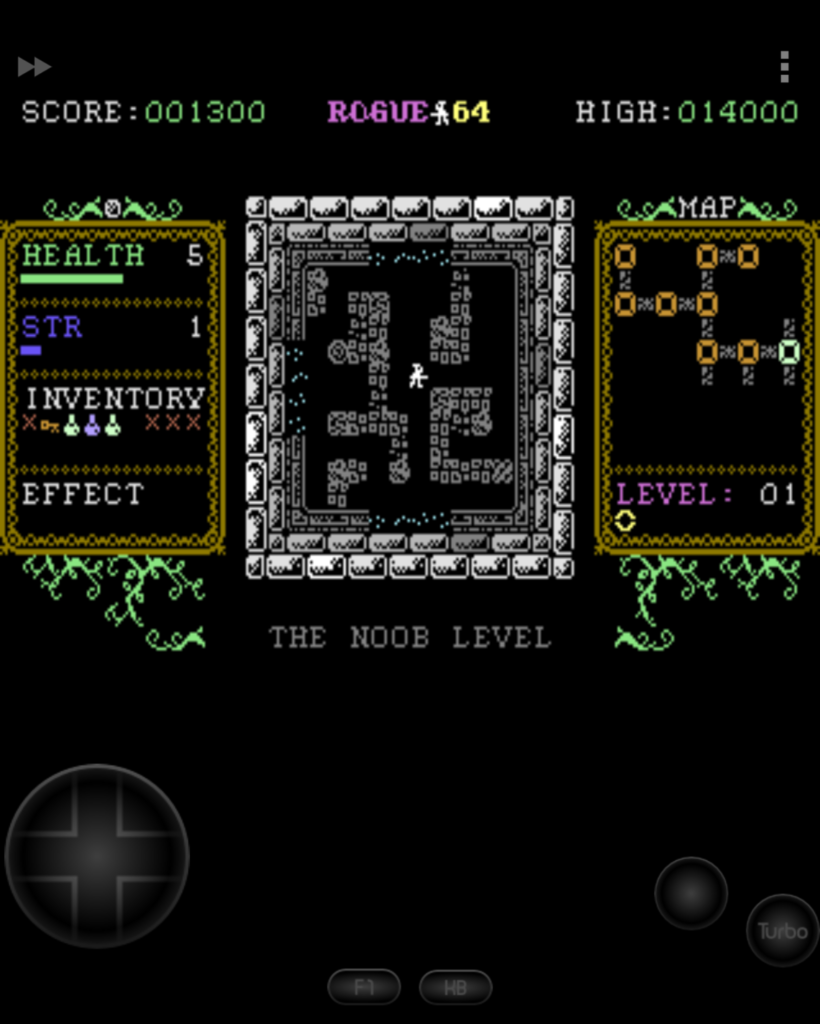
Rogue64 game screen


The game screen is attractively presented, which considering this is all you will ever see, is just as well. The game utilises the C64’s hi-res graphics mode to achieve a detailed and crisp display. A good use of colour ensures that the screen is still attractive to the eye and everything is presented clearly.

In time honoured tradition your score and high score are displayed across the top of the screen along with the name of the game.


Rogue64

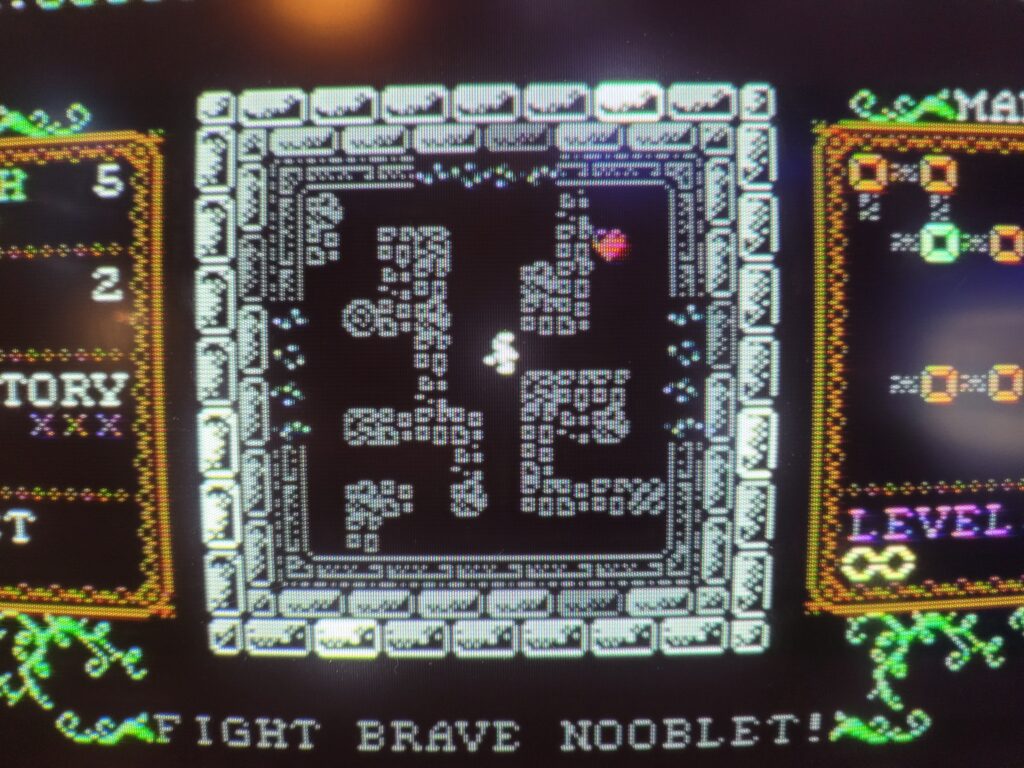
Gameplay window showing current room


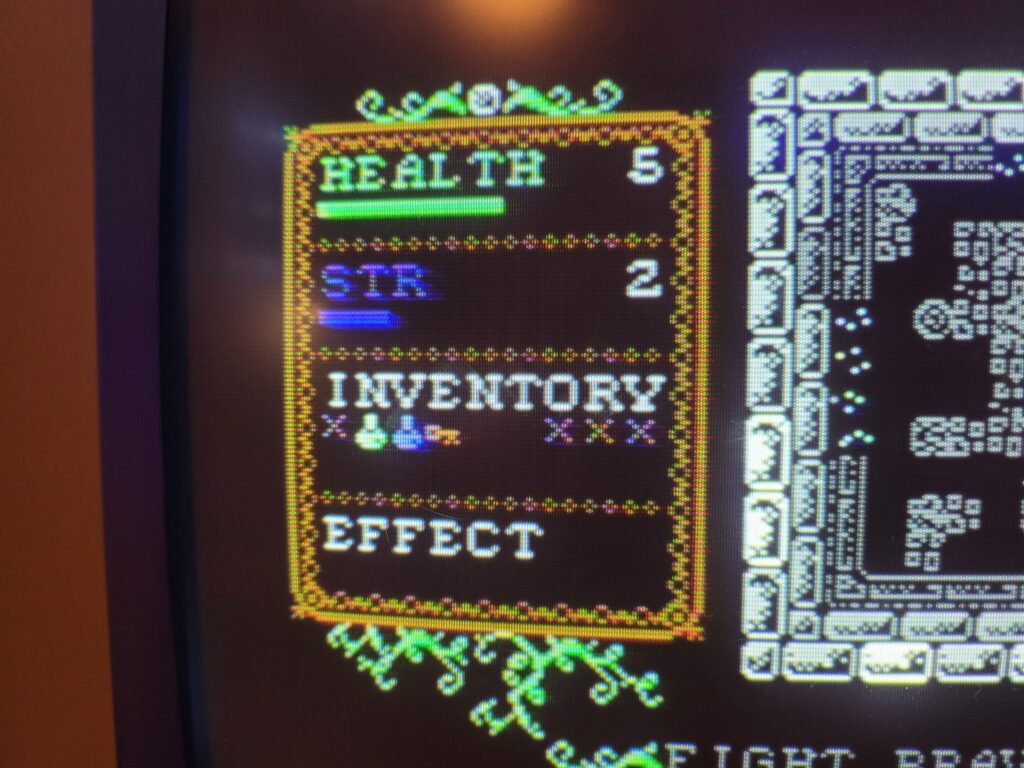
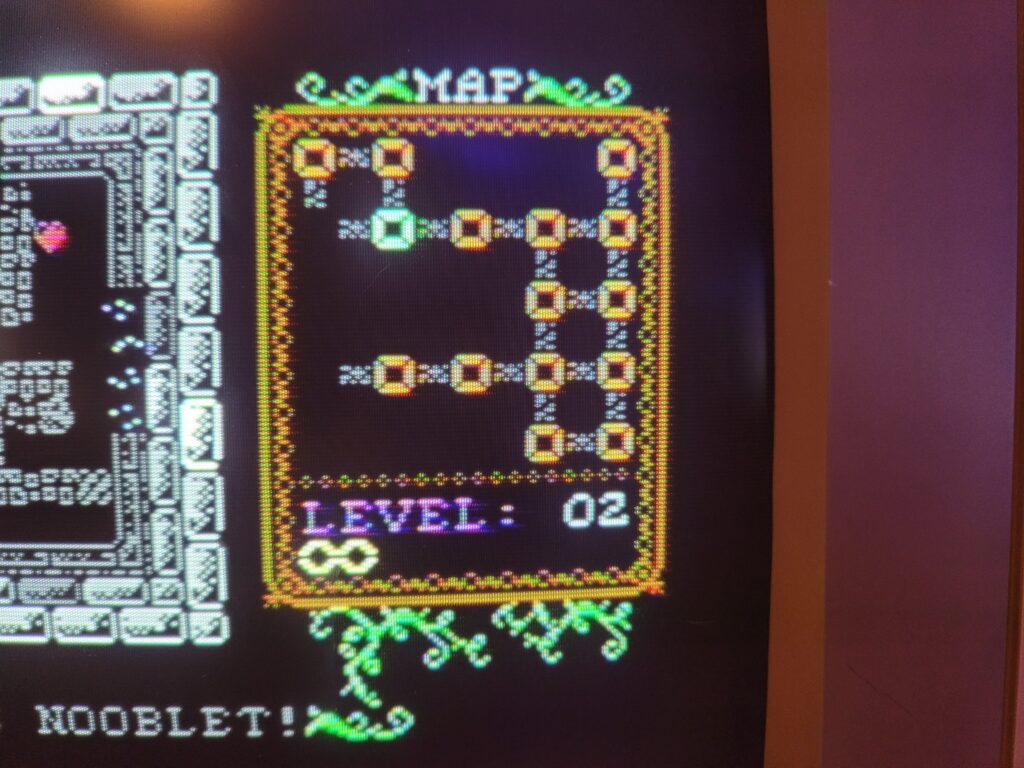
The main screen is split into 3 main sections. On the left is the information panel where you can see your health, strength, inventory and status effects. The central window is where we can find our hero and where all the action takes place. The right hand side displays a map of the current dungeon and is updated automatically as you explore. Each dungeon level has a name which is displayed across the bottom of the screen.


Gameplay

The aim of the game is to battle your way through multiple dungeon levels and ultimately face off against the final boss. Levels get progressively more difficult as you journey deeper down and new monsters are introduced. Thankfully our hero gets stronger too thanks to magical gems that can be found as you explore. These can grant him extra strength or increase his health bar.

Grabbing gold bars adds a nice chunk of points to your score whilst various potions scattered around each level can help or hinder your progress. Green potions always recover health but the red and blue ones could do anything at all. This is because their contents are randomised at the beginning of each game to add a bit of variety to each play through. Some of their effects include freezing time for a number of moves, killing all monsters in a room, making you drunk so you move erratically and so on. This definitely adds an interesting element to the game as you drink one for the first time to discover what it does!

Hearts can also be found on each level and will recover our hero’s health on contact. However unlike the green potions they cannot be carried so you have to decide on the most opportune moment to use them.


Rogue64

Character stats and inventory


Each dungeon is split up into several small rooms and each of these is displayed in full within the central window. There’s no scrolling – your character stays within the confines of that window – it flips as you move from one room to another. Rooms tend to be a little maze-like in appearance and will incorporate one or more exits that allow you to move around the level.

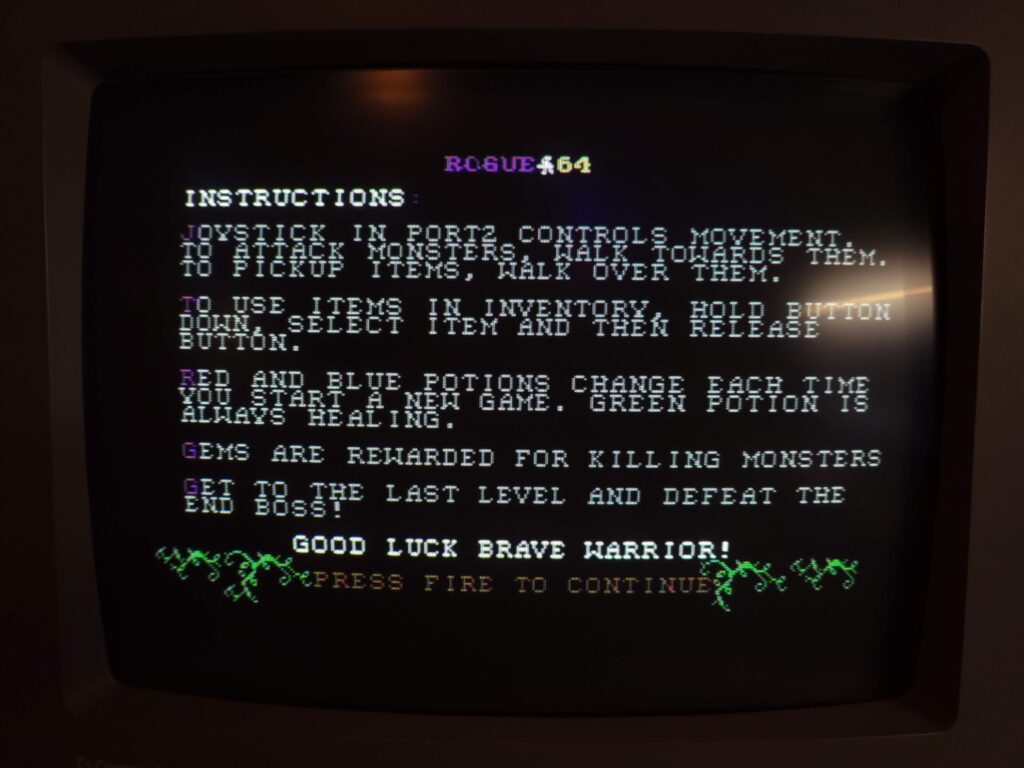
Speaking of movement, our hero is controlled with a joystick in port 2. You simply push in the direction you want him to go. Objects can be picked up by simply walking over them and go straight into your inventory. I think the clever ‘use item’ system is worthy of a mention too. To select a potion within your inventory you hold down the fire button and move the stick left and right until it is highlighted and then simply release the fire button to use it. Very simple and slick, much like the rest of the game.


Combat

Enemies can be attacked by standing next to them and pushing our hero in their direction. Combat is automatic and uses RNG along with your strength, active potions and health to determine the outcome. As RNG is employed both your attacks and those of the monsters can and will miss their target occasionally so it pays to be careful. If a fight looks like it’s going the wrong way, running away is a viable option. You can come back to finish them off after you’ve healed up. It’s important to note that the game is turn based so enemies only react or move when you do which which makes it quite a relaxing experience overall.

Occasionally monsters can inflict a status effect on you that will last for a number of turns. I managed to get poisoned by a snake and kept taking damage after every move. If I hadn’t had a healing potion on me I would have been dead for sure. Likewise some of the potions you take have status affects such as making you stronger or intoxicated for a few turns and so on. This adds a certain level of unpredictability to the game and keeps you on your toes.

To progress onto the next dungeon you must find the exit to the current one (a yellow door) and also the key required to open it. Both of these are randomly somewhere with each level. You could choose to rush to the exit in each dungeon as it is quite possible to avoid contact with a lot of the monsters. However you’ll miss many vital upgrades doing this and end up being ill-prepared for the final boss fight. Far better to take your time and explore each room fully, defeating every monster along the way. Besides, this is what I’d call a ‘high score chaser’ game and the only way to get a decent score is to kill and collect everything in sight!


Design

I really appreciate the way the game screen has been designed – it’s very aesthetically pleasing and everything you need is always visible. No need to toggle map screens or inventories – it’s all there, all the time. The game employs an auto-map feature which is pretty neat. When you enter a room it is added to the map straight away and all available exits indicated too. This makes it easy to see at a glance if there are any rooms you haven’t discovered yet. Occasionally you can pick up a potion that will highlight all the rooms in a level immediately but I didn’t find these terribly useful.

It’s all thoughtfully laid out, intuitive and everything fits in the space allotted for it. Each room fits within the confines of the central window and each dungeon map fits within the map window. Inventory space is very limited so it pays to use the stuff you find rather than try to hoard it for later.


Rogue64 Map Screen

Rogue64 Auto-Map


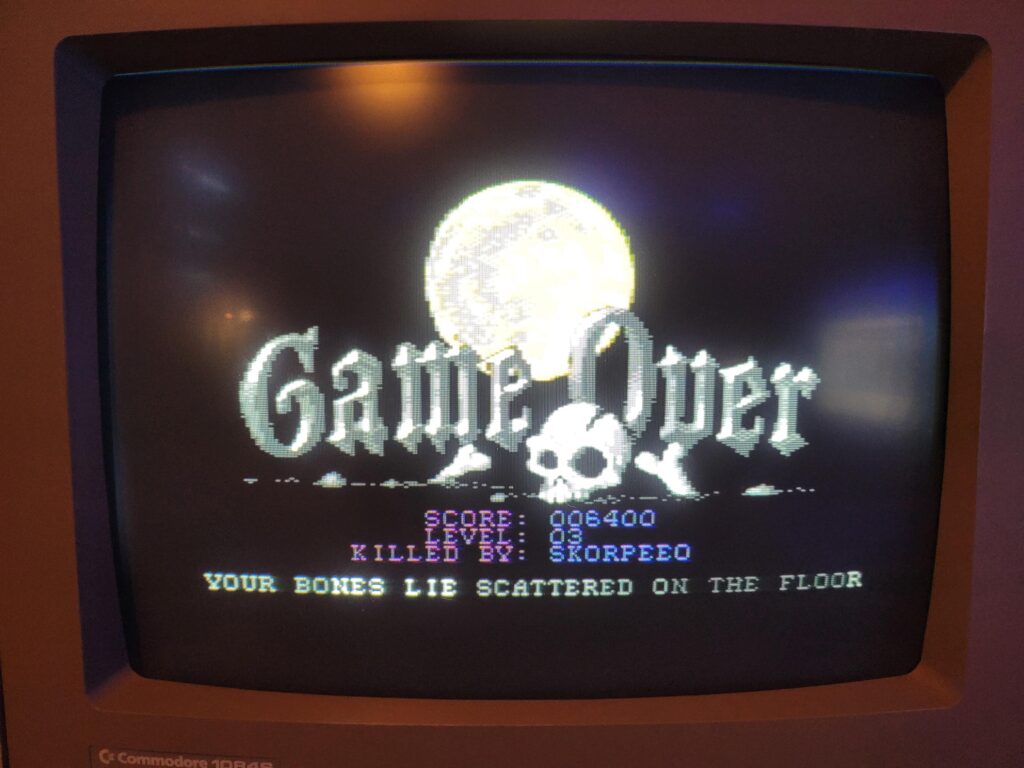
Sooner or later you will meet a grisly death and be greeted with the Game Over screen. This gives you a handy summary of your progress including level reached, score attained and what monster offed you. I should point out that there’s no option to save your progress with this being a ‘roguelike’ game so bear that in mind before you start your dungeon crawl. None of your progress or hero upgrades carry over to your next play through – you are back to square one every time.


Rogue64 Game Over

Rogue64 Game Over screen


Music and Sound

Playing throughout is a terrific SID tune that really suits the game and certainly never gets tiring. Sound effects are minimal but are there when required. Battling, picking up items, exiting a room and so on all have their own little effects that add to the immersion of the game. There’s also a screen shake effect that occurs when you take a hit in battle which is a really nice touch.


Nit-picking

There are a few little things I wish had been incorporated into the game. For example, as great as the automap system is – it would be even better if it was able indicate the exit (after you have discovered it of course) to make it easier to find once you’ve located the key. Likewise if it could identify rooms with discovered but uncollected items I’d find that a real boon too.

Another feature I would love to see is an option to save your game, although I can understand why it’s not there. If you are 10-15 minutes into a game and something comes up it would be nice to have an option to save your progress. Whilst I don’t mind leaving my PC on for extended periods of time, leaving my 40 year old C64 on with a game paused is a definite no-no for me. Finally the big draw of replaying the game is to beat your high score – it would be awesome if the game actually saved this for posterity too.


Mobile Gaming

I’m not a massive mobile gamer but occasionally I’ll stumble across a game that I like to while away my lunch hour playing. This is one of those games. The turn based combat, addictive gameplay and simple control system make this a perfect game to play on a C64 emulator on my phone. There are quite a few C64 emulators out there for Android users; I use C64.emu and this game runs absolutely flawlessly on it. An added benefit of playing on my phone is that I can just flip it shut and the game is paused indefinitely until I come back to it. Nice! If smartphones had existed in the 80’s I would have failed all my ‘O’ Levels for sure…


Rogue64

Rogue64 running on my phone via the C64.emu emulator


Verdict

Normally roguelike games infuriate me. I hate losing my progress and having to slog through a game just to get back to the where I was up to. That’s definitely not the case with Rogue64 though. Through a combination of slick game design, simplified controls, easy to master turn based combat not to mention a great SID tune and a fair but addictive gameplay loop, Rogue64 keeps me going back for ‘one more go’. Sure I could kick myself when I die stupidly after failing to reach the next dungeon, but there there’s also a real sense of satisfaction when I finally do and beat my high score in the process. I’ve not yet reached the last level of the dungeon or seen the boss monster but I’m determined to keep trying until I do!

CD64 Interface – First Edition Review

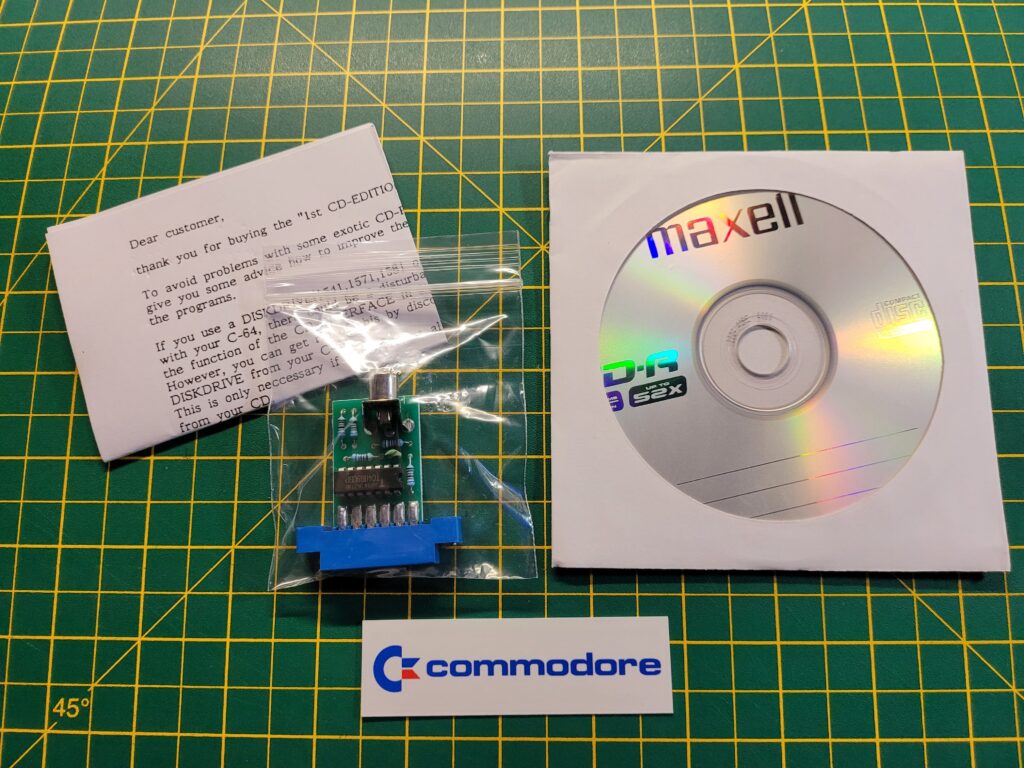
If you’ve ever wanted to use CD’s with your C64 then this could be the gadget for you. I spotted this little gizmo on the SharwarePlus website and wanted it immediately. It arrived quickly and well packaged. Inside the box there was a CDR containing a bunch of games, the CD64 interface itself, an instruction sheet and a small Commodore bookmark type thingy.


CD64 Interface Package contents.

CD64 Interface Package contents.


A Closer look at what’s included

The CD64 Interface comprises a small circuit board with a cassette port socket one end and a single RCA socket the other. The RCA socket actually gives the first clue as to how this device works.


This slideshow requires JavaScript.


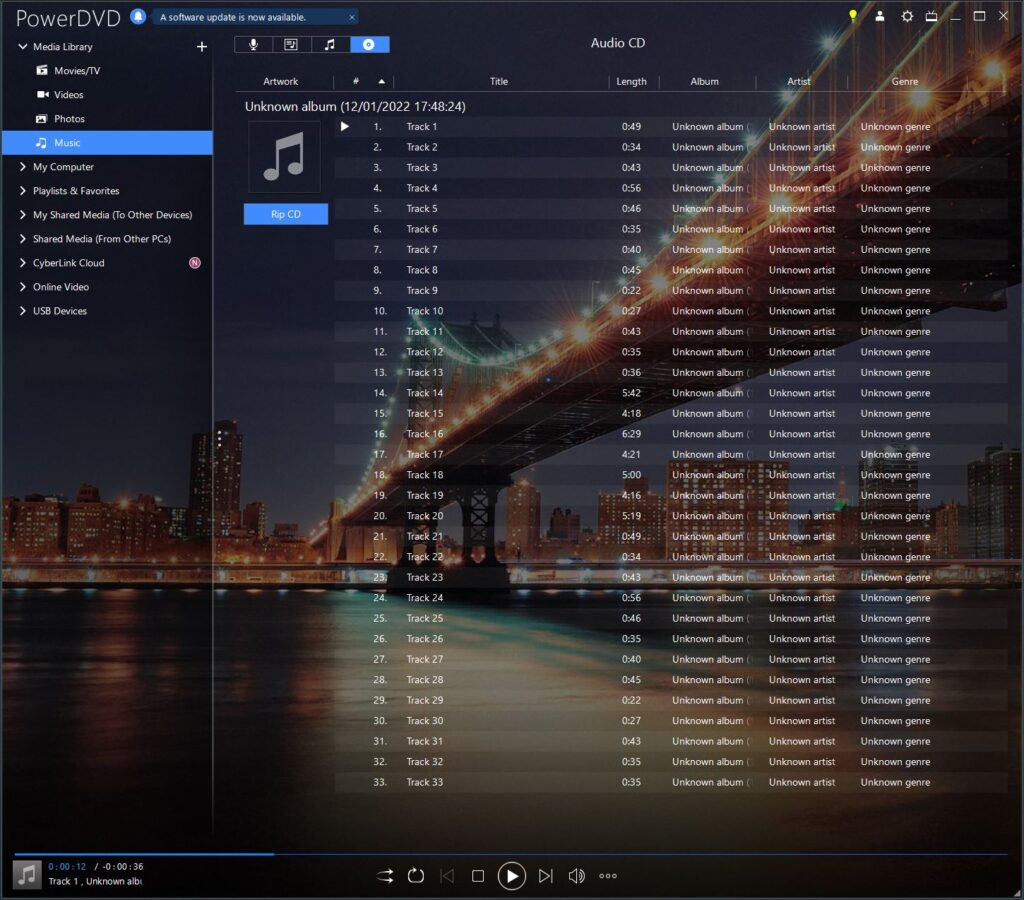
The second big clue can be found when you insert the CD into a computer…


CD Tracklist showing all 33 tracks included on the CD.


If you haven’t already worked it out, the device lets you hook up the audio output of a CD player to the C64’s cassette port. The connected player then becomes a datasette of sorts albeit one with direct access to each program. The disc included is an audio CD and contains 33 audio tracks. Playing a track back through a stereo fills the room with that familiar screeching sound that most of us remember from the 80’s when copying games on cassette.


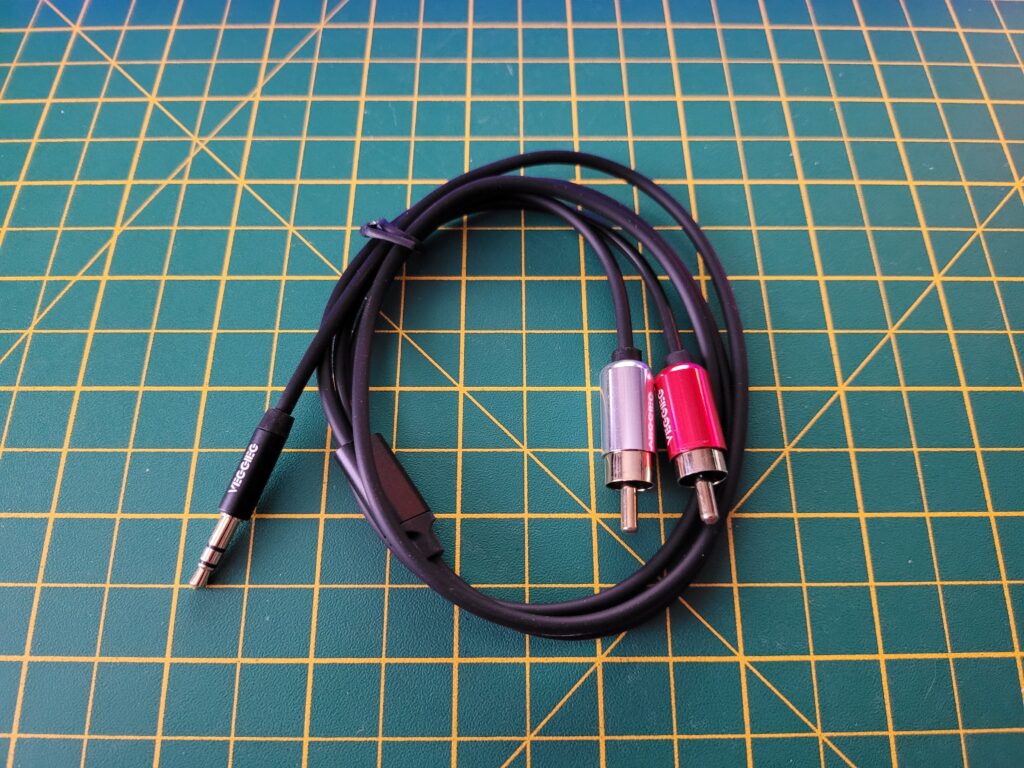
3.5mm headphone jack to Stereo RCA cable (not included).


In addition to the C64 game files there’s also seven Chris Hülsbeck music tracks on the CD which can be listened to on your CD player. Don’t try and do what I did and load them on the C64 thinking they were some sort of demo scene tracks – doh!


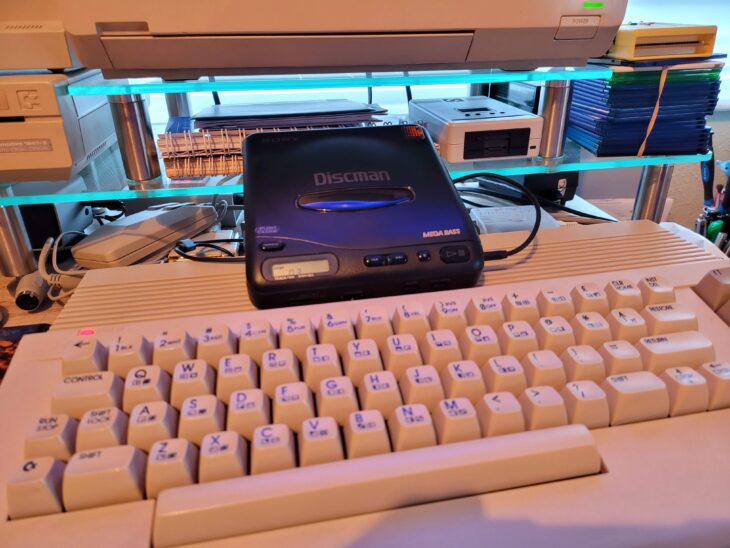
CD64 interface

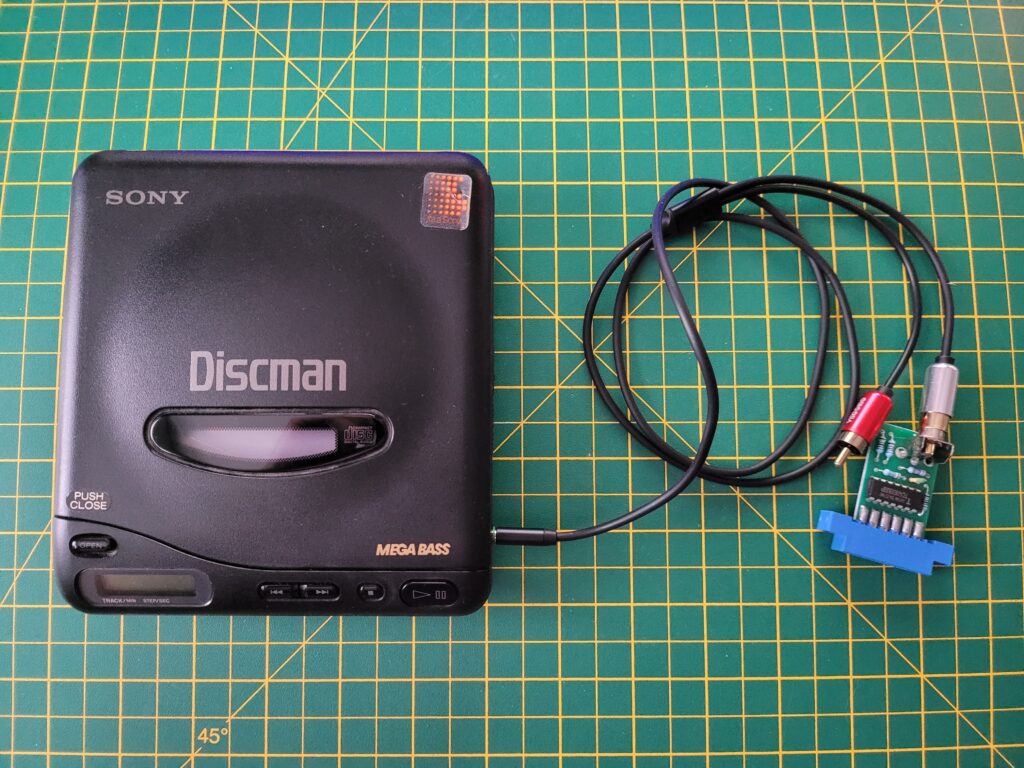
My Sony Discman D-11 attached to the CD64 interface with a 3.5mm headphone jack to stereo RCA cable.


To access the CD I used my old Sony Discman D-11 and a 3.5mm headphone jack to RCA cable to try it out. I listened to the CD with a pair of headphones first just to make sure that the sound was coming out of both left and right channels (it did). Consequently it doesn’t matter which RCA plug you use to hook up the CD64 Interface, both will work.


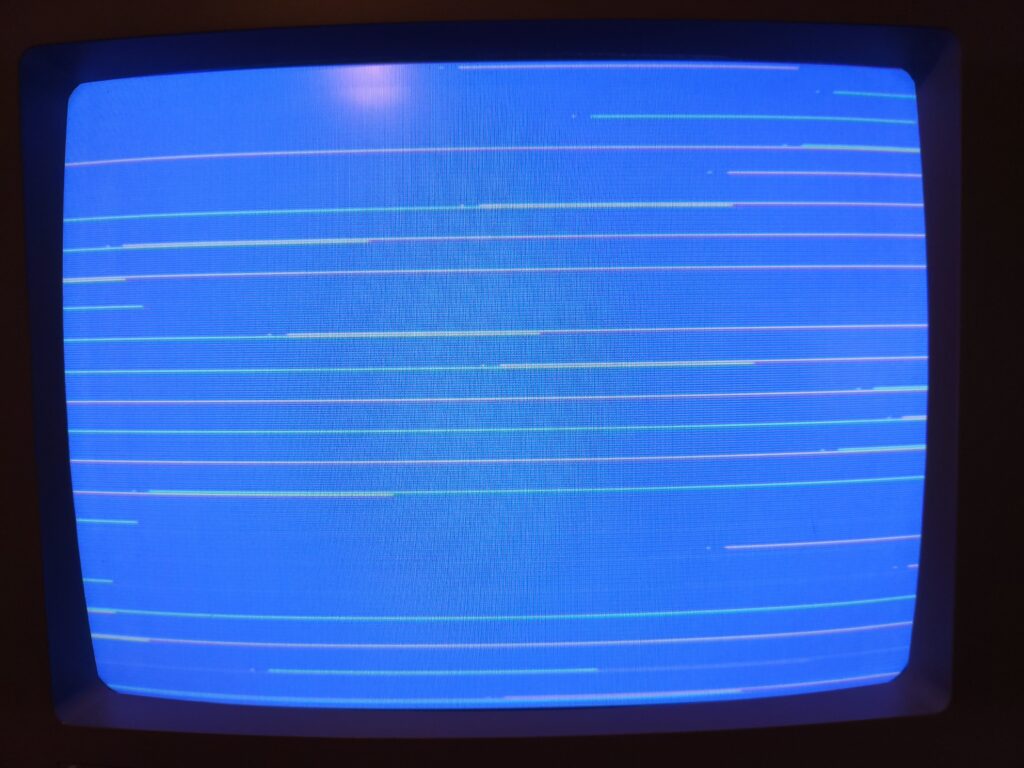
C64 LOAD Screen

First attempt at loading the Menu off CD.


Loading Programs off the CD

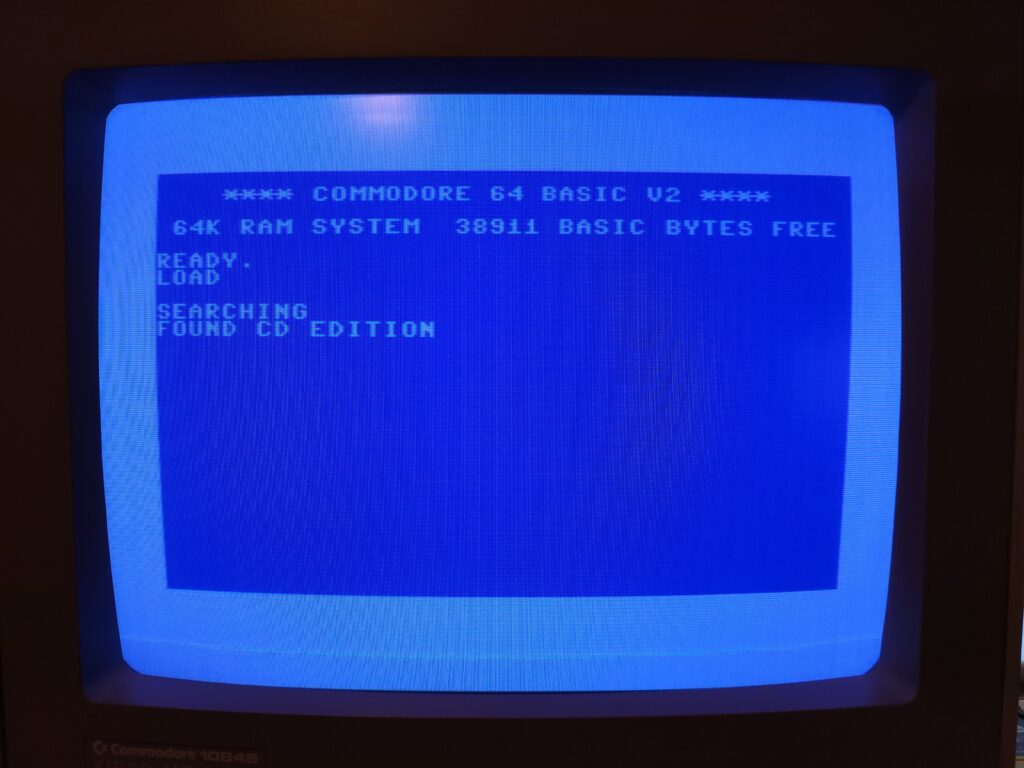
To load stuff off the CD you press the familiar SHIFT & RUN/STOP keys and then press PLAY on the CD player. I was very quickly presented with a ‘Found CD Edition’ message which means it had at least found the first data track on the CD. However for a while I couldn’t get any further than this. After reading the guide it suggested unplugging connected devices to remove any unwanted interference. Once I had removed my 1541 Ultimate-II+ cart and 1541-II floppy drive I began to make some progress.

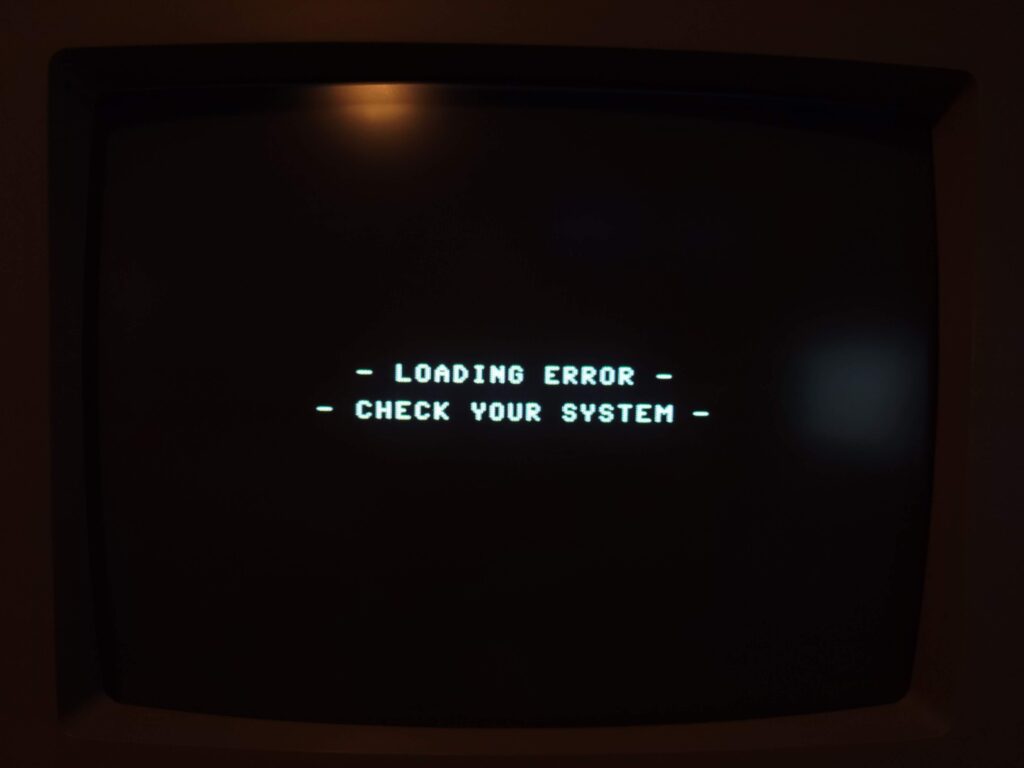
There was still a fair bit of trial and error to get the volume level right though. Too quiet or too loud and the programs failed to load – or loaded with an error.


Load error

Load Error.


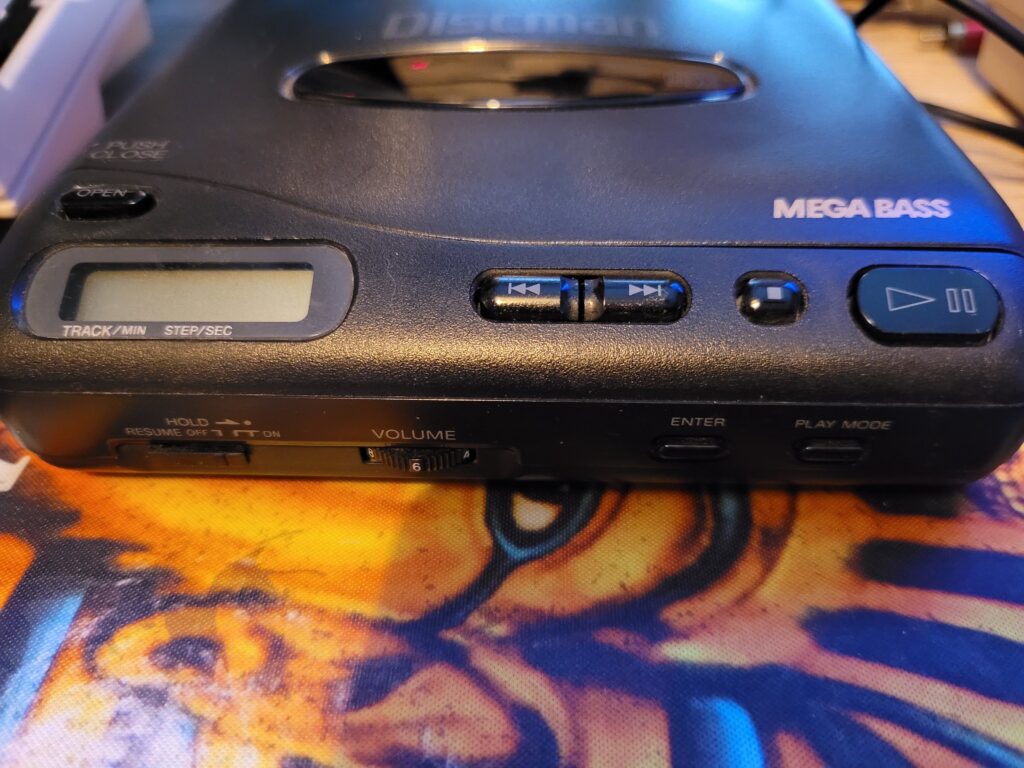
After about 20 minutes of trying different levels I finally found the sweet spot, which for me was a volume level of 6 (my player goes up to 10). I also saw an improvement by setting the Megabass feature to the medium setting (as opposed to being turned off). Of course every player is going to be different in this respect – the key thing is to experiment.


Sony Discman D-11

Setting my volume level to 6 seemed to give the best results.


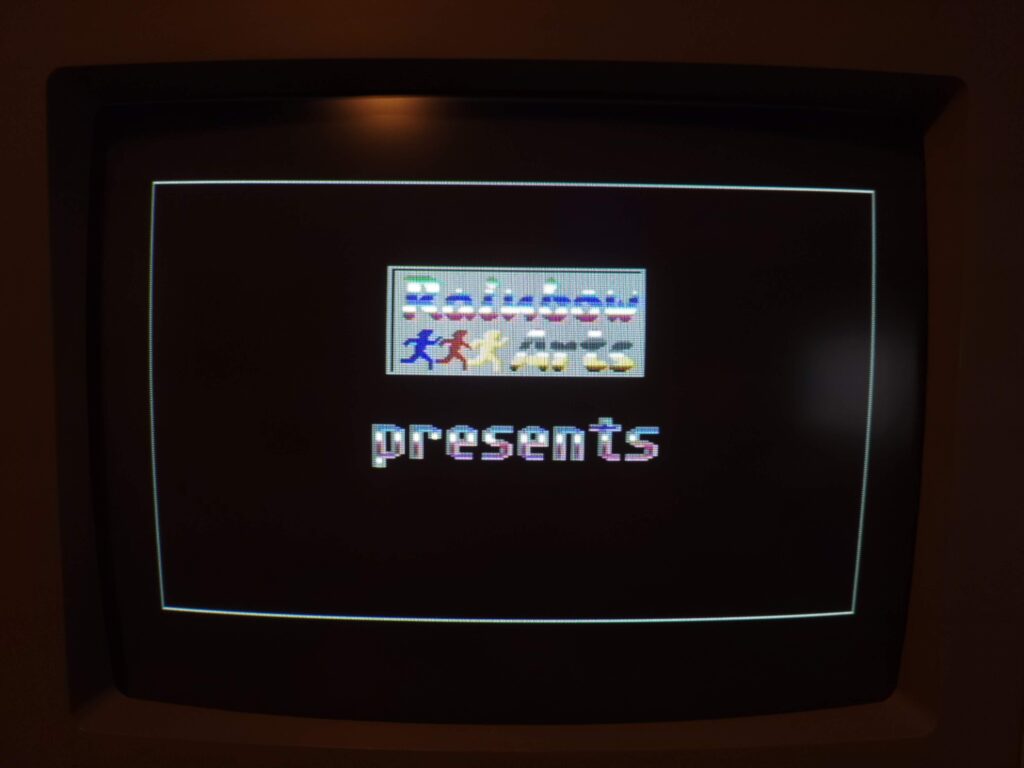
Now that I had the volume level set correctly I was finally able to get to the animated ‘Rainbow Arts’ Title Screen.


Rainbow Arts Title Screen.

Rainbow Arts Title Screen.


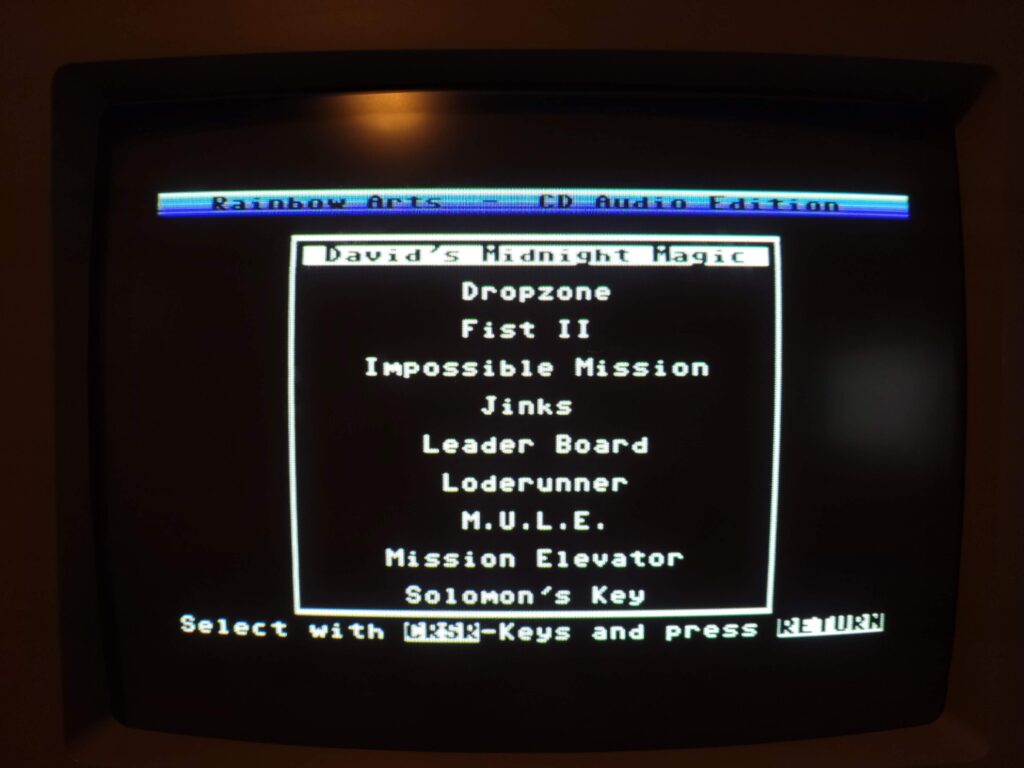
From here I could access each of the included 10 games via a simple menu screen.


Rainbow Arts Menu Screen.

Rainbow Arts Menu Screen.


To operate the menu it was simply a matter of selecting a game from the list with the cursor keys and then hitting RETURN.


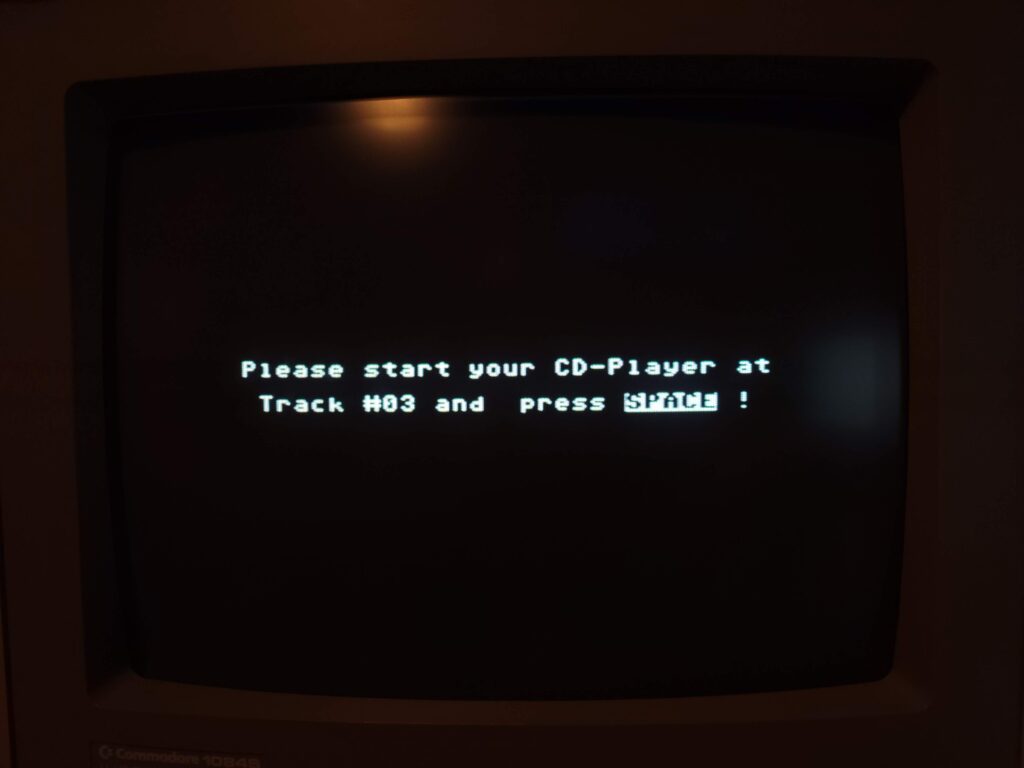
Instructions for selecting the correct track on the CD.

Instructions for selecting the correct track on the CD.


The program then tells you which track to select on your CD player before pressing SPACE to begin loading it.


C64 high speed loader

All programs utilise high speed loaders.


All the games utilise very efficient high-speed loaders so load in no time at all. Impossible Mission took about 35 seconds to load, Dropzone just 15 which is pretty impressive.


A Few of the Included Games

This slideshow requires JavaScript.


CD Contents

Here’s a complete rundown of the CD contents:

1. Start menu,

2. David’s Midnight Magic (Broderbund, flipper),

3. Dropzone (U.S.Gold, action),

4. Fist II – The Legend Continues (Melbourne House),

5. Impossible Mission (Epyx, action),

6-7. Jinks (Rainbow Arts),

8. Leaderboard Golf (Access, golf simulation),

9. Loderunner (Broderbund, jump&run),

10 & 11. M.U.L.E. (Electronic Arts),

12. Mission Elevator (Softgold, action),

13. Solomon’s Key (U.S. Gold),

14 to 20. Music pieces by Chris Hülsbeck,

21 to 33. Repetition of tracks 1 to 13.


Conclusion

This is a great little device once you’ve spent some time tweaking the sound levels. Being able to select which program to load by using the <</>> buttons on the CD player is far more convenient than using FF/RW on a Datasette so it’s shame there aren’t more compilation CD’s like this.

Although there’s only ten games on the CD there’s no reason why you can’t create your own CD compilations. I would think using something like TapWav to convert C64 .TAP files into digital WAVE files and then burning those to an audio CD would work. This is definitely something I’ll have a play around with when I have a spare moment in the future.

I had a lot of fun playing around with this little accessory and the included 10 games too. If you’d like to get hold of one for yourself then head on over to The Shareware PLUS Commodore 64 & 128 Blog and and grab one.

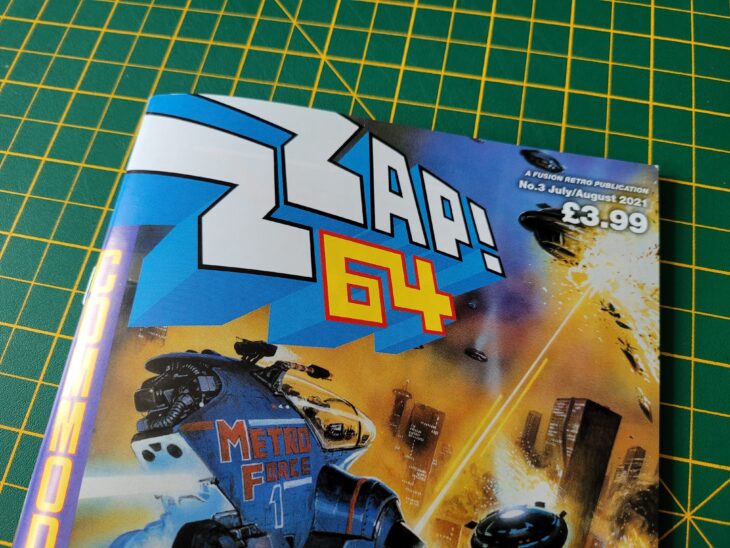
Zzap! 64 Issue 3

Zzap! 64 Issue 3

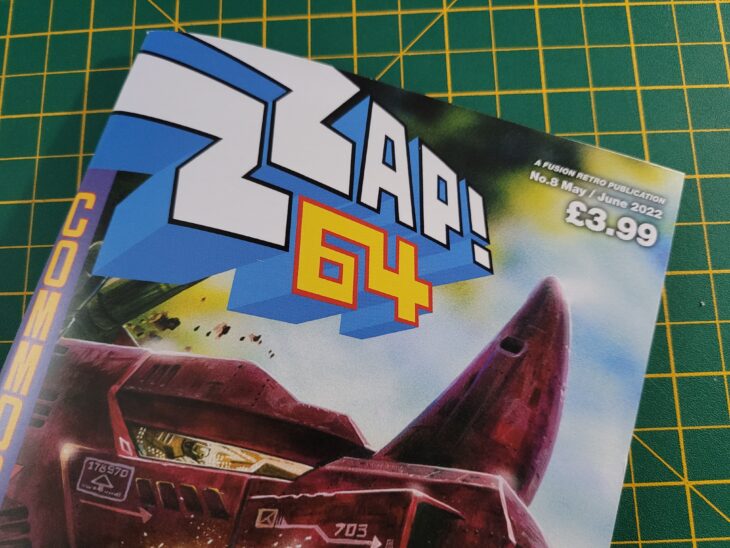
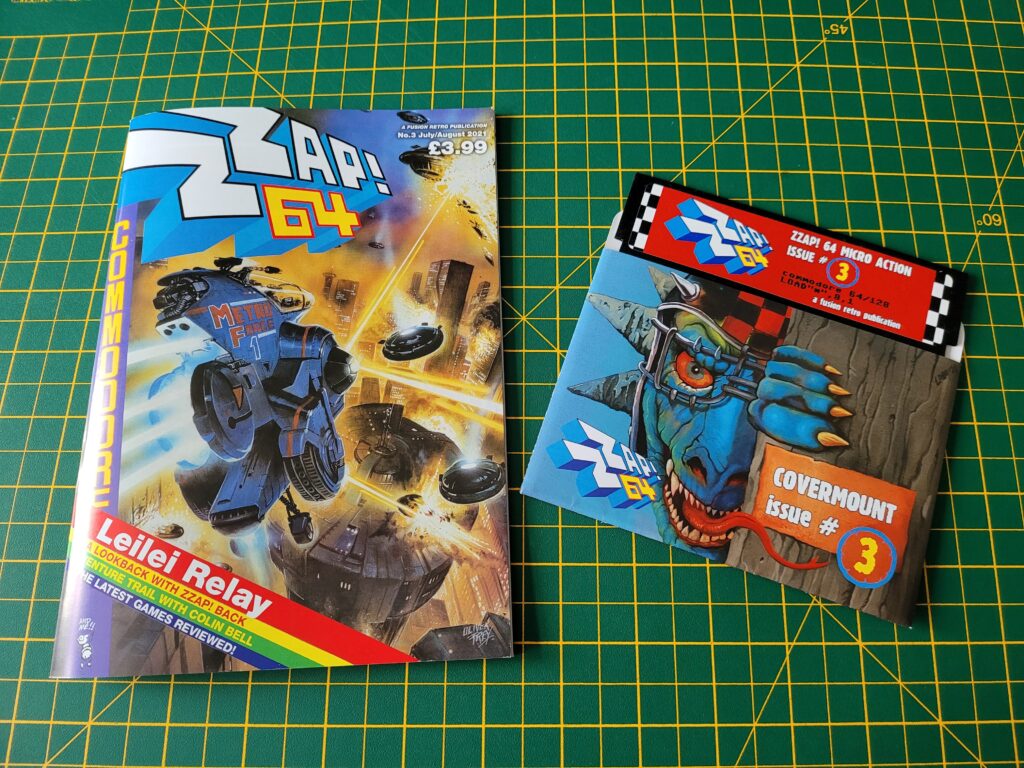
Zzap! 64 Issue 3 arrived in the post last week sporting a very unique addition – an actual physical cover disk! I do remember later editions of Zzap! having cover mounted cassette tapes but this is the first time (to my knowledge) that it’s ever come with a floppy disk!


Zzap! 64 Issue 3

Zzap! 64 Issue 3 with Disk.


The magazine itself is another cracking edition with plenty of game reviews and all my favourite sections featured. A text adventure was even awarded a Zzap! Sizzler –  it’s one I’ve not played and it’s free to download – how great is that!

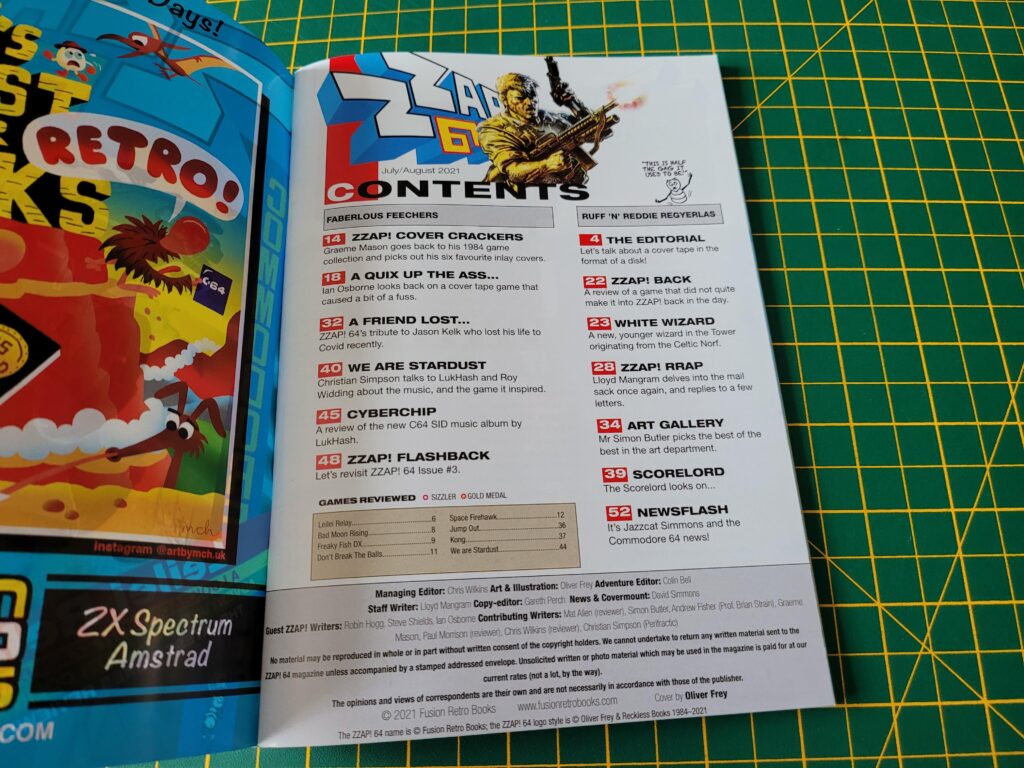
Being a huge Synthwave (and LukHash) fan I found Chris Simpsons ‘We are Stardust’ interview with him about his latest album especially interesting.


Zzap! 64 Issue 3

Zzap! 64 issue 3 Contents page.


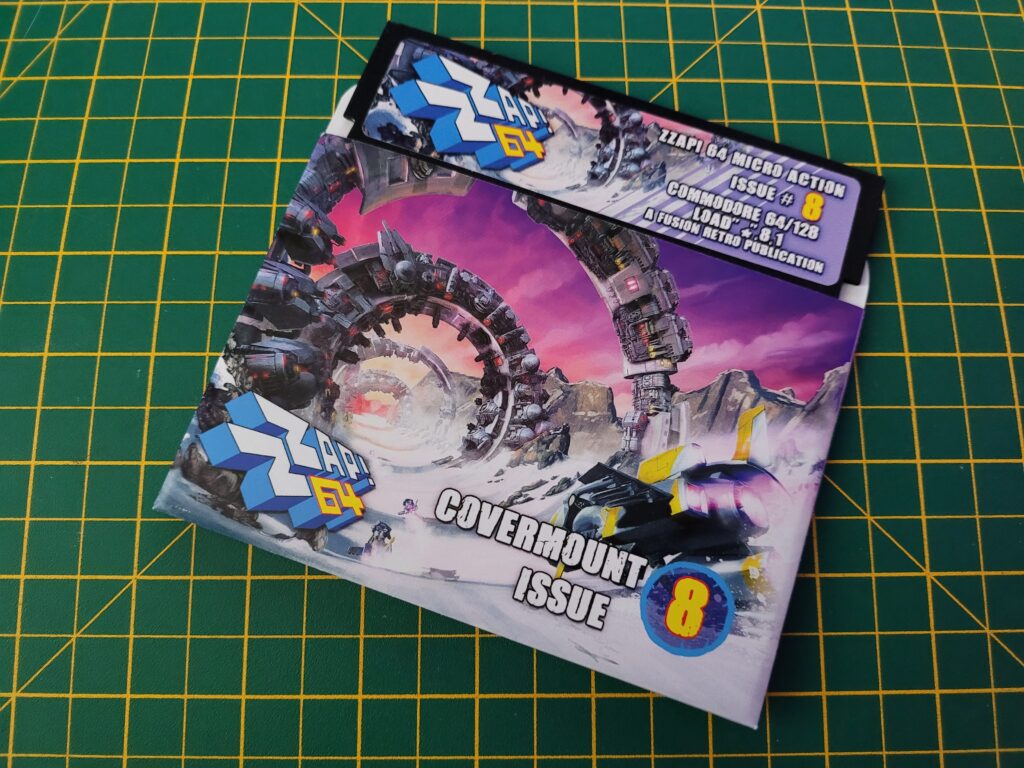
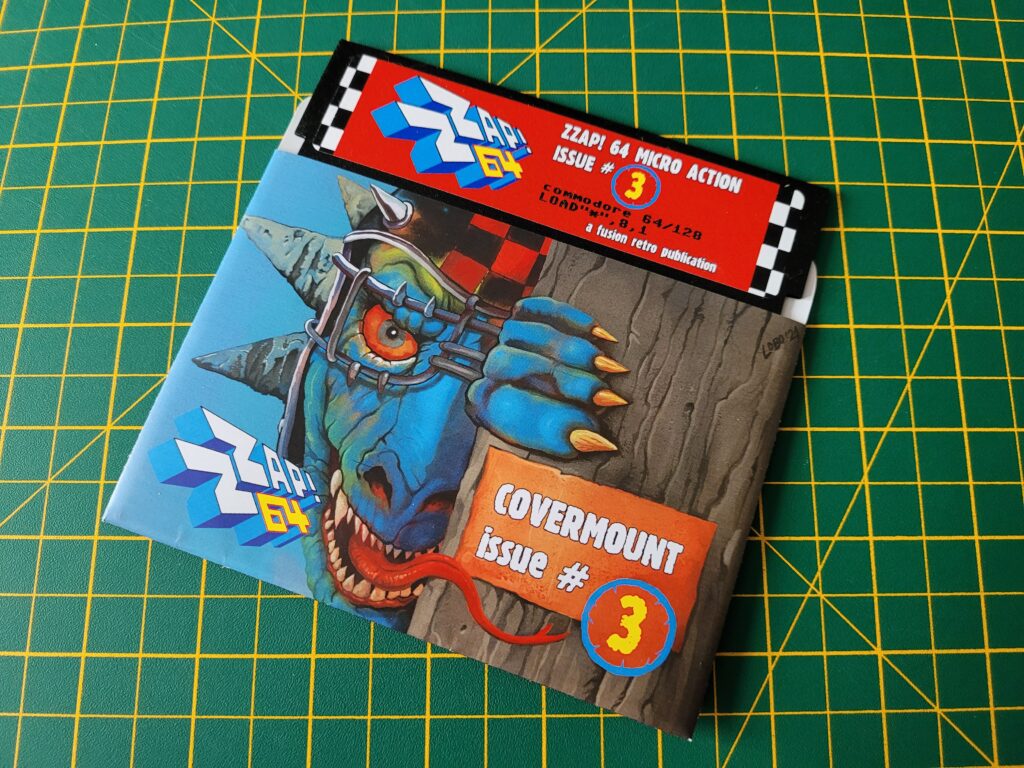
The cover disk itself is beautifully presented in a full colour professionally printed jacket with matching disk label. There’s an extra notch cut into the disk too which means it’s double sided so extra goodies!


Zzap! 64 issue 3

Zzap! 64 issue 3 Cover Disk.

.

I was really excited to see what was on the disk and was not disappointed. Kudos to the person who created the disk too – it worked perfectly even though my physical 1541-II drive is configured as device 9. Nice!


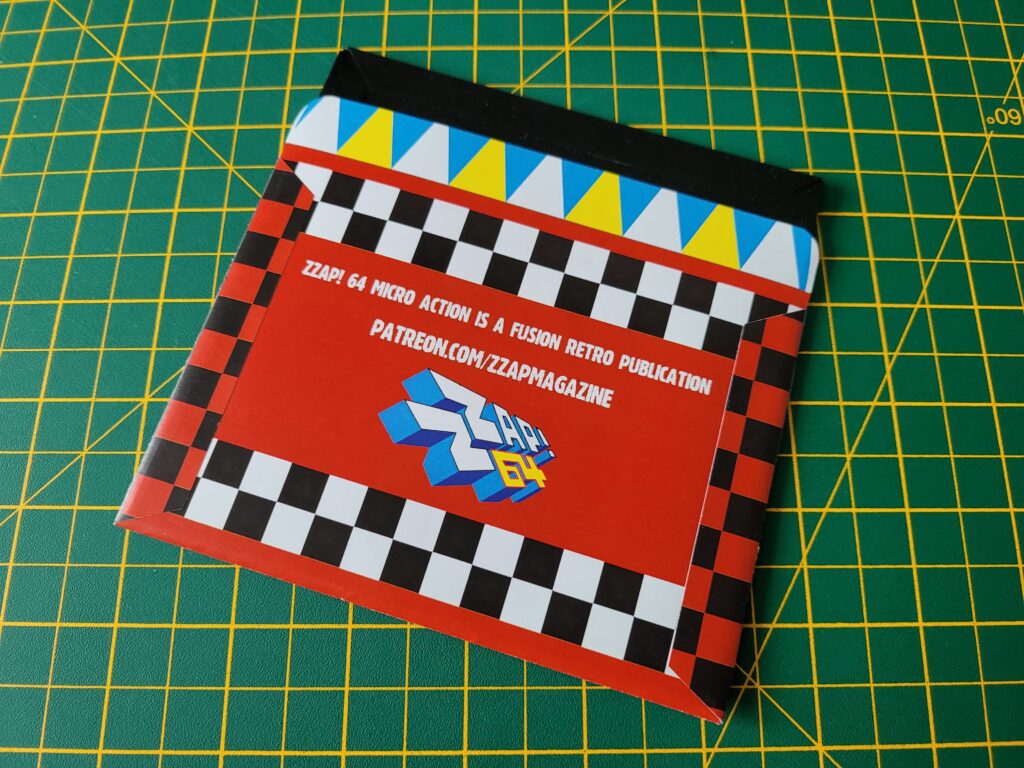
Zzap! 64 issue 3

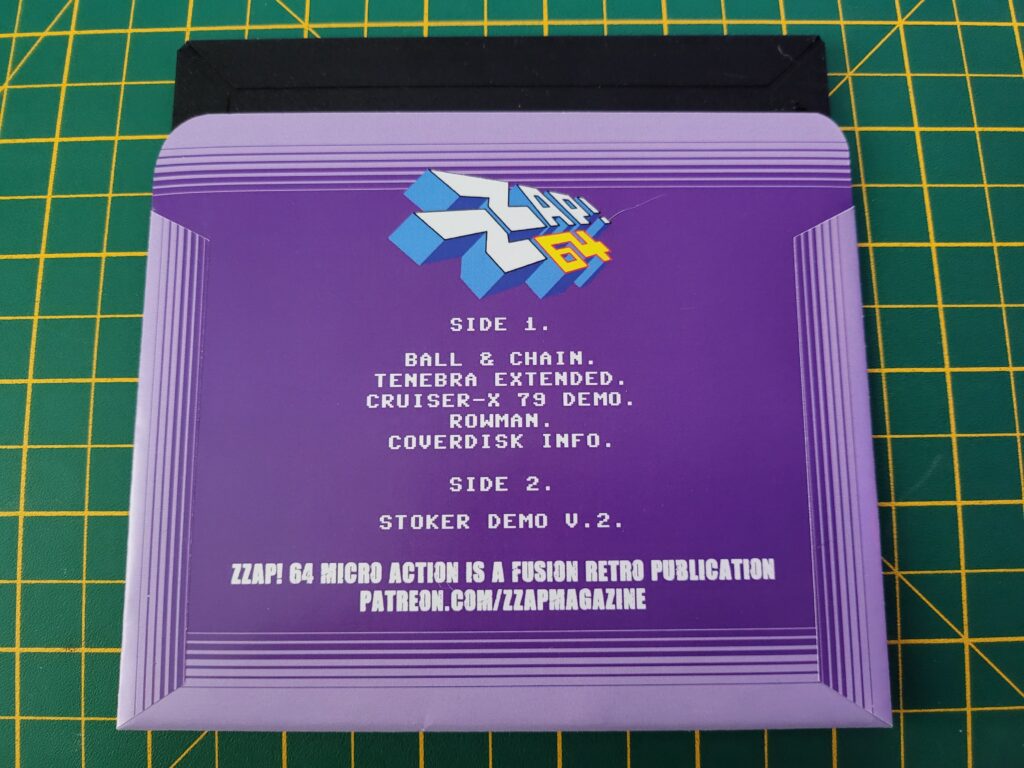
Zzap! 64 issue 3 Cover Disk – back of disk jacket.


Side One Contents


Directory listing for side 1.


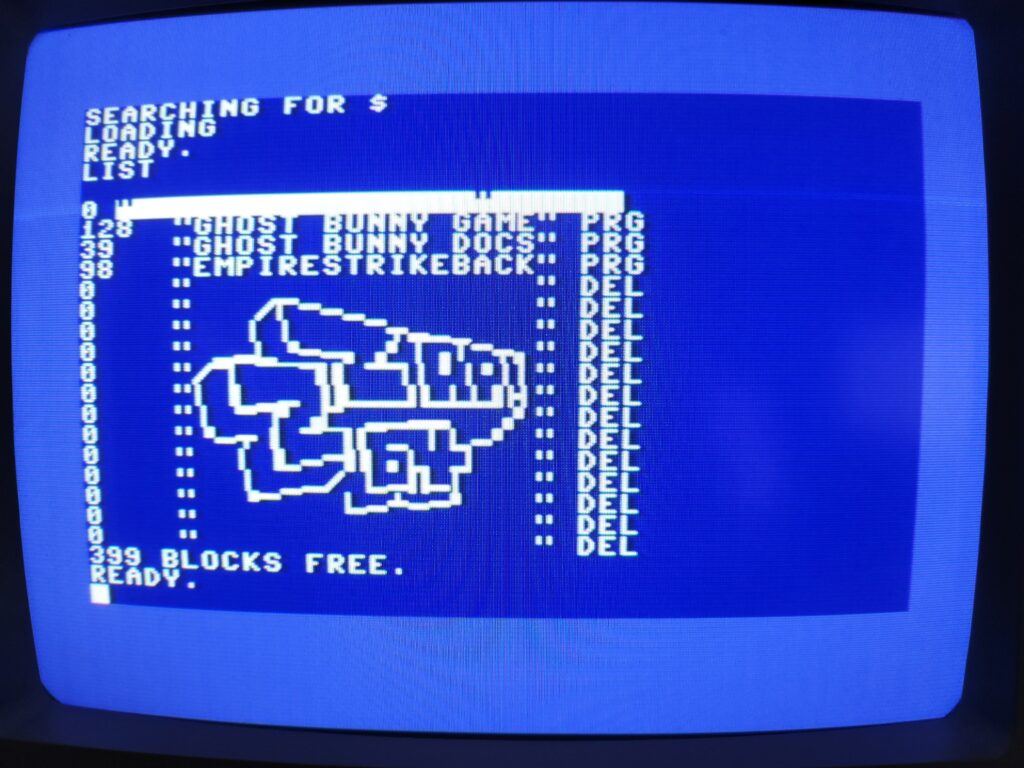
A quick ‘LOAD”$”,9 revealed that this side contained a Ghost Bunny game and also the up and coming Empire Strikes back game. Sadly the latter is just a demo but it’ll be here soon hopefully!


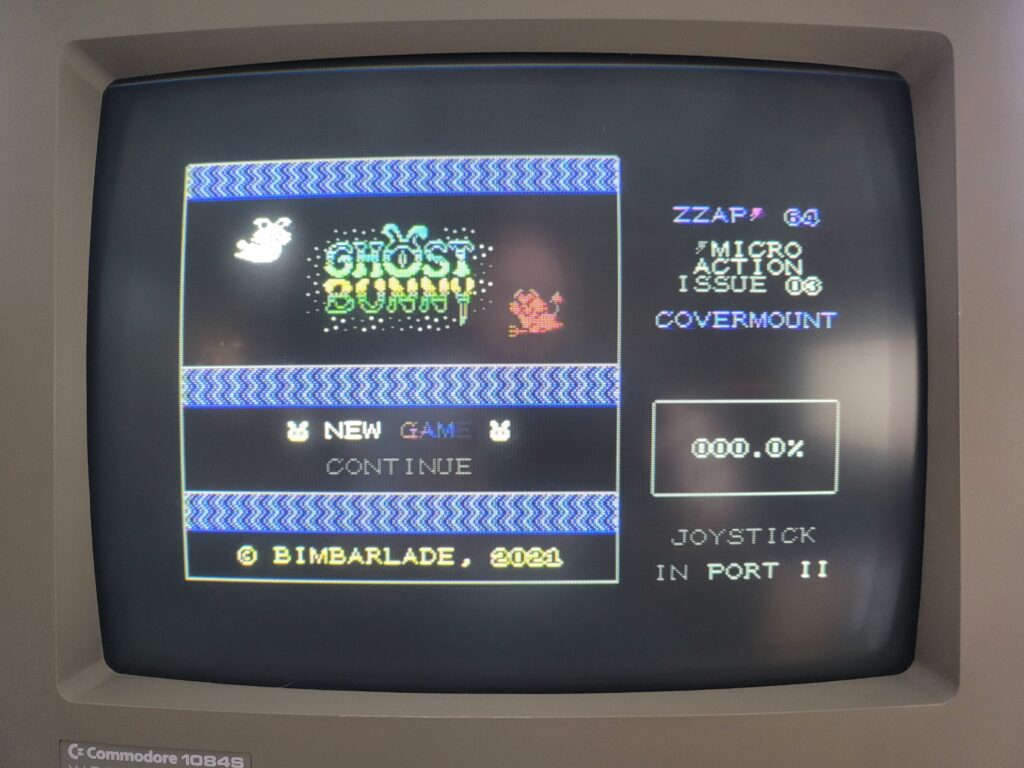
The Ghost Bunny Title Screen.


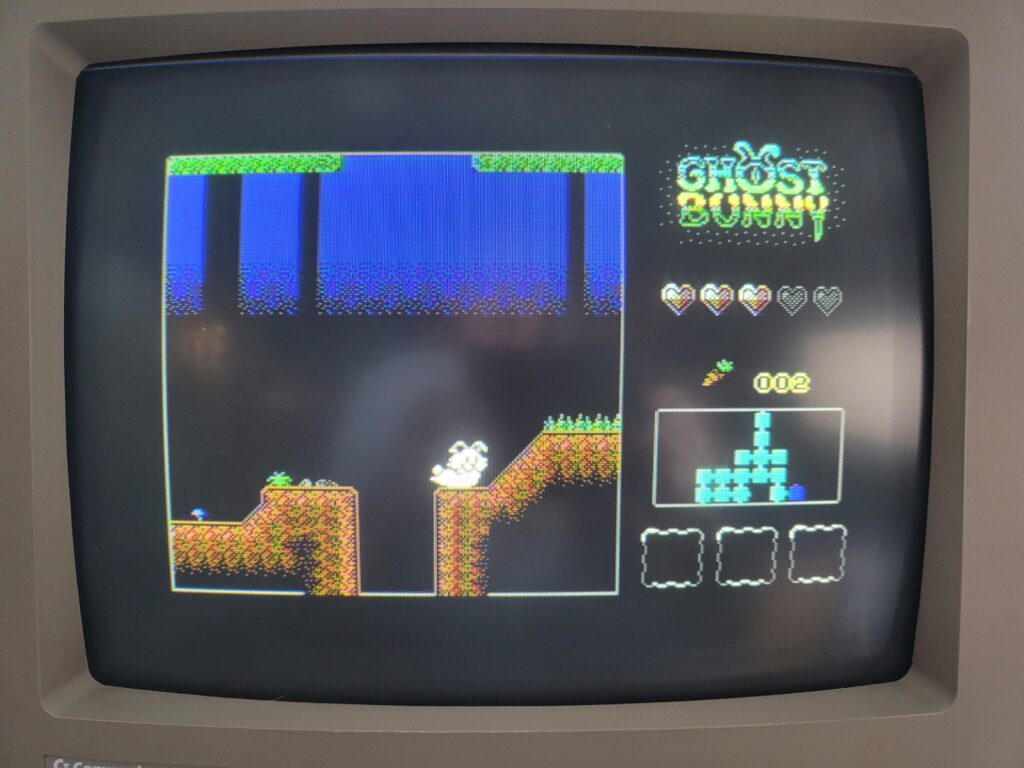
Ghost Bunny is a flip screen game featuring a cute rabbit who you manoeuvre around ‘flappy bird’ style and it utilises the C64’s hi-res graphics mode.


Ghost Bunny Game.


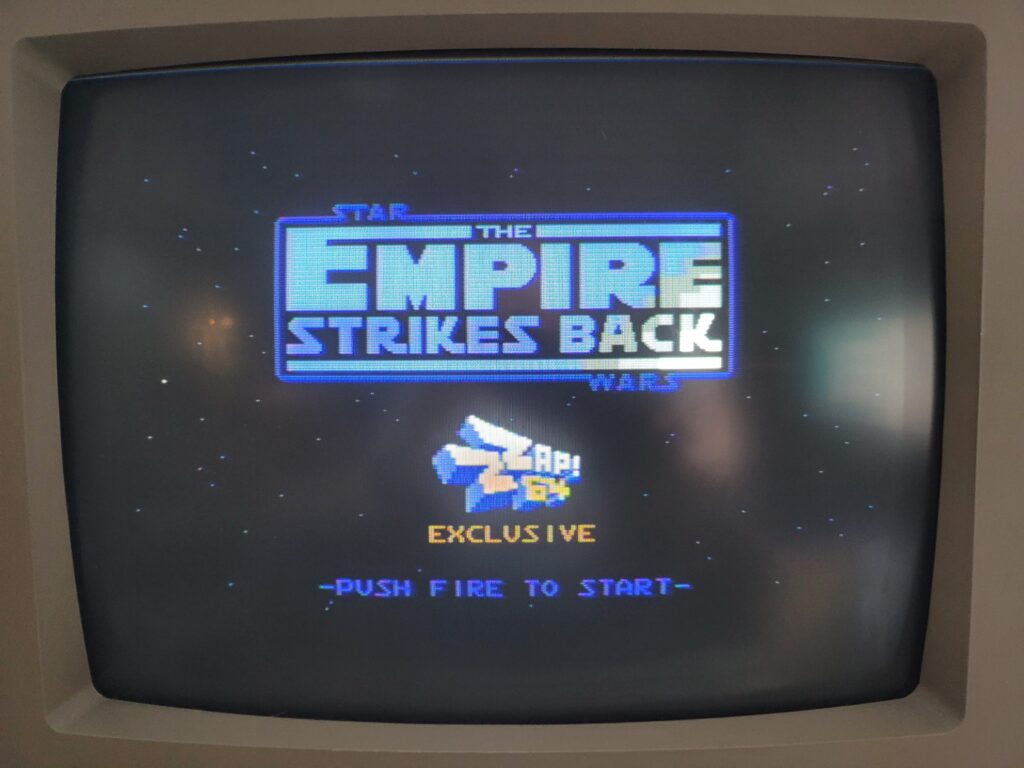
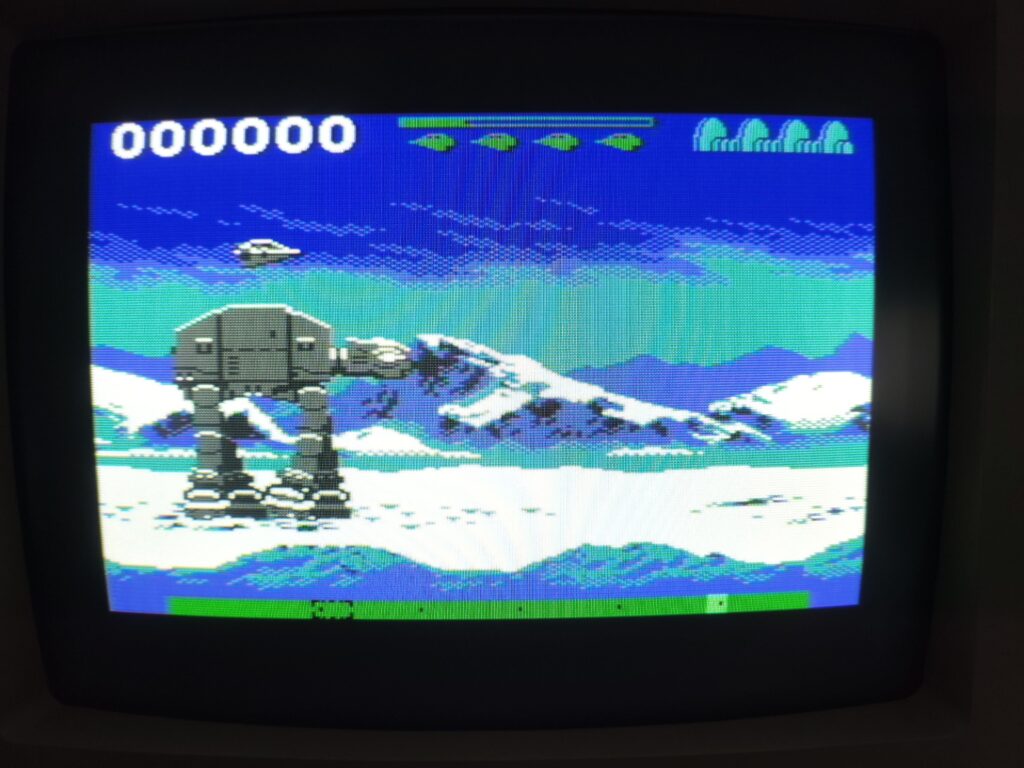
The Empire Strikes Back demo is a Zzap! 64 exclusive and starts with a really cool title screen complete with the Imperial March music playing.


The Empire Strikes Back Title Screen.


Launching the demo takes you straight to a confrontation with a bunch of AT-AT’s where I subsequently died. A lot. Can’t wait for the finished game though!


The Empire Strikes Back Game Demo.


Side Two Contents

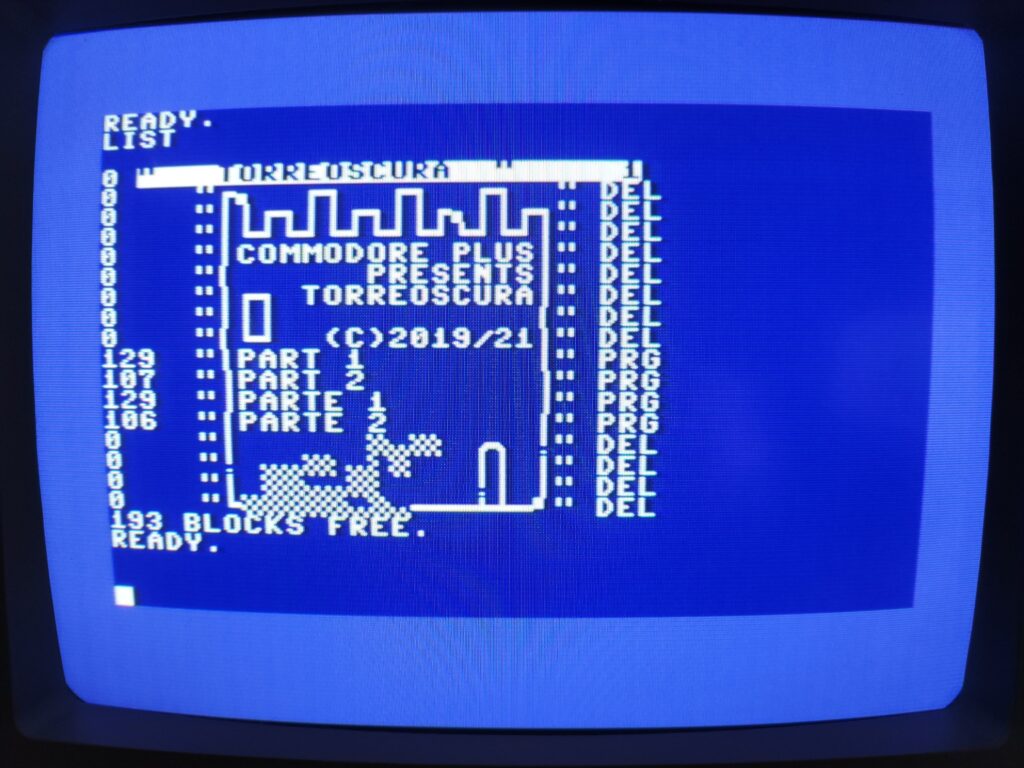
This time loading up the directory listing revealed a single game called ‘Torreoscura’.


Directory listing for side 2.


This is a full blown text adventure game which I was delighted to find. I enjoy shoot’em-ups and platform games but I also appreciate something more chilled and cerebral. I must admit I have a real soft spot for Text Adventures (as my growing Infocom collection will attest to).


Torreoscura Adventure Game.


Getting hold of a copy of Zzap! 64 Issue 3

If you are a C64 gamer then you owe it to yourself to pick up a copy of Zzap! 64 Issue 3. The magazine is available from Fusion Retro Books and is priced at £3.99. Make sure you use the code ‘LYONSDENBLOG’ to grab yourself a nifty 15% off the price! This code works for everything you place in your basket too!

Here’s a small gallery of images from the magazine.


This slideshow requires JavaScript.


Zzap! 64 Issue 2

It’s been a long 3 months since the first issue of Zzap! 64 magazine launched but my copy of issue 2 is finally here. In my ideal ‘alternate reality’ world, Zzap! 64 would be published every month but there has to be sufficient new games out there to actually review. Sadly the 80’s are long gone and though there are lots of games now being made, they’re nowhere near as prolific as they were during Zzap’s original publishing run. Three months seems to be the magic number then, allowing time for enough new games to emerge from bedroom coders around the globe to fill a magazine.


Zzap! 64 issue 2

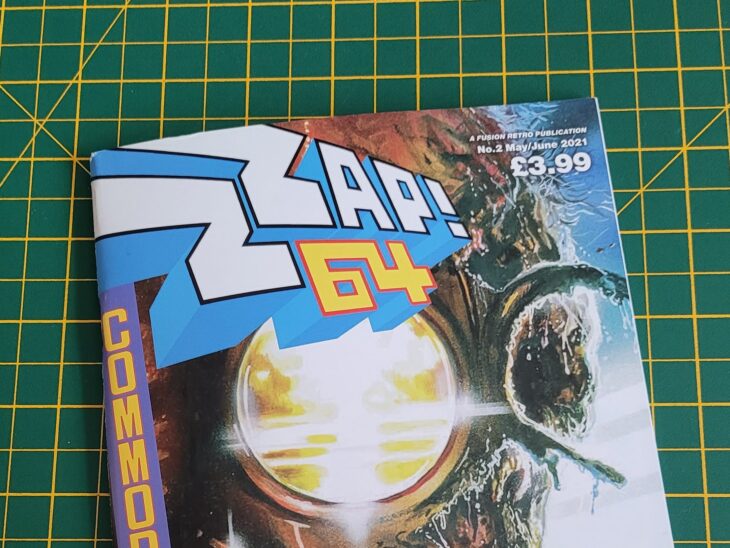
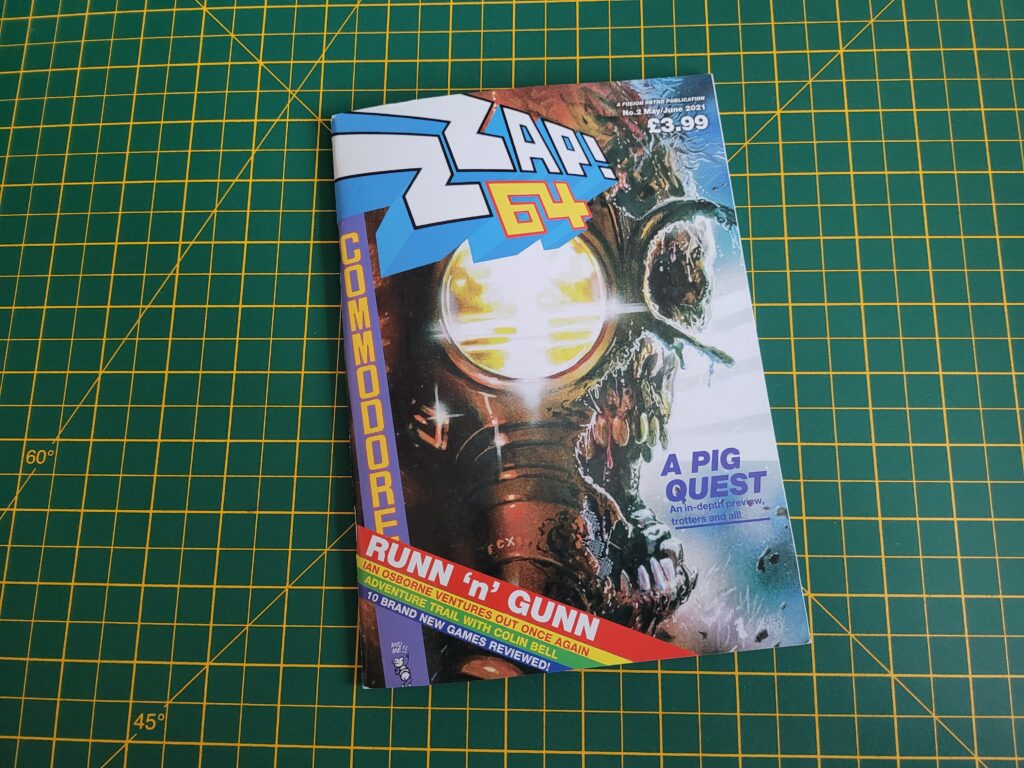
Zzap! 64 Front Cover.


Even though the C64’s halcyon days are long gone, Zzap! 64 issue 2 still manages to feature an impressive ten brand new game reviews. One of them even receives the coveted ‘sizzler’ award. I think that’s a staggering achievement for the C64 scene and just goes to show there’s still plenty of life left in the old girl!

The page count has remained the same as before, as has the quality and use of full colour throughout. Zzap! 64 regulars like the White Wizard, Rrap and Scorelord all make an appearance. Speaking of Scorelord, one of these days I must try and get at least one of my puny high scores featured on his page!


Zzap! 64 issue 2

Zzap! 64 issue 2 Contents page.


This issue was a cracking read from cover to cover, just like the first one. The reviews were bang up to date, even covering the likes of Nixy the Glade Sprite which has literally only just released. I also really appreciate how they give honest reviews with differing viewpoints. The C64 scene is so active now that I find a more critical approach really helpful in deciding on my next purchase(s).


Getting hold of a copy of Zzap! 64 Issue 2

Needless to say if you are a C64 gamer then you owe it to yourself to pick up a copy of Zzap! 64 magazine. It’s available from Fusion Retro Books and is priced at £3.99. Make sure you use the code ‘LYONSDENBLOG’ to grab yourself a nifty 15% off the price! This code works for everything you place in your basket too!

Here’s a small gallery of images from the magazine.


This slideshow requires JavaScript.


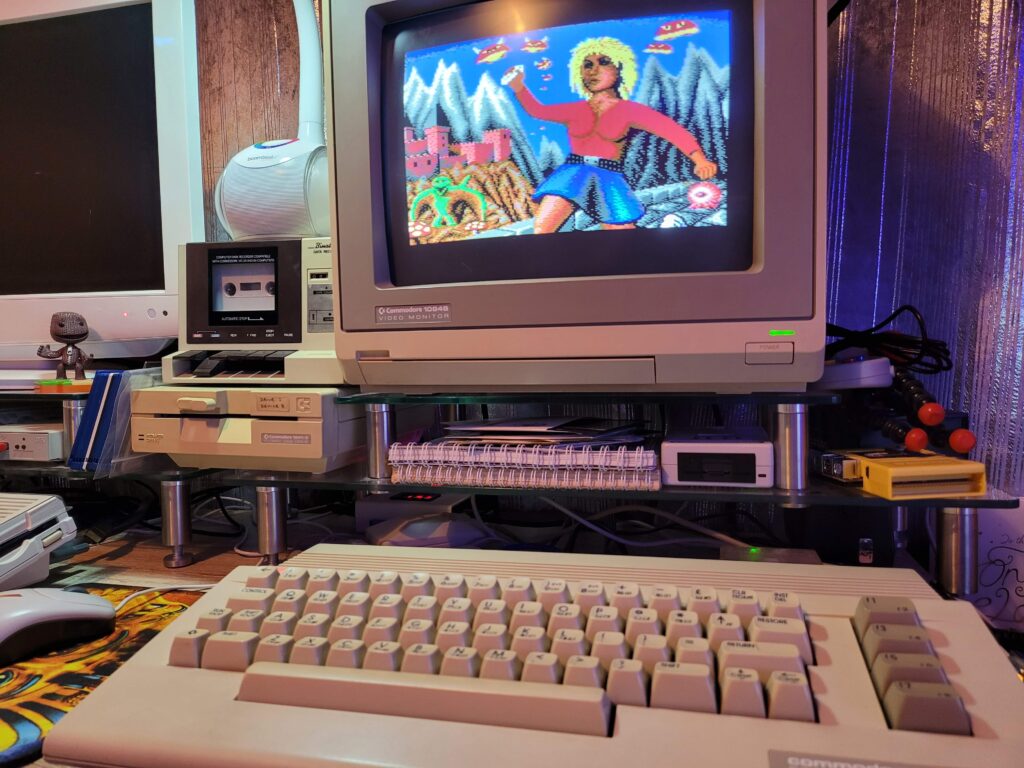
Great Giana Sisters (Reproduction)

One of the less desirable side-effects of the booming C64 retro scene is the extra demand. The supply of old games and hardware is limited as obviously no more copies are being made. Consequently as more and more people try to get hold of stuff the more scarce and thus expensive it becomes. This is basic supply and demand unfortunately and Great Giana Sisters is a perfect example. It was already a scarce product owing to the small number of copies sold originally but add the extra demand and it becomes classic unobtanium.


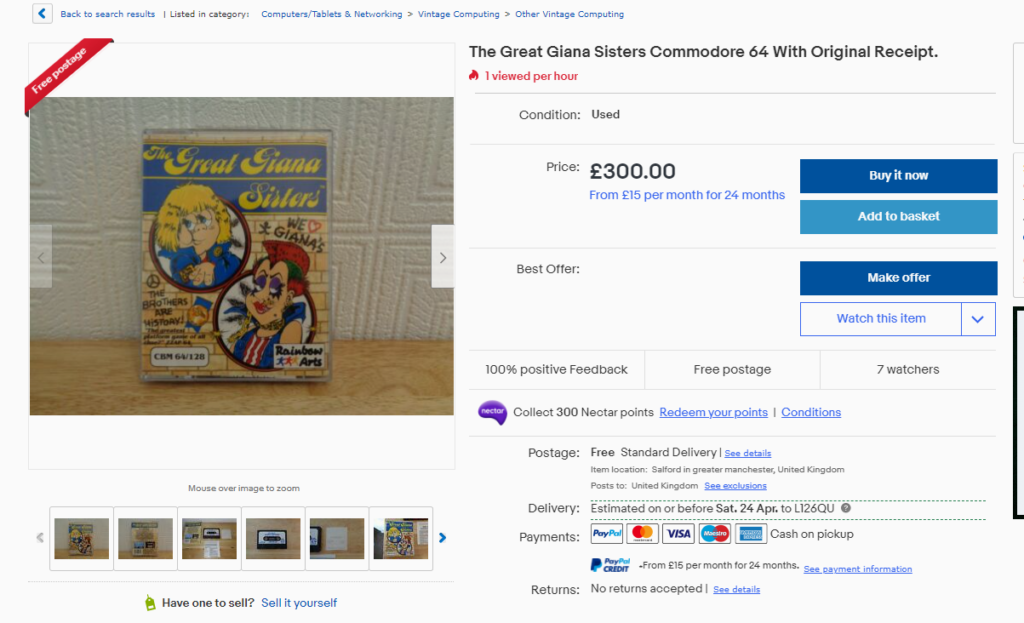
eBay

One of the more reasonable asking prices for the game on eBay!


There are a few copies floating around but when they do appear on eBay they sell for hundreds of pounds. At the time of writing this there is one on there now with a ‘Buy it now’ price of £300 and several others for much more…


eBay

Taking the pi**?


Unless you have very deep pockets then that puts it out of reach of most hobbyist collectors such as myself.


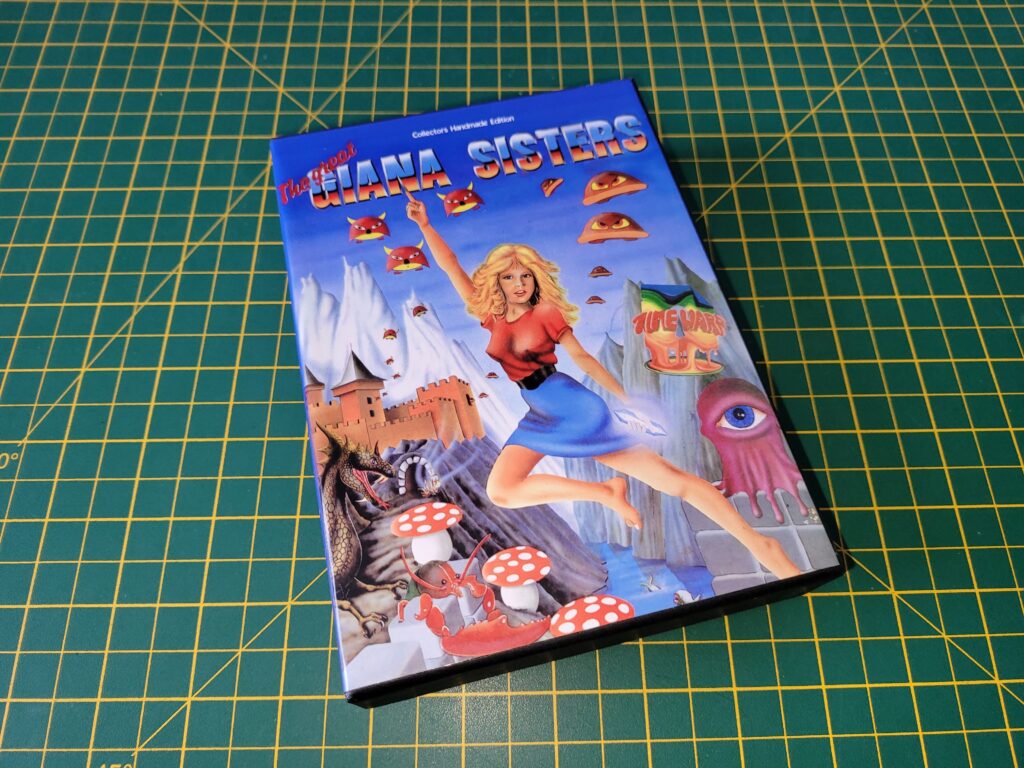
Great Giana Sisters

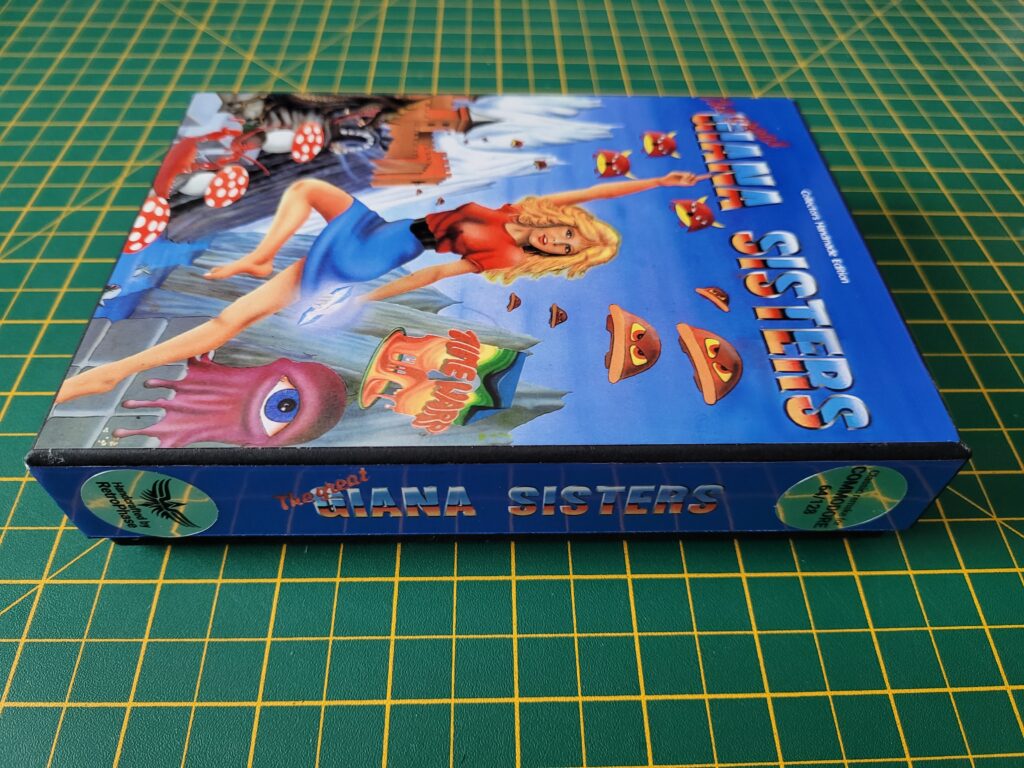
Front Cover Artwork.


Imagine my surprise then, when I stumbled across this version on eBay selling for less than £40. I jumped at the opportunity, even though I was a little apprehensive about the quality of the item I would receive. I made the seller an offer which he accepted and then patiently waited for it to arrive.


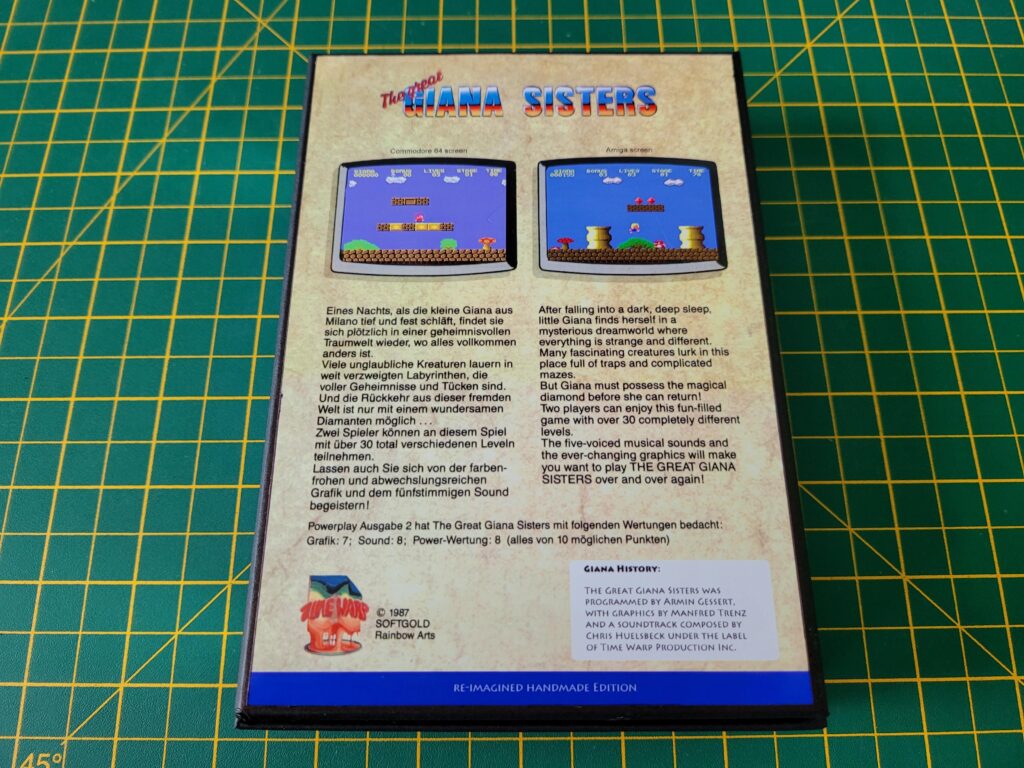
Great Giana Sisters

Back of the box.


A few days later the game arrived, packaged securely to prevent any damage . The sturdy cardboard box the game came in was around the size of a VCR tape but about 50% thicker.


Great Giana Sisters

Another view of the box side-on.


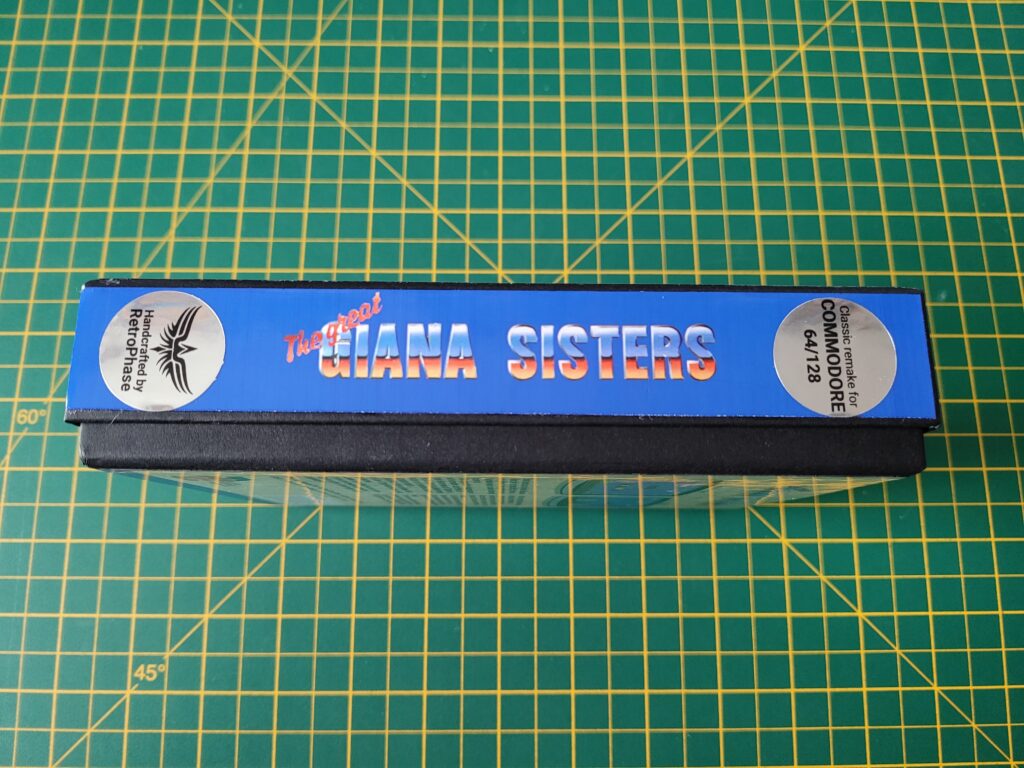
Glossy artwork from the original game adorned the front cover whilst the back of the box had some screenshots and details of the game. Both sides of the box had matching title artwork down the spines, capped off with a couple of very attractive silver foil stickers.


Great Giana Sisters

Box spine.


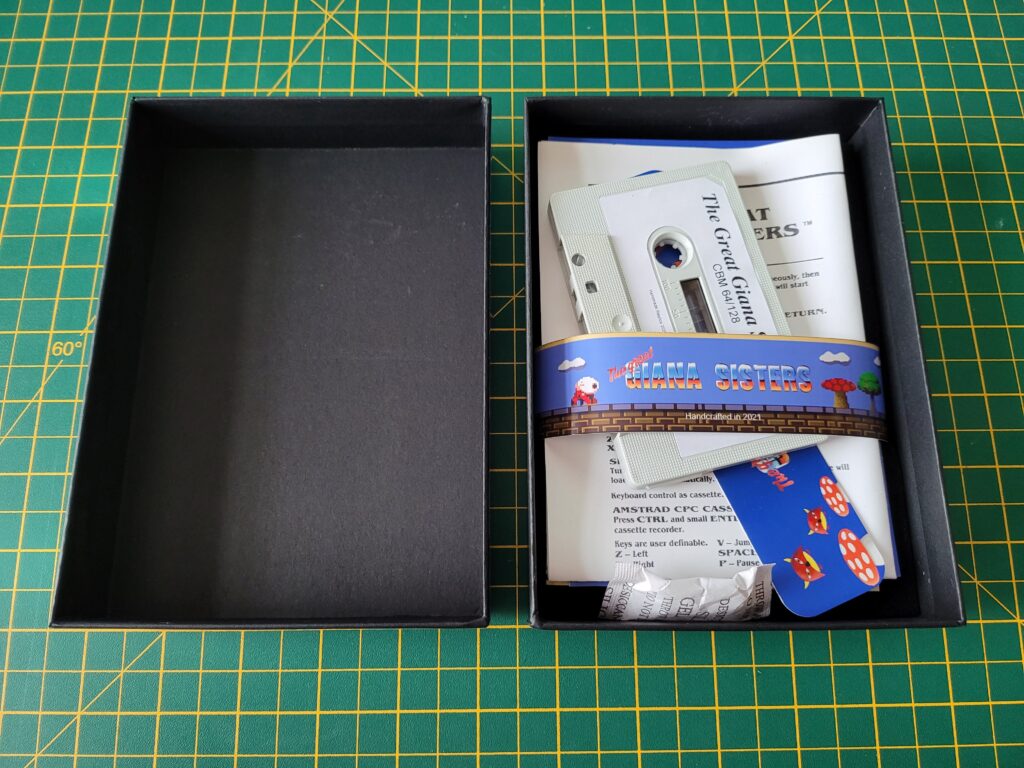
Inside the box was equally well presented with a thick black foam pad sitting at the bottom and all the ‘feelies’ placed on top.


Great Giana Sisters

A look inside the box.


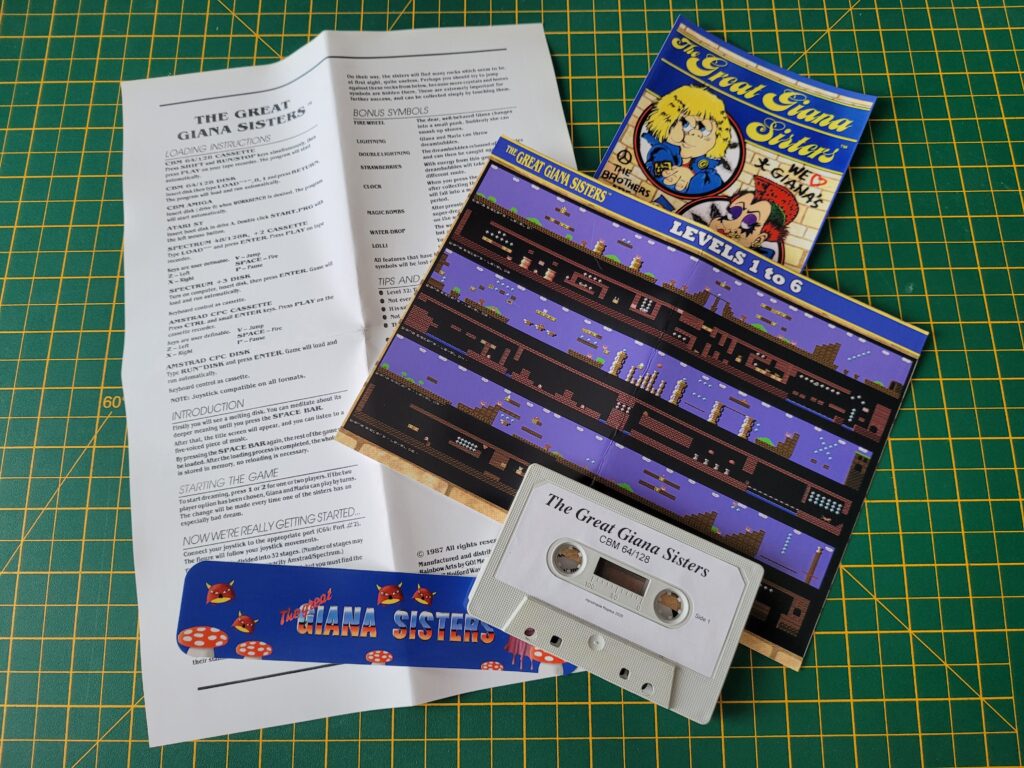
Besides a copy of the game on cassette tape there was also an instruction sheet, glossy colour level map, a bookmark and a postcard featuring the alternative cover artwork. Oh and a little sachet of silica gel crystals to keep moisture at bay. Keeping everything neat and tidy inside the box was a matching Giana Sisters strap around the contents.


Great Giana Sisters

All the ‘feelies’ included in the game.


Is it original? Of course not. Is it going to be worth a fortune in the future? Almost certainly not. Is it a great looking physical copy of the game that didn’t cost me an arm and a leg? It sure is and one I’m more than happy to display on my shelf.


Great Giana Sisters

Great Giana Sisters loading screen.


That tape is no mere dummy either, it actually contains a copy of the game on both sides!  🙂


Great Giana Sisters

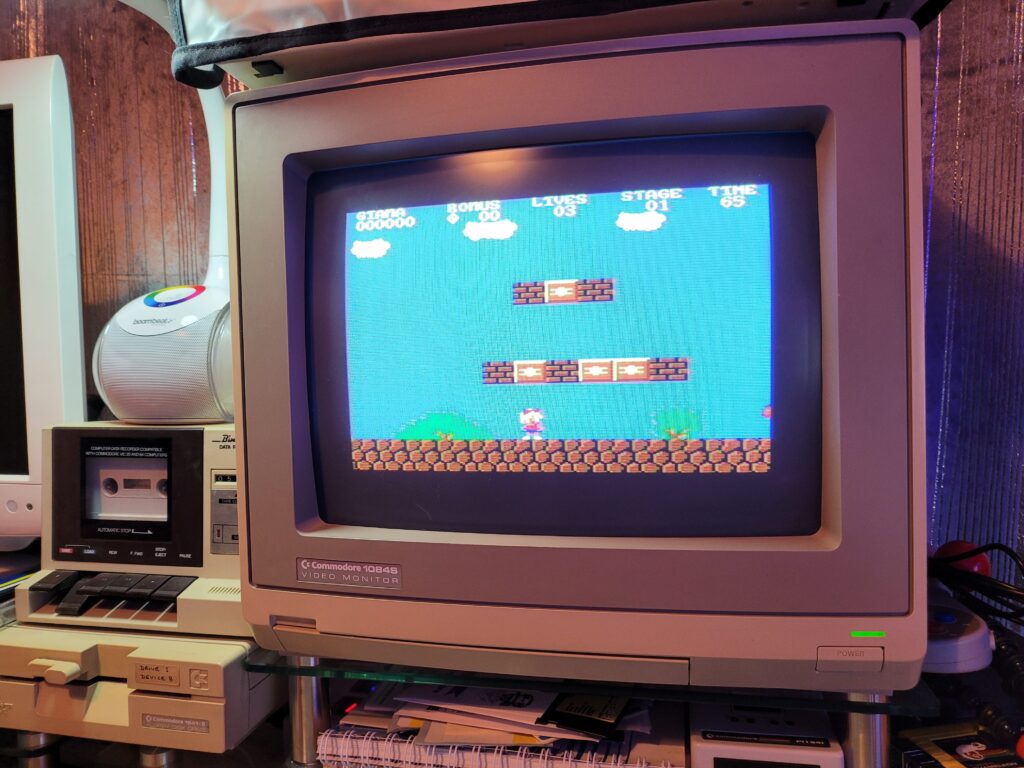
Playing Great Giana Sisters on my C64C.


Here’s a link to the sellers items for sale on eBay if you want to take a look for yourself. He produces a few other reproduction games too although he doesn’t always have them listed for sale. If there’s none there when you look then keep checking back or fire him a message. He says he’s open to requests to produce other games too…

A look at the new Zzap! 64 2021 Annual

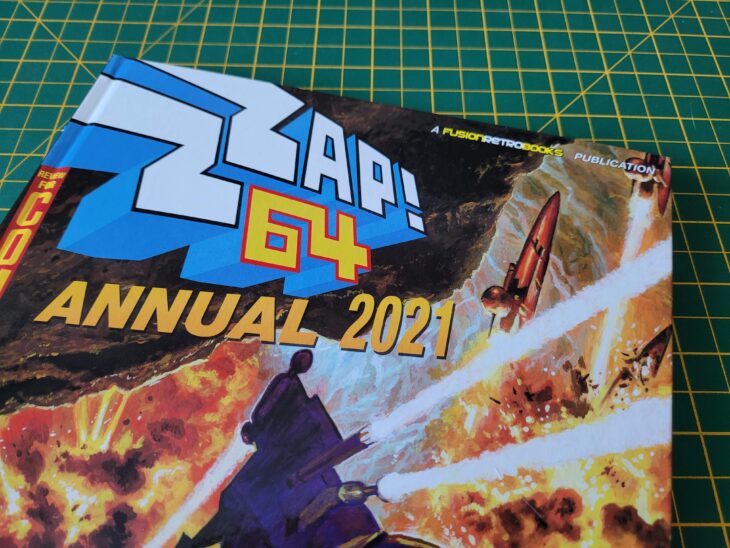
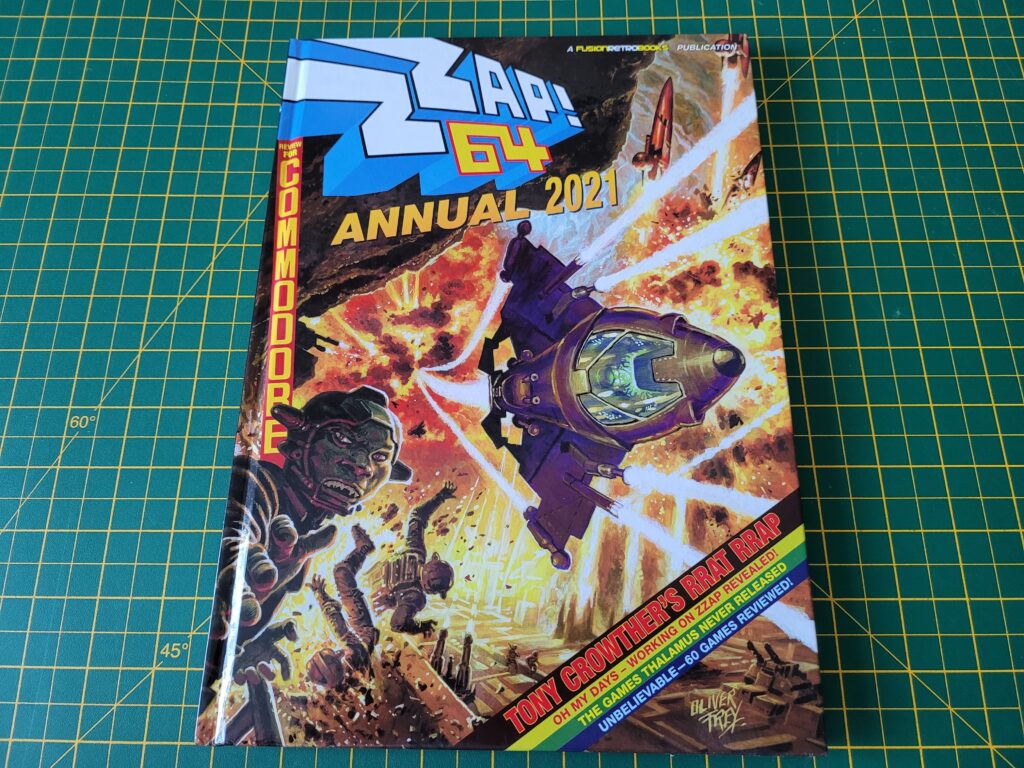
Picked up a copy of the latest Zzap 64 2021 Annual last week so thought I share a little look at what’s inside. Let’s start with the awesome front cover artwork by Oliver Frey, the exact same artist from the original Zzap! 64 magazines of the 80’s.


Zzap 64 2021 Annual

Front cover of the 2021 Zzap! 64 Annual.


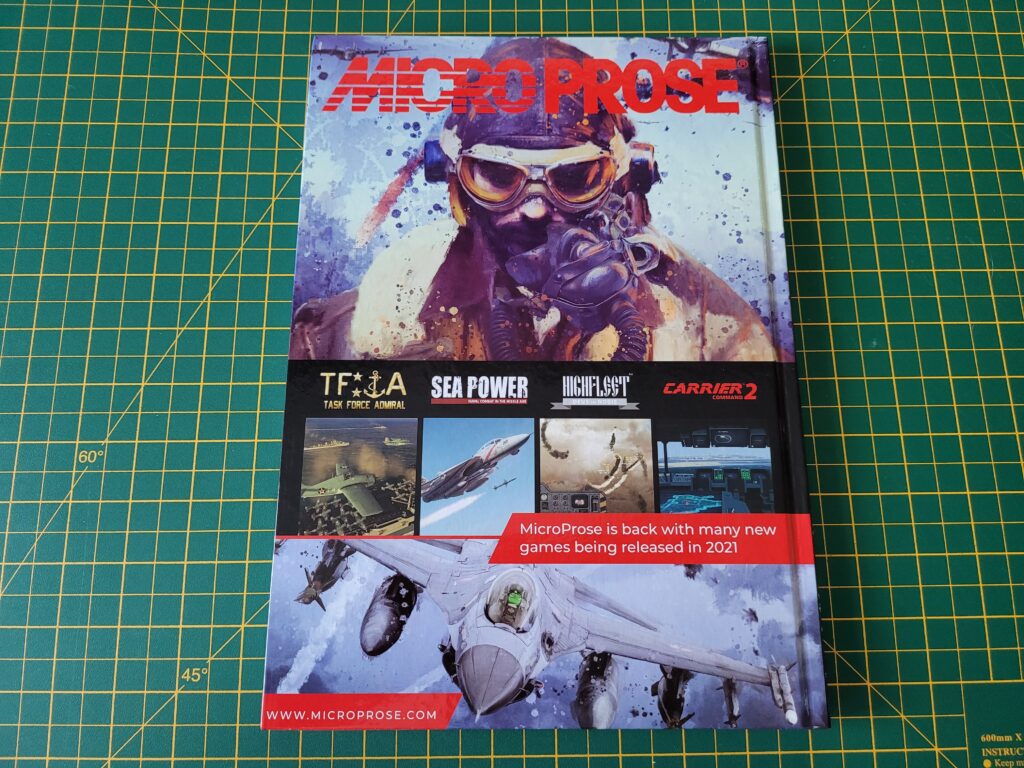
Flipping over to the back cover we find a very interesting advert that appears to herald the return of MicroProse simulation games. MicroProse was a big player in the Commodore market (especially on the Amiga) and produced some of my favourite C64 games such as Silent Service, Gunship and Pirates!

Sadly, but not at all surprising, these new games will be coming to Windows PC’s and not the C64 or Amiga. Even so I’m still looking forward to seeing what MicroProse produces. To be honest that’s probably what they are banking on too otherwise why else would they pay for such a prominent advert in a book about 40 year old computers!


Zzap 64 2021 Annual

Interesting advert on the back!


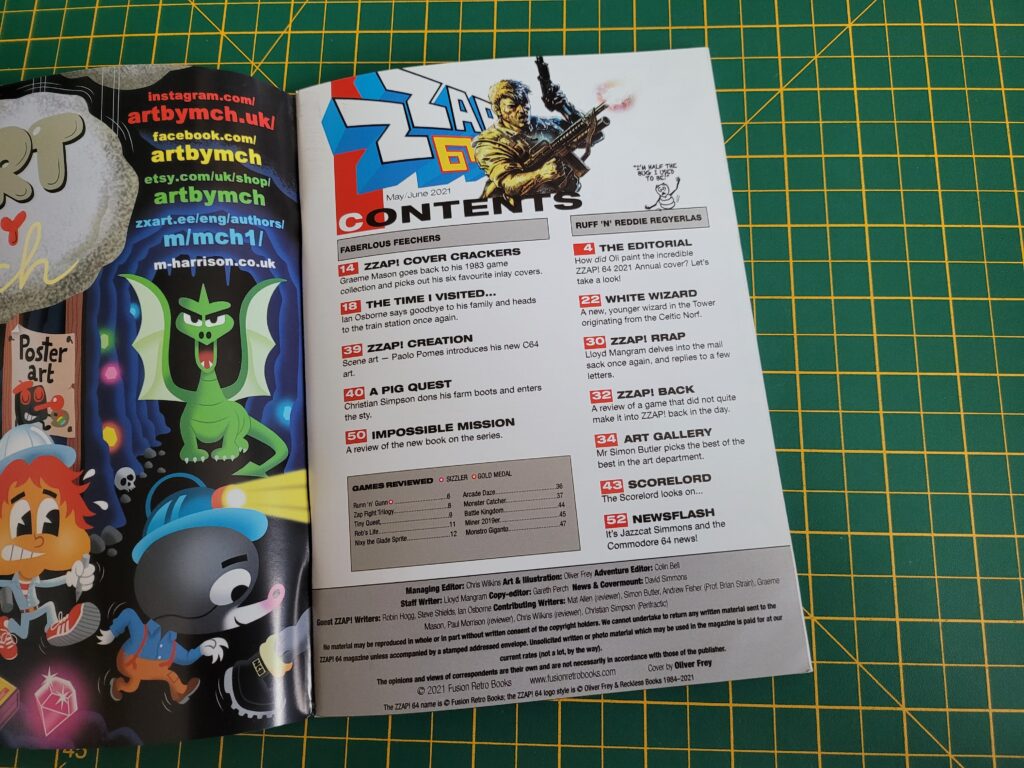
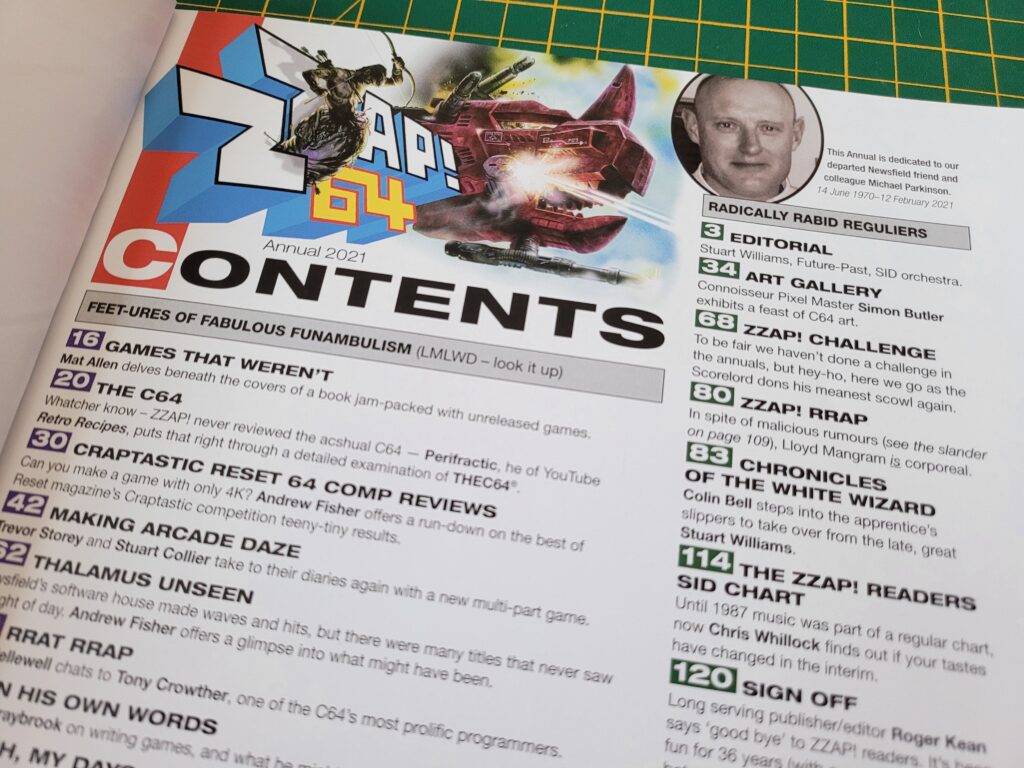
Below is a little peek at the contents page giving you an idea of exactly what’s inside the annual.


Zzap 64 2021 Annual

Zzap! 64 2020 Annual Contents Page


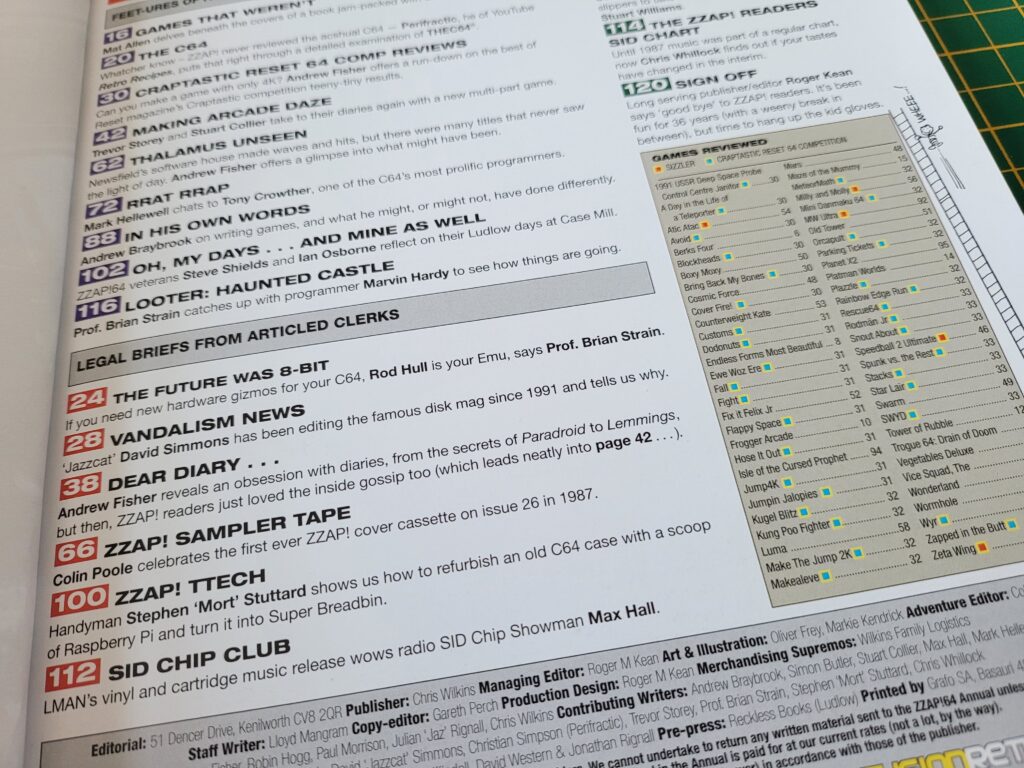
A few of the many contributors this year include Andrew Braybrook, Stuart Collier, Perifratic and Trevor Storey.


Zzap 64 2021 Annual

Zzap! 64 2020 Annual Contents Page


Most of the Zzap! 64 magazine regular features like Zzap! Rrap and the White Wizard can be found within the annual and are given plenty of space to shine. There are also dozens and dozens of game reviews covering pretty much every new game that has been released over the last 12 months for the C64.


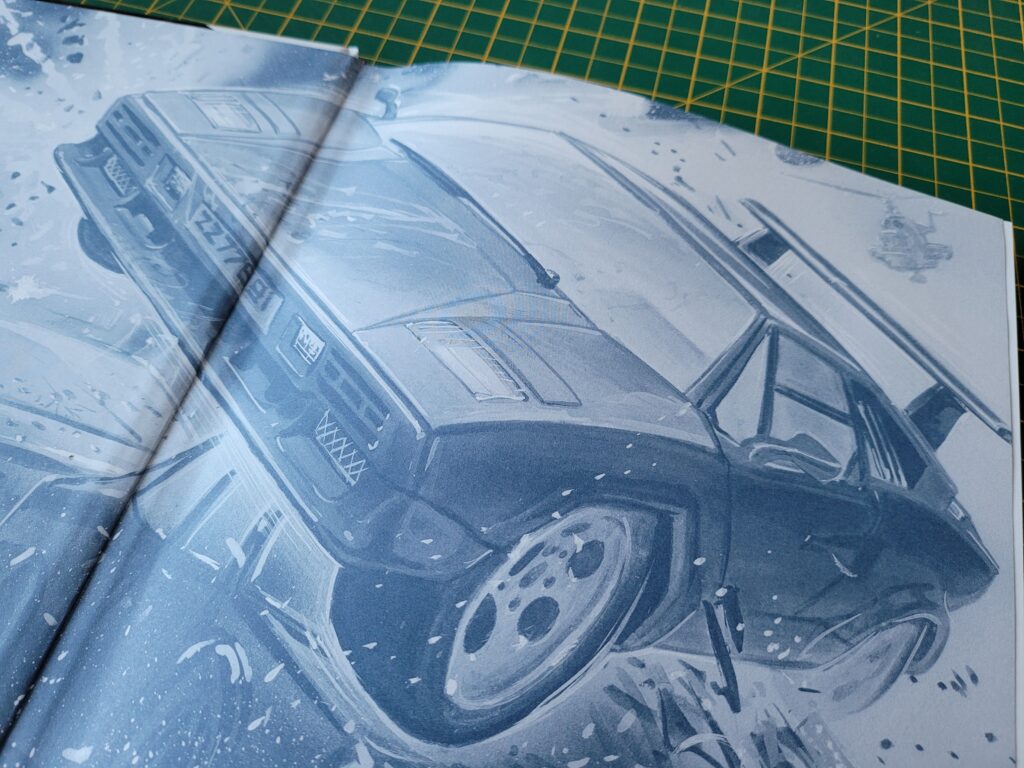
Zzap 64 2021 Annual

Another example of the amazing Artwork of Oliver Frey.


The hardback A4 annual has 120 full colour pages all packed with interesting articles, reviews and artwork.

Here’s a tiny selection of random pages from the annual to give you an idea of what it contains.


This slideshow requires JavaScript.


Rounding off

There’s certainly enough content in this annual to keep any C64 fan quiet for a very long time. I reckon it makes a superb collectors item; chronicling the last twelve months of the C64 scene. I’ve bought every one of this new run of annuals since it started back in 2019 and I sincerely hope they continue being produced for a long time to come too.

The Zzap 64 2021 Annual is available directly from the Fusion Retro Books website for £15. You can save 15% by using the code ‘LYONSDENBLOG’ at the checkout making it even more of a bargain!

K&A Plus #17 Magazine Preview

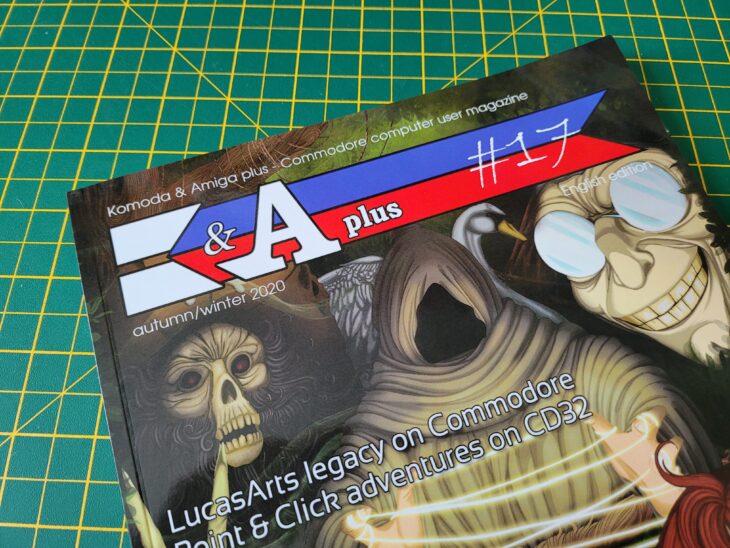
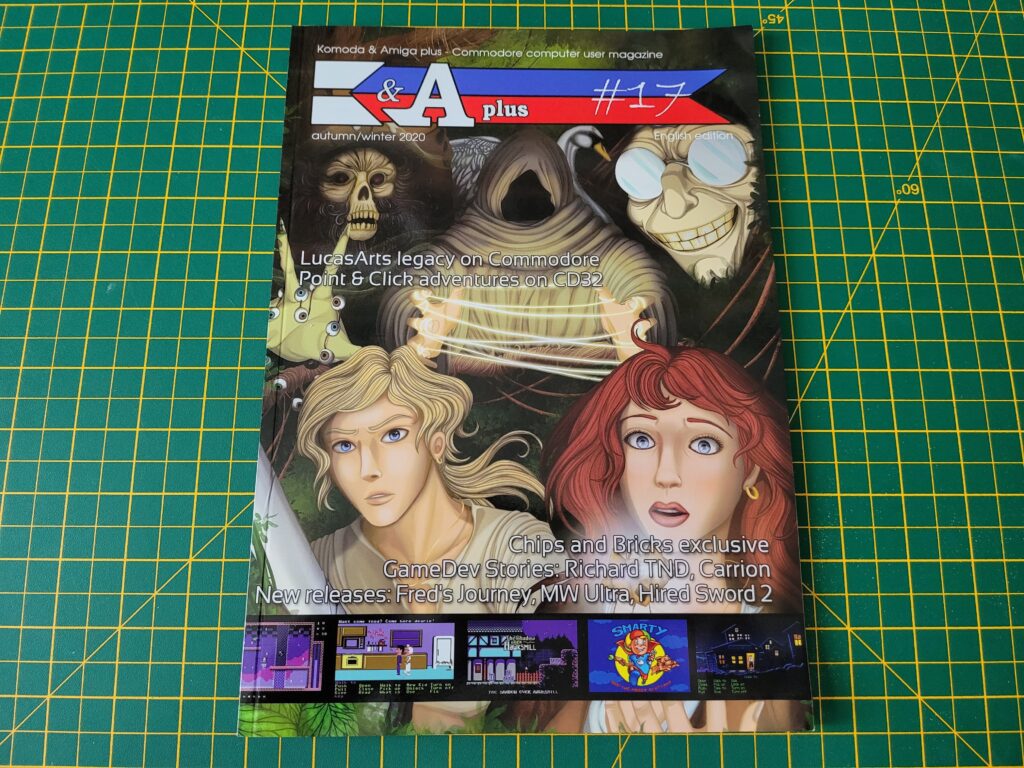
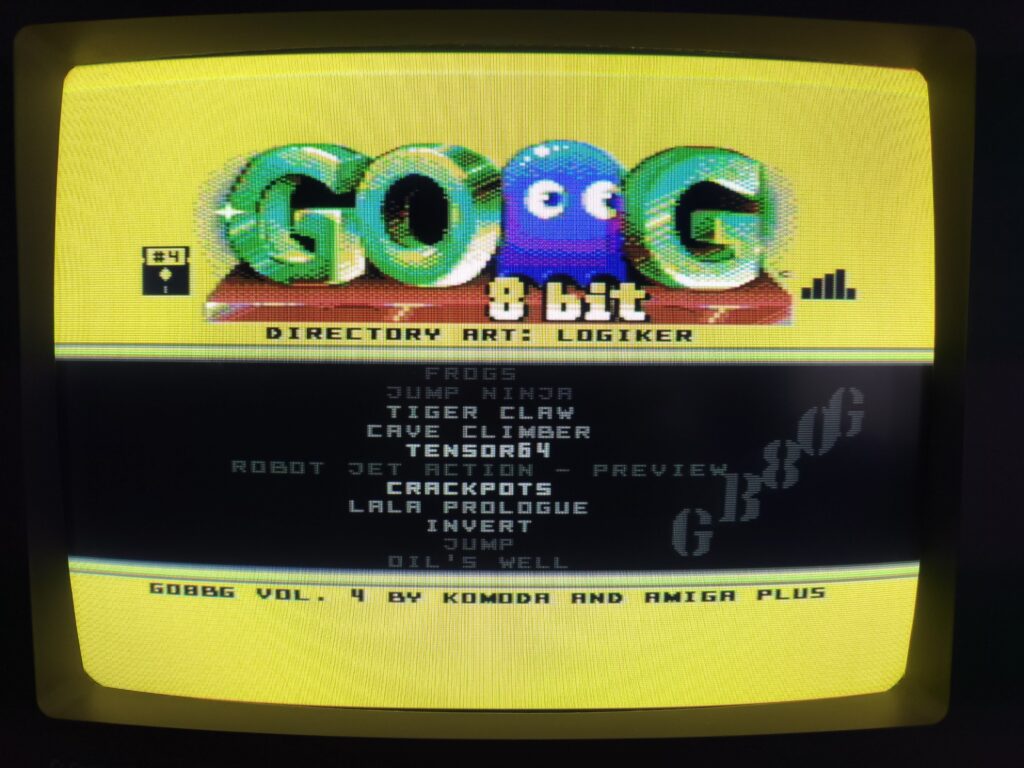
Received my copy of K&A Plus #17 a few days ago. As always I paid a little extra for the cover disk which I think is well worth it. The disk comprises the 4th instalment of a series of games compilations called ‘Good Old 8-Bit Games’.


K&A Plus #17

K&A Plus #17 Front Cover.


The 81 page magazine has a lovely piece of artwork featuring Guybrush and Elaine from Monkey Island adorning the front cover. The relevance of this becomes immediately apparent when reading the very interesting ‘LucasArts Legacy’ article.


The CoverDisk


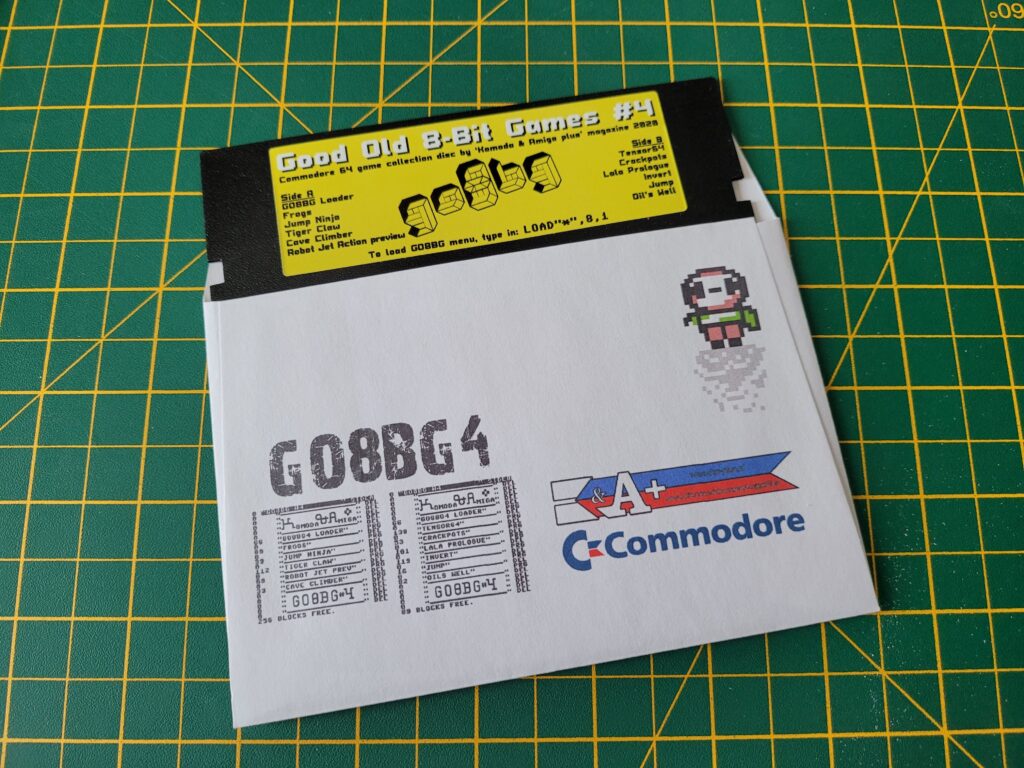
Good Old 8-Bit Games

Good Old 8-Bit Games #4.


The double-sided floppy disk (complete with printed colour jacket) is packed with C64 games to help while away those rainy Sunday afternoons.


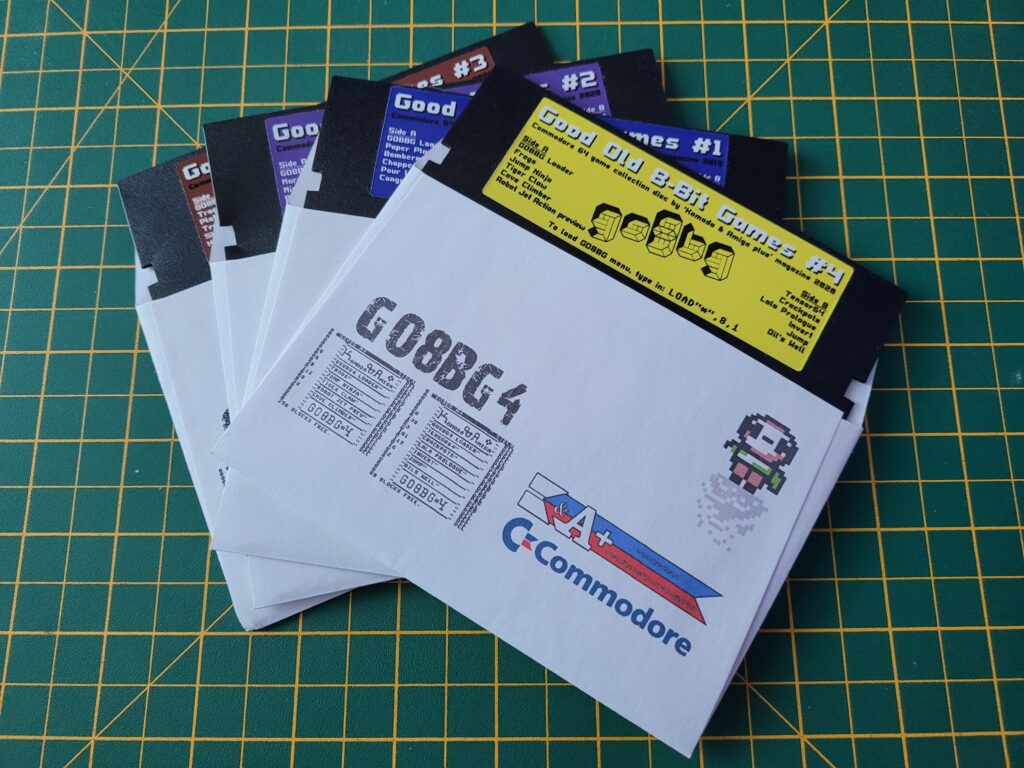
Good Old 8-Bit Games

The Complete GO8BG Collection so far…


Once again the disk represents astounding value for money, packing in 11 great games across both sides. There’s a lovingly crafted custom loader for the disk with some terrific music playing in the background too.


Good Old 8-Bit Games

Custom Game Loader.


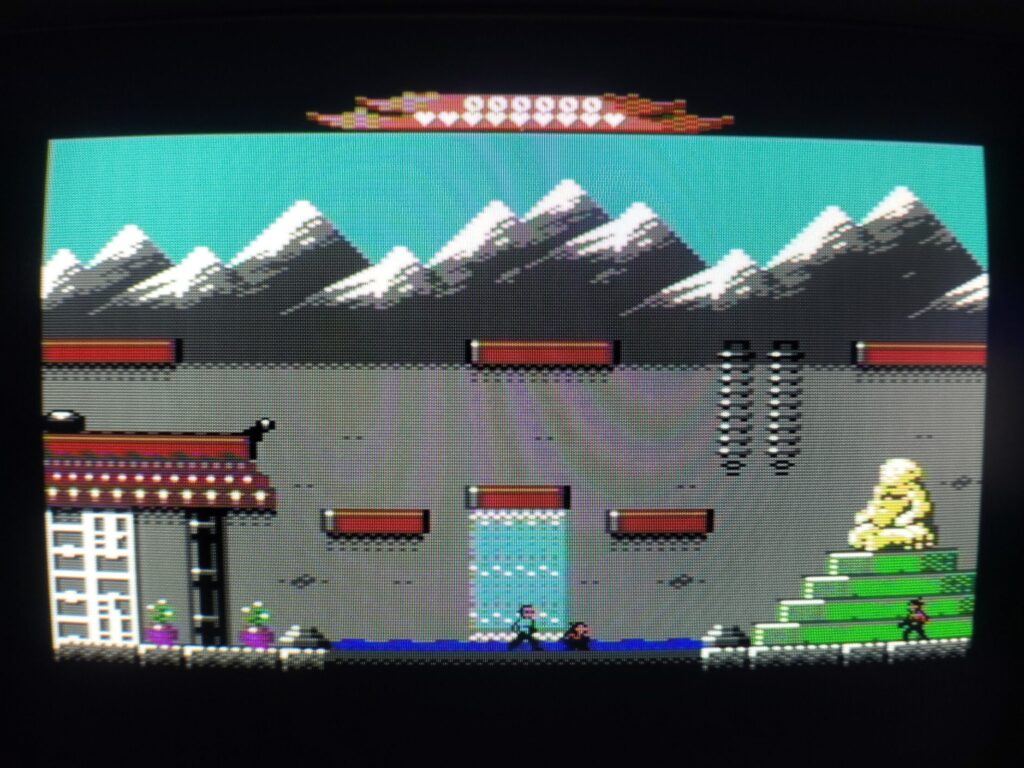
The highlight of the collection for me this time has to be Tiger Claw – a fun little Bruce Lee inspired beat ’em up.


Good Old 8-Bit Games

Tiger Claw


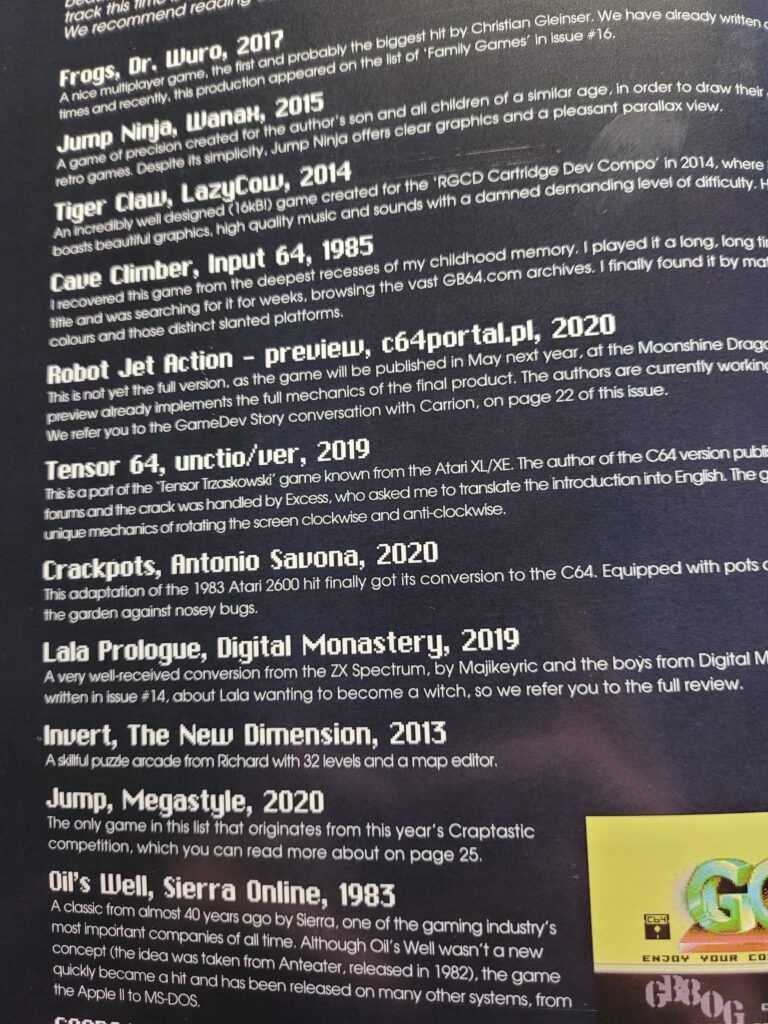
Here’s a full rundown of the games included on disk #4…


K&A Plus #17

Good Old 8-Bit Games #4 – Disk Contents.

Magazine Preview


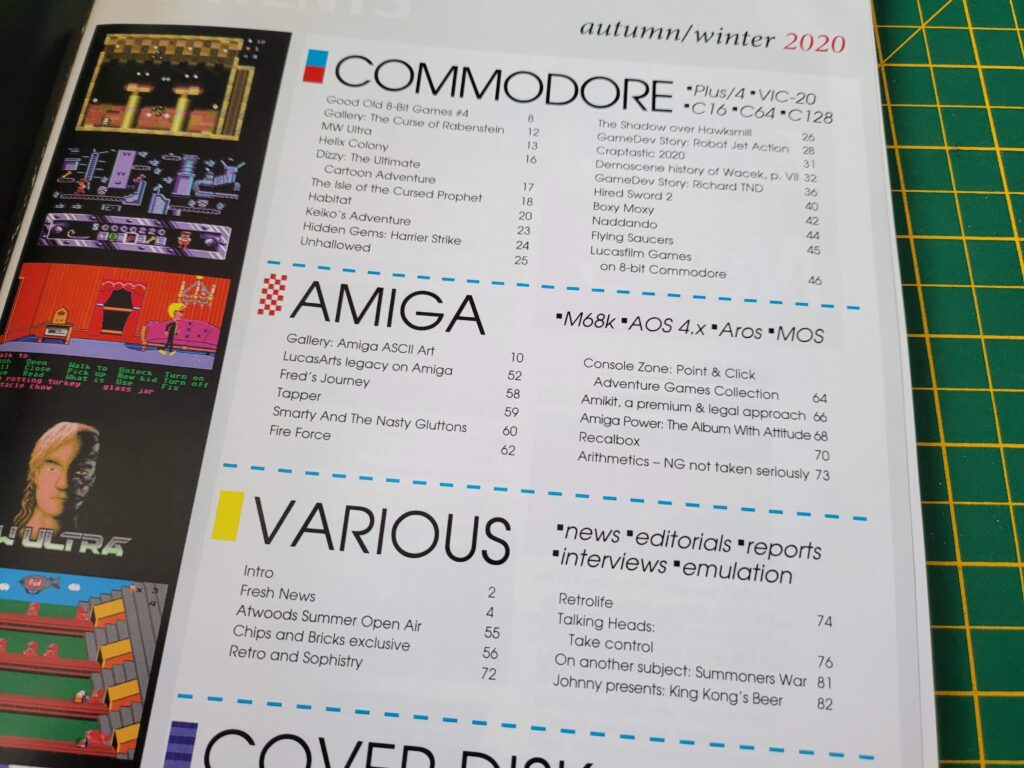
Here’s a quick look at the contents page of K&A Plus #17.


K&A Plus #17

K&A Plus #17 Contents.


And here’s a little preview of some of the great stuff in this issue:

This slideshow requires JavaScript.

This was a great read with loads of reviews and interesting articles to get stuck into. There’s enough here to keep any Commodore fan entertained for an entire afternoon. If you’ve never come across this magazine before you might want to take a look at some of my previews of previous issues here.

If you want to find out more about K&A Plus #17 or order yourself a copy, head on over to the Komoda & Amiga Plus website. The magazine is produced in Poland but they produce an English language version too. Shipping to the UK is pretty quick (COVID disruptions allowing of course).

Zzap! 64 Magazine is Back!

Zzap! 64

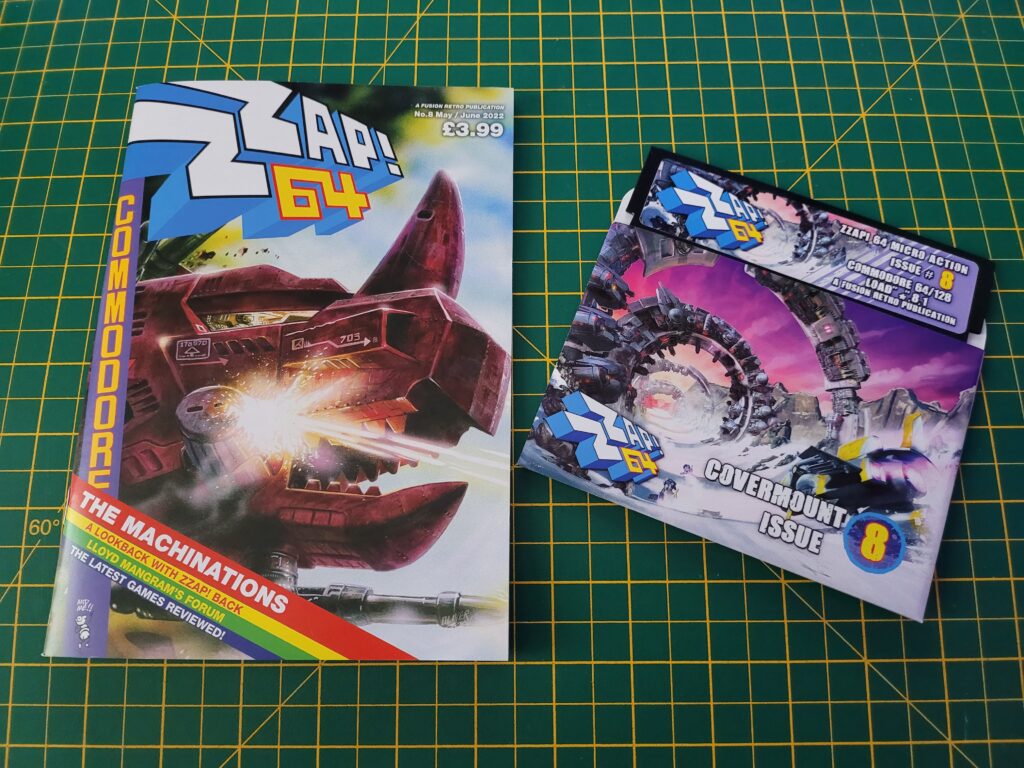
Well this is something I would never have envisaged happening a couple of years ago… the return of a printed Zzap! 64 magazine! This is an A5 sized publication produced by the same guys who make Fusion magazine, Fusion Retro Books. It’s going to be published on a quarterly basis rather than monthly. This makes a lot of sense and should ensure there’s plenty of new gaming content to fill each issue.


Zzap! 64 Issue 1

Zzap! 64 Issue 1


I received issue one a few days ago so I’ve had a chance to read it in its entirety now. I also opted to get the very snazzy binder to store all my future issues in. The magazine has been printed on a high quality silk paper and runs to an impressive 58 pages, all in glorious full colour (back in the day much of the magazine was printed in black and white).


Zzap! 64

Zzap! 64 Binder


Zzap! 64 magazine is packed with reviews of the very latest C64 games to hit the scene. A testament to just how popular the C64 continues to be, despite its advancing age! Speaking of reviews, they are just as good as I remember, presented in that familiar ZZap! style with a main review accompanied by comments from the other writers.


Zzap! 64

Zzap! 64 game scoring.


Games are scored on Presentation, Graphics, Sound, Hookability and Lastability and given an overall aggregate percentage score, very similar to how they used to be reviewed back in the day.


Zzap! 64

Two thumbs up – must be good!


Still present and correct are the little B&W portraits of the reviewers in various pensive poses giving you instant visual feedback about what they think of each game. Further reassurance that this is still the Zzap! 64 I know and love – just shrunk down to A5 size.


Zzap! 64

The White Wizard adventure and RPG section.


As a big Adventure game fan I was thrilled to see the reappearance of the White Wizard. This section of the mag features reviews of some of the current C64 Adventure and RPG games along with news of up and coming ones to look forward to.


Zzap! 64

Soul Force gets the coveted Zzap! Sizzler award.


As well as the many reviews there are some previews of upcoming games such as the Empire Strikes Back and a look back at some of the more notable games of the past.


Zzap! 64

Article about the upcoming Empire Strikes Back game.


There’s a few trips down memory lane and insights into events which happened during the magazines heyday too which I found both engaging and entertaining.

Zzap! Rrap makes a welcome return, presented by the totally real and definitely not imaginary Lloyd Mangram, complete with little cartoons of him adorning the borders of the pages.


Zzap! 64

Lloyd is back!


All in all this is a fantastic return to the C64 scene for the magazine and I thoroughly enjoyed reading it from cover to cover. Along the way I had a good few chuckles, some trips down memory lane and discovered some new games that I want to add to my collection.

This is a magazine that every C64 fan should read and the next issue just can’t come soon enough for me.


Zzap! 64

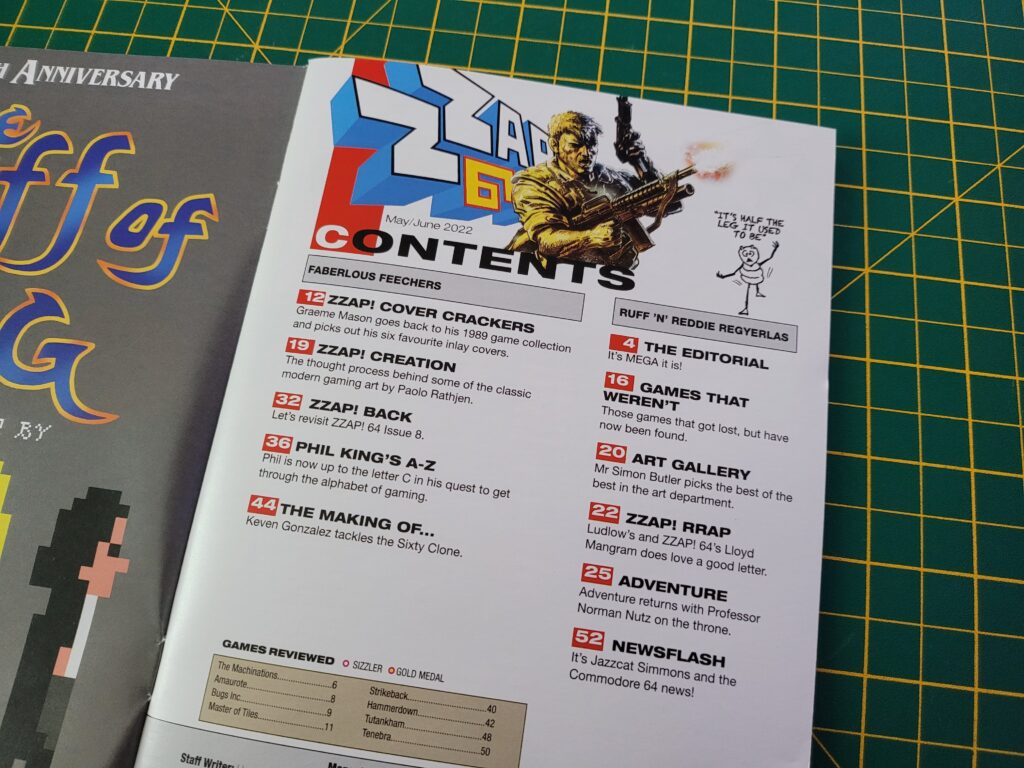
Zzap! 64 Contents page.


Zzap! 64 magazine is available from Fusion Retro Books and is priced at £3.99. The optional binder is £15 and can hold 12 issues or 3 years worth of magazines. Make sure you use the code ‘LYONSDENBLOG’ to grab yourself a nifty 15% off the price!


Zzap! 64

Issue one stored safely in the binder.


A C64 Type-In BASIC Listing – in 2021!

As a fully certified computer nerd I spent an inordinate amount of time in my teenage years typing away on my VIC20 and C64 entering BASIC programs from books and magazines.  I found the process fascinating, witnessing a program gradually taking shape before my eyes. Sometimes I would ‘run’ the program before it was even finished just to glimpse the title screen or see how it was looking.

A couple of my favourite magazines (for listings) at the time were ‘Commodore Horizons’ and ‘Your Computer‘. YC was packed with new listings for all manner of 8-bit machines every month and it always had several for the C64. I would think nothing of spending hours painstakingly transcribing reams of code into my computer and probably another few more ‘debugging’ the code to fix all the mistakes! It was a fun, occasionally frustrating but always rewarding experience. It was also very educational. Typing in other peoples code helped me learn how to program myself. I used to experiment a lot, changing their code to make the program do something different. Eventually I went on to get a few of my own programs published in magazines and ultimately it’s what got me into a lifelong career in computers.


C64 Type-In BASIC Listing

Typing in a listing!


Why the trip down memory lane? Well because it’s now 2021 and I’ve just spent several evenings typing in a brand new game into my Commodore 64! The game in question is a version of the every popular Klondike solitaire card game written by Roman Werner.


C64 Type-In BASIC Listing

A snippet of the Klondike Solitaire PDF.


It’s available to download in PDF format (it is a type-in listing after all) from his itch.io page.


C64 Type-In BASIC Listing

This is how the listing is presented. The colour coding helps makes things easier to follow. Note the 4 digit hex code in grey at the start of each line. This is the checksum code.


What made the idea of typing in his listing all the more appealing was the fact that he has utilised a new checksum tool when creating the listing. The way it works is this; each line of code in the listing is given a checksum number. Every time you type in a line of code the tool examines it and generates a code so that you can check it matches. If it doesn’t then you know you’ve made a mistake and can correct it straight away. That way, when you reach the end of the program it should run first time without issue.


C64 Type-In BASIC Listing

The checksum code in white appears after entering each line of code. If the checksum on the screen matches the one in the listing you are good to go. If not then it’s time to check where you’ve gone wrong!


Obviously I had to type in the small checksum tool program initially and get that working but it only took about 15 minutes. The checksum system was fantastic in use. Inevitably I did make several errors along the way but I was able to correct them immediately and move on. It was certainly far better to know I’d made a mistake straight away than try to fix multiple errors within hundreds of lines of code later on. Occasionally it did lead to some prolonged head-scratching as I tried to figure out what I’d entered wrong though!


C64 Type-In BASIC Listing

Playing the completed game.


I did struggle a little at first – it’s been nearly 40 years since I’ve had to deal with the C64’s weird and wonder special symbols and some of them took me a while to figure out! The fact that ‘Light grey’ is accessed by holding down the C= key and pressing 8 for example had long since faded from memory.

The entire listing took me around 5-6 hours to complete from start to finish and that included ‘debugging’ time. If I had to do it again I’d be much faster now I’m familiar with most of the PETSCII characters once more.

I still found it a very enjoyable experience, even though I now have to deal with wearing varifocal glasses. I was quite surprised to discover that you can still purchase copy holders so I picked one up to help keep the listing and the screen the same distance from my eyes which helped a lot.


The Game

For probably the first time in my life ever the program ran successfully first time! A testament to the success of that Checksum tool for sure. I was greeted with an attractive title screen that includes some options for customising the game.


C64 BASIC Solitaire

Title Screen.


Considering the game is written in BASIC it looks great and plays really well. It utilises the Commodore 1351 mouse which just feels like the natural way to play a game like this. There’s some extra code provided to add joystick support too should you wish to have it. The mouse pointer utilises a sprite in the form of a hand which looks really slick in operation.


C64 Solitaire

Using one of the alternate coloured decks.


The game plays exactly as you would expect a game of solitaire to play. By utilising mouse input it ‘feels’ like a much more modern game during play.

You can opt to play drawing 3 cards from the deck or just 1. Right-clicking on a card sends it to the appropriate foundation pile. You can also select a group of cards to move from one column to another.


C64 Solitaire

You can select a group of cards just like you would expect to move across to another column.


The card backs can also be changed to one of 4 different colour choices (red, grey, purple and blue) simply right-clicking the top card on the deck. Limited but effective sound effects are used to represent both the shuffling of the deck and card movements during the game. There’s even an animated ‘win’ screen at the end.


C64 Solitaire

The ‘win’ screen complete with animation. Game tracks the time played and number of moves you have made which is a nice touch.


SuperCPU

The game runs really well as I said but it is a little on the slow side when first setting up the cards on the screen or if you move a large stack of cards from one column to another. I’m only talking about a few seconds and it certainly doesn’t ruin the game, but it did encourage me to dust off my Turbo Chameleon V2 and test out the SuperCPU functionality.


C64 Turbo Chameleon

My Turbo Chameleon cart.


I tried it set to various speeds to see how it would affect the game. After some experimentation I found 3Mhz to be the sweet spot. Any faster and the mouse pointer started jittering all over the screen. 3Mhz gives the game a real boost to the point where the cards appear at the speed you’d expect. Any faster and you lose the impression that the cards are actually being dealt anyway and thus some if its charm.


C64 Turbo Chameleon

Setting the CPU speed to 3Mhz.


You can see the difference the improved CPU speed makes in the video below. The quality is pretty ropey as my camera lacks the ability to fine tune the shutter speed which is necessary to match the CRT’s refresh rate but it serves its purpose.

The video starts off with the cards being laid out at normal speed. Then you can see me going into my Turbo Chameleon settings and enabling ‘Turbo Mode’ with the speed set to 3Mhz (which is 3x faster than a standard C64). Now that the CPU is running at 3Mhz I demonstrate the cards being laid out again, but noticeably faster this time. This is definitely my preferred way of playing the game now.


Commodore 64 IRQ LED Mod

This Commodore 64 IRQ LED mod is a fun little hack that I spotted on eBay last year. Since my C64 mainboard has just come back from being re-capped I finally took the opportunity to fit this whilst I had the case open.

It’s a very simple little device that changes the colour of the C64 (or VIC20) power LED according to IRQ activity. When the computer is just idling the LED will glow red as usual. However when the CPU is active and generating interrupt requests (IRQ’s) the colour changes to green. This allows you to instantly see at a glance if your C64 is doing something. Anything that causes rapid IRQ’s will actually make the LED appear to be orange as it flicks rapidly between red and green.


Commodore 64 IRQ LED Mod

Everything supplied in the regular breadbin kit.


I picked up two of the devices, one for my 64 and the other for my VIC. I should point out that this isn’t a destructive hack. Nothing is permanently altered or damaged in any way and it can easily be reversed if desired. The device itself is really simple and there’s (usually) no soldering required. It consists of a tiny circuit board containing an LED, a couple of resistors and a single chip that detects the IRQ signals and triggers the LED colour changes. Connected to the board are 3 wires that are terminated with IC clips. These clips attach to the cartridge port pins and this is how the device monitors IRQ’s.


Breadbin Install


VIC20 Power LED.

Original VIC20 Power LED.


For breadbin C64’s and VIC20 computers fitment is extremely simple. You just unplug and remove the existing power LED and replace it with the little circuit board. There’s a small black plastic ring on the inside that needs pulling off and then the LED should push into the case from the outside with a little bit of force.


Removing a VIC20 Power LED.

Removing a breadbin C64/VIC20 Power LED.


There’s a spare black plastic collar for mounting the LED supplied in the kit in case you break the existing one. Also supplied is a little double-sided adhesive pad that you can use to fix the board in place. The new LED will need a little pressure to snap it into place and with the help of the adhesive pad it should be held nice and secure.


Commodore 64 IRQ LED Mod

Fitted board – held in place with a double-sided sticky pad sandwiched between the case and the chip.


Now it’s just a matter of wiring the board up. The 3 wires need to be attached to the front row of cartridge port pins using the IC clips as indicated below.


Commodore 64 IRQ LED Mod

IC clips connected to VIC20 cartridge port.


One the VIC20 the green clip goes onto pin 22 (Ground), Red – Pin 21 (+5V) and White – Pin 19 (IRQ).

On the C64 it gets wired up as follows; Green – Pin 1 (Ground), Red – Pin 3 (+5V), White – Pin 4 (IRQ).


Commodore 64 IRQ LED Mod

View showing the completed mod fitted.


Time for the moment of truth – putting the case back together and giving it a test drive. The LED in my kit had been soldered on in reverse so when my VIC was idle it lit up green and when busy it changed to red. I could have solved this by de-soldering it and flipping it round but it really doesn’t bother me so I left it alone. Other than that it works exactly as advertised and I’m really happy with the result.


This slideshow requires JavaScript.


C64C Install


UPDATE [March 2024]

Tim over at SharewarePlus now produces a version specifically for the C64C too incorporating a rectangular LED and also a much longer set of cables to allow the clips to actually reach the cartridge port as the LED is on the opposite side to the older ‘breadbin’ style machines.


C64C Version.


This makes the installation process just as simple as it was for the breadbin case one.


Close-up view of the C64C version with rectangular LED.


I’ll leave the details of my original installation modification below just in case anyone else finds themselves needing to fit a round peg into a rectangular hole. However realistically this info is now obsolete so long as you are getting one after March 2024 as you can just choose the right one for the job when you buy it.


ORIGINAL INSTALL

I hinted earlier that non-breadbin installs aren’t quite so simple. I have a C64C and as supplied the mod will not work with this model. There’s a couple of reasons for this. The most obvious being the C64C has a rectangular LED rather than the usual round one found in Breadbin style machines.


Commodore 64 IRQ LED Mod

Board supplied without a round LED and a rectangular one waiting to be fitted.


The other problem becomes apparent once you open up the case. As can be seen in the photo below the power LED is at the opposite end of the case to the cartridge port so the supplied wires are too short.


Commodore 64 IRQ LED Mod

Here you can see that the supplied wires in the kit only reach half-way across the board.


Fortunately these issues are easy to sort. I mentioned about the LED to the seller (Tim Harris who runs Shareware Plus) and he kindly supplied the board without an LED fitted so I could fit a rectangular one myself. These ones here are a good fit: rectangular LED’s on eBay.


Commodore 64 IRQ LED Mod

LED fitted to 10′ long wires to allow it reach across.


In order for the LED to fit in the existing hole I soldered it to three 10 inch lengths of wire and then soldered the wires to the circuit board. I fitted some heat shrink tubing over the joints to insulate them. This allowed me to mount the circuit board close to the cartridge port and also have the LED in the correct place.


Commodore 64 IRQ LED Mod

Here you can see the mod fully fitted and wired up. Note there are several other IC clips on this photo – these are from my SIDFX (twin SID chips).


I attached the board with a small double-sided sticky pad to hold it in place. I also carefully bent the wires on the LED 90 degrees so the cables would lie flat along the top of the case.

The IC clips were connected to the cartridge port pins as follows:

  • Green – Pin 1 (Ground)
  • Red – Pin 3 (+5V)
  • White – Pin 4 (IRQ)


Verdict

After giving it all a quick test I put the case back together and had a play around with it. When idle the LED lights up red as normal – a much more vivid red than the photos show. When the CPU is actively generating an IRQ such as when loading off a disk the LED with light green. Rapid IRQ activity that can happen when playing a game makes the LED appear orange.
I’m really impressed with this little mod. It’s one of those things that’s kind of pointless but also completely essential at the same time. I love having a visual indicator that my computer is doing something and during loading or saving operations it functions as a kind of drive activity light.

You can see it working clearly in the video below, taken whilst I was loading a program off a floppy disk.


If you enjoy tinkering and like the idea of having an activity light on your C64 or VIC then I can thoroughly recommend this. Did I mention that it costs less than a tenner too? A real no-brainer for me. You can pick up either version from Tim over at SharewarePlus.

Retro 3 Port USB Cassette Hub Review

I spotted this little USB Cassette hub on social media over Christmas and thought it looked cool so had a look around to pick one up for myself. After some searching I found one on Amazon and for the price I couldn’t resist taking a punt.


Packaging

The Packaging


It arrived in a plain black box with no indication of what was inside at all. Inside the box there’s what at first glance appears to be a standard looking cassette in a transparent library case along with a micro-USB cable.


USB Cassette Package Contents

Package Contents


Opening up the case reveals a ‘C90 Cassette’ styled very much like a tape from the 1970’s or 80’s.


USB Cassette Hub

USB Cassette Hub in library case


Look a little closer though and you start to see that things are not as they first seem. For example, the centre view window where you would normally see the tape spools is merely a sticker. However the two spools are real and can actually be freely rotated. Perfect for reliving your youth by inserting a Bic pen and twirling it around like madman!


USB Cassette Hub

Looks can be deceiving!


If you flip the cassette over you also notice that both sides are labelled as ‘Side 1’. Perhaps with a little more effort that could have been remedied but that’s a minor niggle.


USB Cassette Hub

Side by side comparison with a regular cassette tape.


The shell itself is the exact same shape and size as a regular cassette with the main difference being that where the tape transport holes usually lives there are now three USB sockets. There are also no holes for the capstan spindles.


USB Cassette Hub

USB Cassette Hub placed on top of a real cassette tape. I thought the way the 3 ports are perfectly aligned with the tape transport holes of the original was a nice touch.


Along the top where you might expect to find a write-protect tab there is a micro-USB socket for connecting the hub to your computer using the supplied cable.


USB Cassette Hub

No plastic tabs to snap off (or tape over) here. Just a micro USB port.


The J card is completely blank – I think they missed a trick here and could have had a nice cover image for the hub and printed the instructions inside in the form of an album listing. That’s a little project I will probably do myself on a rainy Sunday afternoon…


Case

The case is just a regular old transparent library case with a blank J card.


Instead of a printed J-card there is a small fold-out guide that gives brief specs and some warnings.


USB Cassette Hub Instructions

Minimalist instructions.


Specifications

In terms of specs it’s positively ancient, supporting only USB 1.1. However, given it’s a retro styled hub it kind of makes sense that the hardware it houses also dates back to the late 1990’s!


USB Cassette Hub

Another comparison with an old tape.


Manufacturer specs:

  • 3 Port USB 1.1 Hub
  • Supports OHCI and UCHI
  • 1.5Mbps – 12Mbps
  • Includes mini USB cable
  • Rated 5V DC

Thankfully USB 1.1 is perfectly fine for the likes of keyboards and mice which makes it a terrific accessory to use with TheC64 Mini and Maxi machines when you need a few extra USB ports.


Putting it to good use


Cassette Hub working with TheC64 Mini, 2 joysticks and a USB drive.


In addition to USB keyboards and mice I found it also worked perfectly with both my TheC64 Mini and Maxi joysticks and my mini USB drive. Great news if I want to play any 2 player games that aren’t on the built in carousel.


Cassette Hub working with TheC64 Mini


I also tested it with my TheC64 Maxi and it worked just as well. However with 4 built-in USB ports on the Maxi it’s not really necessary. Still, it’s nice to know it’s an option in the future.


Cassette Hub working with TheC64 Maxi


Just for kicks I tested the hub out on my PC by transferring a few files across to a USB flash drive. It worked but was very slow – maxing out at a pretty measly 2.77MB/s. Of course this wouldn’t be much of an issue if I was just transferring a few games across to play on TheC64 Mini.


PC file transfer speed graph

Testing out the transfer speed on my PC.


Verdict

This is a super little device to use with a TheC64 Mini and gives you an extra 2 ports overall. (One of the built-in ports is taken up by the hub). It looks really cool and very nostalgic and compliments TheC64 mini perfectly. The extra ports allow you to hook up a USB keyboard and use a flash drive for extra games along with a joystick or two. This simply isn’t possible without the use of a hub. Sure you could get a modern USB 3 hub but where’s the fun in that!

I can’t recommend it for everyday PC use… it’s just far too slow as you’d expect from a USB1.1 device. But for less than a fiver I think it’s a great little device for retro gaming and sure to put a smile on your face when you use it. An added bonus is that it stores neatly away in a cassette rack when not in use!