Lyonsden Blog

Category - Vintage Hi-Fi

SIDPlayer+ Review

SIDPlayer+

The SIDPlayer+ is a neat little hardware music player made by Arananet that is able to play C64 SID audio tracks. They have a strong tendency to be perpetually out of stock but you can register your interest and receive an email when a new batch is ready which is how I got mine.

I’ve actually been meaning to post about this for a while but only just got around to it. Anyway after ordering the device I received small package in the post containing a transparent cassette case with full colour J-card, the SIDPlayer+ PCB and a small A5 instruction sheet.


SIDPlayer+

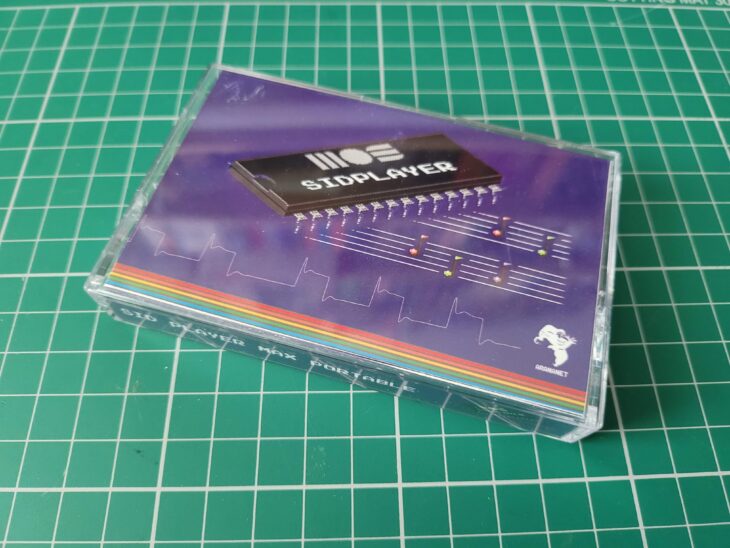
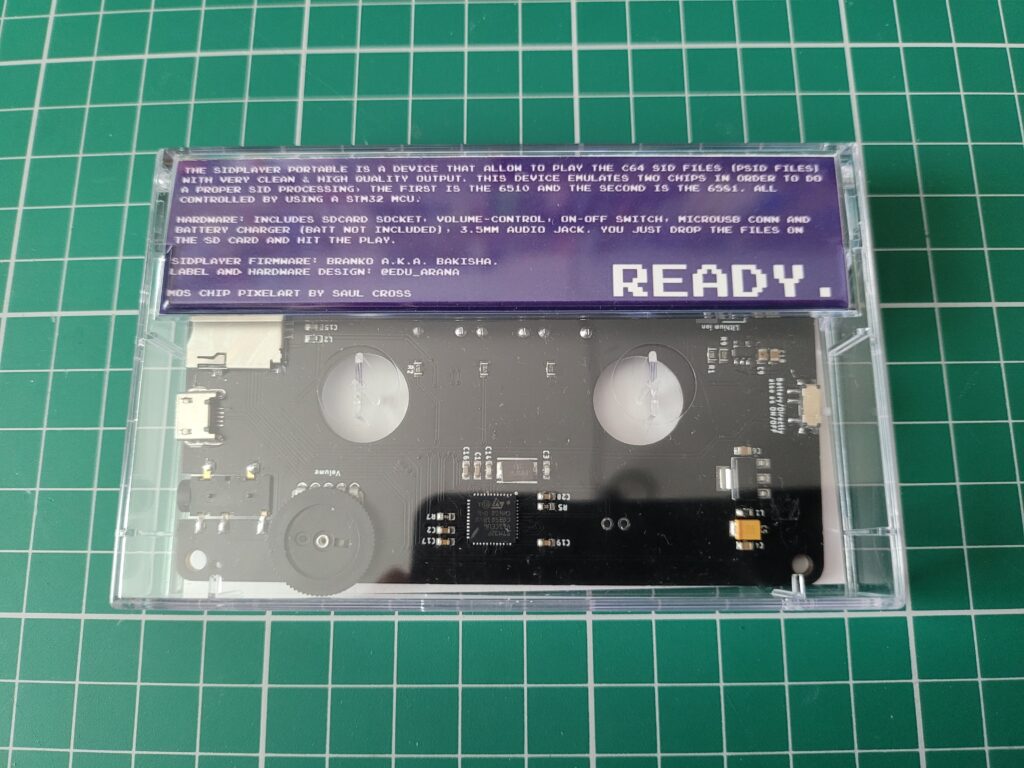
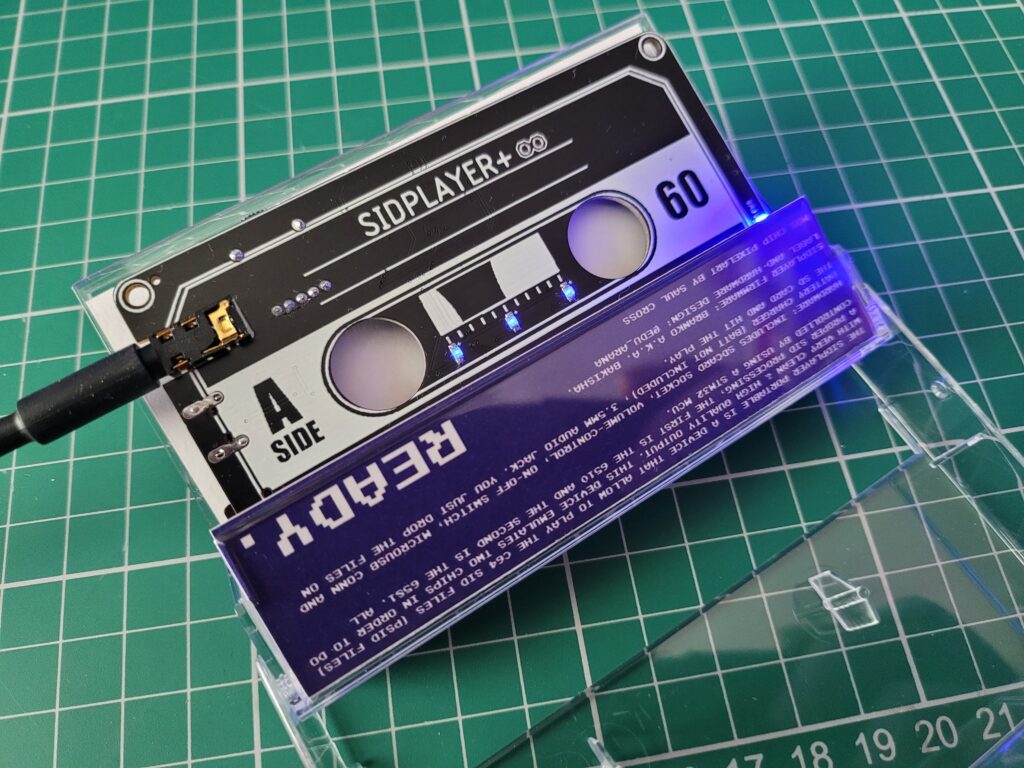
The SIDPlayer+ in cassette storage case.


The PCB has been created in the style of a compact cassette and the case provided offers a very practical means of storing it safely.


SIDPlayer+

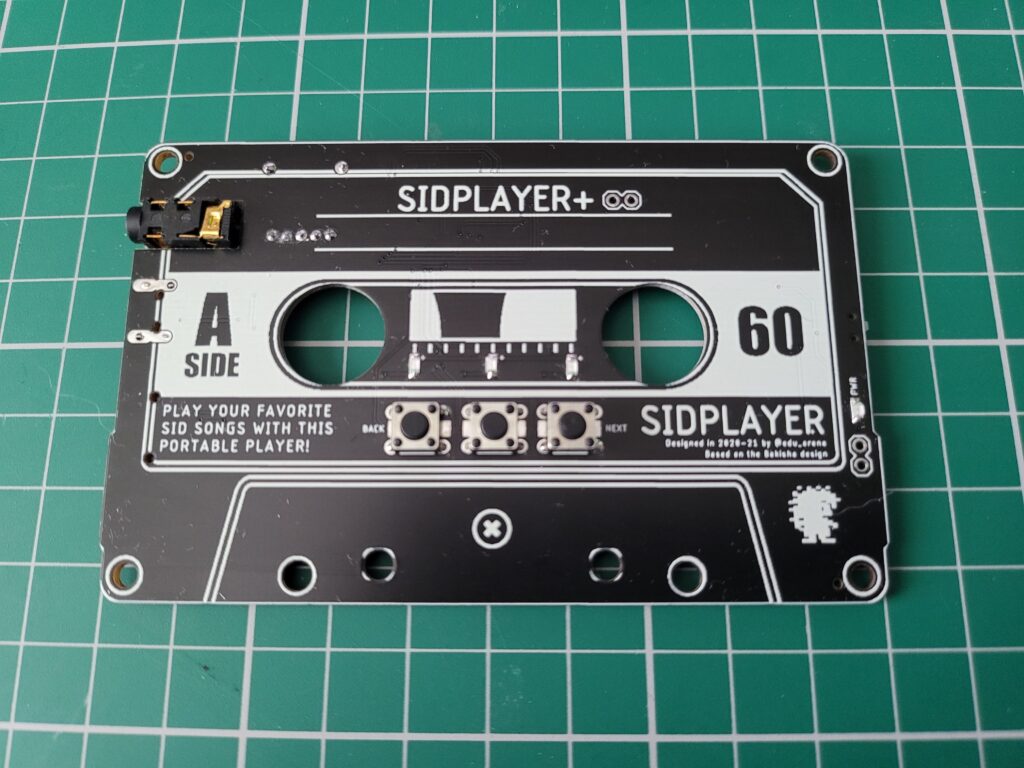
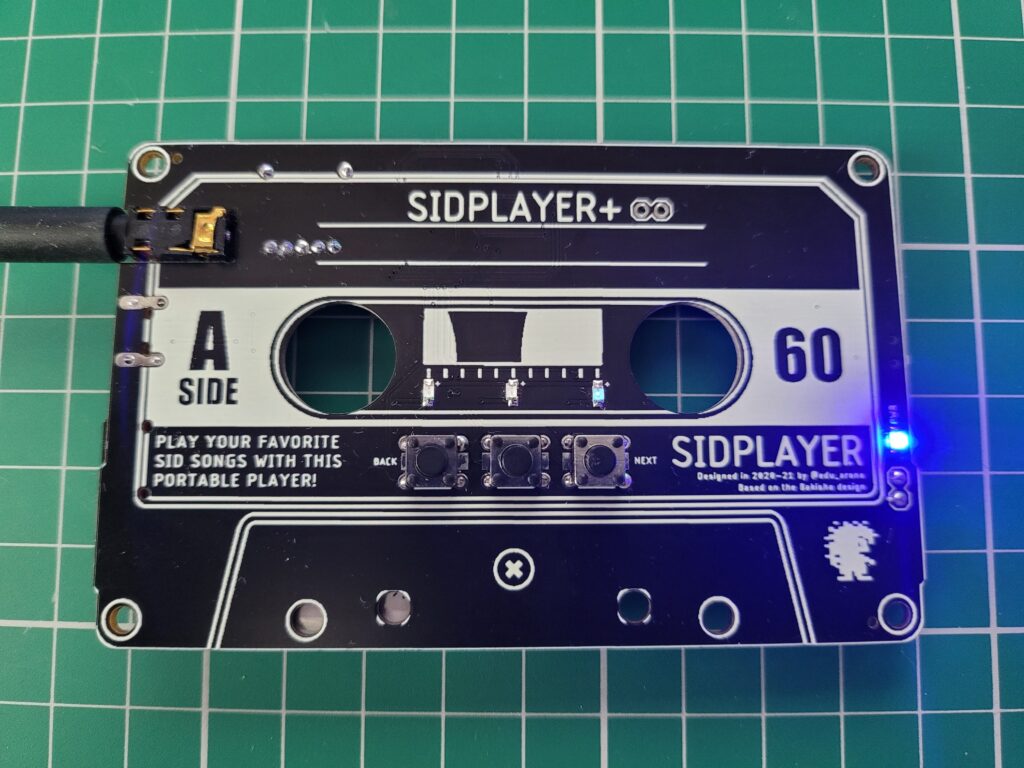
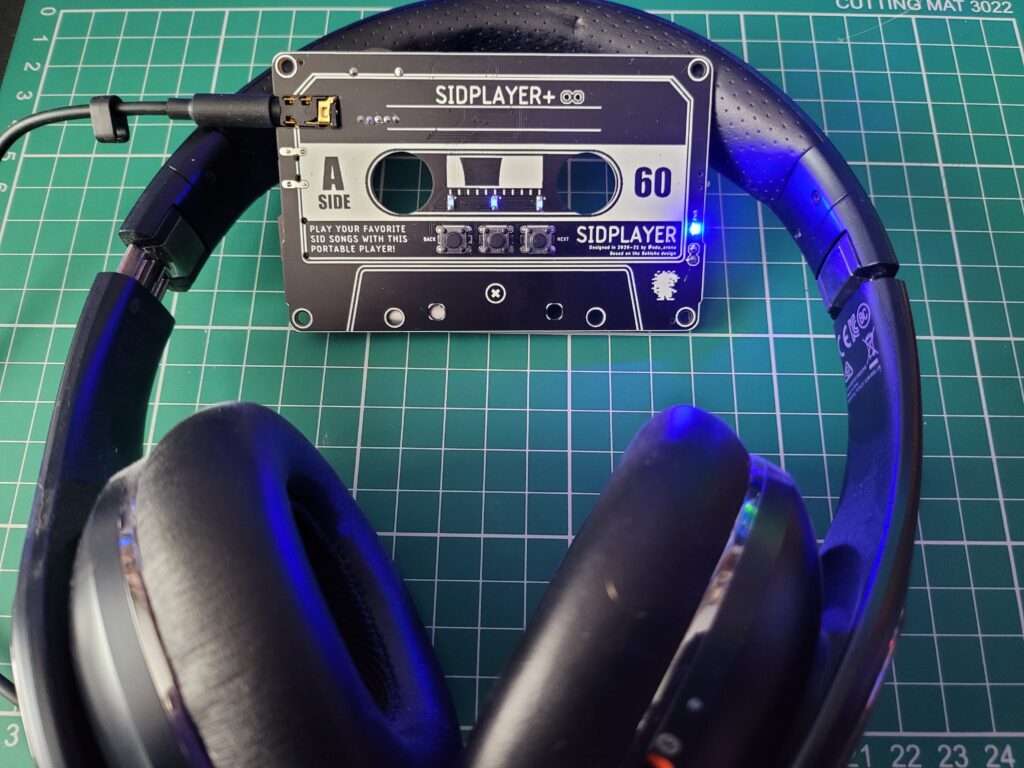
Front of the SIDPlayer+ PCB.


The front of the PCB features three physical buttons; back, stop/play and next which function exactly as you would expect. On the right-hand edge there is a small power LED which indicates whether the device is switched on or not. On the left edge is the 3.5mm stereo headphone socket (the player outputs mono sound so you get the same channels in both ears). In the centre there are three additional LED’s that light up when the corresponding sound channels are in use.


SIDPlayer+

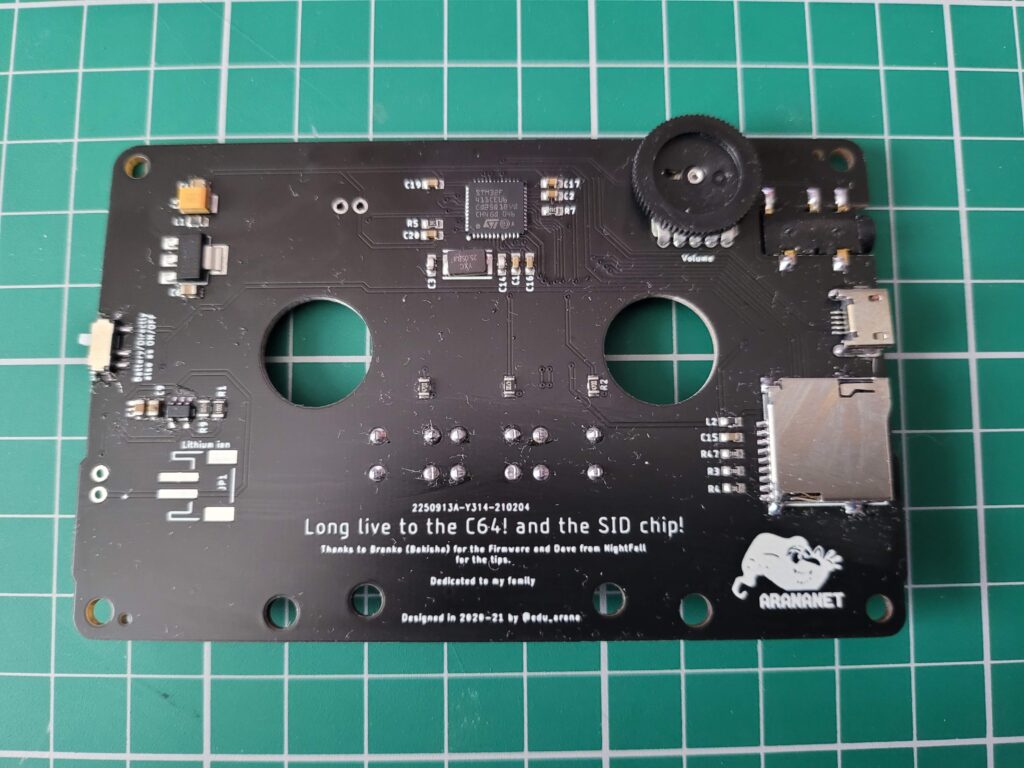
Back side of the SIDPlayer+ PCB.


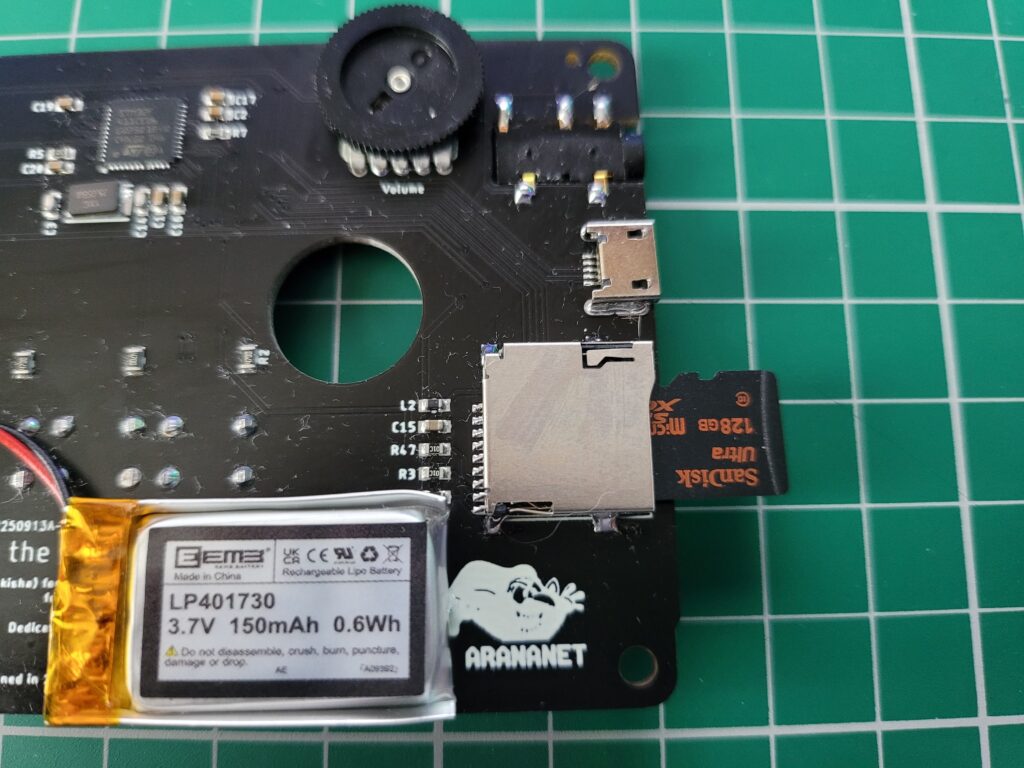
Flipping the PCB over to the back side reveals an on/off switch on the left, rotary volume control along the top whilst on the right can be found a Micro USB power socket and the MicroSD memory card slot. There’s also shout outs to some of the people that helped to create the player printed on the board itself which is a cool touch.


SIDPlayer+

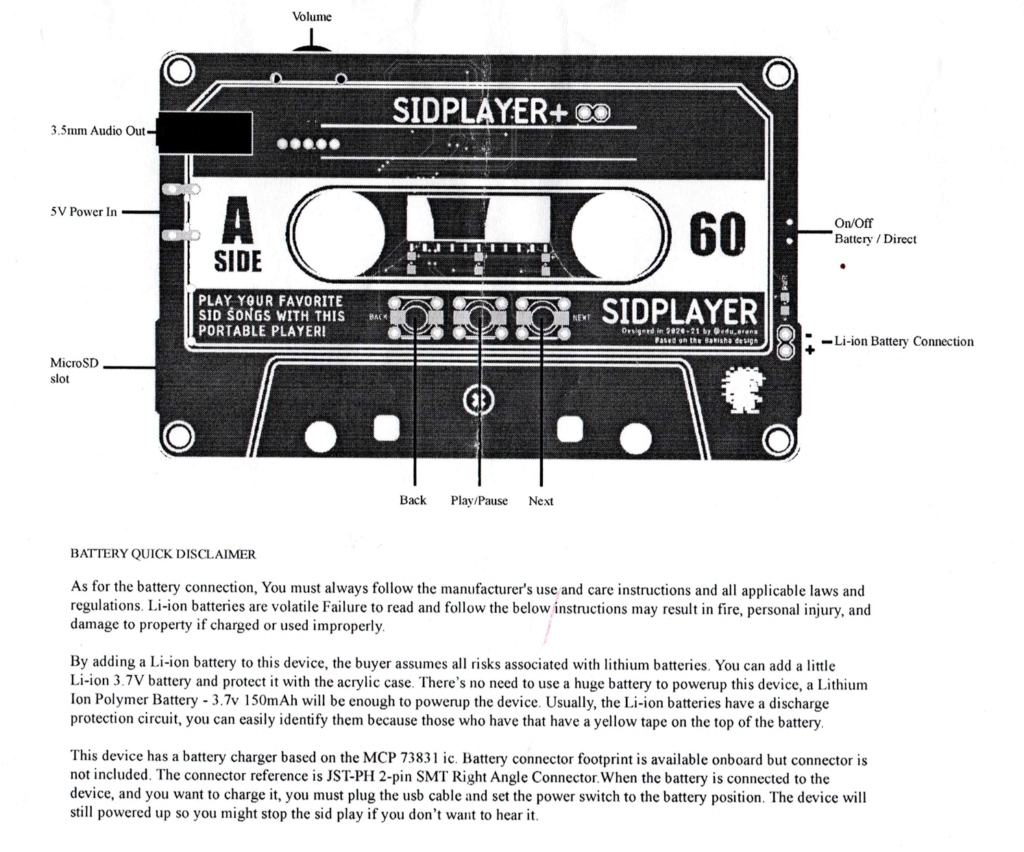
SIDPlayer+ Instructions.


Adding a Battery

The instruction sheet (pictured above) provides a useful annotated diagram of the player showing where all the important parts are located and gives some guidance towards adding a battery.

The player can be used as is, straight out of the packaging by simply plugging in a micro USB cable to power it. However I wanted it to be portable, just like a Walkman, so I ordered myself a compatible battery off Amazon (it doesn’t come supplied with either a battery or micro USB cable).


LI-ION Battery

LI-ION Battery.


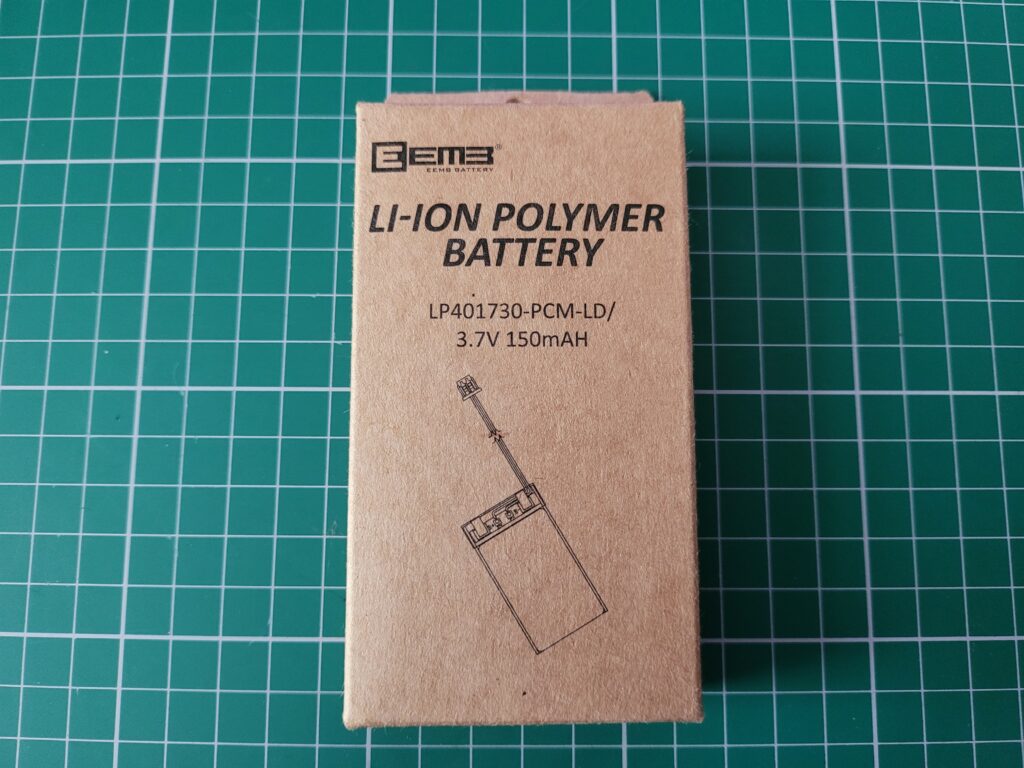
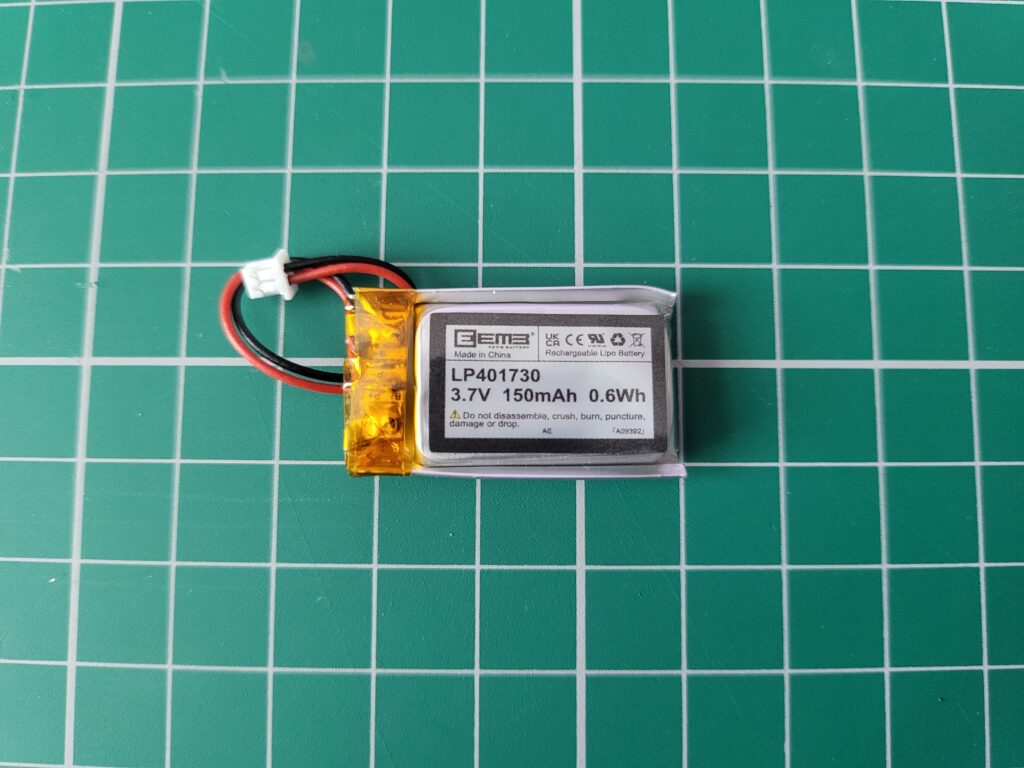
The battery needs to be rated at 3.7V 150mAh and came supplied in oversized box displayed above. The battery itself is tiny, measuring just 30mm long, about 15mm wide and a couple of mm thick.


Battery with supplied connector plug.


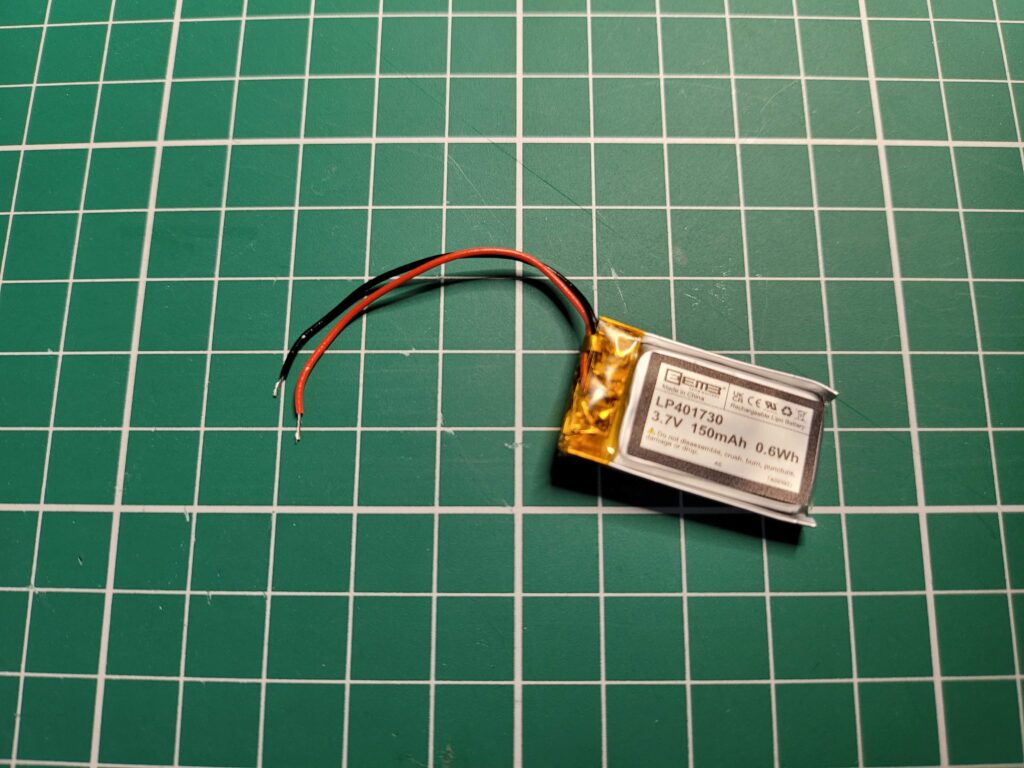
There’s no connector on the board to plug the battery into but there are a couple of solder points for the wires so I just cut off the plug and soldered them in position.


Battery with connector removed and ends stripped ready to be soldered on the board.


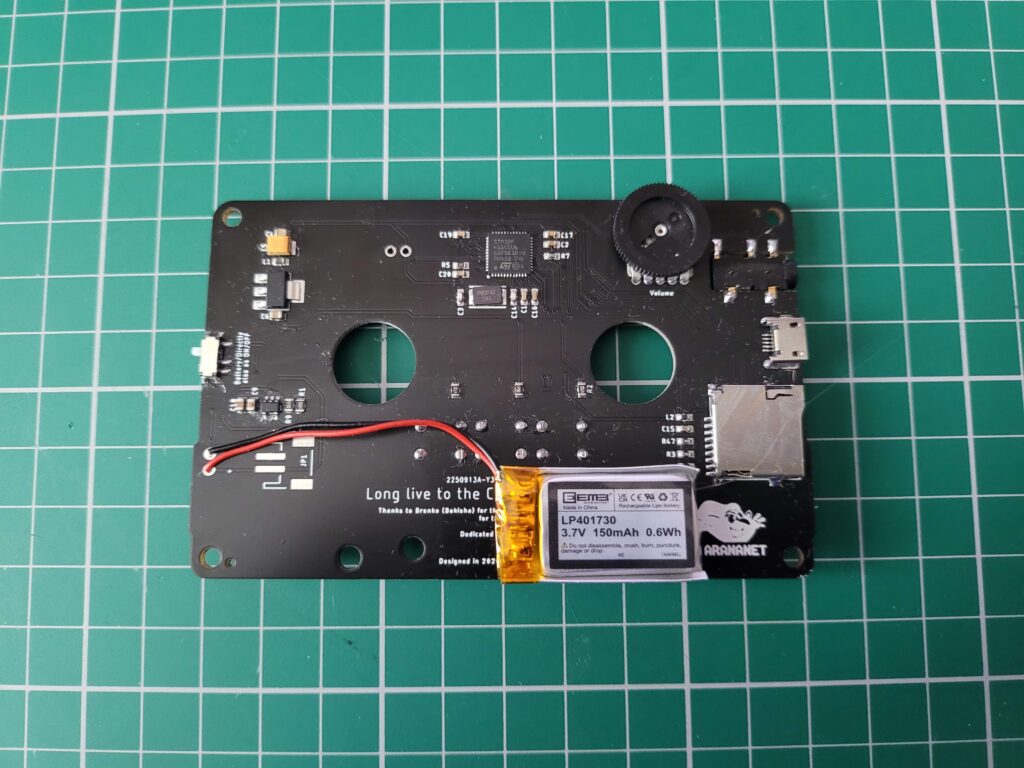
I also used a couple of blobs of hot glue to hold the battery in place on the board to keep things neat and tidy.


SIDPlayer+

Battery glued to PCB and wires soldered in position.


I gave it a quick test by flipping the switch to the ‘on’ position and the blue power LED lit up which was a reassuring sign.


SIDPlayer+

SIDPlayer+ Powered on and headphones plugged in.


The board also incorporates the necessary circuitry to charge the battery. To achieve this you need to supply power via a Micro USB cable and set the on/off switch to the ‘battery’ position. One thing to note is that it continues to play music whilst charging so you need to press the ‘stop’ button to silence it.

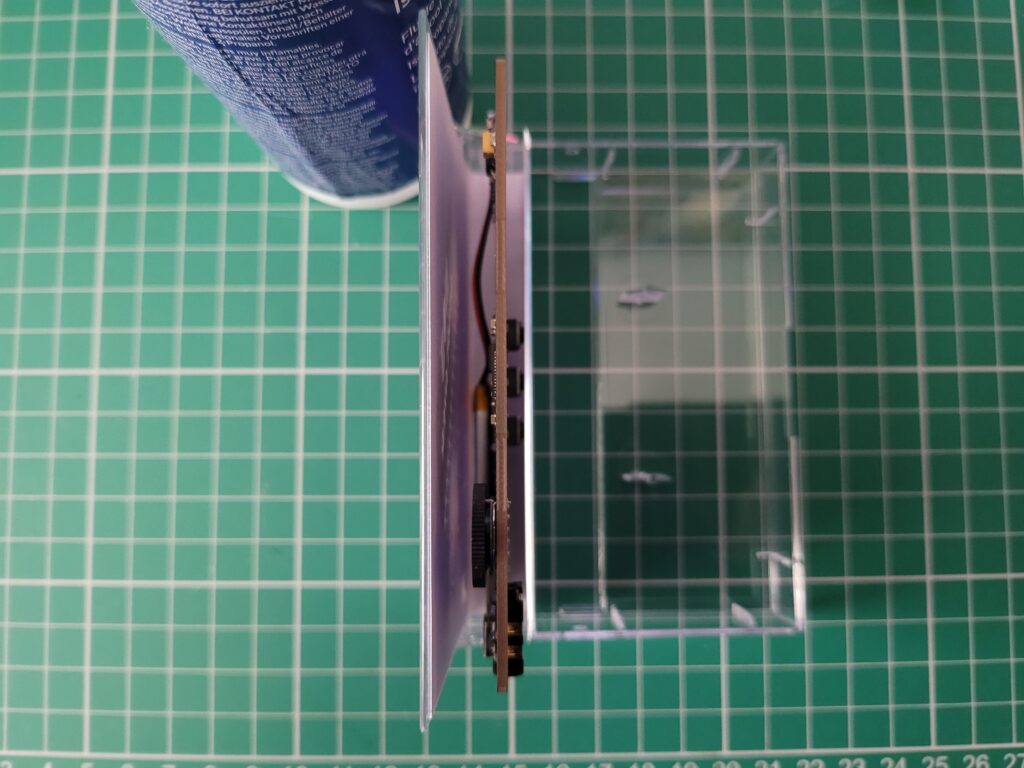
As can be seen in the photo below, the board still fits nicely into the cassette case with room to spare, even with the battery attached.


Tucked away neatly into the cassette box.


Prepping the Card

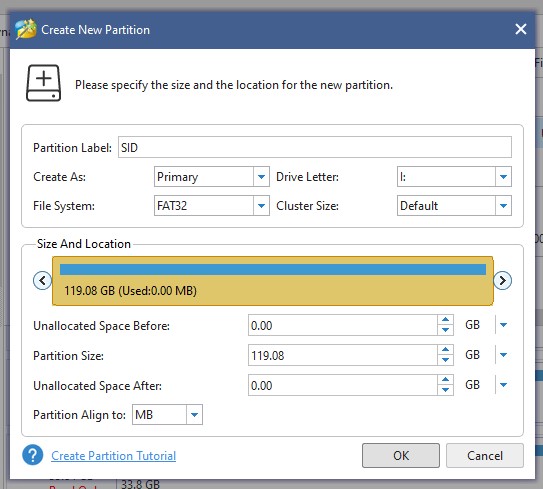
With the SIDPlayer+ now powered it was time to turn my attention to sorting out a memory card to use with it. I didn’t bother buying one as I’ve built up quite a collection of memory cards of all types and sizes over the years. A quick rummage around the bottom of my desk drawer elicited a 128GB SanDisk card which was overkill really but would certainly do the job. It had been partitioned and formatted for something else in the past so I deleted all the partitions and formatted it as one big FAT32 drive using MiniTool Partition Wizard.


MiniTool Partition Wizard

Partitioning and Formatting the MicroSD card.


I then copied a handful of some of my favourite SID tracks onto it and popped it into the card slot on the SIDPlayer+. The files have to be placed in the root of the card and it’s worth pointing out that it can only play the older style PSID files and not the more recent RSID ones.


SIDPlayer+

Popping the MicroSD card into the slot.


Listening to Some SID Music.

With the headphones attached and the player powered on I was finally able to put the player through its paces. I played through a number of tracks and they all sounded terrific. It had plenty of power and I never needed to turn it up fully to get a decent sound level.

Although the player can be used ‘naked’ my preferred option was to keep it inside the cassette case at all times – in fact I will probably cut a small slot in the side of the case to accommodate the headphone jack. That way I can listen to the player with the case closed, maybe in my shirt pocket for example.


SIDPlayer+

Playing some music with the card in the case.


Navigating from one track to the next was easy enough using the buttons but without a screen to show the track names it did get a little tricky at times. This is because many SID files actually contain a number of subtunes and/or sound effects within them so unless you make a note beforehand you can often find yourself clicking through all manner of unexpected tracks before reaching the one you want. Not a dealbreaker but definitely something to be aware of.


SIDPlayer+

Listening to some music.


I recorded a couple of videos of the SIDPlayer+ belting out a two of my favourite C64 tunes. These were just recorded on my phone with the the sound playing through the headphones but it’s loud enough for you to hear what it sounds like. Obviously it’s miles better quality when listening directly through the headphones. The device is supposed to be capable of emulating both the original 6581 SID and the newer 8550.


Name that tune! I picked this particular track not just because it’s one of my all-time favourites but because the intro should make it easier to see the individual channel LED’s flicker on and off.


Sound Quality


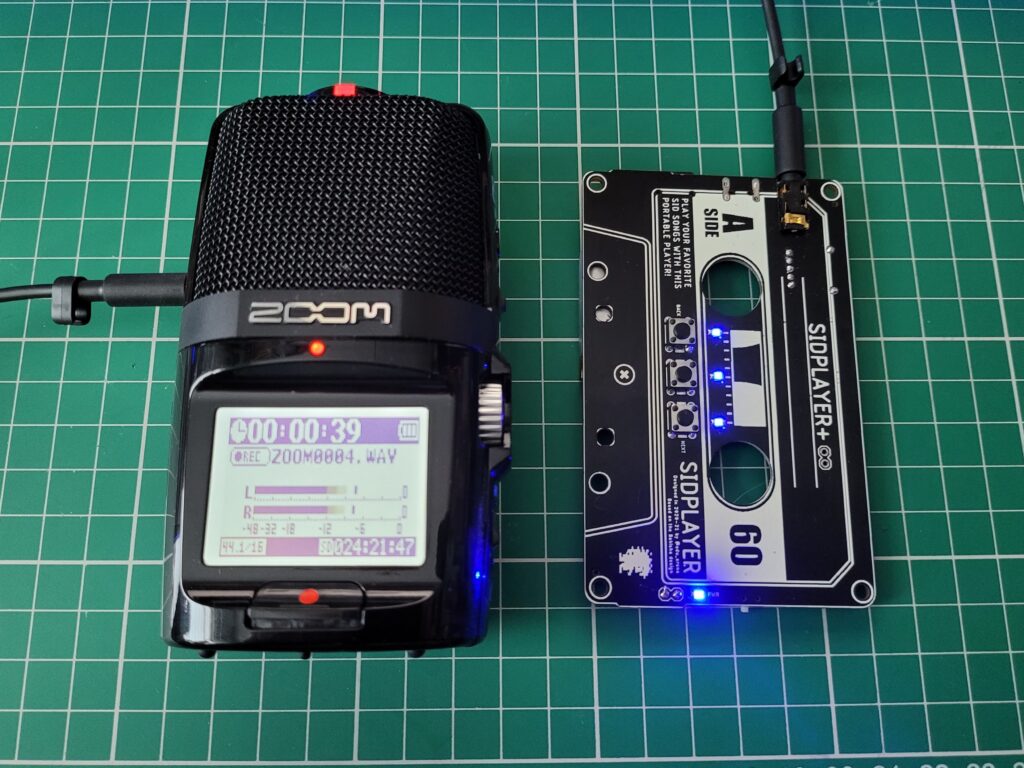
The sound quality from the SIDPlayer+ is impressive for such a compact and inexpensive device but understandably falls a little short of the real deal. To give some idea of the difference I recorded the same track (Cybernoid by Jeroen Tel) into my digital sound recorder from both my real C64 and the SIDPlayer+. If you are able to, listen to them both whilst wearing headphones to get the best impression of the sound quality.


SIDPlayer+ and Zoom H2n

Zoom H2n hooked up to SIDPlayer+.


First off here’s a clip I recorded directly from my C64 via my SIDFX 3.5mm stereo output jack.


And here’s the same clip recorded directly from the headphone socket of the SIDPlayer+.


Initially they do sound very similar but between the 10-20 second mark you can hear a clear difference. I’m no audio expert and lack the vocabulary to describe the sound properly but the SIDPlayer’s rendition of this section of the the track sounds awkward with audible clicks and pops as it struggles to produce the right sounds. Reading through the specs of the player it does say; ‘Some filters are enabled but due to the hardware limitation, they do not cycle exact’. I’d hazard a guess that this is the reason for the issue.


Verdict

So the sound isn’t quite as good as a real Commodore 64 but to fixate on that alone kind of misses the point of this device. A C64 doesn’t fit in my shirt pocket and I can’t mow the lawn whilst listening to some classic Rob Hubbard tracks on it either. The SIDPlayer+ is an inexpensive and fun little gadget and if, like me,  you adore C64 SID music then it’s definitely worth picking up to have a play around with.

It’s worth pointing out also that since I bought mine last year an updated version has now been introduced. This new version includes a Bluetooth module so you can listen to it with wireless headphones making it even more convenient!

The SIDPlayer+ is available to purchase from here. Just create yourself an Arananet account then sign-up for a notification of when the next batch is ready for sale.

How to Build Your Own Cassette Tape Winder

I’ve always wanted a cassette tape winder so when I stumbled across this plan on Thingiverse I thought it would make a great little project for my 3D printer. Sure I could search on eBay and maybe pick up an old one but where’s the fun in that? So here’s a little guide to how I built my own cassette tape winder.

Computer Stuff

First off I had to download the zipped STL files from the Thingiverse site. (STL files contain 3D CAD objects that you can print).

Each component has it’s own STL file and there were 10 of them for this project. You can see them all listed in the folder screenshot below.


These are the components that you need to 3D print.


You cannot print STL files directly so I use a piece of free software called Cura to work with them. This software allows you to see the STL files as an interactive 3D model. It also processes STL files by ‘slicing’ them into layers that can then be saved as GCODE files and printed on a 3D printer. If you’ve never 3D printed something this might all sound very complicated but it really isn’t.
 

Build Your Own Cassette Tape Winder

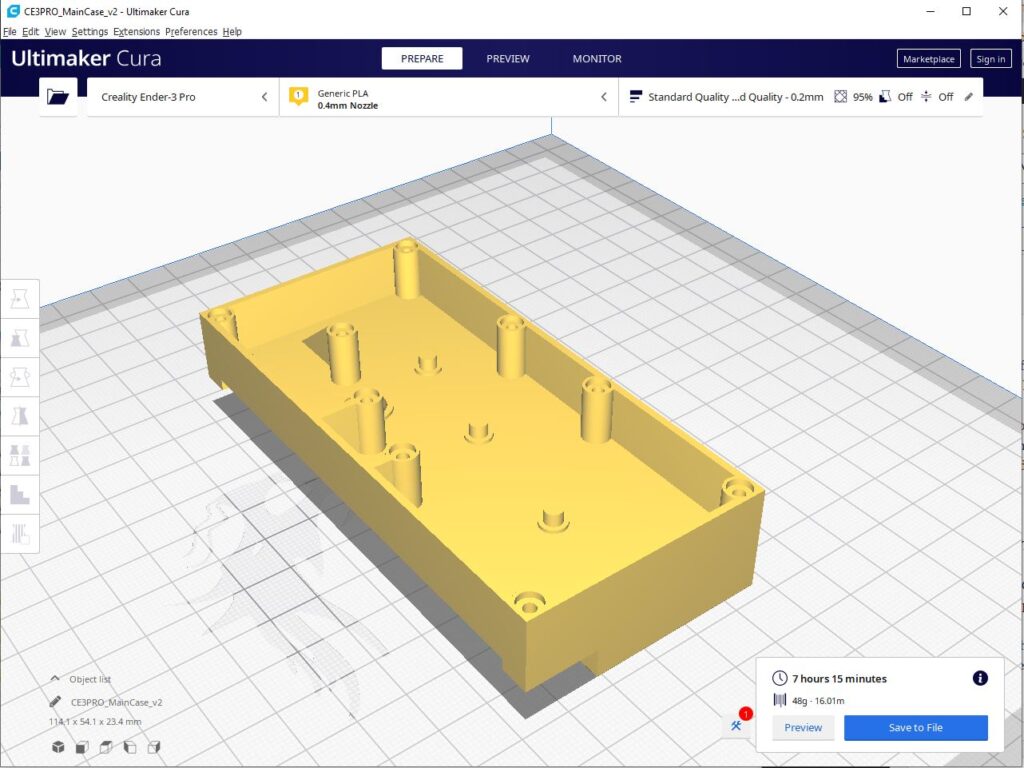
Winder case as viewed within Cura software.


The image above shows the main case for the winder in Cura. I have already sliced it and it shows an estimate of how long it will take to print, over 7 hours in this case. 3D printing is not a fast process!


Beginning the 3D Printing
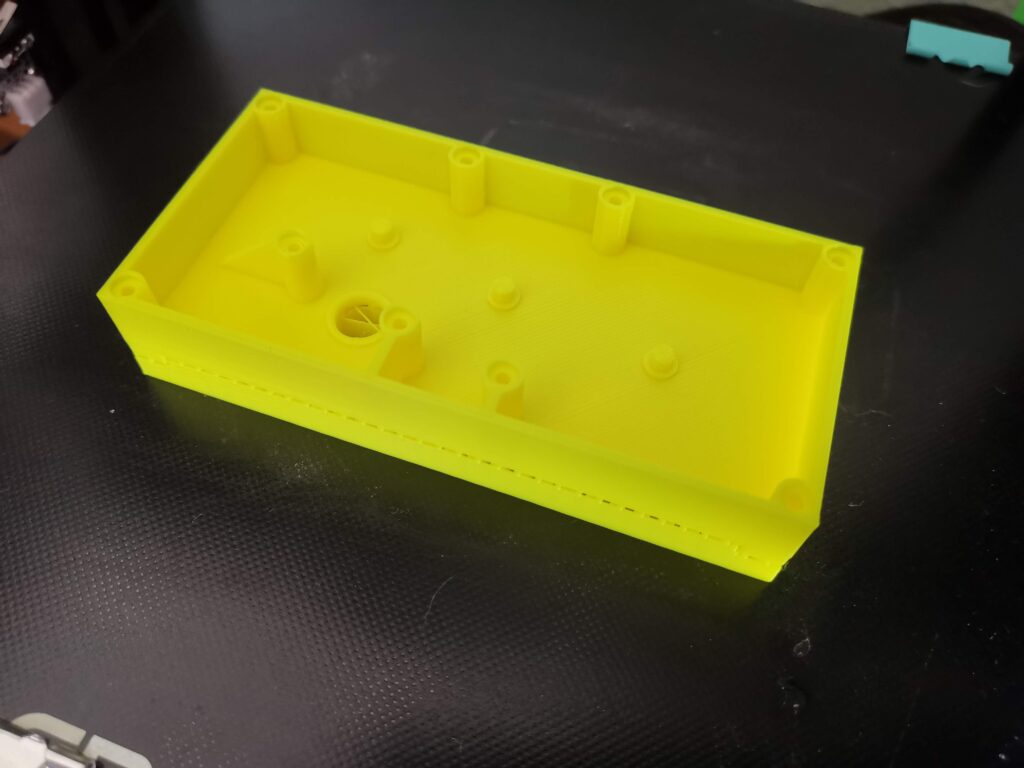
 

Freshly printed winder case.


Above you can see the finished case print… but there’s some extra support material that will need to be removed from underneath it. 3D printers can’t print (over long distances at any rate) in thin air so they need to create a kind of scaffolding system (supports) in order to do so.
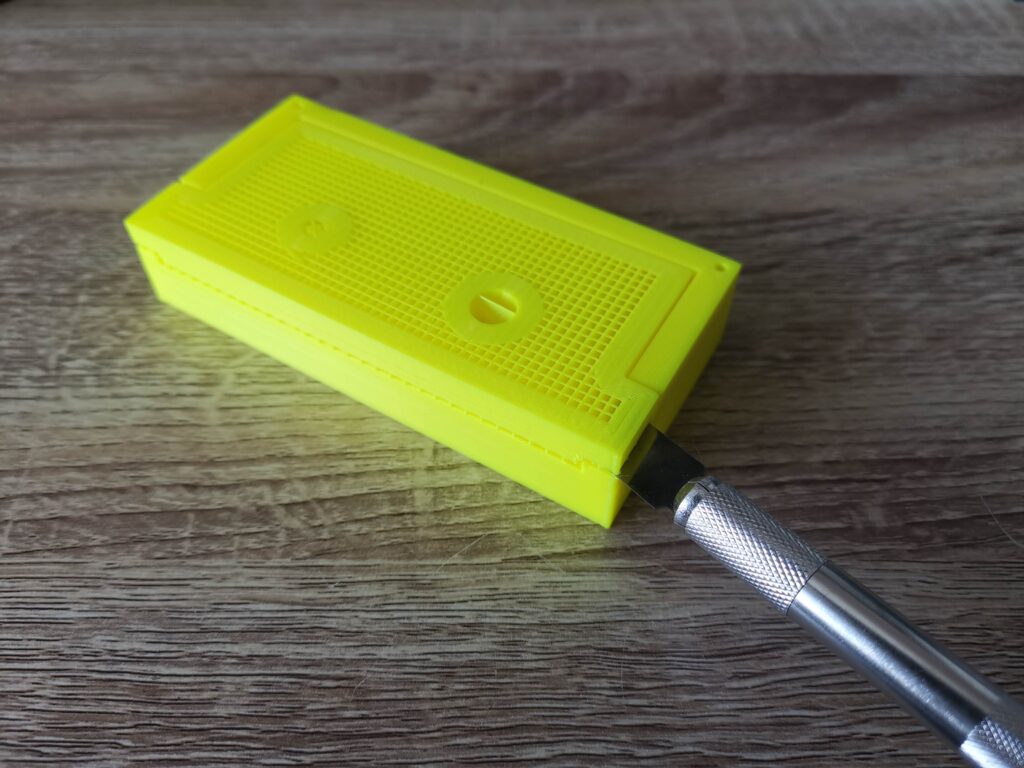
 

Removing the 3D printed support material.


Support material is designed to break away easily from the main print. In the above photo I used a sharp craft knife to break away the support material. It only took a couple of slices and then I was able to get my fingernail under it and simply pull it away in one piece.
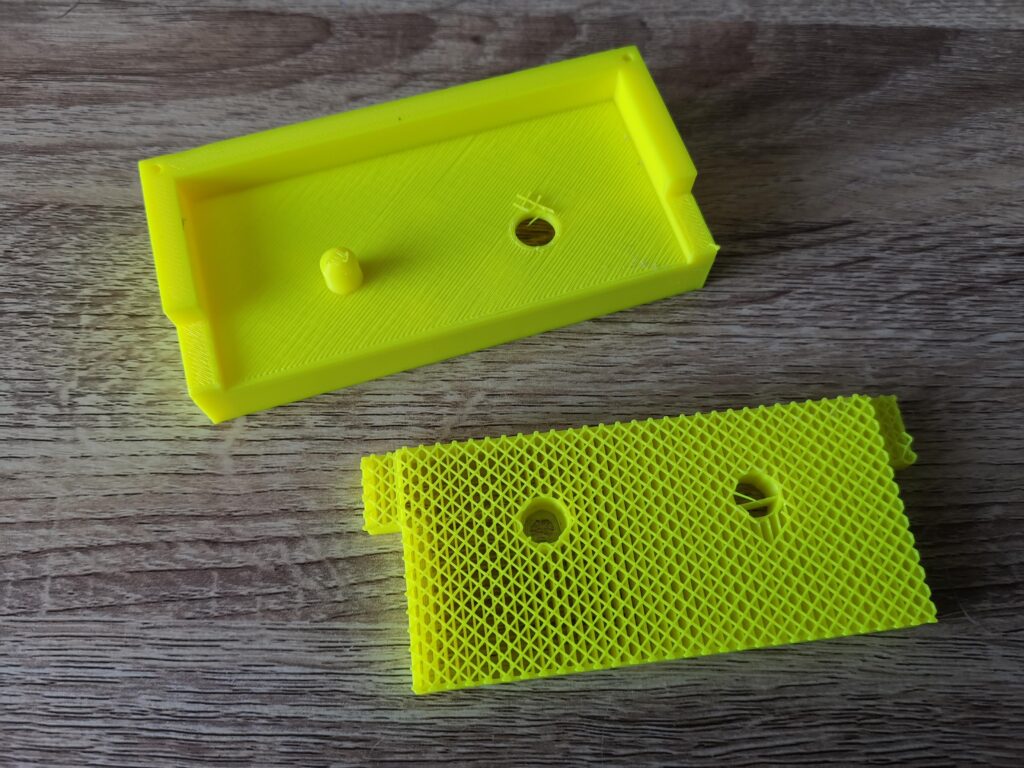
 

View showing the support material removed.


With the support material removed you can now see the winder start to take shape. In the above photo you can see the latticed support material too. It’s made this way to minimise plastic wastage and also allow it to be broken away easily. The fewer points of contact it has with the main build, the easier it is to break off.
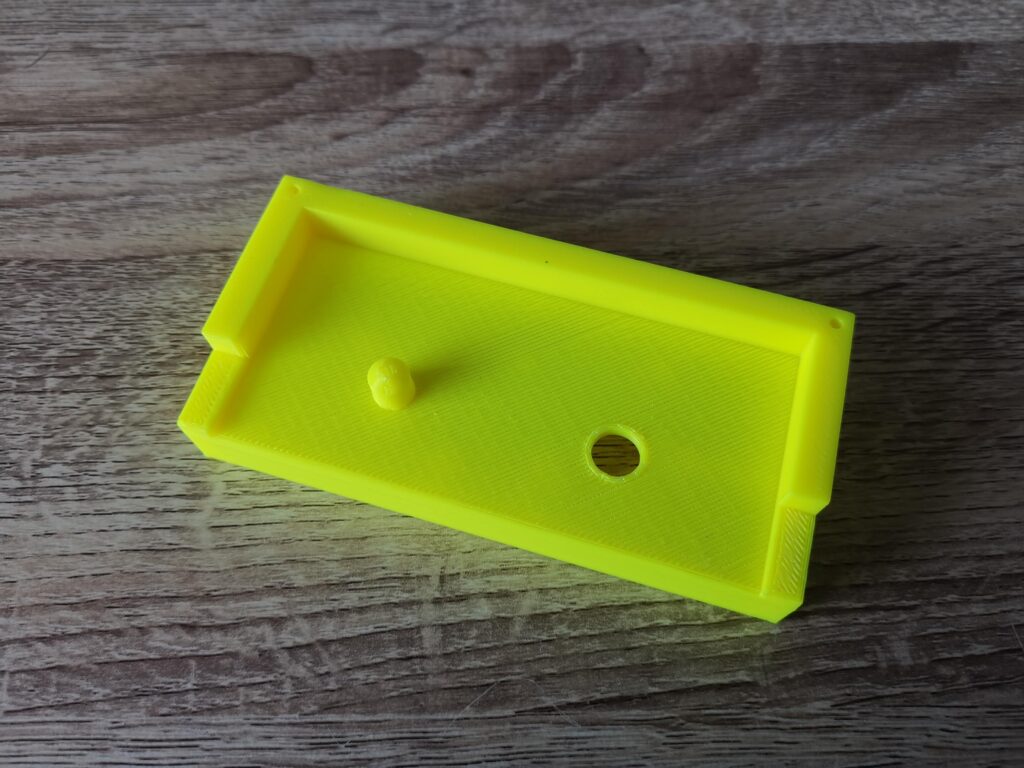
 

Here the few little pieces of support material that were clinging on have been removed with a craft knife.


In the above photo I have cleared away the few little straggly bits of plastic left by the supports with my craft knife.
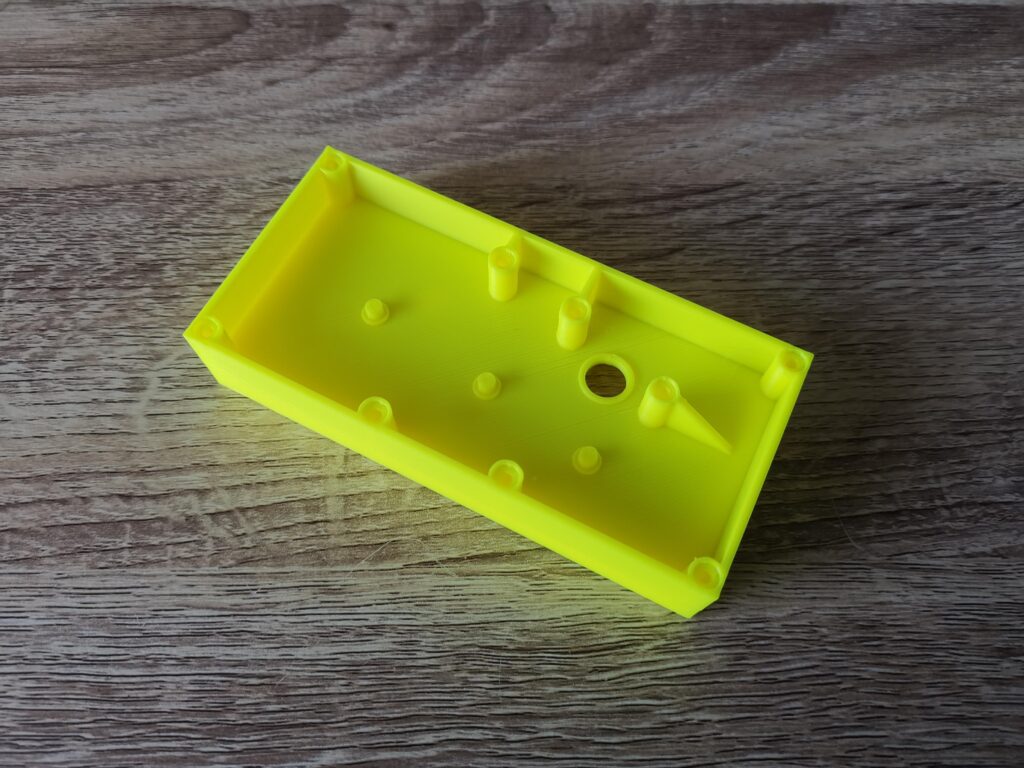
 

This is the case viewed from the other side.


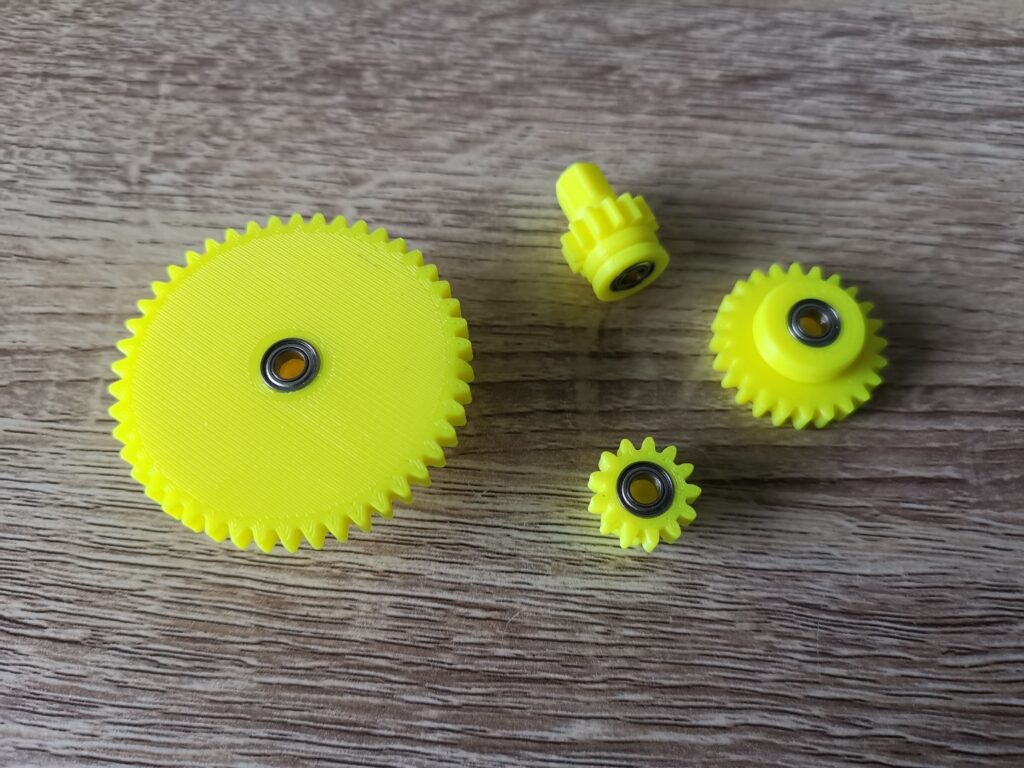
This is what the inside of the winder case looks like. There are 8 posts to support the case screws, a hole for the winder spool and 3 protrusions where the gears will sit.


Gathering the parts together
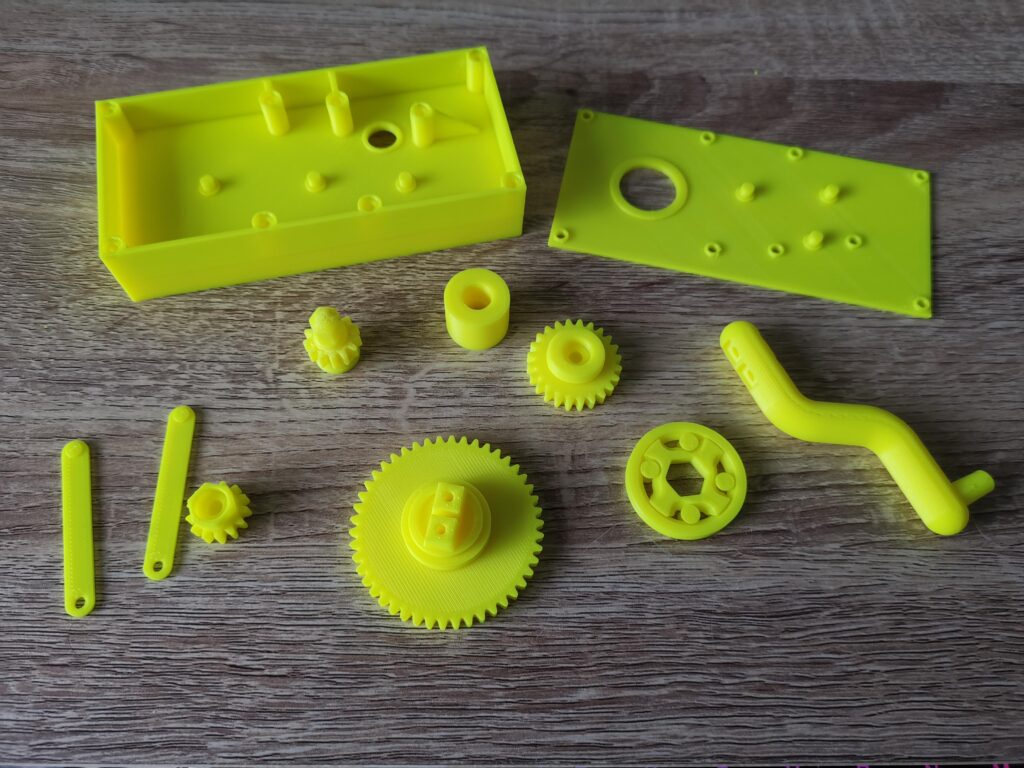
 

Build Your Own Cassette Tape Winder

All the 3D printed components ready for assembly.


This photo shows all the parts of the winder fully printed a few days later. The instructions advise printing the cogs on rafts because they can be difficult to remove from the print bed. However I didn’t bother… I have glass bed and things pop off very easily once it cools down. It also means the finished prints are smooth and clean but of course YMMV. I did use supports for everything where the instructions recommended to do so and carefully removed them after printing.
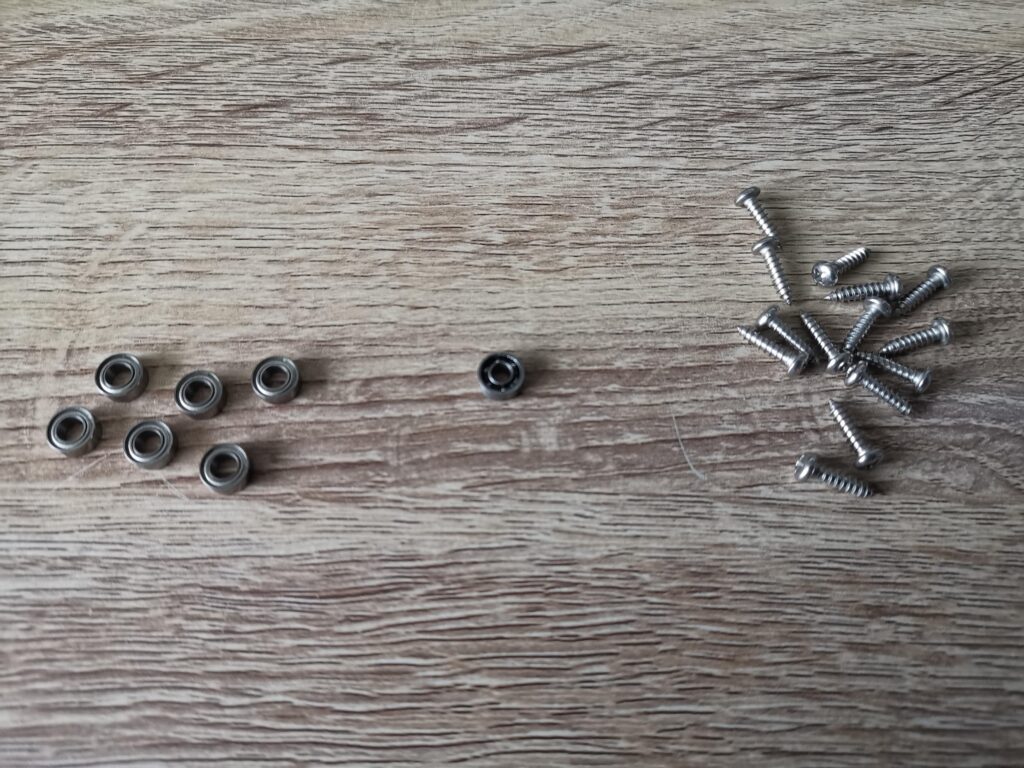
 

The bearings and screws needed.


What you will need

In addition to the 3D printed parts a few bits of hardware are also required. Some bearings, screws and a rubber belt. Here’s a rundown:

  • 6x  4x8x3 miniature ball bearings for the gear wheels – I used these.
  • 1x  3x8x3 miniature ball bearing (for the winder knob) – I used these.
  • 14x  3x12mm pan head self-tapping screws – I used these.
  • A 1mm square rubber belt approximately 55mm in diameter.
  • Philips screwdriver.
  • Craft Knife.
  • Side cutters (to help remove support material if necessary).
  • Silicone Grease (optional but recommended).
  • 3D printer!


Gears with bearings fitted.


The next step was to fit the 6 bearings into the gear wheels. The two pulley cogs are fitted with two bearings, one each side whilst the driving gear and spool take just one.
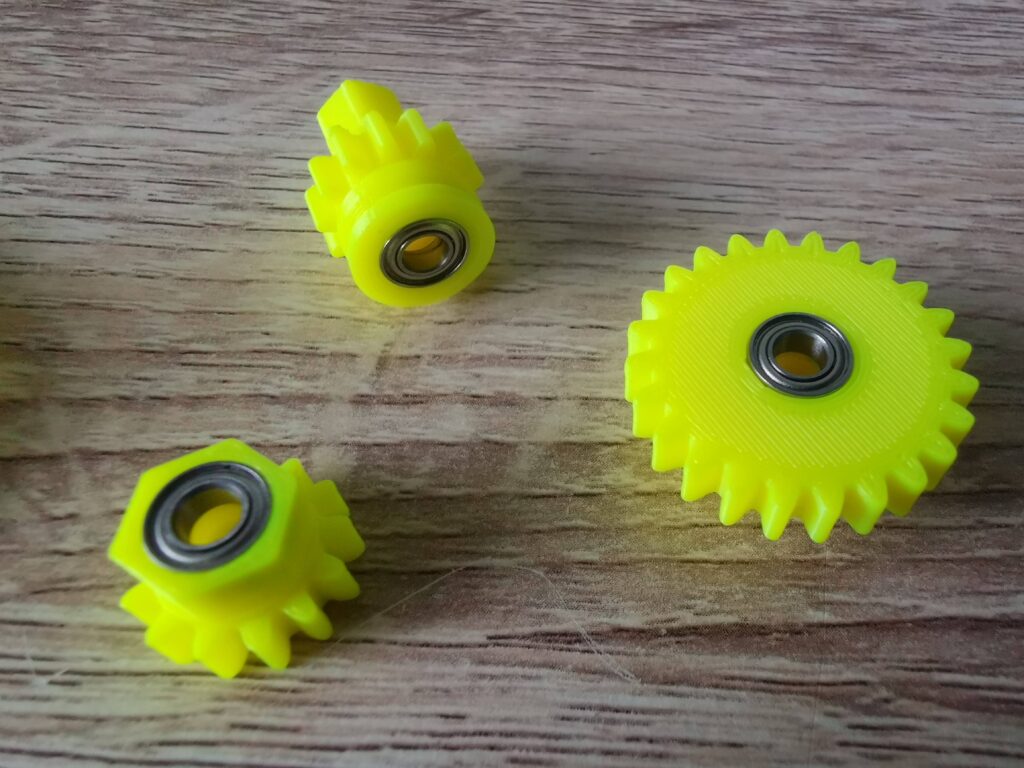
 

Gears with bearings fitted.


The bearings were a snug fit but I didn’t have to force them in at all. Once fitted they remained in place by friction alone so there was no need to glue them in.
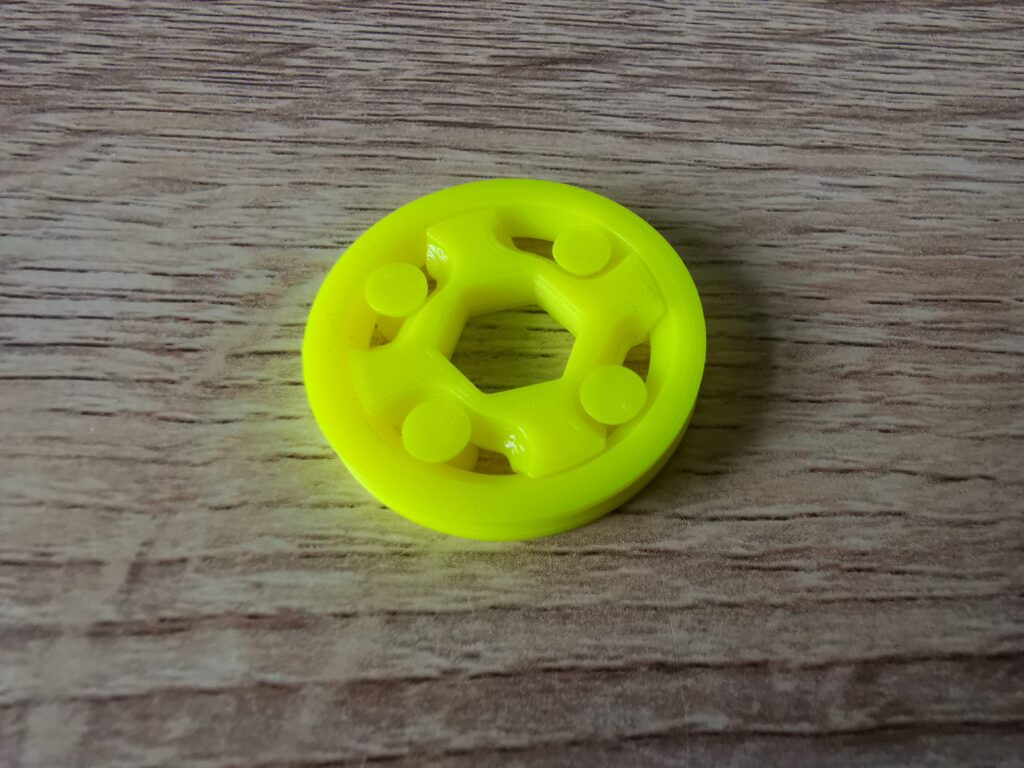
 

One-way clutch.


The winder incorporates an ingenious little one-way clutch mechanism that will only rotate in one direction. The benefit of this is it prevents you from accidentally winding a tape in the wrong direction causing it to unspool inside the case. Impressively it prints in situ too – there are 6 moving parts which are all printed as one complete mechanism together.


Putting it all Together
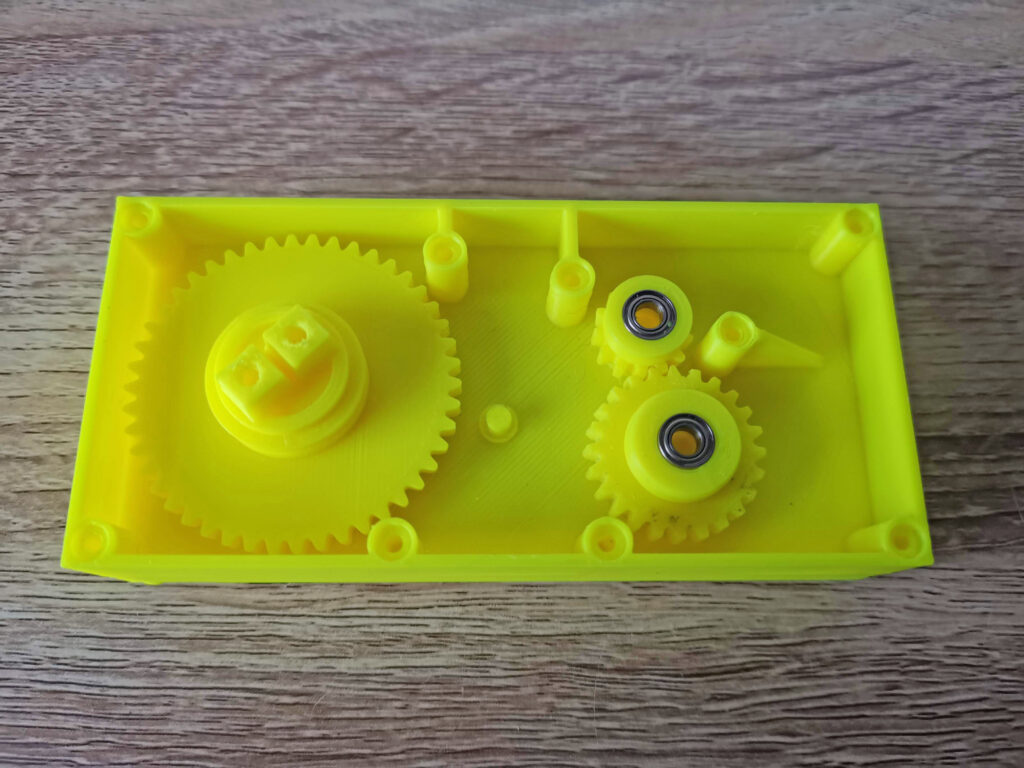
 

Start with these gears first.


Next came the exciting part – putting it all together. The driving gear, both pulley’s and spool went in first, making sure the bearings all seated correctly on the pegs.
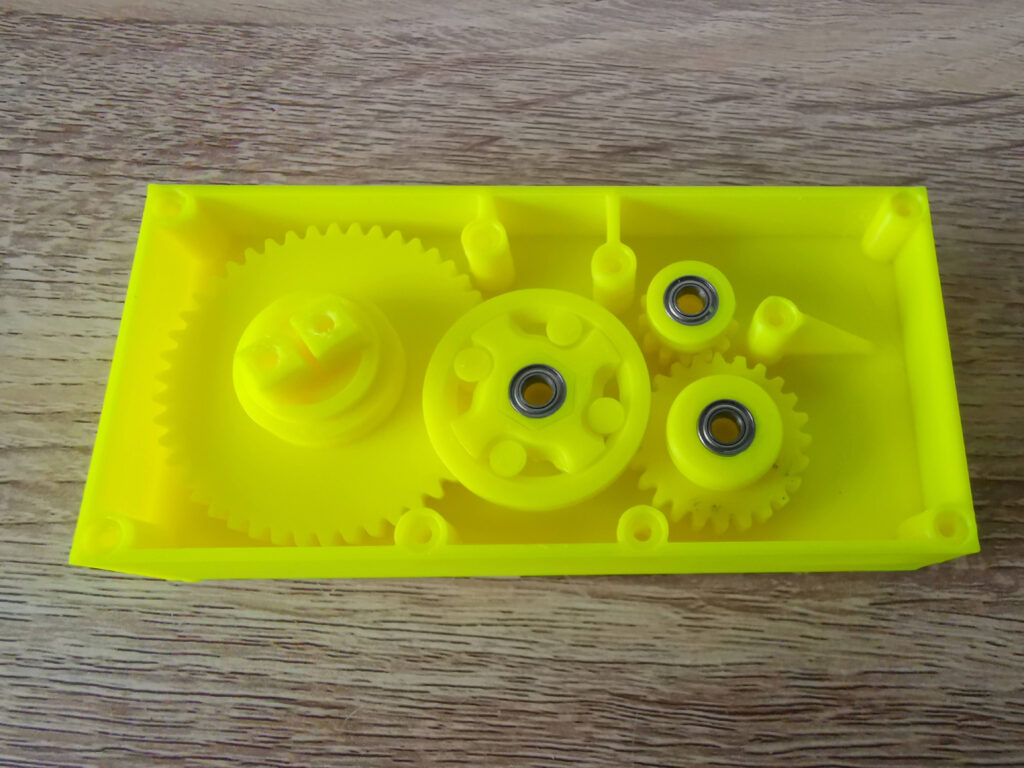
 

Then add these. Note that pulley 1 and the clutch have already been assembled in this photo.


Next to go in was the one-way clutch which fitted onto the hexagonal shaft of pulley 1.  It can fit either way around but needs to installed so that it ‘sticks’ when turned anti-clockwise but free-wheels clockwise. The instructions said to glue this in position but I didn’t bother as its going nowhere once the lid is attached.
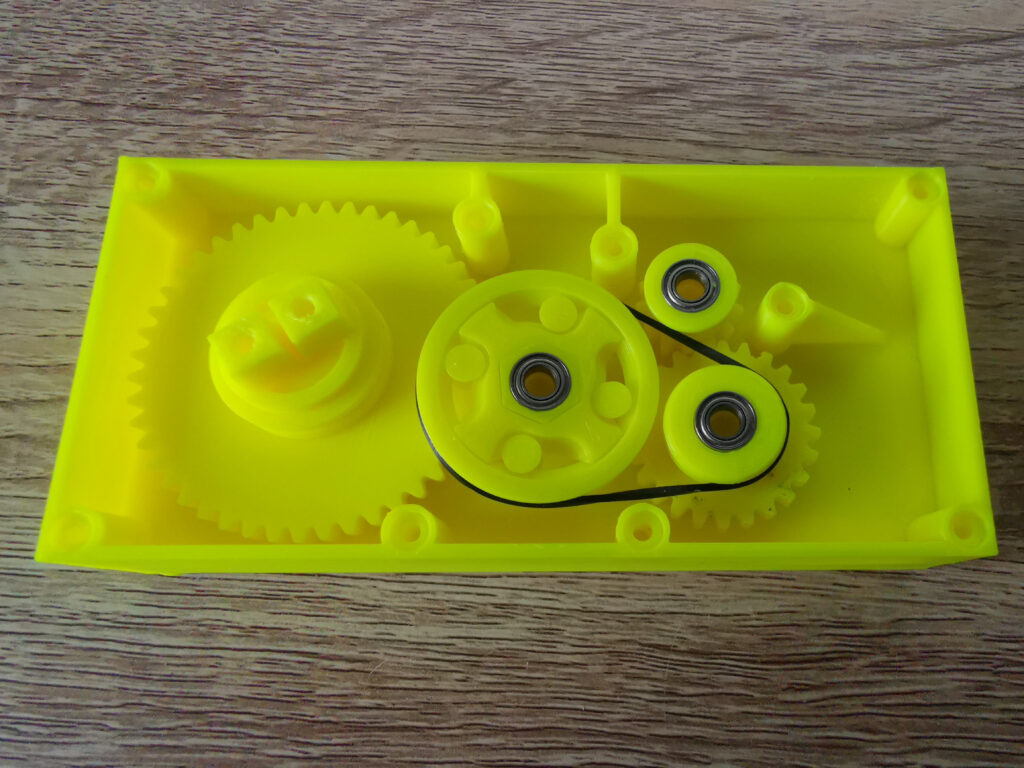
 

Build Your Own Cassette Tape Winder

The rubber belt is added last.


The belt went in next and simply needed stretching around the clutch and pulley 2. There was a fair amount of tension here with the clutch being pulled over to one side, however once the lid goes on and the pegs slot into the bearing top and bottom, it sorts itself out.


A minor issue…

I did have one issue at this point when putting everything together. There was too much friction with the spool and it wasn’t turning freely. I tried shaving/filing plastic from the cog teeth, adding a drop of oil to the bearing and adding a little silicone grease to the teeth but none of this really helped.

In the end I reprinted the part scaled down slightly to 98% which allowed the spool to spin freely. I also had to enlarge the bearing recess slightly with a Dremel so the bearing would still fit inside. Possibly if I’d persevered a little longer with the file I could have got the original part to work. However given how everything else fits together perfectly I figured the part needed re-designing slightly for a better fit. Regardless, I’m happy with my fix and how it now operates.

Before I screwed the back cover on I also added a tiny bit of silicone grease to the other gear wheels just to help keep them lubricated.


The Finished Winder
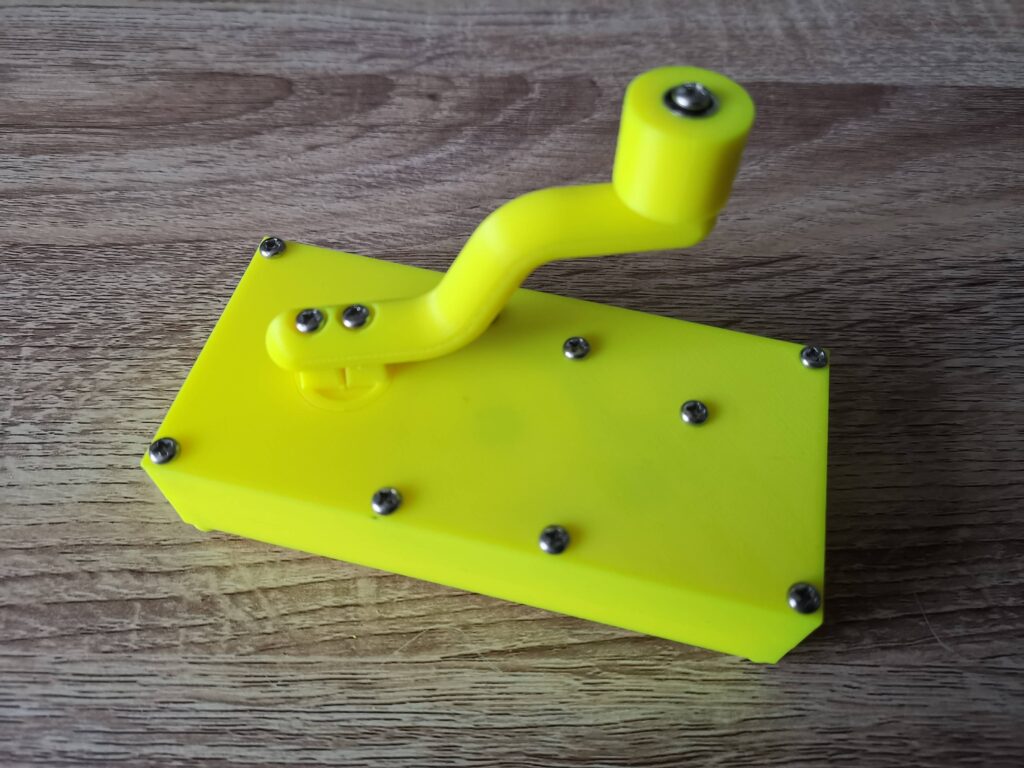
 

View of the back of the assembled winder.


Here’s the winder with the back screwed on and the handle and knob attached.  The knob also has a bearing inserted into it so that when it’s screwed to the handle it will still spin freely.

I had no issues screwing things together but the instructions did advise caution in case the plastic splits and suggested drilling out the holes further as a precaution. Again I didn’t bother as I felt my screws were a good fit for the holes but again YMMV.
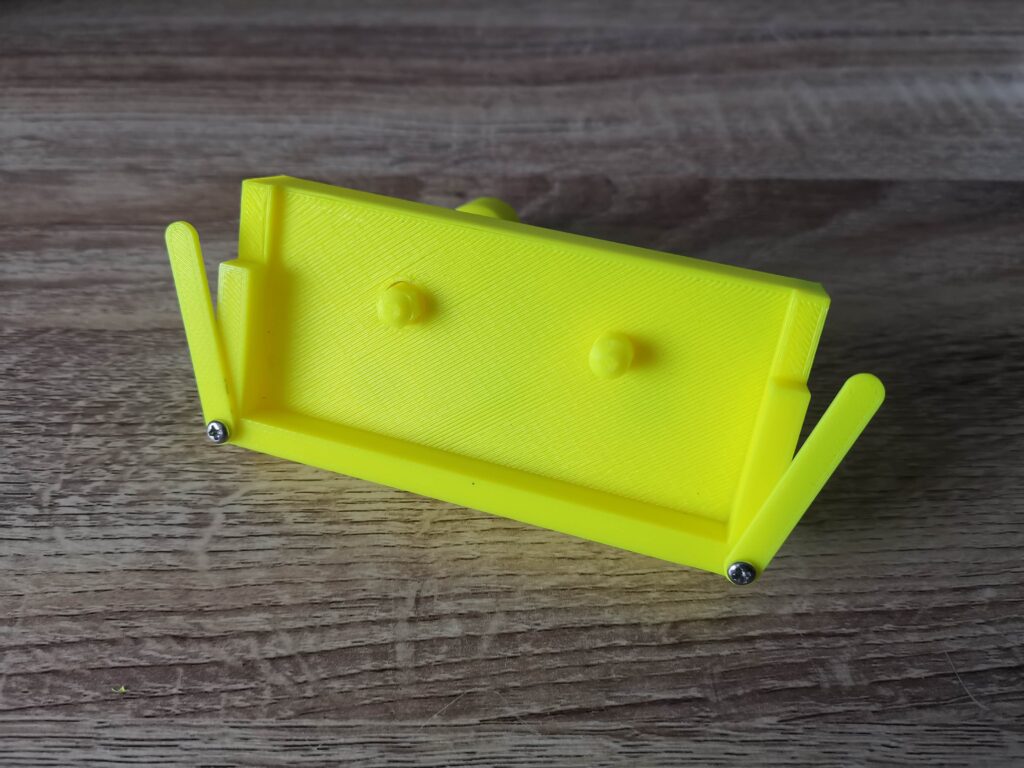
 

Front of Winder with retaining clips attached.


The two retainer clips attached to the front of the case using a couple more screws. The dimples are positioned such that they face the back of the winder.


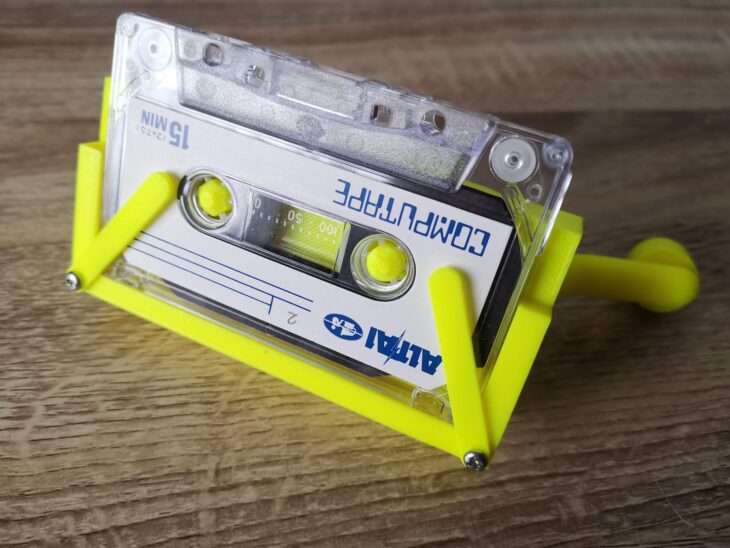
Tape held captive by retaining clips.


The screws need to be tightened just enough so that the clips can move with a little force but remain in any position. These are used to hold cassette tapes securely in place whilst winding.
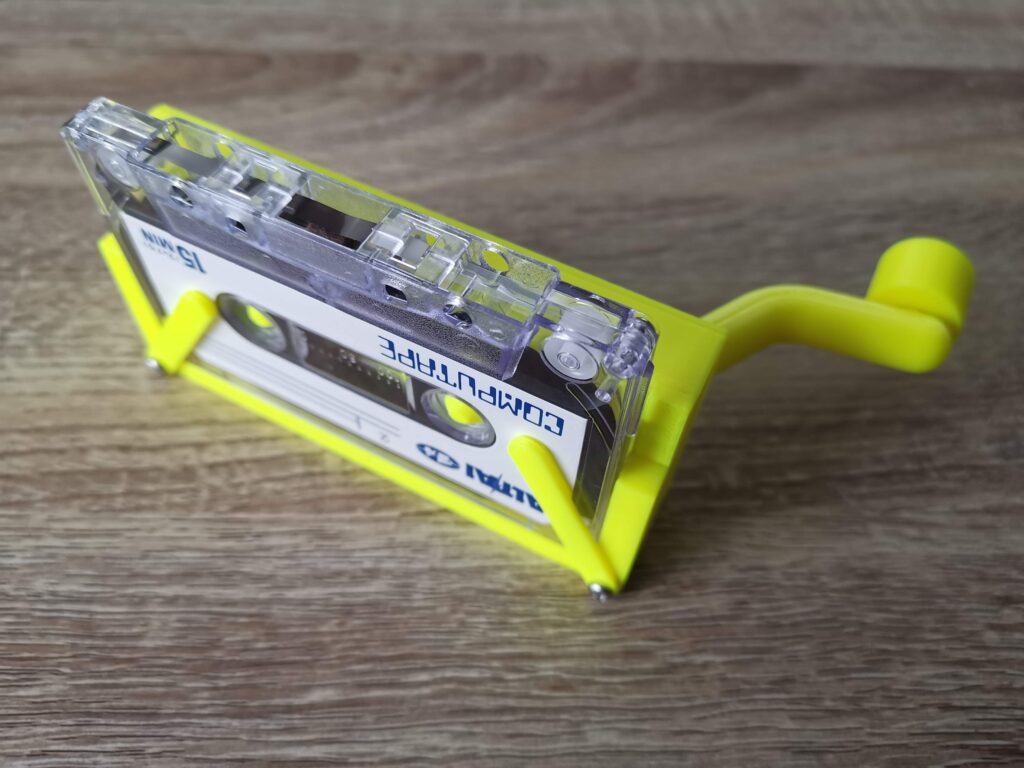
 

Build Your Own Cassette Tape Winder

View of the winder looking down.


Video of winder in use

And here’s the finished winder. I have to say it works extremely well and will be a great help in minimising wear and tear to my various C2N Datasette’s, Walkman’s and tape decks. It’s fast too, I managed to rewind a C90 tape in around 30 seconds. The use of a belt helps to ensure that when reaching the end of a tape, any excess force results in the belt slipping rather than damaging the tape.
 

Audio Tape Cassette Storage – Solution/Review

audio tape cassette storage

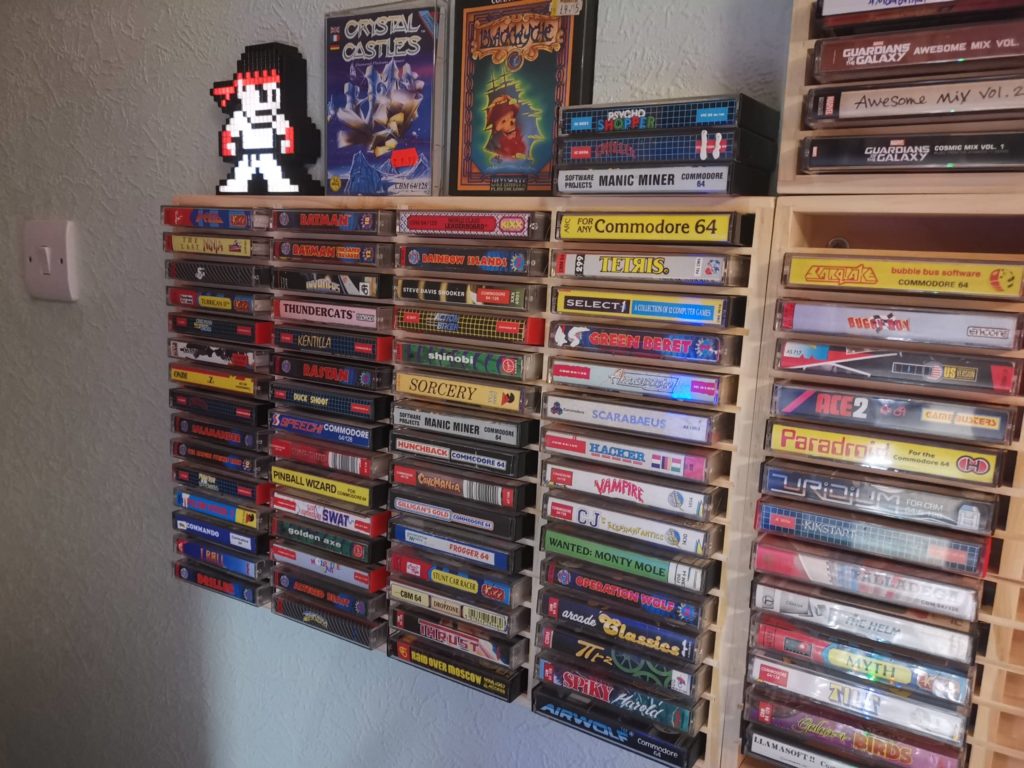
My audio tape cassette storage problem has been bugging me for quite some time now. Over the years I’ve accumulated a lot of cassette tapes (both music and games) and that number is constantly increasing. I’ve been storing a lot of them in those old drawer units (the ones usually covered in tacky looking wood effect vinyl). Whilst this is an effective storage method I’ve always found them a bit of a pain to use and also my tapes are hidden away out of sight. I’ve also got loads of tapes stacked on top of each other on a shelf and this is far from ideal too. Forty year old tapes are not something I want to risk playing Jenga with!

All this leads me to the reason for posting this article. After searching around for a while for a better solution I finally found one I’m happy with so I thought I’d share it.


This is a link to the racks featured in this post.


The Solution

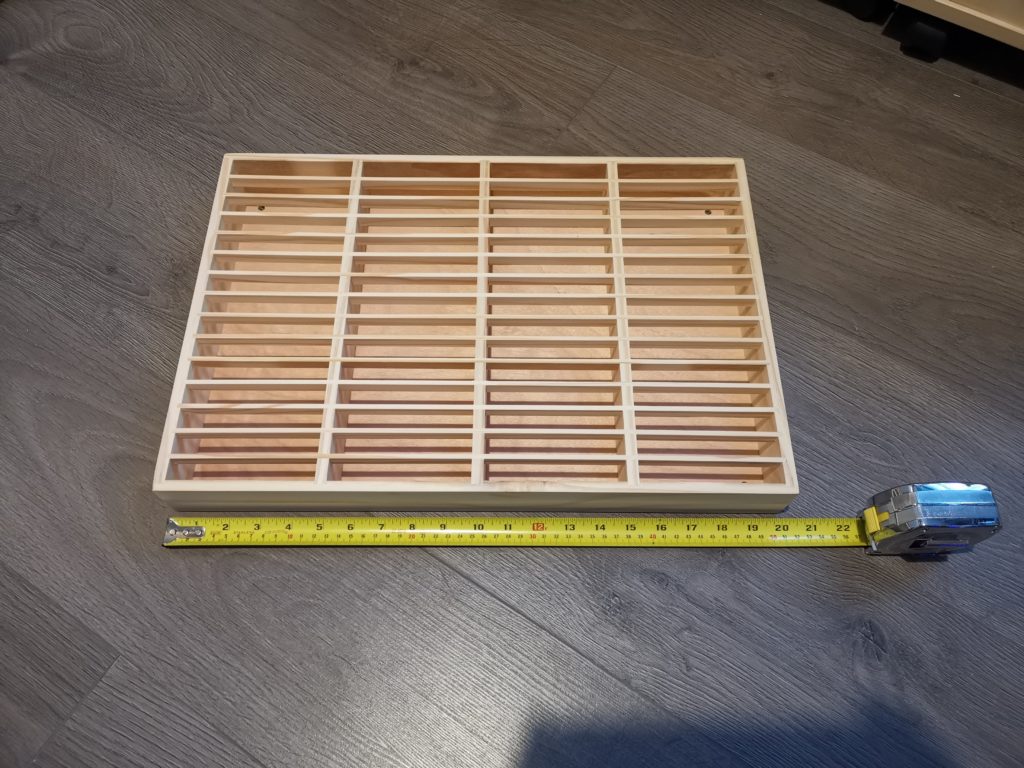
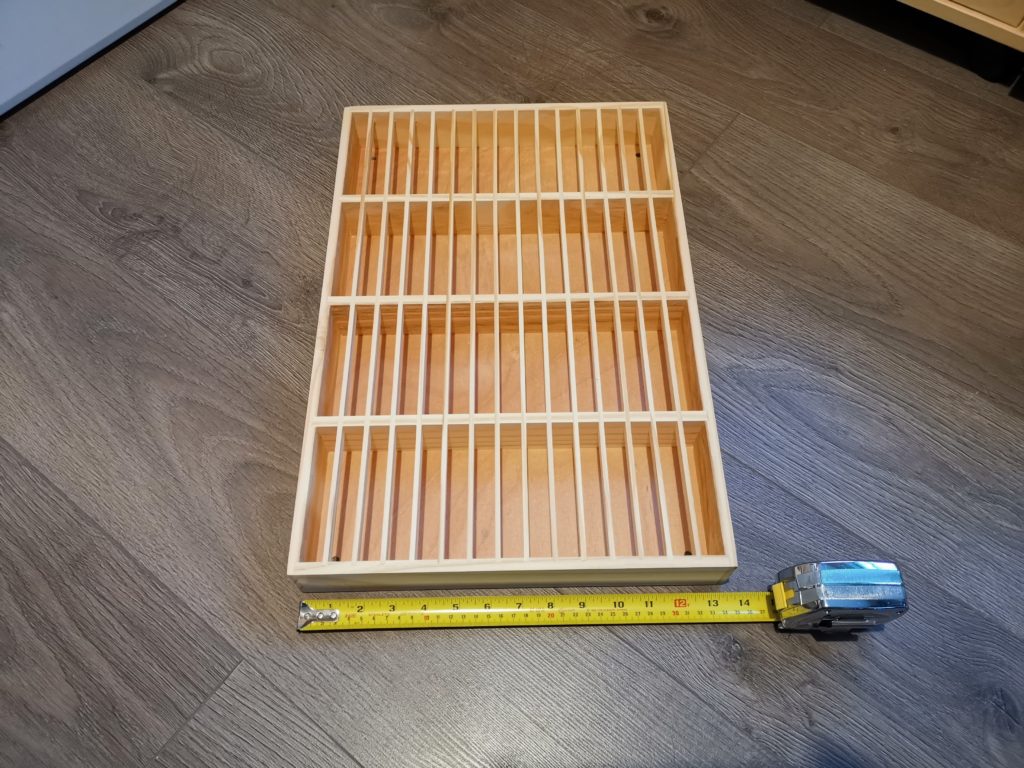
The audio tape cassette storage solution I found is a purpose made wooden rack that can hold 60 cassettes in their boxes. It’s manufactured by a company in Germany called ‘Protected’ and are available for sale on . Delivery took less than a week by DHL.


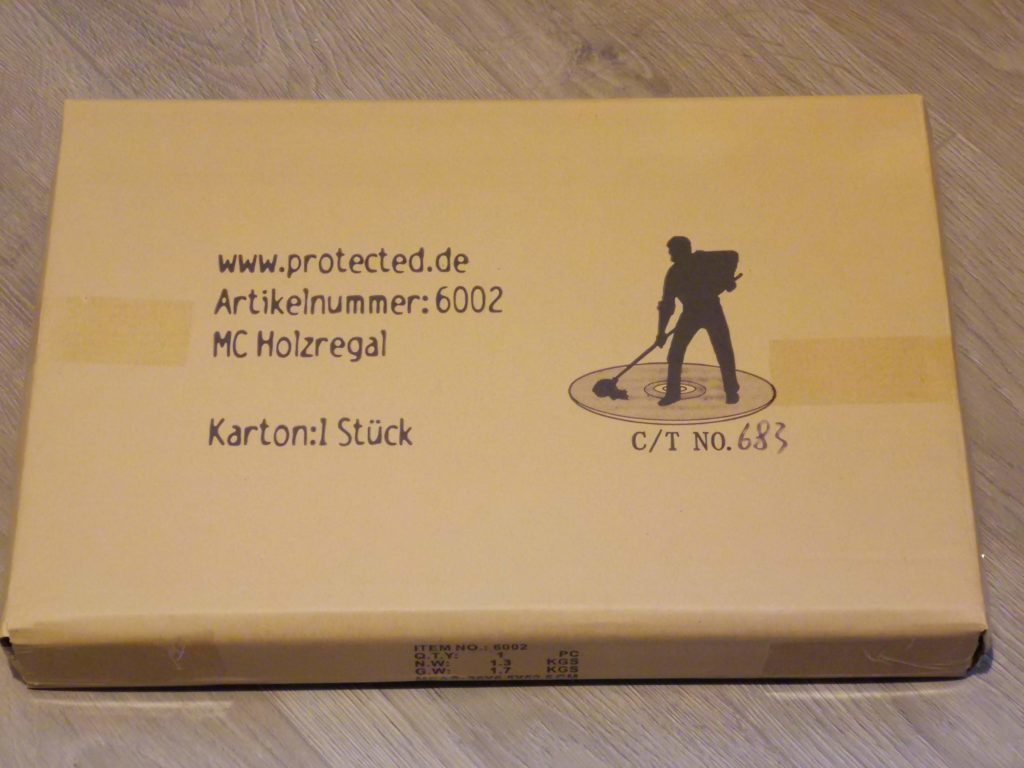
The packaging the racks arrived in.


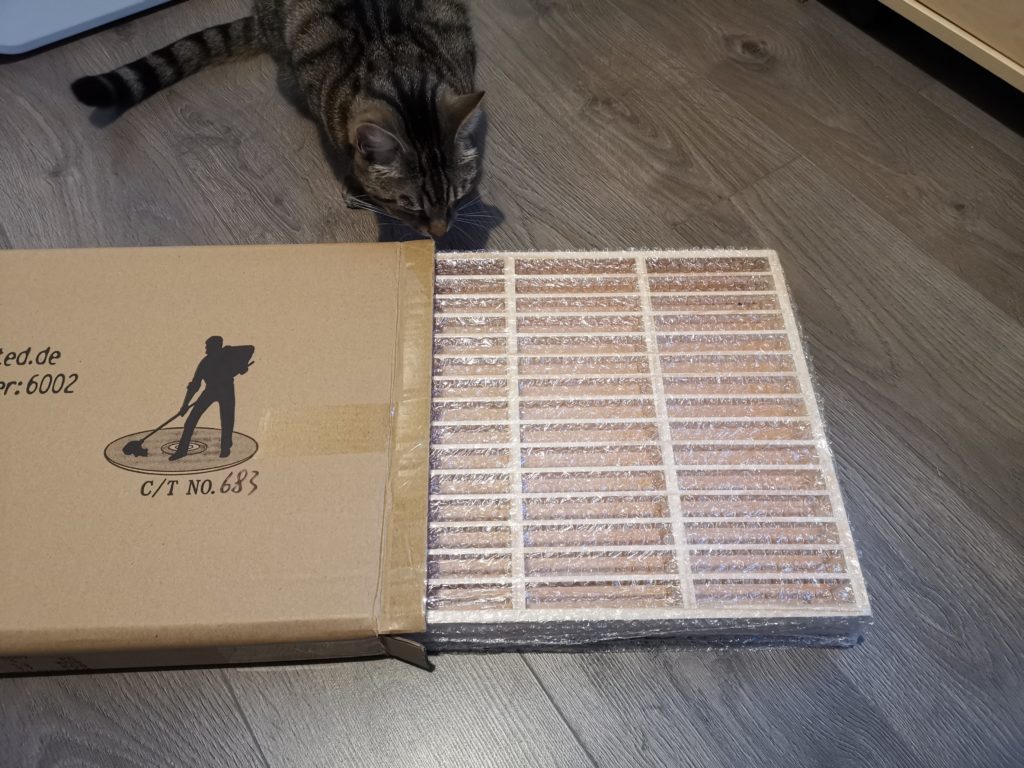
The racks came individually packaged. Opening the cardboard box (carefully to avoid cutting into it) revealed the nicely bubble-wrapped rack inside.


audio tape cassette storage

My cat loves it when I open new parcels!


All three of mine arrived in great shape. I must admit I was a little wary about ordering at first as I wasn’t sure if these were getting knocked together in someone’s garden shed. There is only one (poor) photo on the Amazon website and precious little info provided. However I was very pleased to discover a high standard of both manufacture and finish.


audio tape cassette storage

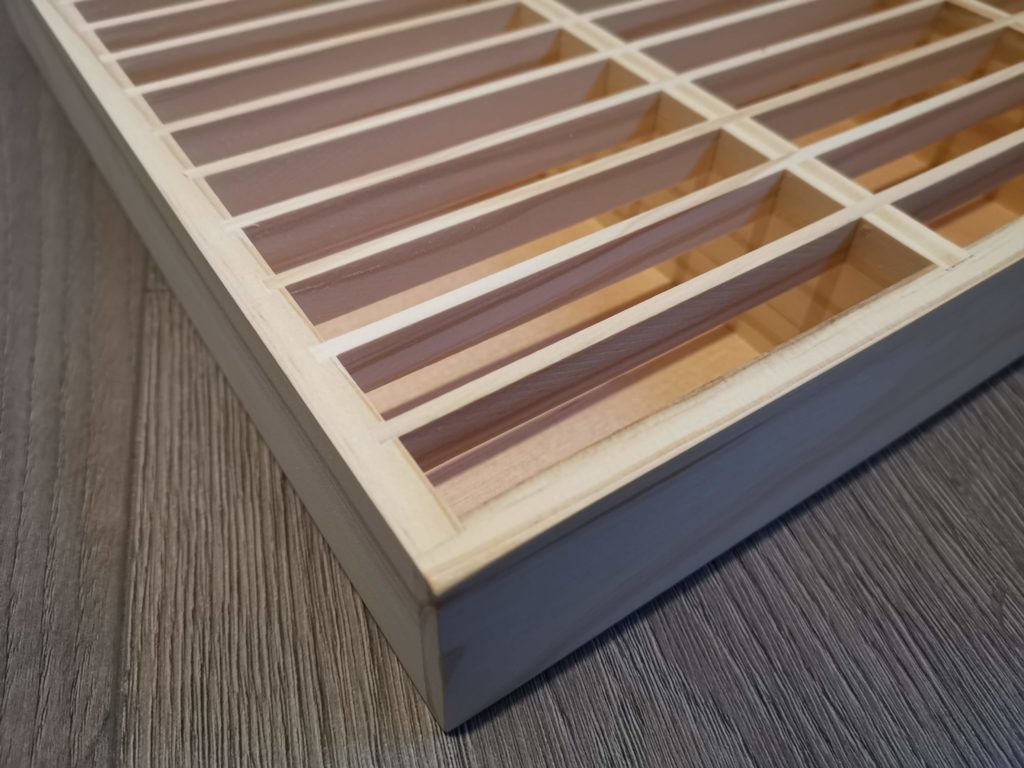
Nicely finished woodwork


A Closer Look

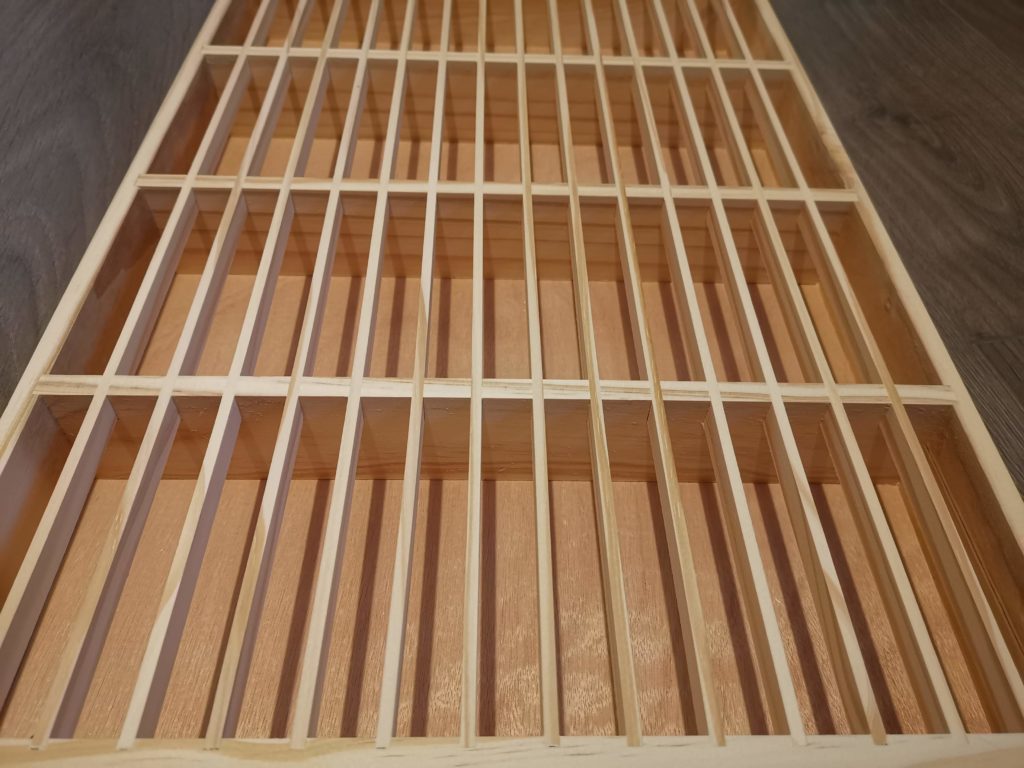
The racks are constructed from solid strips of pine wood and the back panel is made of plywood. All the strips of wood forming the slots are perfectly aligned and fit perfectly flush. There are no sharp edges or splinters to worry about as everything has been sanded smooth and edges rounded off. The back is a little rough but once in use you’re never going to see or touch it again.

There are 4 pre-drilled holes in each corner so you can wall mount the racks. Somewhat disappointingly plugs and screws are not provided. However this is not that big a deal and most people my age have probably got loads in a jam jar somewhere in their shed or garage. I would also recommend the use of a washer as the holes are quite big. Using a washer will also prevent you from driving a screw right through the thin plywood back panel.


width…


Size wise the racks are approximately 20″ (51cm) long and 13.5″ (34cm) tall.


height…


I opted for the natural pine finish but they also offer a white one too. I’ve not seen that in the flesh so can’t comment on the finish of it. I guess you could also either varnish or paint them to suite your colour scheme too. I’m quite happy to keep the bare wood finish for my setup though.


Closer look at the slot construction


The slots are perfectly sized and I’ve not found any cassettes that wouldn’t fit into the them.


audio tape cassette storage

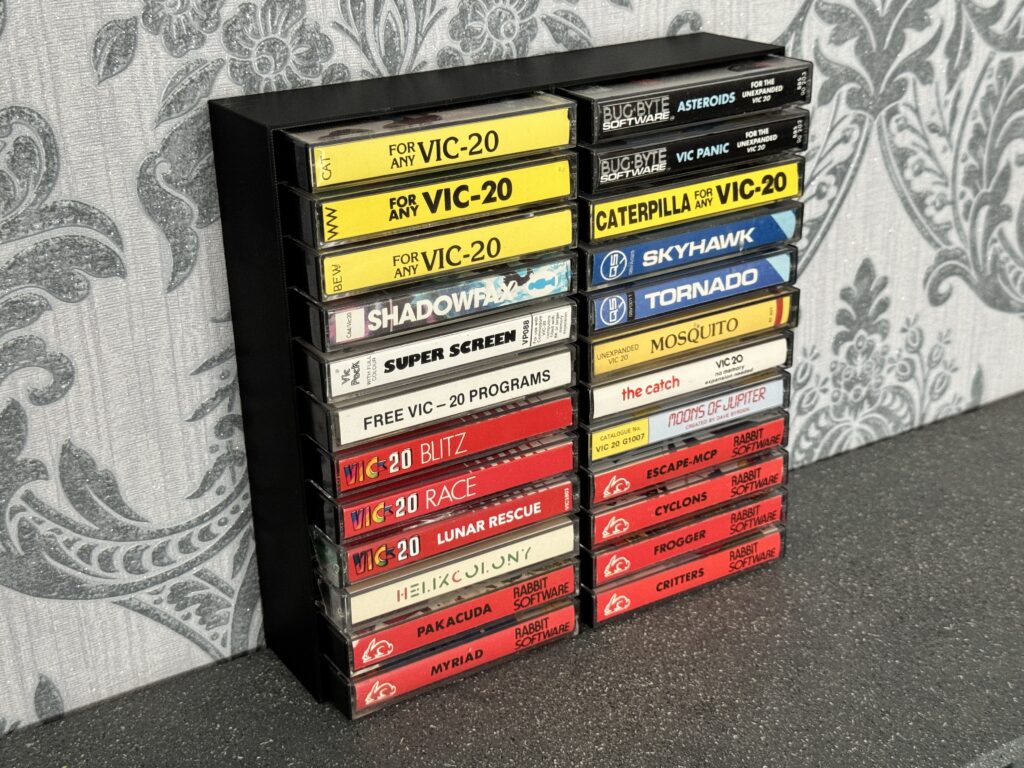
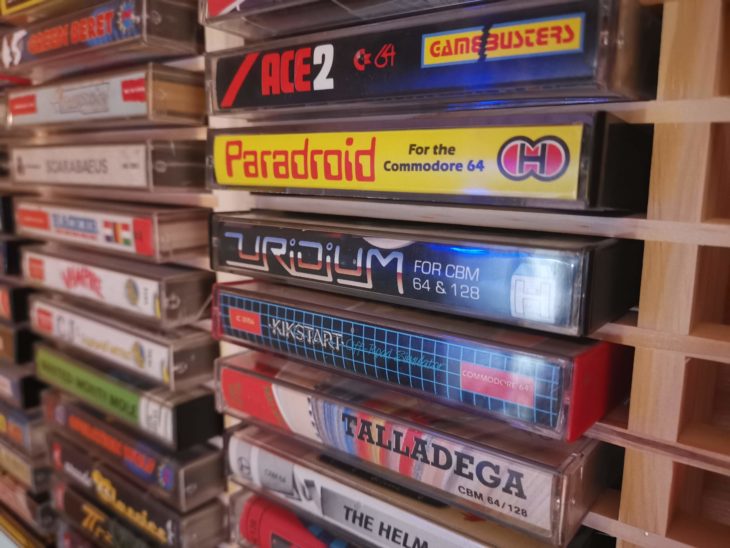
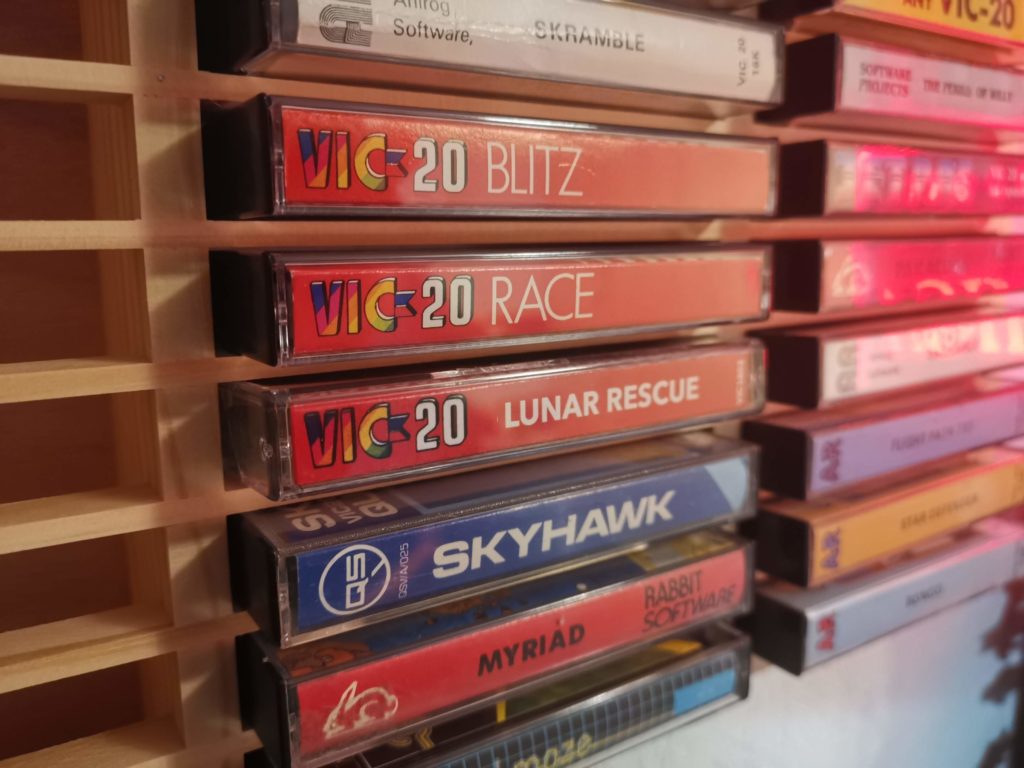
A selection of VIC20 games slotted in nicely


The rack is slightly shallower than a cassette is deep (2″ or 50mm) which means tapes stick out about 1/2″ (12mm). This allows you to easily get your fingers around them when you need to get them out.


audio tape cassette storage

Top of rack makes for a useful display area.


You can even use the top of the rack as a small shelf for extra storage or display purposes. I’m still experimenting with what looks best but will probably settle for displaying double-cassette boxes or the odd big box game.


audio tape cassette storage

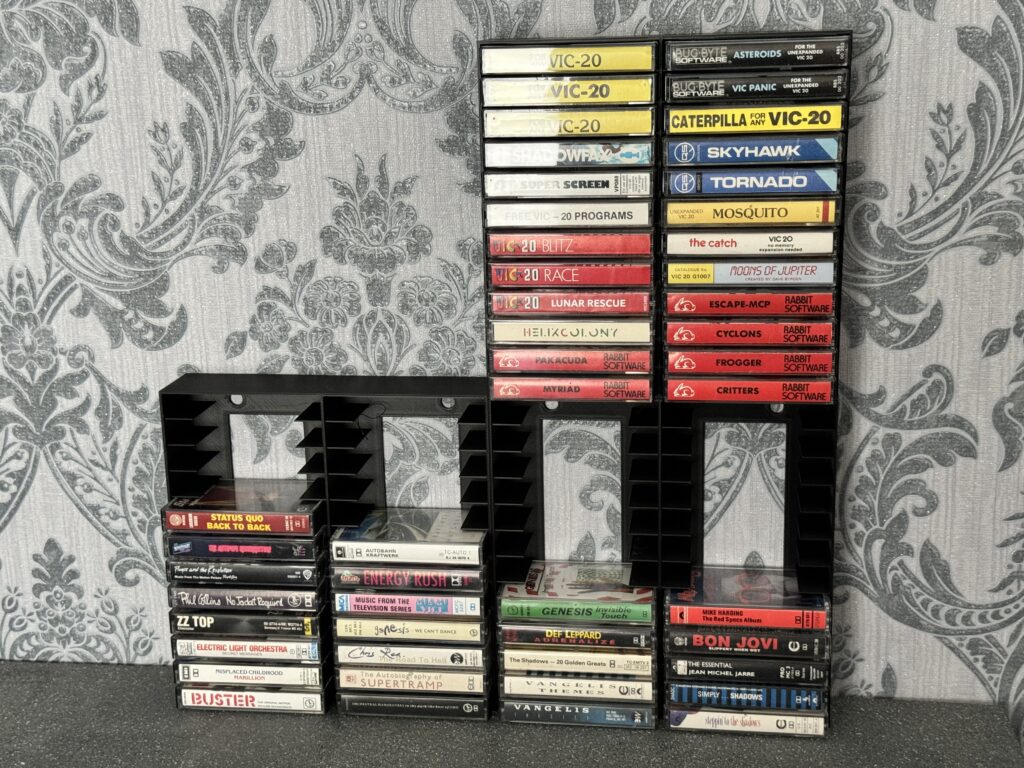
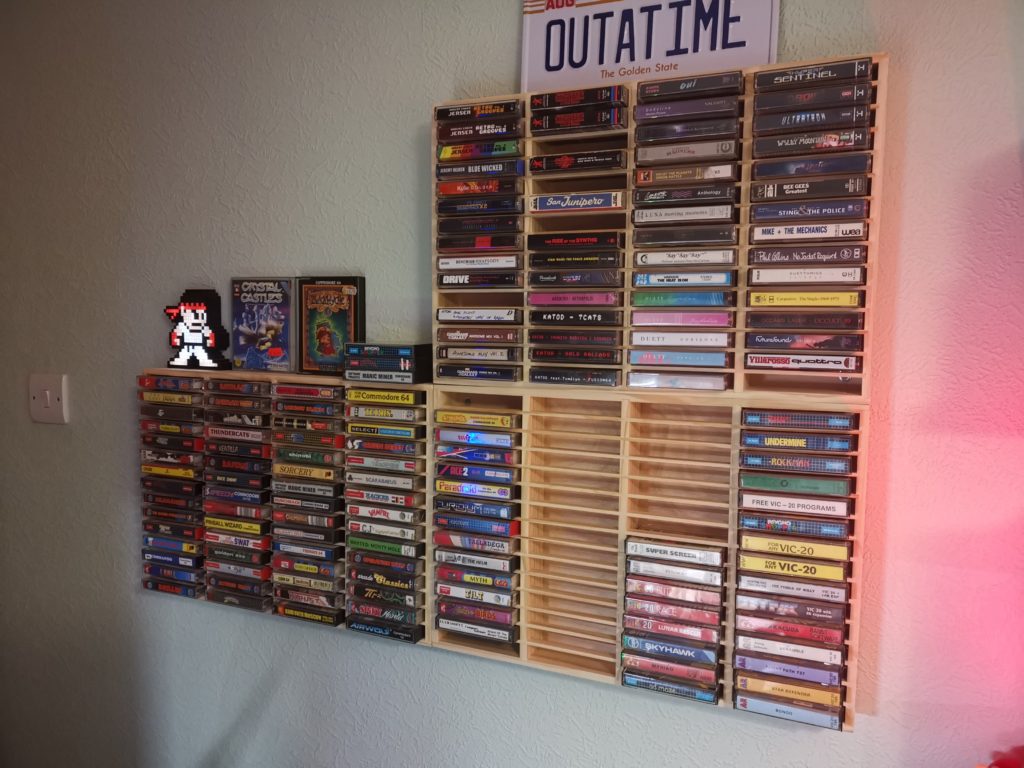
Racks filling up nicely…

Finishing Words

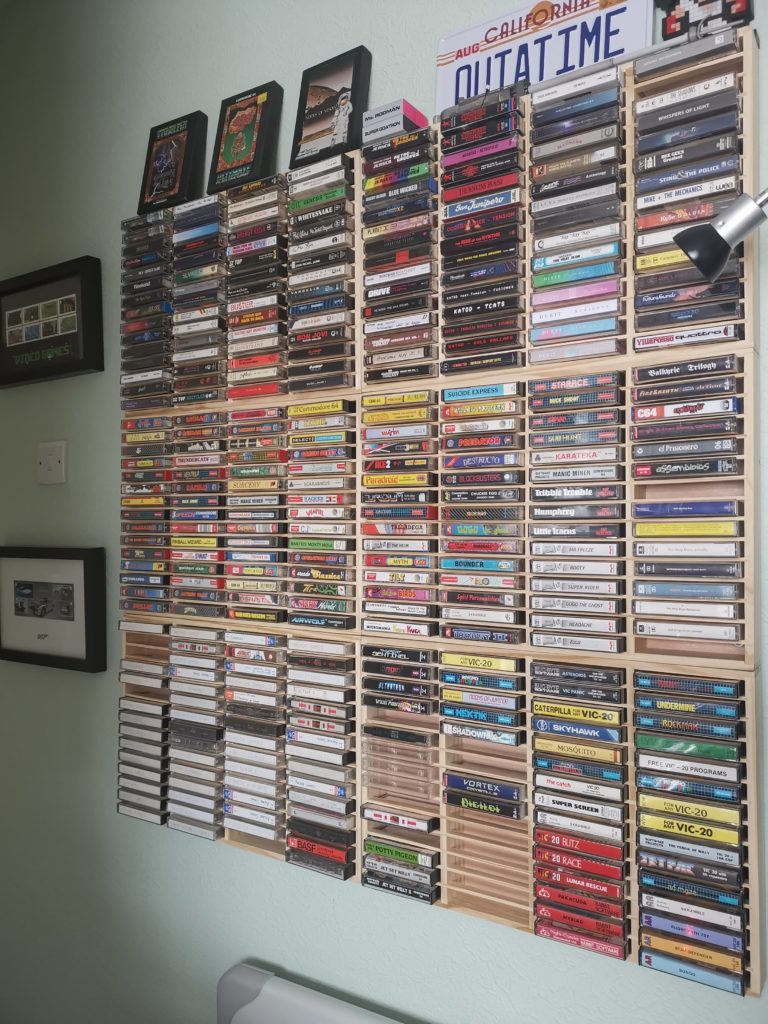
I have to say I really love these racks and I’m glad I’ve finally found a storage solution that fulfils my desire to display my stuff too. I filled my three racks straight away so have just ordered another three. With six racks I’ll have the capacity to store 360 tapes in total. That’ll allow me to store all the tapes I currently own and hopefully leave me with enough empty slots to accommodate future purchases, fingers crossed.

The racks are available from Amazon here:


Update: 1st April 2020

Fitted the extra three racks so as promised here’s a photo of the finished project. I still have a few empty slots left thankfully but how long for is anyone’s guess!


audio tape cassette storage

Finished project with enough space for 360 cassette tapes.


Hope you found this article useful!

Cassette Deck Maintenance: Demagnetising a Tape Head

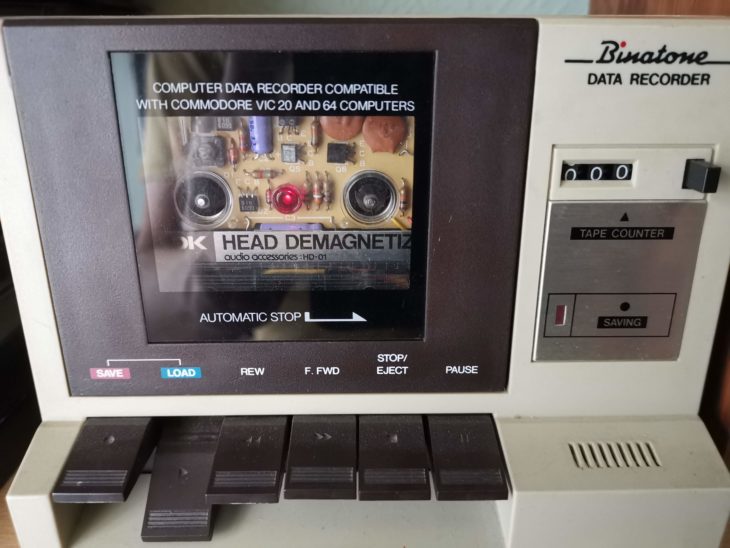
Binatone Data Recorder - Demagnetising Tape head

In addition to regular cleaning another vital part of keeping your cassette deck running smoothly is demagnetising the tape head. This applies to both computer cassette decks and Hi-Fi ones. Over time a residual magnetic field can build up on the head. Not only can this adversely affect playback (more noise and loss of high end response) but it can also degrade the quality of any tape passing over it.

A cassette tape is basically a strip of thin plastic coated with a ferrous material. Music (or data in the case of a computer tape) is recorded onto it by using an electro-magnet to magnetise the tape surface to varying degrees. A tape can be erased by placing a strong magnet near it so even a weakly magnetised head will, over time, slowly erase any recordings passing over it. The more you play a tape on a deck with a magnetised head, the greater the cumulative effect will be.

TDK HD-01 Tape Head Demagnetiser

This slideshow requires JavaScript.


So what can you do about it? Well thankfully there are a number of different ways you can demagnetise tape heads. Popular methods include a mains powered electro-magnetic wand and those cheap cleaning cassettes that contain a rotating magnet on a little disc. In the past I relied on an the latter; an old Maxell cleaner/demagnetising cassette. However just recently I stumbled across this TDK one advertised as ‘New Old Stock’. I’ve always trusted TDK as a brand, they make good quality products and know their stuff. It was a little on the expensive side due to me needing to pay shipping and import taxes from the US but I felt it was worth it.


This slideshow requires JavaScript.


Although the box it came in was very tatty, the contents were like new. Inside there was a small instruction manual and the demagnetiser itself. The device is powered by a small 1.5V lithium battery which should be good for 500 uses according to the instructions.

Naturally I had to install a new battery before I could get it to work. The rear of the instruction manual is stamped with the year 1978 so this little gadget is now over 40 years old! Thankfully it takes a standard size A76/LR44 button cell battery that is still readily available.


How does it work? – Demagnetising the tape heads

So how do you use it? Well it really couldn’t be any simpler. You basically pop it into your cassette player and press play! There’s a small plastic micro-switch above the play head that is activated by the motion of play head moving upwards when you press the play button. A red LED illuminates at the centre of the cassette to demonstrate that it’s working and that’s it, job done! When activated the circuitry inside the demagnetiser generates a pulse signal which demagnetises the play head in a matter of seconds.

This slideshow requires JavaScript.


There’s a little more to the process than that if you are using the device in a cassette deck that doesn’t have a mechanical play button. The device won’t work until the play button is pressed so if you have a deck that won’t allow you to press play whilst powered off then you need to take a few precautions. This is because of the strong signal it outputs which can damage amplifiers and headphones if you don’t make sure to fully turn down any volume controls first. My Hi-Fi has a fully electronic transport mechanism so I have to be careful when using it on that device for example.


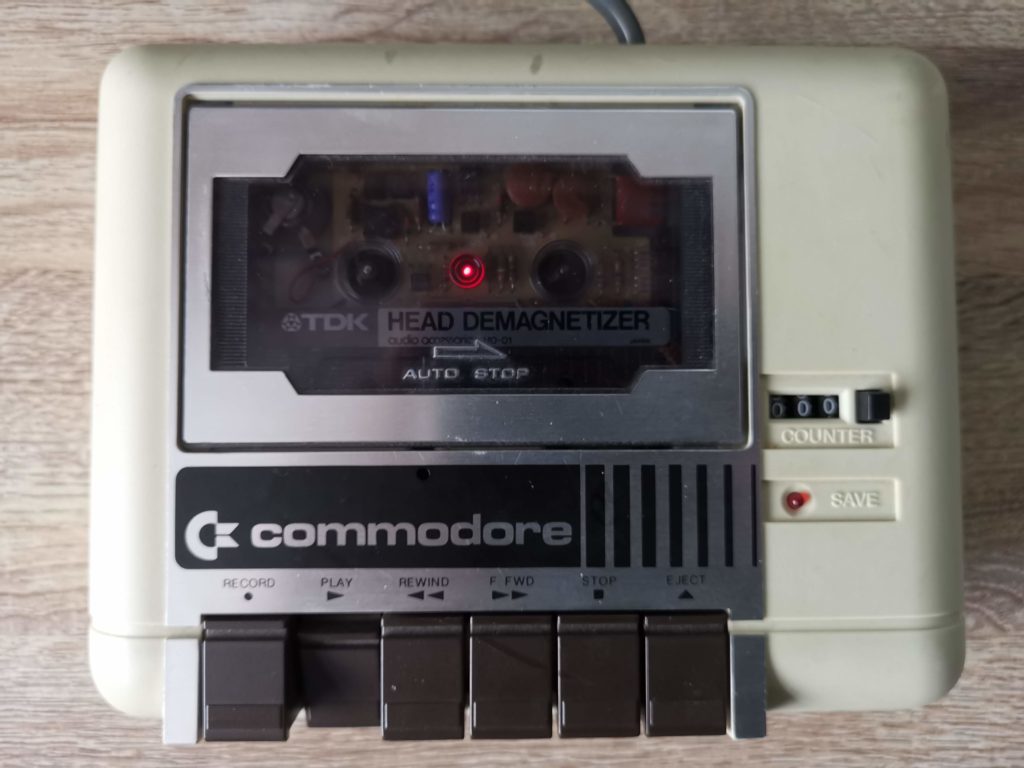
Commodore C2N - Demagnetising Tape head

Commodore C2N – Demagnetising the tape head in progress!


Thankfully most older devices have fully manual play buttons and need no such precautions. With devices like the Commodore C2N Datasette I can simply pop the cassette in, press play and the get the job done in seconds. I would imagine virtually all Walkmans would be equally simple to work with.

The manual recommends demagnetising your tape head every 30 hours of playing time. Therefore, how often you need to do this will depend on what sort of tapes you are playing and how often you play them. For my Hi-Fi deck regularly playing C60 and C90 tapes this could be as often as once a fortnight. For my computer decks playing relatively short C15 tapes much less frequently, once every 6 months would be more appropriate.

Despite the cost I think the device is totally worth my time and money. Given how precious some of my old cassette tapes and games are to me, anything I can do to help prolong their lifespan is worth doing in my book.

Retro Grooves 3, a MiniDisc release in 2019!

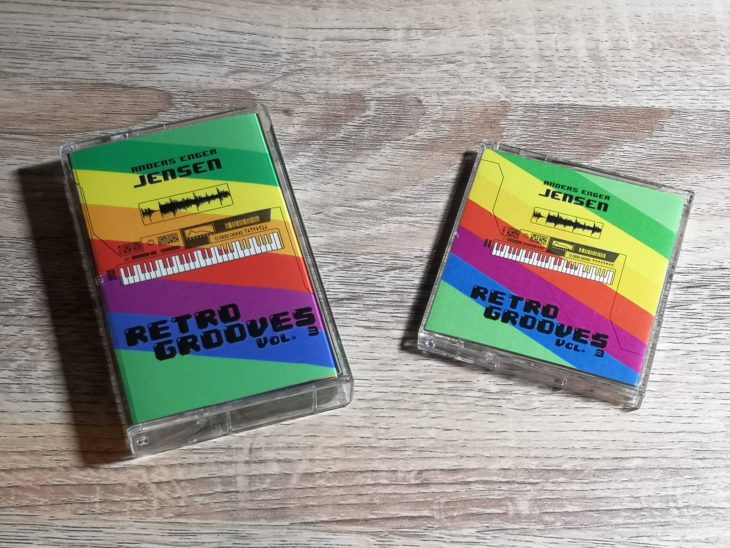
Retro Grooves MiniDisc

As a fan of Anders Enger Jensen’s other releases I’ve been looking forward to Retro Grooves 3 for quite some time now. What I was not expecting at all was for him to release this on MiniDisc! When he emailed me to let me know it was coming out on this format I just had to get it, as well as the cassette version!


This slideshow requires JavaScript.


Both versions are really professionally presented with full colour inlays that unfold to reveal a lot of interesting information about each track. This is something you just don’t get with digital music. I loved being able to listen to each track for the first time whilst browsing Anders’ notes about what inspired him or the processes involved in creating a particular track.


This slideshow requires JavaScript.


He’s certainly pulled out all the stops for the MiniDisc release, the artwork on the disc has been printed directly onto the case itself – no cheap stick-on labels here. This is certainly the only MiniDisc in my collection that has been printed this way and it looks amazing! The cassette release still looks good too, coming in a transparent green case with the album details printed on it in contrasting white.


This slideshow requires JavaScript.


A lossless digital download of the whole album is included with both the Cassette and MiniDisc formats. Additionally the digital download includes an extra 16 bonus tracks not included on either the tape or disc releases. Alternatively, if you don’t mind missing out on the physical formats completely you can opt to just buy the album digitally if you prefer.


Retro Grooves MiniDisc

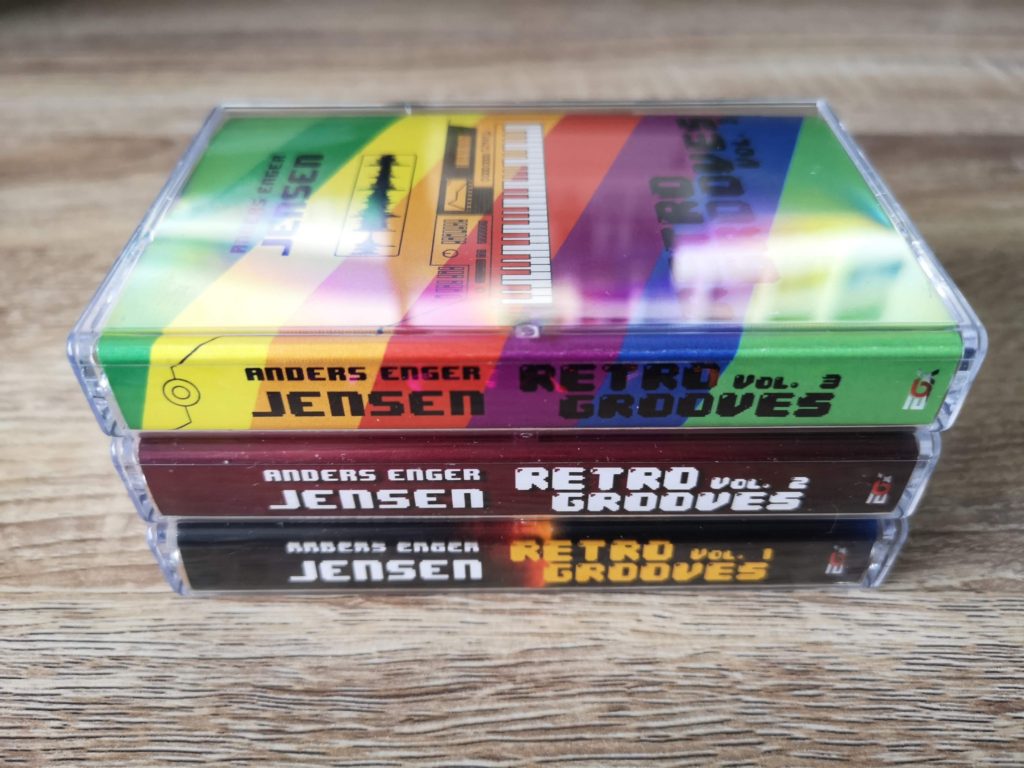
The entire Retro Grooves cassette collection to date…


Verdict

Regardless of which format you choose, if you enjoyed either of his previous Retro Groove albums, or even Troubled Hearts then I pretty much guarantee that you will also enjoy this. Anders’ signature style of upbeat ‘cheerful’ sounding synth music mixed with occasional samples is present and correct. My personal standout favourite track has to be ‘FM Love’ closely followed by ‘Isabella’s Dream’ which features some lovely harmonised female vocal samples.


Retro Grooves MiniDisc

MiniDisc version includes full track listings


There’s a couple of tracks with backing singers this time around that you may or may not enjoy depending on your taste. ‘Escape Your Fear’ sounds like it could have come straight from the Troubled Hearts album and I really enjoyed it. The other, entitled ‘Let’s Fly’, I didn’t like so much as the vocals are very processed and it just didn’t really click for me. It wasn’t bad enough that I’d want to skip it, but it’s definitely not something I’d want on repeat.

Anyway if you would like to get hold of a copy for yourself than head on over to EOX Studios website.

AIWA HS-PC202 Mk3 Cassette Player – Replacing a Drive Belt

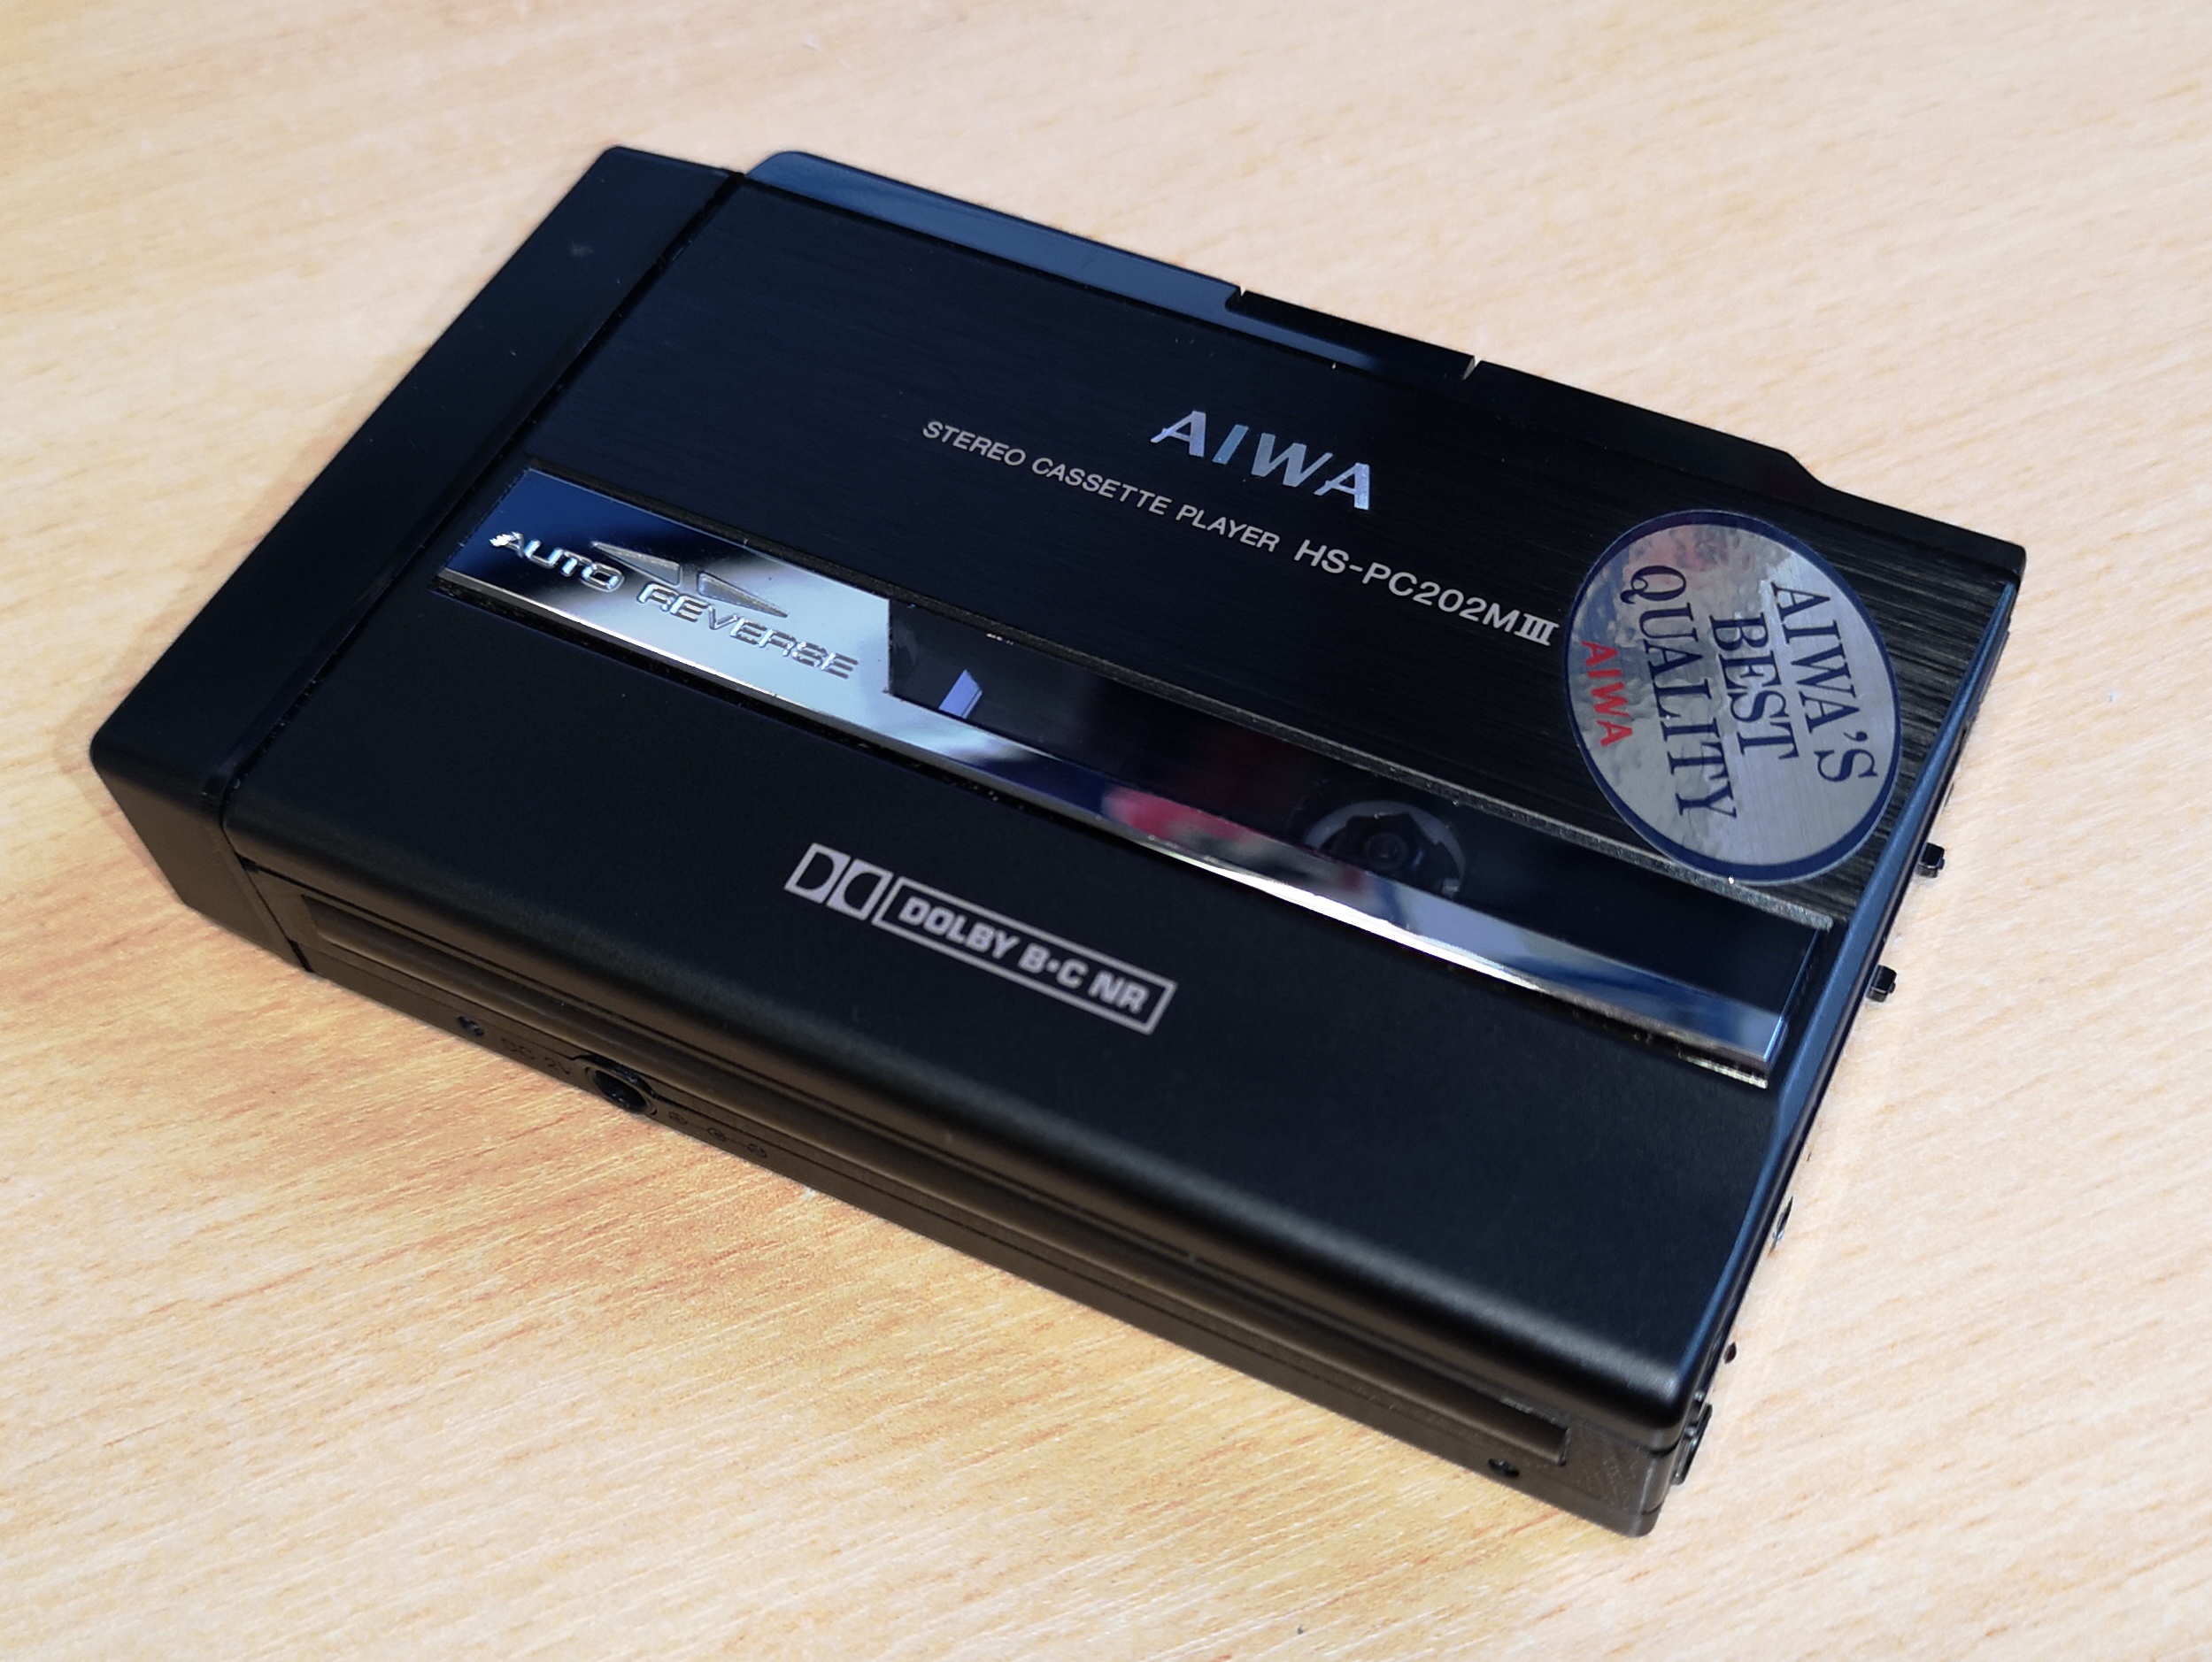
AIWA HS-PC202

Introduction

I recently bought a ‘New Old Stock’ AIWA HS-PC202 Mk 3 Personal Stereo off eBay as I just couldn’t resist the idea of unboxing a ‘new’ walkman in 2018. Now I’m fully aware that you can buy brand new ones off Amazon but these are pretty cheap and nasty affairs designed to cash in on nostalgia rather than offer a quality audio experience. This Aiwa model is a quality bit of kit with the ability to play Chrome tapes, Dolby B & C noise reduction, auto-reverse and a super slim, attractive design.

However it had been sat in storage for about 25 years so when I popped in some batteries and tried to play a tape – nothing happened! I could see the power LED light and hear a hiss from the headphones but the spindles didn’t turn. Thankfully I could hear the motor run momentarily if I held the unit to my ear whilst pressing ‘play’. This was a sure sign that the belt had failed in some way which is very common on vintage cassette decks.

This post will provide instructions on how to open up the AIWA HS-PC202 Mk 3 cassette player, and replace the belt. The only tools you need are some small watch-makers screwdrivers and a pair of tweezers. It’s quite a straightforward job as the player has been designed with the foresight that one day someone would need to change that belt!

Getting Started with your AIWA HS-PC202

The first thing you need to do with your AIWA HS-PC202 is unclip the battery compartment as one of the screws you need to remove is hiding behind this. Now you need to remove the backplate from the player to expose the belt. It is held in place by 3 tiny screws and a clip that fits inside the case near the play button.

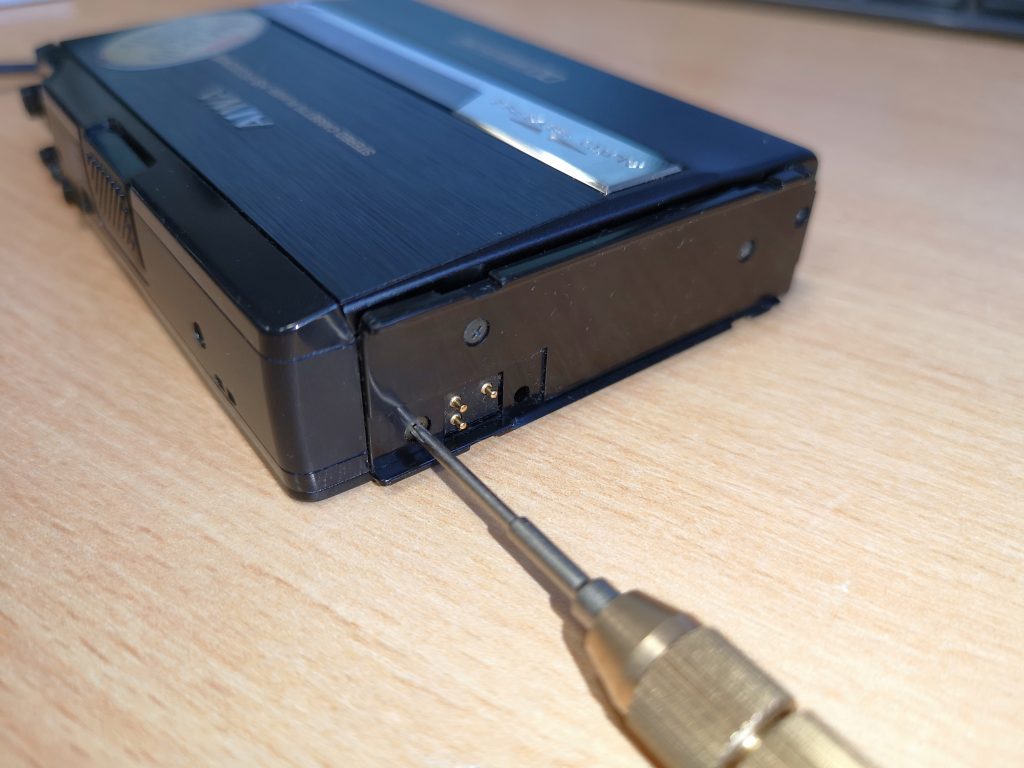
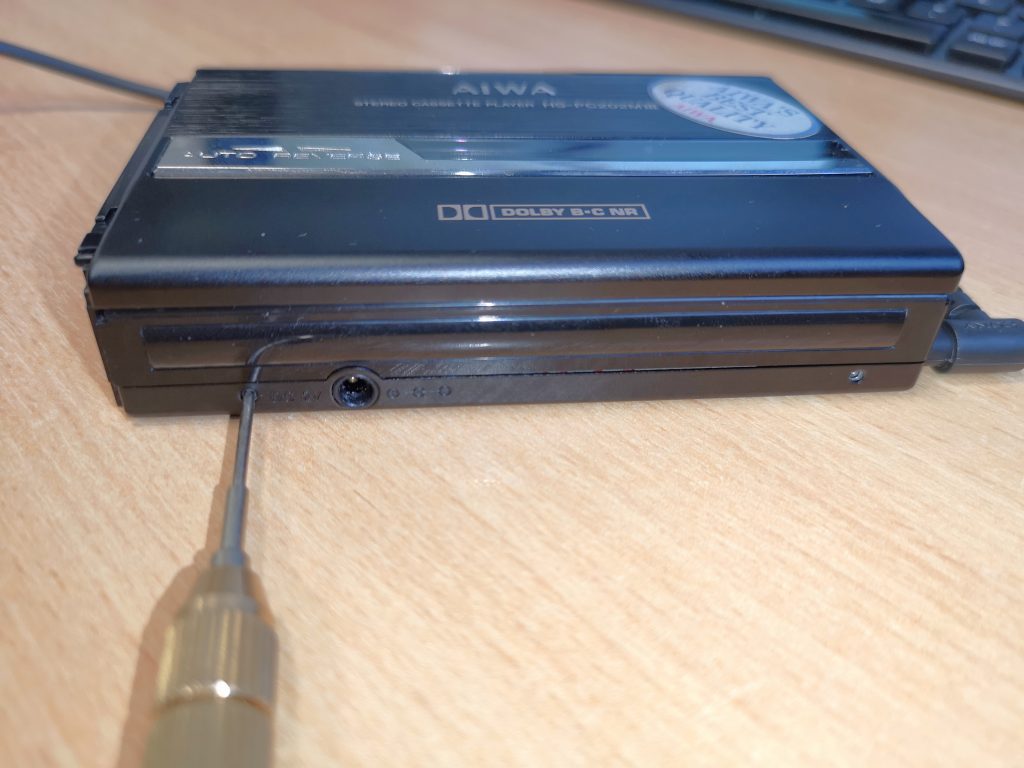
Take your philips screwdriver and remove the first screw shown in the picture below. Place it in safe place, preferably in a small container as the screw is incredibly small and easy to lose. This is a slightly different size to the next two so it should be easy to identify when you are putting things back together.

AIWA HS-PC202

Remove this screw first

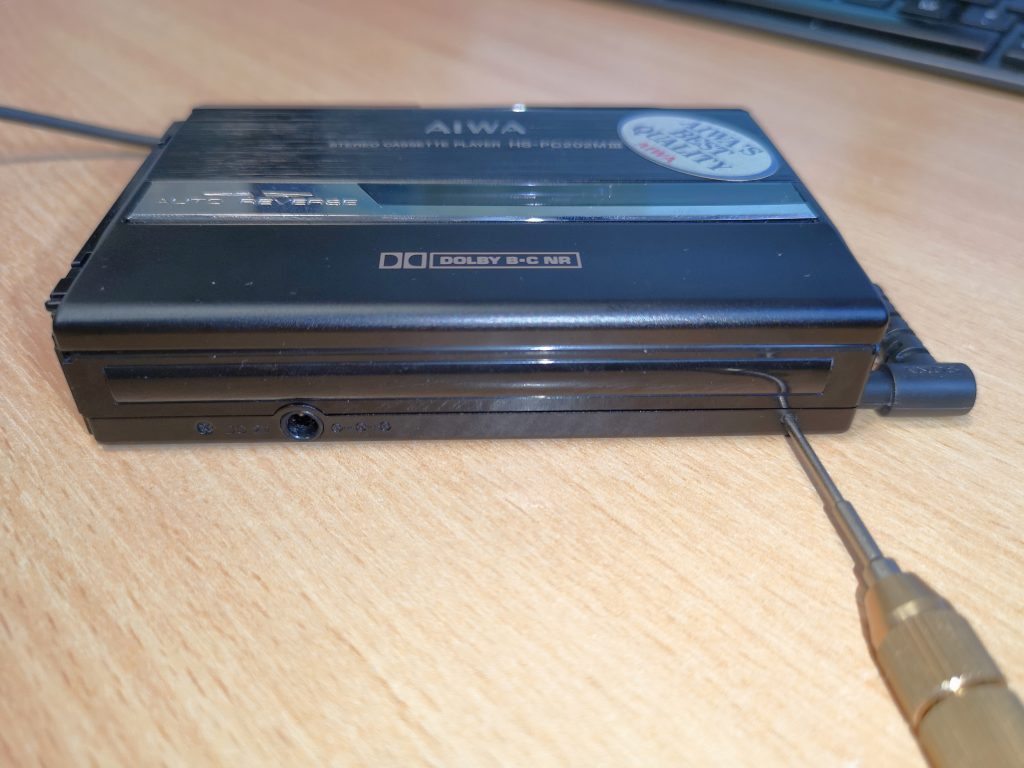
Now spin the player around so you are looking at the side where the lid hinges and remove the two screws indicated in the photos below.

AIWA HS-PC202

Remove the left screw

AIWA HS-PC202

Remove the right screw

Removing the Backplate

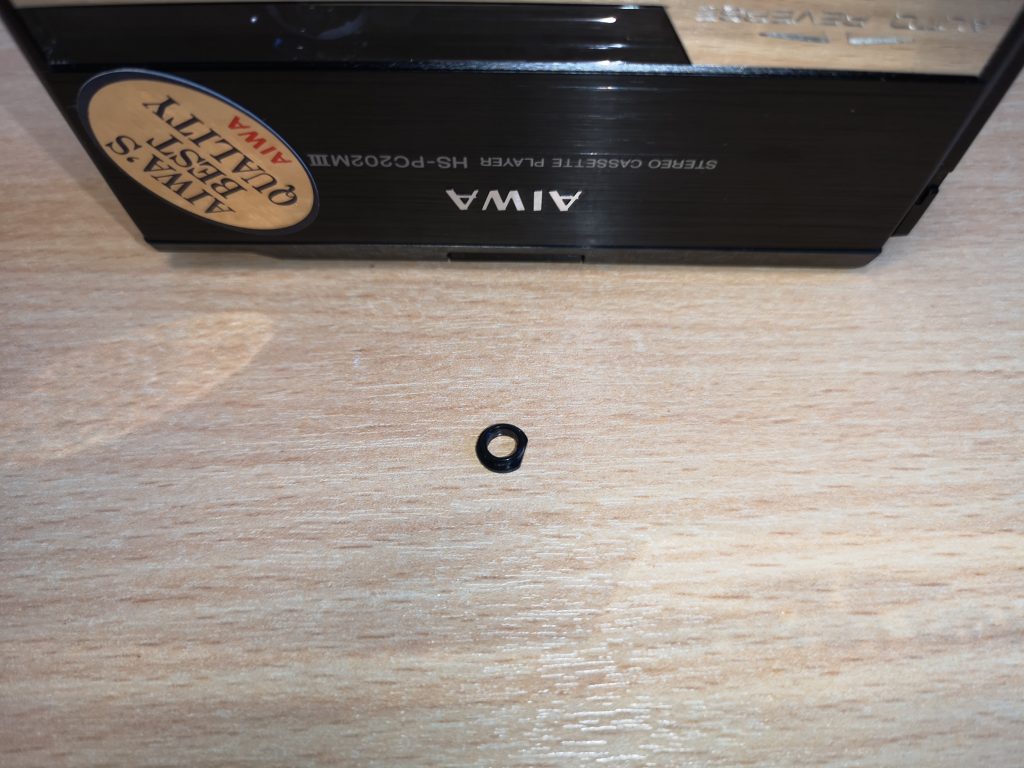
Store these two screws safely with the other and put aside as you are ready to begin removing the backplate now. You need to be careful and not rush this next part as there are a few things that are held in place by the backplate and they will fall out and get lost if you’re not careful. The one thing seems to fall out no matter what you do is a small, circular, black plastic spacer that fits between the backplate and the DC power socket. Now you know about it, be prepared for this and catch it. Store it safely with the other screws.

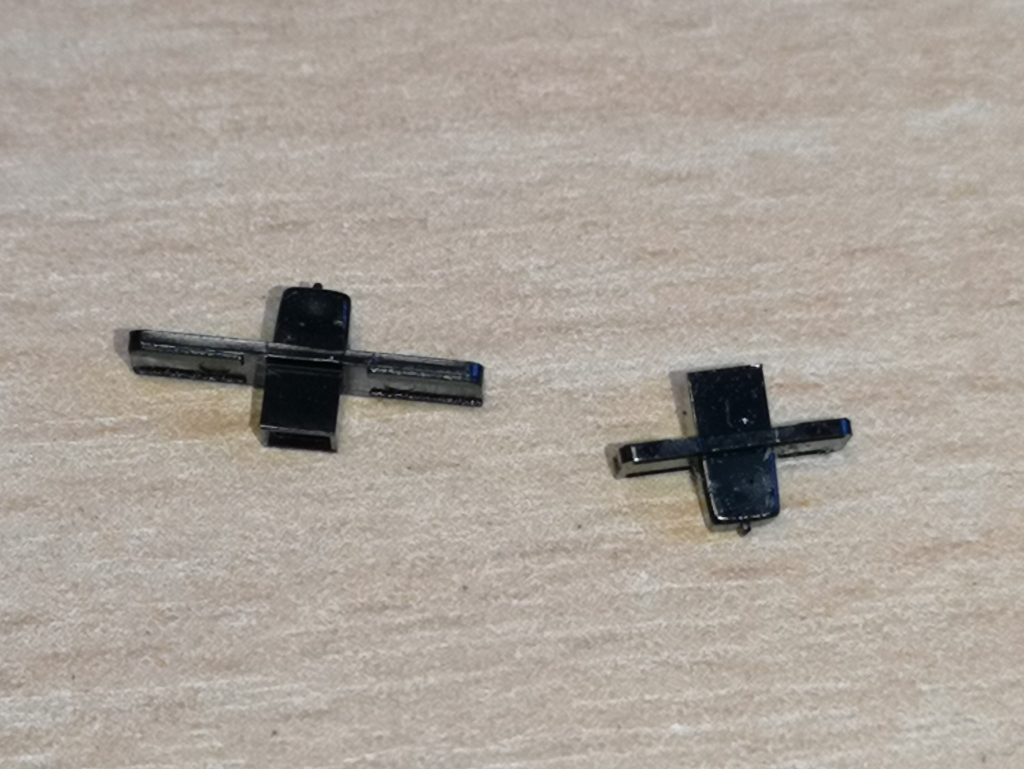
The other things held in place by the backplate are the Dolby NR and Tape Bias selector slide switches. It’s simple to put them back if they fall out – but if you’re not expecting them to drop out they could easily fall on the floor un-noticed and get lost.

AIWA HS-PC202

This is the small plastic part that will fall out from around the DC power socket.

tiny bits of plastic

These are the Bias and Dolby selector switches that may drop out when you remove the backplate.

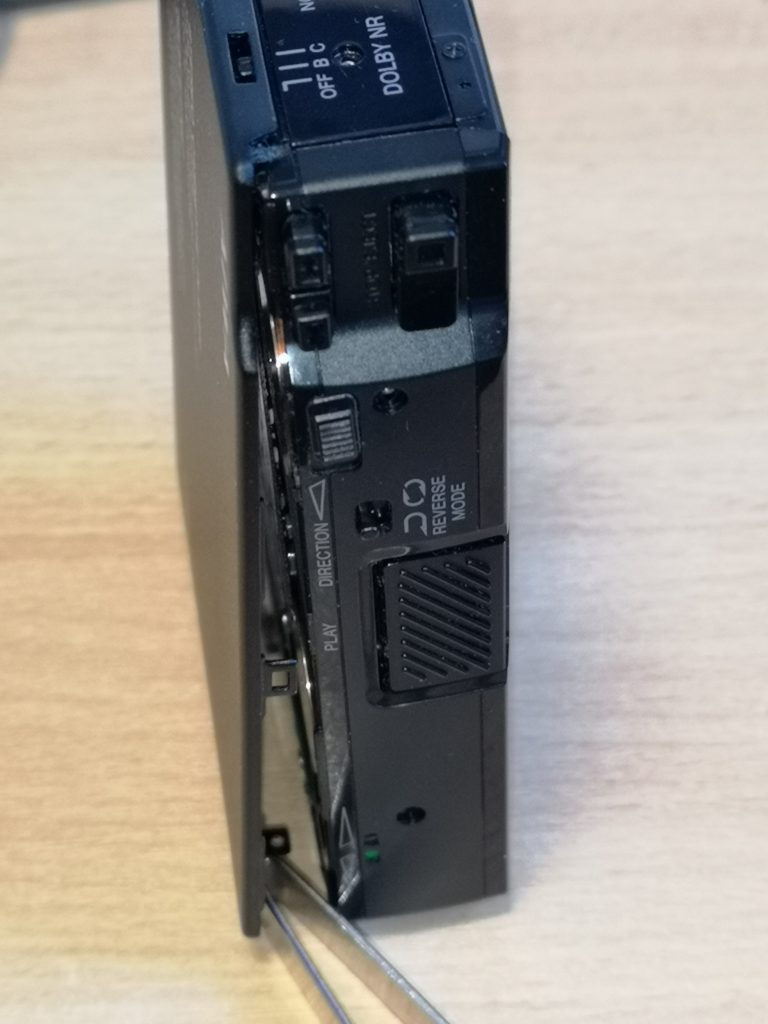
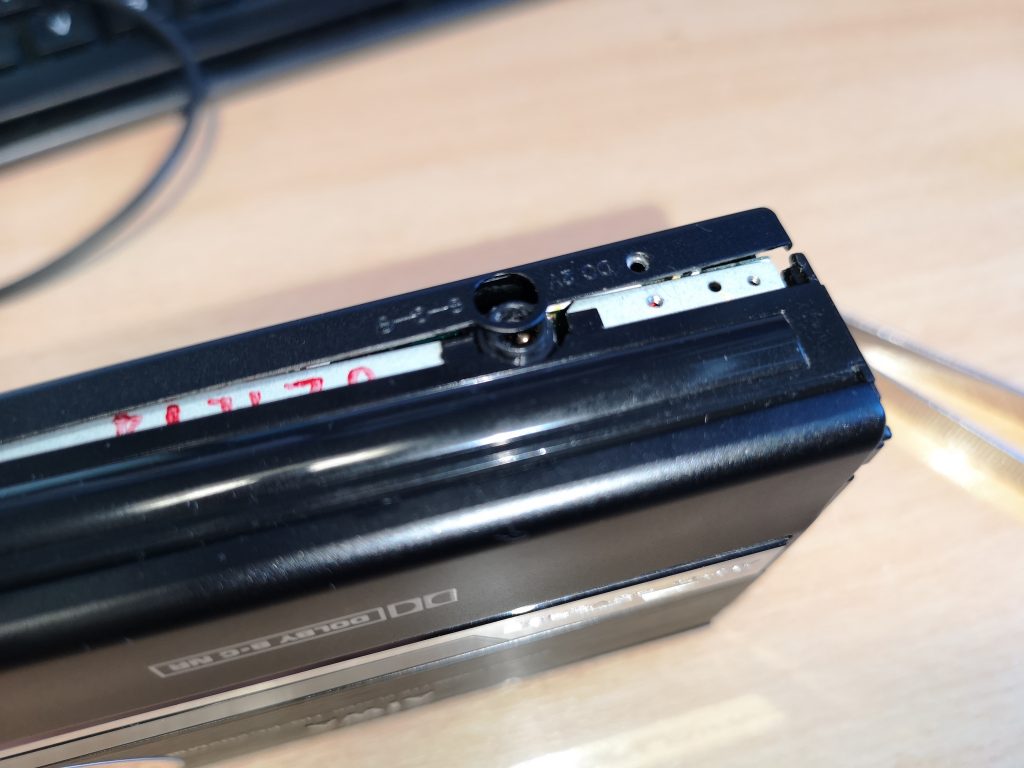
The backplate needs to pivot away from the case from the battery end first. There is a lip at the opposite end by the volume wheel and switches so you need to picture it hinging from that position and focus your efforts on making it open that way. If you place your AIWA HS-PC202  vertically it’s easier to do this and it will prevent the switches from falling out.

AIWA HS-PC202

Gently prise the backplate off, starting at the battery end (the bottom in this photo)

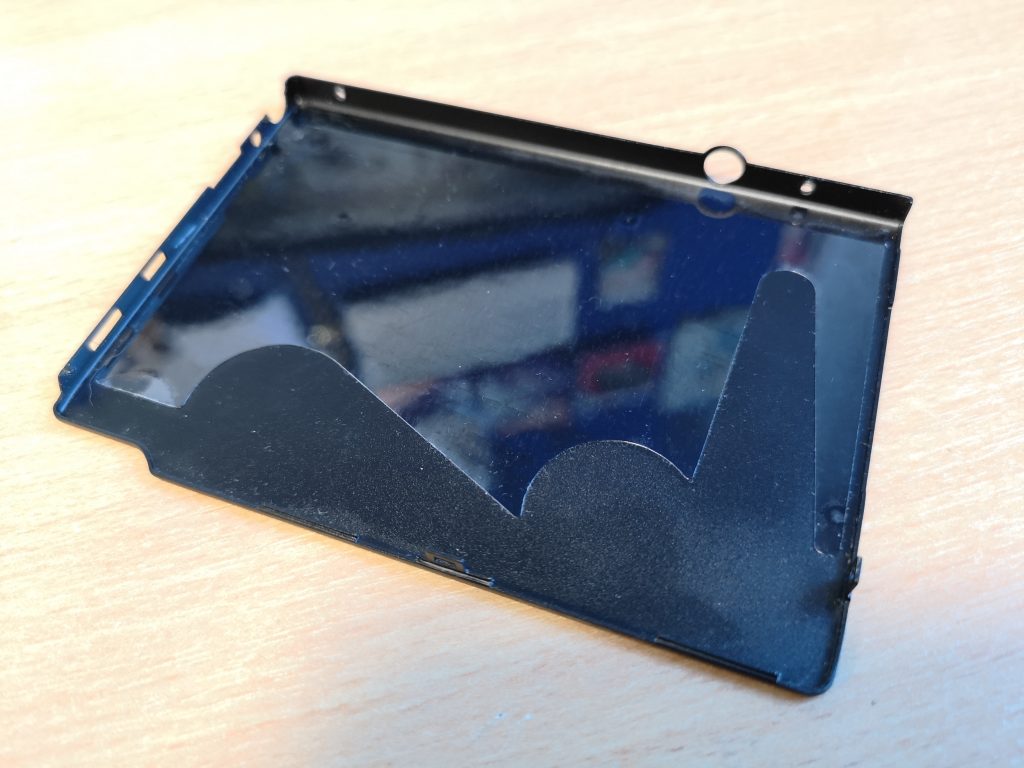
As you can see in the above photo there is a small metal tab on the front edge of the backplate that fits into a plastic lug inside the case, above the play button. You will need to carefully slide a small flat bladed screwdriver in and gently lever the plastic around the play button outward, away from the backplate to release the tab. The backplate should now be free and you can pull it away from the body and slide it upward to remove it, leaving the switches on the top in place.

backplate

The backplate – note screw holes and cut-outs for controls and DC input.

Inside the AIWA HS-PC202 Mk3

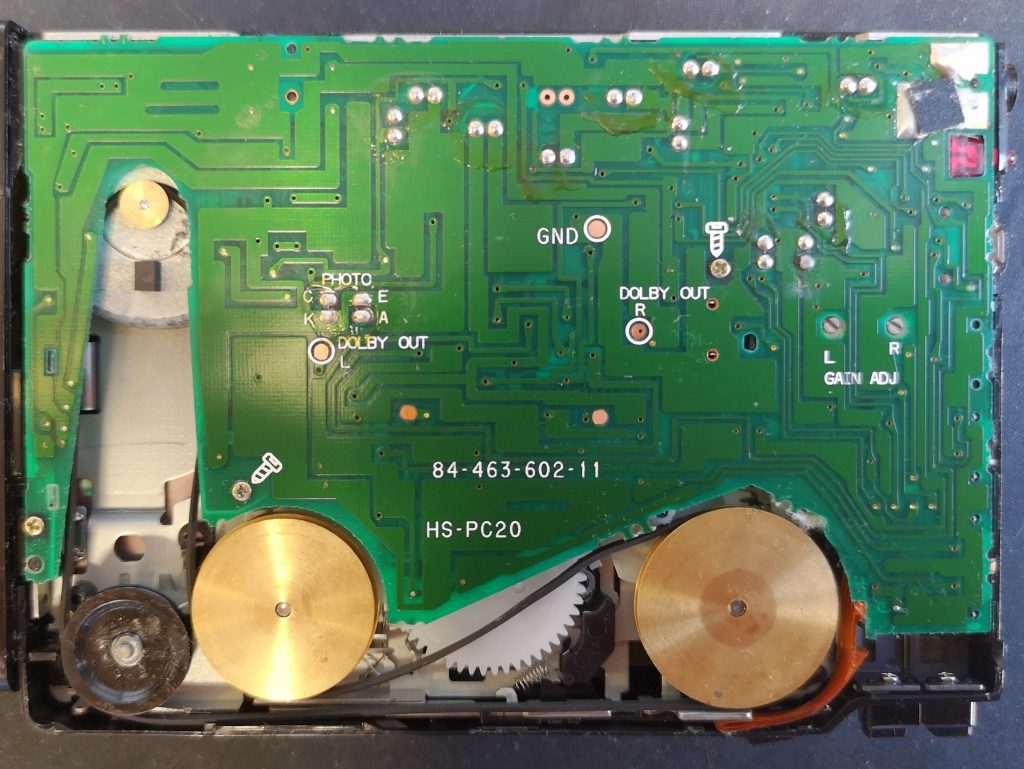
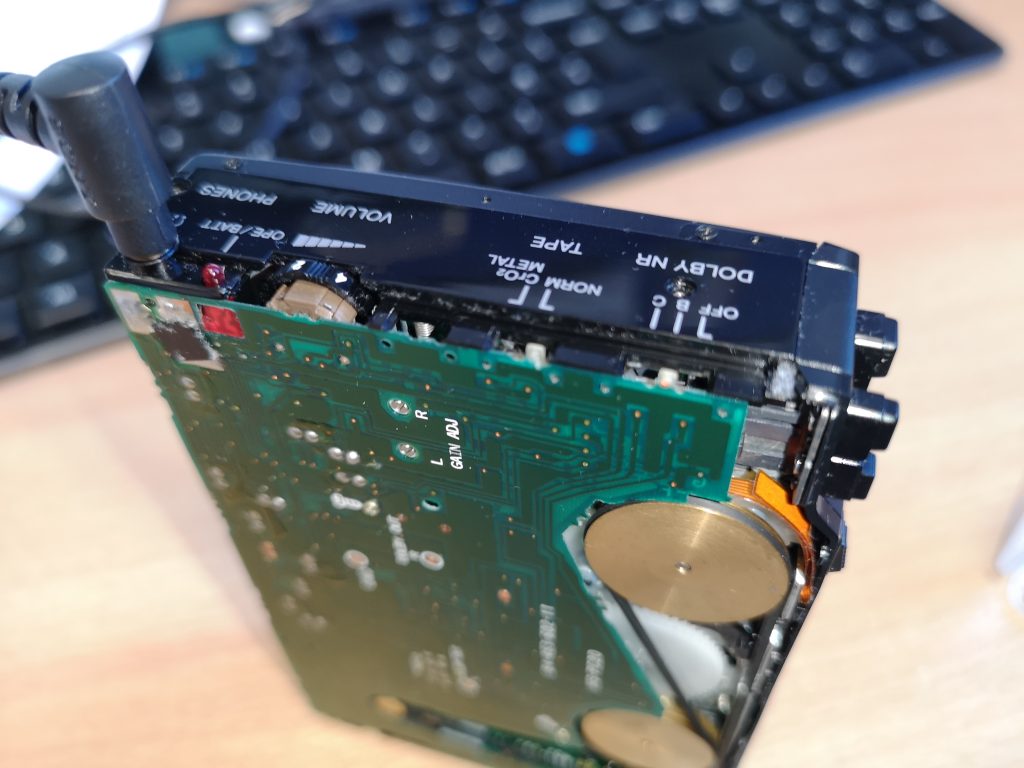
Now that the backplate if off you should see be able to see the circuit board with a cut-out for the belt and pulley wheels just like in the photo below. A belt in good condition should be taught and fit around all the pulleys tightly, something that mine was definitely not doing!

The smallest wheel is the motor pulley, the two large brass wheels drive the capstans and I think the smaller black wheel is there just to guide the belt around the others.

AIWA HS-PC202

Inside the player. See how the rubber belt is no longer taught and is just lying there looking lumpy and uneven

Replacing the Belt (Take 1)

It took quite a lot of investigative work to locate a new belt that was an exact match for the original. Avoid those cheap multi-packs you can pick up off Amazon and eBay from China – the quality of them is variable at best and the chances of getting one that actually fits correctly is next to zero.

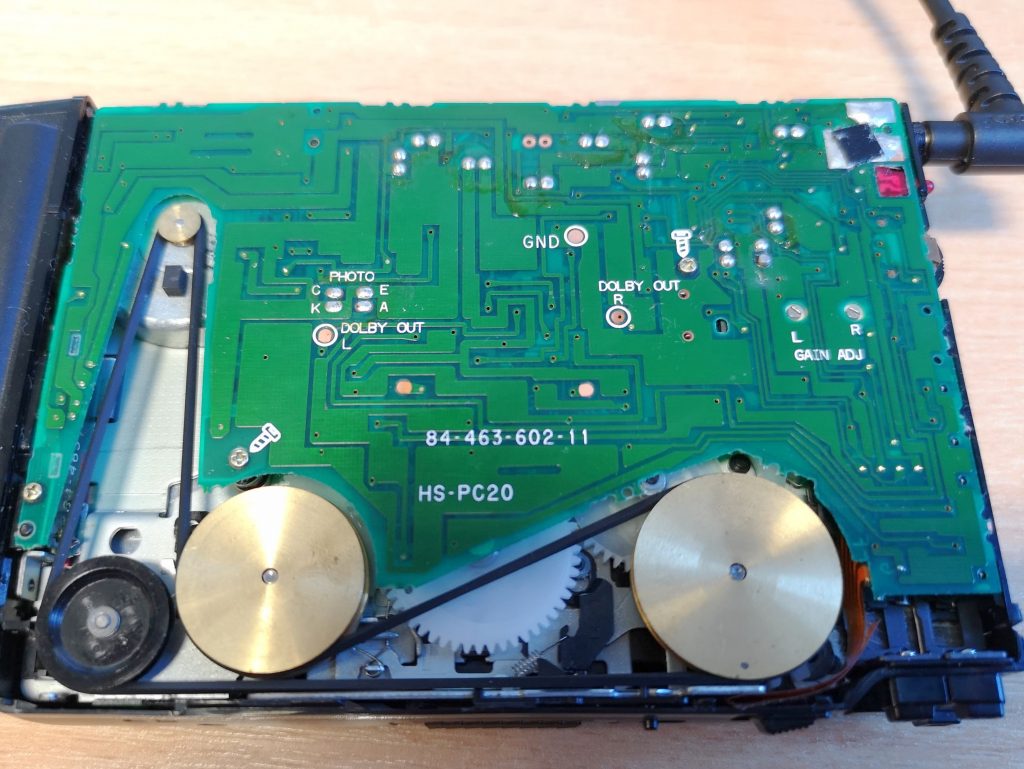
The belt fitted to this walkman has a square cross-section, not round or flat like many other belts. It is also very thin – about 0.6mm thick. The length is 76mm. For belts most suppliers use the measurement of the diameter of the belt when laid out flat in a circle. So basically you need to find a 0.6mm x 76mm belt. I couldn’t find one this thin at first so I bought a 1mm x 76mm belt. It did fit and work but was quite a tight fit around the black wheel where it nearly touches the side of the case. It was also only a fraction of a mm away from touching itself (ooerr) where it passes beneath the nearby brass pulley (see the photo below to see how tight it was).

The company I bought the belt from (SignalsUK) was super helpful and based in the UK too. The belt arrived a couple of days after ordering. Although it was thicker than the original it did appear to work OK. (Edit: Sadly this company no longer appear to exist (at least online) so I’ve removed the out of date link to their site).

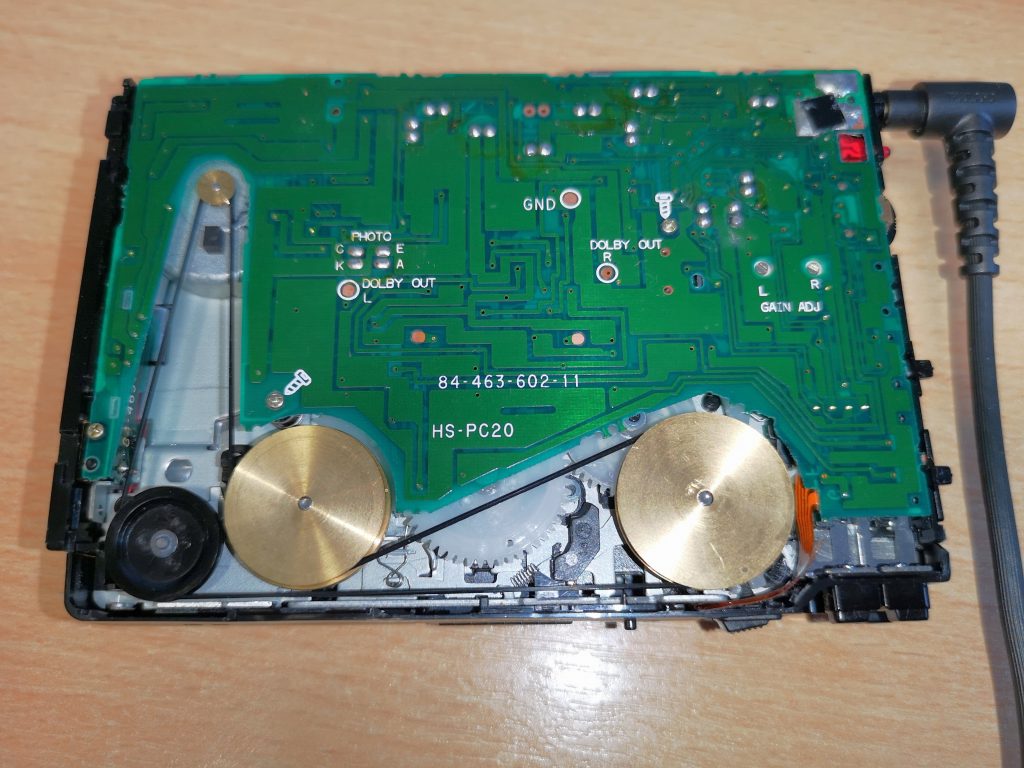
The belt is very easy to fit. Use your tweezers to place it around the motor spindle and around the other pulleys following the path in the photo below. There is a small plastic tab that protrudes out of the case towards the black plastic wheel. The gap it leaves is very small (you will find it at around the 8 o’clock position) so be careful not to snag or damage the belt here. There will be a a degree of tension in the belt and this is normal so you will need to stretch it a little over the final wheel.

AIWA HS-PC202

The 1mm thick belt – notice how it is practically rubbing against itself where it passes back beneath the left-hand brass pulley wheel.

Replacing the Belt (Take 2)

If a jobs worth doing, it’s worth doing properly – so I continued my search for a better fitting belt. Eventually I stumbled upon a place that custom manufactures belts for a variety of machines, including the AIWA HS-PC202 Mk3. The Mk3 is apparently mechanically identical inside to the Mk2 and so the belt they supply for the Mk2 also fits the Mk3. Here’s a link straight to the correct belt – here. The company, FixYourAudio, is based in Slovakia and is run by a very helpful guy who makes the spare parts purely as a hobby to help enthusiasts keep these old machines alive. A week or so after ordering my belt arrived in the UK so I have no qualms in recommending them. It is ever-so-slightly thinner than the original but is definitely a better fit than the 1mm thick one.

belt path

New 0.5mm belt fitted

belts

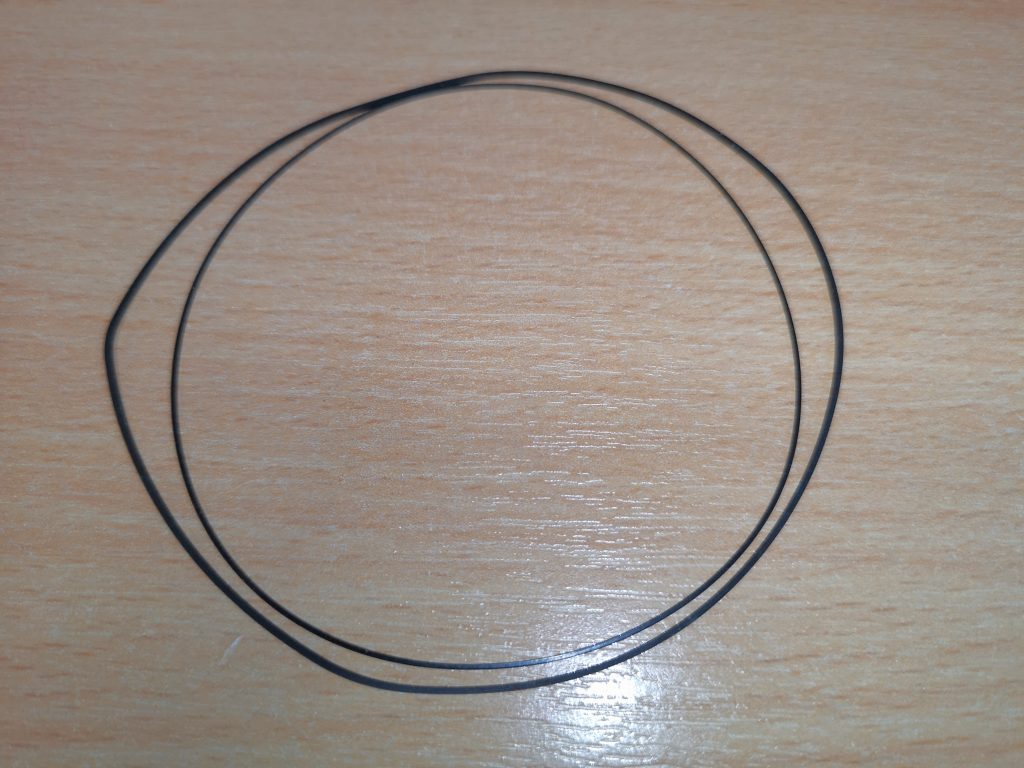
Comparison between the old stretched and worn belt on the outside and the new one on the inside!

Putting it back together

Before you finish off – if you have any additional problems with your player such as unwanted ‘scratchy’ noises when turning the volume wheel or when the headphone jack is twisted in the socket then take advantage of the opportunity and squirt some DeoxIT on them whilst you’ve got the player open. Don’t forget to operate the volume wheel fully a dozen or so times to work the fluid into the pot and clean it up. Likewise for the headphone socket, squirt some in and then insert the plug and twist it around in circles a bunch of times to clean off the contacts.

Now you just need to put it all back together. If you knocked off the slider switches then pop them back on now. You will notice that one side of them is hollow and this will sit on top of the appropriate switch sticking out from the circuit board. The larger of the two fits on the Dolby NR slider whilst the other belongs on the Tape Bias switch. Don’t forget to place the little round spacer back over the DC input port. There is a little flat spot on one side of the circle and this should be positioned facing the outside of the case so that it fits flush against the flat edge of the backplate.

back off

View of the controls – note the small white Bias and Dolby switches. It is on these that the black ‘cross’ pieces will sit on if they have fallen off

You may need to press and squeeze gently in a few places, particularly around the play button to get the tab to engage in the lug correctly. However you should not have to force anything. If you feel any resistance stop and check, reposition the backplate, check the spacer and/or the position of the slide switches and try again. Once it has popped back into place and you are happy with the fit all around, replace the 3 screws and you should be good to go! Enjoy the new lease of life your personal stereo has been given!

AIWA HS-PC202

The small plastic spacer fits here. Flat edge towards the backplate.

If you found this guide to replacing the belt in an AIWA HS-PC202 useful then please leave a comment below, it would mean a lot to me. Likewise if you have any questions I’ll do my best to help.

If you’d like to know how to go about de-magnetising the play head in your AIWA HS-PC202 then take a look at this post.

Retro Grooves volume 2

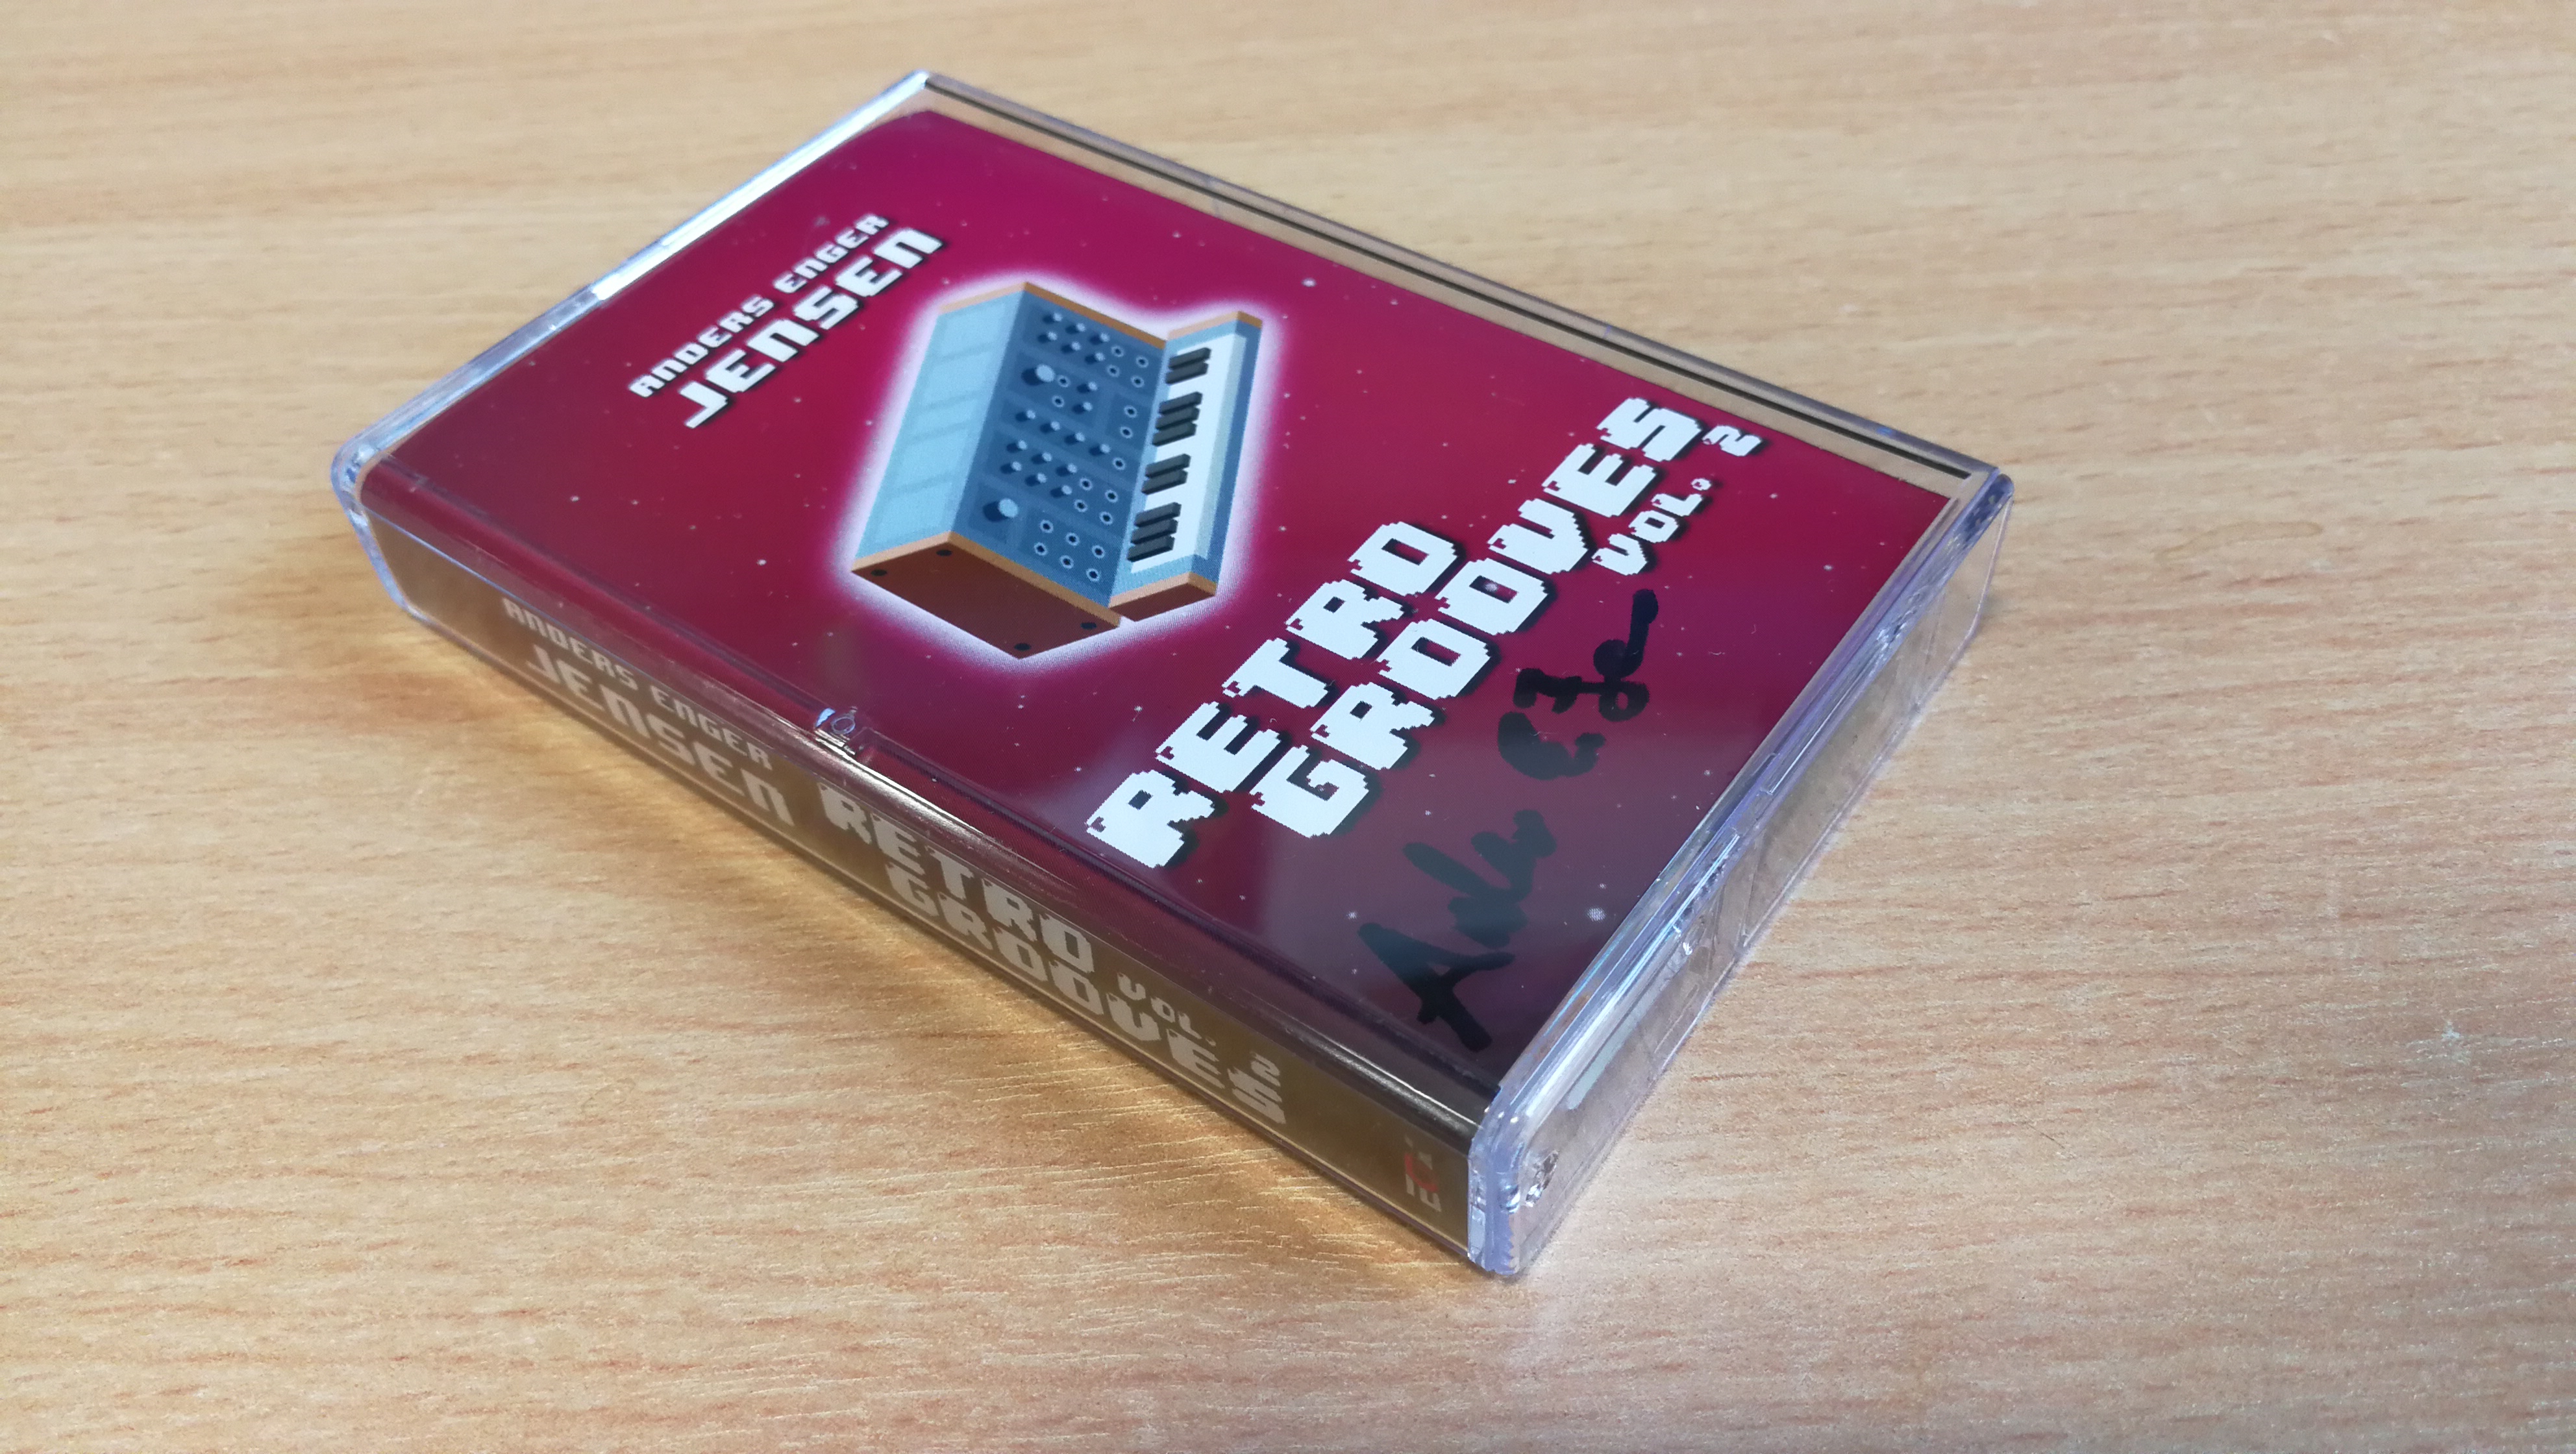
Retro Grooves vol 2

Retro Grooves vol 2 is something I’ve been looking forward to since I first heard Anders was working on it as I loved the first album. As usual it comes on a really awesome professionally presented cassette tape with a lossless digital version included with your purchase. You can also just buy the album digitally if that’s what you prefer.

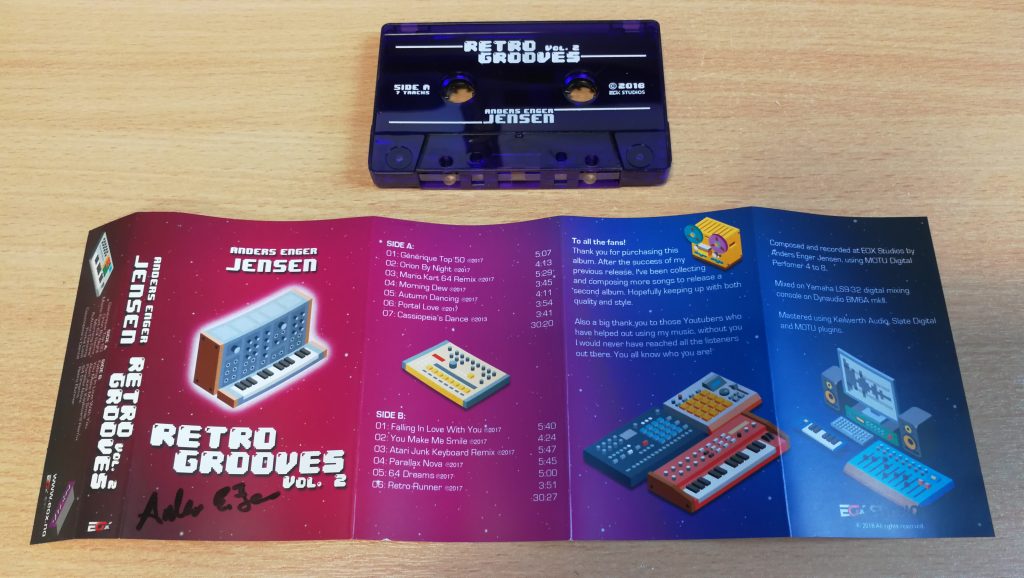
Personally a big part of the pleasure of getting this album is the fact that it comes on an audio cassette. I love opening the cassette, unfolding the inlay, reading about each track and of course popping it in my cassette player to listen to it. It all adds to the experience whilst not being able to skip tracks encourages listening to the entire album instead of skipping through to find instant gratification.

Verdict

I’d say it was a little more mainstream than vol 1 as there aren’t as many chip tunes but if you liked the first album then you will no doubt like this too. I really enjoyed all the tracks except for the MarioKart 64 Remix where I found the Mario samples to be a little annoying. But who knows, maybe it will grow on me in time! Some of the tracks will be instantly recognisable if you watch ‘The 8-Bit Guy‘ on YouTube whilst others will take you straight back to the 80’s with riffs that wouldn’t be out of place in an episode of Miami Vice. Definitely recommended anyway and I personally can’t wait for vol 3!

If you would like to get hold of a copy for yourself than head on over to EOX Studios website.

Retro Grooves vol 2

Cassette tape with folding inlay


Retro Grooves vol 2

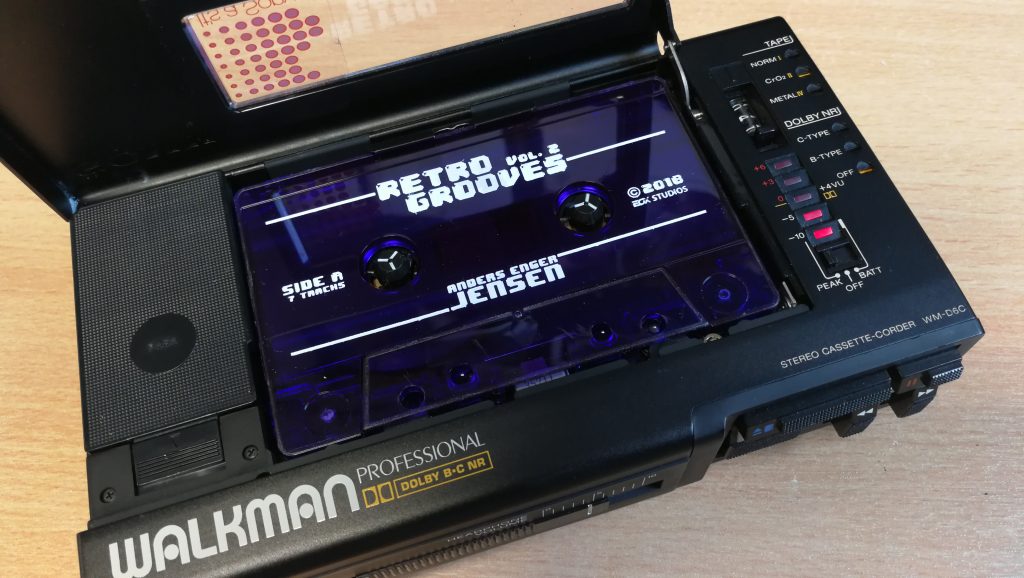
Retro Grooves vol 2 playing in my Sony WM-D6C Walkman