


Boogie Board LCD Slate/Tablet
A couple of years ago I bought a cool looking gadget called a Boogie Board from Firebox. Intention was to attach it to the fridge-freezer and use it as a paperless notepad for shopping lists, reminders and so on. It has performed that job flawlessly until a week ago when it suddenly refused to erase the contents of the screen. To cut a long story short, the battery was flat and without any power the e-ink display (similar to the original Kindle) couldn’t be erased. The device is sold with a NON-REPLACEABLE 3V battery and is supposed to last for 50,000 screen wipes before losing charge. I’ve had the thing for not much longer than 2 years and even if it had been used and wiped every single day that would be less than 800 wipes, a figure massively short of the touted 50K. I’ve probably erased it once or twice a week so probably erased it 250-300 times, tops!!! When you consider that is cost me £30 and they expect me to throw it in the bin and get another one you can imagine I was not too pleased!
So, being a tinkerer and having nothing to lose if things went wrong I decided to open it up and see if there was anything I could do to salvage it. Turns out it is fitted with a normal 3v Lithium CR2032 Button Cell with the only complication being that it is soldered onto the small PCB inside. The good news is these can be purchased off eBay for a few pounds, complete with the solder tags – a much better prospect than throwing a perfectly good product in the bin and spending £30 to replace it! Incidentally, I did try my local Maplins but they don’t stock this type of battery..
I thought I’d share my exploits in case it can help anyone else in a similar situation.

Prising the cover off with a screwdriver
First off, you need to remove the thick top strip (the bit that houses the erase button). There are no screws, it appears to just clip into place by means of four studs spaced across the width of the board. I was able to carefully prise this strip off using a very thin precision flat-head screwdriver, just be careful not to push the screwdriver in too far as you may damage the components inside.
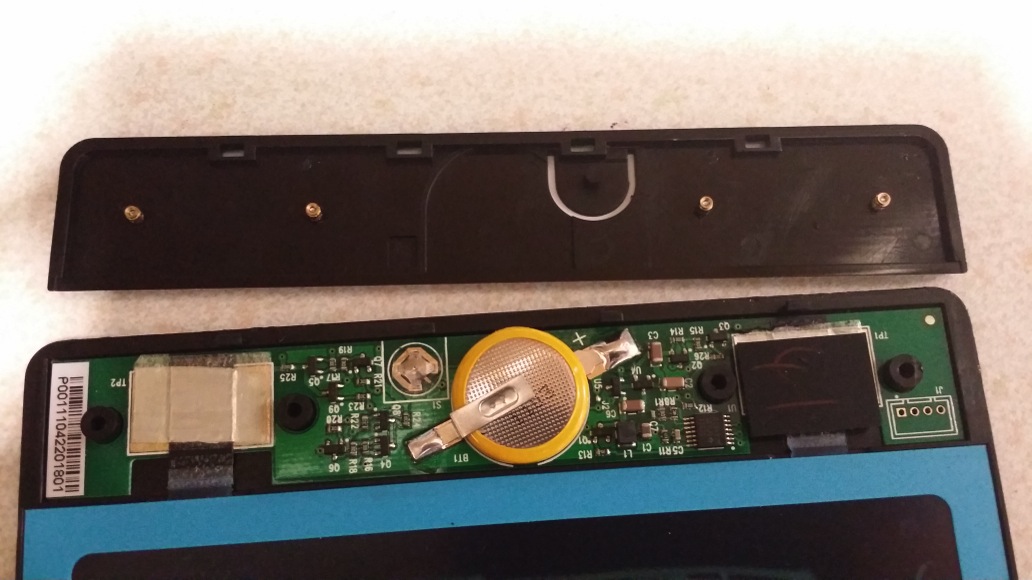
Boogie Board with cover removed
Once it is off you will be able to see the old battery in the centre, soldered to the PCB by means of two ‘tags’. You will need to de-solder the old battery to make way for the new one. Be careful though, I was a little ham-fisted and accidentally pulled away some of the solder pad on one side – luckily enough remained to allow me to continue.

Old battery removed
Here’s the PCB with the old battery removed.

Replacement 3V CR2032 Battery
Here’s the replacement battery, complete with tags. You need to make sure you observe the polarity of the tags when you solder it back onto the PCB otherwise it may not work.

New battery fitted
Once the battery is soldered back on, check the erase function now works by depressing the little silver switch to the top left of the battery. You can then replace the cover strip by simply pressing it back into place and you’ll have a fully working Boogie Board once more!
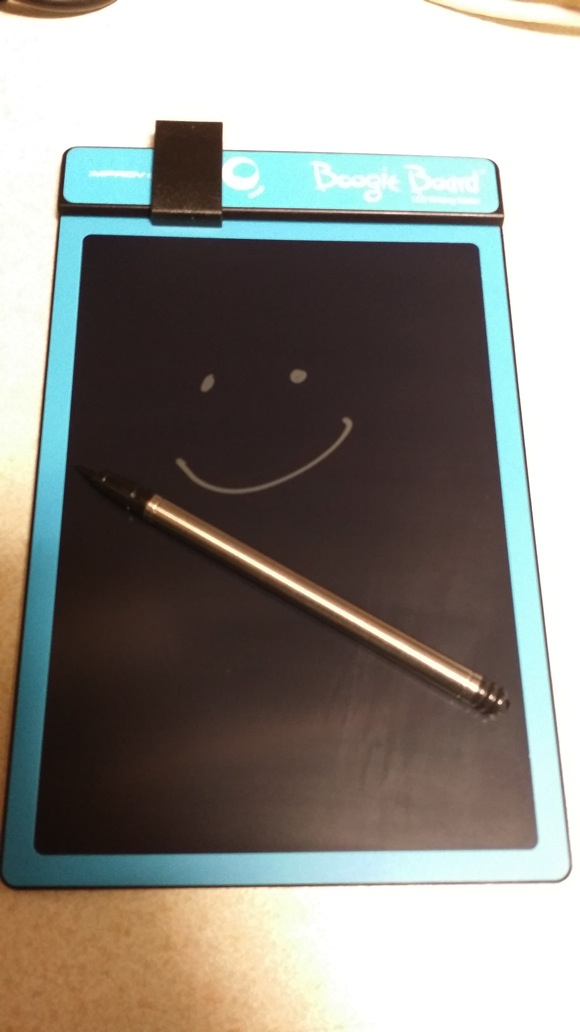
My fixed Boogie Board
Discover more from Lyonsden Blog
Subscribe to get the latest posts sent to your email.