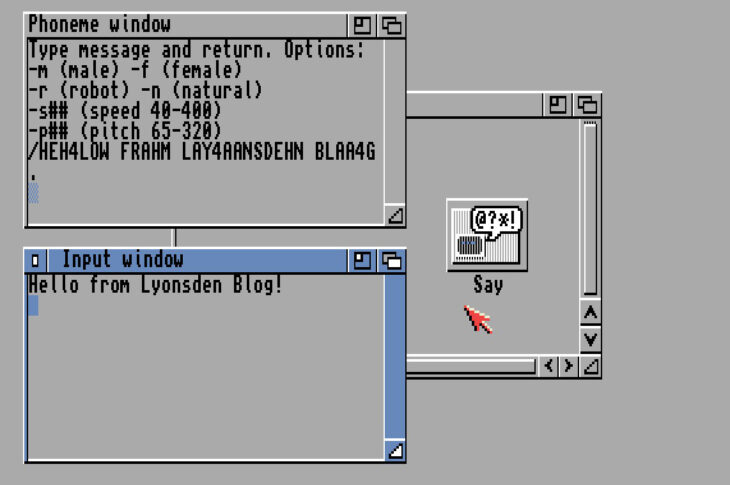
I remember having an awful lot of fun with the speech synthesiser (called ‘Say’) on my Amiga 500 back in the day. As a teenager I would spend far too much time getting it to utter all sorts of obscenities and disparaging remarks to anyone within earshot. So imagine my disappointment a few days ago when I tried to revisit that memory on my Amiga 1200 and discovered the Say program was nowhere to be found!
Turns out that Commodore, in their infinite wisdom, killed off Say back in 1992 with the release of Workbench 3. As my A1200 is running the very latest Workbench 3.2.1. it simply wasn’t included and hasn’t been for a great many years.
I couldn’t leave it there though, I really wanted Say on my Amiga and wasn’t going to settle until I made it happen. Thankfully the fix turned out to be pretty simple, provided you can lay your hands on an old Workbench floppy disk that is! Luckily I have loads of old workbench disks going back to version 1.2 so finding the files wasn’t too difficult..
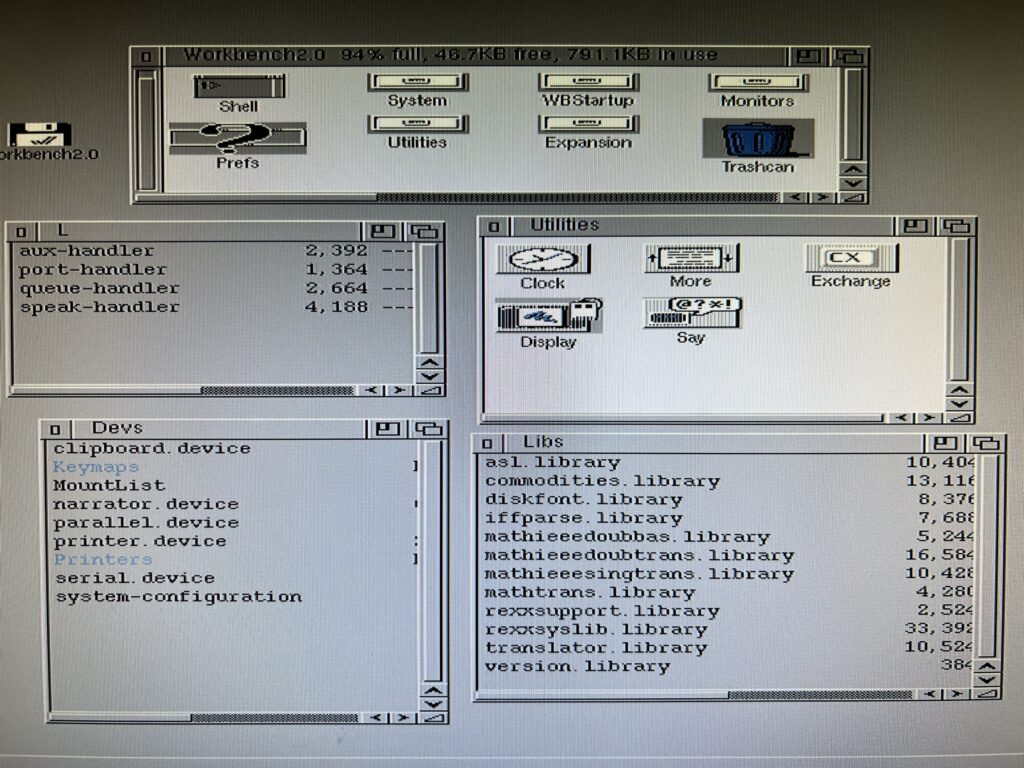
The first and most obvious thing to grab is the Say program itself. This can be found in the Utilities drawer on a Workbench 2 disk. Once you’ve found it copy it to the Utilities drawer on your Workbench 3 machine. Now you may be tempted to run it at this point and have it say something infantile like ‘I like boobies’ but you will be disappointed. There are some missing pieces of the puzzle we need to find before it will work.

Everything you need to get Say working on a Workbench 2.0 disk.
There are three additional files that are required to restore the Amiga’s voice (which I found through trial and error with the help of good old SnoopDOS). The files we need are:- ‘narrator.device’, ‘translator.library’ and ‘speak-handler’ and thankfully all of these files can be found on that very same Workbench 2.0 floppy disk.
Now I realise not everyone has a bunch of Workbench disks to hand so I have gathered the files together and made them available for you below. This LHA archive contains all the necessary files you need so just download it and unpack it on your Amiga.
Where to put the files?
The main ‘Say’ program itself can technically go anywhere but traditionally it was found in the Utilities drawer so I recommend copying it there. The other three files must go in the correct drawers otherwise the program won’t work. You can use any method you like to copy the files into place. I prefer using Directory Opus but you can use the Shell or Workbench too, whatever is easiest for you.
Here’s a quick rundown of where to put the files (and by extension, where to find them too, if you are using your own floppy to source them):
narrator.device -> Devs:
translator.library -> Libs:
speak-handler -> L:
Once all four files have been copied across you can finally run Say and have some fun. Enjoy!
Amiga Speech Sample
Below is a sample of speech from my Amiga 1200 just for fun. I think the quality of the speech is pretty good but in case your ears aren’t tuned to 80’s speech technology here’s a transcript of what it is saying:
“Hello there and a warm welcome from the Lyonsden Blog Amiga 1200 computer. I really hope you enjoyed this article about getting my voice back!”


Love it! Brings back fond memories. Will give your files a go.
Have fun!
Did you know you can get the last version of the Say app from a Workbench 2.1 beta disk? It even has a GUI!
https://eab.abime.net/showthread.php?t=78650
I didn’t know that, no. Nice find, I’ll give it a go 👍🏻