Lyonsden Blog

Tag - microsd

SDBox Review

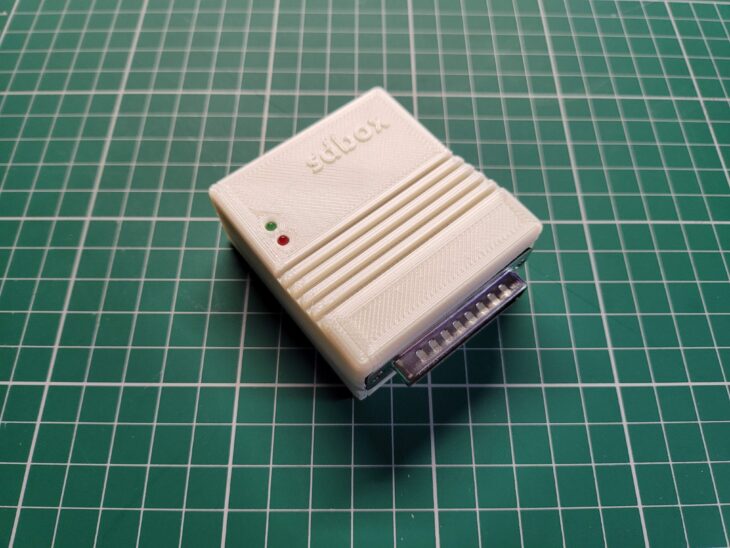
SDBox

If there was one take-away from my recent clean install of AmigaOS3.2 it was that transferring files across to a stock Amiga system is a real pain in the arse. Sure you can use CrossDOS, but that is limited to 720K files. If you have a CD drive then you can burn stuff to a CD which raises the limit considerably to 650mb. However this is pretty time consuming and my drive refuses to read CDRW discs so means I have to use CDR’s which is downright wasteful.

Enter the SDBox – a little expansion for any Amiga system that enables it to read and write data to MicroSD Cards. A few years ago I wrote a post about adding an SD Card to an A500, however that relied on having a Vampire accelerator card. This device just requires a parallel port to operate, something which all Amiga’s have.

What’s Included

The SDBox is actually a public domain Amiga community project that you can construct yourself (see here). However due to the inclusion of some surface mount components I chose to buy one ready made from Amigastore.eu. I can normally solder stuff OK but dealing with tiny surface mount components is beyond my skill level.


SDBox

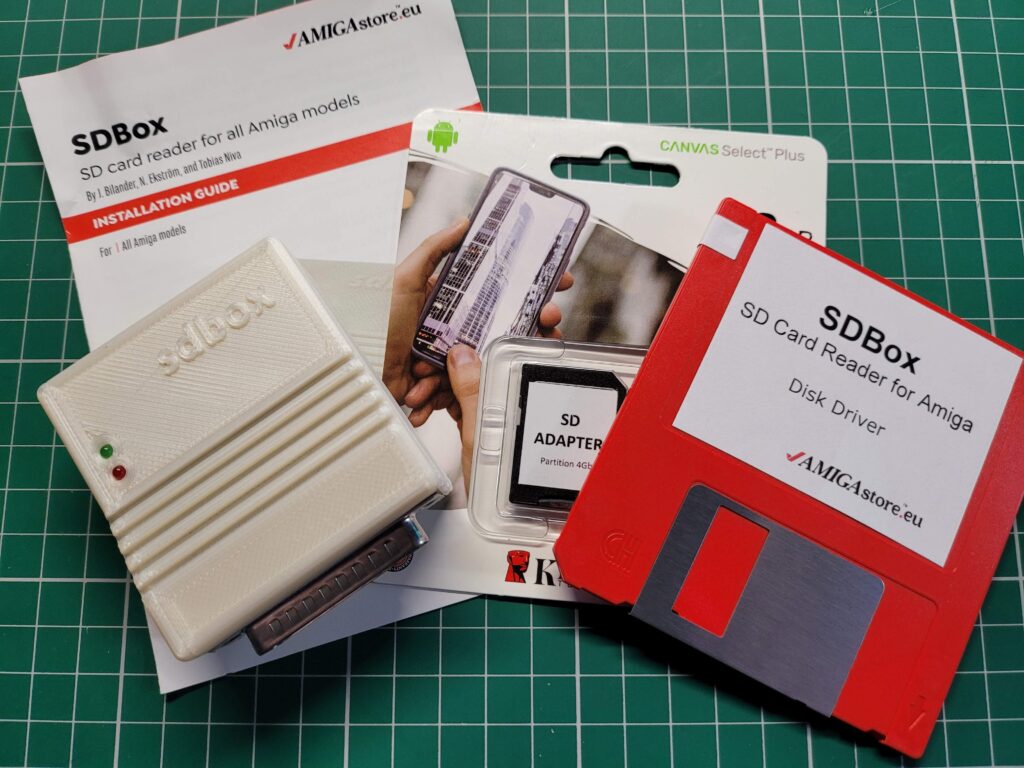
SDBox – package contents.


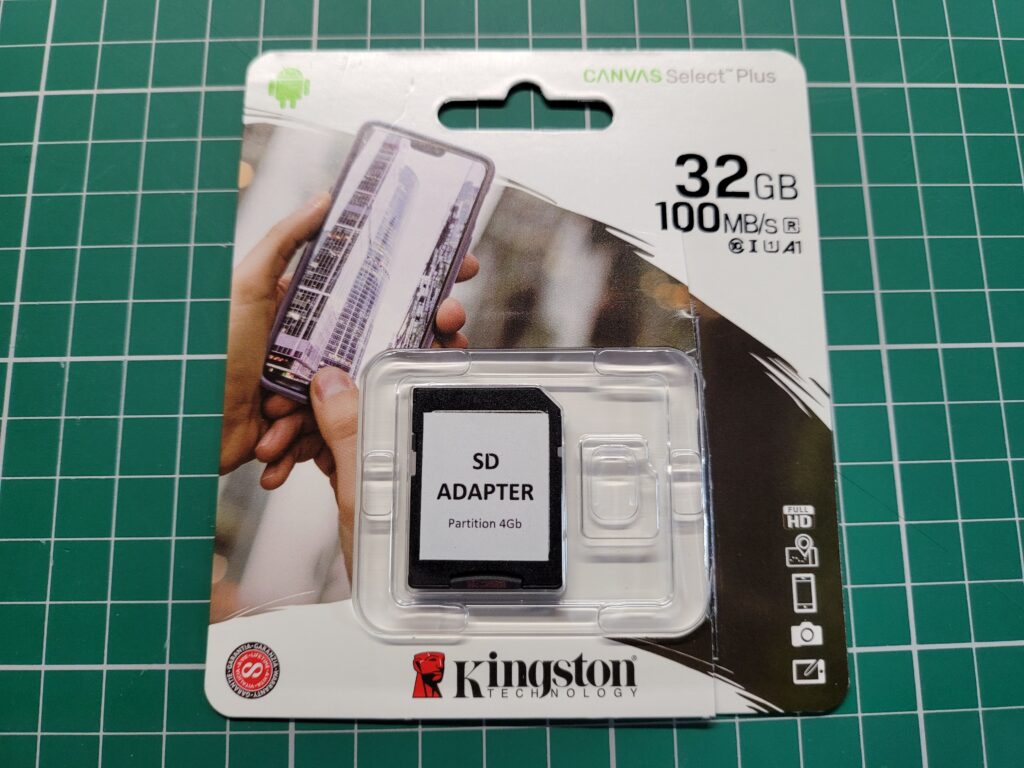
Included in the package was the SDBox device in a nice 3D Printed case, a 4GB MicroSD Card with adapter*, instruction booklet and a 3.5″ floppy containing the software to make it all work. A mini USB cable was an option too but I’ve accumulated dozens of them over the years so didn’t see the point in getting another one.


Connecting the SDBox

With the Amiga turned off the SDBox simply plugs into the parallel port socket round the back. It also requires 5V of power to function which can be provided via a mini USB cable.


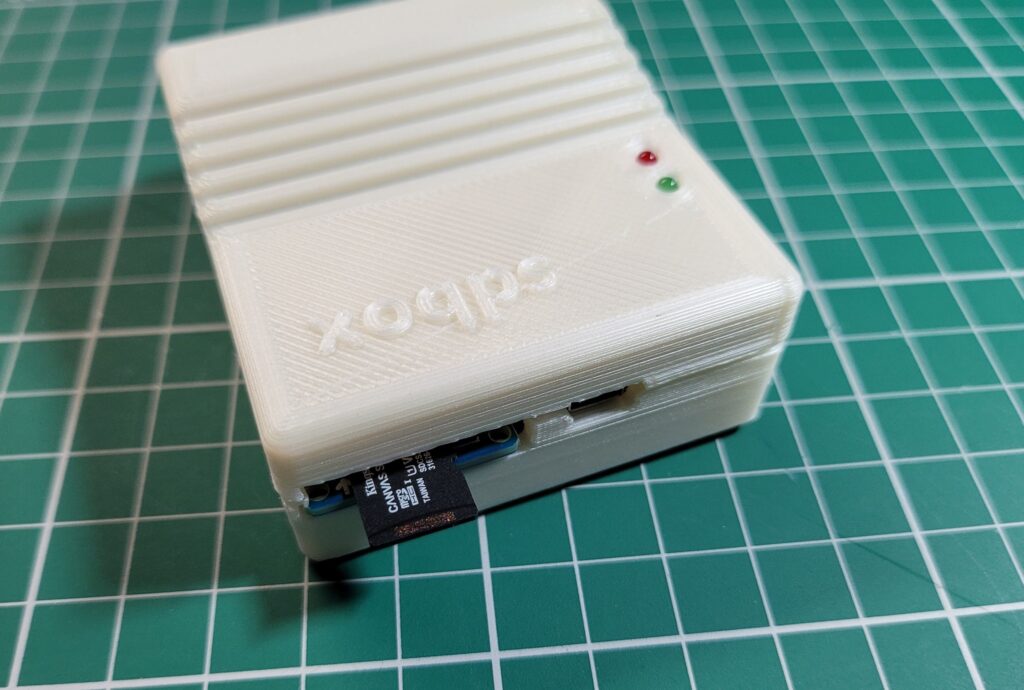
SDBox

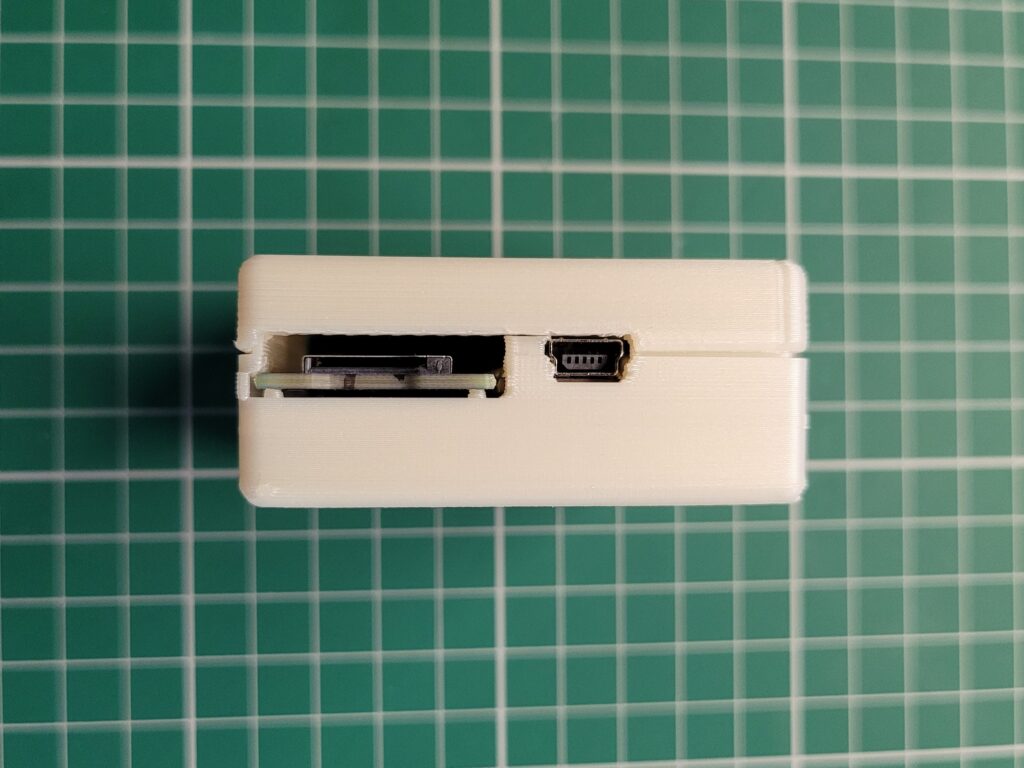
The Micro SD card slot and Mini USB power socket on the back of the SDBox.


I found there was just enough clearance at the side for it to not interfere with my RCA audio plugs but this might not be the case if you have thicker plugs.


SDBox

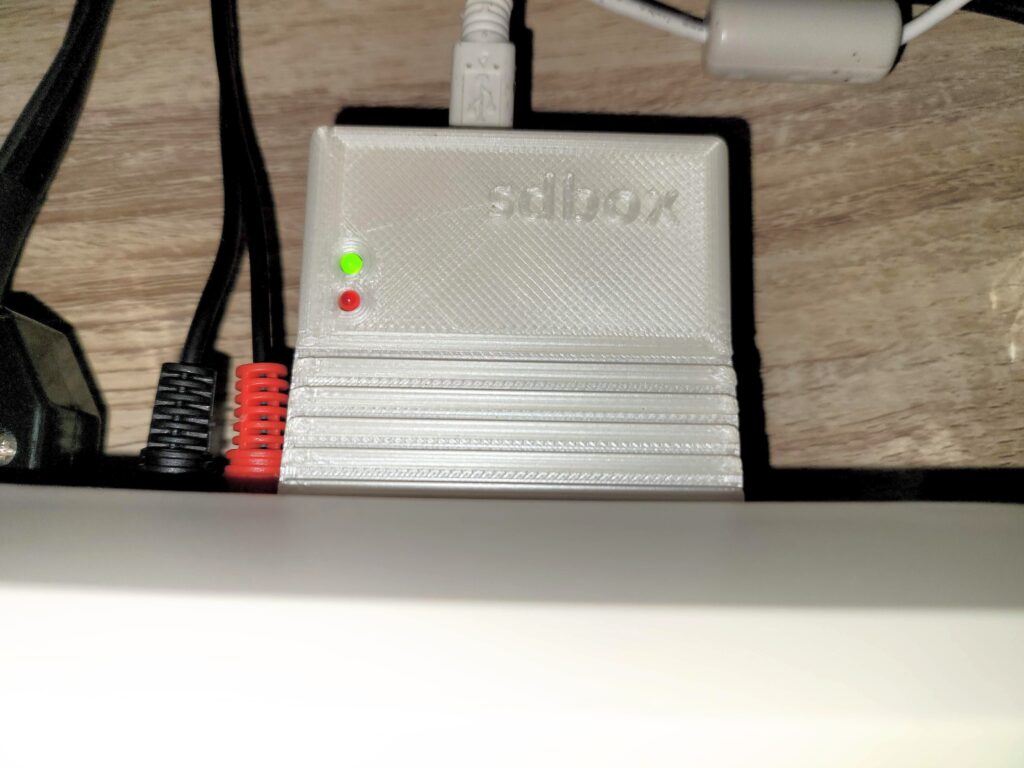
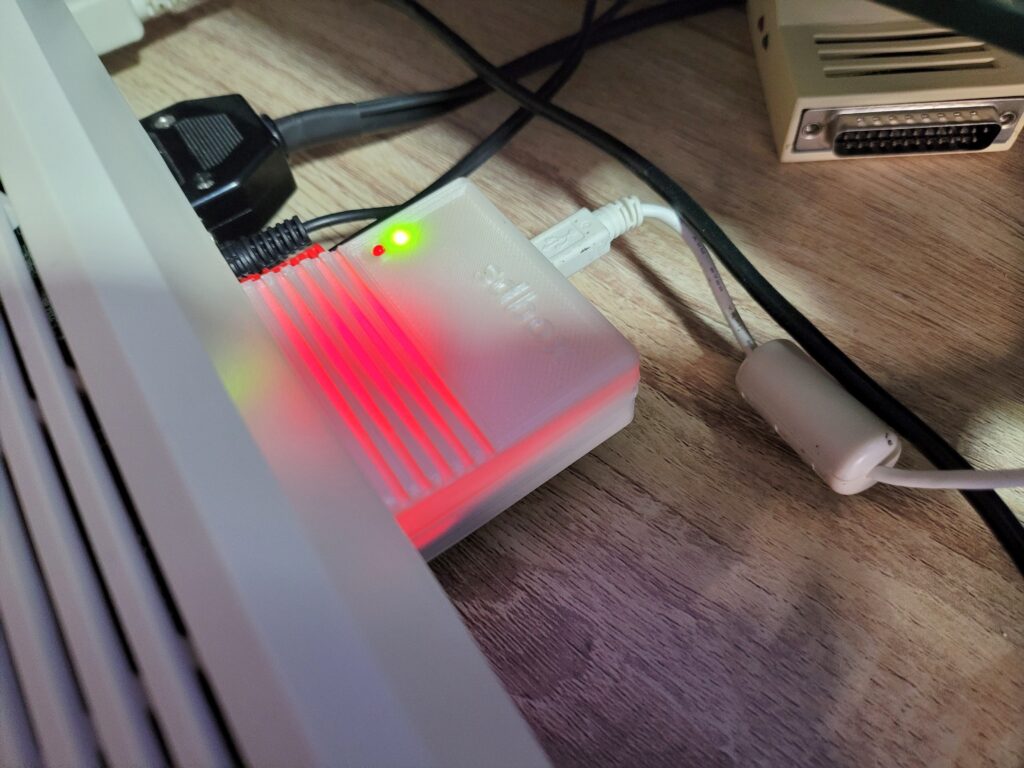
The SDBox plugged into the parallel port.


When powered on the box glows red from inside – presumably this illumination comes from an LED on the Arduino Nano. It’s not quite as noticeable as the photo below would have you believe and it’s not a big deal.


SDBox

Red glow from the Arduino Nano inside.


Installing the Drivers

With the hardware powered on and connected the next task is to pop in the floppy and run the installer to install the driver software.


SDBox

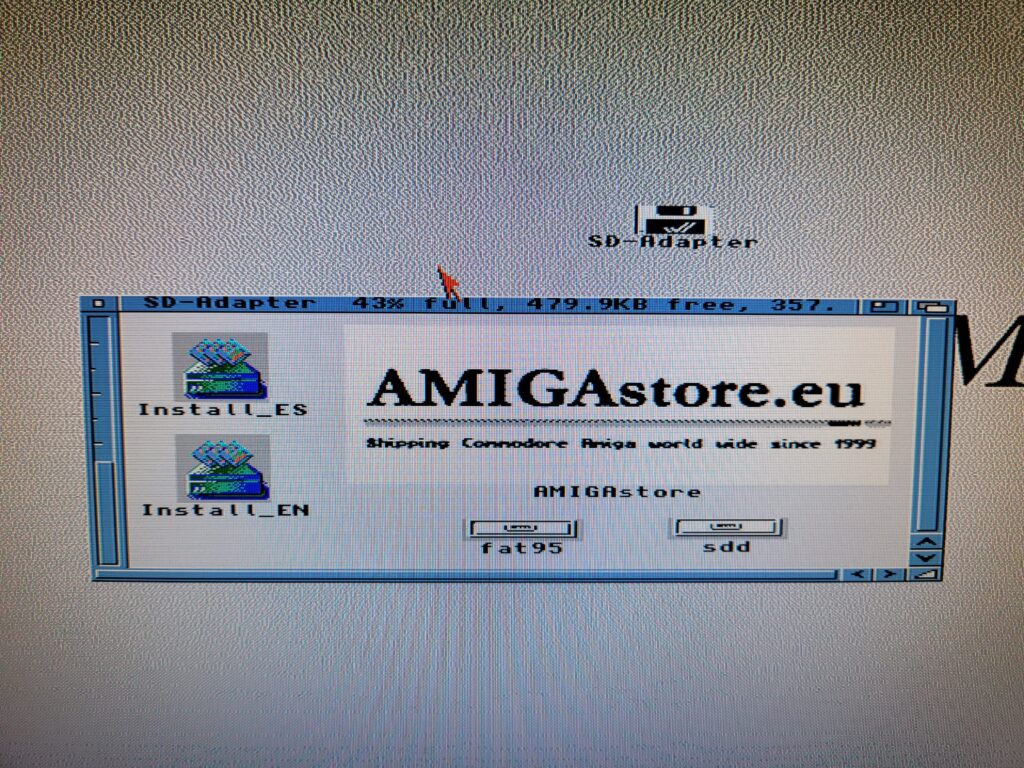
Contents of the floppy disk.


The floppy comes with a handy installer (in both English and Spanish) to copy over and configure everything necessary to use the SDBox.


SDBox

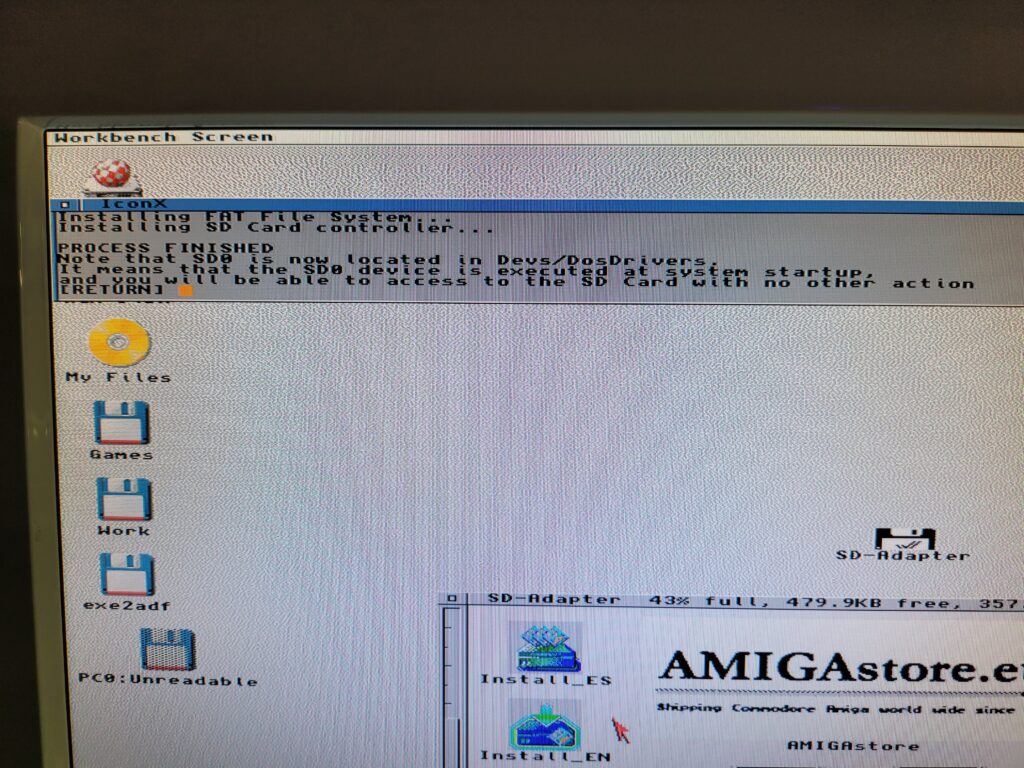
SDBox Installer now finished.


A few moments later a message appears on the screen to inform you that the install is complete and where it has put the SD0 device.


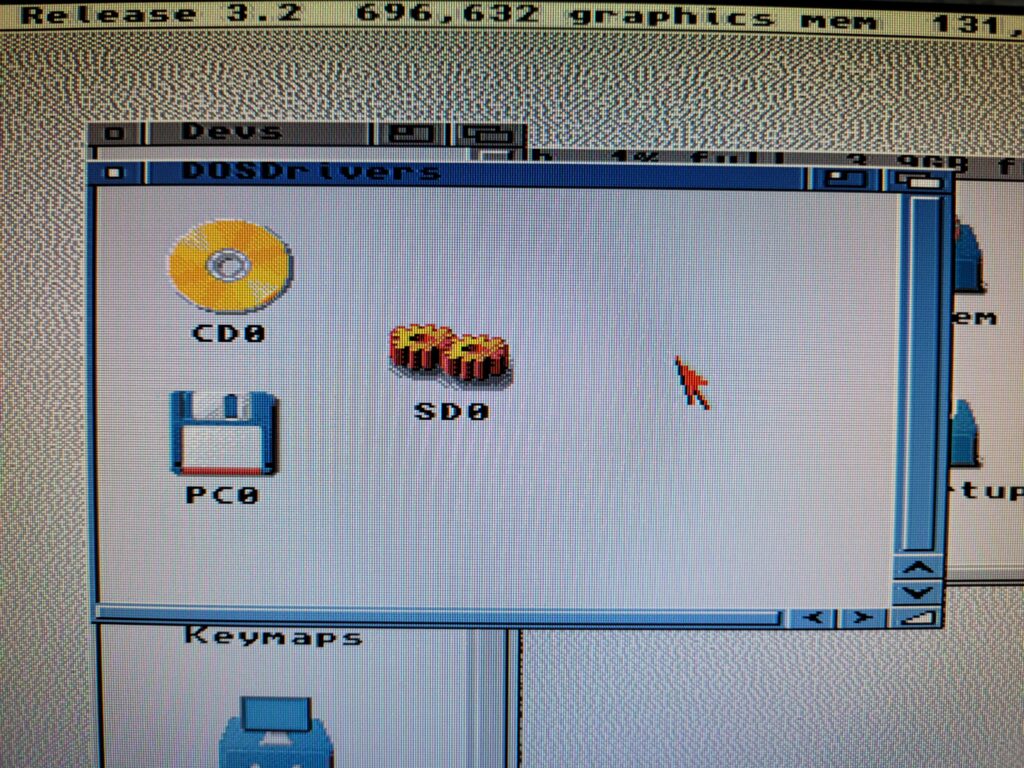
SD0 DOSDriver

This is the SD Device it installs in DEVS/DOSDrivers.


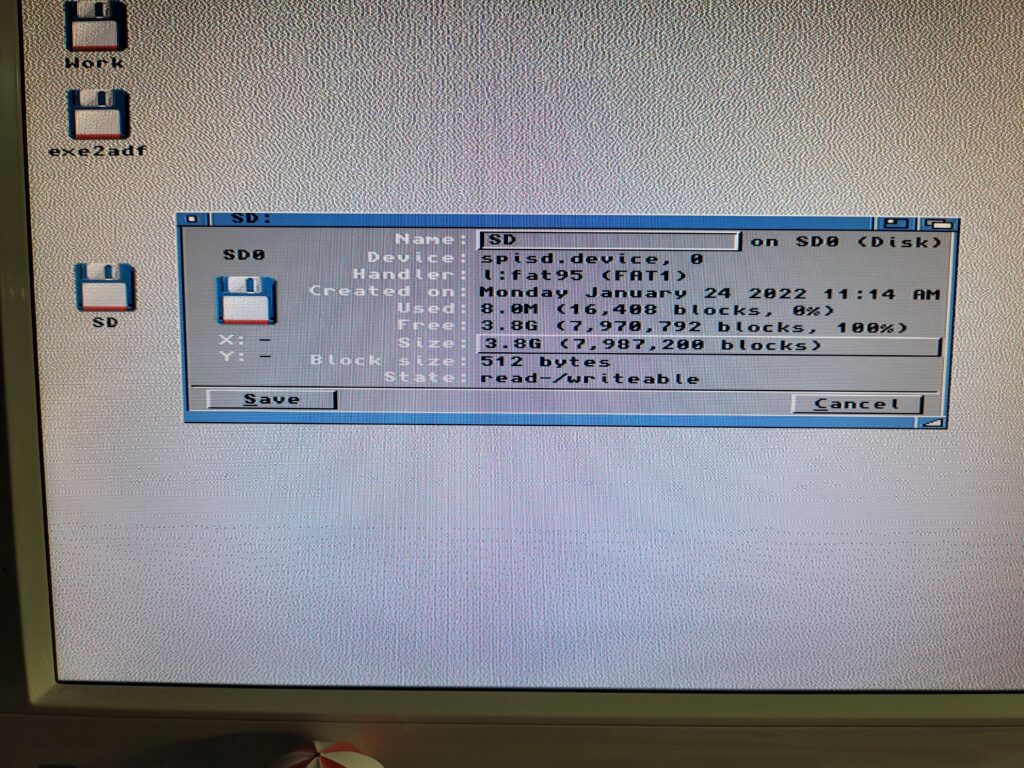
A quick reboot and my SD card was showing up on my Workbench screen, just like any other drive would. I brought up the drive info window for SD0 to confirm it was reading the card properly.


SD0 Information

Icon Information for the SD card.


SD Cards

I chose to get an SD Card with my SDBox but you can use any MicroSD card you may have lying around. The one caveat is the device is only capable of accessing 4GB partitions so if you have a bigger card you must create a 4GB (or smaller)  partition on it for it to work. There’s some info at the end of this post describing how to partition a MicroSD card in Windows if you need it.


SDBox

If you look carefully you can see the packaging has been opened already…


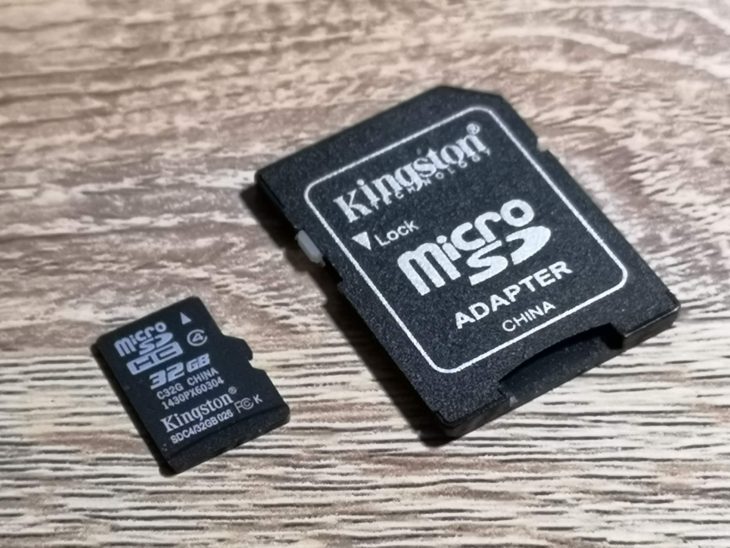
*Clearly AmigaStore.eu were unable to source a 4GB card for me as they actually sent me a 32GB MicroSD card that had been manually partitioned to 4GB.


Using the SDBox

In use the SDBox performed well and exactly as described. It’s not going to set any speed records but given it’s hooked up to a parallel port that’s to be expected. To give an idea of transfer times I copied an 880K ADF file from my RAM Disk to both my internal CompactFlash card and the SDBox. It took about 1 second to transfer to the CF card and 6 seconds to the SDBox. Next I tried a bigger file;  AmiSSL 4.12 which was 5.7MB. It took 6.5 seconds to transfer to my CF card and 39 seconds to complete the transfer via the SDBox. Approximately six times slower but still perfectly acceptable.


SDBox

MicroSD card being inserted in the card slot.


The SDbox doesn’t support swapping thecard whilst the Amiga is running so don’t expect it to update the contents if you do – it’ll just result in an error. It requires a full reboot to refresh the contents of the card but again this is not a great inconvenience.


Fly in the Ointment – Conflict with Indivision AGA Mk3 Flicker Fixer

On a slightly more sour note I did encounter one issue with my unit. Whenever the SDBox was accessed, whether that be reading or writing data, my screen flickered/wobbled around. You can see exactly what I’m on about in the little video clip I recorded below. After testing all sorts of things I narrowed it down to an issue with using interlaced HIGHGFX screenmodes on my Indivision AGA Mk3 flicker-fixer. Normal Amiga screenmodes, including interlaced ones, worked just fine as did non-interlaced HIGHGFX modes (all of these still going through my flicker-fixer).

Naturally Sod’s law meant that my screen was utilising ‘HIGHGFX Super-High Res Laced’ which is why I witnessed the issue from the start. It’s certainly not a deal-breaker – it’s more of an irritation than anything else (especially if you are a bit of a perfectionist). It doesn’t affect the operation of the SDBox and I can certainly live with it – just something to bear in mind for anyone with a similar setup.


I tried many things to get rid of the issue and also contacted the manufacturer of the Indivision card but so far I do not have a solution. If I ever get to the bottom of the issue I’ll update this post.


How to make a 4Gb partition on a larger SD Card.

This is a pretty straightforward task to accomplish in Windows. I used a nice bit of free software called ‘MiniTool Partition Wizard‘ to do the job along with a spare 16GB MicroSD card that I had lying around.


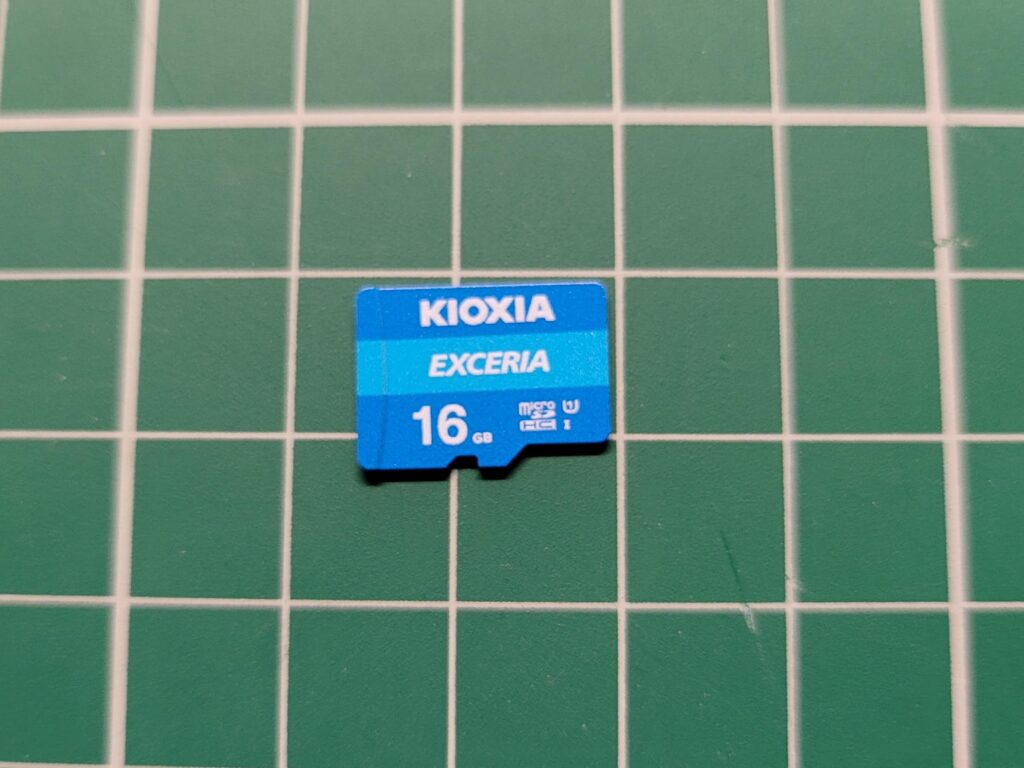
MicroSD Card

A generic 16GB MicroSD card I used for testing.


Basically what you need to do is load up the software and then find your card in the list of drives. They normally show up slightly smaller than the stated capacity. For instance I popped in a 16GB card and it showed as 14.43GB under the list of available drives.

Once you’ve located it simply right-click it and select ‘Delete Volume’ then do the same again but select ‘Create’ to make a new, smaller partition. On the ‘Create New Partition’ screen select ‘FAT’ as the file system (see screenshot below) and it will shrink the size of the partition down to 4GB automatically. Give it a name (this will appear on your Amiga workbench) and then click ‘OK’ and then ‘Apply’ to make all these changes happen.


Partition Wizard

Partition Wizard – New Partition Settings


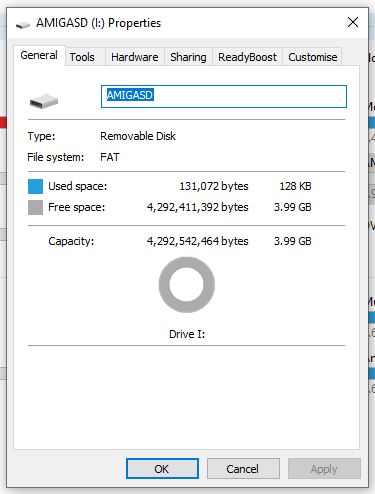
Now if you right-click the SD card and select ‘Properties’ in Windows you should get the screen below showing that the card is now recognised as being 4GB and formatted with the FAT file system.


Windows 10 Drive properties

Checking the size/format of the card in Windows.


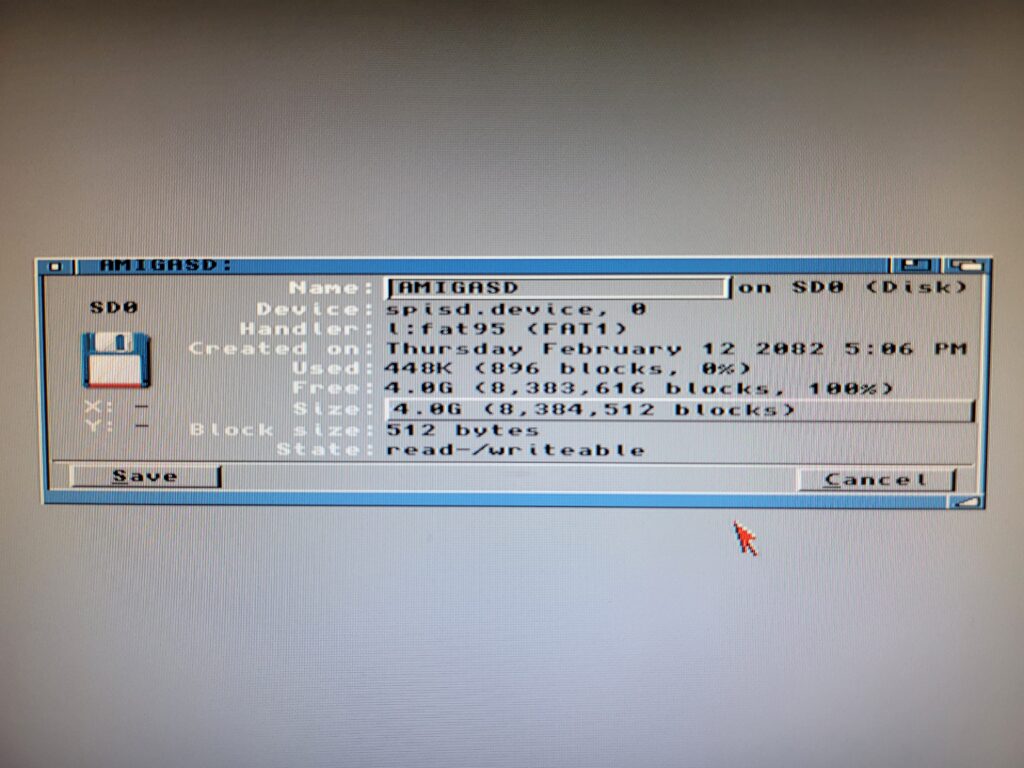
Back over to the Amiga – pop the card into the SDBox and boot up your Amiga. You should now see the card appear on Workbench with the name you gave it in Windows. You can go to ‘Icon’ > ‘Information’ to bring up a similar properties screen to check it’s all setup correctly.


SDBox

SD Card properties displayed on Workbench


And that’s all there is to re-partitioning an SD card to work with the SDBox. Enjoy!


Pi1541 Disk Drive

Pi1541 Disk Drive

Little bit of background

I’ve been aware of the Pi1541 disk drive or Pi1541 ‘hats’ for several months now. This project was undertaken to create a ‘cycle exact’ emulation of a Commodore 1541 floppy drive using a cheap Raspberry Pi computer. The idea behind it is that by fully emulating the 6502 CPU and 6522 VIA chips you would have a 100% 1541 compatible ‘disk drive’ capable of reading any disk image, even ones with custom fast loaders and exotic copy protection schemes. By contrast the ubiquitous SD2IEC devices don’t emulate either chips but rather simulate some disk protocols and use some clever code to try to blag some fast loaders into working. This is why special versions of some games need to be created to work on SD2IEC devices.

In a nutshell a Pi1541 Disk Drive utilises a Raspberry Pi B computer running custom software along with a daughter board or ‘hat’ which sits on top and connects to the GPIPO pins of the Pi. This ‘hat’ adds the standard IEC connectors and handles the stuff that is required for the Pi to successfully communicate with the attached Commodore computer. The project was created by a guy called Steve White and if you want to know the technical ins and outs then check out his website here.

Pi1541 Disk Drives can be picked up very cheaply on eBay. In fact the whole point of the project was to create something better than an SD2IEC but much cheaper than FPGA based offerings like the 1541 Ultimate II+. Of course another option is to build your own but I have neither the time nor the inclination to attempt that. The other big turn off with both of these options is that quite frankly, the devices are just plain ugly. Which brings me neatly on to my latest acquisition…

Pi1541 Disk Drive

As I mentioned earlier I’ve been aware of this project for some time, but for the reasons I mentioned above it just didn’t appeal to me. Until that is, I saw that Tim Harris who runs sharewareplus was offering a super slick, plug and play, cased Pi1541 Disk Drive complete with OLED screen. I just had to have one and after several months of waiting it has finally arrived!
 

Pi1541 Disk Drive

Pi1541 Disk Drive


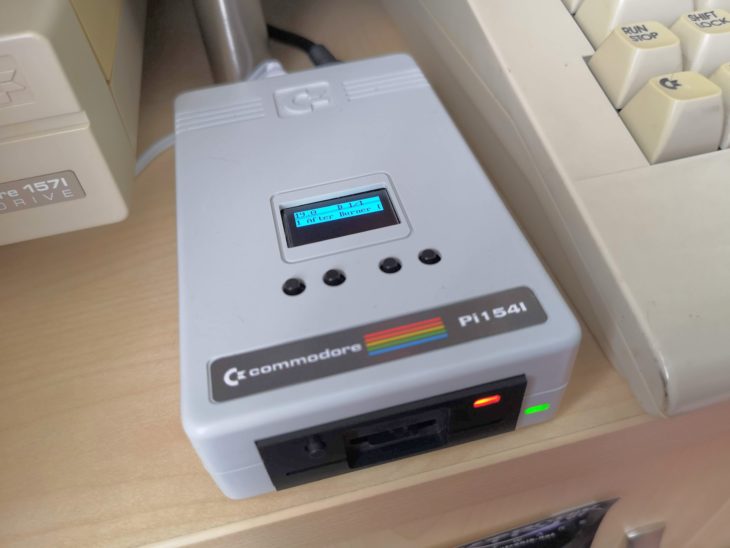
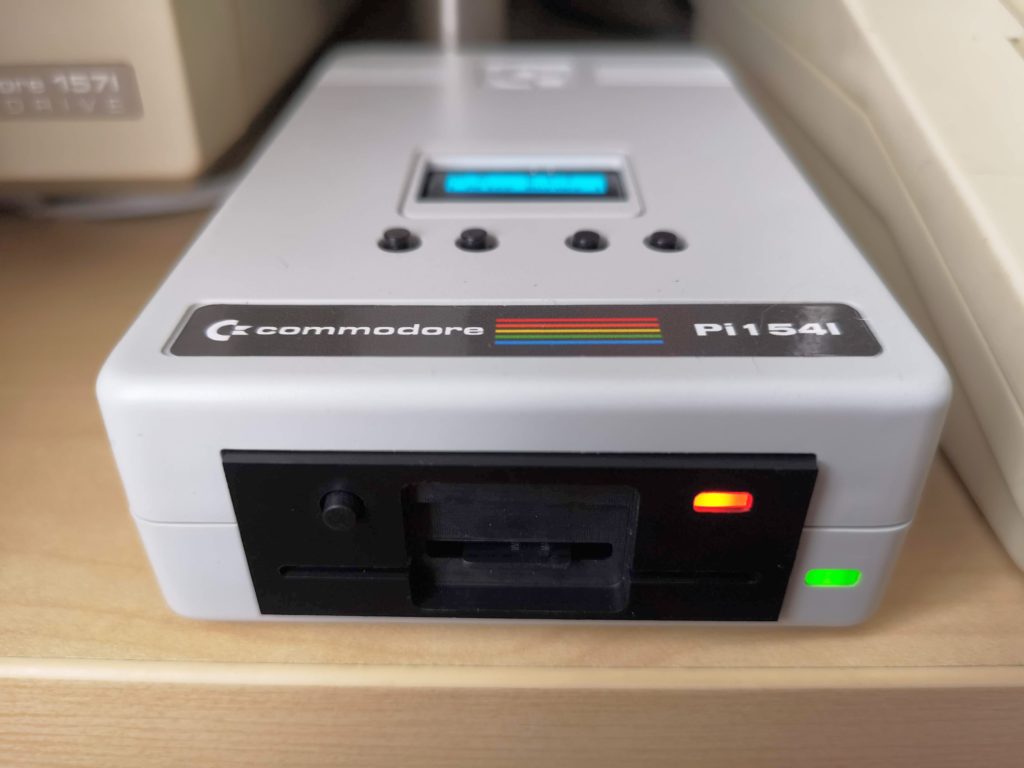
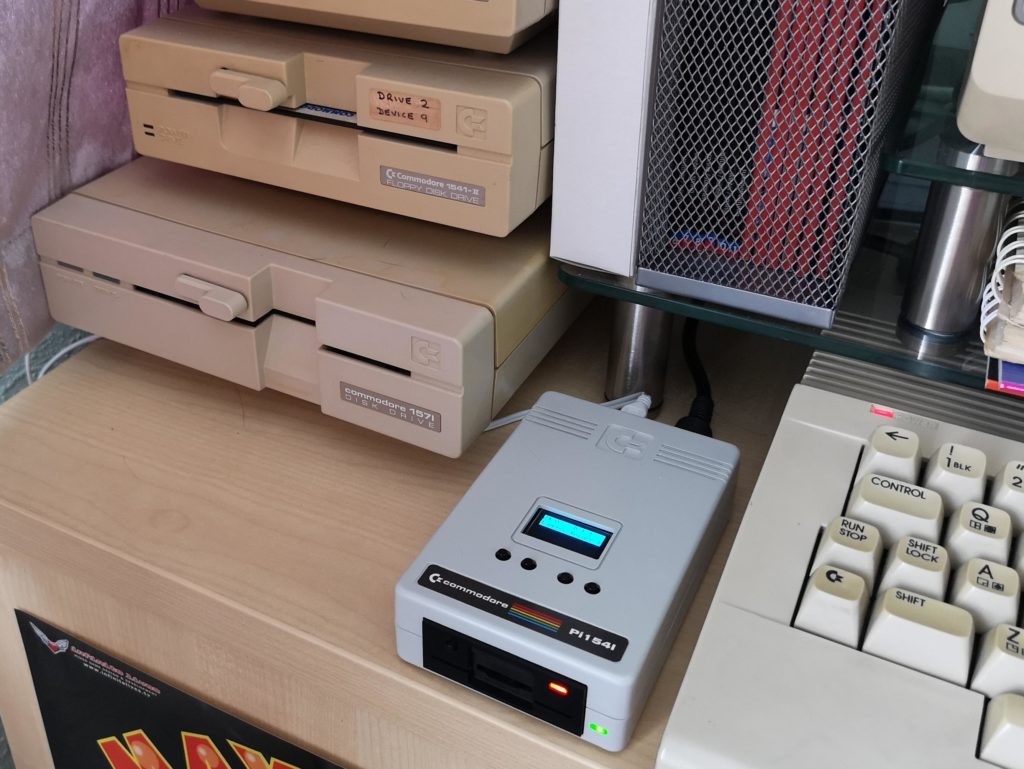
This really is a thing of beauty, modelled closely on the first generation Commodore 1541 floppy drive. There’s so many little design cues taken from the original case. The Micro SD card slot encased in black plastic housing complete with scaled disk ‘slot’.  The red drive activity LED and green power LED. A chicken logo moulded into the casing top. The Commodore label complete with rainbow colours and a 1541 logo where the trailing 1 is actually a letter I. It even has a built in speaker to emulate the drive sounds of the original drive!

It came supplied with a Micro USB cable (to power it) and a single instruction sheet explaining what the ports are for and what the buttons do. Disappointingly it did not include a Micro SD card, IEC cable or even further instructions.


This slideshow requires JavaScript.


The casing is approximately 5″ (13cm) deep, 3″ (7.5cm) wide and 1.25″ (3cm) tall. On the front there is a MicroSD card slot, a green power LED, a red drive activity LED and a ‘Select/Start’ switch. On the rear there is a power on/off switch, Micro USB power socket and a standard CBM IEC drive connector socket.


This slideshow requires JavaScript.


On the top of the device is a lovely 1″ x 0.5″ (128×64 resolution) blue OLED screen along with four navigation buttons. When the device is first turned on it operates in SD2IEC mode which allows you to browse through the contents of your Micro SD card and select an image (or multiple images) to use. In this mode all 4 top buttons have a function: ‘move up’, ‘move down’, ‘exit folder’ and ‘add disk’ (for multi-disk games). In this mode the button on the front acts as a ‘select’ button.

Once an image has been selected on the device and a ‘load “*”,8,1’ (or similar drive command) is issued from the computer, it switches to full 1541 emulation mode. In this mode only the first 2 buttons on the top have a function: ‘previous disk’ and ‘next disk’. In this mode the front button acts as ‘start’.


Setting it up

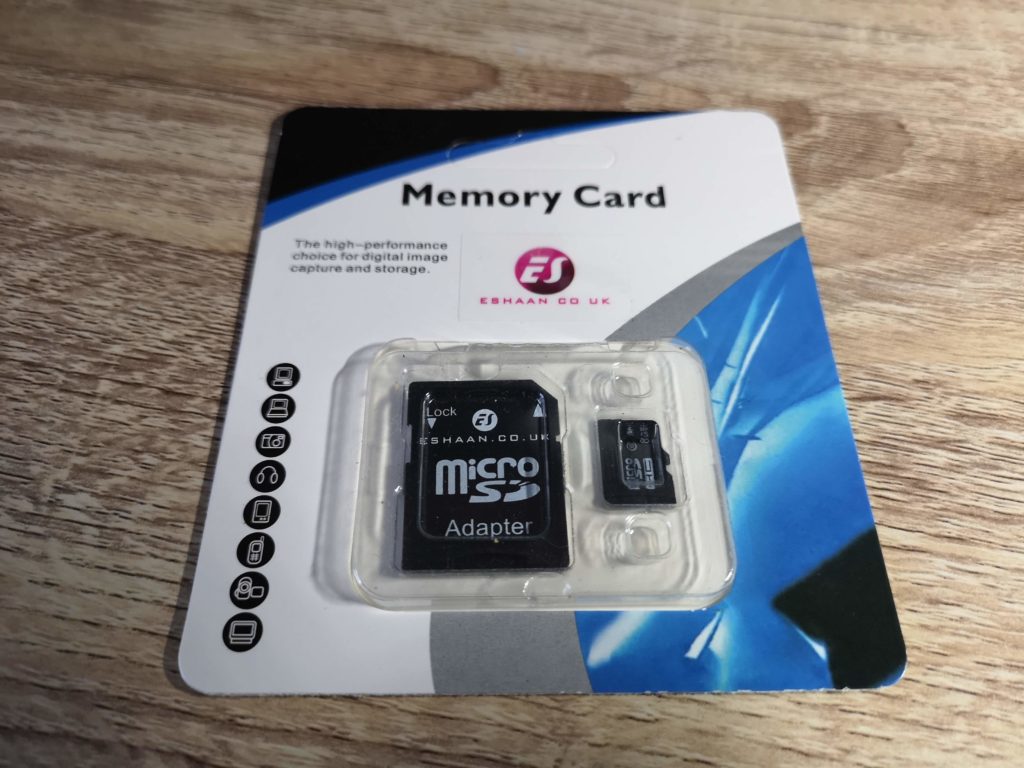
I was advised that this Pi1541 Disk Drive worked best if you use an 8GB Micro SD card so I just picked up this [amazon_textlink asin=’B00OO1489A’ text=’generic card’ template=’ProductLink’ store=’lyonsden-21′ marketplace=’UK’ link_id=’2cfd7b41-fa87-463d-8193-fa88db2fcc6e’] off Amazon and it has worked perfectly.


Pi1541 Disk Drive

8GB Micro SD Card


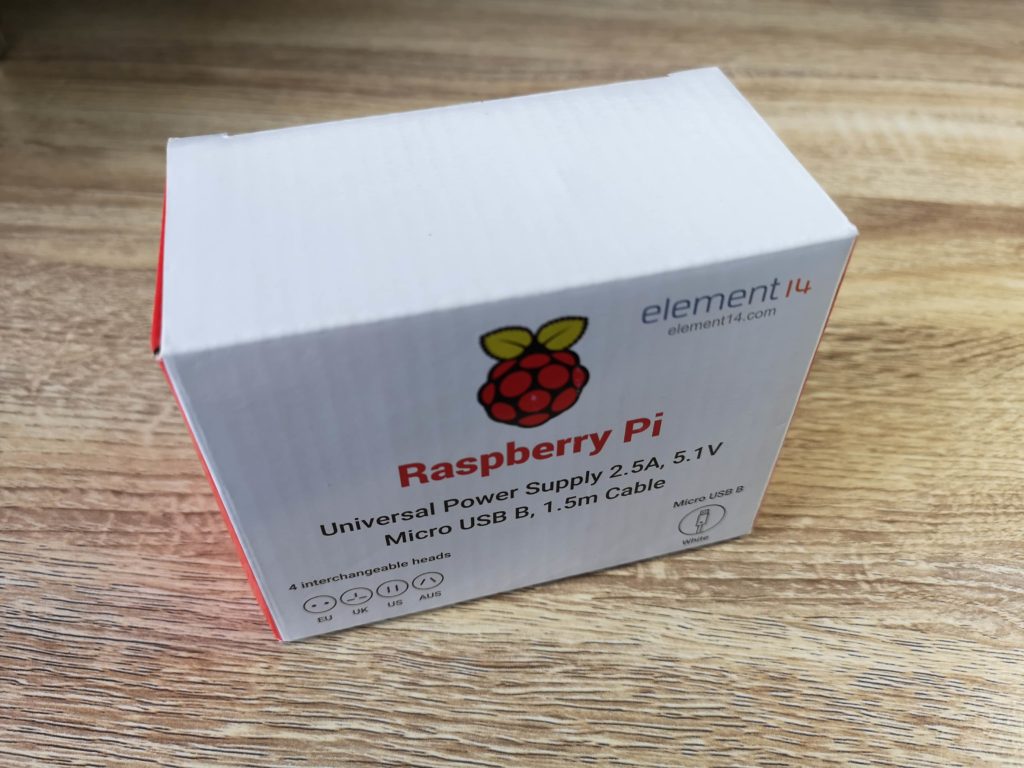
Unfortunately I did not fare so well with the Micro USB power supply. The device came with a Micro USB A-B cable so I plugged it into a free port on my power strip extension lead. The drive powered up and appeared to work fine until I tried to actually load a directory listing or a program and then it would just lock up and my C64 would freeze. Thinking the device was faulty, I got in touch with the guy selling it and was advised this was likely a power issue. The Pi needs a beefy PSU, especially when it’s also powering an additional board plus OLED screen. Long story short I tried several USB chargers from phones and such like but none of them fixed the problem. In the end I ordered an official [amazon_textlink asin=’B01CO1ELT8′ text=’Raspberry Pi PSU’ template=’ProductLink’ store=’lyonsden-21′ marketplace=’UK’ link_id=’5f2082ed-bb79-4d0e-a527-0c957f374c26′] off Amazon and the problem just went away. Moral of the story? Don’t be a cheapskate and buy a decent power supply for it!


Pi1541 Disk Drive

Official Raspberry Pi PSU


In use

Once I’d properly sorted out the Micro SD card and PSU the Pi1541 Disk Drive worked perfectly. It loaded everything I threw at it including .G64 disk images that that won’t work on my SD2IEC device (but do work on my 1541 Ultimate II+). I also tried it with turbo load cartridges such as the Epyx Fastload and Action Replay VI’s Fastload. It worked perfectly and as you would expect loading times were significantly reduced using either cart. It is claimed to be 100% compatible with Jiffy DOS too but at the moment I don’t have the hardware to put that to the test.

There are a few other benefits that the Pi1541 Disk Drive has over it’s rivals. It doesn’t hijack the cassette port or user port for power like an SD2IEC device would as it’s powered independently from the host computer. Nor does it occupy the cartridge slot like a 1541 Ultimate does. It also works with my VIC20, something even the mighty 1541 Ultimate cannot do. I believe it will also work with both the Commodore 16 and plus 4 but I own neither of these machines so cannot confirm this.

There are a few niggles, the first being that the Micro SD card doesn’t have the ‘push to eject’ feature. When you want to remove it there is only 2mm of card protruding to grip onto and I found it difficult to pull out without using some needle-nose pliers.

My other gripe is that it didn’t come with an IEC cable, memory card or PSU. For a device costing £150 I would have expected these to be included and it would have saved me messing around trying to get a working power supply.

The sound produced is a little disappointing too. More a series of beep’s than a true emulation of drive noises (sounds a bit like what you get with a Gotek that’s had a sound mod fitted). My 1541 Ultimate II+ does a much better job of reproducing drive sounds.

Verdict

This is a terrific product and probably the best and most accurate emulation of the Commodore 1541 drive there has been to date. It also looks the part and will work across almost the entire range of 8-bit Commodore machines.


Pi1541 Disk Drive

Pi1541 Disk Drive next to 1541-II’s and a 1571


It’s definitely a luxury peripheral in my eyes though rather than an essential purchase. In this particular form it cannot compete on price with either the SD2IEC or the 1541 Ultimate II+ cartridge (which has many more features). However if you were to choose one of the more modest Pi1541’s you can find on eBay then it trounces the Ultimate on price and beats the SD2IEC on compatibility for a similar cost.

Another thing to bear in mind is that although, strictly speaking, SD2IEC devices are nowhere near as compatible as the Pi1541, they ARE ubiquitous. Because of this most games have been tweaked to make them work within the confines of the system out of necessity, so in most cases compatibility is often a moot point.

Bottom line is this; if you want the most compatible and by far the best looking modern 1541 Drive implementation there is and you don’t mind paying a premium for it, then you won’t find a better product than this. You can pick these up from from Tim over at SharewarePlus.

How to Format an SD Card for Amiga to PC File Transfer

SD Card Amiga PC Transfer

Introduction

The whole benefit, to me at least, of having an SD card reader on my Amiga 500 is to allow me to transfer files to and from a PC. In order to do this the SD card needs to be formatted in such a way as to be readable by both systems. Turns out it’s not too hard to do. This post will show you exactly how to achieve this and also serve as a reminder for myself in the future when I inevitably forget what I did!


Stuff You’ll Need

I used a MicroSD card for this task but the process would be the same for a regular full-size SD card too. I have personally got this working with a 32GB card and more recently with a 200GB MicroSD card! Please note that I have a Vampire Card in my Amiga (which has a MicroSD card slot) and use Apollo OS (Coffin R34 – Amiga OS 3.9). This solution is based on that scenario. If you want to find out more about my Vampire upgrade please read about it here and adding an SD card reader here.


By the way, this should work with most SD cards you may have lying around. I used to link directly to the card I bought but time stays still for no man and it is no longer available. However this 32GB MicroSD Card is almost identical.


Formatting the card on a PC

First things first – the card MUST be formatted on the PC, not the Amiga. The format we need to use is FAT32 as this is easily readable on the Amiga whilst still being compatible with the PC. The main disadvantage with FAT32 is it has a 4GB file size limit but this should never really be an issue with the Amiga as most of the files we will be dealing with are only a few MB in size.

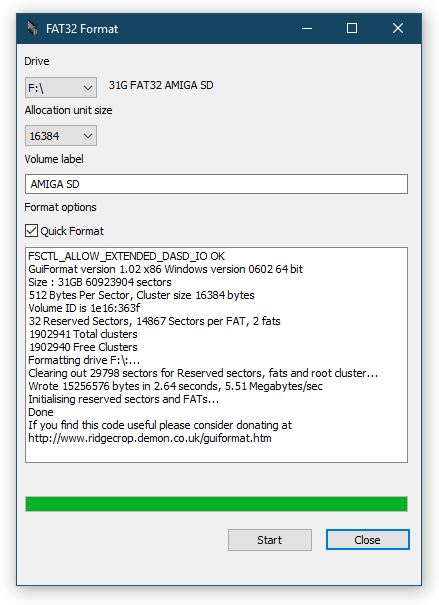
I’m using Windows 10 which annoyingly doesn’t have a native FAT32 format option (only NTFS or exFAT). After searching around I settled on this free 3rd party FAT32Format app to get the job done. If you already have some FAT32 formatting software then by all means go ahead and use that. If not then this one is free and very simple to use, you don’t even need to install it, just run the executable.

  • Run the .exe file you just downloaded and make absolutely sure that the drive letter under ‘Drive’ matches that of your SD card.
  • Leave the ‘Allocation unit size’ at the default setting.
  • Give your card a name under the ‘Volume label’ heading but keep it short. No more than 11 characters and avoid using any symbols. In the example below I called mine ‘AMIGA SD’.
  • Ensure ‘Quick format’ is ticked (otherwise it’ll take forever) and then click ‘start’.
  • When the format warning box pops up click on ‘OK’.


SD Card Amiga PC Transfer

View after the card has been formatted


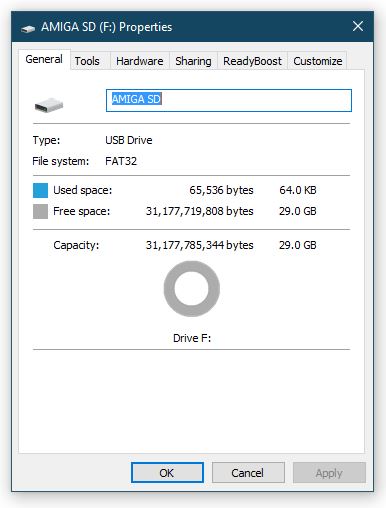
A few moments later you should have a nicely formatted FAT32 SD card! As you can see from the image below it has been correctly formatted as FAT32 and shows approx 29GB of free space. It’s perfectly normal to lose some space when formatting disks so don’t worry that it doesn’t exactly match the capacity of your card.


SD Card Amiga PC Transfer

SD card properties viewed in Windows after formatting.

Configuring the Amiga side of things

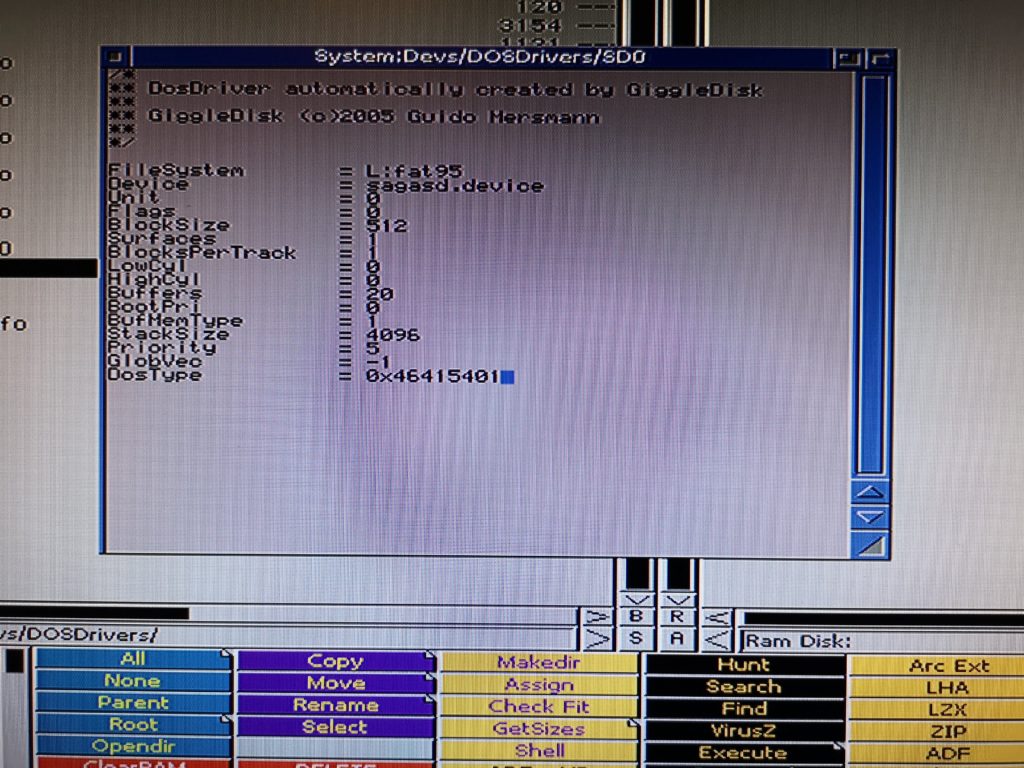
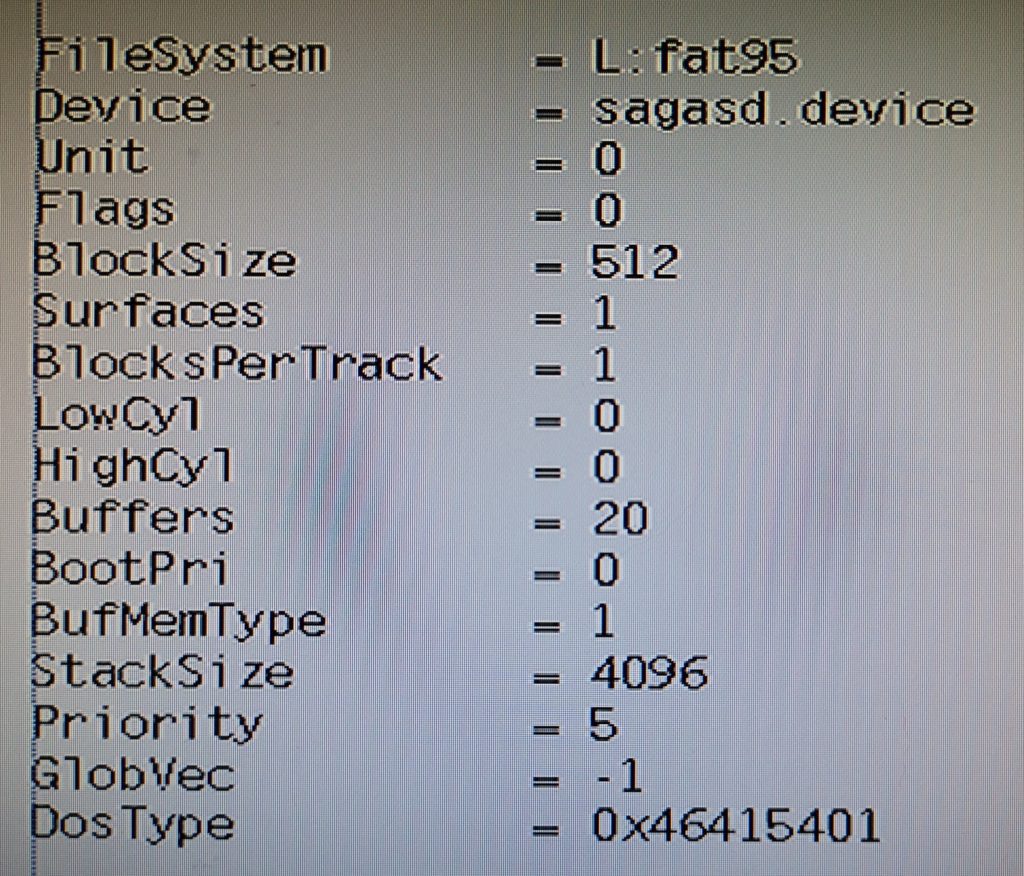
Now it’s time to take the SD card over to your Amiga for the next stage of the process. This is going to involve editing a DOSDriver on the Amiga with the parameters needed to successfully read and write to your SD card. Unless you’ve been messing around with SD Cards already there won’t be an SD0 device in your Amiga’s SYSTEM:DEVS/DOSDrivers directory. Fear not though because you can finding it lurking in the STORAGE directory (SYSTEM:Storage/DOSDrivers) waiting to be put to good use. Find the SD0 file and open it in your editor of choice, for me that’s the one built into Directory Opus. Edit the file so that the contents look exactly like the one in the image below:


SD Card Amiga PC Transfer

SD0 DOSDriver File contents (shown in Directory Opus Editor)


SD Card Amiga PC Transfer

Slightly clearer copy of the config (pasted into Wordworth to make it clearer to read)


Save your changes to SD0 and close the editor. This next part is particularly crucial otherwise, despite all your efforts thus far, the card will still be unreadable. You need to move the file OUT of SYSTEM:Storage/DOSDrivers and place it INTO the actual SYSTEM:DEVS/DOSDrivers directory. Doing this will force the Amiga to read the config on boot and enable it to recognise an SD card when present. You can do this in a number of different ways but again my preferred method is Directory Opus.


SD0 DOSDriver File Content

Edited SD0 correctly placed in DOSDrivers Directory


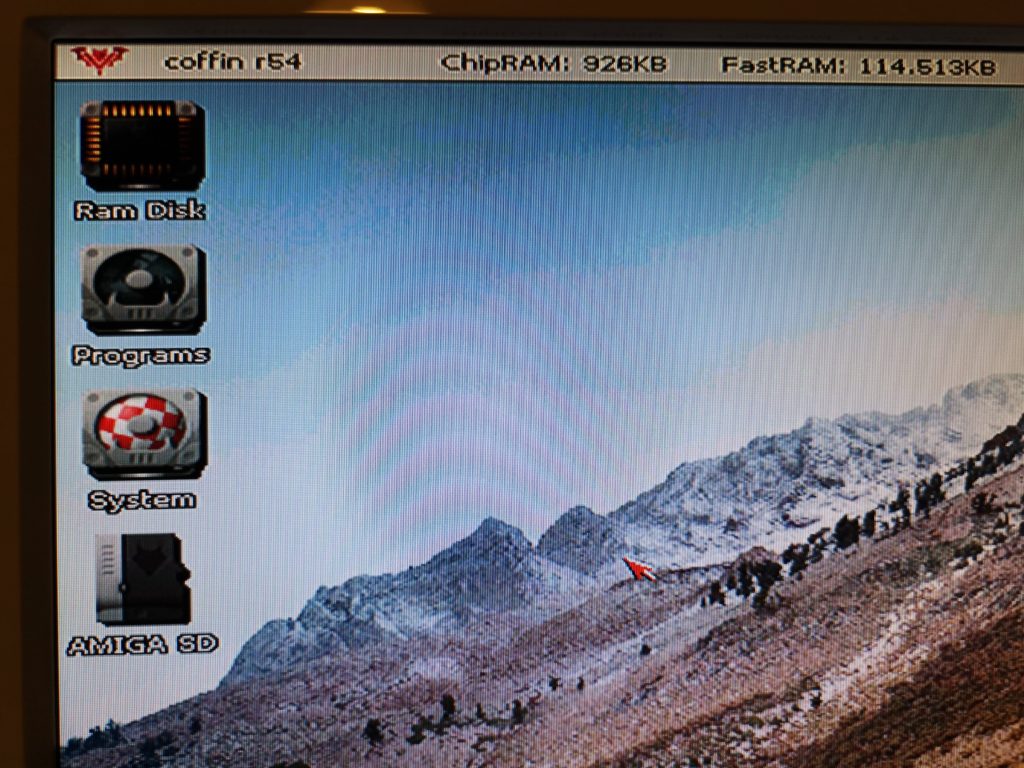
Once you’ve done this, assuming the card is already inserted, reboot your Amiga (CTRL-A-A) and when Workbench has loaded back up you should see a lovely SD card icon on the screen similar to the one below.


SD Card Amiga PC Transfer

SD0 Icon on Workbench


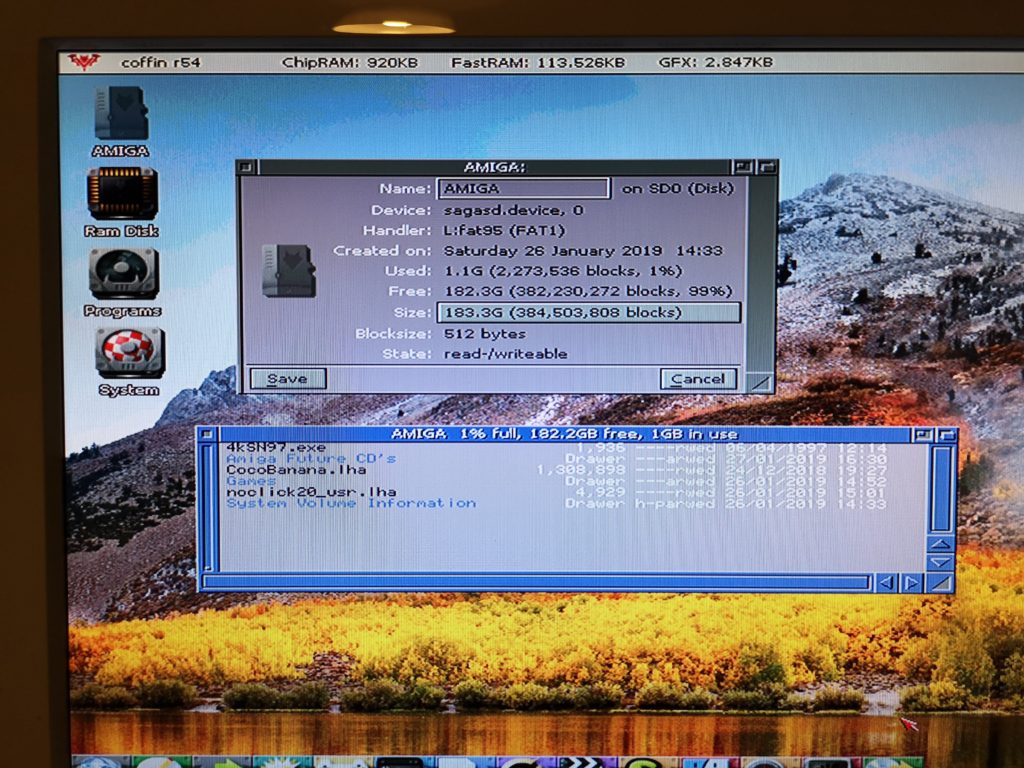
The next image shows a 200GB MicroSD card working and you can see the Amiga recognising the card capacity as 183.3G.


SD Card Amiga PC Transfer

200GB MicroSD card working on the Amiga. 183.3GB of space 🙂


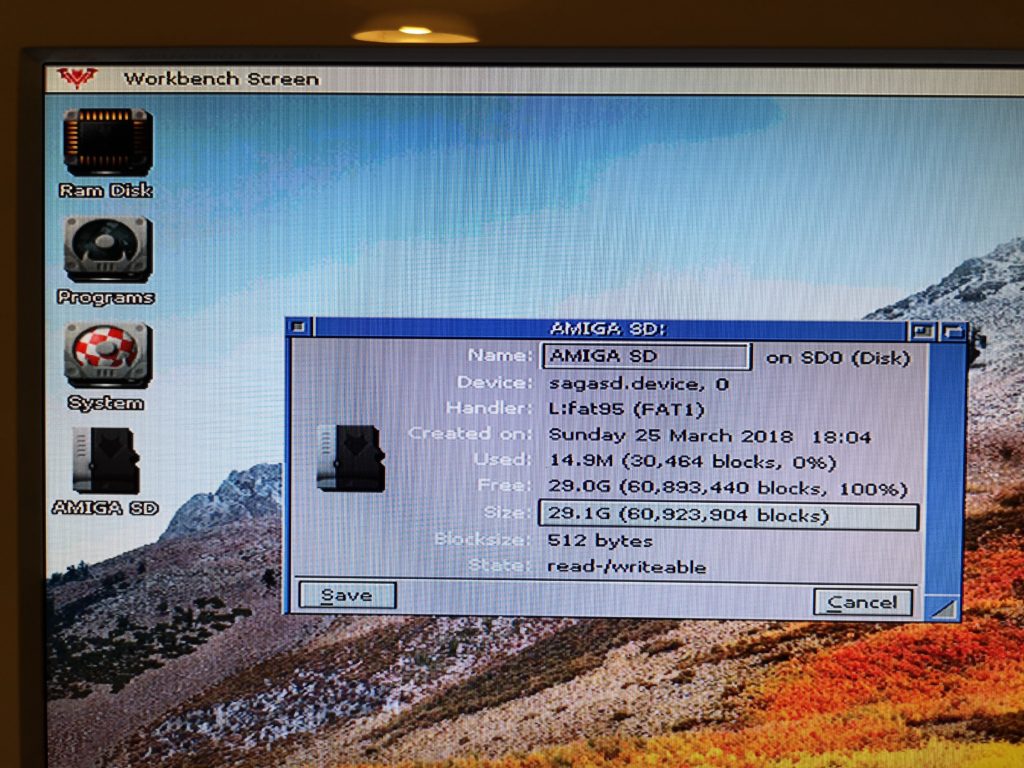
Here’s a regular 32GB card working recognised as being 29.1GB capacity. If you remember from earlier on that reported size is pretty much the same as how Windows saw it.


SD Card Amiga PC Transfer

32GB MicroSD card working on the Amiga. 29.1GB of space.


SD Card Amiga <-> PC Usage


I find my Amiga/PC formatted SD card incredibly useful, not only for transferring files between systems but also for storing CD’s on. I don’t have a CD drive on my Amiga but I do on my PC. Any Amiga CD’s I get, such as the Amiga Future Coverdisks, I simply copy into a folder on the card and they’re instantly available on the Amiga. The 200GB card is particularly useful for this purpose as it can potentially hold nearly 300 CD’s plus all my other stuff.


I have noticed that SD cards work a little differently on the Amiga. You can’t just insert one and expect it to appear in Workbench. The card needs to be present in the card slot before you boot your Amiga up. Likewise, if you remove it, it will still show the icon on your Workbench. For these reasons I’d recommend always inserting the card whilst your Amiga is off and not removing the card until you’ve shut down your Amiga just to be safe. If I ever find a way around this I’ll update this post.


Anyway, I hope this post proves useful for a few people, I know it took me quite a lot of stumbling around before I brought all the parts of the puzzle together!


Adding an SD Card Slot and HDMI port to an Amiga 500

SD Card Slot and HDMI port to an Amiga 500

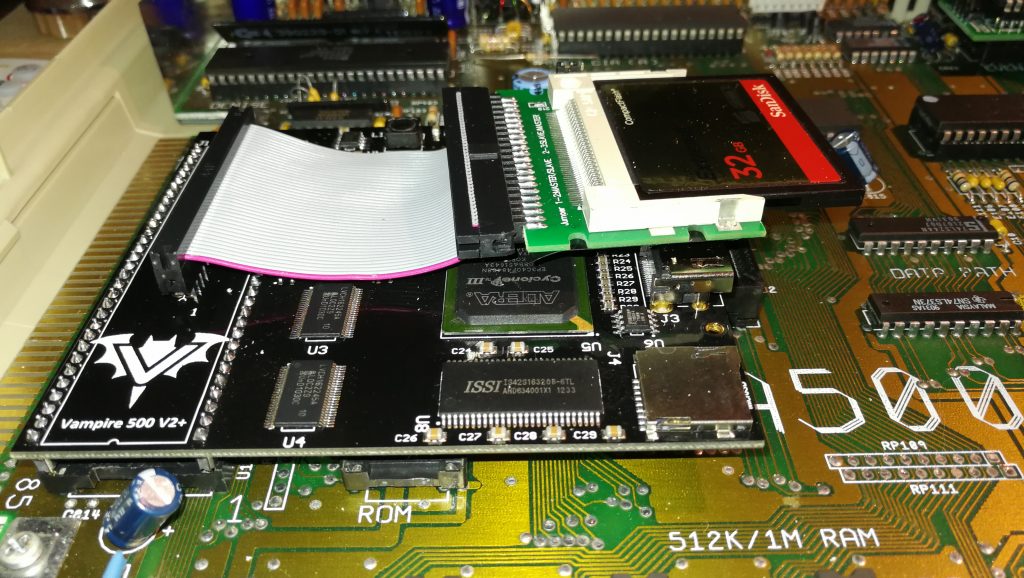
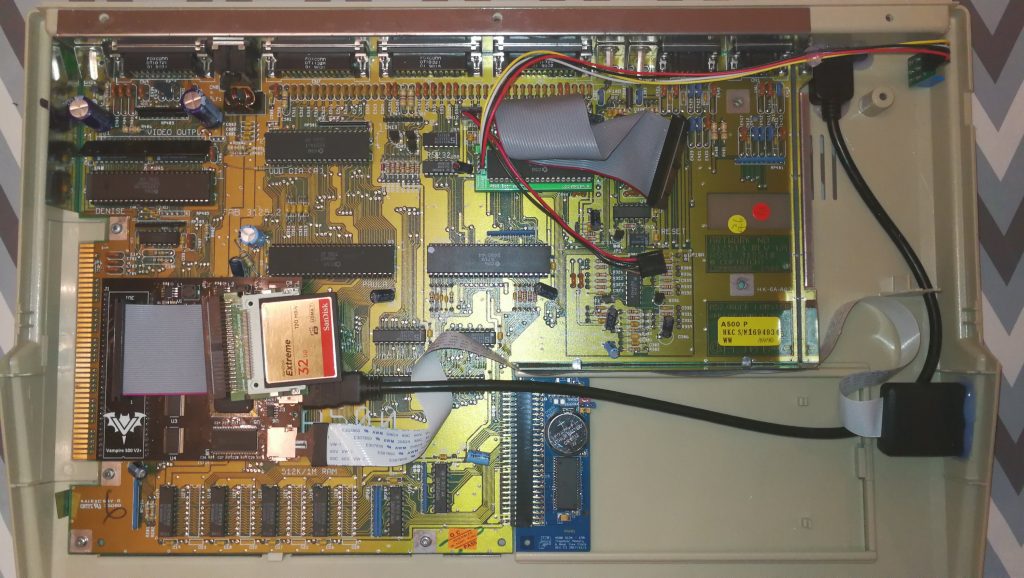
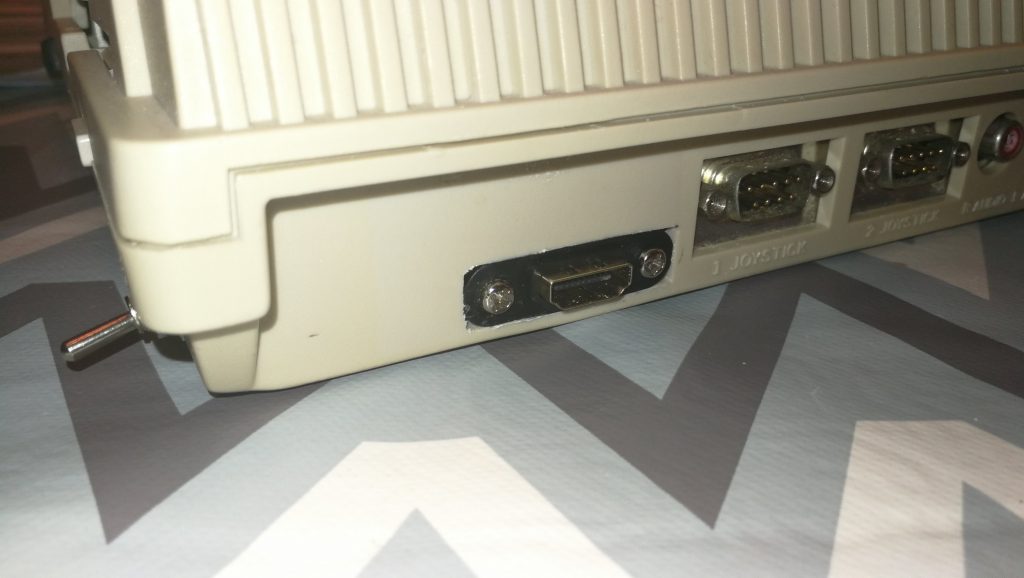
So you may be aware that the Vampire V500 V2+ Card gives your vintage Amiga 500 both a MicroSD card slot and an HDMI port for hooking up to a modern display.  Trouble is the ports are on the board itself which is rather inconvenient if you don’t want to leave the top of your Amiga’s case off.  After doing a little research and searching around I discovered that you can get some nifty little extension cables for both ports which will allow you to ‘move’ them to the exterior of the Amiga’s case.  This post will explain how to add both an SD Card Slot and HDMI port to an Amiga 500 computer.

SD Card Slot and HDMI port to an Amiga 500

Location of the HDMI and MicroSD ports on the Vampire card. Not exactly easily accessible once the lid is back on!

Purchasing the right cables for the job

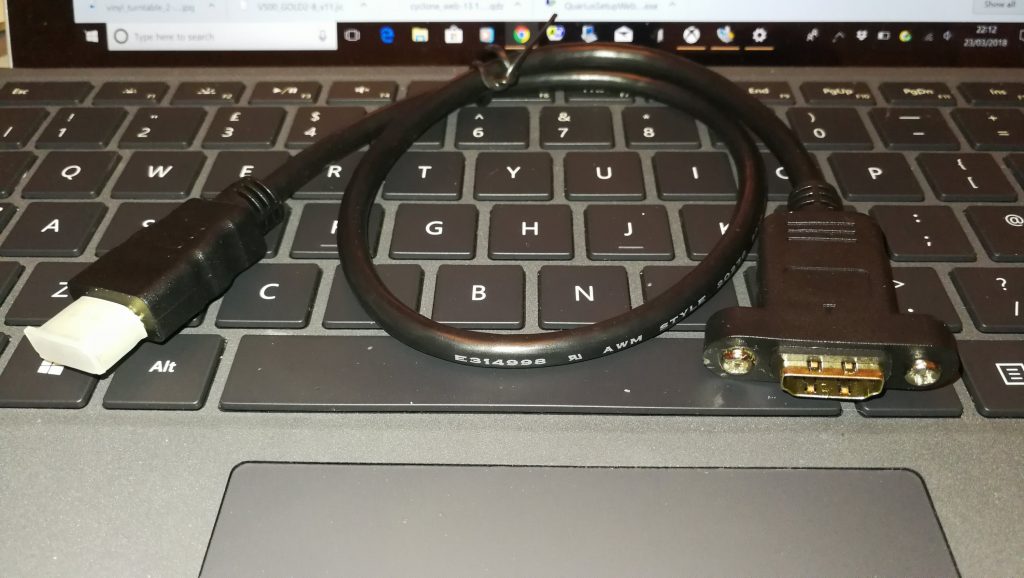
The HDMI cable was a little tricky to locate at first as there are just so many options. Once I got the search term correct I stumbled into the right cable for the job.  The cable I bought (below) was an Adafruit Panel mount HDMI Cable – 40 cm which you can pick up from Amazon.  It’s just the perfect length and almost seems tailor made for the Amiga!

SD Card Slot and HDMI port to an Amiga 500

40cm HDMI extension cable

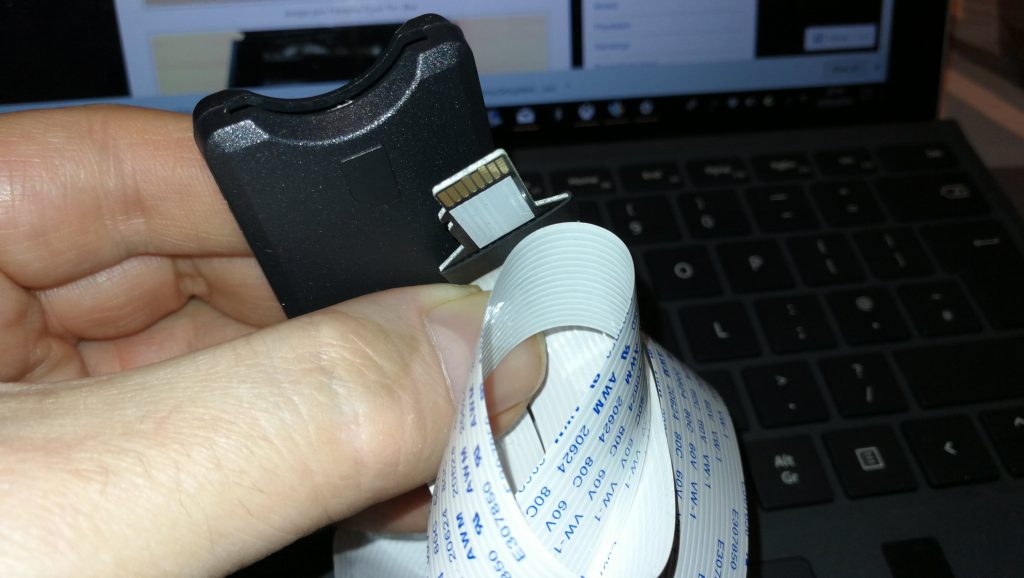
The MicroSD slot extender was a much easier product to locate.  This Micro SD to SD Card Extension Cable I picked up from Amazon is perfect.  You will find that you can actually get both MicroSD to MicroSD and also MicroSD to SD extender cables.  I decided to chose the MicroSD to SD option as I thought it would allow a little extra flexibility in terms of what cards I can use with it.  With it I have a choice of using both regular SD cards or  MicroSD cards now with the use of a MicroSD adapter card.

SD Card Slot and HDMI port to an Amiga 500

MicroSD Extension Cable

Deciding where to locate the ports

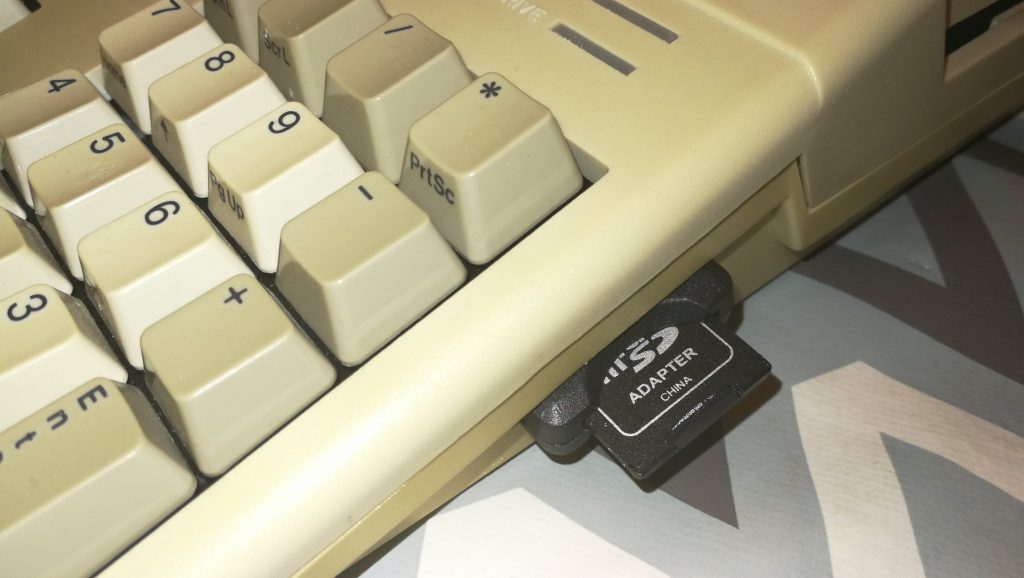
I decided the HDMI port needed to be at the back of my A500 but that the SD card would be much more useful if it was located somewhere along the side.  There is quite a lot of free space underneath the floppy drive, ample to accommodate the HDMI socket.  However because the SD Card Slot is housed in quite a chunky plastic case there wasn’t room for it under the floppy, plus I already have my floppy boot selector switch there anyway.  So, I chose a spot that sits just under the keyboard where there is plenty of space and it’s also super convenient for me to pop cards in and out.

SD Card Slot and HDMI port to an Amiga 500

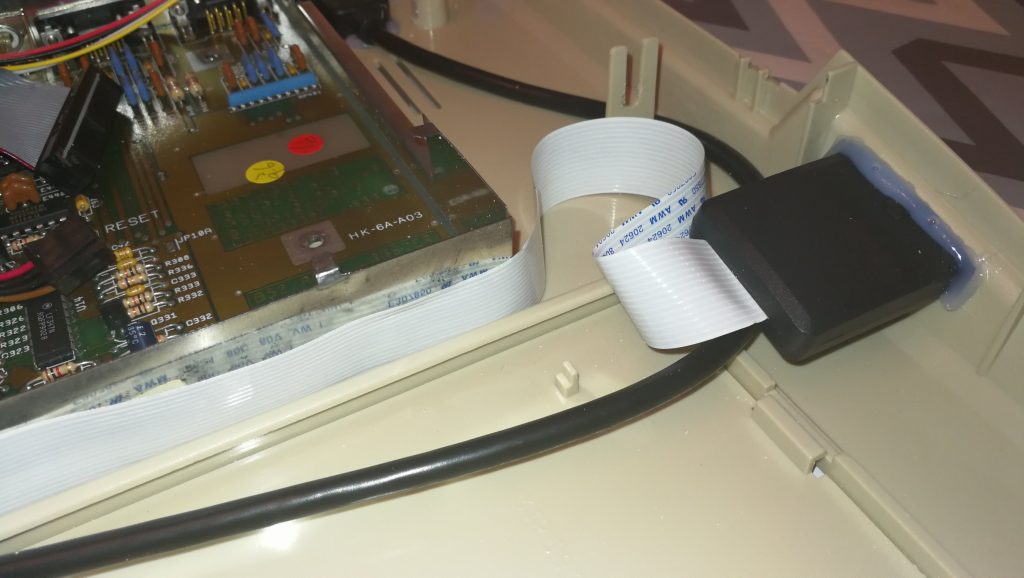
Final Cable Routes


SD Card Slot and HDMI port to an Amiga 500

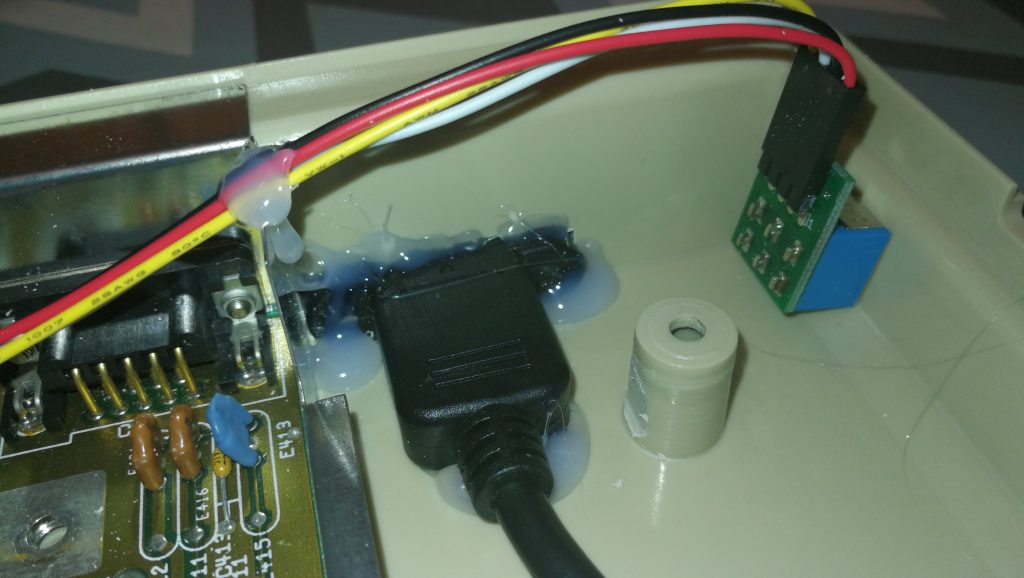
HDMI Socket secured with hot glue. It ain’t pretty but it’s very secure.


SD Card Slot and HDMI port to an Amiga 500

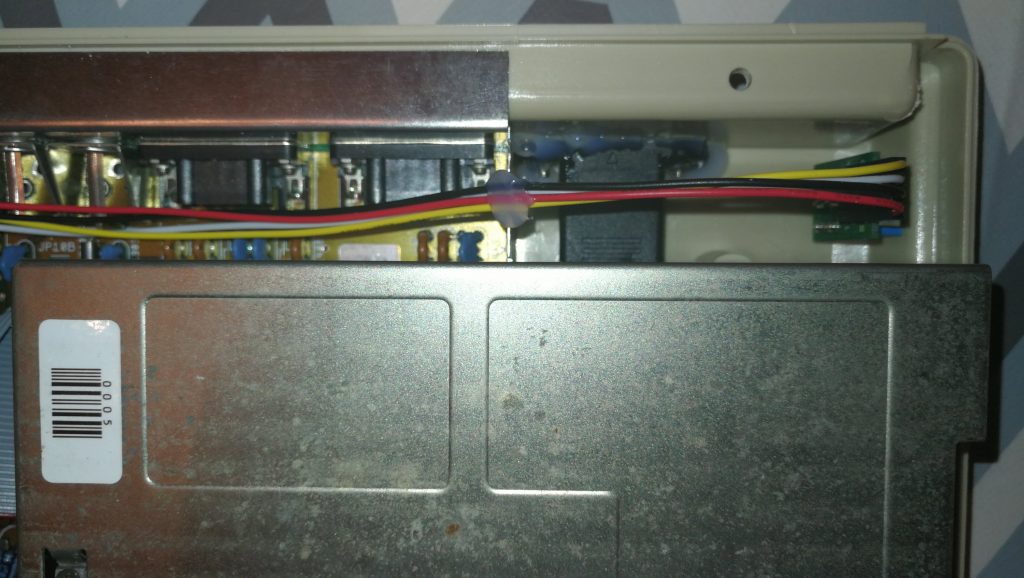
Plenty of clearance around floppy drive


SD Card Slot and HDMI port to an Amiga 500

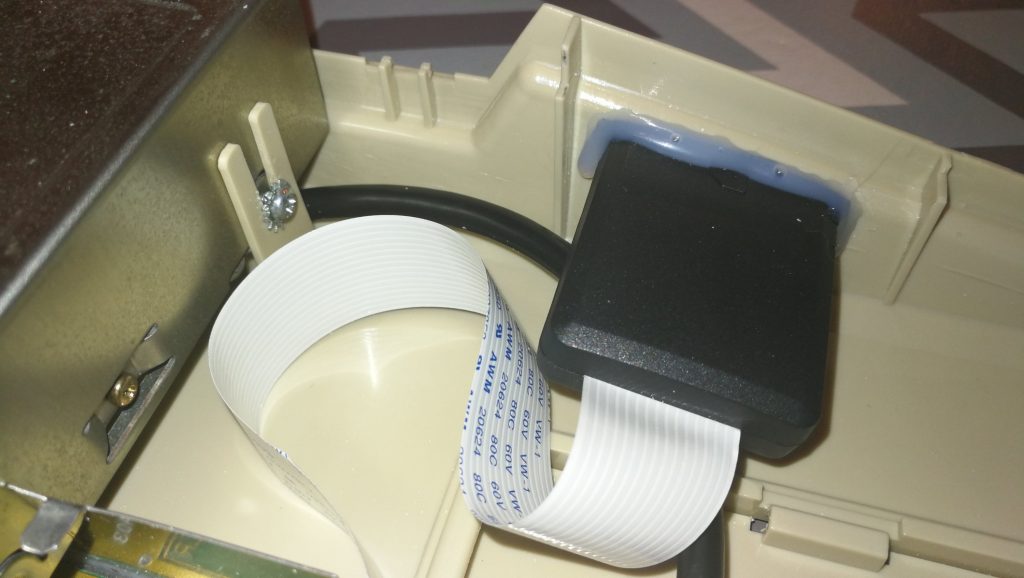
SD Card Slot Hot Glued in position

Creating the SD Card and HDMI cut-outs in the Amiga case and securing the new ports

The slots for both ports were cut out using a Dremel tool (if you have one you should know instinctively how to do this!). Take care to use a low speed otherwise you risk melting the plastic.  The ports themselves are held in place with some hot glue, perfect for this sort of project as it flows freely around things before setting hard.  I used a few blobs of hot glue to keep the SD extension ribbon cable out of harms way too as it’s quite fragile.  It could easily become trapped and get damaged by the A500 keyboard when it is replaced if it was left unchecked.

SD Card Slot and HDMI port to an Amiga 500

Top view of HDMI Socket with floppy drive back in place


SD Card HDMI Amiga

Finished HDMI Port


SD Card HDMI Amiga

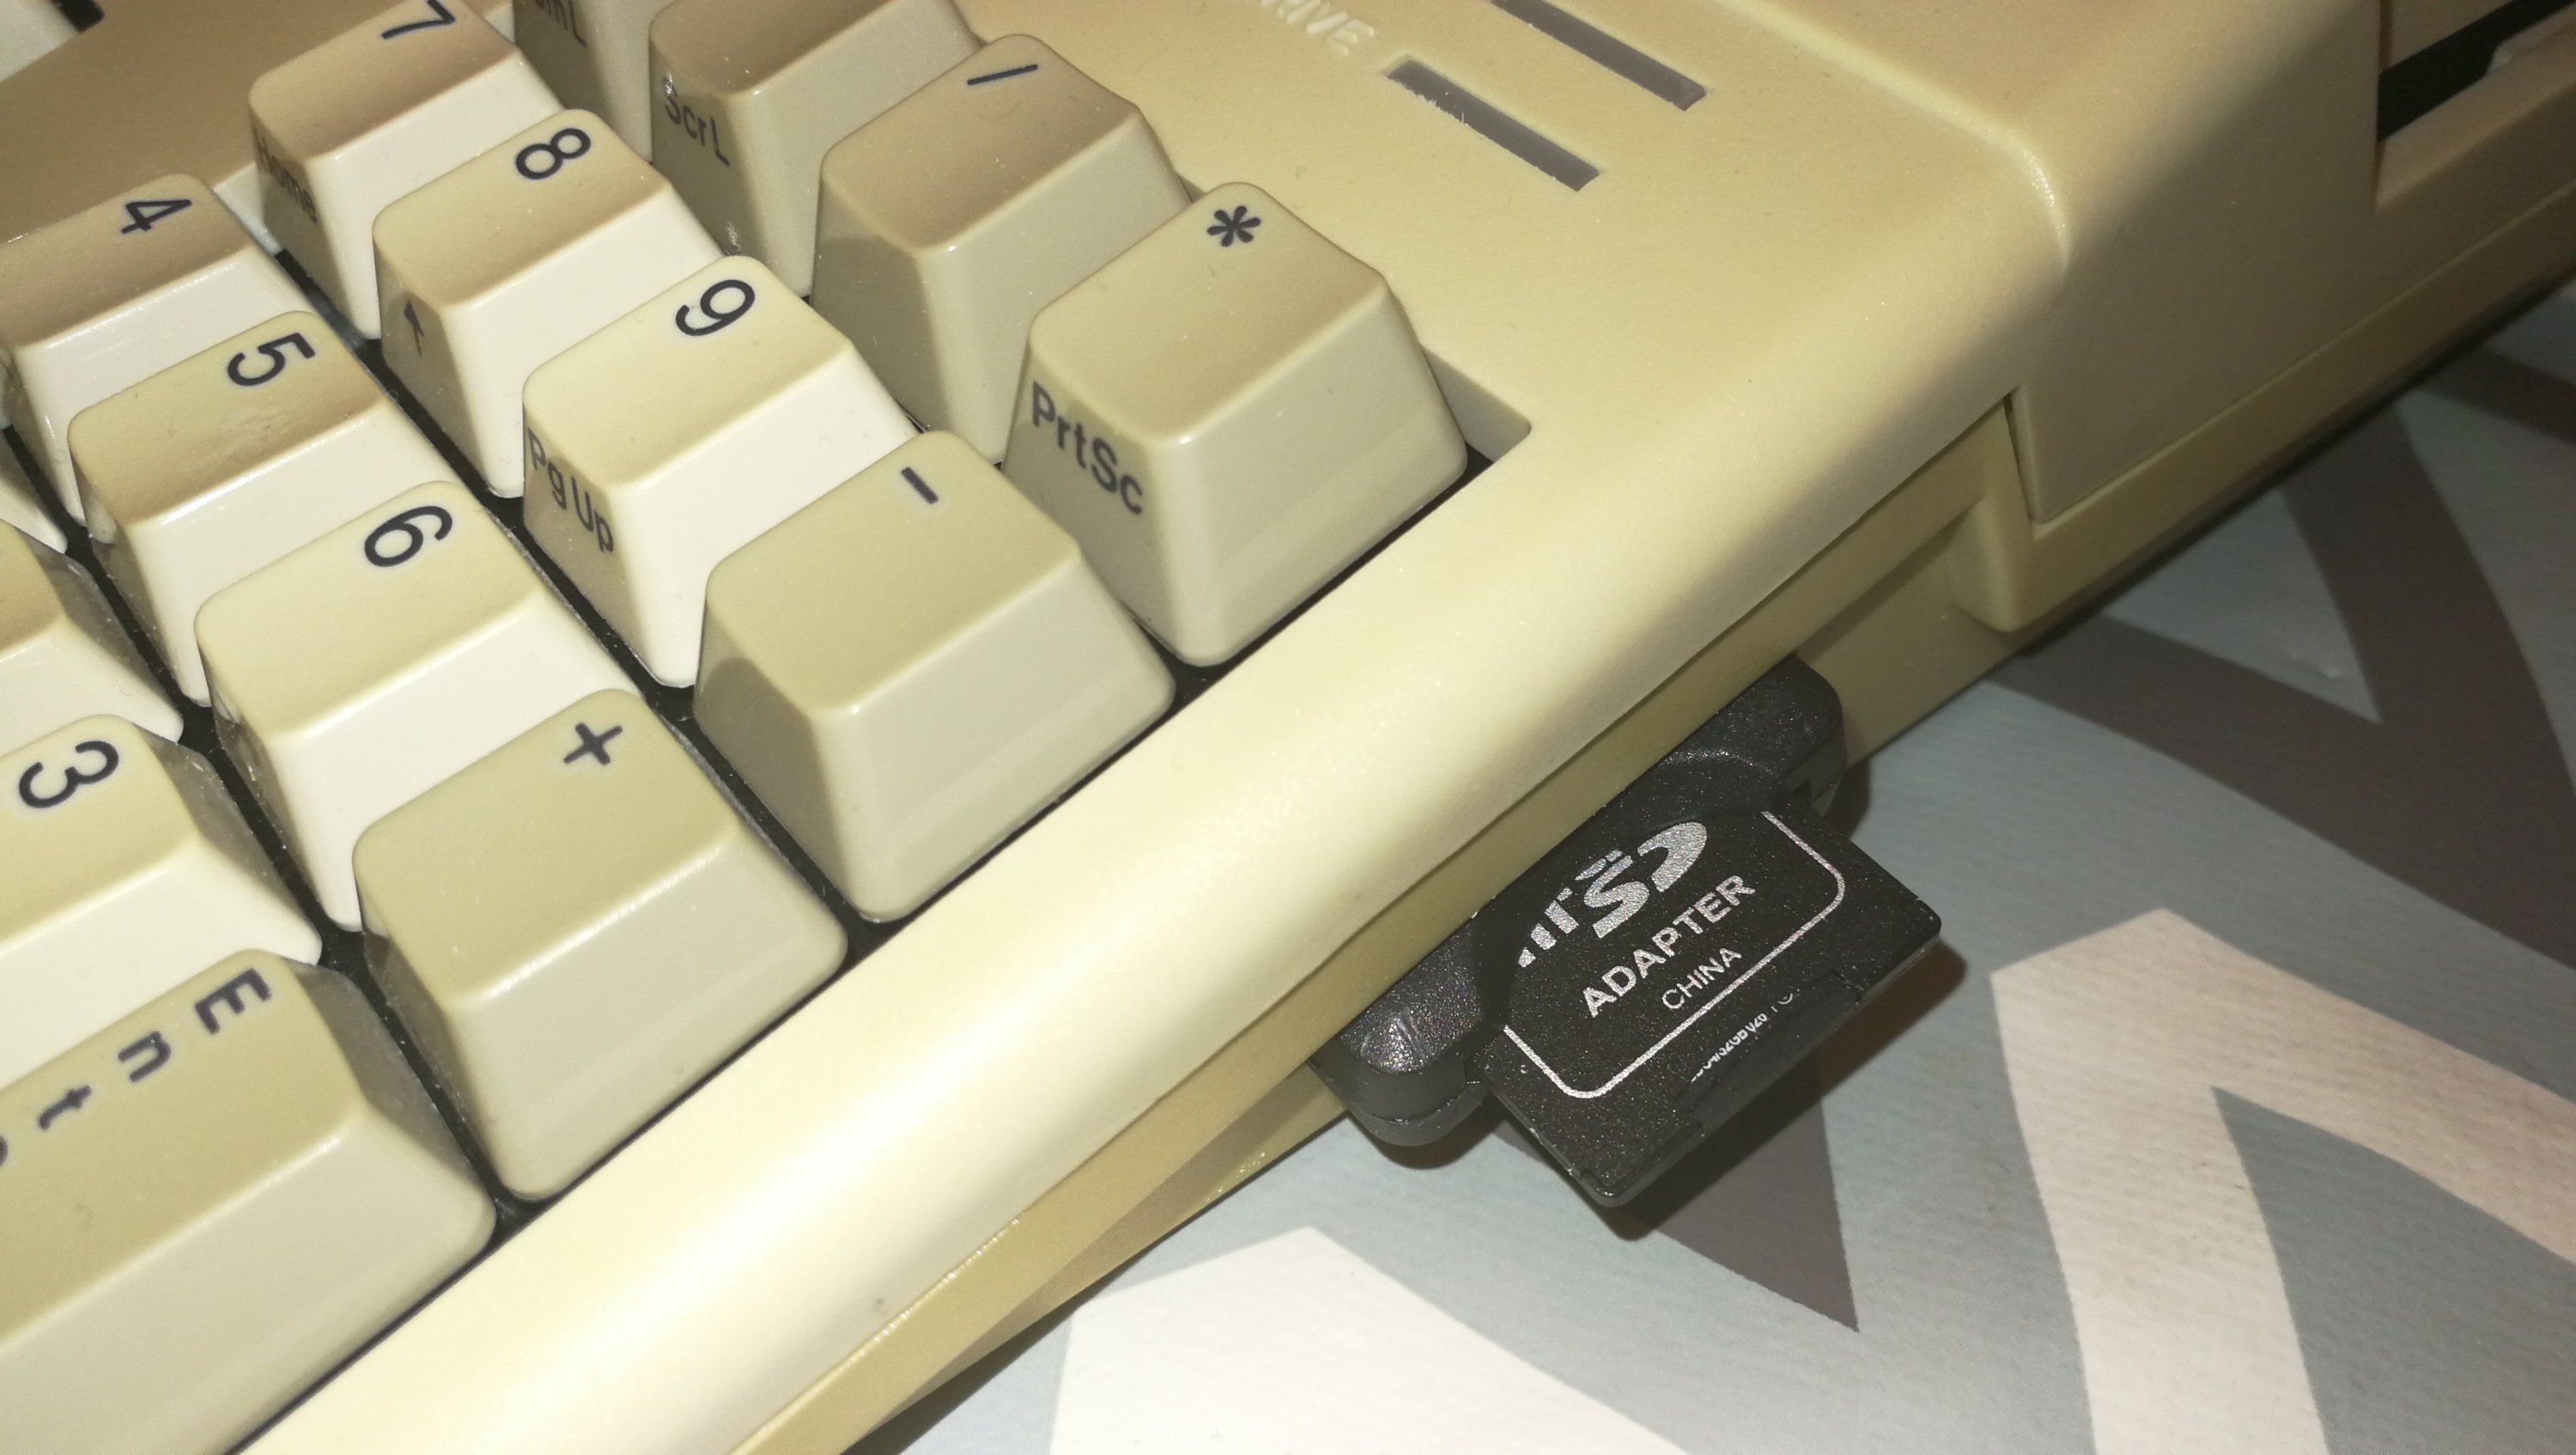
Finished SD Card Slot with MicroSD adapter sticking out

End Result

I’m pretty pleased with the end result, with hindsight I probably should have tidied up the HDMI cut-out a little with a file as there are a few rough bits left… but it’s around the back of the case and out of sight so no biggie.  The HDMI port is rock solid and should have no problem with me plugging and unplugging a cable in and out.  Likewise the SD card slot is nice and secure and more than up to the task of dealing with regular card swaps.  Perhaps a version in white (or off-white LOL) would have been better but I just couldn’t find one for sale anywhere.

Improvements?

Only other thing I might do in future is add an RJ45 extender when the Apollo Vampire team make the Ethernet port expansion option a reality.  Although I already have Ethernet through the use of the fantastic little plipbox device this is currently hogging my parallel port so I cannot print without first unplugging it – hardly ideal.

Formatting the SD Card

Incidentally, if you’d like to know how to go about formatting your SD Card check out my post – How to Format an SD Card for Amiga to PC File Transfer.


Fitting an SD Card Slot and HDMI port to an Amiga 500.