Seems like it was only yesterday that AmigaOS3.1.4 was released and yet here I am with AmigaOS3.2! I actually bought this in June last year but I’ve only just got around to having a play around with it. For the time being this release is only available physically on CD which is fine by me. Hyperion say there will be a digital download version of it at some point in the future.
I will preface this post by saying that things didn’t go smoothly during my first install attempt. Hopefully someone can benefit from the issues I experienced and how I overcame them.
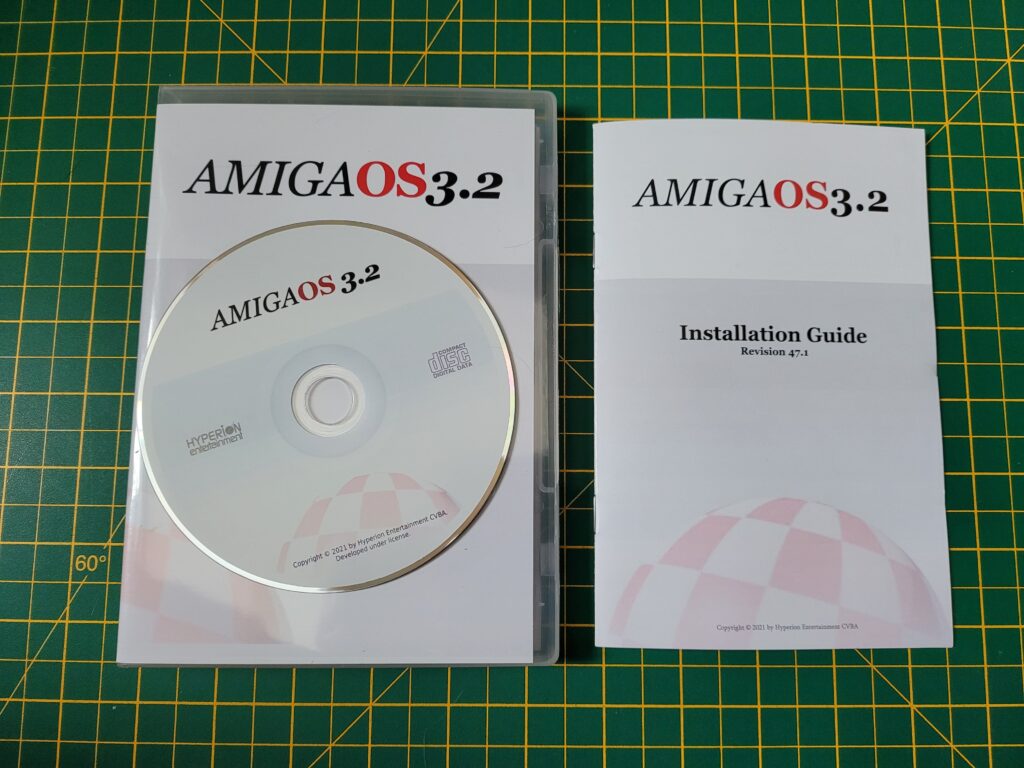
A closer look at the what you get…
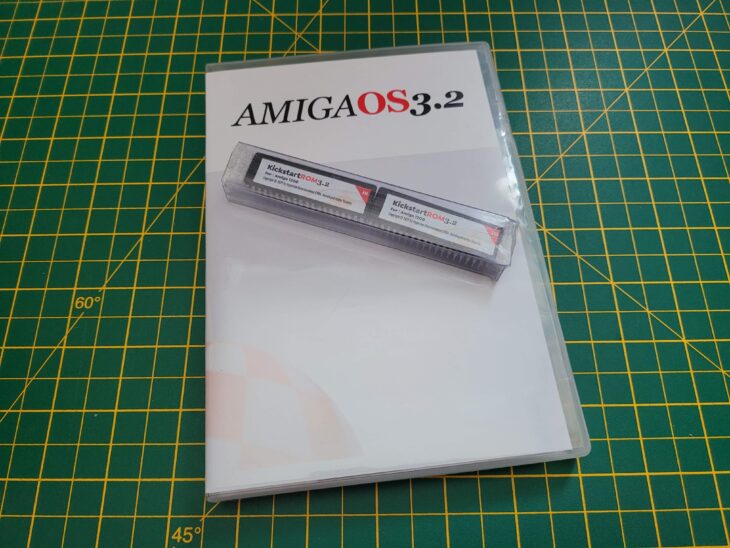
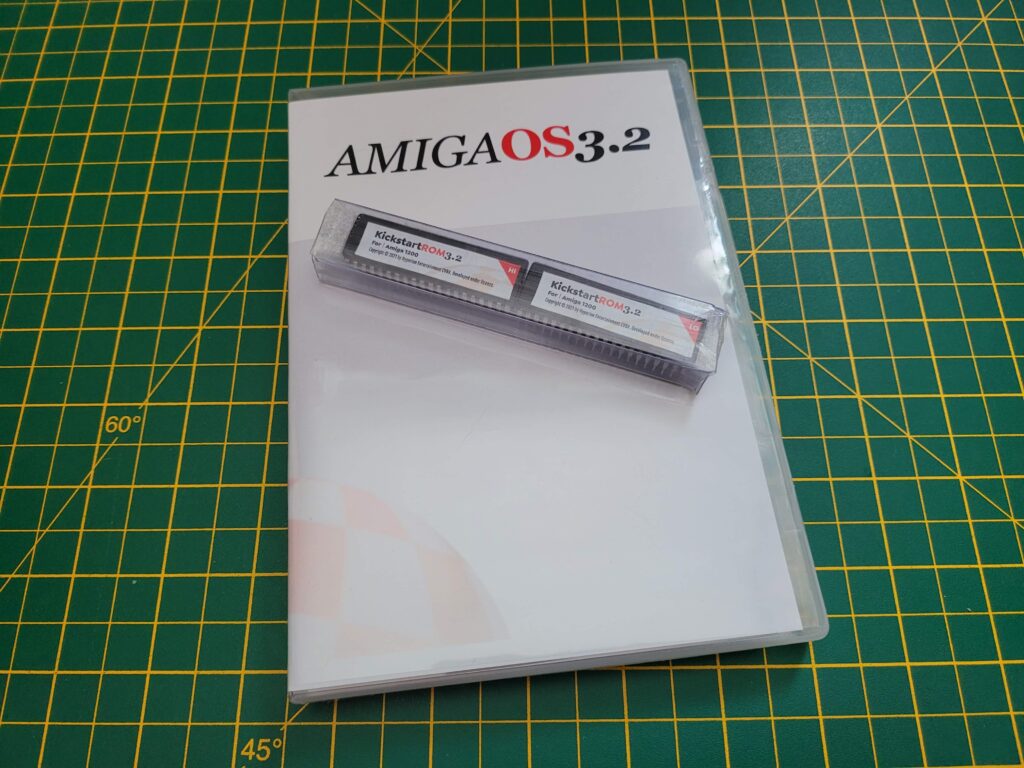
Anyway I ordered the CD along with the Kickstart ROMs for my A1200 from Amigastore.eu. I have to award top marks for presentation as the CD came in a very attractive DVD style case along with professionally printed jacket. Inside there is a 14 page manual and the silk-screen printed CD itself. Finally but by no means least there were 2 new Kickstart ROMs to replace the existing chips.
The serial number is on a little sticker affixed to the cellophane wrapping on the outside of the box – don’t make the mistake I did of throwing it in the bin. Luckily I realised before the bin was emptied! The code is needed to register your purchase on the Hyperion site in order to be eligible for future updates.
Workbench 3.2 actually spans a grand total of 35 floppy disks now which is why the decision was made to supply it on CD. Although half of those disks are either country or machine specific but it’s still a lot. The CD contains ADF images of all the discs should you wish to create your own physical versions. Likewise it contains the new ROM images so you can use them with a Vampire, map the ROMs to RAM or just use them with an emulator.
Fitting the 3.2 Kickstart ROMS
Naturally the first thing I did was to open up my A1200 and fit the two new ROM chips. If you are looking for detailed instructions on how to do this you can follow my detailed guide here. The important things are to get the ‘HI’ and ‘LO’ chips in the correct sockets (see photo above), that you orient them correctly (notched end of chip goes next to notched socket) and finally that you leave the last pair of pins in each socket empty as the sockets have 42 pins whereas the ROMS only have 40!
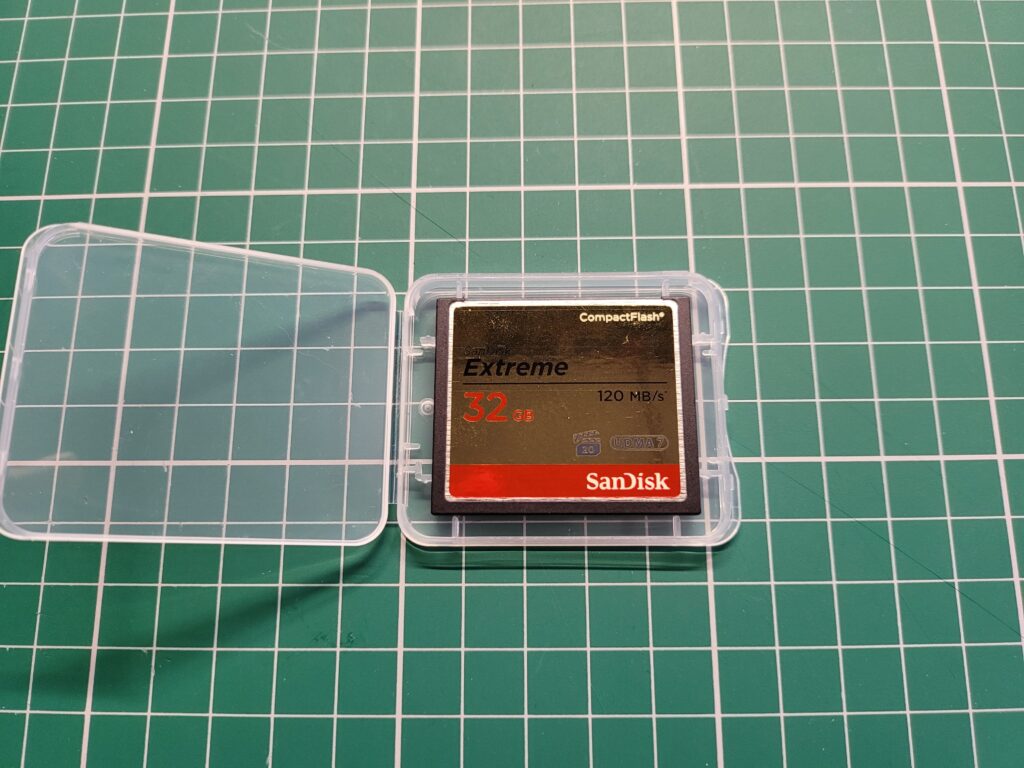
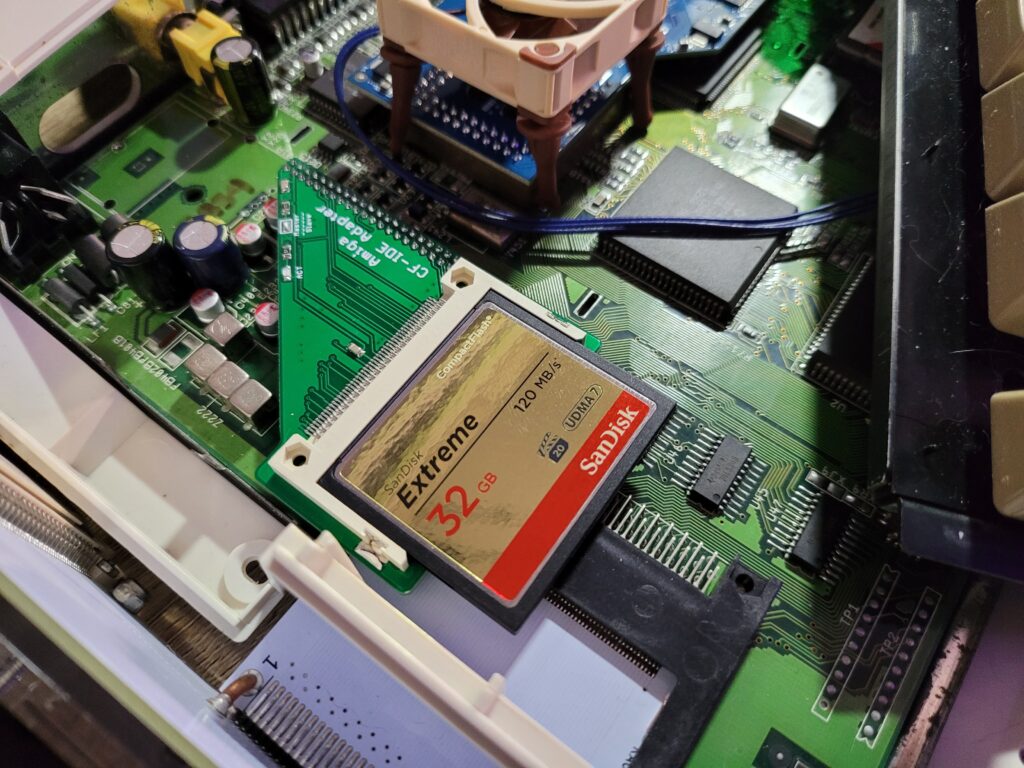
Whilst I had the case open I thought it would be a good time to install the new Compact Flash card I’d bought for the occasion. I opted to go with a nice big 32GB card this time around as it’s surprising how quickly you fill these things up without even trying. The card I bought was a SanDisk Extreme 32GB Compact Flash. I wanted something that would prove reliable and SanDisk is a brand I trust.
With the ROMS and new Compact Flash card installed it was time to power up my A1200 and make sure everything was working.
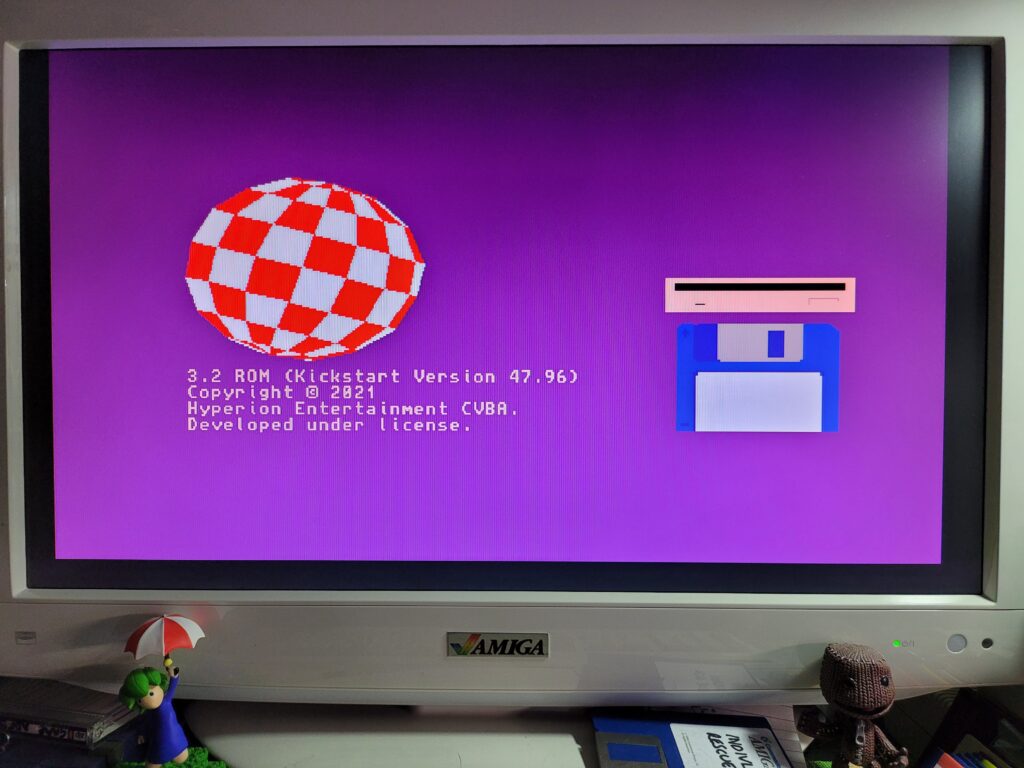
Just a few moments after turning the power back on I was greeted with a brand new boot screen. Gone was the multi-colour tick that has been there for the last thirty years – replaced by the Amiga ‘boing’ ball. Commodore’s name has also been removed and replaced with Hyperion’s. Anyway, mixed feelings aside, so far so good! Now it was time to get cracking with the Workbench install.
Prepping the disks
(The Discovery of problem no. 1)
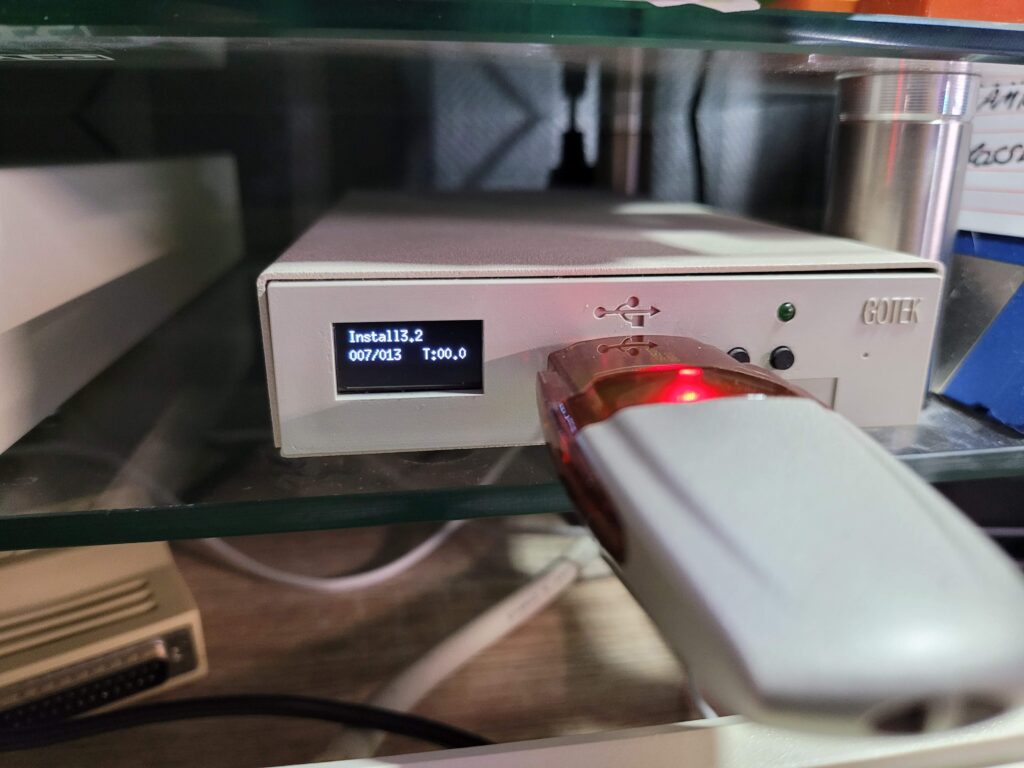
As I mentioned previously there are a whopping 35 disks in total for this install. Even after I weeded out all the language specific variations it still left 11 disks to install. Thankfully the CD contains all the disks as ADF images and if you have a Gotek drive available it’s a simple matter of copying them across to a USB flash drive and using that. This time around there are no snazzy pre-printed disk labels included either so that was another reason not to bother making physical copies of the ADF images. There are a bunch of PNG images included on the CD for you to print your own labels should you wish to though.
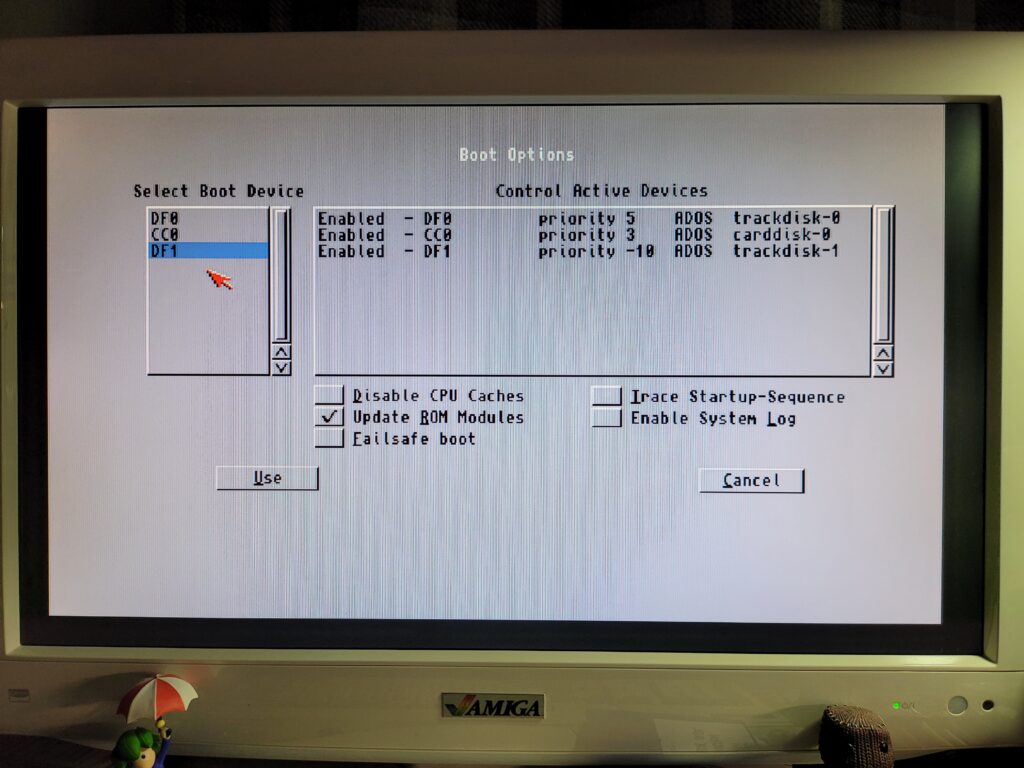
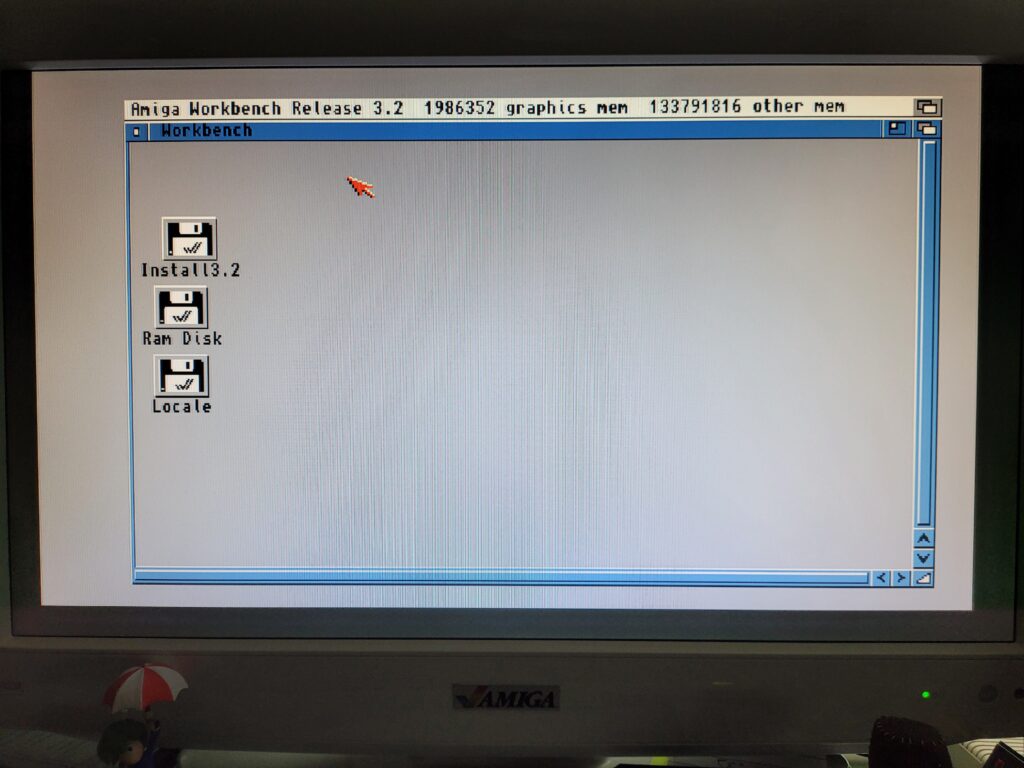
The journey starts with the ‘Install3.2’ disk so I selected that on my external Gotek and then selected DF1 as the boot device from the A1200’s Boot options screen. (Accessible by holding down both mouse buttons on bootup until the power LED flashes). If you have a Gotek configured as DF0 then you won’t need to do this.
A short while later I was greeted with a basic Workbench screen and I thought I was on my way. Well you know what thought did… Everything looked OK but the mouse pointer was completely frozen – likewise the keyboard wouldn’t respond either. I tried to boot a few more times with no success. I unplugged all my peripherals, PCMICA card, audio cables, SCSI devices until all that was left was power, video and my external Gotek. Still it wouldn’t work. Maybe it didn’t like my Gotek, or the fact it was hooked up as DF1? So I created a physical Install3.2 floppy disk, disconnected my external Gotek and tried again with a real floppy in DF0. Another fail. So it wasn’t that either.
I tried all sorts of things like re-formatting my USB flash drive and copying across the ADF’s again. I even tried a different flash drive and removing my Indivision Mk3 flicker fixer, all to no avail.
Eventually I was left with one thing I hadn’t tried – removing my Blizzard 1230 MkIV card. Luckily I remembered that the card could be disabled by holding down the ‘2’ key on boot so I gave it a try. Just like magic after doing this Workbench loaded fine and I could use my mouse and keyboard without any issues. Clearly something was up with my accelerator card.
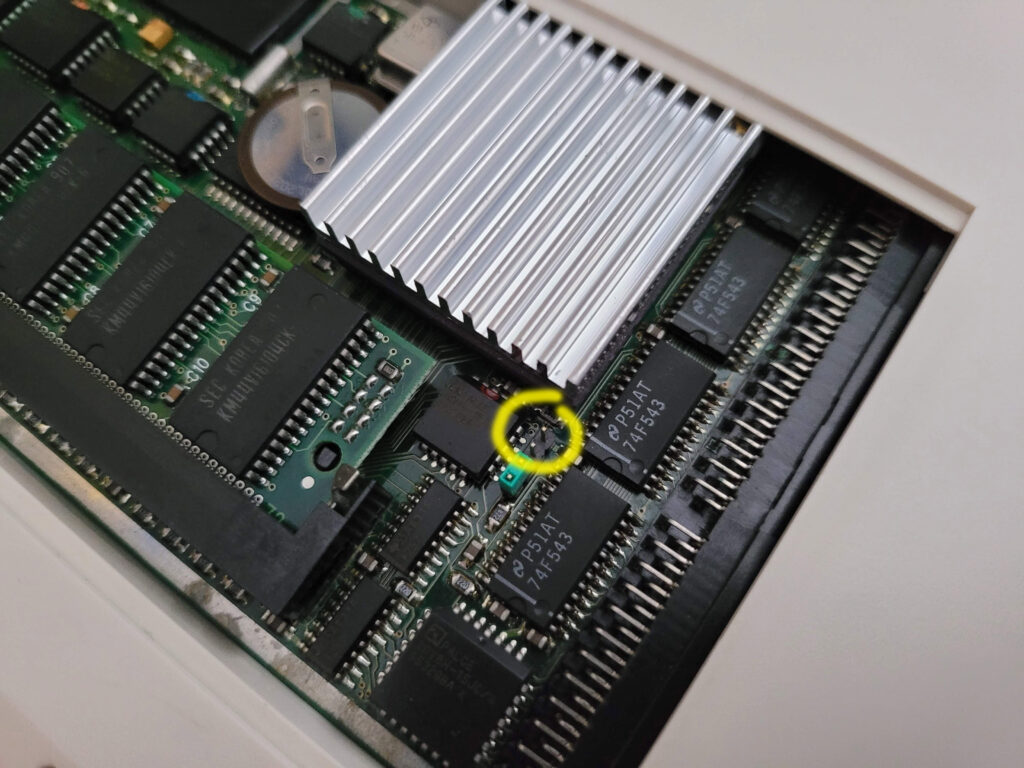
More head scratching and investigations ensued until I finally discovered the source of the issue. I had the MAPROM feature enabled on my card which is supposed to speed the Amiga up by copying Kickstart into FASTRAM. However for whatever reason OS3.2 didn’t like that because from the moment I disabled it by removing the jumper (see photo above) the problem simply vanished. Happy days!
Prepping the Compact Flash Card
(The beginning of problem no. 2)
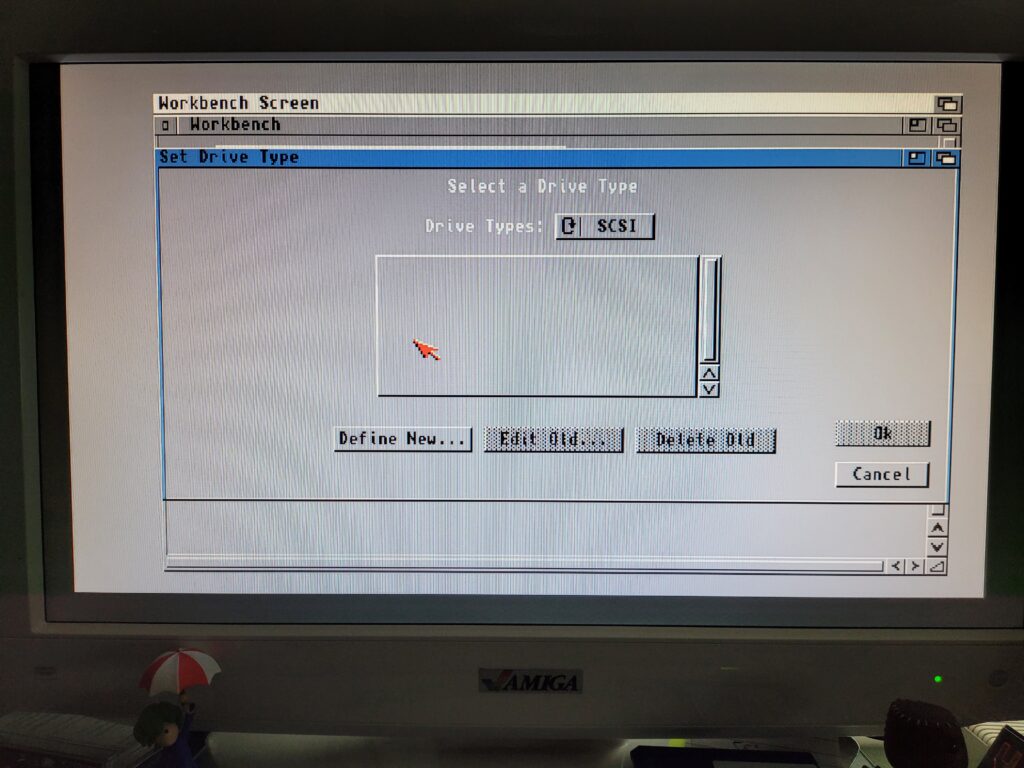
Now I had a working 3.2 Workbench it was time to Partition that nice shiny new Compact Flash card. I loaded up HDToolBox from the disk and clicked ‘Change Drive Type’.
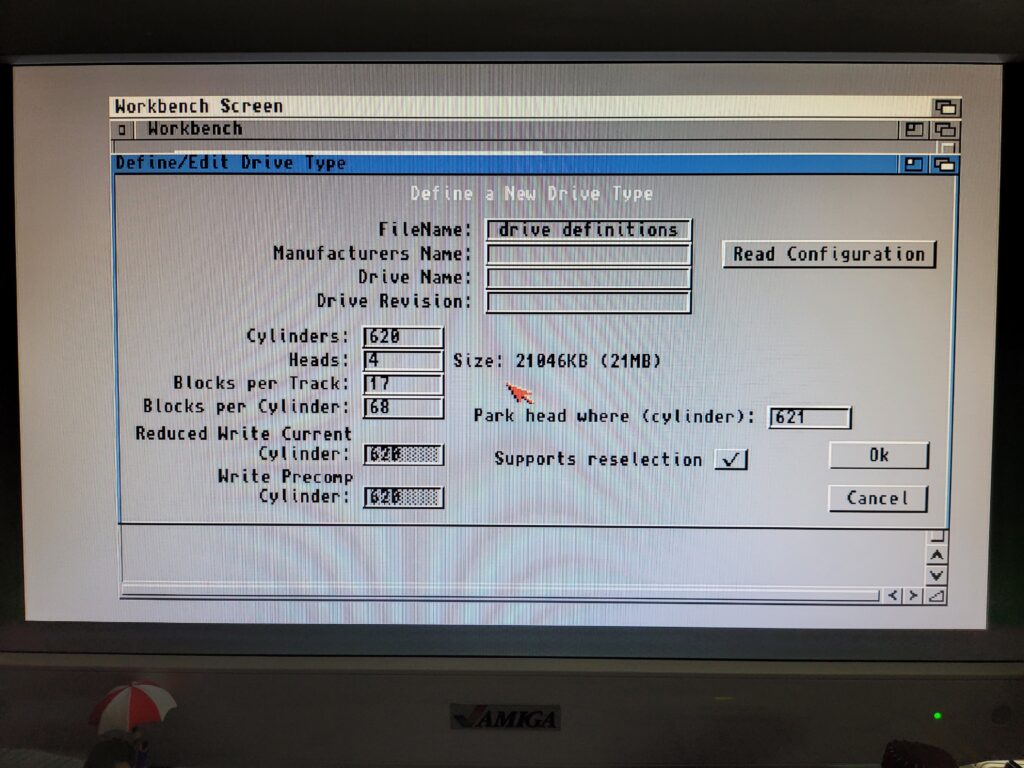
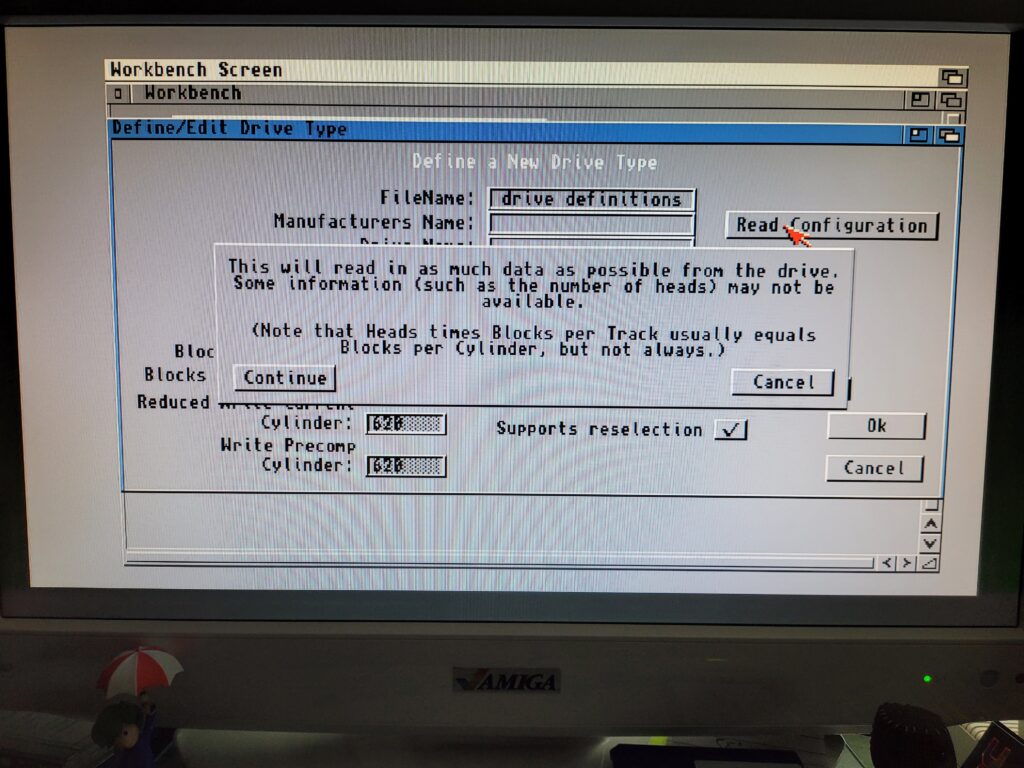
Next I clicked ‘Define New…’ which brought up the Define/Edit Drive Type window shown below.
The Amiga is perfectly capable of doing all the heavy lifting here – I just needed to click on ‘Read Configuration’ to get it to extract all the necessary parameters from the card. A little info window popped up and I clicked ‘Continue’.
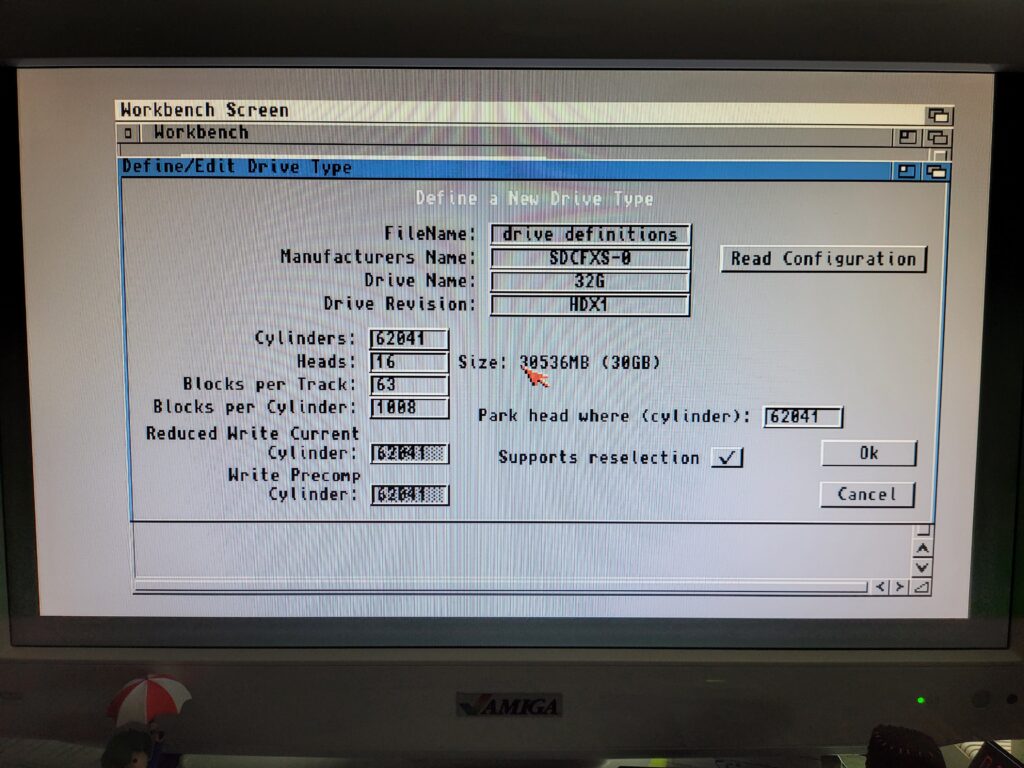
A second or so later and all the parameters had been pulled from the card and filled out on the screen.
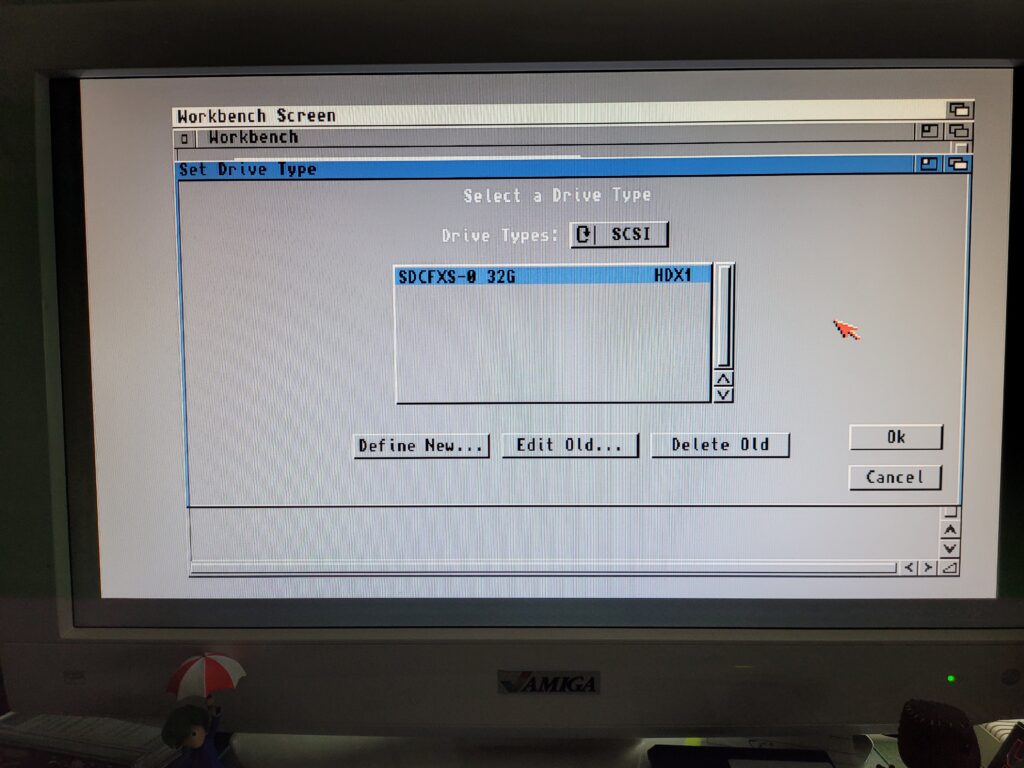
Clicking ‘OK’ brought me back to the ‘Set Drive Type’ window where I could see my newly created drive listed as ‘SDCFXS-0 32G’.
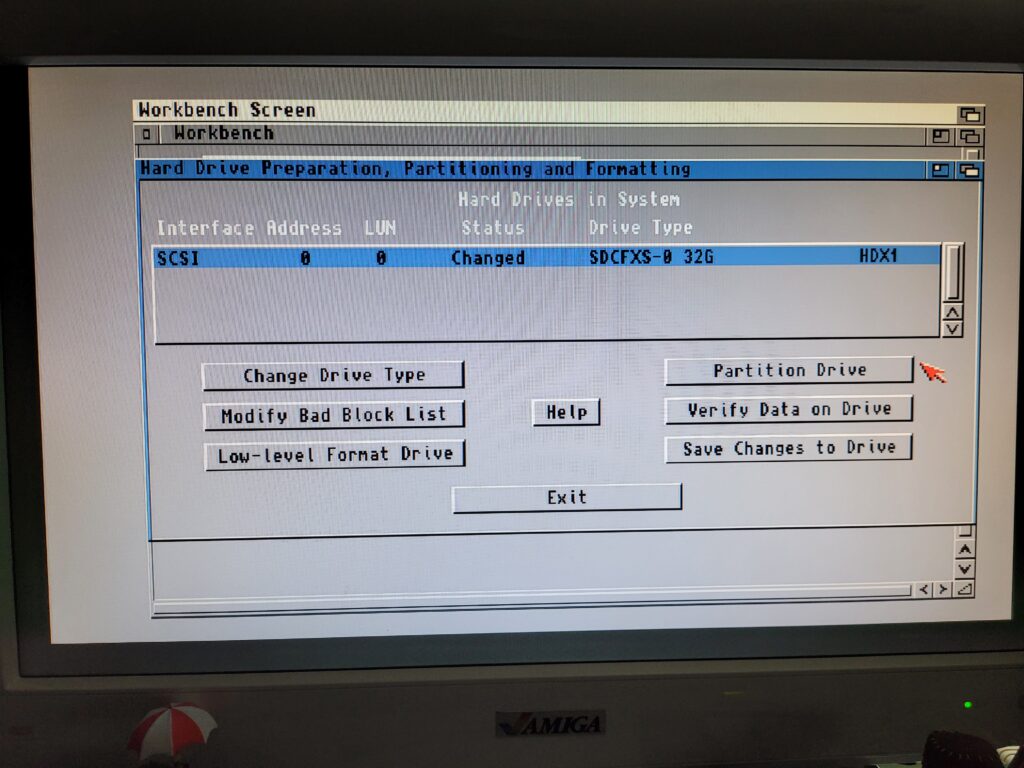
Clicking ‘OK’ again brought me back to the main HDToolBox screen, shown below.
Partitioning the Card
Now it was time to partition the drive by clicking on the appropriately named ‘Partition Drive’ button.
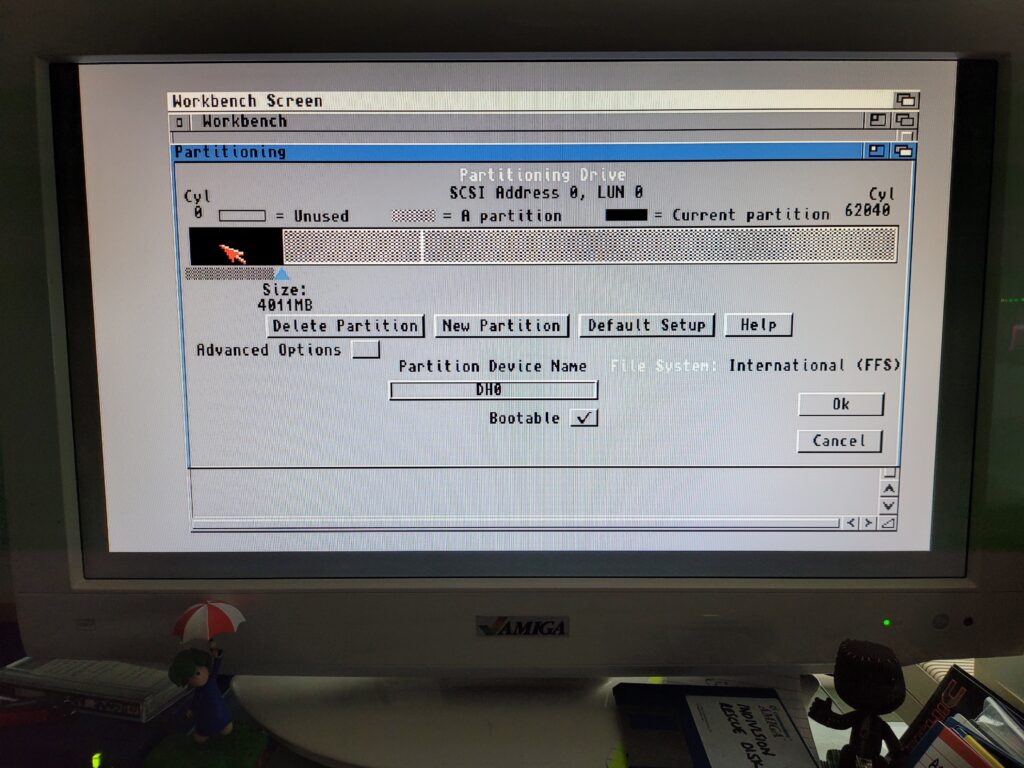
I chose to make my first partition 4GB, this would be my System/Workbench drive. To select the size I simply dragged the little triangle pointer and slid it along the bar. Annoyingly it’s still impossible to size a partition exactly so I just got it as close as I could which was 4011MB.
I called the first partition ‘DH0’ as this is the time honoured name for the Amiga’s boot drive and what most software expects to see by default. I also ticked the box to make it bootable as this is the first partition and the one the Amiga boots off.
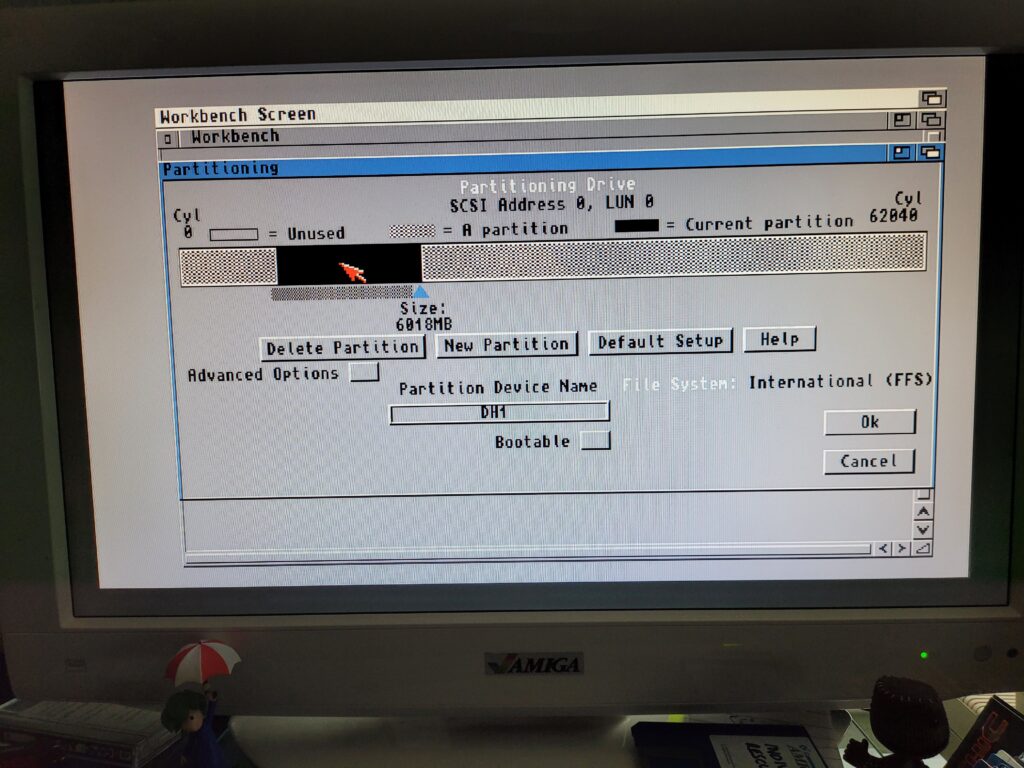
I made the second partition 6GB (6018MB) and called it DH1. To do this I clicked ‘New partition’ and then clicked on an unused portion of the card in the visual representation on the screen.
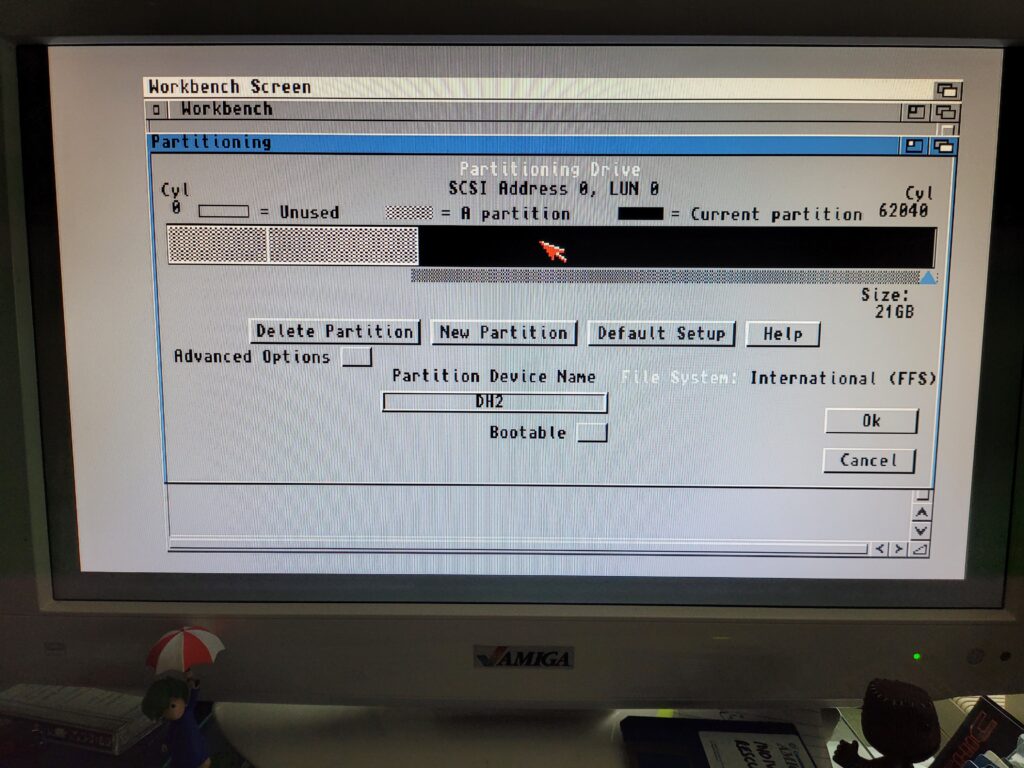
Finally I used all the remaining space to make one big 21GB partition and called it DH2. This will be were I install games, whether they be WHLoad or otherwise.
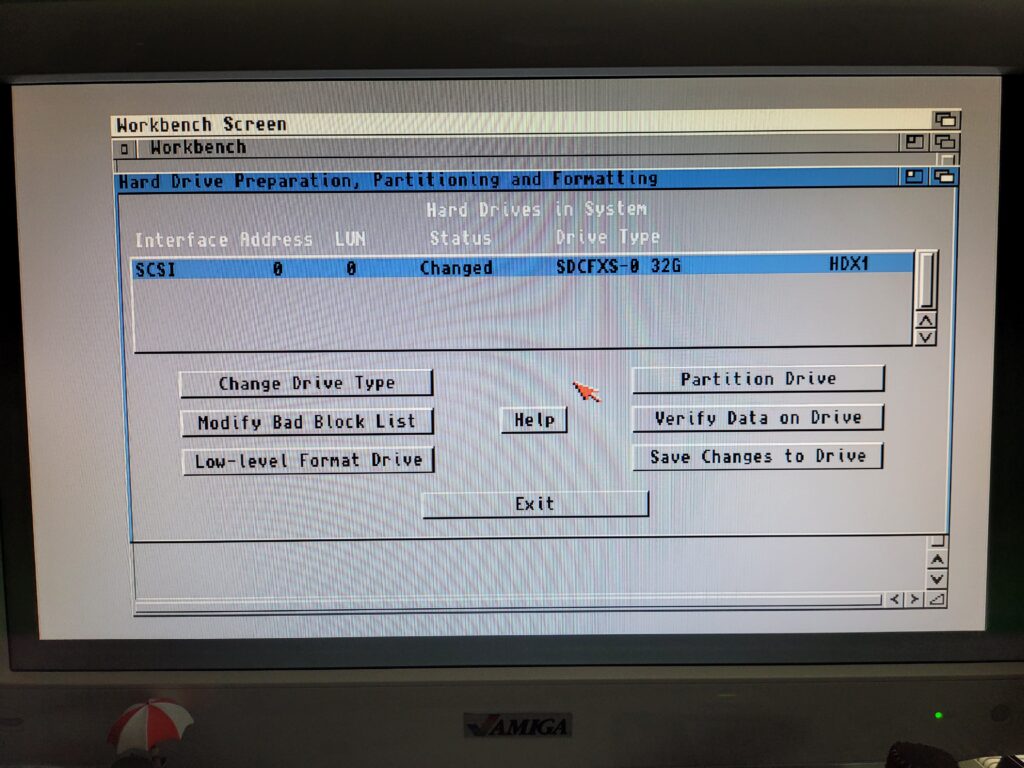
Once I was happy that all my partitions were sized and named exactly the way I wanted them I hit ‘OK’. (You can click each of the partitions in the bar to check their details before committing). This took me back to the main HDToolbox window shown below.
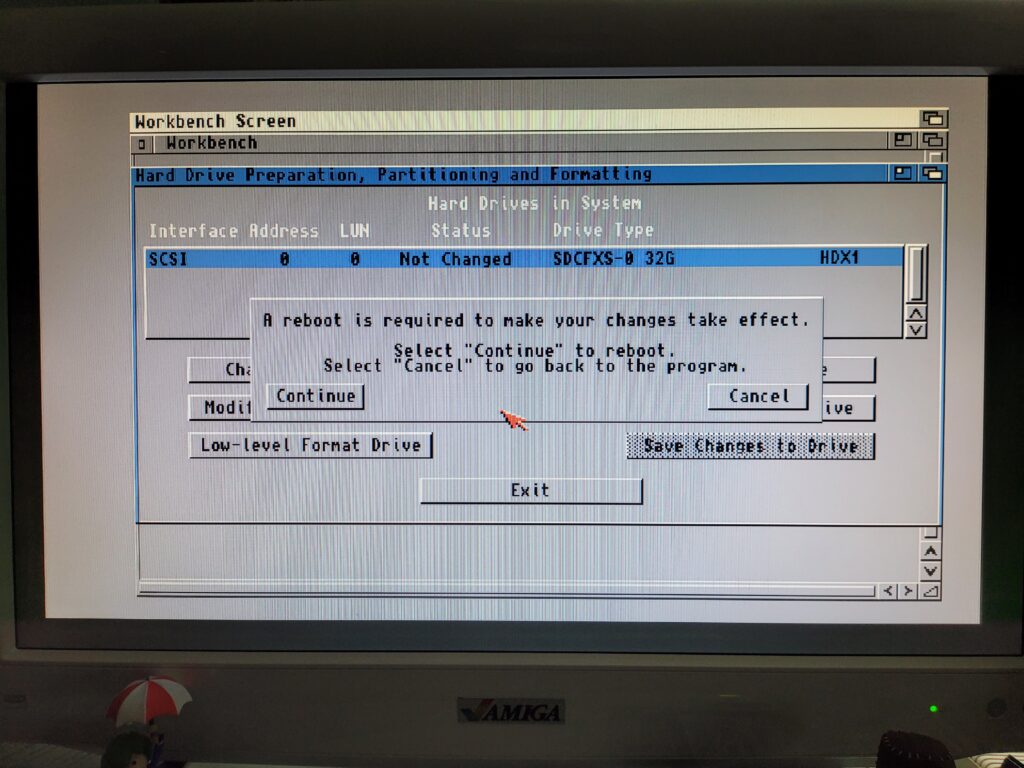
To save all that configuration info and partition detail I clicked ‘Save Changes to Drive’ which flagged up a message (shown below) that a reboot was required. I then clicked continue to finish the process and write all the settings to the compact flash card.
Next I rebooted my Amiga off the Install3.2 ADF disk so I could begin formatting them. Unfortunately this was were I encountered problem number 2…
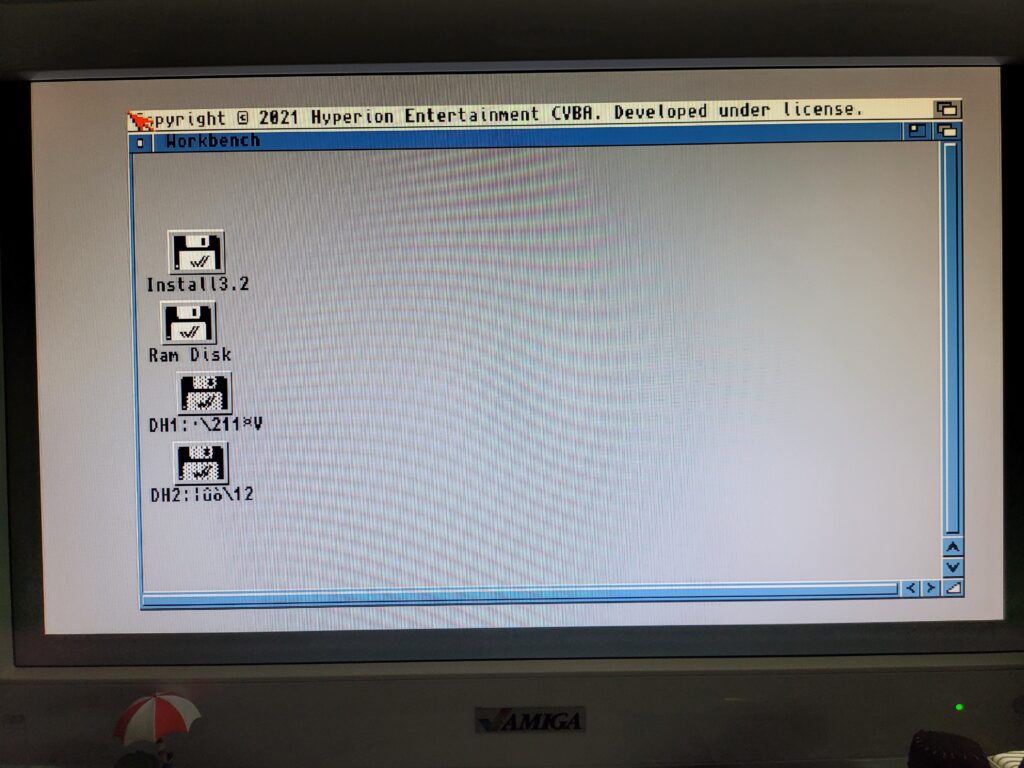
There should have been three additional icons on the desktop, one for each of the partitions I had created. However for some reason DH0: was not being displayed. I tried going back through the HDToolbox configuration and making DH0 smaller and even making it the only partition on the card. Nothing worked.
Fixing the Problem
It turns out that for whatever reason, some cards are created with all the sectors on them filled with ‘1’s’ instead of ‘0’s’ and the Amiga doesn’t like that one bit. So I had to remove the Compact Flash card from my A1200 and hook it up to my PC via a USB card reader.
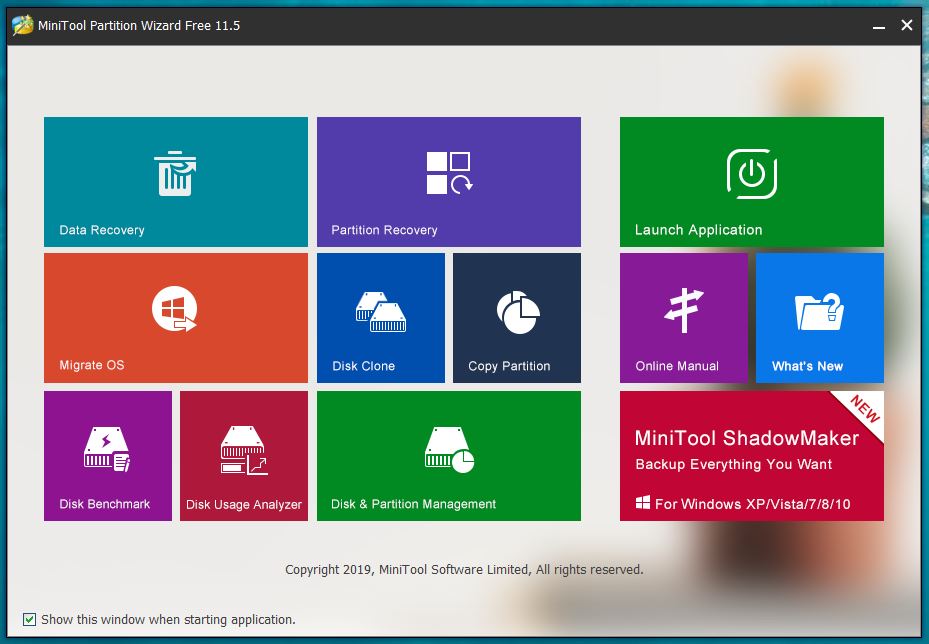
I loaded up a piece of drive management software on my PC called ‘MiniTool Partition Wizard‘ (available as a free download). I then clicked on ‘Disk and Partition management’ which is the large green button near the bottom of the menu screen in the image below.
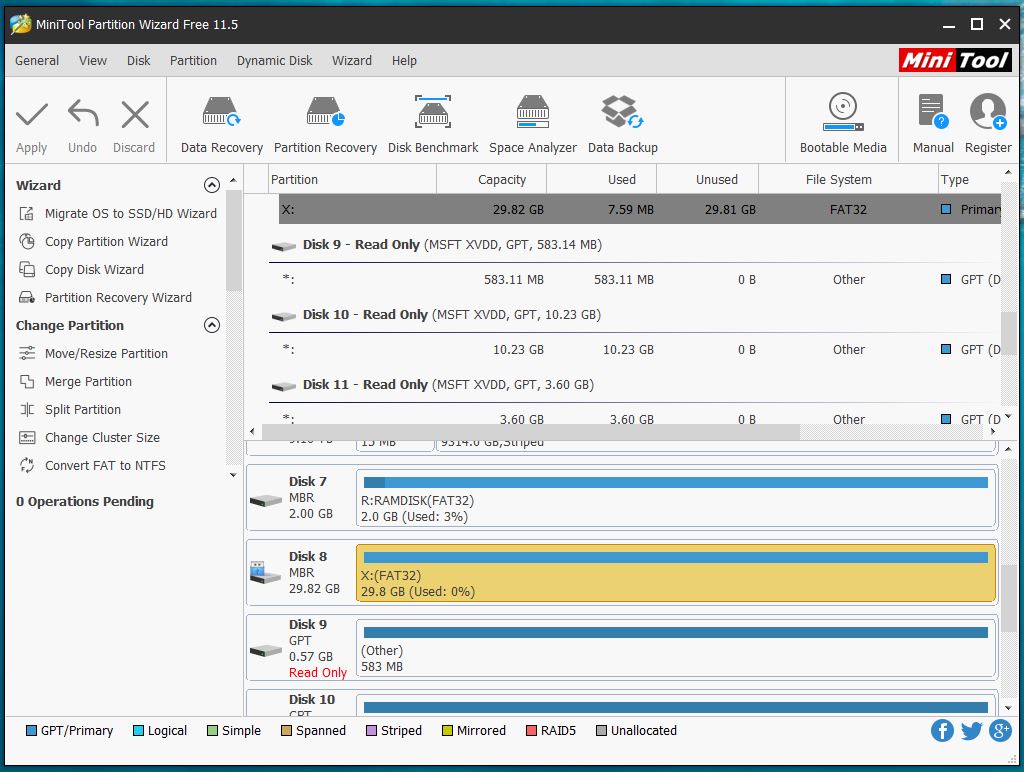
Next I needed to select my CF card from the list of available drives as can be seen in the image below. I knew my card was 32GB so it was pretty easy to spot – it appeared as a 29.82GB drive. It’s imperative to select the correct drive here – the consequences of picking the wrong one don’t bear thinking about!
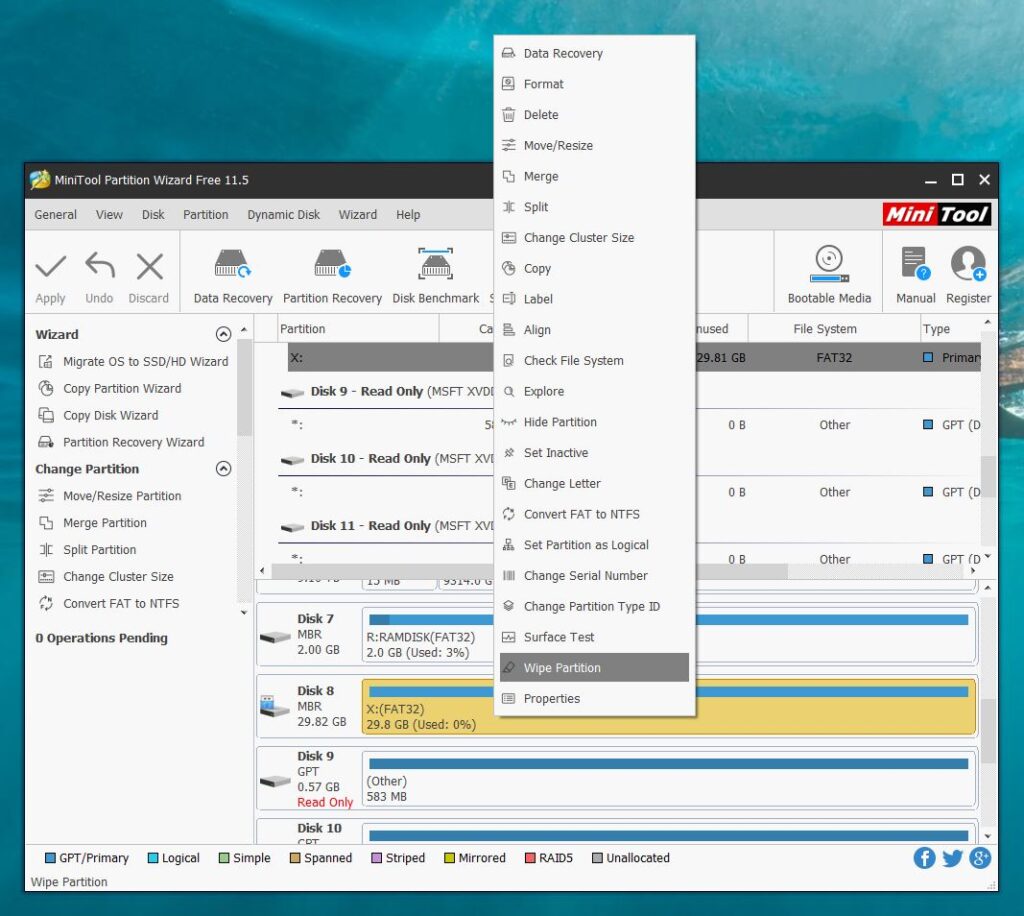
With my CF card highlighted I right clicked on it to bring up the menu and selected ‘Wipe Partition’.
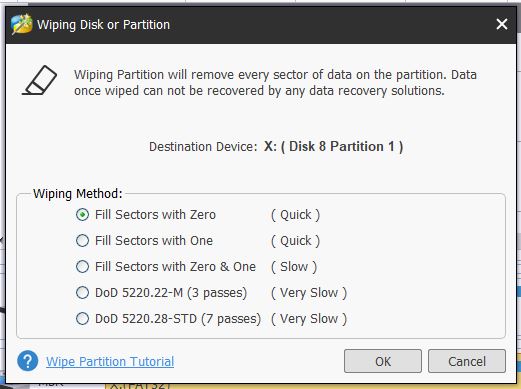
This brought up another window along with a warning that doing this is irreversible so once again I made absolutely sure I had the correct drive selected. Definitely better to be safe than sorry when messing with partitioning software! Anyway the option to fill all sectors with zeros was already selected by default so I simply clicked ‘OK’ here.
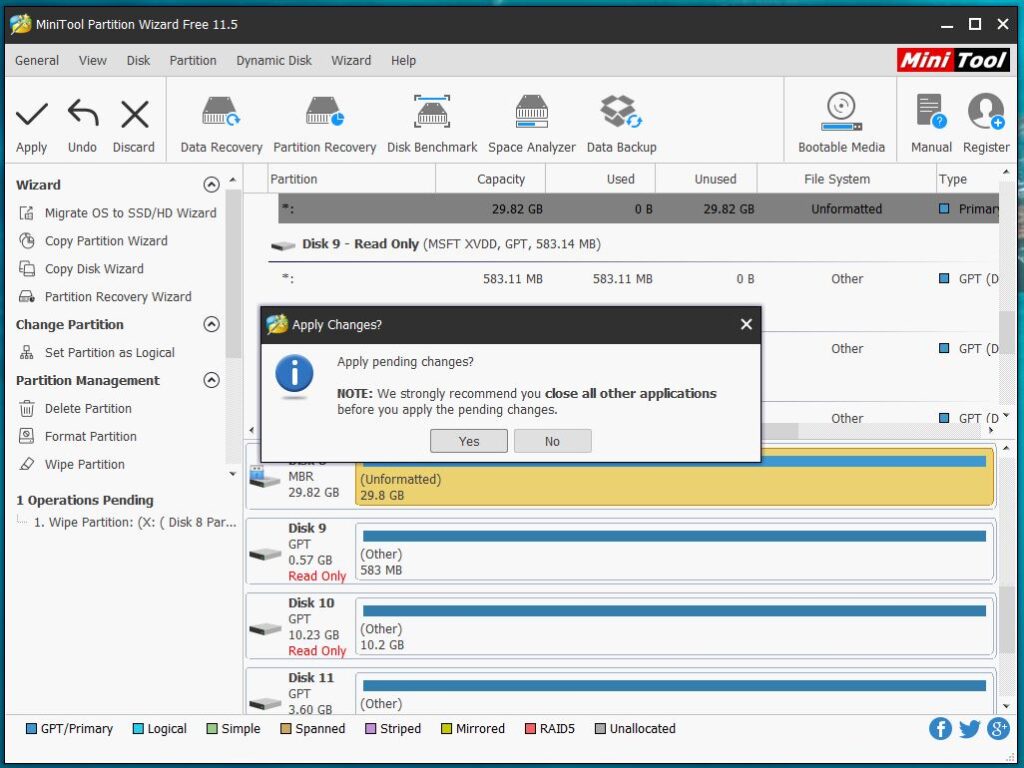
This took me back to the main screen. Up until this point no changes had actually been made to the drive. To actually wipe the drive I needed to click ‘Apply’ in the top left hand corner. A warning then popped up about not running any other applications whilst applying the changes and then I clicked ‘Yes’.
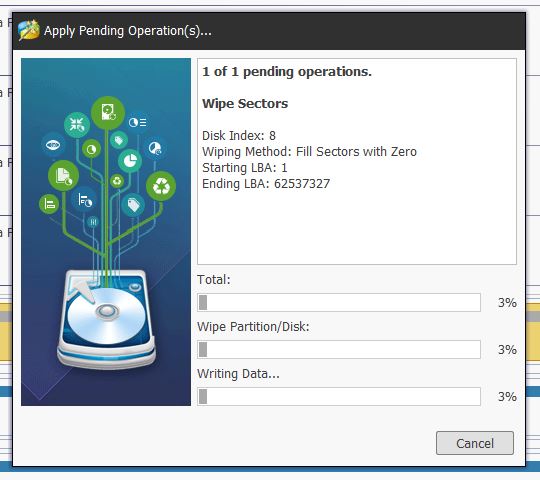
Finally the ‘Apply pending operations’ window popped up and a progress bar slowly made its way across the bottom as my card was being fill with zeros.
The whole operation took around 5 minutes or so to complete successfully at which point I was able to close down the program and remove the card.
Back on Track.
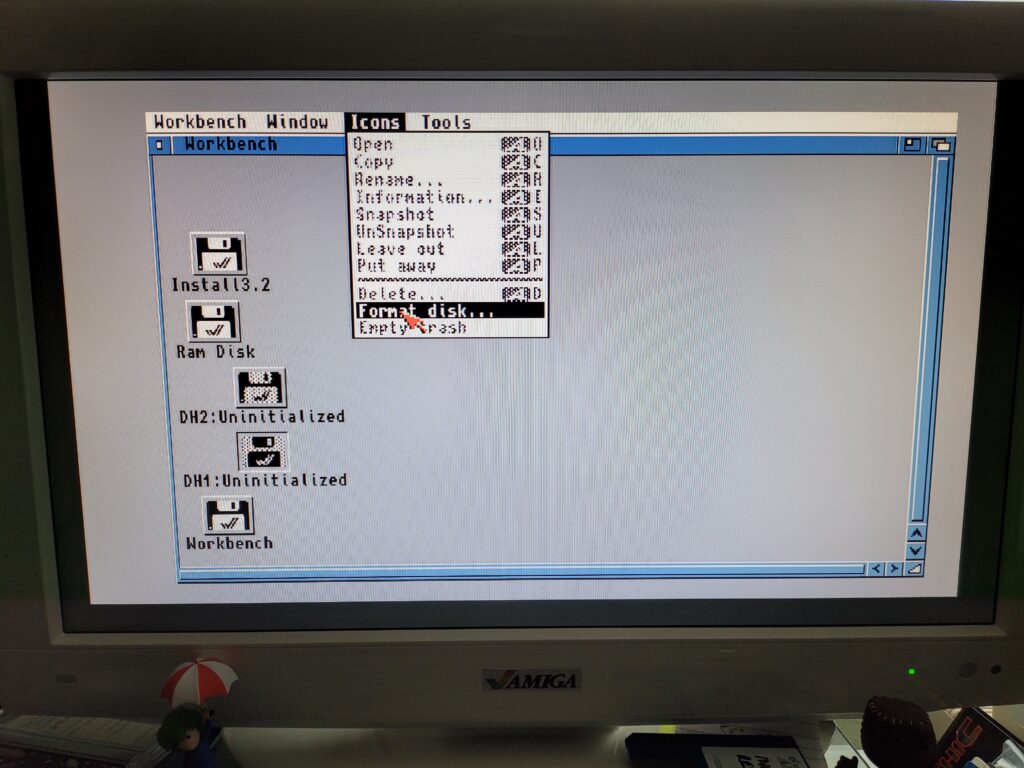
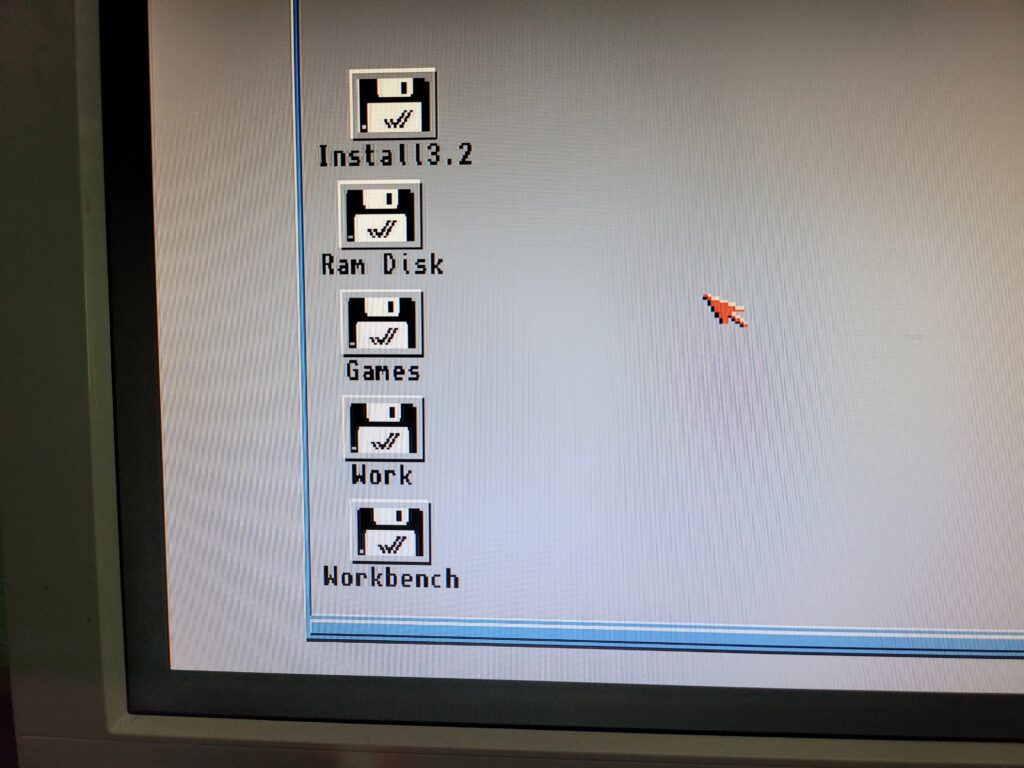
Now that I finally had a correctly prepared Compact Flash card, I re-installed it into my A1200 and begin the entire Partitioning process again, choosing exactly the same options as before. When I rebooted at the the end of it this time I was greeted with the Workbench screen I’d been looking for. One with all 3 drive icons showing on the screen waiting to be formatted as shown below.
To format each drive I selected the relevant icon and then selected ‘Format disk…’ from the Icons menu.
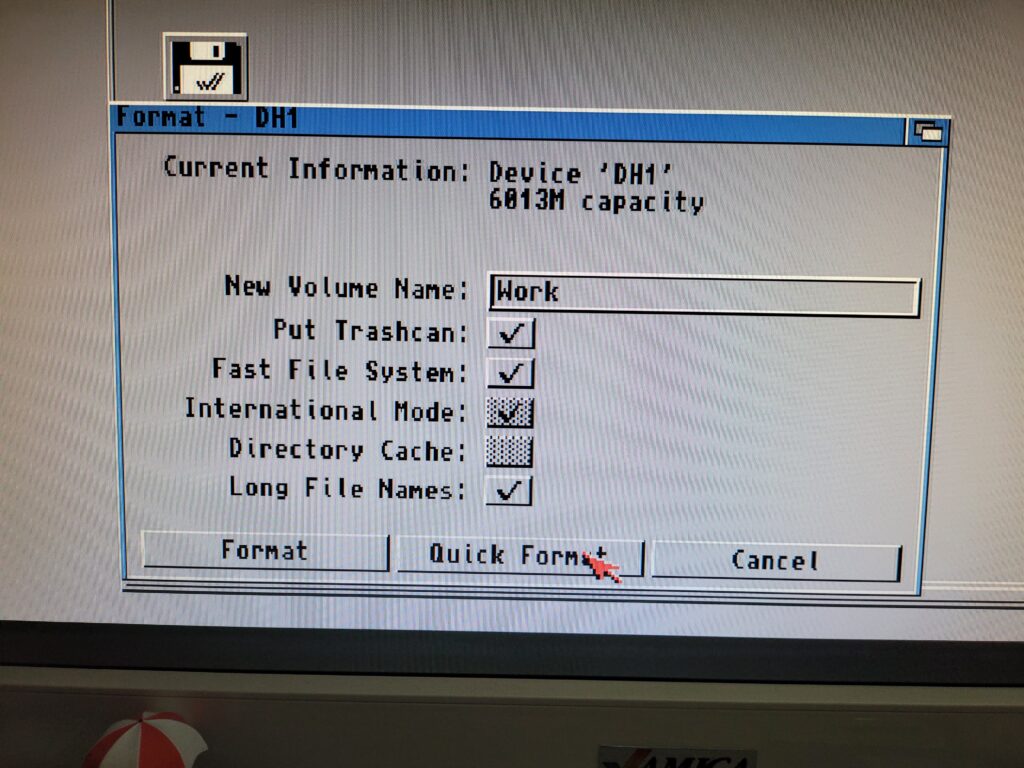
I named DH0 ‘Workbench’, DH1 ‘Work’ and DH2 ‘Games’. I also made sure that long file name support was ticked along with the Trashcan and Fast File System.
I used the ‘Quick Format’ option otherwise I’d be waiting all day for the format to finish! It’s totally unnecessary for large drives anyway – the only time I ever do a full format is on floppy disks.
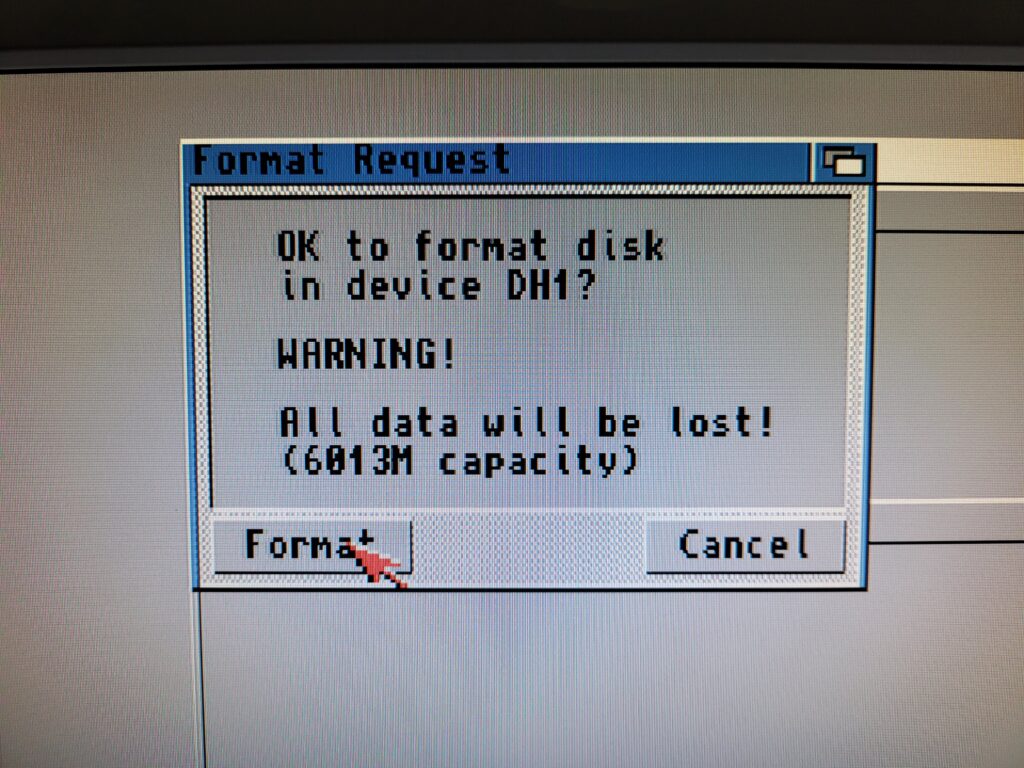
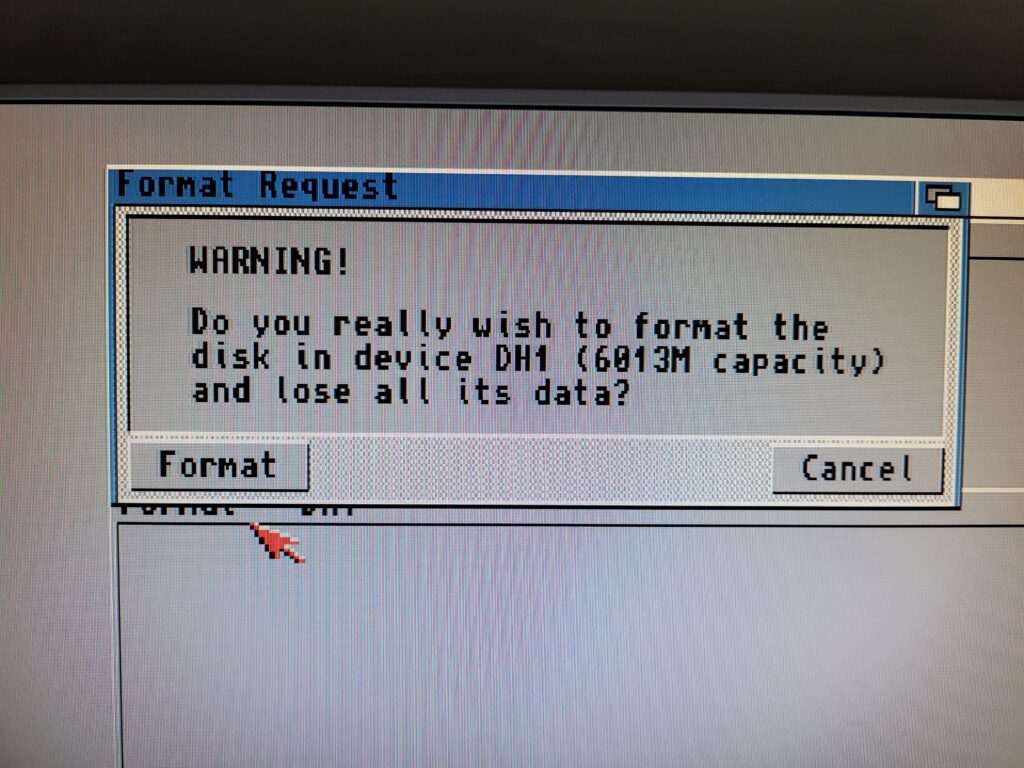
A couple of warning messages popped up reminding me that all data would be lost. I simply clicked ‘Format’ on both of them to get the job done.
The format was almost instantaneous and once I’d done all three drives I ended up with a screen looking like the image below.
Installing Workbench 3.2
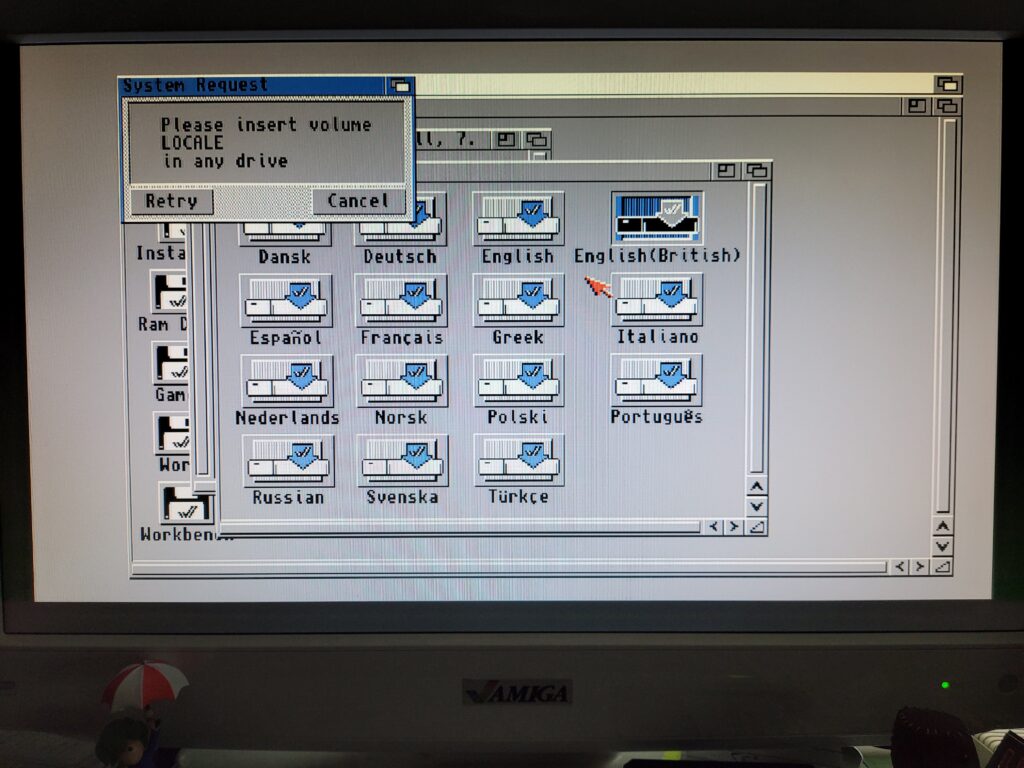
Finally it was time to install Workbench for real. I opened the Install3.2 disk and ran the English(British) installer from within the Install folder.
This invoked the first of many disk swaps. Thankfully I had all the ADF images on my USB flash drive so it was simply a matter of flicking through to the correct ‘disk’ and then letting the install continue.
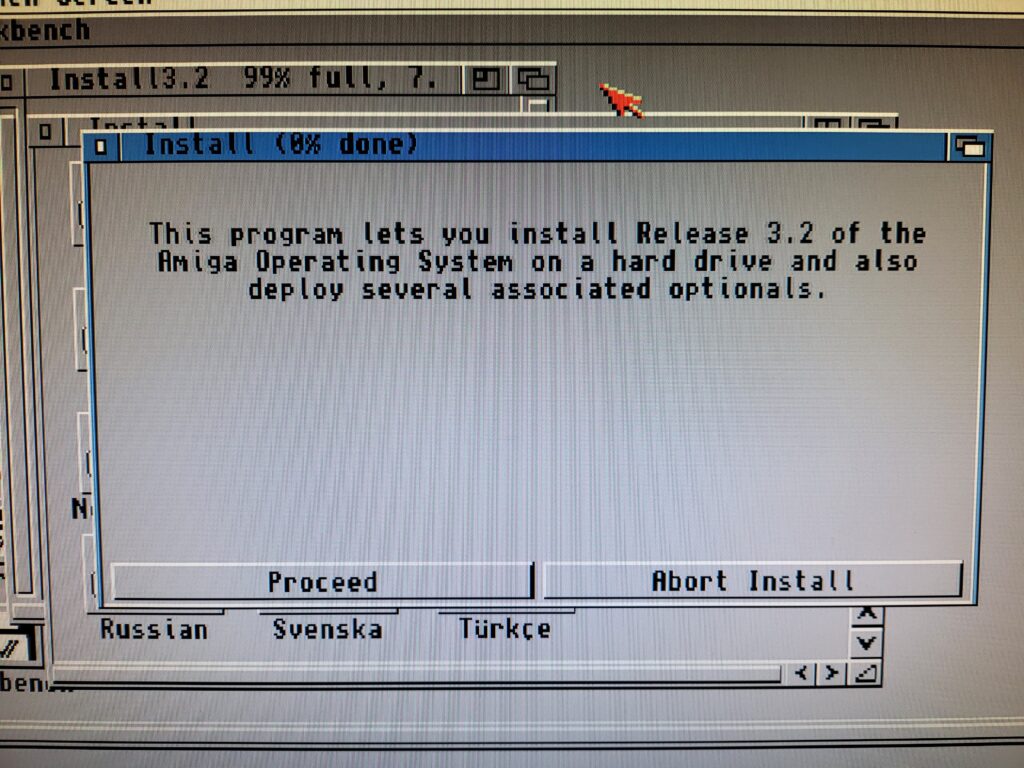
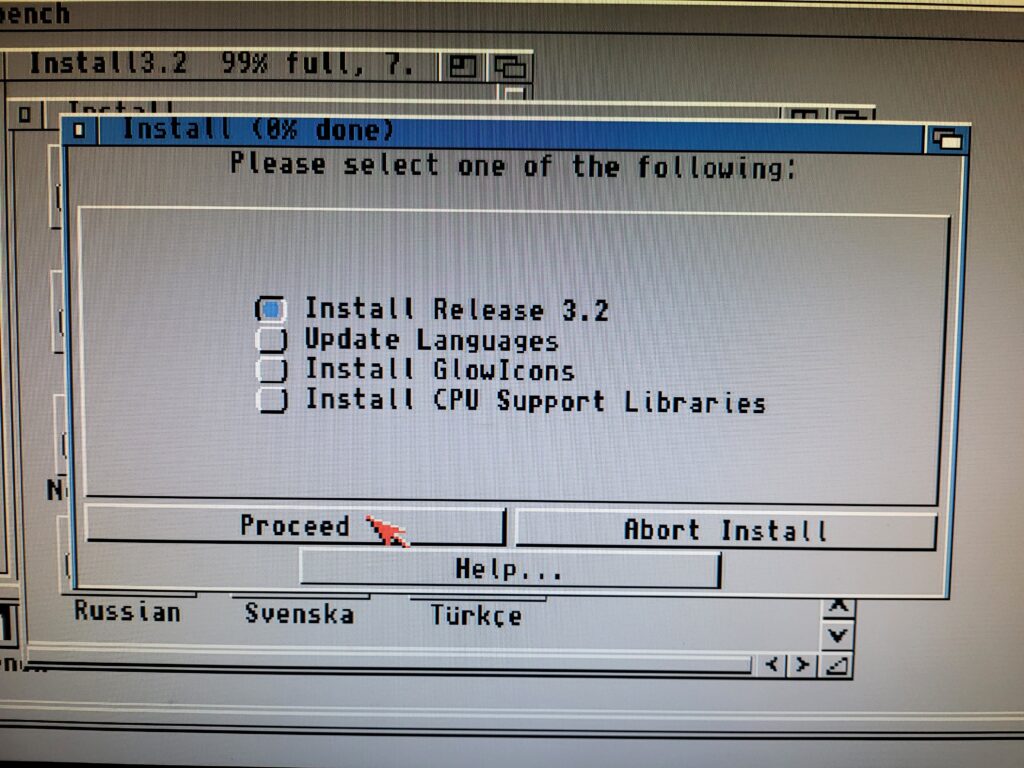
I clicked ‘Proceed’ on the first menu to appear as the other options are concerned with amendments/additions to an existing install.
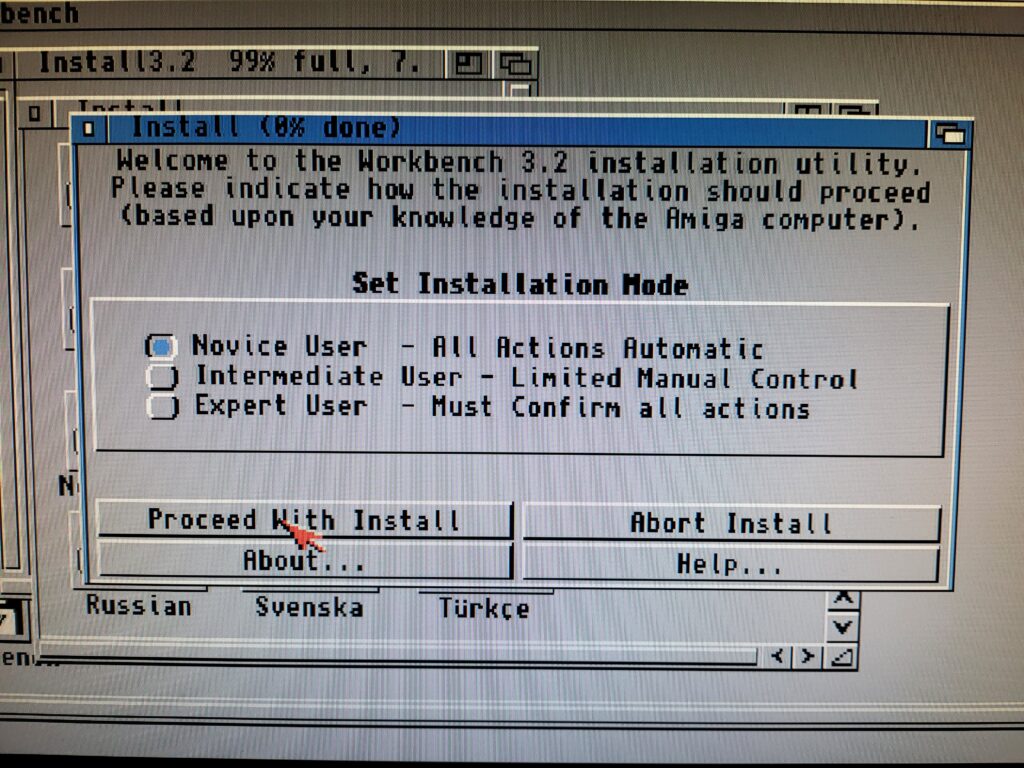
As I was doing a straightforward ‘clean install’ I left the Installation Mode set to ‘Novice User’ and then clicked ‘Proceed With Install’.
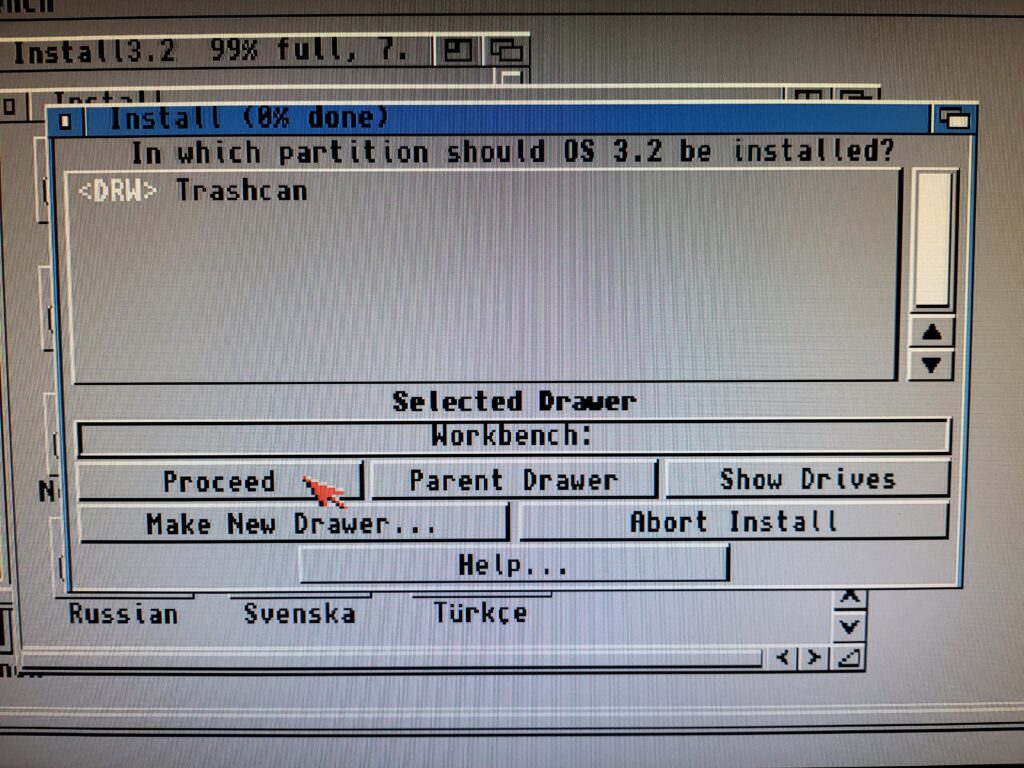
The next screen asked where I wanted to install OS3.2. I selected my ‘Workbench:’ partition and then clicked on Proceed.
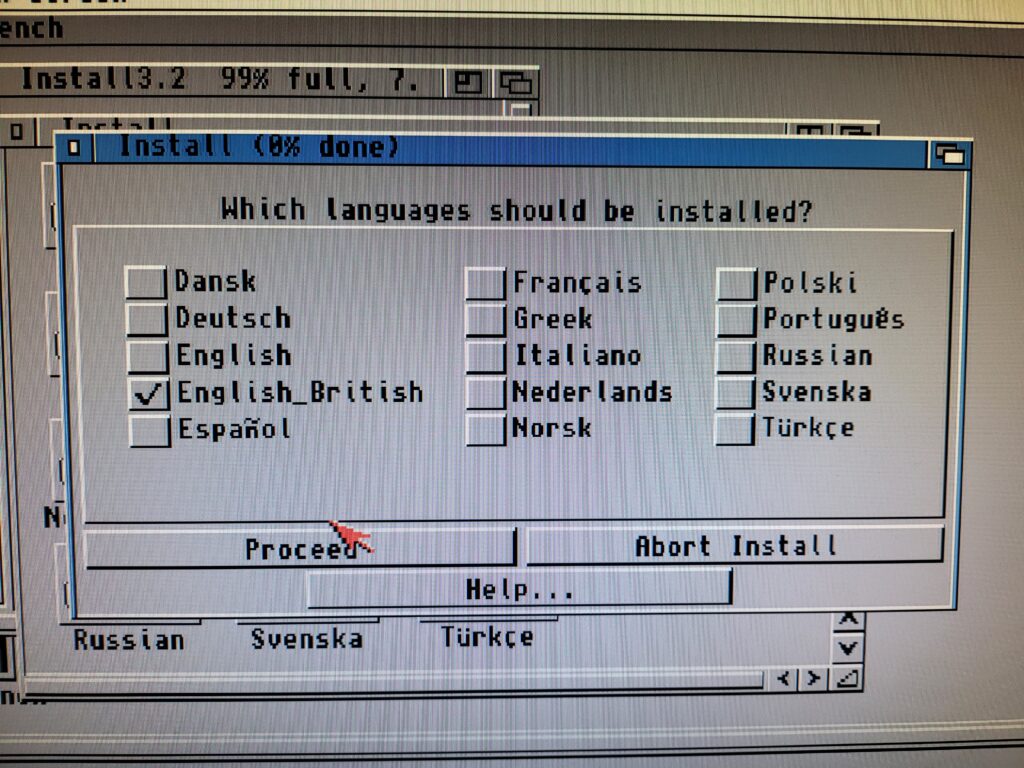
The installer asked me which language(s) to install so being in the UK I naturally chose ‘English-British’ before hitting ‘Proceed’.
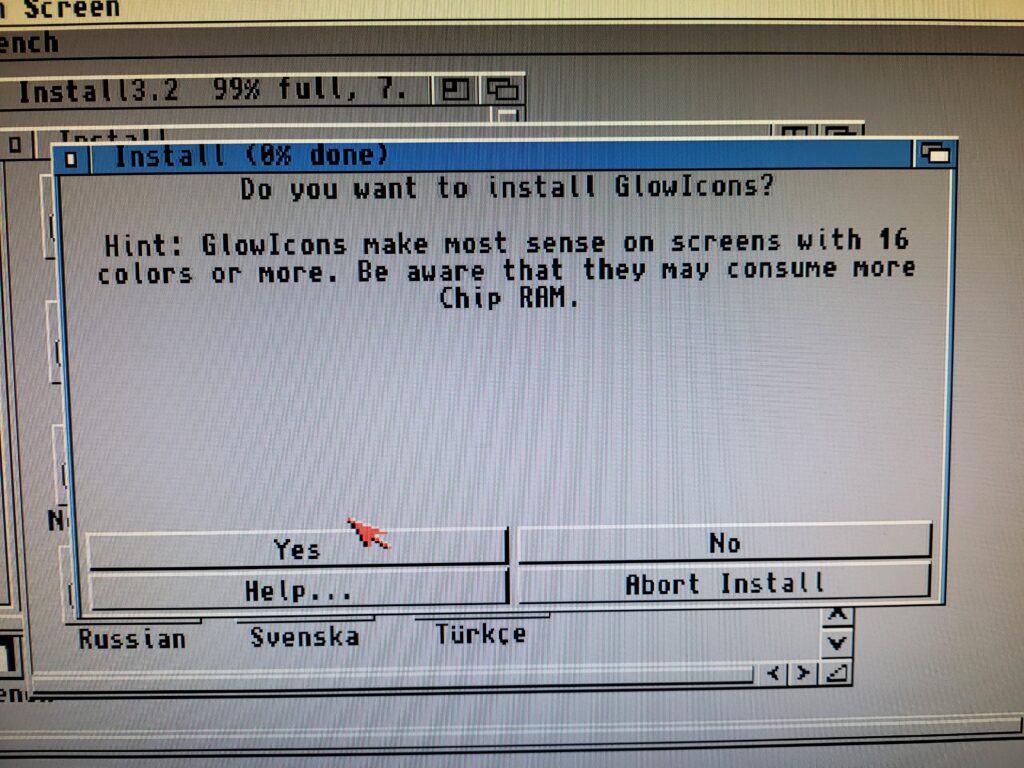
The next choice to present itself was whether I wanted to install GlowIcons or not. I most definitely did so I clicked on ‘Yes’.
I spent the next several minutes swapping ADF disks as the installer plucked files from everywhere based on the choices I’d selected.
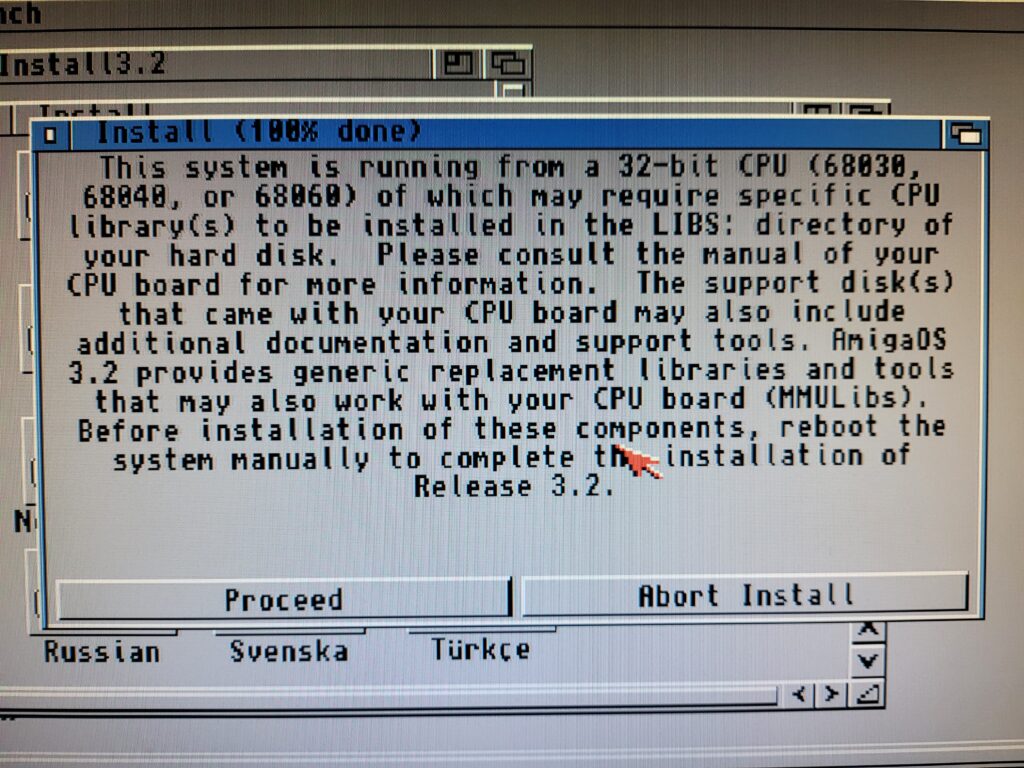
Eventually the installation reached 100% and then popped up a message telling me I would need to install some CPU specific library files to support my 68030 CPU.
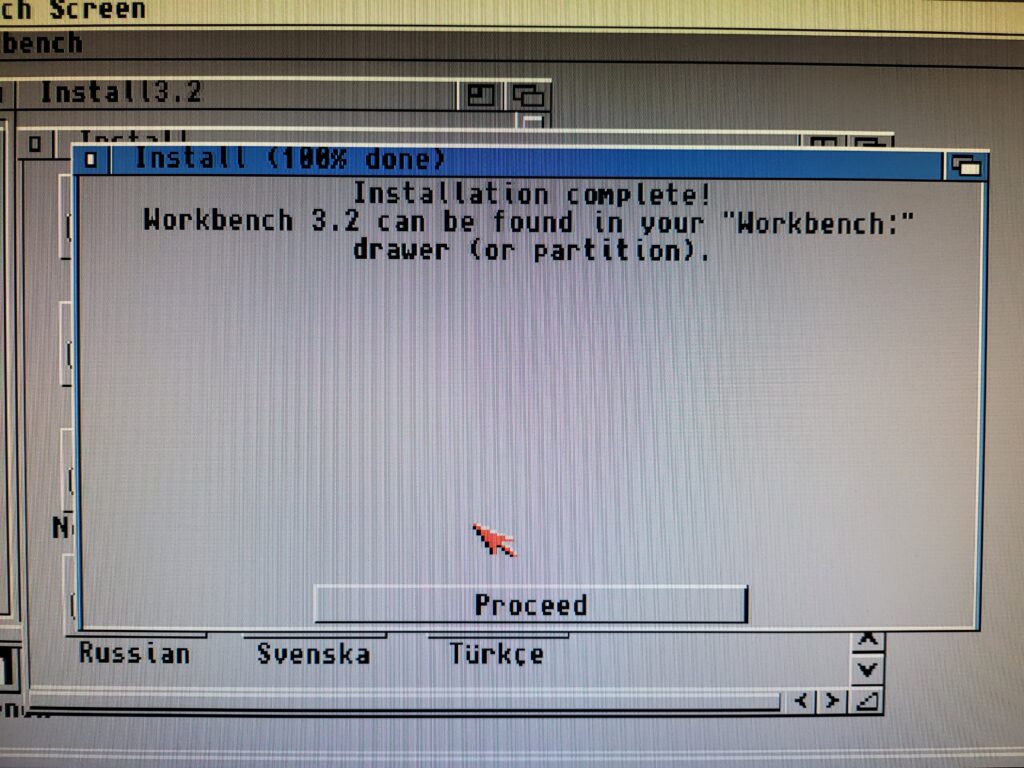
Hitting ‘Proceed’ on that screen and then on the next concluded the first part of the install.
Booting Workbench for the First Time
A reboot was required to test out the new install so I reset my A1200 and hoped for the best…
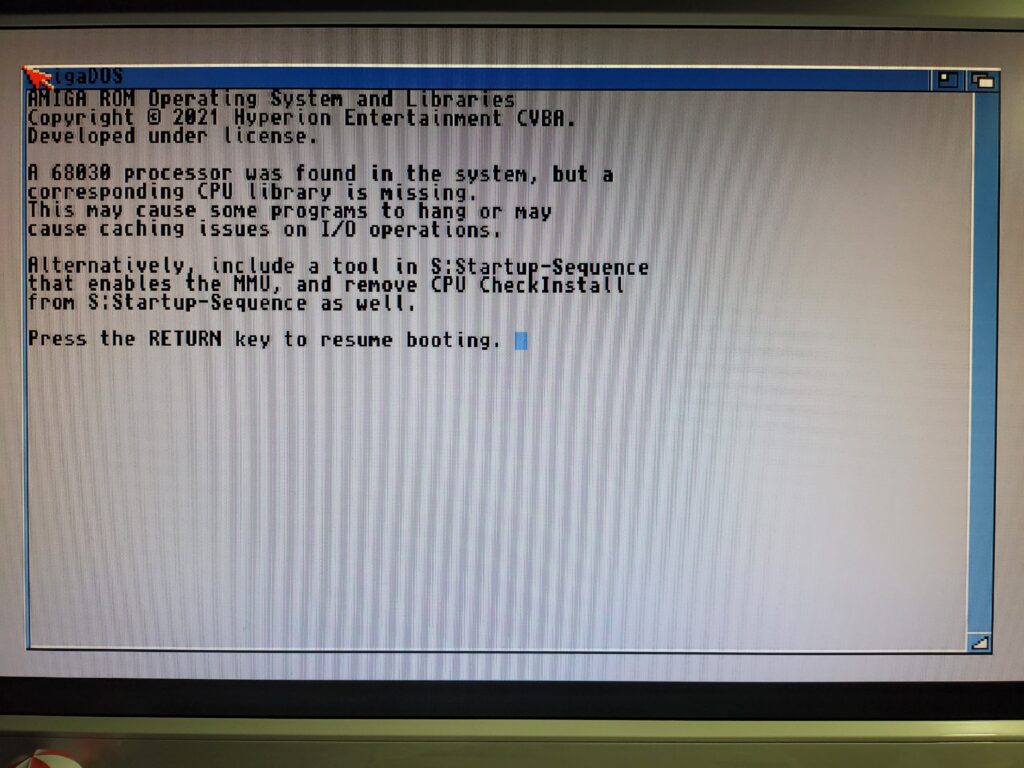
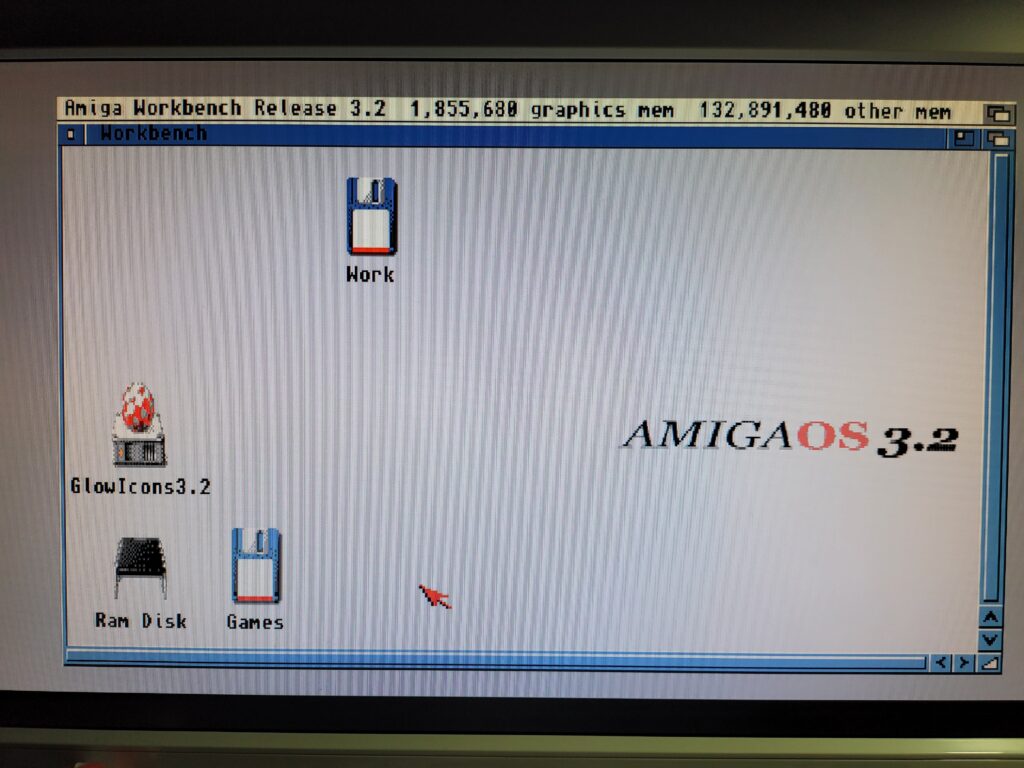
Soon I was greeted with yet another reminder that I had an 030 CPU but no library for it. I hit ‘Return’ to continue booting and a few moments later I reached the AmigaOS3.2 Workbench screen complete with backdrop and snazzy GlowIcons.
Content with the knowledge that Workbench was working nicely it was time to fix that CPU library issue.
Installing CPU Support Libraries
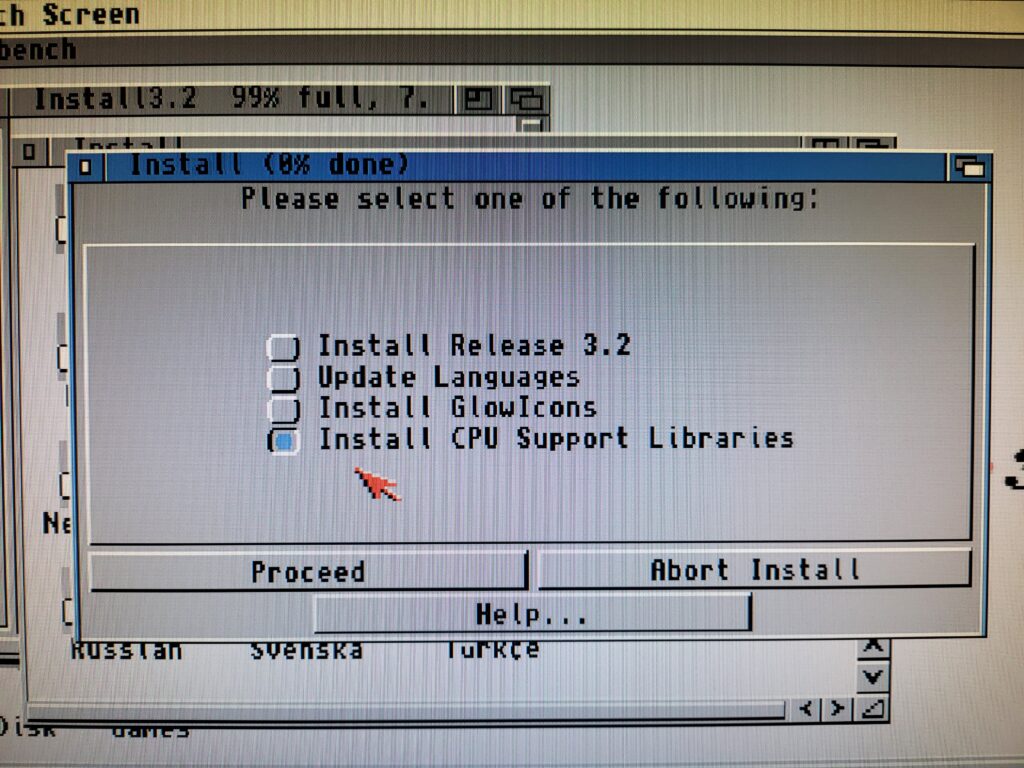
Back when I installed AmigaOS3.1.4 I remember having to source the necessary MMULIBS files from Aminet. Thankfully that’s now a thing of the past as 3.2 can install the required files itself. In order to do so I needed to re-run the installer and this time select ‘Install CPU Support Libraries’ from that initial menu.
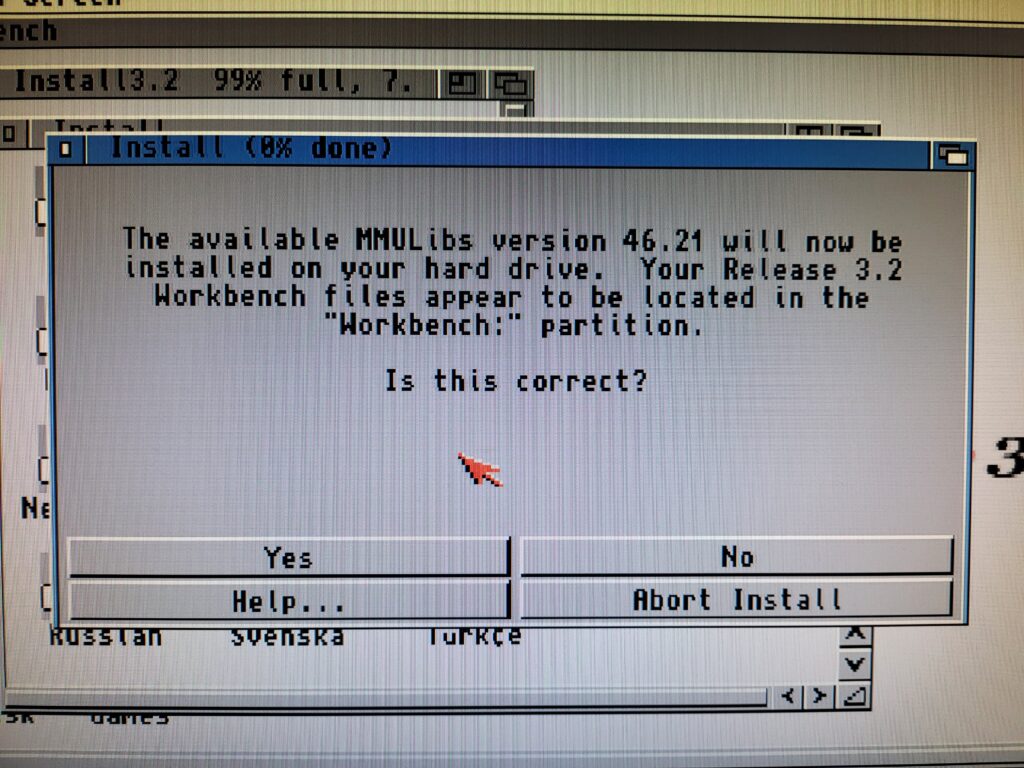
A confirmation window popped up and I simply responded with ‘Yes’ to proceed.
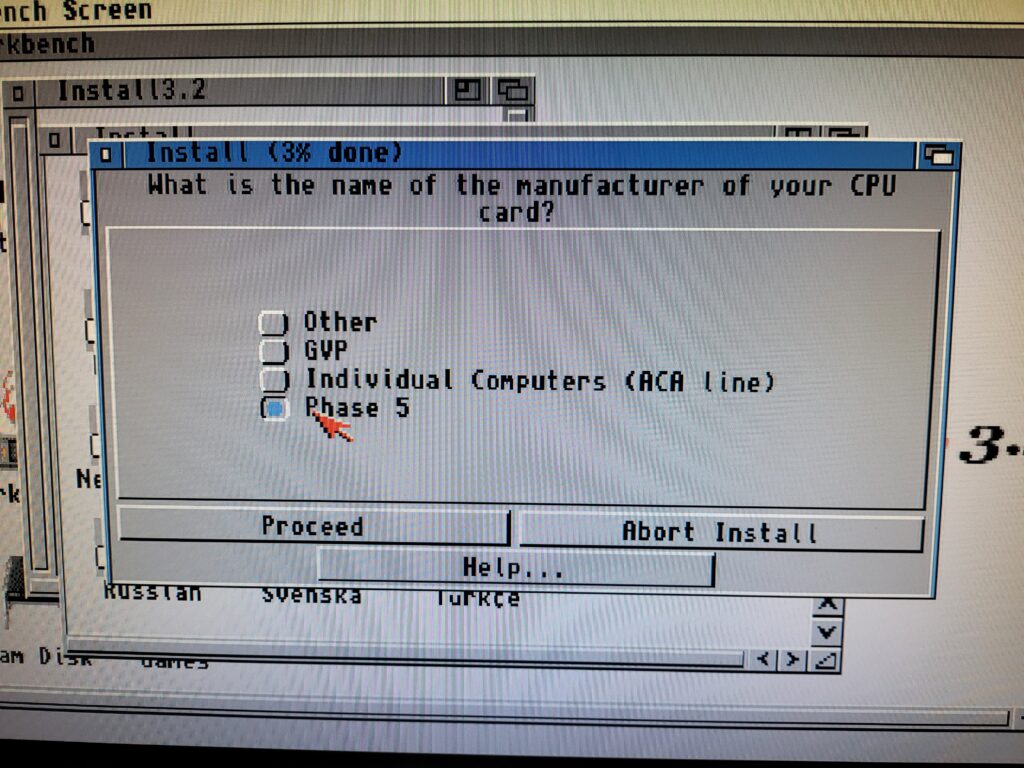
The following dialogue wanted to know which model of accelerator card I had installed. As I have a Blizzard 1230 MkIV I chose ‘Phase 5’ from the list and then clicked ‘Proceed’.
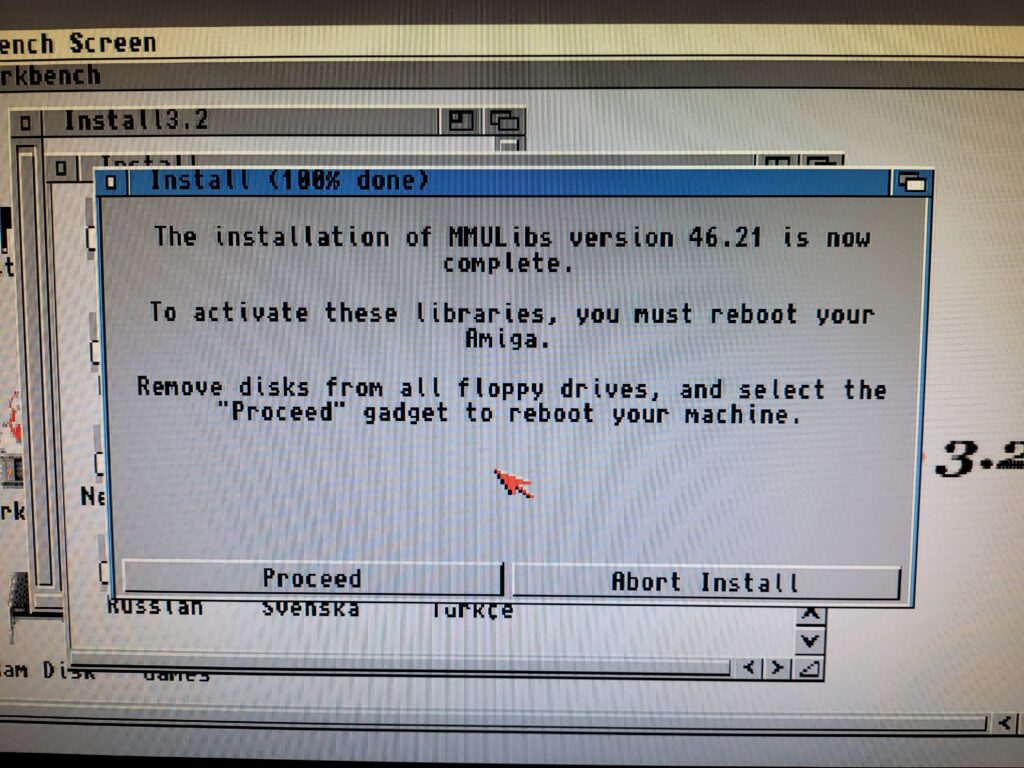
A few moments later and the installation was complete – all I needed to do now was reboot my A1200 and make sure all the warning messages had all cleared. (They had).
Configuring CD Access
There was one other quick configuration change I could make to round off my install and that was to get my CD drive working. OS3.2 includes a CD filesystem so I didn’t need to install anything extra.
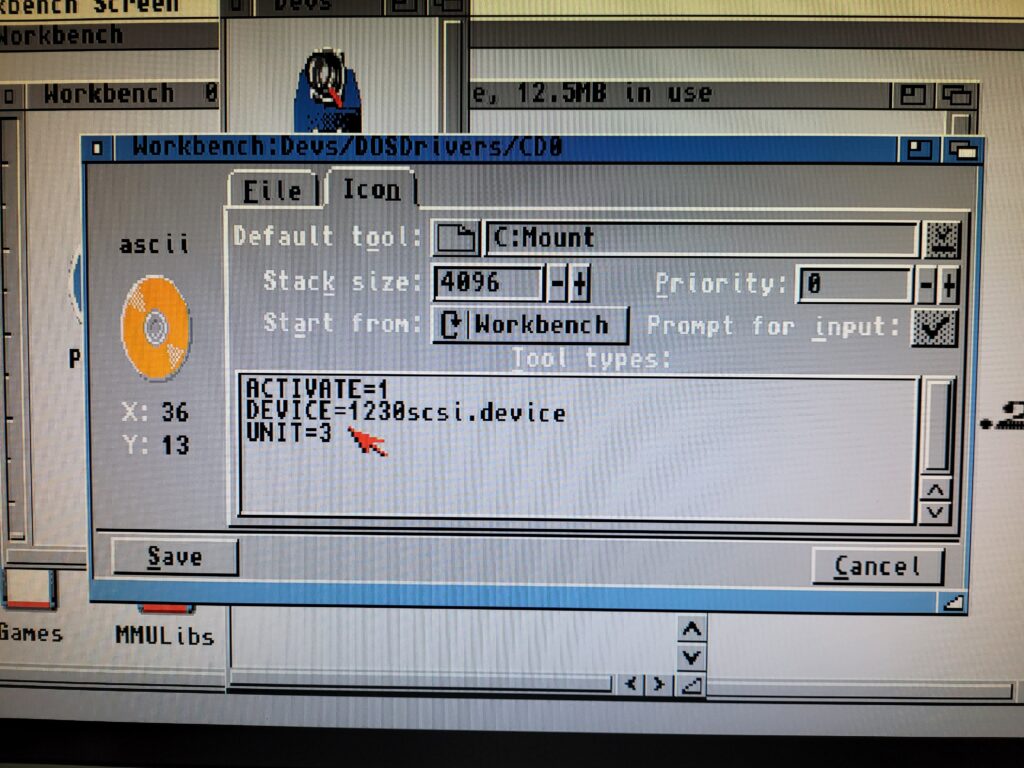
The first thing to do was drag the CD0 device from STORAGE/DEVS/DOSDrivers to DEVS/DOSDrivers and bring up the Icon Information window to edit the Tooltypes. The Information window has changed a little bit under 3.2 so the Tooltypes now reside under a Tab called ‘Icon’.
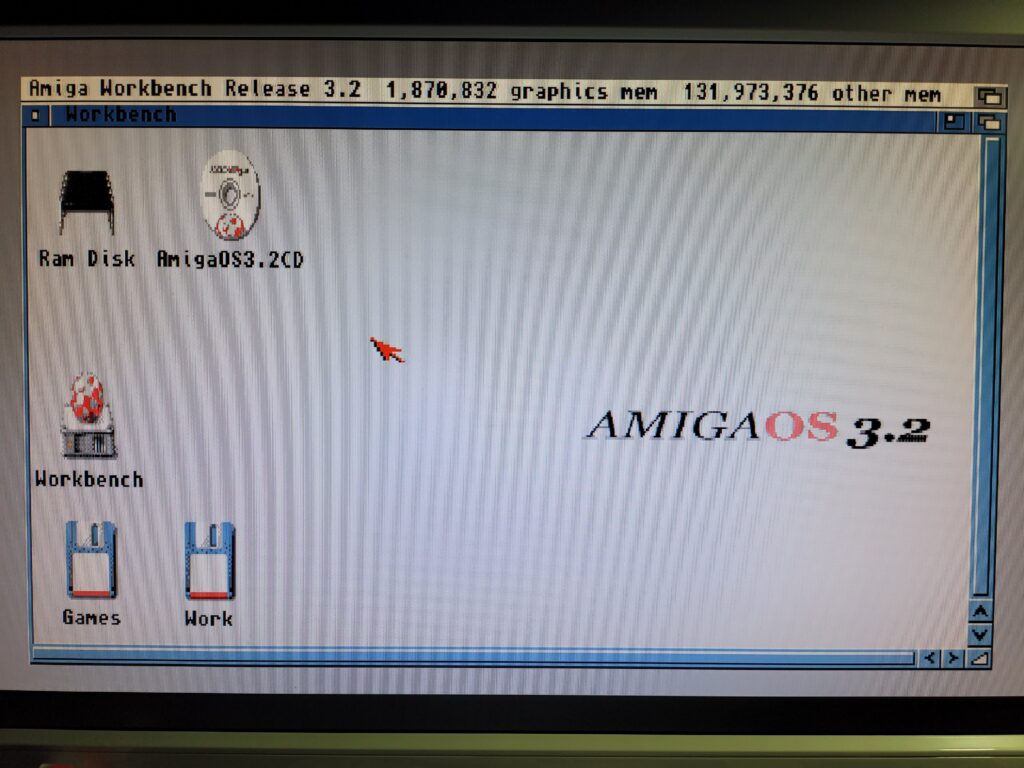
There were two tooltypes I needed to alter; ‘DEVICE’ and ‘UNIT’. As I have a Blizzard SCSI card I needed to set ‘DEVICE=1230scsi.device’ as that is what my SCSI device is called. My CD drive has a SCSI ID of 3 so I set ‘UNIT=3’ and then saved my changes. As no CD device had been mounted up to this point I simply double-clicked the CD0 icon to test if the new settings worked and popped in my 3.2 CD. Happily a few moments later I could see a fancy little AmigaOS3.2 CD icon on my Workbench. Another job done.
With Workbench 3.2 successfully installed it was now time to get busy sorting out internet access and installing all my apps and games once more…
I’ve covered all that stuff before with 3.1.4 but if anything crops up that poses an unexpected issue I’ll add to this post.




Make sure you install the 3.2.1 update,. It fixes a lot of issues I was having with a very similar 1200 spec to yours.
I definitely will. Just waiting for my 3.2.1 ROMS to arrive. I know I don’t strictly need them but I wanted to have them anyway. Plus it spreads a bit of money around to support the community. 🙂
I have the OS 3.2 and the 3.2.1 roms which i have fitted. I did write back to floppy disk MMULibds Amiga and the Modules A1200 and the Install 3.2
Now i thought i could install the OS 3.2 from CD alone on a fresh partitioned hard drive?
The cd0 is already mounted in storage/devs on the Install 3.2 disk but my cd rom is not detected?
Have i understood this all wrong and the OS 3.2 needs to be installed via floppy disks which need to be all written back to floppies from the cd?
Hi again, It seems i can install OS 3.2 from scratch via cd 🙂 I had to reinstall OS 3.1 then my fastATA driver then drag my CD2 and CD3 icon from my workbench DEVS:DOS drivers to the Install 3.2 Install disk in Storage DosDrivers: so now whenever i do a fresh install from OS 3.2 i boot the Install 3.2 disk and the OS3.2 CD is there 🙂
I’m using a blizzard 040 ppc@175mhz 68k@25mhz I used the cpu support and chose phase5 now on booting i get a warning not to use the 68060 libs as this will not work so i have deleted that from the Libs and left the other cpu Libs and now the yellow guru warning has gone?
Hi Andrew, glad you’ve managed to get it all up and running in the end. Sorry for the lack of posts/replies of late but I’ve recently undergone surgery and am now recuperating so I just haven’t been feeling up to much. Did you get your Virgin mail working?