Lyonsden Blog

Tag - Joystick

Wireless Amiga and C64 Gamepad Review

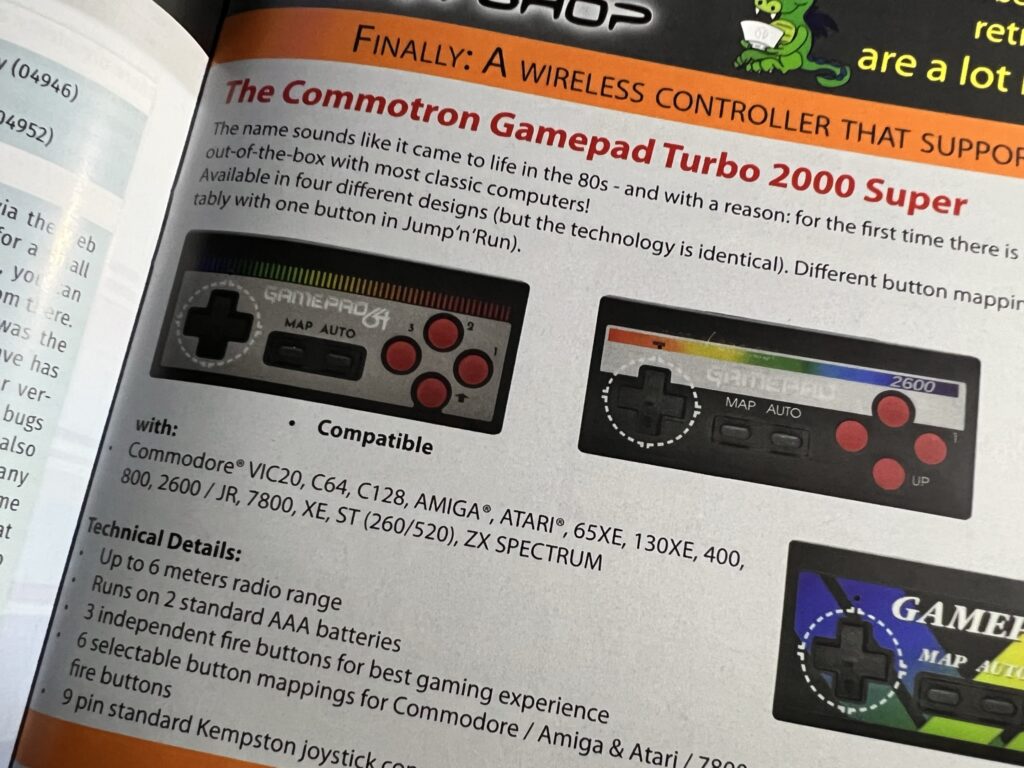
I spotted this wireless Amiga gamepad in an advert in the latest issue of Amiga Future magazine and ordered myself one immediately. Reading a physical Amiga magazine in 2023, seeing an advert in it and actually being able to order the item in that advert is a pretty special experience for me as a retro gamer. Normally when browsing through old Amiga magazines I see adverts for products and from suppliers that are long gone, but this was like being back in the early 1990’s all over again!
 

wireless Amiga gamepad

Advert in Amiga Future Magazine.


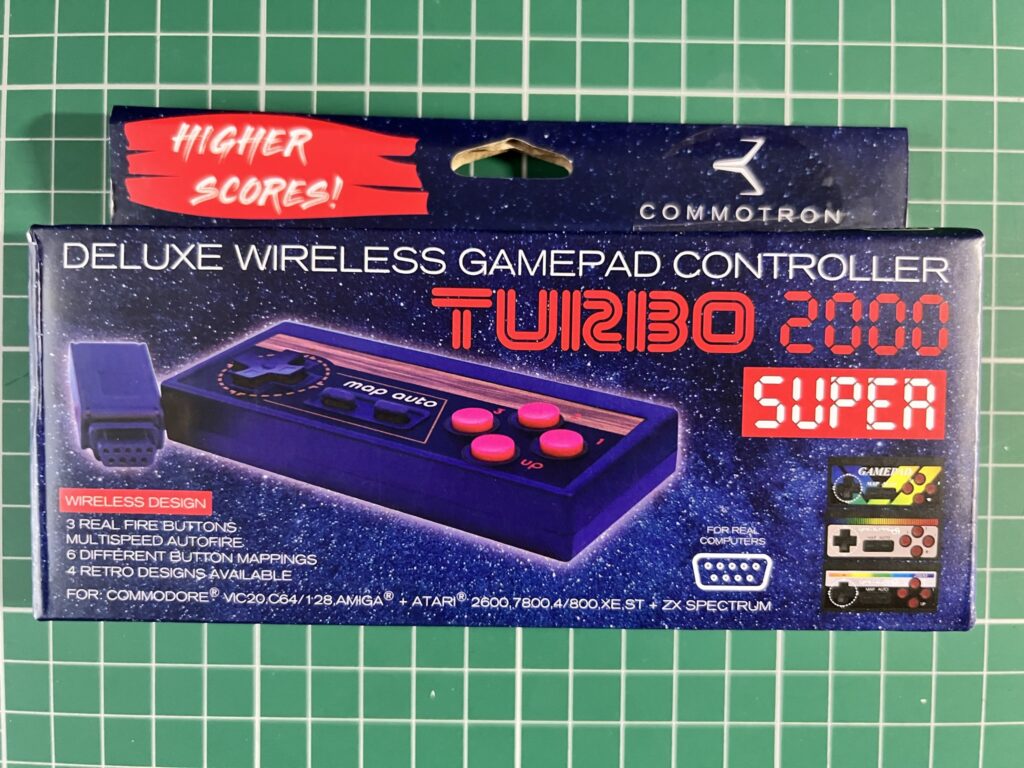
It’s full name is the “TURBO 2000 Super – Deluxe Wireless GamePad Controller” which is ridiculously OTT in a loveable 80’s kind of way. I picked mine up from their eBay web store but they’re available elsewhere online from other retro retailers too.
 

wireless Amiga gamepad

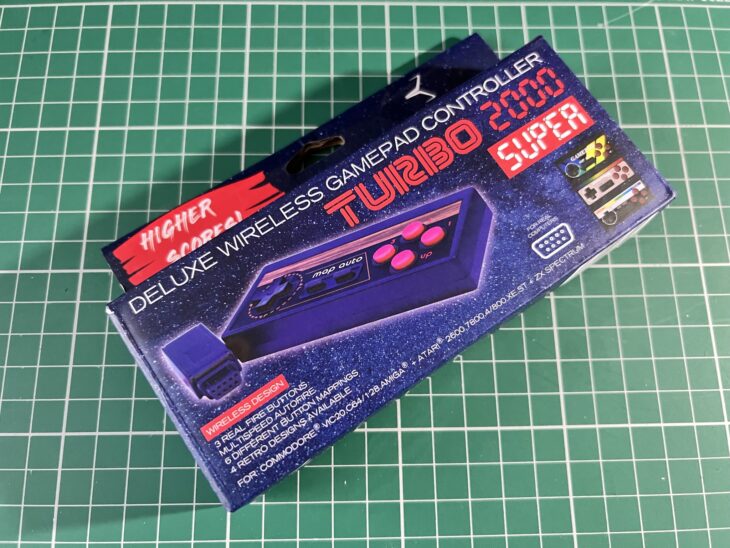
The box front.


Despite coming from Germany delivery took less than a week and I had no import fees to pay. Yippee! 🙂
 

wireless Amiga gamepad

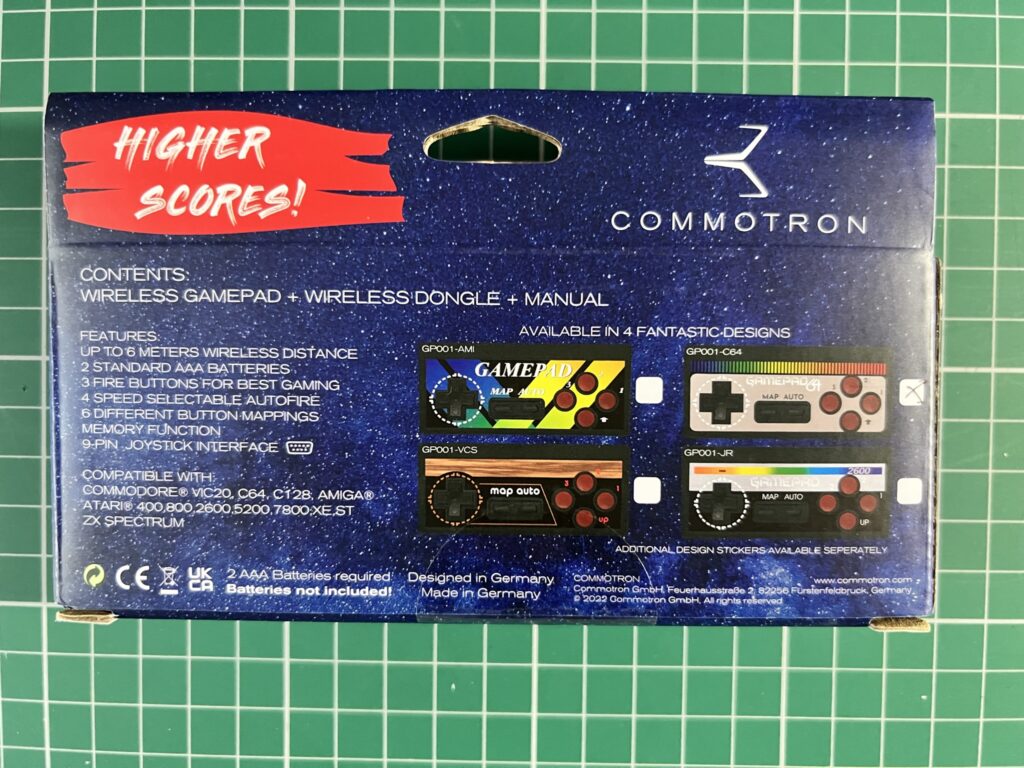
Back of the Box.


It came packaged in a pretty slick and colourful box that definitely wouldn’t look out of place on the shelf in your local game store.


Batteries Not Included

Opening up the box reveals a couple of instruction sheets, a dongle with a standard 9-pin DSub plug and of course the gamepad itself.
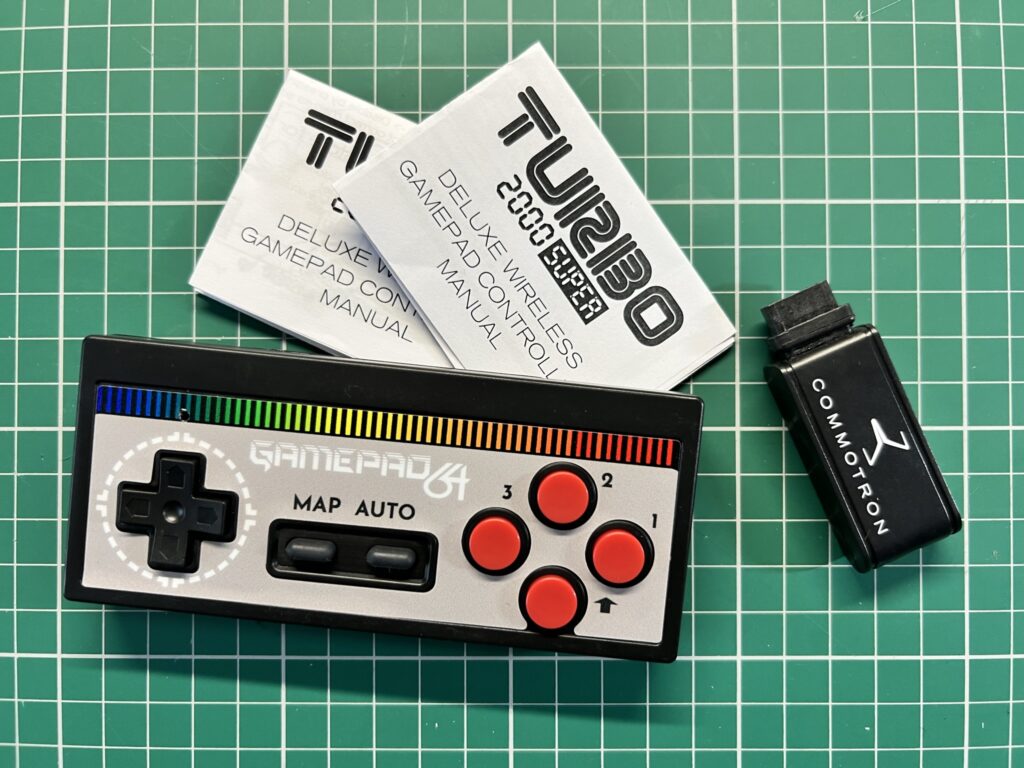
 

wireless Amiga gamepad

Everything you get inside the box.


They actually make four different versions of the gamepad for the Amiga, C64, Atari VCS and Atari 2600. They’re all the same physical device though, it’s just the vinyl sticker on the controller that differs for each version.
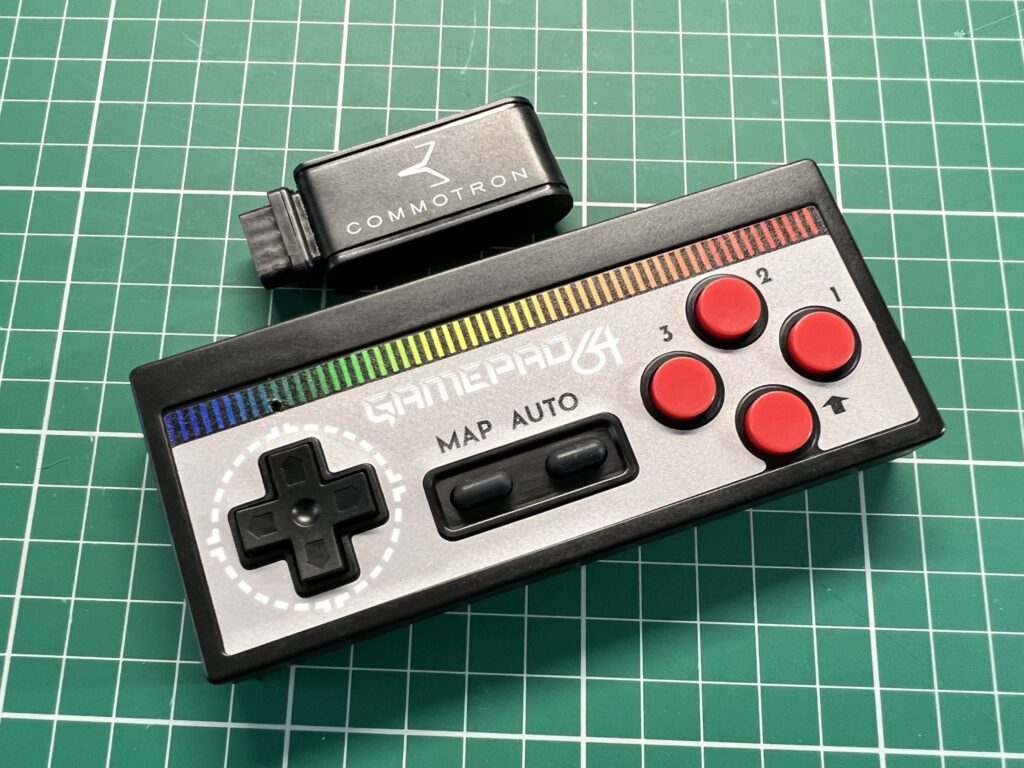
 

wireless Amiga gamepad

The wireless dongle and gamepad.


I chose the C64 themed controller as the colours just appealed to me the most.
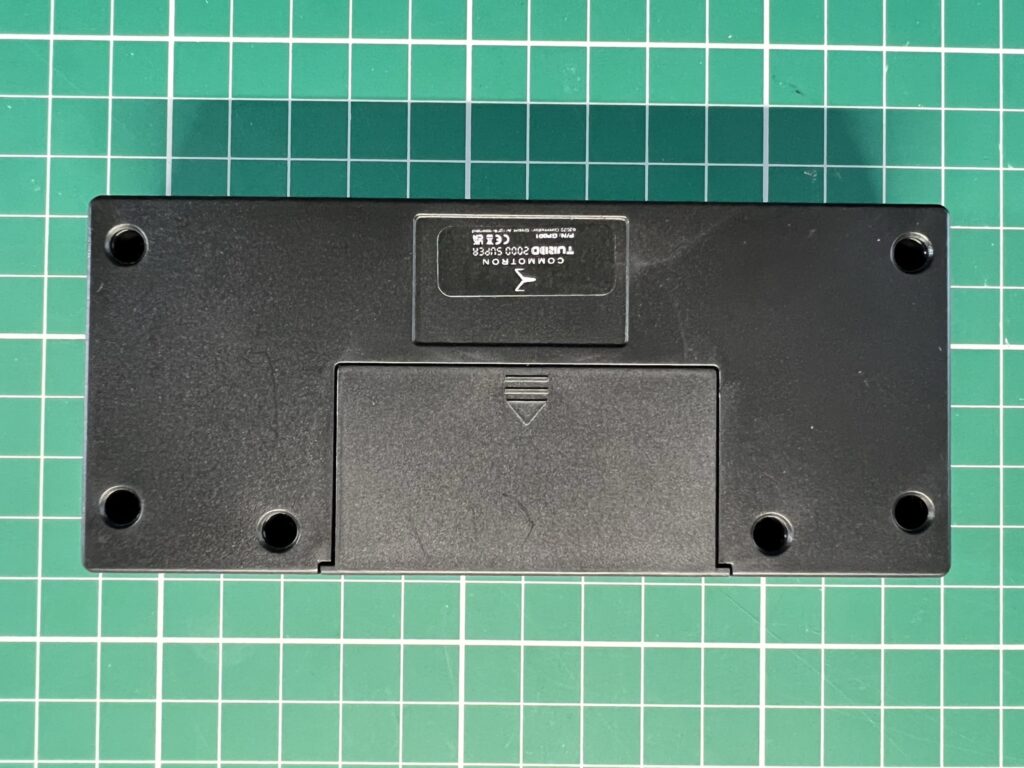
 

wireless Amiga gamepad

Bottom of the Gamepad.


The controller takes 2 AAA batteries (not supplied) that fit into a little compartment on the underside.
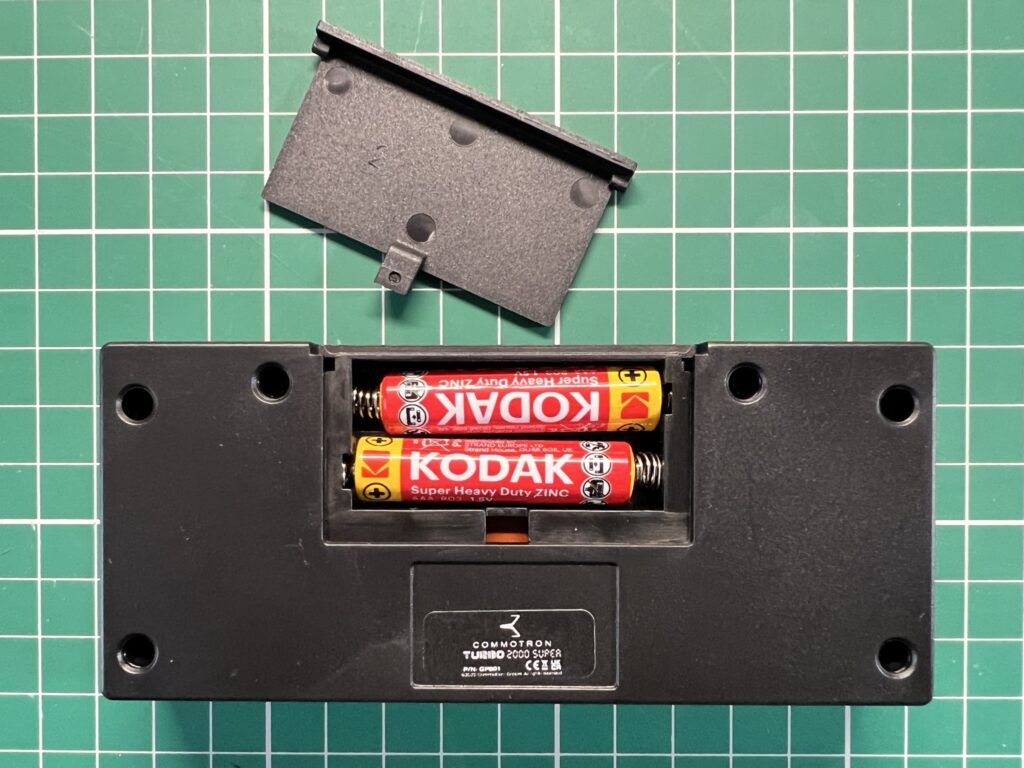
 

wireless Amiga gamepad

AAA Battery Compartment.


Connecting the Gamepad to the Amiga

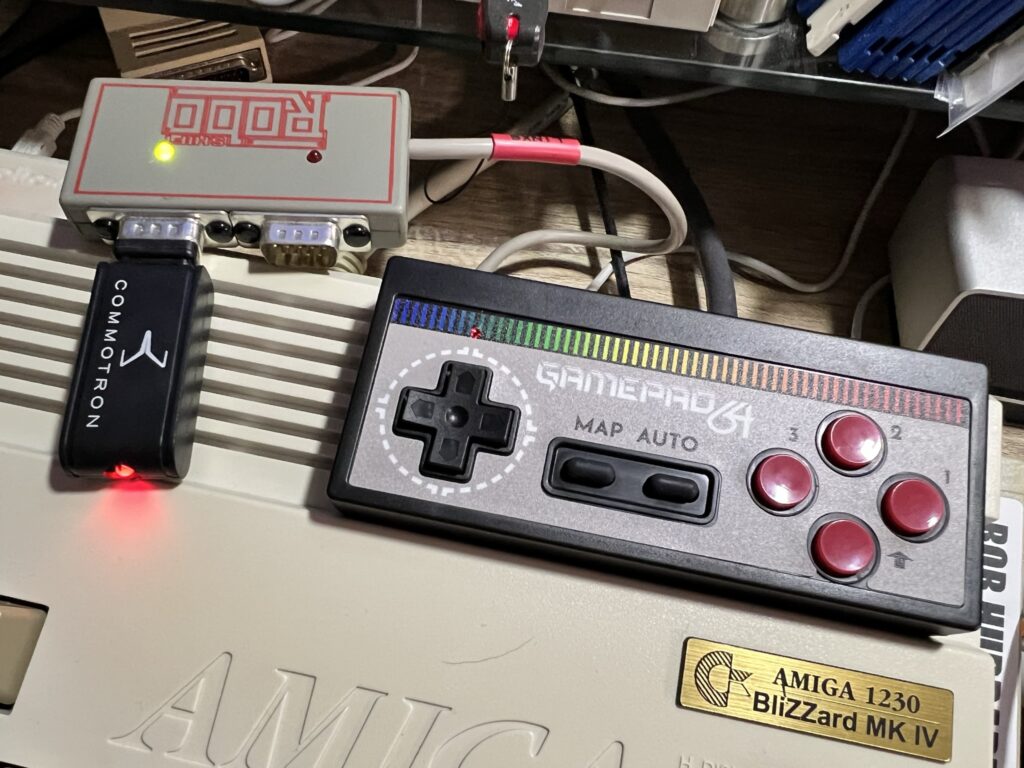
Connecting the dongle and gamepad to the Amiga could not have been any simpler. You just plug the dongle into the joystick port as normal (or in my case my Roboshift), power on the Amiga and then power on the gamepad.
 

wireless Amiga gamepad

Hooking the Wireless Dongle up to my Roboshift device.


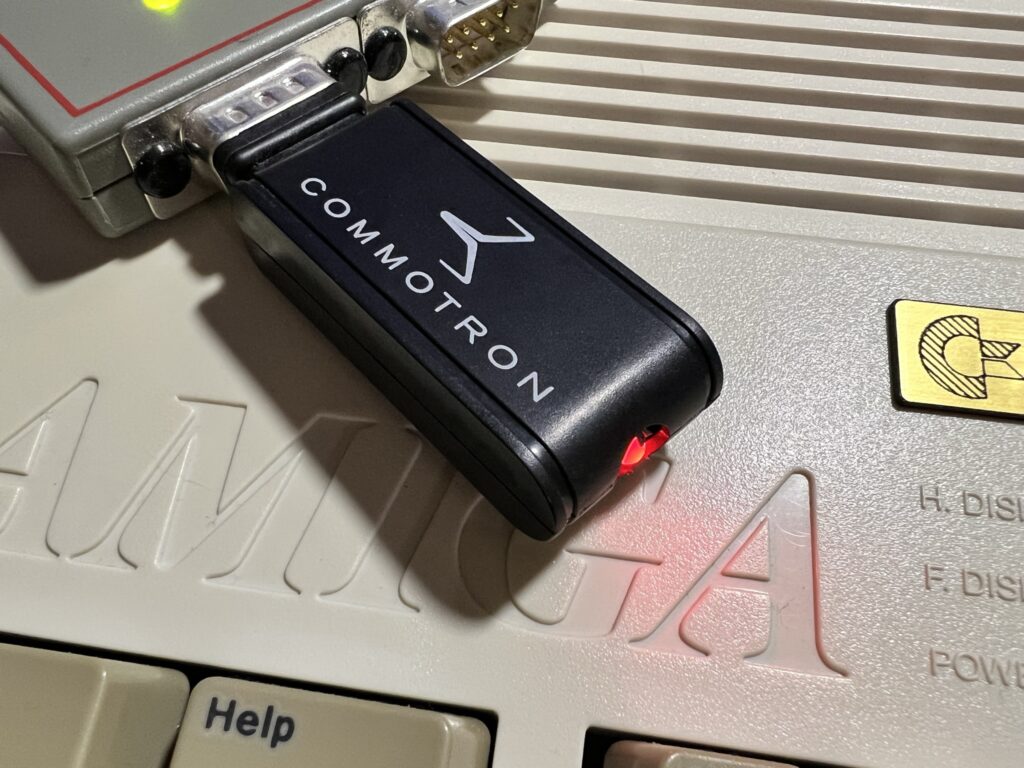
When you first plug the dongle in and power on your Amiga, a red LED on the device flashes signifying that it is trying to pair with the controller.
 

wireless Amiga gamepad

The Wireless Dongle.


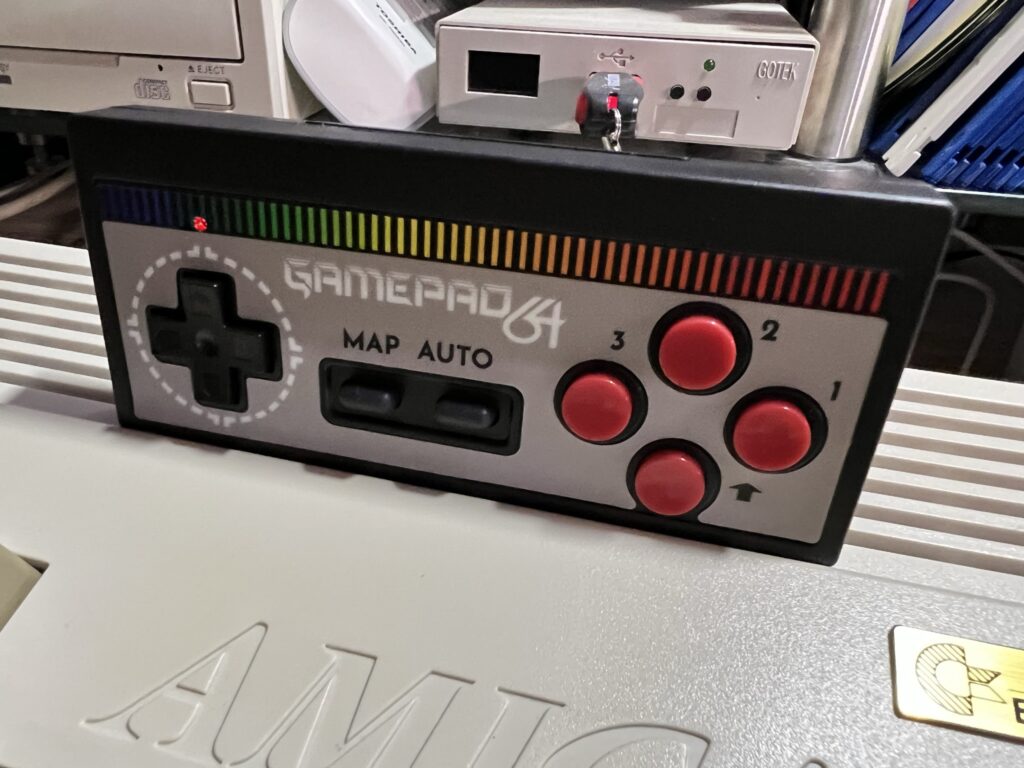
As soon as I powered on the gamepad (which also had a small red LED above the D-Pad) both LED’s became solid red right away.
 

wireless Amiga gamepad

Notice the little Power/Connectivity LED above the D-Pad.


What’s it like to use?

The gamepad is well constructed and nicely finished in a textured matte black plastic. The vinyl sticker on the front is really well made and looks professional. The textured finish makes it easy to grip and having a set of batteries inside it means it has a nice bit of weight to it.
 

wireless Amiga gamepad

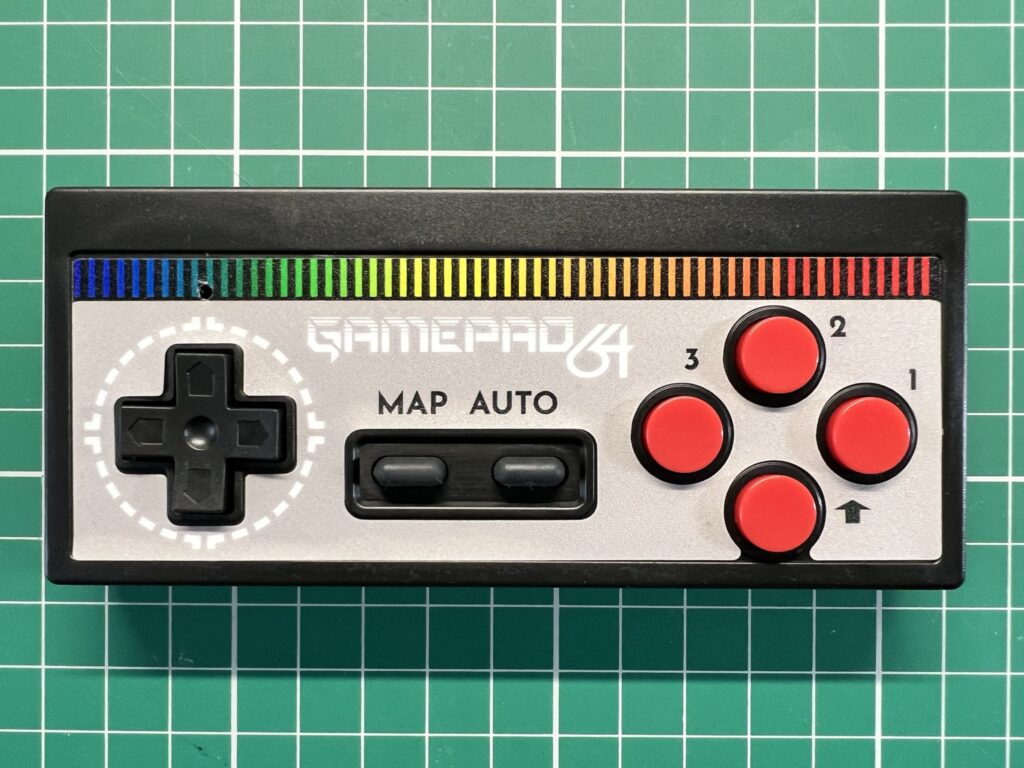
Close-up of the buttons.


The gamepad features 3 fire buttons (labelled 1, 2 & 3) and a dedicated ‘UP’ button which is a real boon in platform games. The ‘MAP’ button is used to switch around the fire buttons depending on your preference or system being used. It can also be used to switch the ‘UP’ button with fire button 1 should you wish. The ‘AUTO’ button toggles the auto-fire feature on and off. 4 different auto-fire speeds are configurable on the pad; 1, 5, 8 and 13 ‘clicks per second’.

The D-Pad is very responsive and easy to operate without accidentally triggering a diagonal direction unless you actually want to. The fire buttons are quite stiffly sprung and require a firm push to depress which gives plenty of tactile feedback. It did take me a little while to get used to though. Compared to say an Xbox or PlayStation controller they require much more pressure to operate.
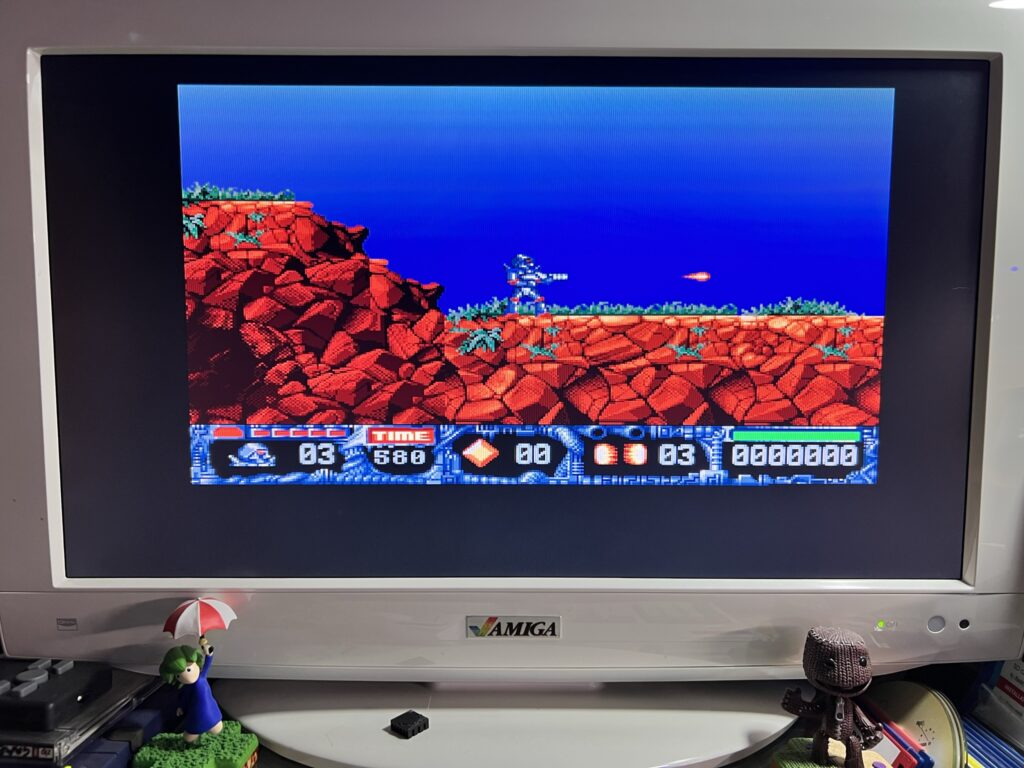
 

Turrican 2 AGA

Turrican 2 AGA


Having 2 fire buttons that work on the Amiga is terrific. Playing the new Turrican 2 AGA for example (awesome game by the way) is so much better when you have the 2nd fire button to help trigger extra weapons/abilities instead of having to reach for the keyboard all the time!
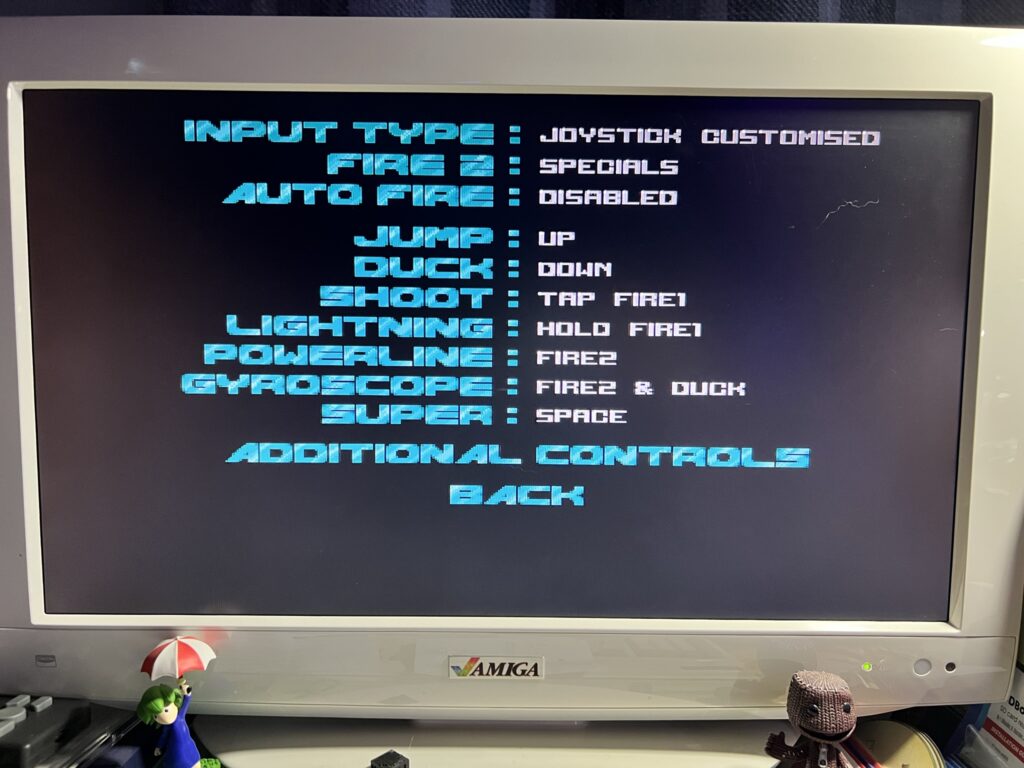
 

Turrican 2 AGA

Turrican 2 AGA – 2nd Fire Button Configuration.,


This gamepad would be equally awesome for games that support 2 fire buttons on the C64 too. Games like Super Mario Bros 64 and Chase HQ 2 for example.

Another useful feature is that the gamepad turns itself off after a period of inactivity to conserve battery life. Turning it back on just requires a quick press of the ‘AUTO’ button for near instantaneous reconnection.


Final Thoughts

This is an awesome controller and I’m so glad I bought it. I have a ton of retro joysticks and gamepads now but this one has quickly become my favourite. The combination of auto-fire, configurable extra fire buttons and of course the wireless capability means it’s a no-brainer for me. It’s reasonably priced too, coming in at around the same level you would expect to pay for an Xbox or PlayStation controller. Considering this is a low volume product I think the price is very fair indeed.

Needless to say I’m going to order some more so I can leave one permanently attached to each of my Commodore machines! Highly recommended.


FYI

I’ve included scans of the instructions below in case anyone is curious about exactly how the button mapping or pairing works.
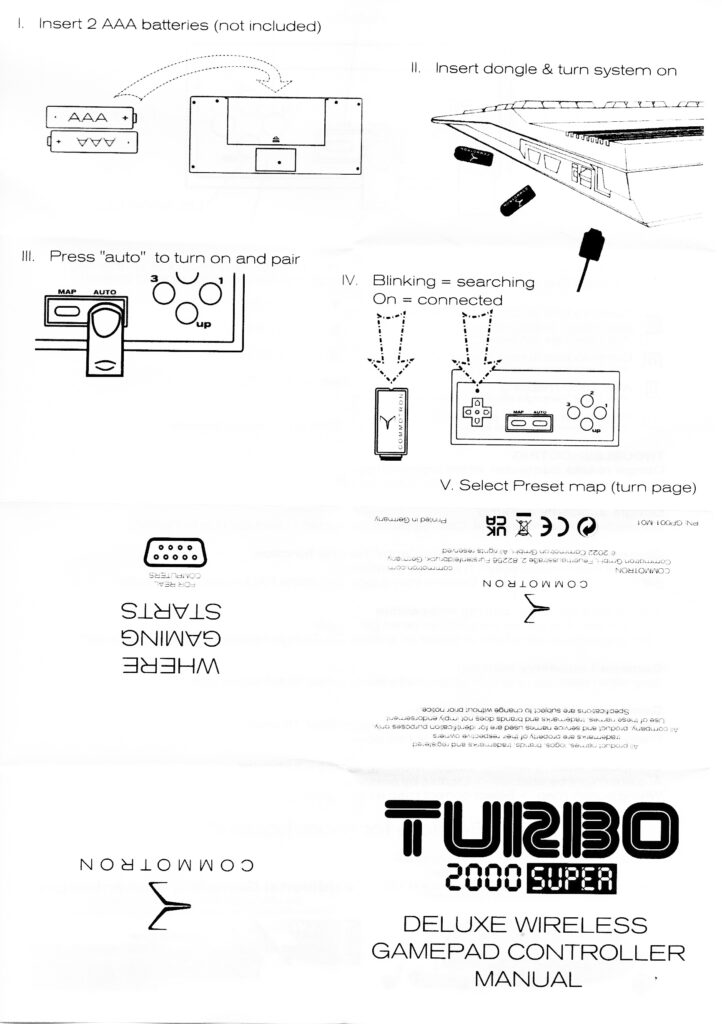
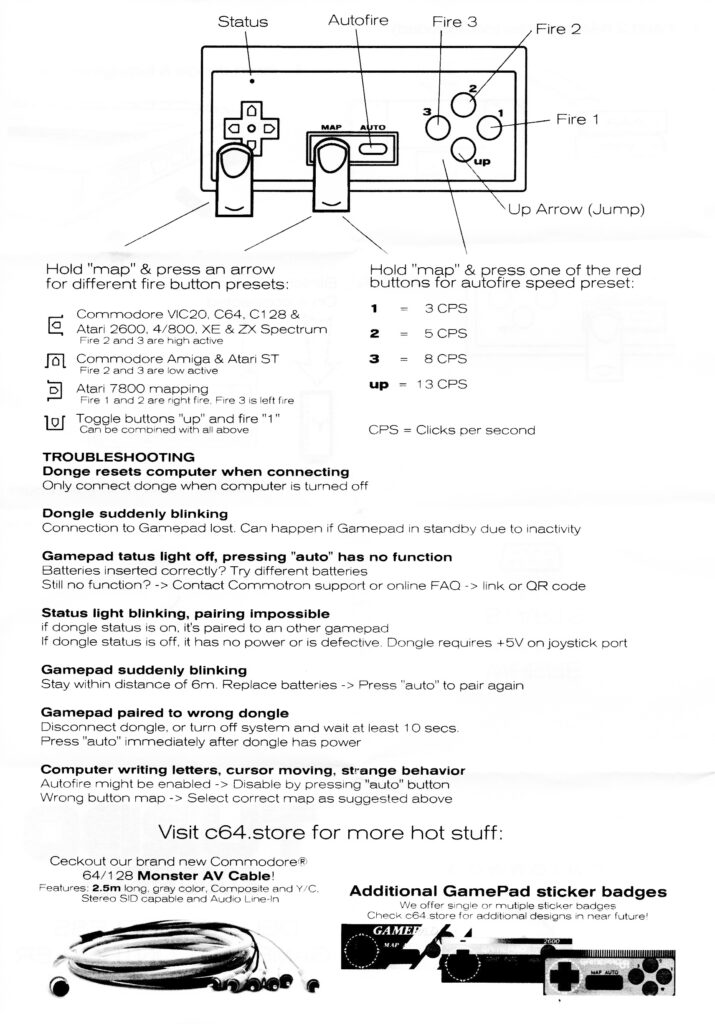


Hedaka Multi-Function HED-1 Joystick

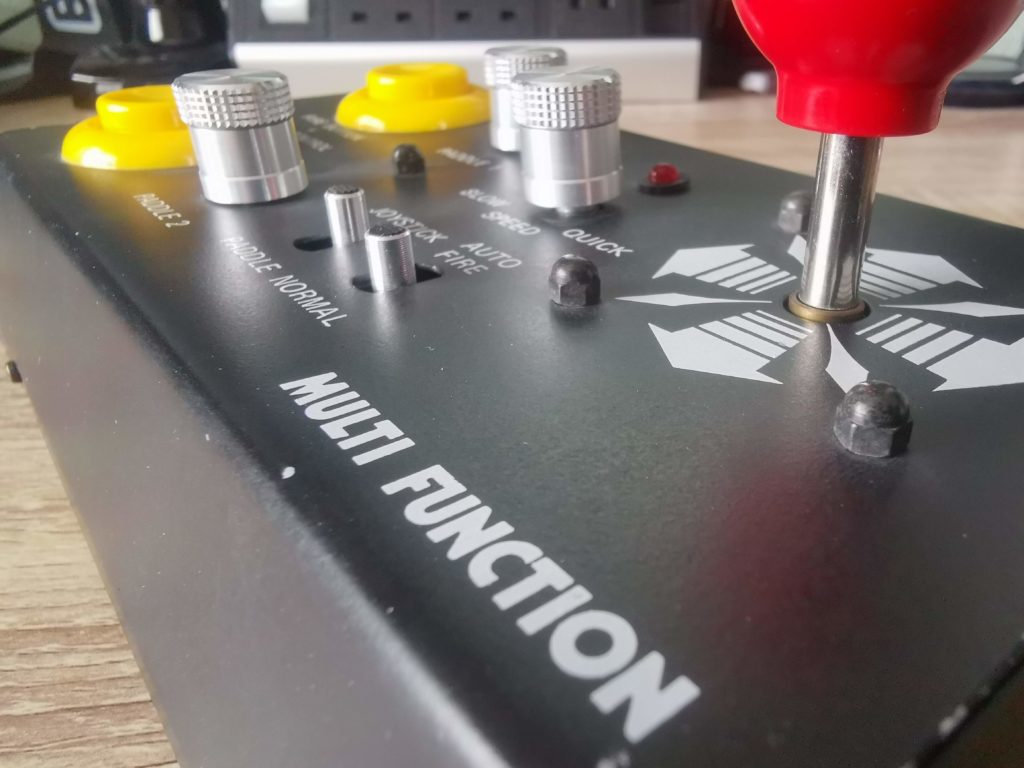
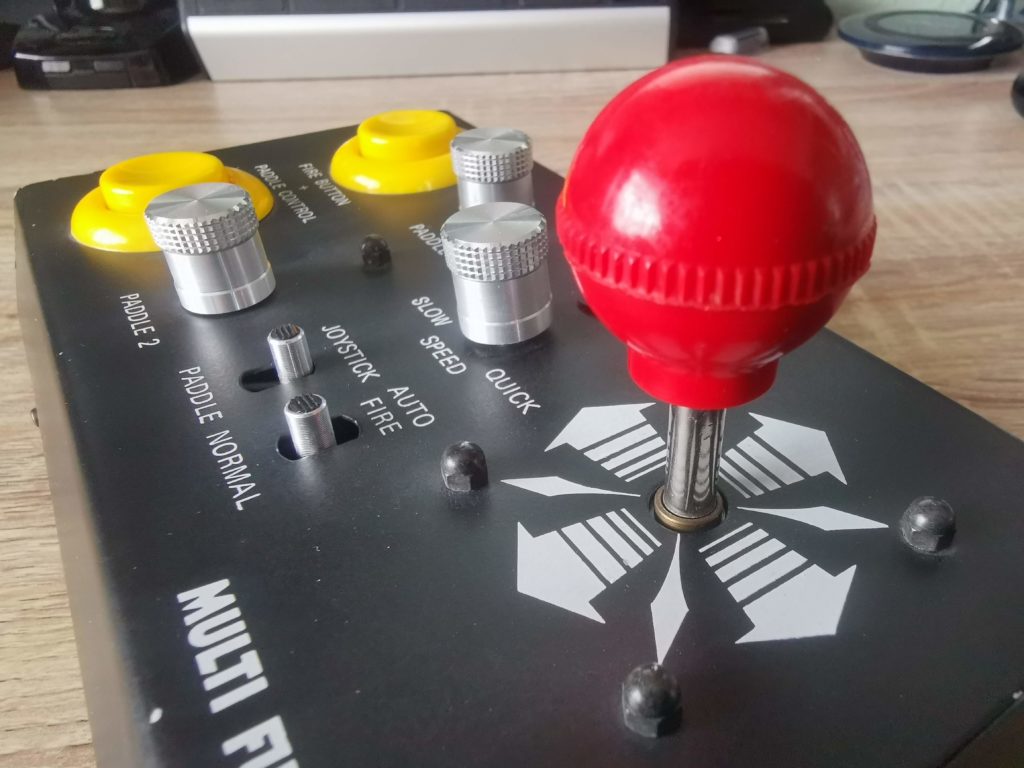
Hedaka Joystick

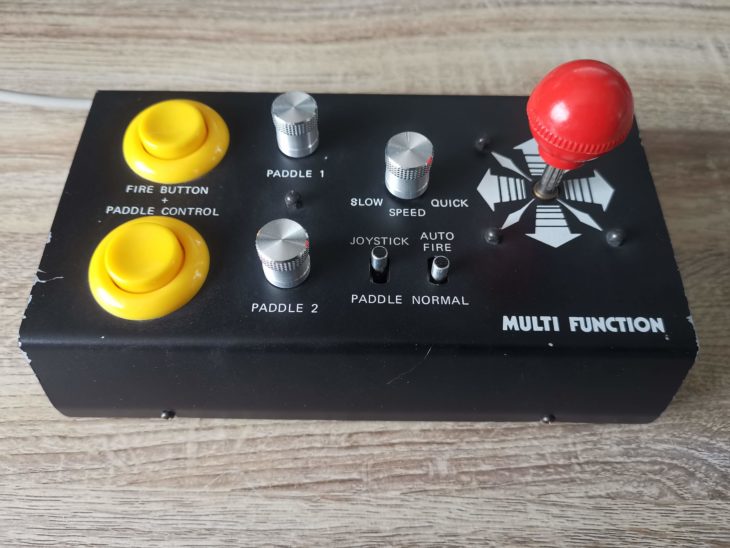
While I was looking for a new gamepad for my Commodore 64 a while back I stumbled across this bad boy. It’s called the ‘Hedaka Multi-Function HED-1’ joystick and I spotted it on the German eBay site and imported it to the UK. All in with postage I think it cost me around £40.

Using the interactive 3D display immediately below you can take a look at the box it came in. Just click inside the box and then when the hand icon appears drag to rotate and zoom in and out.

I honestly don’t know too much about the origins of this device – I simply bought it because it looked interesting. From the German language used on the box it appears to have been made for the German market. However all the text on the device itself is in English which seems a little odd. It’s worked out great for me though as I know instantly what everything should do!


Hedaka Multi-Function HED-1 Joystick Specs

Using my amazing multi-lingual abilities Google translate I was able to glean the following information from the specifications listed on the box:

  • Control knob for computer games, suitable for many computers, Atari all types, Commodore VIC20, C64, 128 and C16 & Plus/4 with adaptor.
  • Additionally 2 integrated paddles
  • Particularly sensitive control by micro-switch
  • Auto-fire infinitely adjustable
  • Extra large fire-buttons
  • Stable metal housing
  • Practical suction feet for safe stand
  • Extra long connection cable

Basically this device looked to have been aiming to be the only controller you would ever need to use with your computer!


This slideshow requires JavaScript.


Construction

This thing is built like a tank with the entire case being constructed from 1mm thick powder coated steel. The base measures 20cm x 12cm and the height to the top of the joystick is 10cm. A very generous 3m long cable is provided which means you can use this device from pretty much anywhere in the room.


Hedaka Joystick

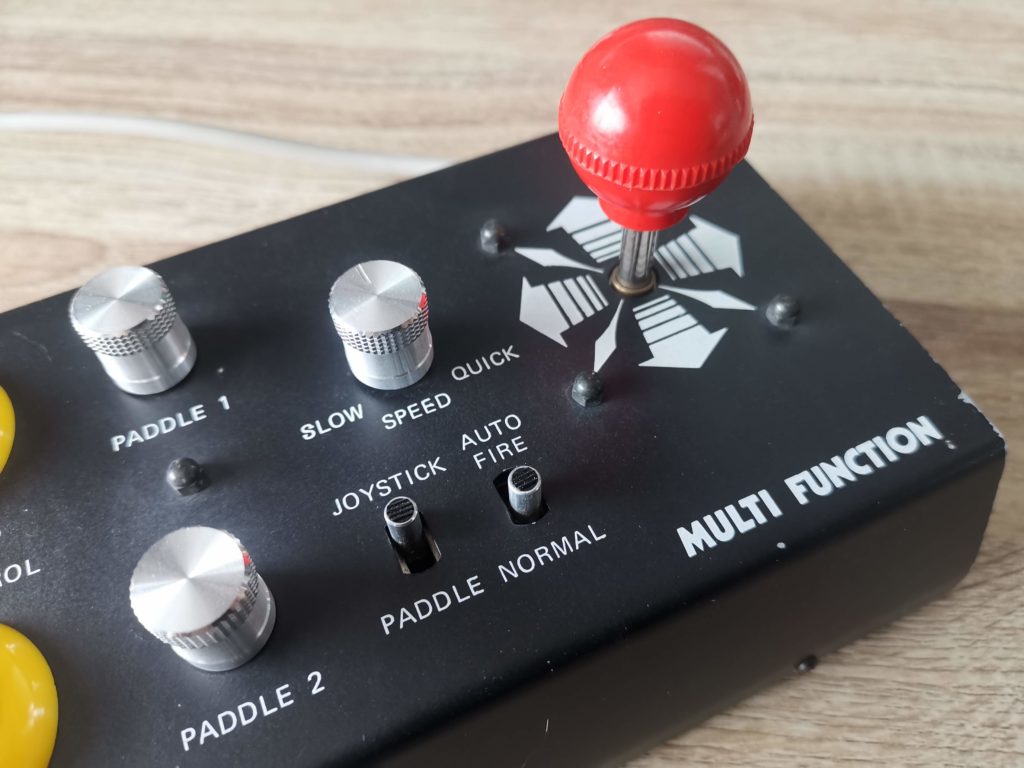
Closer view of the joystick controls.


The stick itself is very comfortable in use and the micro-switches ensure you get a nice tactile ‘click’ as you move it around. The oversized fire buttons provide similarly satisfying feedback when pressed. The joystick requires only light pressure to operate and about 5mm deflection from centre to register a click.


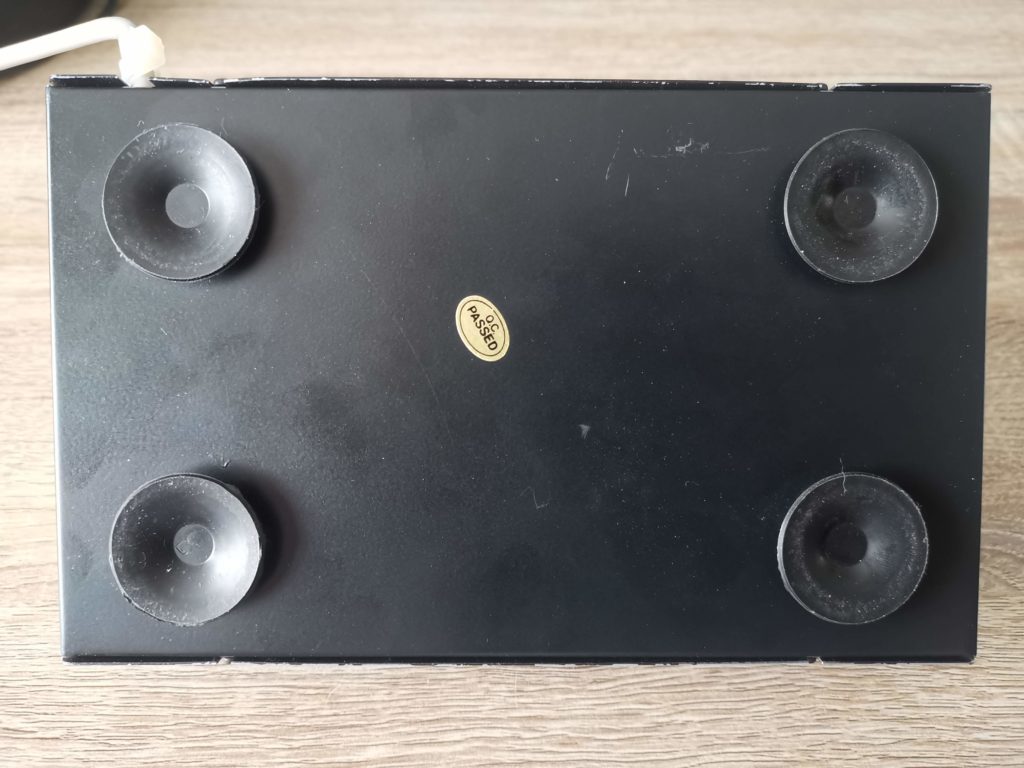
View of the base showing the four sucker feet.


On the underside of the joystick are 4 large rubber suckers that allow you to stick the base to a desk or table. These work really well and on a completely smooth surface possibly a little too well. When I placed the joystick down on a glass coffee table I really struggled to get it off!

When firmly affixed to a surface it gives a great arcade-like experience. I tried using it on my knee but it quickly became uncomfortable. However sticking it onto a place mat first and then on my knee offered a comfortable compromise.


Hedaka Joystick

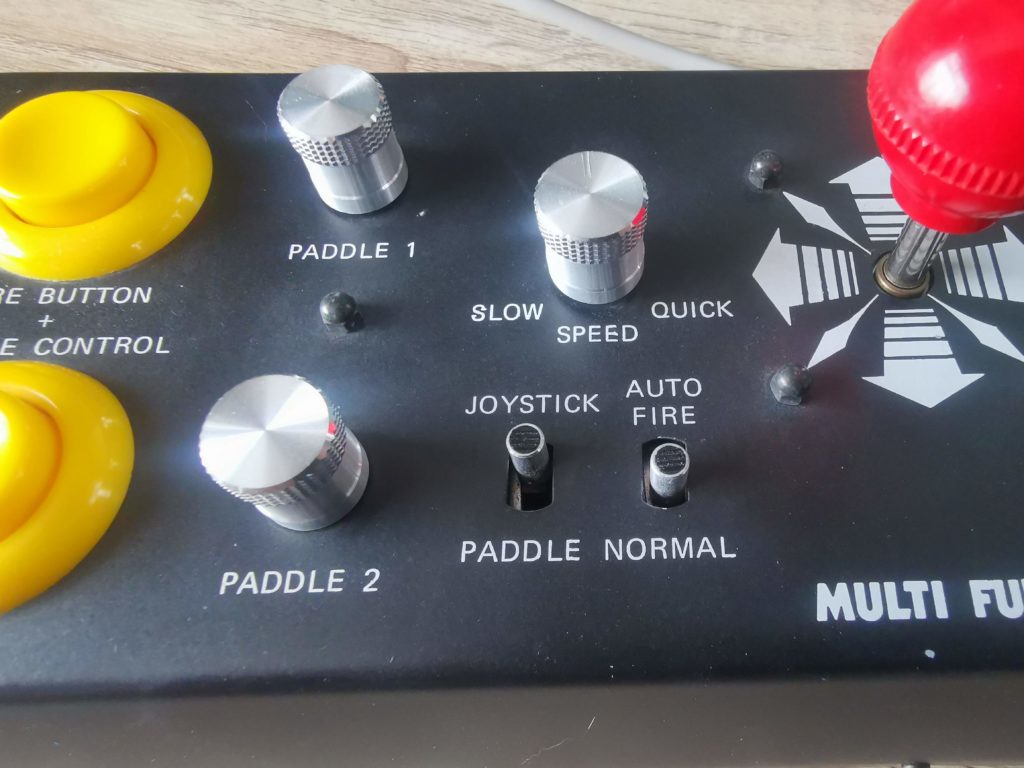
In this view you can see the red LED just to the right of the auto-fire speed control knob. This visually displays the rate of fire.


Auto-Fire

For shoot-em-ups you can opt to turn on auto-fire mode using the toggle switch. Once this is engaged there is a speed selector knob which can be rotated to fine tune the rate of fire. This is completely analogue and the knob rotates through 270′ so you really can set it to anything you desire. There is a red LED above the speed control knob that lights each time the fire button is activated providing instant visual feedback of the rate of fire. The auto-fire only engages whilst the fire button is held down too which makes perfect sense.


Hedaka Joystick

Close-up of the joystick itself.


Paddles

The real ace up its sleeve for me though is the inclusion of paddle controls. This means if I fancy a quick game of Panic Analogue (easily my favourite paddle game) I no longer need to dig out my Atari Paddles.


Hedaka Joystick

Close-up of the paddle controls.


Both paddles are implemented and of course each has its own fire button. The button for paddle 2 is activated by selecting another toggle switch. The paddle knobs do take a little getting used to as they are much smaller than a typical paddle wheel (1cm diameter v 6cm). However they work effectively and allow very smooth and precise movement.


A Look inside

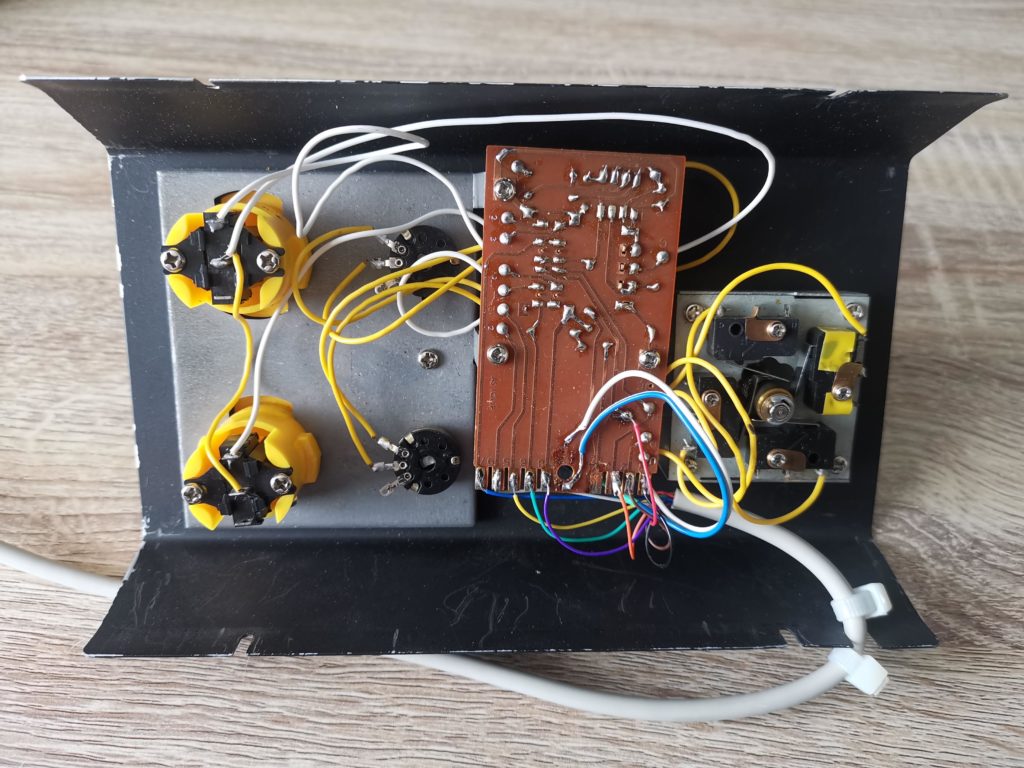
Just out of curiosity I decided to open up the case and have a peek inside. There are four philips screws along the lower edge of the base keeping the cover firmly attached. These screws fit into four little slots cut into the sides of the cover so they only need to be loosened a few turns and the cover will slide up and off.


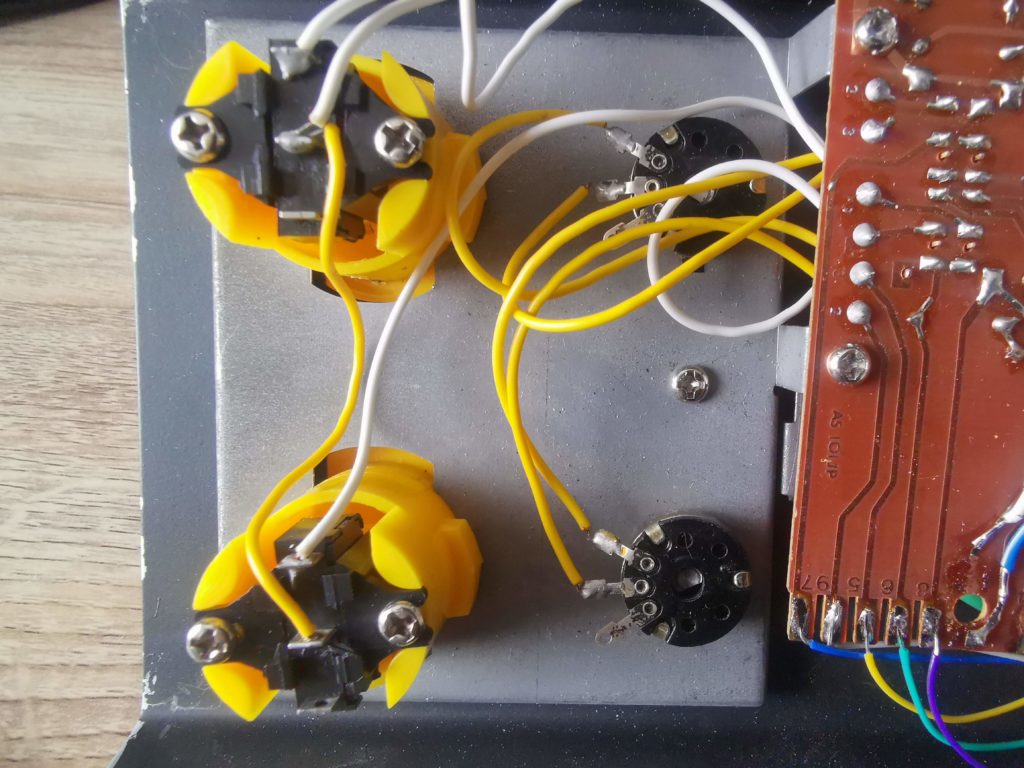
View of the inside with all the electronics attached to the top cover.


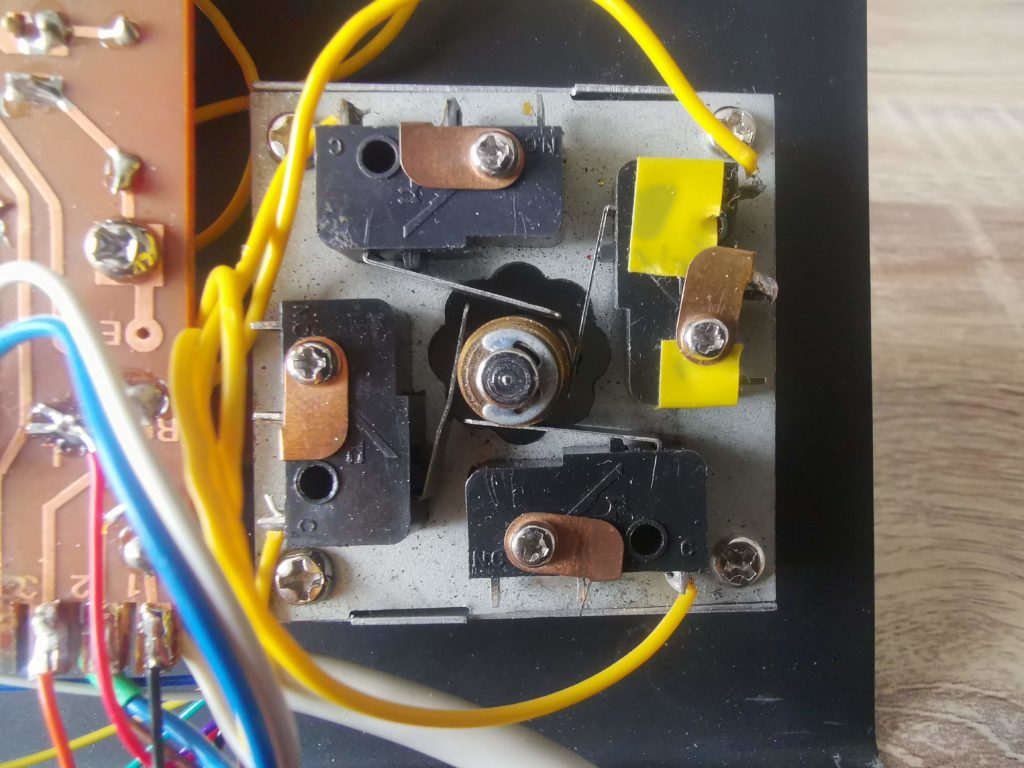
Close-up of the joystick micro-switches.


This is a close-up of the two micro-switch fire buttons (left) and the Paddle potentiometers (right).


Verdict

This is a terrific joystick and I’m so glad I took a chance and bought it. The auto-fire feature is superb, probably the best implementation I have seen. Furthermore, the design of the joystick with its large base, oversized fire buttons and limpet-like suckers means it offers a very arcade like experience. Playing the classic Gorf or the much more recent Galencia with this joystick is a real pleasure. When I want to play the odd paddle game, not having to swap controllers to do so is incredibly convenient. Definitely a recommended pickup if you see one up for sale.

Commodore 64GS Gamepad Review

A Little History

Back in the twilight period of the C64’s life, Commodore released the C64 Games System or C64GS. It was a keyboard-less console that used cartridge based games just like the Sega Master System or NES. Unfortunately there were only ever a few dozen games released for it and it was a commercial flop.

Why am I mentioning this now? Well, although it didn’t come with a gamepad, it did come with a joystick (Cheetah Annihilator) that had a second, independent fire button. Prior to this all C64 joysticks just had a single fire button. Those joysticks that did have two physical buttons existed solely to allow left or right-handed play.

Unfortunately due to the short life-span of the Commodore 64GS only a small number of games were ever produced that supported this second fire button.


Present Day


Super Mario Bros C64

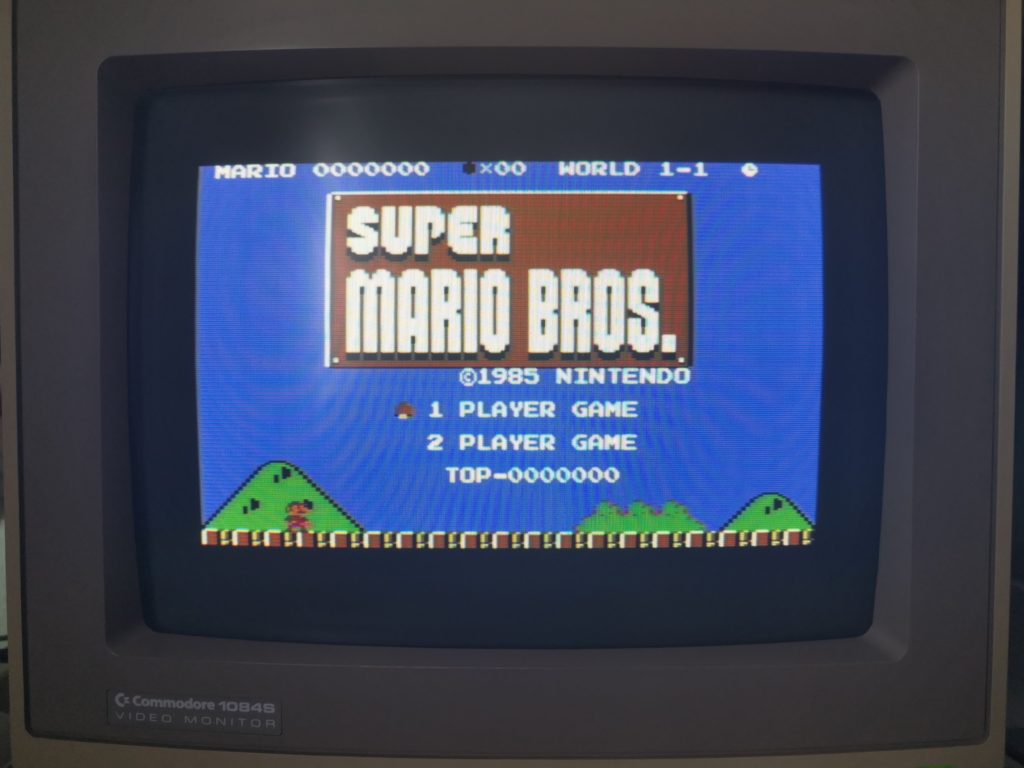
Super Mario Bros on the Commodore 64.


Fast forward to 2019 and the amazing Super Mario Bros for the C64 was released supporting 2 buttons. This kick-started my desire to find a decent 2 button joystick to control Mario. I mean who wants to have to push ‘up’ on a joystick to make Mario jump?


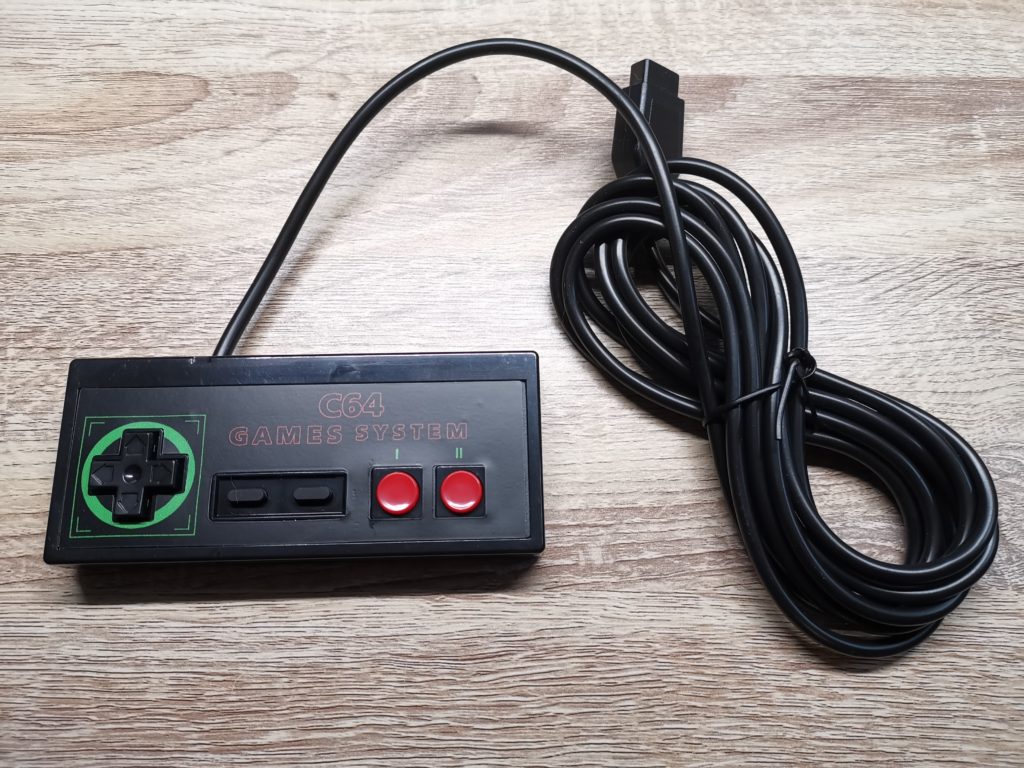
Commodore 64GS Gamepad

The gamepad comes with a nice long cable.


A few weeks ago I discovered someone who is actually making Commodore 64GS gamepads. The company, based in the USA can be found on Etsy and eBay and is called RetroGameBoyz. The gamepads it produces are custom made to order and they offer quite a few different options to choose from.


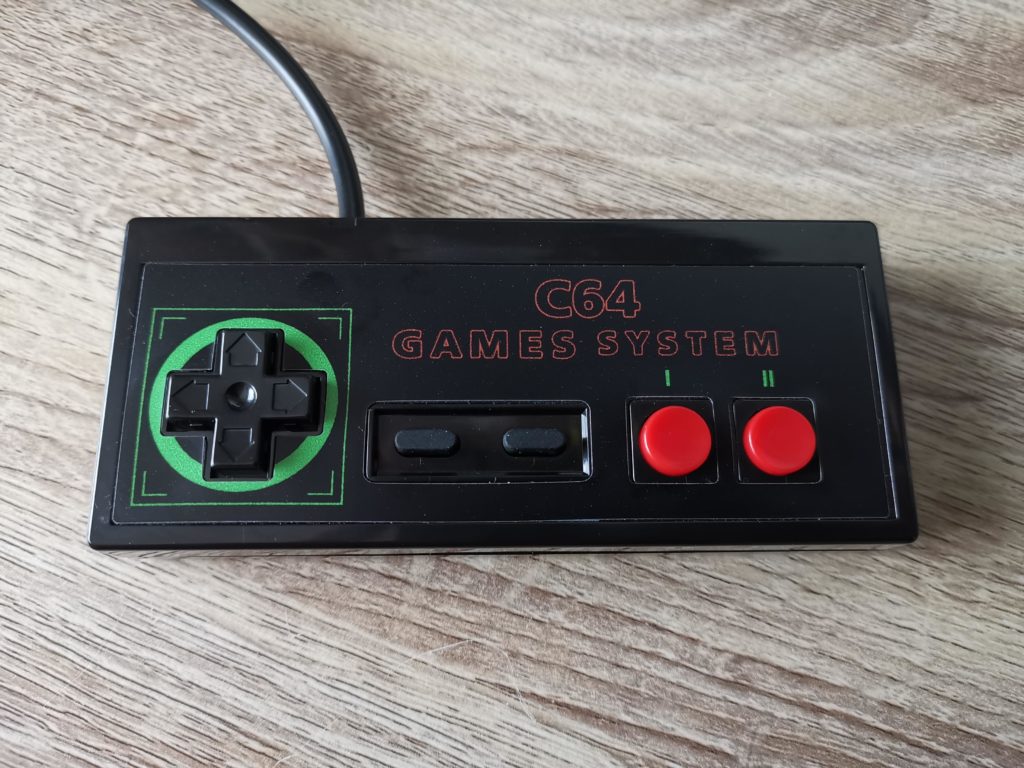
Commodore 64GS Gamepad

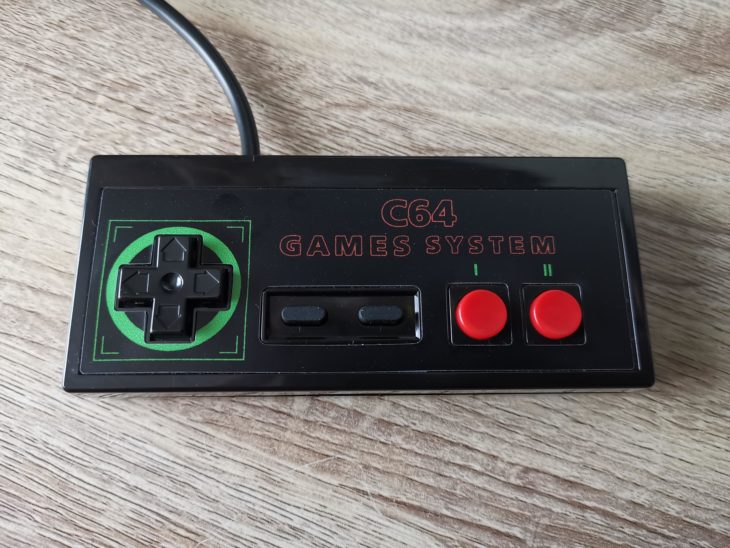
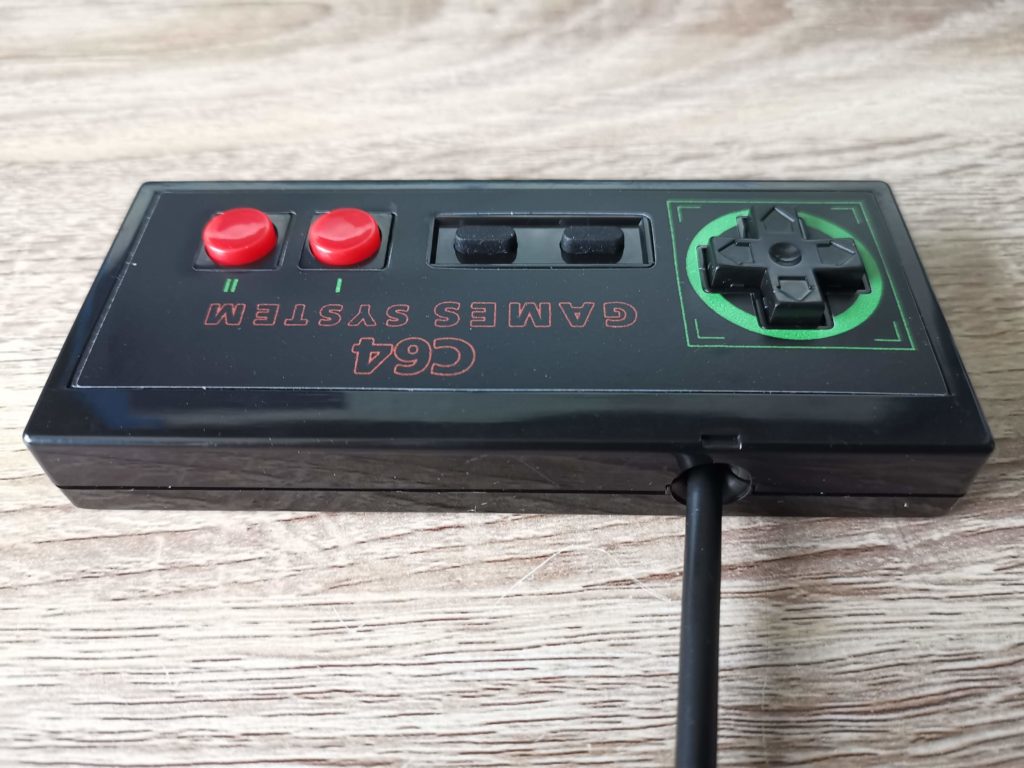
Commodore 64GS Gamepad.


They sell the gamepad for around £25 with delivery to the UK taking around ten days. Unfortunately I did get stung for import taxes and the usual Royal Mail ‘money for nothing’ charge. Combine that with the postage fee and this basically doubled the cost of the pad for me.


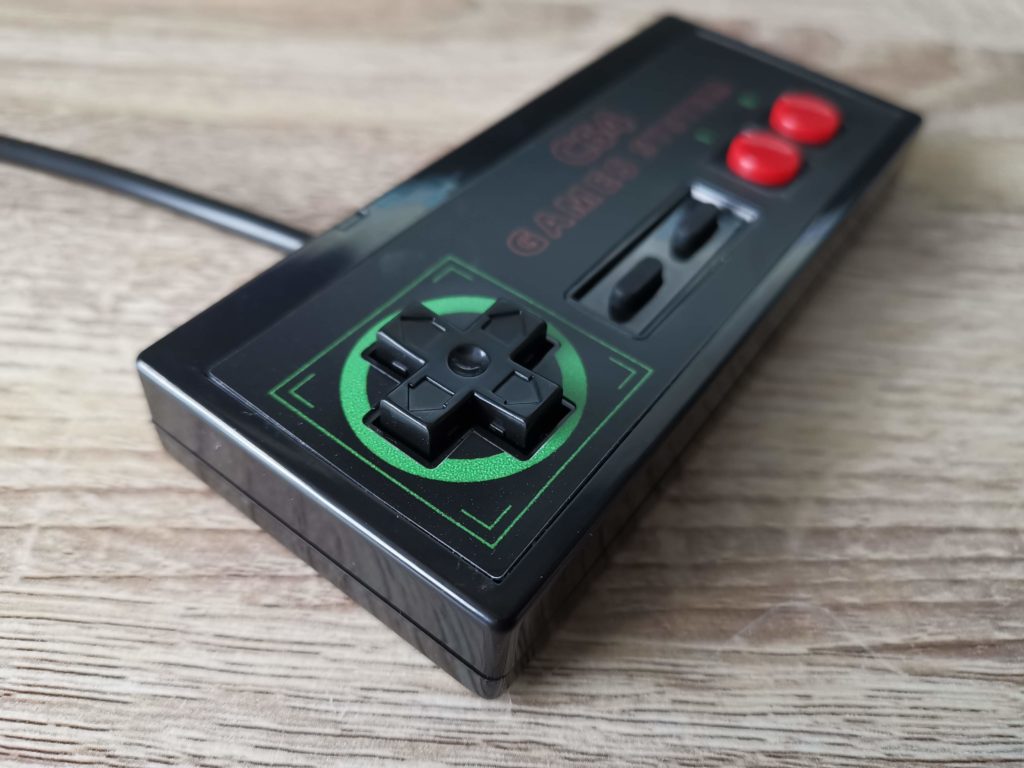
Commodore 64GS Gamepad

A close-up shot of the D-pad.


In More Detail

The gamepad is well constructed and nicely presented in a glossy black plastic shell. It is faced with a custom made vinyl ‘C64 Games System’ skin which really sets it off. This skin is how RetroGameBoyz differentiate each gamepad in their range. They do one for the Amiga and few more variations for the C64 too. In one configuration you can have the second fire button mapped to ‘up’ which would come in handy for a lot of platformers.


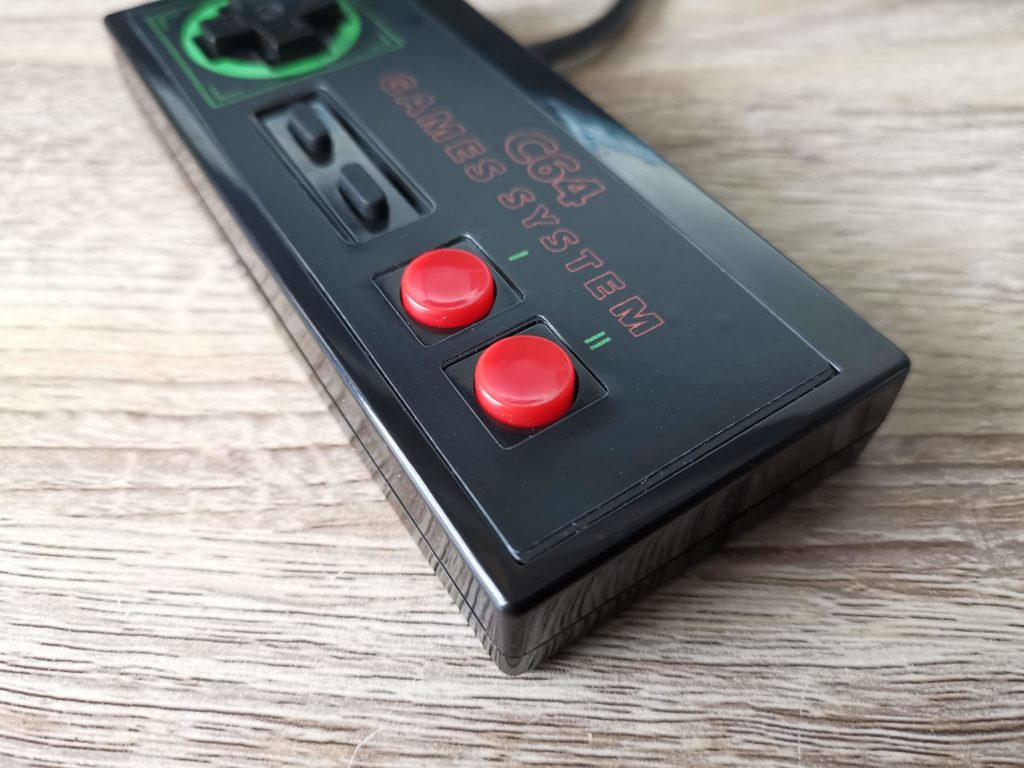
Commodore 64GS Gamepad

A close-up shot of the 2 fire buttons.


The gamepad came with a very generous 10 foot (3m) long cable and is fitted with a standard 9-pin D-sub plug.


Commodore 64GS Gamepad

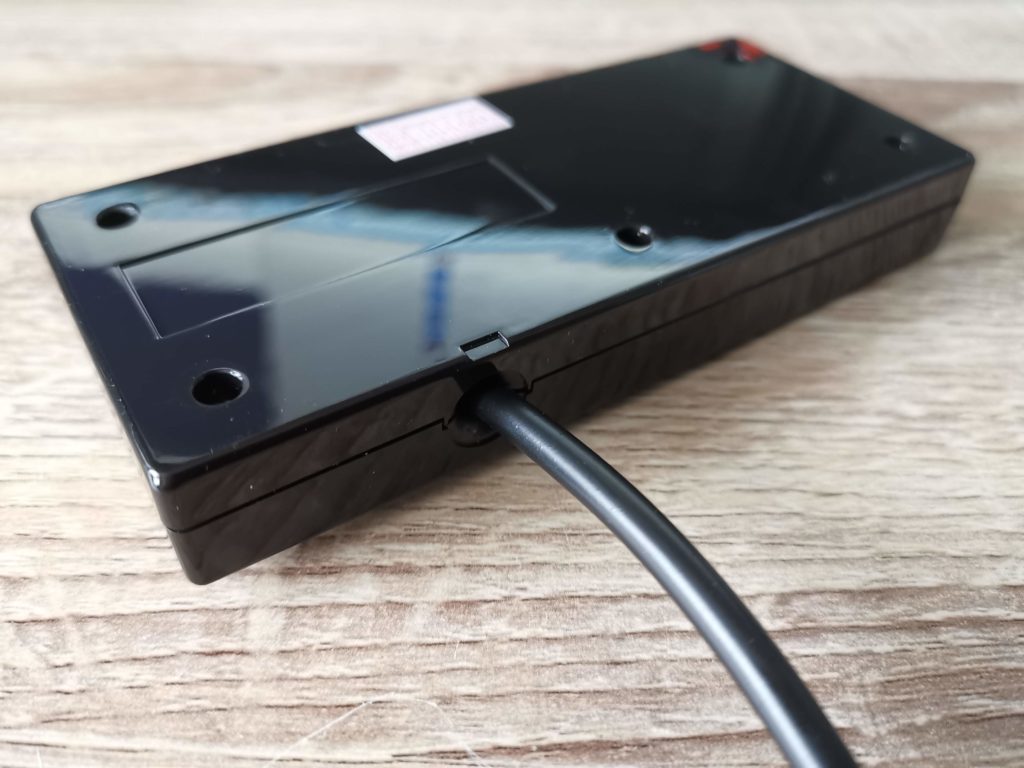
Rear view of cable entry point.


In use it works well with the D-Pad being easy to operate and the two fire buttons very responsive. The two central ‘select’ and ‘start’ buttons are actually extra ‘left’ and ‘right’ buttons. The main fire button is labelled ‘I’ and the extra button ‘II’.


Commodore 64GS Gamepad

Bottom of the gamepad case.


I’m really happy I’ve found this controller. For games like Super Mario Bros it really transforms the gameplay experience. I know joysticks are great for a lot of games but I do prefer using a gamepad these days for platform games.


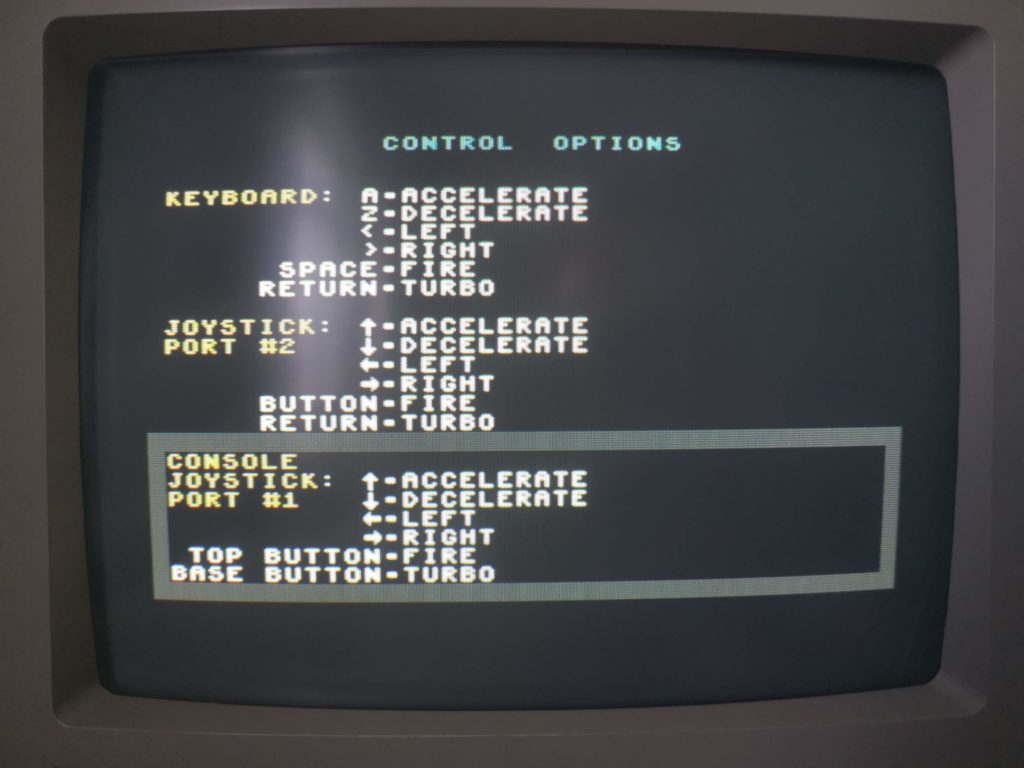
Second fire button option selected in Chase HQ 2 settings.


The addition of the second fire button is a real boon too. In supported games like Chase HQ 2 you can play them without having to keep reaching over to press a key on the keyboard. In other titles like Paradroid Redux it offers a more nuanced control system by separating off one of the extra controls from fire button A to button B.


Supported Games

Here’s a list of Commodore 64 games that support a 2nd fire buttons and its function, if I’ve played them.

  • Alien 8 – 2nd button used to pickup/drop objects
  • Battle Command (Cart) – 2nd button toggles between driving and cursor control
  • Chase HQ2 (Cart) – 2nd button operates Turbo mode.
  • Double Dragon (Ocean Cart) – 2nd button performs all sorts of extra moves
  • Giana Sisters 30th Anniversary Hack
  • The Last Ninja Remix (Cart)
  • Myth (Cart) – 2nd button changes weapon
  • Paradroid Redux – 2nd button used to enter transfer mode
  • Robocop 2 (Cart) – 2nd button used for jump
  • Spacegun
  • Super Mario Bros – can now use buttons to jump and throw fireballs
  • Turrican II (Rainbow Arts)

VS-7000 Joystick Review

VS-7000 Joystick

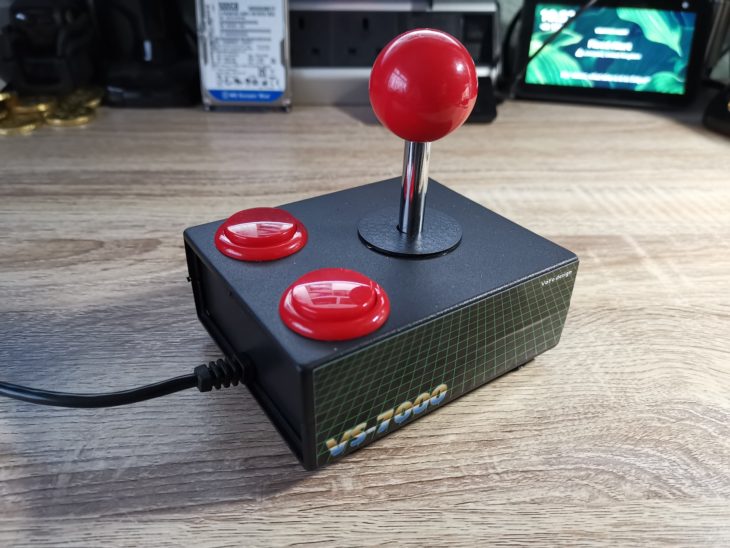
I recently picked up a super little arcade joystick off eBay for my Commodore machines. It’s brand new and made by this seller on eBay. He’s calling it the ‘VS-7000’. I’m really impressed with it so thought I’d share my thoughts.


This slideshow requires JavaScript.


VS-7000 Joystick Construction

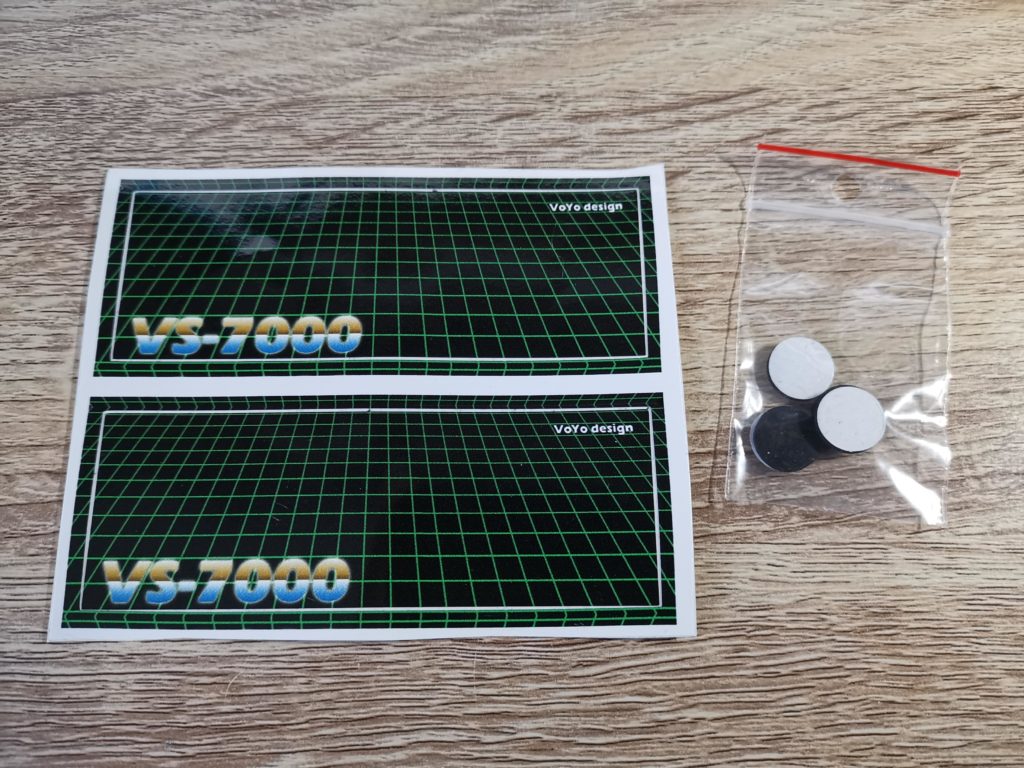
As standard it comes with a plain black plastic base with four sucker feet. However there’s a couple of retro styled vinyl VS-7000 stickers supplied in the box. These can be attached to the sides of the base if you want to jazz it up a little more. Additionally, if suckers aren’t your thing then they can be replaced by the included set of 4 rubber feet.

The seller also offers the same joystick in a couple of other colours. There’s one with a white base and another black one but with wood effect panels, presumably for people that want to use it with Atari systems. Sadly at the time of writing this he’s got no stock left of any variant but hopefully he’ll make some more soon.


VS-7000 Stickers and Rubber feet

The supplied stickers to go on either side of the base and a set of 4 rubber feet.


Both the buttons and stick are micro-switched and this makes for a really satisfying ‘click’ when pressed. In use I was never unsure whether a button had been pressed that’s for sure. The joystick unit itself is based on the Sanwa mechanism which is designed for arcade game cabinets. The shaft is made of metal with a nice chrome finish and it all feels reassuringly sturdy in use.

The joystick is available with either two ‘A’ buttons or an ‘A’ and ‘B’ button configuration (on request). It is straightforward enough to change from ‘AA’ to ‘AB’ yourself too. Unfortunately the A & B configuration of this stick is NOT compatible with 2 button capable C64 games like Super Mario Bros and Chase HQ 2. The C64 just doesn’t see the extra button at all.


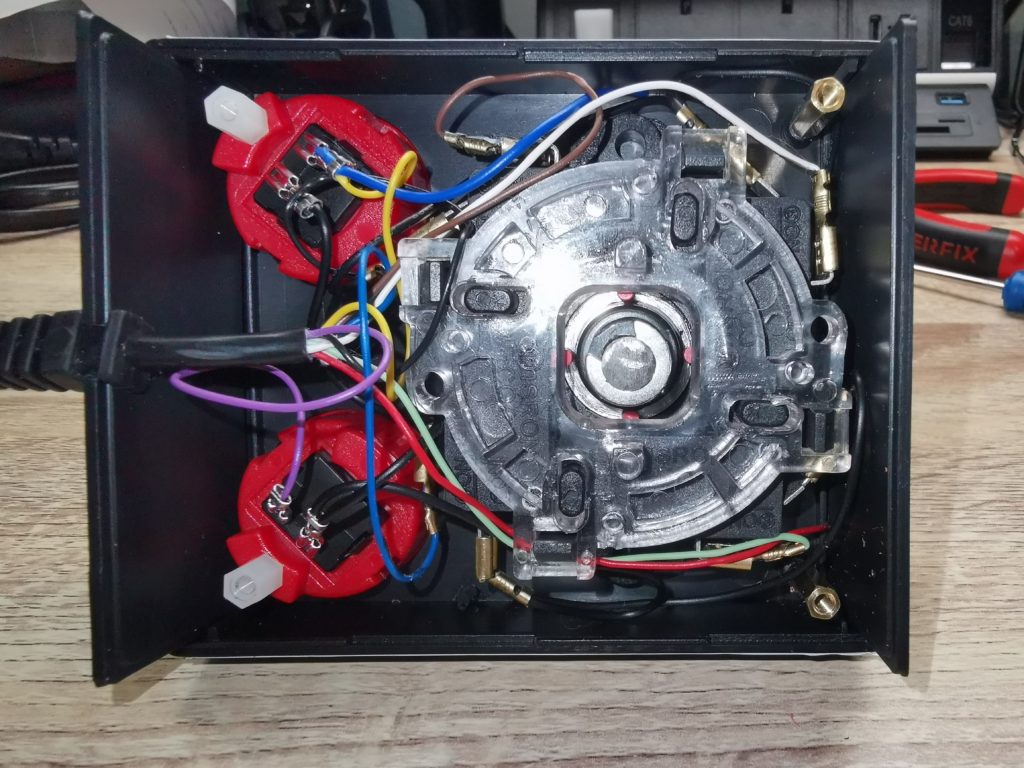
VS-7000 Joystick

Here’s what the inside of the joystick looks like


Verdict

I have to say that this little joystick has really exceeded my expectations. It requires very little lateral force to move the stick around so it makes extended play sessions much more comfortable. I also found it enabled me to move around games more accurately or pull off those different moves in IK+ more easily. Puzzle games such as Vegetables Deluxe and Milly & Mollie suddenly became far more relaxing to play too.

I can’t overstate how much I love the stick movement on this thing. Selecting a direction only requires a gentle nudge which is immediately rewarded with a satisfying click. I can guide it in the direction I want using just my forefinger and thumb instead of needing to clamp my whole hand around it. Consequently, playing for hours no longer results in getting cramp in my right hand like I do with the other sticks (especially the Suncom). I should point out that this may well be an age related preference. I loved the ZipStick when I was a kid but fifty year old me? Not so much.

The VS-7000 joystick does have one shortcoming though… the base is quite bulky and angular so is not the most comfortable thing to hold for extended periods of time. However I suppose that’s to be expected from a homebrew project like this. The joysticks of yesteryear were manufactured in large numbers and had custom, injection moulded bases, not something you can easily replicate on a small scale. Having said that this didn’t prove to be much of an issue for me as I use it mostly either resting on my knee or affixed to my desk with the suckers.


This slideshow requires JavaScript.


Commodore 64 Joyswitcher Review

Joyswitcher

If you have two joysticks permanently plugged into your Commodore 64 then you would probably have no use for the Joyswitcher. However, if you’re anything like me, you might find that this is something you’ve wanted for a long time without realising it. I don’t play 2-player games but do play a wide variety of 1-player games, including those that require paddles or a mouse. Not only that but I also dabble with GEOS from time to time too. This means I’m constantly having to switch my joystick between ports 1 and 2 and swap in my mouse or paddles for those games and programs that require them as well. Not only is this a little tedious but it’s also a lot of unnecessary wear and tear on my C64’s 35 year old joystick ports.


This slideshow requires JavaScript.


Enter the Joyswitcher

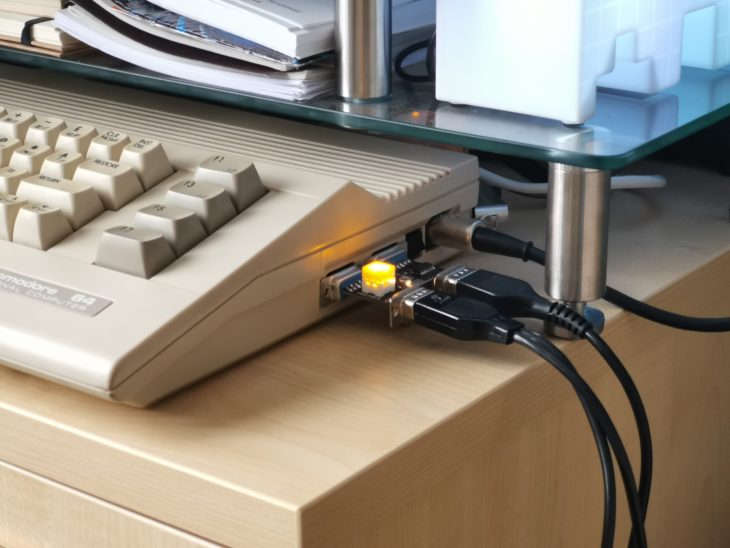
I stumbled across this little device over on AmiBay recently. This is a neat little gizmo that plugs into both of your Commodore 64’s joystick ports simultaneously. It allows you to attach any combination of mouse, joysticks or paddles and freely switch between both devices and ports without ever having to unplug anything. The guy that makes these little devices is based in Hungary but it only took a week to arrive and was well packaged too.

The Joyswitcher itself is really well constructed and very sturdy. Those DB9 joystick ports are very securely attached and don’t move around at all when plugging stuff in. There are two female DB9’s that plug into your C64 on one side of the Joyswitcher and two male DB9’s on the opposite side for you to attach your gaming devices. On the underside is a little brass post that is just the right length to support the board so that no strain is placed on the joystick ports.


This slideshow requires JavaScript.


How it works

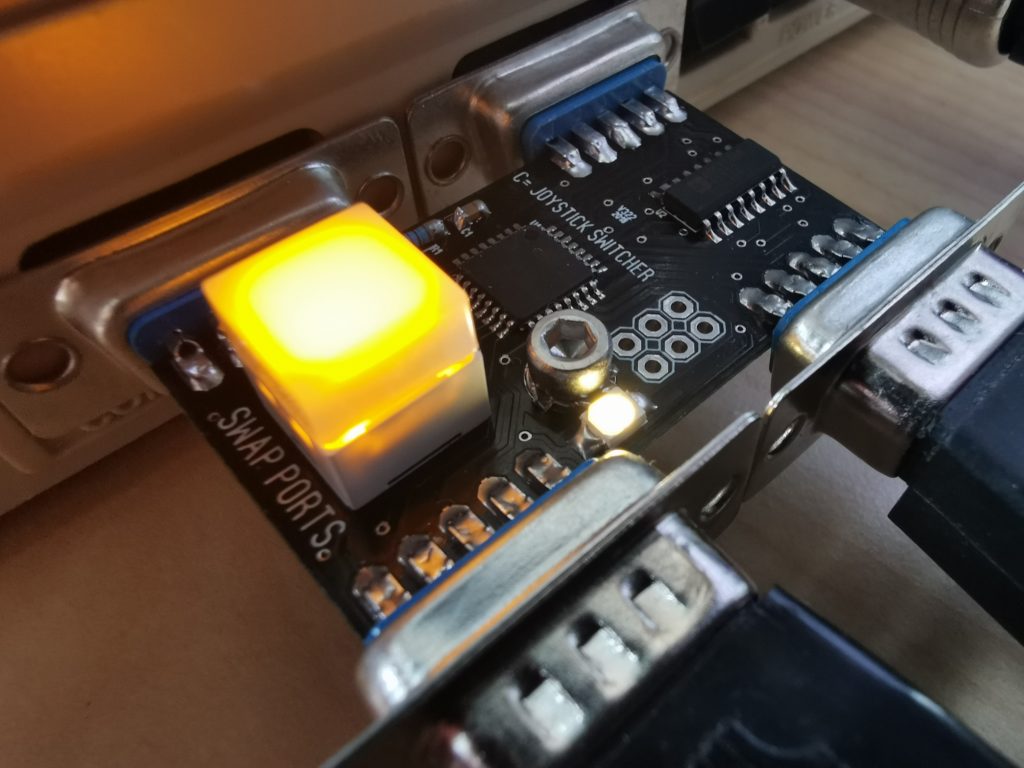
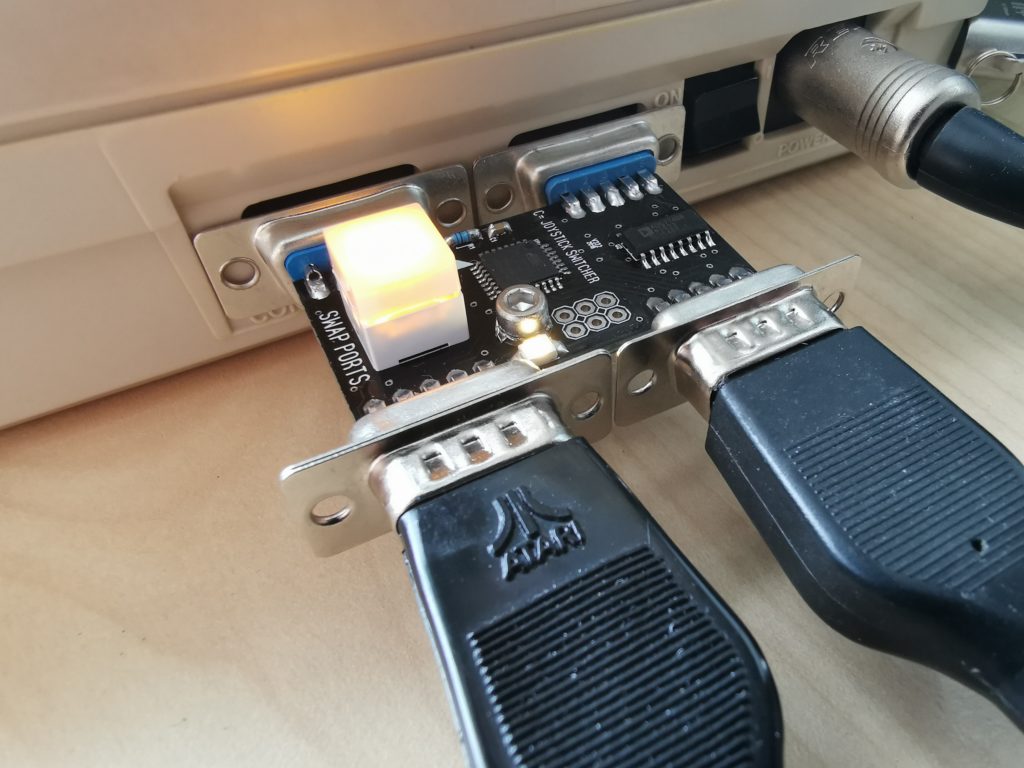
On the top of the device is a chunky illuminated square button, helpfully labelled ‘swap ports’ on the board. Press this for a second and you can switch the ports around from their normal position to a ‘crossed over’ one. This button stays illuminated all the time making it very easy to find if you’re playing at night with the lights dimmed.

When you first attach the Joyswitcher the default port arrangement looks like this:

Port 1 > 1

Port 2 > 2

However after pressing the illuminated button the port mapping switches over like this:

Port 1 > 2

Port 2 > 1


Joyswitcher

Notice the little LED to the right of port 1. When illuminated you know the ports are operating in their normal way, (not switched).


You can tell at a glance which mode the Joyswitcher is in as a little LED lights up when the ports are are in the ‘normal’ position. The Joyswitcher also remembers it’s last switched ‘state’ even after being powered off which is very useful.


Joyswitcher

Joyswitcher operating in normal mode with a pair of paddles attached to port 1 and a zipstick in port 2.


I still occasionally have to swap my paddles for a mouse and vice versa but not very often. Certainly nowhere near as often as I was when having to juggle a zipstick, paddles and a mouse between the 2 ports.

If I could change a single thing about the Joyswitcher it would be to add a 3rd input port so I could leave everything plugged in permanently. However there’s probably very few other users like me and it would complicate the design of the board no end so I can accept that it will probably never happen!

Conclusion

This is a fantastic little device and well worth the €32.90 it cost me. Can’t really fault the device as it does exactly what it sets out to do, is well constructed and looks like it will last a long time. I really love the aesthetics of it and appreciate being able to see everything exposed in an ‘industrial’ kind of way. It certainly looks way cooler like this than it ever would hidden away in a bland plastic case in my opinion. No doubt if you don’t feel the same way you could probably find a 3D printed case for it online.