Lyonsden Blog

Tag - gamepad

Wireless Amiga and C64 Gamepad Review

I spotted this wireless Amiga gamepad in an advert in the latest issue of Amiga Future magazine and ordered myself one immediately. Reading a physical Amiga magazine in 2023, seeing an advert in it and actually being able to order the item in that advert is a pretty special experience for me as a retro gamer. Normally when browsing through old Amiga magazines I see adverts for products and from suppliers that are long gone, but this was like being back in the early 1990’s all over again!
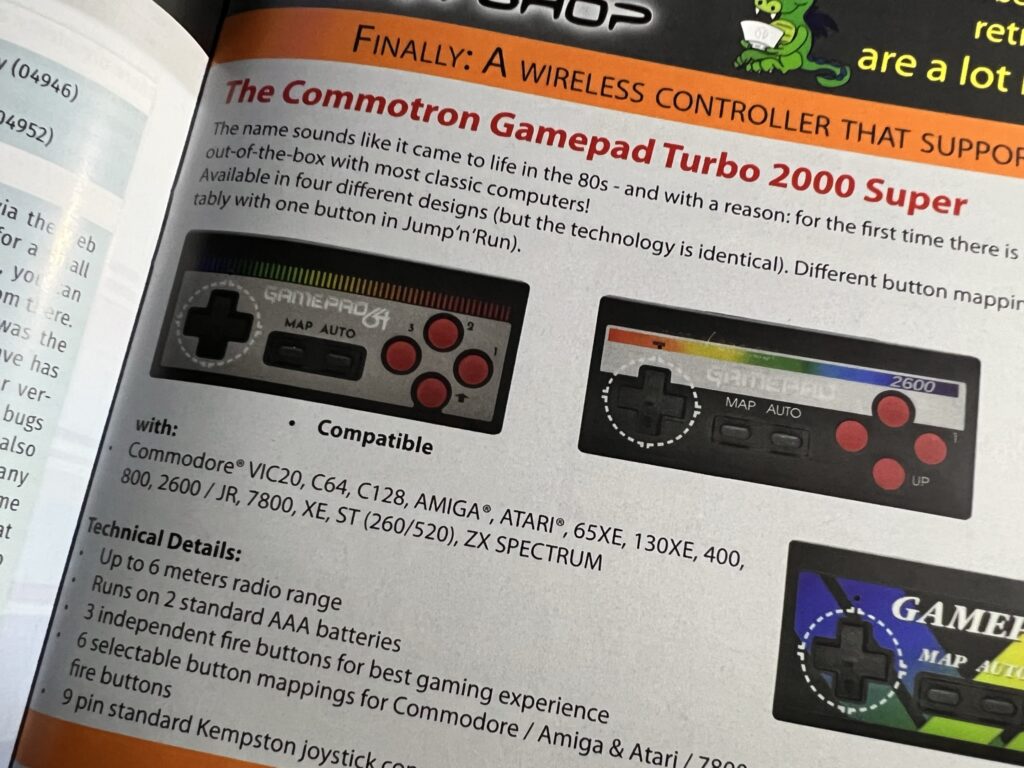
 

wireless Amiga gamepad

Advert in Amiga Future Magazine.


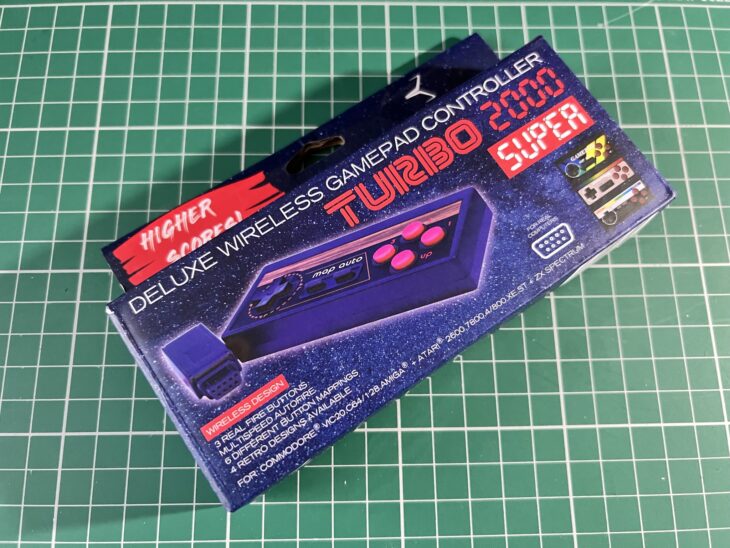
It’s full name is the “TURBO 2000 Super – Deluxe Wireless GamePad Controller” which is ridiculously OTT in a loveable 80’s kind of way. I picked mine up from their eBay web store but they’re available elsewhere online from other retro retailers too.
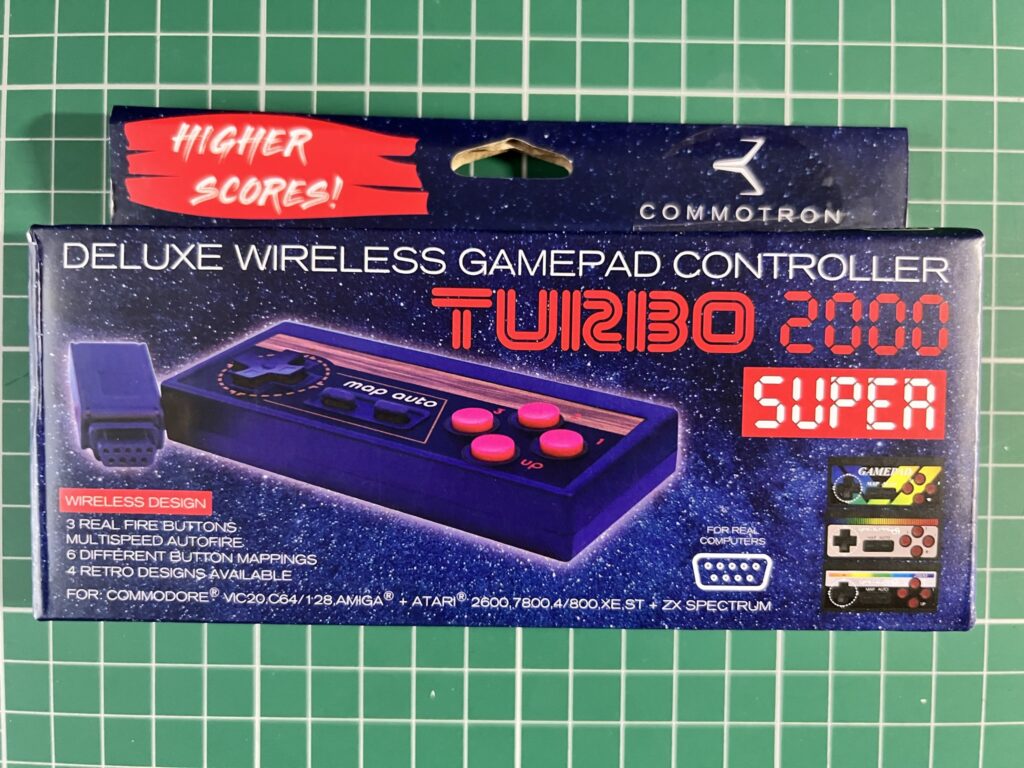
 

wireless Amiga gamepad

The box front.


Despite coming from Germany delivery took less than a week and I had no import fees to pay. Yippee! 🙂
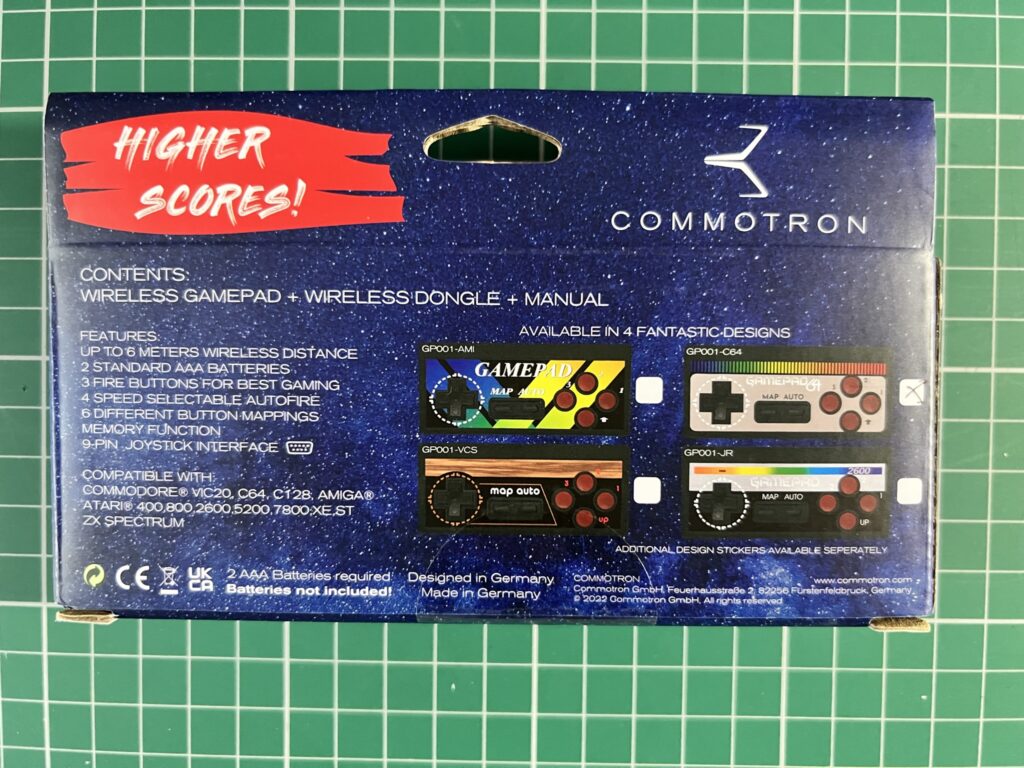
 

wireless Amiga gamepad

Back of the Box.


It came packaged in a pretty slick and colourful box that definitely wouldn’t look out of place on the shelf in your local game store.


Batteries Not Included

Opening up the box reveals a couple of instruction sheets, a dongle with a standard 9-pin DSub plug and of course the gamepad itself.
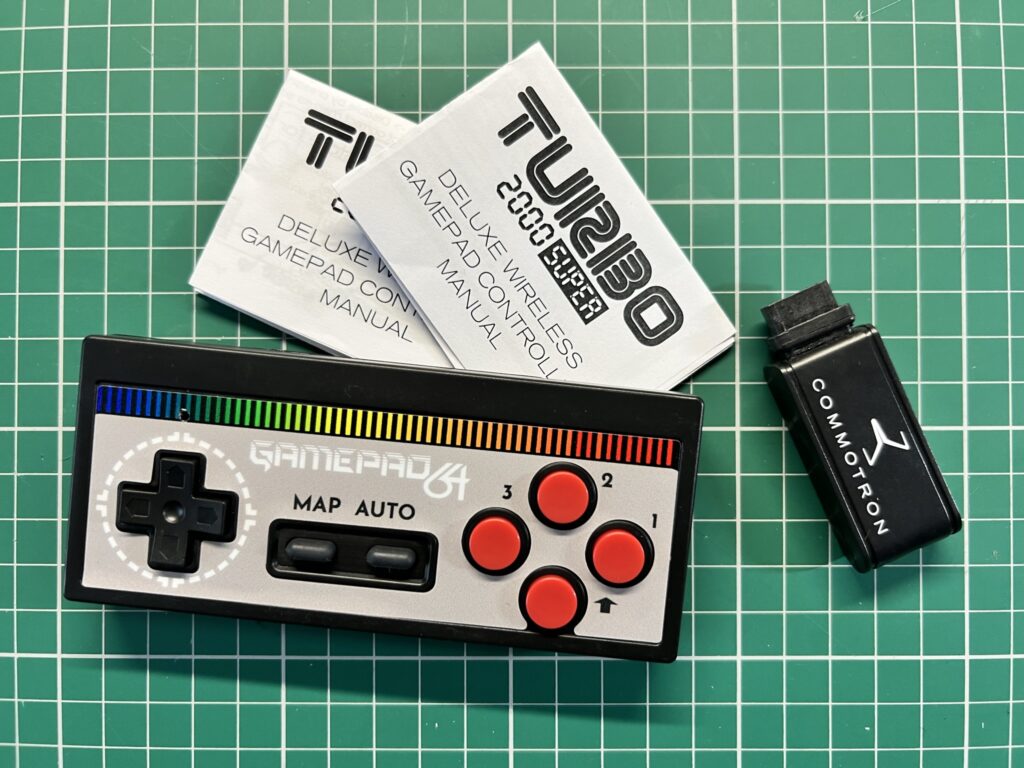
 

wireless Amiga gamepad

Everything you get inside the box.


They actually make four different versions of the gamepad for the Amiga, C64, Atari VCS and Atari 2600. They’re all the same physical device though, it’s just the vinyl sticker on the controller that differs for each version.
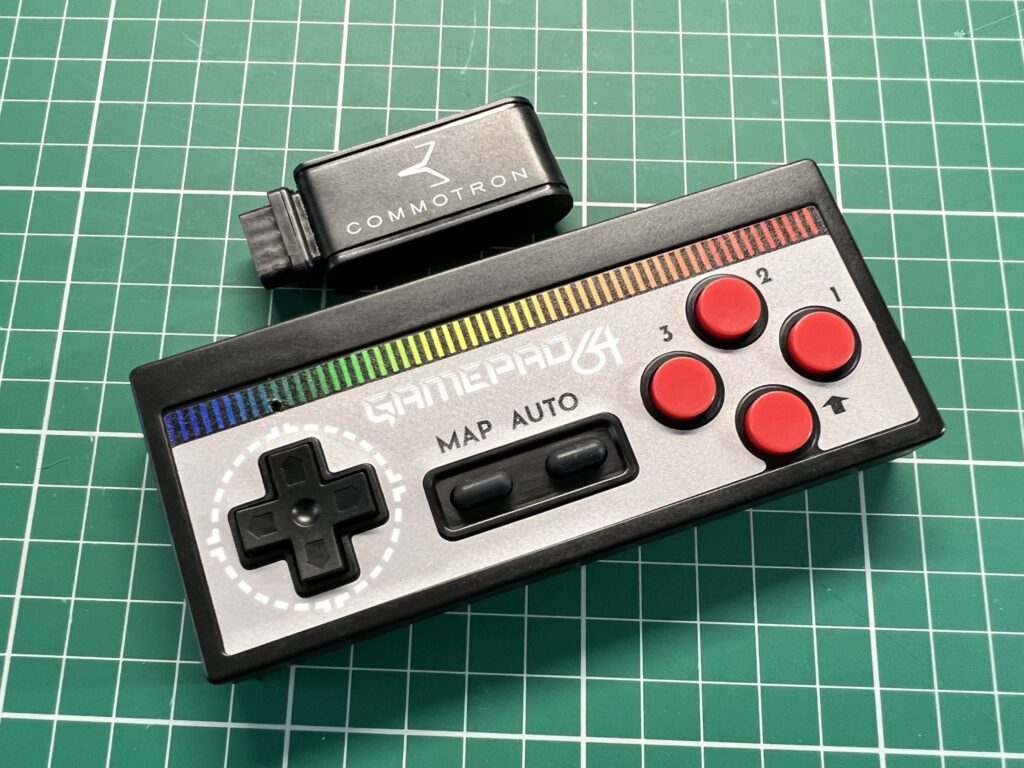
 

wireless Amiga gamepad

The wireless dongle and gamepad.


I chose the C64 themed controller as the colours just appealed to me the most.
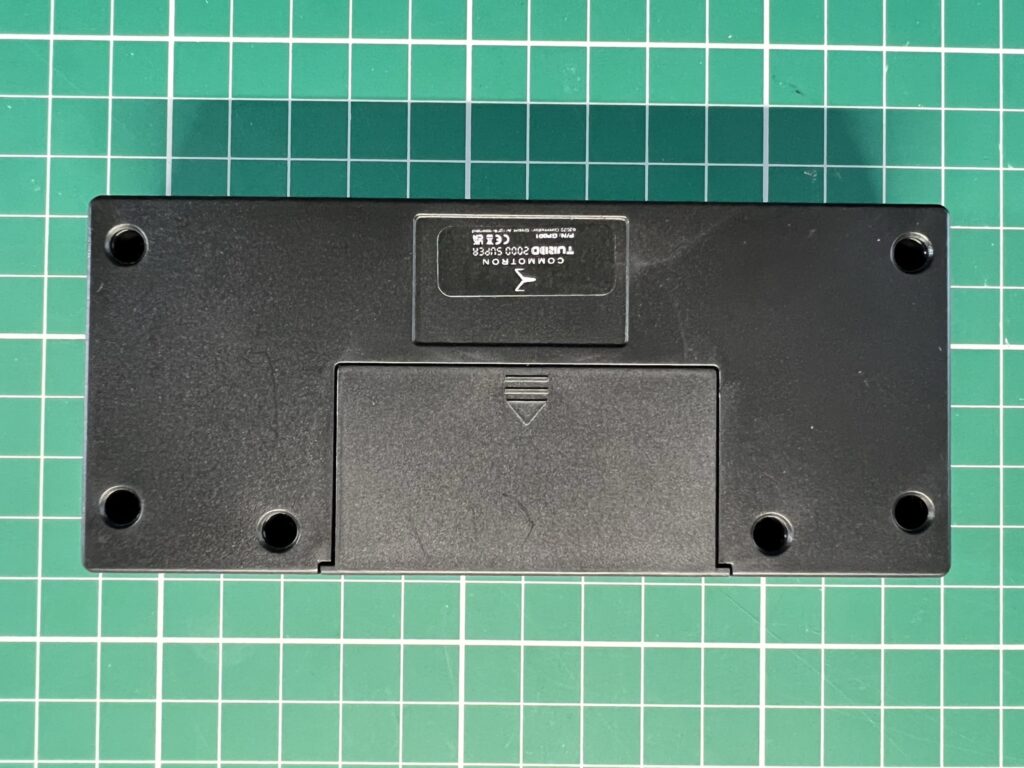
 

wireless Amiga gamepad

Bottom of the Gamepad.


The controller takes 2 AAA batteries (not supplied) that fit into a little compartment on the underside.
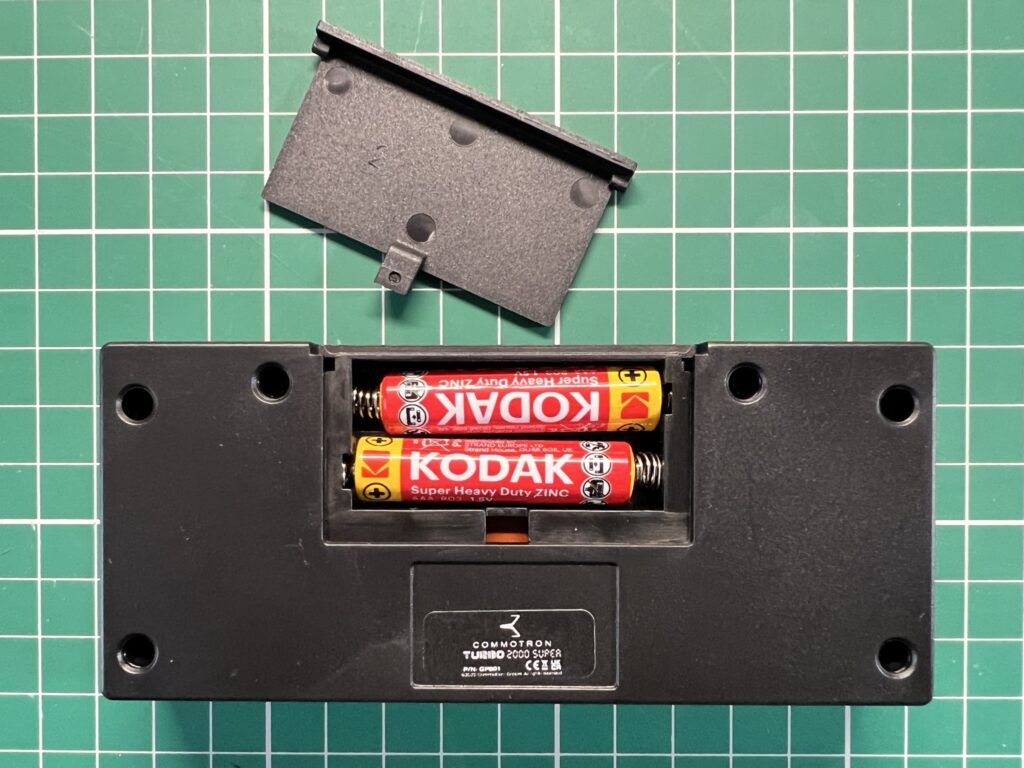
 

wireless Amiga gamepad

AAA Battery Compartment.


Connecting the Gamepad to the Amiga

Connecting the dongle and gamepad to the Amiga could not have been any simpler. You just plug the dongle into the joystick port as normal (or in my case my Roboshift), power on the Amiga and then power on the gamepad.
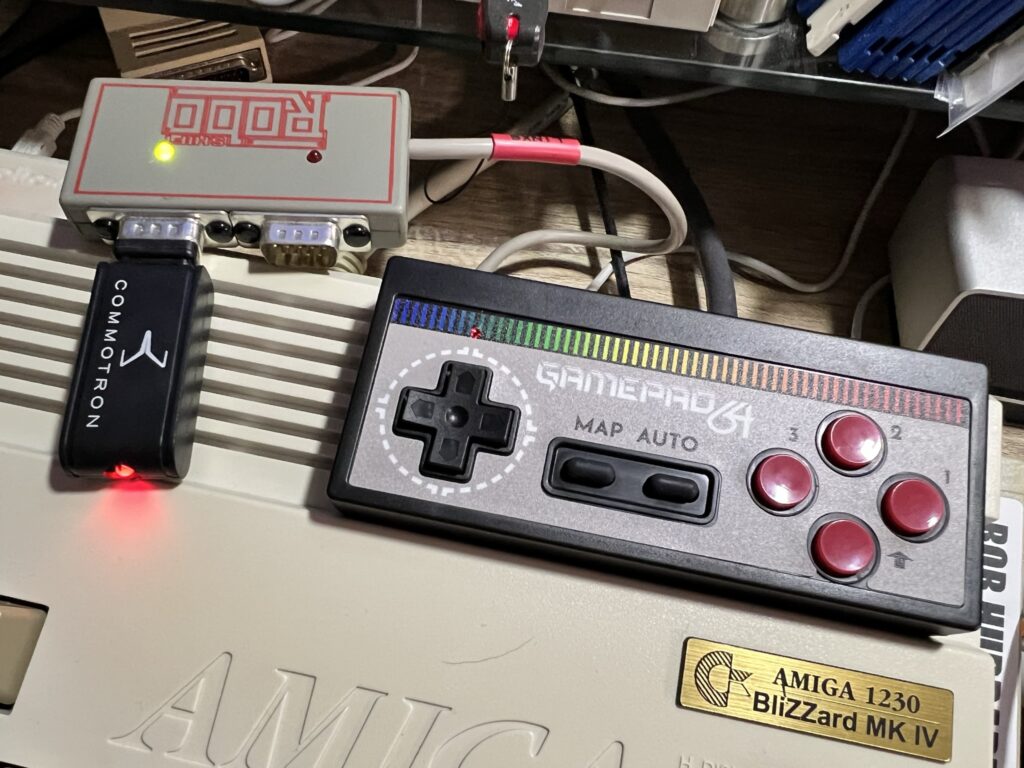
 

wireless Amiga gamepad

Hooking the Wireless Dongle up to my Roboshift device.


When you first plug the dongle in and power on your Amiga, a red LED on the device flashes signifying that it is trying to pair with the controller.
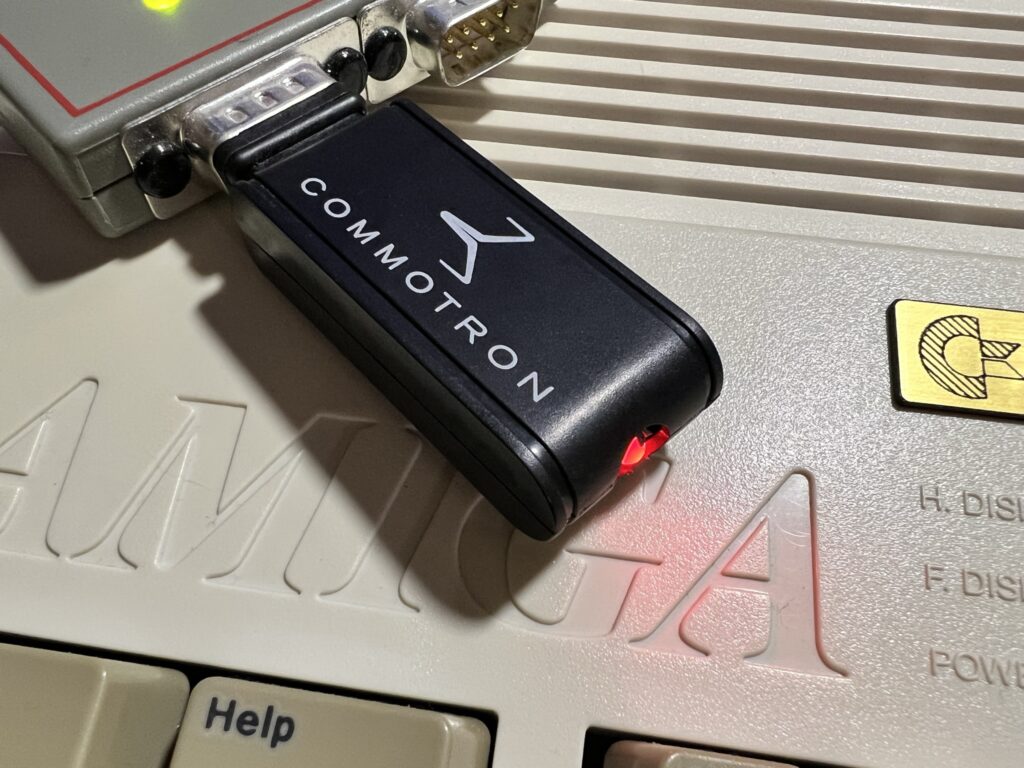
 

wireless Amiga gamepad

The Wireless Dongle.


As soon as I powered on the gamepad (which also had a small red LED above the D-Pad) both LED’s became solid red right away.
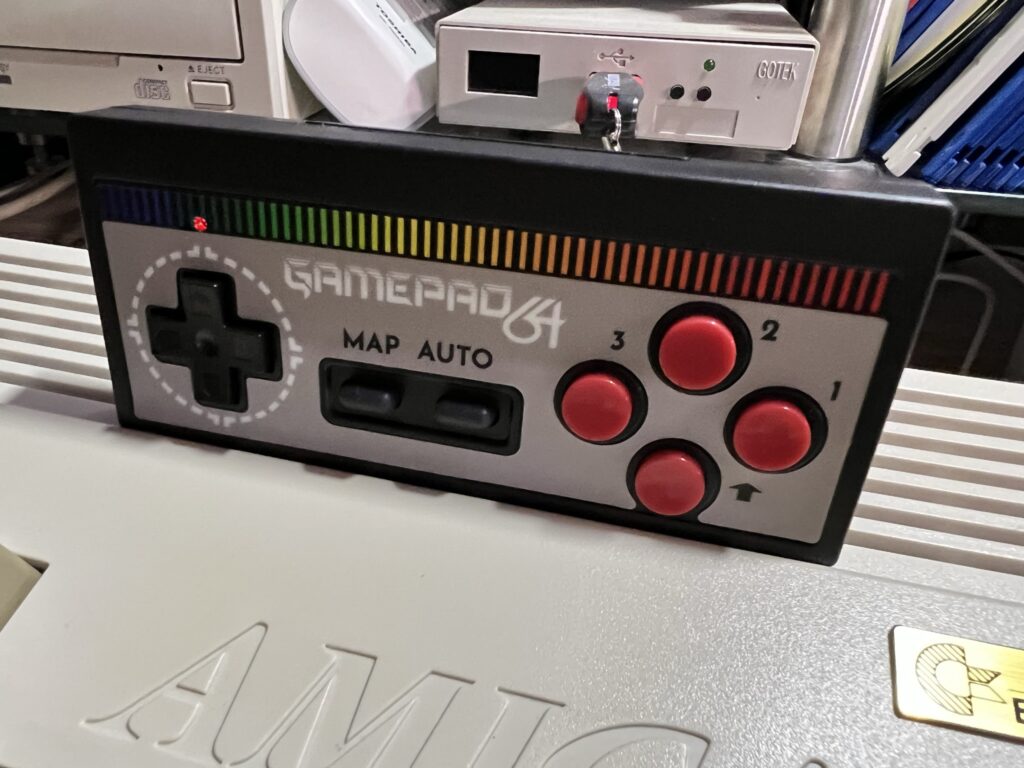
 

wireless Amiga gamepad

Notice the little Power/Connectivity LED above the D-Pad.


What’s it like to use?

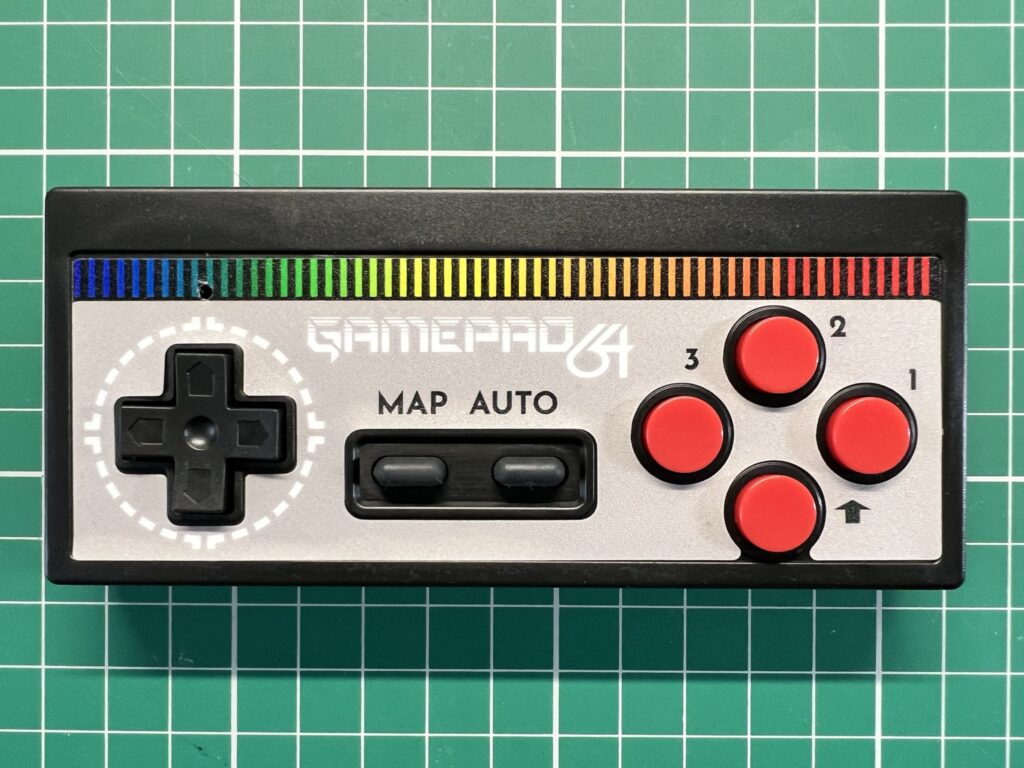
The gamepad is well constructed and nicely finished in a textured matte black plastic. The vinyl sticker on the front is really well made and looks professional. The textured finish makes it easy to grip and having a set of batteries inside it means it has a nice bit of weight to it.
 

wireless Amiga gamepad

Close-up of the buttons.


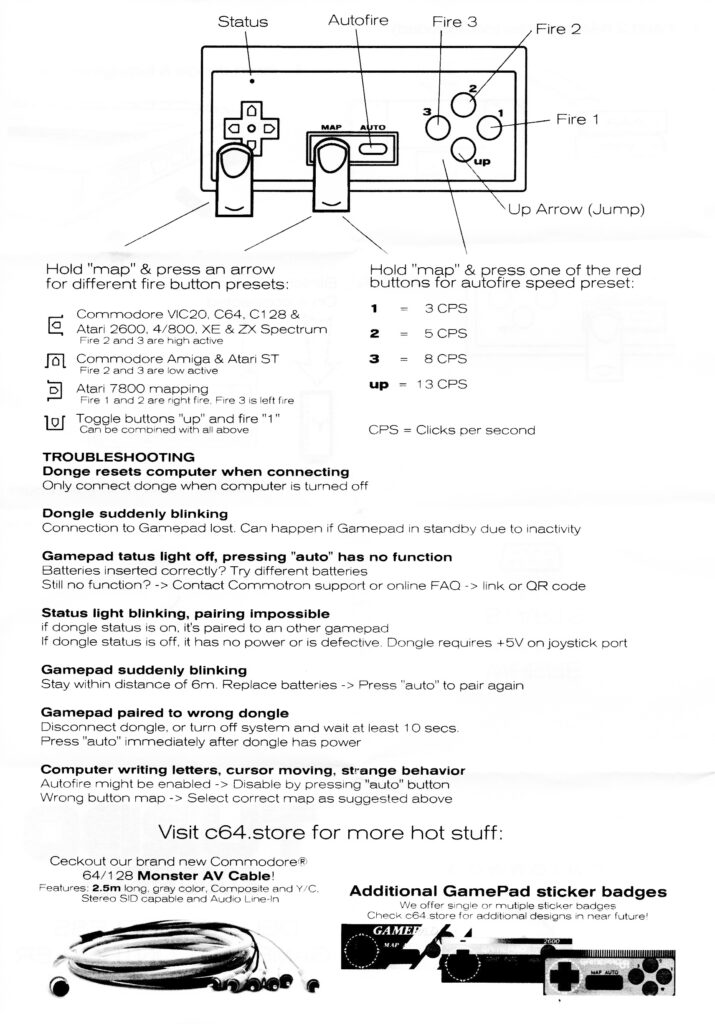
The gamepad features 3 fire buttons (labelled 1, 2 & 3) and a dedicated ‘UP’ button which is a real boon in platform games. The ‘MAP’ button is used to switch around the fire buttons depending on your preference or system being used. It can also be used to switch the ‘UP’ button with fire button 1 should you wish. The ‘AUTO’ button toggles the auto-fire feature on and off. 4 different auto-fire speeds are configurable on the pad; 1, 5, 8 and 13 ‘clicks per second’.

The D-Pad is very responsive and easy to operate without accidentally triggering a diagonal direction unless you actually want to. The fire buttons are quite stiffly sprung and require a firm push to depress which gives plenty of tactile feedback. It did take me a little while to get used to though. Compared to say an Xbox or PlayStation controller they require much more pressure to operate.
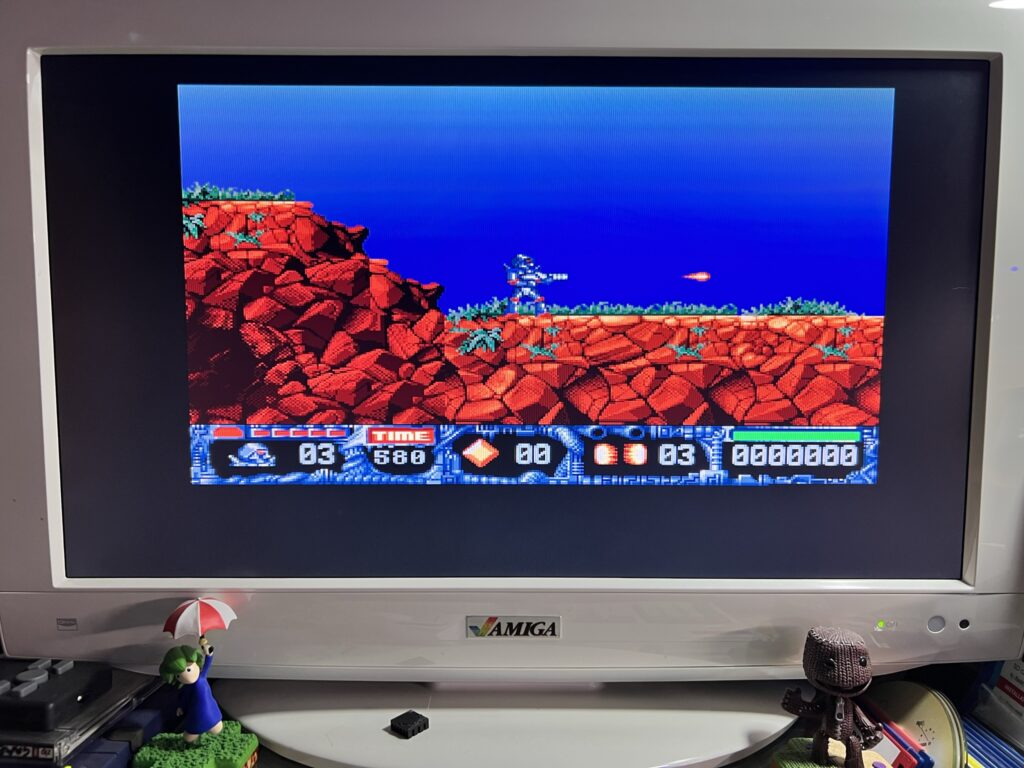
 

Turrican 2 AGA

Turrican 2 AGA


Having 2 fire buttons that work on the Amiga is terrific. Playing the new Turrican 2 AGA for example (awesome game by the way) is so much better when you have the 2nd fire button to help trigger extra weapons/abilities instead of having to reach for the keyboard all the time!
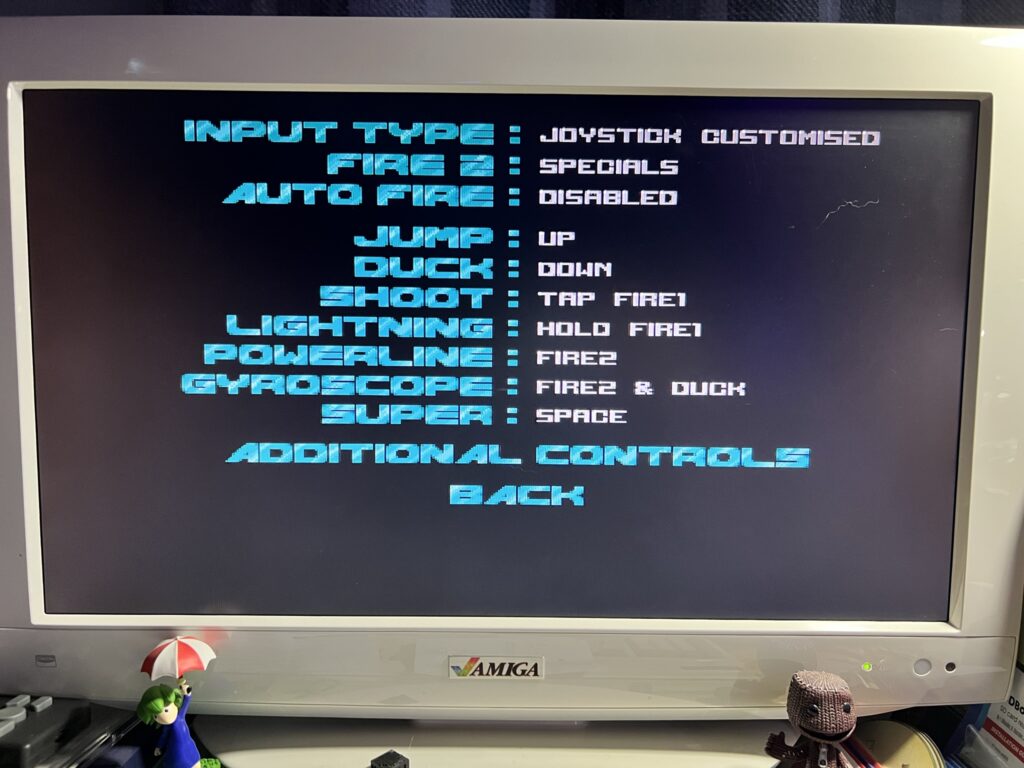
 

Turrican 2 AGA

Turrican 2 AGA – 2nd Fire Button Configuration.,


This gamepad would be equally awesome for games that support 2 fire buttons on the C64 too. Games like Super Mario Bros 64 and Chase HQ 2 for example.

Another useful feature is that the gamepad turns itself off after a period of inactivity to conserve battery life. Turning it back on just requires a quick press of the ‘AUTO’ button for near instantaneous reconnection.


Final Thoughts

This is an awesome controller and I’m so glad I bought it. I have a ton of retro joysticks and gamepads now but this one has quickly become my favourite. The combination of auto-fire, configurable extra fire buttons and of course the wireless capability means it’s a no-brainer for me. It’s reasonably priced too, coming in at around the same level you would expect to pay for an Xbox or PlayStation controller. Considering this is a low volume product I think the price is very fair indeed.

Needless to say I’m going to order some more so I can leave one permanently attached to each of my Commodore machines! Highly recommended.


FYI

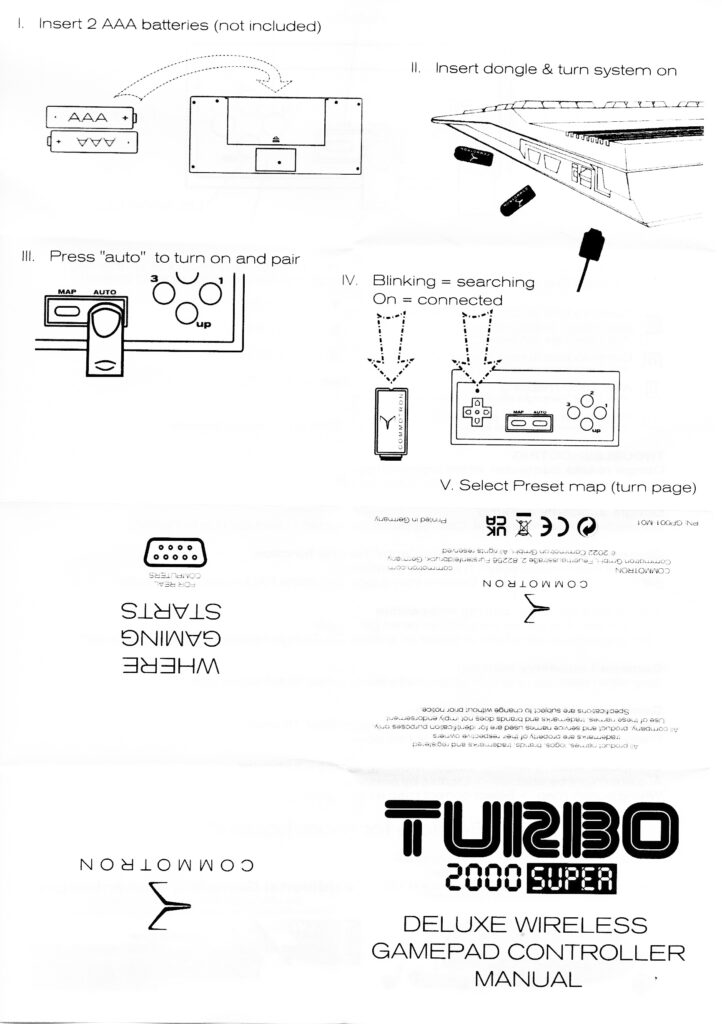
I’ve included scans of the instructions below in case anyone is curious about exactly how the button mapping or pairing works.


iNNEXT USB Game Controller Review

iNNEXT USB Game Controller

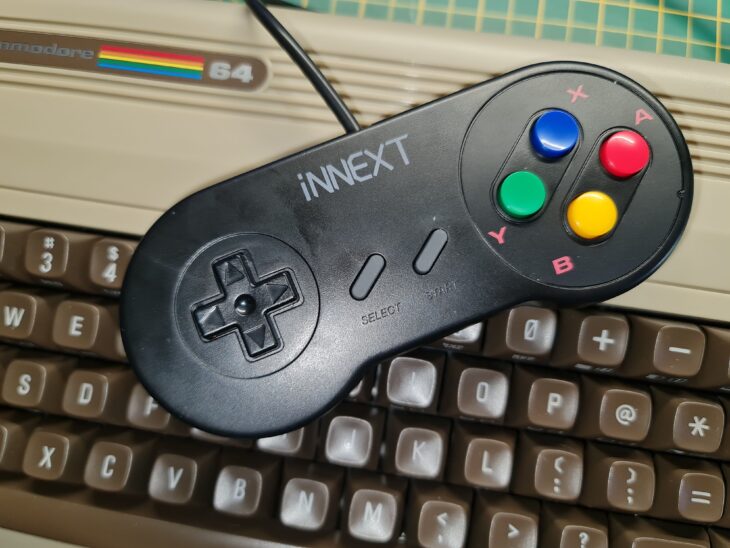
Just picked up an iNNEXT USB Game Controller off Amazon to use with my TheC64 Mini and Maxi consoles. Why? Well unfortunately after almost 40 years of faithful service my C64C has started to act up. It’s been crashing and freezing whilst playing games that have always run flawlessly before. I’ve ran my diagnostic cart on it and everything passed so I’m hoping it’s just the electrolytic capacitors. My C64C has never been recapped before so it’s been packaged up carefully and sent away to an expert to get them all replaced. I decided not to attempt it myself as I don’t want to risk causing further damage with my dodgy soldering skills! I’ll know the outcome of this in a couple of weeks when I get it back.

Anyway, in the mean time I still want to be able to play my C64 games without having to resort to the Zip stick wannabe’s that the Mini/Maxi consoles come with. Even though the stick that came with the Maxi is much improved I just prefer a gamepad controller these days.


iNNEXT USB Game Controller

iNNEXT USB Game Controller Packaging


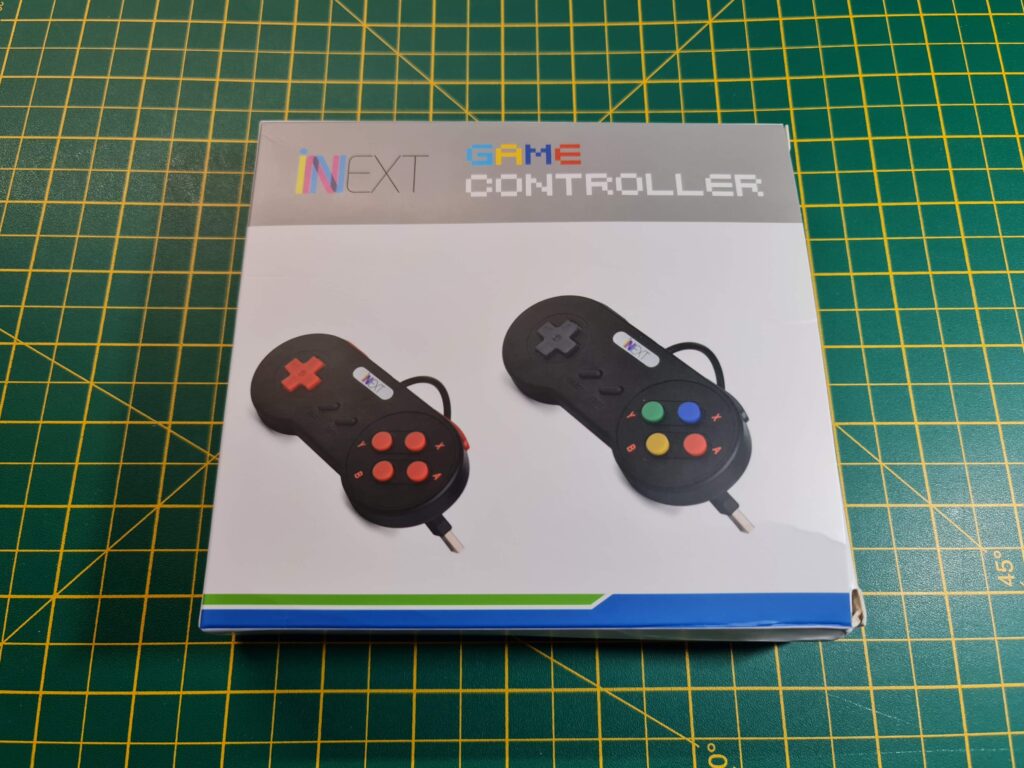
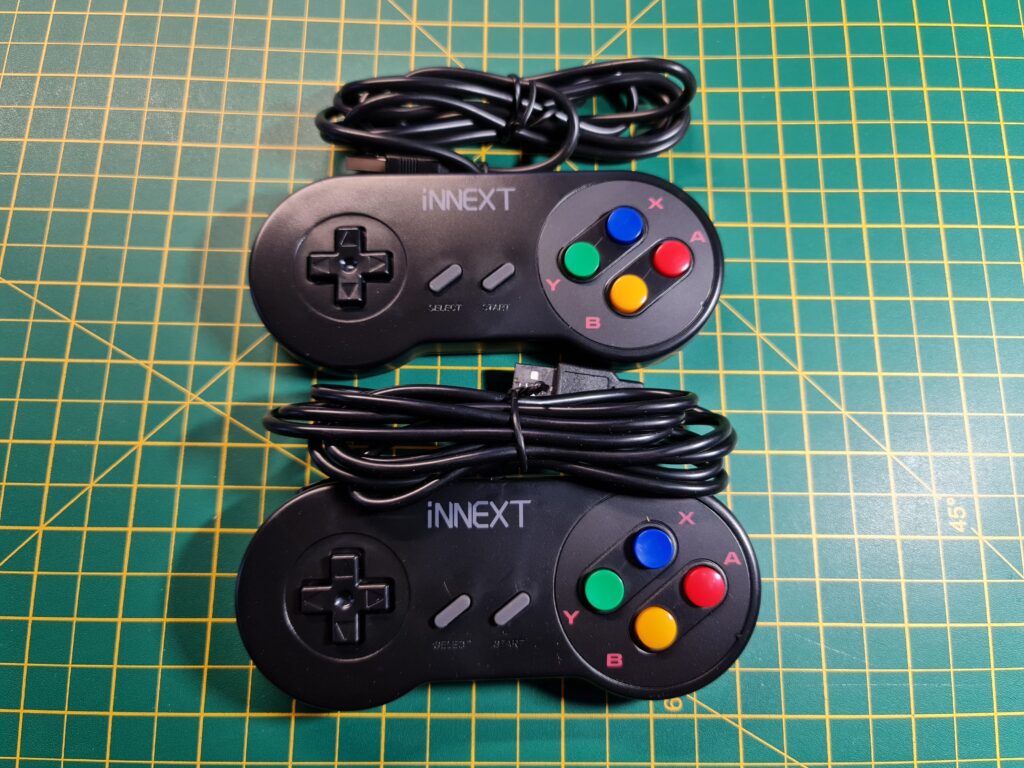
I’m sure there are other controllers out there that will work but I chose these for a number of reasons. The most important one being that in addition to the D-pad they have 8 buttons, matching the number of buttons on TheC64 joystick. They also looked great and came in a pack of 2 for a reasonable price. I was a little apprehensive when purchasing as I wasn’t sure if all the buttons would actually be recognised by the console. This is why I thought I’d share my experience in case anyone else is looking for a similar gamepad for their TheC64’s.


iNNEXT USB Game Controller

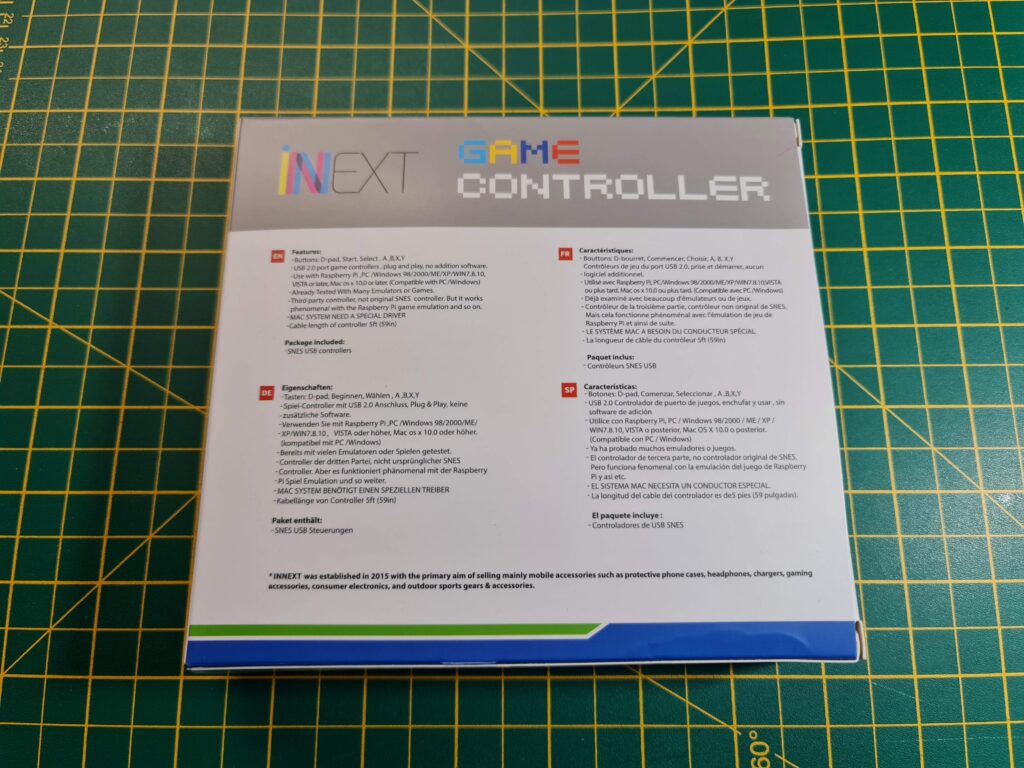
Back of the box.


I was fully expecting a nondescript plain box as is often the case with cheap Chinese goods. However the gamepads came supplied in a surprisingly attractive box featuring product shots of the controllers on the front. The reverse side lists all the gamepad features in multiple languages.


iNNEXT USB Game Controller

The two controllers unboxed.


A Closer Look

The iNNEXT USB Game controllers themselves are styled like the old SNES gamepads. In addition to the D-Pad they have ‘Select’, ‘Start’, ‘A’, ‘B’, ‘X’, ‘Y’ and two shoulder buttons. Altogether this makes 8 buttons plus the direction controls which matches the configuration of the TheC64 joysticks exactly.


This slideshow requires JavaScript.


Taking a Peek Inside

The build quality of the pads is really good and although they’re pretty lightweight, they feel solid and well constructed. They certainly didn’t creak or flex in my hands, even when I deliberately tried to bend them. The D-Pads worked well and the buttons have a decent tactile feel to them when pressed. They didn’t feel spongey or rubbery so I was never in any doubt as to whether I had pressed one or not. One little feature I appreciated was the contrasting convex and concave buttons for the XY and AB buttons which made it easier to know what I was pressing in low light.


iNNEXT USB Game Controller

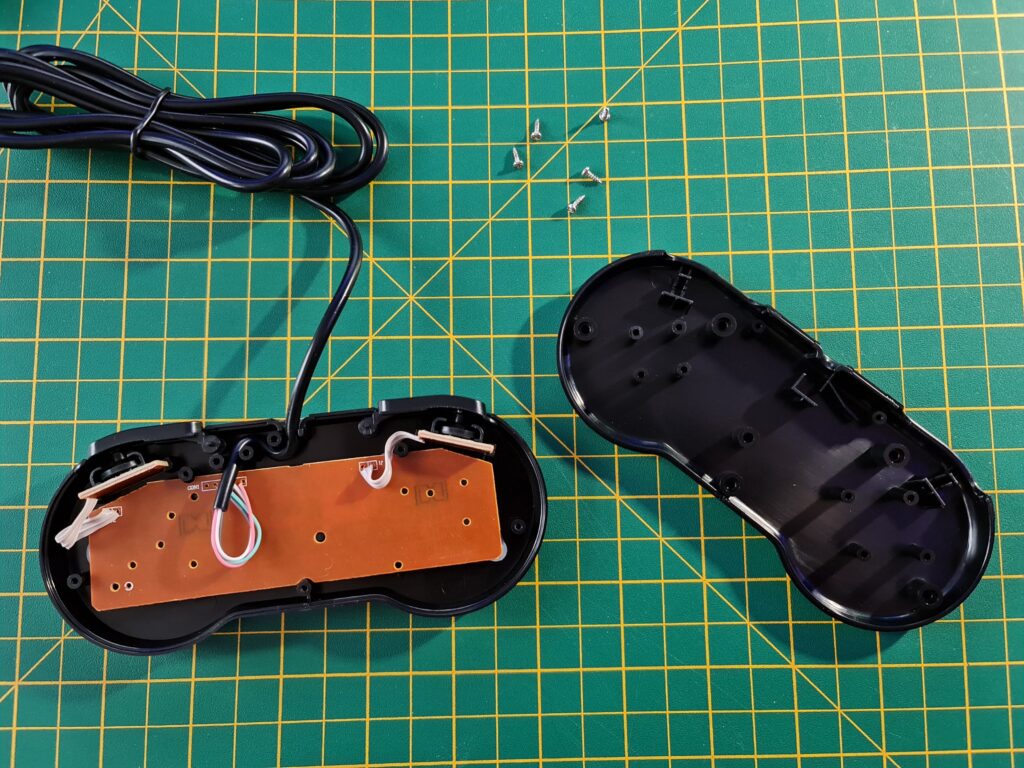
iNNEXT USB Game Controller Internals.


The cable is approximately 5 foot long (1.5m) which I found was more than long enough for my needs. The gamepad shell itself is held together with 5 small philips screws. Naturally my curiosity got the better of me and I took it apart to see what was inside.


iNNEXT USB Game Controller

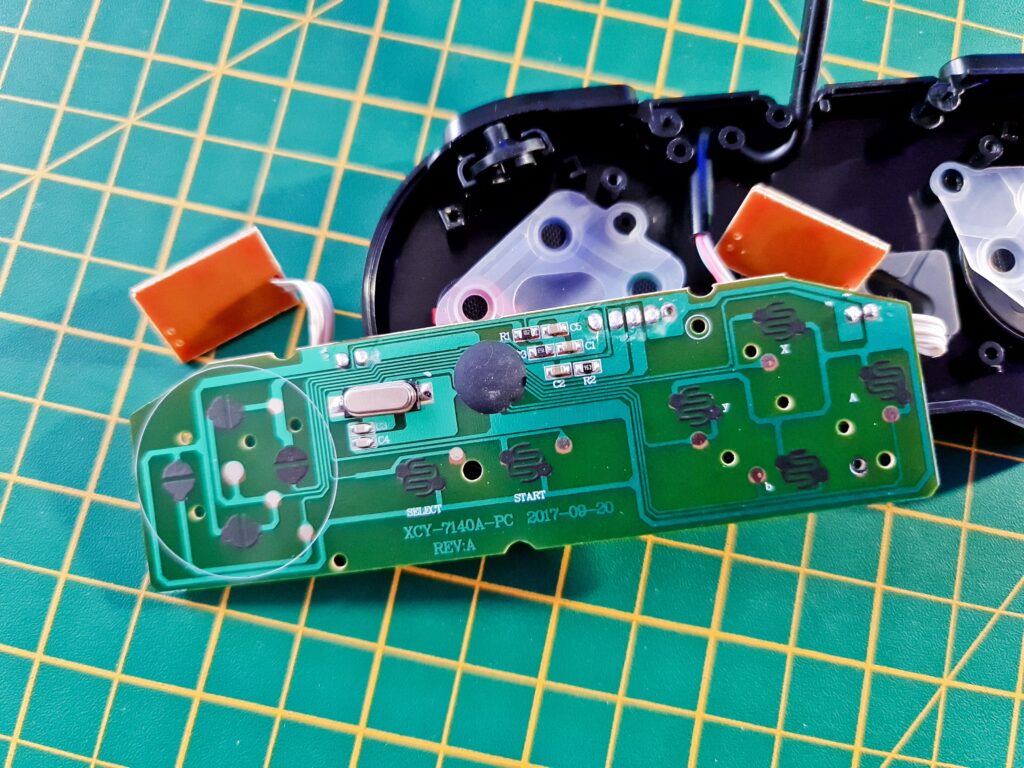
The iNNEXT USB Game Controller PCB.


As I should have expected from a modern piece of electronics, there wasn’t really much to see. Still, at least my curiosity was sated!


iNNEXT USB Game Controller

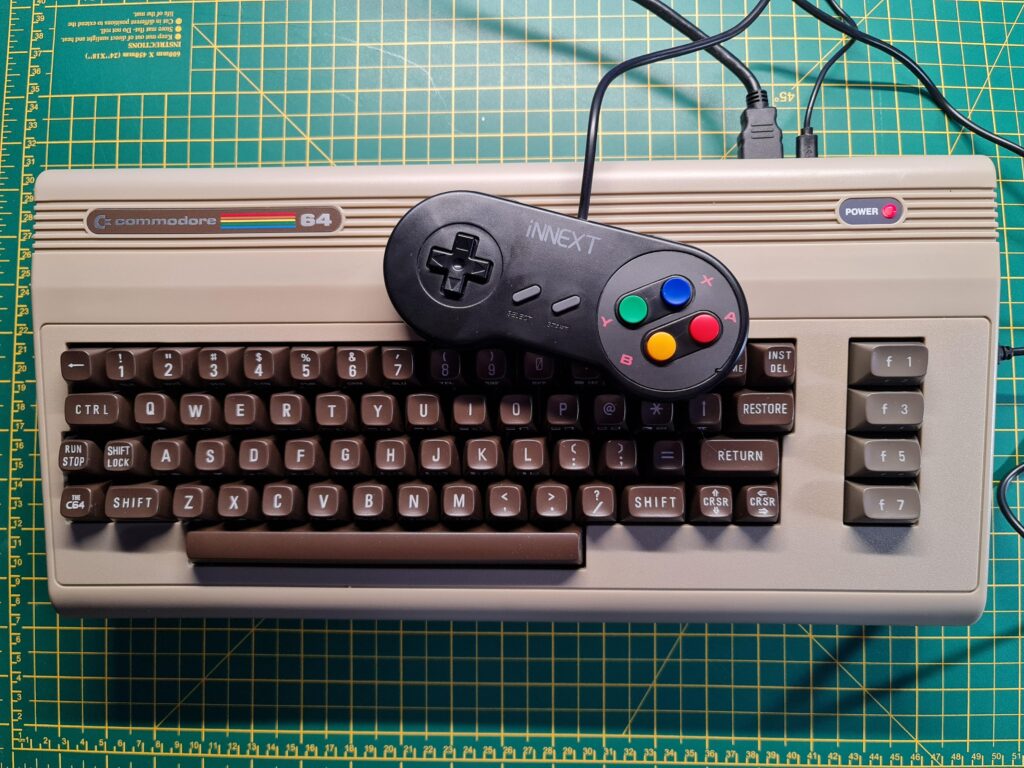
iNNEXT USB Game Controller with TheC64 Maxi*.


*Just in case anyone wants to know where I got the Commodore 64 badge from – check out my post here.


Testing

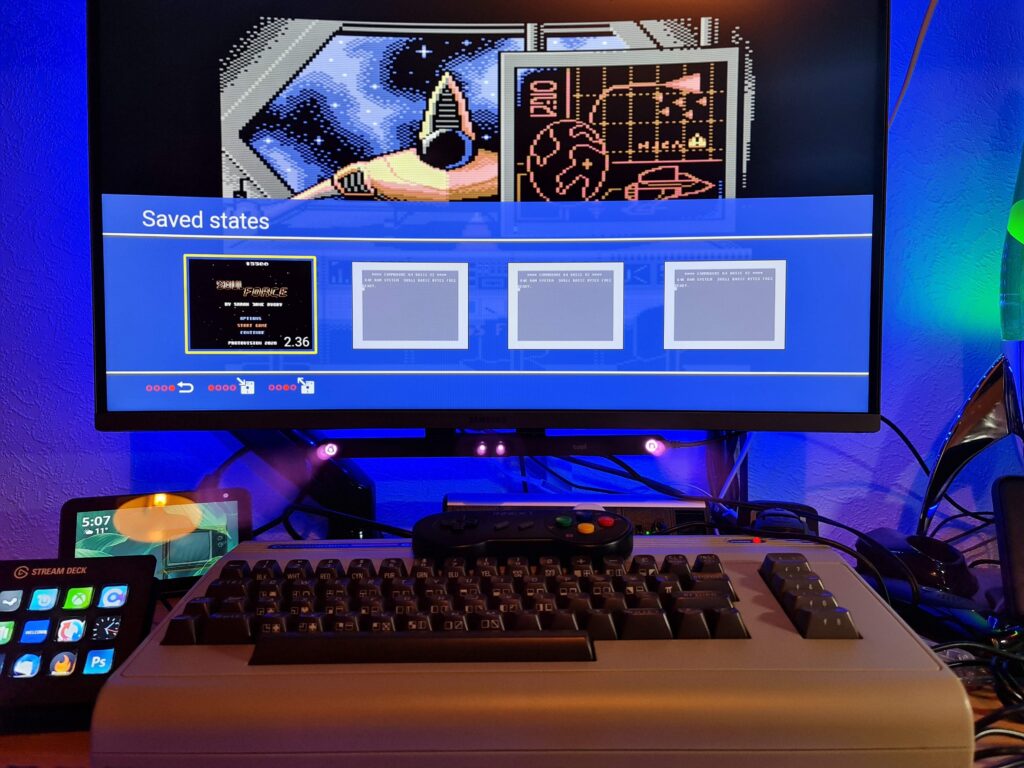
The controller just worked out of the box with the games I tried on TheC64 Maxi carousel. By default both shoulder buttons are configured as ‘Fire’ buttons which I found worked pretty well. The Start button brings up the ‘save state’ menu whilst X and Y operate the two triangular buttons. The first three round buttons on the base of the Joystick are replicated by the A, B and Select buttons. So that was every one of the joystick buttons replicated successfully.


iNNEXT USB Game Controller

iNNEXT USB Game Controller being used to bring up the Save State menu during a game of Soul Force.


I tried a number of non carousel games off a USB flash drive too like Galencia and Soul Force. Happily I experienced no issues at all with these either. Of course if there had been problems there’s always the option of creating custom .CJM files to change the button configuration for specific games if needs be too.

Perhaps you’d like the left shoulder button to operate the spacebar in Ghostbusters for example? No problem, simply add that to a Ghostbusters.CJM file and you can get your C64 shouting ‘Ghostbusters’ without reaching for the keyboard. This is an even more useful feature when dealing with the keyboard-less TheC64 Mini..

iNNEXT USB Game Controller – Verdict

All in all I think these are terrific gamepads and fulfil their retro gaming duties admirably. They’re very reasonably priced, well built, comfortable to hold and work exactly as I’d hoped. I’ll be keeping the 2nd pad as a spare but there’s no reason why you couldn’t plug them both in and enjoy some 2-player games like Pit Stop II or Spy vs Spy. Oh and they work perfectly on PC as well, whether for native PC gaming or some retro emulator action. Definitely recommended.

Commodore 64GS Gamepad Review

A Little History

Back in the twilight period of the C64’s life, Commodore released the C64 Games System or C64GS. It was a keyboard-less console that used cartridge based games just like the Sega Master System or NES. Unfortunately there were only ever a few dozen games released for it and it was a commercial flop.

Why am I mentioning this now? Well, although it didn’t come with a gamepad, it did come with a joystick (Cheetah Annihilator) that had a second, independent fire button. Prior to this all C64 joysticks just had a single fire button. Those joysticks that did have two physical buttons existed solely to allow left or right-handed play.

Unfortunately due to the short life-span of the Commodore 64GS only a small number of games were ever produced that supported this second fire button.


Present Day


Super Mario Bros C64

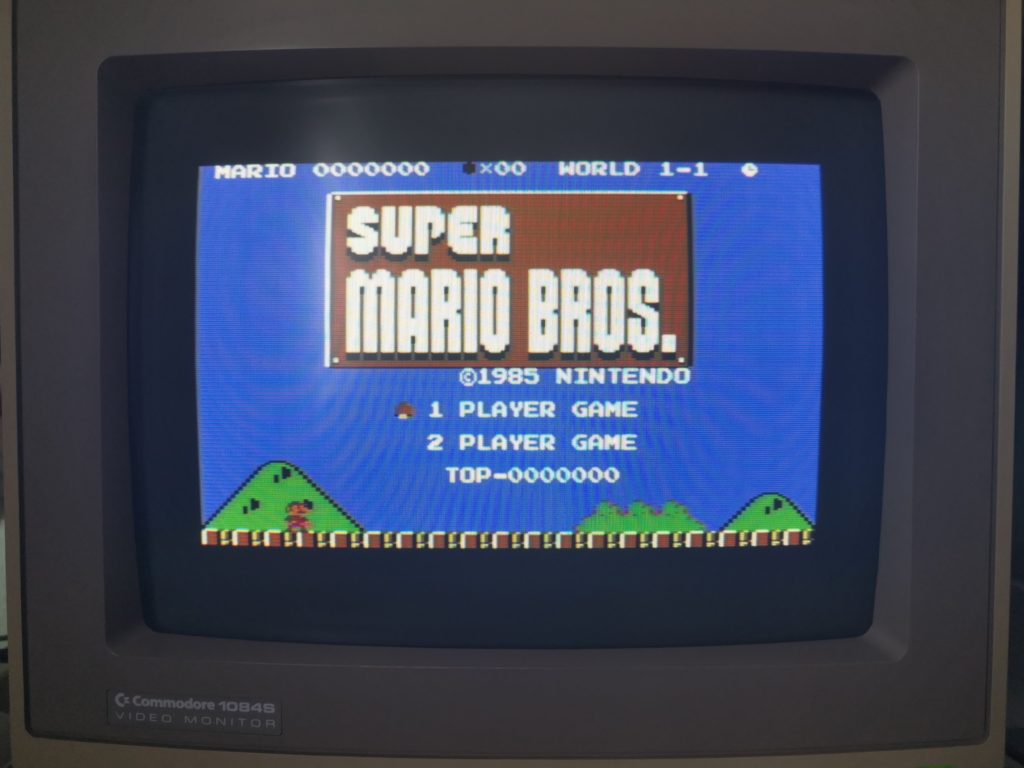
Super Mario Bros on the Commodore 64.


Fast forward to 2019 and the amazing Super Mario Bros for the C64 was released supporting 2 buttons. This kick-started my desire to find a decent 2 button joystick to control Mario. I mean who wants to have to push ‘up’ on a joystick to make Mario jump?


Commodore 64GS Gamepad

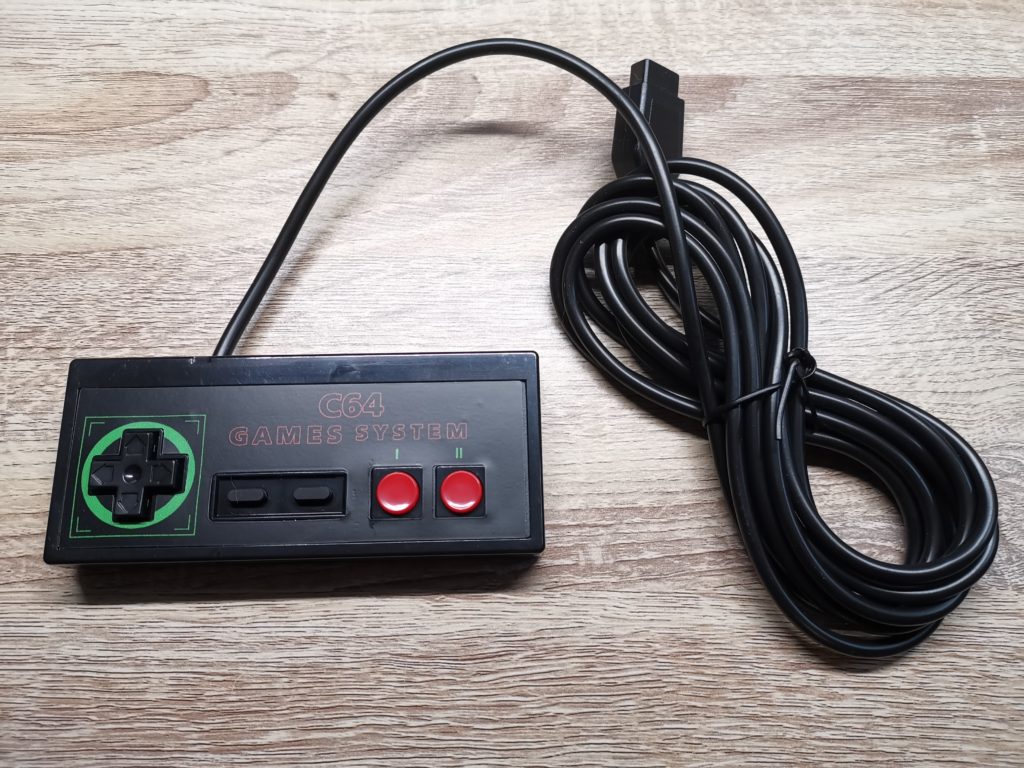
The gamepad comes with a nice long cable.


A few weeks ago I discovered someone who is actually making Commodore 64GS gamepads. The company, based in the USA can be found on Etsy and eBay and is called RetroGameBoyz. The gamepads it produces are custom made to order and they offer quite a few different options to choose from.


Commodore 64GS Gamepad

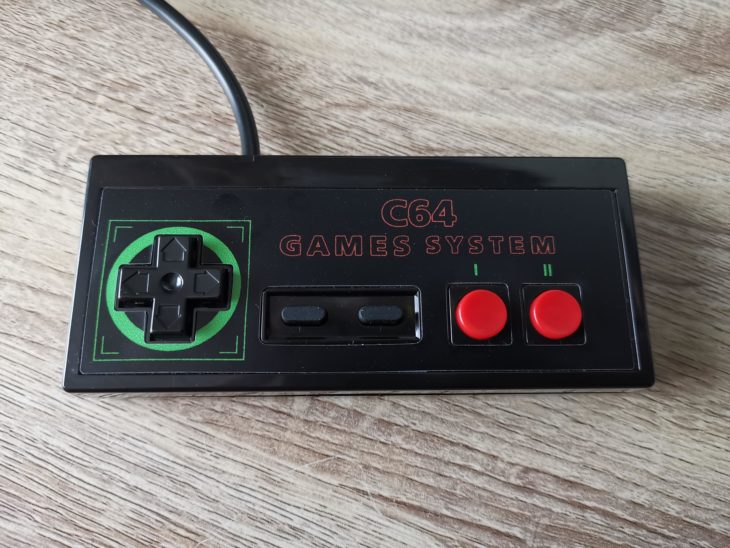
Commodore 64GS Gamepad.


They sell the gamepad for around £25 with delivery to the UK taking around ten days. Unfortunately I did get stung for import taxes and the usual Royal Mail ‘money for nothing’ charge. Combine that with the postage fee and this basically doubled the cost of the pad for me.


Commodore 64GS Gamepad

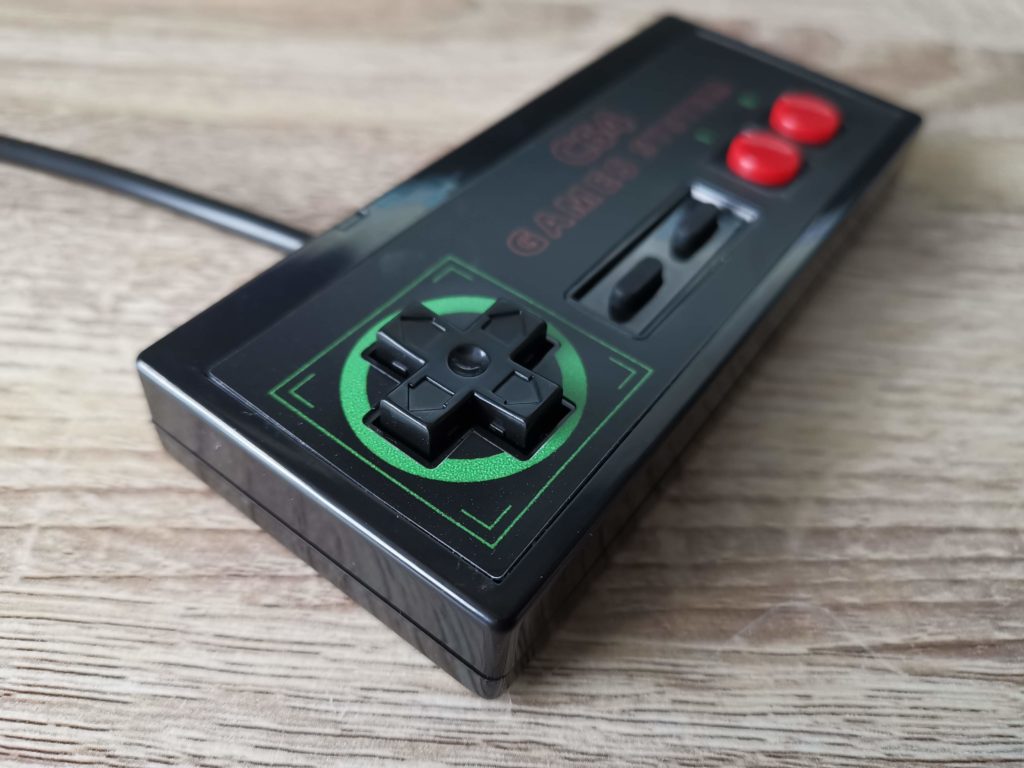
A close-up shot of the D-pad.


In More Detail

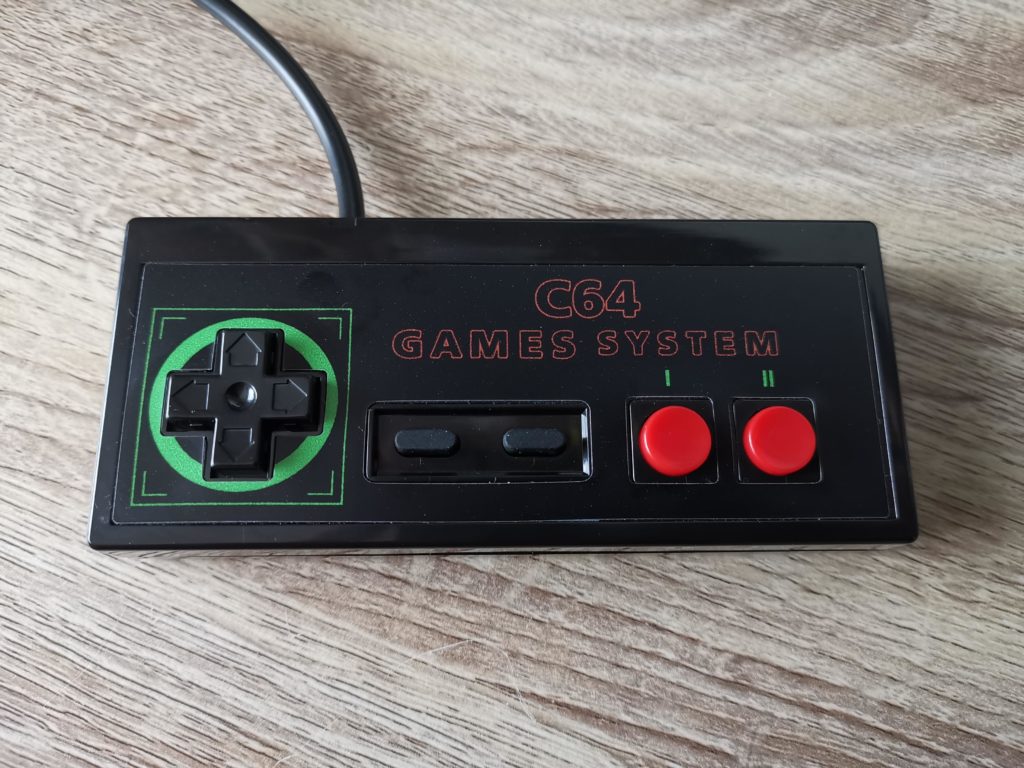
The gamepad is well constructed and nicely presented in a glossy black plastic shell. It is faced with a custom made vinyl ‘C64 Games System’ skin which really sets it off. This skin is how RetroGameBoyz differentiate each gamepad in their range. They do one for the Amiga and few more variations for the C64 too. In one configuration you can have the second fire button mapped to ‘up’ which would come in handy for a lot of platformers.


Commodore 64GS Gamepad

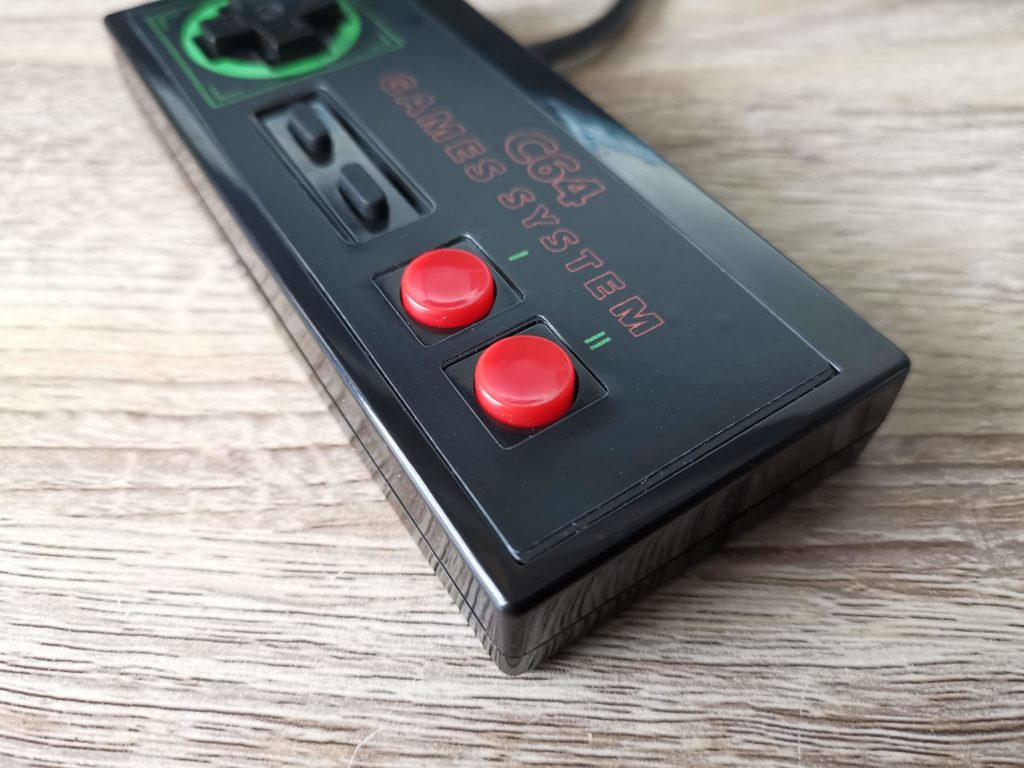
A close-up shot of the 2 fire buttons.


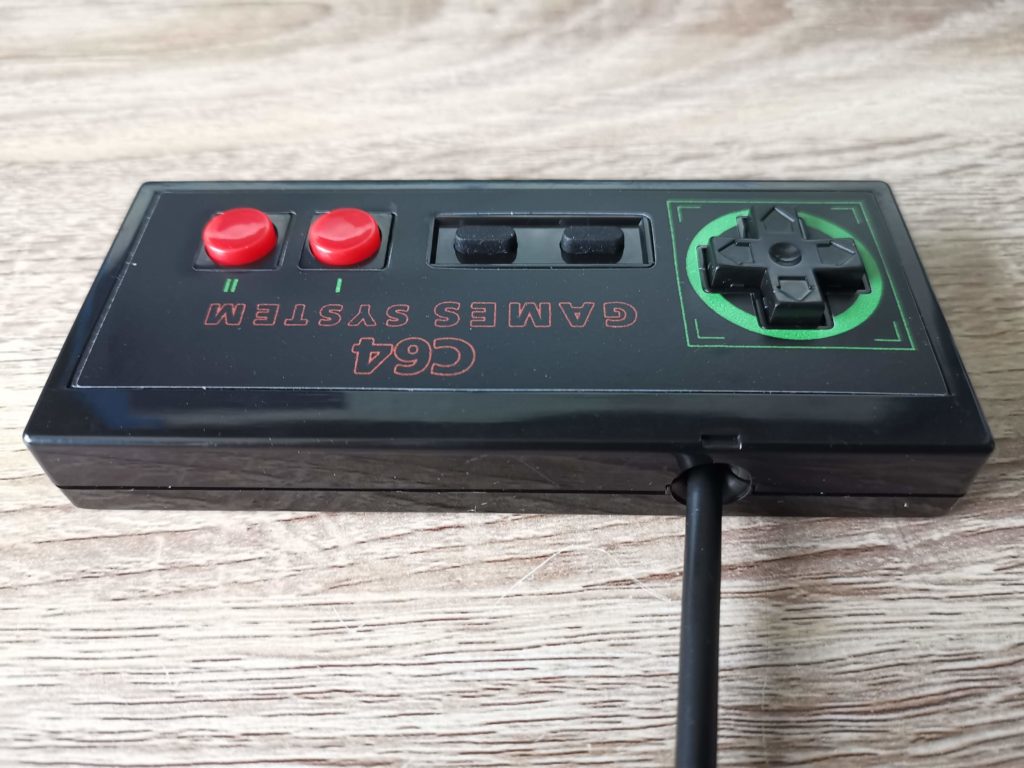
The gamepad came with a very generous 10 foot (3m) long cable and is fitted with a standard 9-pin D-sub plug.


Commodore 64GS Gamepad

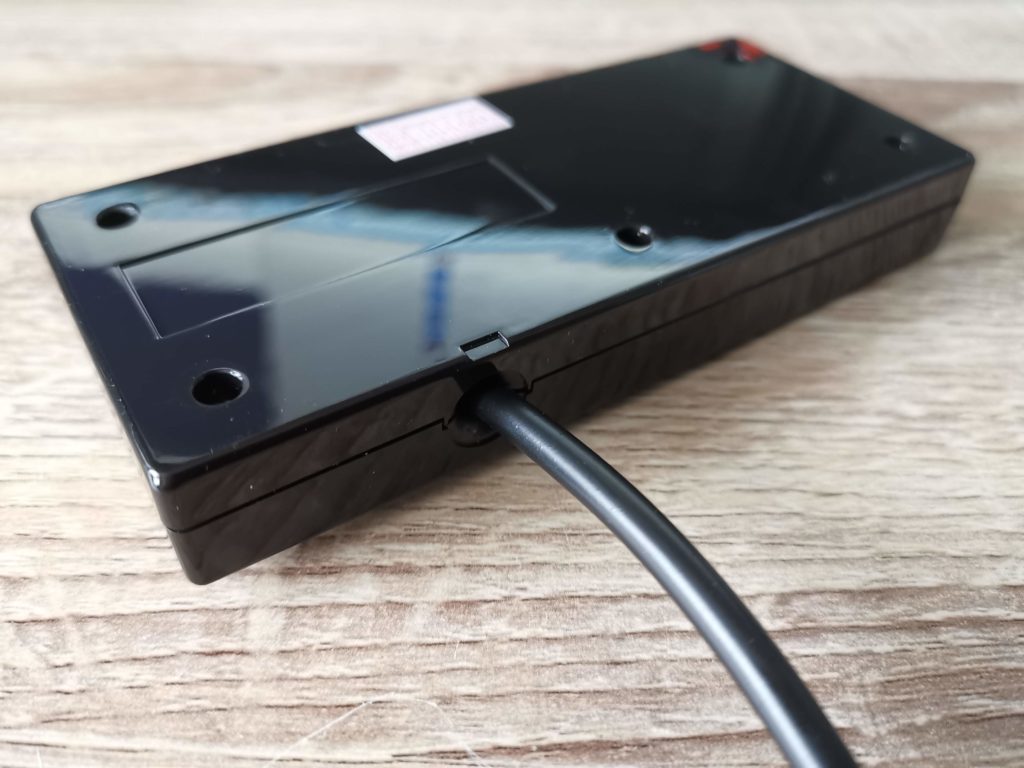
Rear view of cable entry point.


In use it works well with the D-Pad being easy to operate and the two fire buttons very responsive. The two central ‘select’ and ‘start’ buttons are actually extra ‘left’ and ‘right’ buttons. The main fire button is labelled ‘I’ and the extra button ‘II’.


Commodore 64GS Gamepad

Bottom of the gamepad case.


I’m really happy I’ve found this controller. For games like Super Mario Bros it really transforms the gameplay experience. I know joysticks are great for a lot of games but I do prefer using a gamepad these days for platform games.


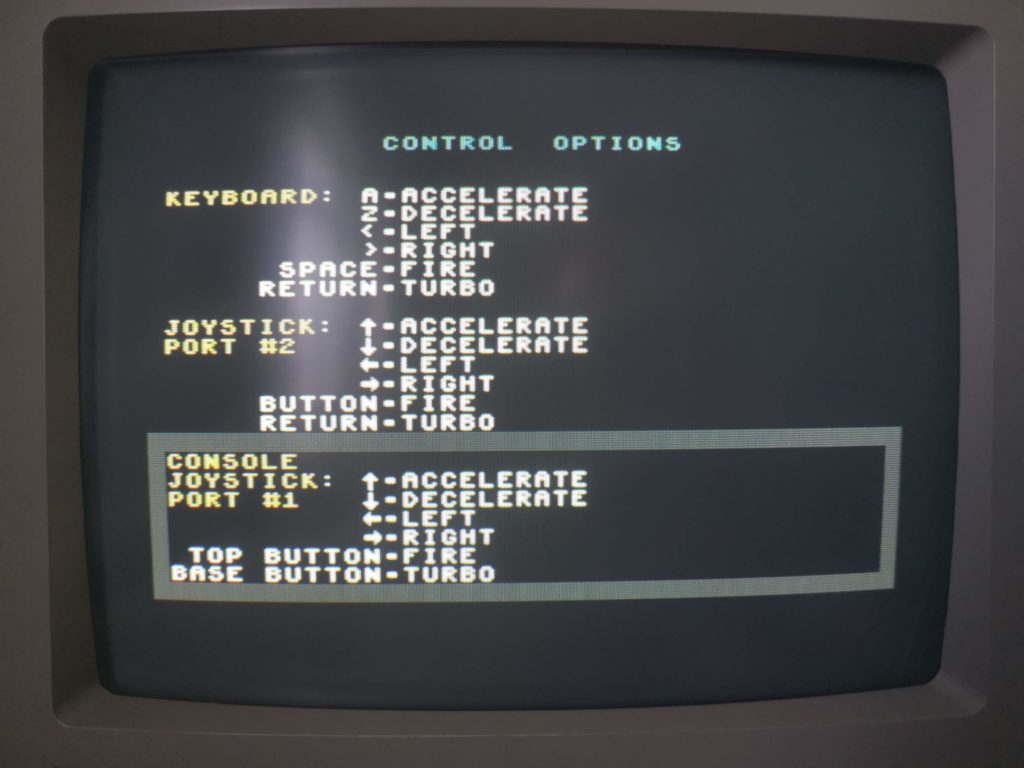
Second fire button option selected in Chase HQ 2 settings.


The addition of the second fire button is a real boon too. In supported games like Chase HQ 2 you can play them without having to keep reaching over to press a key on the keyboard. In other titles like Paradroid Redux it offers a more nuanced control system by separating off one of the extra controls from fire button A to button B.


Supported Games

Here’s a list of Commodore 64 games that support a 2nd fire buttons and its function, if I’ve played them.

  • Alien 8 – 2nd button used to pickup/drop objects
  • Battle Command (Cart) – 2nd button toggles between driving and cursor control
  • Chase HQ2 (Cart) – 2nd button operates Turbo mode.
  • Double Dragon (Ocean Cart) – 2nd button performs all sorts of extra moves
  • Giana Sisters 30th Anniversary Hack
  • The Last Ninja Remix (Cart)
  • Myth (Cart) – 2nd button changes weapon
  • Paradroid Redux – 2nd button used to enter transfer mode
  • Robocop 2 (Cart) – 2nd button used for jump
  • Spacegun
  • Super Mario Bros – can now use buttons to jump and throw fireballs
  • Turrican II (Rainbow Arts)

My New Amiga CD32 Console

Amiga CD32

Introduction

I never owned an Amiga CD32 Console back when they launched in 1993. I remember reading about them in Amiga Format and wanting one desperately but could never justify or afford one at the time. Not long after they launched Commodore went out of business and so the CD32 quickly disappeared from the shelves and from my mind.

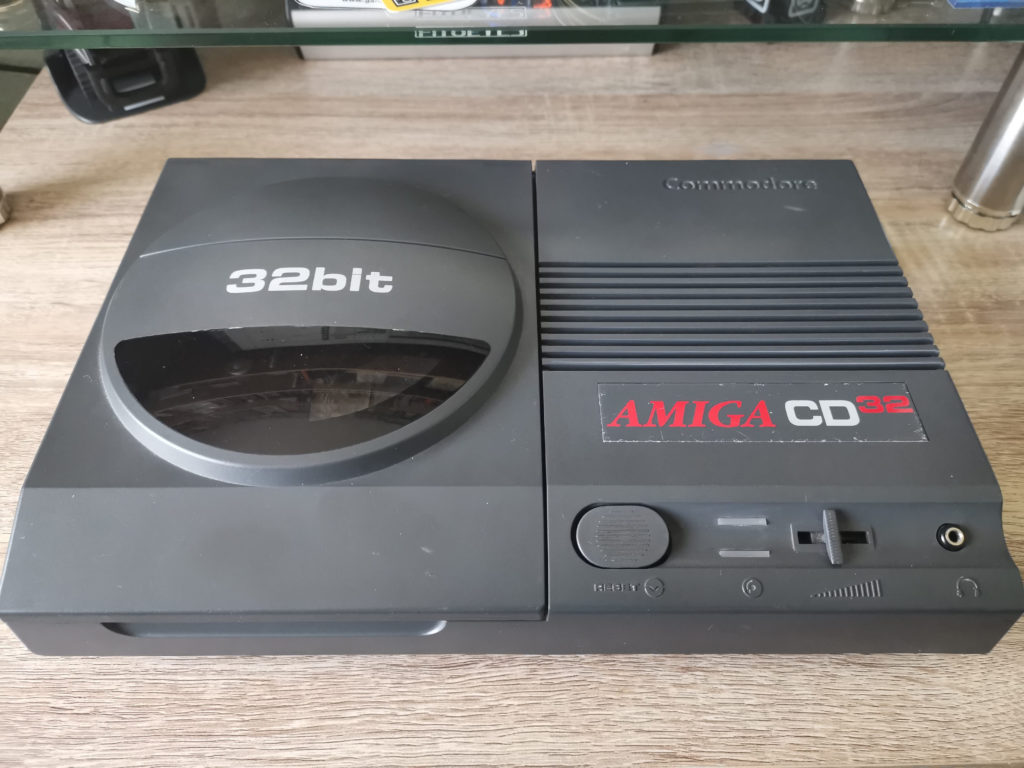
Fast-forward some 25 years and I recently found myself pining after one of these mythical beasts again. Reading numerous articles about them in magazines and on the ‘net added further fuel to the fire. So I did the only sensible thing a middle-aged bloke could do and bought my very own Amiga CD32! Here she is in all her 32-bit glory!


Amiga CD32

My new Amiga CD32 console


For it’s age and what I paid for it I think it’s in great condition. Sure there’s a couple of blemishes and the badge is scratched but for a 26 year old machine I’m more than happy with it. It’s already been fully re-capped so I don’t have to worry about that side of things either.


Amiga CD32

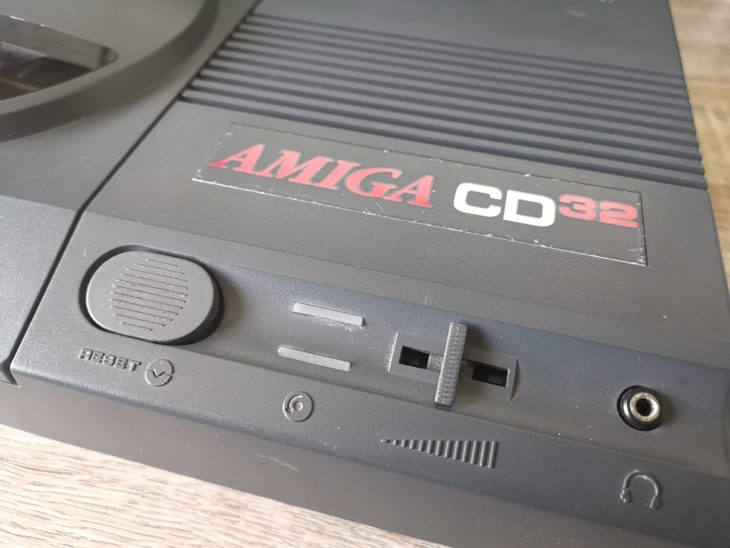
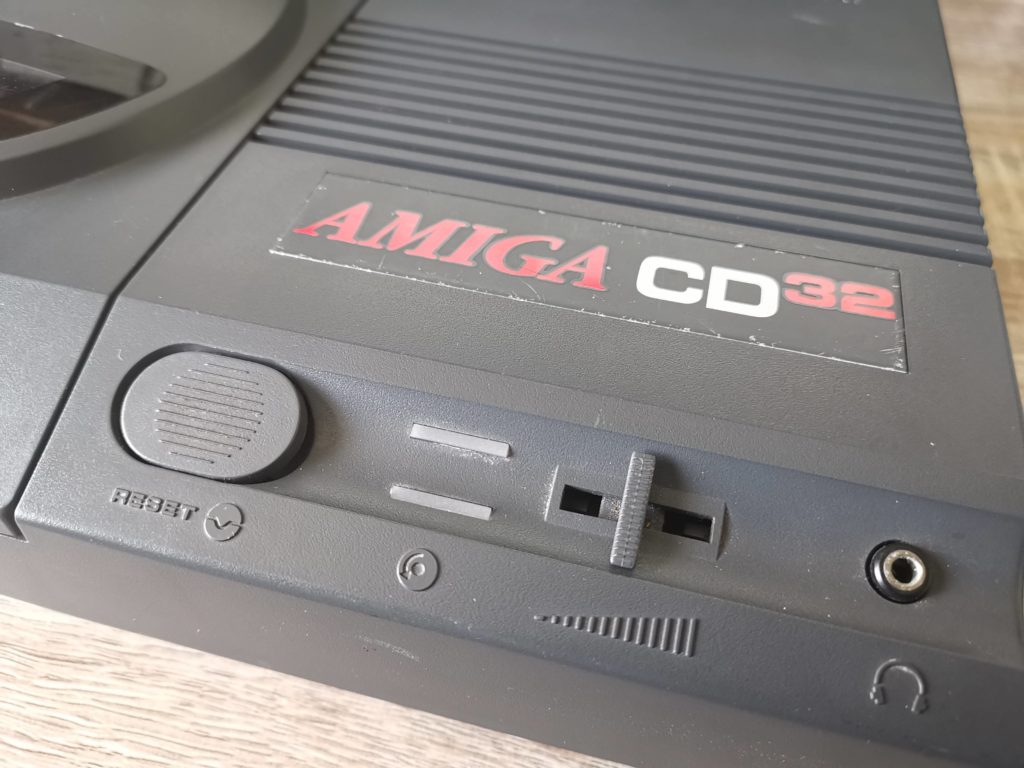
Close-up of the Amiga CD32 control panel. From left to right: reset button, power and drive activity LED’s, volume slider and headphone socket.


All the ports, buttons and outputs work as they should. However I can’t really see myself using it as a CD player much but at least the option is there should I want to!


Connectivity


Amiga CD32

Amiga CD32 expansion port


Amiga CD32 expansion port

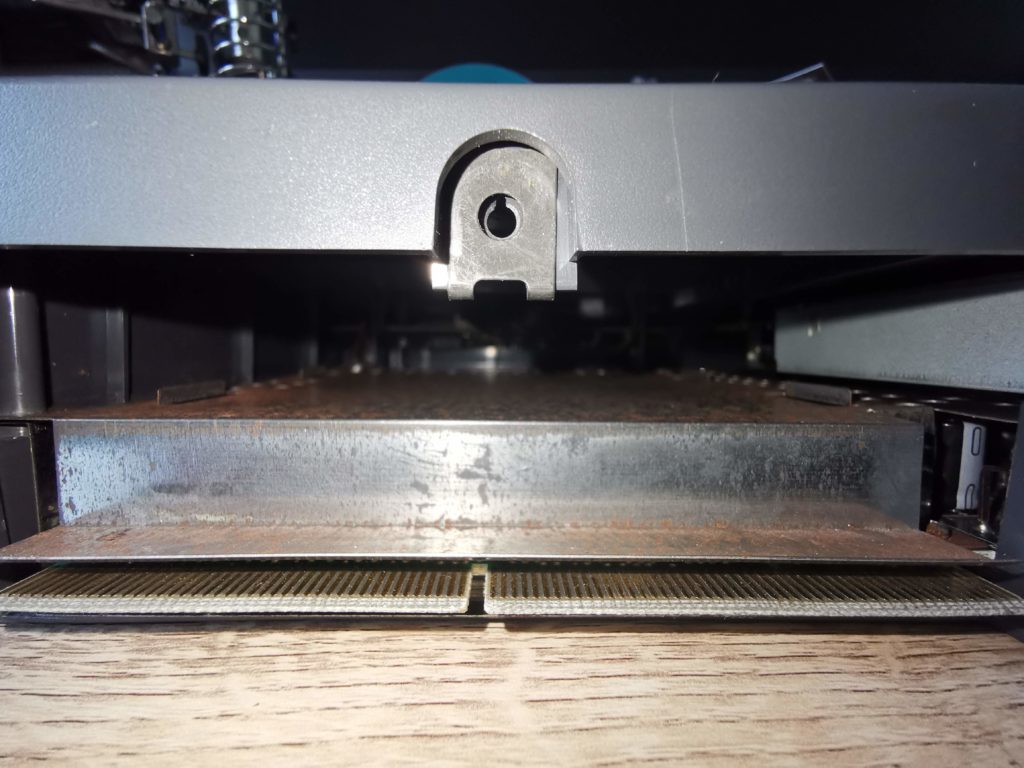
A look inside the CD32 expansion port


There’s an expansion port on the back which can be used to install all manner of wonderful contraptions. In the past there were FMV cartridges, floppy drives and the SX-1 which could convert the CD32 into a full blown computer. Nowadays you can hook up a TerribleFire expansion which offers extra RAM, faster CPU’s, IDE interface and more. I’ll definitely be looking to utilise this port soon!


Amiga CD32

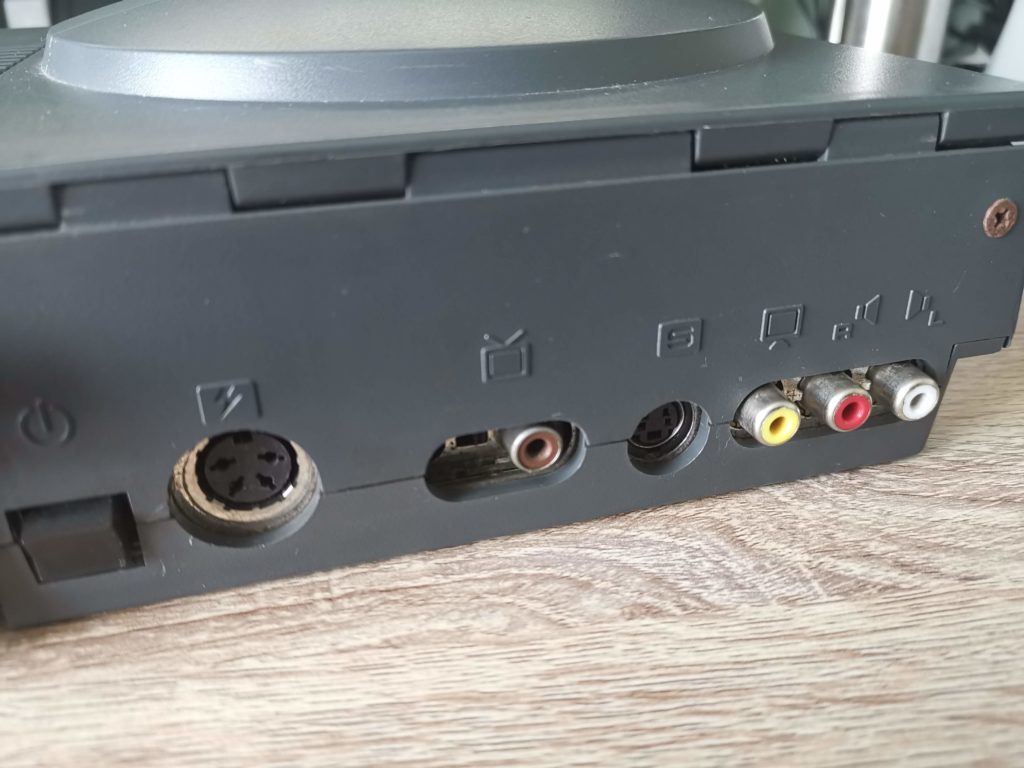
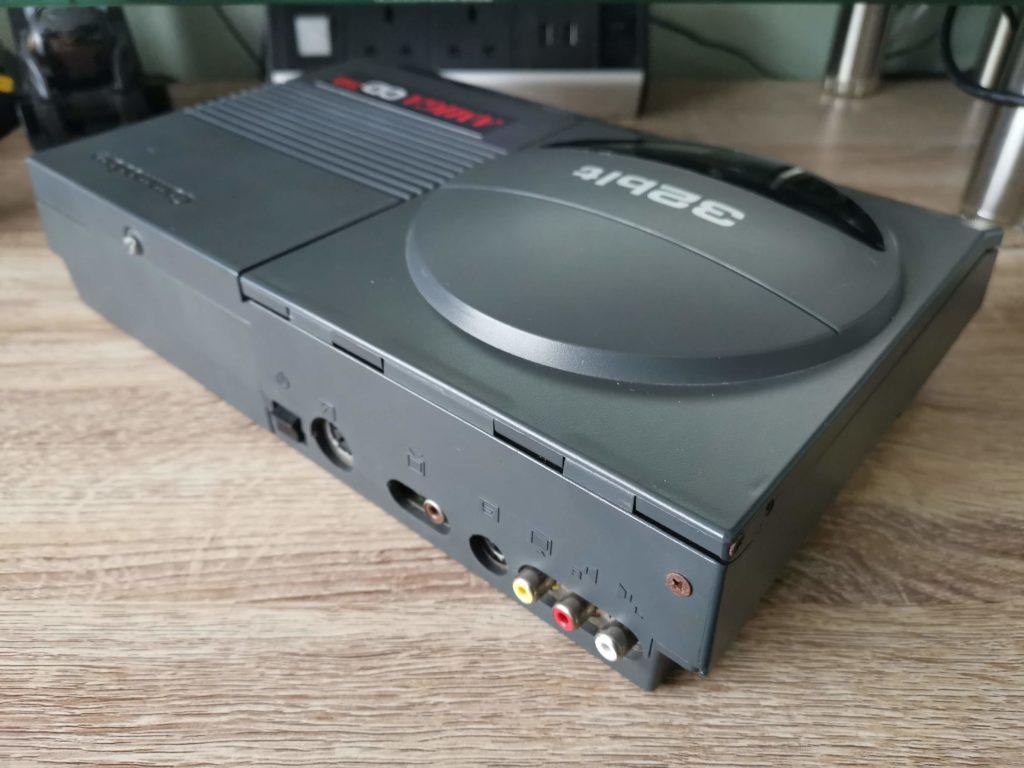
Amiga CD32 rear connectivity. From left to right: power rocker switch, power socket, RF aerial output, s-video, composite video and right/left audio RCA sockets.


There’s plenty of connectivity round the back as standard. No less than 3 video output options, RF, composite and S-video. The latter provides by far the best picture if you have a TV capable of utilising it.


Amiga CD32

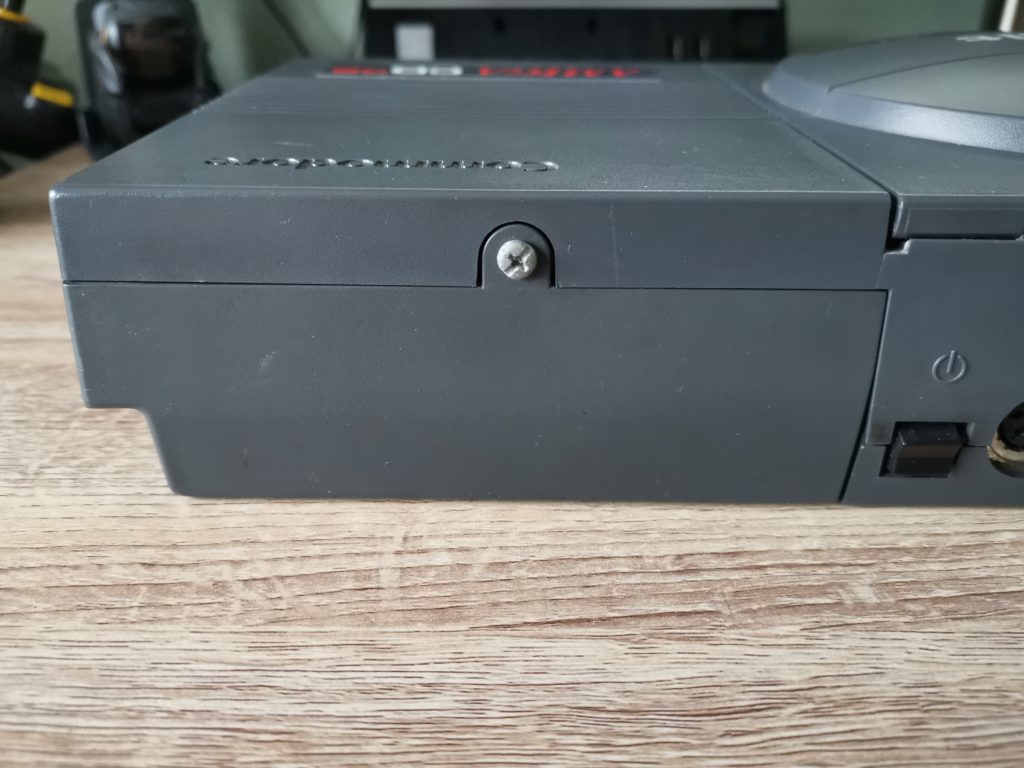
View of the Amiga CD32 rear – that rusty screw definitely needs sorting…


Amiga CD32

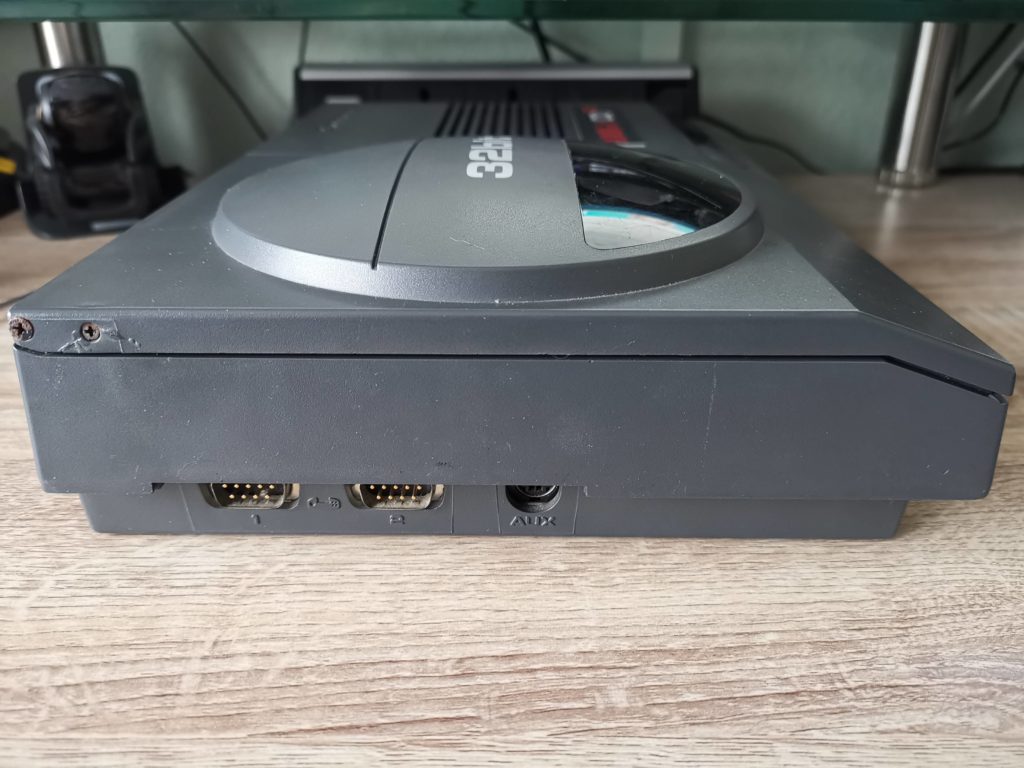
Amiga CD32 left side. From left to right: controller port 1 (for gamepads), controller port 2 (for gamepads or a mouse), aux port (for an Amiga keyboard).


Amiga CD32

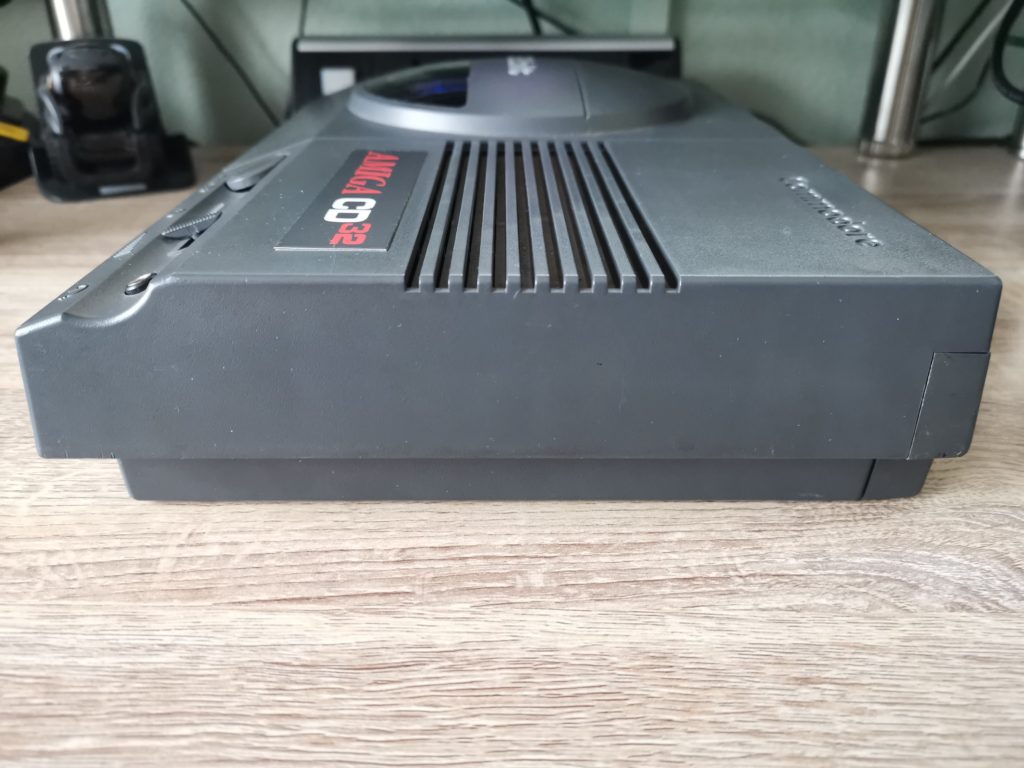
Amiga CD32 right side. Not much to see here really.


Amiga CD32

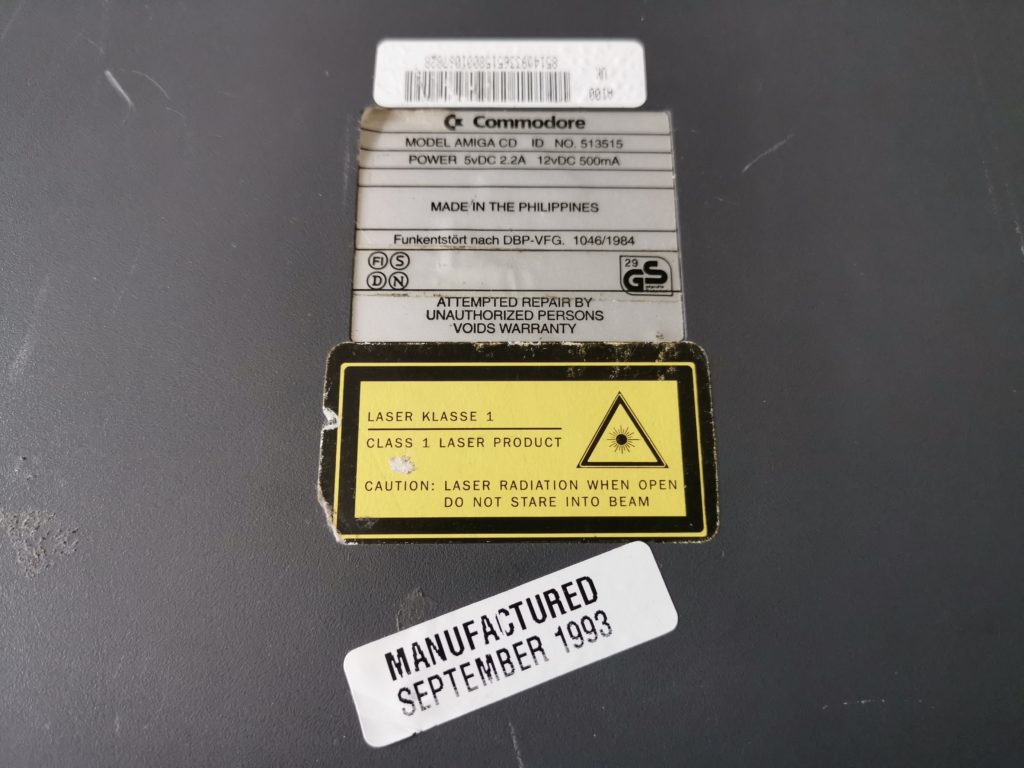
Made in 1993 in the Philippines.


Amiga CD32

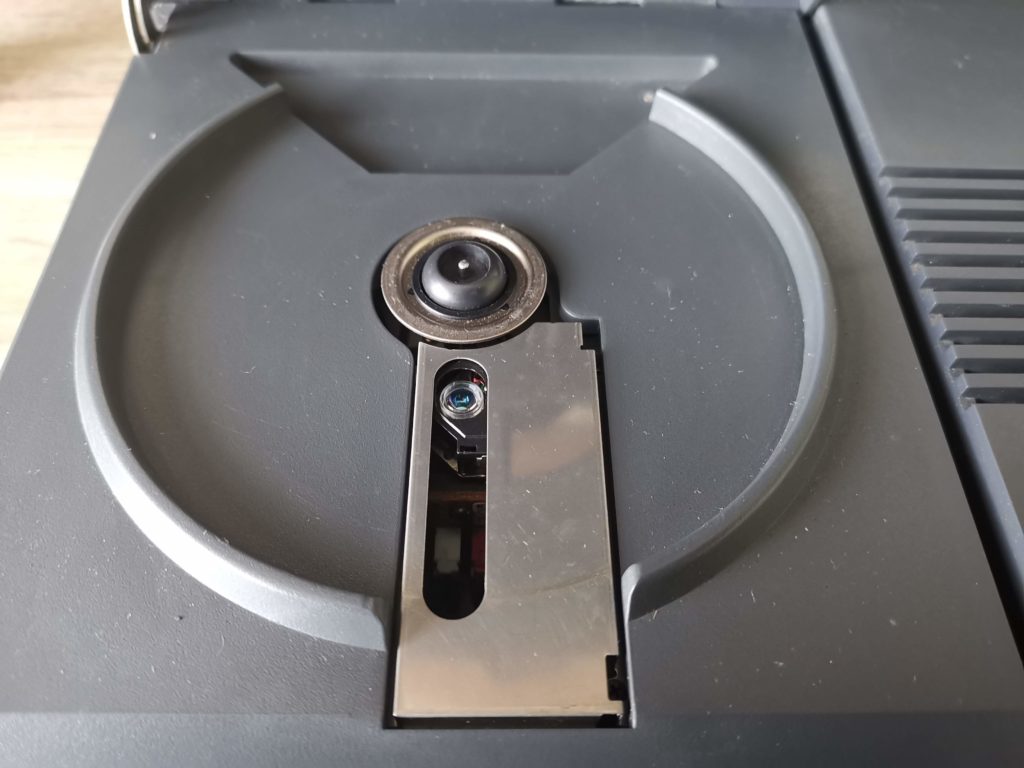
View of the CD tray and laser pickup.


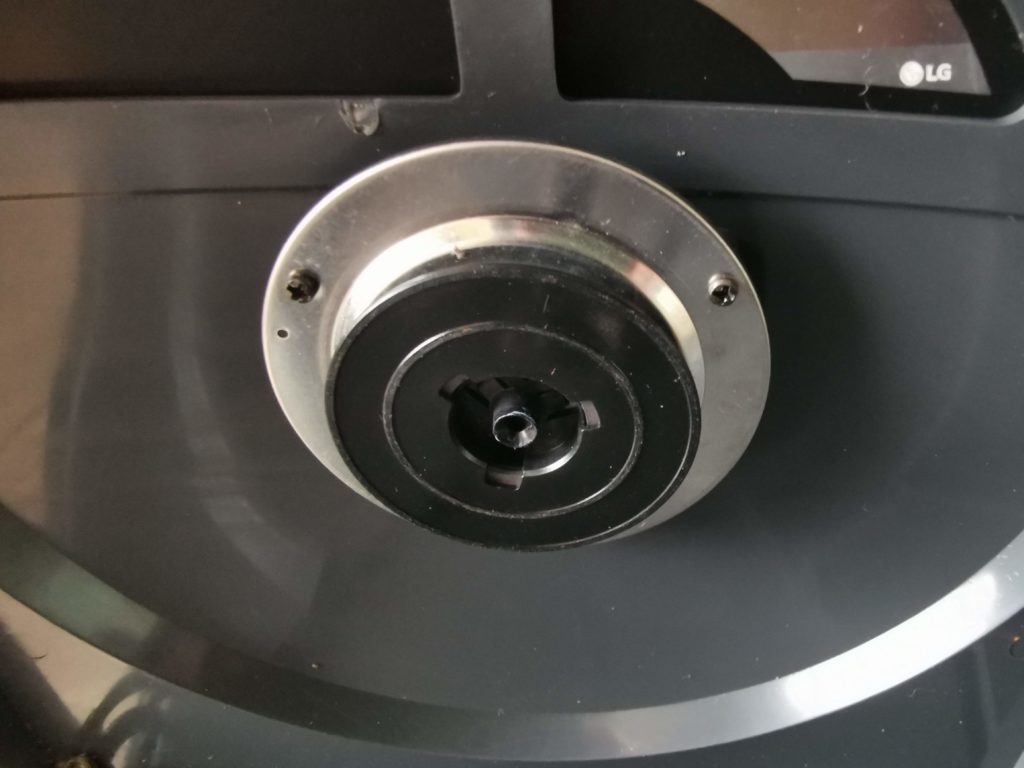
The CD mechanism is pretty basic but it gets the job done. My CD32 came with a spare laser pickup assembly but hopefully I won’t need to use it for a long time! Discs don’t click into place like on a lot of modern CD players. Instead they’re held in place by the friction of the lid pressing down on the CD when it closes.


Amiga CD32

Inside of the lid. This is what presses down on a CD to grip it.


A Few Issues


This slideshow requires JavaScript.


If there’s one facet of this CD32 console that concerns me, it’s this rear left corner. The rusty screws are an eyesore but also easily rectified. No, the thing that worries me is that it looks like the lid has cracked at some point and been glued back together. The repair actually looks quite effective and from a normal viewing distance isn’t that noticeable (I’ve zoomed in close in the above photo). However there is a spring loaded lever underneath this corner which ‘lifts’ the lid up automatically once you start to raise it and so this area is presumably under a lot of strain. I’m not going to do anything with it for the time being other than keep on eye on it. I will however be keeping my eyes peeled for a replacement lid just in case!


A Quick Peek Inside

Because, why not? Had to make sure that it had actually been re-capped as advertised (it had) at the very least! Also wanted to take a look at the Akiko chip which is only found in the CD32. This is the chip that allows it to convert planar to chunky graphics in hardware for 3D games.


This slideshow requires JavaScript.


CD32 Controller

The controller that came with my Amiga CD32 console is in superb condition. In fact I’d go as far as to say it’s in mint condition. It doesn’t look like it has ever been used. Sadly though it actually proved to be faulty – the D-pad ‘up’ just doesn’t work at all. Very disappointing – no idea what is wrong with it so will have to open it up and take a look soon.


This slideshow requires JavaScript.


Amiga CD32 Competition Pro Controller


Luckily I was able to pick up this Amiga CD32 compatible ‘Competition Pro’ gamepad off eBay pretty cheaply. Although it doesn’t look as cool as the official controller it works perfectly. At the end of the day that’s all that matters so I can still play with my new toy until I get around to sorting the original controller!


This slideshow requires JavaScript.


At the request of a reader here are some photos of the inside of the controller. The photos show that is is actually a ‘Honey Bee SF-3’ which is both on the back of the pad and printed onto the circuit board itself. Upon opening it up I also discovered that the insides were absolutely filthy! The board and contacts received a good cleaning with Isopropyl Alcohol before being reassembled. I hope the images prove useful and if anyone has any further interesting info about the controller please let me know I will be sure to update this page.

This slideshow requires JavaScript.


PSU

Sadly my CD32 console didn’t come with an original Commodore PSU but rather this modern one made by LaCie. Although given the ropy nature of some of the official C= PSU’s maybe that’s a good thing?


This slideshow requires JavaScript.


That Badge – Revisited & Fixed!

OK, I’ll confess that the scratched Amiga CD32 metal badge annoyed me more than I thought it would. I started hunting around for a possible replacement. Replacement badges are quite commonplace for the Commodore 64 and Amiga computers so I had planned to replace my scratched up old one with a brand new one. Turns out CD32 badges are quite hard to come by. However I did come across a guy in Switzerland selling vinyl CD32 stickers on eBay that he claimed fitted exactly so I ordered one.


This slideshow requires JavaScript.


True to his word, the vinyl sticker was indeed a perfect fit in terms of size. It’s also a very close match in colour and tone to the original, certainly close enough for me anyway. It was a little tricky to get it lined up perfectly, but now it’s in place I think it looks fantastic. Sure it’s not quite as glossy as the original, it’s got more of a silk finish, but I’m very happy with the end result.

FYI, I didn’t remove the original badge – I simply stuck the new one on top of the old metal one. The reason I did this was so that if I ever wanted to go back to a 100% original finish I could simply peel the new one off.


We have ignition!

Here’s a quick video I did of the awesome CD32 boot-up sequence. This must have been amazing back when it launched, two years before Sony’s original PlayStation in the UK! The quality is a little bit ropy as it’s only connected up to my TV using composite video at the moment.


Definitely time to dig out my CD32 Scene magazines and see what games I need to buy to start my collection!