Lyonsden Blog

Tag - cd

CD64 Interface – First Edition Review

If you’ve ever wanted to use CD’s with your C64 then this could be the gadget for you. I spotted this little gizmo on the SharwarePlus website and wanted it immediately. It arrived quickly and well packaged. Inside the box there was a CDR containing a bunch of games, the CD64 interface itself, an instruction sheet and a small Commodore bookmark type thingy.


CD64 Interface Package contents.

CD64 Interface Package contents.


A Closer look at what’s included

The CD64 Interface comprises a small circuit board with a cassette port socket one end and a single RCA socket the other. The RCA socket actually gives the first clue as to how this device works.


This slideshow requires JavaScript.


The second big clue can be found when you insert the CD into a computer…


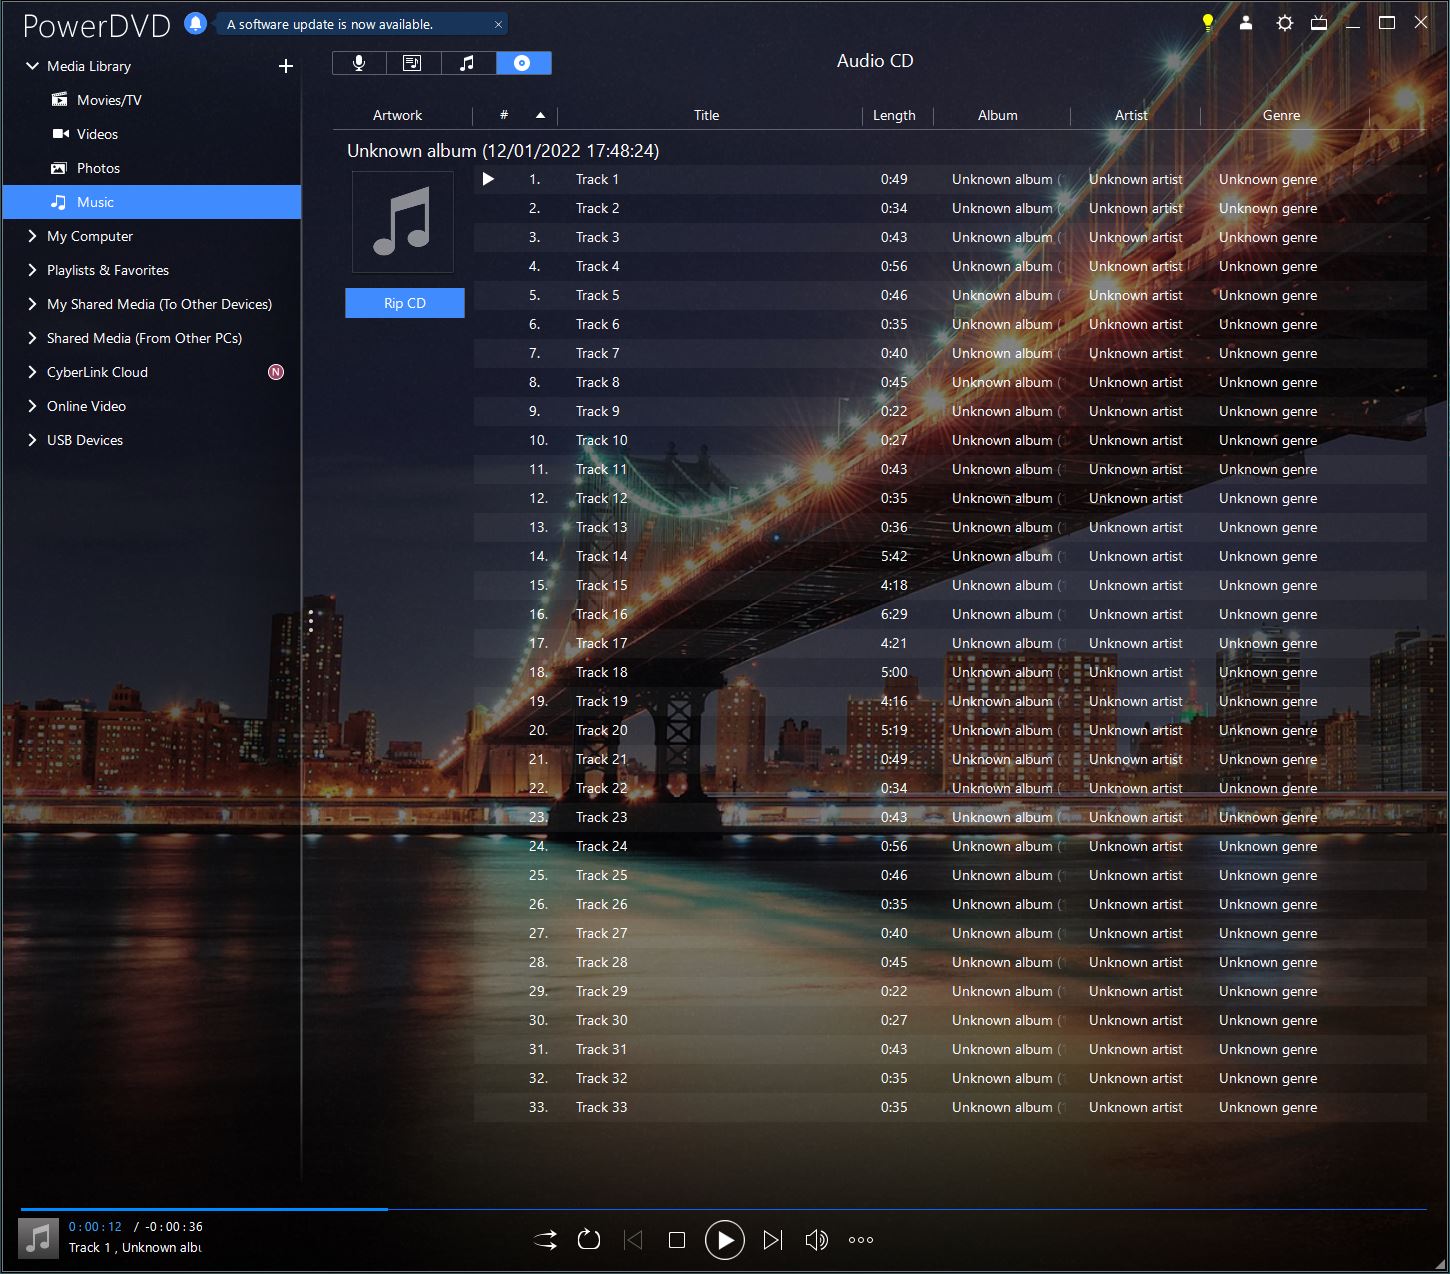
CD Tracklist showing all 33 tracks included on the CD.


If you haven’t already worked it out, the device lets you hook up the audio output of a CD player to the C64’s cassette port. The connected player then becomes a datasette of sorts albeit one with direct access to each program. The disc included is an audio CD and contains 33 audio tracks. Playing a track back through a stereo fills the room with that familiar screeching sound that most of us remember from the 80’s when copying games on cassette.


3.5mm headphone jack to Stereo RCA cable (not included).


In addition to the C64 game files there’s also seven Chris Hülsbeck music tracks on the CD which can be listened to on your CD player. Don’t try and do what I did and load them on the C64 thinking they were some sort of demo scene tracks – doh!


CD64 interface

My Sony Discman D-11 attached to the CD64 interface with a 3.5mm headphone jack to stereo RCA cable.


To access the CD I used my old Sony Discman D-11 and a 3.5mm headphone jack to RCA cable to try it out. I listened to the CD with a pair of headphones first just to make sure that the sound was coming out of both left and right channels (it did). Consequently it doesn’t matter which RCA plug you use to hook up the CD64 Interface, both will work.


C64 LOAD Screen

First attempt at loading the Menu off CD.


Loading Programs off the CD

To load stuff off the CD you press the familiar SHIFT & RUN/STOP keys and then press PLAY on the CD player. I was very quickly presented with a ‘Found CD Edition’ message which means it had at least found the first data track on the CD. However for a while I couldn’t get any further than this. After reading the guide it suggested unplugging connected devices to remove any unwanted interference. Once I had removed my 1541 Ultimate-II+ cart and 1541-II floppy drive I began to make some progress.

There was still a fair bit of trial and error to get the volume level right though. Too quiet or too loud and the programs failed to load – or loaded with an error.


Load error

Load Error.


After about 20 minutes of trying different levels I finally found the sweet spot, which for me was a volume level of 6 (my player goes up to 10). I also saw an improvement by setting the Megabass feature to the medium setting (as opposed to being turned off). Of course every player is going to be different in this respect – the key thing is to experiment.


Sony Discman D-11

Setting my volume level to 6 seemed to give the best results.


Now that I had the volume level set correctly I was finally able to get to the animated ‘Rainbow Arts’ Title Screen.


Rainbow Arts Title Screen.

Rainbow Arts Title Screen.


From here I could access each of the included 10 games via a simple menu screen.


Rainbow Arts Menu Screen.

Rainbow Arts Menu Screen.


To operate the menu it was simply a matter of selecting a game from the list with the cursor keys and then hitting RETURN.


Instructions for selecting the correct track on the CD.

Instructions for selecting the correct track on the CD.


The program then tells you which track to select on your CD player before pressing SPACE to begin loading it.


C64 high speed loader

All programs utilise high speed loaders.


All the games utilise very efficient high-speed loaders so load in no time at all. Impossible Mission took about 35 seconds to load, Dropzone just 15 which is pretty impressive.


A Few of the Included Games

This slideshow requires JavaScript.


CD Contents

Here’s a complete rundown of the CD contents:

1. Start menu,

2. David’s Midnight Magic (Broderbund, flipper),

3. Dropzone (U.S.Gold, action),

4. Fist II – The Legend Continues (Melbourne House),

5. Impossible Mission (Epyx, action),

6-7. Jinks (Rainbow Arts),

8. Leaderboard Golf (Access, golf simulation),

9. Loderunner (Broderbund, jump&run),

10 & 11. M.U.L.E. (Electronic Arts),

12. Mission Elevator (Softgold, action),

13. Solomon’s Key (U.S. Gold),

14 to 20. Music pieces by Chris Hülsbeck,

21 to 33. Repetition of tracks 1 to 13.


Conclusion

This is a great little device once you’ve spent some time tweaking the sound levels. Being able to select which program to load by using the <</>> buttons on the CD player is far more convenient than using FF/RW on a Datasette so it’s shame there aren’t more compilation CD’s like this.

Although there’s only ten games on the CD there’s no reason why you can’t create your own CD compilations. I would think using something like TapWav to convert C64 .TAP files into digital WAVE files and then burning those to an audio CD would work. This is definitely something I’ll have a play around with when I have a spare moment in the future.

I had a lot of fun playing around with this little accessory and the included 10 games too. If you’d like to get hold of one for yourself then head on over to The Shareware PLUS Commodore 64 & 128 Blog and and grab one.

Blizzard SCSI Kit MkIV

Blizzard SCSI Kit

Ever since I picked up my Blizzard 1230 MkIV card last year I’ve been hankering after the SCSI expansion for it. The Squirrel SCSI system I’ve been using for the past six months certainly works great but I really wanted to free up the PCMCIA port for other things.

Blizzard SCSI kits are pretty thin on the ground these days but after many months of searching I finally managed to get one. It came complete with the software disk, instruction manual, SCSI breakout port and even a 64MB SIMM!


Blizzard SCSI

Everything you get in the Blizzard SCSI Kit.


It’s in beautiful condition and if it wasn’t for the faded text on a couple of the stickers it could probably pass for being brand new.


Blizzard SCSI

Close-up of the 26-pin SCSI header on the board.


There are three connecters on the board. On the top there’s a 72-pin socket to accept a SIMM of up to 128Mb capacity.


26-pin SCSI header.


There’s also a 26-pin header for connecting the ribbon cable for the 25 pin female D-SUB SCSI port. Finally on the bottom there’s a 100 pin edge connecter which is used to connect the SCSI card to the 1230 MkIV accelerator card.


The business end of the card with a Symbios Logic SCSI Host adapter chip dated 1992.


Underneath the board there’s a single 100 pin edge connecter and a white insulating pad to prevent any short circuits when the card is installed.


Blizzard SCSI

View of the underside of the board. The large white area is insulating material to prevent short-circuits.


Specifications

In the mid 90’s these cards were pretty cutting edge and offered Amiga 1200 owners some impressive features. The manual proudly claims that it will “set new performance standards in its class”.

The headline specifications are listed below:

  • Fast SCSI-II DMA Controller for the Blizzard 1230-IV or Blizzard 1260 Turbo Boards.
  • Transmission rates up to 7Mb/s asynchronous and up to 10 Mb/s synchronous on the SCSI bus.
  • 72-pin standard SIMM socket for memory expansion by up to 128Mb in addition to the memory already installed on the Blizzard Turbo Board. Completely auto-configuring.
  • Ability to connect 6 SCSI devices with ID’s between 0 and 7 (the Blizzard SCSI Card itself is device 0).


Fitting the SCSI Connecter Port


Fitting the card is a little more involved than the accelerator was as installing the rear-mounted SCSI port requires removing the floppy drive to gain access to the expansion port.


Amiga 1200 Expansion Port.

Expansion port blanking plate and the holes where the two floppy drive mounting screws fit.


There’s two screws holding the drive in place from the underside of the case, found next to the expansion port. The other screw is located inside the case along the lower edge of the drive just above the trapdoor. Once these have been removed the drive can be safely lifted to one side revealing the expansion port area.


Amiga 1200 Floppy Drive mount points.

Location of the three screws holding the floppy drive in place.


After removing the plastic blanking plate, the SCSI connecter slides into the vacant slot from the rear. If done correctly the hole in the metal plate should align with the hole in the Amiga case perfectly.


Blizzard SCSI

SCSI port connecter inserted into expansion slot.


The provided screw can then be inserted into the hole from the base of the Amiga and fastened into the threaded hole in the metal plate.


Blizzard SCSI

SCSI port fully fitted – you can see the securing screw on the base of the case next to the rubber foot.


This screw is the only thing that holds the port in place whilst inserting and removing SCSI cables so it needs to be securely fastened.


Blizzard SCSI

Metal plate now secured with the supplied screw.


It’s a pretty neat and surprisingly robust solution and looks almost factory fitted.


Blizzard SCSI

This is how the SCSI port looks once fitted. Also – I hadn’t noticed how corroded my mouse port was until I took this photo!


Fitting the SCSI Card

With the fitment of the SCSI port dealt with it was time for the main event – fitting the SCSI card.


Blizzard SCSI

View of the Blizzard 1230 MkIV and SCSI Kit IV installed in the trapdoor expansion bay.


The SCSI card needs to be married to the Accelerator card before it’s fitted into the slot. There simply isn’t enough room inside the case to attach the SCSI card once the accelerator has been installed. I took my time here as there’s only one way the two cards will successfully slot into place and I didn’t want to damage either by trying to force anything.


Blizzard SCSI

Another view of the Blizzard 1230 MkIV and SCSI Kit IV installed in the trapdoor expansion bay.


Once the two cards are correctly aligned the accelerator card (and only the accelerator card!) can be firmly pressed into its socket. Pushing the edge of the SCSI card might damage the edge connecter.


Blizzard SCSI

Close-up of how the ribbon cable connects to the SCSI card. Pin one is nearest the SIMM socket.


Pin 1 is next to the SIMM socket and the ribbon cable should be attached such that the red edge aligns with it. However in reality the SCSI cable will only fit one way due to how close the pins are to the circuit board.


View of the Blizzard 1230 MkIV Accelerator and SCSI MkIV cards from below.


Testing it all Works!

As always with an old upgrade like this I was quite anxious about whether it would actually work. After double-checking that everything was connected correctly I powered on my A1200 and waited. Thankfully a few moments later Workbench appeared and was reporting approximately 128Mb of Fast Ram available. Definitely a positive sign!


Amiga Workbench

132,065,208 bytes free – a very promising sign.


Next I loaded up the SCSI Config software off the Blizzard Tools disk to see if my devices were being recognised. Sure enough both my Zip drive and CDROM appeared as unit 5 and 2 respectively. Happy days!


Blizzard SCSI

Checking to see if my SCSI devices were recognised using the Blizzard SCSI Config utility.


Although my devices were visible to the system, my discs weren’t showing up on Workbench yet. This was because they were still configured to use my Squirrel SCSI hardware. To get them working I edited the ‘tool types’ for my ZIP and CD mountlists in DEVS:DOSDrivers, setting the ‘DEVICE’ to ‘1230scsi.device’ for them both (the name of the Blizzard SCSI host adapter).


Blizzard SCSI

Editing the ZIP mountlist tool type to use my Blizzard 1230scsi.device.


A quick CTRL-A-A reboot and everything was working – my Zip drives, CDROM’s and Music CD’s were all recognised correctly.


Closing Thoughts

This has been another great addition to my A1200. Not only do I have all my SCSI peripherals working but now I have an extra 64Mb of Fast RAM to play with. Additionally my PCMCIA port is now left vacant so I’m free to explore the addition of a network card or maybe a card reader.

Is this the end for my Amiga 1200’s trapdoor expansions? For the time being, probably yes. I could replace the 64Mb SIMM fitted in both cards with 128Mb SIMM’s to give me a total of 256Mb. However my A1200 already has way more RAM than I ever had back in the day so not sure if that is really necessary. Mind you, if I see some RAM going cheap I’ll probably go for it.

There’s always the possibility of replacing the 1230 for an 040 or 060 accelerator (or even a PPC one). Unfortunately these expansions are obscenely expensive nowadays so that would be hard to justify. Besides, I think the 68030 is the sweet spot for performance versus compatibility for the Amiga. I never say never though…

How to Format an SD Card for Amiga to PC File Transfer

SD Card Amiga PC Transfer

Introduction

The whole benefit, to me at least, of having an SD card reader on my Amiga 500 is to allow me to transfer files to and from a PC. In order to do this the SD card needs to be formatted in such a way as to be readable by both systems. Turns out it’s not too hard to do. This post will show you exactly how to achieve this and also serve as a reminder for myself in the future when I inevitably forget what I did!


Stuff You’ll Need

I used a MicroSD card for this task but the process would be the same for a regular full-size SD card too. I have personally got this working with a 32GB card and more recently with a 200GB MicroSD card! Please note that I have a Vampire Card in my Amiga (which has a MicroSD card slot) and use Apollo OS (Coffin R34 – Amiga OS 3.9). This solution is based on that scenario. If you want to find out more about my Vampire upgrade please read about it here and adding an SD card reader here.


By the way, this should work with most SD cards you may have lying around. I used to link directly to the card I bought but time stays still for no man and it is no longer available. However this 32GB MicroSD Card is almost identical.


Formatting the card on a PC

First things first – the card MUST be formatted on the PC, not the Amiga. The format we need to use is FAT32 as this is easily readable on the Amiga whilst still being compatible with the PC. The main disadvantage with FAT32 is it has a 4GB file size limit but this should never really be an issue with the Amiga as most of the files we will be dealing with are only a few MB in size.

I’m using Windows 10 which annoyingly doesn’t have a native FAT32 format option (only NTFS or exFAT). After searching around I settled on this free 3rd party FAT32Format app to get the job done. If you already have some FAT32 formatting software then by all means go ahead and use that. If not then this one is free and very simple to use, you don’t even need to install it, just run the executable.

  • Run the .exe file you just downloaded and make absolutely sure that the drive letter under ‘Drive’ matches that of your SD card.
  • Leave the ‘Allocation unit size’ at the default setting.
  • Give your card a name under the ‘Volume label’ heading but keep it short. No more than 11 characters and avoid using any symbols. In the example below I called mine ‘AMIGA SD’.
  • Ensure ‘Quick format’ is ticked (otherwise it’ll take forever) and then click ‘start’.
  • When the format warning box pops up click on ‘OK’.


SD Card Amiga PC Transfer

View after the card has been formatted


A few moments later you should have a nicely formatted FAT32 SD card! As you can see from the image below it has been correctly formatted as FAT32 and shows approx 29GB of free space. It’s perfectly normal to lose some space when formatting disks so don’t worry that it doesn’t exactly match the capacity of your card.


SD Card Amiga PC Transfer

SD card properties viewed in Windows after formatting.

Configuring the Amiga side of things

Now it’s time to take the SD card over to your Amiga for the next stage of the process. This is going to involve editing a DOSDriver on the Amiga with the parameters needed to successfully read and write to your SD card. Unless you’ve been messing around with SD Cards already there won’t be an SD0 device in your Amiga’s SYSTEM:DEVS/DOSDrivers directory. Fear not though because you can finding it lurking in the STORAGE directory (SYSTEM:Storage/DOSDrivers) waiting to be put to good use. Find the SD0 file and open it in your editor of choice, for me that’s the one built into Directory Opus. Edit the file so that the contents look exactly like the one in the image below:


SD Card Amiga PC Transfer

SD0 DOSDriver File contents (shown in Directory Opus Editor)


SD Card Amiga PC Transfer

Slightly clearer copy of the config (pasted into Wordworth to make it clearer to read)


Save your changes to SD0 and close the editor. This next part is particularly crucial otherwise, despite all your efforts thus far, the card will still be unreadable. You need to move the file OUT of SYSTEM:Storage/DOSDrivers and place it INTO the actual SYSTEM:DEVS/DOSDrivers directory. Doing this will force the Amiga to read the config on boot and enable it to recognise an SD card when present. You can do this in a number of different ways but again my preferred method is Directory Opus.


SD0 DOSDriver File Content

Edited SD0 correctly placed in DOSDrivers Directory


Once you’ve done this, assuming the card is already inserted, reboot your Amiga (CTRL-A-A) and when Workbench has loaded back up you should see a lovely SD card icon on the screen similar to the one below.


SD Card Amiga PC Transfer

SD0 Icon on Workbench


The next image shows a 200GB MicroSD card working and you can see the Amiga recognising the card capacity as 183.3G.


SD Card Amiga PC Transfer

200GB MicroSD card working on the Amiga. 183.3GB of space 🙂


Here’s a regular 32GB card working recognised as being 29.1GB capacity. If you remember from earlier on that reported size is pretty much the same as how Windows saw it.


SD Card Amiga PC Transfer

32GB MicroSD card working on the Amiga. 29.1GB of space.


SD Card Amiga <-> PC Usage


I find my Amiga/PC formatted SD card incredibly useful, not only for transferring files between systems but also for storing CD’s on. I don’t have a CD drive on my Amiga but I do on my PC. Any Amiga CD’s I get, such as the Amiga Future Coverdisks, I simply copy into a folder on the card and they’re instantly available on the Amiga. The 200GB card is particularly useful for this purpose as it can potentially hold nearly 300 CD’s plus all my other stuff.


I have noticed that SD cards work a little differently on the Amiga. You can’t just insert one and expect it to appear in Workbench. The card needs to be present in the card slot before you boot your Amiga up. Likewise, if you remove it, it will still show the icon on your Workbench. For these reasons I’d recommend always inserting the card whilst your Amiga is off and not removing the card until you’ve shut down your Amiga just to be safe. If I ever find a way around this I’ll update this post.


Anyway, I hope this post proves useful for a few people, I know it took me quite a lot of stumbling around before I brought all the parts of the puzzle together!