Introduction
The whole benefit, to me at least, of having an SD card reader on my Amiga 500 is to allow me to transfer files to and from a PC. In order to do this the SD card needs to be formatted in such a way as to be readable by both systems. Turns out it’s not too hard to do. This post will show you exactly how to achieve this and also serve as a reminder for myself in the future when I inevitably forget what I did!
Stuff You’ll Need
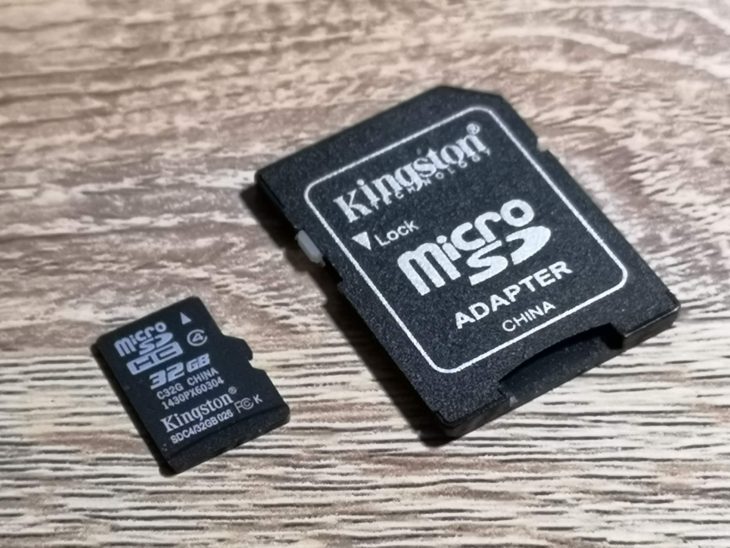
I used a MicroSD card for this task but the process would be the same for a regular full-size SD card too. I have personally got this working with a 32GB card and more recently with a 200GB MicroSD card! Please note that I have a Vampire Card in my Amiga (which has a MicroSD card slot) and use Apollo OS (Coffin R34 – Amiga OS 3.9). This solution is based on that scenario. If you want to find out more about my Vampire upgrade please read about it here and adding an SD card reader here.
By the way, this should work with most SD cards you may have lying around. I used to link directly to the card I bought but time stays still for no man and it is no longer available. However this 32GB MicroSD Card is almost identical.
Formatting the card on a PC
First things first – the card MUST be formatted on the PC, not the Amiga. The format we need to use is FAT32 as this is easily readable on the Amiga whilst still being compatible with the PC. The main disadvantage with FAT32 is it has a 4GB file size limit but this should never really be an issue with the Amiga as most of the files we will be dealing with are only a few MB in size.
I’m using Windows 10 which annoyingly doesn’t have a native FAT32 format option (only NTFS or exFAT). After searching around I settled on this free 3rd party FAT32Format app to get the job done. If you already have some FAT32 formatting software then by all means go ahead and use that. If not then this one is free and very simple to use, you don’t even need to install it, just run the executable.
- Run the .exe file you just downloaded and make absolutely sure that the drive letter under ‘Drive’ matches that of your SD card.
- Leave the ‘Allocation unit size’ at the default setting.
- Give your card a name under the ‘Volume label’ heading but keep it short. No more than 11 characters and avoid using any symbols. In the example below I called mine ‘AMIGA SD’.
- Ensure ‘Quick format’ is ticked (otherwise it’ll take forever) and then click ‘start’.
- When the format warning box pops up click on ‘OK’.
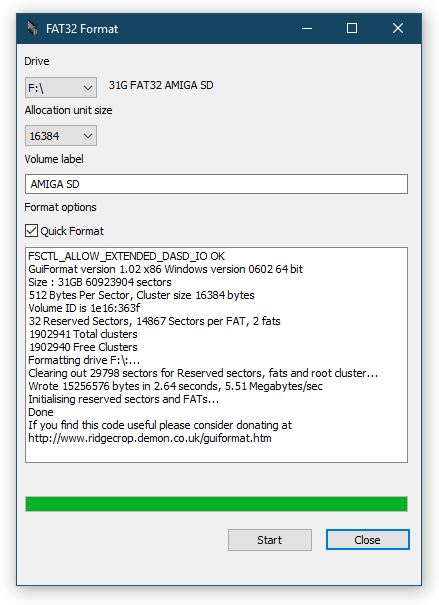
View after the card has been formatted
A few moments later you should have a nicely formatted FAT32 SD card! As you can see from the image below it has been correctly formatted as FAT32 and shows approx 29GB of free space. It’s perfectly normal to lose some space when formatting disks so don’t worry that it doesn’t exactly match the capacity of your card.
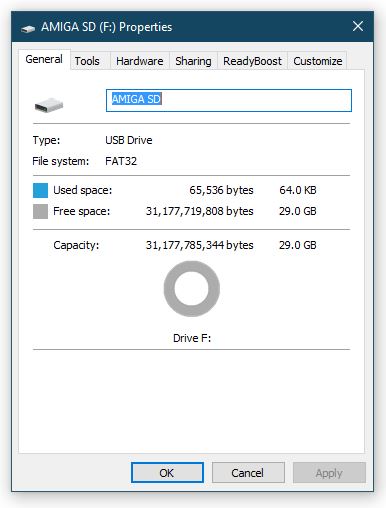
SD card properties viewed in Windows after formatting.
Configuring the Amiga side of things
Now it’s time to take the SD card over to your Amiga for the next stage of the process. This is going to involve editing a DOSDriver on the Amiga with the parameters needed to successfully read and write to your SD card. Unless you’ve been messing around with SD Cards already there won’t be an SD0 device in your Amiga’s SYSTEM:DEVS/DOSDrivers directory. Fear not though because you can finding it lurking in the STORAGE directory (SYSTEM:Storage/DOSDrivers) waiting to be put to good use. Find the SD0 file and open it in your editor of choice, for me that’s the one built into Directory Opus. Edit the file so that the contents look exactly like the one in the image below:
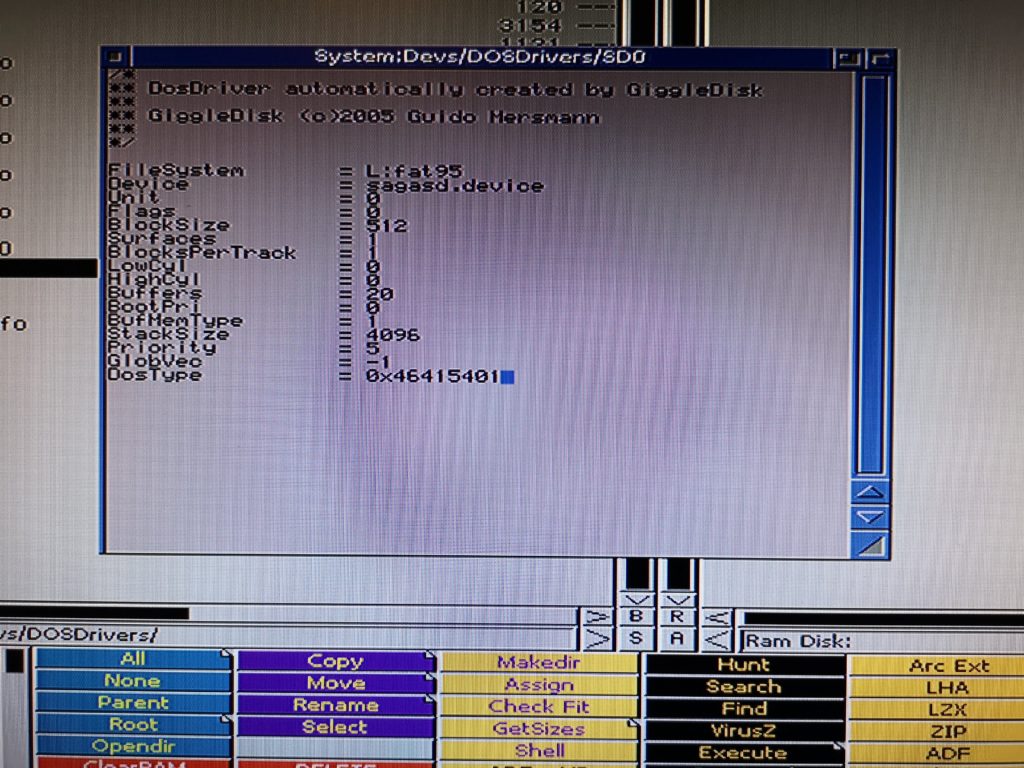
SD0 DOSDriver File contents (shown in Directory Opus Editor)
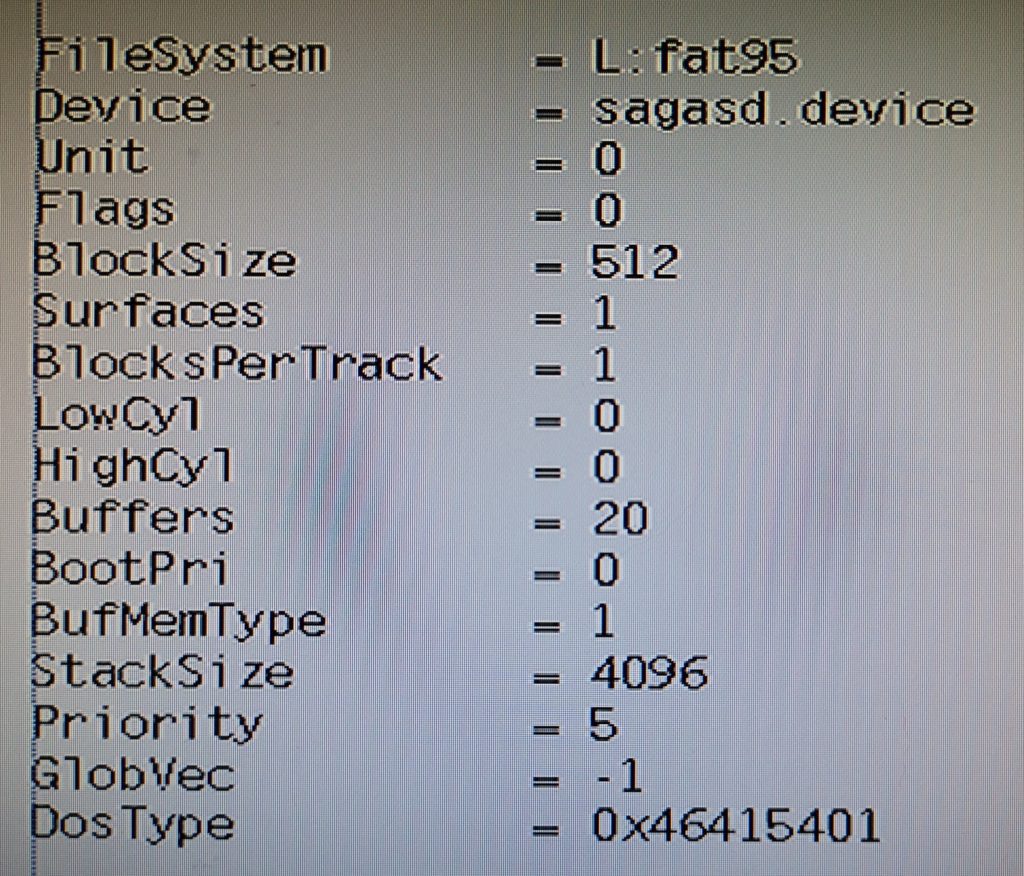
Slightly clearer copy of the config (pasted into Wordworth to make it clearer to read)
Save your changes to SD0 and close the editor. This next part is particularly crucial otherwise, despite all your efforts thus far, the card will still be unreadable. You need to move the file OUT of SYSTEM:Storage/DOSDrivers and place it INTO the actual SYSTEM:DEVS/DOSDrivers directory. Doing this will force the Amiga to read the config on boot and enable it to recognise an SD card when present. You can do this in a number of different ways but again my preferred method is Directory Opus.
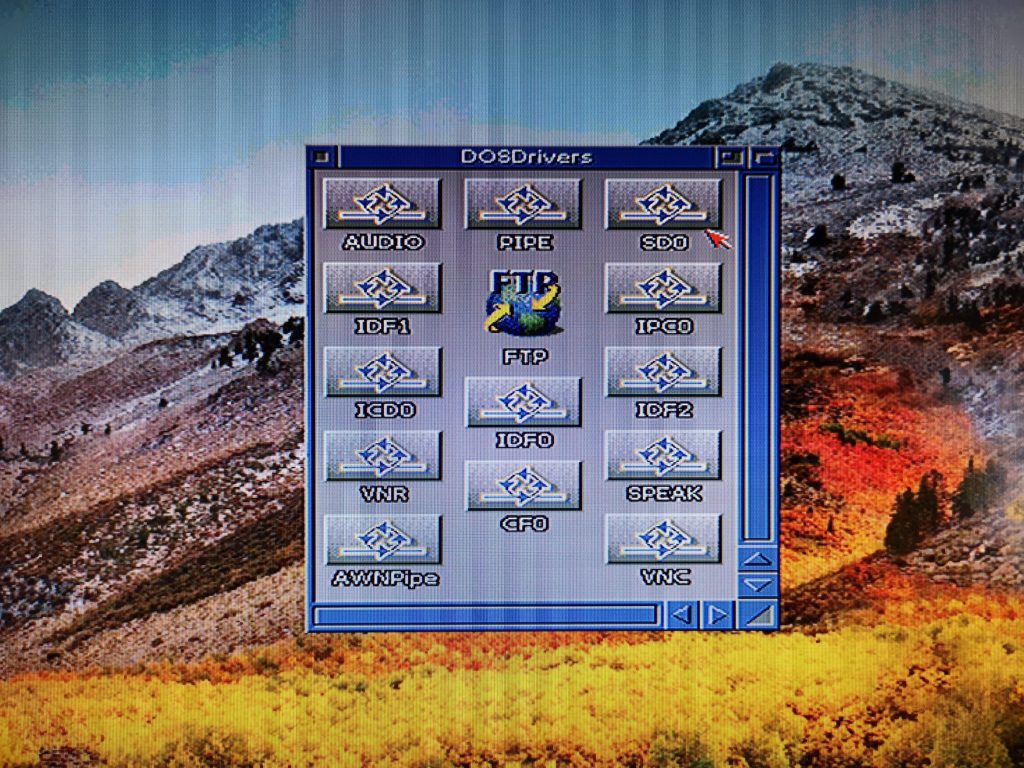
Edited SD0 correctly placed in DOSDrivers Directory
Once you’ve done this, assuming the card is already inserted, reboot your Amiga (CTRL-A-A) and when Workbench has loaded back up you should see a lovely SD card icon on the screen similar to the one below.
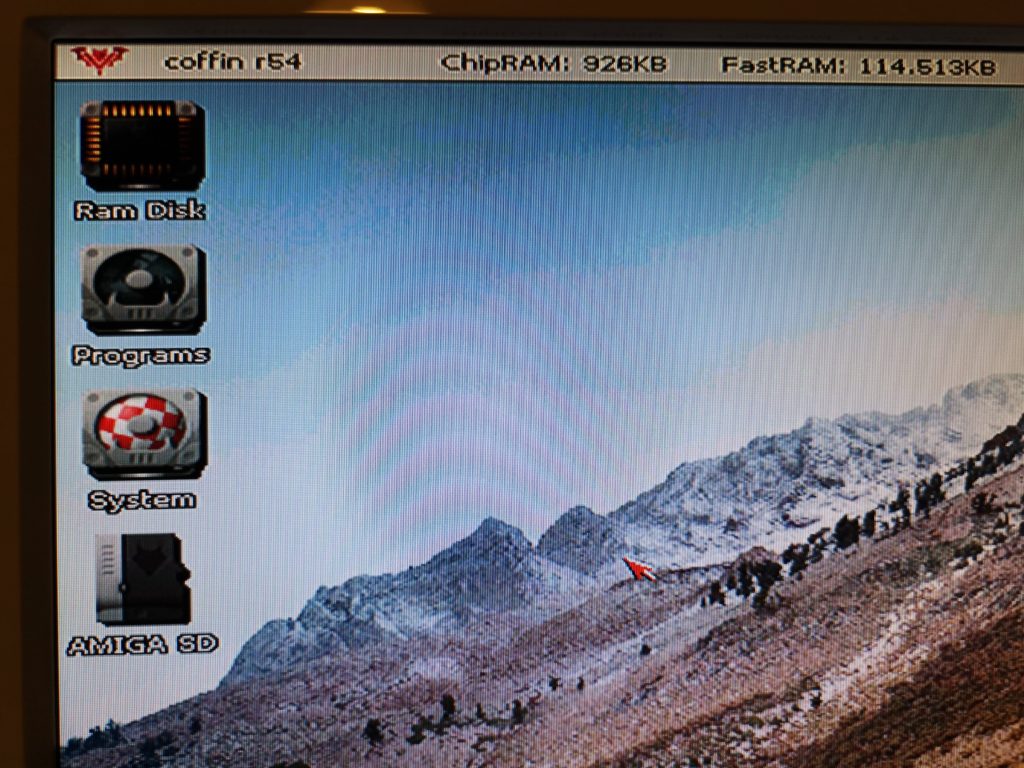
SD0 Icon on Workbench
The next image shows a 200GB MicroSD card working and you can see the Amiga recognising the card capacity as 183.3G.
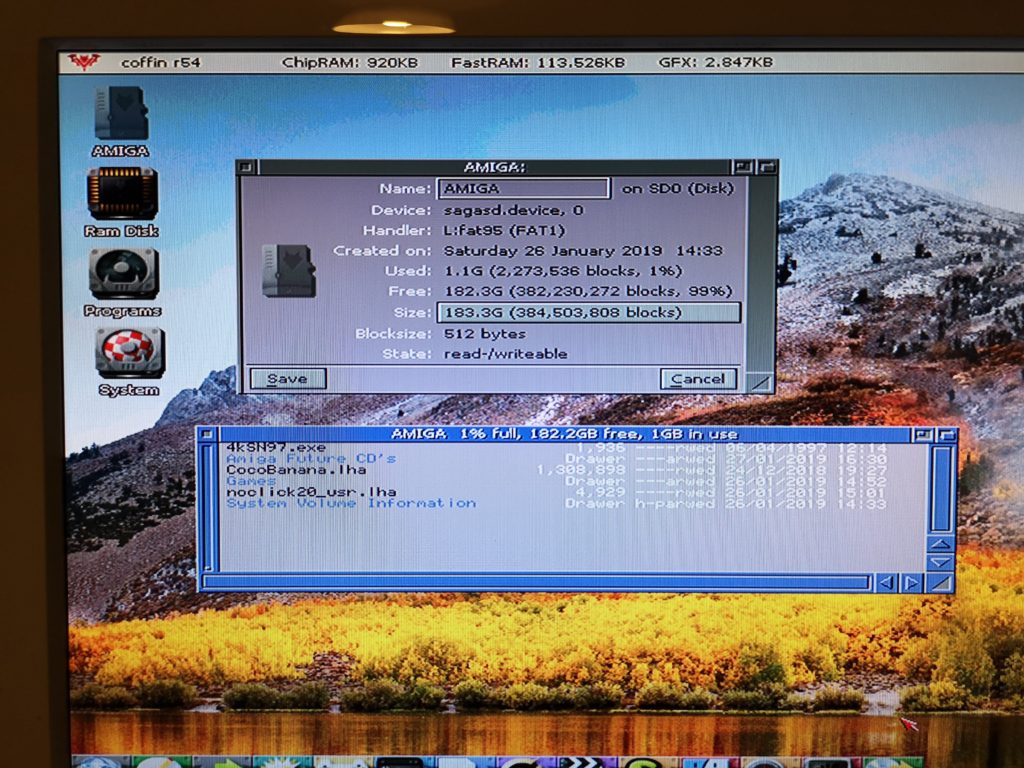
200GB MicroSD card working on the Amiga. 183.3GB of space 🙂
Here’s a regular 32GB card working recognised as being 29.1GB capacity. If you remember from earlier on that reported size is pretty much the same as how Windows saw it.
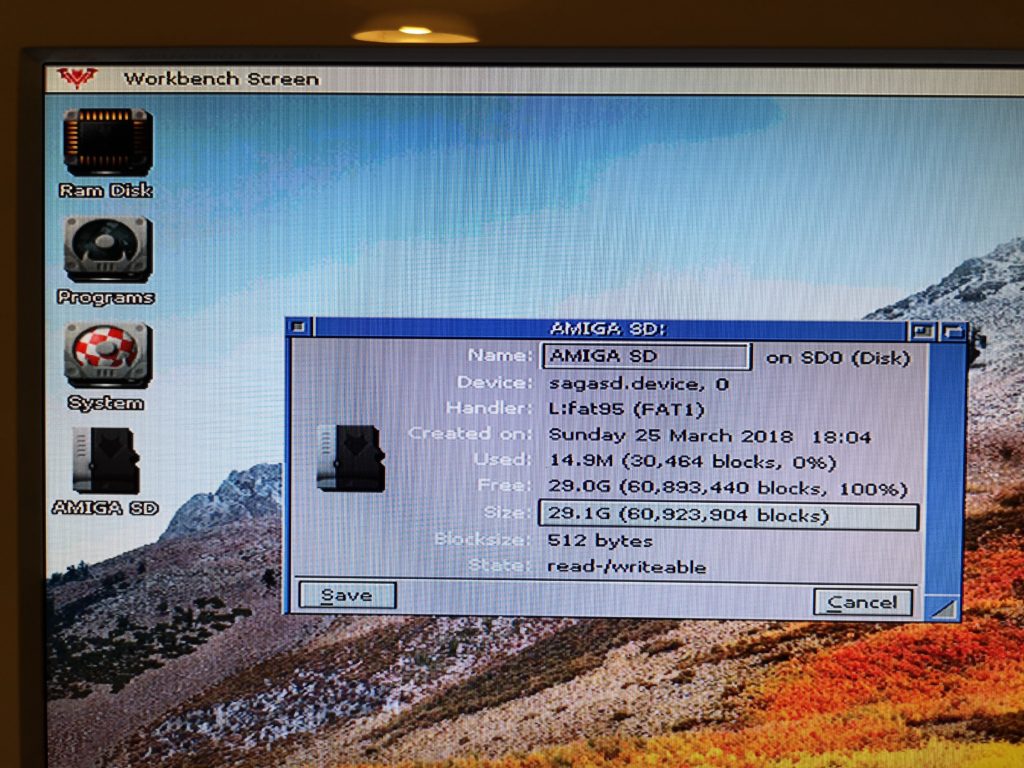
32GB MicroSD card working on the Amiga. 29.1GB of space.
SD Card Amiga <-> PC Usage
I find my Amiga/PC formatted SD card incredibly useful, not only for transferring files between systems but also for storing CD’s on. I don’t have a CD drive on my Amiga but I do on my PC. Any Amiga CD’s I get, such as the Amiga Future Coverdisks, I simply copy into a folder on the card and they’re instantly available on the Amiga. The 200GB card is particularly useful for this purpose as it can potentially hold nearly 300 CD’s plus all my other stuff.
I have noticed that SD cards work a little differently on the Amiga. You can’t just insert one and expect it to appear in Workbench. The card needs to be present in the card slot before you boot your Amiga up. Likewise, if you remove it, it will still show the icon on your Workbench. For these reasons I’d recommend always inserting the card whilst your Amiga is off and not removing the card until you’ve shut down your Amiga just to be safe. If I ever find a way around this I’ll update this post.
Anyway, I hope this post proves useful for a few people, I know it took me quite a lot of stumbling around before I brought all the parts of the puzzle together!
Discover more from Lyonsden Blog
Subscribe to get the latest posts sent to your email.


what brand CF to ide44 did you use. i have had nothing but issues with mine, i have purchased literally 10 different readers, including the native Vampire Cf to 44 pin that sticks on top the V2 (amiga on the lake in New York sells it)
Hi Chris,
No problem,
I just opened up my A500 to take a pic of my adaptor for you:
https://lyonsden.net/wordpress_s/wp-content/uploads/2019/05/IMG_20190507_173745-1.jpg
I picked it up from a company called ‘Retrobench’ in the UK. Here’s a link to it:
https://www.retrobench.com/shop/ide-to-compact-flash-adaptor-kit-cable.
Hope this helps you out. All the best, Steven
This blog post was a lifesaver…I recently got a Vampire board for my A1200, and for the life of me I could not get the SD card formatted properly to be recognized on both the Amiga AND my Mac, even though the card was indeed FAT formatted. Configuring the SD0 DOSDriver per the settings you posted worked like a charm, and I now have a 64 GB SD card that I can read on both systems. THANK YOU!
That’s brilliant, glad to know it helped you. 👍🏻
You helped me as well, a total newcomer to the Amiga scene. Thanks a ton!!
Awesome and welcome to the fold!
Thanks for this, the link for Amazon SD card is not working for me, also what software did you use to format FAT32 as I couldn’t not open that either, thanks.
Hi Jay, thanks for bringing both of those issues to my attention. Wrote that article a couple of years ago now so the links for both have changed. Was able to track down the new home of the formatting software and have amended the link accordingly. Likewise found the correct card on Amazon and updated that link too. Enjoy.
Hi, I’ve followed the instructions and when my Amiga reboots SD0 appears as uninitialized. Any idea what the issue could be? SD card is in the vampire. Cheers
Hi Chris,
Kind of difficult to diagnose from afar but assuming you aren’t trying to use a high capacity card and it isn’t faulty then I’d triple-check the DOSDriver file to ensure it is exactly like the one I listed. Just one wrong character could cause it to fail. Also make sure that you did actually place the file into your SYSTEM:DEVS/DOSDrivers directory and not leave it in the storage directory. Hope that helps.
Thanks for the reply Steven. Looks like it was the formatting of the SD card. I tried it on Mac and an older windows version with no success. When I used the formatting tool you suggested – it worked. I guess it’s kinda picky about the specific fat32 format… cheers
No problem. I don’t use a Mac myself but maybe your experience will help another Mac user in the future struggling with the same issue so it’s all good. Glad to hear you got it working in the end anyway. 👍🏻
I’m having the same issue as Chris is having but I don’t a access to a PC to run the tool.
Anyone found a way to format a micro SD in the right FAT32 format on a mac?
I also tried: diskutil partitiondisk /dev/disk6 MBR FAT32 SD0 0
But got the same result.
Would this work with a FAT16 formatted card? I am investigating whether I can create a wireless transfer system using https://biqu.equipment/products/bigtreetech-module-btt-tf-cloud-v1-0-sd-cloud-wireless-transmission-module?variant=31555936944226 but it does not appear to play nice with FAT32 SD cards.
The Amiga can read most FAT drives with the correct mountlist and DOS drivers installed. However that device is far from a standard SD card (think it has been designed specifically to send print jobs wirelessly to a 3D printer) so all bets are off 😉
You could try Giggledisk which can create drivers/mountlists automatically for many drives. You can get it here: http://aminet.net/package/disk/misc/giggledisk. Good luck – let me know if you get it working!
Hi,
I have my SD0 configured already, and i can use the 32GB SD card came with the Amiga (bought it recently), but when i’m trying to format a brand new 128GB card with the tool you suggested, the card works well on the PC, but the Amiga shows “SD0:Unreadable”.
Any advice…?
Thanks!