Lyonsden Blog

Tag - user port

C64 User Port Expander

Over the years I’ve amassed quite a number of C64 peripherals that attach via the User Port. Off the top of my head I have a Wi-Fi modem, FM Radio, MP3 Player, sound sampler, Parallel printer device, Power Monitor, webcam interface not to mention DIY contraptions from various electronics projects. I’ve probably got other stuff that I’ve forgotten about too. Constantly swapping all these device over is a bit of a pain and not only that it must exact a toll on the user port which has already seen decades of wear and tear. Suffice to say that this all lead me to the idea of getting hold of some sort of user port ‘expander’ device.
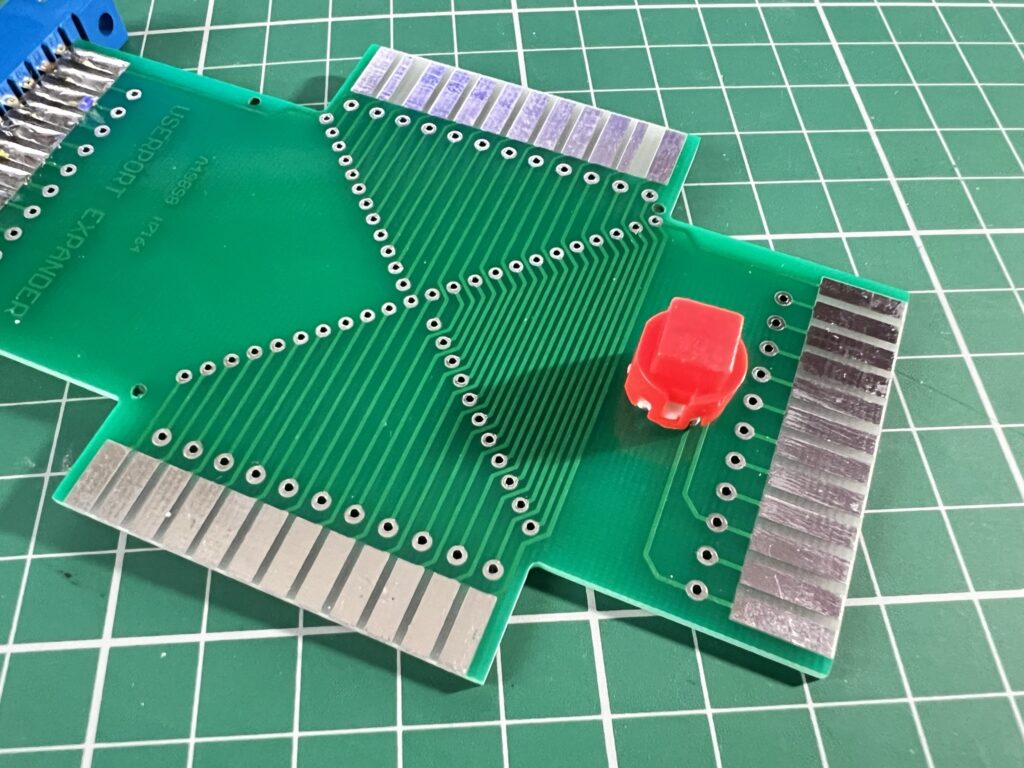
 

C64 User Port Expander

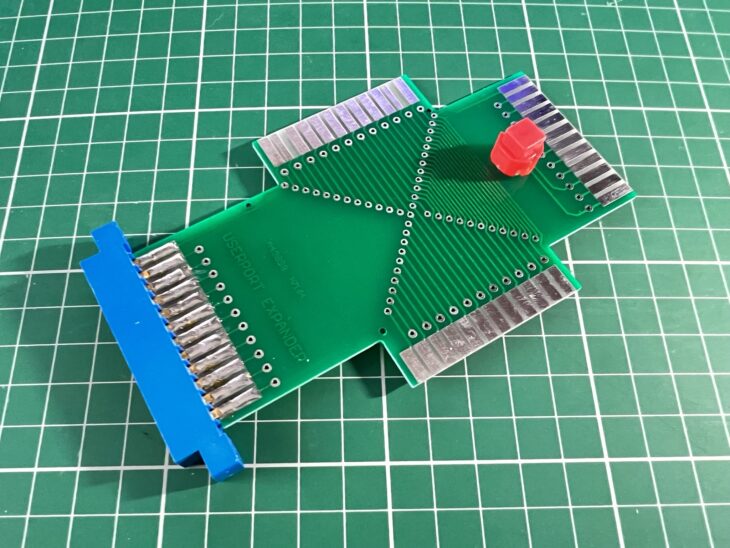
Don’t press that big red button… unless you want to reset your C64!


I reached out to Tim Harris over at SharewarePlus who stocks a plethora of Commodore 64 peripherals and as luck would have it he had such a device in stock and sent one over. Once attached it provides three user port edge connectors instead of just one. As an added bonus it also incorporates a handy (impossible to miss) reset button on the board too.
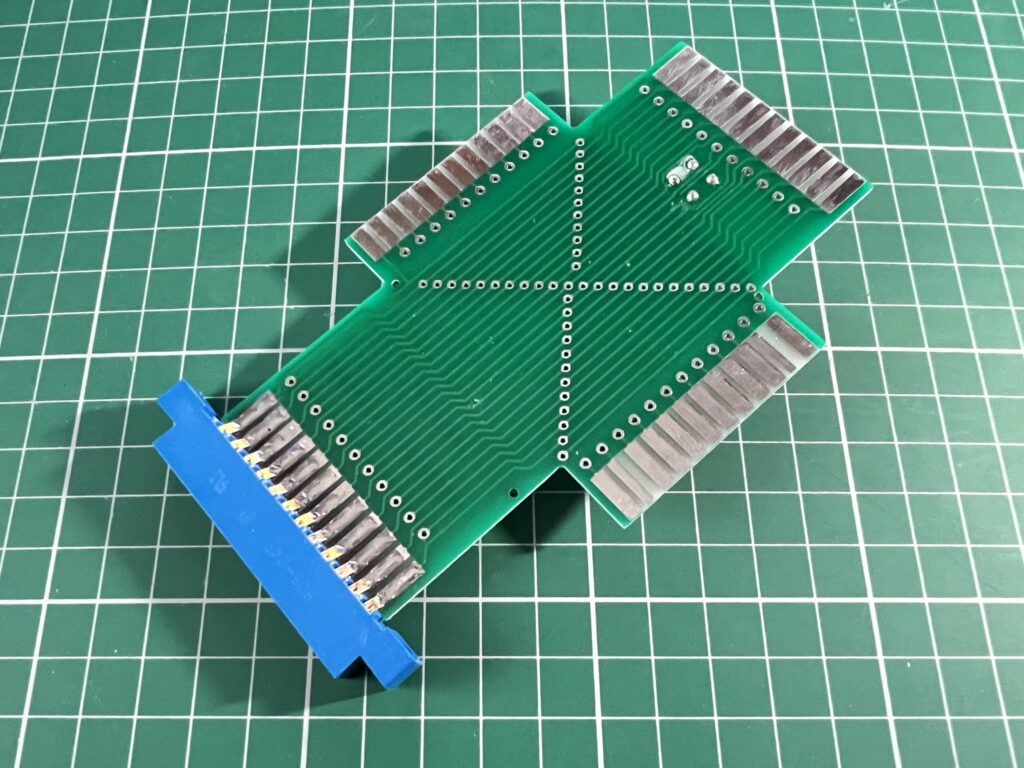
 

C64 User Port Expander

Underside of the user port expander.


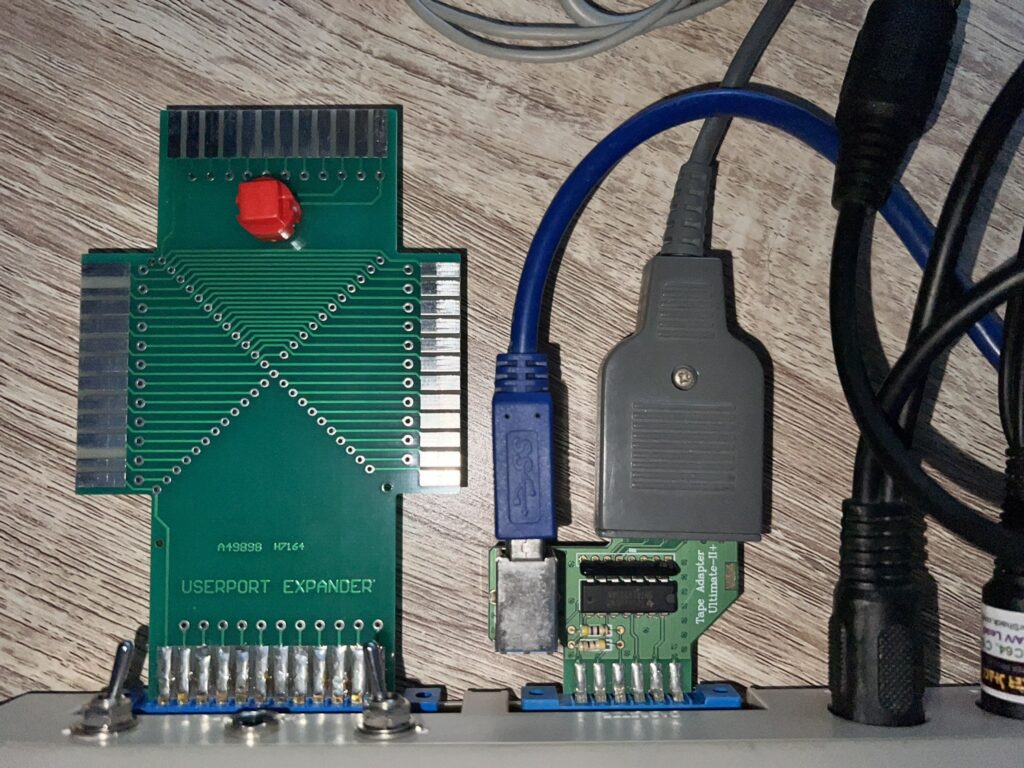
I immediately set about attaching everything I could to the expander to see what would work and what wouldn’t. There’s certainly one glaring issue right away in that anything you hook up to the right hand connector is going to interfere with the datasette port.
 

C64 User Port Expander

Nothing is connecting to the right-hand side unless I remove that tape adapter!


I had to disconnect my 1541 Ultimate II+ tape adapter to be able to attach anything I owned on that side.
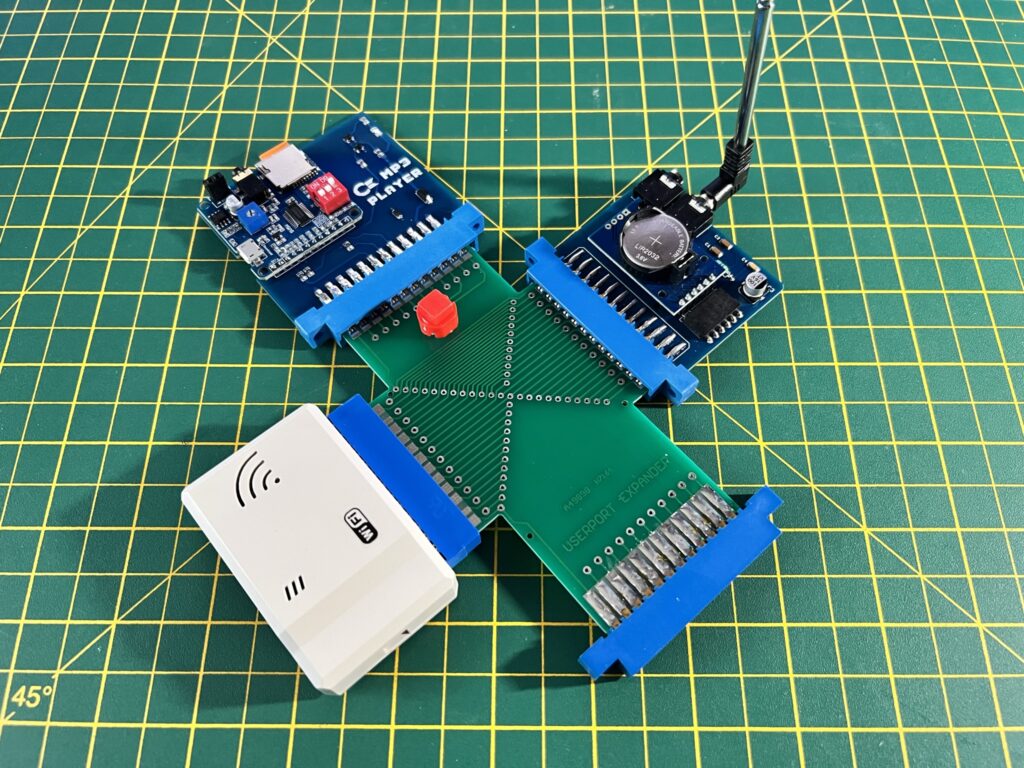
 

C64 User Port Expander

A losing combination of user port gizmo’s.


The other issue is that not everything plays nicely with other devices as they are sharing the same connections. My FM Radio was particularly anti-social in this respect and refused to work at all when anything else was attached to the expander. However my MP3 player, Wi-Fi modem and Power Monitor were all much better behaved in this regard. I had a great time listening to some tunes from my MP3 player whilst browsing BBS’s via the Wi-Fi modem. Awesome stuff!
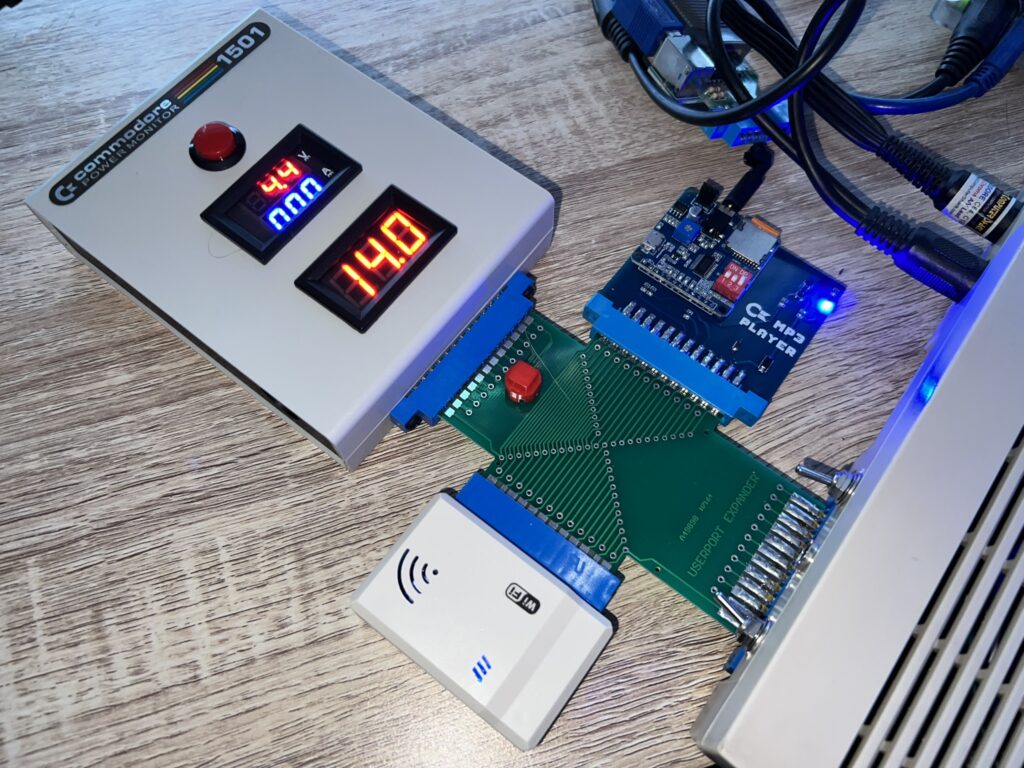
 

C64 User Port Expander

Winner winner, chicken dinner!


I haven’t tested every combination of devices together but it definitely requires a level of experimentation to see what will work. Don’t get one expecting to be able to just attach three random devices and for them to just work. I will be leaving the expander connected most the time, even if it means only having a single device attached to it. Why? Because it will stop the wear and tear on my user port – the poor thing has been getting used and abused for forty years now, it deserves a rest!
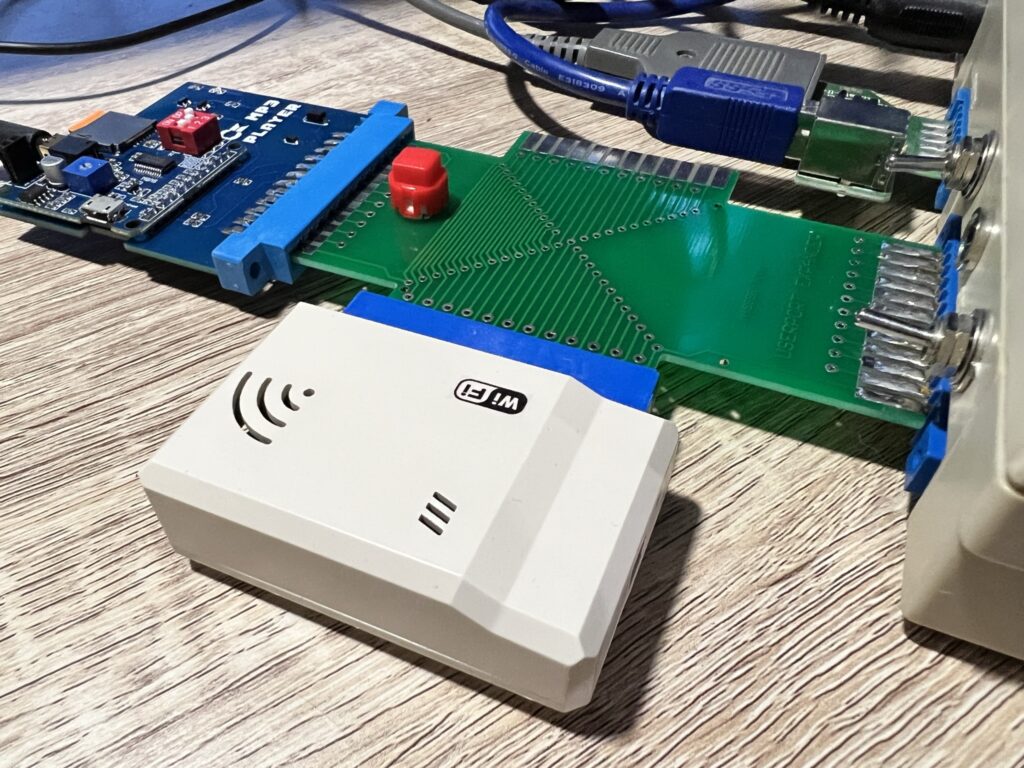
 

C64 User Port Expander

Happy compromise so that I don’t lose access to my datasette port.


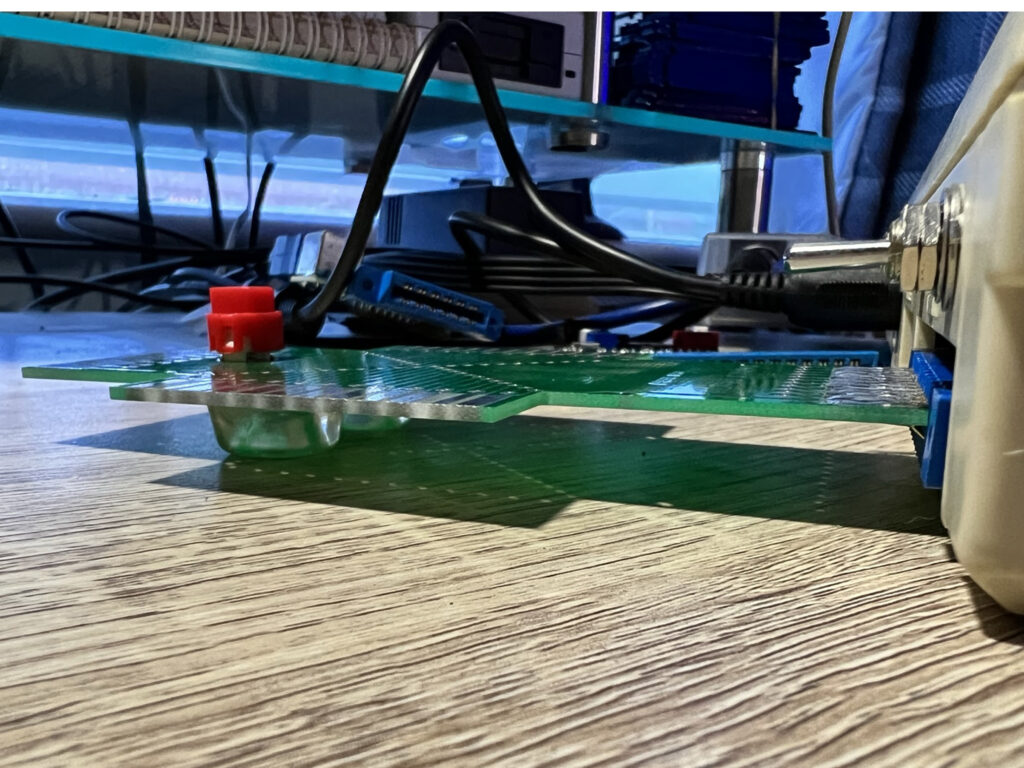
The reset button worked well although I usually just use the one on my 1541 Ultimate II+,  it’s nice to have another option. My only other criticism would be that the expander isn’t supported in any way so the weight any devices attached causes it to droop down at an angle. This isn’t really that much of an issue since the user port is quite low and the length of the board means the angle it comes to rest at is pretty shallow.
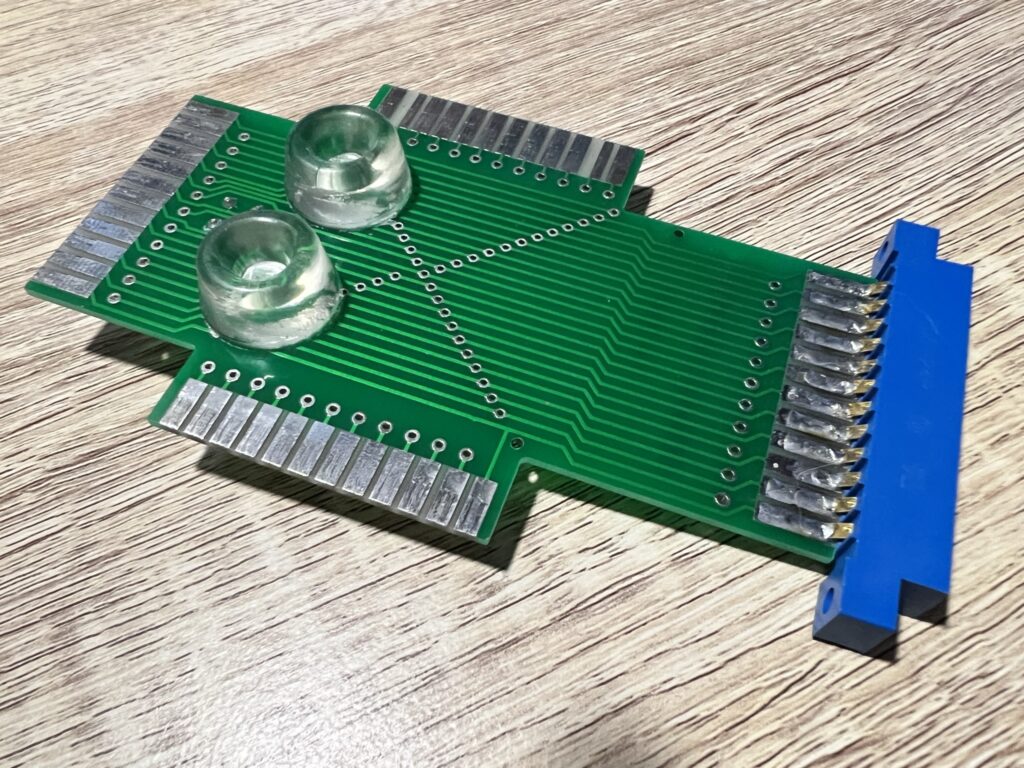
 

C64 User Port Expander

Added a couple of silicone feet to the board.


However my OCD just couldn’t let it slide so I had a rummage around my junk drawer and found a few silicone feet that were the correct height and attached them to the bottom of the board.
 

C64 User Port Expander

Board is well supported now.


With the little feet attached I was much happier as I knew the weight of the board and attachments wasn’t going to put any strain on the solder joints.


Pros & Cons

This is a great little device to have in your arsenal of C64 peripherals and can potentially offer a lot of convenience and functionality, provided the devices you choose to hook up are mutually compatible. It will also help to protect your C64’s user port and if you don’t already have one, the reset button comes in really handy and saves wearing out the power button on your C64.

It’s by no means perfect though, especially if you want to keep using your datasette port. Doing so effectively means you lose the use of a connector. I suppose a version with vertical slots would help here, but in my case that would create a new problem as my monitor stand only offers 8cm of headroom. Some extra circuitry to allow you to disable a slot if an attached device won’t play nice would be a boon too. Regardless I’m really happy with it as it lets me use two devices at the same time and when I do need to swap over to a difference device I know that it isn’t wearing out that edge connector on my 64.

If you would like to get a user port expander for your own C64, head over to SharewarePlus and drop Tim Harris a message to let him know what you are after and he’ll sort you out.

A C64 MP3 Player!

Given that the much more powerful 16-bit Amiga 500 is unable to play MP3’s you could be forgiven for thinking that the lowly 8-bit C64 has no chance. Well it’s time for a re-think because equipped with this nifty little C64 MP3 Player device your humble C64 can now play MP3 files without breaking a sweat!


C64 MP3

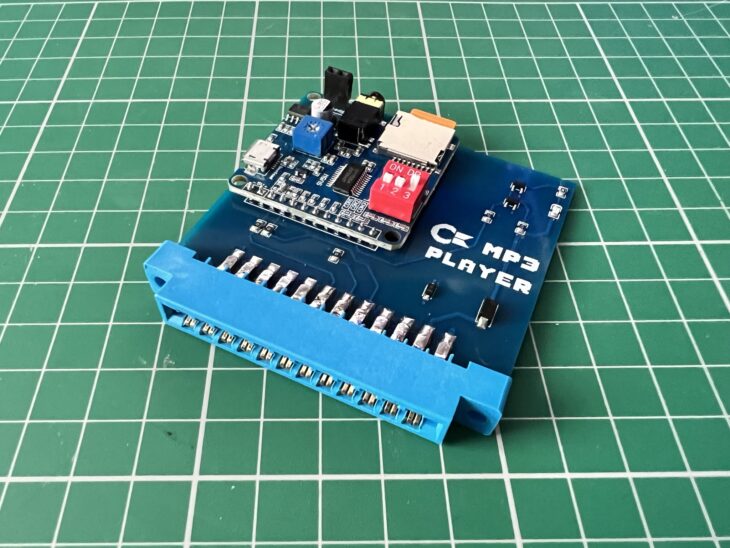
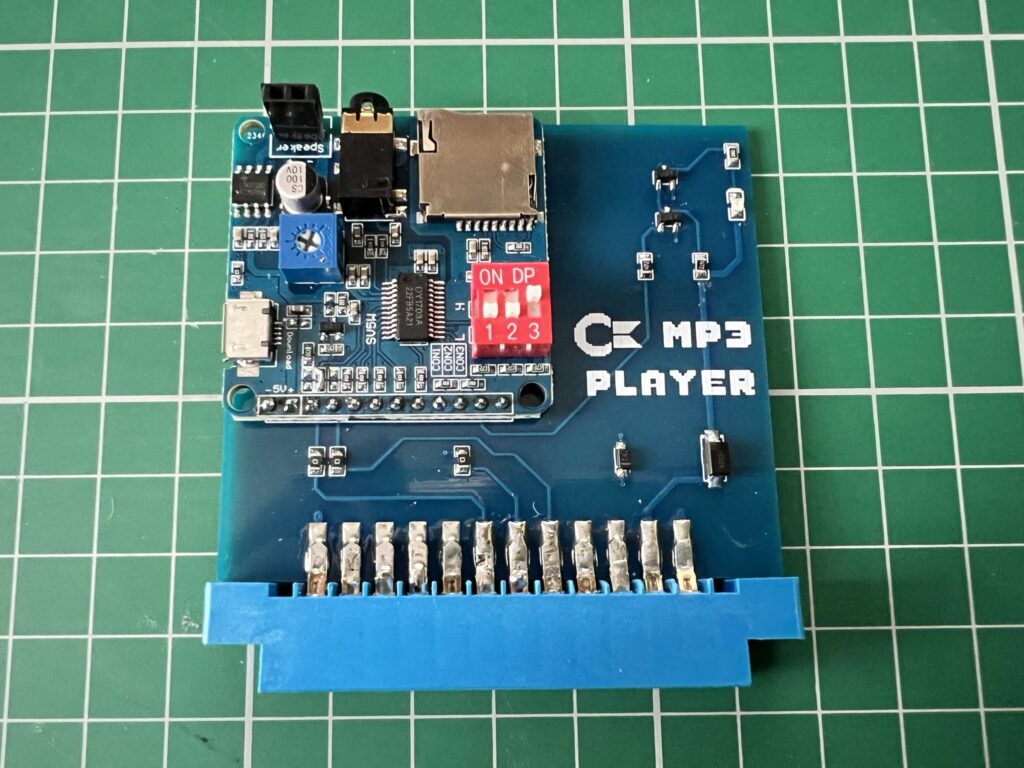
The C64 MP3 Player Top View.


This slick little device was designed and hand built by a chap called Pietro in Italy. It consists of a larger PCB, approximately 7cm x 7cm  in size with a smaller 4cm x 4cm Mp3 ‘daughterboard’ attached to it in one corner. It didn’t start out looking like this though. Pietro’s first prototype consisted of a bunch of wires and components soldered directly to a user port connector. Only once he knew it all worked did he set about designing the PCB to do the job in style.

The larger PCB links the power and control lines of the MP3 module to the corresponding connections of the C64’s user port. He also added a few extra components into the mix to enable an LED illuminate when the device is playing music.


C64 MP3

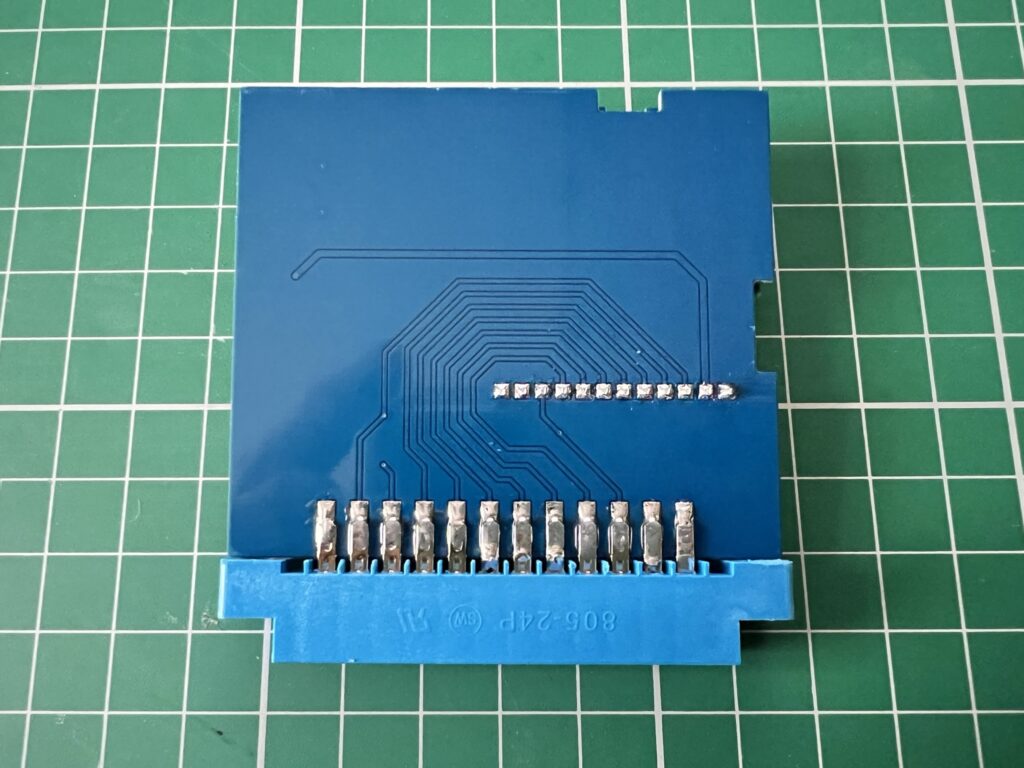
You can clearly see the tracks snaking around the board on the back of the device here.


Pietro tells me that it started out in life as an MP3 ‘voice playback’ module he picked up off AliExpress. Although the module was designed to be used with an Arduino device, after some tinkering he figured out which pins controlled things such as next/previous track, volume up/down etc. He then set about writing the software to control it in C using the CC64 compiler along with a bit of Assembly where speed was a factor.


C64 MP3

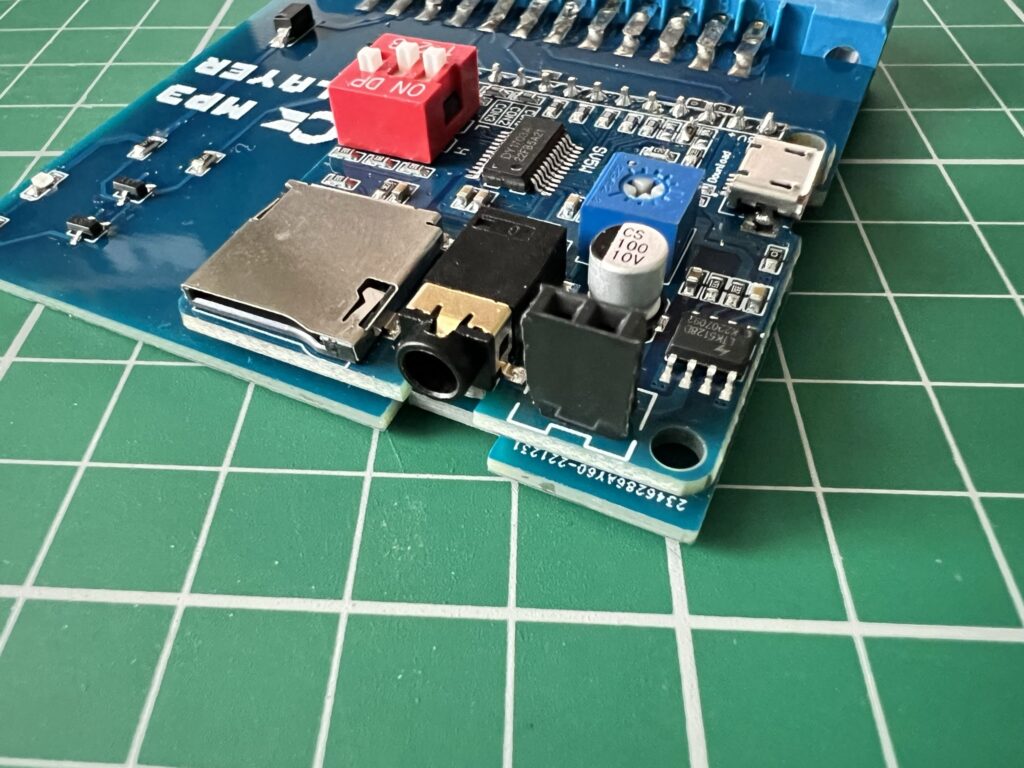
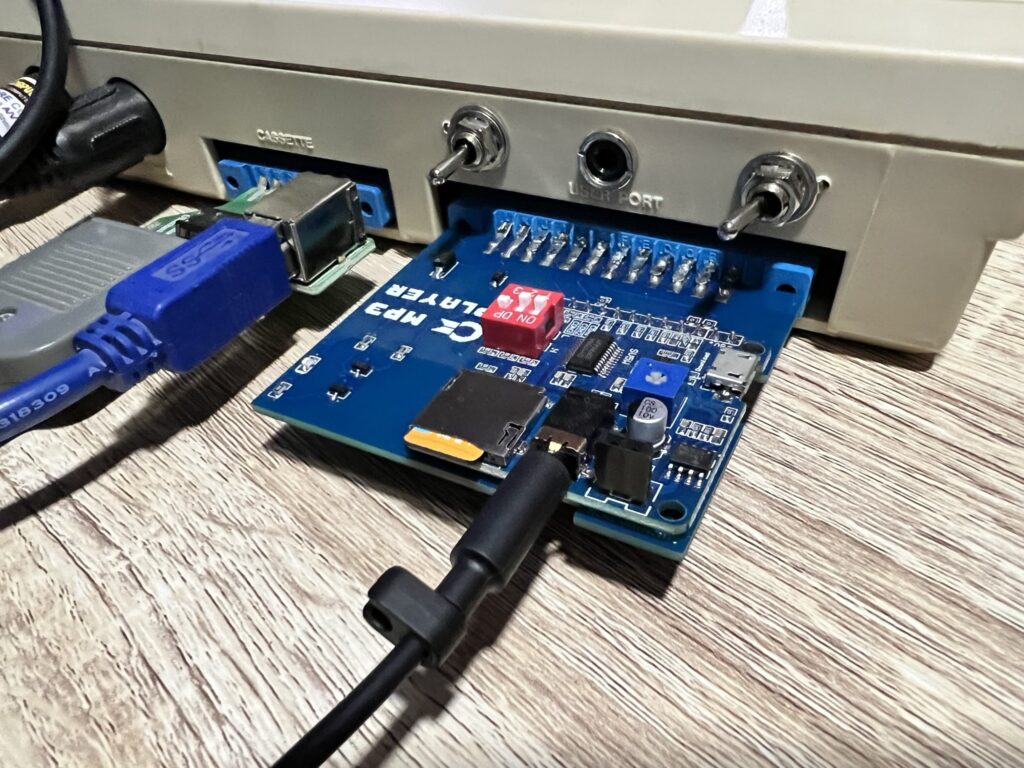
From left to right; MicroSD card slot, 3.5mm headphone jack and line out.


There’s a lot of connectivity packed onto that small daughterboard including a MicroSD card slot, 3.5mm headphone jack, line-out connection and also a Micro USB socket. You can control the output level of the line-out using a small potentiometer on the daughterboard.


C64 MP3

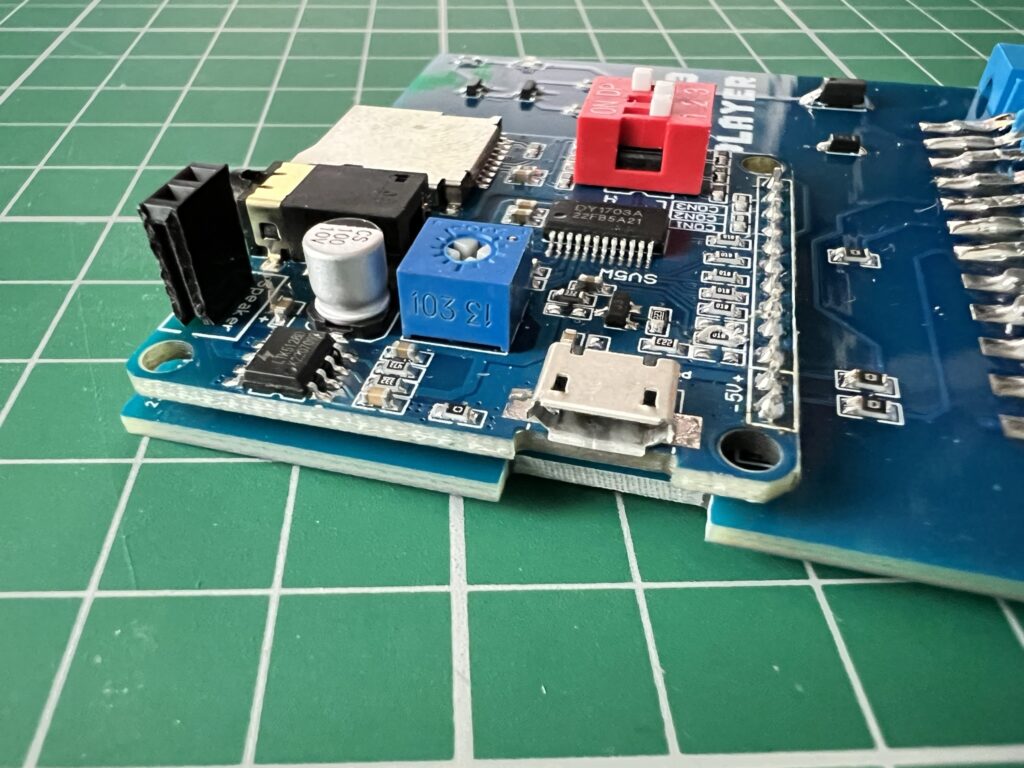
The blue cube in the centre is a potentiometer to control the line out level. Note also the Micro USB socket that allows connection to a PC.


The last thing of note to point out is the bright red DIP switch array. There are three little switches here that can be configured in different positions here according to which piece of software you want to use it with.


Lets Play Some MP3’s


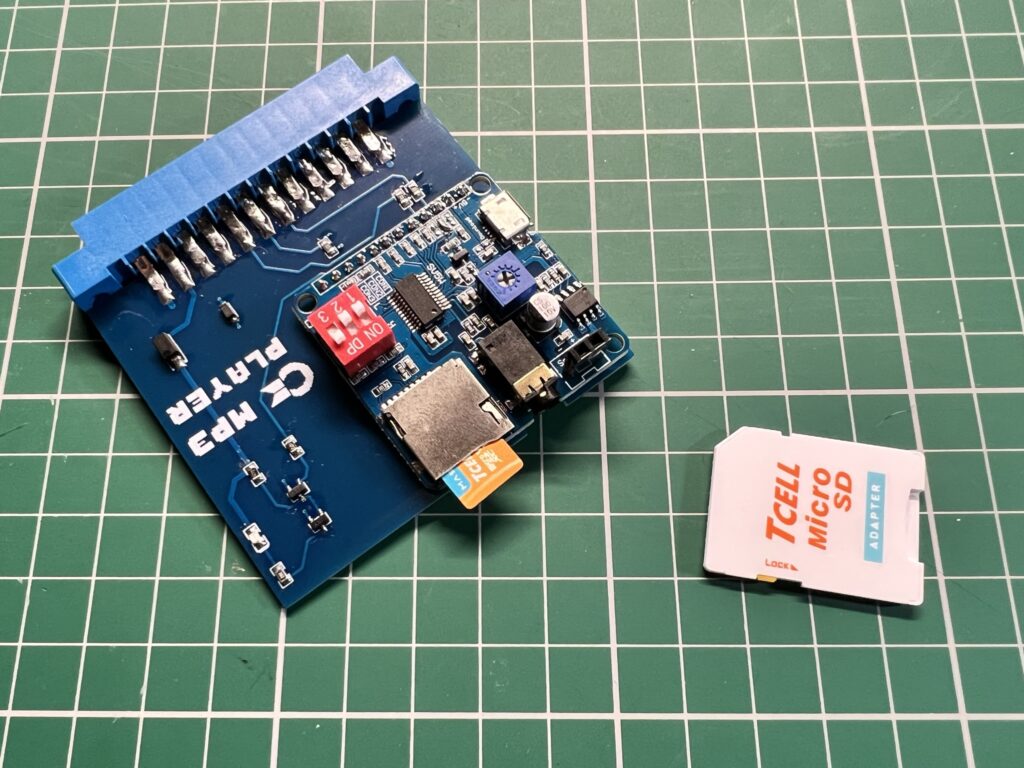
The first thing to do is get some music onto a Micro SD card. It doesn’t seem to be fussy about what cards it will read so I just used a cheap one off Amazon and have had no issues with it.


C64 MP3

Micro SD card inserted.


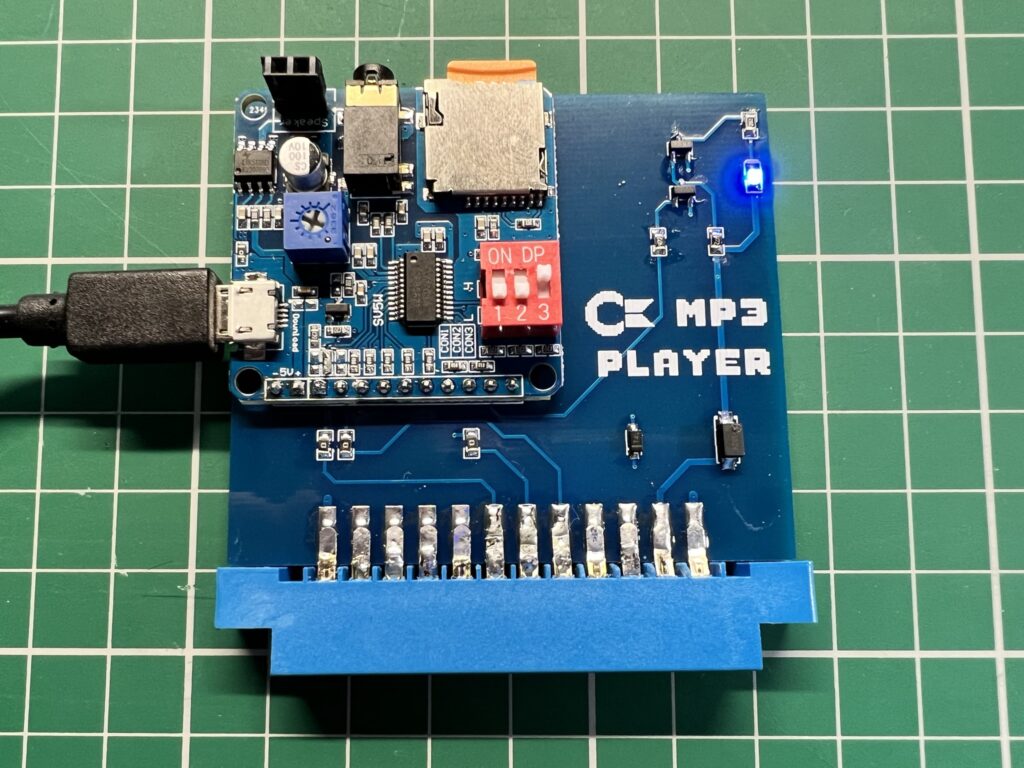
To actually get music onto the device you can either pop the MicroSD card into a reader on your PC and copy it across, or alternatively, you can connect it via a Micro USB cable and it will appear on your PC as a mass storage device allowing you to copy music across that way. The device is able to play MP3’s at up to 320Kbps without issue and also lossless WAV files. However FLAC files appear to be unsupported so if you have a bunch of these you want to listen to then you’ll need to convert them over to MP3’s.


C64 MP3

A blue LED will light up once the board is connected to a PC via USB cable.


Obviously the board must be plugged into the user port and connected to either an external powered speaker (my personal preference) via the 3.5mm headphone jack or a suitable amp via the line out but I didn’t have one available to test this side of things.


C64 MP3

MP3 Player hooked up to the C64’s user port.


There’s a few different programs that Petro has written for the player. The “basic” program toggles the 8 pins to select a track number from 1 to 255 whereas the “one” version as he calls it uses the One-Line interface from which you can also change the volume, EQ setting and more. Naturally as the second one offers the most features it’s the version I opted to use.

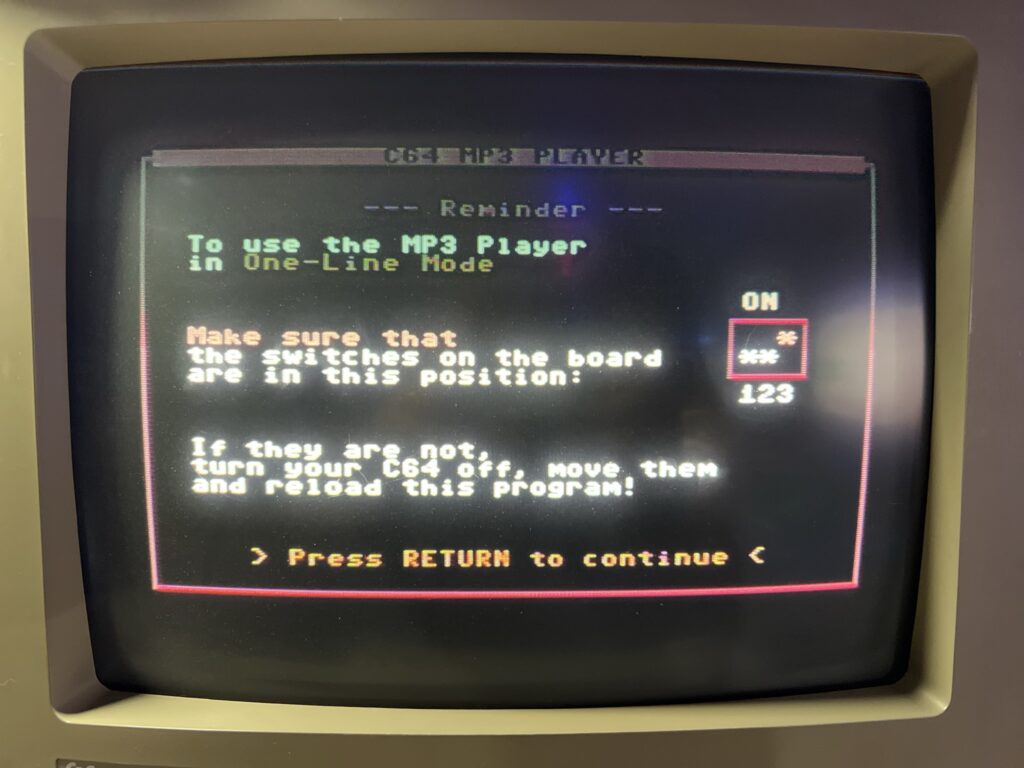
Once the software has loaded (only takes a couple of seconds) you are presented with a screen reminding you about which mode the program is using and how to set the DIP switches. Assuming they’re in the correct position simply hit ‘return’ to continue. If the switches are set wrongly then you must do as it suggests and turn off the computer and move them into the correct positions before trying again.


C64 MP3 Player

Checking the DIP switches are correctly set.


Sadly file/track names are not supported here so you must know the number of the track you want to play. If there was one feature I’d like to see in a future version, track names would be it!


C64 MP3 Player

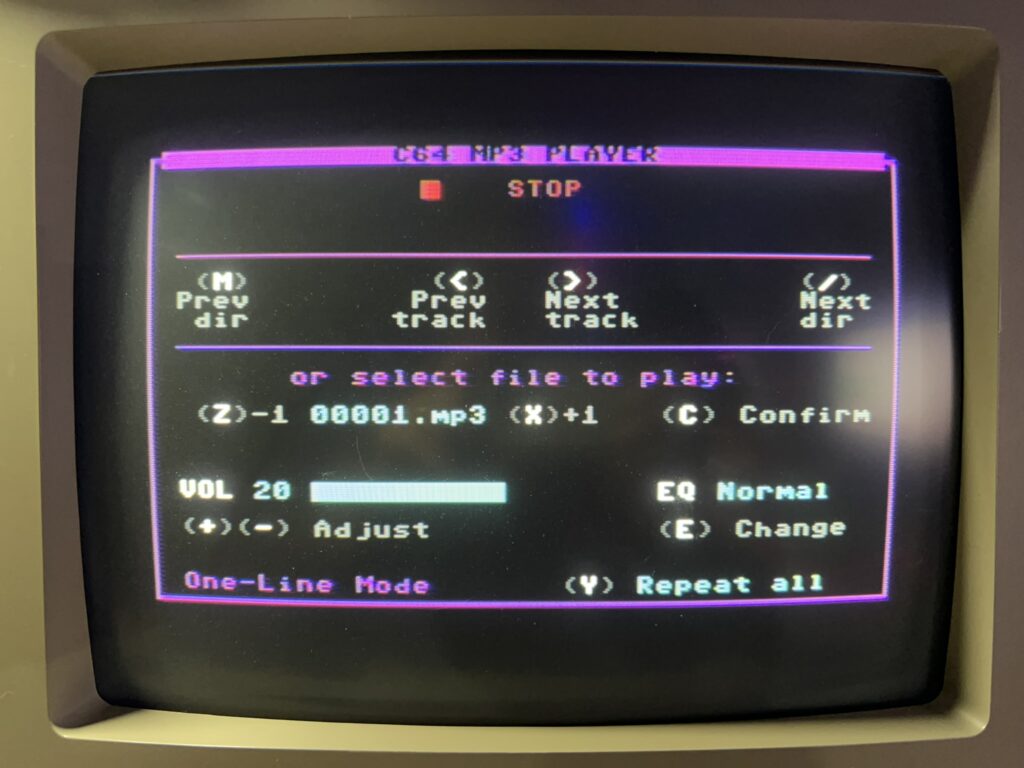
The MP3 Player Interface.


The main program screen provides pretty much all of the features you would expect from an MP3 player. You can start, pause and stop a track, skip back and forth and navigate through directories too as these are also supported. There’s a full repertoire of extra functions, such as repeating a single track, repeating all tracks or repeating everything within a directory.  Random track play is also supported in a similar way. If you know which track number you wish to play you can skip straight to it using the ‘select file’ option.

The player software also includes an Equalizer that really has a dramatic effect on the sound playback. The choices provided are; ‘Normal’, ‘Pop’, ‘Rock’, ‘Jazz’ and ‘Classic’. Finally you can control the volume in 30 increments using the +/- keys.


Final Thoughts and Availability

This really is an amazing and fun little device that adds yet another string to the C64’s already impressive entertainment bow. The quality of music playback is terrific and provided you keep a little printout of what files are on the card handy, navigating around your collection is fairly straightforward. The one caveat I must point out though is that you do need a powered speaker or headphones with a suitable pre-amp to listen to it. This is because the device itself lacks an amplifier of it’s own so although you can plug headphones directly into it, the sound you’ll experience is quiet and tinny.


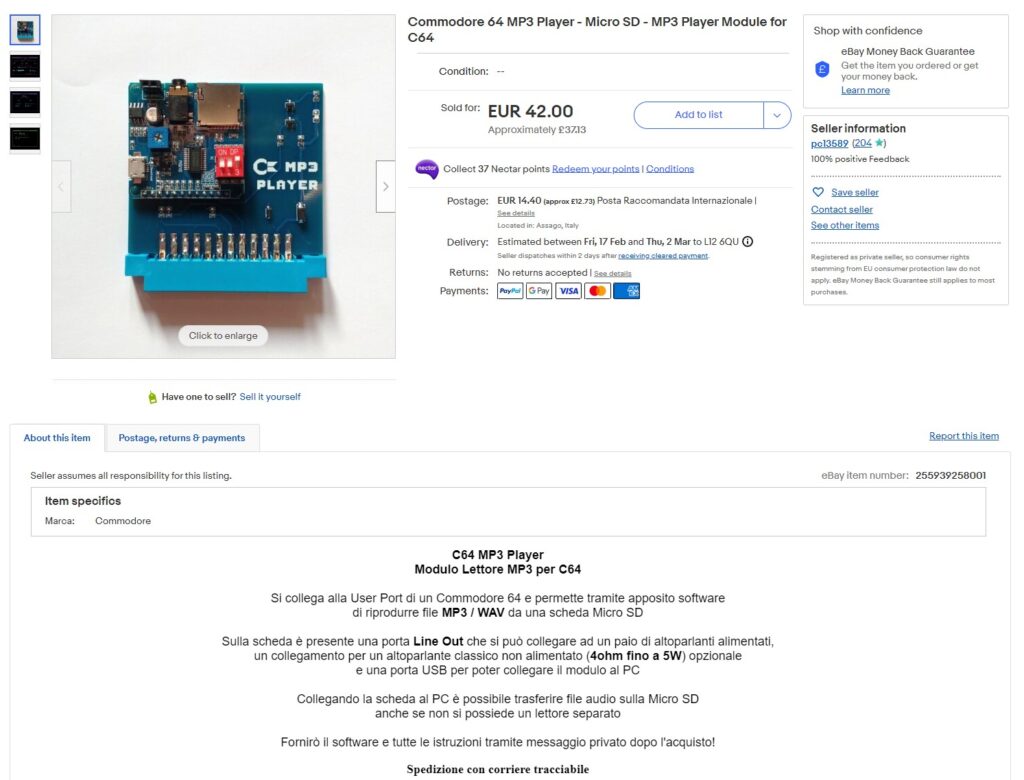
The Original eBay auction advert for the MP3 Player.


Unfortunately Pietro informed me he only made a handful of these devices for fun so doesn’t have any more of them available for sale right now. However he says he’s totally open to the idea of making more if the demand is there so if you fancy one of these for yourself get in touch with him over at his eBay store and let him know!

Commodore 64 FM Radio Module

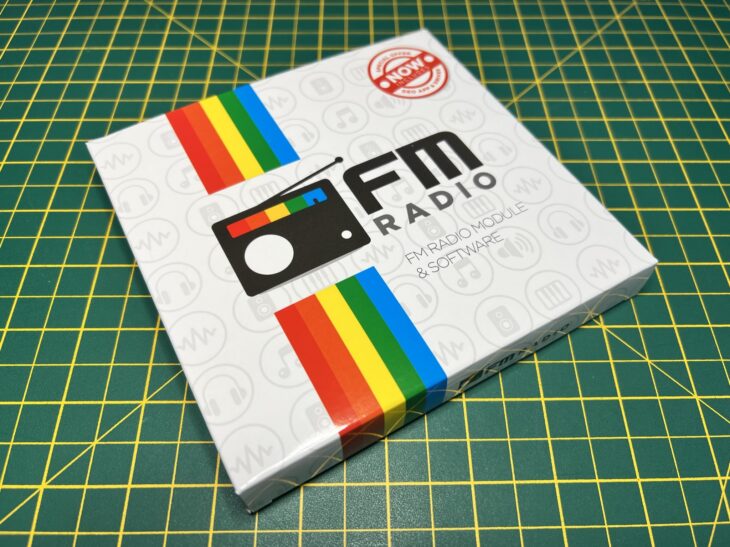
If you’ve ever wanted to have an FM radio built into your C64 then your dreams have just come true. I spotted this cool little device whilst browsing around the SharewarePlus website a few weeks ago and have been putting it through its paces since…


What’s in the box?

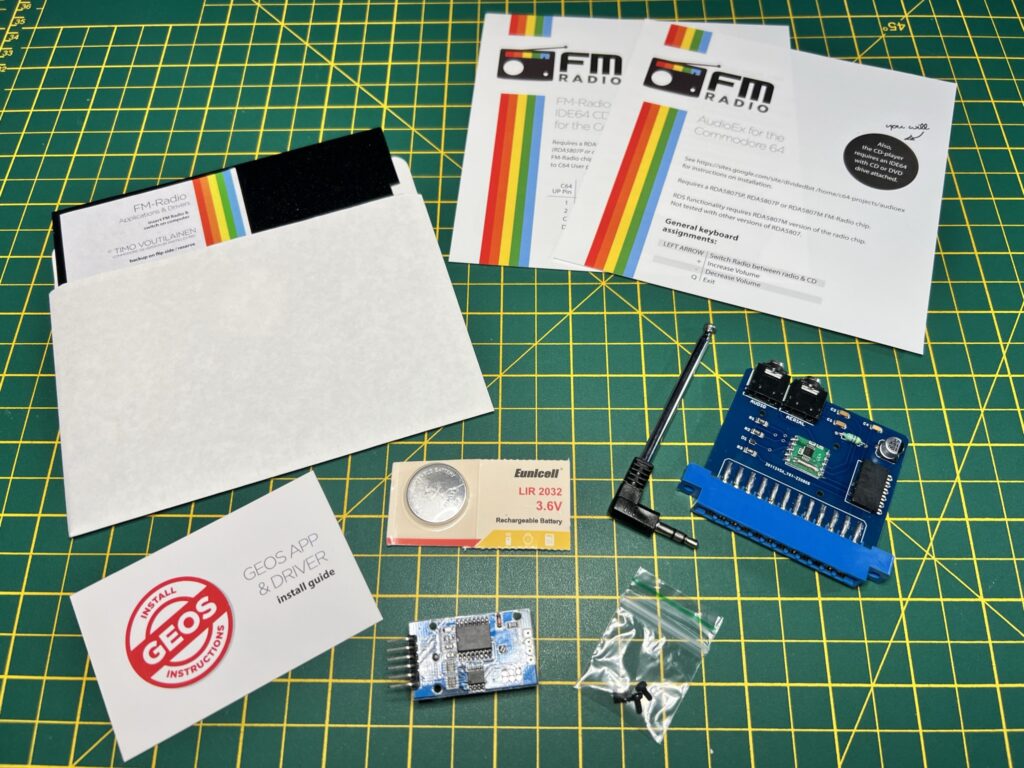
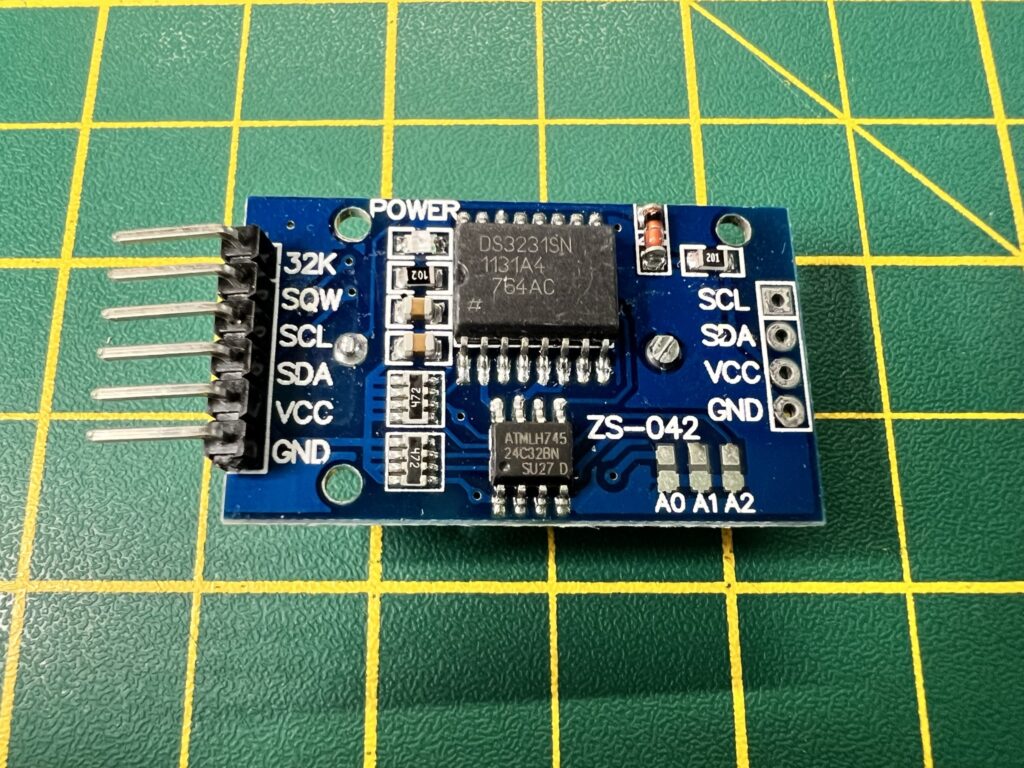
Included in the box is the radio module, a real time clock (RTC) module, small telescopic aerial, program disk, battery (for the RTC), some fittings and finally some instruction sheets.


C64 FM Radio

Kit Contents.


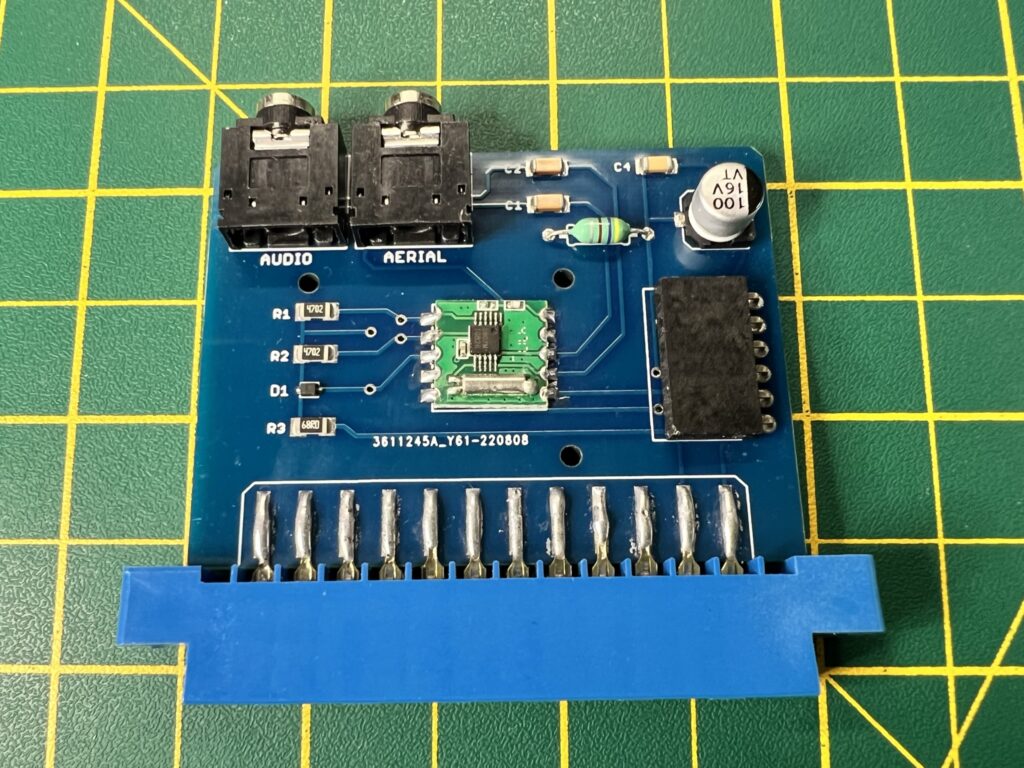
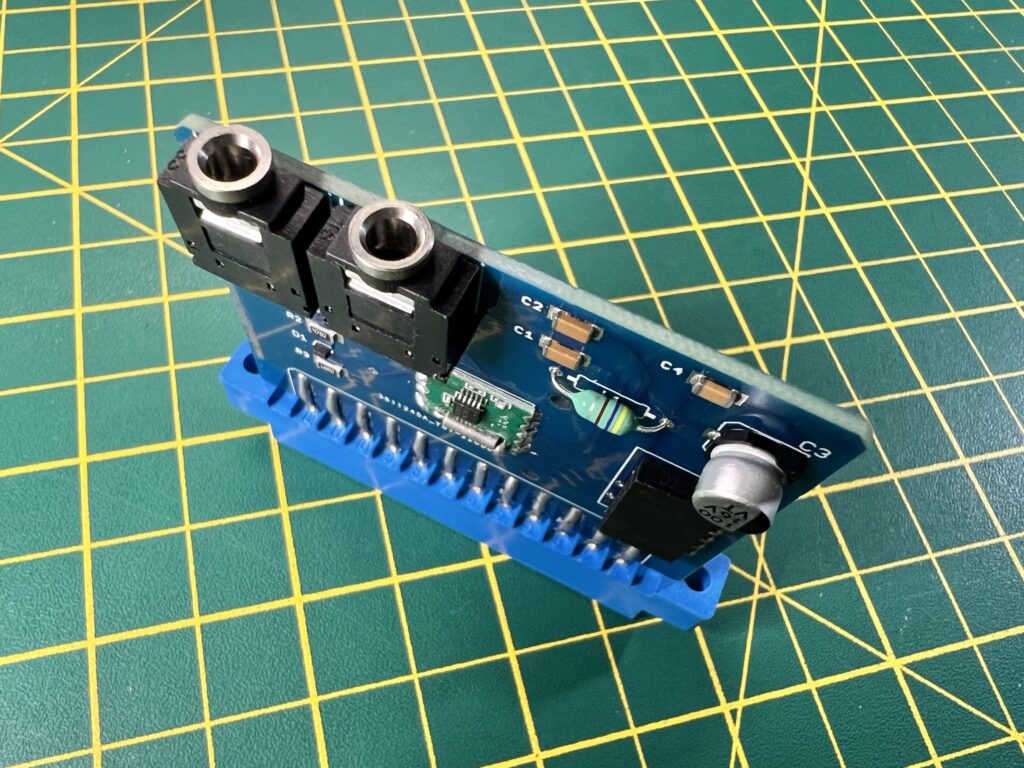
The board is nicely made and incorporates sockets for stereo audio output, aerial input and a 6-pin female socket header to accommodate the RTC.


C64 FM Radio

Close-up of the Radio board.


C64 FM Radio

Audio port (left) and Aerial port (right).


The RTC features mostly surface mounted components on one side along with 6 header pins that will allow it to be plugged into the Radio PCB.


C64 RTC

The RTC module.


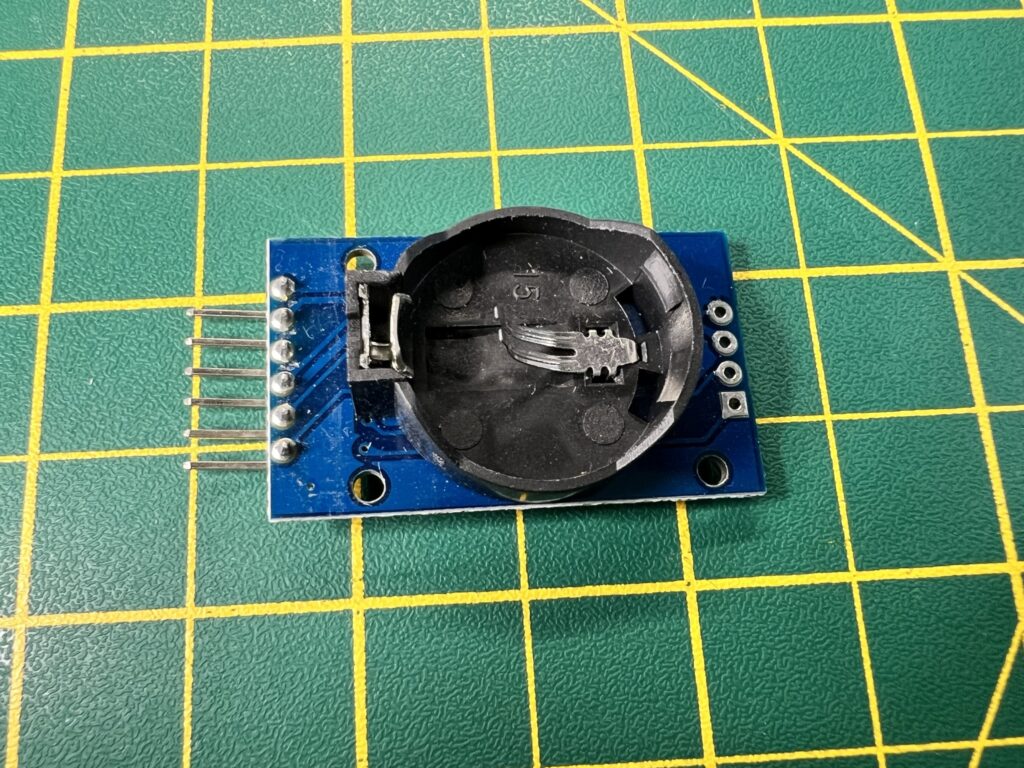
The reverse side is dominated by a battery holder for a 3V Lithium CR2032 battery which is required to power it.


C64 RTC

3V CR2032 button cell goes here.


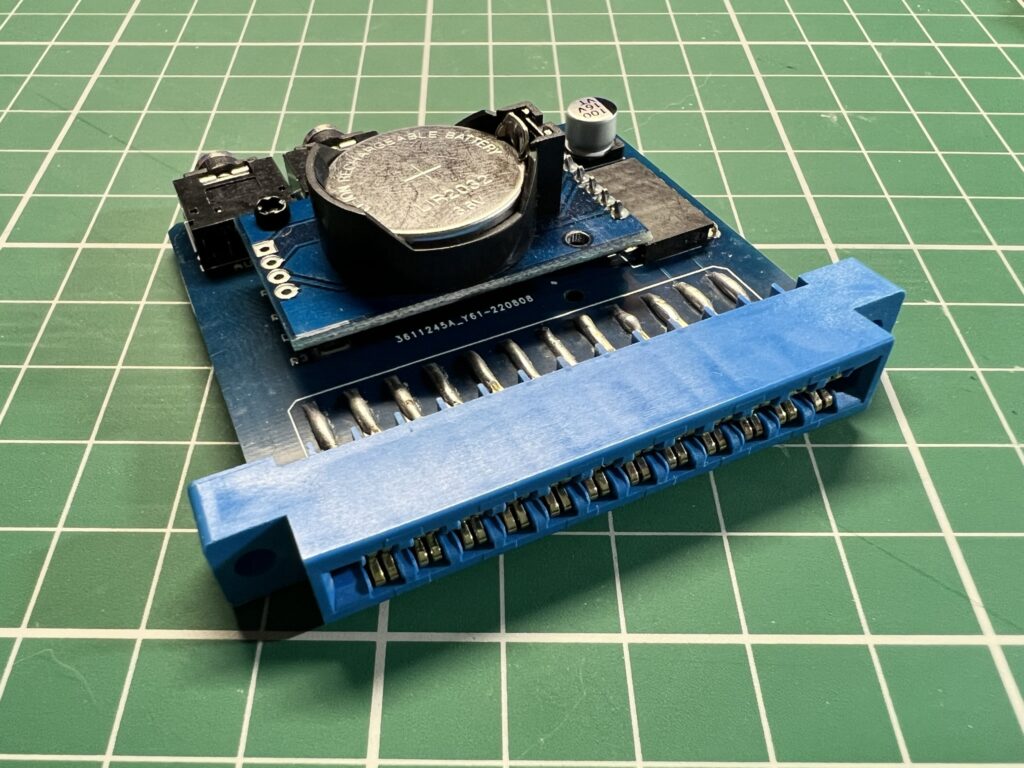
The RTC attaches neatly to the main Radio PCB as shown in the photo below.


C64 FM Radio

Here the RTC ‘daughterboard’ has been securely attached to the radio PCB.


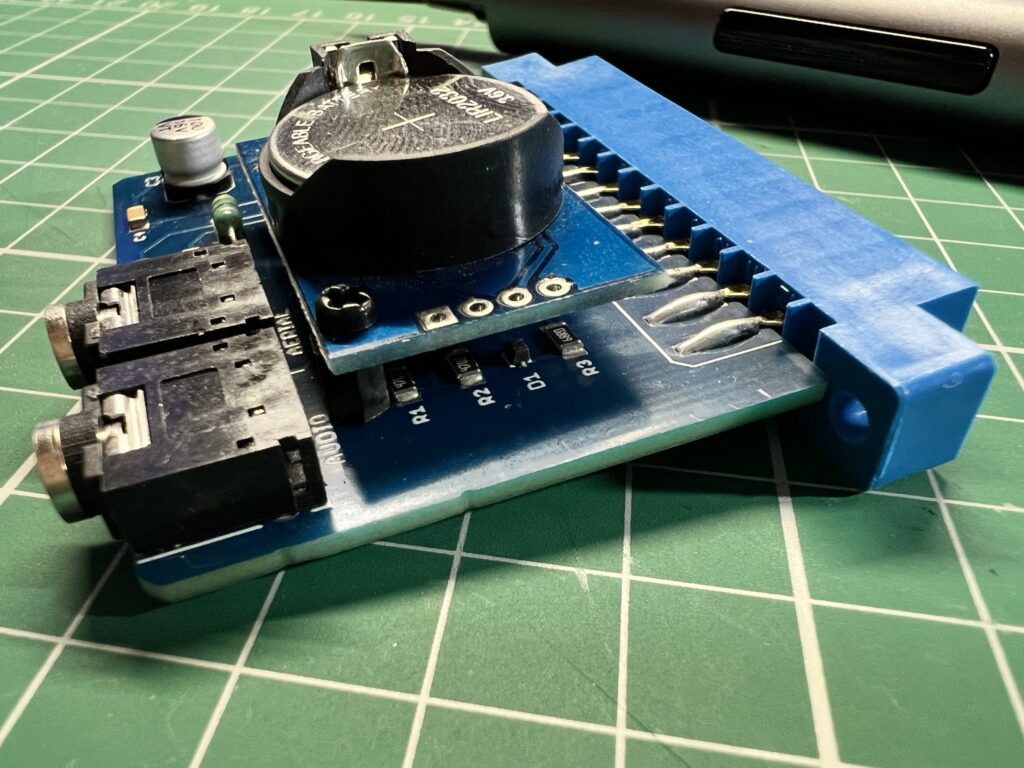
A couple of small screws top and bottom with a stand-off sandwiched in-between ensures the RTC stays in place as you can see in the photo below.


C64 FM Radio

Close-up showing how the board attaches with the stand-off spacer.


Getting it Working

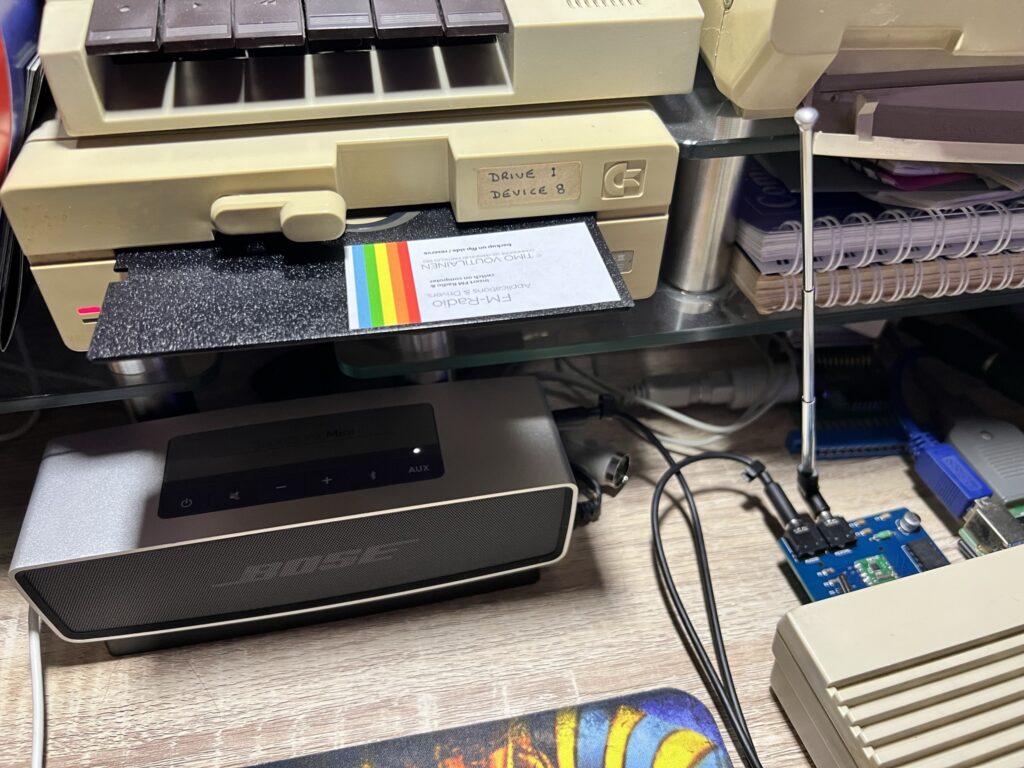
The FM Radio module plugs into the User Port at the back of your Commodore 64. Sound is output via a standard 3.5mm jack so you can attach a pair of headphones, or, as I did, hook it up to a powered speaker. In order to actually pick up any stations you also need to plug in the included telescopic aerial.


C64 FM Radio

FM Radio plugged in a ready to go.


With the radio board plugged into the C64’s user port, speakers and aerial attached it’s time to power on the C64 and load up the supplied software to get it working.


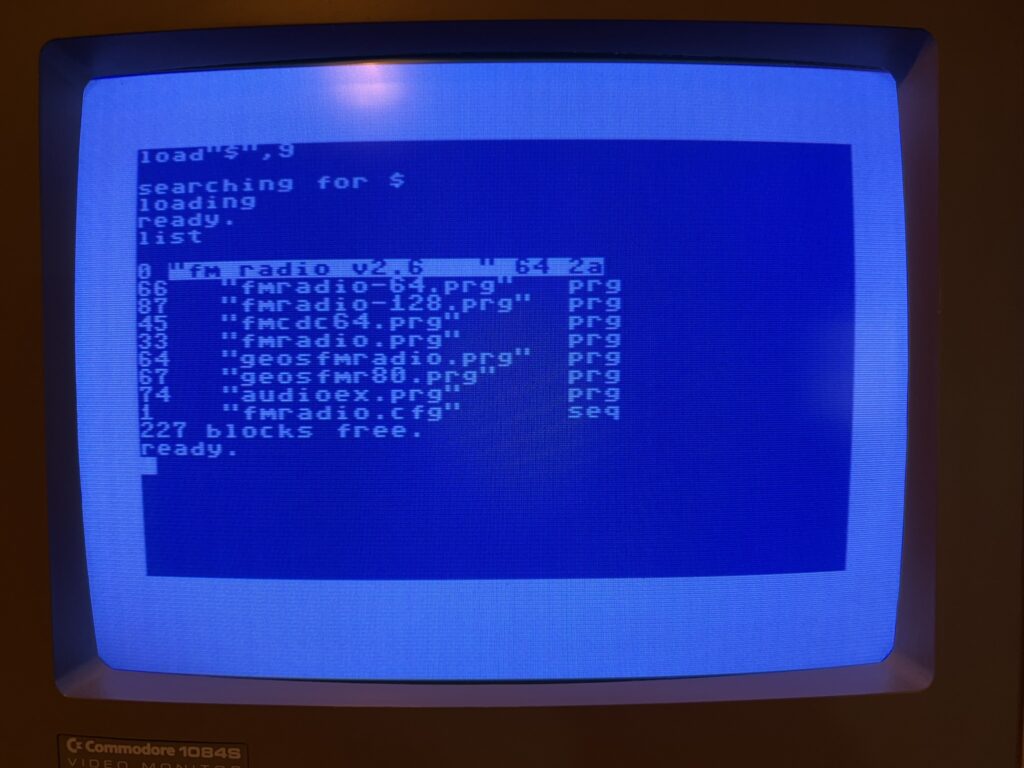
C64 Directory Listing

Contents of the supplied floppy disk.


The supplied floppy disk contains a number of different programs for both the  C64 and C128 but the one I was interested in to get the radio working was the first one in the list above; “fmradio-64.prg”.


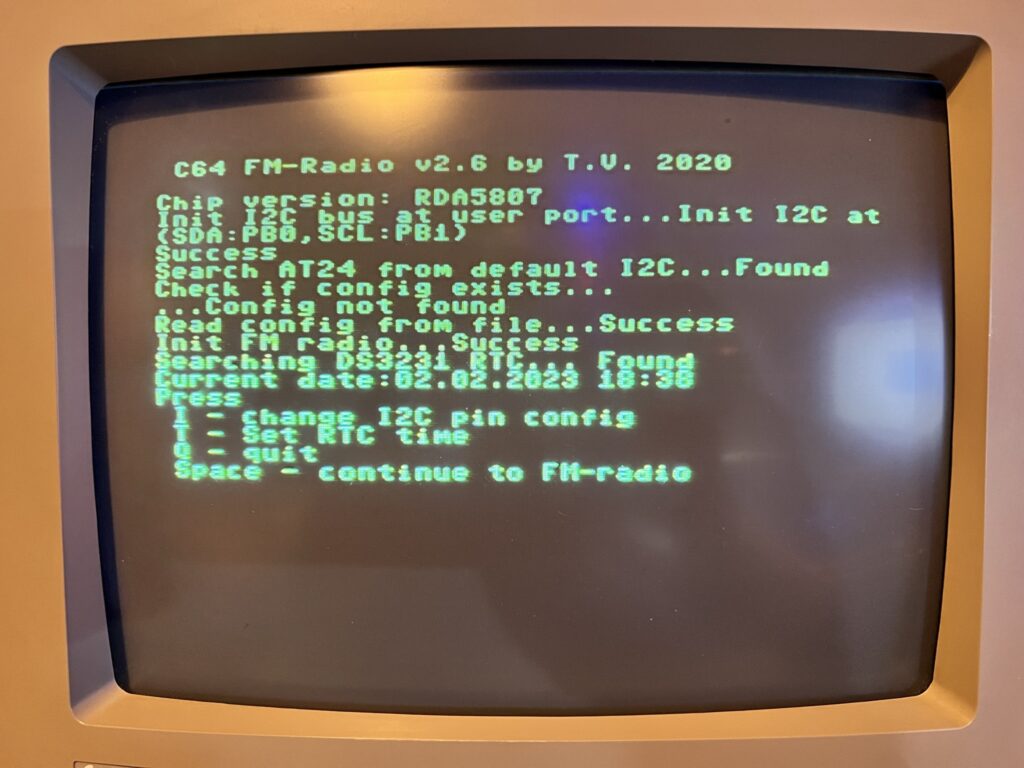
C64 FM Radio

Initial screen.


Loading it up will initially present the screen above where it will confirm the presence of the RTC, show the current date and time and give you the option to set it too. Pressing ‘space’ loads up the actual FM Radio program.


Using the Radio

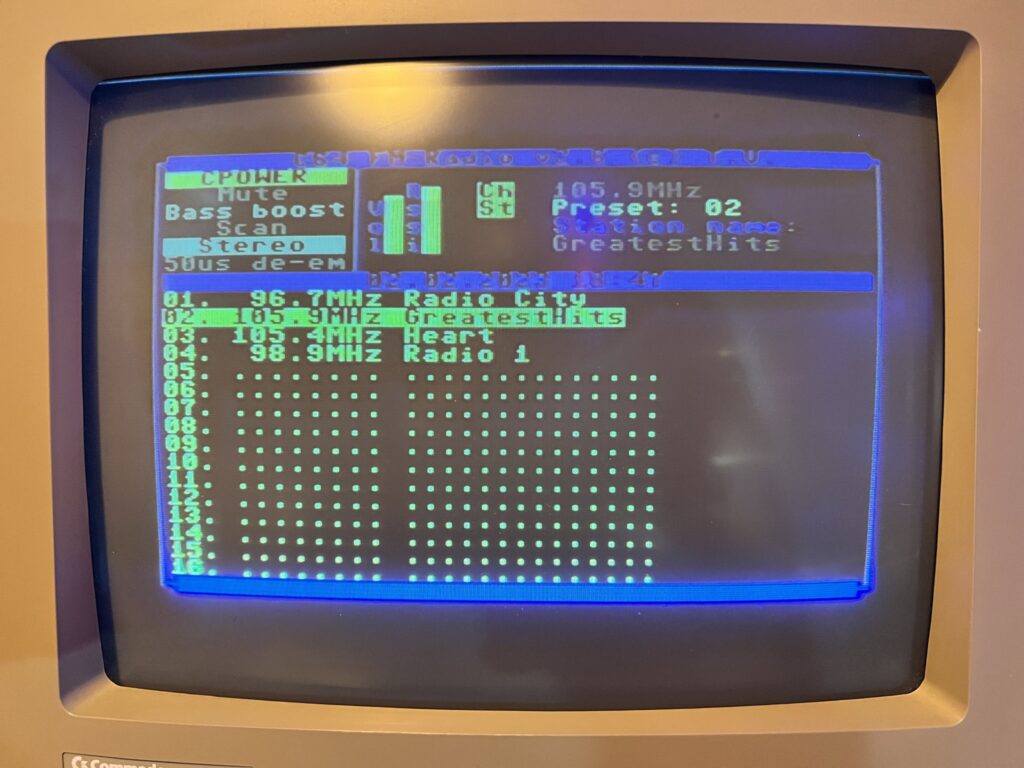
With the program running you can control the radio via a basic but functional user interface (UI) that displays all the information you need.


C64 FM Radio

FM Radio Software UI.


The top-left portion of the screen is dedicated to showing the following 6 things:

  • CPOWER – Power status (Green=ON / RED=OFF)
  • Mute – on/off
  • Bass Boost – on/off
  • Scan – Indicates if the radio is currently scanning for a channel
  • Stereo – Shows whether channel is playing in Mono or Stereo
  • 50us de-em – ‘de-emphasis’ 50us or 70us setting that can help remove unwanted noise/interference

Moving across to the larger section on the right we can see details about the currently tuned channel along with the volume level and signal strength. If you have stored a channel in a ‘preset’ and named it then that will be displayed too under ‘Station name’.

In the strip below (providing you have set it already) the current date and time will be displayed.

Finally below all this and occupying the majority of the screen is the channel preset/listing area. This is basically a list of all the channels you have stored and the names you have assigned them.


How well does it work?

As the C64 FM Radio is digital rather than analogue, tuning in to stations is really simple. You can initiate an automatic channel scan up or down the FM frequency by tapping ‘;’ and ‘:’ respectively. Alternatively you can nudge the tuner up or down 100Khz at a time to fine tune a station yourself by using the ‘U’ and ‘D’ keys. The radio will not automatically retrieve channel names but once you have tuned in a channel you like you can press ‘C’ to store it and assign it any name you like  (up to 12 characters) and save it into one of the 16 available slots. These presets are saved to disk when you quit the program. The first 10 presets can be quickly accessed by simply pressing the corresponding number on the keyboard. Alternatively, you can use the cursor keys to move up and down the list and press ‘return’ to select one.

Here’s a short video of me using the radio, switching channels and so on, all from my C64.


Once you have tuned into a particular station you have the option of changing between mono and stereo reception and toggling a ‘de-emphasis’ setting to improve the audio. I found tuning to be mostly ‘all or nothing’ meaning that most of the stations either tuned in perfectly or barely at all so I had no use for these tools but it’s nice to have them available. Of course you can also alter the volume level, add Bass Boost or mute the audio all from your C64. The bass boost works quite well too, at least with my Bose speaker anyway.

I was only able to pull in a couple of local radio stations initially with the supplied telescopic aerial but I do have a lot of electronic equipment in my man cave that could well be affecting reception. However I replaced the supplied aerial with a 2m long aux cable I had lying around and was then able to pull in a few more channels. Who knows what I could pull in if I had an even longer one! If it’s been a while since you used an FM radio then you might have forgotten how finicky they can sometimes be depending on where they are placed and what direction the aerial is pointing in etc. Luckily for me, my favourite radio station (Greatest Hits Radio) was one of the two I could receive with the supplied telescopic aerial. The quality of the reception was spot on too so I was quite happy to continue using the stock aerial.

I should point out that the FM Radio hardware is doing all the work here. The C64 just interfaces with the board to provide power and interact with it via software. This becomes pretty obvious once you quit the program or reset your C64 because the radio continues to work. However this allows you to play a game on your C64 whilst listening to the radio so is actually a positive for me!


GEOS

The included RTC works with GEOS (after you install a small driver to read the time from it) which is amazingly useful and really cool. Sadly this latest radio design (there have been at least 3 different ones used that I’m aware of) doesn’t yet work with GEOS but the guys behind this project are working on a revised PCB that should fix this in the future.

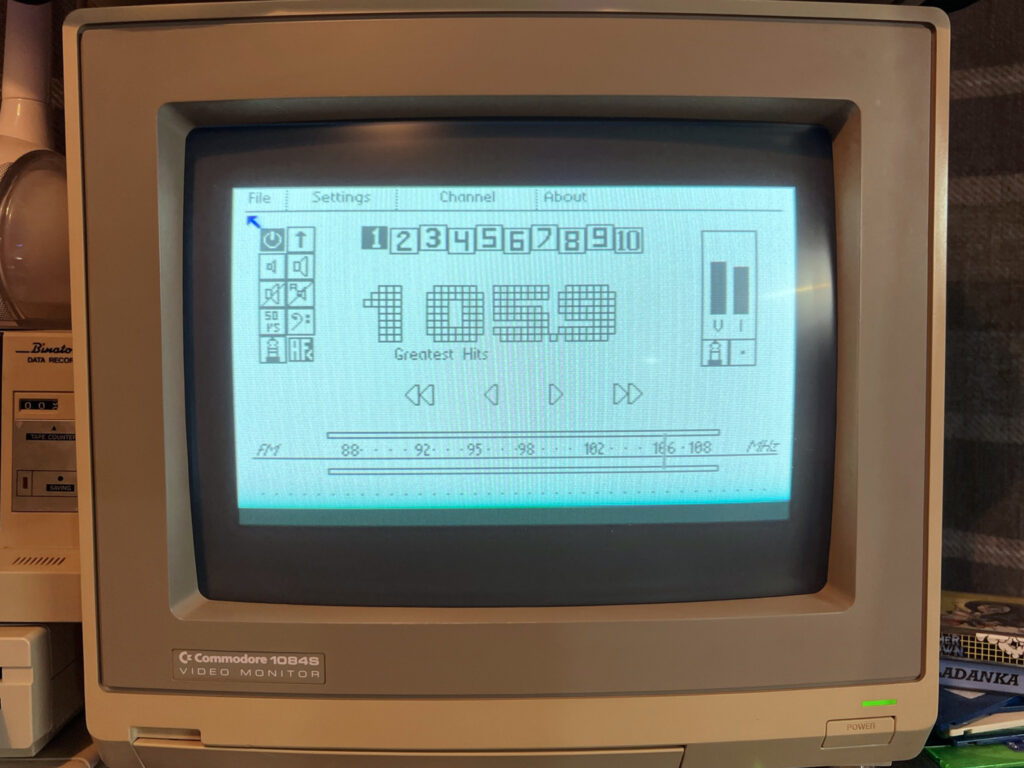
I was able to get hold of an older version of the Radio hardware that still works with the GEOS Radio program and it’s a really slick experience. It provides a modern, mouse driven UI for the radio with a nice chunky digital channel display. You can see how attractive the radio app is in the photo below.


Radio program running within GEOS.


Where to get one?

I picked up my C64 FM Radio kit from Shareware Plus in the UK. If you fancy getting one yourself you can find them here. It’s not only a fun piece of hardware to tinker around with but its really useful too. The clock feature for GEOS alone made it worthwhile for me. Just be aware that if you have your heart set on using the radio with GEOS then hang fire until they revise the board to work correctly with it.