Lyonsden Blog

Category - Gaming

Hibernated 1 – A New Text Adventure

Hibernated 1

Been waiting for this particular game to arrive for what feels like an eternity after having pre-ordered it last year. As of today that wait is finally over! Hibernated 1 – This Place is Death is now on my desk waiting to be played! 🙂

This isn’t a review as I’ve not had time to play the game yet, just a look at the physical edition and what’s inside it. Hopefully once I’ve completed it (always the optimist) I’ll write one.!


Hibernated 1

Amiga 3.5″ Disk & MicroSD Card


Which format?

I deliberated over whether to get the game on the Commodore 64 or Amiga for a while before ordering. In the end the Amiga won out due to it being able to display a greater number of characters per screen row. Given this is a text adventure I thought that was the most important consideration. However the beauty of this release is that although I chose the Amiga, this only affects the physical media the game ships with. On the MicroSD card are digital versions of ALL of the supported formats, including the Commodore 64. The other formats on the card are; Atari ST, Amstrad CPC, Spectrum and IBM PC along with some bonus stuff like concept art.

Eight Feet Under

An extra bonus is that a digital copy of the spin-off game, ‘Eight Feet Under’ is included – you can download it from itch.io and again you have the same choice of formats as above. You can also choose to get Hibernated 1 digitally if you like, it’s available here and you can name your own price.


Hibernated 1

A look at what’s inside the box


Box Contents

Inside the box there are plenty of goodies to enjoy, here’s a quick rundown:


  • A5 full colour game manual
  • A3 full colour poster
  • Game on physical disk
  • Digital version of the game on MicroSD card (in a snazzy Hibernated case)
  • Password to download ‘Eight Feet Under’ from itch.io
  • Terran Alliance round cloth patch
  • Stickers
  • Adverts for some other poly.play games


Couple of screenshots

Here’a quick look at the loading screen and the opening screen to the game.

Open eyes… 😉


Hibernated 1

Loading Screen


Hibernated 1

Open eyes…….


Replacing Grotty Game Library Cases

Replacing Game Library Cases

Replacing your game library cases is a very quick and easy method of rejuvenating some of your old cassette games. If yours are anything like some of mine then you may have several scratched up, chipped, broken or yellowed cases skulking around in your collection. The good news is that there are still companies out there supplying replacement cassette library cases. The company I use, based in the UK, is called Tapeline but there are probably others too.

The ones I’m using here are just standard black library cases costing around 26p each at the time of writing. You can get a variety of different types and colours too, even double and triple cases should you need them.


Replacing Game Library Cases

Standard Black Library Case


Once the cases arrive it’s simply a matter of removing the cassette tape and paper ‘J’ card inlay from the old case and popping it inside a nice shiny new one. Here’s a few before and after photos to show the difference they can make. I’m sure you’ll agree that after replacing the game library cases the games look infinitely better, almost like new!


Replacing Game Library Cases

Before


Replacing Game Library Cases

After


Replacing Game Library Cases

Before


Replacing Game Library Cases

After


Replacing Game Library Cases

Before


Replacing Game Library Cases

After


Replacing Game Library Cases

Before


Replacing Game Library Cases

After

Tiny Arcade Space Invaders

Tiny Arcade Space Invaders

Rounding off this month with something a little different… I’ve seen these Tiny Arcade games around for a while now but managed to resist the temptation to buy one. At the back of my mind I was always thinking they’d just be too small to play on and just a gimmick. Well last weekend I finally caved in and bought the Space Invaders one on impulse at the checkout of my local Game store so here’s my little review of it.


This slideshow requires JavaScript.


Contents

The packaging is all transparent plastic which allows you to see exactly what you are buying. A little cut-out in the front lets you start up a demo without opening the pack (assuming it’s not behind a locked cabinet in the shop of course). Once you’ve got it home only a couple of pieces tape need to be sliced through on the top flap and the whole package opens easily and safely.


Tiny Arcade Space Invaders

Size comparison with a AA battery


A closer look

They’re certainly not kidding about it being tiny. Once unpacked it stands just 9cm (3.5″) tall and 4cm (1.5″) wide. It’s powered by 3 AAA batteries and a set are supplied inside it. There’s an on/off switch on the rear although I won’t be using that so much myself. The device goes into sleep mode if you don’t touch it for 30 seconds and so long as you let it do this it maintains your high score. I think that’s well worth sacrificing a little battery life for.


Tiny Arcade Space Invaders

Back panel and battery compartment


What does it look like?

By default the game ships in ‘demo’ mode so you need to turn the power off and back on again when you first open it. Doing this basically resets it, something I didn’t do at first, leaving it stuck in perpetual demo mode. Chalking that one up to one of those rare occasions when it actually pays to read the manual!

There is a key-chain on the rear of the cabinet, though why anyone would want to attach it to their keys is beyond me. Still, it doesn’t interfere with using the device and it isn’t visible when the device is on display so it’s not really an issue. If it really bothers you it could be removed easily enough by snipping through the metal attachment loop with some wire cutters.

Once it is turned on you’ll immediately notice just how good that little screen is. I’m not sure what sort of technology it is using, but whatever it is, it’s very clear and vibrant. A particularly nice feature I noticed was that the ‘Space Invaders’ sign above the screen lights up when it’s turned on. This really helps to recreate that authentic arcade cabinet appearance.


Tiny Arcade Space Invaders

Screen is crisp, clear and vibrant


What does it sound like?

The sound also impressed me too, being both loud and clear with no distortion. One small criticism is that I couldn’t find a way to alter the volume or mute it. Thankfully it’s set to a sensible level and I didn’t really feel the need to change it. It might be an issue if you wanted to play it next to someone trying to sleep or watch TV though.


Tiny Arcade Space Invaders

High Score is saved so long as you don’t turn the power off via the rear switch


How does it play?

Incredibly well actually! It’s an extremely faithful version of the game we all know and love. Despite my large hands and the tiny joystick and fire buttons I was able to control my ship and fire away without an issue. My fingers didn’t block the screen either which was another thing I was concerned about. The screen is easy to see, even for me wearing varifocal glasses. As I mentioned earlier the game saves your high score so that urge to have ‘one more go’ to get a higher one is as strong as it ever was.


Videos

Here’s a couple of videos of it in action. They only show the demo running but should give you a good idea of how the game plays. The funny noises at the start of the first video are just Vector chirping away to himself, nothing to do with the game!


Worth a buy?

Absolutely. I’m no Space Invaders aficionado by any means but to me this seems like a pretty accurate replica of both the arcade cabinet and the game itself. Space Invaders was one of the first arcade games I ever played as child alongside Asteroids and Pacman. This little package really encapsulates that early 1980’s experience perfectly for me and all within a cabinet that fit’s in the palm of my hand!

There are a lot of copycat products that offer dozens, even hundreds of games but they rarely have the official games on them and tend to be full of rubbish clones. They certainly don’t have the game specific arcade cabinet designs like the Super Impulse ones do which is quite a big deal to me.

These little arcade cabinets retail for around £25 although occasionally pop up in sales for less. I got mine from Game (a physical shop in the UK) but you can get them online from Amazon and other places too.

Whether you buy it as a cool shelf ornament or to actually play on I think it’s a terrific little device and well worth the money. In fact I’m so impressed with it that I’ll be picking up some more of the range so I can build up a mini arcade of my own!

Fusion Issue 4 has arrived

Fusion Issue 4

This morning the latest edition of Fusion magazine, issue 4, dropped onto my doormat. There’s quite a variety of interesting gaming content including a look at the Picade, PlayStation Classic and reviews of Spiderman and Hollow Night. There’s also articles about the Robocop arcade game, the history of Super Monkey Ball and even a ‘Retro Man Cave’ article looking at the Pioneer LaserActive.

There’s quite a bit more I’ve not covered too, but despite all that, I can’t help but feel short changed by the complete lack of Commodore related content this month. There’s simply nothing about my beloved machines at all. The most relevant thing I could find was an article about joysticks. Still, that’s the chance you take with any multi-format publication I guess. Hopefully in the next issue they will redress the balance!

Should any of those subject areas I’ve mentioned sound interesting then you might like to visit their website to order your own copy. However, if you’re mainly interested in reading about Commodore related stuff then I wouldn’t blame you for wanting to skip this issue.

If you’ve never heard of this magazine before then you might like to take a look at my overviews of the previous 3 issues here: Issue #1, Issue #2, Issue #3.


Fusion Issue 4

Interesting article about retro Joysticks

Mono Review

Mono

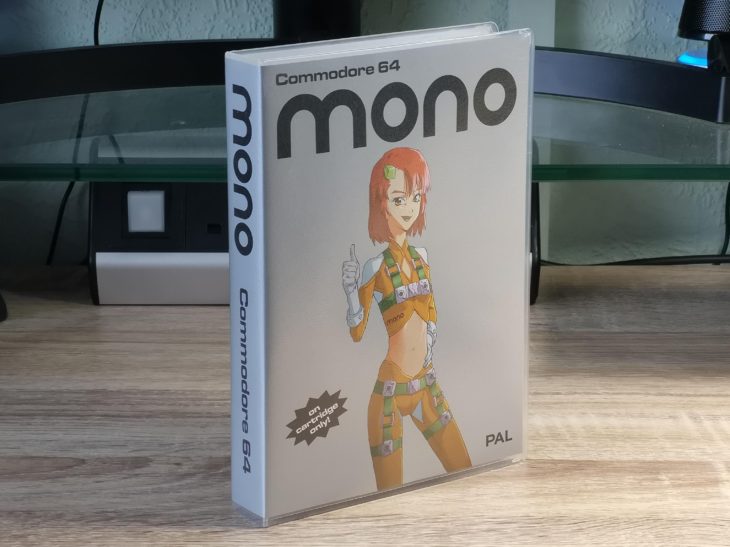
Mono is a brand new PAL game for the Commodore 64 created by a couple of guys in Switzerland, Clay Spoerri and Raphael Graf. It’s only available in cartridge format and costs €35 plus postage from their website. I bought this pretty much blind a few months ago as there was little information about it online. Sadly my first copy was faulty so had to be replaced (thanks Raphael) but the new one works perfectly so I thought I’d write a little review in case anyone else is interested in the game.


Contents


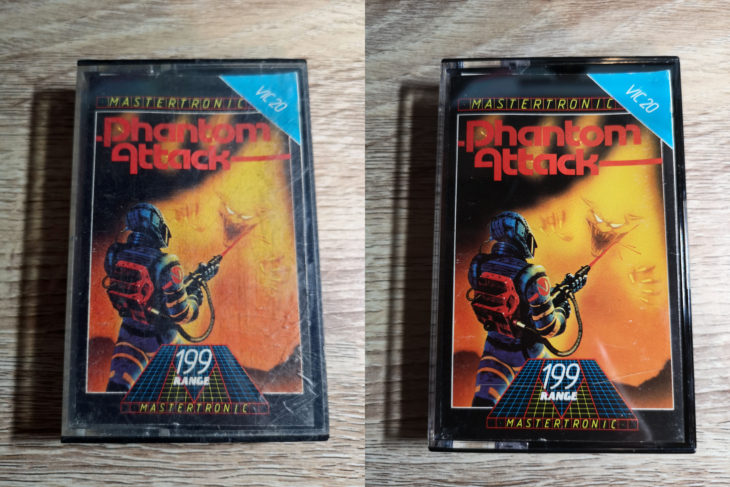
For your money you get a nicely designed plastic case with a cool manga inspired front cover featuring the pilot of your ship with some game screenshots and ship artwork on the back.
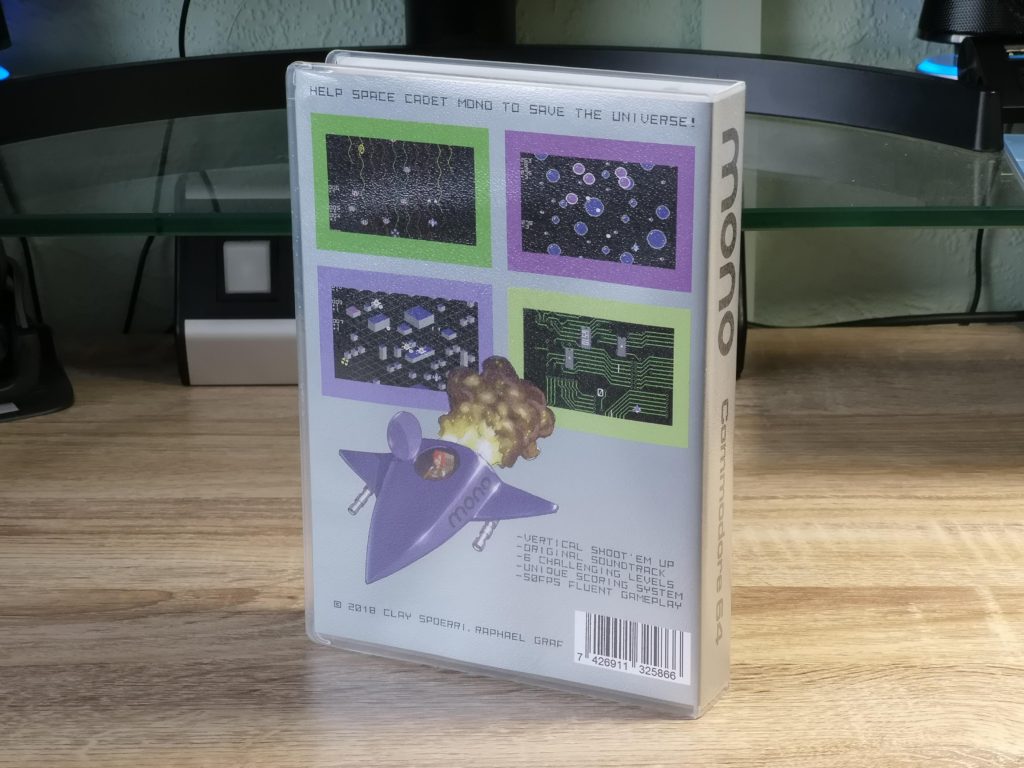
 

Mono

Mono Back Cover


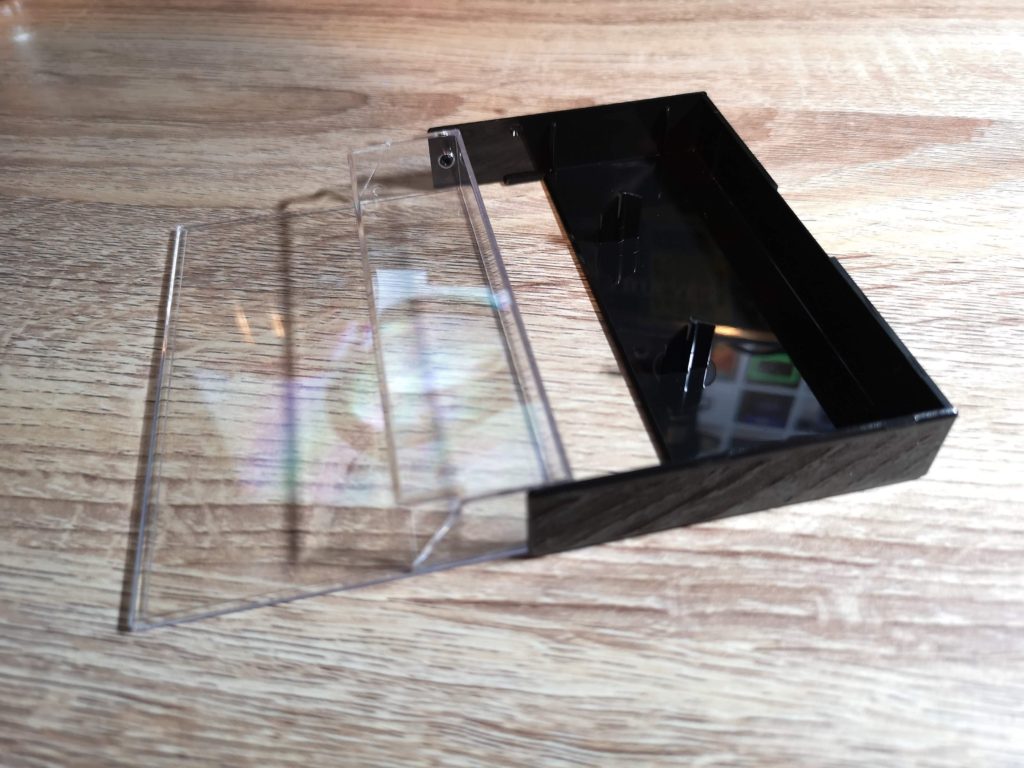
Inside the case you will find a sleek black cartridge with the title of the game etched onto it. The cartridge fits into the C64’s expansion port easily, unlike some other recent cartridges that required shoehorning in! You also get an instruction sheet, mono pin badge, a sticker, postcard and a beer mat/coaster. It should be noted that the latter three items all relate to other games, only the pin badge relates to mono. It’s only a minor complaint but I would have loved to see a sticker in the box of the girl or your ship instead. Also the cartridge is loose inside the case – a foam insert would have stopped it sliding around inside.
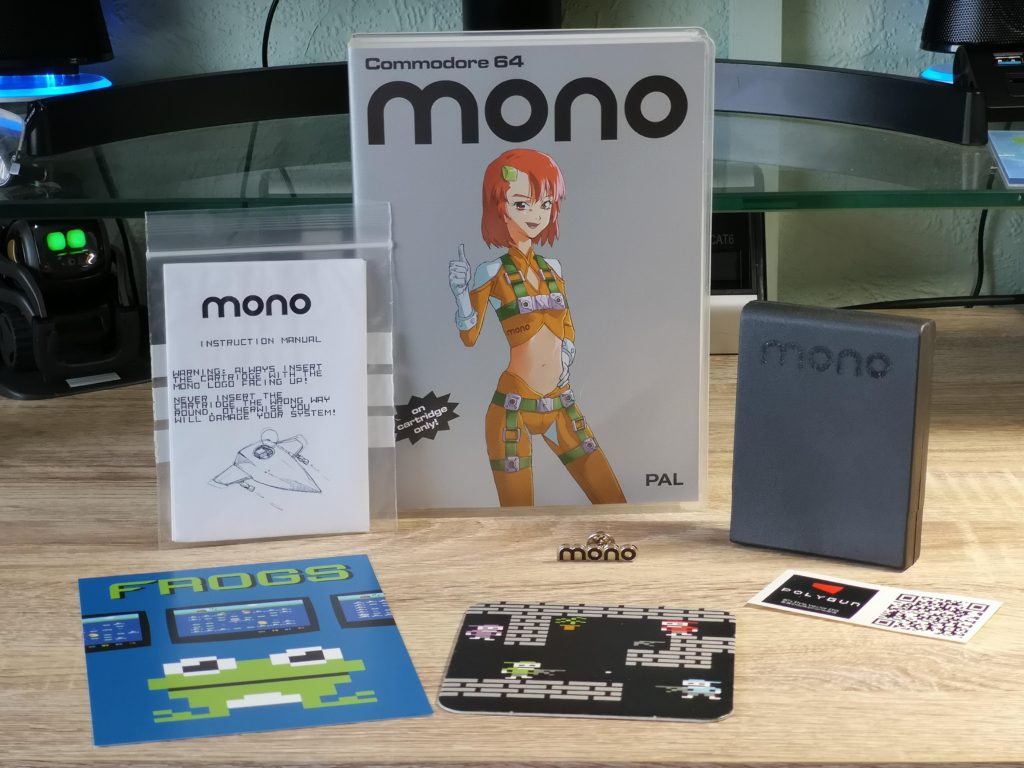
 

Mono

Mono Game Contents


Gameplay


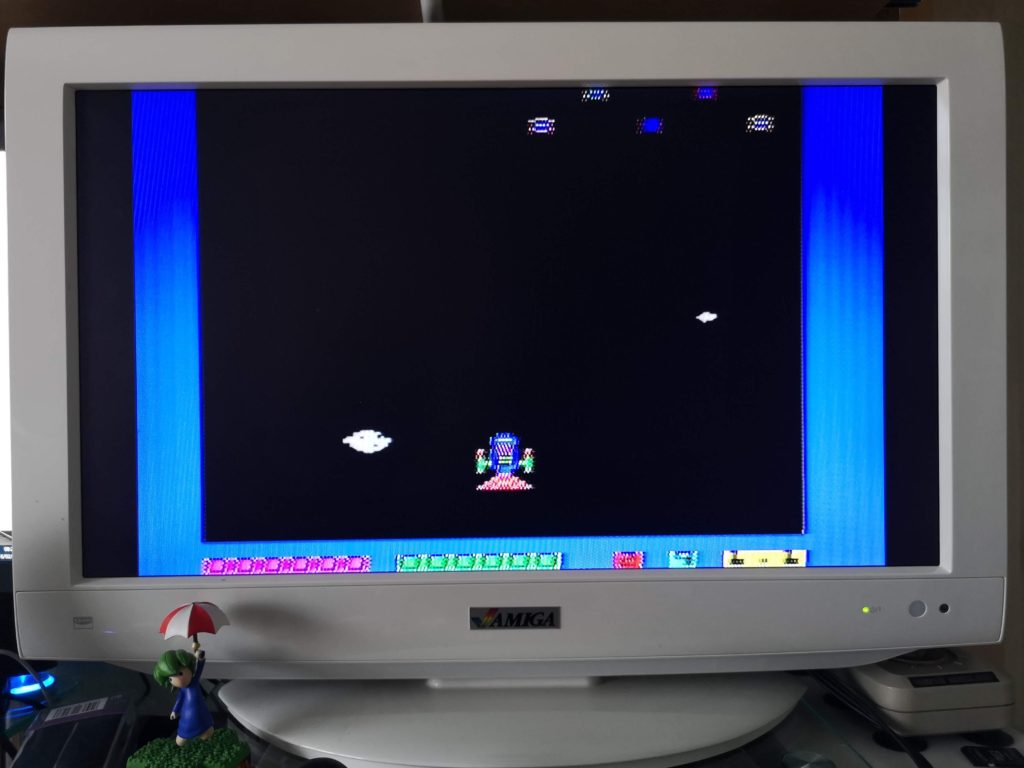
Mono is a vertically scrolling shoot ’em up that features a couple of fairly unique and pretty important gameplay elements that set it apart from similar games. Firstly your ship wraps around the edges of the screen. Move off the left side of the screen and you’ll reappear over on the right. Move off the top or bottom of the screen and you’ll reappear at the opposite end. Once you get used to this it’s actually a great gameplay enhancement and one that becomes essential with some of the bosses you’ll encounter later in the game. However it does take a few minutes to get used to and led to me dying on my first play-though. I kept accidentally moving off the bottom of the screen straight into the aliens spawning at the top!

The second unique feature is that your score and your ships life are one and the same. As you play you’ll notice a series of positive and negative numbers scrolling down the side of the screen. Kill an alien and a positive number will appear. Take a hit and a negative will appear instead. So long as you do more killing than getting hit you’ll be fine. However take too many hits and your score dwindles to zero leading to a ‘game over’.

Like many shoot ’em ups there are weapon power-ups to be had, but again these are linked to your score. Score well and power-ups will appear on screen for you to collect. However take some hits and you will lose your last power-up until you are back down to your standard issue guns. As soon as you start building that score back up the power-ups will start flowing again.
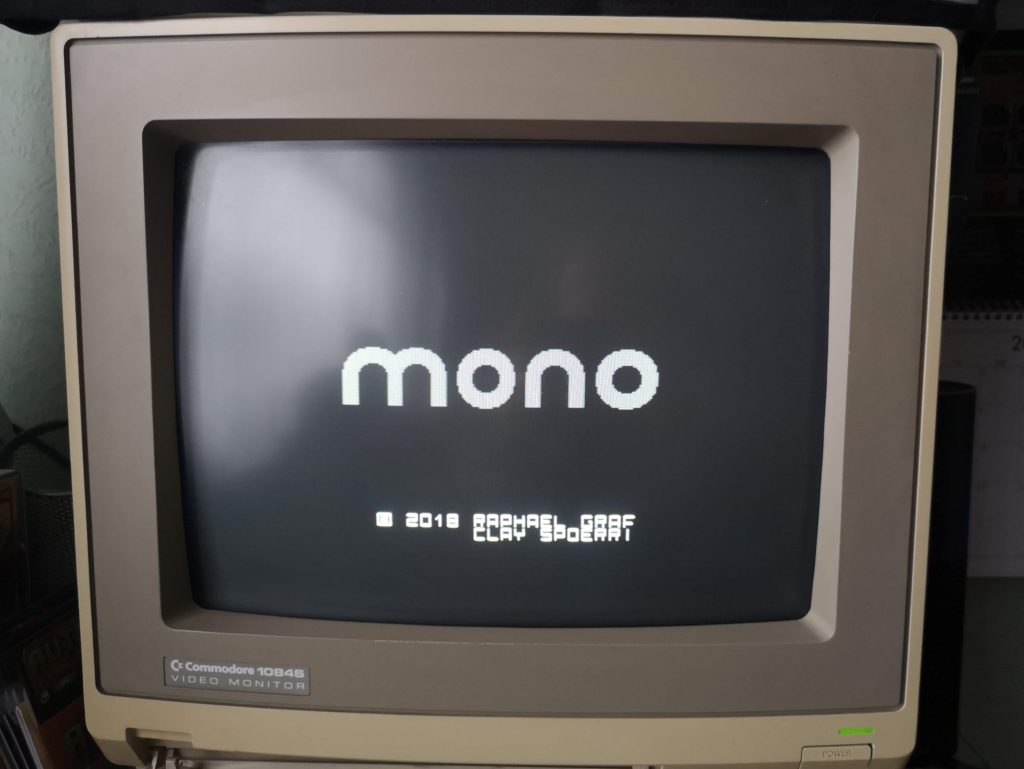
 

Mono

Title Screen


Level Design


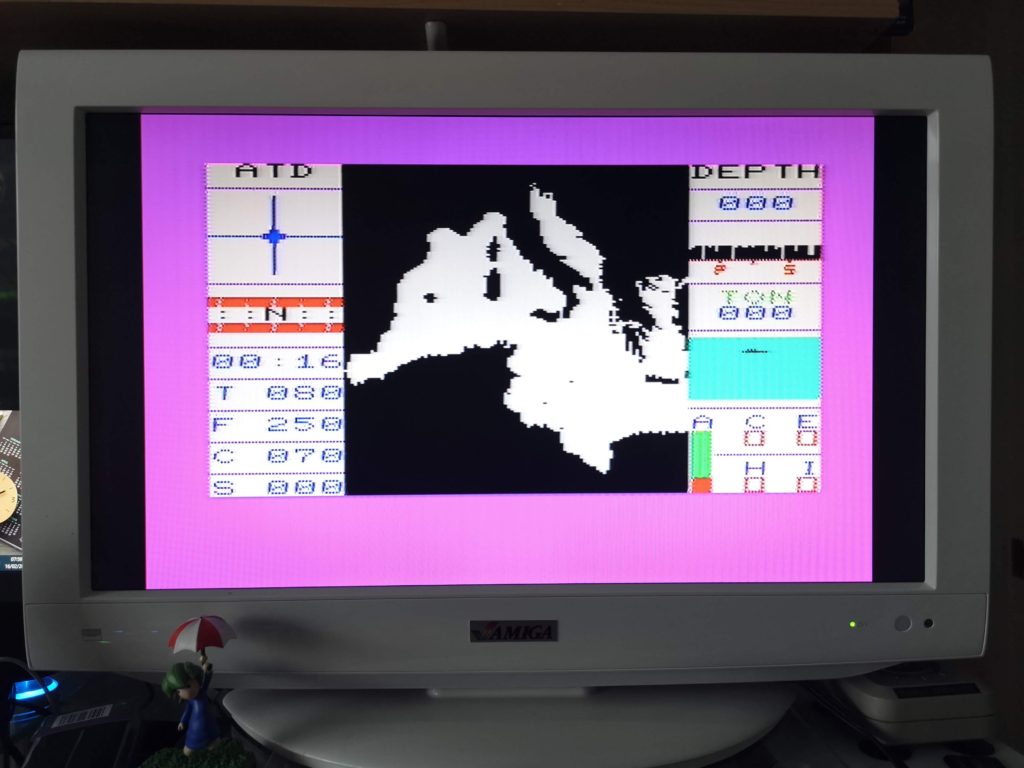
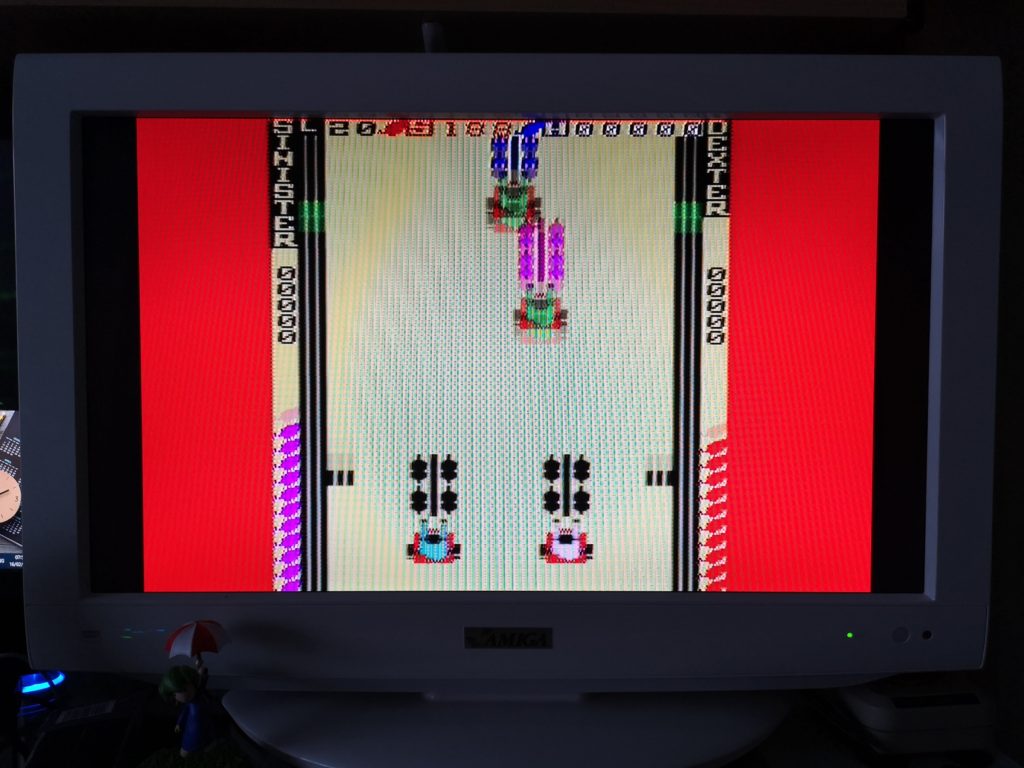
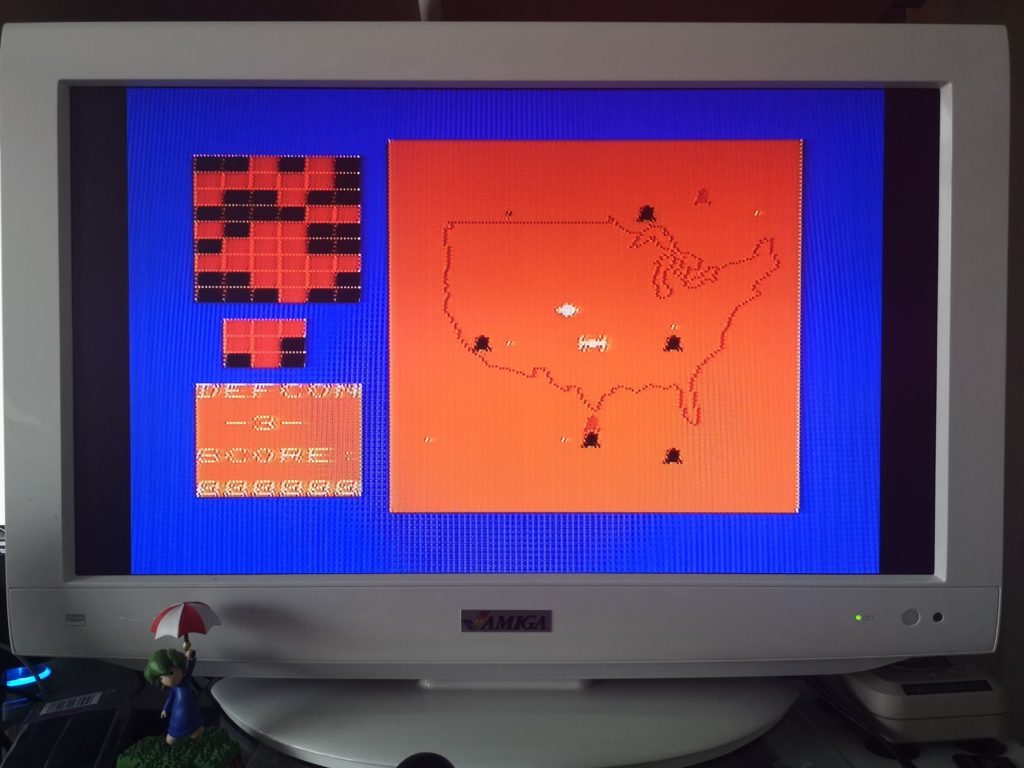
There are six levels in the game, each one themed differently with it’s own colour scheme, music, background, enemies and boss. The backdrops scroll down the screen smoothly but are pretty simply affairs, based around various shapes or patterns – bubbles, lines, pyramids, blocks and even a circuit board (populated by 6510 chips!).

The alien designs are also pretty simple but they’re nice and clear and each feature unique move and firing patterns. Some of the bullets fired home in on your position too which makes for some tricky situations if you don’t take the enemies out quickly enough. There is some overlap of enemy use from one level to the next but the game adds new enemies to each new level to mix things up.

Every level culminates in a boss fight where a group of bullet sponge enemies appear for you to take down before you can progress onto the next level. I found it was during these segments of the game that the screen wrapping feature came into its own, allowing you to stay literally one step ahead of the enemy, out of their line of fire, whilst chipping away at their health.

This slideshow requires JavaScript.


Game Length and Difficulty


You can play Mono using either the keyboard or a standard joystick which is the option I chose to go with. My thumb also appreciated the fact that your ship auto-fires. No need get cramp stabbing away at that fire button like a madman!

One thing that I have to mention here relates to the game difficulty and length. Those 6 levels are quite short, taking maybe 2-3 minutes to complete each. They’re also pretty easy to get through too as the score-life mechanic is very forgiving. To put this into perspective I was able to beat the game on my second play-though in around 15 minutes and that includes brief interludes where I was taking photos for this review!

I’m guessing that is a feature rather than an issue though. For me it seems the game is built around replaying it and trying to improve on that high score as you learn the move sets of the enemies and best ways to take them out without getting hit.

Sound


Mono has some great music playing throughout the game and it changes slightly for each new level. There are no sound effects at all in the game because all the SID’s voices are being utilised to produce the soundtrack. However this is no bad thing, at least to my ears as I really enjoyed the music.
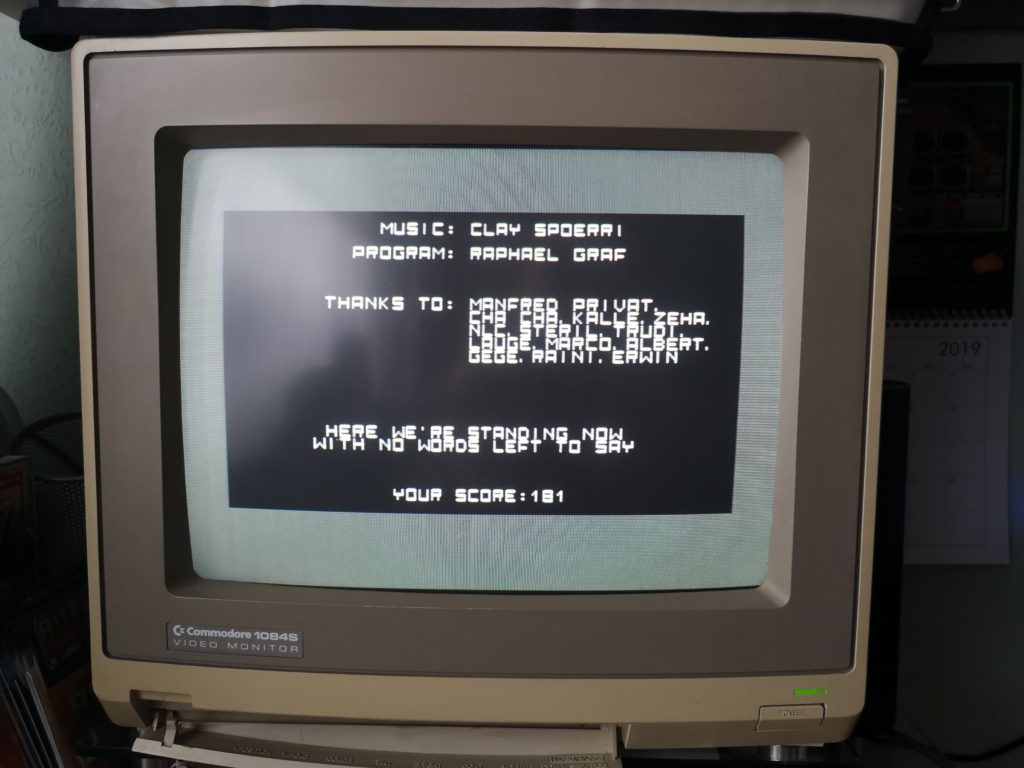
 

Mono

My High Score: 181


Verdict


I realise that for some, €35 for a game that can be bested in 15 minutes may not be perceived as value for money. If so you’ll need to way up the pros and cons I’ve mentioned already in order to decide if this game is for you. Sadly there is no digital purchase available so it’s the Cartridge version or nothing I’m afraid.

Speaking for myself I’ve really enjoyed my time playing Mono, although the graphics are a little simplistic the gameplay is tight and rewarding and the music is terrific. The physical packaging is fantastic and looks great on my shelf. I’ll definitely be replaying it often to improve my score and it’s the perfect game to play if you’re limited on time… you know from the outset that a game will never last more than 15 minutes!

I think the price is quite fair too and on a par with the majority of other cartridge releases so all things considered it gets a recommended from me. 🙂

Six Classic VIC20 Games Added & Remembered

I received a nice package in the post this week containing half a dozen classic games for the VIC20. Four of these are actually re-acquisitions after I foolishly sold them. In my defence, at the time I believed I no longer still had my VIC20 so had little use for them. The other two (Skyhawk & Myriad) I only ever had copies copies of. I wanted to have the original games in my collection.

The Six Game Packages


All but one of the games loaded fine, though a couple needed a second try, either from the flip side of the tape or in the case of Skyhawk, the correct side of the tape! Sadly Tank Commander just didn’t load at all, it never even registered a ‘found’ on either side of the cassette so that one goes back on my shopping list…


They’re all in great condition and complete with their little instruction booklets. I have to admit I’ve never really been a big fan of these early plastic clam-shell cases. They often tended to have ill fitting inlays that stuck out of the top or bottom of the case leading to them becoming dog-eared or worse. Thankfully these cases have fared pretty well considering their age and still look really smart.


A brief look at each game together with a screenshot


I thought I’d honour the occasion with a screenshot of each game taken after I got them to load (or not). Maybe it will jog a few happy memories for you too. I know I had completely forgotten what a few of these looked like until loading them up. Crucially I’d forgotten what they sounded like! The woosh and thrum of my harrier jump jet loading fuel and getting ready to fly in Skyhawk instantly whisked me back to my childhood for example.


Classic VIC20 Games

Skyhawk by Quicksilva – needs either a 3K or 8K RAM expansion. Make sure to load the correct side or you’ll get an ‘out of memory’ error! I used to love this game, even preferring it to Falcon Patrol on the C64. It just just seemed to play and sound better to me, offering a faster paced game that was just more fun to play. Even the bright chunky graphics had a charm of their own that FP couldn’t match.


Classic VIC20 Games

Myriad by Rabbit Software – needs 8K RAM expansion. A brilliant little vertical shoot ’em up with colourful graphics and great sound effects. I found this pretty addictive as a child taking turns playing against my school friend to try and get the highest score. This was one of the games I copied, probably off that same friend I was playing against. I’m glad I finally own the game now.


Classic VIC20 Games

Submarine Commander by Creative Sparks – needs 16K RAM expansion. Not quite on a par with Silent Service on the C64 but still an engrossing sub sim on the VIC that convinced childhood me that I was the Captain of a submarine!


Classic VIC20 Games

Chariot Race by Micro Antics – the only game here that runs on an unexpanded machine. Amazingly this was one of the few VIC games that had a 2 player option. There was no joystick option though, you both had to use the keyboard to control your chariot. With my much larger adult hands this is probably a bit restrictive now but as a child playing against my sister (and beating her all the time) it was never a problem!


Classic VIC20 Games

Computer War by Creative Sparks – needs 8K RAM expansion. This was basically a game based on the movie War Games. I suppose you could describe it as a variety of mini games where you had to crack codes and shoot down missiles in order to avoid WW3! This was another game that used to keep me entertained for long periods of time!


Classic VIC20 Games

Tank Commander by Creative Sparks – needs 8K RAM expansion. Sadly this is as far as it got when attempting to load it 🙁 It was a great game though, you had to control your little tank within a large scrolling map, taking out enemy tanks and destroying their bases whilst hiding behind cover avoiding their attacks. Think top-down World of Tanks using just 14 kilobytes of memory! 🙂


All of these games were played heavily as a child, particularly those that required more RAM. The extra memory afforded improved effects and more interesting, in-depth games.  I remember being especially fond of Skyhawk, Myriad and Tank commander back in the day. This makes the fact that Tank Commander wouldn’t load all the more disappointing. However I can’t help but be amazed that the other five games still loaded perfectly, nearly 40 years after they were made on a format that was never expected to last this long.


Classic VIC20 Games

Looks like there’s still a couple of original games I still need to track down before I can retire this tape! Incidentally the cassette inlay was designed and printed on the VIC20 by me using the Commodore 1520 Printer Plotter and BASIC.

CD32 Scene Issue 2 – Out now!

CD32 Scene Issue 2

Nearly six months after its debut, CD32 Scene Issue 2 is finally out. It’s lost the coverdisk, it’s a little thinner but it’s also cheaper too. Best of all I’m happy to report that the quality of the writing has vastly improved. It’s not perfect and there are a few printing errors near the front but it no longer spoils the content of the magazine.


CD32 Scene Issue 2

Reviews


Speaking of content… Review wise we’ve got Zerosphere, Heroes of Gorluth, Tiger Claw and Power Glove. There’s a look at some of the recent PD releases and the next part of the A-Z of CD32 games.


CD32 Scene Issue 2

A look at recent PD releases


There’s also an interesting overview of expansion cards available for the CD32 (both old and new), news, an interview with Richard Löwenstein and some game previews.


CD32 Scene Issue 2

Expanding the CD32


As the author is quick to acknowledge, the CD32 scene is quite small at the moment and there isn’t a massive amount of new content that can be covered. However I enjoyed everything CD32 Scene Issue 2 had to offer and think it was well worth the £3.99 asking price. I feel it’s worth pointing out that most of the games featured work on regular Amigas too, so even if you don’t yet own a CD32, the content is still mostly relevant.

Stop that Amiga drive clicking noise!

stop Amiga drive clicking noise

Ah, the Amiga’s Drive clicking noise… For some this is the Amiga’s heartbeat, for others like me, it’s a source of increasing irritation the longer I have to listen to it. The same was true back in the 80’s and it’s still true now, especially as I have 4 drives that all click in unison! It only occurs when the drives are empty so you could stick a disk in each one to shut them up, but I’ve never been fond of that solution.

Originally back in the 80’s I installed a ‘Noclick’ program off a magazine coverdisk that silenced my drive. Sadly I no longer have either so I had to find something else. The good news is that there are quite a few on Aminet (yes Aminet is still alive and kicking!). I tried several before finding one that would reliably silence all my drives. By the way, as a rule of thumb – if any ‘noclick’ program doesn’t silence your drive after about 10-20 seconds after running it then don’t use it – it’s incompatible with your drive type and could possibly damage it over time.


stop Amiga drive clicking noise

There are quite a few ‘noclick’ programs to choose from but not all worked for me…


The one that worked for me is:

noclick20_usr.lha – http://aminet.net/util/cdity/noclick20_usr.lha

For the record I have four drives (1x internal Chinon drive, 2x external Roctec drives and 1x Gotek with sound mod) and it silenced all of them.


Amiga drive clicking noise

Here’s the contents of the noclick20_usr.lha archive decompressed to my Ram Disk.


Like most things on Aminet it is compressed using LHA so use something like Directory Opus to unpack it to your RAM Disk. Once there you can copy it to a location of your choice to run as and when you need it. If you want it to run all the time then copy it to your WBStartup directory which will cause it to run automatically every time your boot your Amiga up.


stop Amiga drive clicking noise

Copy NoClick to your WBStartup directory to have it run each time you boot up your Amiga.

Myst 25th Anniversary Collection Review

Myst 25th Anniversary Collection

It’s finally here, about 8 months after backing this on Kickstarter – the awesome Myst 25th Anniversary Collection animated linking book! I received the digital GOG versions of the remastered games quite some time ago and the physical DVD’s just a few weeks ago. However the linking book is what I’ve really been waiting for and it finally arrived in the post today!


Myst 25th Anniversary Collection

Contents


It’s turned out to be a lovely collectors item, just liked I’d hoped for. It really does look like a well worn antique book with the way they’ve finished it with faux cracks and worn out fabric and gilding. The linking part is something that only a video can do justice to though so here it is!


When you open it you get a fantastic fly-past of the game world along with the theme music. The image is crisp, sharp and vivid and the screen beautifully hidden behind the page. This video plays automatically so presumably there is a hidden magnetic switch somewhere that is triggered when you lift the cover.

Along the bottom and side there are magnetic flaps that open up to reveal three hidden drawers. There’s a long shallow draw that runs the full length of the spine which I assume could be used to store the pen if you purchased it (I didn’t). There are also two big drawers which open out on the right. The upper one houses the seven game DVD’s and the other is empty on mine but would probably have stored the inkwell had I been able to afford to add that to my pledge.


Myst 25th Anniversary Collection

Linking Book Hidden Drawers


Cleverly hidden away from plain sight under the little ‘stains’ and ‘marks’ on the linking screen page are a number of control buttons. These let you control the volume and allow you to switch to another video from a different game should you wish to. There’s also a button that will pause playback.


Myst 25th Anniversary Collection

Spot the buttons!


A tiny micro USB port hidden under the large flap can be used to charge up the battery for the LCD screen that’s hidden inside. Plug it into a PC and you’ll discover that the book actually has around 500MB of storage on board, most of which is used. There’s 4 folders on the device. One is used to store the actual video that plays when you open the book. The second is full of videos from the various games for you to swap in and out of the ‘play’ folder. A third folder contains a number of game screenshots and box art while the fourth is basically empty besides a readme that suggests you can store your own files in it. There’s also a handy link to re-download the video files should you ever need to.


Anyway I’m delighted with the finished product and will proudly display this on my gaming shelves for years to come.  I am a little disappointed that I couldn’t get the inkwell but it was around £80 extra and I had to draw a line somewhere!

Here’s a selection of photos from various angles showing the book and screen in more detail.


How to Format an SD Card for Amiga to PC File Transfer

SD Card Amiga PC Transfer

Introduction

The whole benefit, to me at least, of having an SD card reader on my Amiga 500 is to allow me to transfer files to and from a PC. In order to do this the SD card needs to be formatted in such a way as to be readable by both systems. Turns out it’s not too hard to do. This post will show you exactly how to achieve this and also serve as a reminder for myself in the future when I inevitably forget what I did!


Stuff You’ll Need

I used a MicroSD card for this task but the process would be the same for a regular full-size SD card too. I have personally got this working with a 32GB card and more recently with a 200GB MicroSD card! Please note that I have a Vampire Card in my Amiga (which has a MicroSD card slot) and use Apollo OS (Coffin R34 – Amiga OS 3.9). This solution is based on that scenario. If you want to find out more about my Vampire upgrade please read about it here and adding an SD card reader here.


By the way, this should work with most SD cards you may have lying around. I used to link directly to the card I bought but time stays still for no man and it is no longer available. However this 32GB MicroSD Card is almost identical.


Formatting the card on a PC

First things first – the card MUST be formatted on the PC, not the Amiga. The format we need to use is FAT32 as this is easily readable on the Amiga whilst still being compatible with the PC. The main disadvantage with FAT32 is it has a 4GB file size limit but this should never really be an issue with the Amiga as most of the files we will be dealing with are only a few MB in size.

I’m using Windows 10 which annoyingly doesn’t have a native FAT32 format option (only NTFS or exFAT). After searching around I settled on this free 3rd party FAT32Format app to get the job done. If you already have some FAT32 formatting software then by all means go ahead and use that. If not then this one is free and very simple to use, you don’t even need to install it, just run the executable.

  • Run the .exe file you just downloaded and make absolutely sure that the drive letter under ‘Drive’ matches that of your SD card.
  • Leave the ‘Allocation unit size’ at the default setting.
  • Give your card a name under the ‘Volume label’ heading but keep it short. No more than 11 characters and avoid using any symbols. In the example below I called mine ‘AMIGA SD’.
  • Ensure ‘Quick format’ is ticked (otherwise it’ll take forever) and then click ‘start’.
  • When the format warning box pops up click on ‘OK’.


SD Card Amiga PC Transfer

View after the card has been formatted


A few moments later you should have a nicely formatted FAT32 SD card! As you can see from the image below it has been correctly formatted as FAT32 and shows approx 29GB of free space. It’s perfectly normal to lose some space when formatting disks so don’t worry that it doesn’t exactly match the capacity of your card.


SD Card Amiga PC Transfer

SD card properties viewed in Windows after formatting.

Configuring the Amiga side of things

Now it’s time to take the SD card over to your Amiga for the next stage of the process. This is going to involve editing a DOSDriver on the Amiga with the parameters needed to successfully read and write to your SD card. Unless you’ve been messing around with SD Cards already there won’t be an SD0 device in your Amiga’s SYSTEM:DEVS/DOSDrivers directory. Fear not though because you can finding it lurking in the STORAGE directory (SYSTEM:Storage/DOSDrivers) waiting to be put to good use. Find the SD0 file and open it in your editor of choice, for me that’s the one built into Directory Opus. Edit the file so that the contents look exactly like the one in the image below:


SD Card Amiga PC Transfer

SD0 DOSDriver File contents (shown in Directory Opus Editor)


SD Card Amiga PC Transfer

Slightly clearer copy of the config (pasted into Wordworth to make it clearer to read)


Save your changes to SD0 and close the editor. This next part is particularly crucial otherwise, despite all your efforts thus far, the card will still be unreadable. You need to move the file OUT of SYSTEM:Storage/DOSDrivers and place it INTO the actual SYSTEM:DEVS/DOSDrivers directory. Doing this will force the Amiga to read the config on boot and enable it to recognise an SD card when present. You can do this in a number of different ways but again my preferred method is Directory Opus.


SD0 DOSDriver File Content

Edited SD0 correctly placed in DOSDrivers Directory


Once you’ve done this, assuming the card is already inserted, reboot your Amiga (CTRL-A-A) and when Workbench has loaded back up you should see a lovely SD card icon on the screen similar to the one below.


SD Card Amiga PC Transfer

SD0 Icon on Workbench


The next image shows a 200GB MicroSD card working and you can see the Amiga recognising the card capacity as 183.3G.


SD Card Amiga PC Transfer

200GB MicroSD card working on the Amiga. 183.3GB of space 🙂


Here’s a regular 32GB card working recognised as being 29.1GB capacity. If you remember from earlier on that reported size is pretty much the same as how Windows saw it.


SD Card Amiga PC Transfer

32GB MicroSD card working on the Amiga. 29.1GB of space.


SD Card Amiga <-> PC Usage


I find my Amiga/PC formatted SD card incredibly useful, not only for transferring files between systems but also for storing CD’s on. I don’t have a CD drive on my Amiga but I do on my PC. Any Amiga CD’s I get, such as the Amiga Future Coverdisks, I simply copy into a folder on the card and they’re instantly available on the Amiga. The 200GB card is particularly useful for this purpose as it can potentially hold nearly 300 CD’s plus all my other stuff.


I have noticed that SD cards work a little differently on the Amiga. You can’t just insert one and expect it to appear in Workbench. The card needs to be present in the card slot before you boot your Amiga up. Likewise, if you remove it, it will still show the icon on your Workbench. For these reasons I’d recommend always inserting the card whilst your Amiga is off and not removing the card until you’ve shut down your Amiga just to be safe. If I ever find a way around this I’ll update this post.


Anyway, I hope this post proves useful for a few people, I know it took me quite a lot of stumbling around before I brought all the parts of the puzzle together!


Solo Flight – Classic C64 Purchase

Solo Flight Cover

Although I already own Microprose Solo Flight on cassette tape, I’ve been keeping my eye out for a decent copy of the disk version for quite some time now. Happily I recently came across a fine specimen, so here it is! The wallet case and insert are in pretty much mint condition, as is the instruction booklet. The three maps of the locations you can fly around in the game (Colorado, Washington and Kansas) also look brand new. Clearly this has either been very well looked after or not seen much use. The disk label is on wonky but it will have been like that from new, that’s just how they came sometimes unfortunately. I was delighted that the disk loaded up no problem first time around, but I’ll still make a backup copy just to be safe.

I used to play this game for hours on end back in the 80’s. The graphics are pretty basic and it probably runs at around 2 FPS but none of that mattered. It felt like you were really flying a light aircraft. I used to love doing the mail delivery missions too – provided a real sense of purpose to it all.

Here’s a few photos of the game…

Vic-20 Attic Find – Reacquainting myself with an old friend

VIC-20

Whilst rummaging around in the attic looking for a box of lights during the Christmas 2018 period I stumbled upon something amazing. It looked innocuous enough, a really dusty brown box tucked away under the eaves.  A box that I’d completely forgotten about. A box that hadn’t seen the light of day since I moved into our house 24 years ago. The contents had probably in that box for years before that too. What am I rambling on about? Only my Commodore VIC-20 that’s what. The very first computer I ever owned or indeed used! Not an eBay re-acquisition but the actual machine that my parents bought me for Christmas when I was 12 years old!


VIC-20

Peering inside the box my VIC-20, C2N, Zipstick and PSU were all visible


The box was chock full of goodies, some in better condition than others. My VIC-20 had held up quite well albeit slightly yellowed. Unfortunately the sockets on the underside of some of the keys had become brittle and broken apart. When I removed the faux leather cover several simply fell away. The space bar had come off too but fortunately that just clipped straight back on.


VIC-20

VIC-20 Keyboard looking a little worse for wear.


Besides the VIC, a lot of my old software was in the box too including all my old cartridge games. There was also a vintage cassette case containing most of my old tape games too. I used to have a load ‘school playground’ acquisitions as well but they where nowhere to be found sadly.


VIC-20

A whole bunch of cartridge games…


VIC-20

My VIC-20 cassette games


Thankfully all of my more esoteric accessories were present and correct. My Adman Speech synthesizer, Vixen switchable 16K RAM pack and my Stack 4 slot cartridge expander


VIC-20

RAM pack, cartridge port expander on top of a stack of cartridge games 🙂


VIC-20

A better look at all the cartridges and accessories


Once I’d made sure that pretty much everything I remembered from my childhood was present and correct I naturally wanted to see if it still worked! To be safe I decided to open up the case and check that nothing had fell inside that might cause a short circuit. I also checked that none of the capacitors had degraded or leaked onto the motherboard. Happily, besides looking a little dusty the old girl looked to be in good condition!


VIC-20

A look at the VIC-20’s motherboard.


The original PSU still worked but as they can be notoriously bad for your Commodore’s health if they fail I didn’t want to take any chances. To protect my VIC-20 I used my SAV64 between the VIC-20 and PSU which would prevent any errant voltages reaching the motherboard.  Suitably protected I plugged everything in and turned on the power. I have to admit I was fearing the worst so I was relieved when I was greeted by a lovely glowing red LED! A very good start.


VIC-20

She’s alive!


Next I needed to hook it up to my TV. Although the modulator was in the box there was no way I was going to try and use that, the picture quality would have been appalling. I grabbed my C64 video cable to see if it would fit but unfortunately it didn’t. The VIC-20 uses a 5 pin DIN socket whereas my C64 uses an 8 pin one (for the extra chroma & luma info presumably).


VIC-20

The 5 pin video DIN port


Not to be deterred I rummaged through my boxes of old cables. Eventually I found a suitable composite cable that I used to use for my C64 before upgrading. I plugged it in, switched everything on and with some trepidation, switched the TV over to its’ AV input channel. I couldn’t have been happier when I was greeted with that familiar white and cyan screen. That message saying ‘**** CBM BASIC V2 **** 3583 BYTES FREE almost brought a tear to my eye.


VIC-20

A dear old friend says ‘hello’


Buoyed by this success I quickly dug out one of my favourite old game cartridges, Omega Race. Everything worked perfectly, the joystick, the sound, just as it had done the last time I played it about 30 years ago. Incredible!


VIC-20

Omega Race


In the coming months I will be trying to restore it to it’s former glory, cleaning up the insides, adding heat sinks to some of the chips to prolong their life and possibly retrobriting the case. I will also be looking into the current VIC-20 scene and expanding my game collection, trying to get hold of games that I previously only owned copies of. Not only that but I will be scanning my whole VIC-20 game collection and putting them on this site as 3D models for everyone to enjoy.