Lyonsden Blog

Tag - Commodore

Trilogic 64 Doctor Diagnostic Cartridge Review

Trilogic 64 Doctor

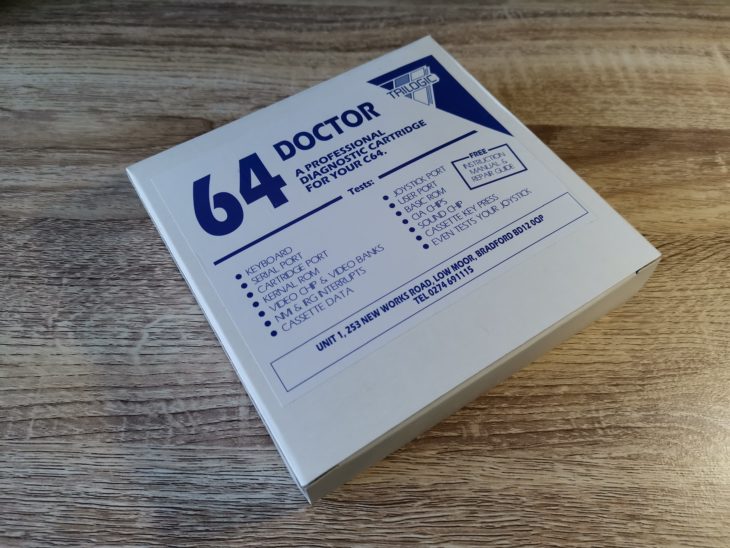
I picked ‘Trilogic 64 Doctor’ up a little while ago as I thought it might come in handy one day. As it had been sat around on a shelf for some time I decided it was time to have a play around with it. You would be forgiven for thinking that this was new old stock given that Trilogic (as we know it) ceased to be a long time ago*. However this is actually a factory fresh product, made under licence by the prolific Tim Harris of SharewarePlus.


Trilogic 64 Doctor

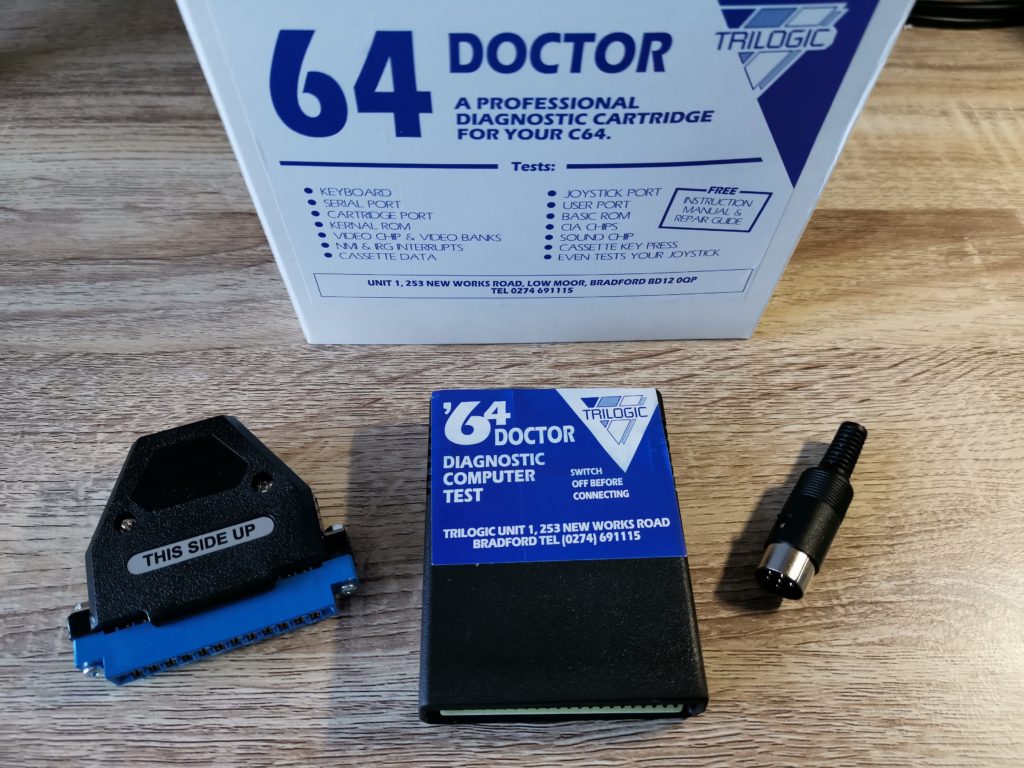
Here’s the contents of the box. From left to right. User port dongle, test cartridge and serial port dongle.


Inside the box you get an instruction booklet, some flyers for other Trilogic products, the Trilogic 64 Doctor diagnostic cart itself, a user port dongle and also a serial port dongle.


Trilogic 64 Doctor Instructions

Here’s the instruction booklet along with some very retro looking flyers for other Trilogic stuff.


What does it do?

So what does the Trilogic 64 Doctor actually do? Well there is a little clue in the ‘doctor’ part of the name itself. Basically you plug it in and it will then perform a barrage of tests on your Commodore 64, from RAM chips to joystick ports.

Here’s a list of the tests it can perform:

  • Keyboard
  • Serial Port
  • Cartridge Port
  • Kernal ROM
  • Video Chip & Video Banks
  • NVI & IRQ Interrupts
  • Cassette Data
  • Joystick Port
  • User Port
  • BASIC ROM
  • CIA Chips
  • Sound Chip
  • Cassette Key Press
  • Joystick(s)


Trilogic 64 Doctor

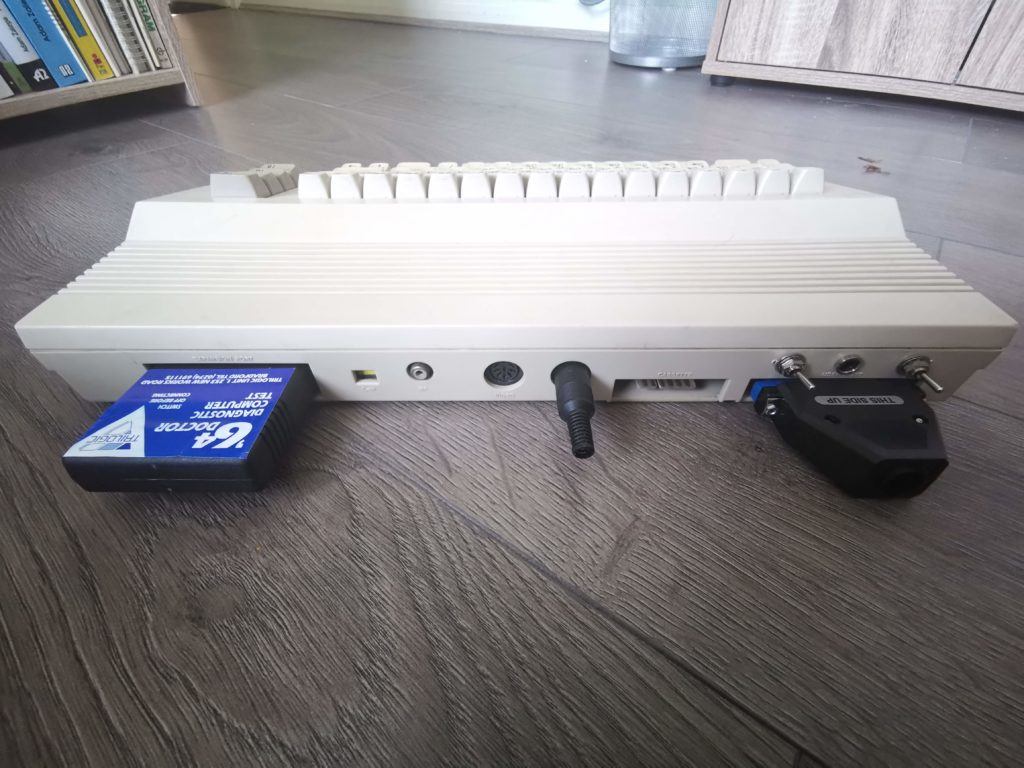
Rear of the Commodore 64 with cartridge and both dongles inserted.


Keyboard Test

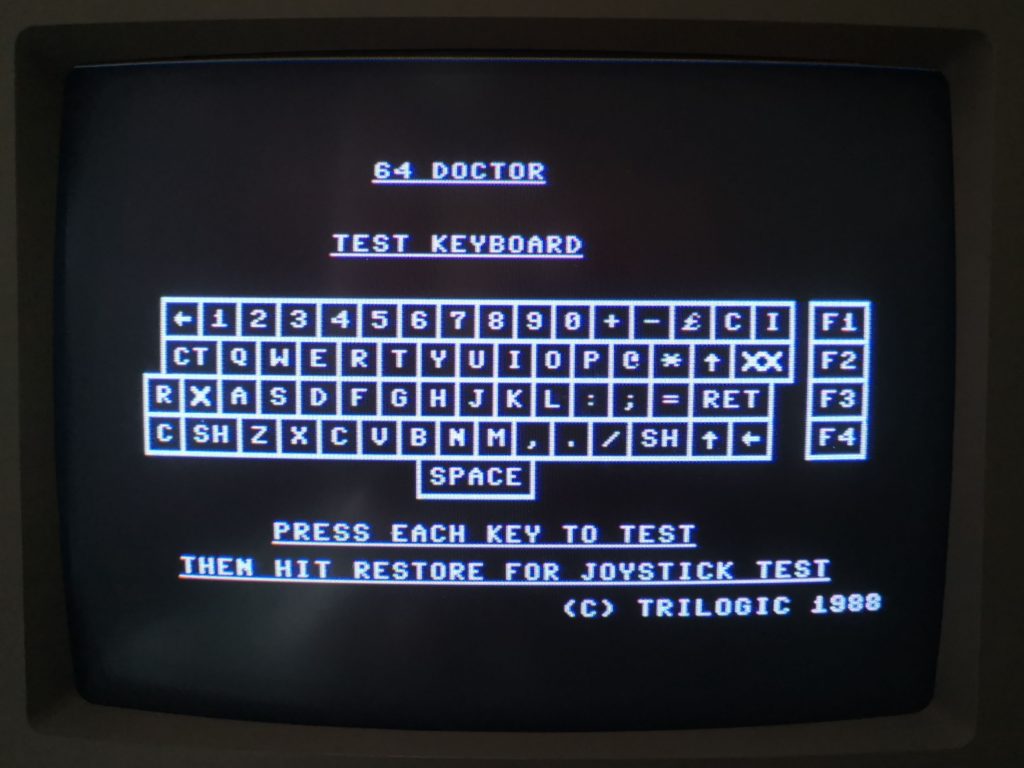
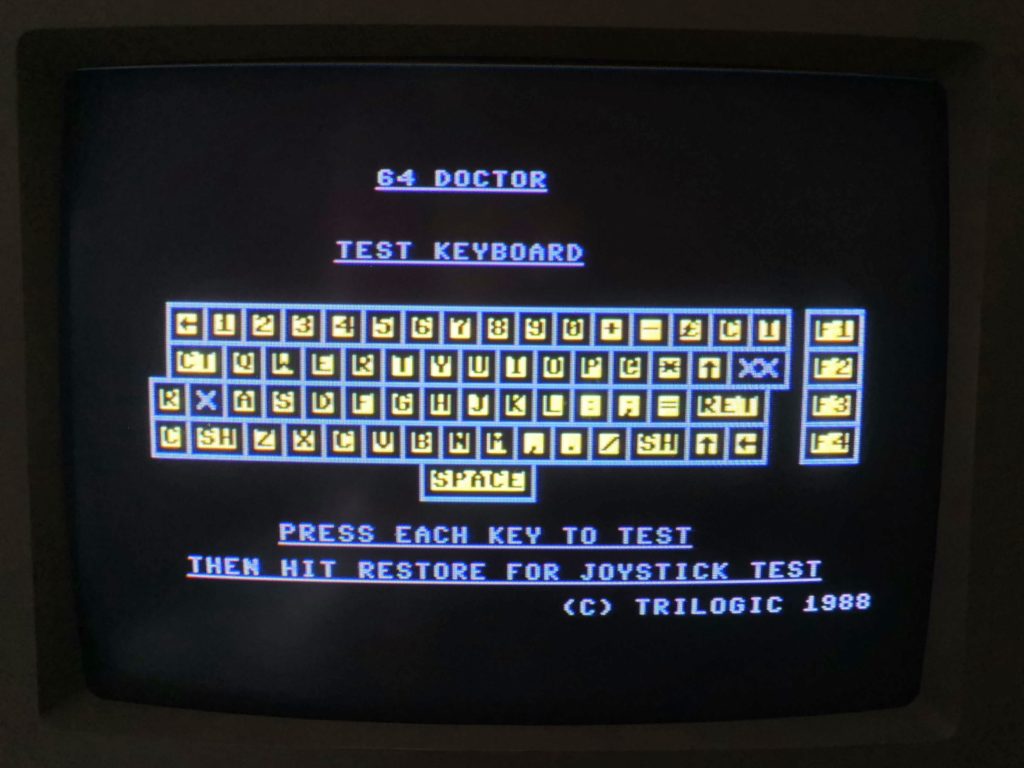
When you first turn your C64 on with the cartridge inserted you are presented with an on-screen keyboard. This is the keyboard test and allows you to quickly determine whether any of your keys are misbehaving. As you press each key in turn, their on-screen counterparts light up in yellow. If any don’t light up then you know there’s a problem. The restore key isn’t included in the test per se, but given it is needed to progress to the next test it will be obvious if it’s faulty!


Trilogic 64 Doctor

The Keyboard test screen


Trilogic 64 Doctor

Successfully passing the keyboard test


Joystick and Joystick Port Test

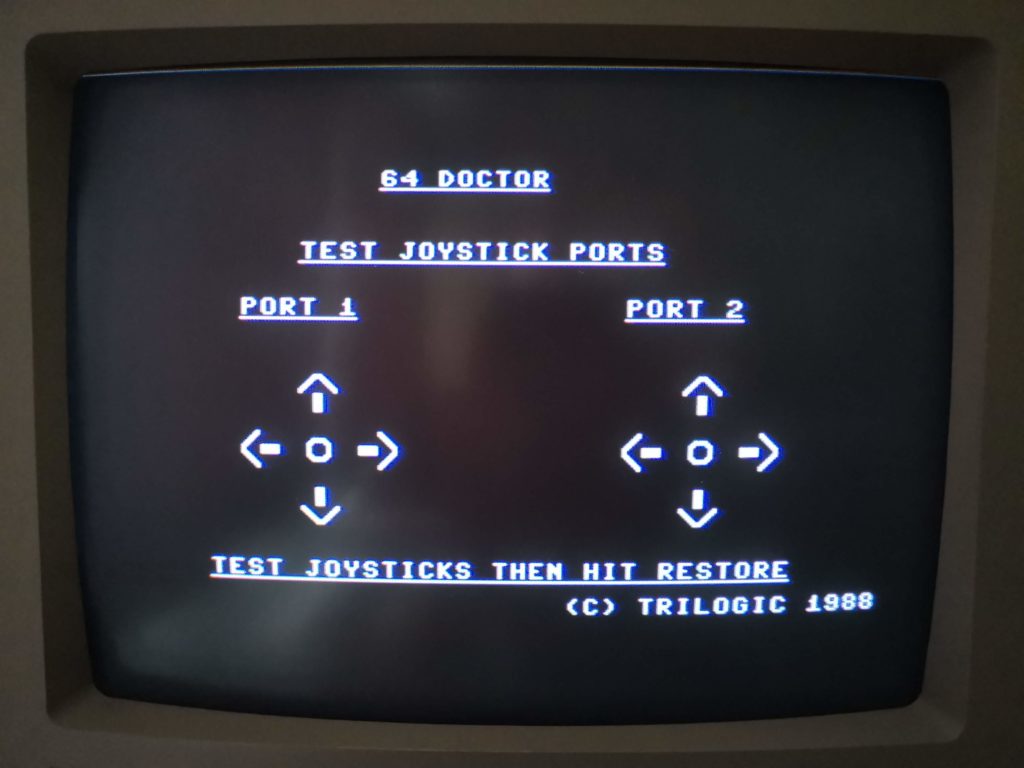
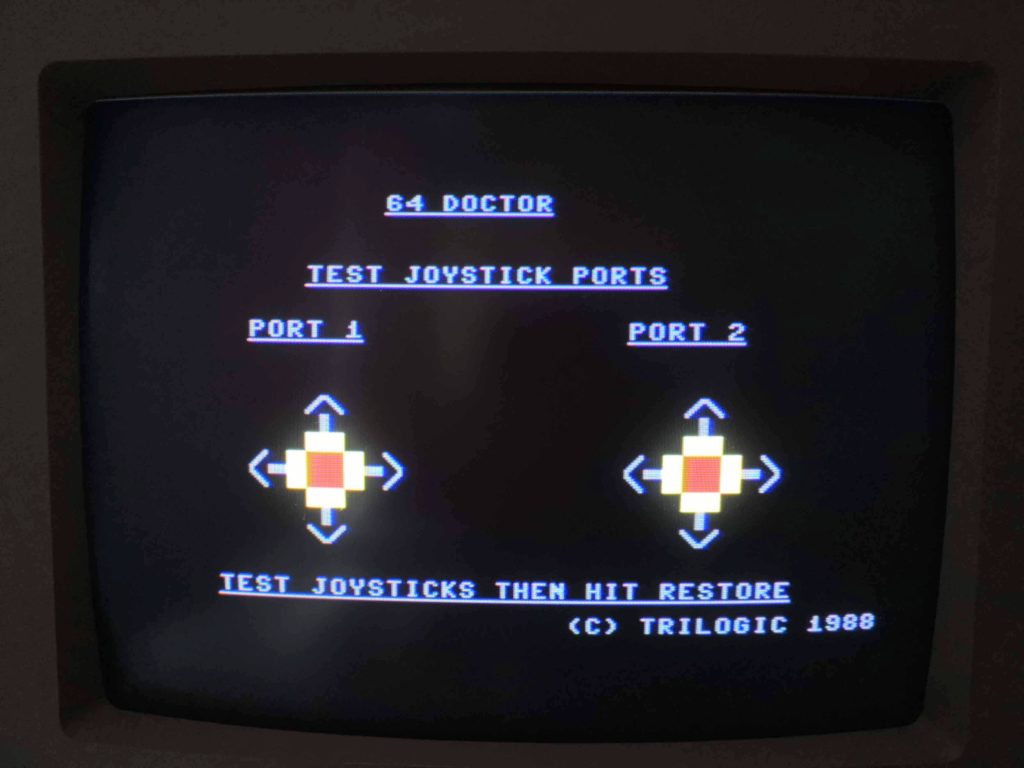
The next test is for the two joystick ports and of course whatever joystick you happen to have plugged in. Simply press up, down, left, right and fire with a joystick attached (in turn) to both ports. Like with the keyboard test, an on-screen visualisation of the presses should appear if all is working correctly.


Trilogic 64 Doctor

The joystick test screen


Trilogic 64 Doctor

Successfully passing the joystick test


Chip and Ports test

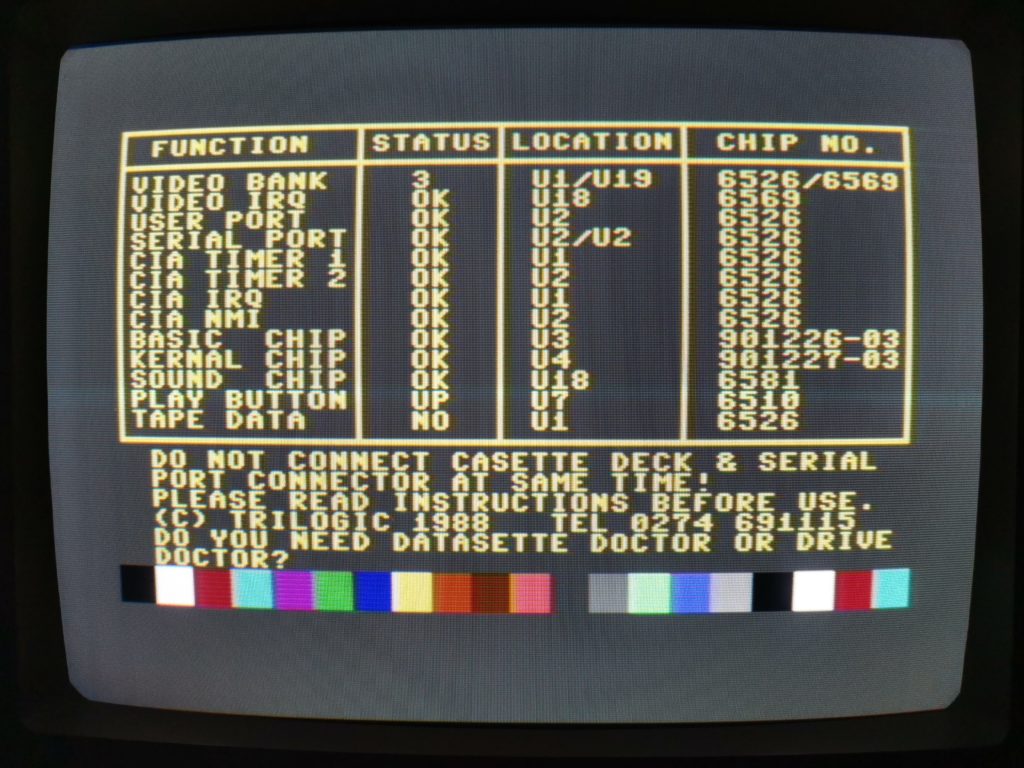
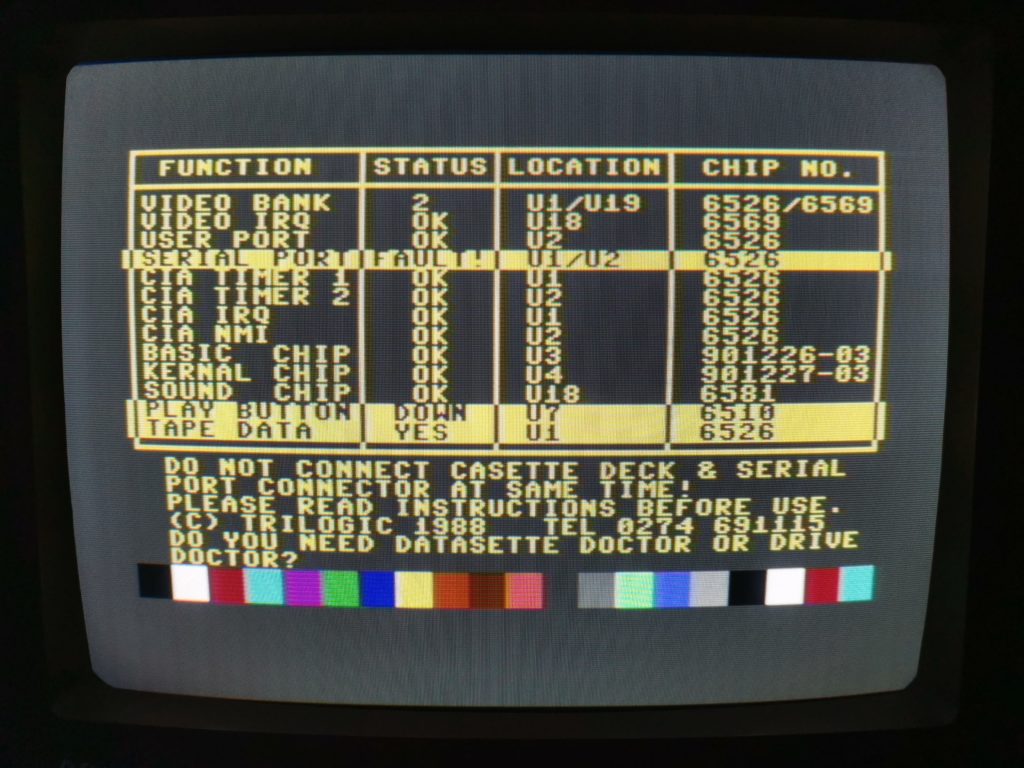
The final and probably most important test is that of the various chips and ports of the Commodore 64. This test includes both the User Port and Serial port so long as you have plugged in the supplied dongles. Video, SID, Kernel, CIA and several other chips are also tested too. If you need to test the cassette port then you must connect a datasette to it, after making sure you unplug the serial port dongle first.


Trilogic 64 Doctor

Successful chip tests


Trilogic 64 Doctor

Successful cassette deck/port test. Notice how the serial port lists a fault – this is because the serial port dongle has to be unplugged for this part of the test.


After the tests…

Once the tests have completed you will either be presented with a clean bill of health or a fault to fix. The included manual provides a wealth of useful information not just about faults but also how to fix them. It goes into great detail about common reasons for each fault, how to troubleshoot them and ultimately what you can do to fix them. It even goes as far as recommending other useful tools that you may need to diagnose faults or perform repairs.


Conclusion

With the inclusion of the two dongles this offers a very comprehensive phalanx of tests for your Commodore 64. Combined with the informative manual, whether you need to troubleshoot a faulty C64 or just want to have it ‘in reserve’ in your retro toolkit this is a recommended purchase.

If you fancy getting hold of one yourself, head on over to SharewarePlus – it’s £25 at the time of writing.


*Curiosity got the better of me so I did some googling. Although Trilogic Computers does still exist, it is now a PC repair business. It’s still in Bradford only located at a different address. A look through the records at Companies House indicate that they changed from their old address to their current one back in 1997. Maybe one day when I’m in the area I’ll pop in with my old Expert cart and ask them to fix it!

TerribleFire 330 – CD32 Upgrade

TerribleFire 330

One of the things I’ve always loved about the Amiga is it’s expansion possibilities. There was always some upgrade or gizmo you could add that would let you do something new, or do something faster. The TerribleFire 330 is touted as being able to do both of these things and then some. Naturally, as soon as I spotted it on AmiBay I wanted one…

What is it?

The TerribleFire 330 is an expansion for the Amiga CD32 that adds many new features to the console. It’s attached by means of a ‘Riser’ card to the expansion port which itself offers some benefits to the user. Here’s a quick run-down of the extra features it offers:

  • 68030 CPU over-clocked to 50Mhz
  • 64MB Fast Ram
  • IDE Interface
  • RGB Video Port (on the riser)
  • PS/2 Keyboard port (on the riser)

In a nutshell, it converts your CD32 into a souped up Amiga 1200 with built-in CD-ROM drive.


A Closer Look at the TF330
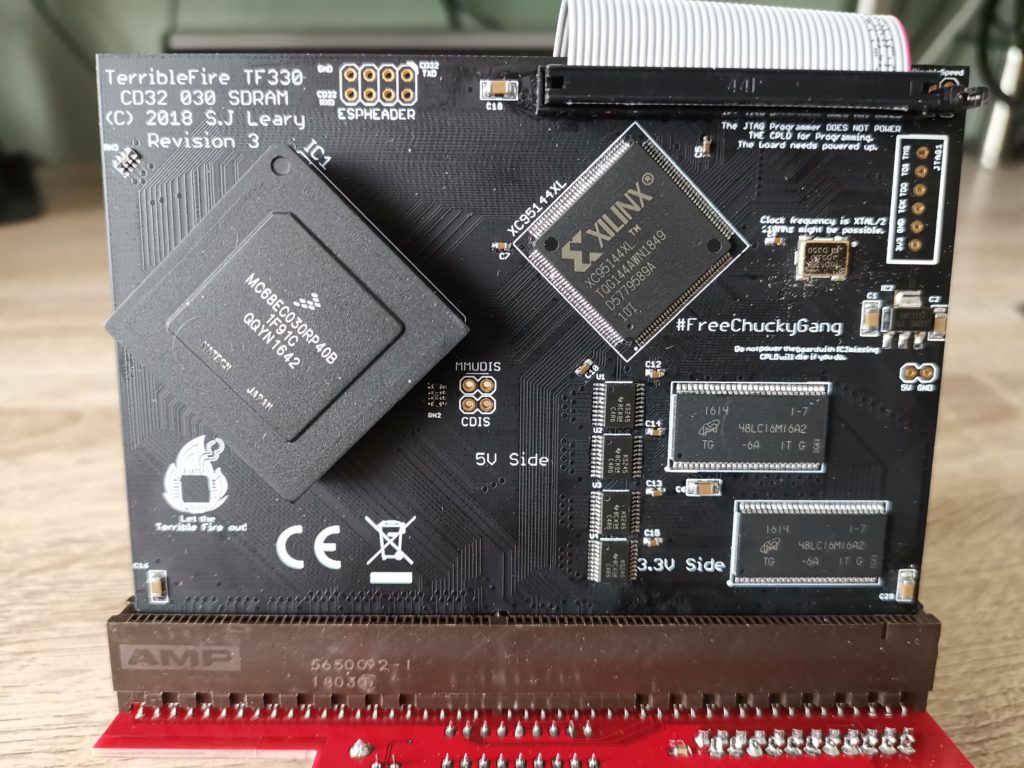
 

TerribleFire 330

Here’s a close-up of the top of the board. CPU on the left, IDE connector top right.
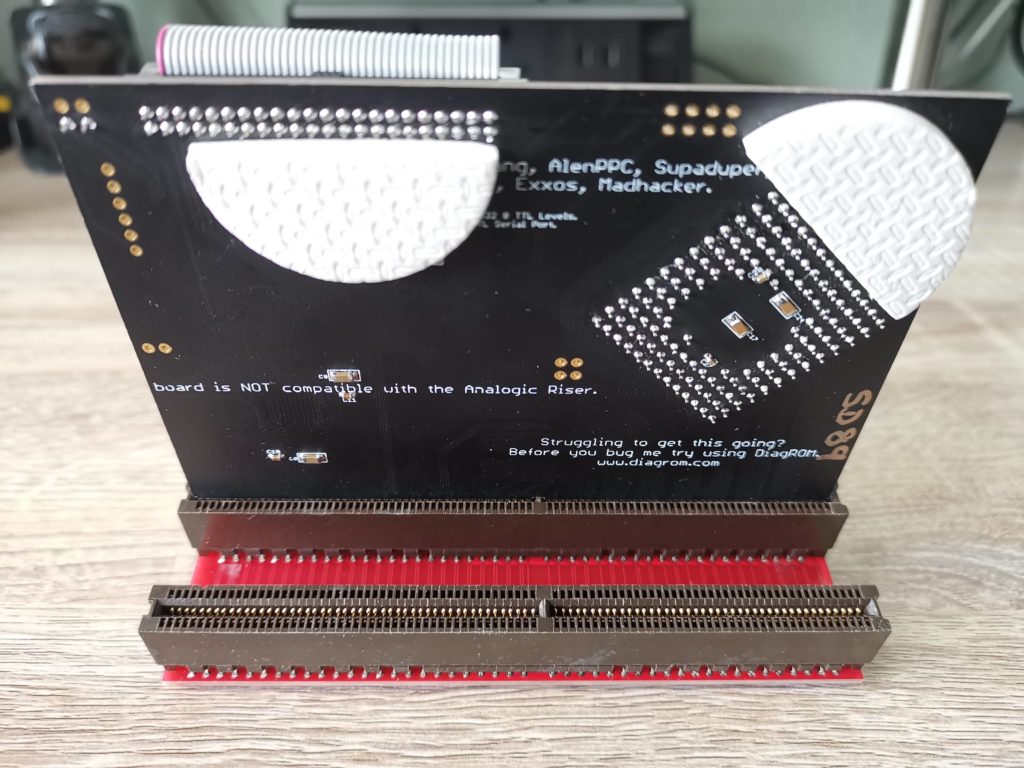
 

TerribleFire 330

Here’s a view of the underside of the board. Foam pads are present to prevent the exposed solder pads from touching the metal shielding cover inside the CD32 when inserted.
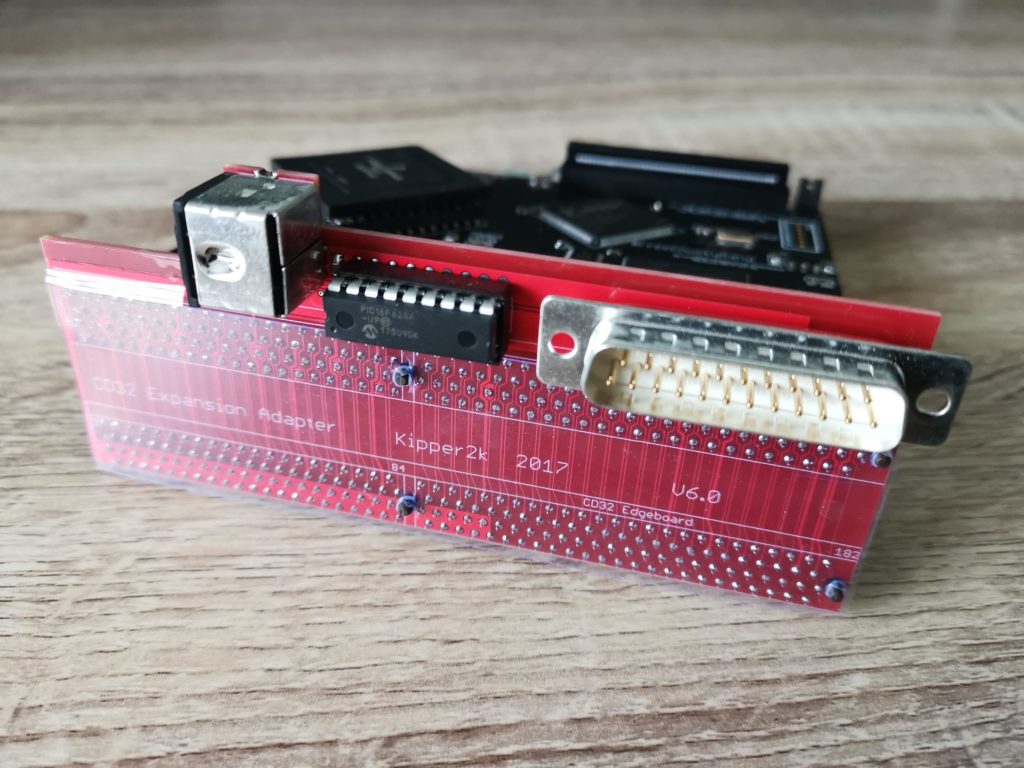
 

TerribleFire 330 Riser Board

Here’s a view of the riser board.


Riser Board

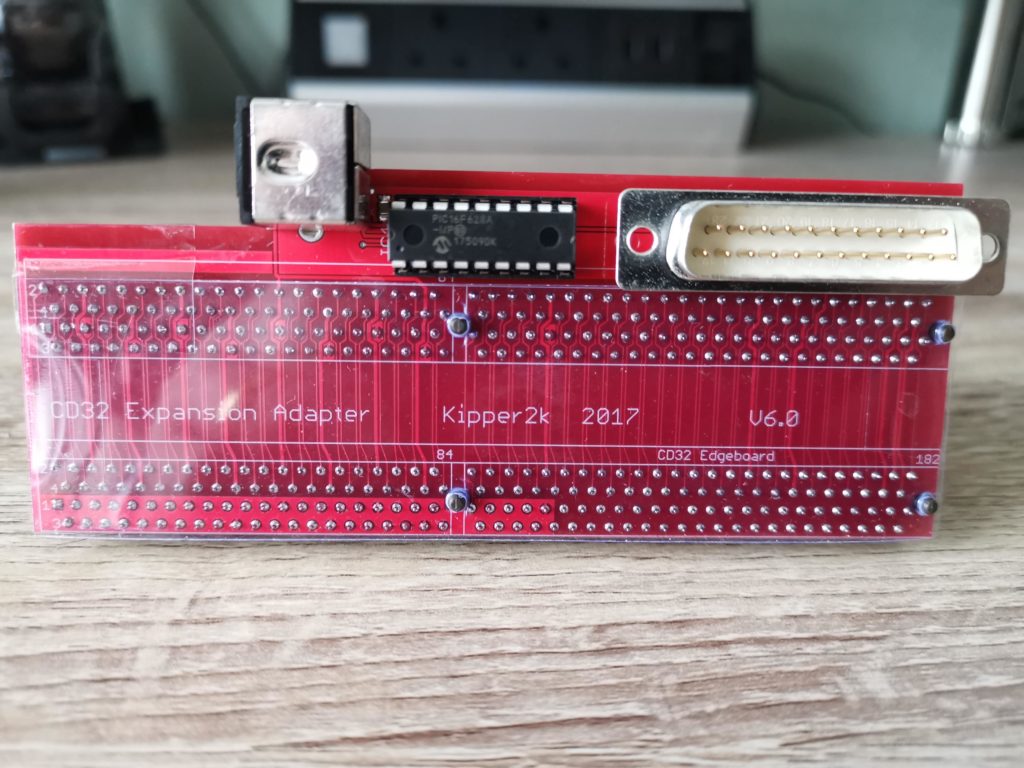
The is a straight-on view of the riser board. The male DB25 port on the right is for hooking up an RGB video cable for vastly improved picture quality. The PIC chip in the center provides a means of converting the inputs from a PS/2 PC keyboard into key presses that will the Amiga will recognise.
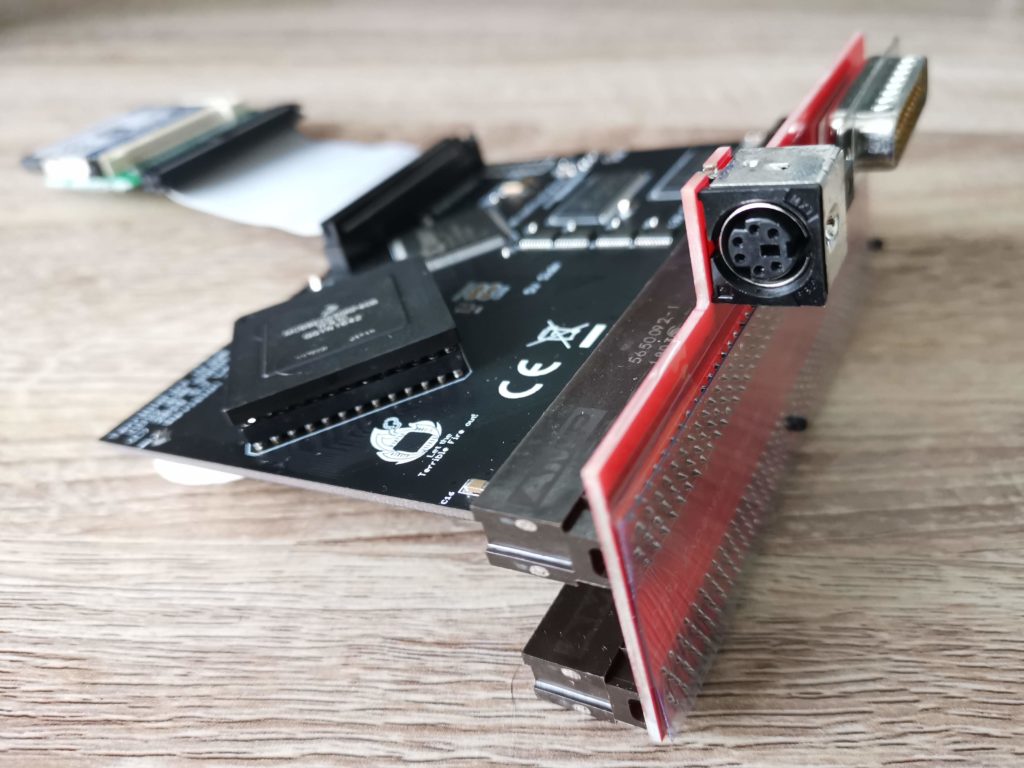
 

TF330 PS/2 Port

A better view of the PS/2 port.


TF330 68030 CPU

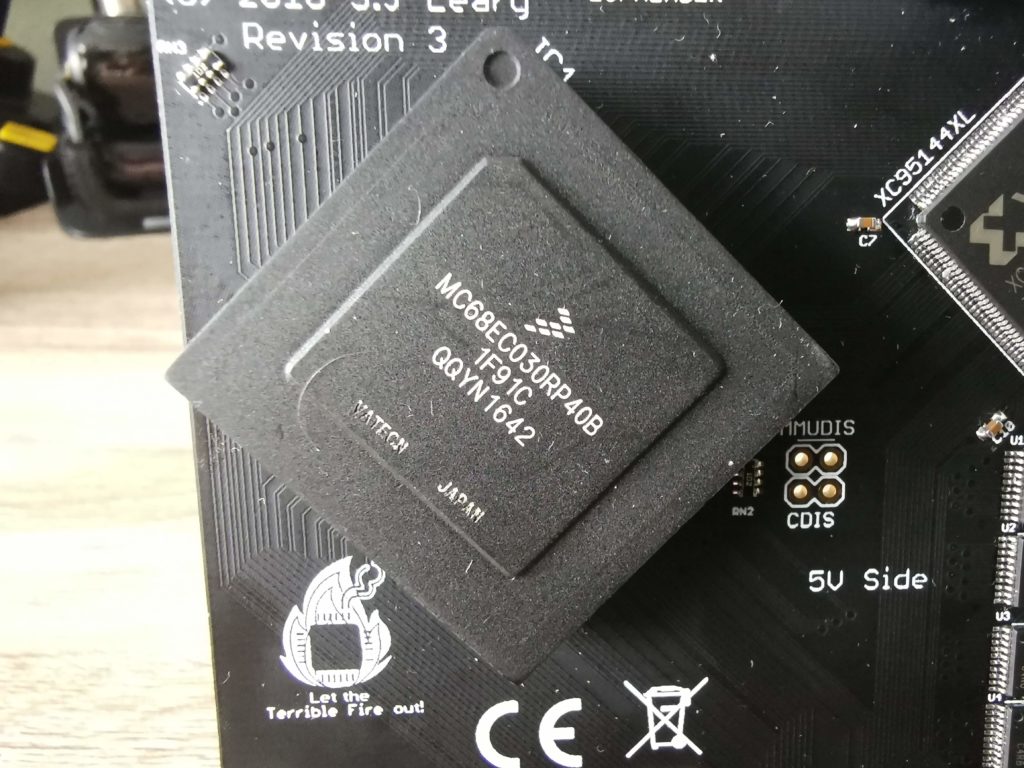
Close-up of the 68030 CPU. As you may notice it’s officially rated at 40Mhz. On the TF330 board it has been overclocked to run at 50Mhz.
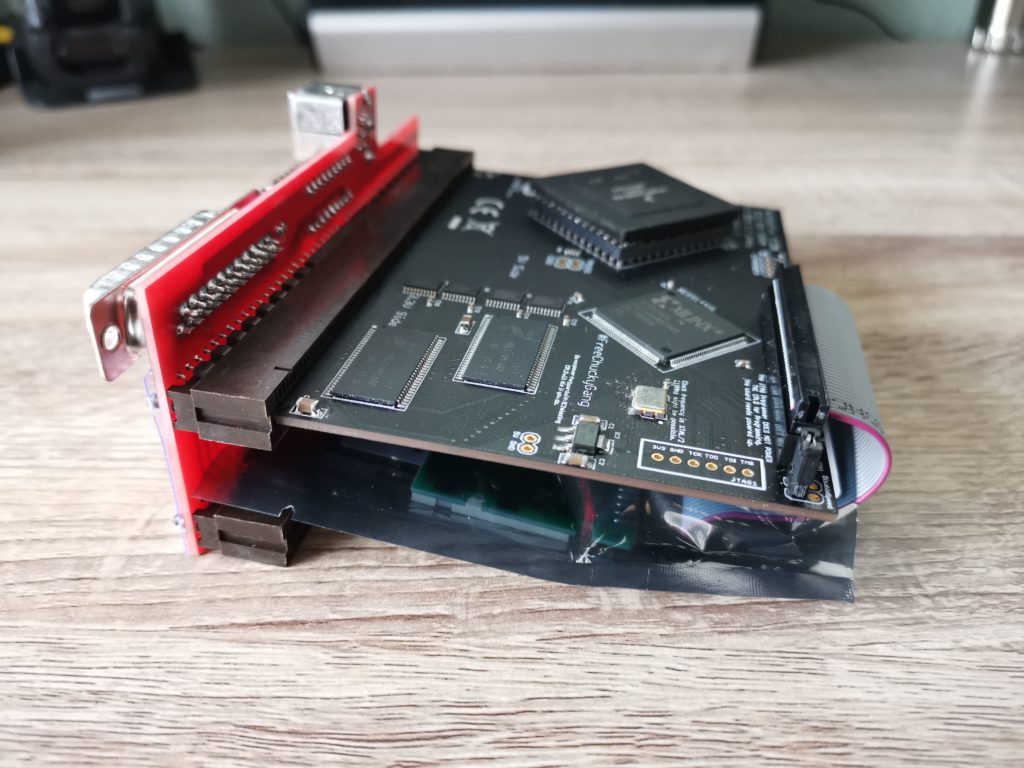
 

TerribleFire 330

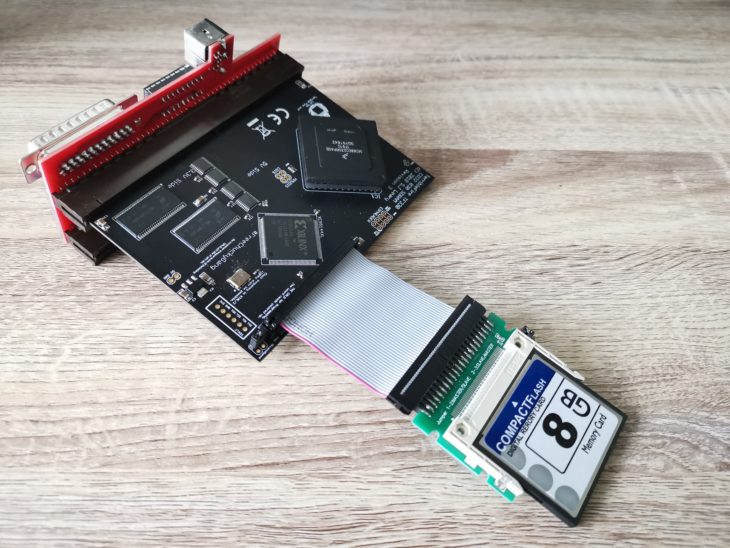
Side view of the TF330 – note how the CF card can be tucked underneath.
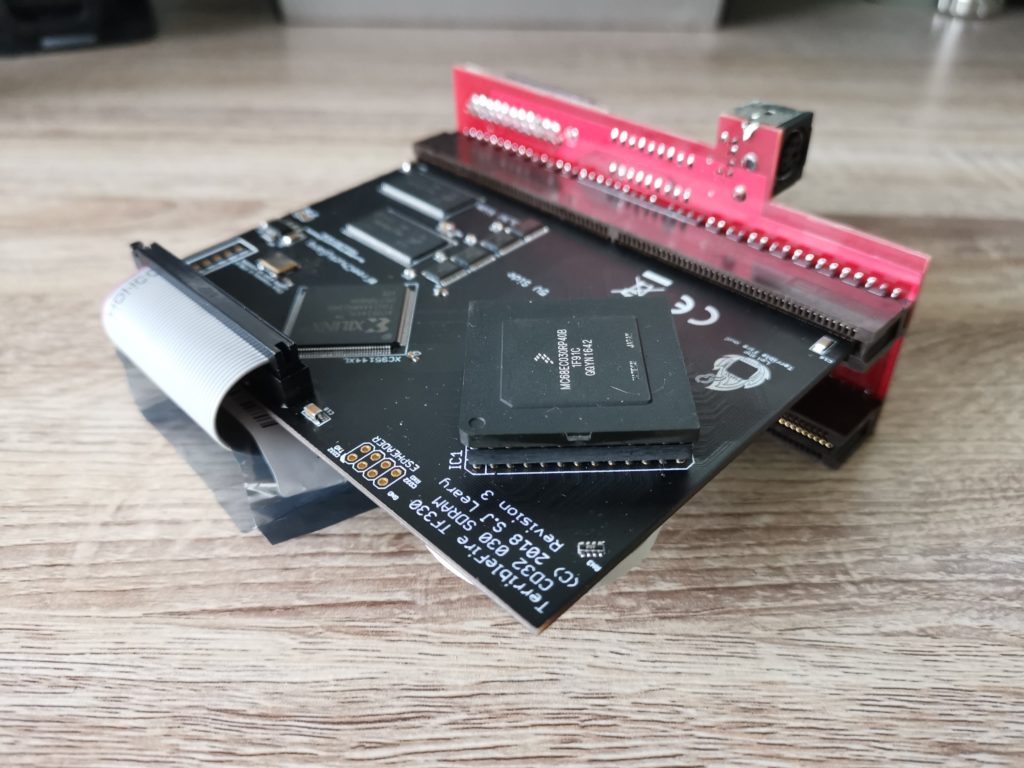
 

TerribleFire 330

Another view of the TerribleFire 330 card.


Installing the TerribleFire 330


Installation is pretty straightforward and involves removing the plastic expansion cover on the back of the CD32 console. There’s only one phillips screw to remove. Both the screw and the cover can be safely stashed away at this point as they won’t be getting used again.
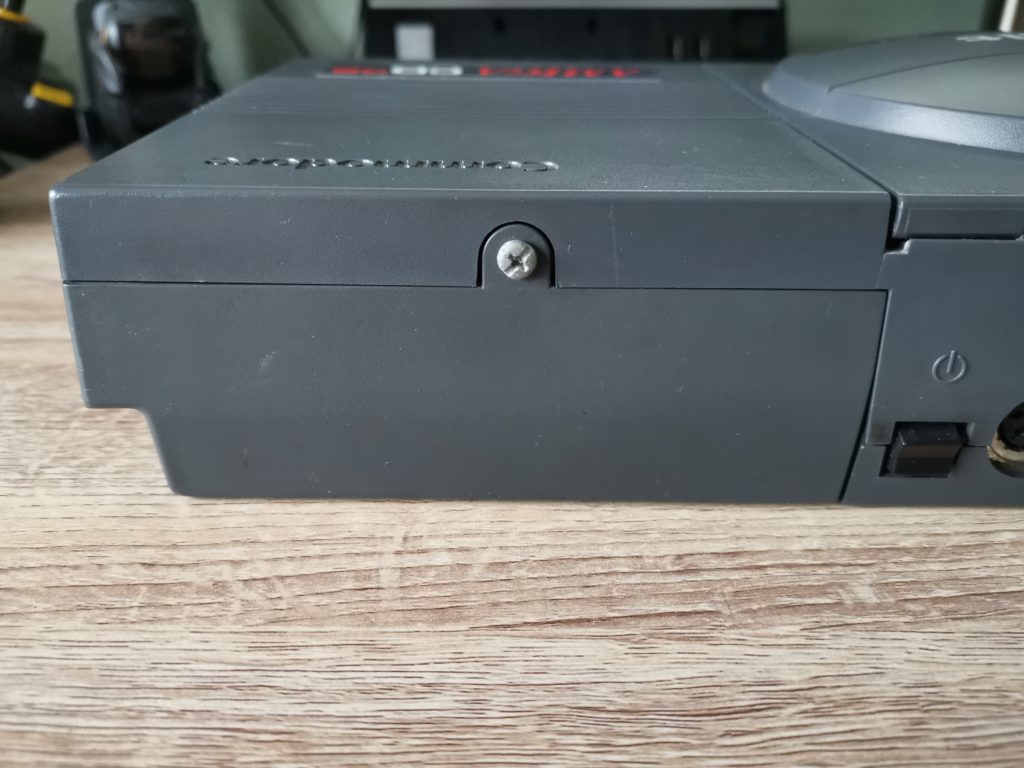
 

CD32 Expansion Cover

This is the CD32 expansion bay where the TerribleFire card will be installed.


With the cover removed you can clearly see a big empty space left above the shielding. This expansion bay was original intended to allow the use of the official Commodore CD32 Full Motion Video Module.
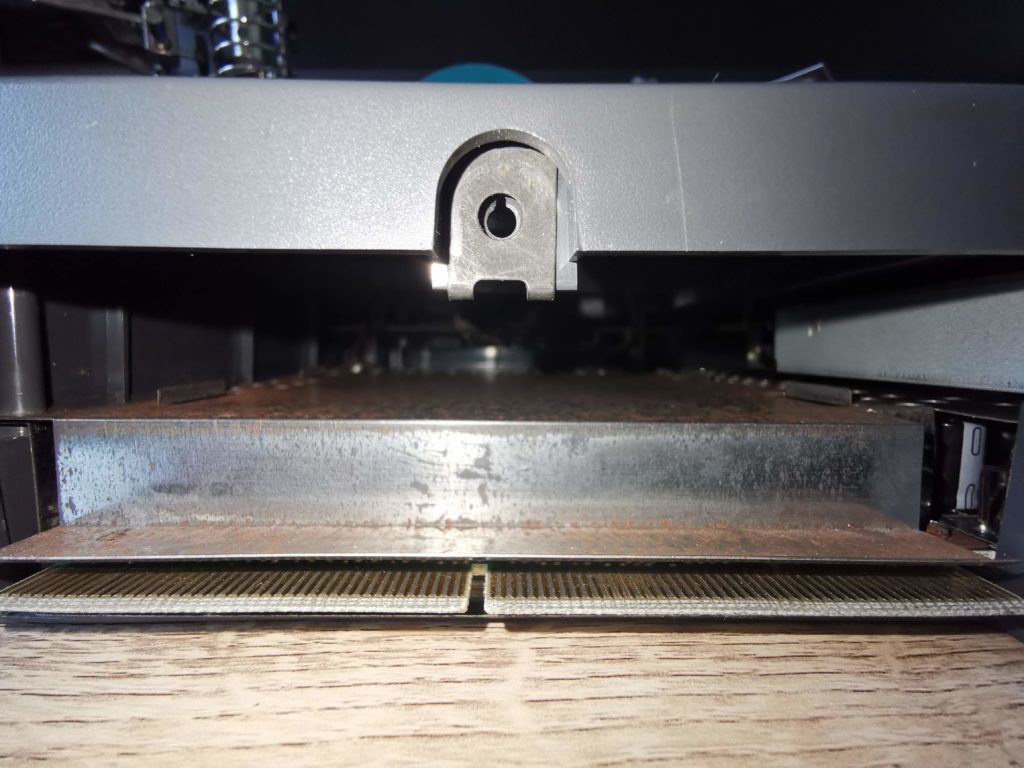
 

CD32 Expansion Bay

Here’s a view of the expansion bay with the cover removed. The edge connector can be seen at the bottom of the image. The TerribleFire 330 card will occupy that empty space above the shielding.


You can simply install the TF330 as it comes but I found a nice little 3D printed clip to hold the IDE cable and CF card in place on eBay. With this fitted the card is securely held underneath the main TF330 board out of harms way. Not an essential purchase but as I store my CD32 vertically I thought it was a worthwhile extra to prevent things moving around.


This slideshow requires JavaScript.


Installing the TerribleFire 330

Here are some photos of the TF330 after I installed it. It does protrude from the back of the console somewhat and it certainly ain’t ‘pretty’ but I’m more than happy to overlook this given the features it offers.
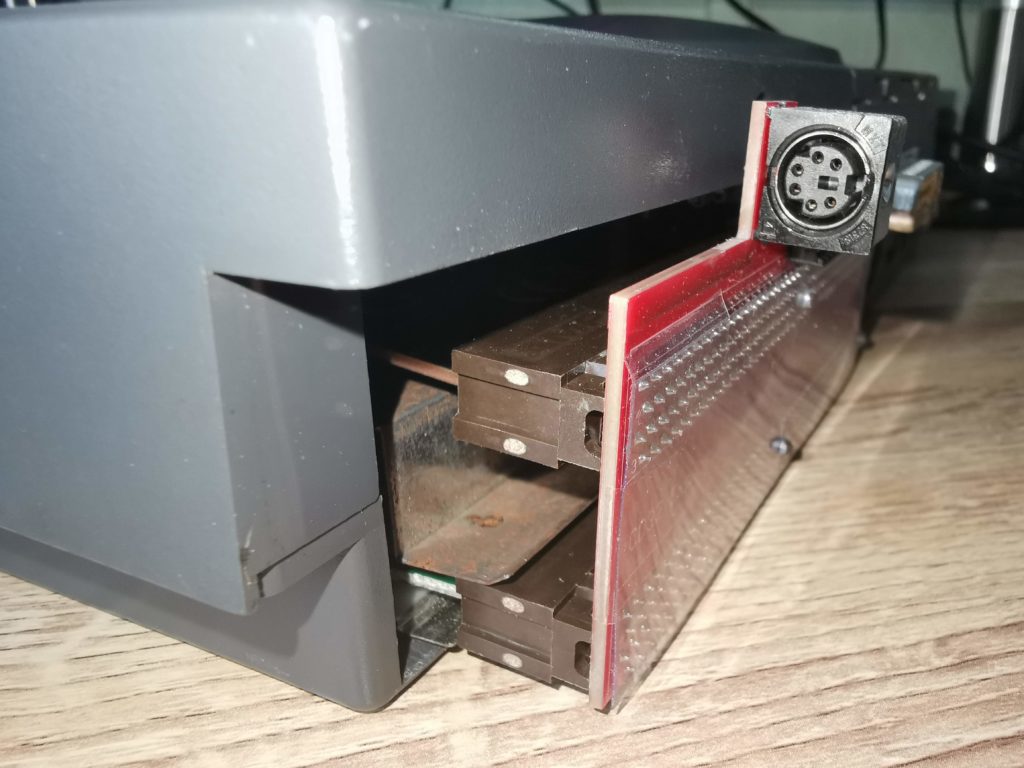
 

Installed TerribleFire 330

TF330 fully installed – you can clearly see that it protrudes about 1″ from the back of the console to the edge of the PS/2 port.
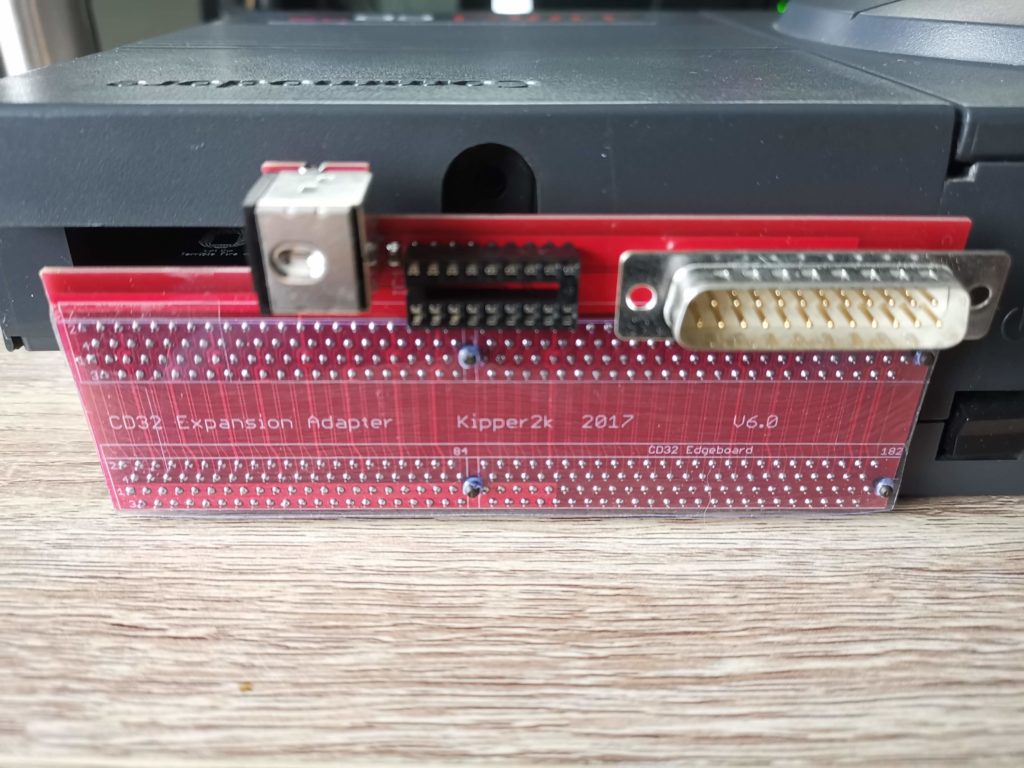
 

TF330 Riser installed

The transparent plastic stuck over the circuit board protects it from being shorted out accidentally. The PIC chip is missing for reasons that I will explain later…


Booting up for the first time

My TerribleFire 330 came with a pre-installed copy of Workbench on an 8GB Compact Flash card. To boot into Workbench all you need to do is turn on the CD32 without a disc inside it. After a few seconds the CD activity light starts to flicker away and then up pops the workbench screen.
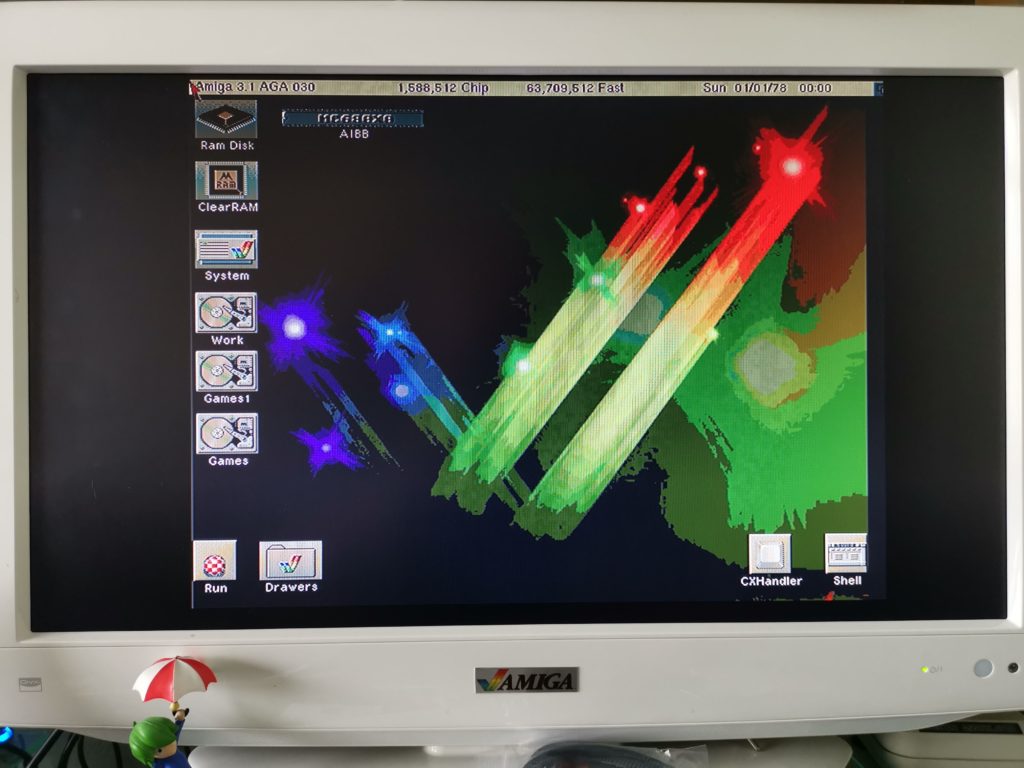
 

TF330 Workbench Screen

You can see the 68030 CPU recognised along with the extra 64MB of RAM on the title bar of the screen.


As with any accelerator upgrade for the Amiga I couldn’t resist loading up Sysinfo to see how my pimped out CD32 fared against other systems in the Amiga range. I was not disappointed, it ranked between the Amiga 3000 and 4000 which is impressive. It’s almost twice as fast as a stock A3000 which has a 25Mhz 030 processor.
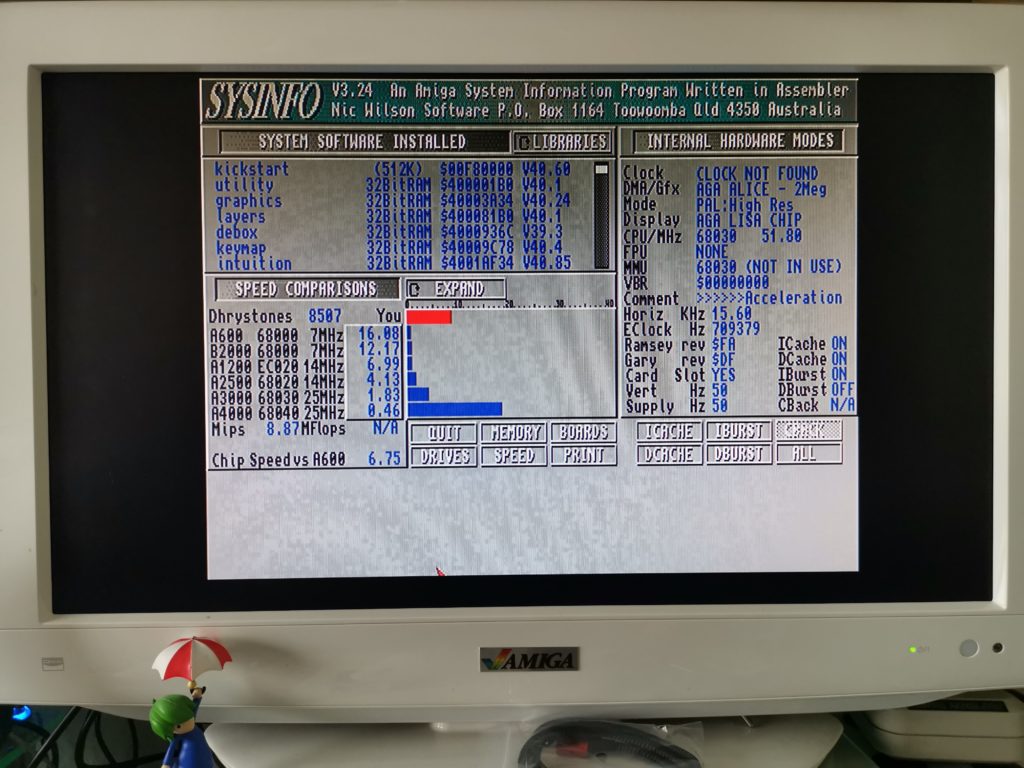
 

TerribleFire 330 Sysinfo

SYSINFO: Nearly half as fast as an Amiga 4000…
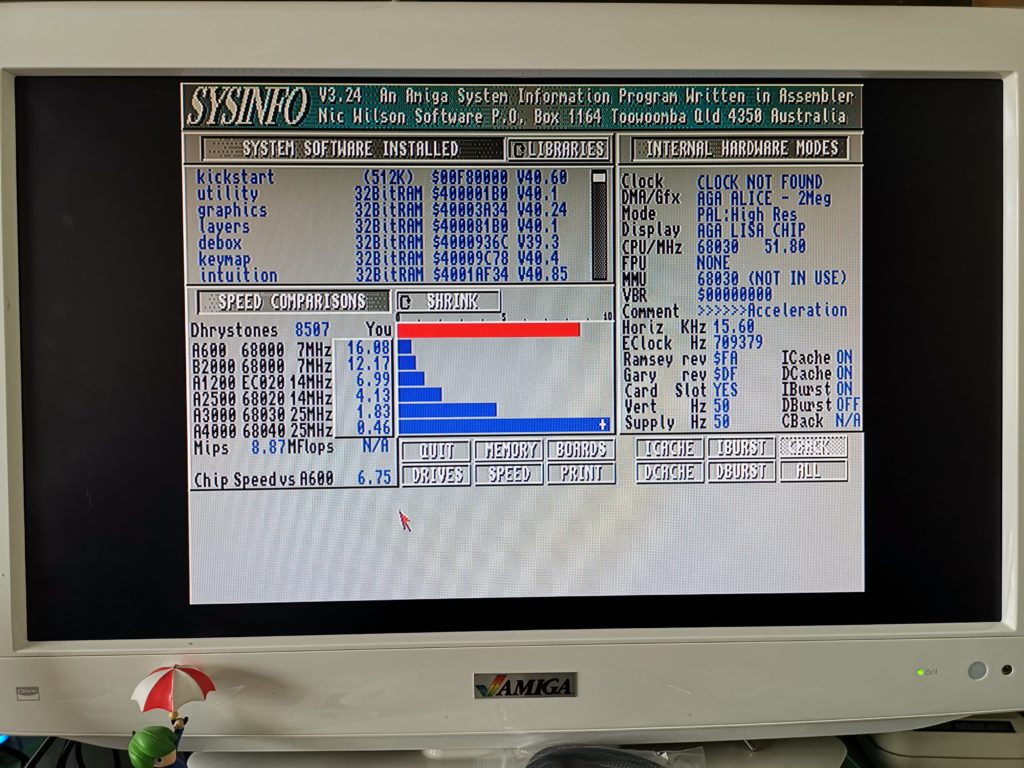
 

TerribleFire 330 Sysinfo

SYSINFO: Zoomed in view.


And of course with the ability to run Workbench off an installed CF card comes the option of using WHDLoad! My card came pre-installed with hundreds, if not thousands of games all ready to play with a few clicks of a mouse. The CD32 already has the required 2Mb chip RAM and with the TF330 it also has plenty of Fast RAM now too. Throw in a PS/2 keyboard and you can also exit games cleanly back to Workbench and play games like Star Crusader that require one.
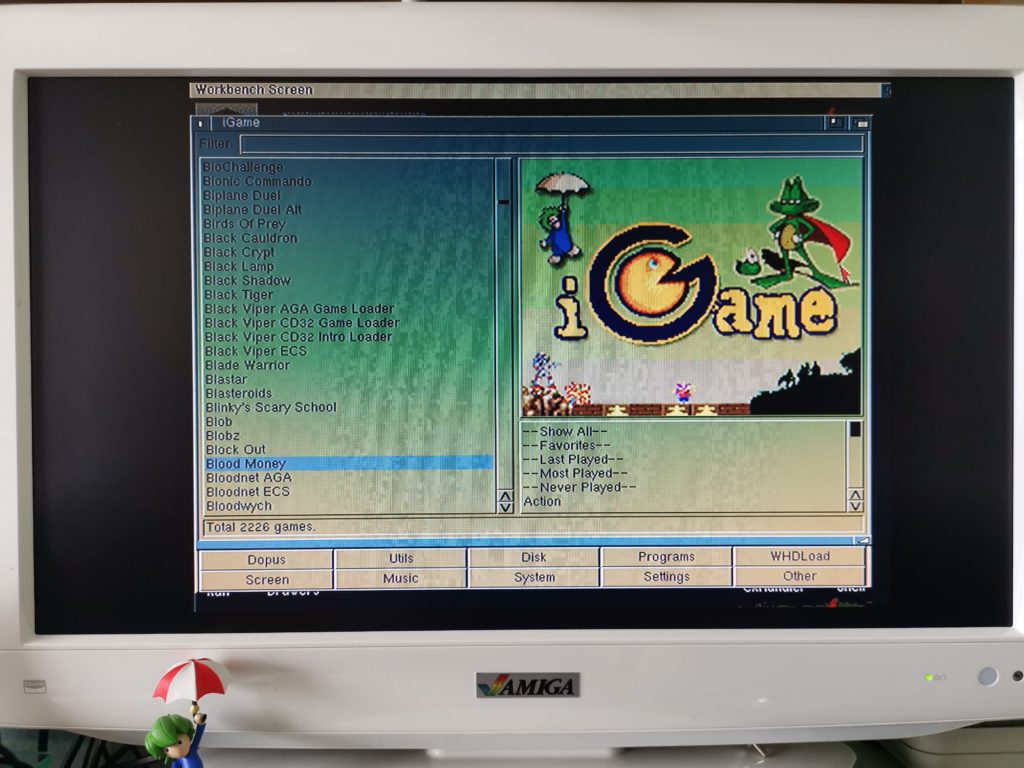
 

CD32 WHDLoad

TerribleFire 330 lets you use WHDLoad on the CD32.

Compatibility

I’ve now tested all the games I own and listed the results on my CD32 Game Compatibility page.

The board was described as having a ‘disable jumper’. Removing it is supposed to make it invisible to the CD32 so it can boot up as normal. However in my testing this simply doesn’t work, in fact removing the jumper prevented my console from booting up at all. I contacted the seller on AmiBay who said there’s still a bug with this and that it would hopefully be fixed in a future firmware update. If that ever happens I’ll update this article.

As things stand right now I can either remove the board if I come across an incompatible CD32 game or see if there’s an alternative version on the internet that has been patched to work. Alternatively I can also try the WHDLoad version.


RGB Video Functionality


The RGB port works exactly as described and offers a beautifully crisp, vibrant display with a regular Amiga RGB SCART cable. Much better than the composite I was having to use previously. Whether or not I was using Workbench or playing a game off CD this worked flawlessly.
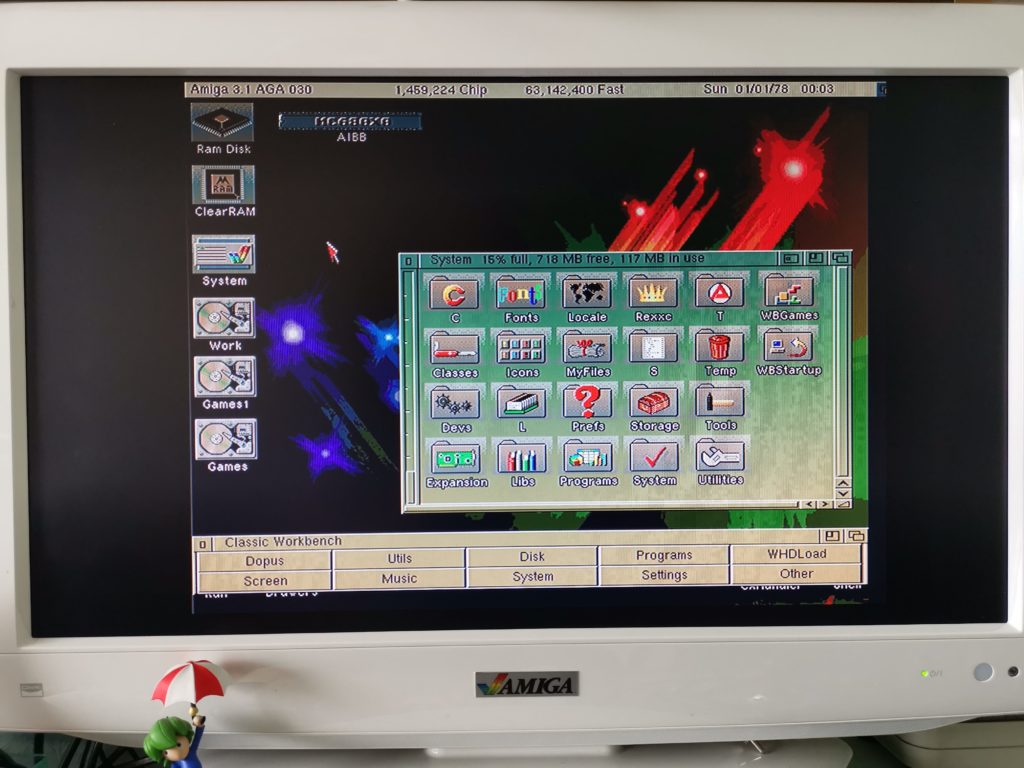
 

TerribleFire330 RGB

A beautifully crisp display thanks to the TerribleFire 330’s RGB video output.


PS/2 Keyboard Functionality


Unfortunately I can’t say the same for the PS/2 port. The whole point of this is to allow people to use cheap PC PS/2 keyboards with the CD32 instead of super scarce Amiga ones. However I tried three different brands of PS/2 keyboard and only one of those worked… for about 10 minutes. No matter what I tried I couldn’t get that keyboard to work reliably. It turns out that the PS/2 keyboard compatibility is very poor with the riser card. People report greater success with really old keyboards rather than currently available ones. I was advised by the seller to get a CD32 AUX to PS/2 adapter.


This slideshow requires JavaScript.


I chose one of these on eBay for about £18. The seller was really helpful and even offered to refund me if the adapter turned out not to work. Thankfully that wasn’t necessary as it worked perfectly with my cheap Genius PS/2 keyboard that I picked up off Amazon. There’s some clever electronics hidden inside the adapter that converts stuff like the two ‘Windows’ keys into ‘Amiga’ ones so you can still do a soft-reset. It works really well and I highly recommend getting one, even if you don’t get a TerribleFire!


This slideshow requires JavaScript.


Actually there was one other issue that I had to solve before I was in PS/2 keyboard nirvana. The keyboard initially behaved like a key was stuck down. There is a conflict between the PIC chip on the Kipper 2K riser and the PS/2 Aux adapter. Simply removing the PIC chip solved this problem completely with no negative effects.

Here’s the PS/2 keyboard I’m using with my CD32, it’s just a cheap one I picked up off Amazon but it does the job and isn’t a bad match for the dark grey colour of the console either.
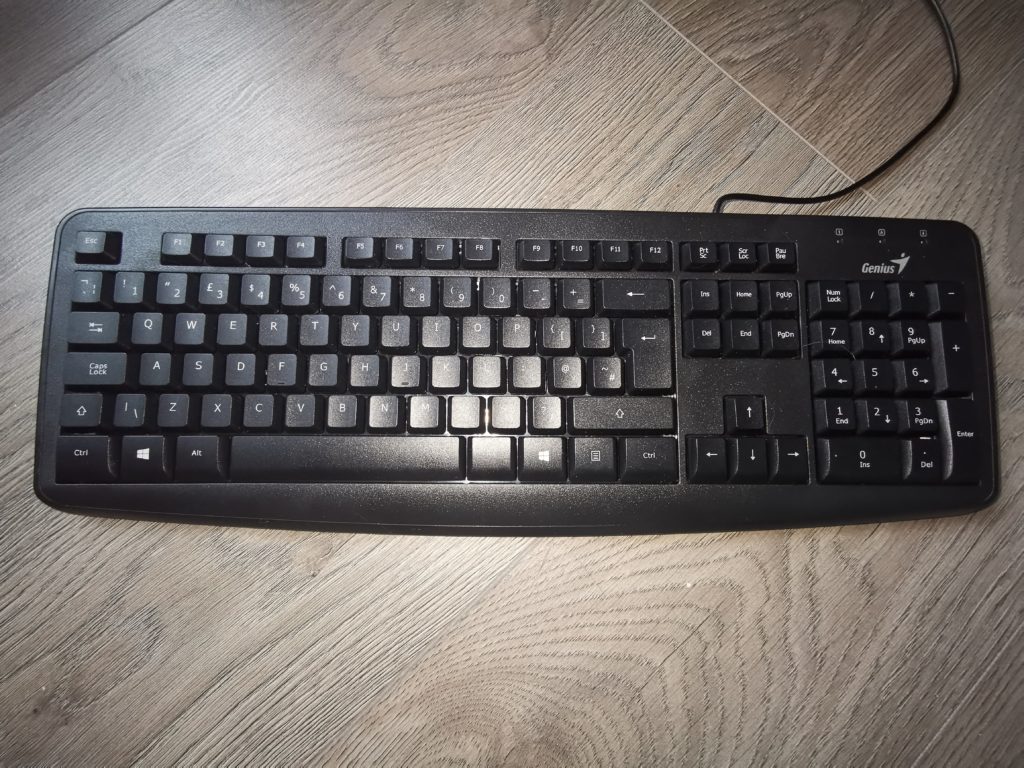
 

CD32 PS/2 Compatible Keyboard

CD32 PS/2 Compatible Keyboard


Conclusion

I can’t deny it’s shame the built-in PS/2 keyboard option doesn’t work as well as it could and that I can’t disable the board without removing it. However these small niggles don’t stop the TerribleFire 330 from being a beast of an expansion for the money. You’d be hard pressed to find anything else offering as much bang for your buck.

With the TerribleFire 330 installed my CD32 has become the ultimate Amiga gaming machine. It can play CD32 and CDTV titles and thanks to WHDLoad it can now play pretty much any other Amiga title as well. In fact with mouse and keyboard attached it can even be used for productivity stuff just like an A1200, only with a built in CD-ROM drive!

The extra grunt of the 50Mhz 030 also helps it run games like Alien Breed 3D, Frontier Elite 2 and Wing Commander at their very best. The addition of the RGB video port makes everything look its very best too! Bottom line, if you have a CD32 then the TerribleFire 330 is an essential upgrade for it.
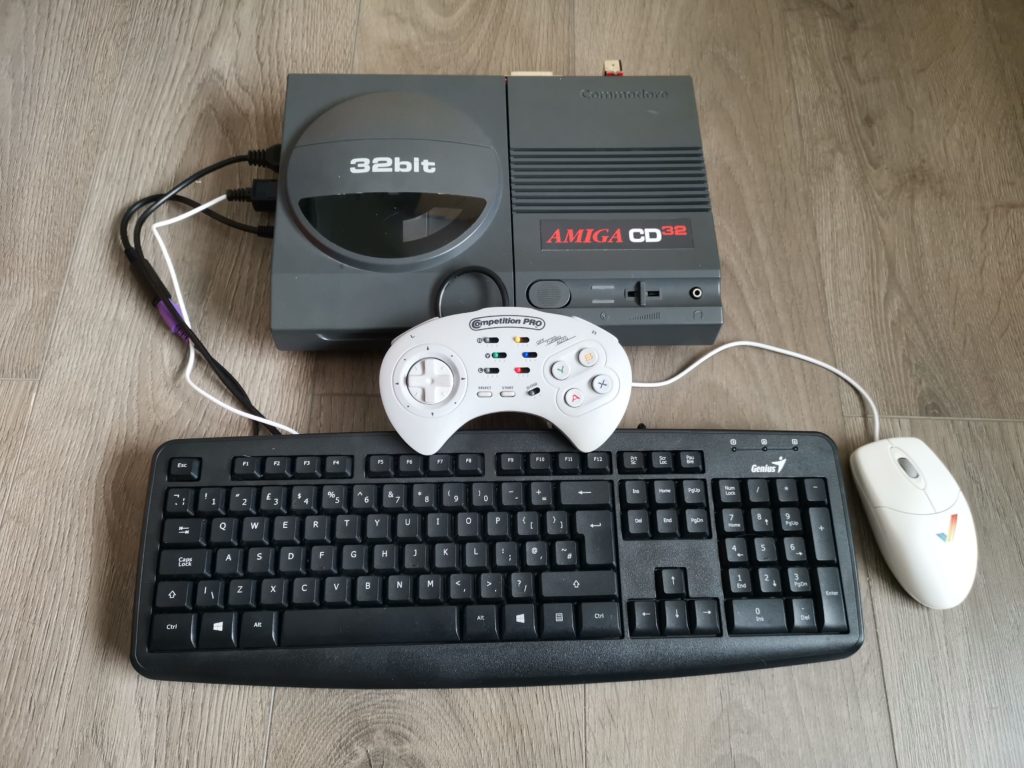
 

Ultimate Amiga gaming machine

With the TF330 my CD32 has become the ultimate Amiga gaming machine.
Commodore 64 Joyswitcher Review

Joyswitcher

If you have two joysticks permanently plugged into your Commodore 64 then you would probably have no use for the Joyswitcher. However, if you’re anything like me, you might find that this is something you’ve wanted for a long time without realising it. I don’t play 2-player games but do play a wide variety of 1-player games, including those that require paddles or a mouse. Not only that but I also dabble with GEOS from time to time too. This means I’m constantly having to switch my joystick between ports 1 and 2 and swap in my mouse or paddles for those games and programs that require them as well. Not only is this a little tedious but it’s also a lot of unnecessary wear and tear on my C64’s 35 year old joystick ports.


This slideshow requires JavaScript.


Enter the Joyswitcher

I stumbled across this little device over on AmiBay recently. This is a neat little gizmo that plugs into both of your Commodore 64’s joystick ports simultaneously. It allows you to attach any combination of mouse, joysticks or paddles and freely switch between both devices and ports without ever having to unplug anything. The guy that makes these little devices is based in Hungary but it only took a week to arrive and was well packaged too.

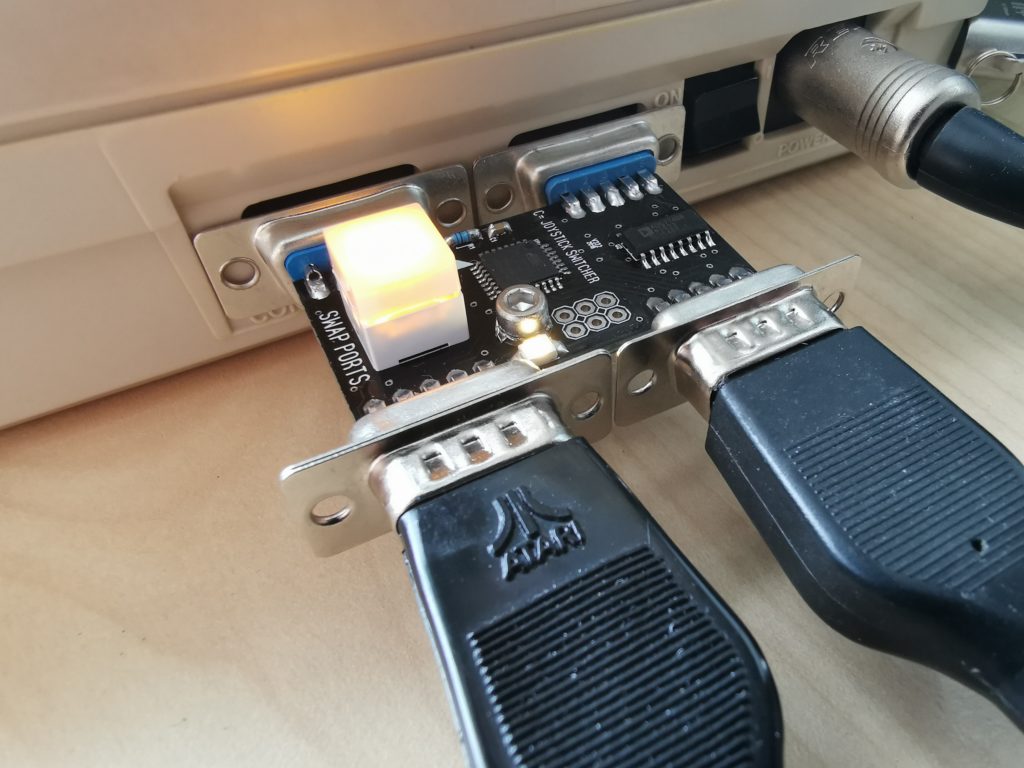
The Joyswitcher itself is really well constructed and very sturdy. Those DB9 joystick ports are very securely attached and don’t move around at all when plugging stuff in. There are two female DB9’s that plug into your C64 on one side of the Joyswitcher and two male DB9’s on the opposite side for you to attach your gaming devices. On the underside is a little brass post that is just the right length to support the board so that no strain is placed on the joystick ports.


This slideshow requires JavaScript.


How it works

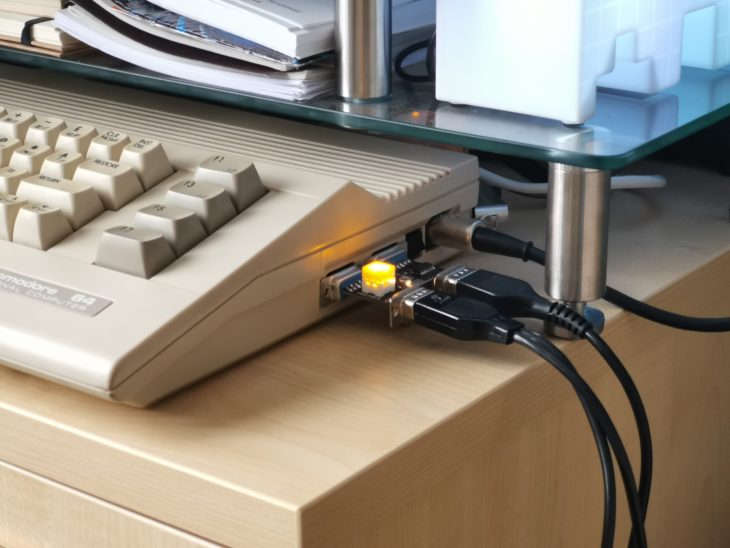
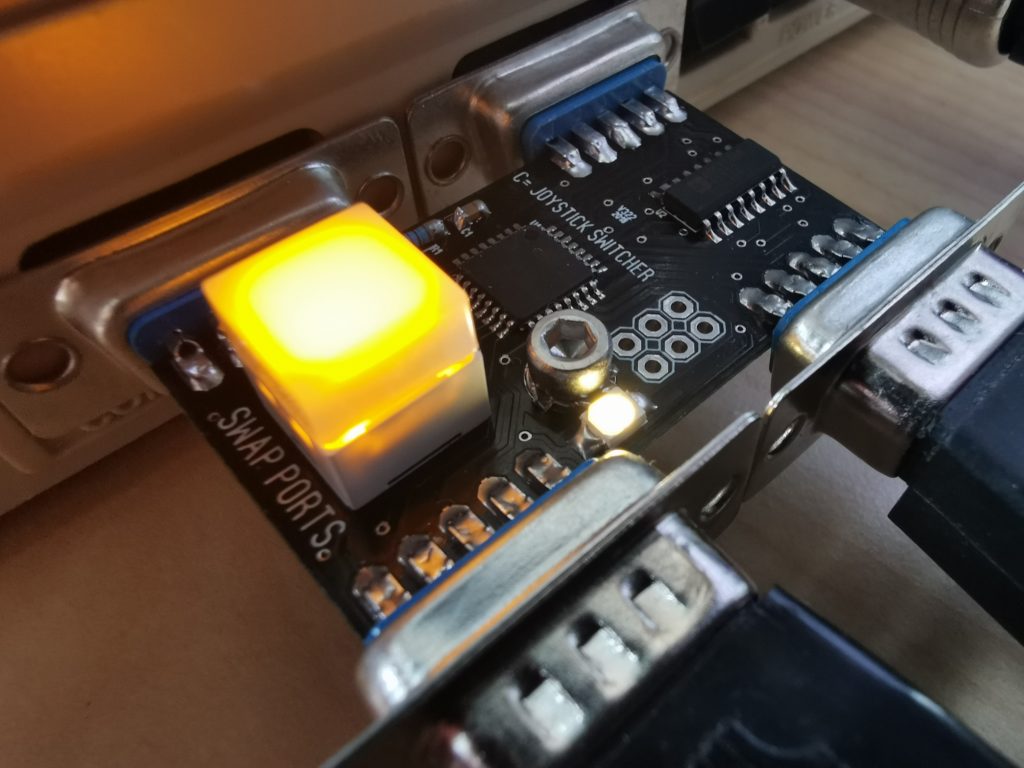
On the top of the device is a chunky illuminated square button, helpfully labelled ‘swap ports’ on the board. Press this for a second and you can switch the ports around from their normal position to a ‘crossed over’ one. This button stays illuminated all the time making it very easy to find if you’re playing at night with the lights dimmed.

When you first attach the Joyswitcher the default port arrangement looks like this:

Port 1 > 1

Port 2 > 2

However after pressing the illuminated button the port mapping switches over like this:

Port 1 > 2

Port 2 > 1


Joyswitcher

Notice the little LED to the right of port 1. When illuminated you know the ports are operating in their normal way, (not switched).


You can tell at a glance which mode the Joyswitcher is in as a little LED lights up when the ports are are in the ‘normal’ position. The Joyswitcher also remembers it’s last switched ‘state’ even after being powered off which is very useful.


Joyswitcher

Joyswitcher operating in normal mode with a pair of paddles attached to port 1 and a zipstick in port 2.


I still occasionally have to swap my paddles for a mouse and vice versa but not very often. Certainly nowhere near as often as I was when having to juggle a zipstick, paddles and a mouse between the 2 ports.

If I could change a single thing about the Joyswitcher it would be to add a 3rd input port so I could leave everything plugged in permanently. However there’s probably very few other users like me and it would complicate the design of the board no end so I can accept that it will probably never happen!

Conclusion

This is a fantastic little device and well worth the €32.90 it cost me. Can’t really fault the device as it does exactly what it sets out to do, is well constructed and looks like it will last a long time. I really love the aesthetics of it and appreciate being able to see everything exposed in an ‘industrial’ kind of way. It certainly looks way cooler like this than it ever would hidden away in a bland plastic case in my opinion. No doubt if you don’t feel the same way you could probably find a 3D printed case for it online.
Retrobrighting with Just the Sun!

Retrobrighting with Just the Sun

Came across this idea of retrobrighting with just the sun on YouTube. I was highly sceptical so thought I’d give it a go myself! It’s a pretty simple idea. Instead of slathering your yellowed computer in peroxide, or immersing it in bath of bleach, simply stick it out in the sun for a few days! Sounds too good to be true right?

Enter the VIC

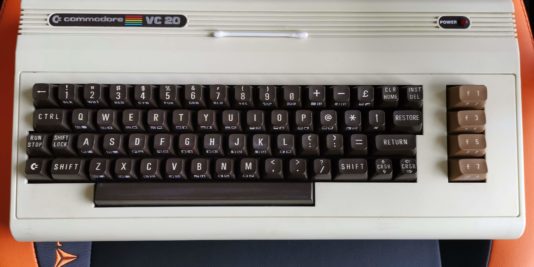
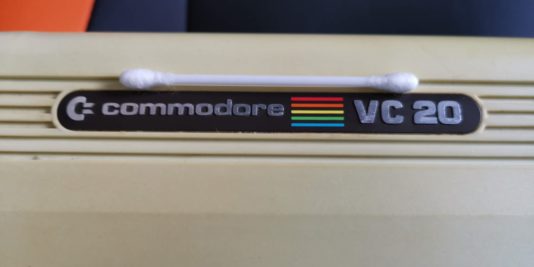
My VIC20 had some pretty unpleasant yellowing to it so I used that as my test subject. For 4 days straight I put it outside on a south-facing bench in the garden. I’d place it there before I left for work in the morning and bring it in once I got home in the evening. Today was the 4th and final day.

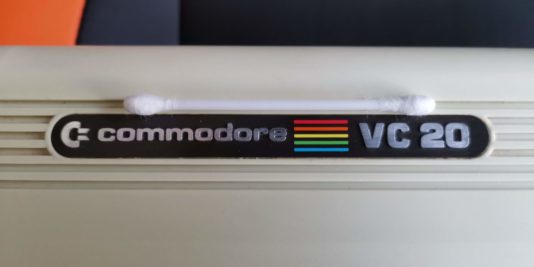
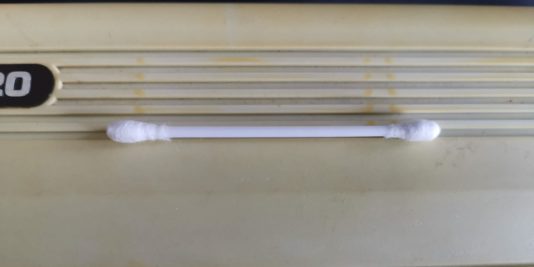
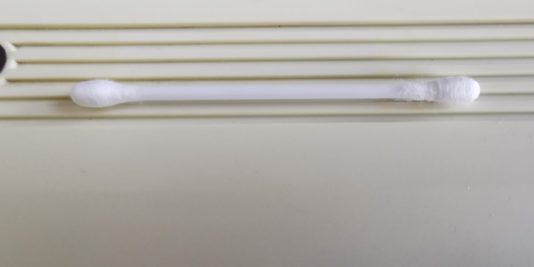
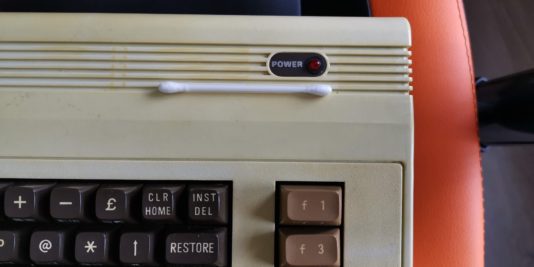
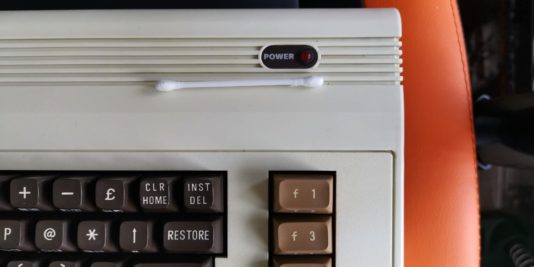
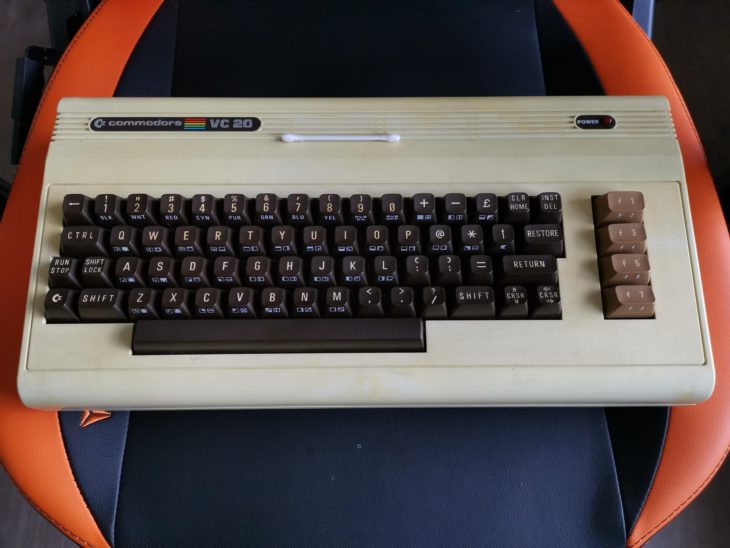
I’ll let the results below do the talking. I used the same white cotton bud in each photo as a frame of reference to judge the level of yellowing. I also took the photos in the exact same location at the same time of day to keep the lighting as similar as possible. No flash was used in any of the photos.

Before & After Results

I’m extremely pleased with the results. The overall yellowing has vanished, even the quite pronounced yellowing around the grill area has gone too. The beauty of this method is that I literally did nothing – the sun did all the work for me. I didn’t even need to dismantle the computer!

Conclusion

I’ve had some disastrous results using peroxide gel in the past. On one occasion I ended up with an appalling marbling effect on a rare C128D keyboard. After that incident I had vowed never to try my hand at retrobrighting again, however this test has changed my mind. It looks like it’s the safest and easiest way imaginable to brighten up yellowed plastic. It’ll be interesting to see if the brightening effect lasts. If the yellowing comes back in future I’ll update this article.

My New Amiga CD32 Console

Amiga CD32

Introduction

I never owned an Amiga CD32 Console back when they launched in 1993. I remember reading about them in Amiga Format and wanting one desperately but could never justify or afford one at the time. Not long after they launched Commodore went out of business and so the CD32 quickly disappeared from the shelves and from my mind.

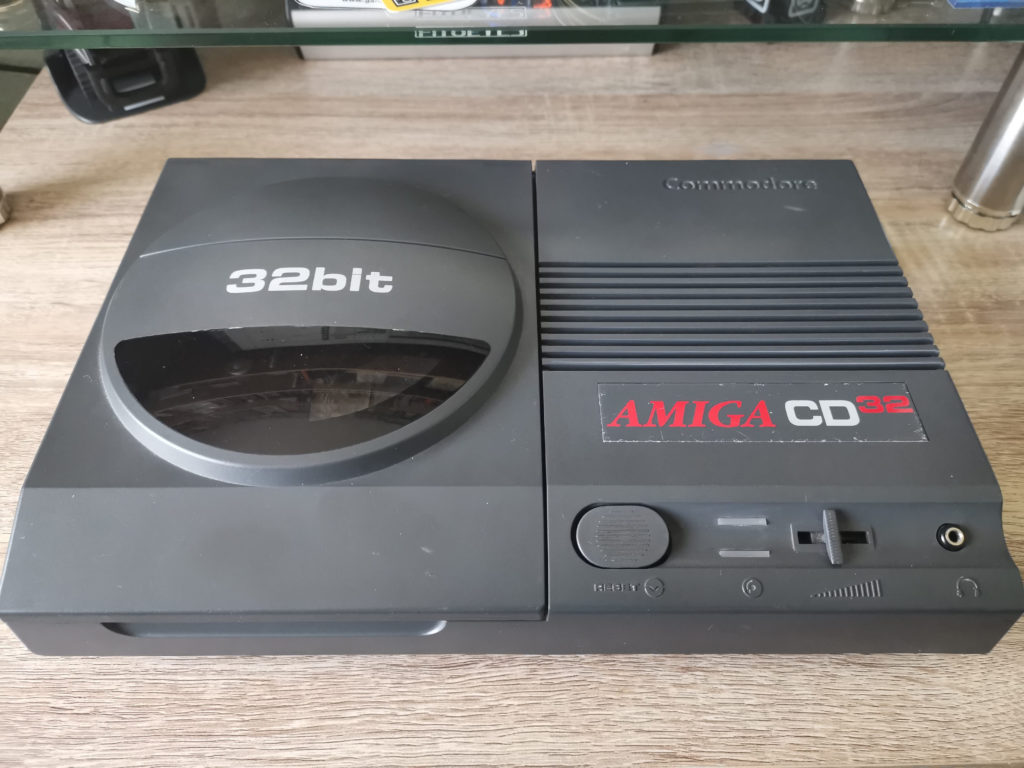
Fast-forward some 25 years and I recently found myself pining after one of these mythical beasts again. Reading numerous articles about them in magazines and on the ‘net added further fuel to the fire. So I did the only sensible thing a middle-aged bloke could do and bought my very own Amiga CD32! Here she is in all her 32-bit glory!


Amiga CD32

My new Amiga CD32 console


For it’s age and what I paid for it I think it’s in great condition. Sure there’s a couple of blemishes and the badge is scratched but for a 26 year old machine I’m more than happy with it. It’s already been fully re-capped so I don’t have to worry about that side of things either.


Amiga CD32

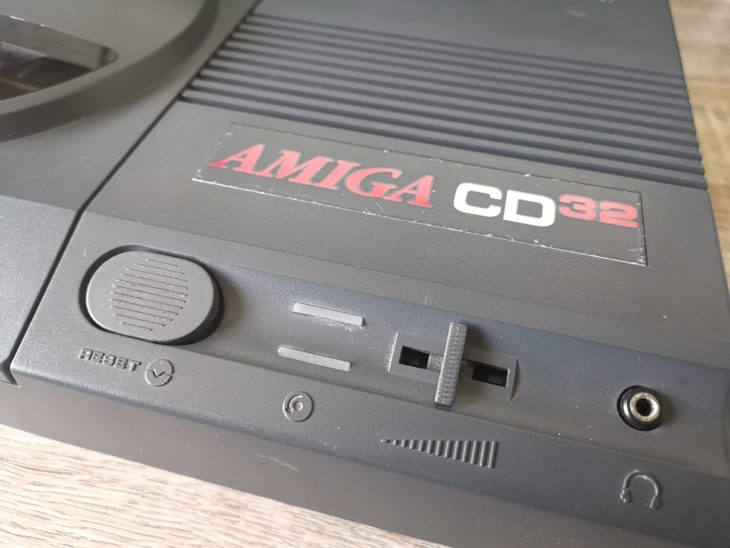
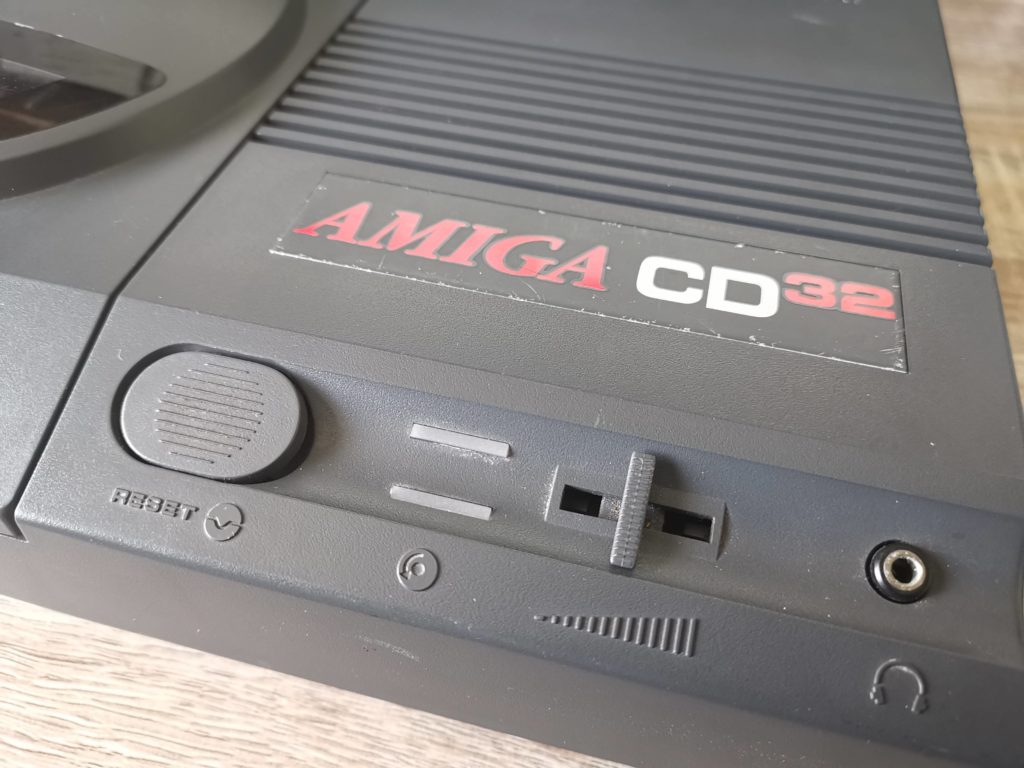
Close-up of the Amiga CD32 control panel. From left to right: reset button, power and drive activity LED’s, volume slider and headphone socket.


All the ports, buttons and outputs work as they should. However I can’t really see myself using it as a CD player much but at least the option is there should I want to!


Connectivity


Amiga CD32

Amiga CD32 expansion port


Amiga CD32 expansion port

A look inside the CD32 expansion port


There’s an expansion port on the back which can be used to install all manner of wonderful contraptions. In the past there were FMV cartridges, floppy drives and the SX-1 which could convert the CD32 into a full blown computer. Nowadays you can hook up a TerribleFire expansion which offers extra RAM, faster CPU’s, IDE interface and more. I’ll definitely be looking to utilise this port soon!


Amiga CD32

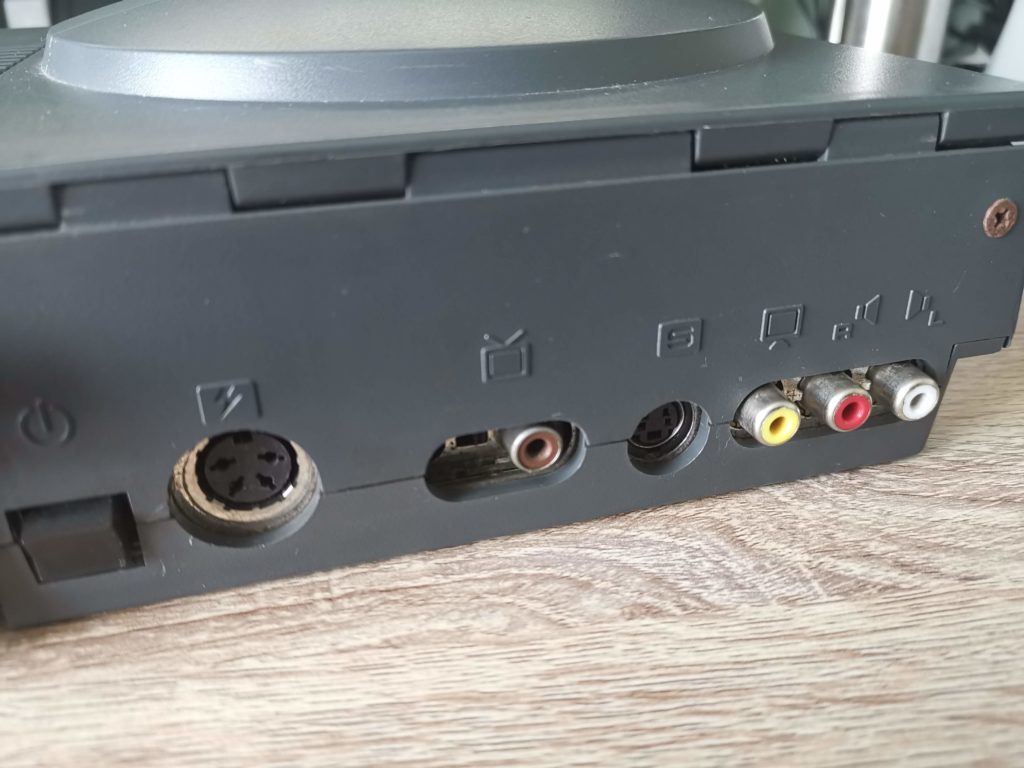
Amiga CD32 rear connectivity. From left to right: power rocker switch, power socket, RF aerial output, s-video, composite video and right/left audio RCA sockets.


There’s plenty of connectivity round the back as standard. No less than 3 video output options, RF, composite and S-video. The latter provides by far the best picture if you have a TV capable of utilising it.


Amiga CD32

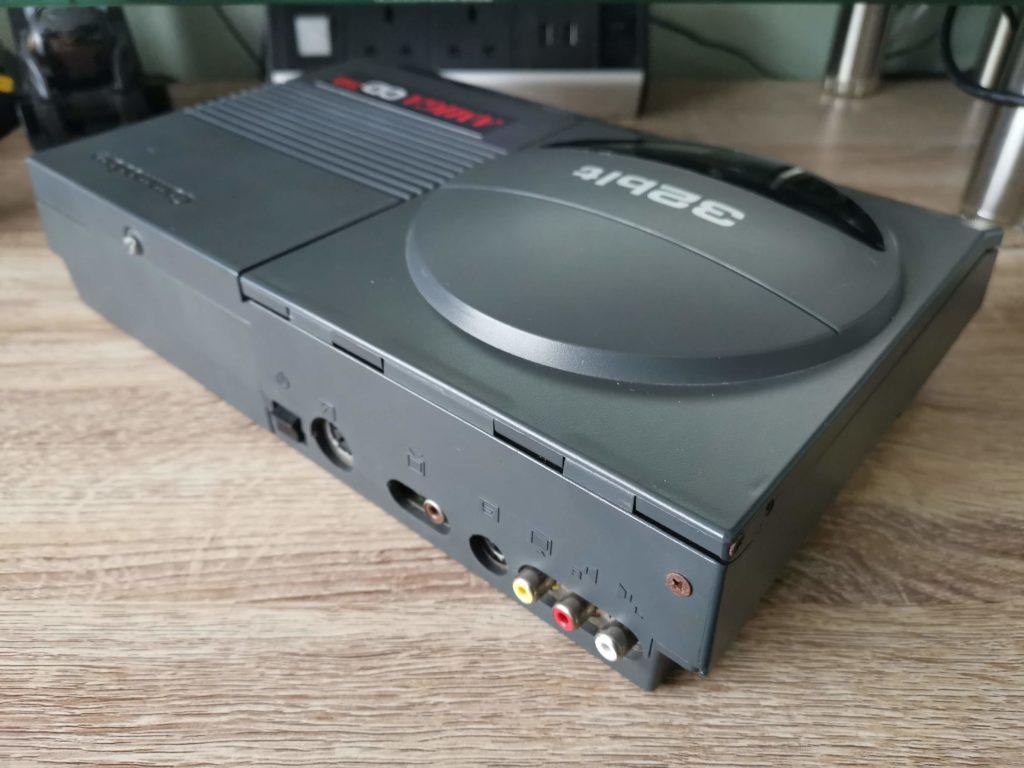
View of the Amiga CD32 rear – that rusty screw definitely needs sorting…


Amiga CD32

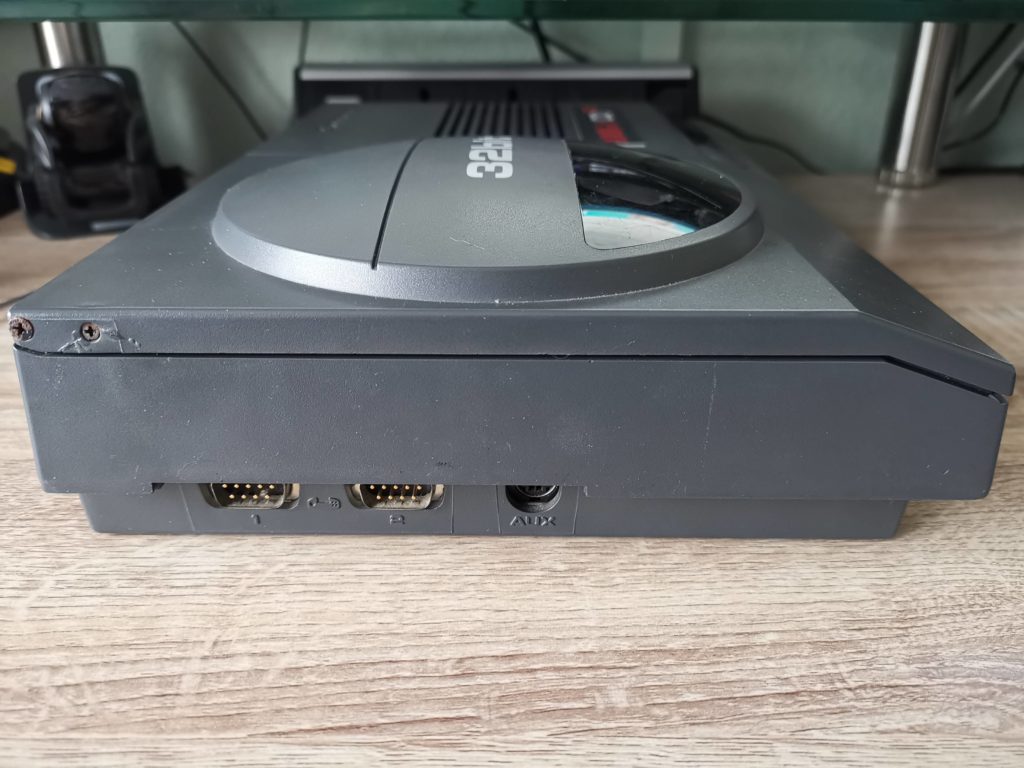
Amiga CD32 left side. From left to right: controller port 1 (for gamepads), controller port 2 (for gamepads or a mouse), aux port (for an Amiga keyboard).


Amiga CD32

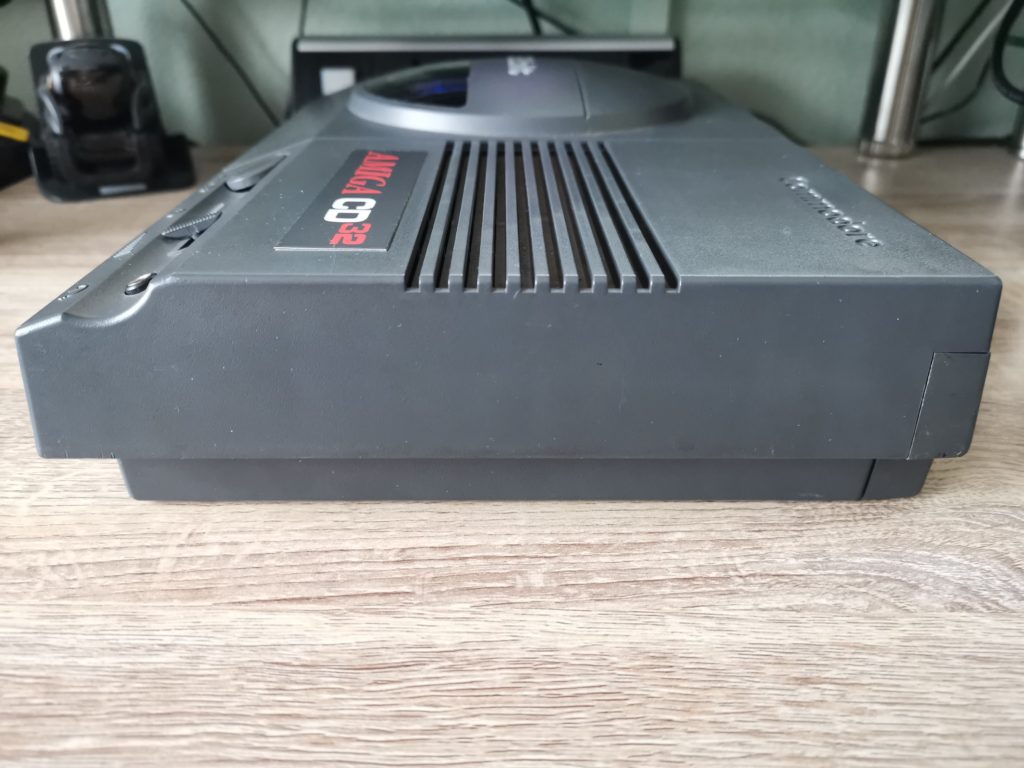
Amiga CD32 right side. Not much to see here really.


Amiga CD32

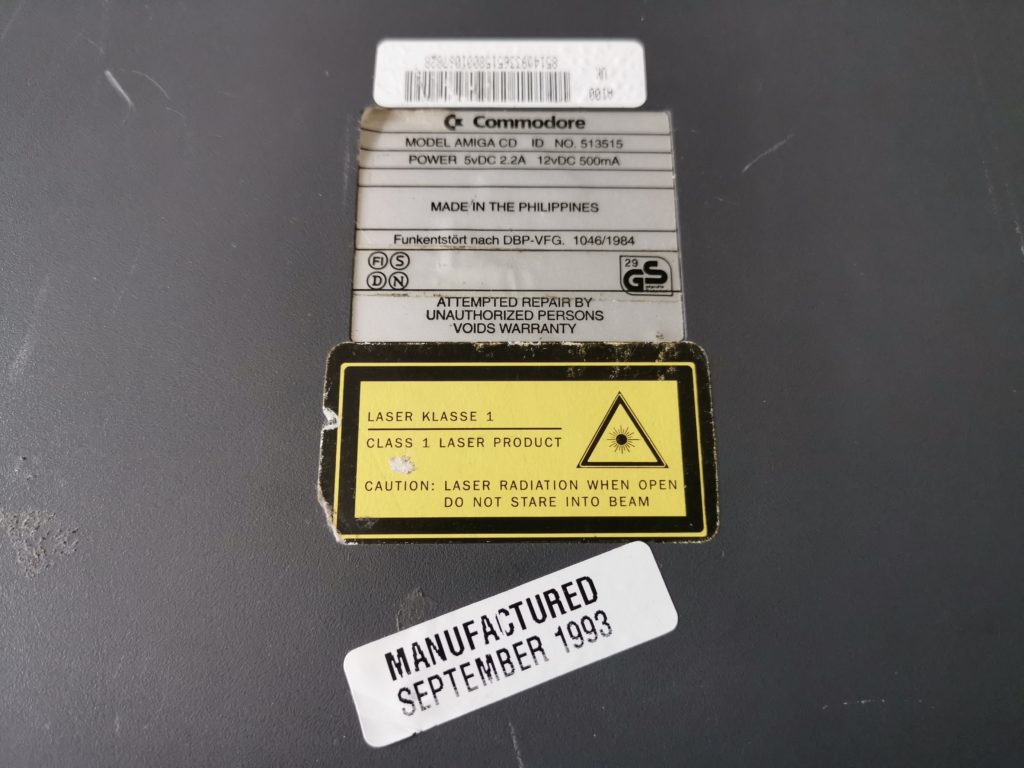
Made in 1993 in the Philippines.


Amiga CD32

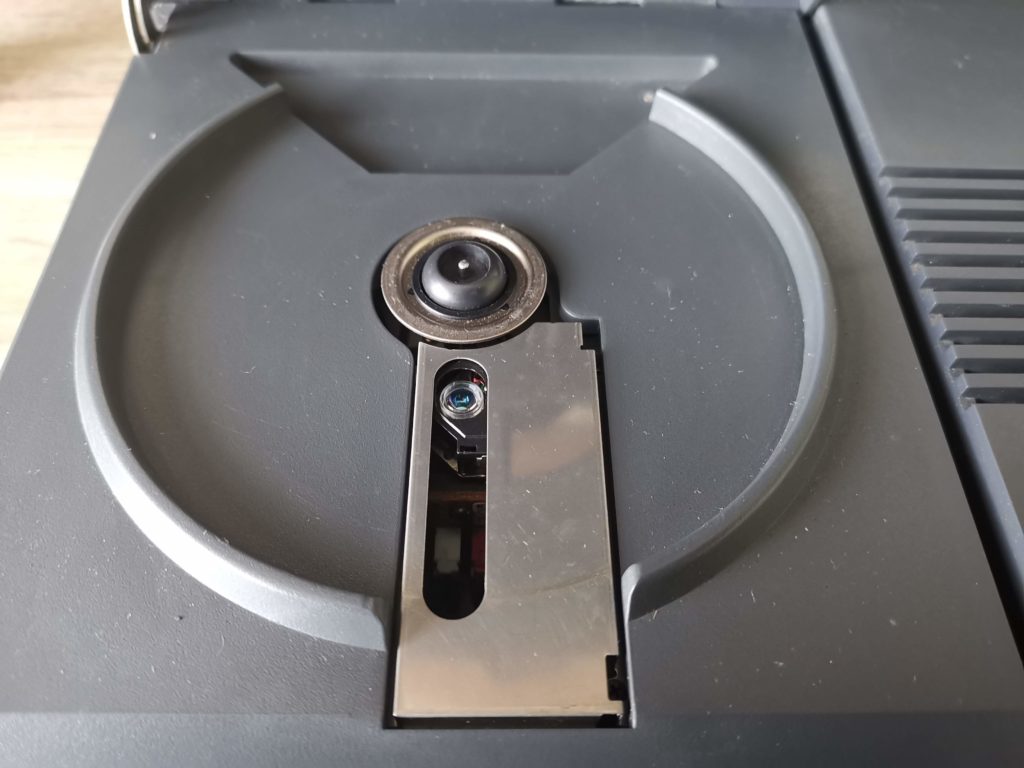
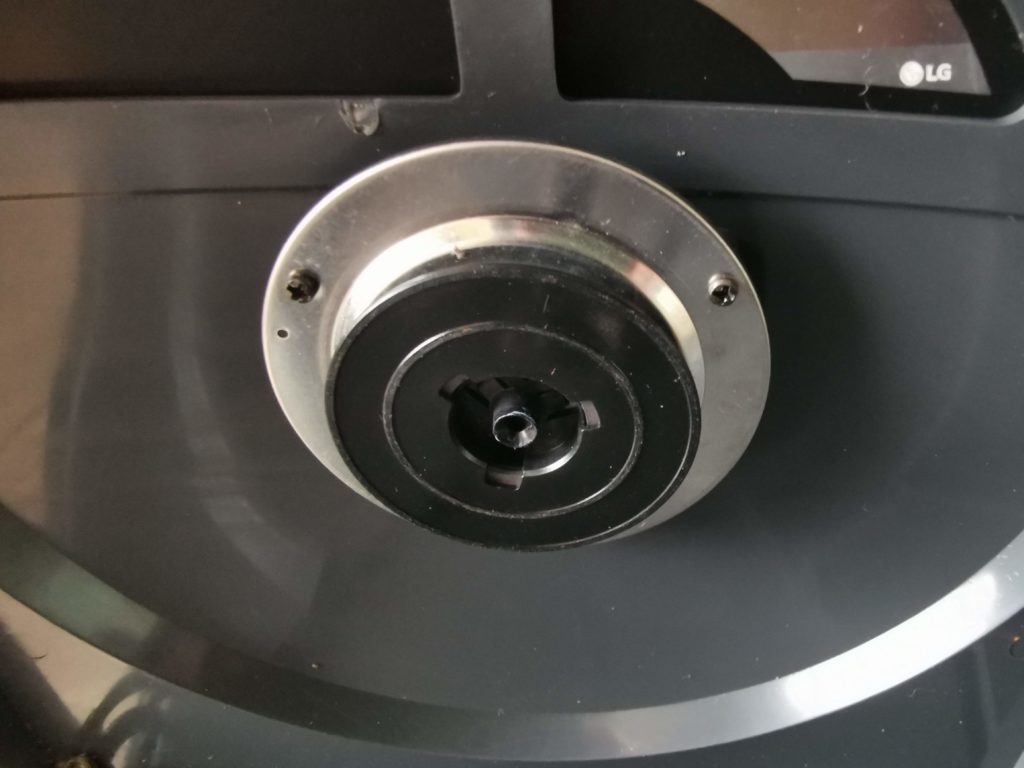
View of the CD tray and laser pickup.


The CD mechanism is pretty basic but it gets the job done. My CD32 came with a spare laser pickup assembly but hopefully I won’t need to use it for a long time! Discs don’t click into place like on a lot of modern CD players. Instead they’re held in place by the friction of the lid pressing down on the CD when it closes.
 

Amiga CD32

Inside of the lid. This is what presses down on a CD to grip it.


A Few Issues


This slideshow requires JavaScript.


If there’s one facet of this CD32 console that concerns me, it’s this rear left corner. The rusty screws are an eyesore but also easily rectified. No, the thing that worries me is that it looks like the lid has cracked at some point and been glued back together. The repair actually looks quite effective and from a normal viewing distance isn’t that noticeable (I’ve zoomed in close in the above photo). However there is a spring loaded lever underneath this corner which ‘lifts’ the lid up automatically once you start to raise it and so this area is presumably under a lot of strain. I’m not going to do anything with it for the time being other than keep on eye on it. I will however be keeping my eyes peeled for a replacement lid just in case!


A Quick Peek Inside

Because, why not? Had to make sure that it had actually been re-capped as advertised (it had) at the very least! Also wanted to take a look at the Akiko chip which is only found in the CD32. This is the chip that allows it to convert planar to chunky graphics in hardware for 3D games.


This slideshow requires JavaScript.


CD32 Controller

The controller that came with my Amiga CD32 console is in superb condition. In fact I’d go as far as to say it’s in mint condition. It doesn’t look like it has ever been used. Sadly though it actually proved to be faulty – the D-pad ‘up’ just doesn’t work at all. Very disappointing – no idea what is wrong with it so will have to open it up and take a look soon.


This slideshow requires JavaScript.


Amiga CD32 Competition Pro Controller


Luckily I was able to pick up this Amiga CD32 compatible ‘Competition Pro’ gamepad off eBay pretty cheaply. Although it doesn’t look as cool as the official controller it works perfectly. At the end of the day that’s all that matters so I can still play with my new toy until I get around to sorting the original controller!


This slideshow requires JavaScript.


At the request of a reader here are some photos of the inside of the controller. The photos show that is is actually a ‘Honey Bee SF-3’ which is both on the back of the pad and printed onto the circuit board itself. Upon opening it up I also discovered that the insides were absolutely filthy! The board and contacts received a good cleaning with Isopropyl Alcohol before being reassembled. I hope the images prove useful and if anyone has any further interesting info about the controller please let me know I will be sure to update this page.
This slideshow requires JavaScript.
 

PSU

Sadly my CD32 console didn’t come with an original Commodore PSU but rather this modern one made by LaCie. Although given the ropy nature of some of the official C= PSU’s maybe that’s a good thing?


This slideshow requires JavaScript.


That Badge – Revisited & Fixed!

OK, I’ll confess that the scratched Amiga CD32 metal badge annoyed me more than I thought it would. I started hunting around for a possible replacement. Replacement badges are quite commonplace for the Commodore 64 and Amiga computers so I had planned to replace my scratched up old one with a brand new one. Turns out CD32 badges are quite hard to come by. However I did come across a guy in Switzerland selling vinyl CD32 stickers on eBay that he claimed fitted exactly so I ordered one.


This slideshow requires JavaScript.


True to his word, the vinyl sticker was indeed a perfect fit in terms of size. It’s also a very close match in colour and tone to the original, certainly close enough for me anyway. It was a little tricky to get it lined up perfectly, but now it’s in place I think it looks fantastic. Sure it’s not quite as glossy as the original, it’s got more of a silk finish, but I’m very happy with the end result.

FYI, I didn’t remove the original badge – I simply stuck the new one on top of the old metal one. The reason I did this was so that if I ever wanted to go back to a 100% original finish I could simply peel the new one off.


We have ignition!

Here’s a quick video I did of the awesome CD32 boot-up sequence. This must have been amazing back when it launched, two years before Sony’s original PlayStation in the UK! The quality is a little bit ropy as it’s only connected up to my TV using composite video at the moment.


Definitely time to dig out my CD32 Scene magazines and see what games I need to buy to start my collection!

Modding Amiga 500 Floppy LED to Display IDE Activity

Introduction

Unlike the Amiga 1200, the A500 was never designed to allow the fitment of an IDE Hard Disk Drive (HDD) inside it so naturally it never included an HDD activity LED. For the longest time this was never really an issue. Sidecar expansions such as the A590 were the only way to add HDD’s to the A500 and they came with their own drive activity LED. However, now that many owners are fitting expansions like the Vampire into their Amiga 500, things are a little different. These new devices facilitate the use of 2.5″ HDD’s or Compact Flash (CF) cards inside the casing of the A500, something that was never possible before.

The problem with this is the lack of a drive activity light. It can be quite disconcerting at times when you turn on your ‘Vampired’ Amiga 500 and nothing appears to happen. You sometimes wonder if it’s actually booting up or simply frozen. The same issue crops up whilst loading a game or running a program. There’s simply no way to tell if your Amiga is doing anything, especially if you’re using a CF card as they are completely silent. At least if you have a 2.5″ HDD they do at least make some sounds whilst being accessed.

Wouldn’t it be great if you could add a hardware activity light to your A500 to solve this issue? Well, recently I stumbled across a nifty little mod from Arananet that claimed to allow you to do just that by using the Amiga 500 floppy disk activity LED to show IDE HDD/CF activity. It’s called the ‘IDELED’ and is only €7 plus postage so I ordered one and sat back waiting for it to arrive. (Direct link to the Amiga 500 IDE activity LED can be found here).

Incidentally, if you fancy making this modification yourself all you need is a phillips screwdriver (to open the A500 case up), some wire cutters/strippers and a soldering iron. Don’t worry if you’re not an expert solderer, I’m rubbish at soldering but this is very basic stuff and should be well within most peoples capabilities.

A closer look at the IDELED device

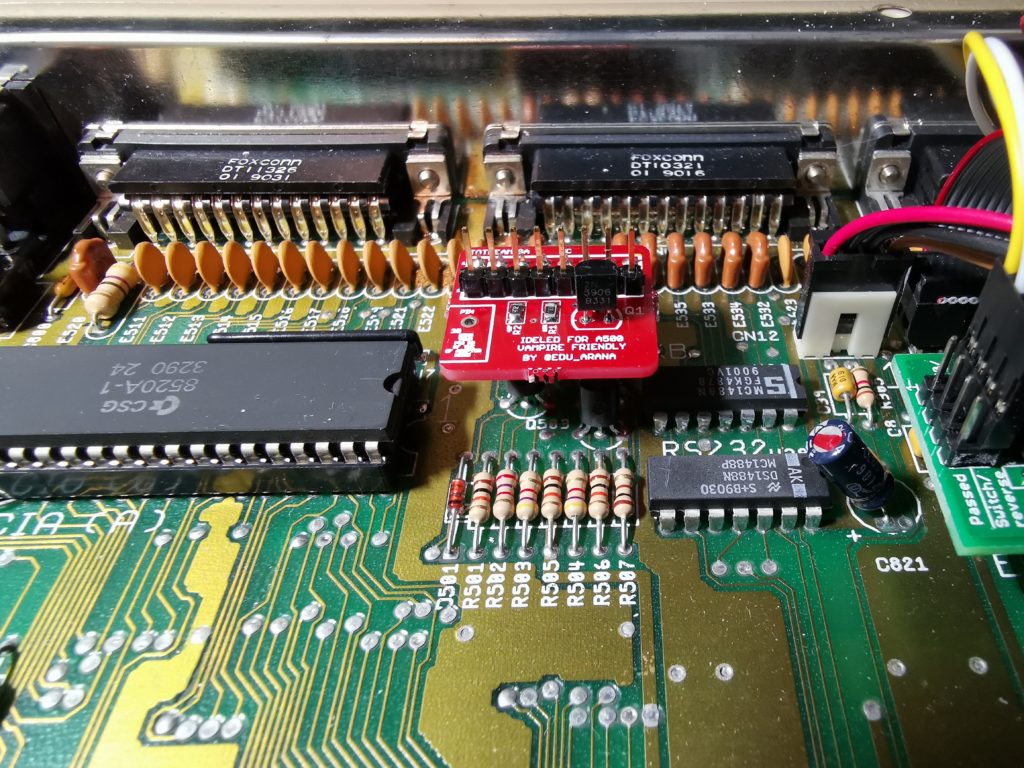
The device arrived in a little anti-static bag with no instructions. It’s a tiny little 1″ square circuit board that incorporates an 8 pin socket one one side and 8 pins on the other. There is also a small hole for you to solder a wire to, plus a few components that allow it to ‘do its thing’.

This slideshow requires JavaScript.

Getting Started

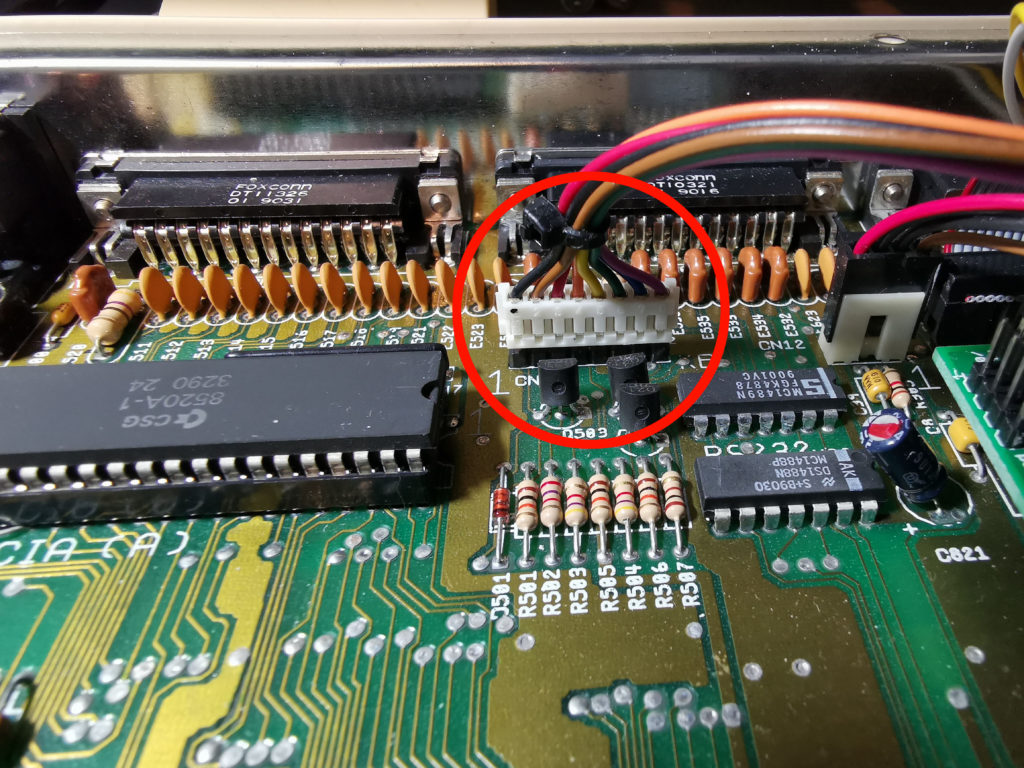
The IDELED is designed to sit between the Amiga 500’s keyboard connector and the keyboard cable. This gives it access to the floppy drive LED circuit and allows that to be used as an IDE activity LED in your Amiga 500. After opening up your A500 the first thing you need to do is carefully unplug the keyboard connector, lift away the keyboard and set it to one side.


Amiga 500 keyboard connector

Unplug the keyboard connector (circled in red).


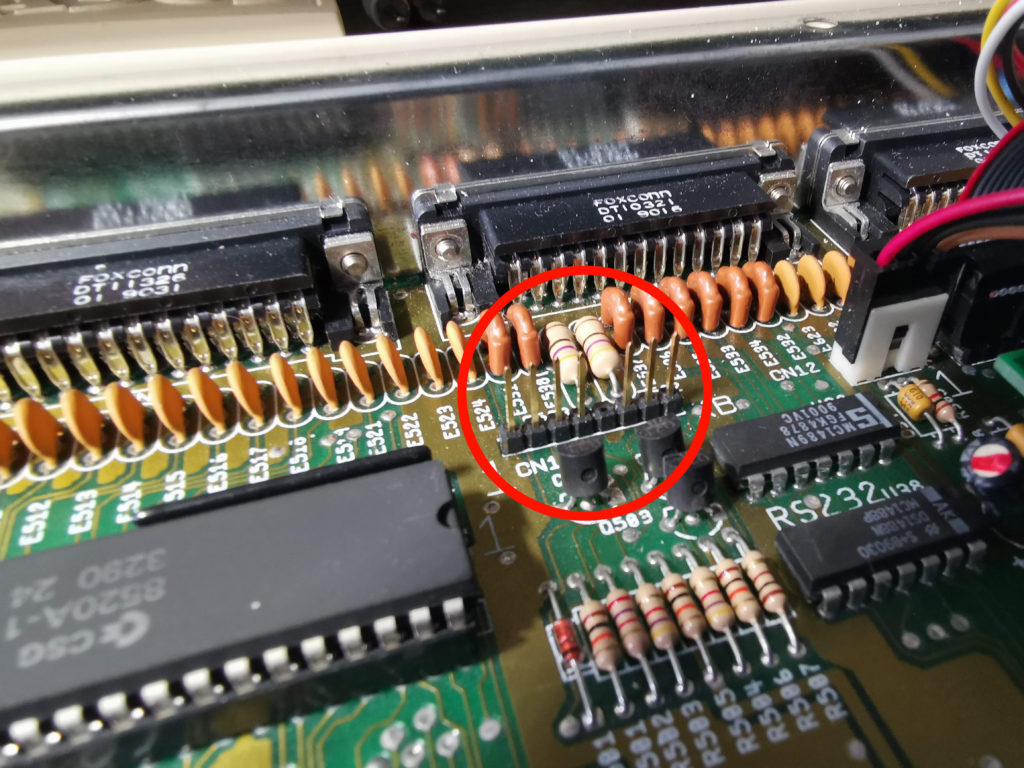
You’ll then have access to the 8 pin keyboard connector on the mainboard which will look like this:


Amiga 500 keyboard connector pins

Keyboard connector pins


Next you need to attach the IDELED board to the keyboard connector pins on the mainboard. Make sure that you connect it the correct way around – orient the board so that the keyboard connector is at the back if you are looking at it from the front of your Amiga. It should then look like this:


IDELED board

IDELED fitted to keyboard connector


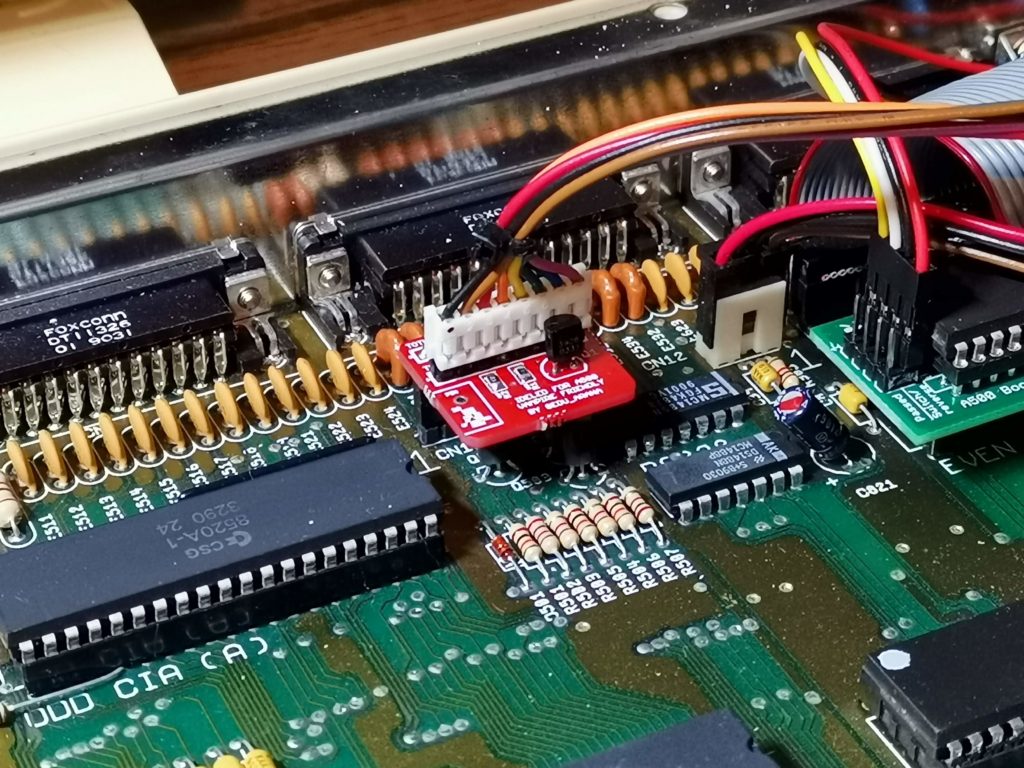
At this point I connected the keyboard to the pins on top of the IDELED board. You might want to leave doing this until after you’ve soldered the connecting wire but I needed to experiment a bit and wanted the A500 powered on and the LED’s working. At this stage the project looked like this:


Amiga IDELED board

IDELED board fitted between mainboard and keyboard cable


Solder time

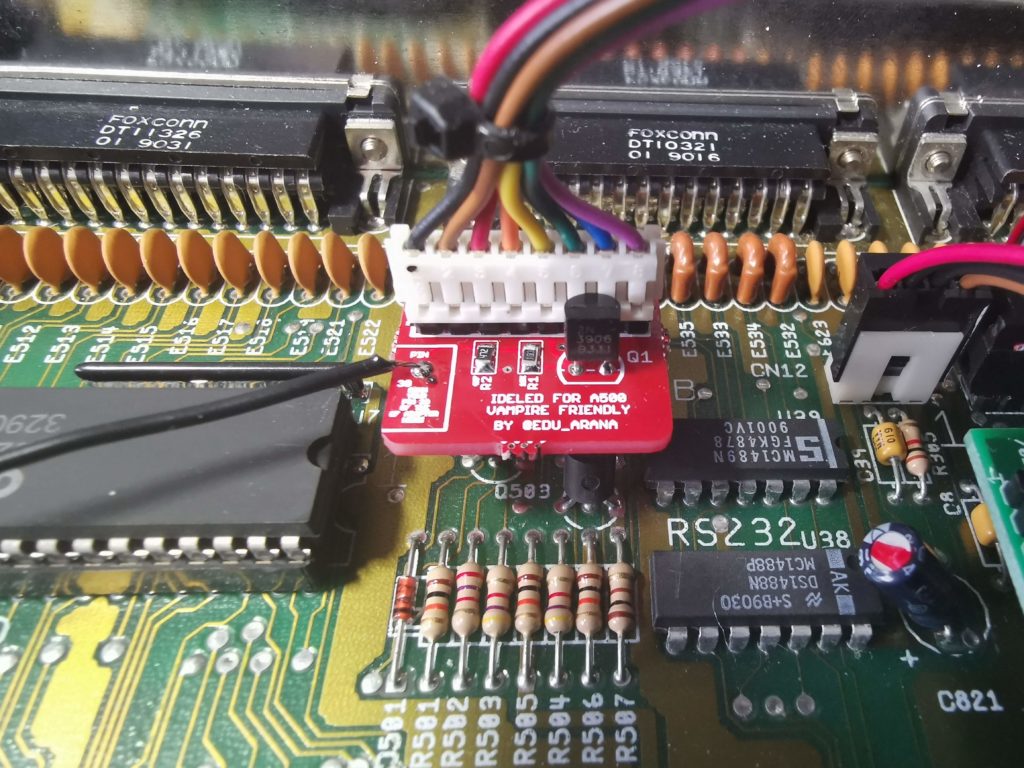
The next job is to attach a short wire to that little solder point on the left side of the IDELED board. The wire needs to be long enough to reach the IDE connector on top of your Vampire (or other accelerator card) with enough slack so that it’s never under any strain if you have to move things around in the future. You will need to strip off a few millimeters of insulation from each end of the wire before you go any further. It’s much easier to do this before one end of the wire is attached to anything. I’d also suggest ‘tinning’ the exposed wire each end as this makes soldering them easier.

Insert one stripped and tinned end of the wire into the little hole in the board and apply a blob of solder. You should now have something looking like this:


Amiga 500 IDELED board

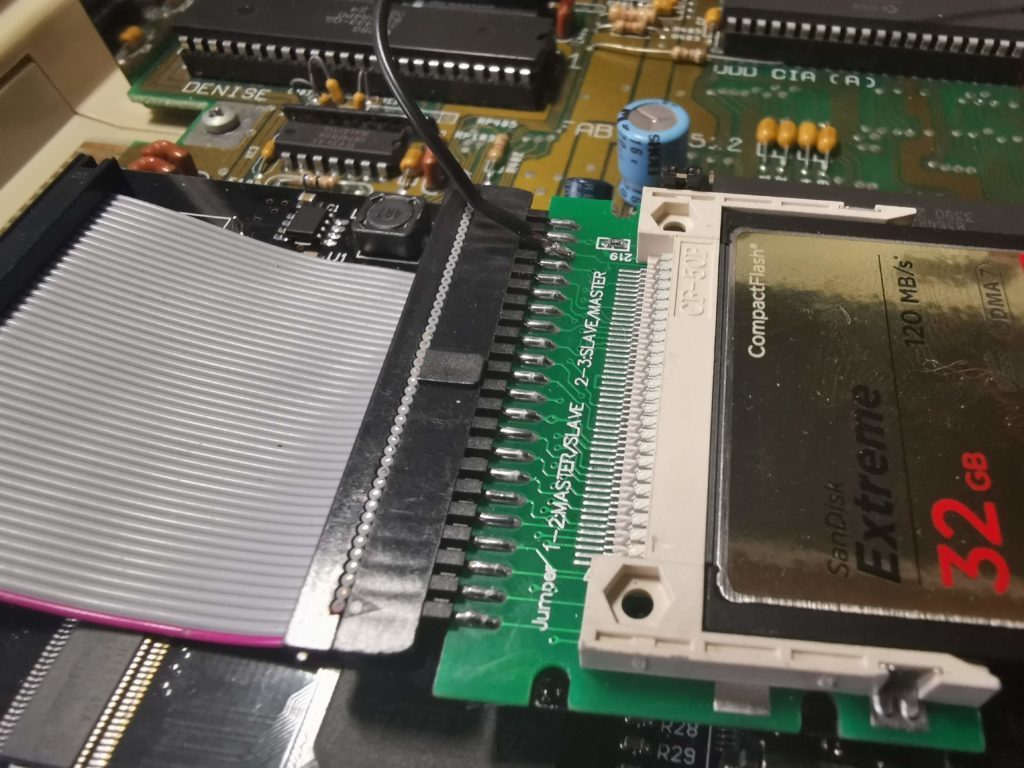
IDELED board with ‘activity’ wire soldered on


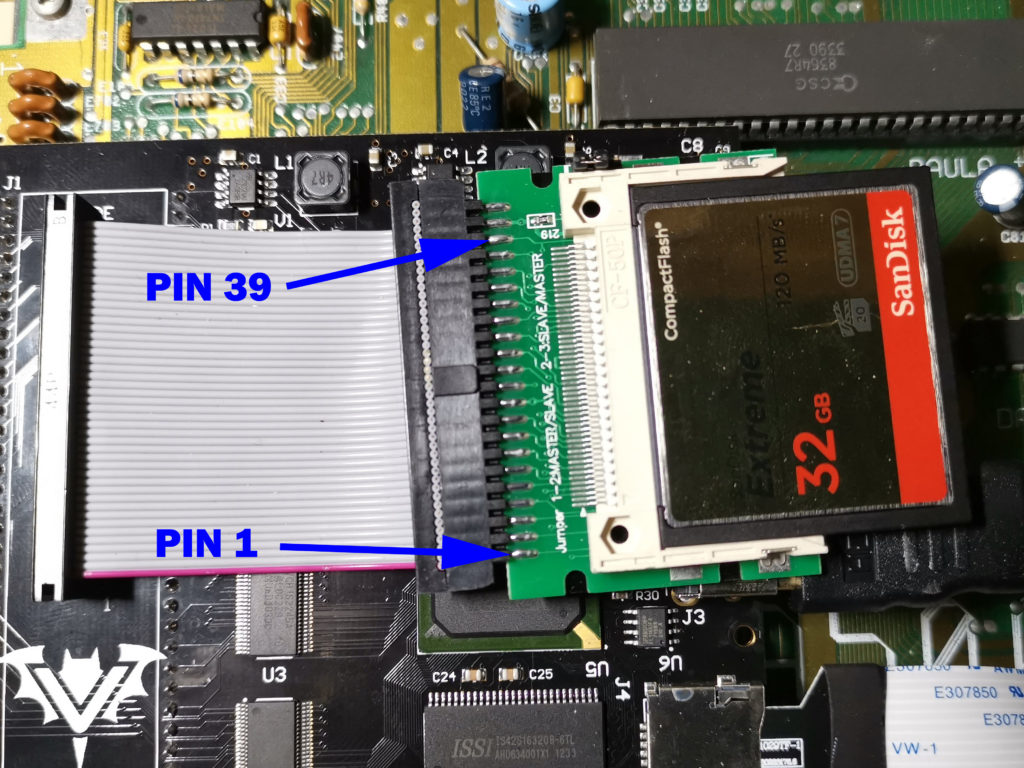
Locating pin 1 and 39

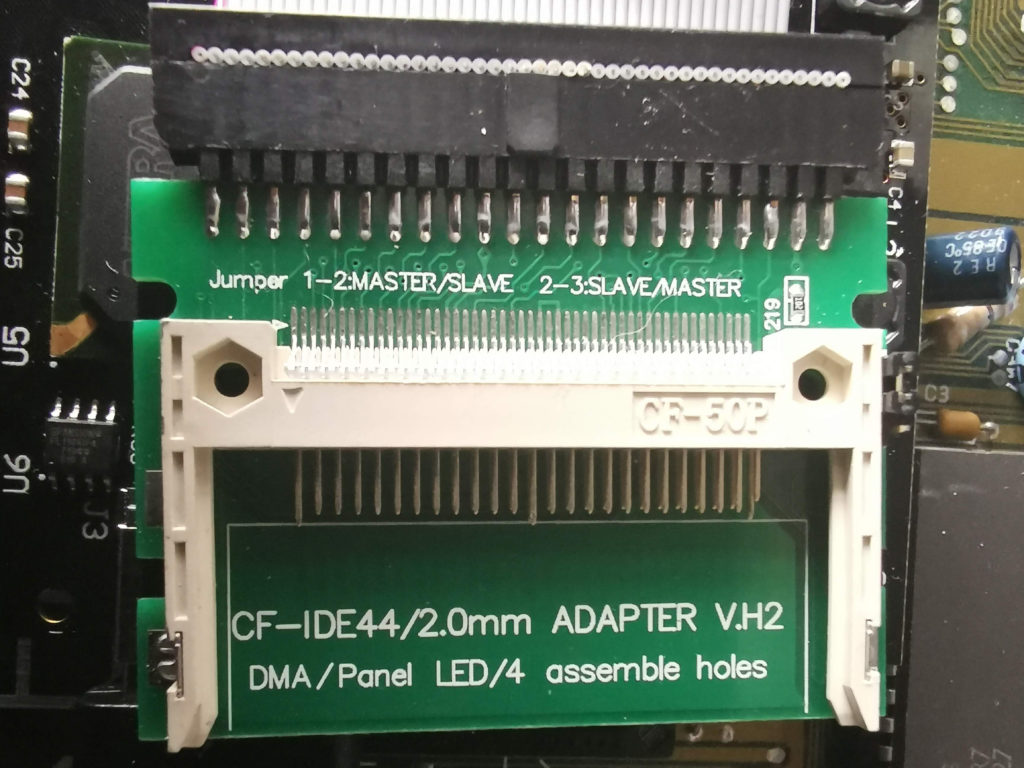
The other end of the wire needs to go to ‘pin 39’ on your IDE adapter. This is the pin responsible for transmitting drive activity. If you have a CF adapter like mine (pictured below) then you should be OK to just hook the wire up to the same pin as I did.


Amiga Compact Flash IDE adapter

A closer look at my IDE CF adapter (without CF card fitted)


Amiga Vampire CF flash adapter pins

Locations of pins 1 and 39 on my 44 pin IDE adapter


To locate ‘pin 39’ on my adapter I used the 44 PIN IDE connector diagram below for reference. Note the way the pins are numbered – it alternates up and down with 1 top left, 2 bottom left, 3 back to top row and so on. My particular adaptor has the upper row of 22 PINs connected to the top of the circuit board and the lower row of 22 pins to the underside.


Diagram showing pin numbering of a 44 pin IDE connector

2.5″ 44 PIN IDE pin layout & numbering


Provided it was connected up the correct way round originally, the purple edge of the ribbon cable indicates which side ‘pin 1’ should be. Thankfully the Vampire card clearly indicates where ‘pin 1’ is (see the little ‘1’ above the bats head in the photo above) so my cable was oriented correctly. Once I was sure of the location of ‘pin 1’ it was a simple matter of counting along to identify ‘pin 39’. Obviously if you have a different kind of adapter then you will have to confirm its location yourself. Hopefully the information above will help you out.


Amiga 500 IDE activity LED - pin 39 activity wire soldered on

Wire soldered to pin 39 – not the prettiest soldering job in the world but it does the job.


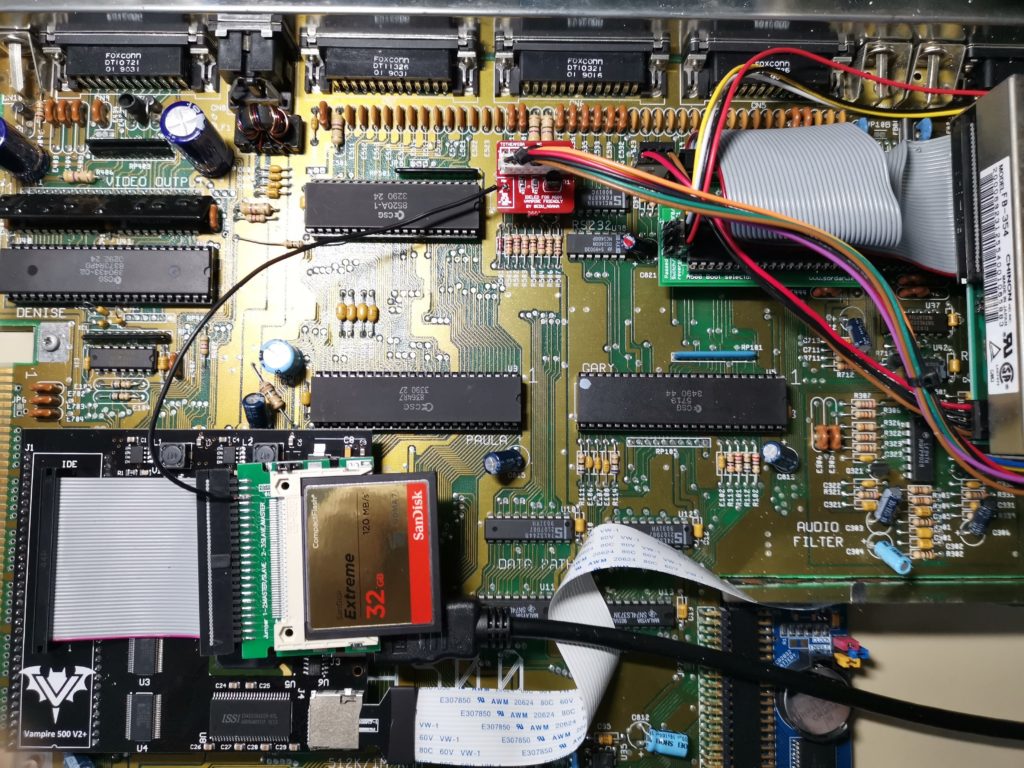
The completed modification


Amiga 500 IDE activity LED fitted

View showing the completed modification in its’ entirety.


Assuming you’ve connected everything up correctly (check  before you screw the case back together), you should now how a fully working IDE activity LED on your A500.


Demonstration

In the video below you can see my Amiga 500’s new IDE activity LED flashing away whilst it boots into Workbench. The loud clicking sound is just my empty floppy drives clicking – the anti-click software doesn’t run until workbench has finished loading.

I’m really pleased with this mod, it was cheap, pretty simple to implement and above all else, really useful. No longer will I be in the dark about when my CF card is being accessed!


But wait, there’s more!

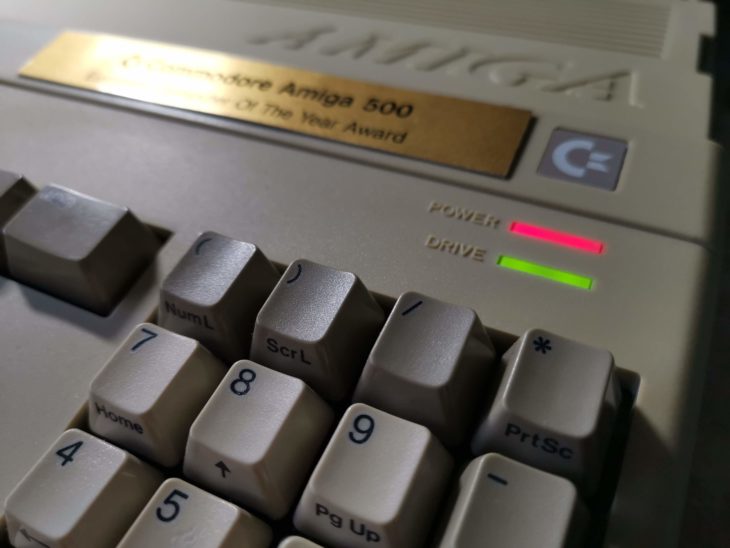
When you pop in a floppy disk the activity LED still flashes away as usual so there is no loss of functionality. Quite the opposite in fact as the LED even flashes when I use an SD card (the Vampire supports SD card storage too) which is totally awesome and something I definitely wasn’t expecting. An added bonus is that because Commodore simply labelled the A500’s floppy activity light as ‘Drive’ it’s still labelled correctly! How’s that for future-proofing!?

Anyway that about wraps this article up for now. I do hope you found this article both interesting and useful. If you did, please let me know by leaving a comment below, I’d love to hear from you.

Three Classic VIC20 Games Remembered

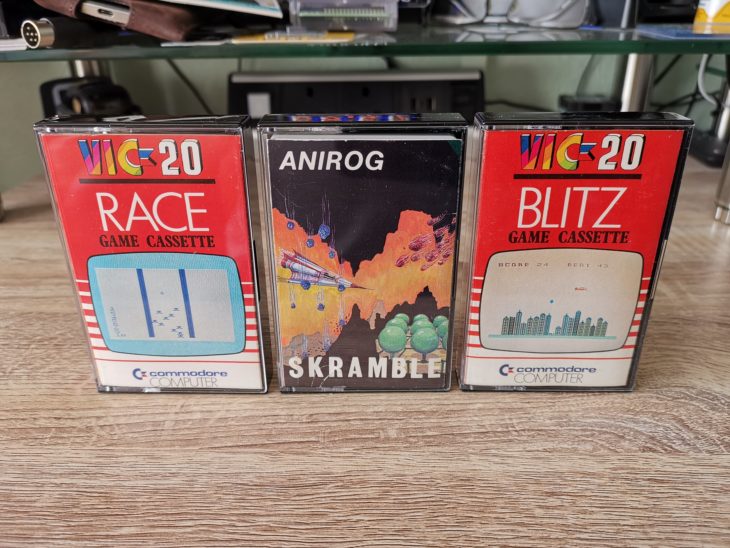
Race, Skramble & Blitz

Picked up a few nice games off eBay recently for my VIC20. Although I’ve had all of them in past, this is the first time I’ve actually owned the retail releases for each game. The copies of Blitz and Race I had as a child were part of a compilation tape I got with my VIC20. I only ever had a pirated copy of Skramble so now at long last I have the original game in my collection.

Although the cassette tapes and ‘J’ card inlays were in terrific shape, the boxes on all three were extremely tatty and well worn. The very first thing I did was replace them with new ones and as you can see the games all look as good as new now.


This slideshow requires JavaScript.


Like many people I got my copy of ‘Blitz’ and ‘Race’ on a compilation tape that came with my VIC20 computer.  I still have this tape (pictured below) of course but thought it would be cool to own the original, stand alone copies of the games too.  It’s holding up pretty well considering it’s now 37 years old!


This slideshow requires JavaScript.


A brief look at each game


As I’ve done on previous occasions,  I’ve taken some screenshots of each game and written little mini reviews of each. Part of the fun of getting hold of these old games is to relive the whole experience of loading them and seeing if I even remember what they used to look like correctly after all this time.


Race


Despite some horrendous squeaking noises this loaded after a few tries. It’s a pretty spartan game with a brief text introduction and then on to the game. Despite the name and screenshot on the front of the cassette case this is not a racing game. No, this is a dodging game. Move your bike left and right to avoid the other bikes scrolling up the screen. The are four difficultly levels and it gets faster as you progress until you either reach the end or crash. Needless to say it’s not a very entertaining game, and probably never really was. The whole thing is very rudimentary, but then again it looks like it was written in BASIC so you can’t expect too much. Still, it’s a nice little bit of VIC20 history.

This slideshow requires JavaScript.


Blitz

This is also a 3.5K game written in BASIC for an expanded VIC20. However this one manages to have a lot of charm and character and is quite fun to play.

The idea is simple, fly your little bi-plane across a randomly generated city as you bomb it into oblivion so you can land. Every time you reach the edge of the screen your plane drops down a row, getting ever closer to the skyscrapers below. You can only drop a single bomb at a time so there is an element of strategy (and luck) to it if you want to succeed. If you time it well you can often drop two or more bombs in one pass which is crucial to clearing the city. Fail to bomb even the smallest bit of rubble away and you’ll crash into it and it’s game over.

I played this quite a lot as a child, the graphics are really pretty good for what it is and the sound effects  work really well too. It’s still actually fun now and a worthy addition to my collection.


This slideshow requires JavaScript.


Skramble


I thought this tape was faulty at first as every time I tried to load it I was getting an ‘out of memory’ error. After a spot of RTFM I tried just typing ‘LOAD’ instead of the customary ‘SHIFT & RUN/STOP’ as it suggested. Hey presto – it worked! The screen turned white and the text red and several minutes later the game greeted me with a very colourful  title screen.

I have to say this is by far the best game of the bunch, the extra 16K of RAM really allows the VIC20 to show what it is capable of. Fantastic, colourful graphics, slick side scrolling and punchy sound effects made this one of the best Skramble clones you could play at the time and it still looks great even now. It’s definitely the best version of Skramble you could play on the VIC. Just a shame so few games actually took advantage of the 16K RAM expansion back in the day as the VIC20 was capable of running some great games if given the chance.

It’s was very difficult trying to play this whilst reaching for the phone camera, games back then didn’t have a ‘pause’ feature! I’m looking forward to playing this a lot more now and reaching the end. If my memory is correct there were 6 levels in all with the final one being pretty torturous. I completed it many times over as a child and won’t rest until I do the same now as an older and wiser, albeit probably slower adult!


This slideshow requires JavaScript.


Retro Gamer Magazine with Rob Hubbard CD!

Retro Gamer Magazine

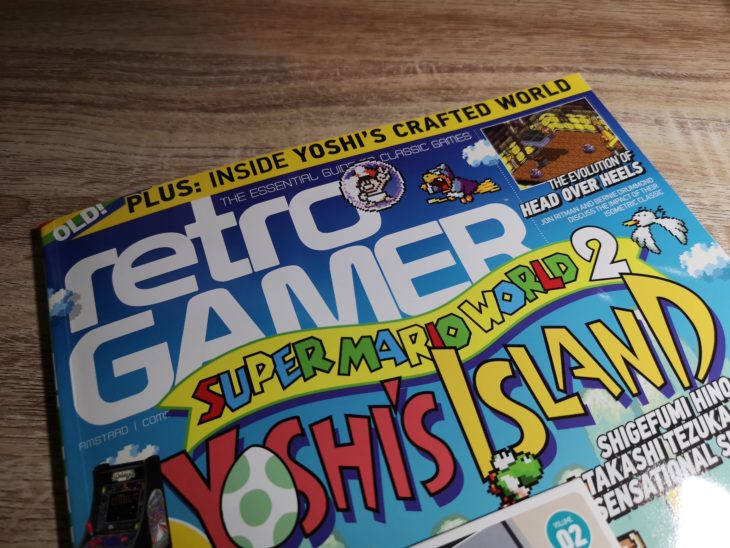
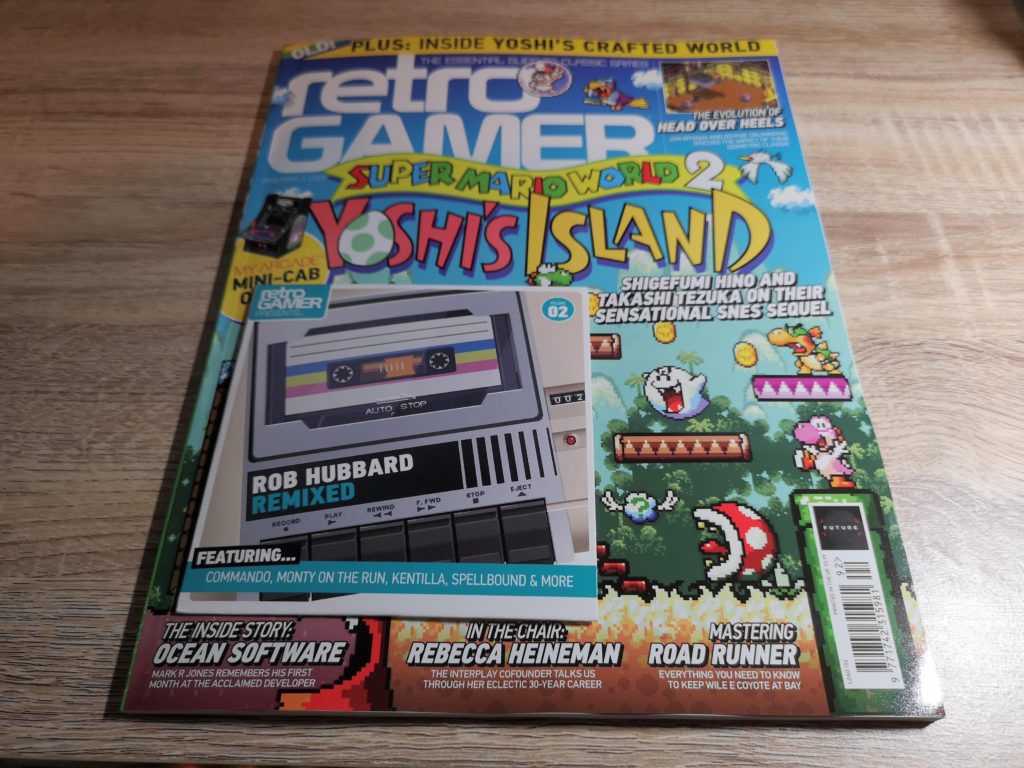
It’s been a long time since I bought a copy of Retro Gamer magazine so kudos to the person who decided to offer a Rob Hubbard CD in a C2N wallet as a covermount this month. Your marketing ploy worked on me!  As I browsed through the magazine rack in my local WH Smiths the unmistakable image of the C2N immediately caught my eye and then when I looked closer and saw ‘Rob Hubbard’ it became an instant impulse purchase.


Retro Gamer Magazine

Retro Gamer Magazine with Rob Hubbard ‘Remixed’ covermount CD


My love of synthwave music can be traced right back to the chip music created using the C64’s SID chip and Rob Hubbard was one of my favourite composers back in the day.


This slideshow requires JavaScript.


The music on the CD is terrific, a whole bunch of Rob’s tracks that have been given a little bit of a modern make-over. However the magazine is actually a pretty fine read too. Obviously with it covering pretty much every retro system on the planet it’s not wall to wall Commodore content but there is a good amount and lots of non machine specific articles that are still really interesting.


This slideshow requires JavaScript.


Commodore Content

I thought I’d highlight the Commodore content here for the benefit of anyone wondering if they should get a copy

  • 4 page article about Rob Hubbard
  • 6 page look at the history of Ocean software
  • 4 page article looking at the making of Space Taxi
  • 4 page article looking at the making Road Runner
  • A brief look at Shadow of the Beast
  • 4 page spread dedicated to the CD32 covering the likes of Guardian, The Chaos Engine, Pirates! and several other games

To be honest there was a lot of great content, not just for the Commodore but Megadrive, PlayStation, original Xbox and so on. I think I’ll be checking this magazine out regularly from now on.


Pi1541 Disk Drive

Pi1541 Disk Drive

Little bit of background

I’ve been aware of the Pi1541 disk drive or Pi1541 ‘hats’ for several months now. This project was undertaken to create a ‘cycle exact’ emulation of a Commodore 1541 floppy drive using a cheap Raspberry Pi computer. The idea behind it is that by fully emulating the 6502 CPU and 6522 VIA chips you would have a 100% 1541 compatible ‘disk drive’ capable of reading any disk image, even ones with custom fast loaders and exotic copy protection schemes. By contrast the ubiquitous SD2IEC devices don’t emulate either chips but rather simulate some disk protocols and use some clever code to try to blag some fast loaders into working. This is why special versions of some games need to be created to work on SD2IEC devices.

In a nutshell a Pi1541 Disk Drive utilises a Raspberry Pi B computer running custom software along with a daughter board or ‘hat’ which sits on top and connects to the GPIPO pins of the Pi. This ‘hat’ adds the standard IEC connectors and handles the stuff that is required for the Pi to successfully communicate with the attached Commodore computer. The project was created by a guy called Steve White and if you want to know the technical ins and outs then check out his website here.

Pi1541 Disk Drives can be picked up very cheaply on eBay. In fact the whole point of the project was to create something better than an SD2IEC but much cheaper than FPGA based offerings like the 1541 Ultimate II+. Of course another option is to build your own but I have neither the time nor the inclination to attempt that. The other big turn off with both of these options is that quite frankly, the devices are just plain ugly. Which brings me neatly on to my latest acquisition…

Pi1541 Disk Drive

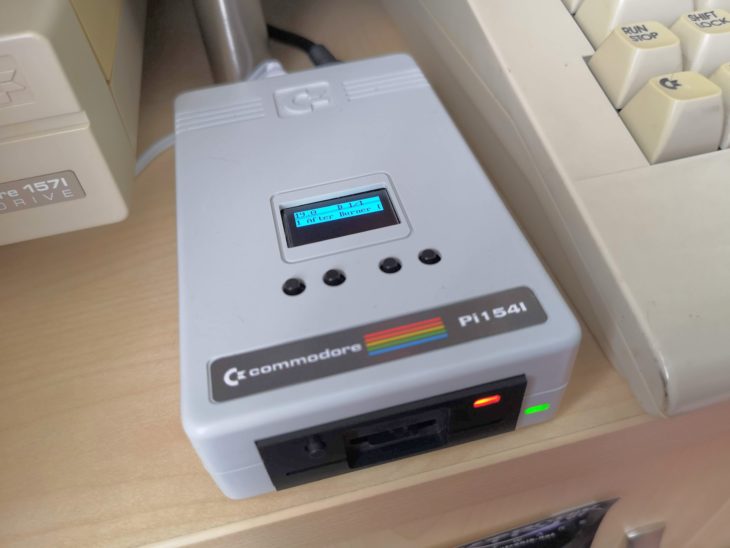
As I mentioned earlier I’ve been aware of this project for some time, but for the reasons I mentioned above it just didn’t appeal to me. Until that is, I saw that Tim Harris who runs sharewareplus was offering a super slick, plug and play, cased Pi1541 Disk Drive complete with OLED screen. I just had to have one and after several months of waiting it has finally arrived!


Pi1541 Disk Drive

Pi1541 Disk Drive


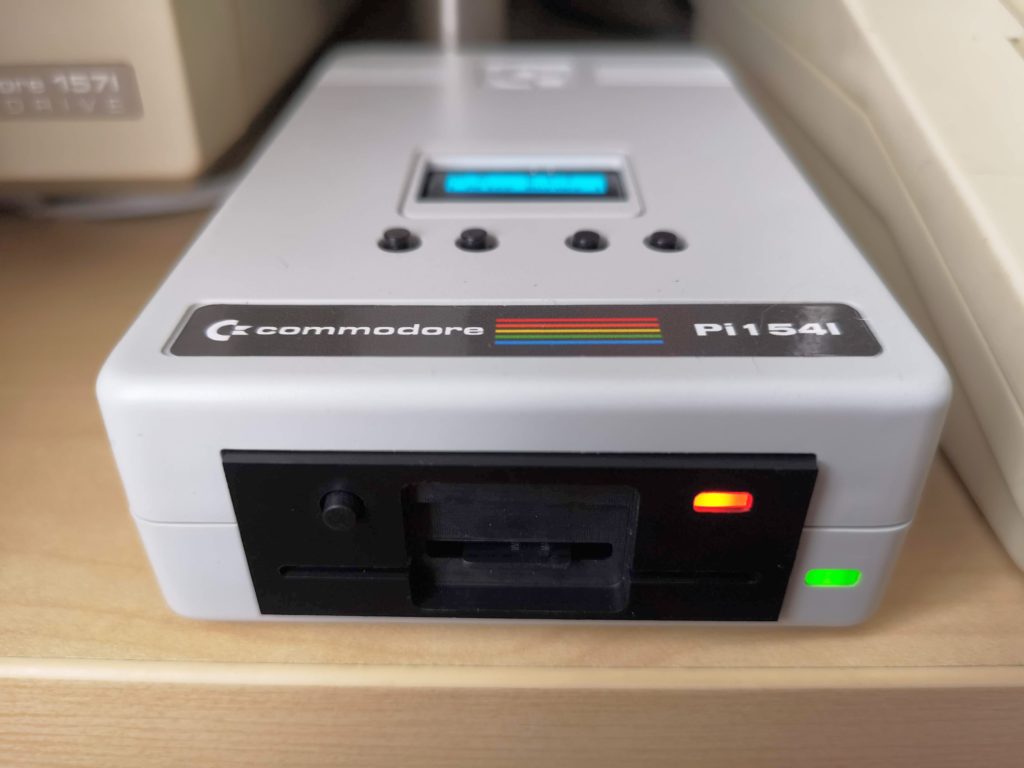
This really is a thing of beauty, modelled closely on the first generation Commodore 1541 floppy drive. There’s so many little design cues taken from the original case. The Micro SD card slot encased in black plastic housing complete with scaled disk ‘slot’.  The red drive activity LED and green power LED. A chicken logo moulded into the casing top. The Commodore label complete with rainbow colours and a 1541 logo where the trailing 1 is actually a letter I. It even has a built in speaker to emulate the drive sounds of the original drive!

It came supplied with a Micro USB cable (to power it) and a single instruction sheet explaining what the ports are for and what the buttons do. Disappointingly it did not include a Micro SD card, IEC cable or even further instructions.


This slideshow requires JavaScript.


The casing is approximately 5″ (13cm) deep, 3″ (7.5cm) wide and 1.25″ (3cm) tall. On the front there is a MicroSD card slot, a green power LED, a red drive activity LED and a ‘Select/Start’ switch. On the rear there is a power on/off switch, Micro USB power socket and a standard CBM IEC drive connector socket.


This slideshow requires JavaScript.


On the top of the device is a lovely 1″ x 0.5″ (128×64 resolution) blue OLED screen along with four navigation buttons. When the device is first turned on it operates in SD2IEC mode which allows you to browse through the contents of your Micro SD card and select an image (or multiple images) to use. In this mode all 4 top buttons have a function: ‘move up’, ‘move down’, ‘exit folder’ and ‘add disk’ (for multi-disk games). In this mode the button on the front acts as a ‘select’ button.

Once an image has been selected on the device and a ‘load “*”,8,1’ (or similar drive command) is issued from the computer, it switches to full 1541 emulation mode. In this mode only the first 2 buttons on the top have a function: ‘previous disk’ and ‘next disk’. In this mode the front button acts as ‘start’.


Setting it up

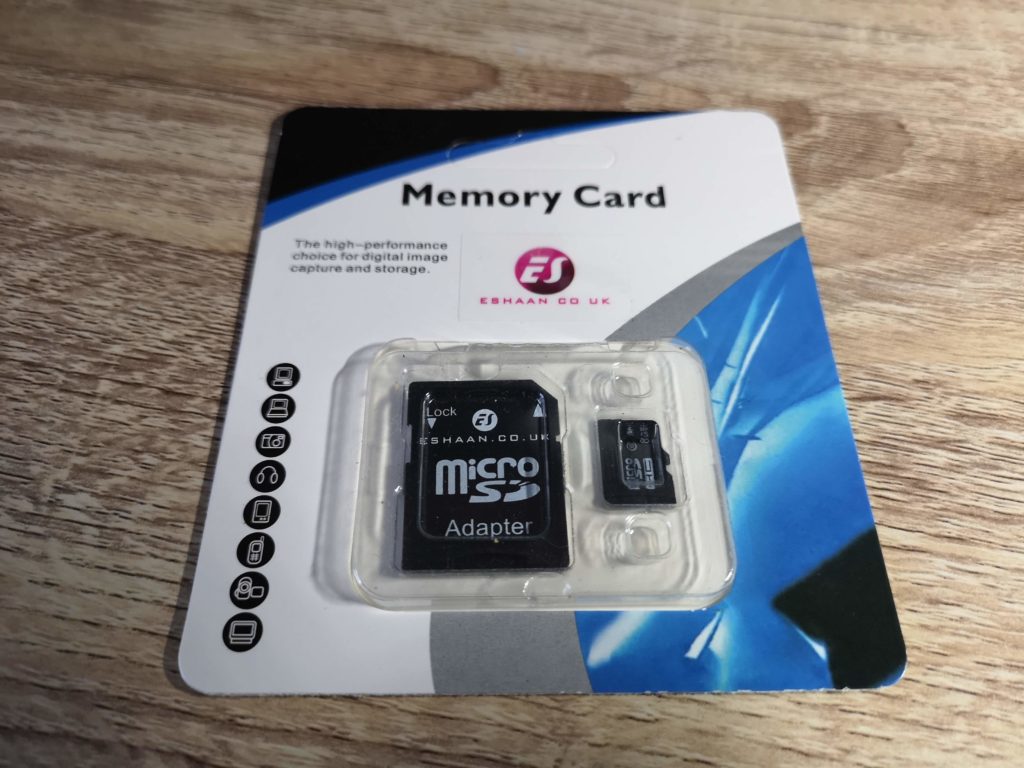
I was advised that this Pi1541 Disk Drive worked best if you use an 8GB Micro SD card so I just picked up this [amazon_textlink asin=’B00OO1489A’ text=’generic card’ template=’ProductLink’ store=’lyonsden-21′ marketplace=’UK’ link_id=’2cfd7b41-fa87-463d-8193-fa88db2fcc6e’] off Amazon and it has worked perfectly.


Pi1541 Disk Drive

8GB Micro SD Card


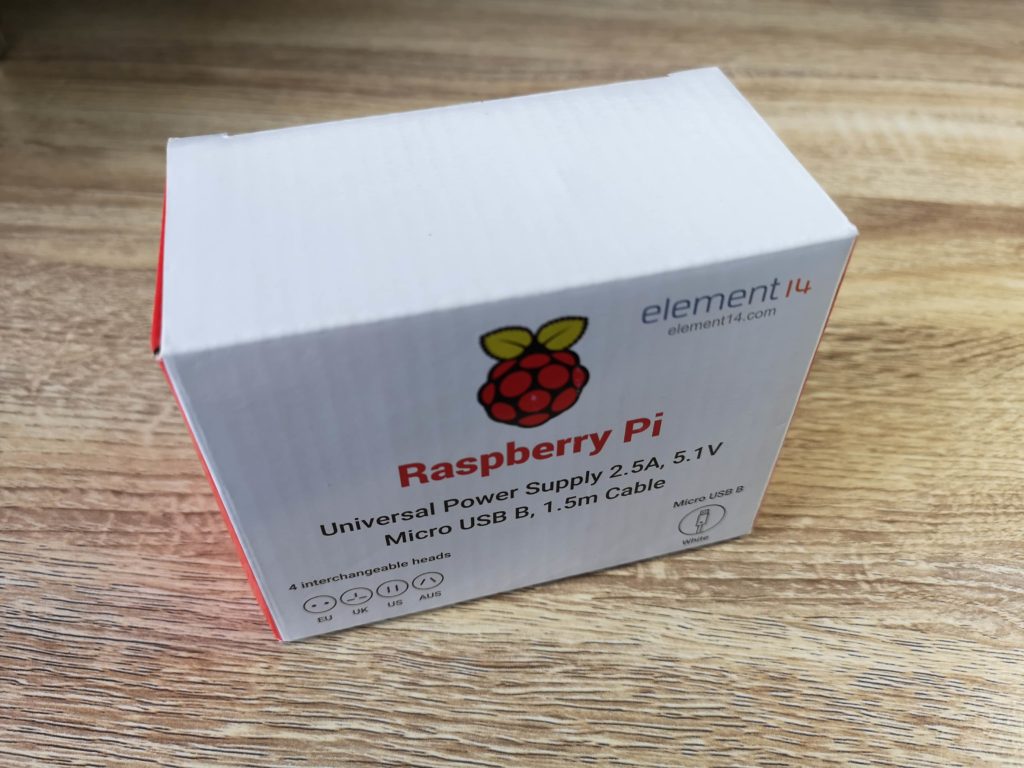
Unfortunately I did not fare so well with the Micro USB power supply. The device came with a Micro USB A-B cable so I plugged it into a free port on my power strip extension lead. The drive powered up and appeared to work fine until I tried to actually load a directory listing or a program and then it would just lock up and my C64 would freeze. Thinking the device was faulty, I got in touch with the guy selling it and was advised this was likely a power issue. The Pi needs a beefy PSU, especially when it’s also powering an additional board plus OLED screen. Long story short I tried several USB chargers from phones and such like but none of them fixed the problem. In the end I ordered an official [amazon_textlink asin=’B01CO1ELT8′ text=’Raspberry Pi PSU’ template=’ProductLink’ store=’lyonsden-21′ marketplace=’UK’ link_id=’5f2082ed-bb79-4d0e-a527-0c957f374c26′] off Amazon and the problem just went away. Moral of the story? Don’t be a cheapskate and buy a decent power supply for it!


Pi1541 Disk Drive

Official Raspberry Pi PSU


In use

Once I’d properly sorted out the Micro SD card and PSU the Pi1541 Disk Drive worked perfectly. It loaded everything I threw at it including .G64 disk images that that won’t work on my SD2IEC device (but do work on my 1541 Ultimate II+). I also tried it with turbo load cartridges such as the Epyx Fastload and Action Replay VI’s Fastload. It worked perfectly and as you would expect loading times were significantly reduced using either cart. It is claimed to be 100% compatible with Jiffy DOS too but at the moment I don’t have the hardware to put that to the test.

There are a few other benefits that the Pi1541 Disk Drive has over it’s rivals. It doesn’t hijack the cassette port or user port for power like an SD2IEC device would as it’s powered independently from the host computer. Nor does it occupy the cartridge slot like a 1541 Ultimate does. It also works with my VIC20, something even the mighty 1541 Ultimate cannot do. I believe it will also work with both the Commodore 16 and plus 4 but I own neither of these machines so cannot confirm this.

There are a few niggles, the first being that the Micro SD card doesn’t have the ‘push to eject’ feature. When you want to remove it there is only 2mm of card protruding to grip onto and I found it difficult to pull out without using some needle-nose pliers.

My other gripe is that it didn’t come with an IEC cable, memory card or PSU. For a device costing £150 I would have expected these to be included and it would have saved me messing around trying to get a working power supply.

The sound produced is a little disappointing too. More a series of beep’s than a true emulation of drive noises (sounds a bit like what you get with a Gotek that’s had a sound mod fitted). My 1541 Ultimate II+ does a much better job of reproducing drive sounds.

Verdict

This is a terrific product and probably the best and most accurate emulation of the Commodore 1541 drive there has been to date. It also looks the part and will work across almost the entire range of 8-bit Commodore machines.


Pi1541 Disk Drive

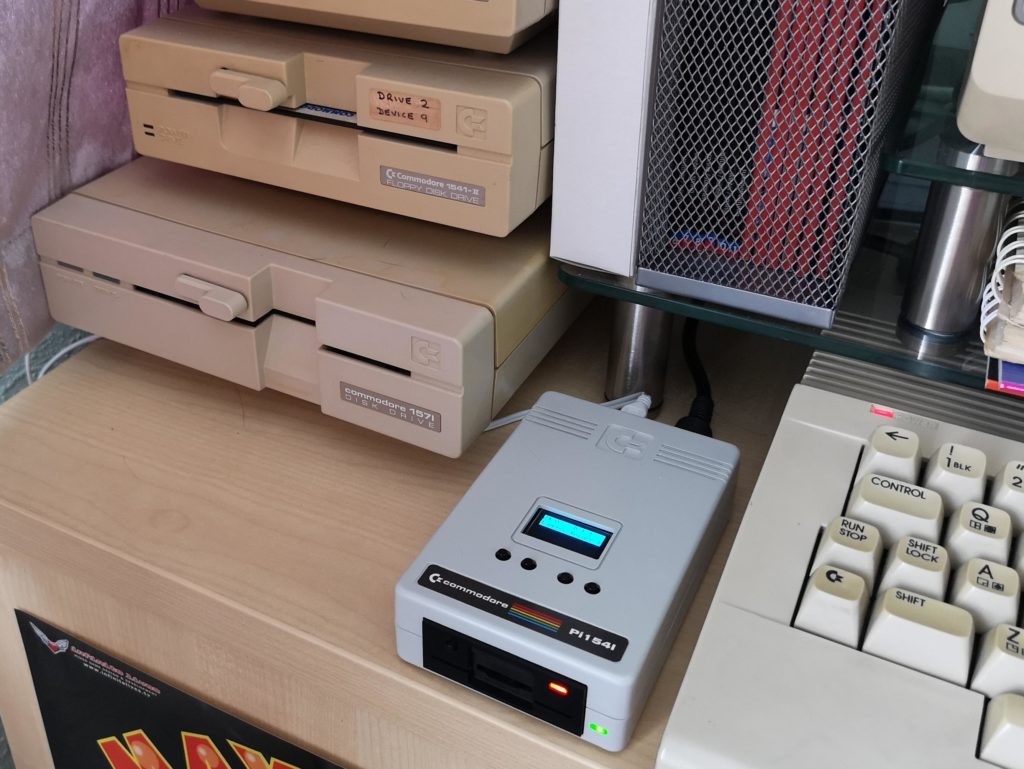
Pi1541 Disk Drive next to 1541-II’s and a 1571


It’s definitely a luxury peripheral in my eyes though rather than an essential purchase. In this particular form it cannot compete on price with either the SD2IEC or the 1541 Ultimate II+ cartridge (which has many more features). However if you were to choose one of the more modest Pi1541’s you can find on eBay then it trounces the Ultimate on price and beats the SD2IEC on compatibility for a similar cost.

Another thing to bear in mind is that although, strictly speaking, SD2IEC devices are nowhere near as compatible as the Pi1541, they ARE ubiquitous. Because of this most games have been tweaked to make them work within the confines of the system out of necessity, so in most cases compatibility is often a moot point.

Bottom line is this; if you want the most compatible and by far the best looking modern 1541 Drive implementation there is and you don’t mind paying a premium for it, then you won’t find a better product than this. You can pick these up from from Tim over at SharewarePlus.

2 New VIC20 Game Cartridges

VIC20 Pirate Cove & Star Battle

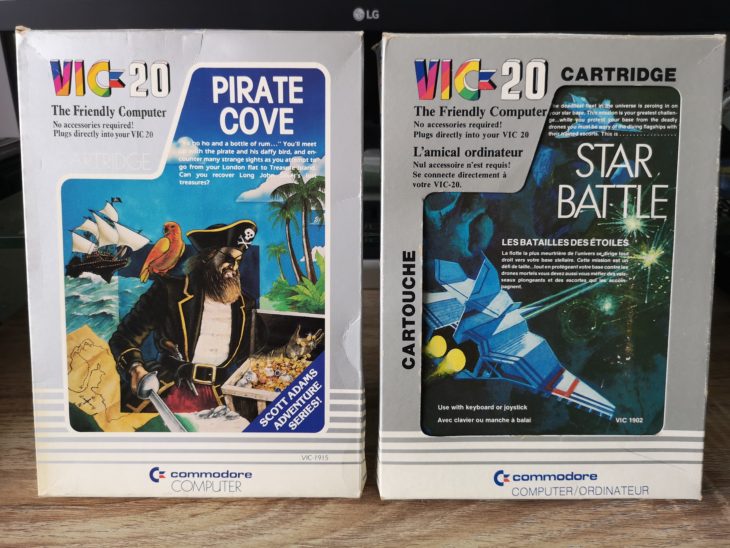
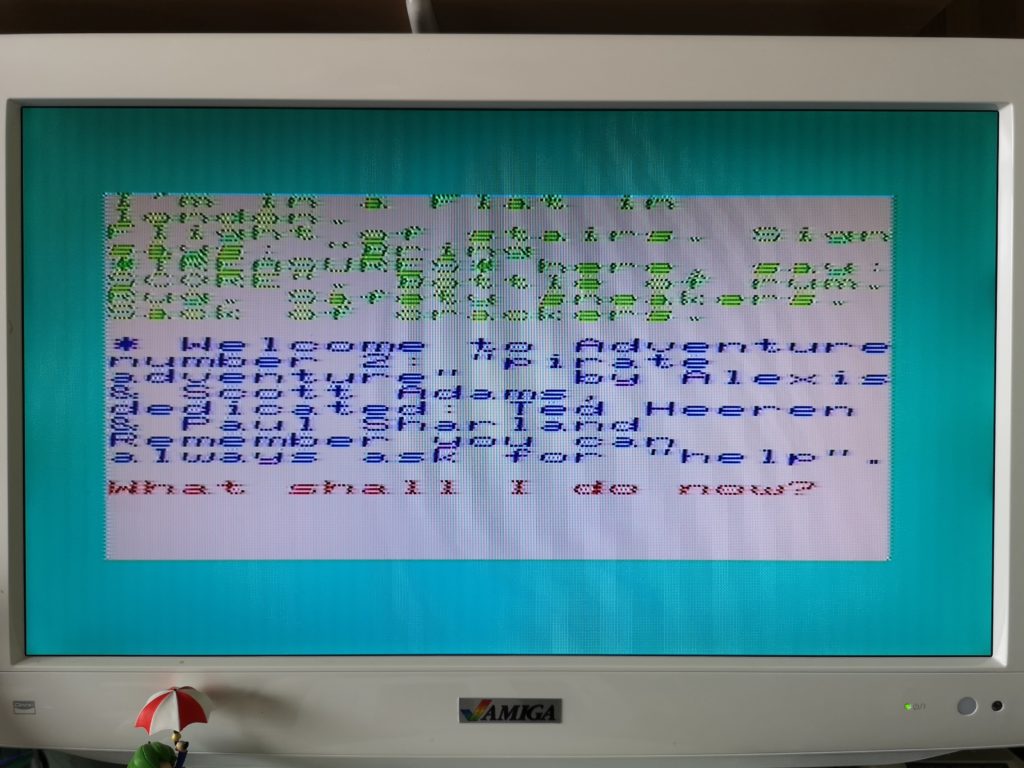
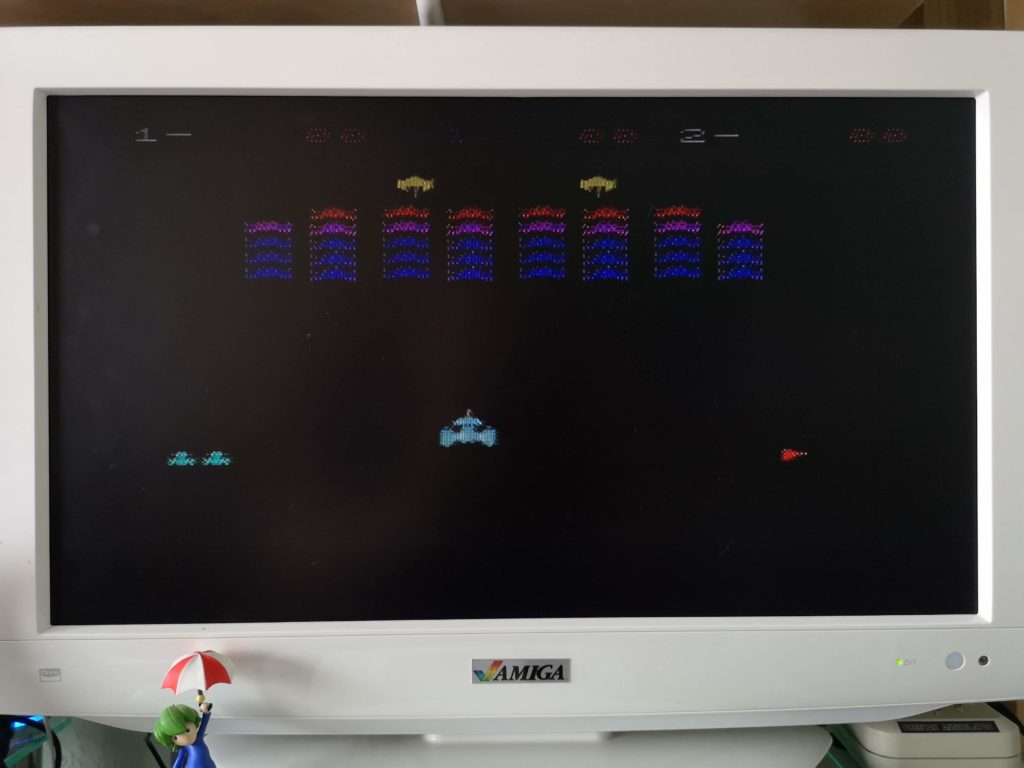
Picked up a couple of terrific classic VIC20 game cartridges off eBay to add to my collection this week. Pirate Cove and Star Battle, both of which are in fantastic condition. I’ve also spent some time scanning the boxes in and have added them to my ‘3D VIC20 Game Museum‘ too!

Pirate Cove is another excellent Scott Adams text adventure and along with ‘The Count‘, ‘Voodoo Castle‘, ‘Adventureland‘ and ‘Mission Impossible‘ completes my collection of his games on the VIC20.


VIC20 Pirate Cove

VIC20 Pirate Cove


Star Battle is a rather good Galaxians clone for the VIC20. I never had this as a child so really pleased to be able to add it to my collection now.


VIC20 Space Battle

VIC20 Space Battle


Amiga User 6

Amiga User 6

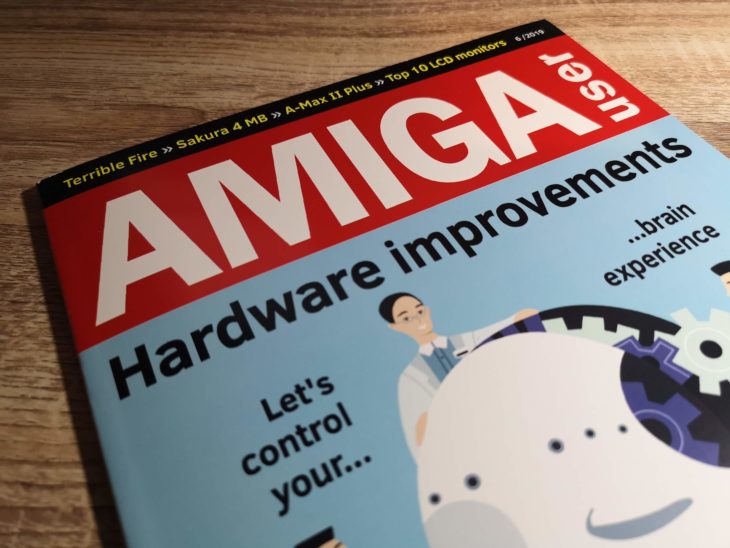
There’s certainly no shortage of reading material this month as Amiga User 6 arrives alongside K&A Plus magazine. This is another twice a year publication and is also an equally weighty tome packed with interesting articles.

This is definitely a mag devoted to the more serious Amiga user. Although games do get a mention occasionally, the bulk of the pages are devoted to applications, utilities and the like.

There’s a great piece that looks into exactly what areas of the Internet you can still access on old Amiga systems and how to do so.   There’s also part 2 of an article delving into the intricacies of MUI and a interesting article looking into the history of Sid Meier’s Silent Service.


This slideshow requires JavaScript.

There’s tons more to read, far too much to list here so if you fancy getting hold of your own copy take a look at the Bitronic.pl website. Like K&A Plus, Amiga User 6 is also produced in Poland but again the English is excellent and delivery to the UK is pretty quick.


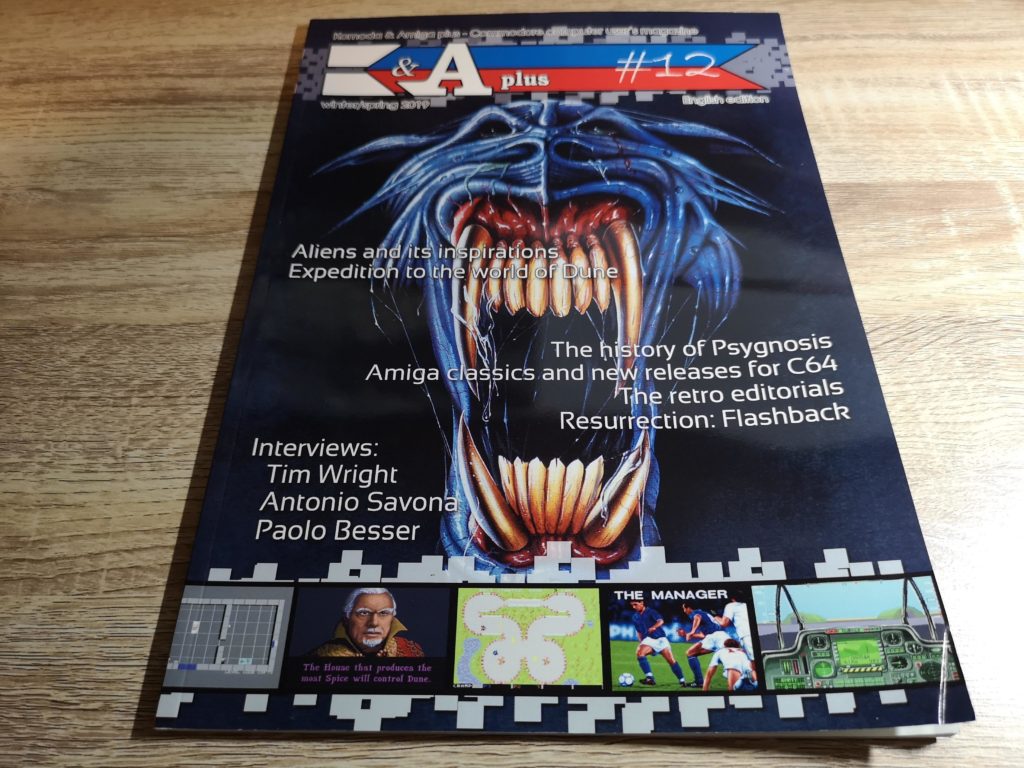
K&A Plus Issue 12

K&A Plus Issue 12

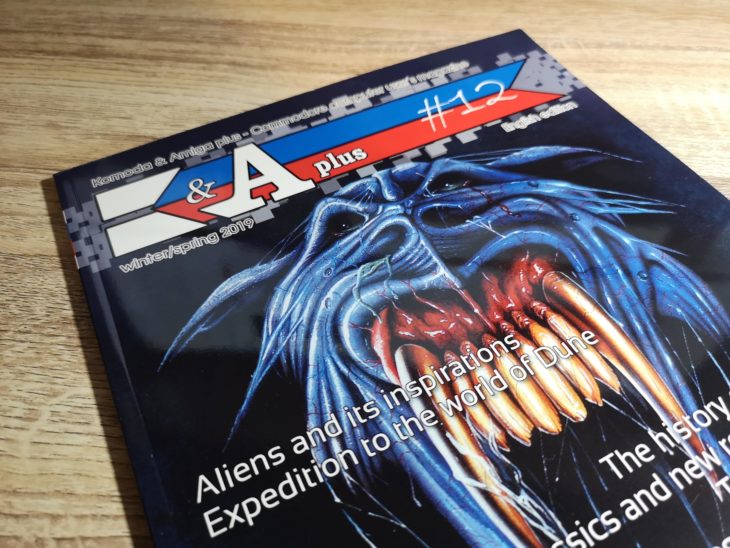
K&A Plus magazine is only published twice a year but is always packed with great content and issue 12 is no exception. Weighing in at 81 pages there’s plenty of content to get stuck into over the coming weeks.


K&A plus

What a great cover!


Although the magazine supports all Commodore machines (even MorphOS and AROS systems) the bulk of the magazine is devoted to the good old C64 and original Amiga systems and that suits me just fine.


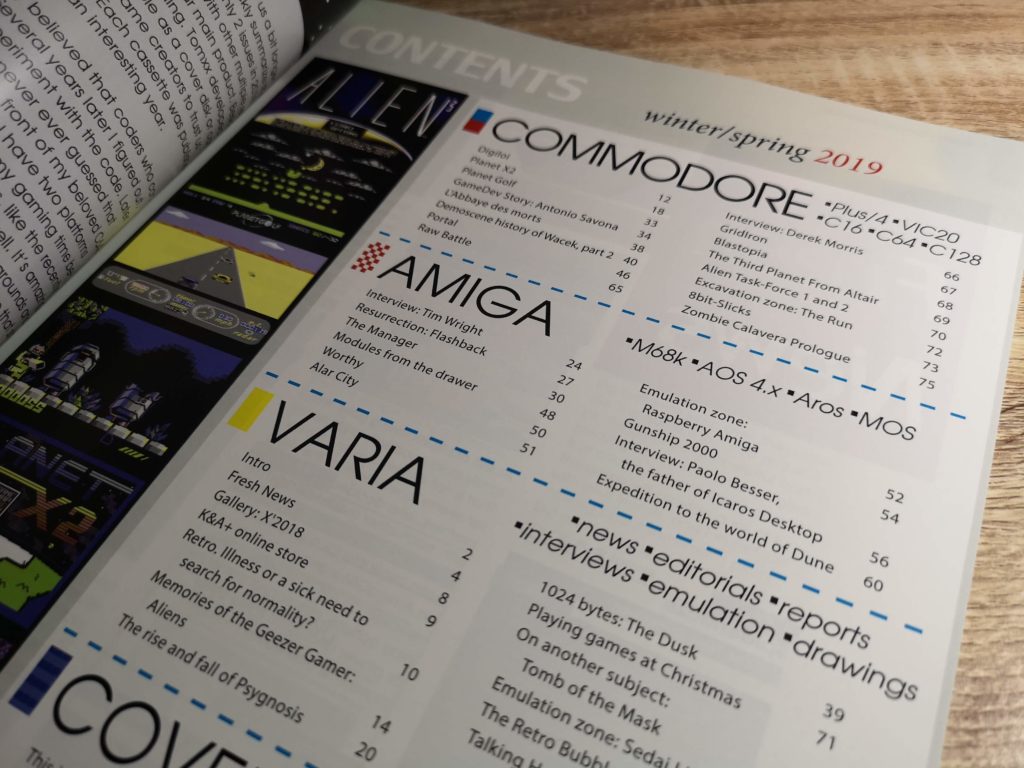
K&A Plus Issue 12

Here’s a look at the contents page showing the breadth of articles


The magazine is packed with interesting articles and reviews of new games for both the C64 and Amiga computers.


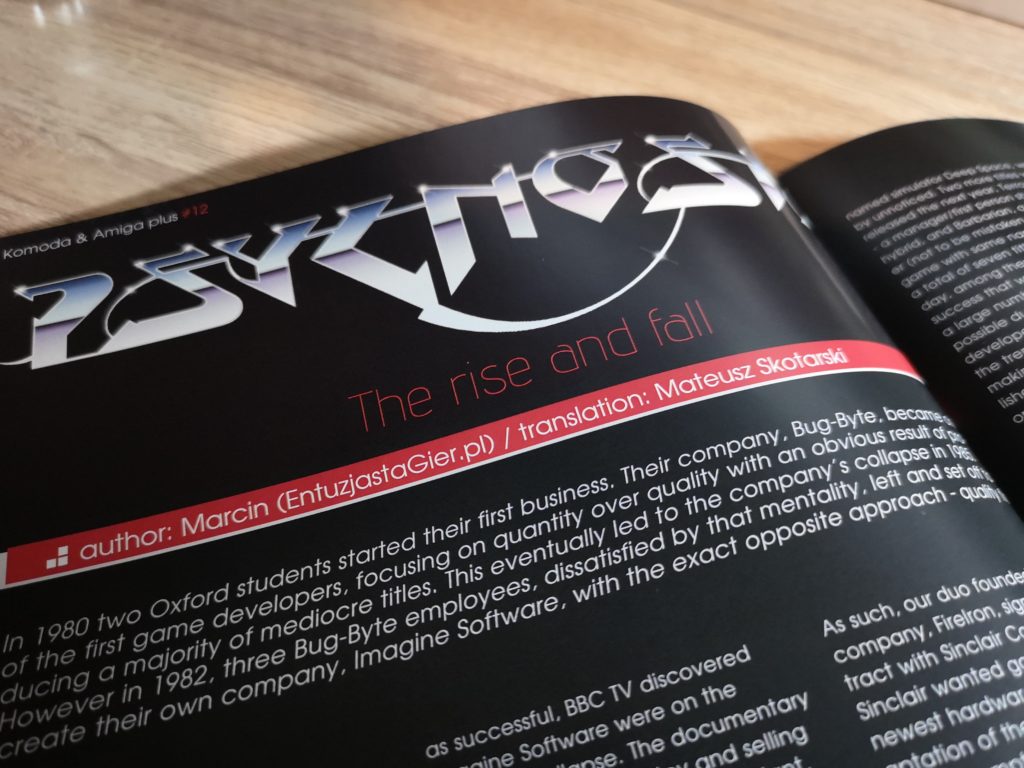
K&A Plus Issue 12

The rise and fall of Psygnosis


As a scouser, one article that immediately caught my eye was ‘The rise and fall of Psygnosis’. This deals with how the company sprang into existence and what they got up to before being engulfed by Sony and ultimately, closing. There’s even some photos inside their old Liverpool offices where they used to work.


K&A Plus Issue 12

Expedition to the world of Dune


Another fascinating article is ‘Expedition to the world of Dune’ which is a in depth look at the transition from book, to movie and ultimately the games.


K&A Plus Issue 12

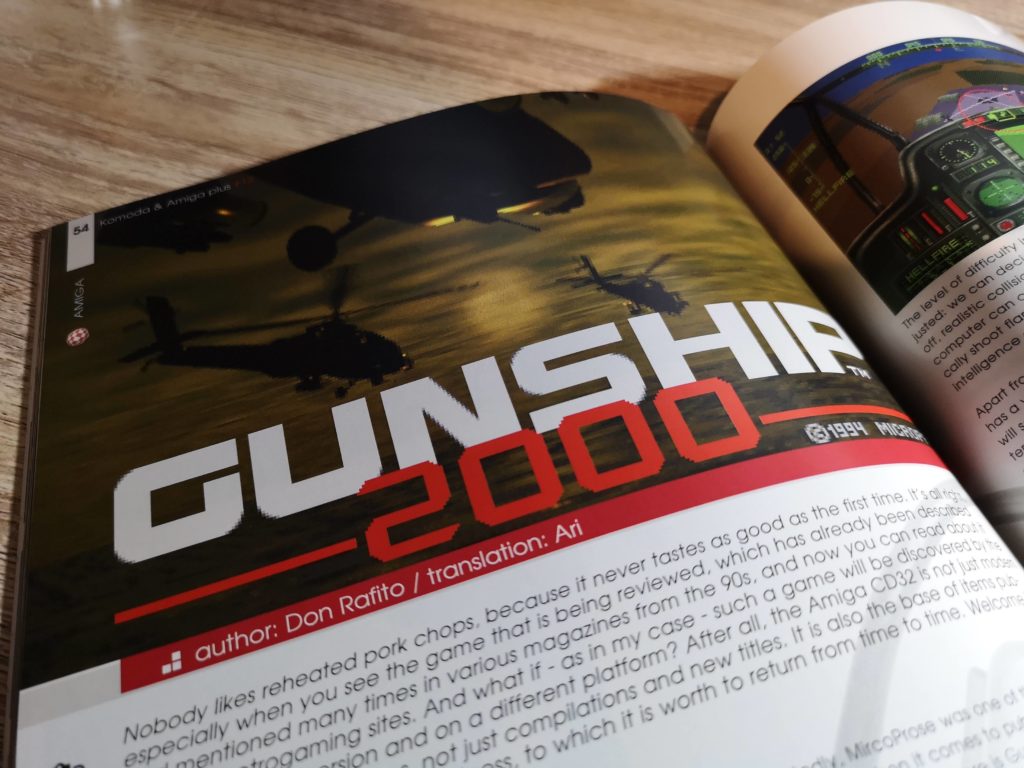
Gunship 2000


As a big Microprose simulation fan the article about Gunship 2000 for the Amiga also warranted my immediate attention.

If you want to find out more, or order yourself a copy, head on over to the Komoda & Amiga Plus website. The magazine is produced in Poland (but the English is great) and shipping to the UK only takes a few days.