Lyonsden Blog

Category - Gaming

Commodore 64 IRQ LED Mod

This Commodore 64 IRQ LED mod is a fun little hack that I spotted on eBay last year. Since my C64 mainboard has just come back from being re-capped I finally took the opportunity to fit this whilst I had the case open.

It’s a very simple little device that changes the colour of the C64 (or VIC20) power LED according to IRQ activity. When the computer is just idling the LED will glow red as usual. However when the CPU is active and generating interrupt requests (IRQ’s) the colour changes to green. This allows you to instantly see at a glance if your C64 is doing something. Anything that causes rapid IRQ’s will actually make the LED appear to be orange as it flicks rapidly between red and green.


Commodore 64 IRQ LED Mod

Everything supplied in the regular breadbin kit.


I picked up two of the devices, one for my 64 and the other for my VIC. I should point out that this isn’t a destructive hack. Nothing is permanently altered or damaged in any way and it can easily be reversed if desired. The device itself is really simple and there’s (usually) no soldering required. It consists of a tiny circuit board containing an LED, a couple of resistors and a single chip that detects the IRQ signals and triggers the LED colour changes. Connected to the board are 3 wires that are terminated with IC clips. These clips attach to the cartridge port pins and this is how the device monitors IRQ’s.


Breadbin Install


VIC20 Power LED.

Original VIC20 Power LED.


For breadbin C64’s and VIC20 computers fitment is extremely simple. You just unplug and remove the existing power LED and replace it with the little circuit board. There’s a small black plastic ring on the inside that needs pulling off and then the LED should push into the case from the outside with a little bit of force.


Removing a VIC20 Power LED.

Removing a breadbin C64/VIC20 Power LED.


There’s a spare black plastic collar for mounting the LED supplied in the kit in case you break the existing one. Also supplied is a little double-sided adhesive pad that you can use to fix the board in place. The new LED will need a little pressure to snap it into place and with the help of the adhesive pad it should be held nice and secure.


Commodore 64 IRQ LED Mod

Fitted board – held in place with a double-sided sticky pad sandwiched between the case and the chip.


Now it’s just a matter of wiring the board up. The 3 wires need to be attached to the front row of cartridge port pins using the IC clips as indicated below.


Commodore 64 IRQ LED Mod

IC clips connected to VIC20 cartridge port.


One the VIC20 the green clip goes onto pin 22 (Ground), Red – Pin 21 (+5V) and White – Pin 19 (IRQ).

On the C64 it gets wired up as follows; Green – Pin 1 (Ground), Red – Pin 3 (+5V), White – Pin 4 (IRQ).


Commodore 64 IRQ LED Mod

View showing the completed mod fitted.


Time for the moment of truth – putting the case back together and giving it a test drive. The LED in my kit had been soldered on in reverse so when my VIC was idle it lit up green and when busy it changed to red. I could have solved this by de-soldering it and flipping it round but it really doesn’t bother me so I left it alone. Other than that it works exactly as advertised and I’m really happy with the result.


This slideshow requires JavaScript.


C64C Install


UPDATE [March 2024]

Tim over at SharewarePlus now produces a version specifically for the C64C too incorporating a rectangular LED and also a much longer set of cables to allow the clips to actually reach the cartridge port as the LED is on the opposite side to the older ‘breadbin’ style machines.


C64C Version.


This makes the installation process just as simple as it was for the breadbin case one.


Close-up view of the C64C version with rectangular LED.


I’ll leave the details of my original installation modification below just in case anyone else finds themselves needing to fit a round peg into a rectangular hole. However realistically this info is now obsolete so long as you are getting one after March 2024 as you can just choose the right one for the job when you buy it.


ORIGINAL INSTALL

I hinted earlier that non-breadbin installs aren’t quite so simple. I have a C64C and as supplied the mod will not work with this model. There’s a couple of reasons for this. The most obvious being the C64C has a rectangular LED rather than the usual round one found in Breadbin style machines.


Commodore 64 IRQ LED Mod

Board supplied without a round LED and a rectangular one waiting to be fitted.


The other problem becomes apparent once you open up the case. As can be seen in the photo below the power LED is at the opposite end of the case to the cartridge port so the supplied wires are too short.


Commodore 64 IRQ LED Mod

Here you can see that the supplied wires in the kit only reach half-way across the board.


Fortunately these issues are easy to sort. I mentioned about the LED to the seller (Tim Harris who runs Shareware Plus) and he kindly supplied the board without an LED fitted so I could fit a rectangular one myself. These ones here are a good fit: rectangular LED’s on eBay.


Commodore 64 IRQ LED Mod

LED fitted to 10′ long wires to allow it reach across.


In order for the LED to fit in the existing hole I soldered it to three 10 inch lengths of wire and then soldered the wires to the circuit board. I fitted some heat shrink tubing over the joints to insulate them. This allowed me to mount the circuit board close to the cartridge port and also have the LED in the correct place.


Commodore 64 IRQ LED Mod

Here you can see the mod fully fitted and wired up. Note there are several other IC clips on this photo – these are from my SIDFX (twin SID chips).


I attached the board with a small double-sided sticky pad to hold it in place. I also carefully bent the wires on the LED 90 degrees so the cables would lie flat along the top of the case.

The IC clips were connected to the cartridge port pins as follows:

  • Green – Pin 1 (Ground)
  • Red – Pin 3 (+5V)
  • White – Pin 4 (IRQ)


Verdict

After giving it all a quick test I put the case back together and had a play around with it. When idle the LED lights up red as normal – a much more vivid red than the photos show. When the CPU is actively generating an IRQ such as when loading off a disk the LED with light green. Rapid IRQ activity that can happen when playing a game makes the LED appear orange.

I’m really impressed with this little mod. It’s one of those things that’s kind of pointless but also completely essential at the same time. I love having a visual indicator that my computer is doing something and during loading or saving operations it functions as a kind of drive activity light.

You can see it working clearly in the video below, taken whilst I was loading a program off a floppy disk.


If you enjoy tinkering and like the idea of having an activity light on your C64 or VIC then I can thoroughly recommend this. Did I mention that it costs less than a tenner too? A real no-brainer for me. You can pick up either version from Tim over at SharewarePlus.

VIC20 Game Box Preservation

It’s winter here in the UK so recently I decided to spend a particularly cold and rainy afternoon on a little VIC20 game box preservation project I’ve been meaning to do for some time.

Why did I want to do this?

Unfortunately, unlike Sega games which came in sturdy plastic clamshell boxes, Commodore cartridges were supplied in flimsy cardboard boxes. Consequently many of these have not stood the test of time – as a quick glance at all the box-less cartridges on eBay will attest to. I’m really proud that my collection has remained largely in tact for almost 40 years but for them to survive another 40 I figured they’d need a little helping hand.

I’d already found some great looking box protectors on eBay and also picked up some sachets of Silica Gel off Amazon for good measure. All I needed was a some time to apply them to my VIC20 cartridge collection.


Sachets of Silica Gel

Sachets of Silica Gel


The Silica Gel sachets came in a sealed bag of 100. The moment you open the pack they will start absorbing any moisture in the air so it’s important to minimise their exposure and keep them in a sealed container once opened.


VIC20 Box Protector

A VIC20 Box Protector folded flat (this is how they are supplied).


The Box Protectors

The box protectors are made of PET material which according to Wikipedia “makes a good gas and fair moisture barrier, as well as a good barrier to alcohol (requires additional “barrier” treatment) and solvents. It is strong and impact-resistant”. The boxes were supplied with a protective film on them to prevent scratches in transit. I have to admit I hadn’t realised this at first and was wondering why they looked slightly opaque. When the penny dropped and I removed the film they were crystal clear. You can see the difference clearly in the photos below.


This slideshow requires JavaScript.


Protect and Preserve

After ensuring that my game boxes were dust free and that the cartridge inside was similarly clean I added a couple of sachets of gel inside each box. The plastic box protectors should do a good job of protecting the contents from the environment but they’re not air-tight so the gel will absorb any moisture that makes its way inside. This should prevent any mould from forming on the contents. At some point in the future the sachets will need replacing but as I’m keeping the games in a nice warm room they should be fine for years.


VIC20 Cosmic Jailbreak Cartridge

Game box, with the cartridge and instruction manual laid out alongside it.


If I was placing them in a damp, cold basement, loft or garage then they would need replacing far sooner. However in those locations the games would need to be sealed in an air-tight box too.


VIC20 Game Box Preservation

Silica gel sachets placed inside the bottom of box.


The protective cases were supplied flat-packed so needed folding into shape before they could be used. I found this really easy to do and it took less than a minute per box.


VIC20 Game Box Preservation

A completed box… with the protective film still attached in this photo!


Now it was simply a matter of carefully sliding the game box into the protective case. The cases were a very snug fit so I did need to ensure the box went in straight before it would fit inside.


VIC20 Game Box Preservation

Game box fitted inside a protective case.


There is a seam down one edge (where the box spine is) so I made sure to position that at the back when displaying them on my shelf.


VIC20 Game Box Preservation

Notice how the game on the far left looks slightly opaque – this box still had the protective film on it. It has been removed from the other two.


I think the games look terrific inside the boxes and from most angles you can’t even tell they’re inside a cover.  In fact I’d go as far as saying some of my games looked much better inside the protective cases. Take the Menagerie game shown below which has suffered some box crushing and creasing over the years.


Before…


This slideshow requires JavaScript.


Because the protective covers are such a snug fit they actually force the game boxes back into their original shape when inserted. In effect the covers act as a kind of exoskeleton, almost eliminating the effect of the creasing. The creases are still there of course but just far less noticeable now.


After…


This slideshow requires JavaScript.


All in all I’m really pleased with how this project worked out. It was inexpensive, effective and the whole project only took me a couple of hours to complete. That included taking the photos for this post too.


VIC20 Game Box Preservation

A bunch of VIC20 games in their new protective covers.


My VIC20 games not only look better than before but I feel much happier knowing that I’ve taken steps to ensure they last for another 40 years!


VIC20 Box protectors

Row of protected games on my shelf.

Brucie Bonus

I discovered that the protectors are also a perfect fit for the Commodore 64 Microprose style boxes. This means they’ll also fit similar style boxes from the likes of Rainbird and Level 9. I can see another batch being ordered very soon!


C64 Microprose box protector

The VIC20 box protector also happens to be a perfect fit for the popular Commodore 64 Microprose style game boxes!

iNNEXT USB Game Controller Review

iNNEXT USB Game Controller

Just picked up an iNNEXT USB Game Controller off Amazon to use with my TheC64 Mini and Maxi consoles. Why? Well unfortunately after almost 40 years of faithful service my C64C has started to act up. It’s been crashing and freezing whilst playing games that have always run flawlessly before. I’ve ran my diagnostic cart on it and everything passed so I’m hoping it’s just the electrolytic capacitors. My C64C has never been recapped before so it’s been packaged up carefully and sent away to an expert to get them all replaced. I decided not to attempt it myself as I don’t want to risk causing further damage with my dodgy soldering skills! I’ll know the outcome of this in a couple of weeks when I get it back.

Anyway, in the mean time I still want to be able to play my C64 games without having to resort to the Zip stick wannabe’s that the Mini/Maxi consoles come with. Even though the stick that came with the Maxi is much improved I just prefer a gamepad controller these days.


iNNEXT USB Game Controller

iNNEXT USB Game Controller Packaging


I’m sure there are other controllers out there that will work but I chose these for a number of reasons. The most important one being that in addition to the D-pad they have 8 buttons, matching the number of buttons on TheC64 joystick. They also looked great and came in a pack of 2 for a reasonable price. I was a little apprehensive when purchasing as I wasn’t sure if all the buttons would actually be recognised by the console. This is why I thought I’d share my experience in case anyone else is looking for a similar gamepad for their TheC64’s.


iNNEXT USB Game Controller

Back of the box.


I was fully expecting a nondescript plain box as is often the case with cheap Chinese goods. However the gamepads came supplied in a surprisingly attractive box featuring product shots of the controllers on the front. The reverse side lists all the gamepad features in multiple languages.


iNNEXT USB Game Controller

The two controllers unboxed.


A Closer Look

The iNNEXT USB Game controllers themselves are styled like the old SNES gamepads. In addition to the D-Pad they have ‘Select’, ‘Start’, ‘A’, ‘B’, ‘X’, ‘Y’ and two shoulder buttons. Altogether this makes 8 buttons plus the direction controls which matches the configuration of the TheC64 joysticks exactly.


This slideshow requires JavaScript.


Taking a Peek Inside

The build quality of the pads is really good and although they’re pretty lightweight, they feel solid and well constructed. They certainly didn’t creak or flex in my hands, even when I deliberately tried to bend them. The D-Pads worked well and the buttons have a decent tactile feel to them when pressed. They didn’t feel spongey or rubbery so I was never in any doubt as to whether I had pressed one or not. One little feature I appreciated was the contrasting convex and concave buttons for the XY and AB buttons which made it easier to know what I was pressing in low light.


iNNEXT USB Game Controller

iNNEXT USB Game Controller Internals.


The cable is approximately 5 foot long (1.5m) which I found was more than long enough for my needs. The gamepad shell itself is held together with 5 small philips screws. Naturally my curiosity got the better of me and I took it apart to see what was inside.


iNNEXT USB Game Controller

The iNNEXT USB Game Controller PCB.


As I should have expected from a modern piece of electronics, there wasn’t really much to see. Still, at least my curiosity was sated!


iNNEXT USB Game Controller

iNNEXT USB Game Controller with TheC64 Maxi*.


*Just in case anyone wants to know where I got the Commodore 64 badge from – check out my post here.


Testing

The controller just worked out of the box with the games I tried on TheC64 Maxi carousel. By default both shoulder buttons are configured as ‘Fire’ buttons which I found worked pretty well. The Start button brings up the ‘save state’ menu whilst X and Y operate the two triangular buttons. The first three round buttons on the base of the Joystick are replicated by the A, B and Select buttons. So that was every one of the joystick buttons replicated successfully.


iNNEXT USB Game Controller

iNNEXT USB Game Controller being used to bring up the Save State menu during a game of Soul Force.


I tried a number of non carousel games off a USB flash drive too like Galencia and Soul Force. Happily I experienced no issues at all with these either. Of course if there had been problems there’s always the option of creating custom .CJM files to change the button configuration for specific games if needs be too.

Perhaps you’d like the left shoulder button to operate the spacebar in Ghostbusters for example? No problem, simply add that to a Ghostbusters.CJM file and you can get your C64 shouting ‘Ghostbusters’ without reaching for the keyboard. This is an even more useful feature when dealing with the keyboard-less TheC64 Mini..

iNNEXT USB Game Controller – Verdict

All in all I think these are terrific gamepads and fulfil their retro gaming duties admirably. They’re very reasonably priced, well built, comfortable to hold and work exactly as I’d hoped. I’ll be keeping the 2nd pad as a spare but there’s no reason why you couldn’t plug them both in and enjoy some 2-player games like Pit Stop II or Spy vs Spy. Oh and they work perfectly on PC as well, whether for native PC gaming or some retro emulator action. Definitely recommended.

Retro 3 Port USB Cassette Hub Review

I spotted this little USB Cassette hub on social media over Christmas and thought it looked cool so had a look around to pick one up for myself. After some searching I found one on Amazon and for the price I couldn’t resist taking a punt.


Packaging

The Packaging


It arrived in a plain black box with no indication of what was inside at all. Inside the box there’s what at first glance appears to be a standard looking cassette in a transparent library case along with a micro-USB cable.


USB Cassette Package Contents

Package Contents


Opening up the case reveals a ‘C90 Cassette’ styled very much like a tape from the 1970’s or 80’s.


USB Cassette Hub

USB Cassette Hub in library case


Look a little closer though and you start to see that things are not as they first seem. For example, the centre view window where you would normally see the tape spools is merely a sticker. However the two spools are real and can actually be freely rotated. Perfect for reliving your youth by inserting a Bic pen and twirling it around like madman!


USB Cassette Hub

Looks can be deceiving!


If you flip the cassette over you also notice that both sides are labelled as ‘Side 1’. Perhaps with a little more effort that could have been remedied but that’s a minor niggle.


USB Cassette Hub

Side by side comparison with a regular cassette tape.


The shell itself is the exact same shape and size as a regular cassette with the main difference being that where the tape transport holes usually lives there are now three USB sockets. There are also no holes for the capstan spindles.


USB Cassette Hub

USB Cassette Hub placed on top of a real cassette tape. I thought the way the 3 ports are perfectly aligned with the tape transport holes of the original was a nice touch.


Along the top where you might expect to find a write-protect tab there is a micro-USB socket for connecting the hub to your computer using the supplied cable.


USB Cassette Hub

No plastic tabs to snap off (or tape over) here. Just a micro USB port.


The J card is completely blank – I think they missed a trick here and could have had a nice cover image for the hub and printed the instructions inside in the form of an album listing. That’s a little project I will probably do myself on a rainy Sunday afternoon…


Case

The case is just a regular old transparent library case with a blank J card.


Instead of a printed J-card there is a small fold-out guide that gives brief specs and some warnings.


USB Cassette Hub Instructions

Minimalist instructions.


Specifications

In terms of specs it’s positively ancient, supporting only USB 1.1. However, given it’s a retro styled hub it kind of makes sense that the hardware it houses also dates back to the late 1990’s!


USB Cassette Hub

Another comparison with an old tape.


Manufacturer specs:

  • 3 Port USB 1.1 Hub
  • Supports OHCI and UCHI
  • 1.5Mbps – 12Mbps
  • Includes mini USB cable
  • Rated 5V DC

Thankfully USB 1.1 is perfectly fine for the likes of keyboards and mice which makes it a terrific accessory to use with TheC64 Mini and Maxi machines when you need a few extra USB ports.


Putting it to good use


Cassette Hub working with TheC64 Mini, 2 joysticks and a USB drive.


In addition to USB keyboards and mice I found it also worked perfectly with both my TheC64 Mini and Maxi joysticks and my mini USB drive. Great news if I want to play any 2 player games that aren’t on the built in carousel.


Cassette Hub working with TheC64 Mini


I also tested it with my TheC64 Maxi and it worked just as well. However with 4 built-in USB ports on the Maxi it’s not really necessary. Still, it’s nice to know it’s an option in the future.


Cassette Hub working with TheC64 Maxi


Just for kicks I tested the hub out on my PC by transferring a few files across to a USB flash drive. It worked but was very slow – maxing out at a pretty measly 2.77MB/s. Of course this wouldn’t be much of an issue if I was just transferring a few games across to play on TheC64 Mini.


PC file transfer speed graph

Testing out the transfer speed on my PC.


Verdict

This is a super little device to use with a TheC64 Mini and gives you an extra 2 ports overall. (One of the built-in ports is taken up by the hub). It looks really cool and very nostalgic and compliments TheC64 mini perfectly. The extra ports allow you to hook up a USB keyboard and use a flash drive for extra games along with a joystick or two. This simply isn’t possible without the use of a hub. Sure you could get a modern USB 3 hub but where’s the fun in that!

I can’t recommend it for everyday PC use… it’s just far too slow as you’d expect from a USB1.1 device. But for less than a fiver I think it’s a great little device for retro gaming and sure to put a smile on your face when you use it. An added bonus is that it stores neatly away in a cassette rack when not in use!


How to use an Iomega Zip Drive with the Amiga A1200

Zip Drive Amiga

In this post I’m going to explain just how you can use an Iomega Zip 100 Drive with an Amiga 1200. The software side of this will be applicable to other Amiga models too but the hardware required is specific to the Amiga 600/1200 series as it utilises the PCMCIA port.

A Little bit of history

Before I delve into the guide a little bit of history. Back in the early 1990’s the most common media format available to Amigan’s was the humble 3.5″ DS/DD Floppy Disk. HD floppy drives were available too but were expensive and only offered double the storage capacity anyway.

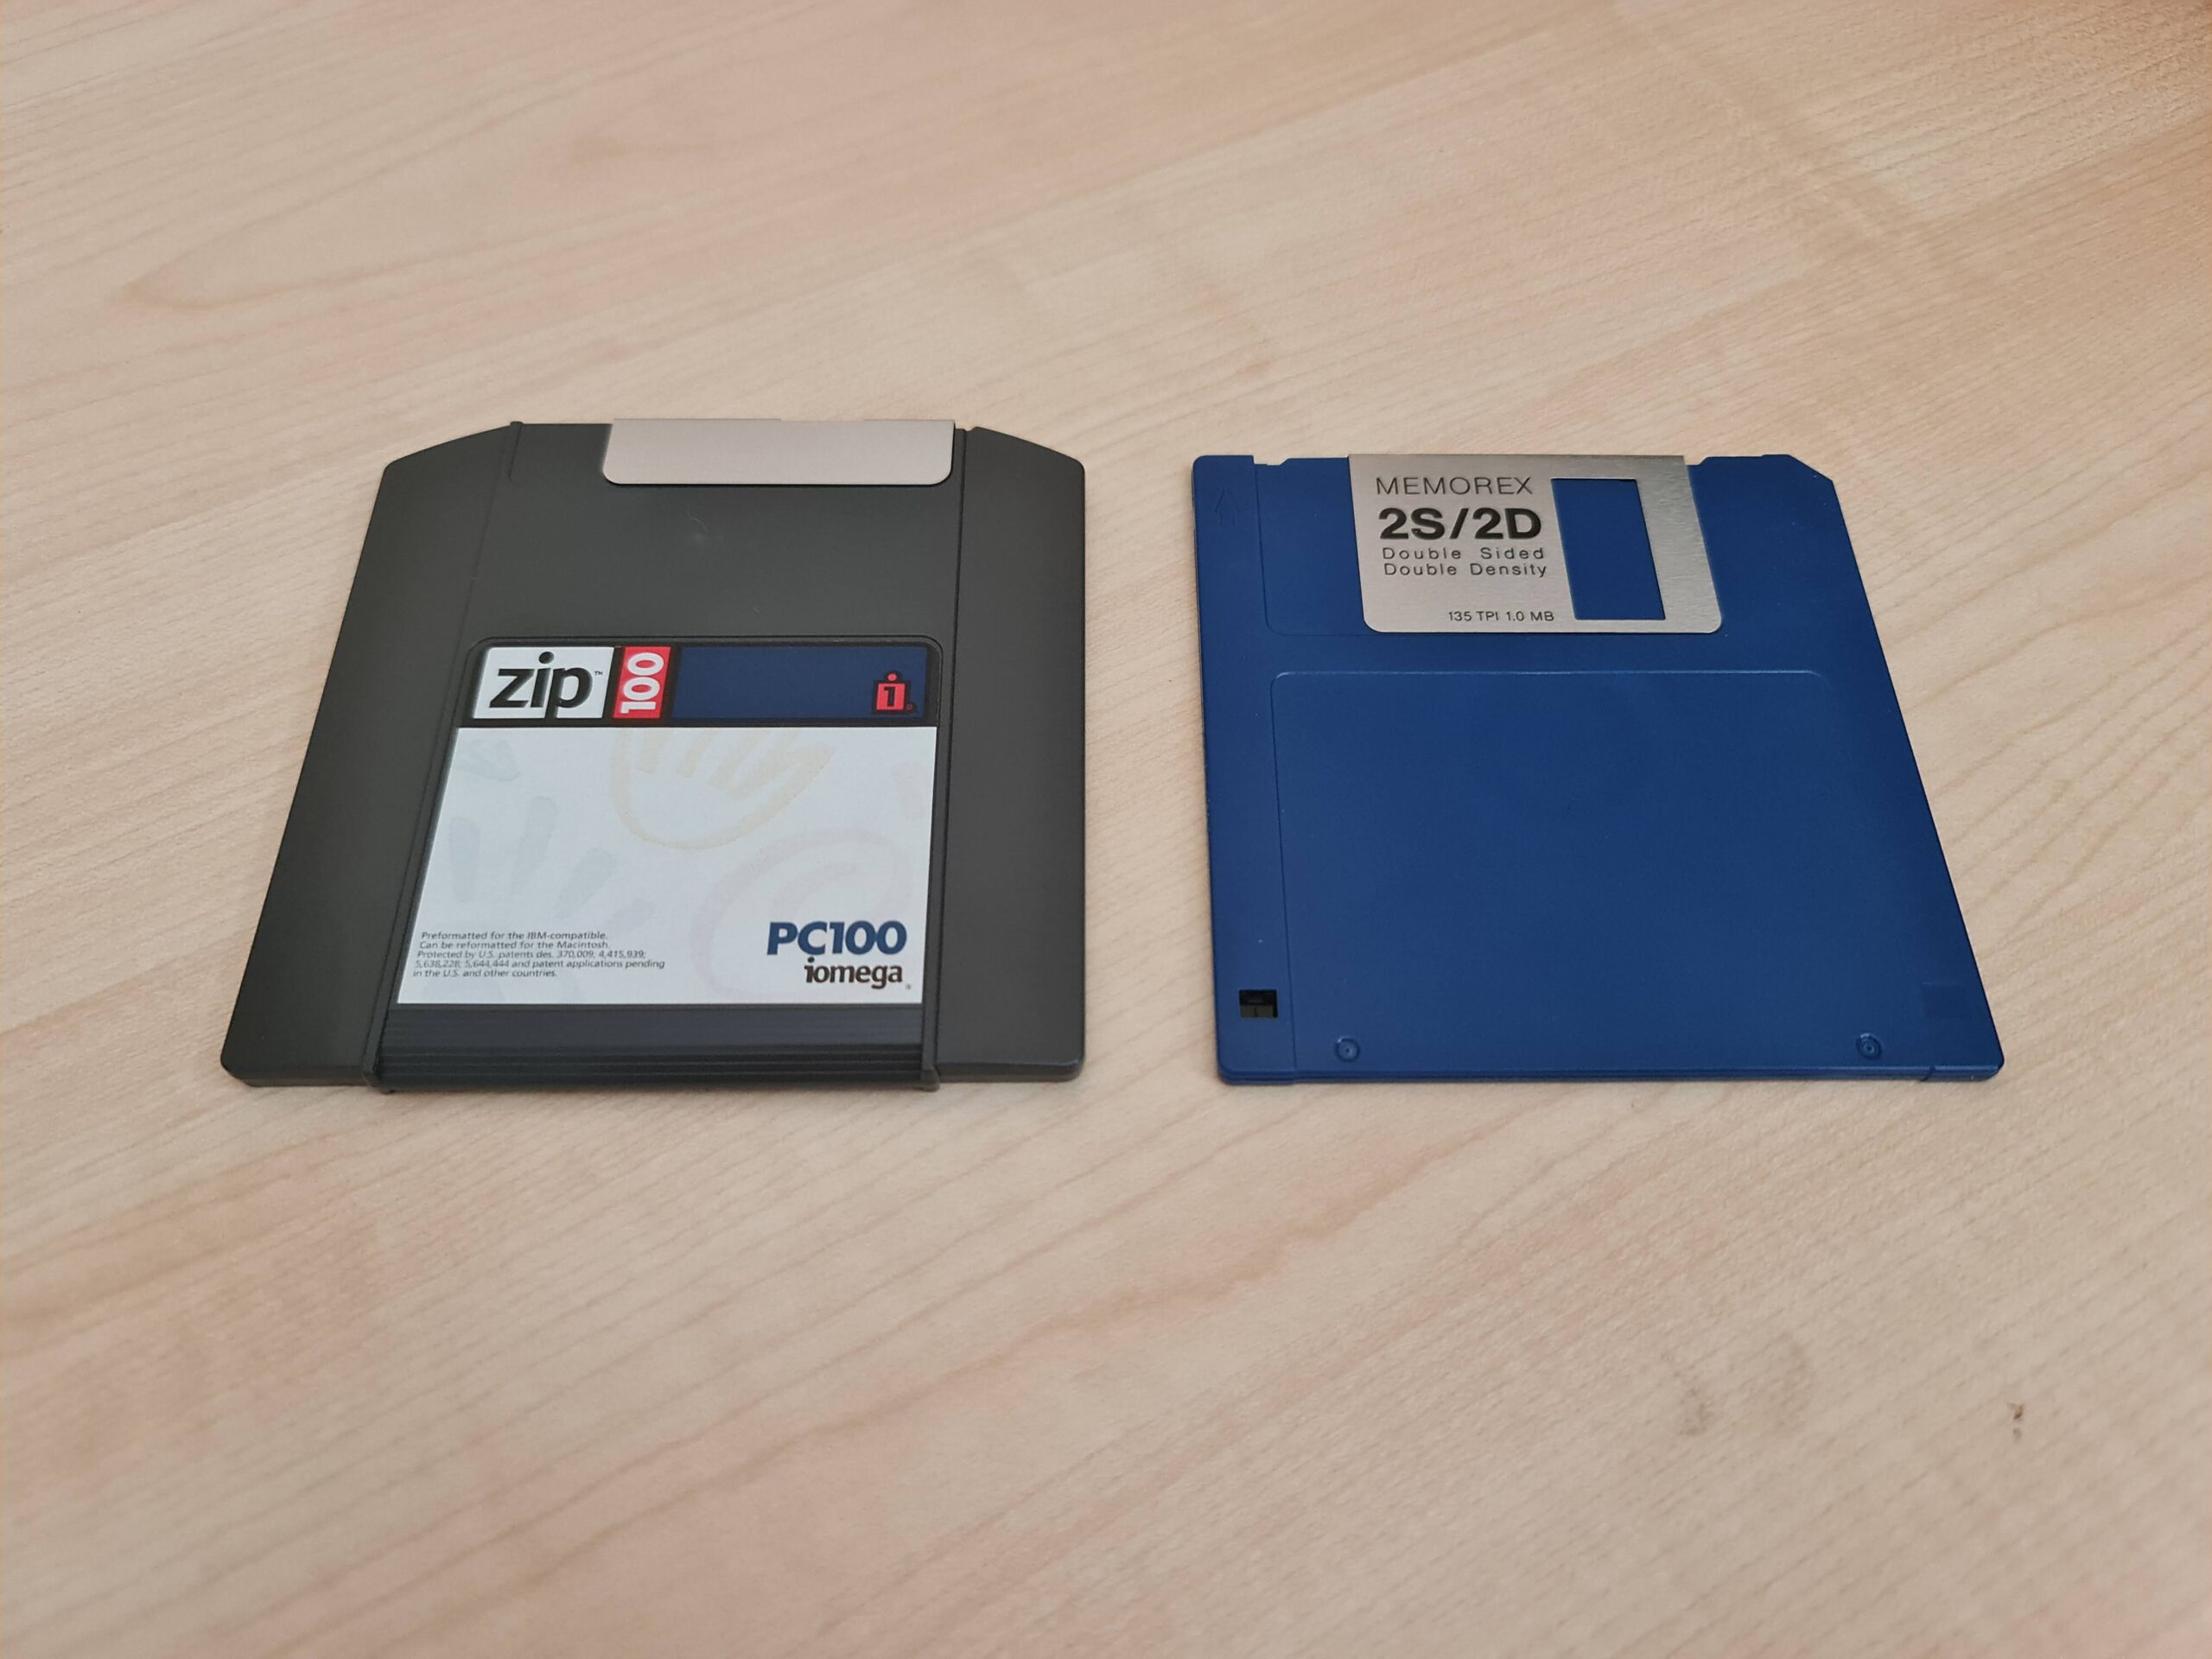
This was when Iomega launched their Zip 100 Drive, along with a new disk format that could hold a whopping 100MB. This was a big deal to me back then as standard Amiga floppies could only hold 880K of data and Hard Disk drives cost a fortune! The disks were very similar in size and shape to regular disks and about twice as thick as you can see in the photo below.


Zip 100 Disk size comparison

Zip 100 Disk next to a standard 3.5″ disk.


These drives were aimed at the PC and Apple Mac markets but enthusiasts quickly facilitated the use of them with Amigas too. There were three versions of this drive made that hooked up in one of three different ways; parallel port, SCSI and later a USB version too. However it is important to note that only one version is actually suitable for Amiga use and that is the SCSI version. (The parallel version can be made to work but it requires physically modifying the Amiga’s parallel port which is something I have no intention of doing).

If you have a big box Amiga there’s actually a fourth version – they made an Internal version of the drive with an ATAPI IDE interface but that’s a project for another time… if I ever get my own ‘big box’ Amiga system!


Zip Drive Amiga

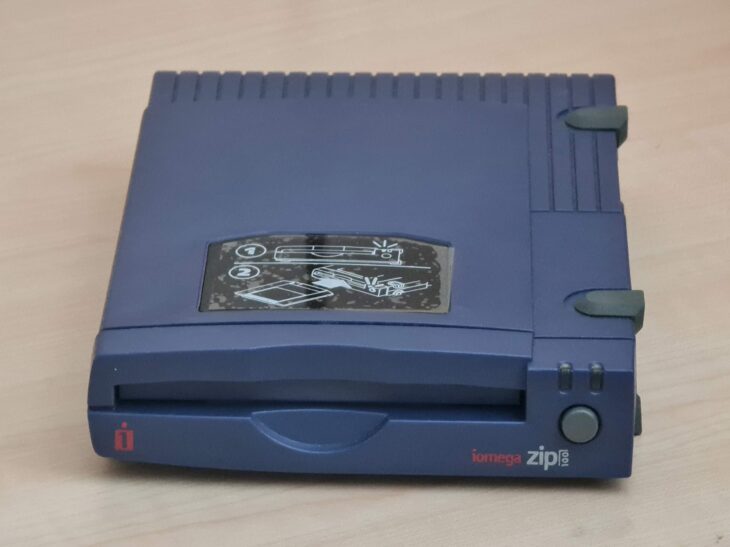
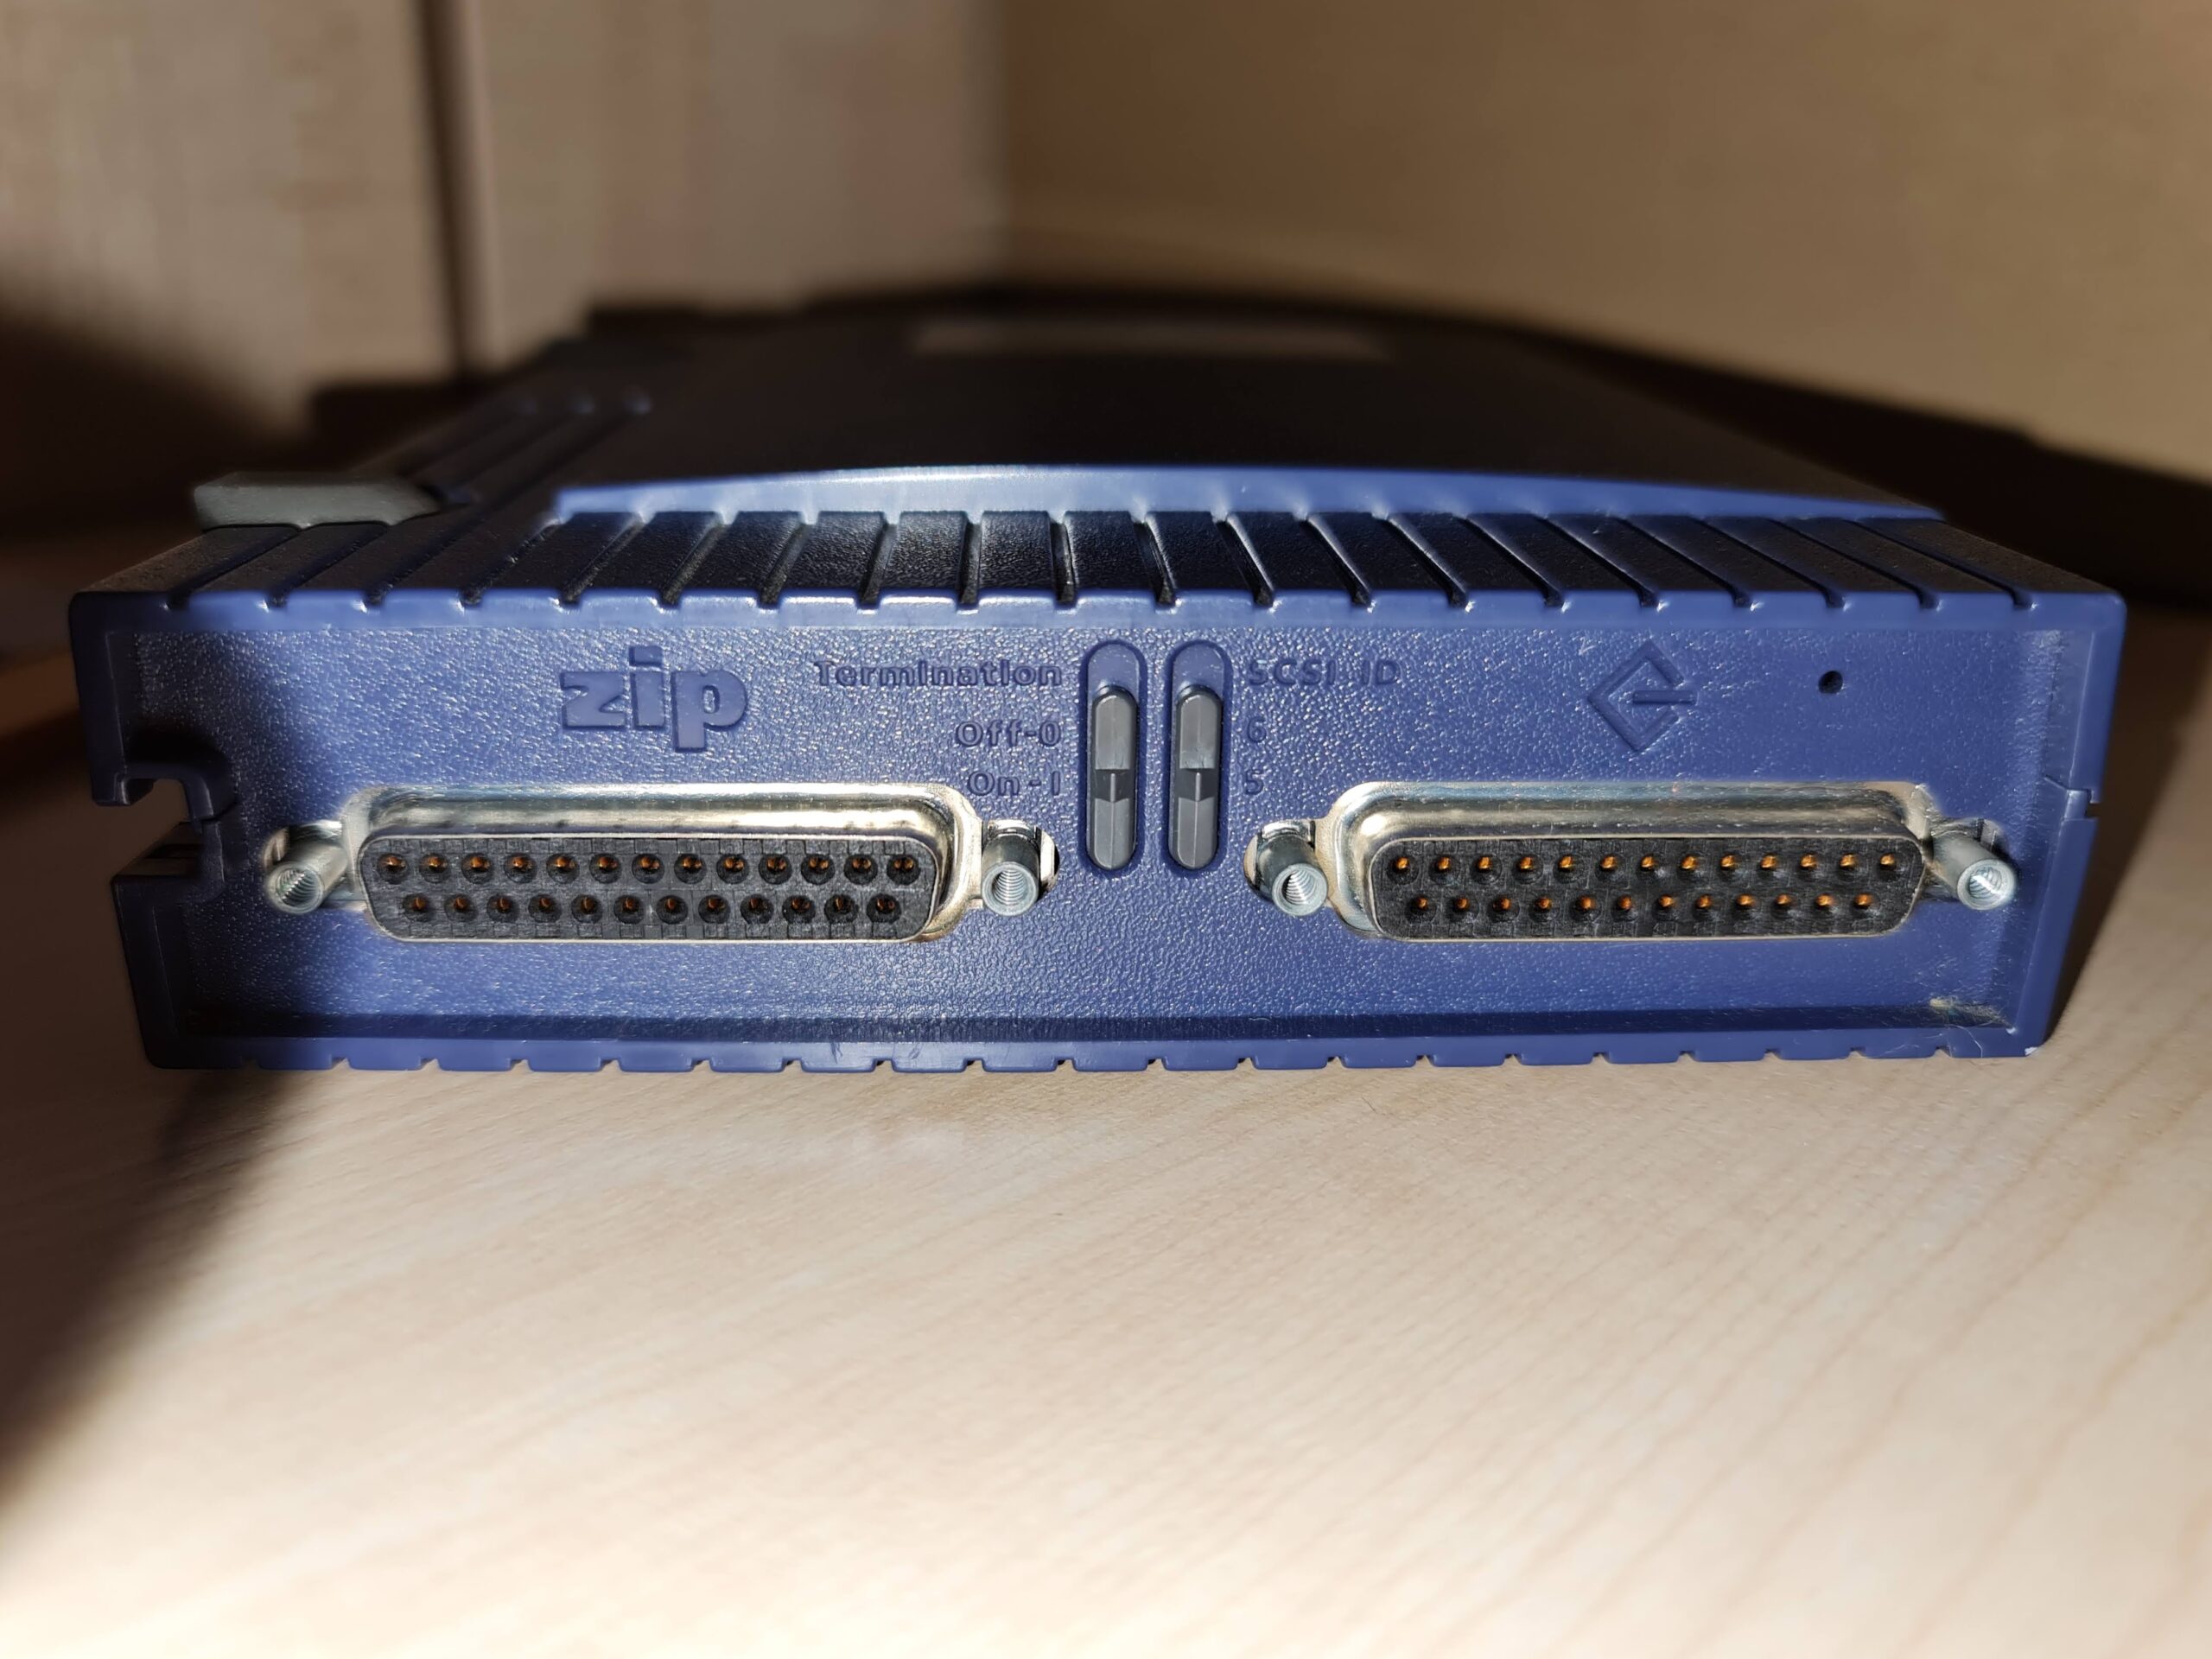
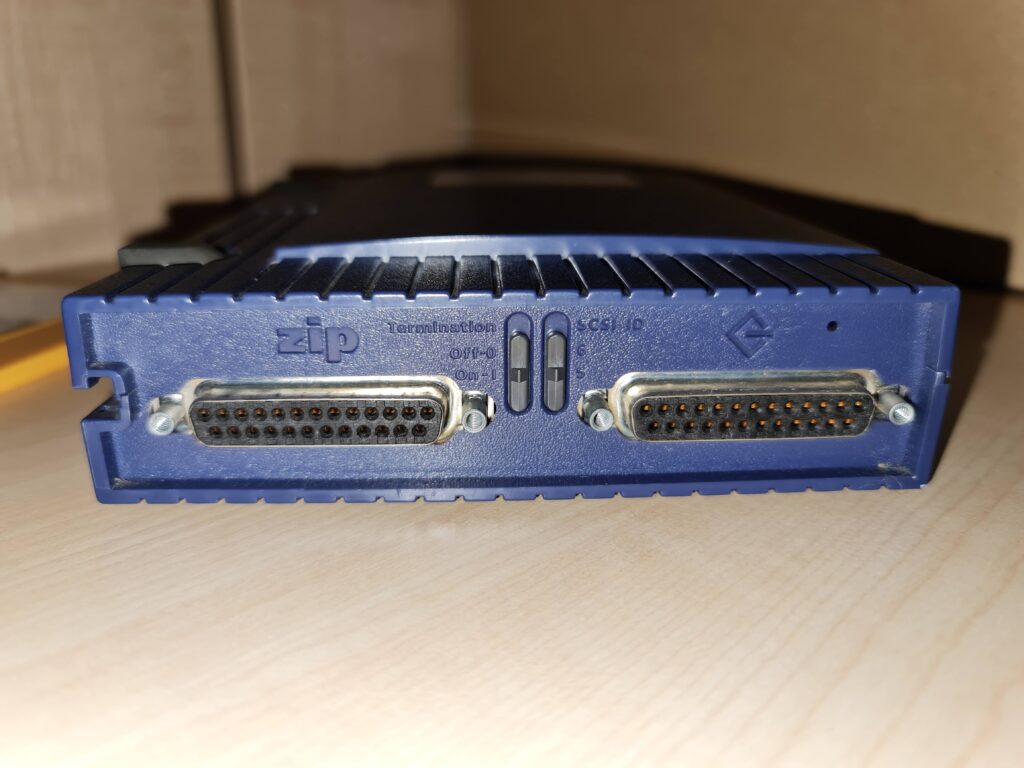
This is what the back of a SCSI Zip 100 drive should look like. If it doesn’t look like this then don’t buy it – it won’t work.


Now of course by todays standards 100MB is a trifling amount, my mobile phone has 256GB of storage for example. My Amiga 1200 also has an 8GB CF card so technically I don’t really need any more storage. However all that misses the point. In my eyes, to have an authentic Amiga experience and relive the 90’s you need to use the appropriate hardware. Besides, most of the fun of using retro computers is getting old stuff working again… not because you need to, but because you want to!


Zip Drive Amiga

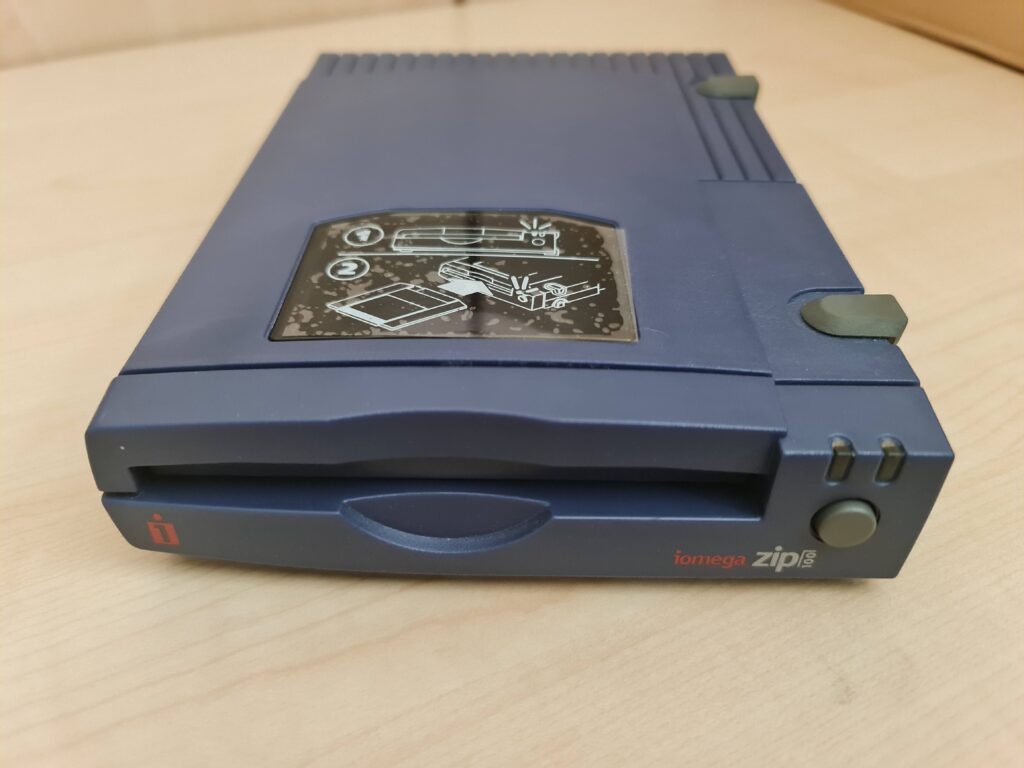
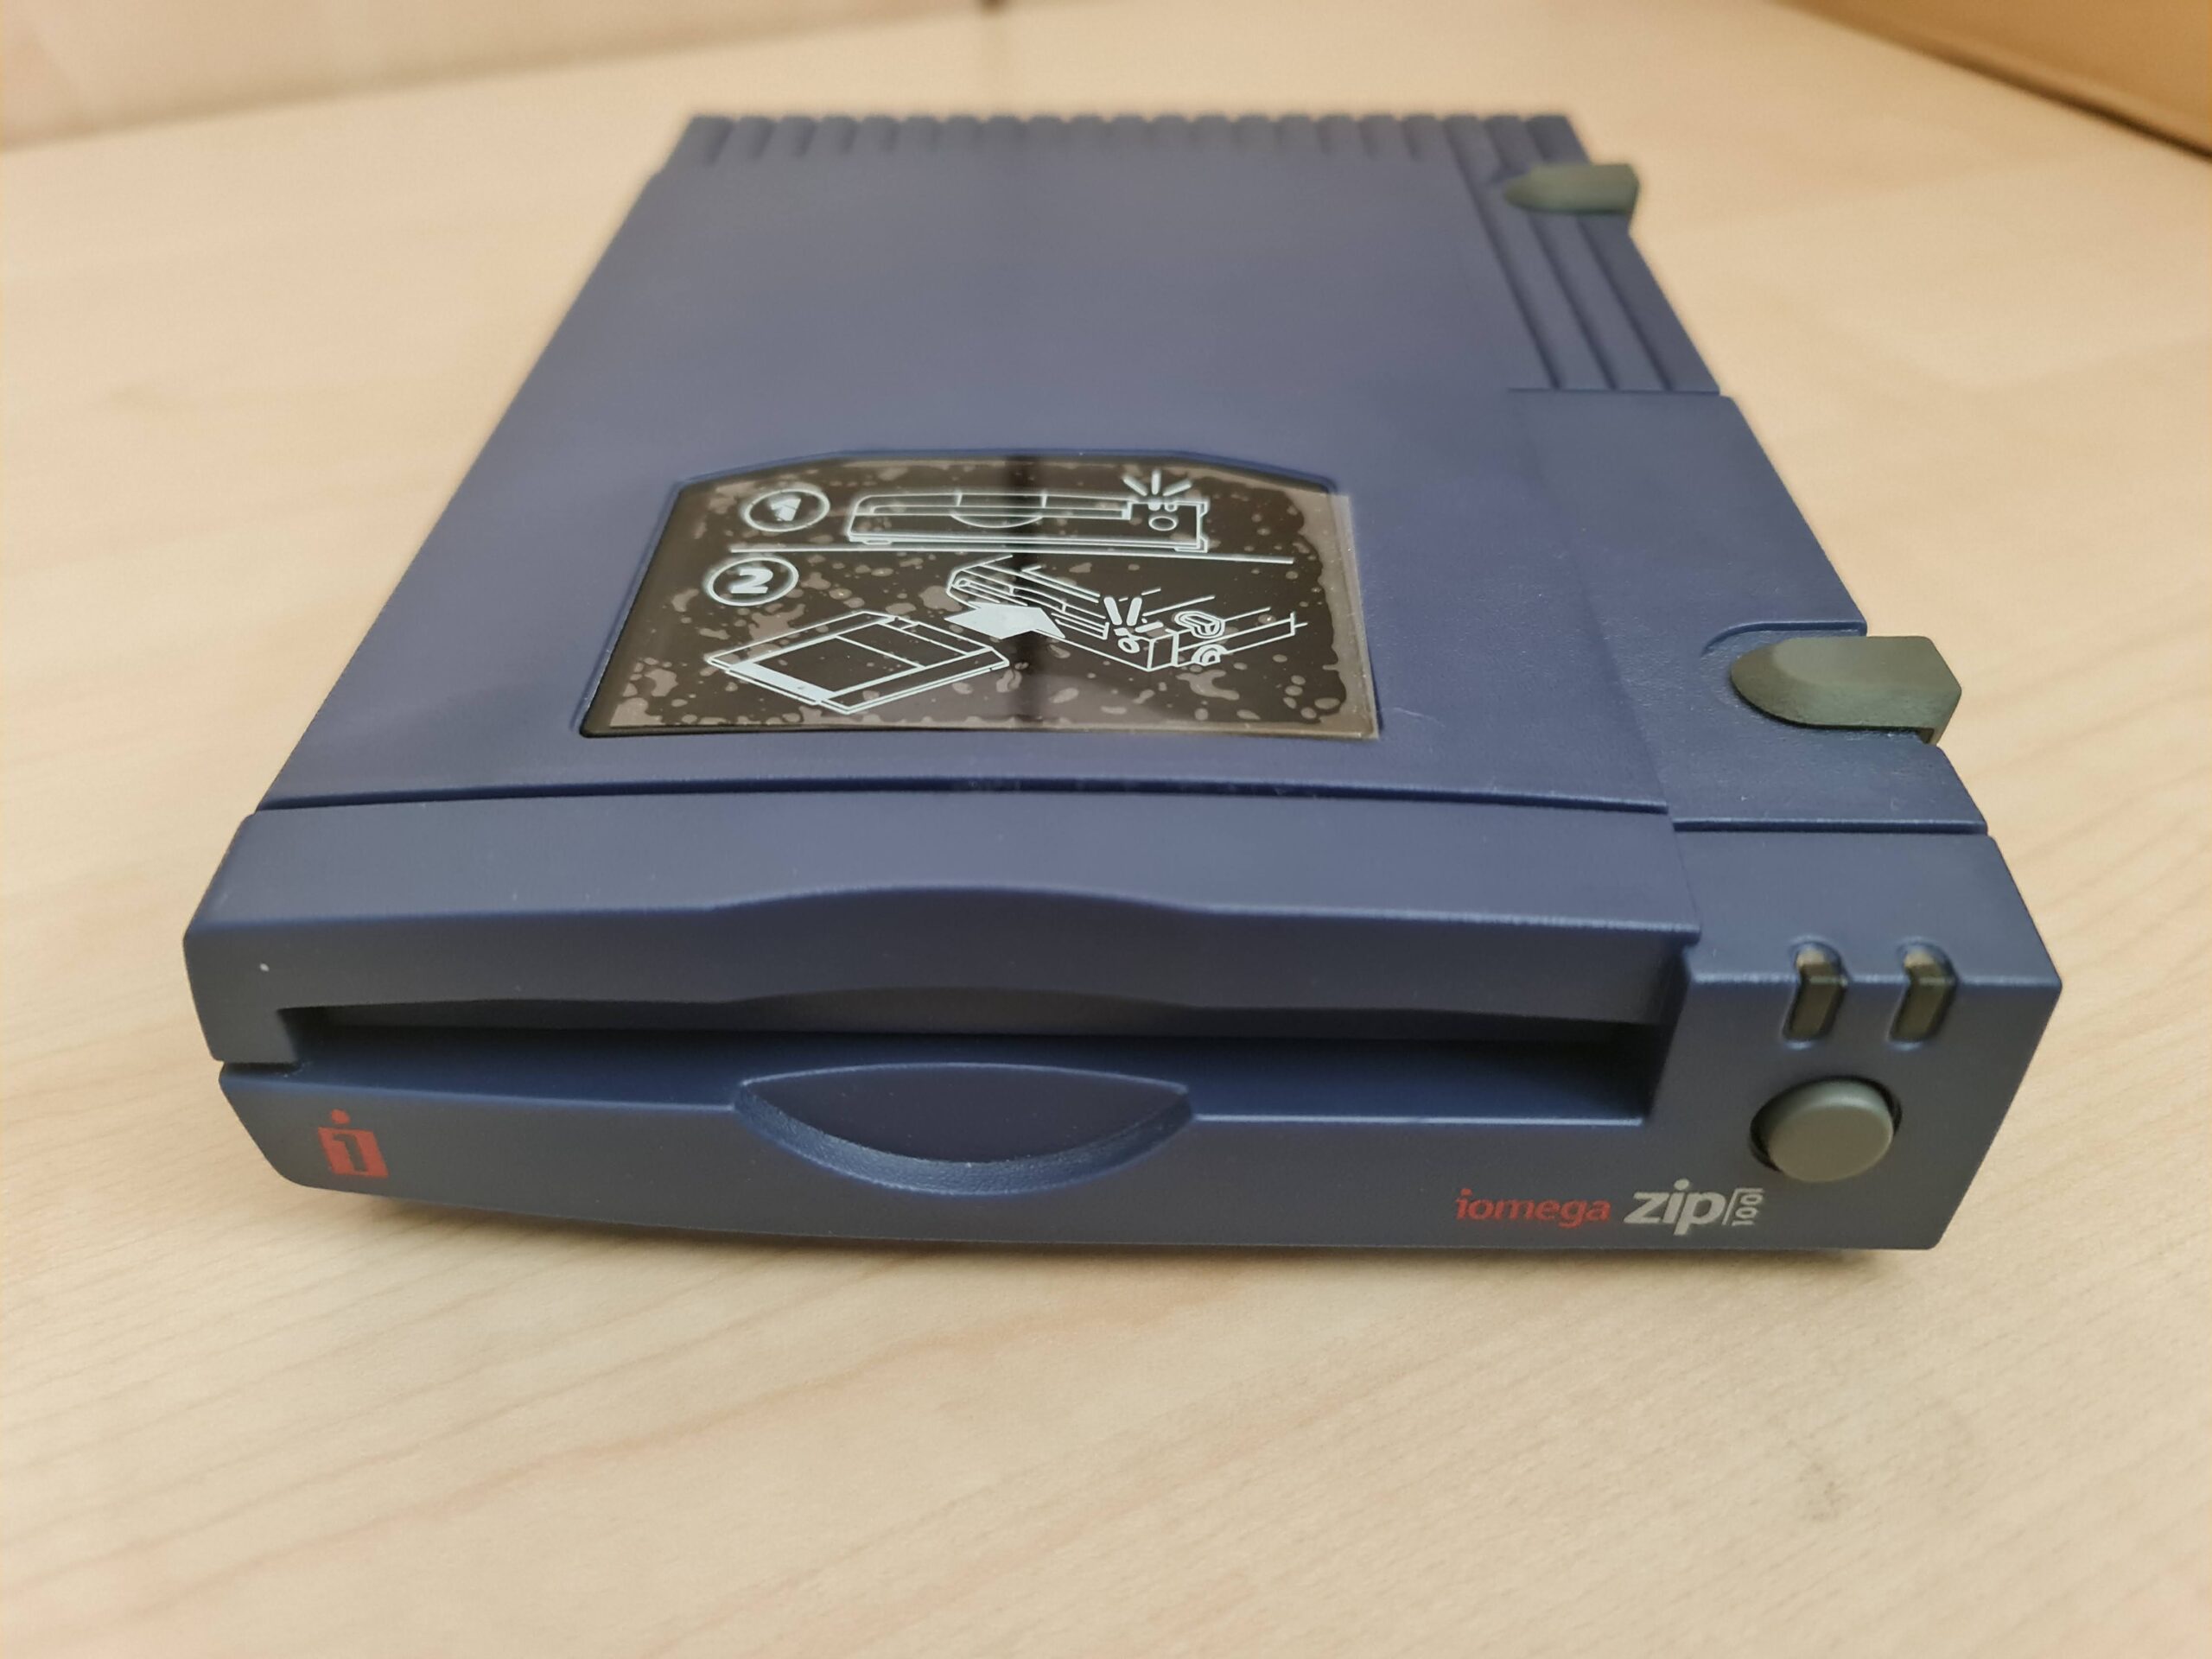
My ‘new’ Zip 100 Drive still sporting the ‘how to insert a disk’ sticker on the top.


Buying a Zip 100 Drive

Zip drives went out of production a long time ago so your only source is the second hand market now, which for most people will be eBay. There’s always a few on there in various conditions with prices ranging from around £40 to £120. Now of course what you buy is entirely up to you but from my own personal experience I’d say it is worth paying extra for a drive that has been fully tested and confirmed working. I tried the cheap and cheerful approach and ended up with three duds before I decided enough was enough and paid £90 for a fully tested one. Cheaper in the long run and a lot less hassle for sure!


Zip Drive Amiga

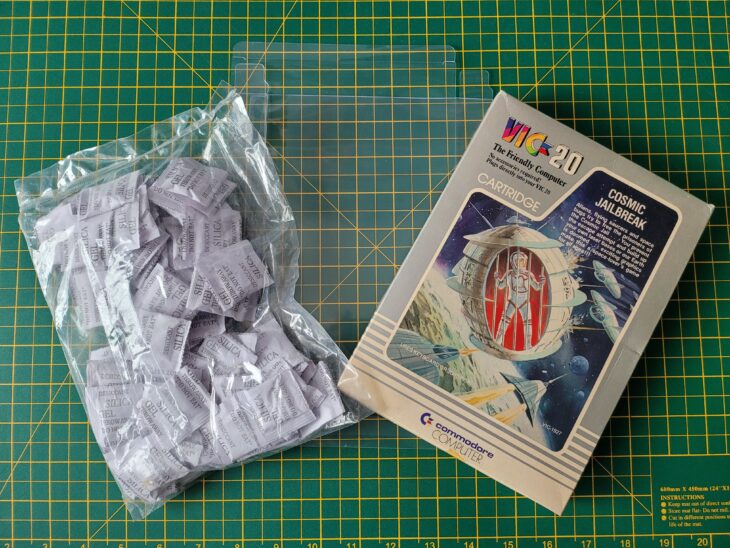
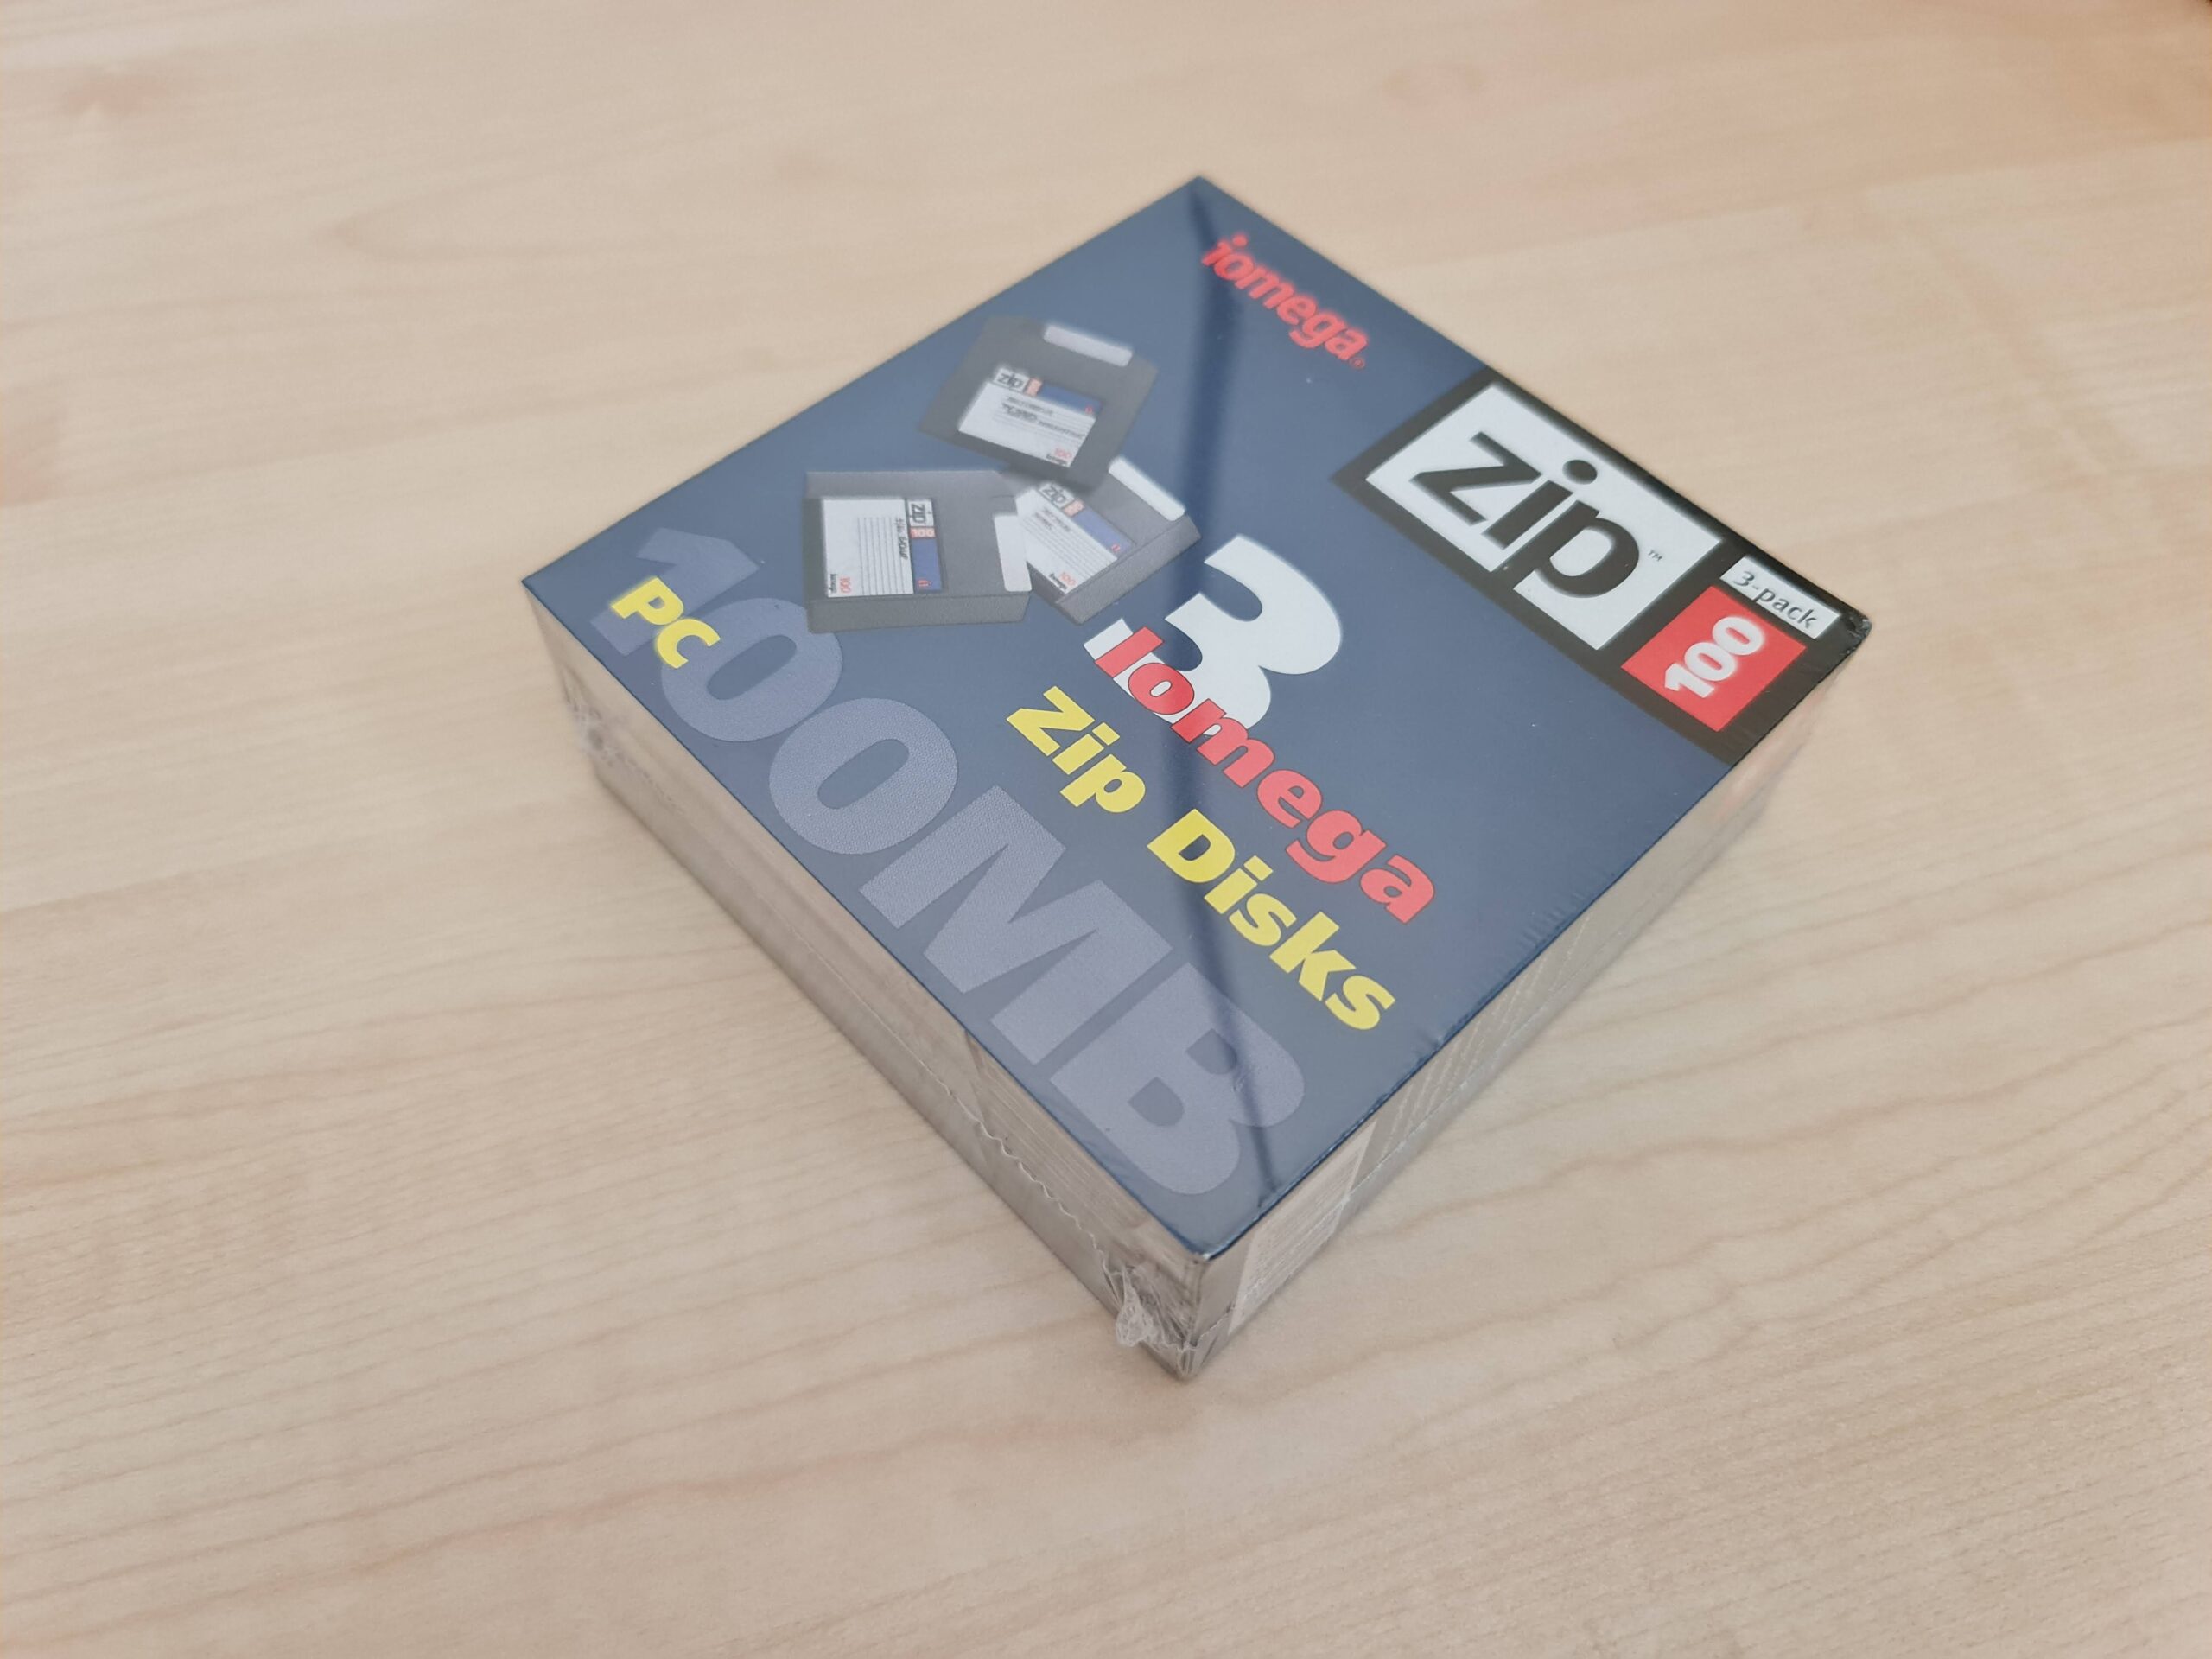
New Old Stock (NOS) Zip 100 disks are still readily available.


The disks can be bought very cheaply and there’s plenty out there, even brand new and sealed. Expect to pay between £1.50 and £4 per disk depending on quantity being sold and whether they’re new or used. You can even pick yourself up some rainbow Zip disks and caddy boxes to store them all in!


Zip Drive Amiga

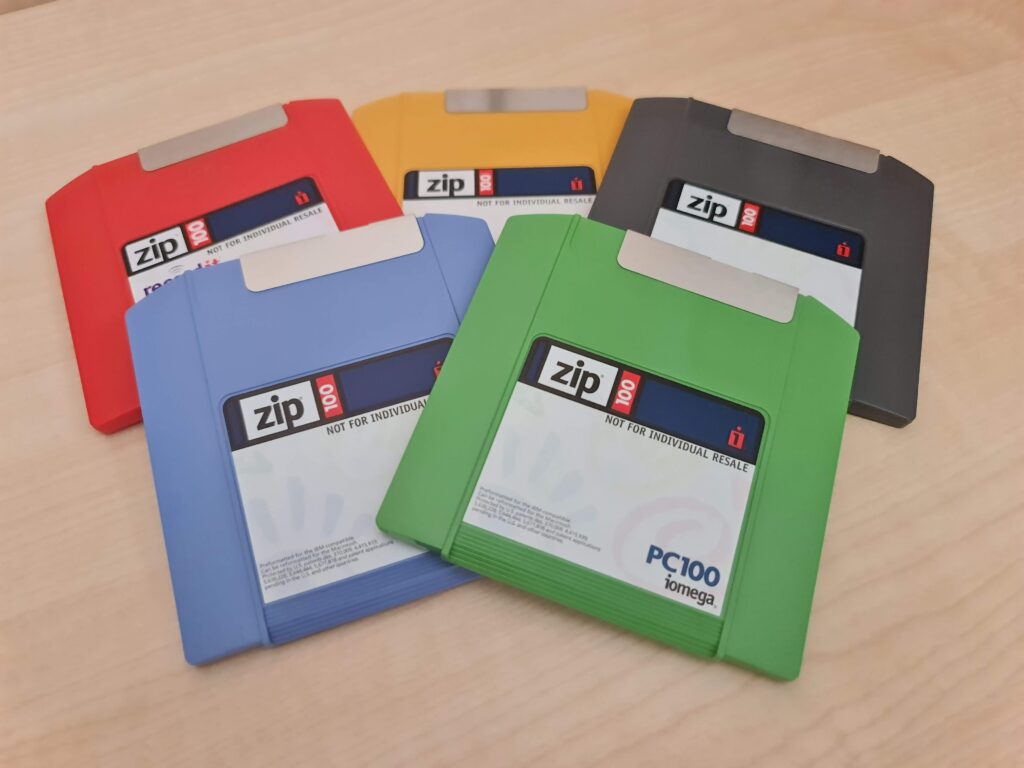
Rainbow Zip 100 Disks.


Adding SCSI to the Amiga 1200

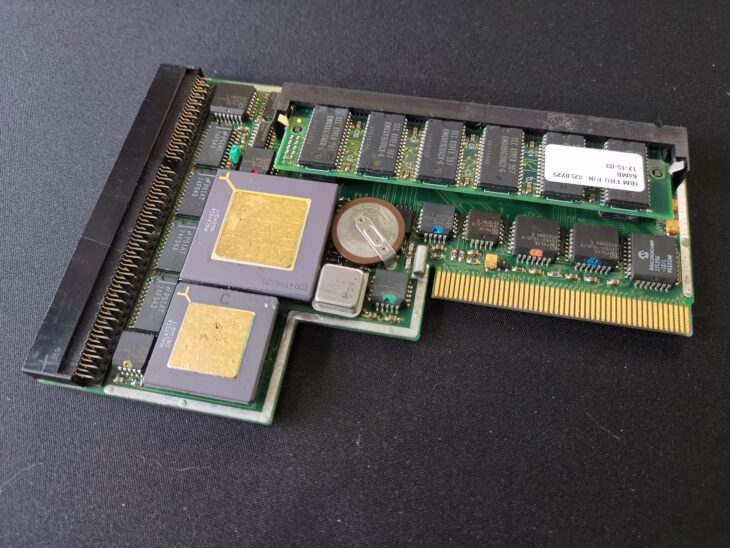
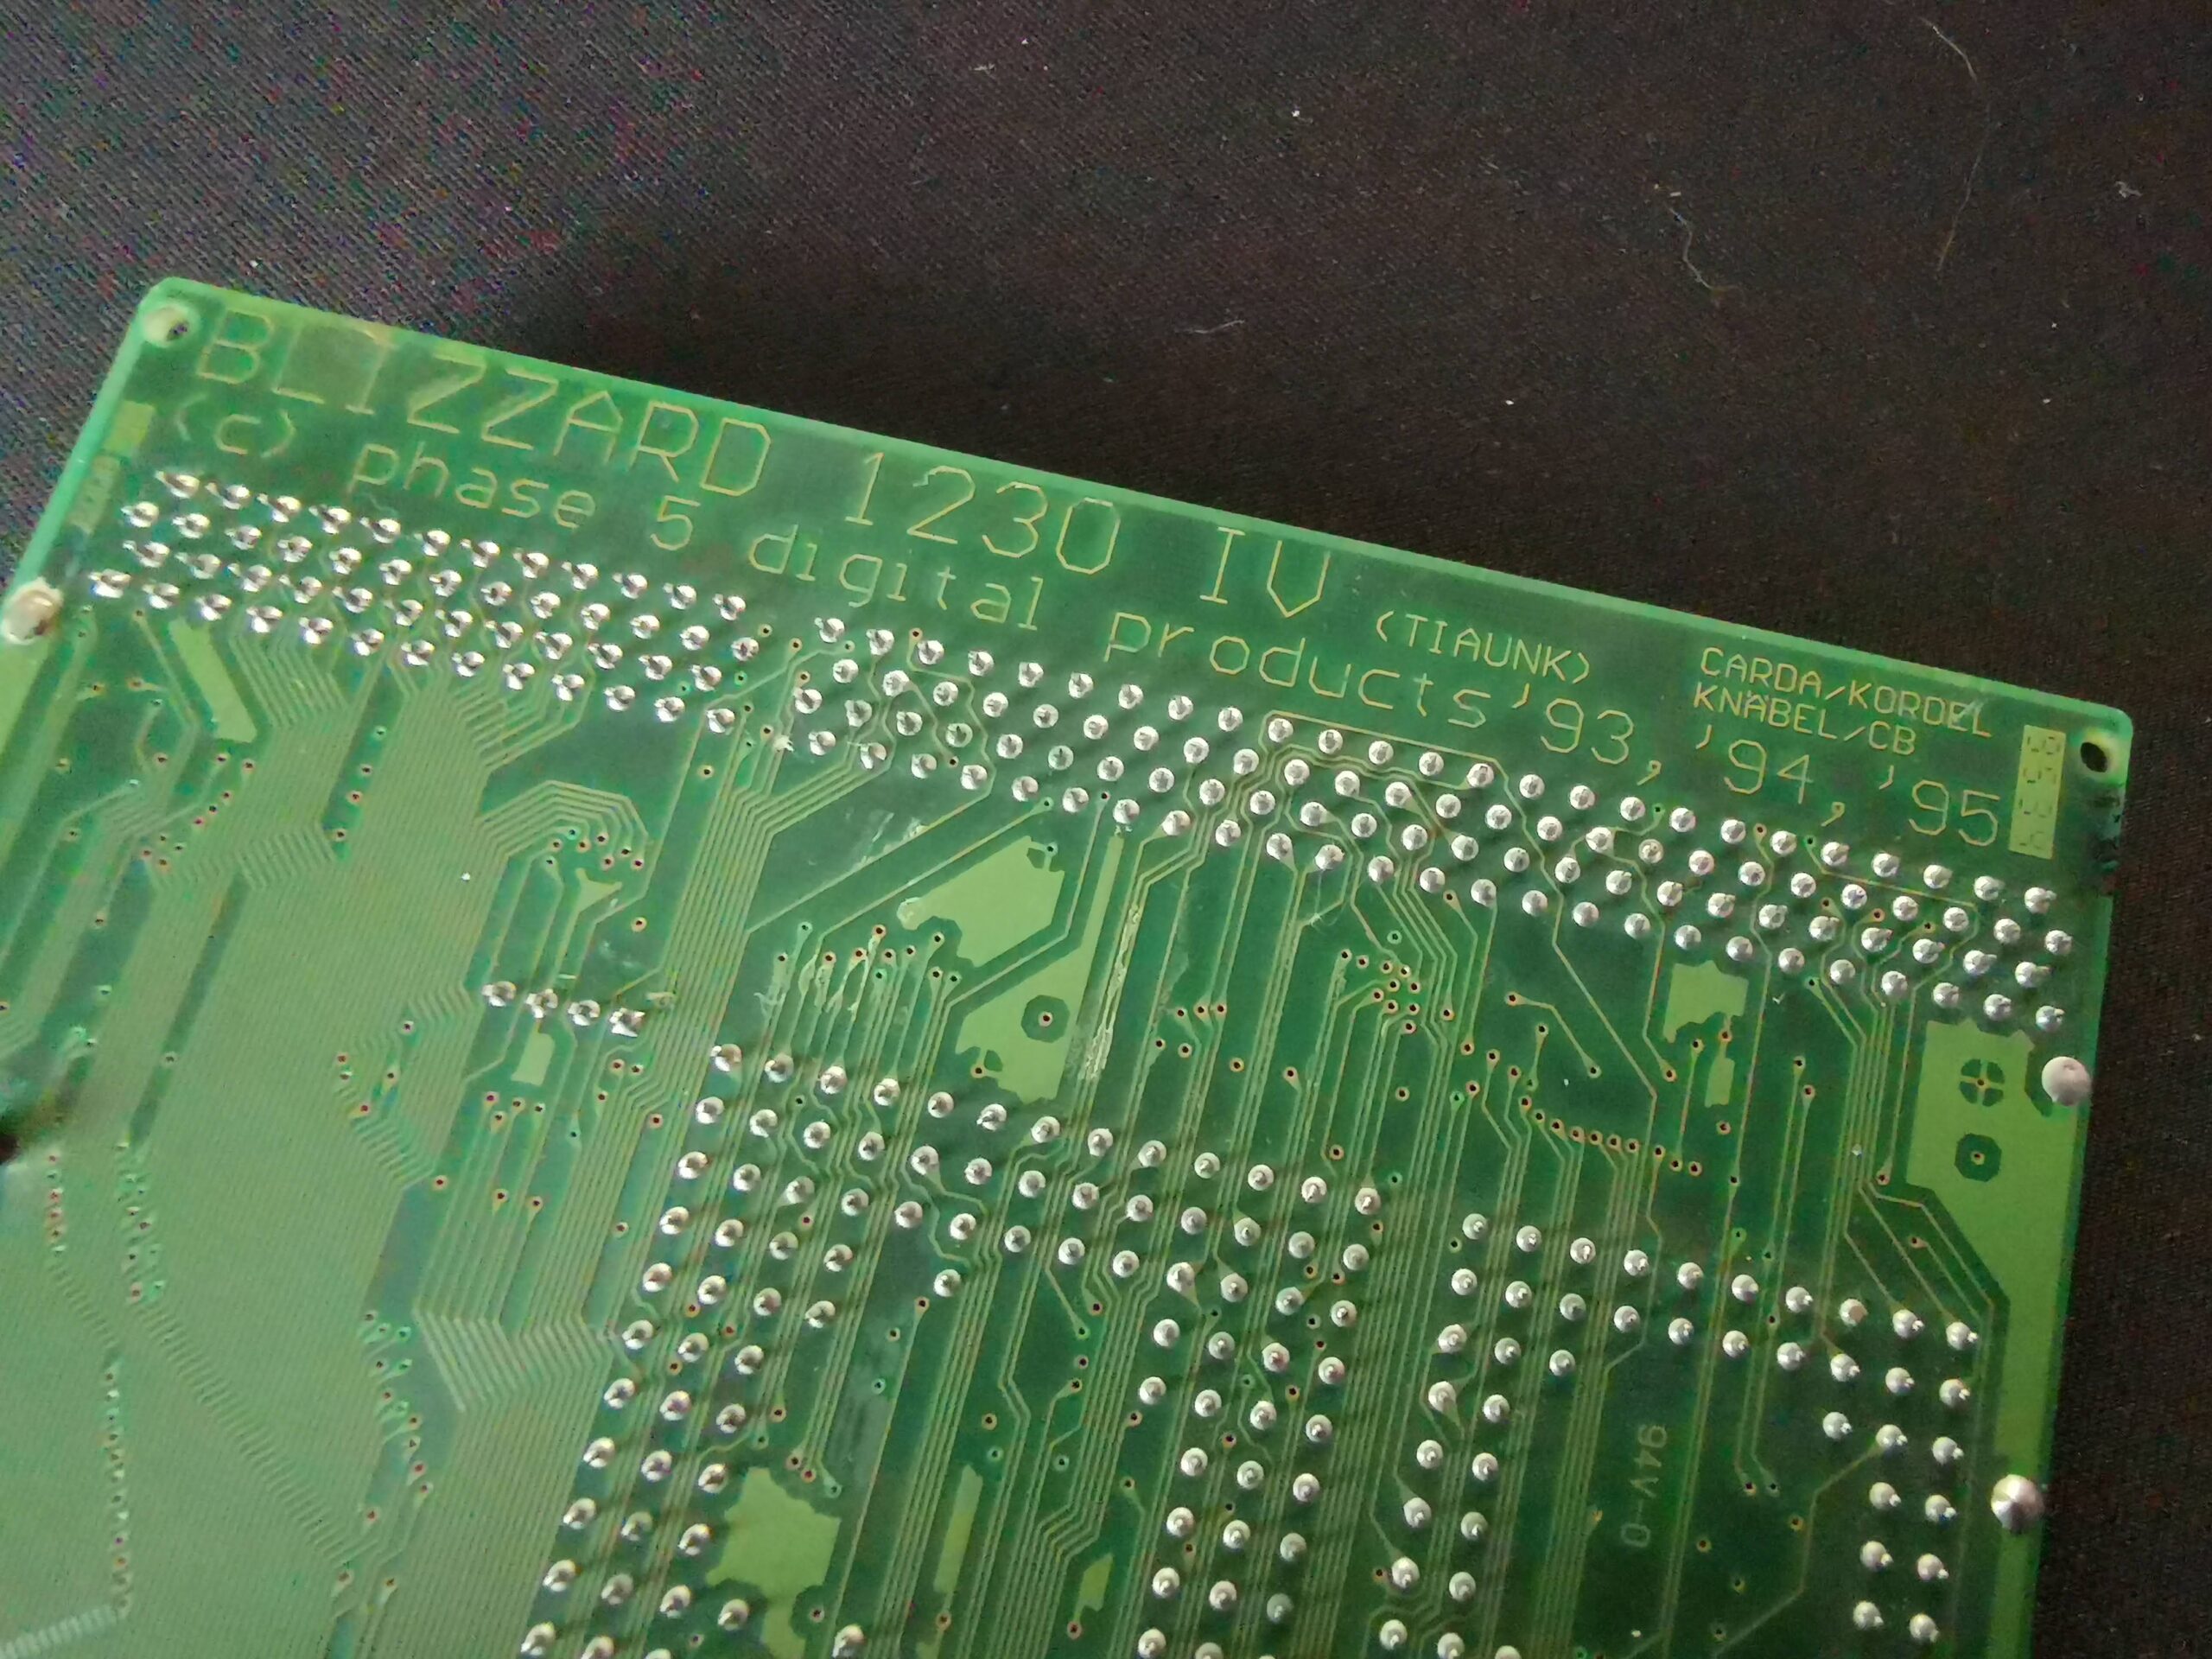
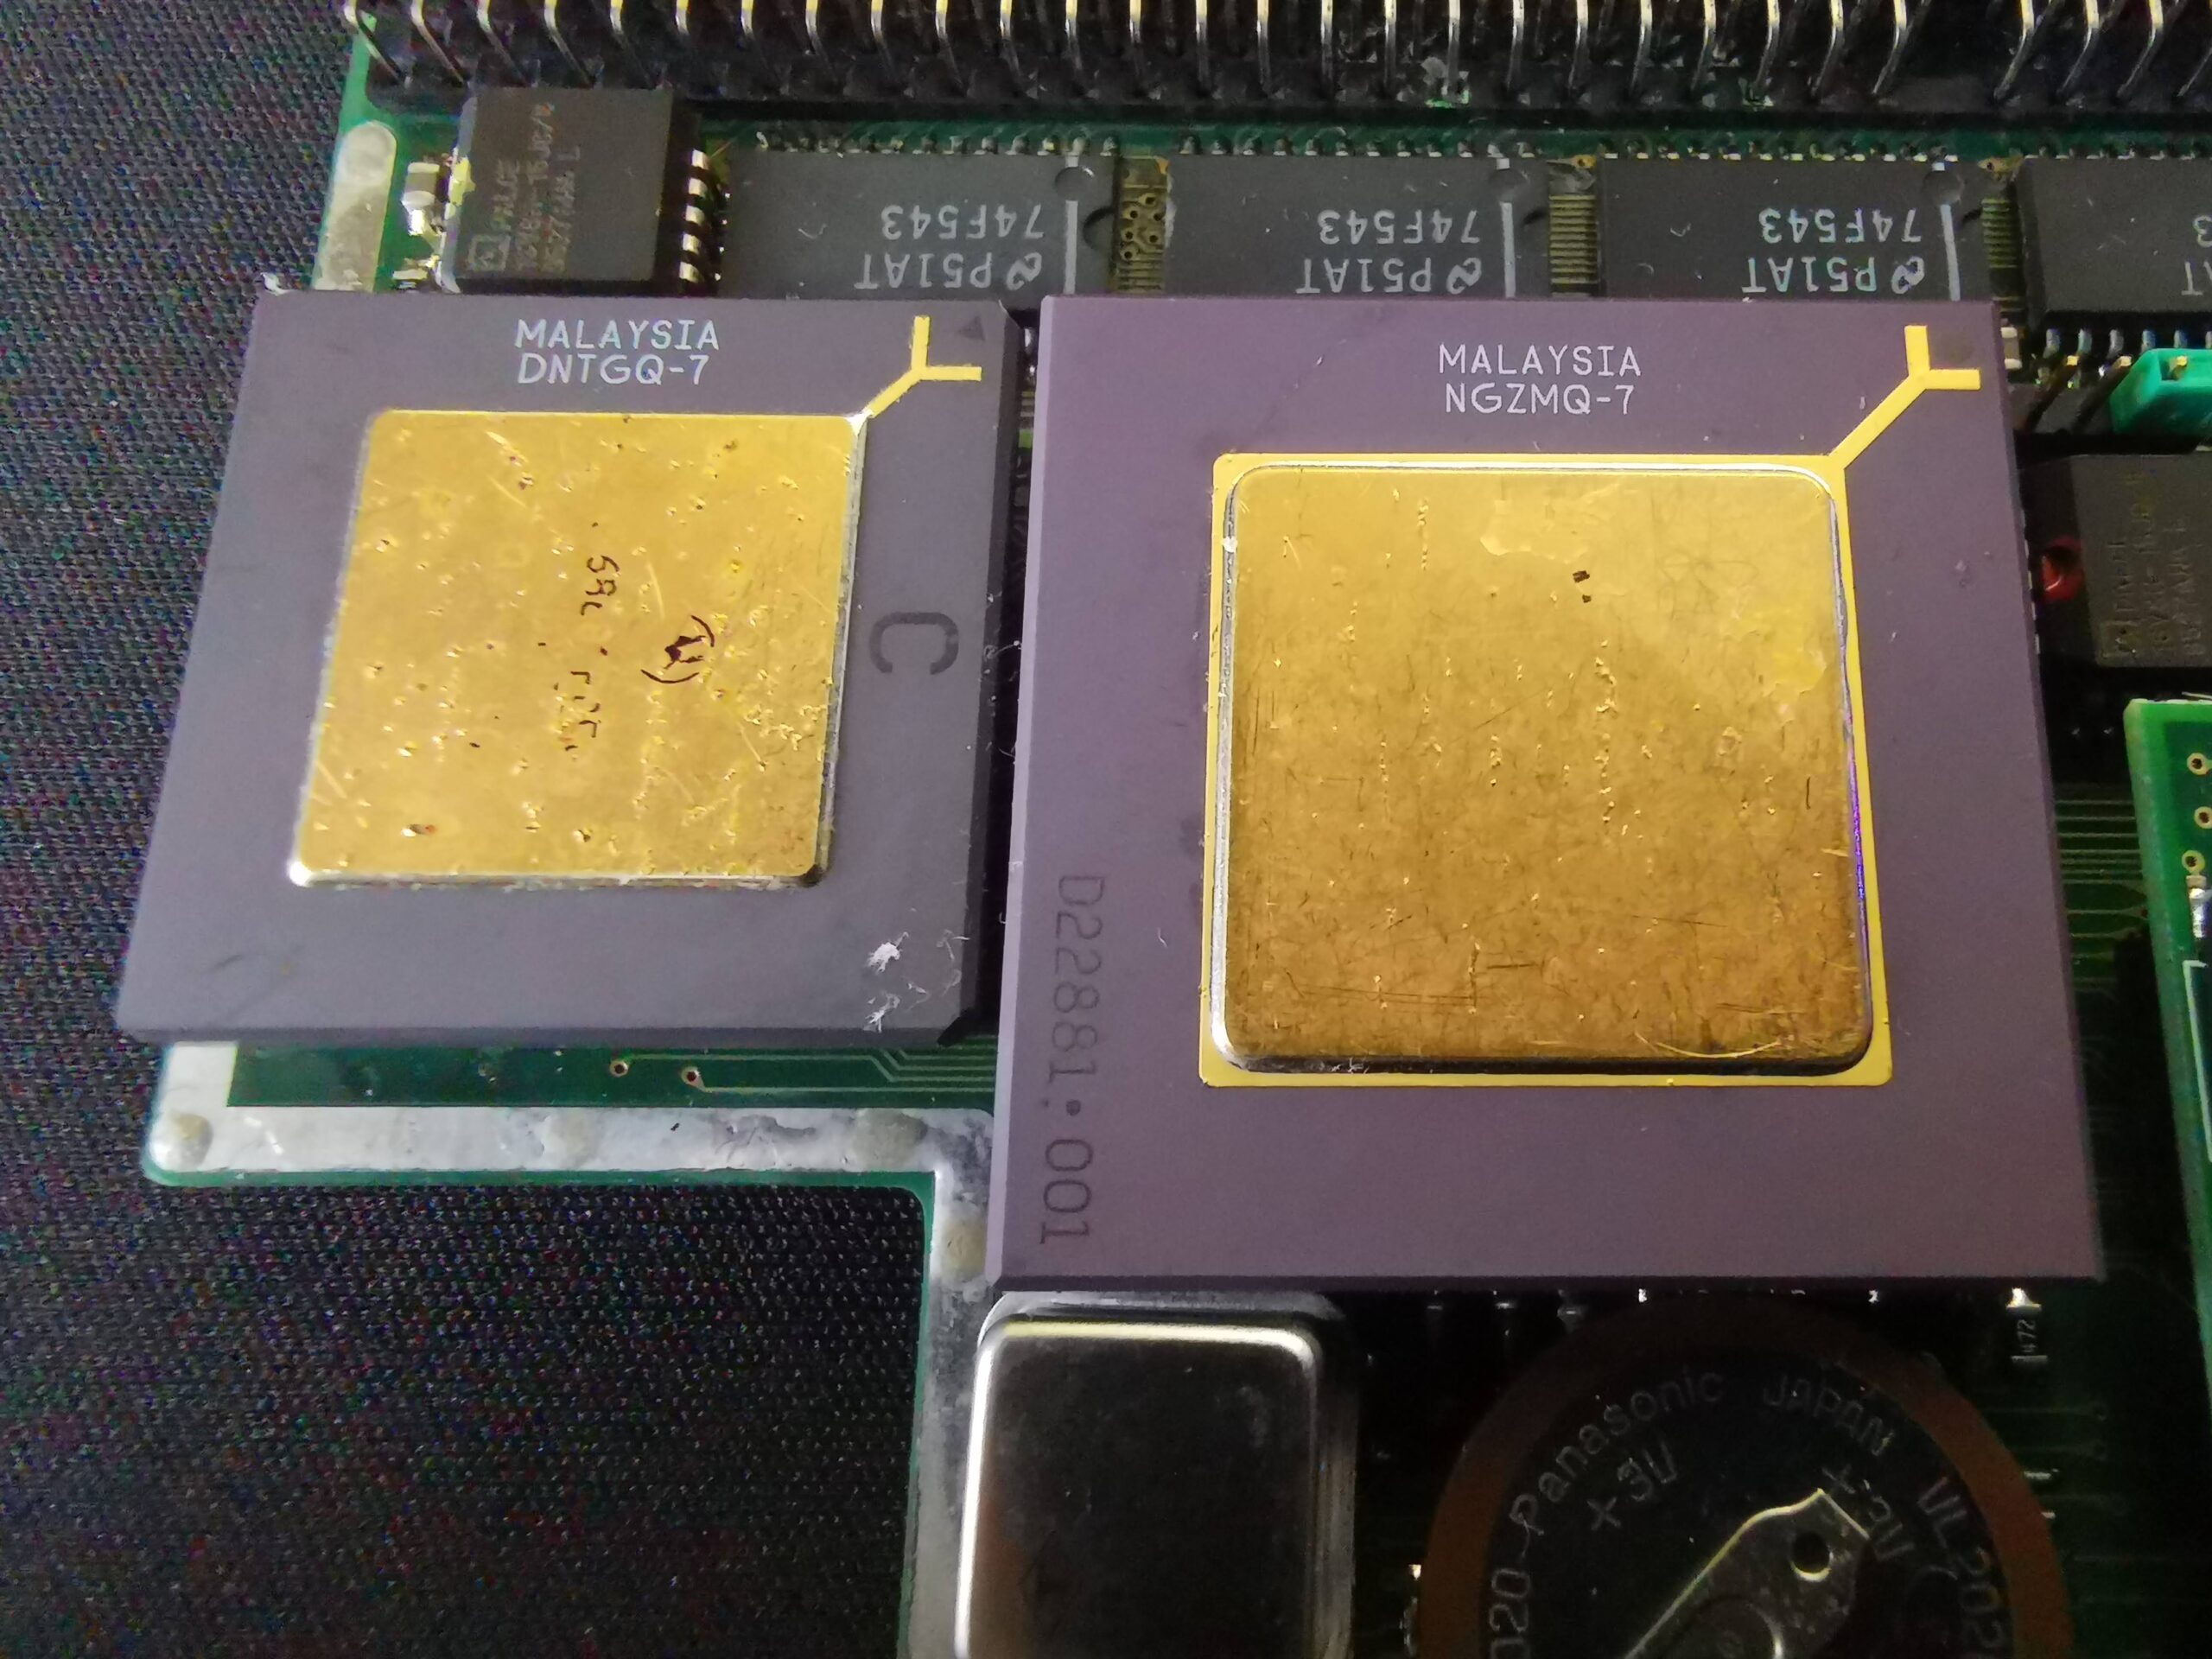
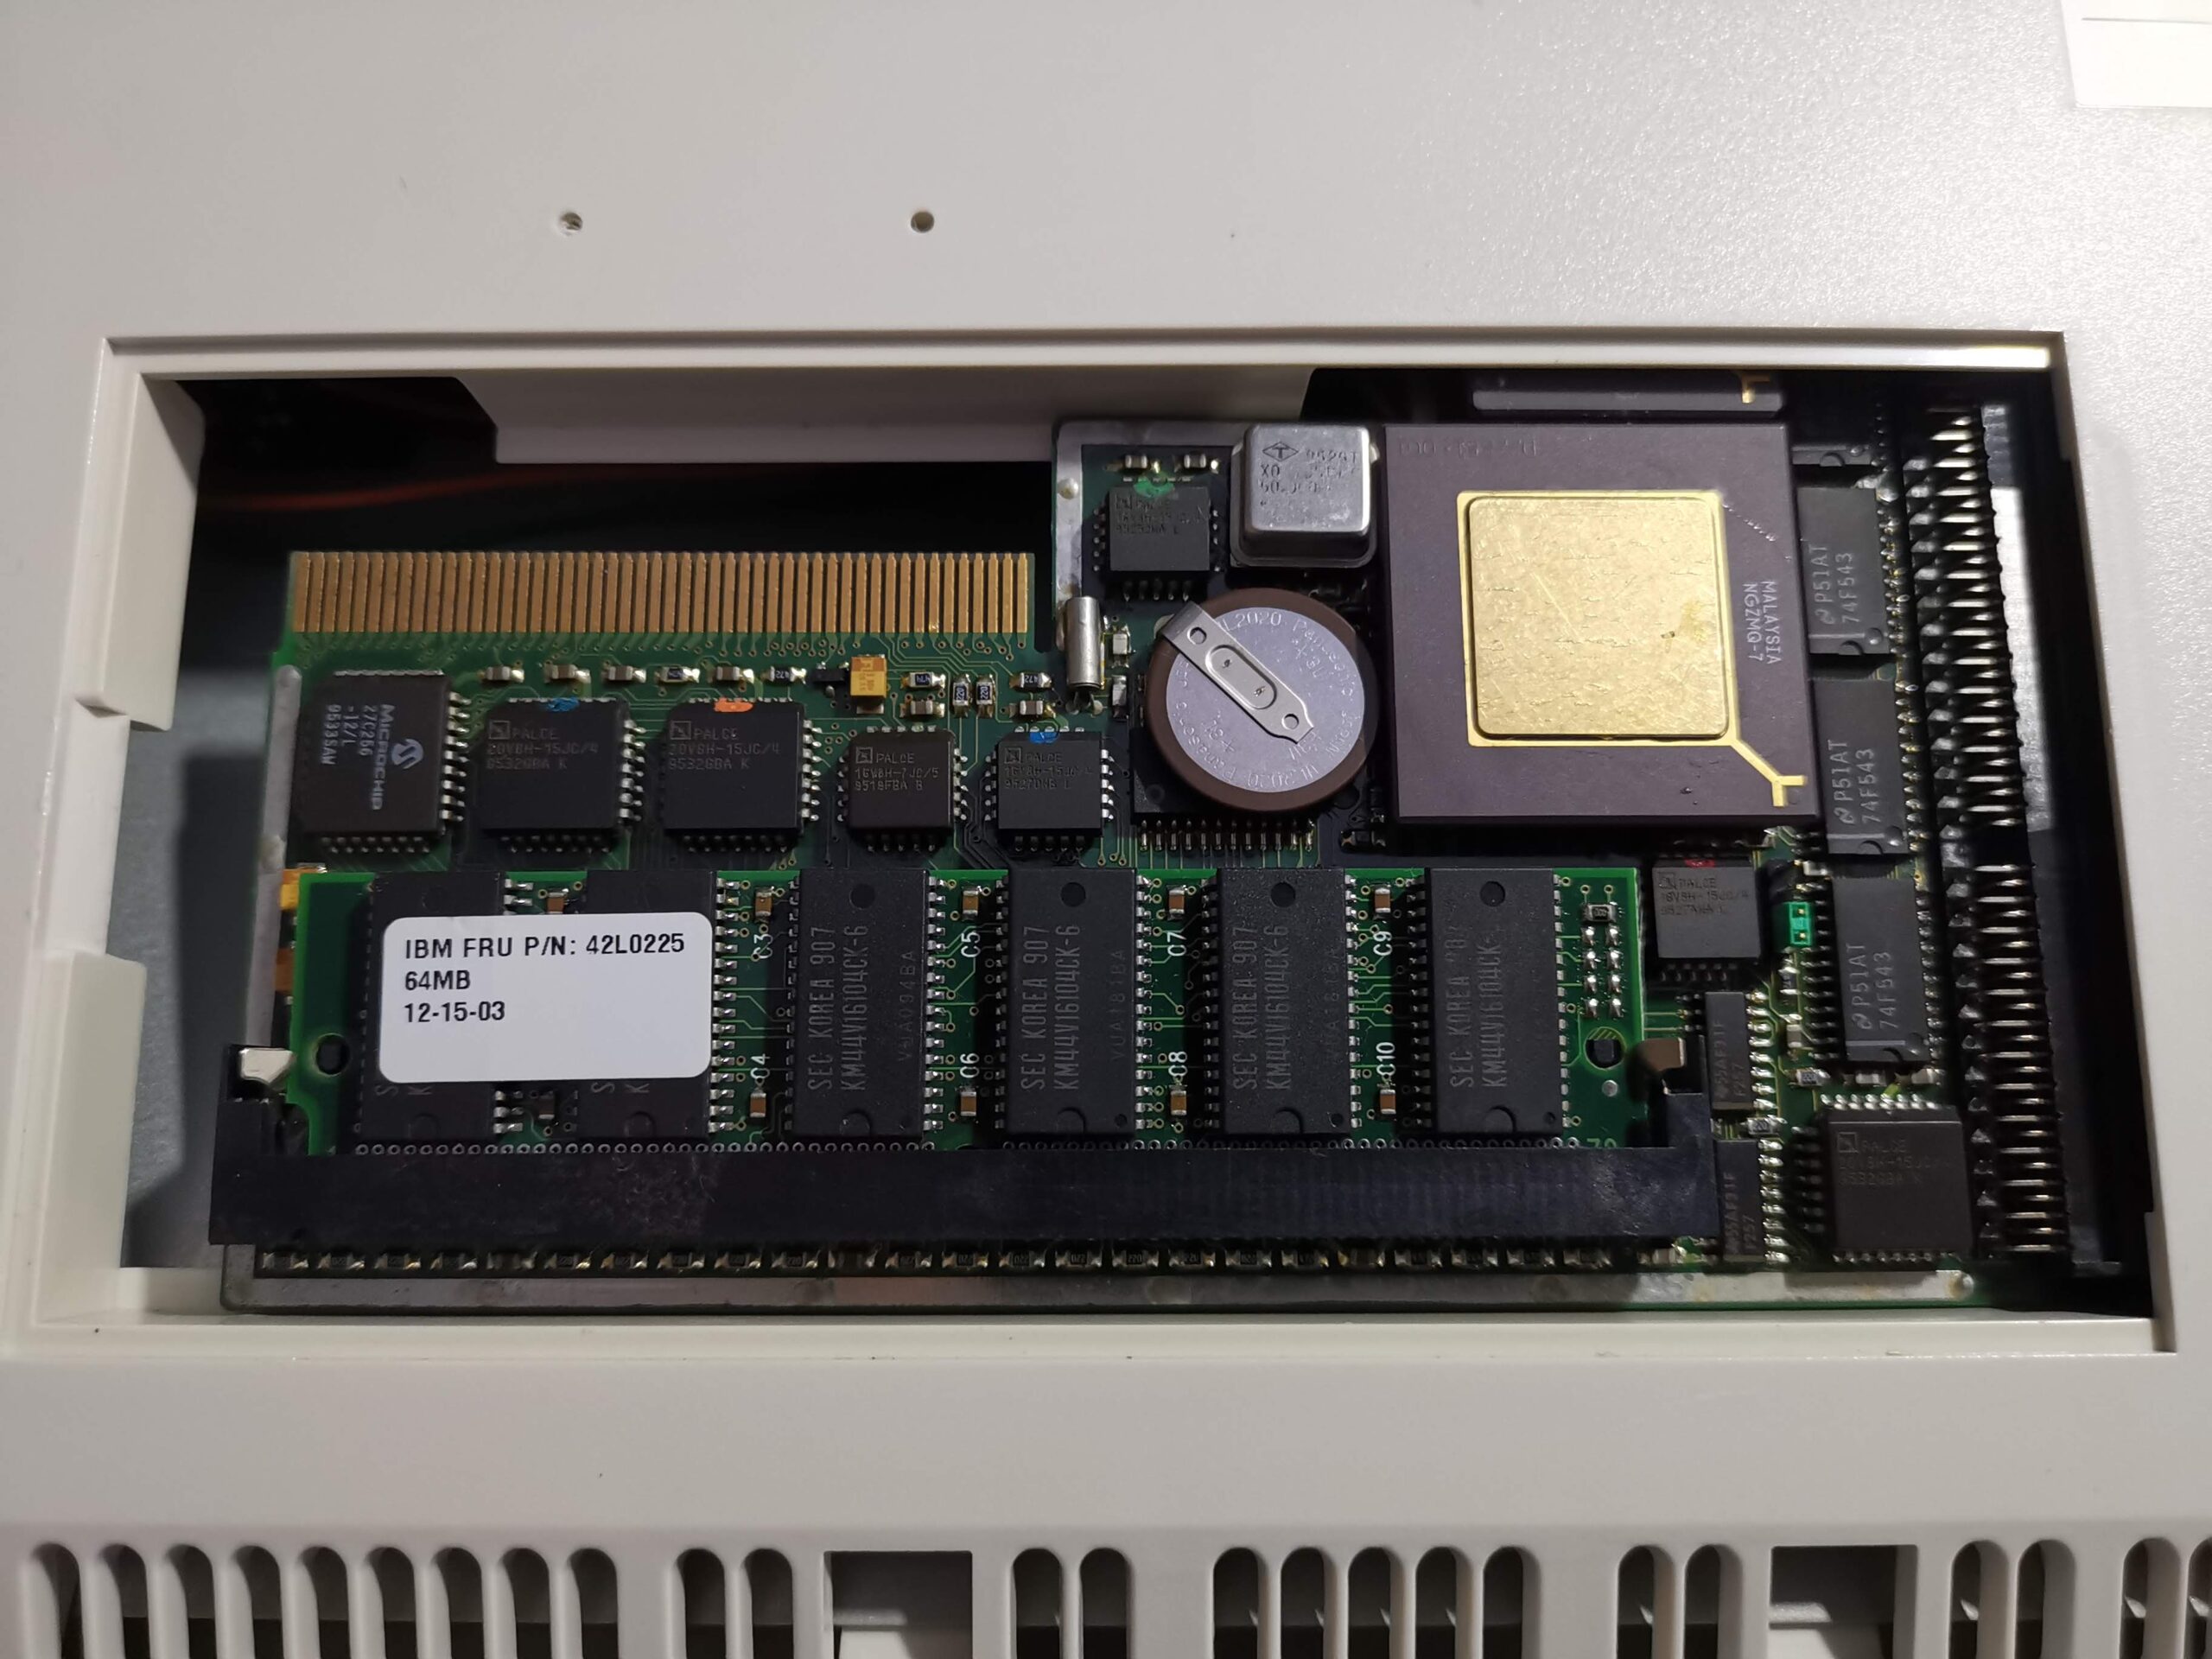
Despite it’s name, the SCSI.device on the A1200 is actually the internal IDE interface. That’s not going to work with our Zip drive so we need to get hold of a SCSI adapter of some kind. If you have a Blizzard trapdoor accelerator card then there was a SCSI expansion made for that. However these are pretty rare nowadays so I would recommend you pick up a Squirrel SCSI interface instead. These devices were made to slot into the Amiga 600/1200’s PCMCIA expansion port and opened up a whole new world of SCSI devices to Amiga enthusiasts.


Zip Drive Amiga

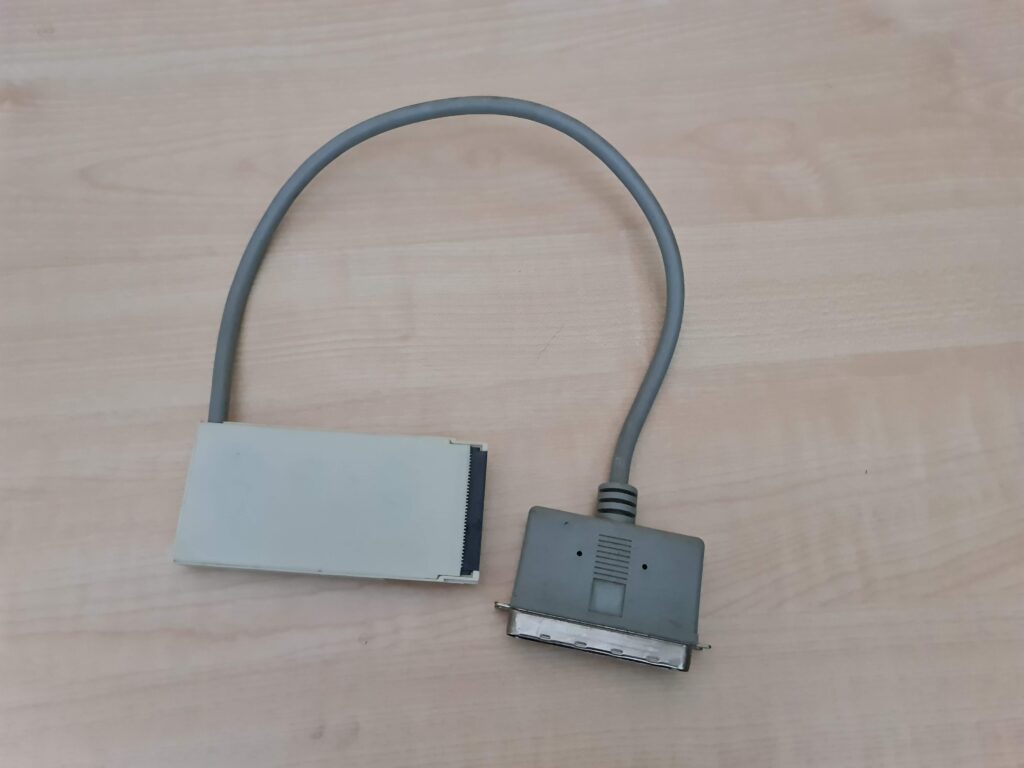
Amiga Squirrel SCSI Device.


The Squirrel SCSI Interface was made by a company called HiSoft but other companies would often bundle it with their own products. I picked up mine as part of a Power Computing CD-ROM drive bundle. Interestingly Power Computing is still going strong, although not surprisingly they don’t sell anything for the Amiga any more.


Amiga Squirrel SCSI Adapter

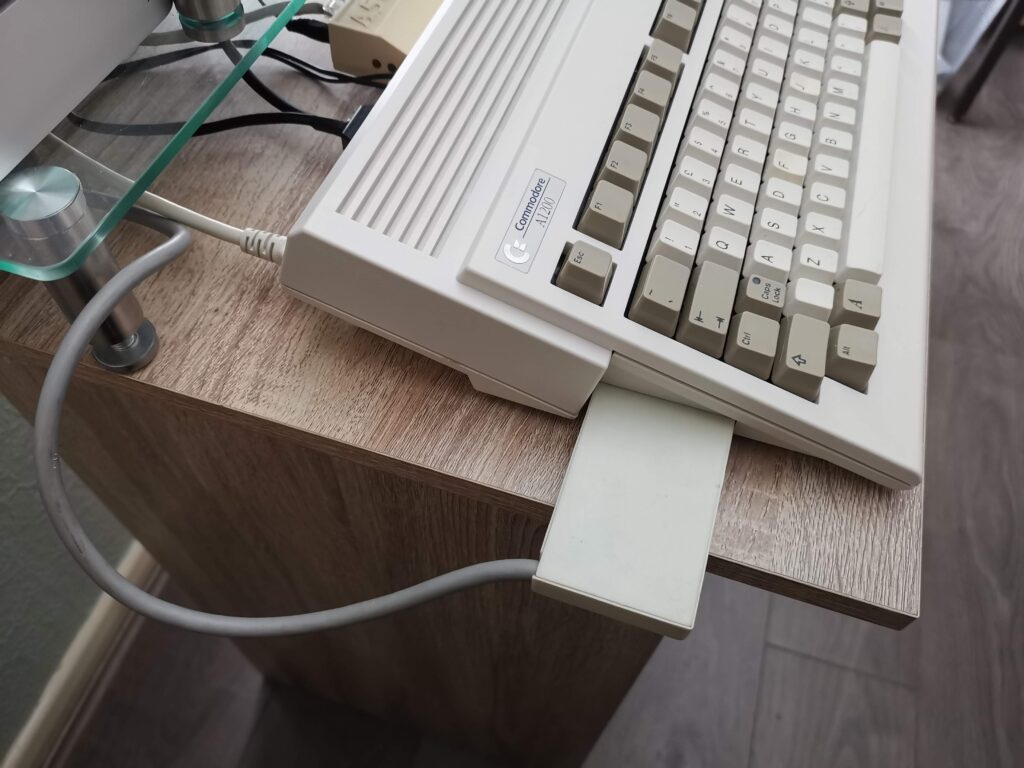
Squirrel SCSI Adapter plugged into my A1200’s PCMCIA Expansion Port.


The Squirrel is just a small box that plugs into the PCMCIA port and has a short cable with a 50 pin male SCSI connector permanently wired into it. No matter whether you buy the Squirrel on its own or with another device we now have another issue.


Zip Drive Amiga

No way our Squirrel SCSI is connecting to these out of the box…


The Zip drive has two D25 female connectors on the back but our only connector from the Squirrel is a male 50 pin Centronics plug. They don’t fit together so we need to get creative with our cabling. Ideally we would need a cable with a female 50 pin Centronics connector one end and a male D25 connector at the other but I was unable to locate one.


Zip Drive Amiga

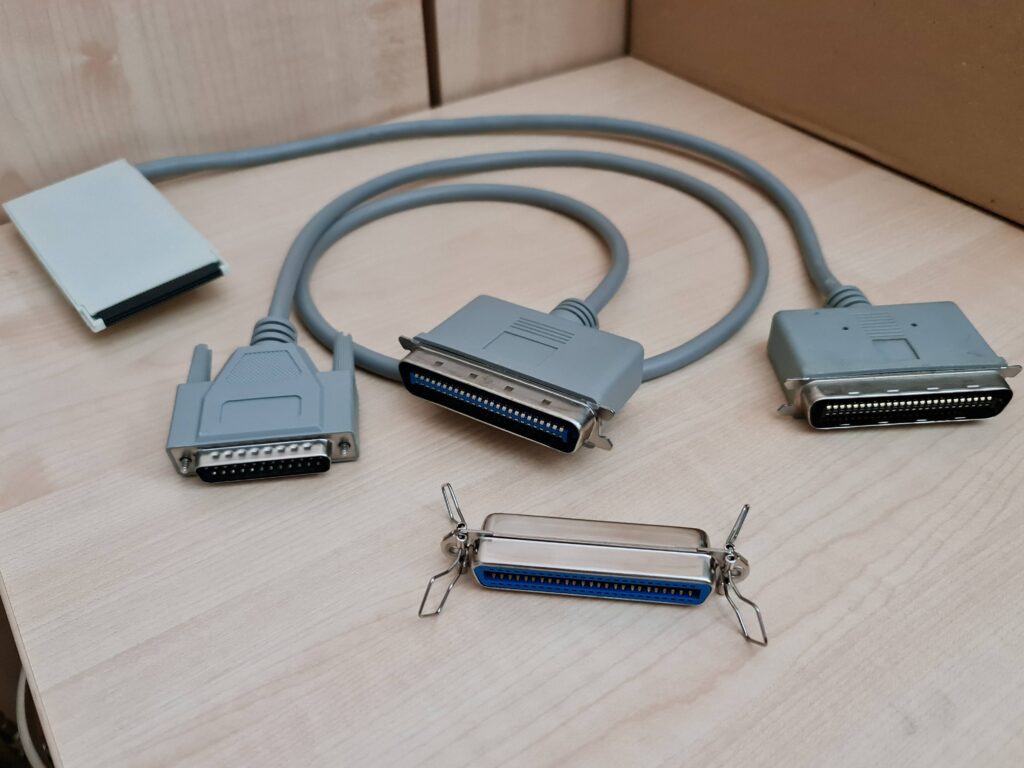
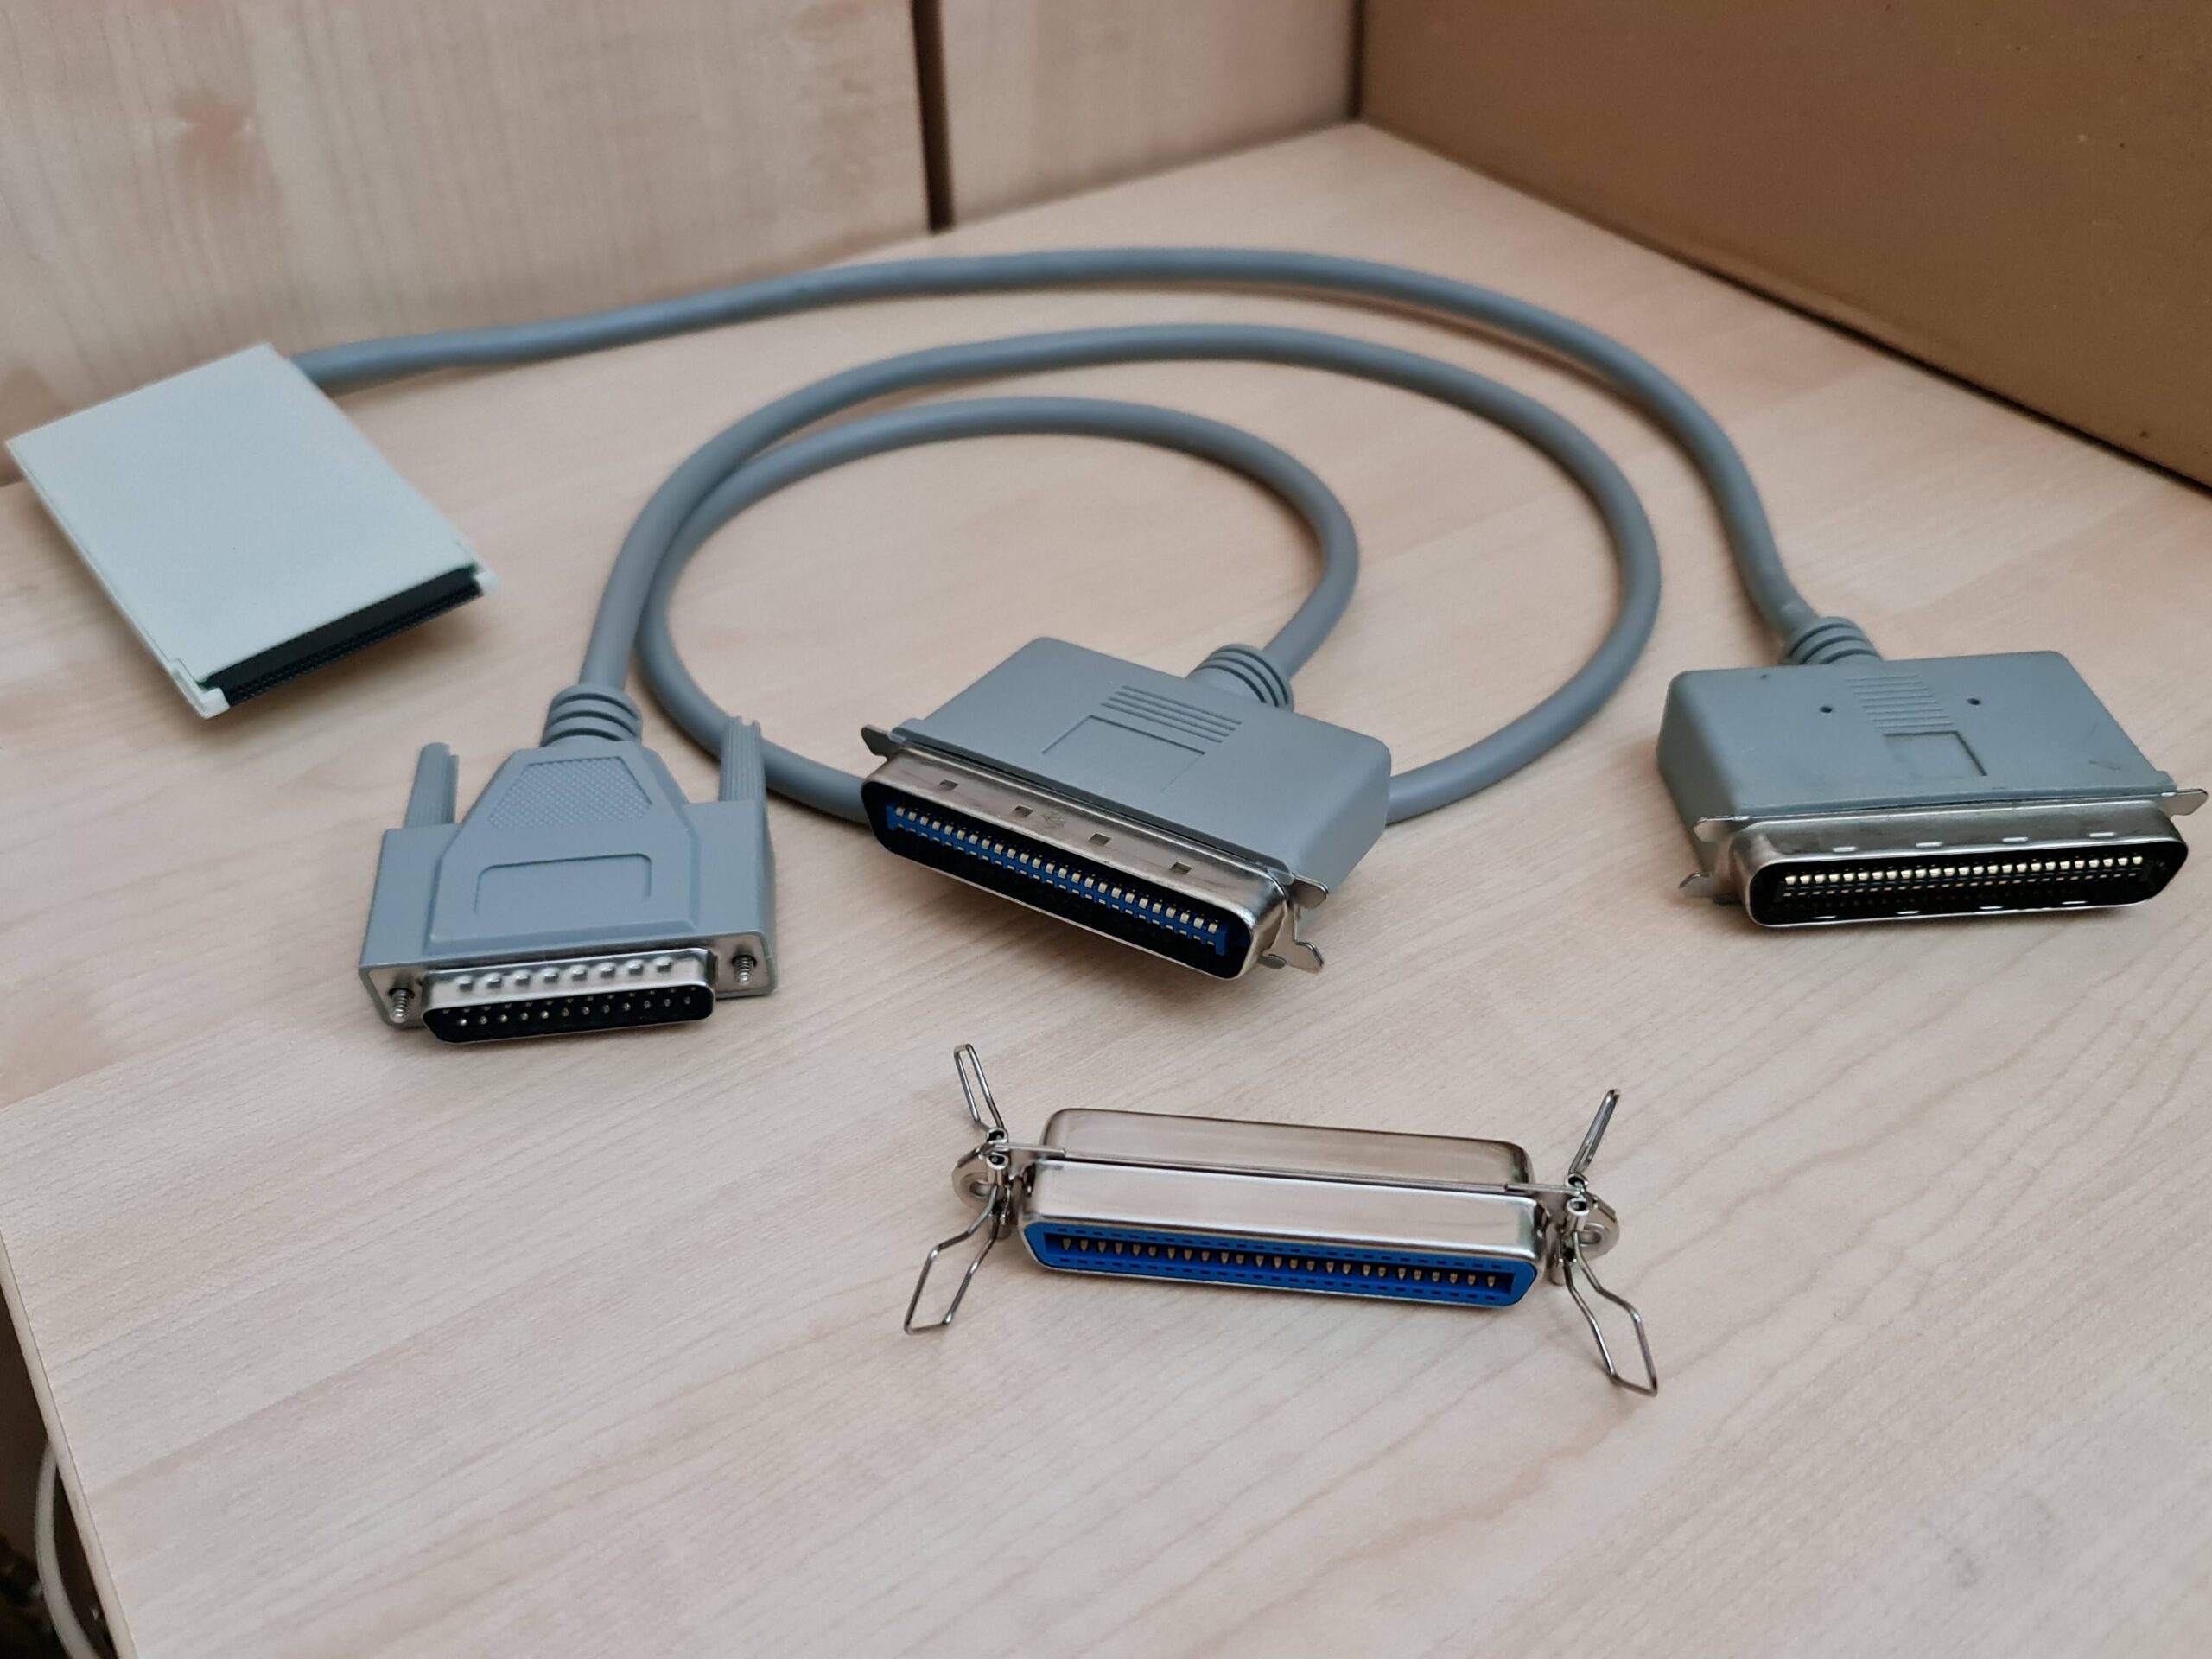
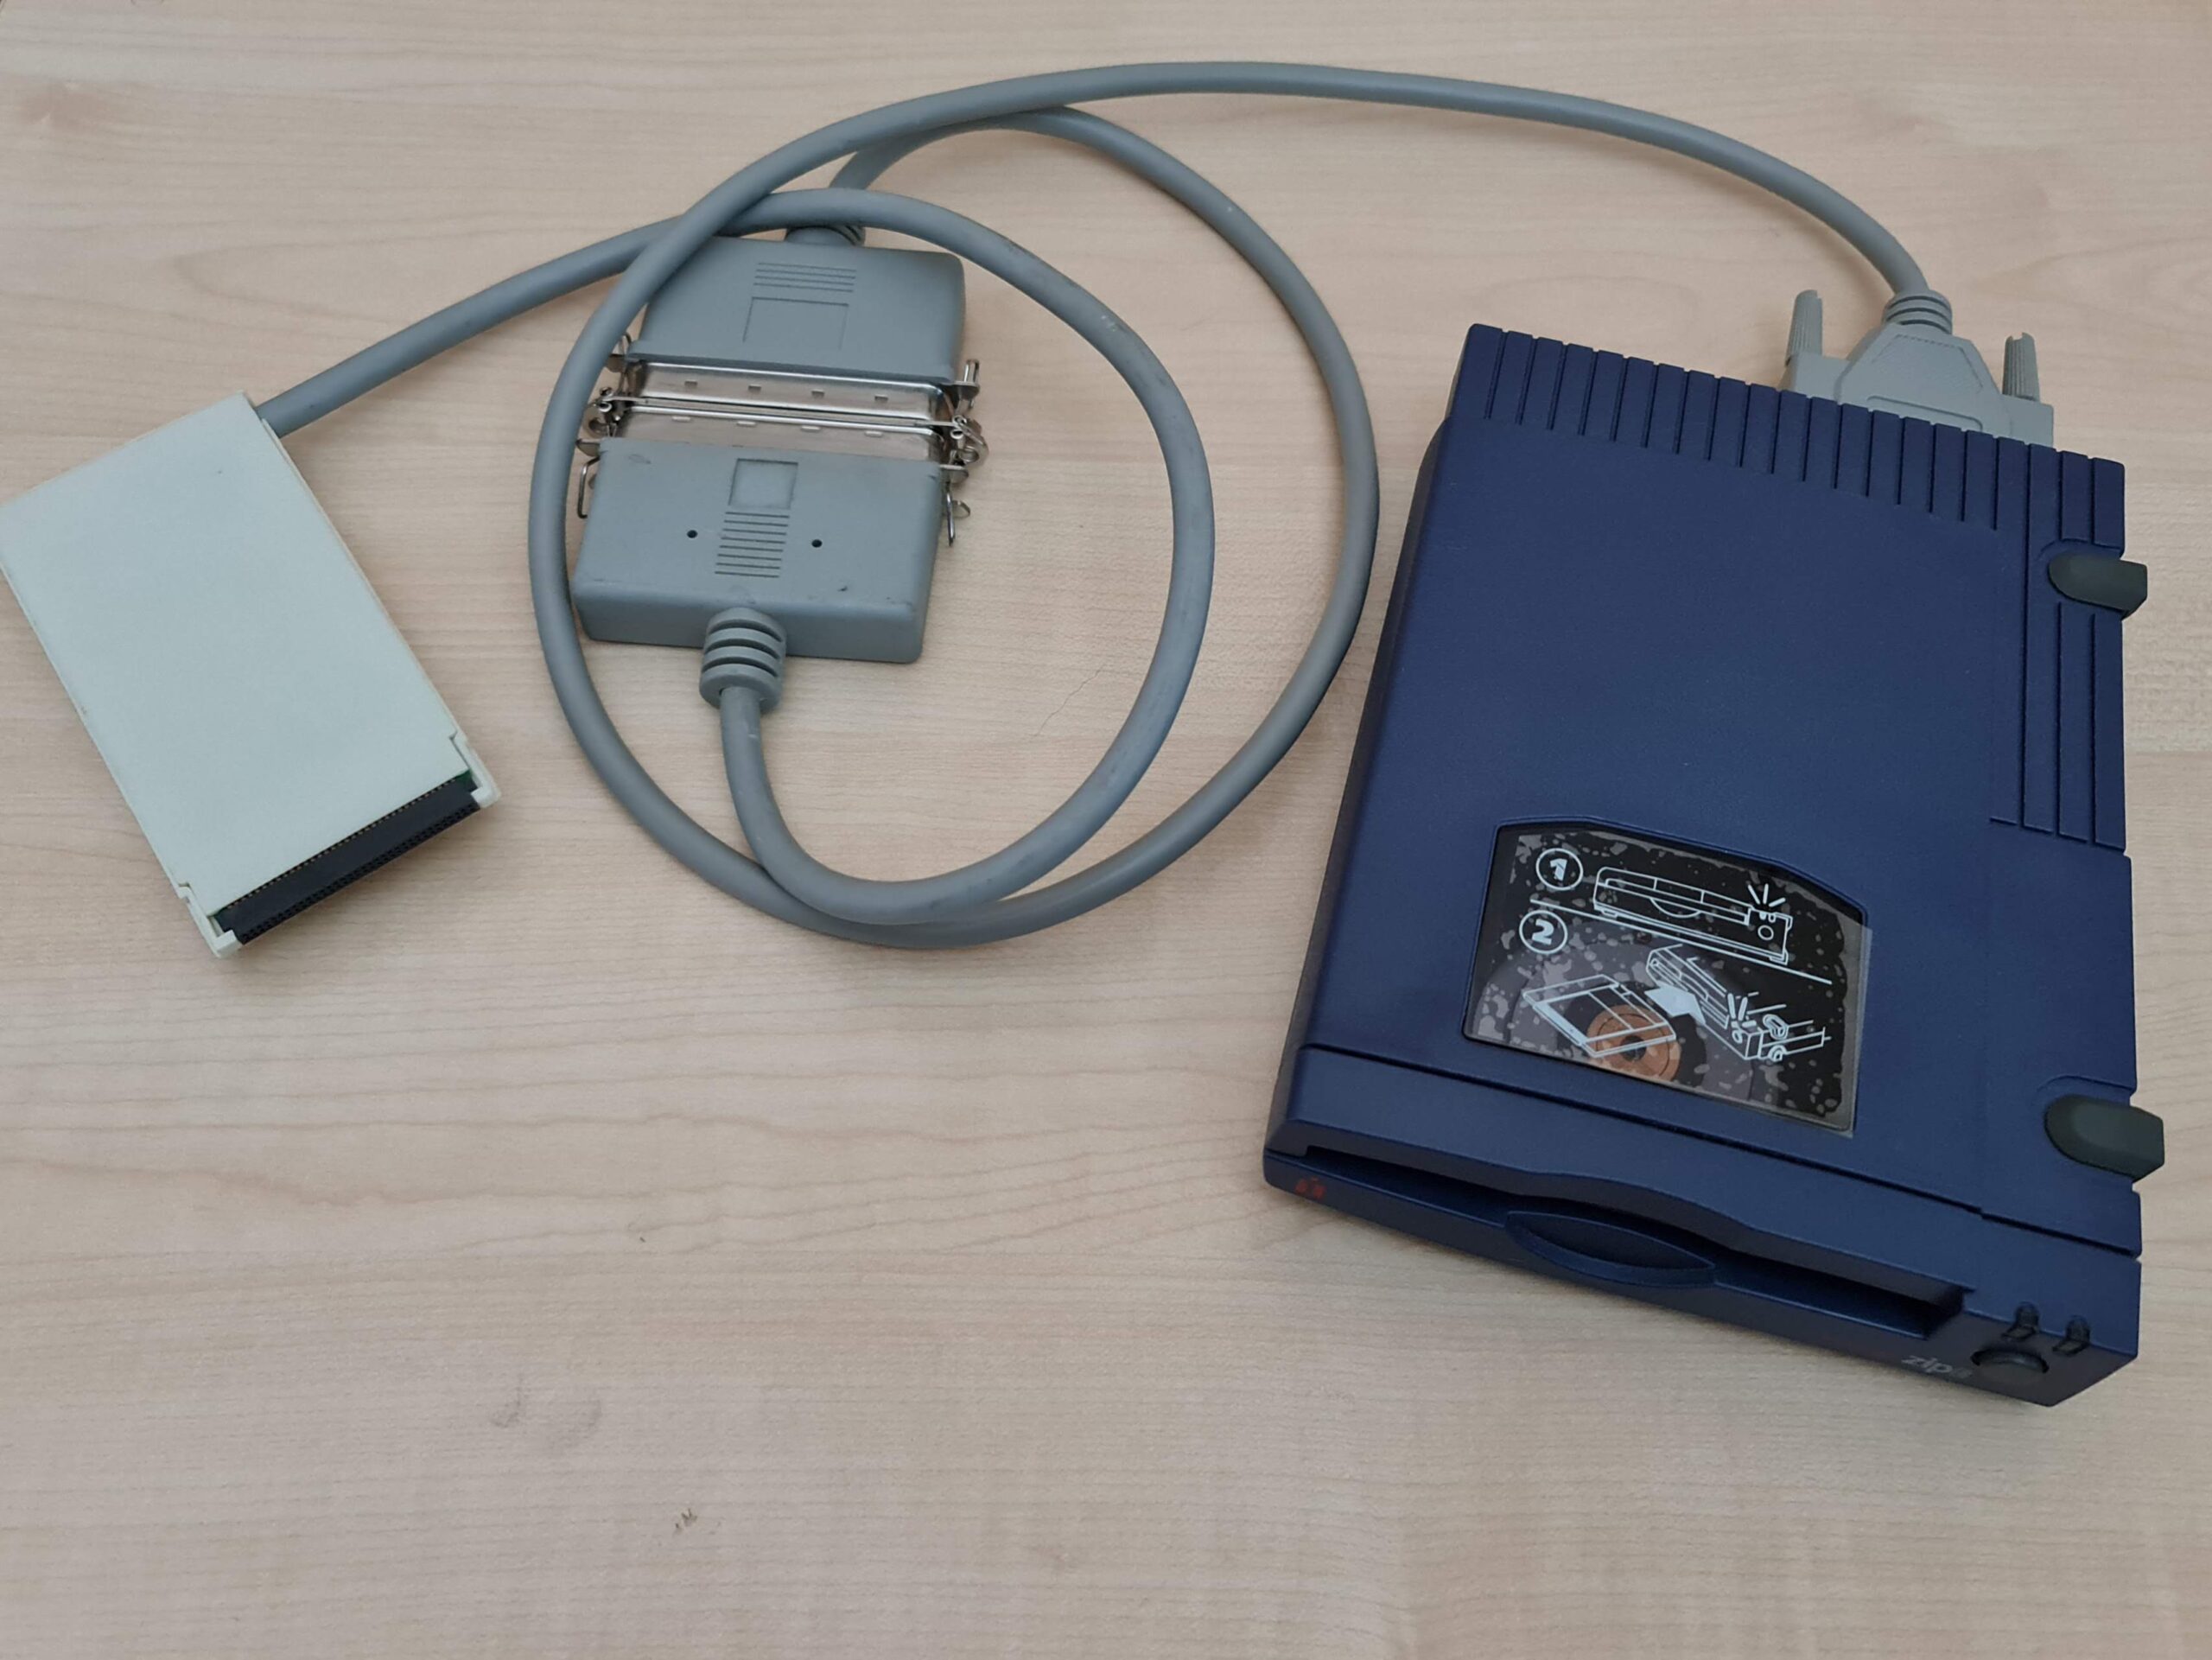
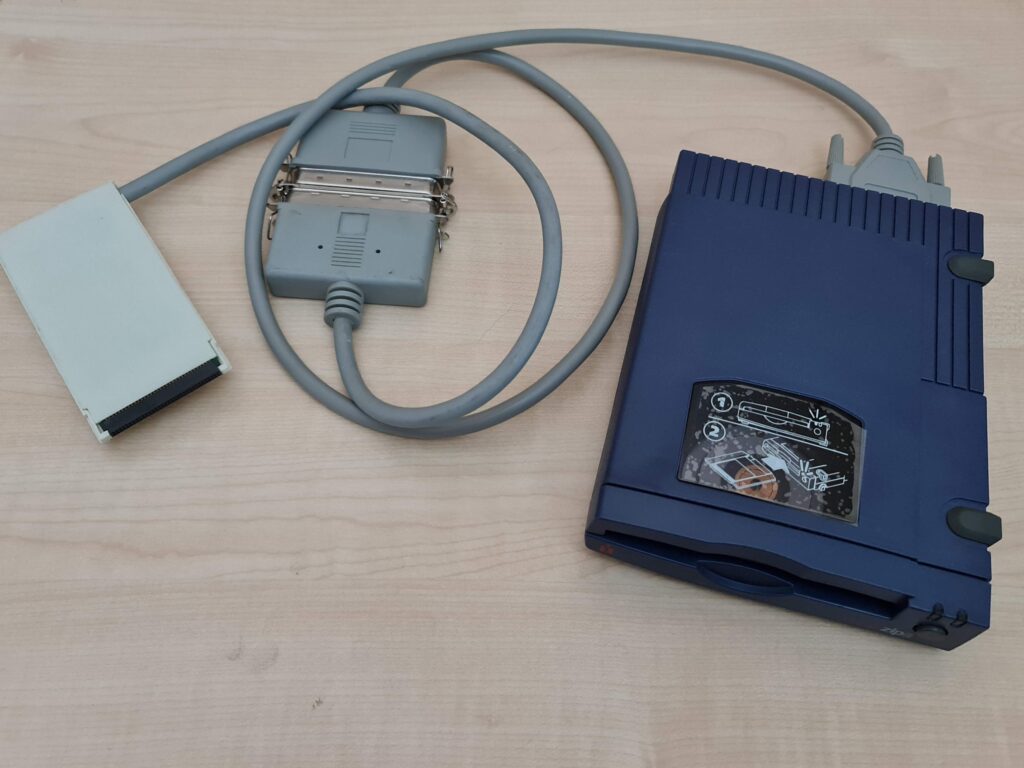
All the hardware needed to connect our Zip 100 Drive.


Fortunately there are still a variety of cables and connectors cheaply available. What I ended up having to do was get a male D25 to male 50 pin Centronics cable and a ‘gender changer’ connector. The latter is basically a double sided female 50-pin Centronics connector.


Zip Drive Amiga

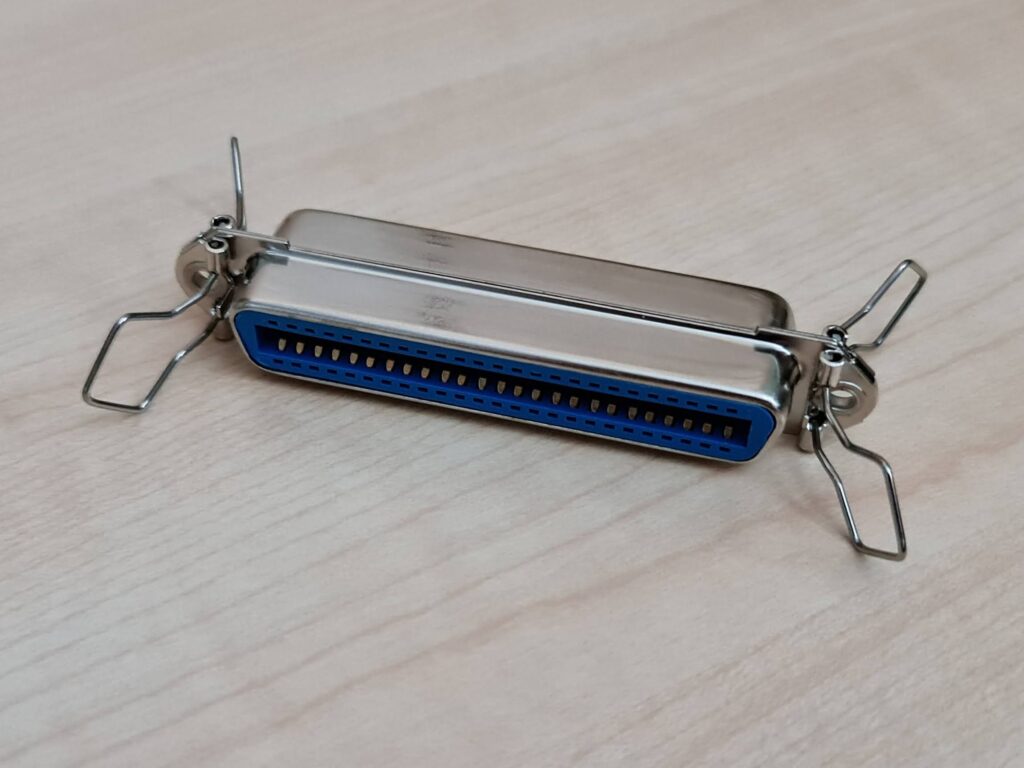
A closer look at the SCSI gender changer.


The gender changer allows us to join the two male connectors from the Squirrel and the D25-Centronics cable together as you can see in the next image.


Zip Drive Amiga

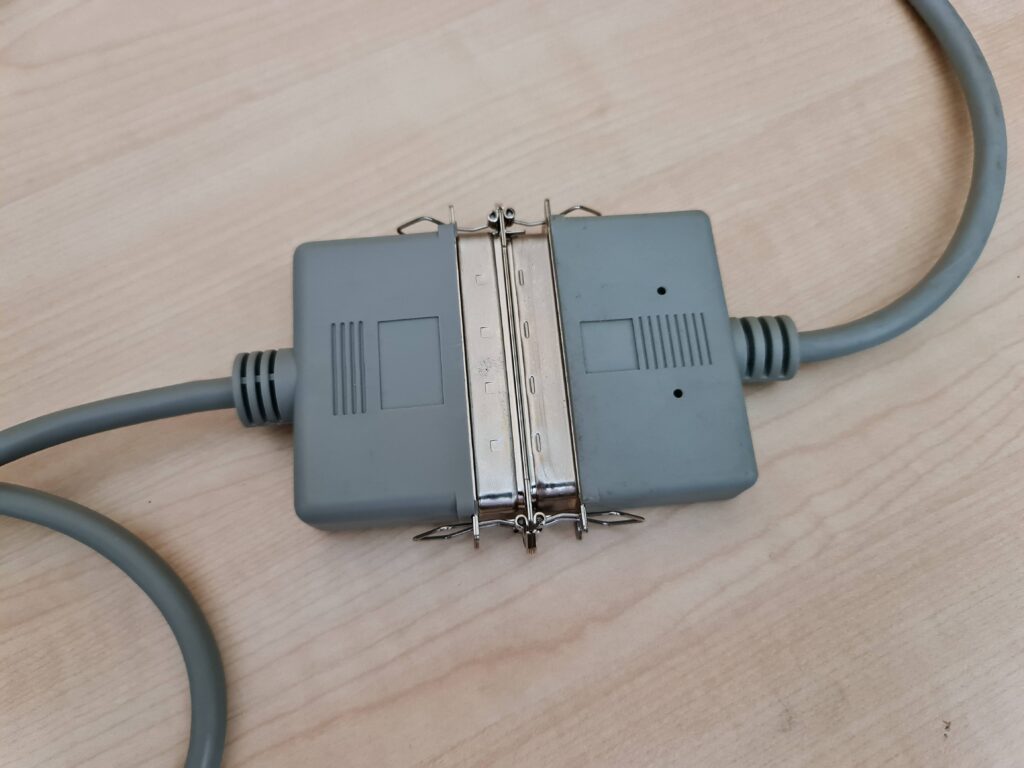
Two male 50-pin Centronics cables connected by means of a gender changer.


SCSI Chains

So now we have our Squirrel SCSI Interface fitted with cables that can actually connect to our Zip 100 Drive. However, before actually connecting everything up we just need to check that Termination is enabled on our Zip drive.


Zip Drive Amiga

Zip 100 Drive connected to Squirrel SCSI.


I’m not going to go into great detail here but suffice to say that SCSI (an acronym for Small Computer System Interface) is a system that allowed the daisy-chaining of multiple devices to a computer. To enable the computer to be able to identify each device in the chain they were all allocated an ID number from 0 to 7. In the case of our Zip drive we have the choice of selecting ID 5 or 6 via the little switch at the back. As this is our only device either ID will work but I will be using ID 5 for the rest of this guide.


Zip Drive Amiga

Zip 100 Drive with termination set to ‘on’ and ID set to ‘5’.


The other peculiarity with SCSI chains is that both the first and last devices on the chain have to be ‘terminated’. The Squirrel SCSI adaptor is actually classed as the first device (ID 0) and is already terminated. The Zip drive will be the last device on our chain and so must also be ‘terminated’. Often times on other devices you would have needed to plug a physical Terminator (a bit like a blank plug) into an empty socket to terminate a device. Fortunately the Zip drive has the circuitry built-in and selectable via the switch on the back.

Once the switches are set correctly (as shown in the image above) the Zip drive can be hooked up to the Squirrel and we are ready to proceed onto the next phase.


Zip Drive Amiga

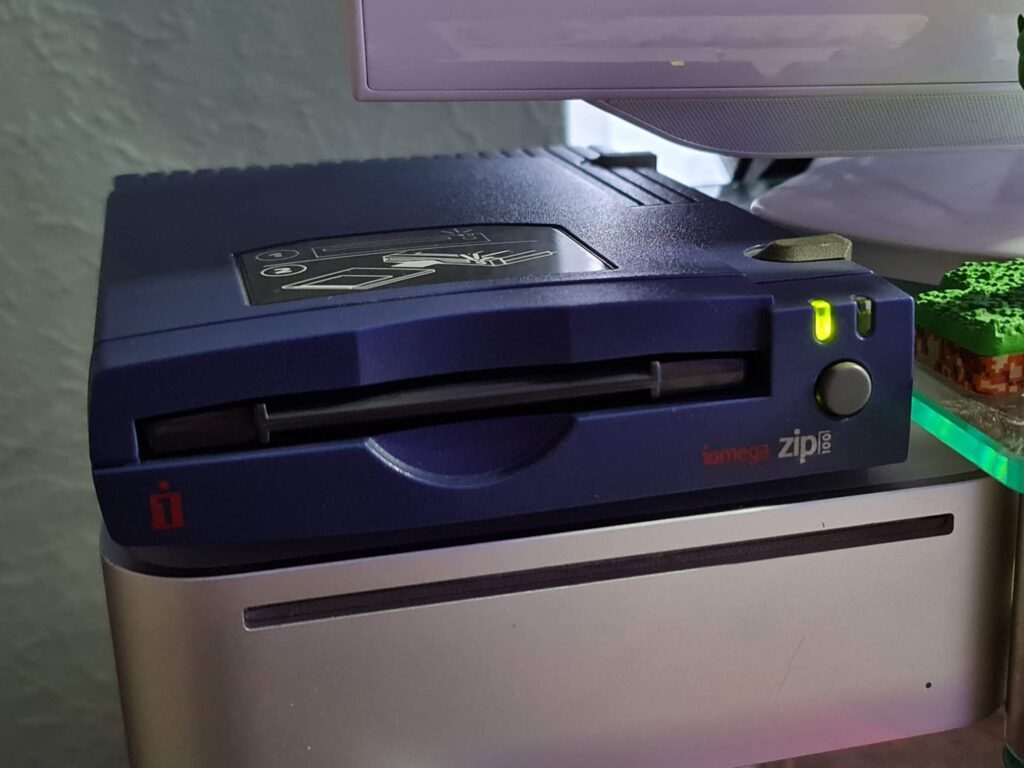
My Zip Drive (sat on top of my MorphOS machine).


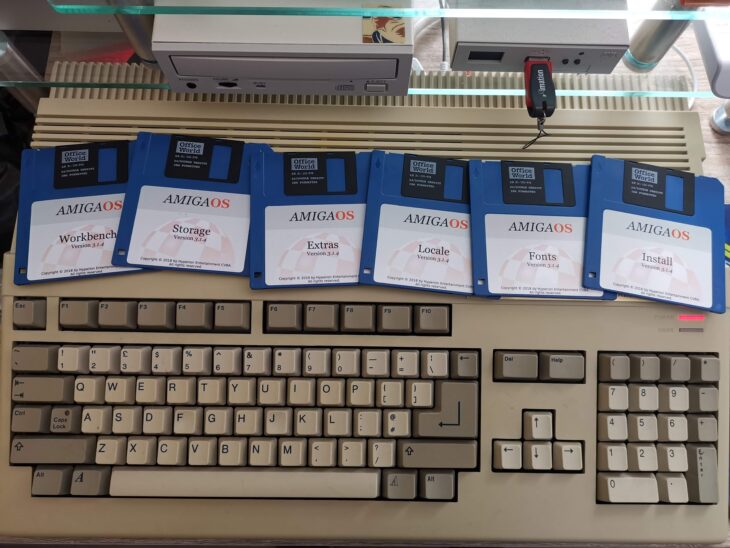
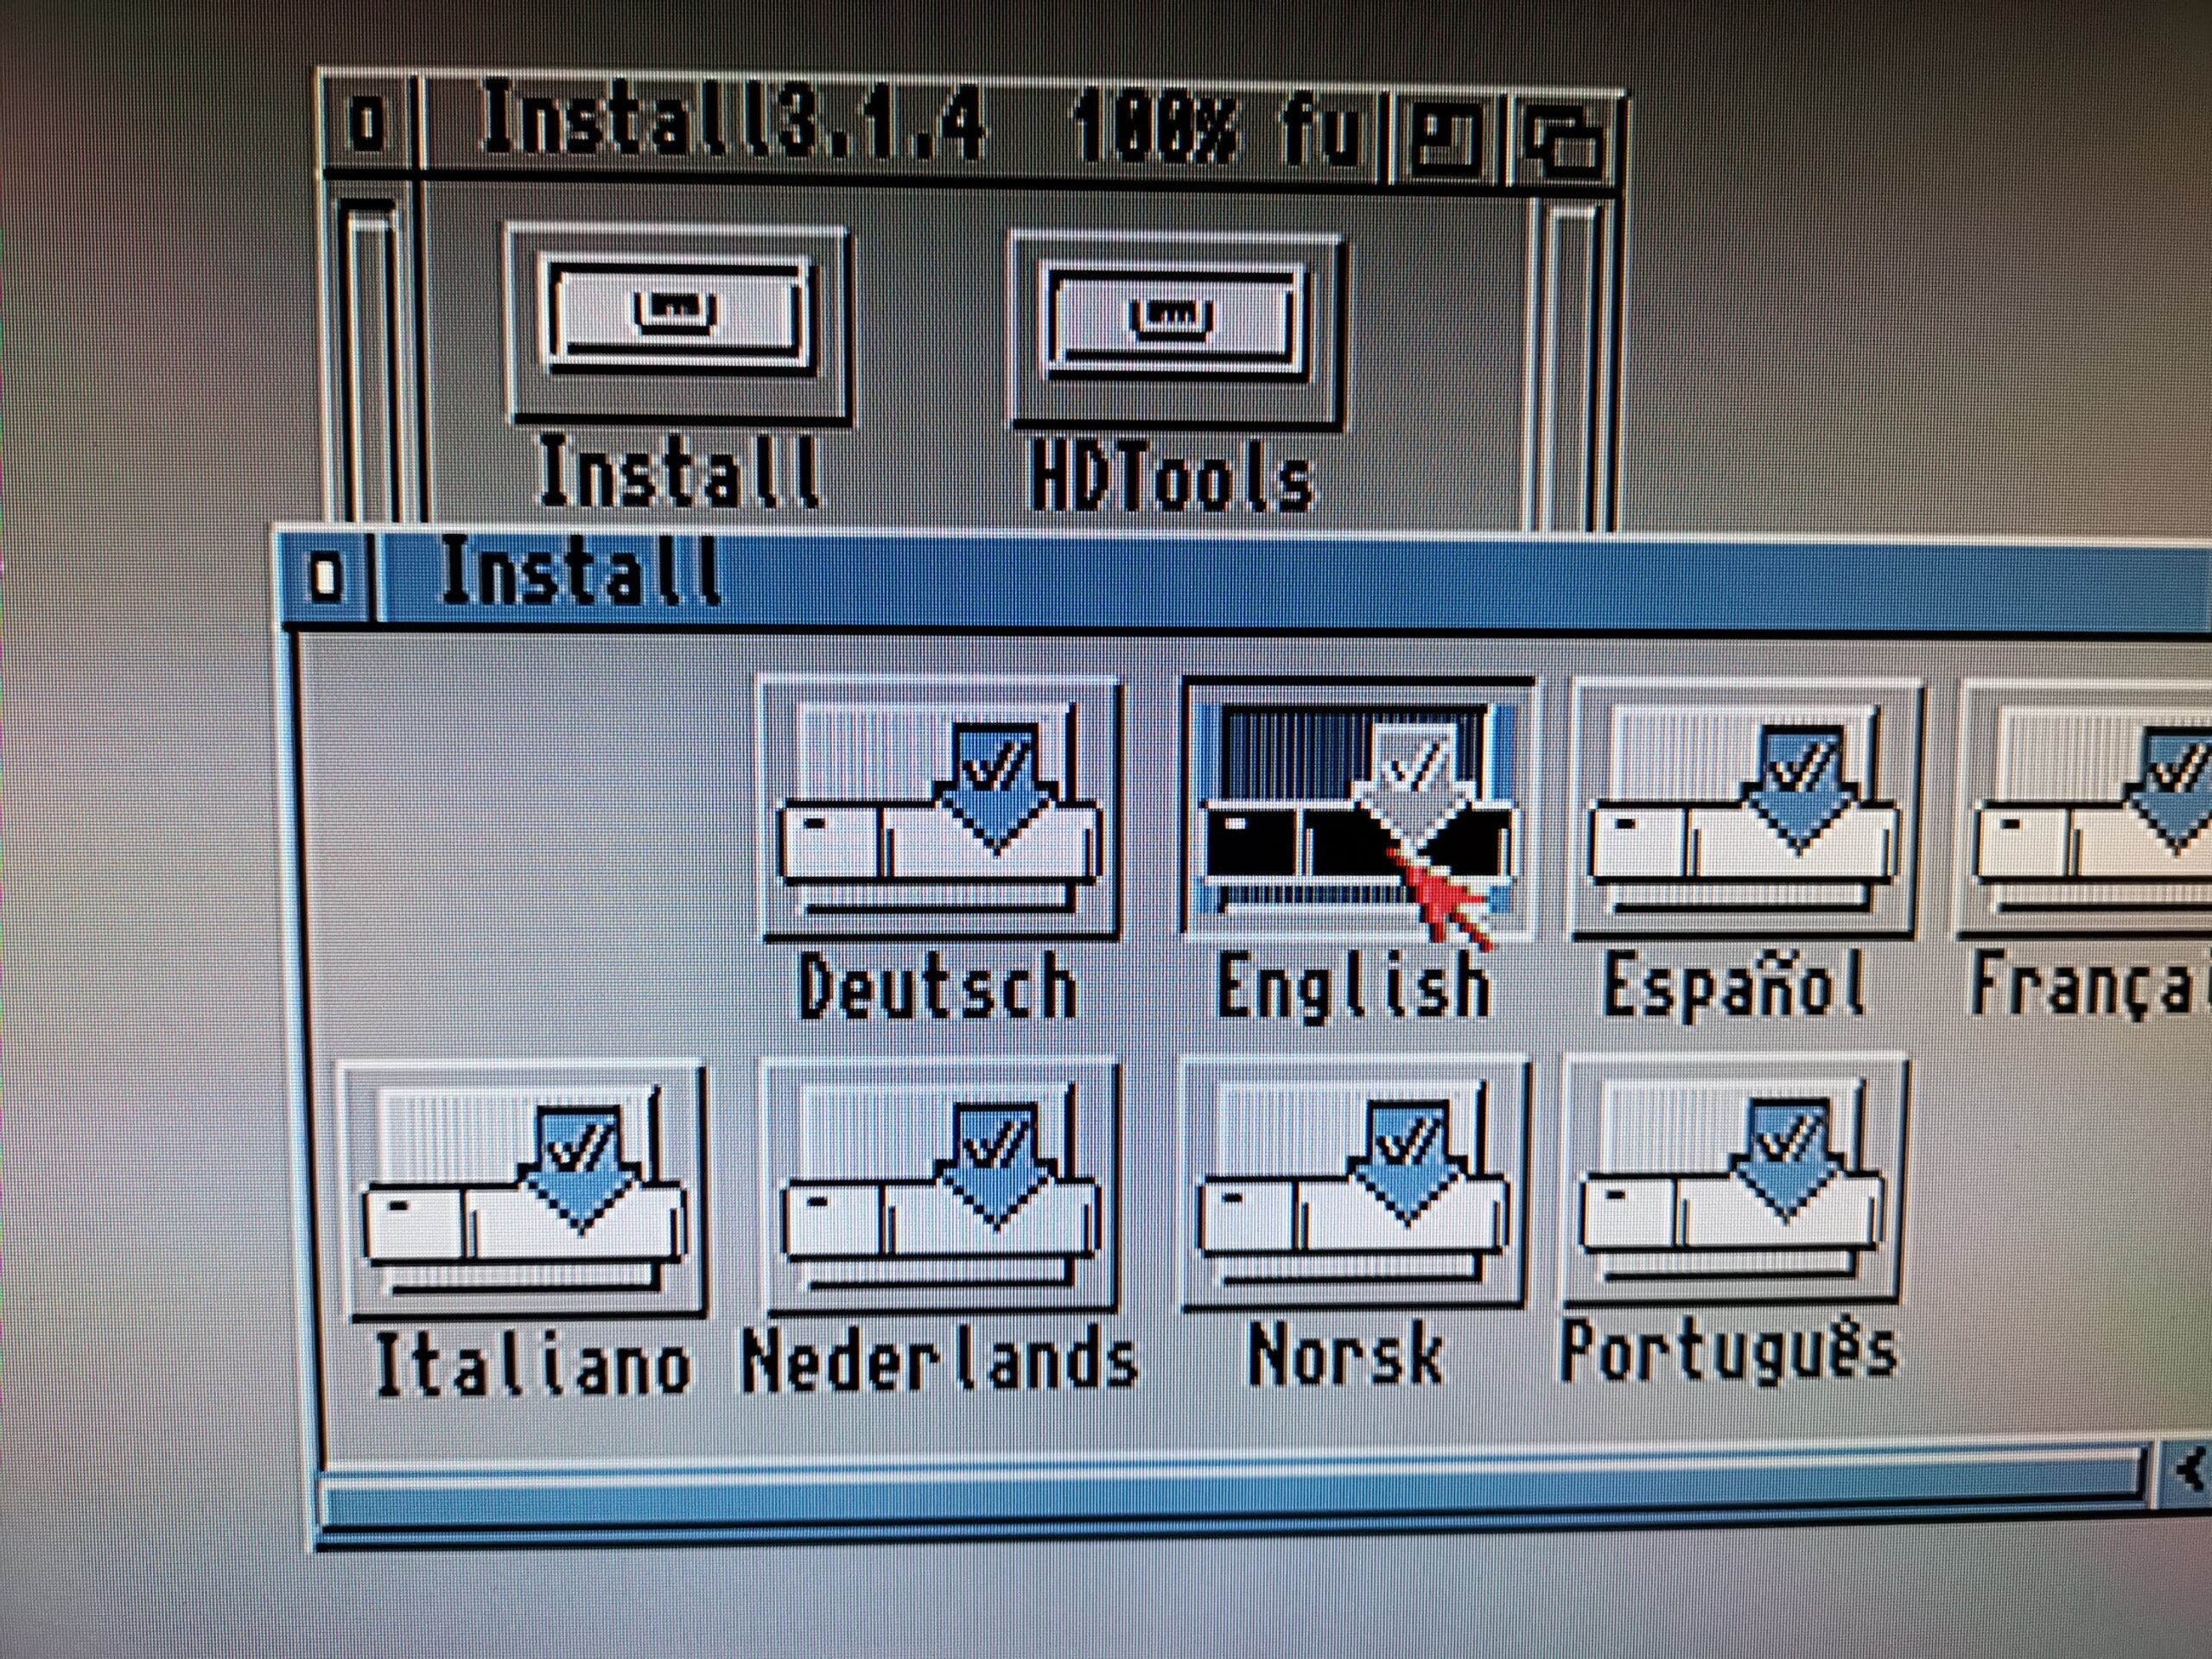
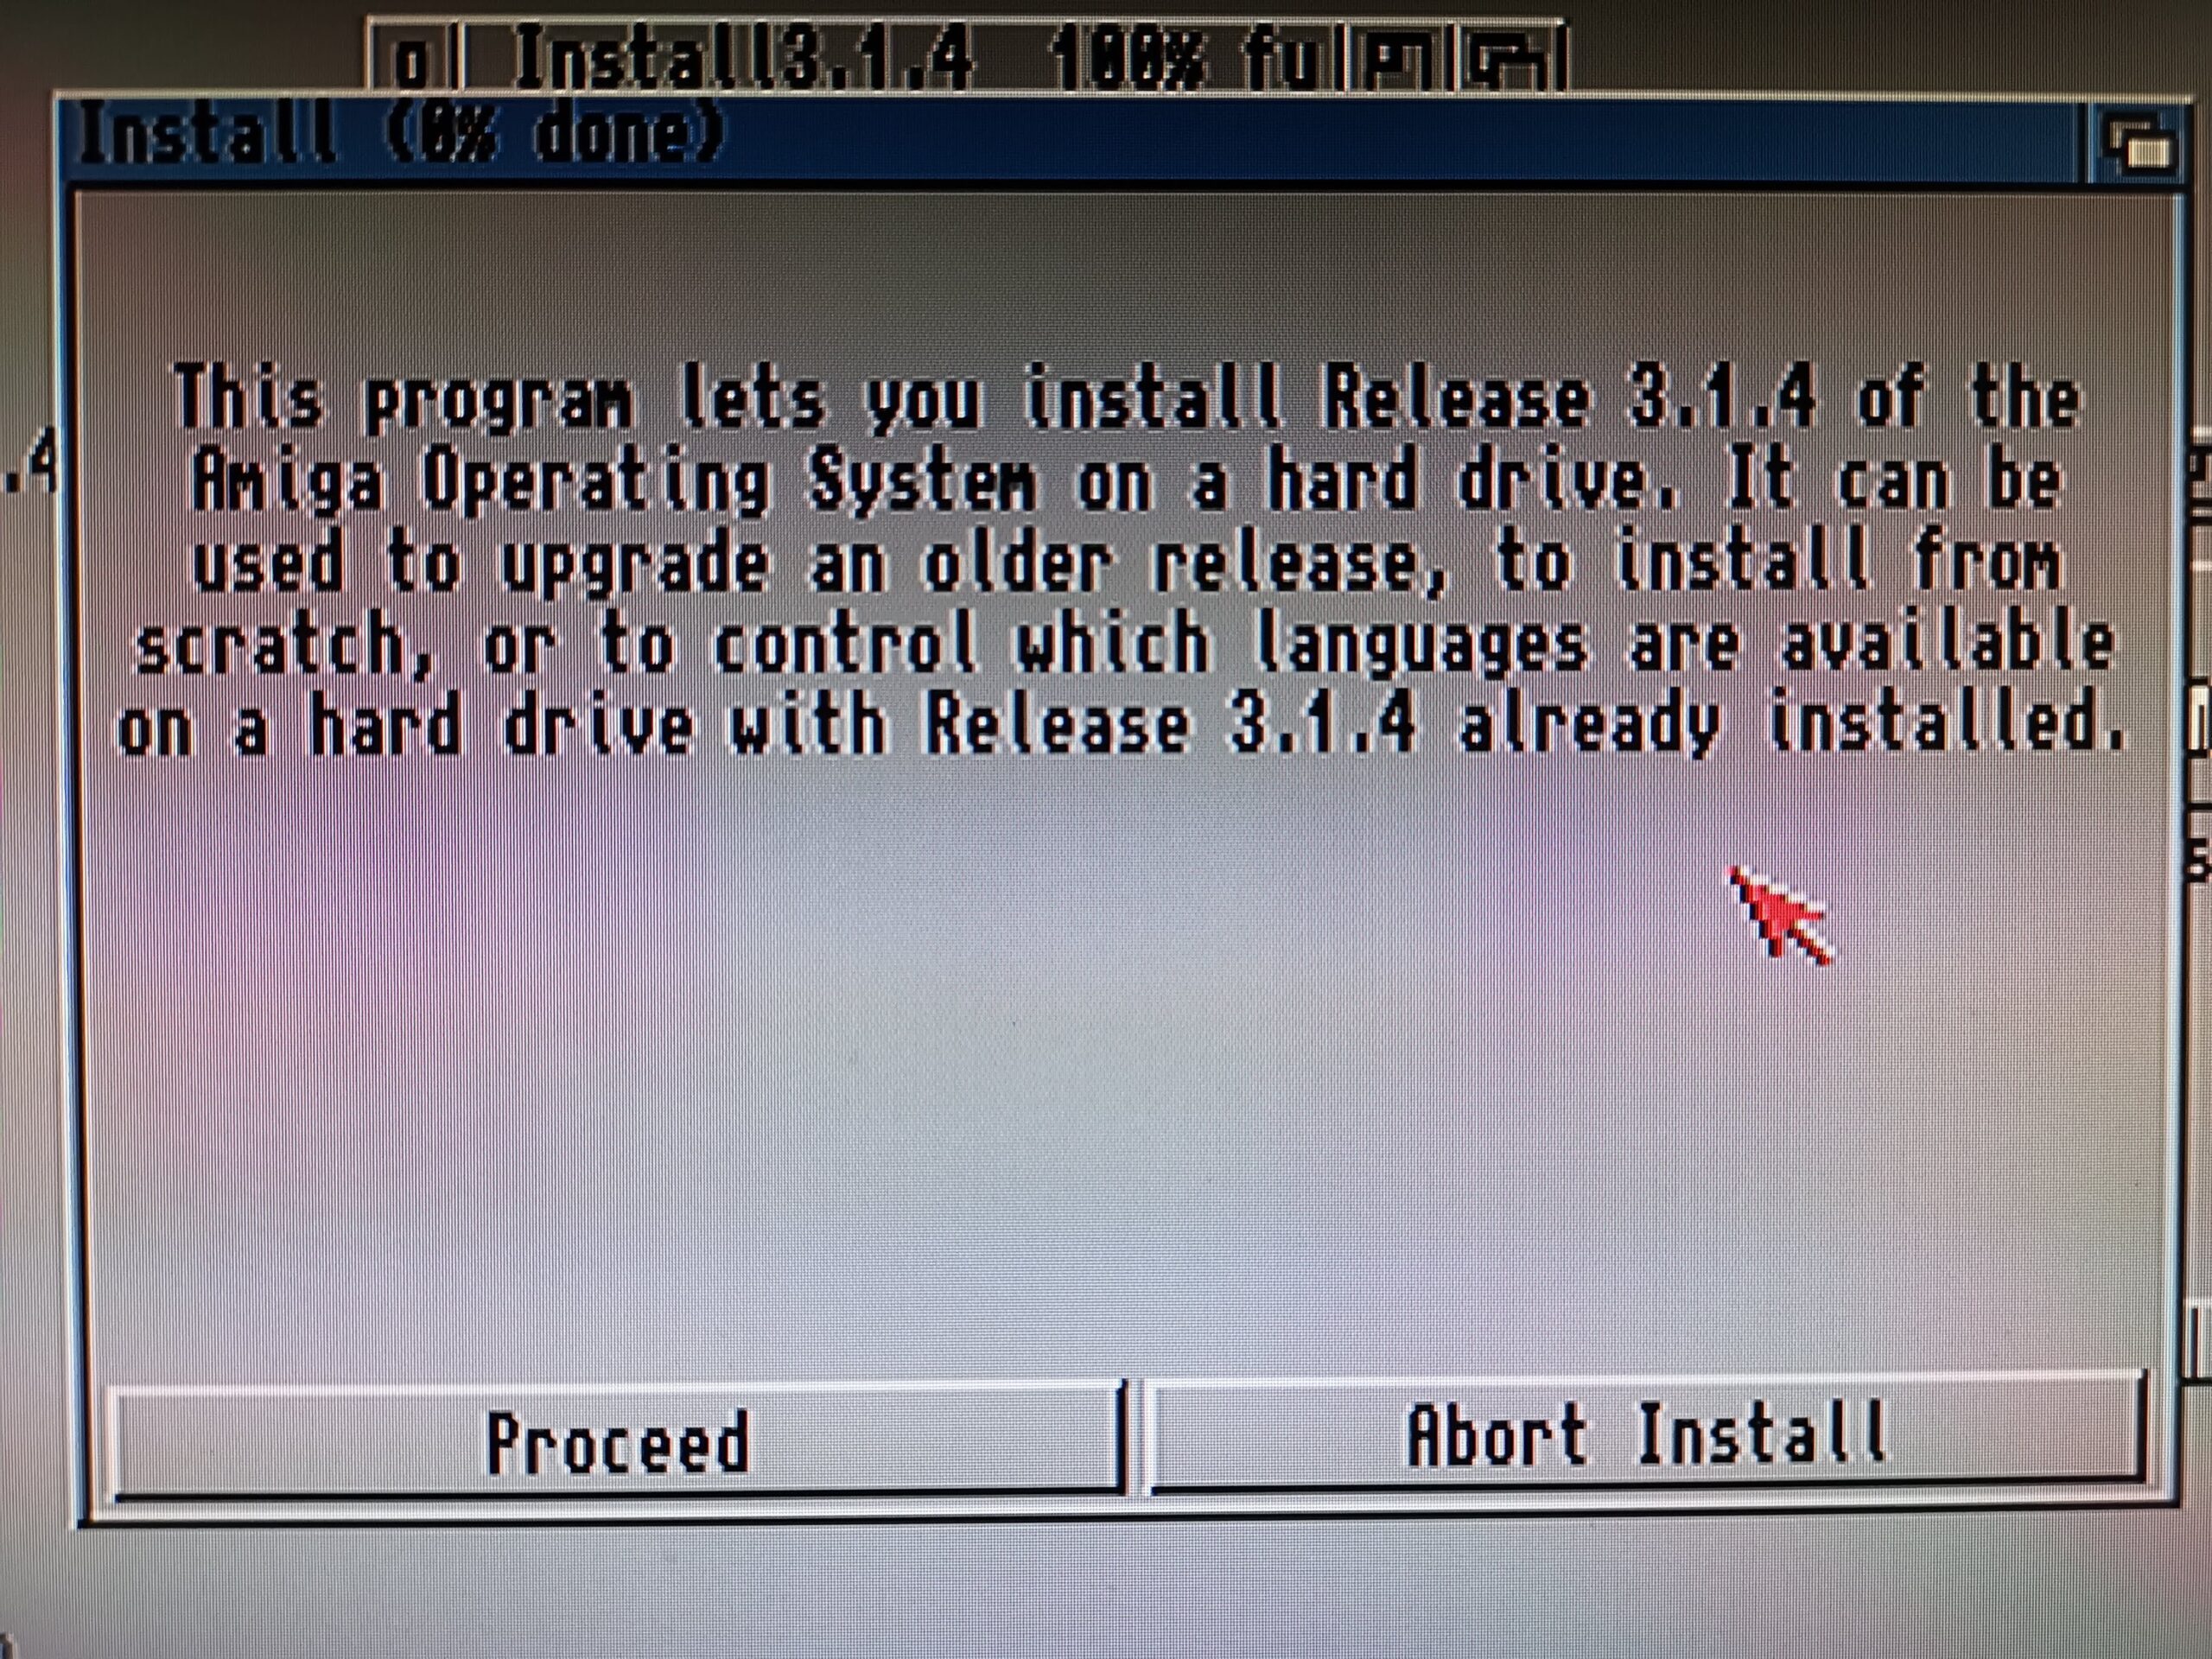
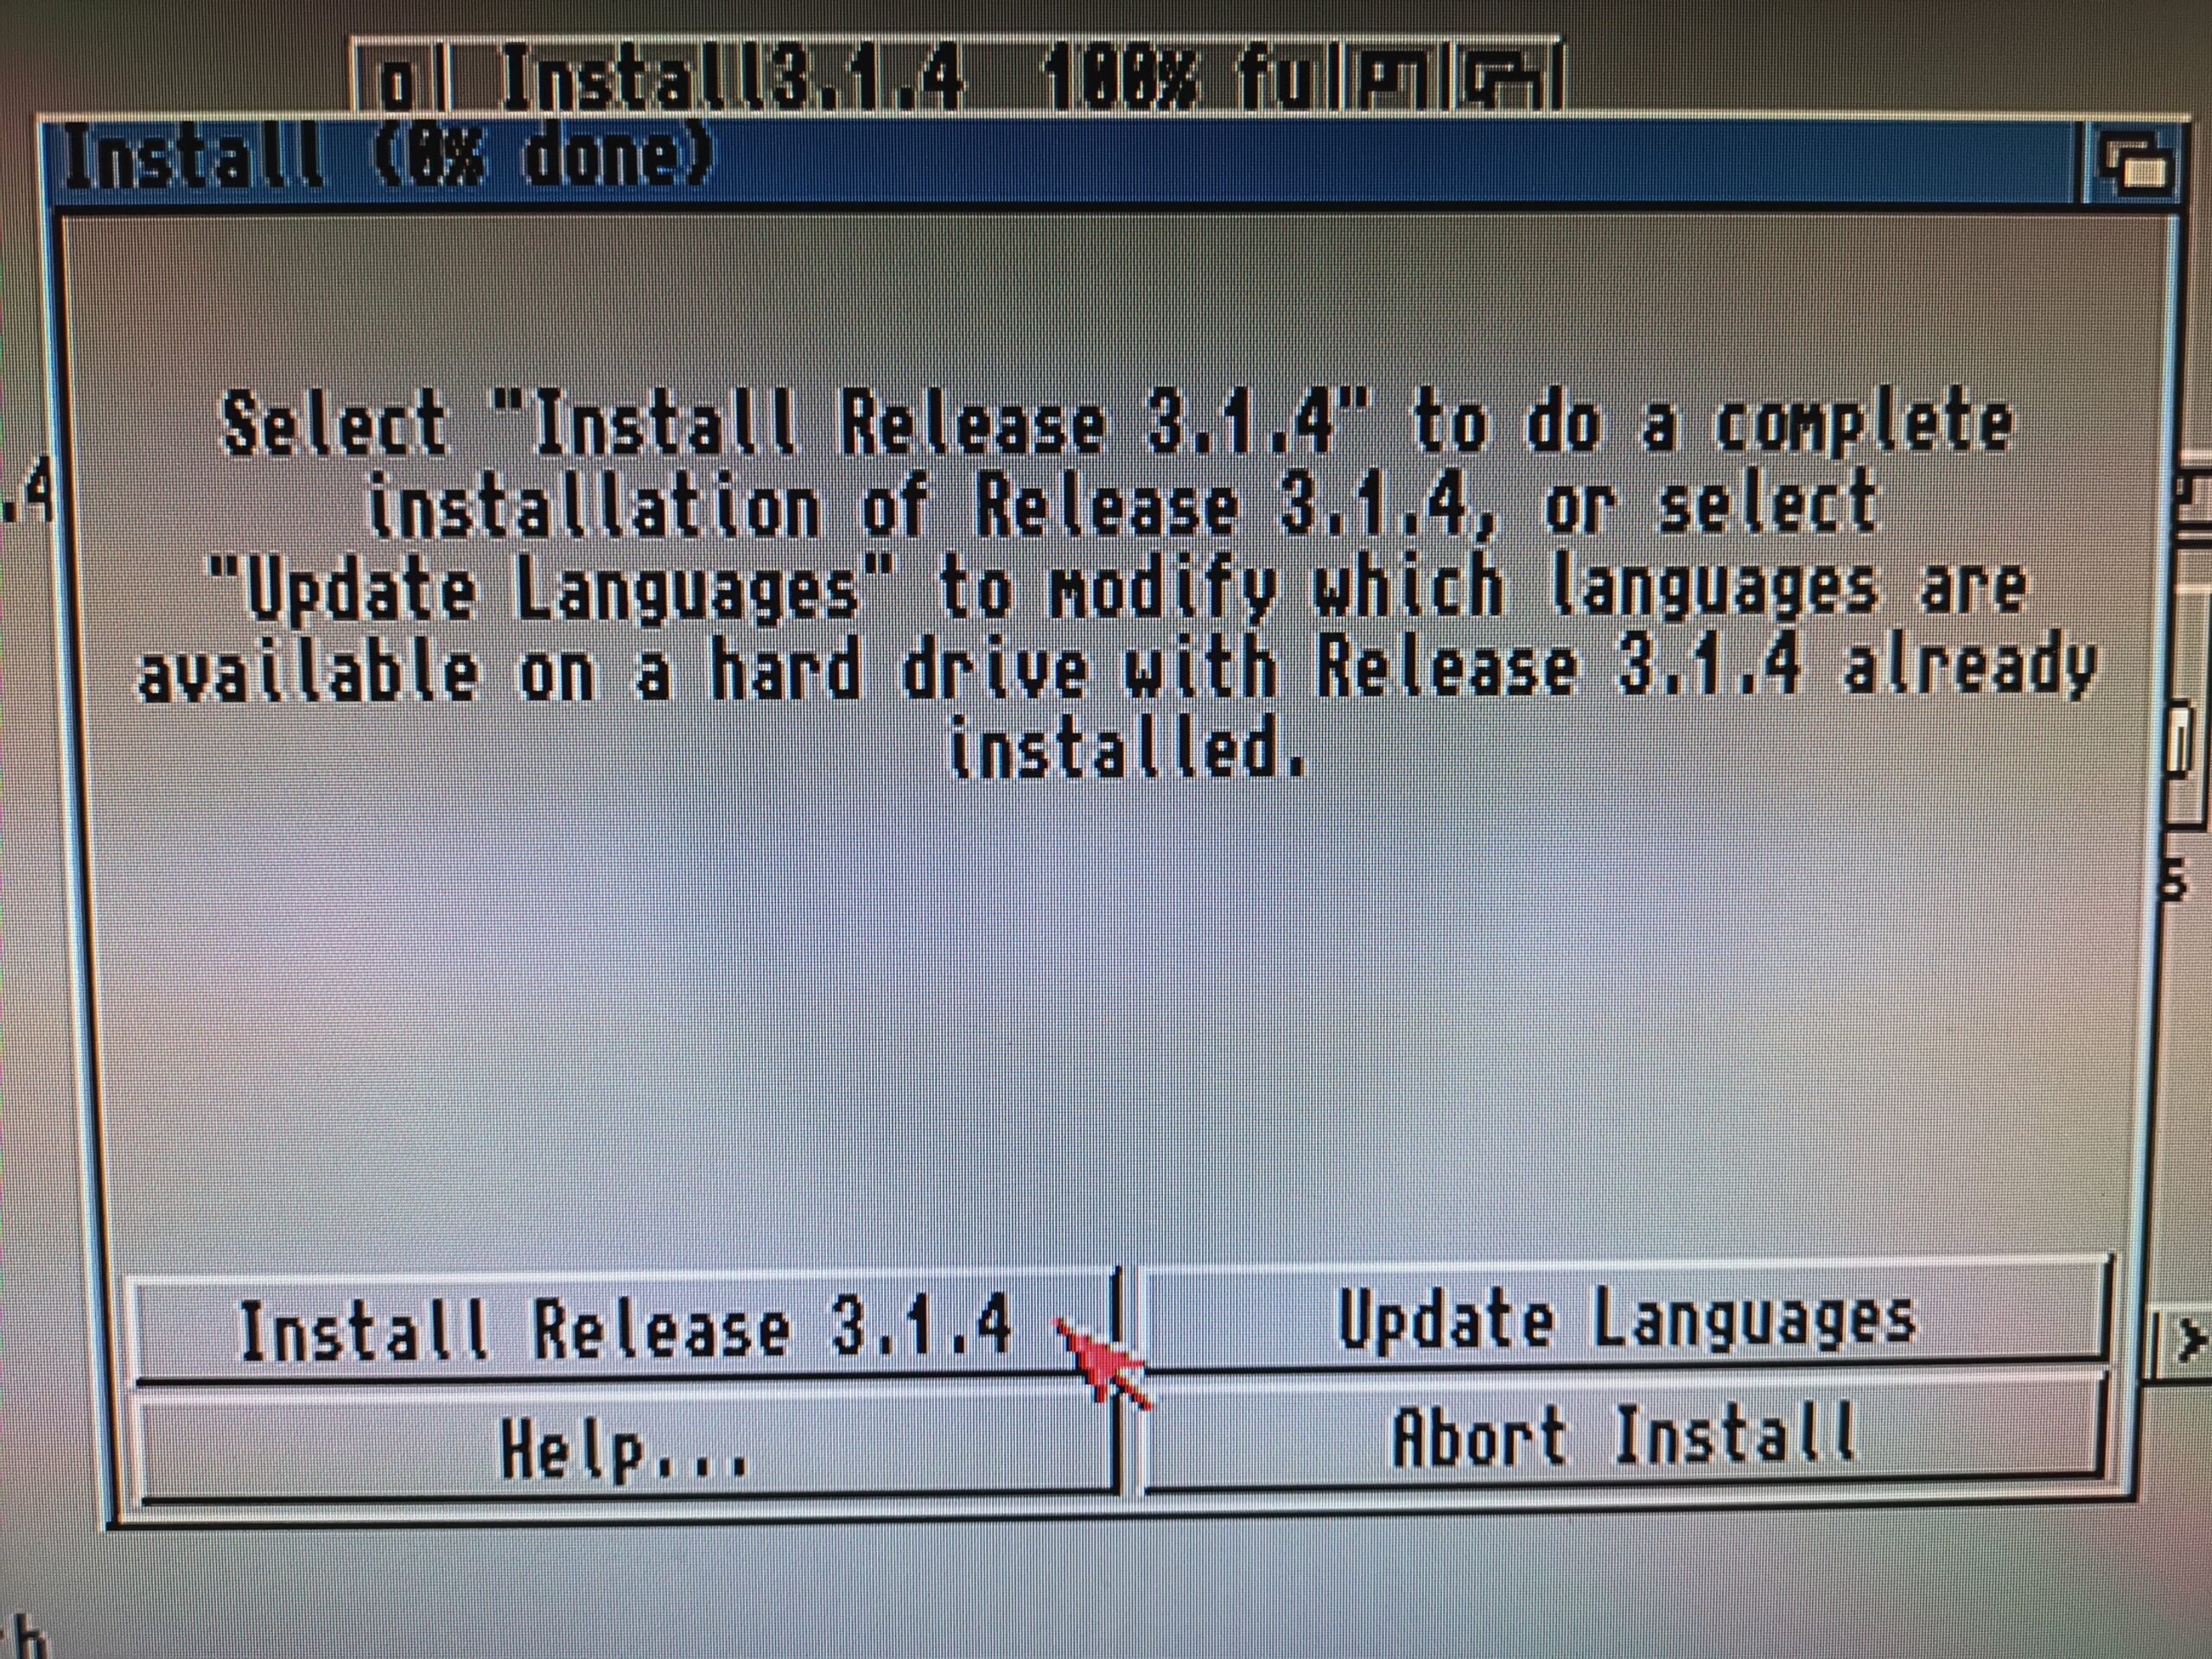
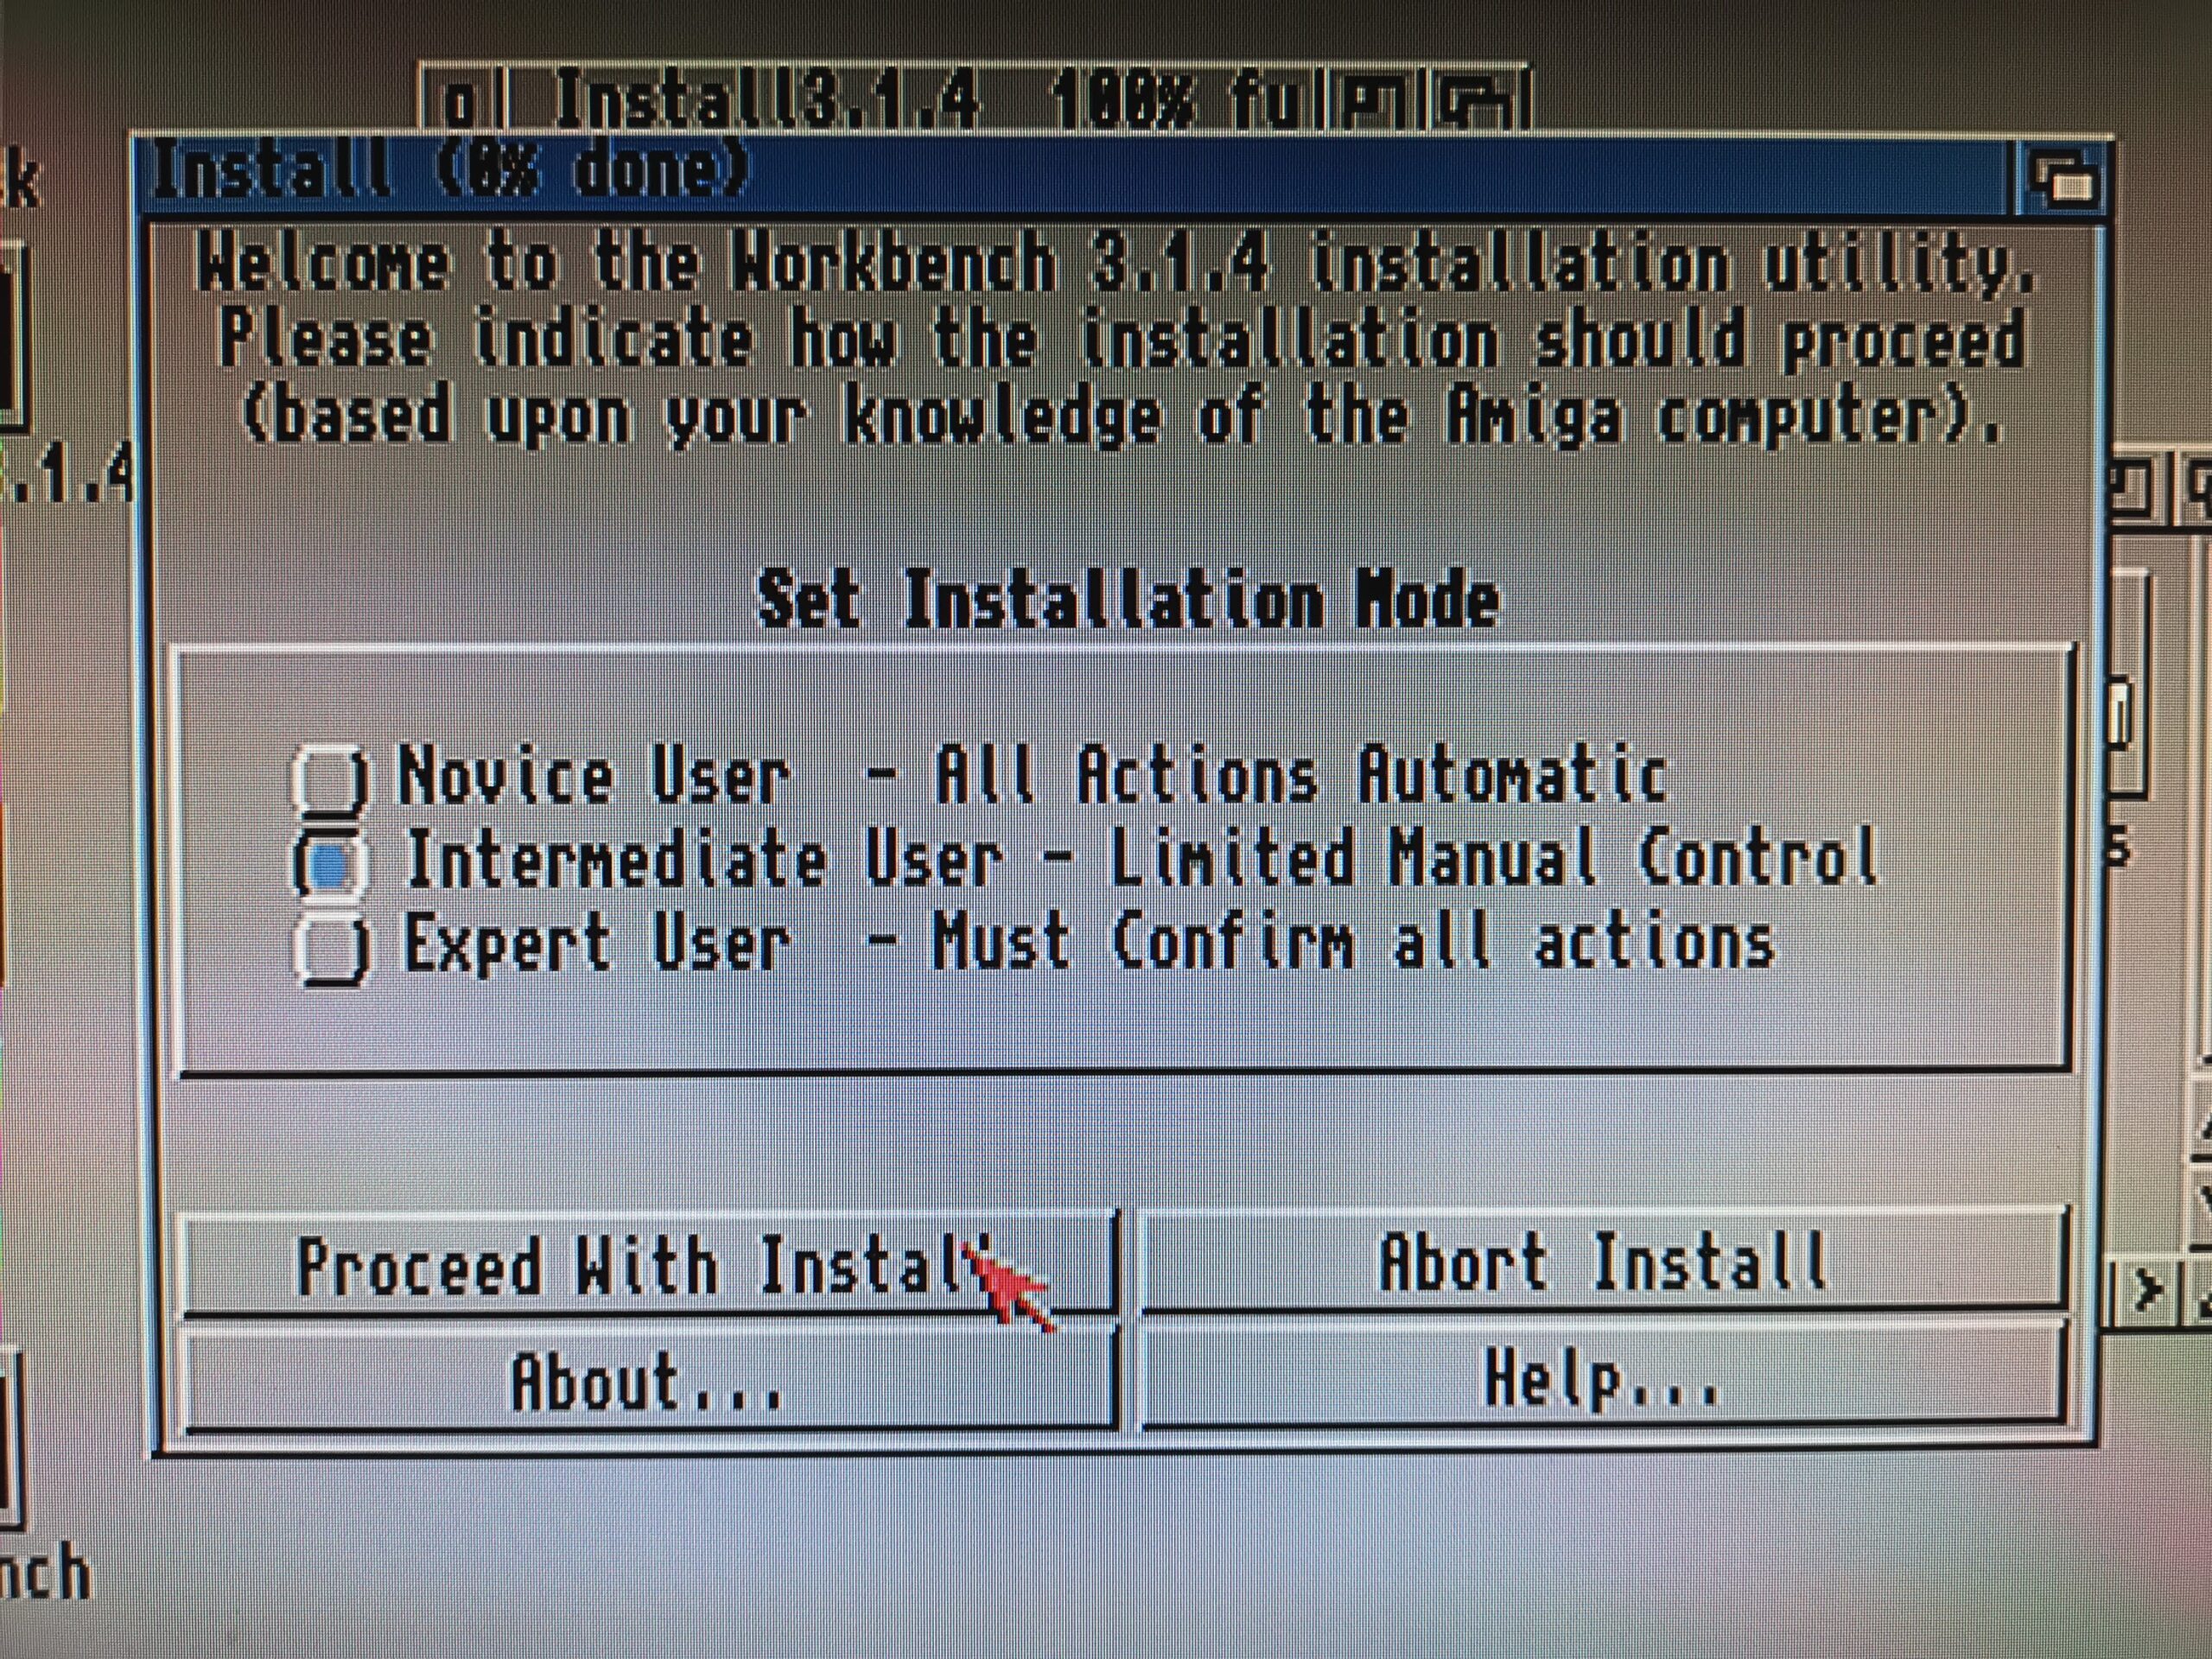
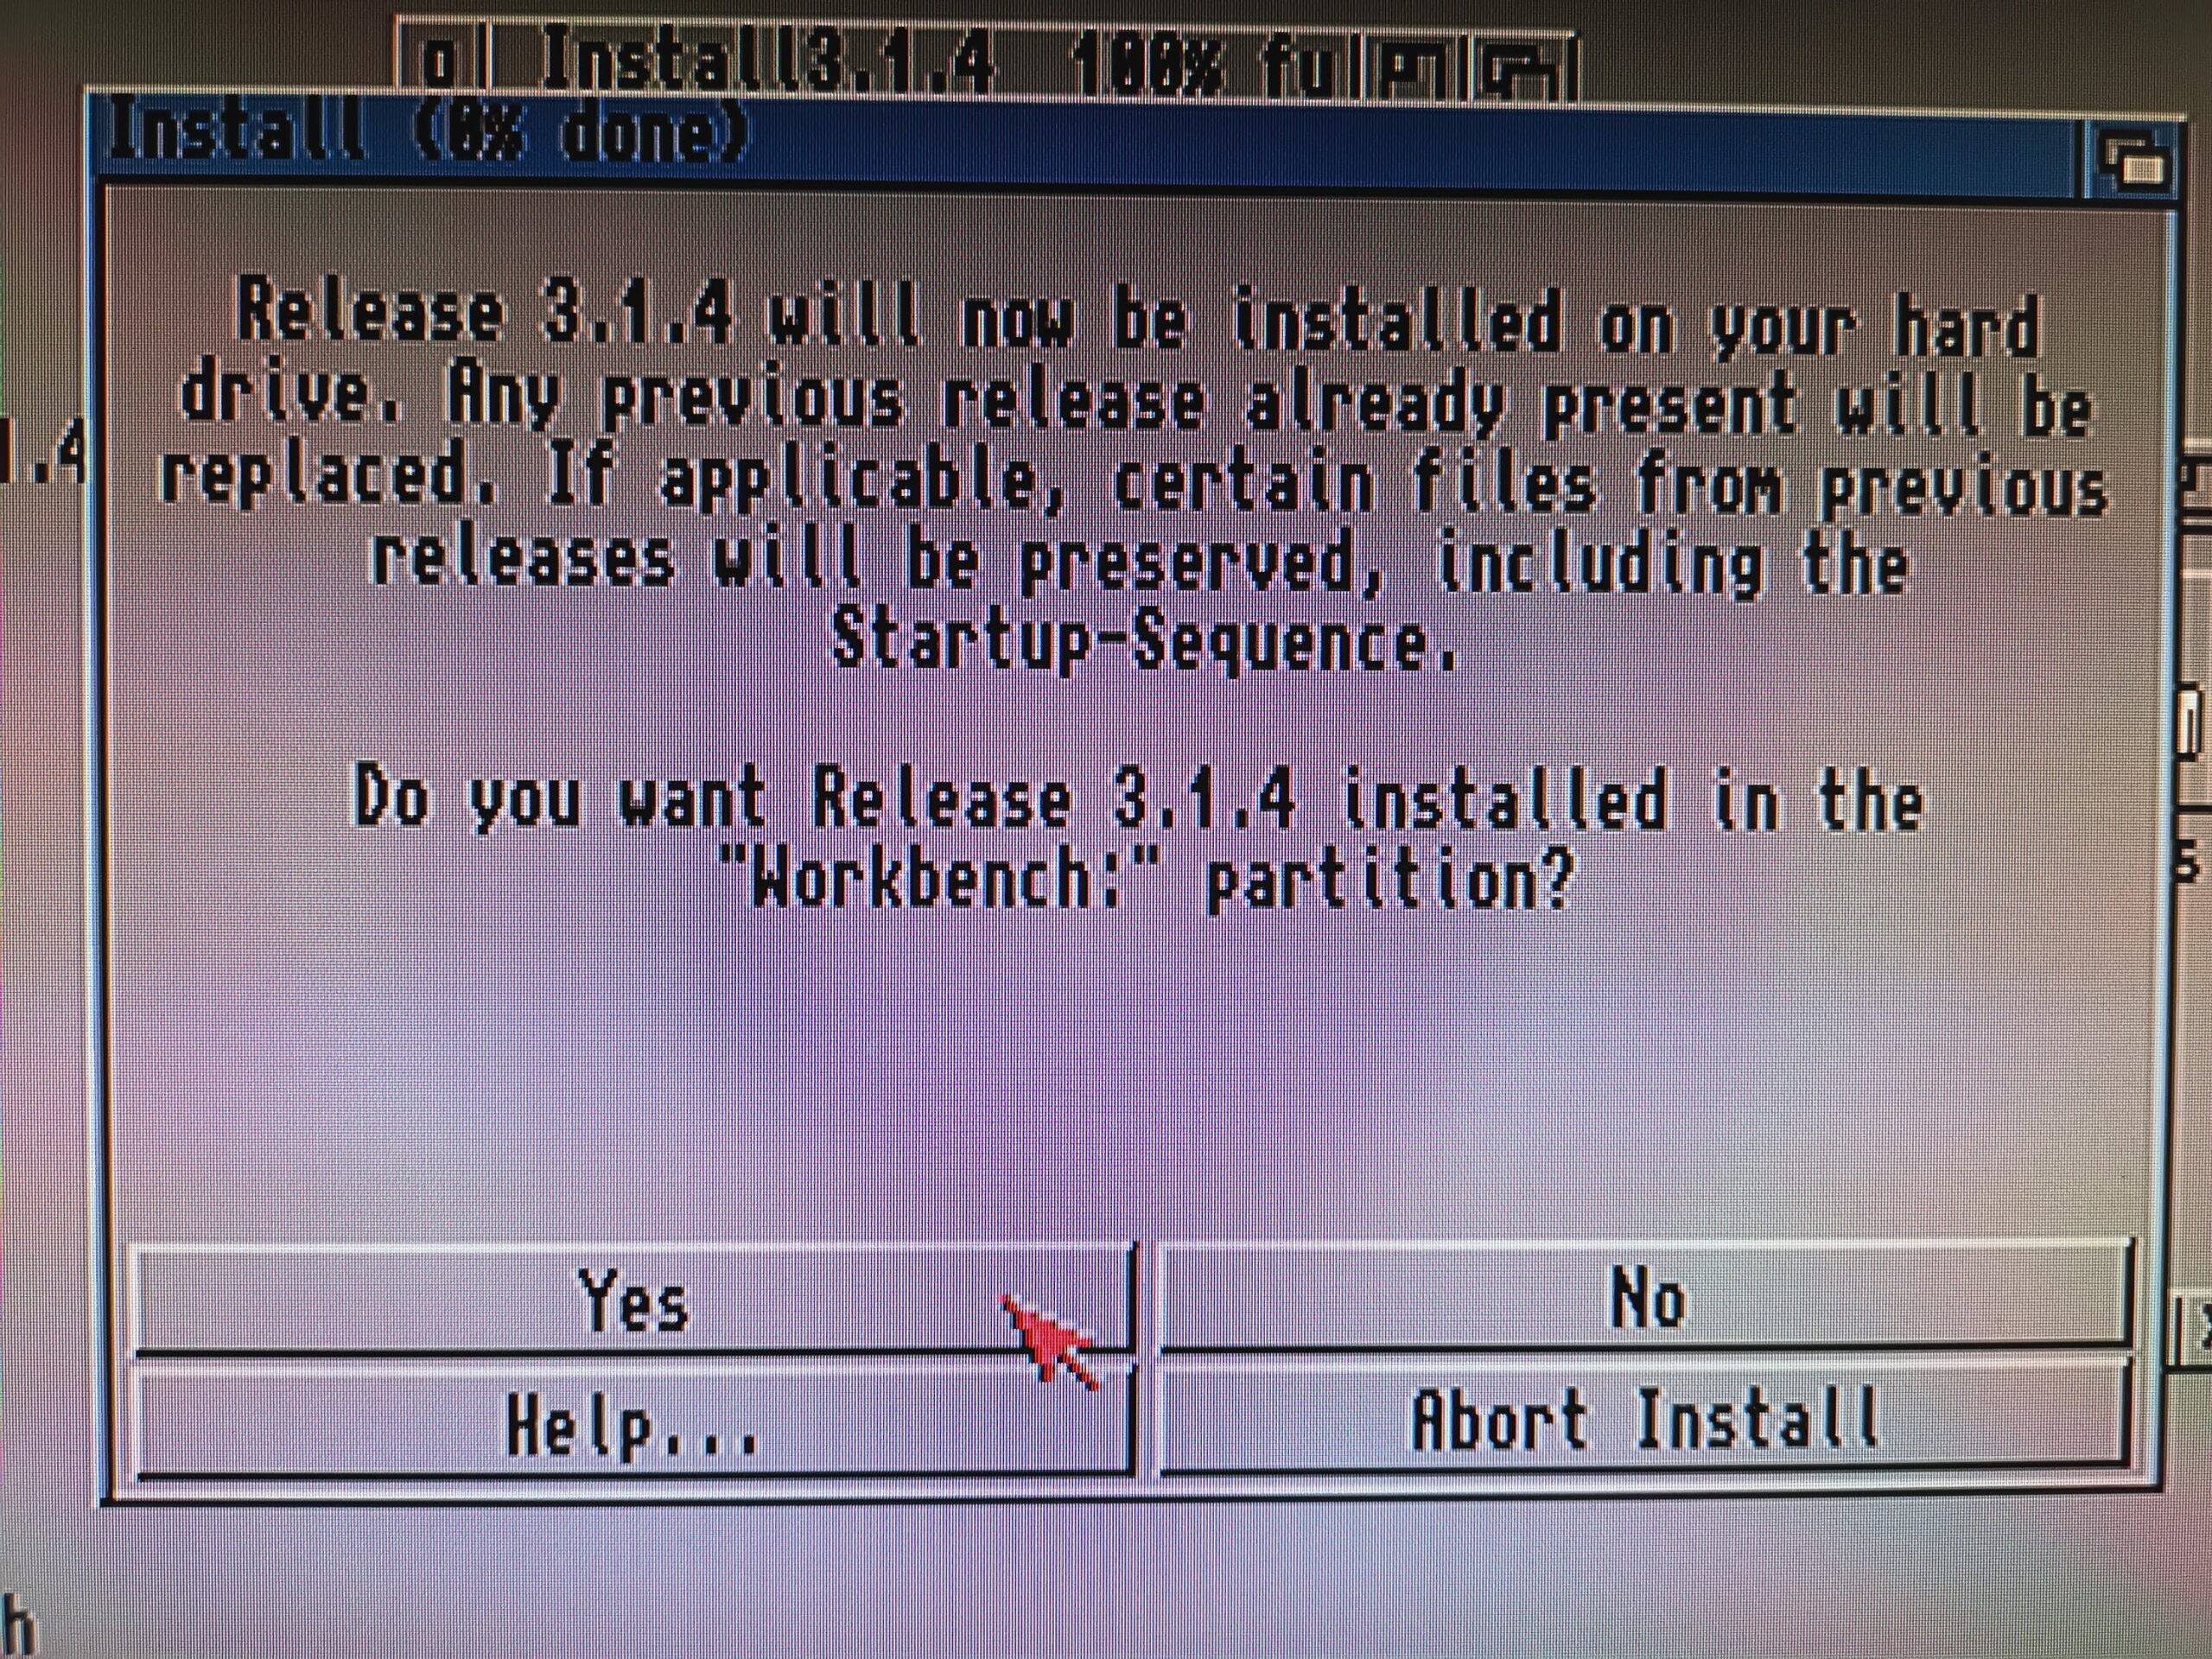
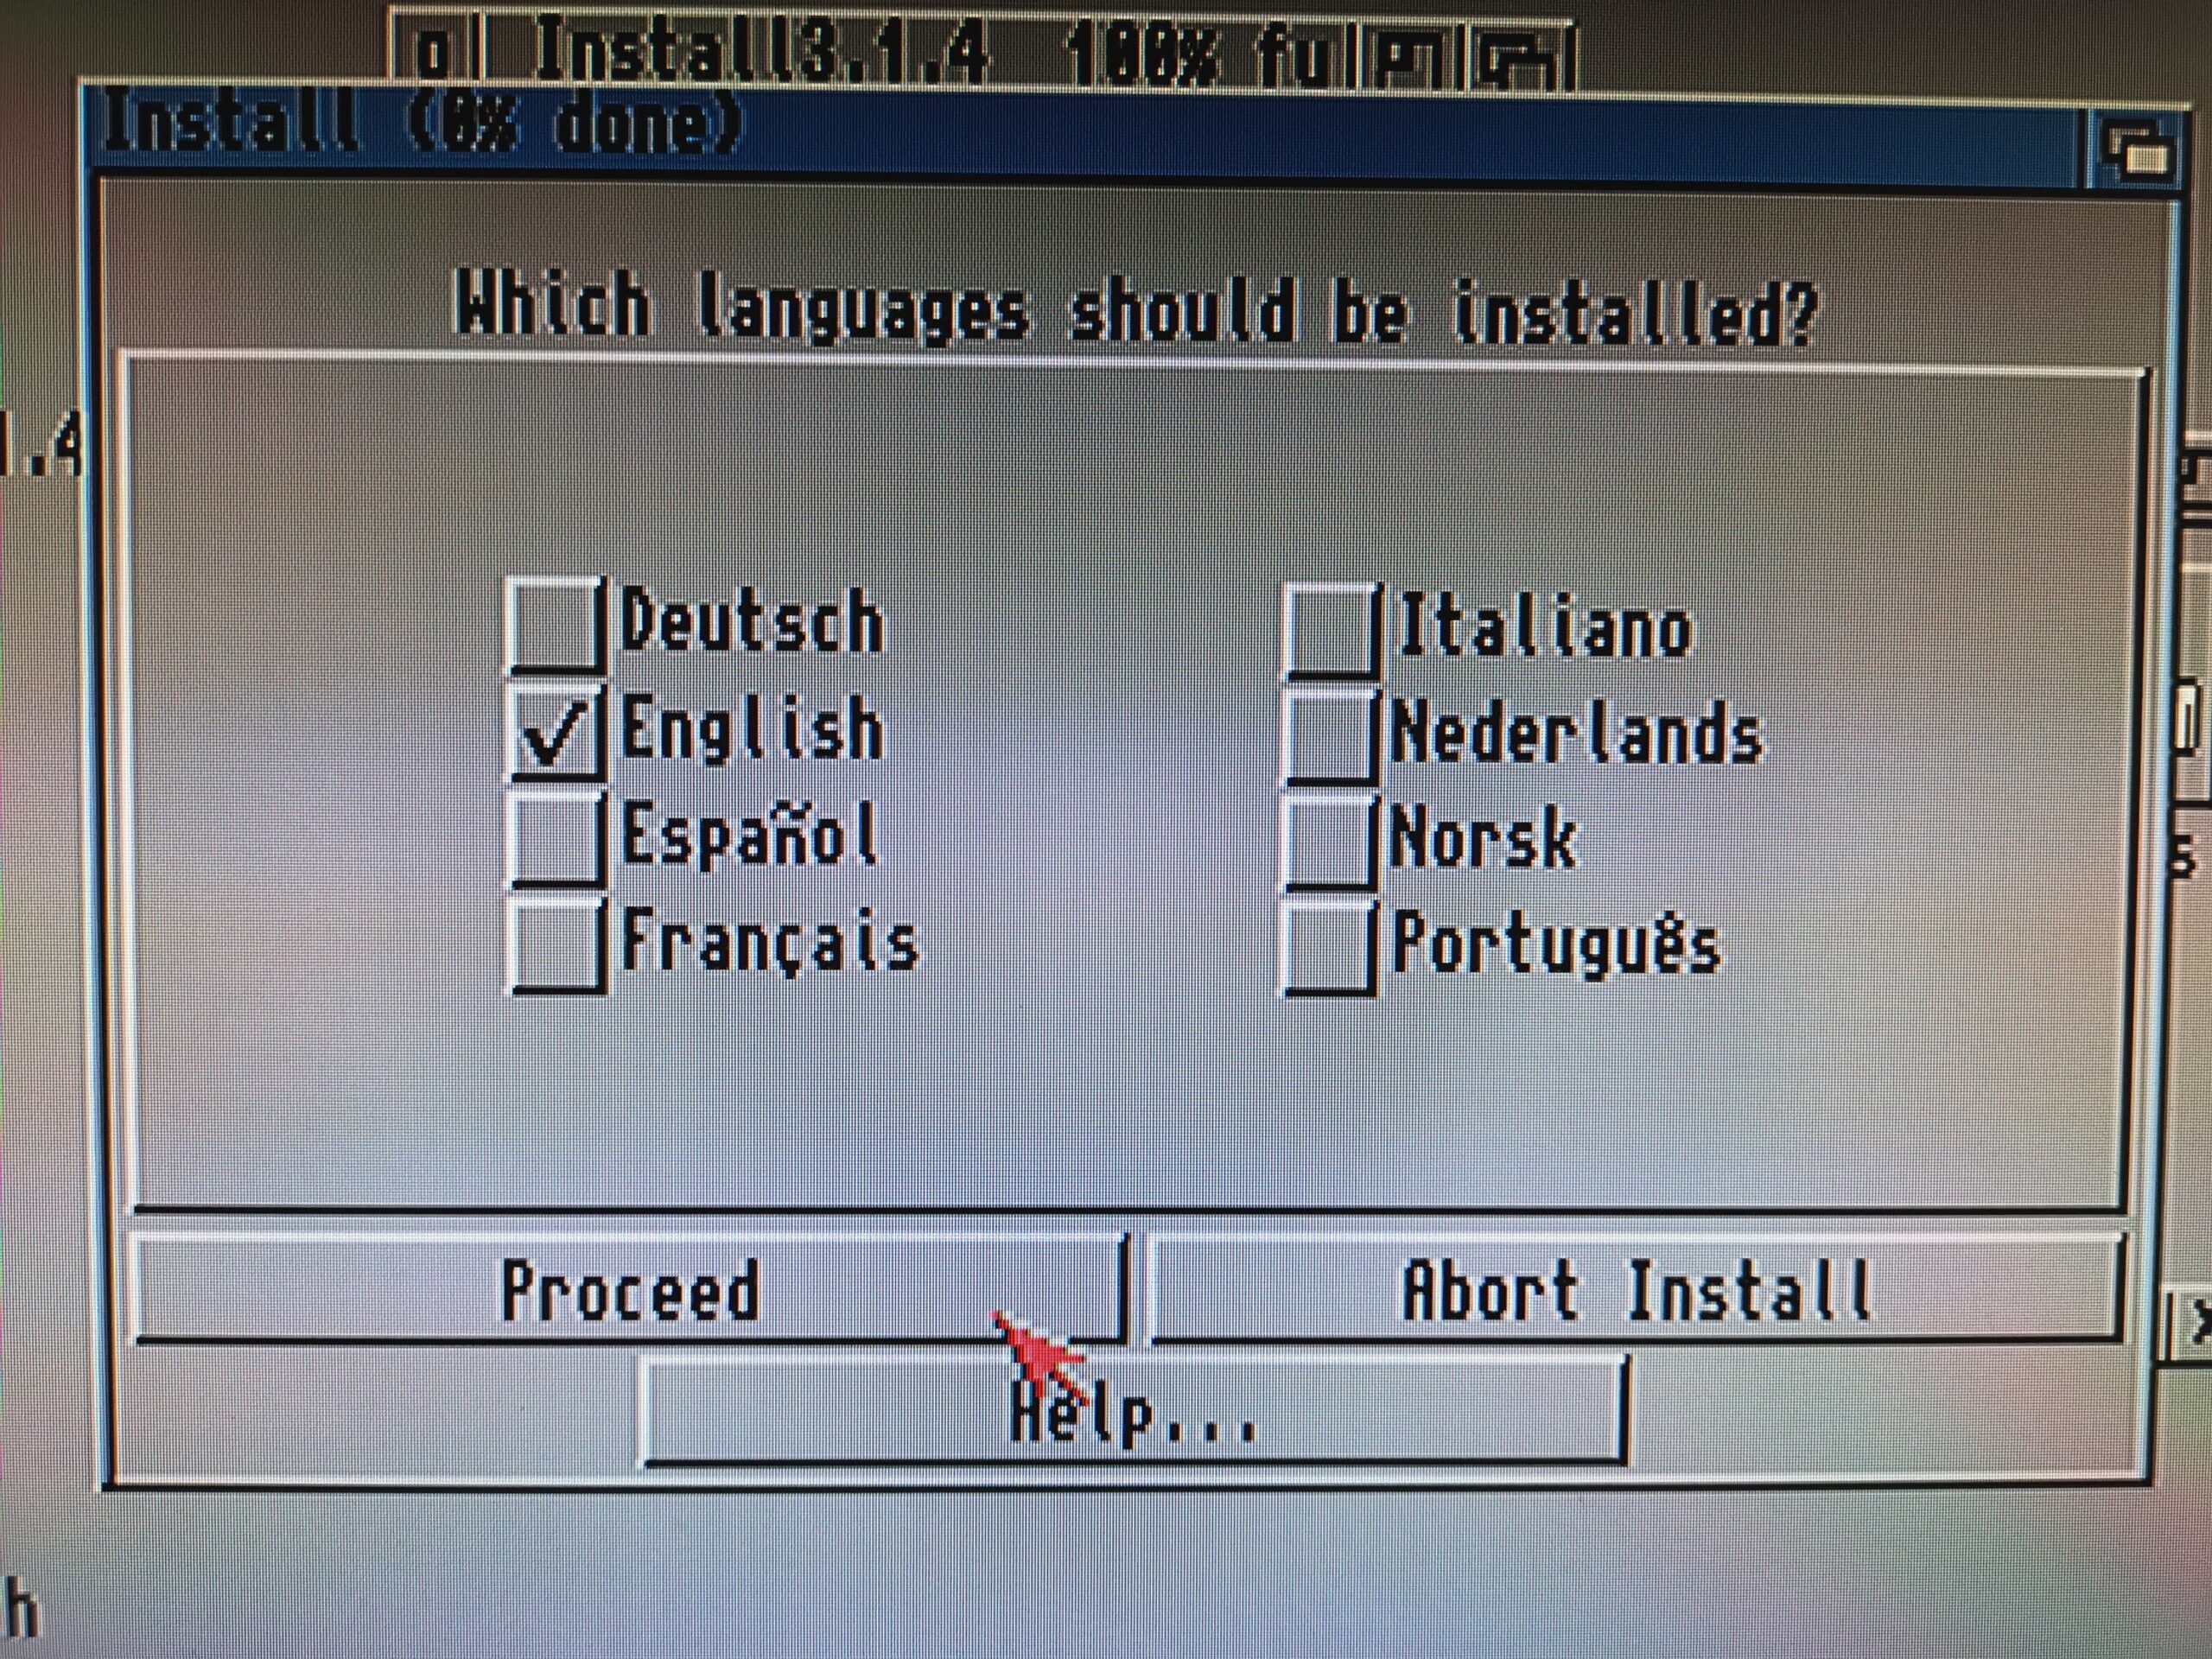
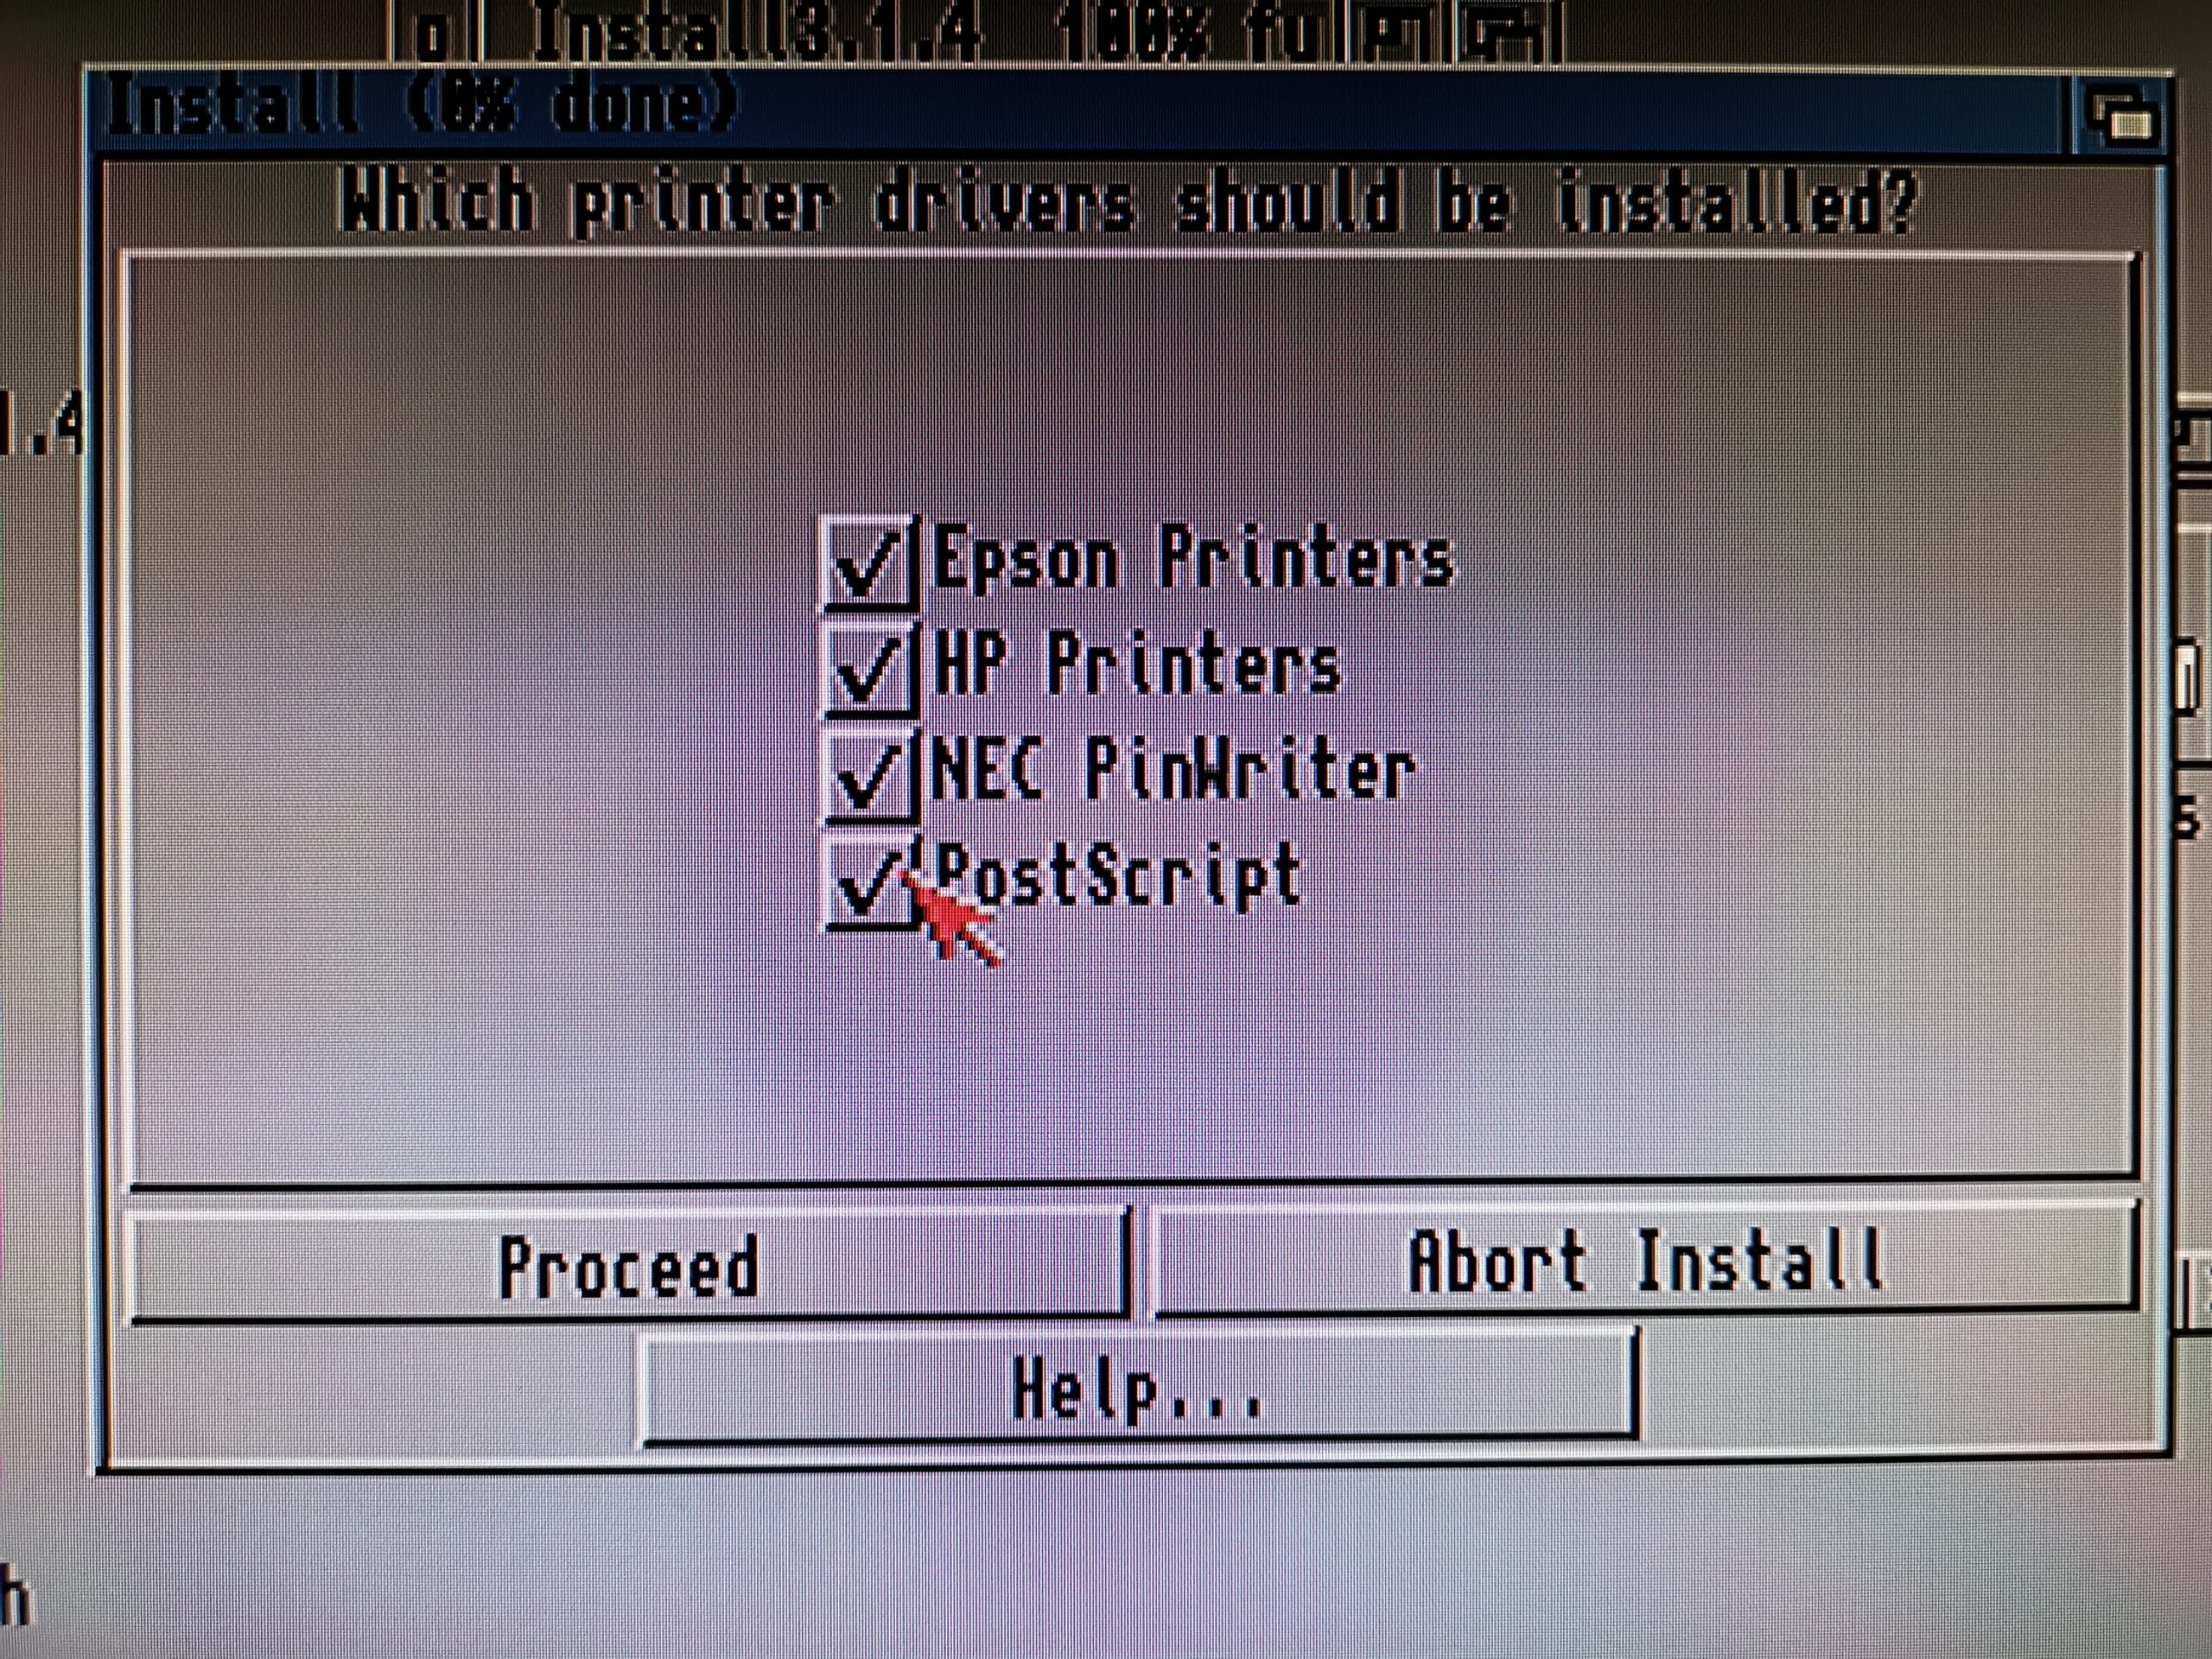
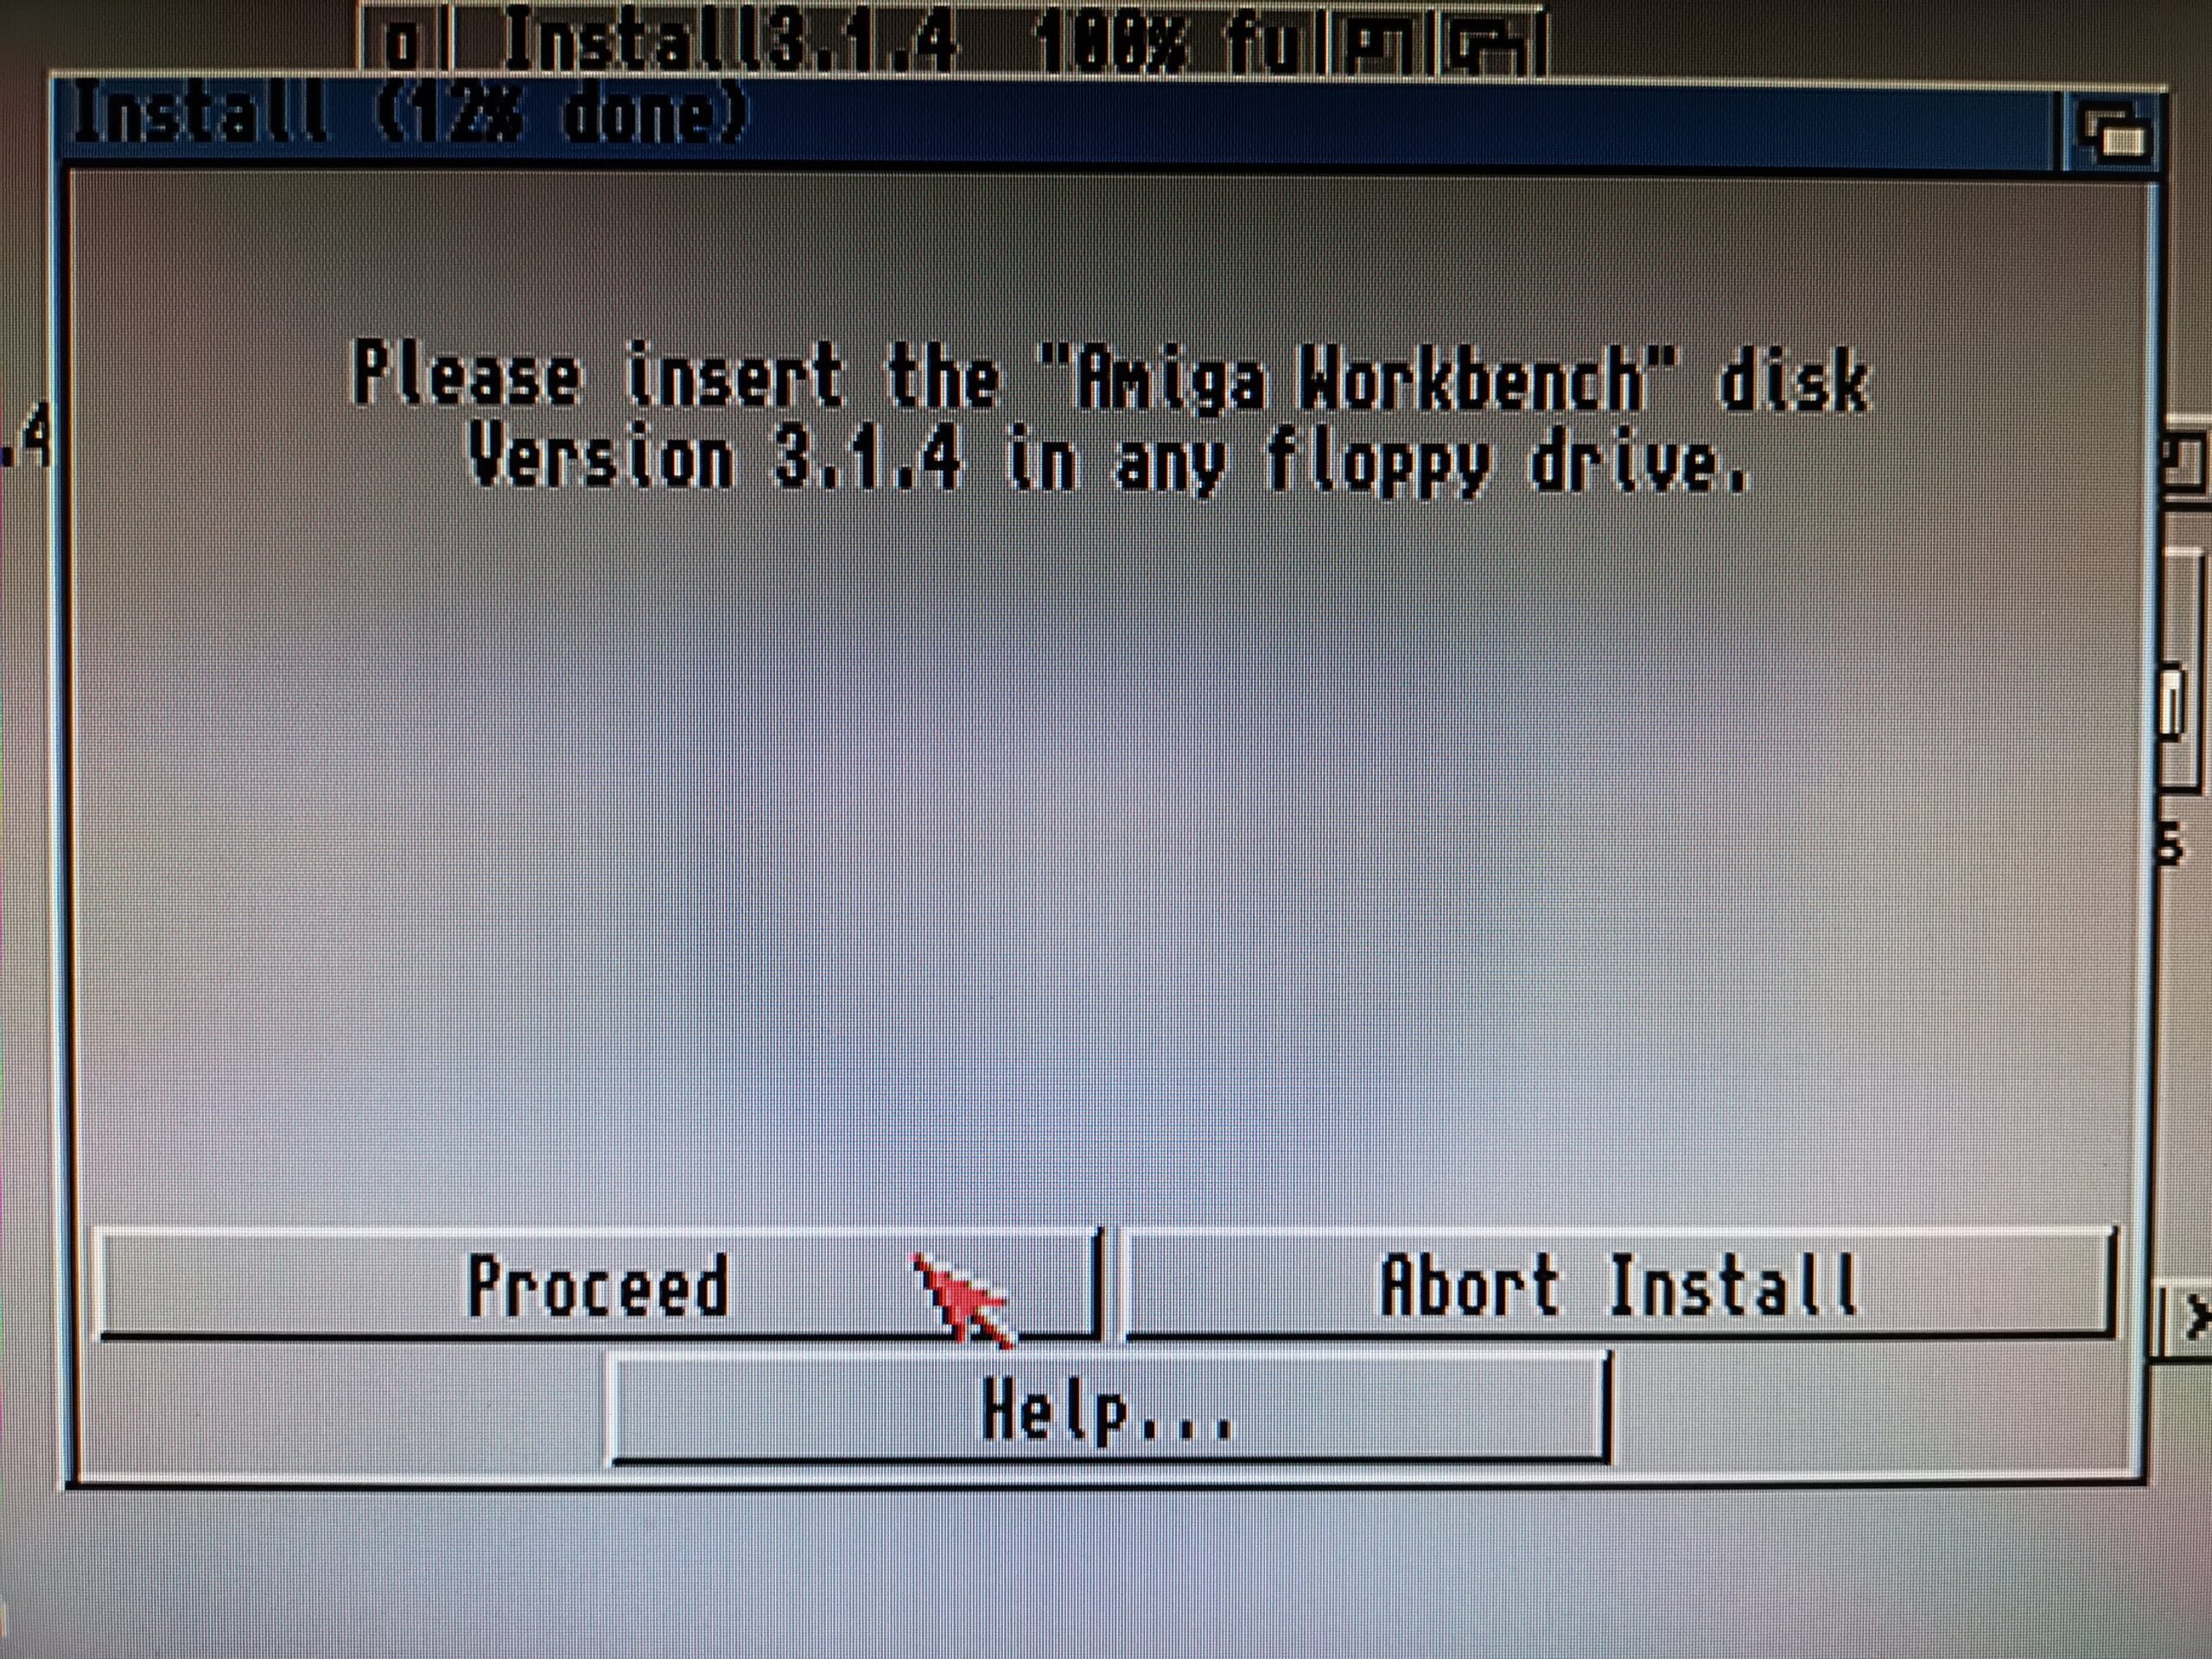
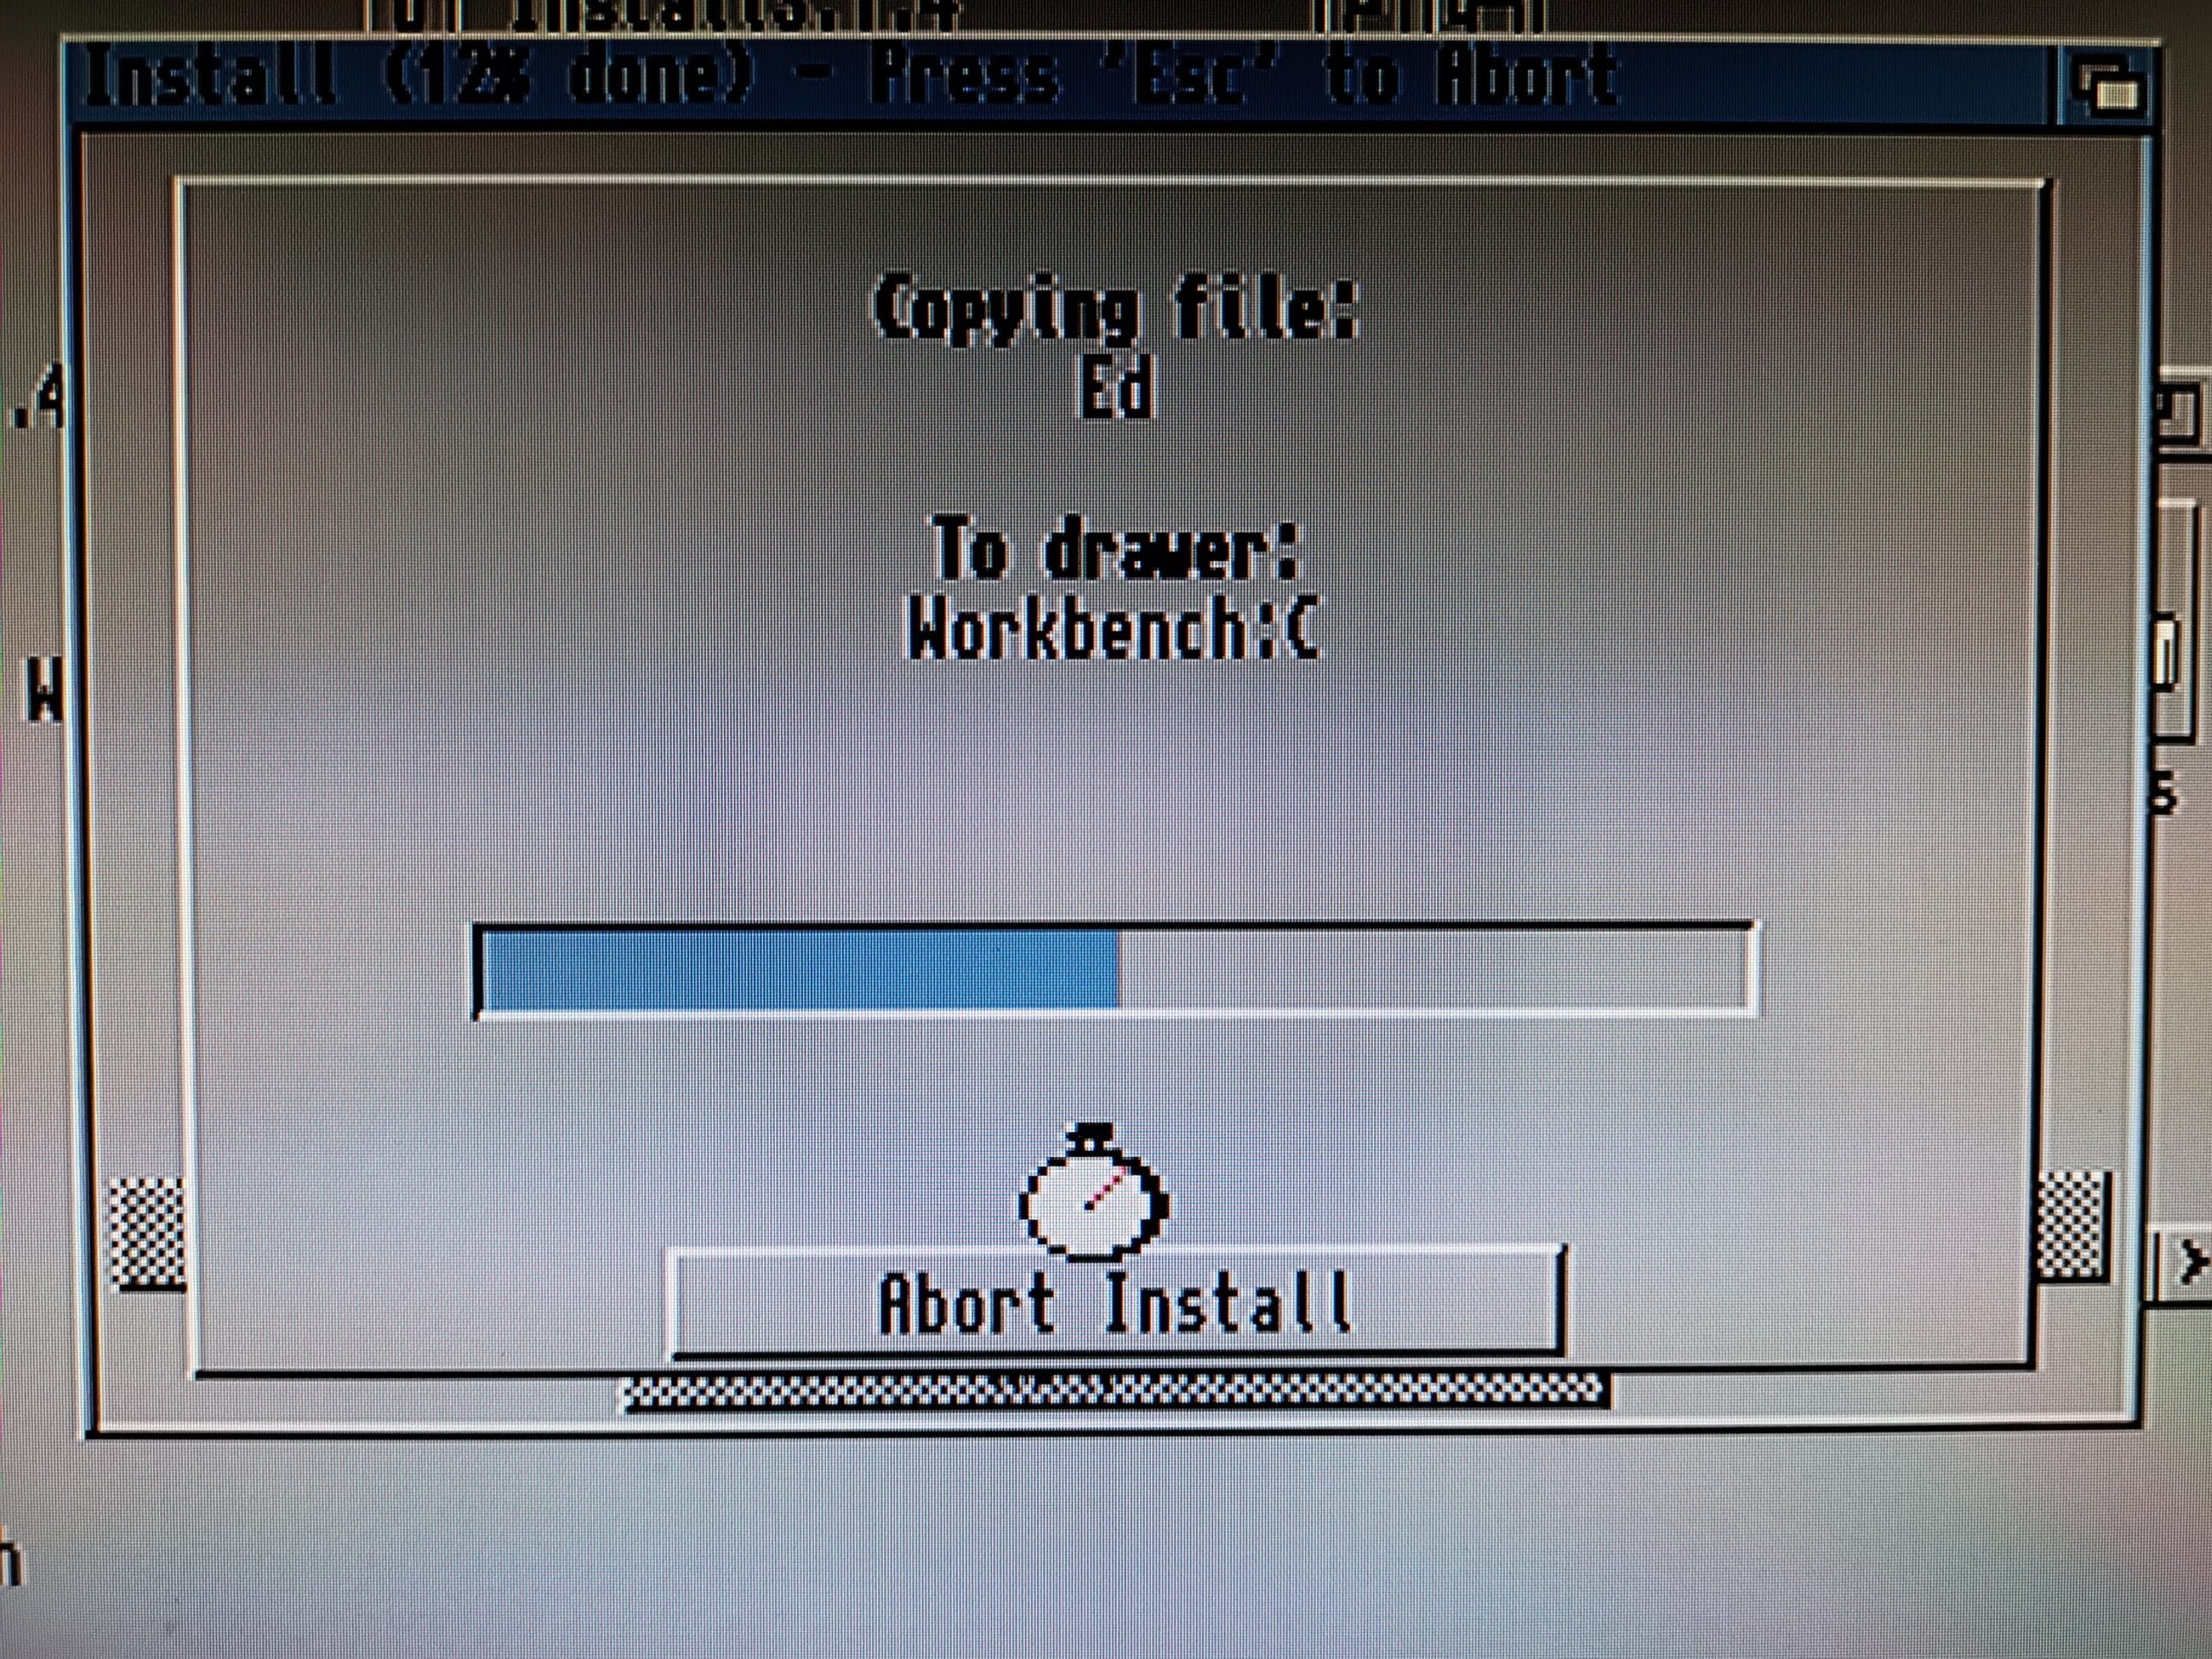
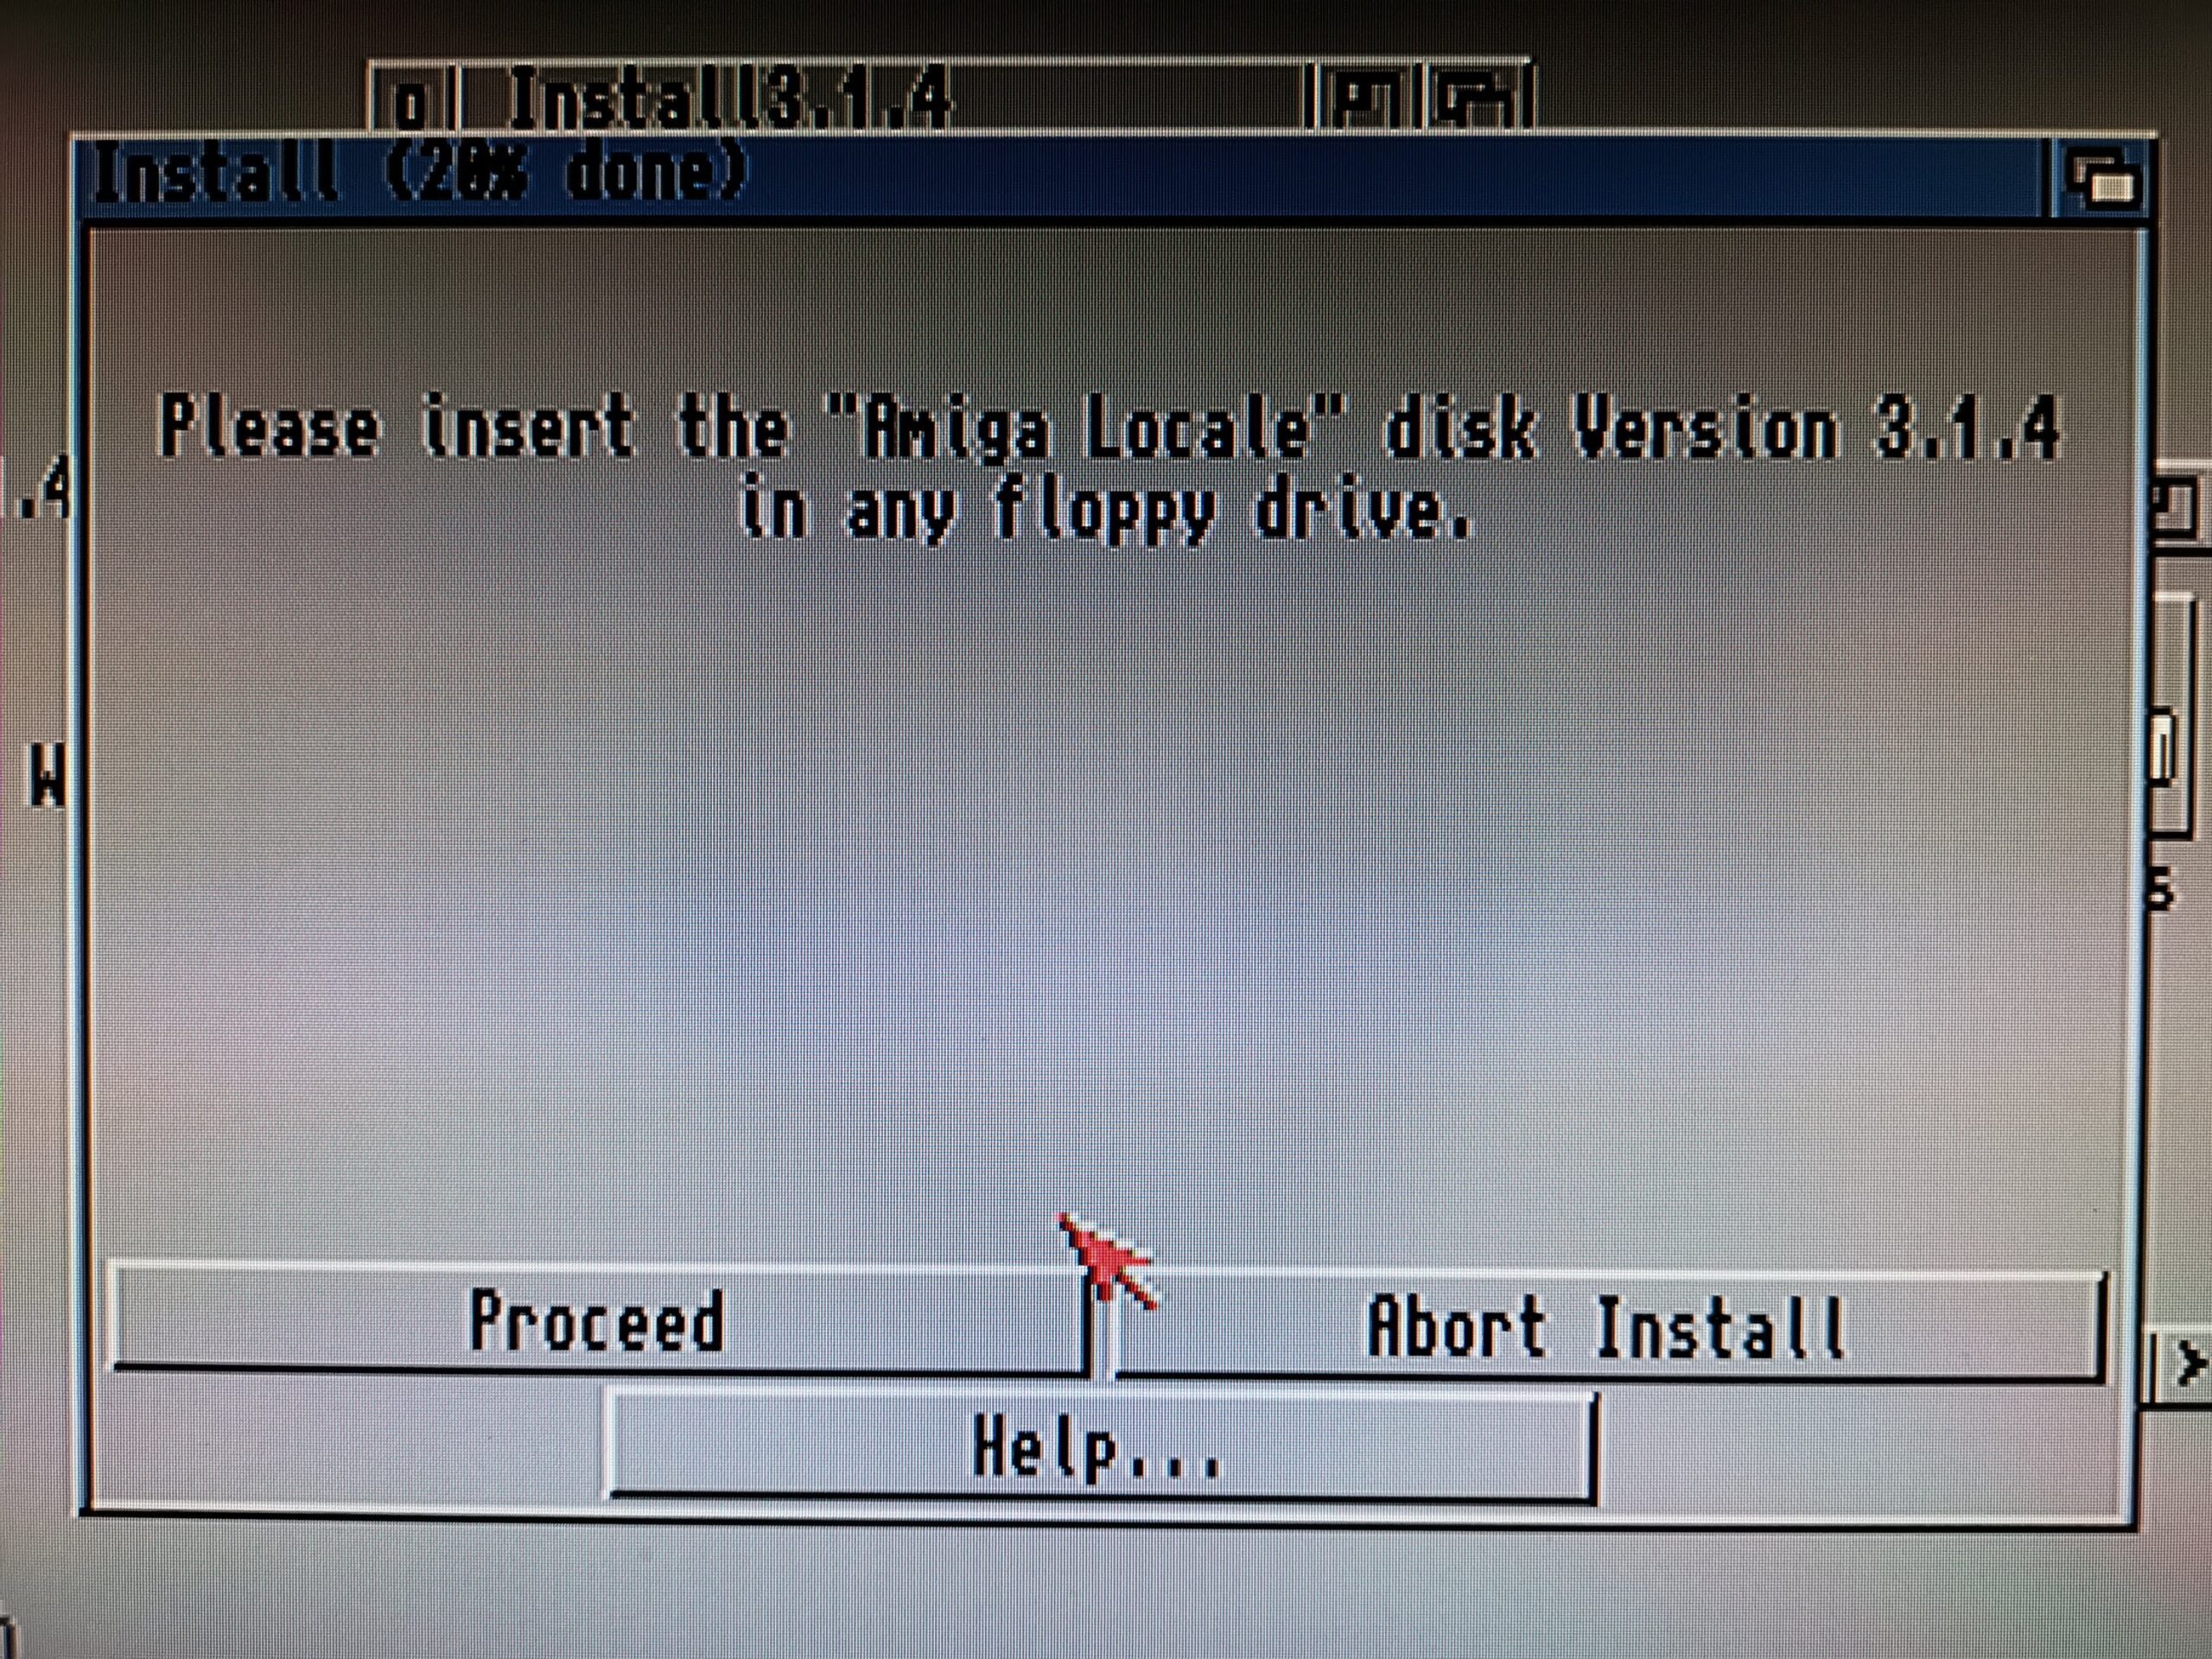
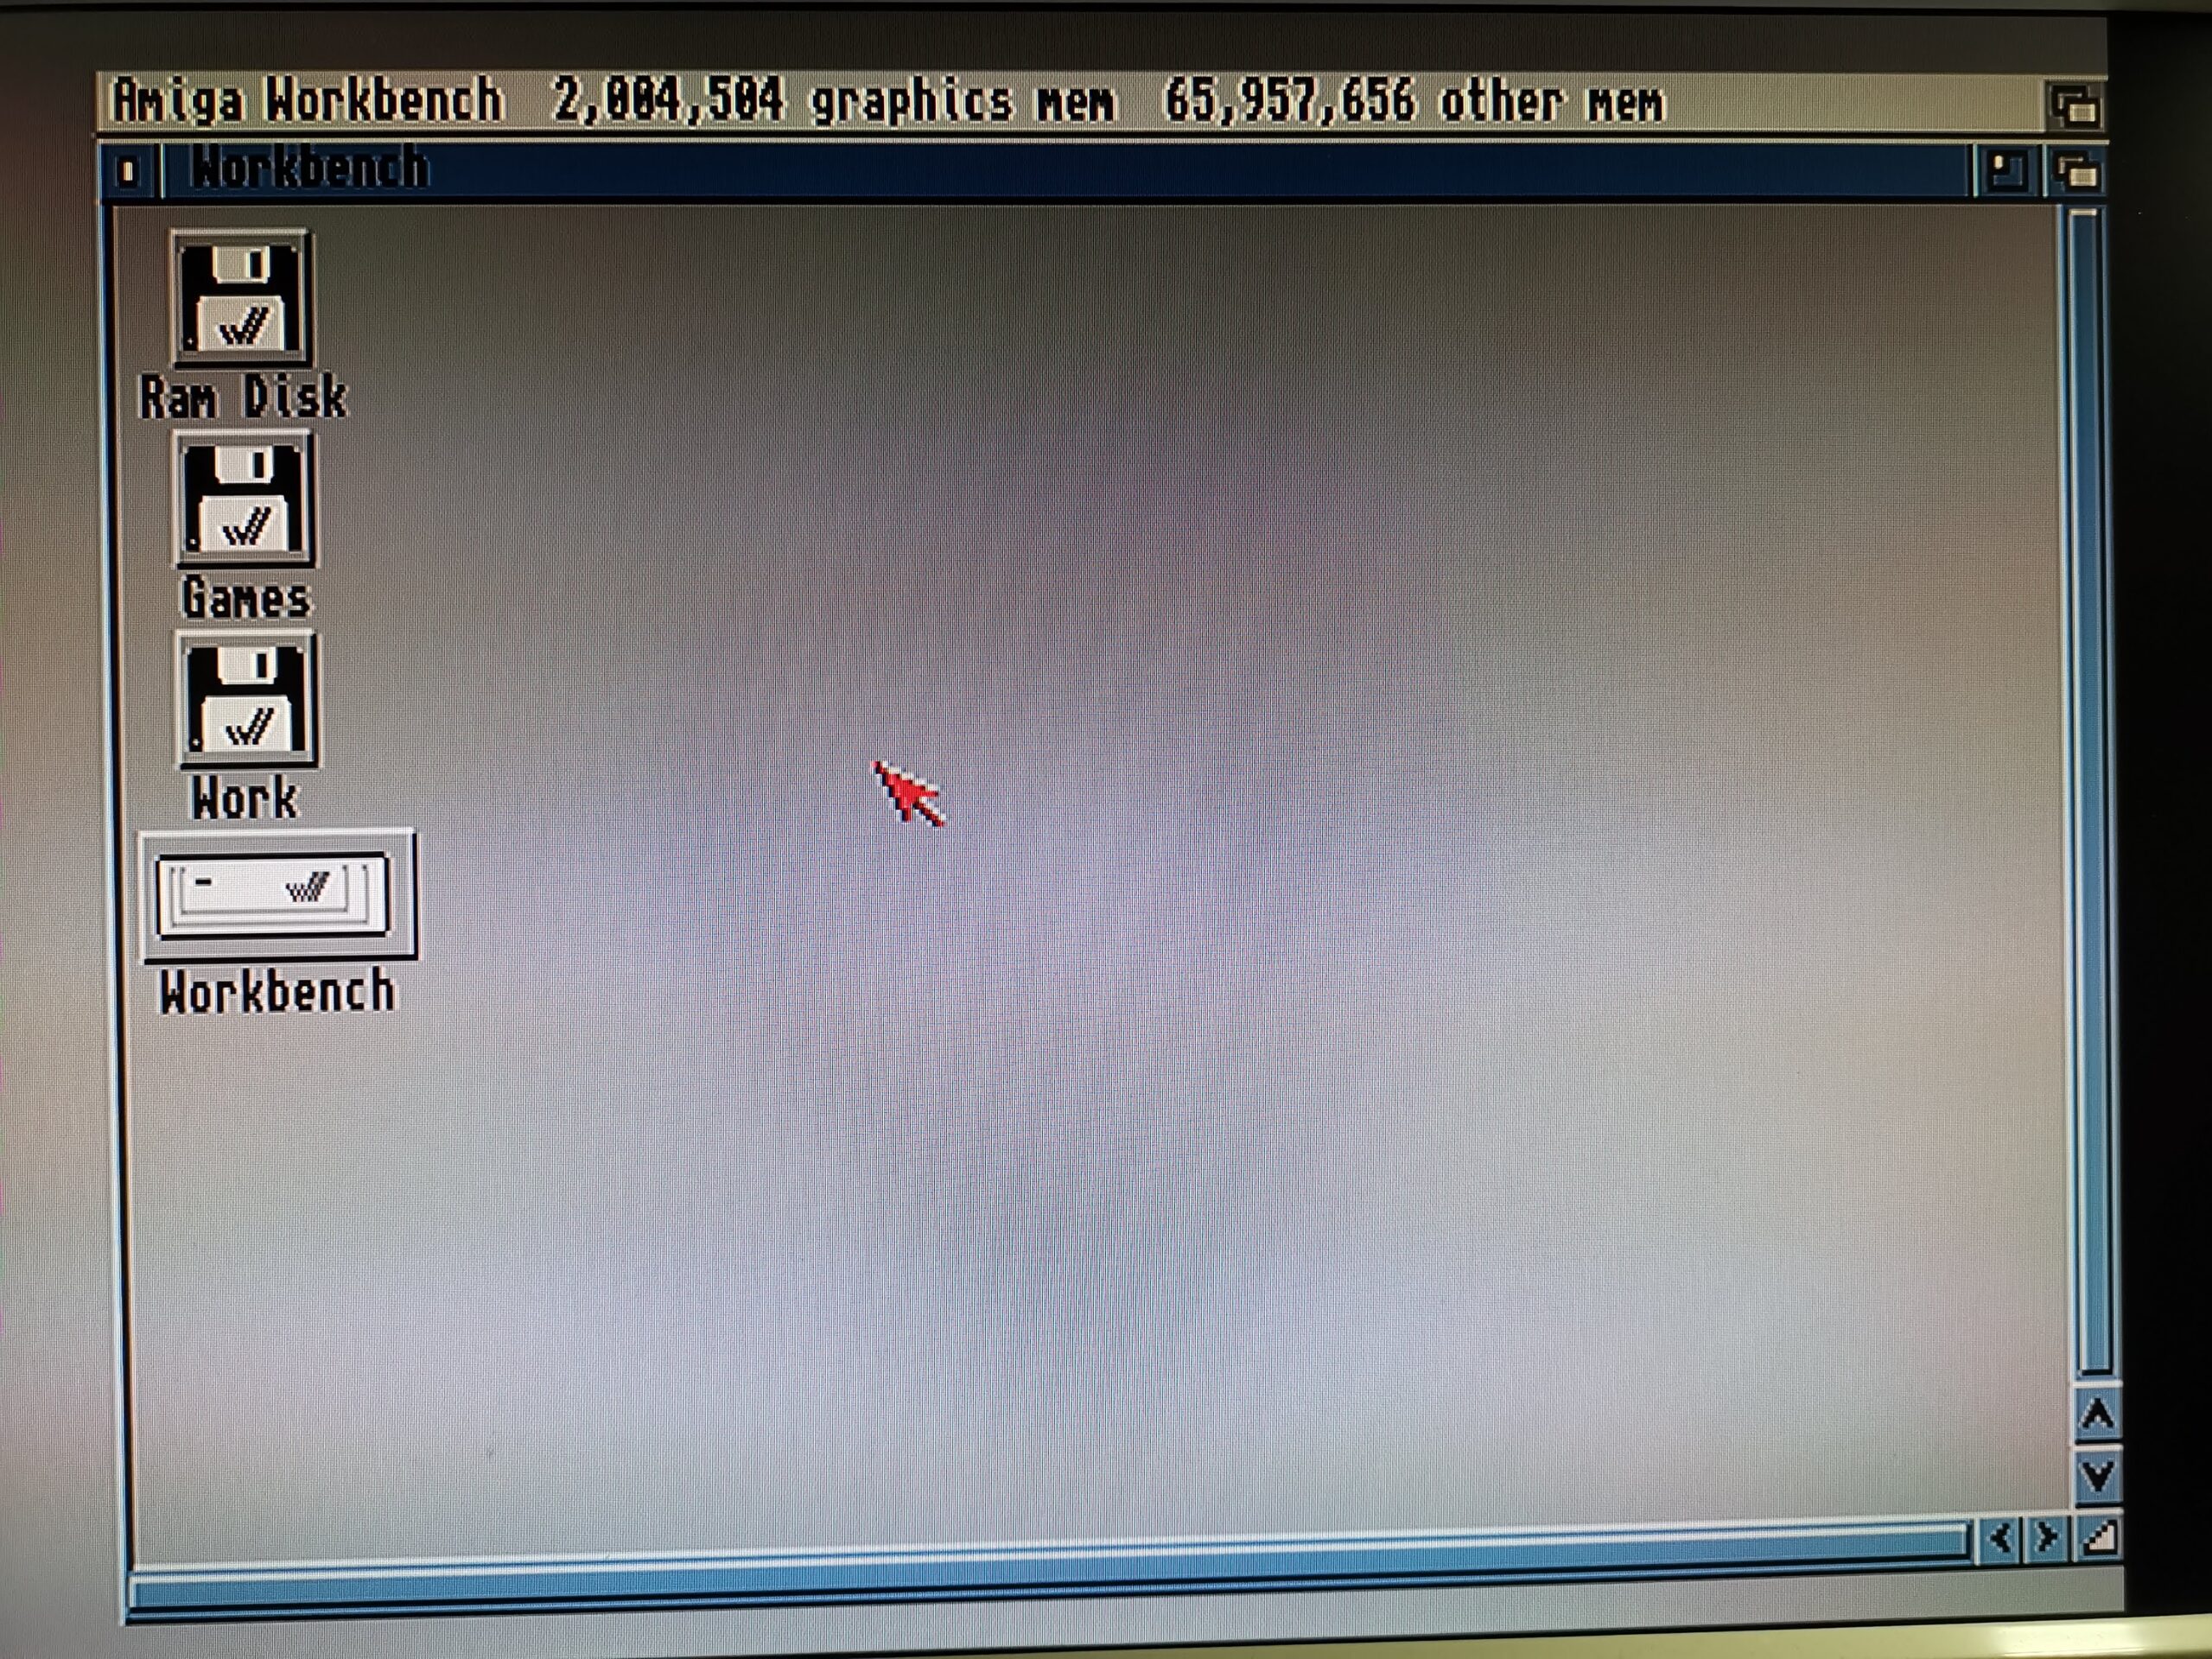
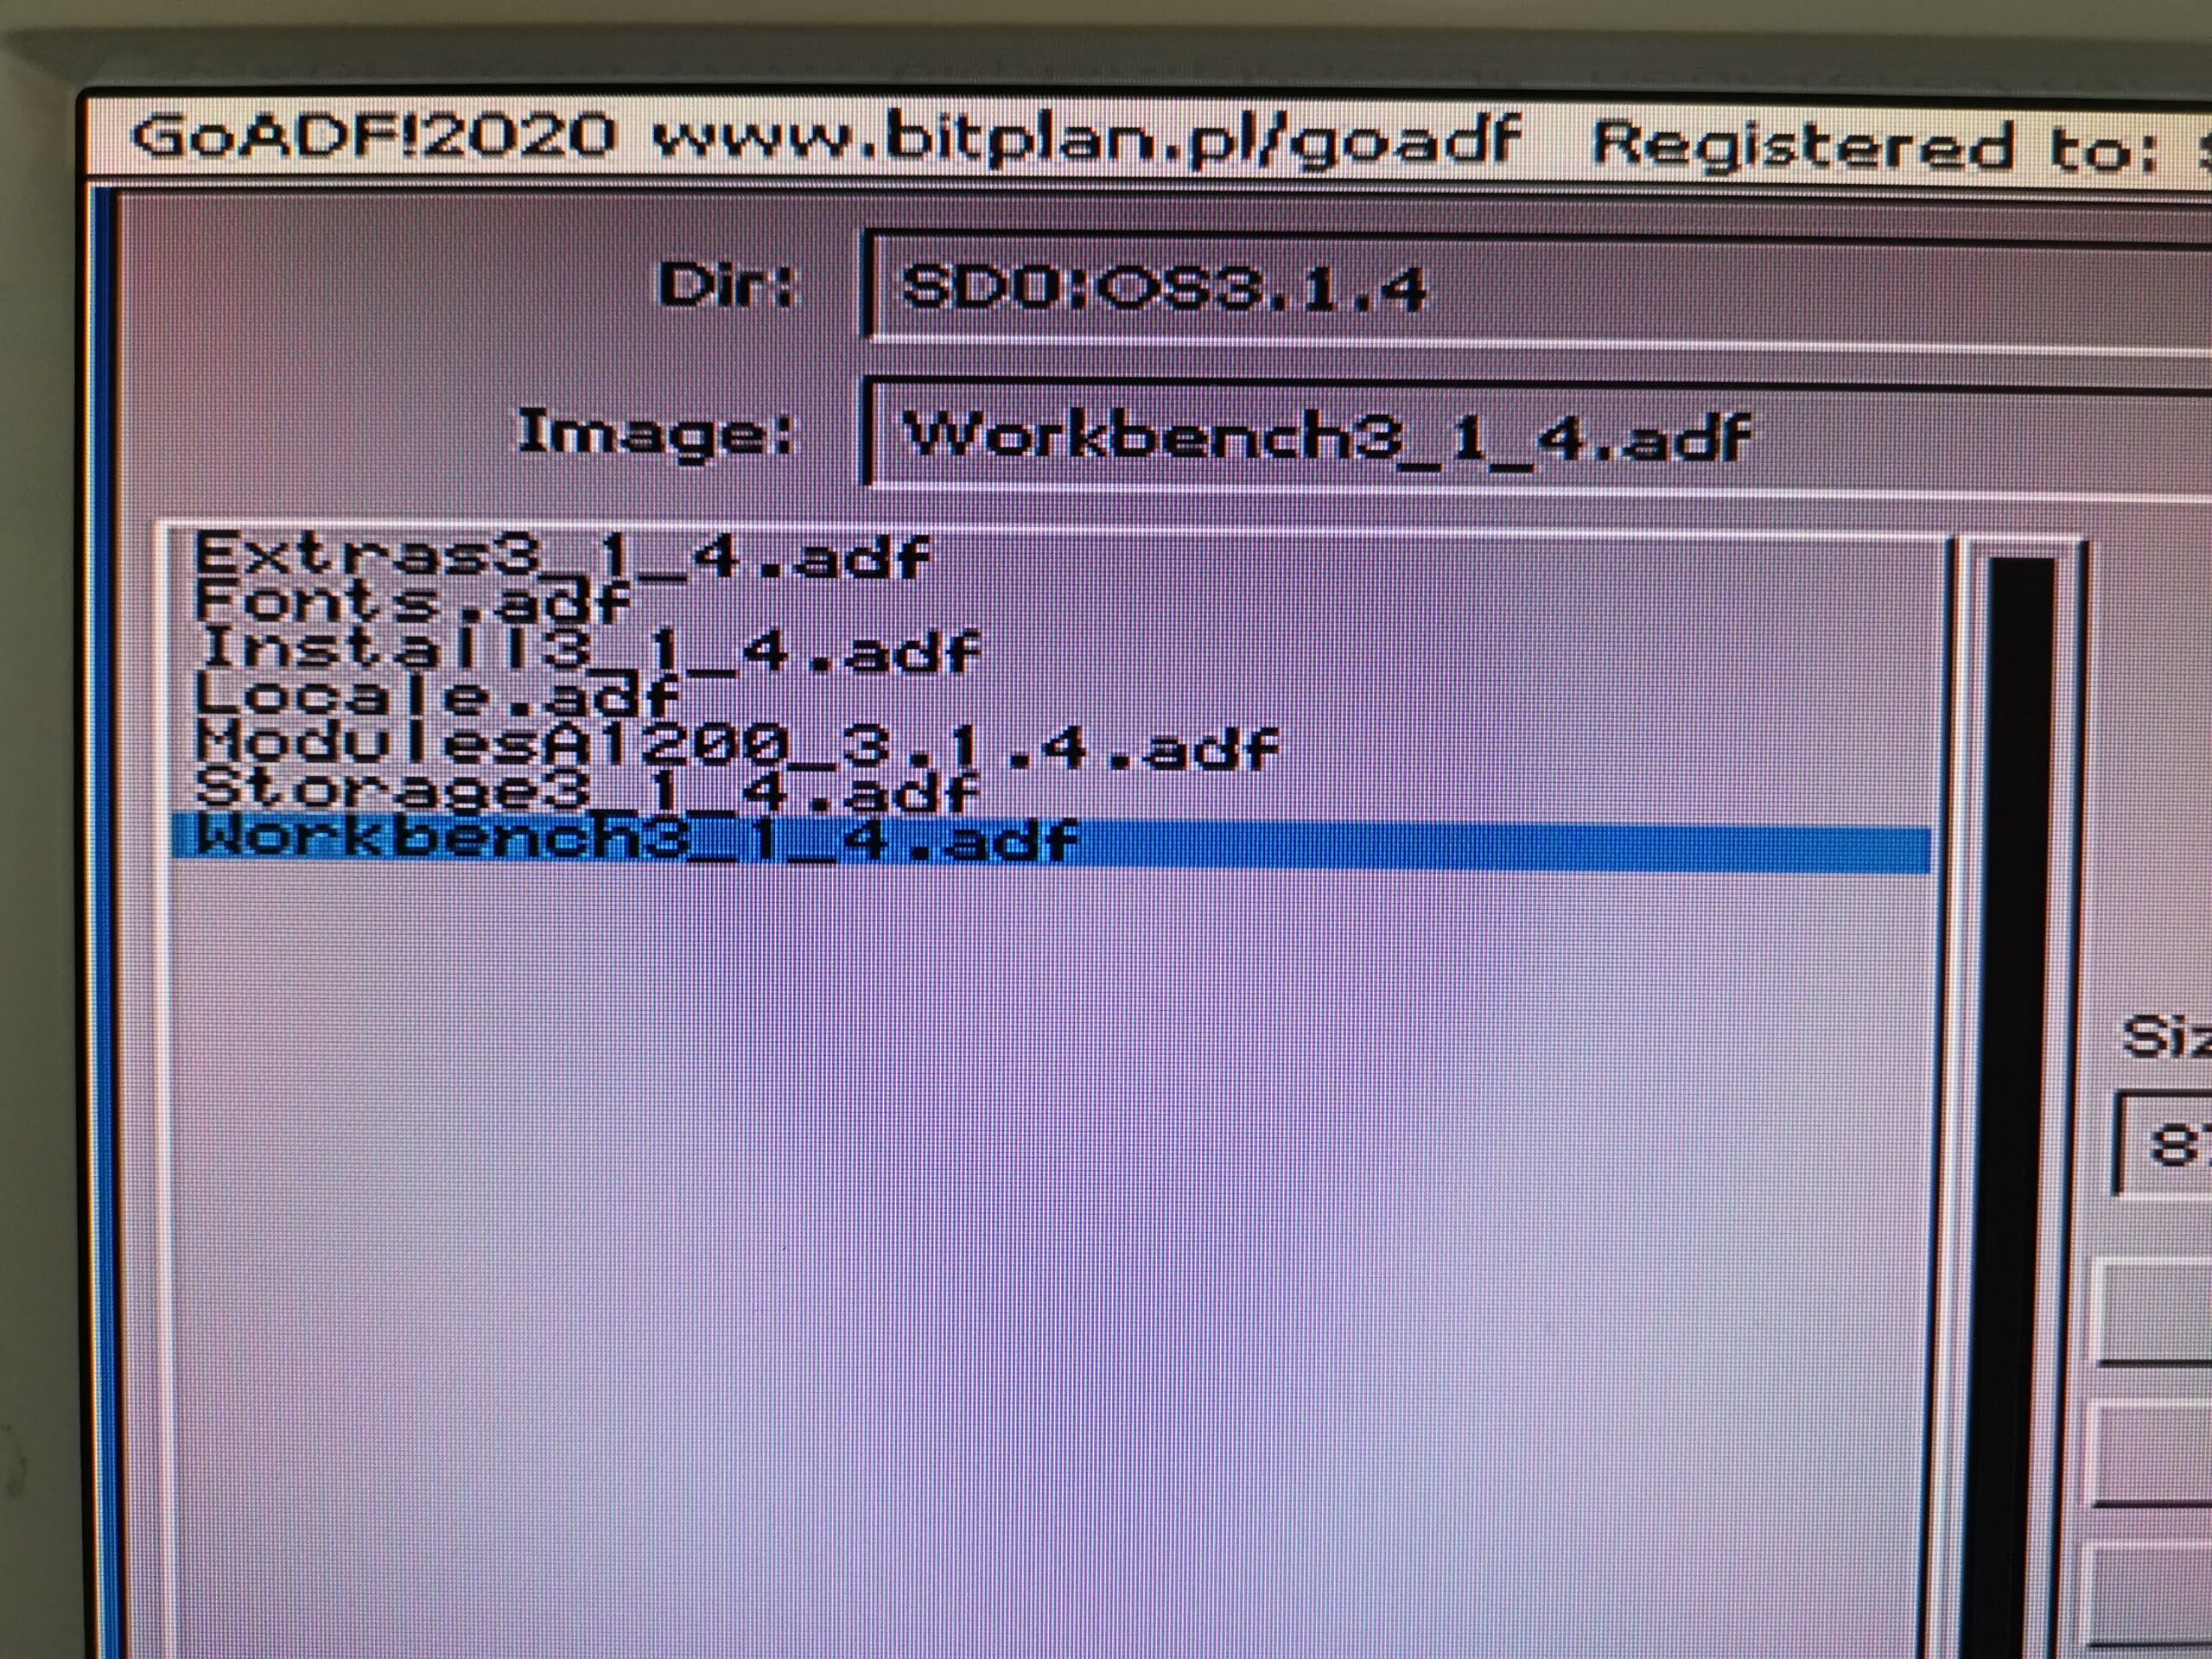
Getting the Zip 100 Drive to work with Amiga Workbench


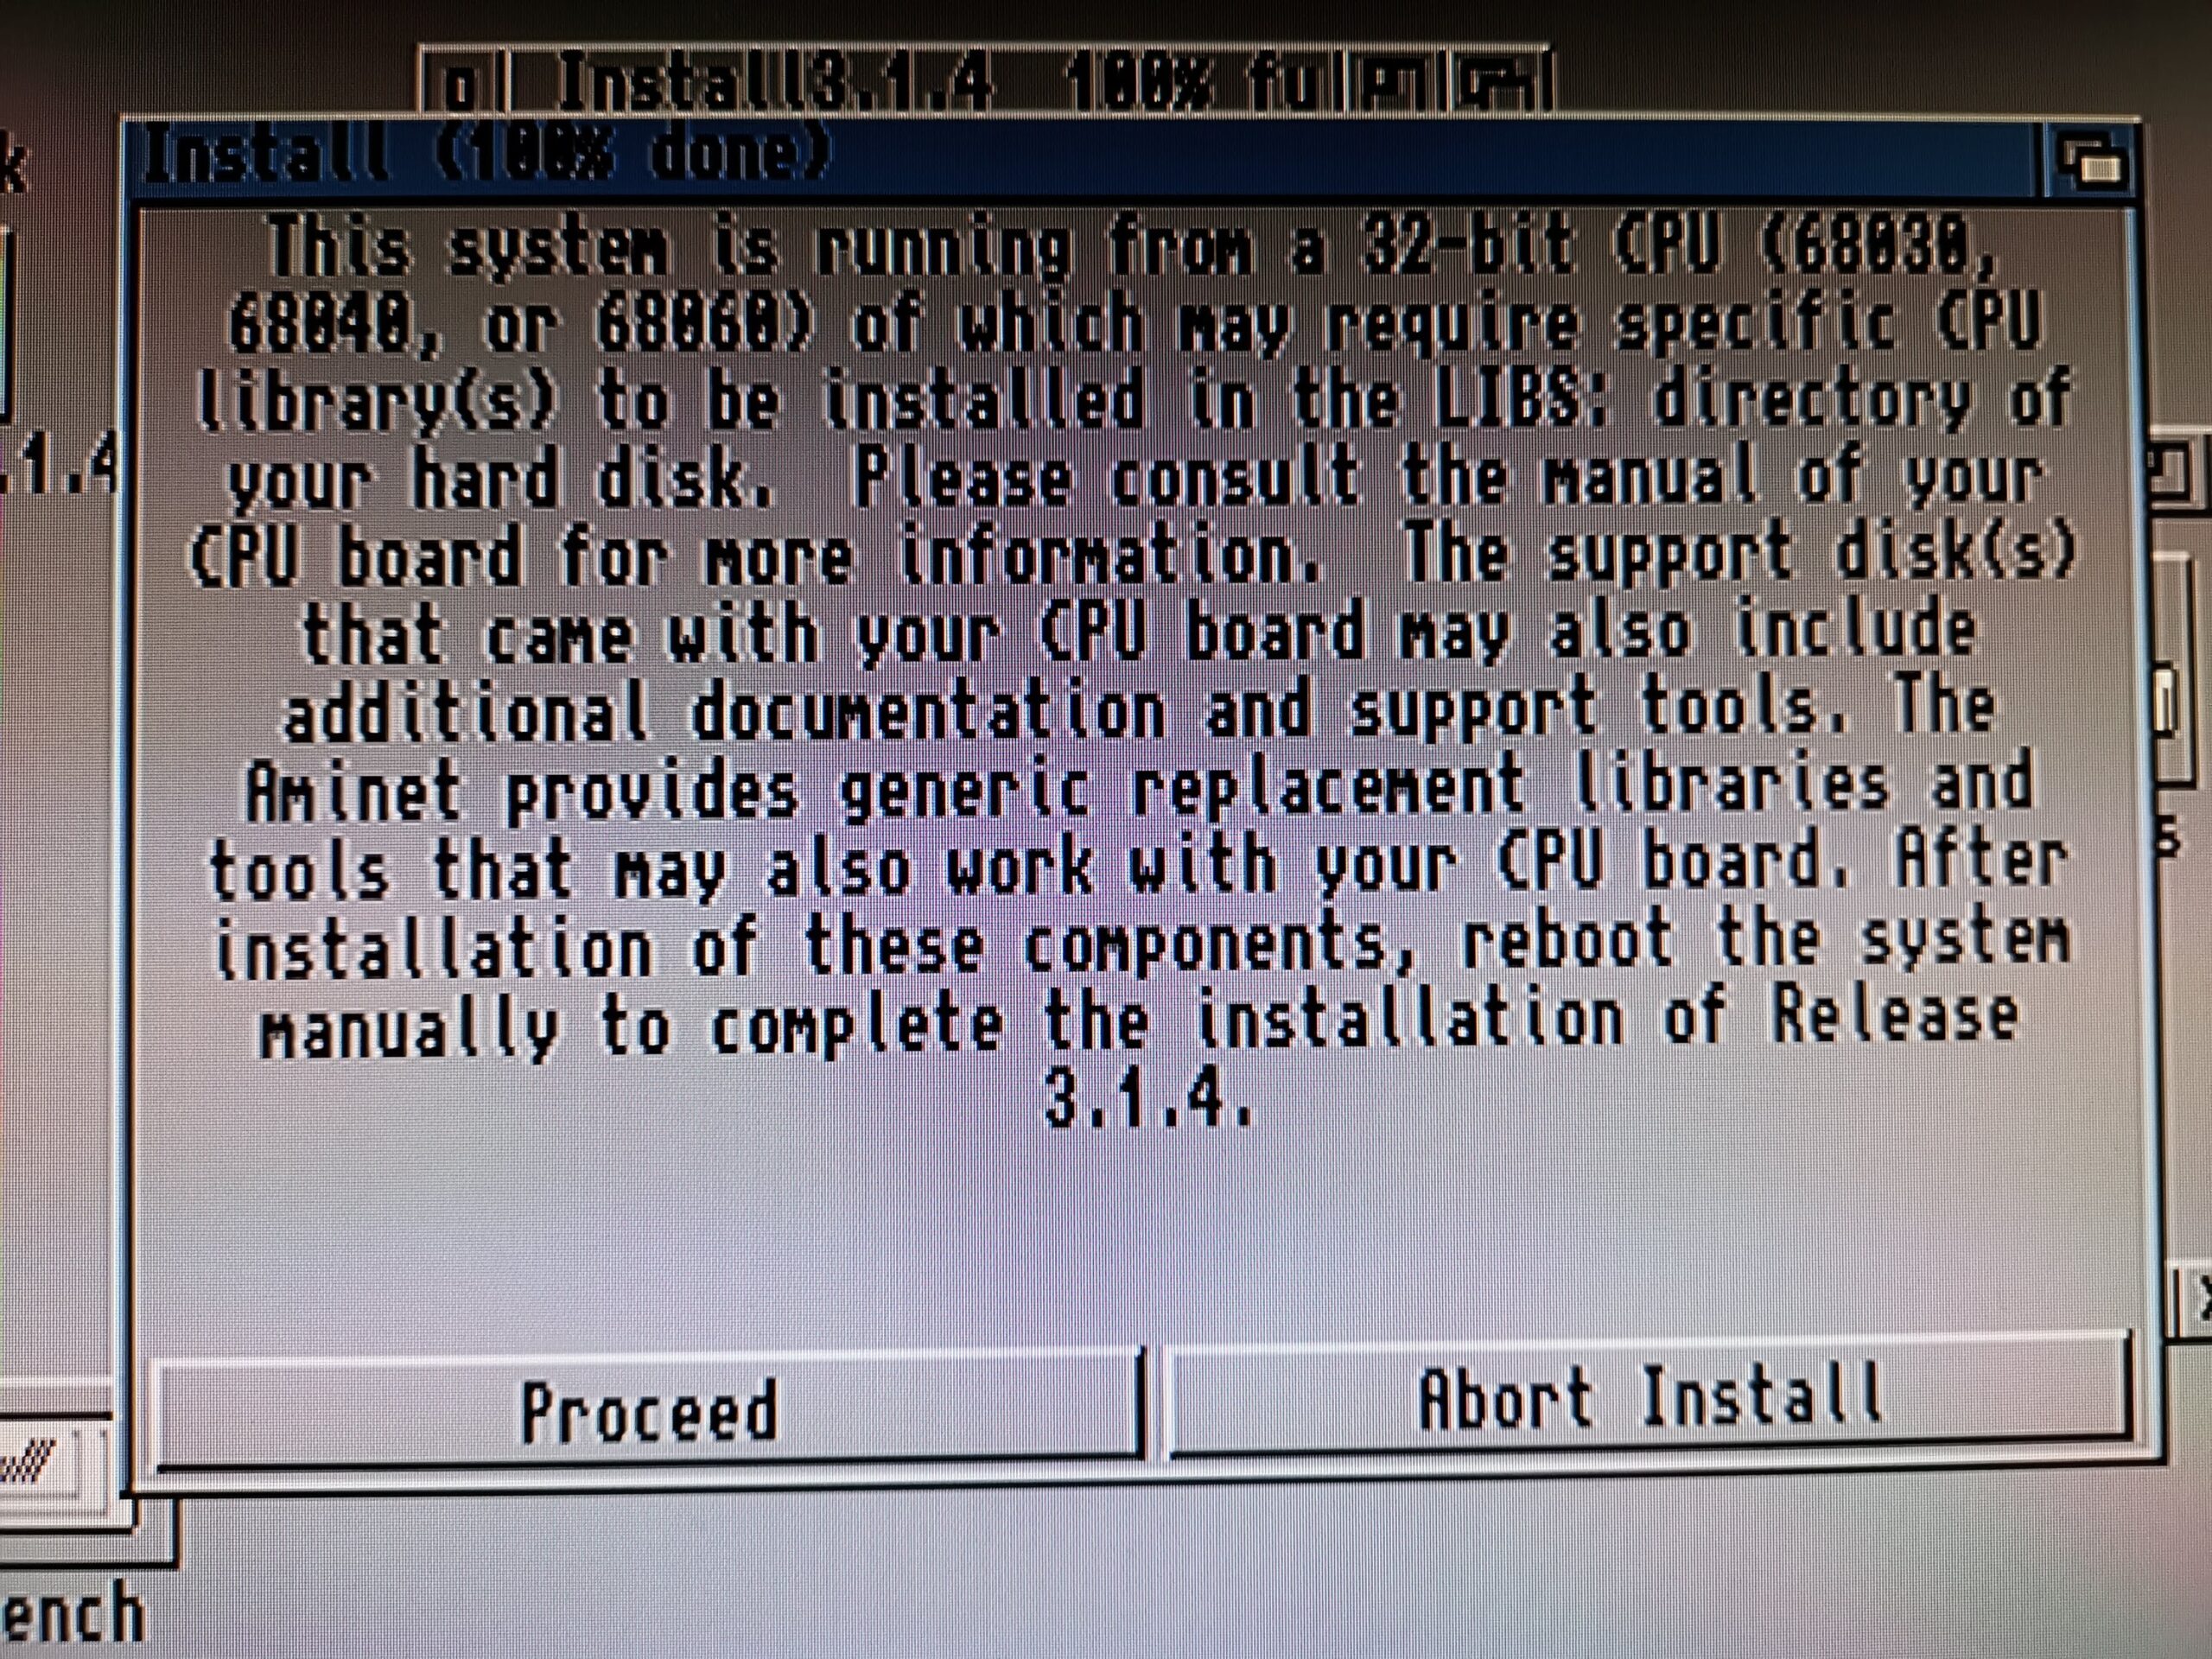
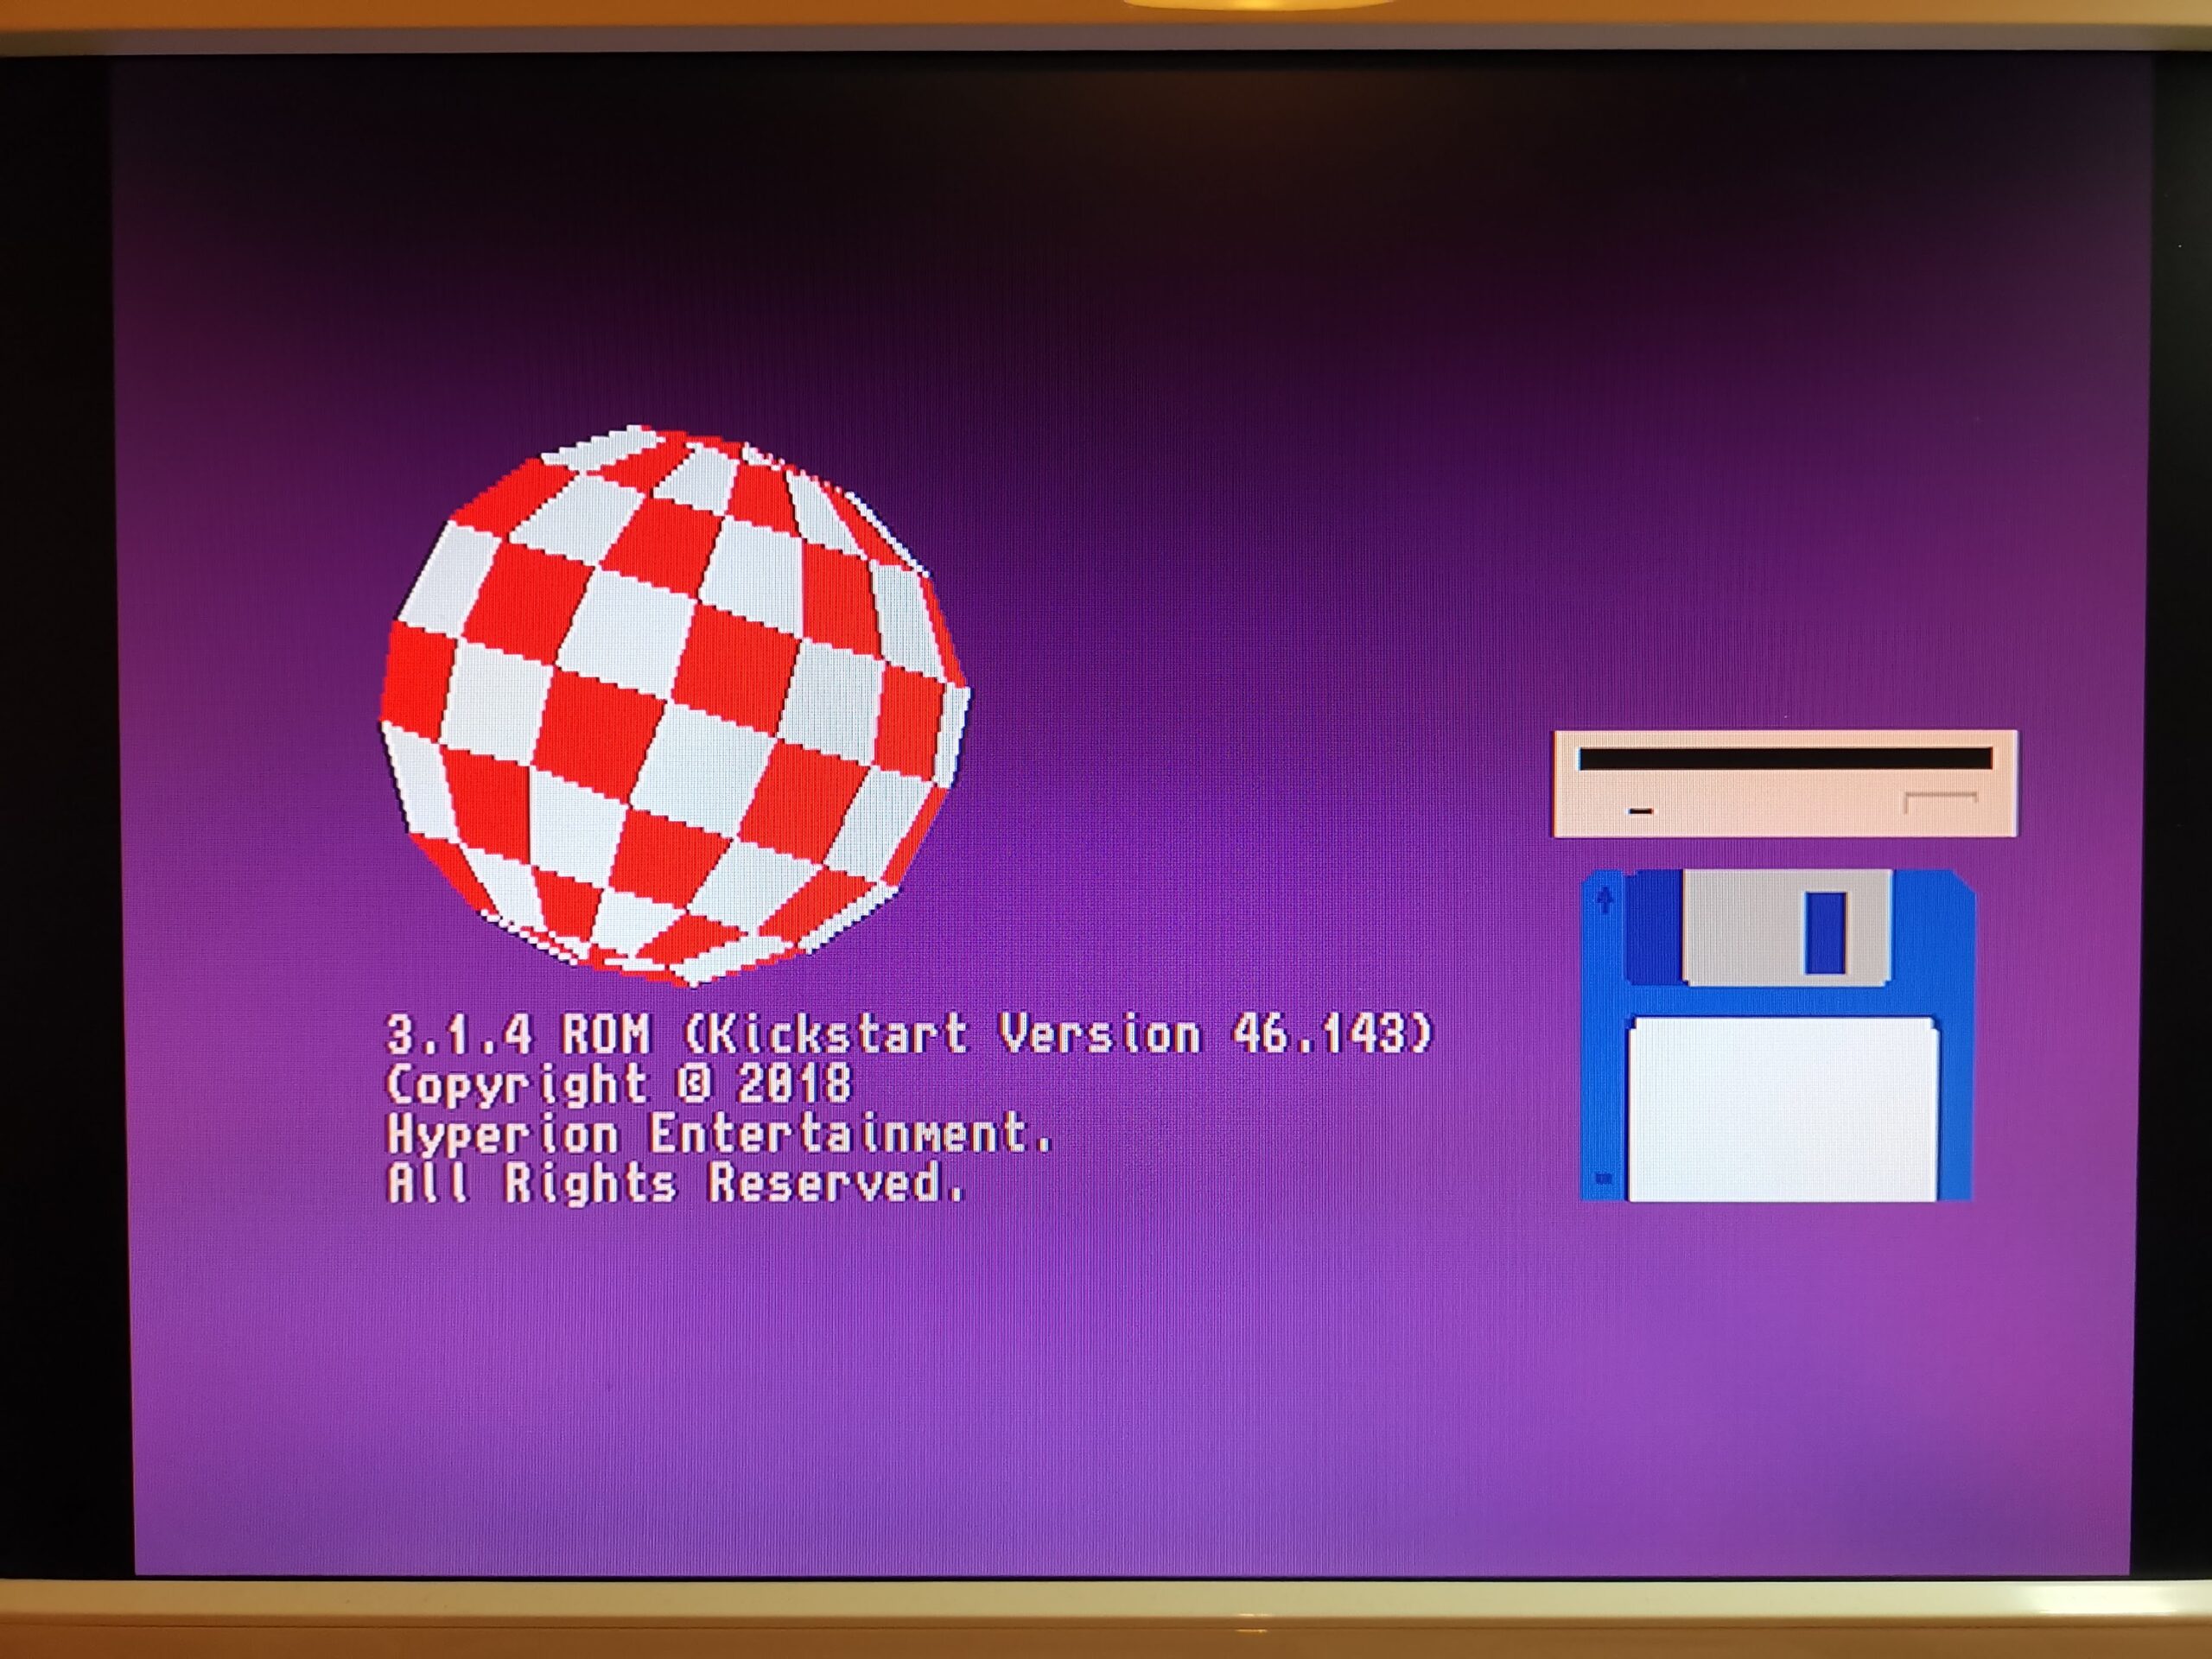
I’m using AmigaOS 3.1.4.1 but I would assume this will work just as well with 3.0 and above.

To get the Amiga to actually read and write to our Zip disks we need to create a ‘Mountlist’ for them. It actually took me a few days of tinkering with different mountlists off Aminet before I found one that would actually work reliably. I’ve successfully formatted several dozen disks with this mountlist so I’m pretty happy with it now.

Now I could have created a mountlist that would allow the reading of PC formatted disks but as Zip drive PC compatibility ceased with with the demise of Windows XP I didn’t feel it would be very useful. Consequently this mountlist is purely for Amiga use.

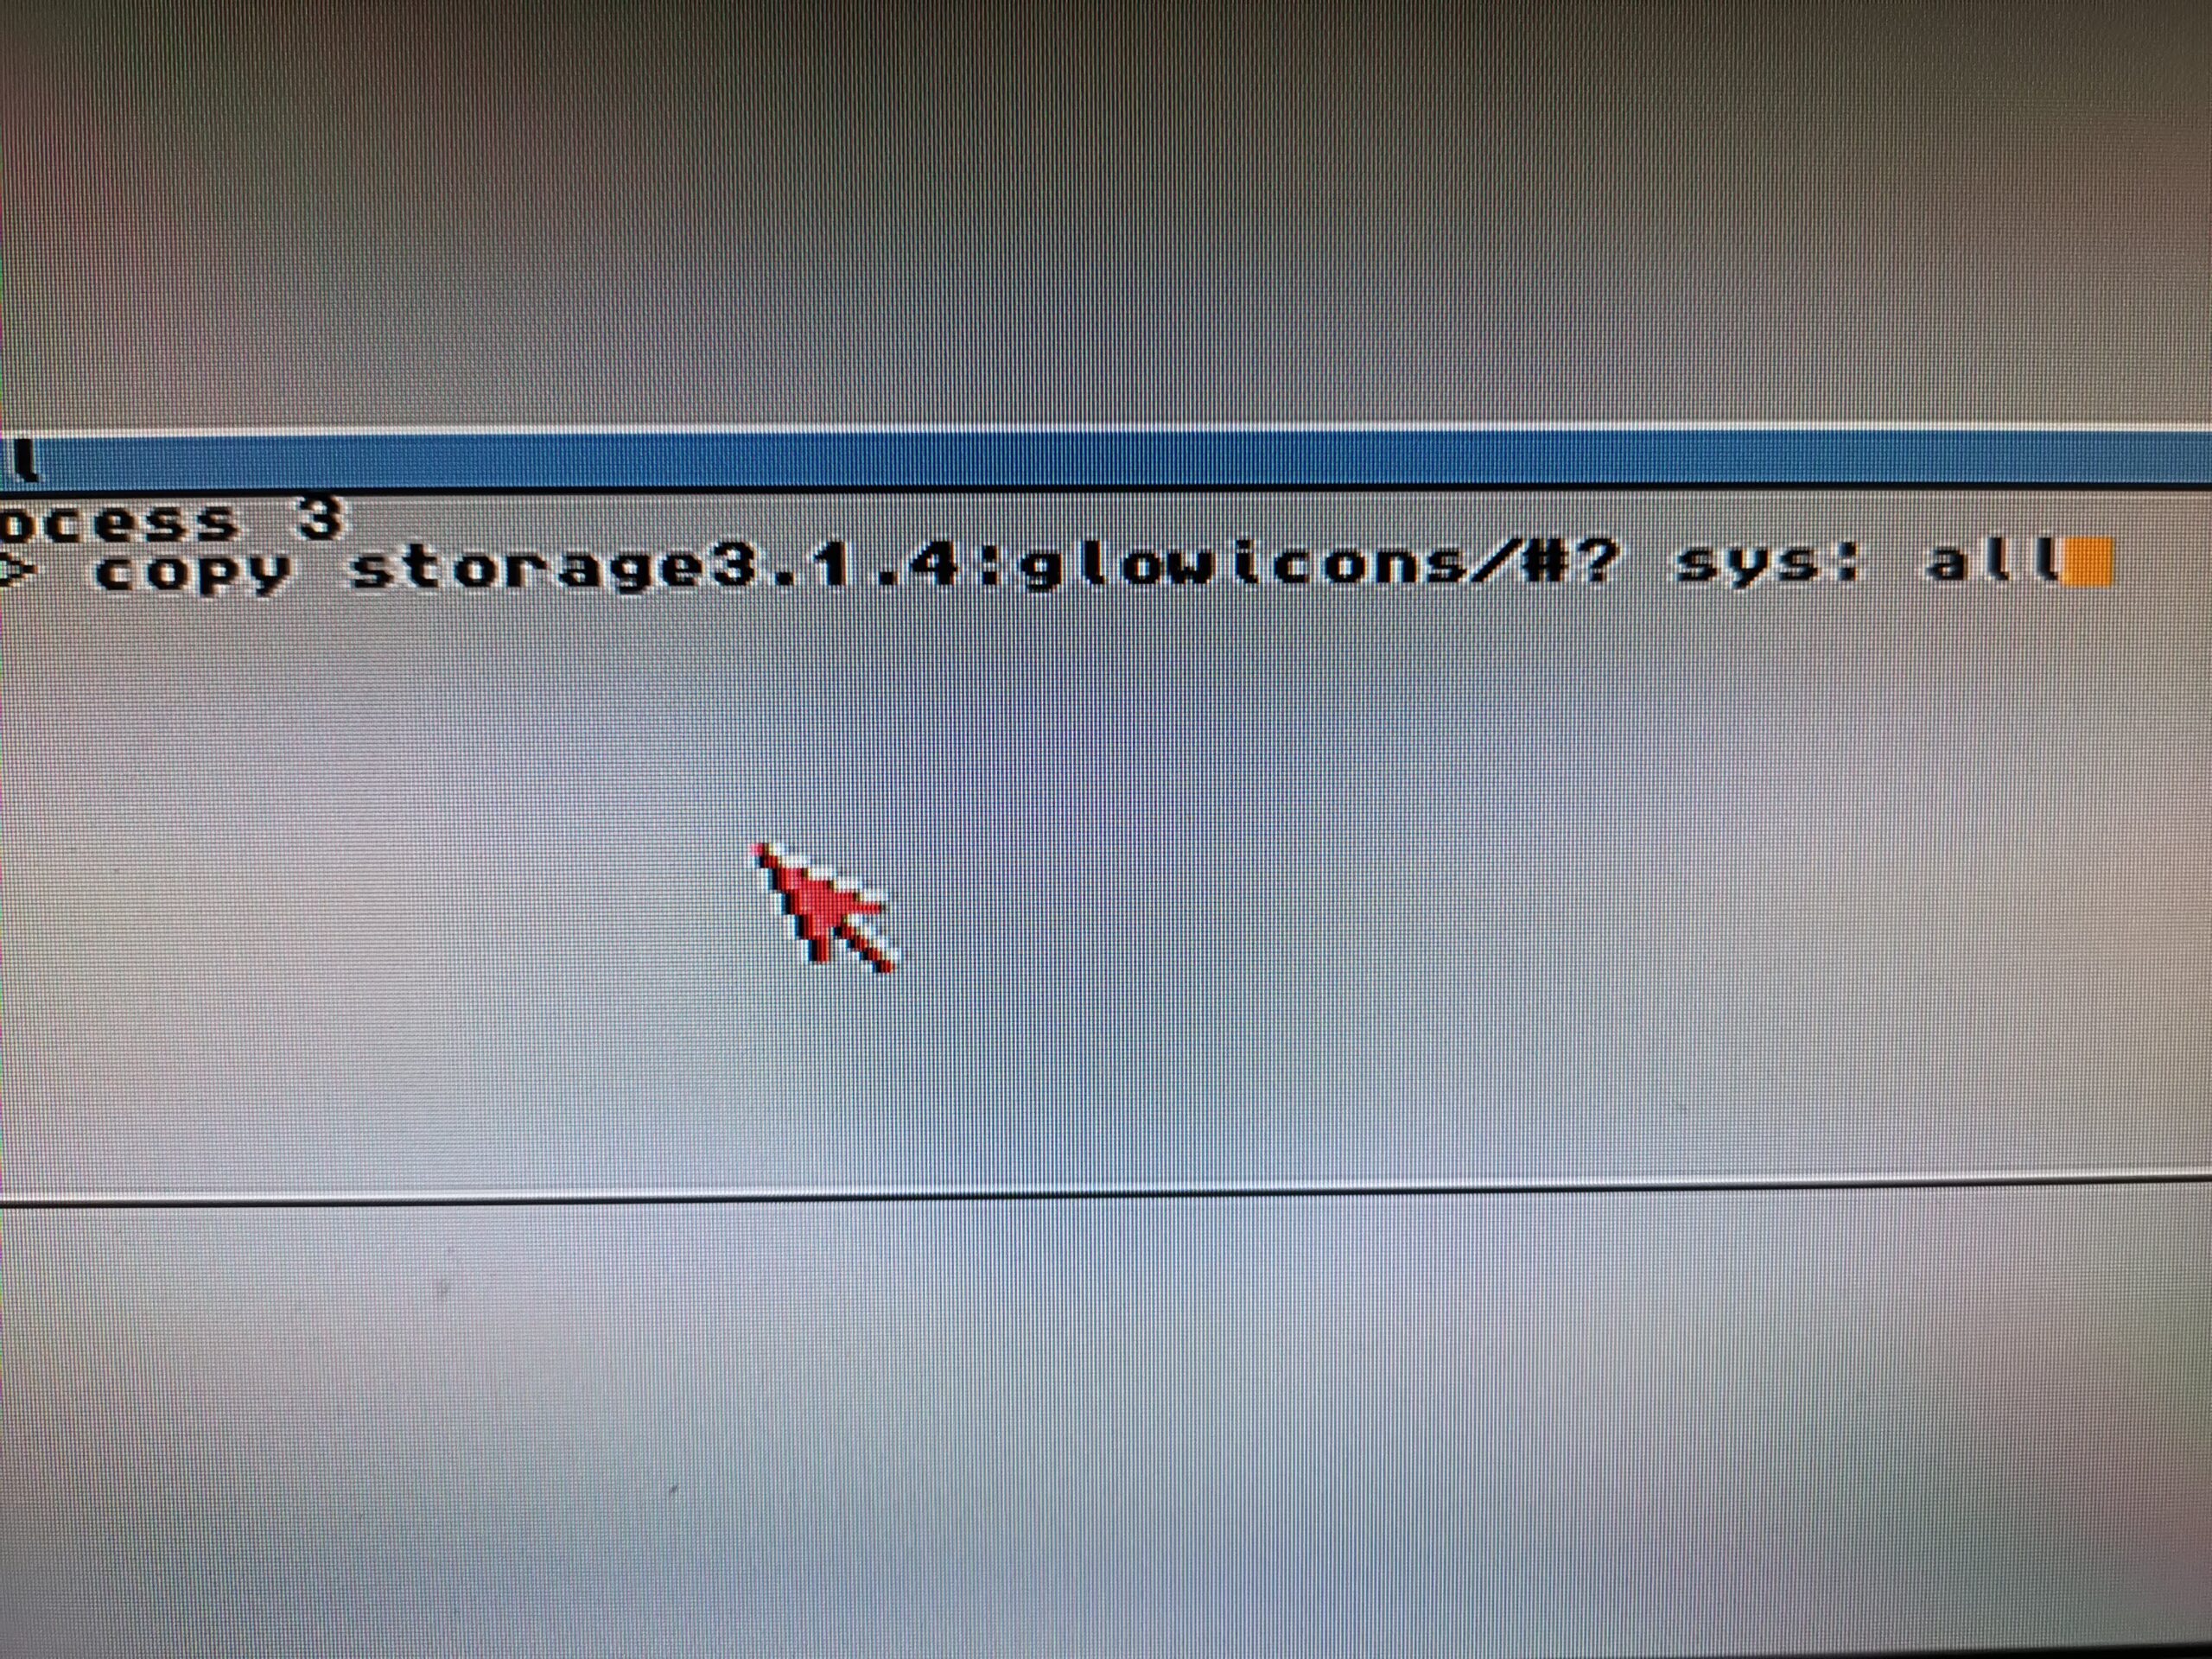
Now as you will discover, there is no mountlist on your Amiga for Zip disks, even in the storage directory, so we must make our own. To do this we need to copy a spare one from the Storage/DOSDrivers directory and place it into the Devs/DOSDrivers directory. I used the AUX mountlist but any of them will do. This can be achieved by opening up a Shell prompt and typing the following commands:

copy sys:storage/dosdrivers/aux sys:devs/dosdrivers/ZIP0

This copies the AUX mountlist to the correct location and renames it at the same time.

We also need the icon file so press cursor up to bring back your last command and edit it to look like this:

copy sys:storage/dosdrivers/aux.info sys:devs/dosdrivers/ZIP0.info

Now open up that newly created ZIP0 file in the editor of your choice. If you don’t have one then simply enter this command into the Shell to use the built in text editor:

ED sys:devs/dosdrivers/zip0

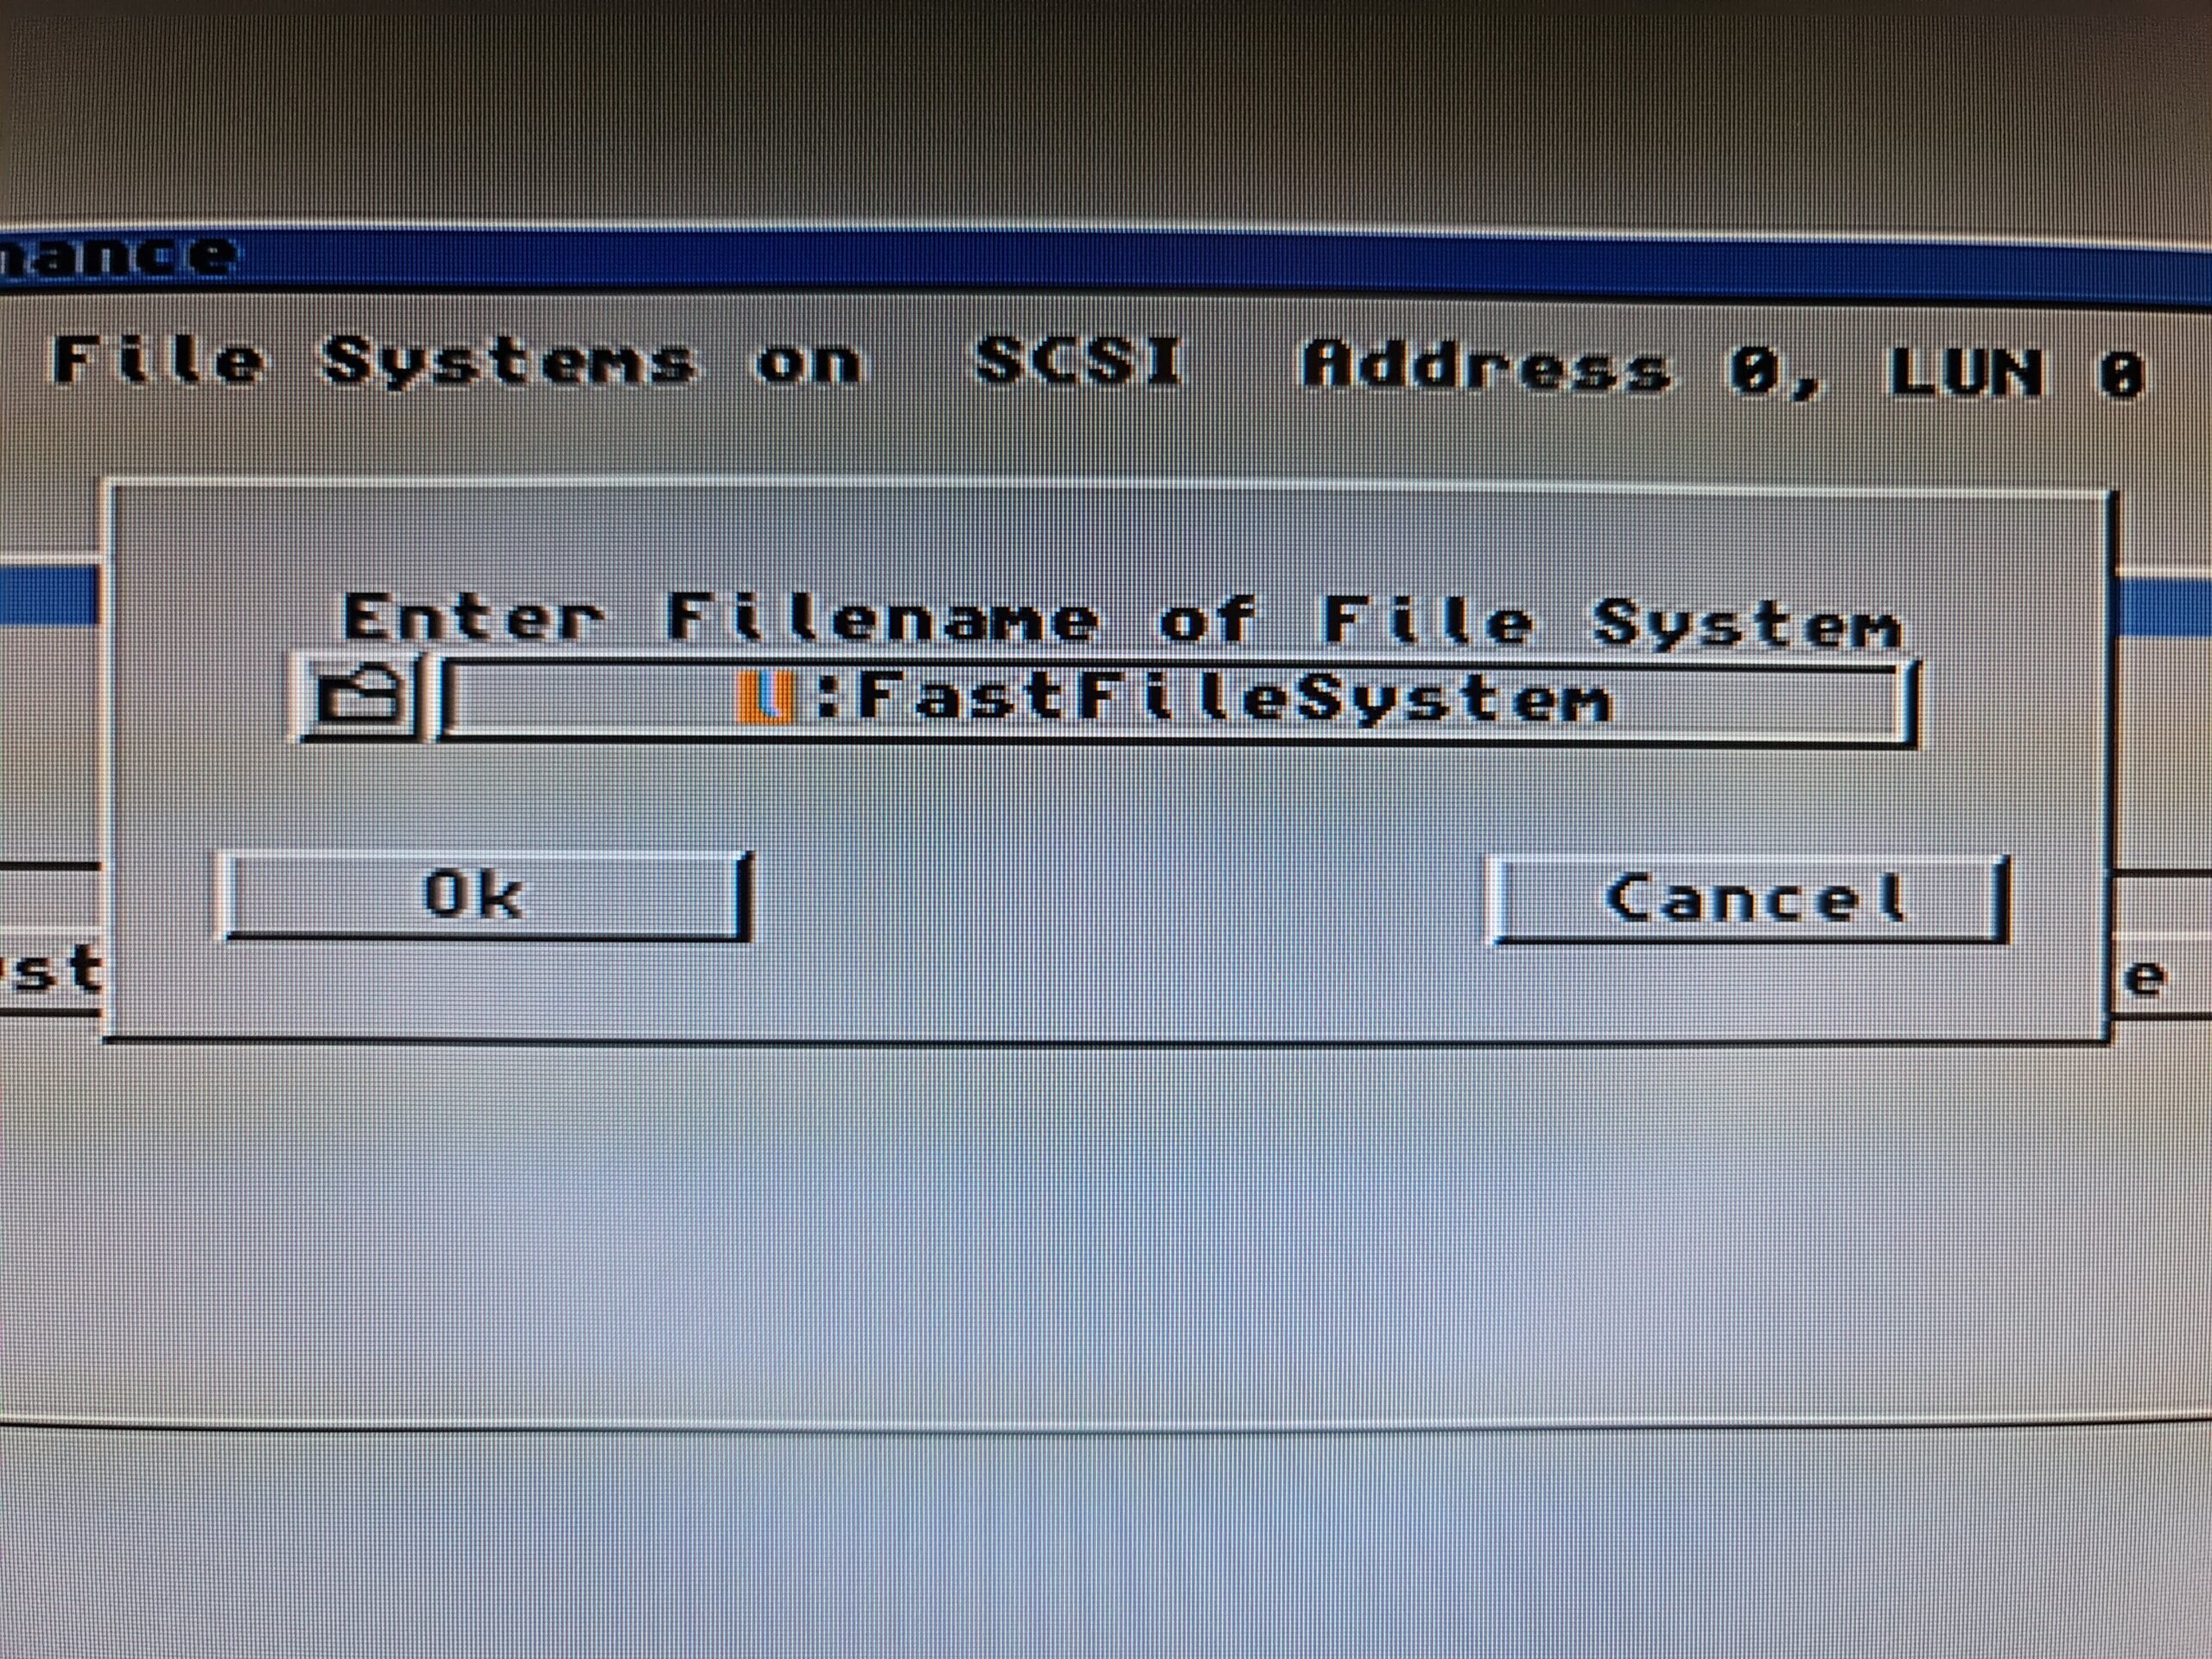
Delete all the existing text in the file and then enter the following exactly as shown below:

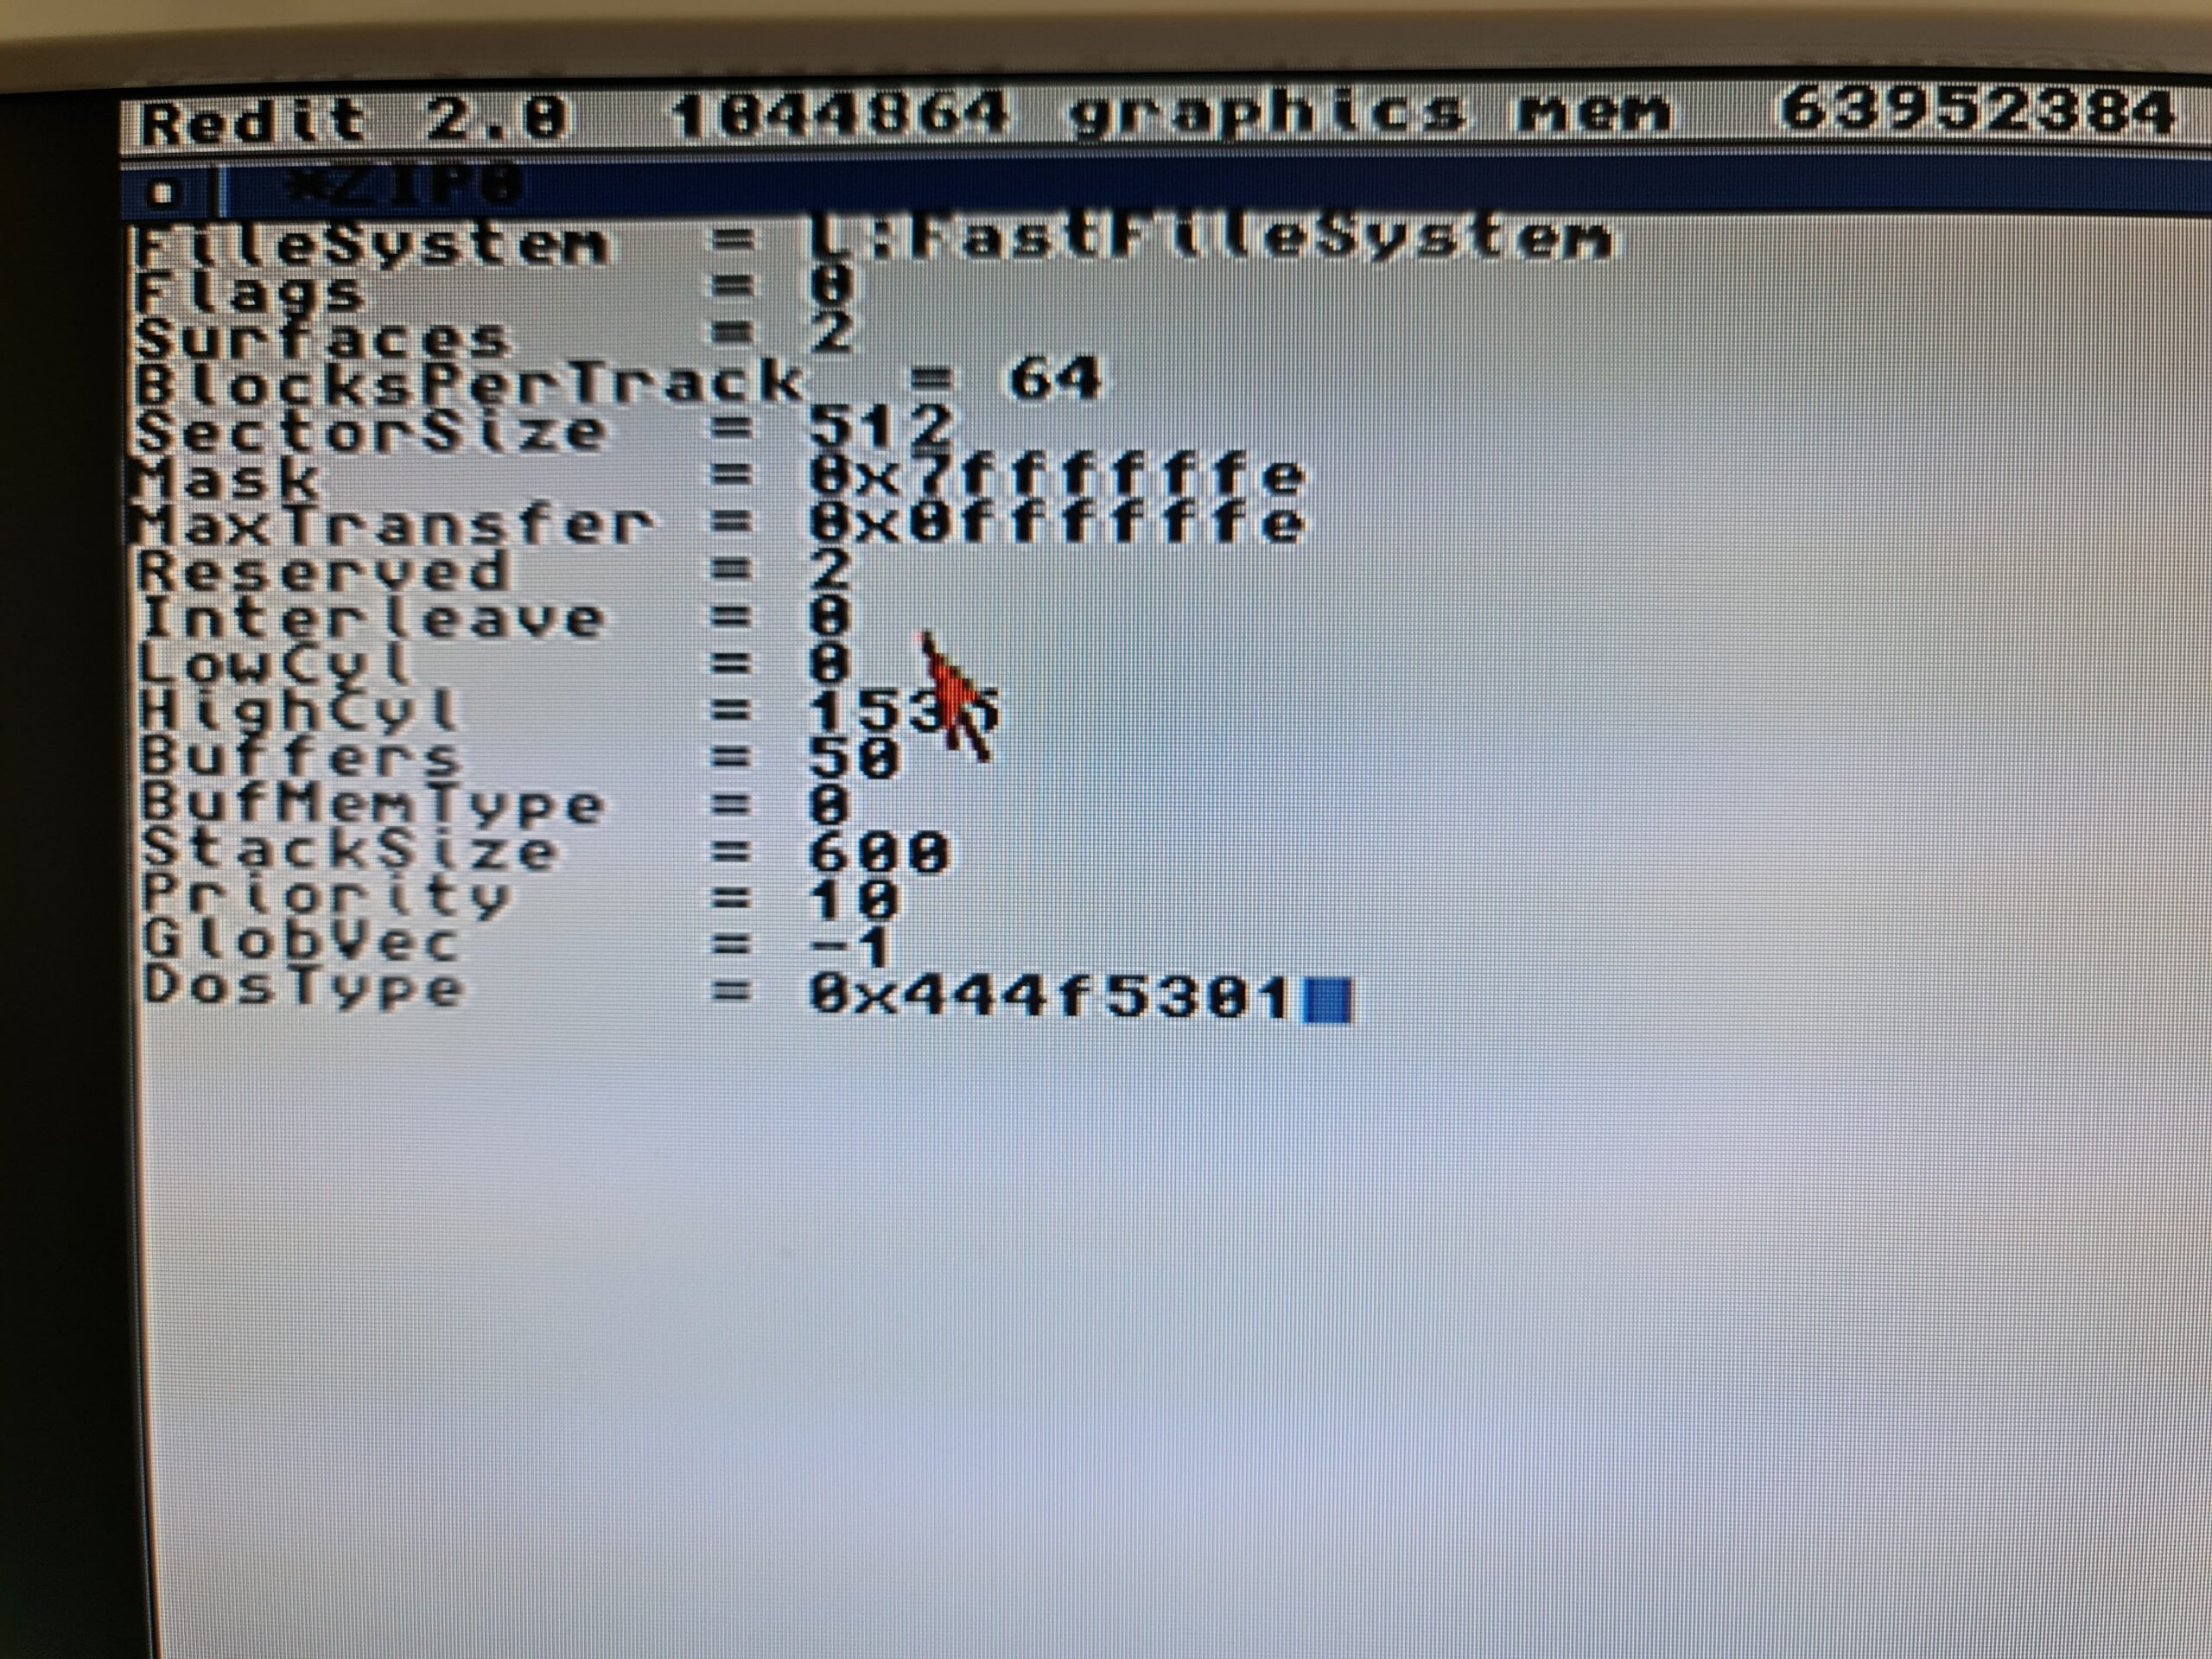
FileSystem = L:FastFileSystem
Flags = 0
Surfaces = 2
BlocksPerTrack = 64
SectorSize = 512
Mask = 0x7ffffffe
MaxTransfer = 0x0ffffffe
Reserved = 2
Interleave = 0
LowCyl = 0
HighCyl = 1535
Buffers = 50
BufMemType = 0
StackSize = 600
Priority = 10
GlobVec = -1
DosType = 0x444f5301


It should look like this on the Amiga:


Zip Drive Amiga Mountlist

ZIP0 Mountlist entries


Once you’ve entered everything above, triple check it. Once you are certain it is correct make sure you save the edited file!

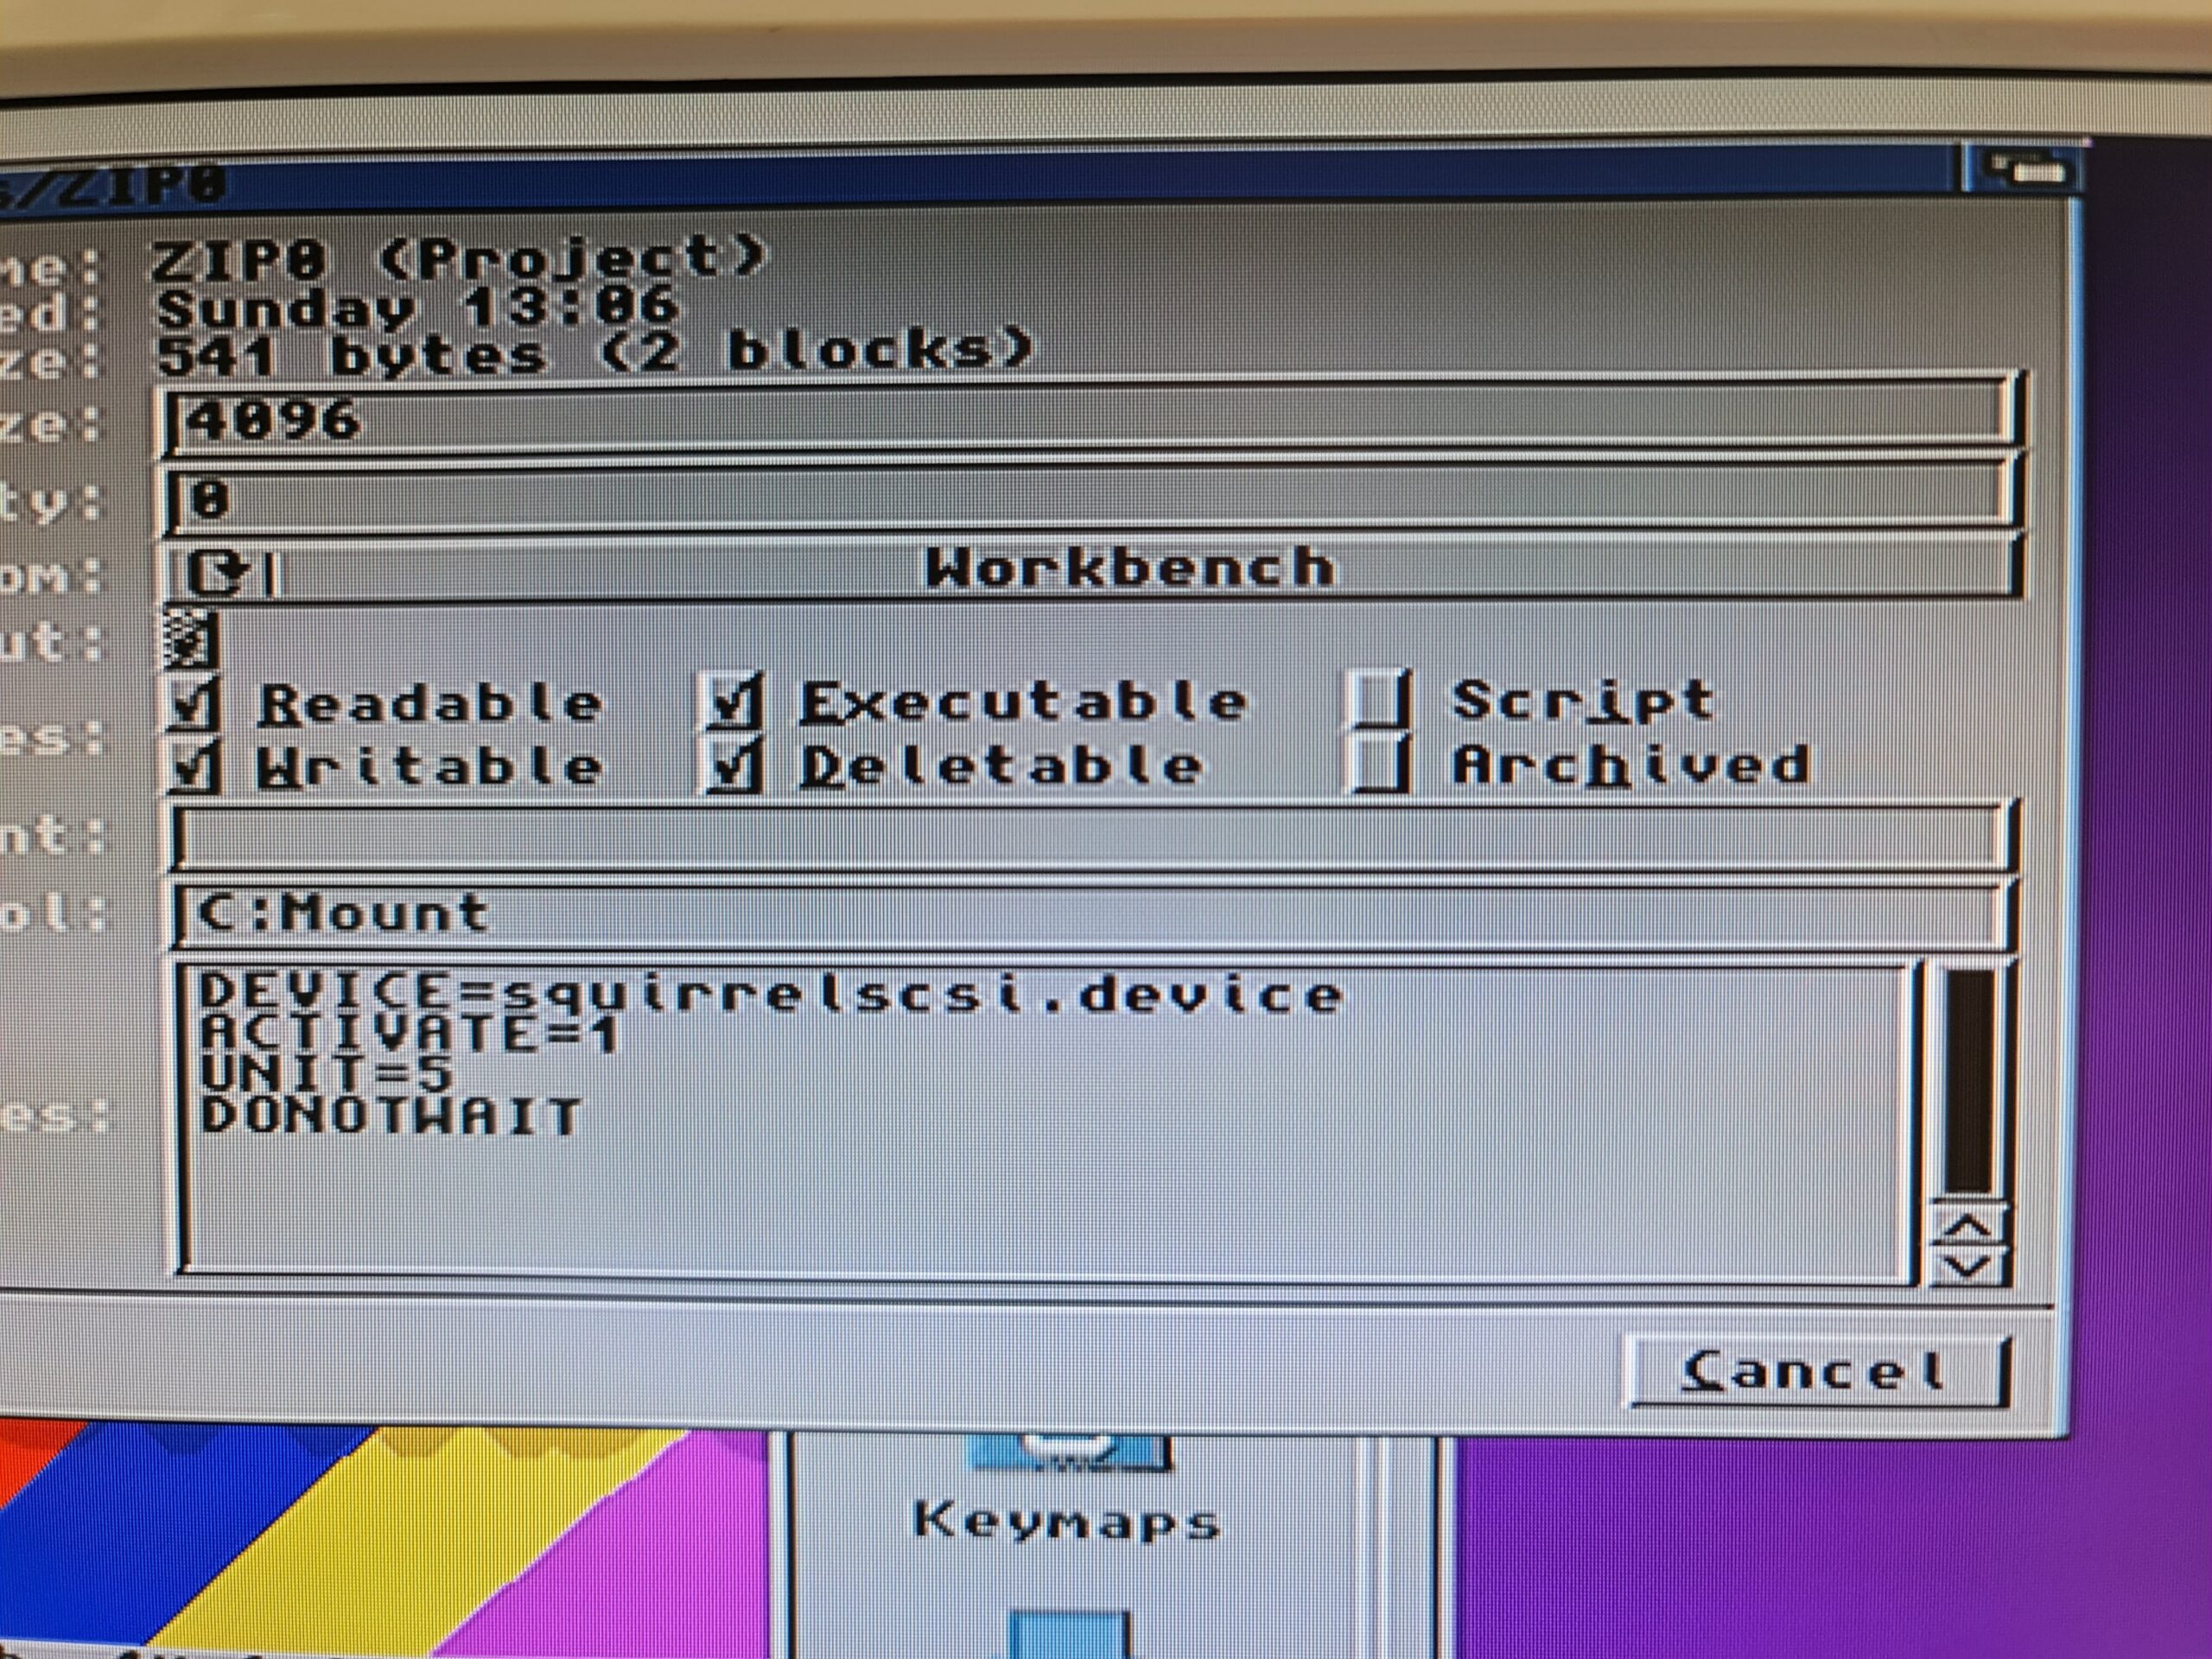
We’re not quite done yet. We need to add a few Tooltypes to provide the Amiga with a bit more info to go on. Click on the ZIP0 icon and select ‘Information…’ from the Icon Window and edit the Tooltypes.

Delete any existing entries that may be in the Tooltypes window and replace them with these:


DEVICE=squirrelscsi.device

ACTIVATE=1

UNIT=5

DONOTWAIT


It should look like this when you’re finished:


Zip Drive Amiga

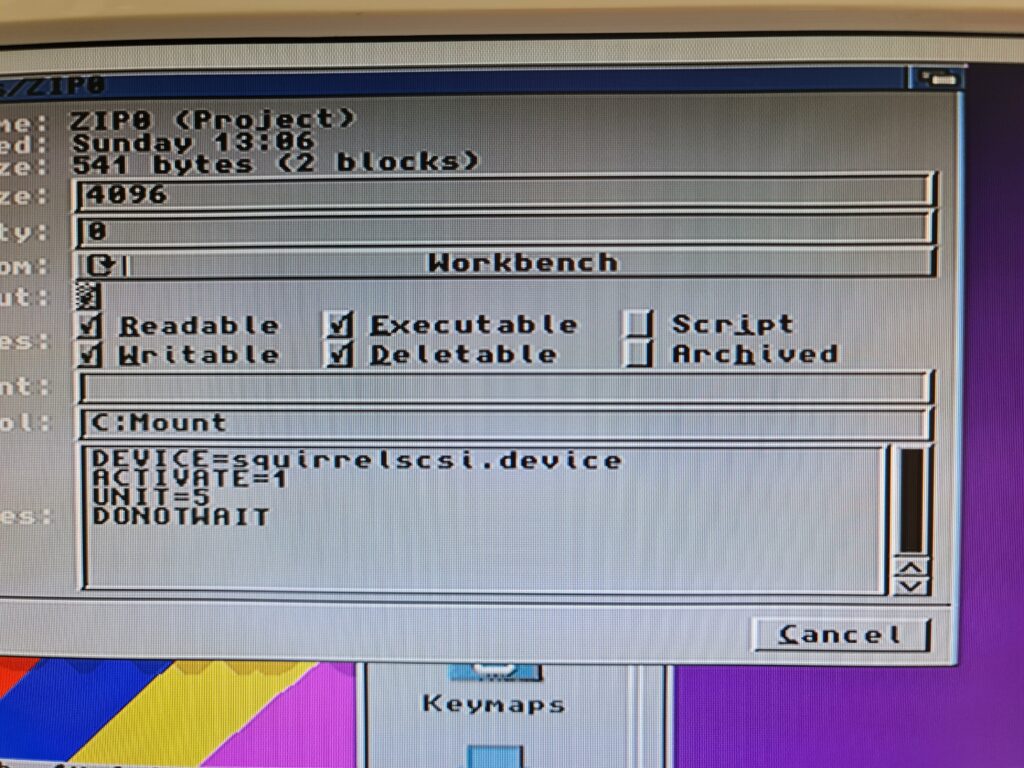
ZIP0 Icon Tooltype entries


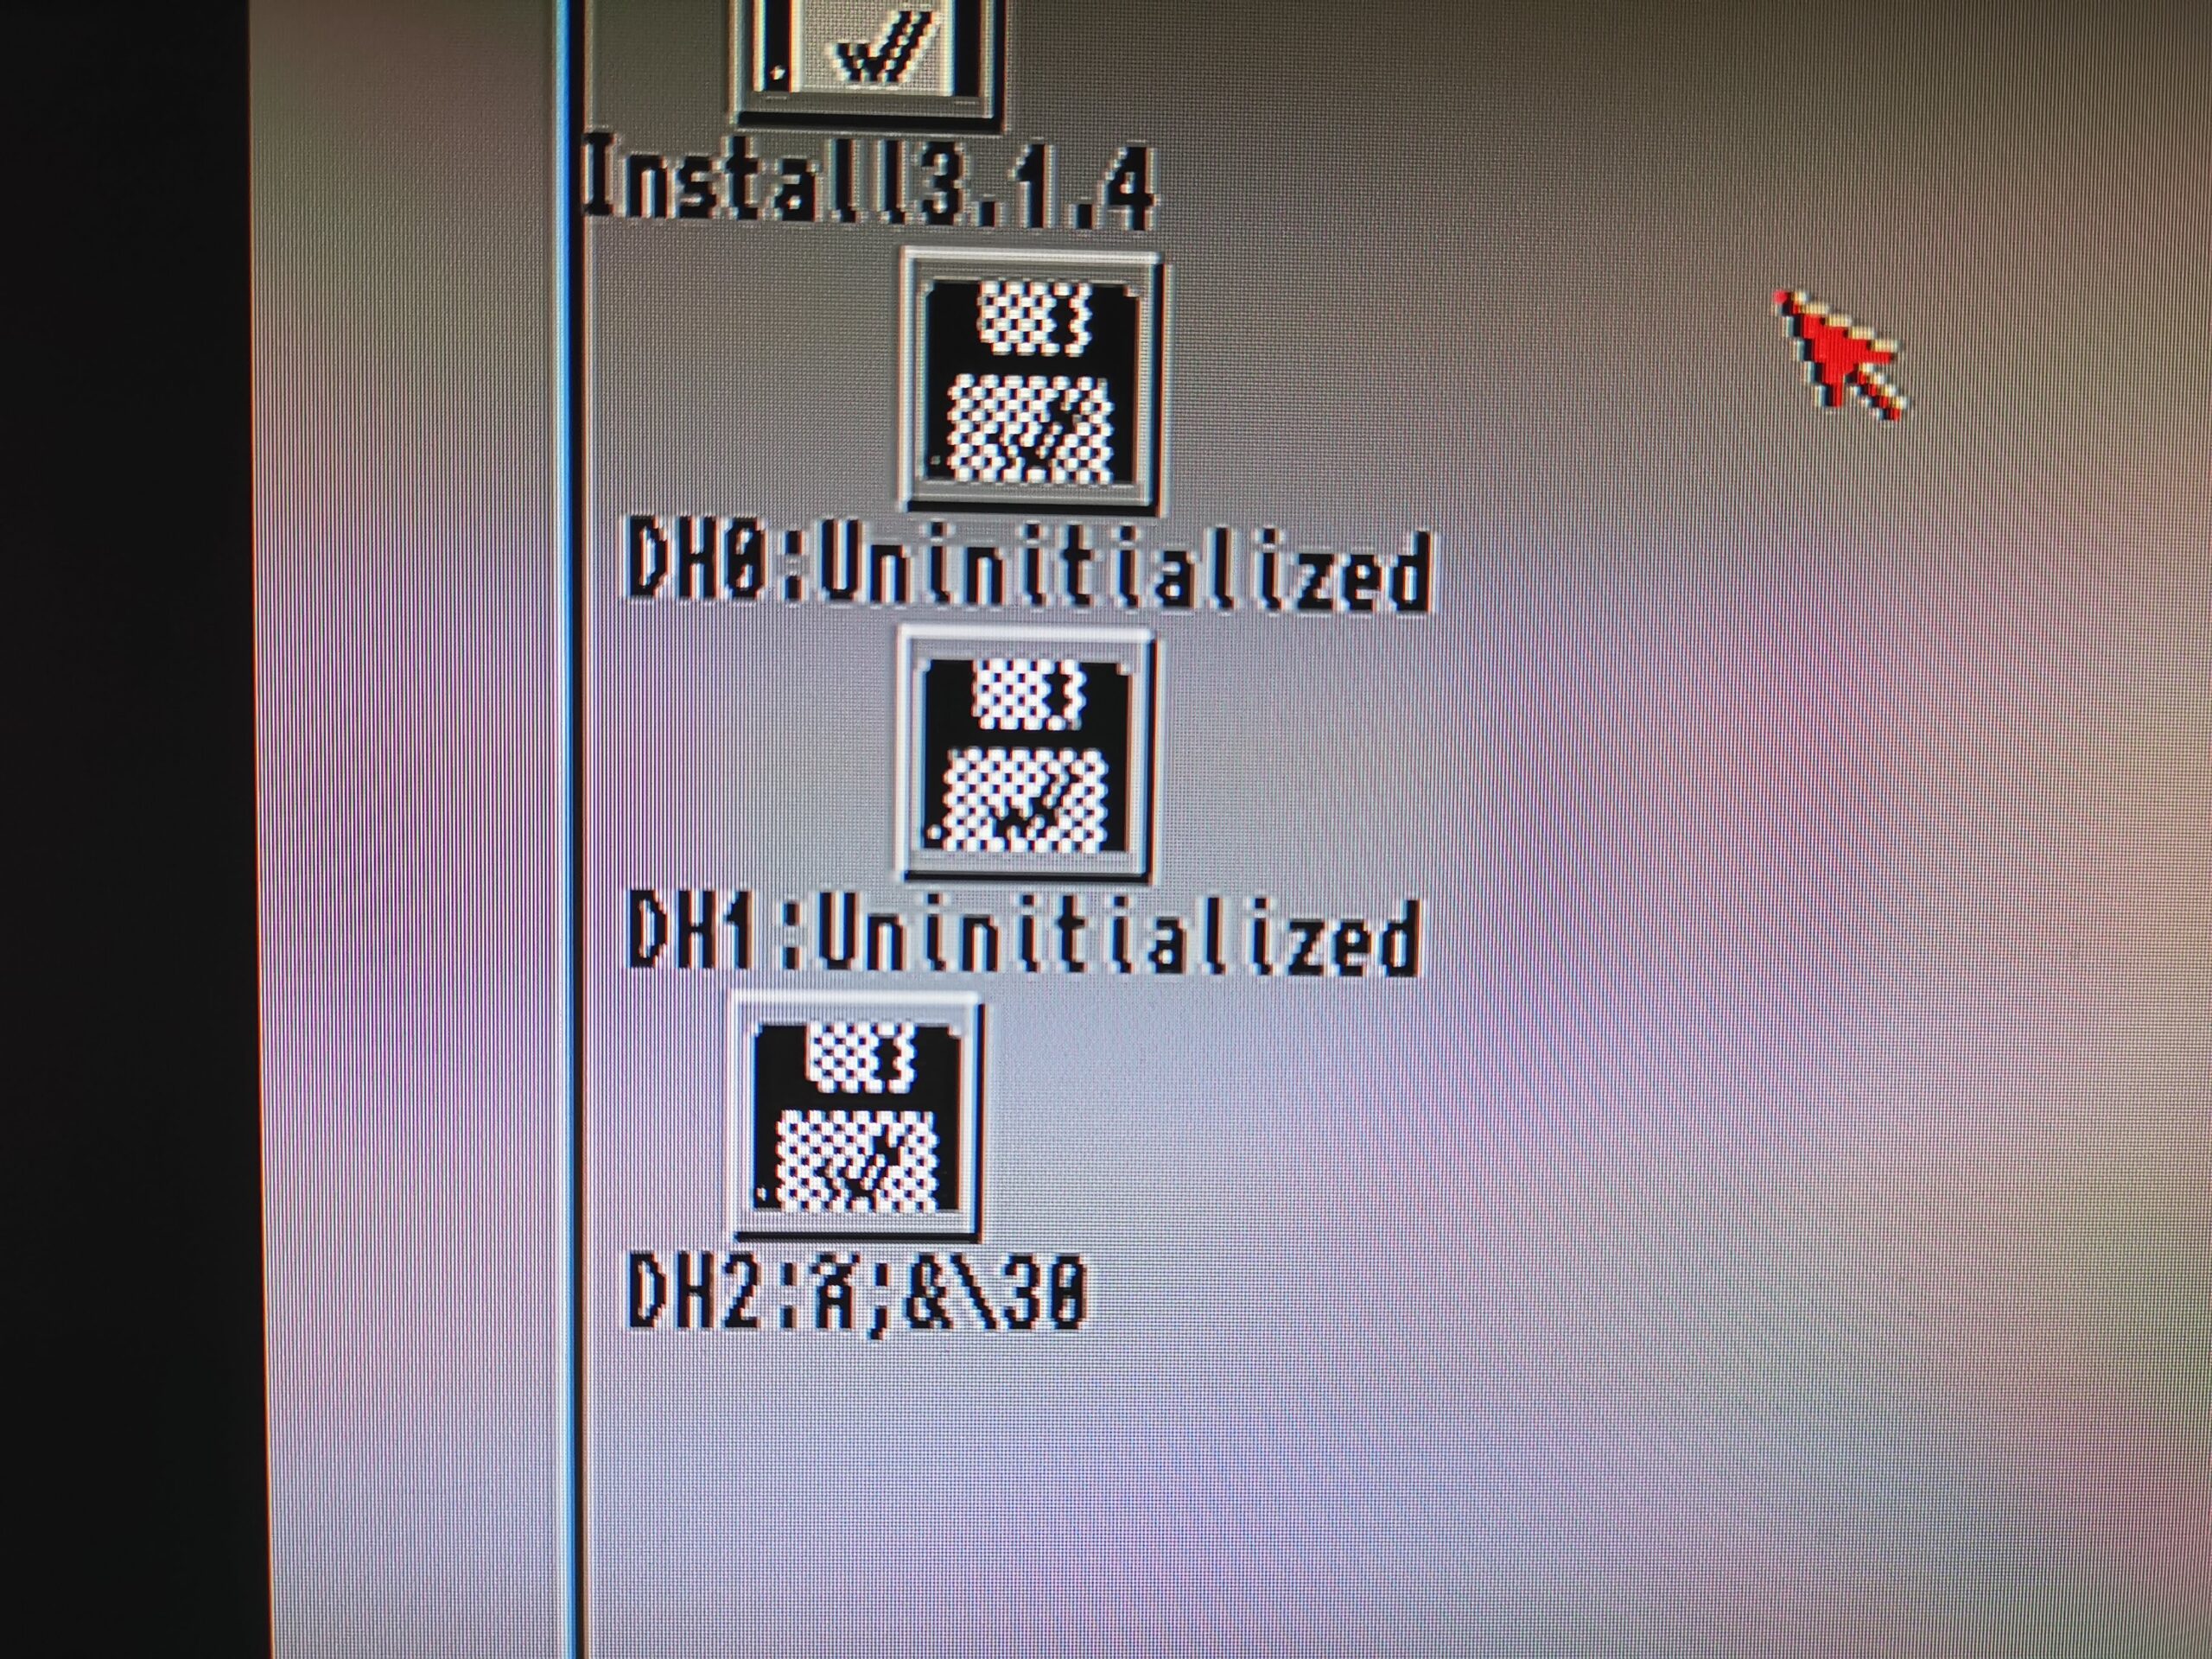
Check what you’ve entered is correct and then click save and reboot your Amiga. Pop a Zip disk in the Zip drive and it should pop up on the desktop looking like the image below. If it doesn’t then you will need to go back through the above and check you’ve got everything right.


Zip Drive Amiga

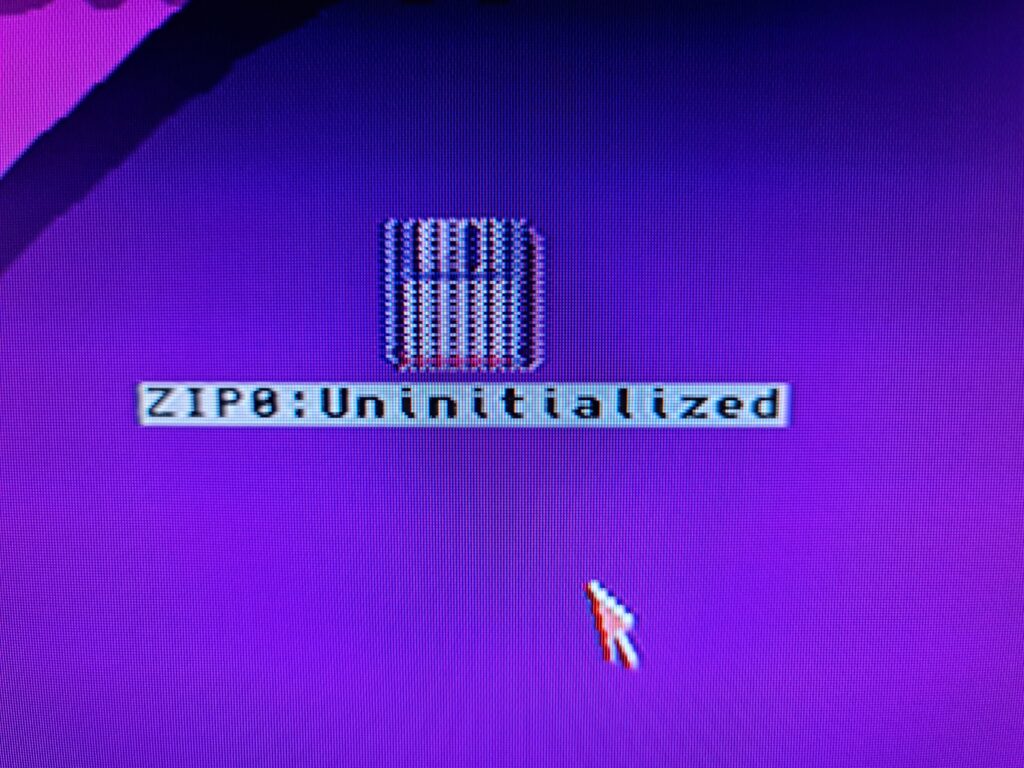
An uninitialized Zip disk.


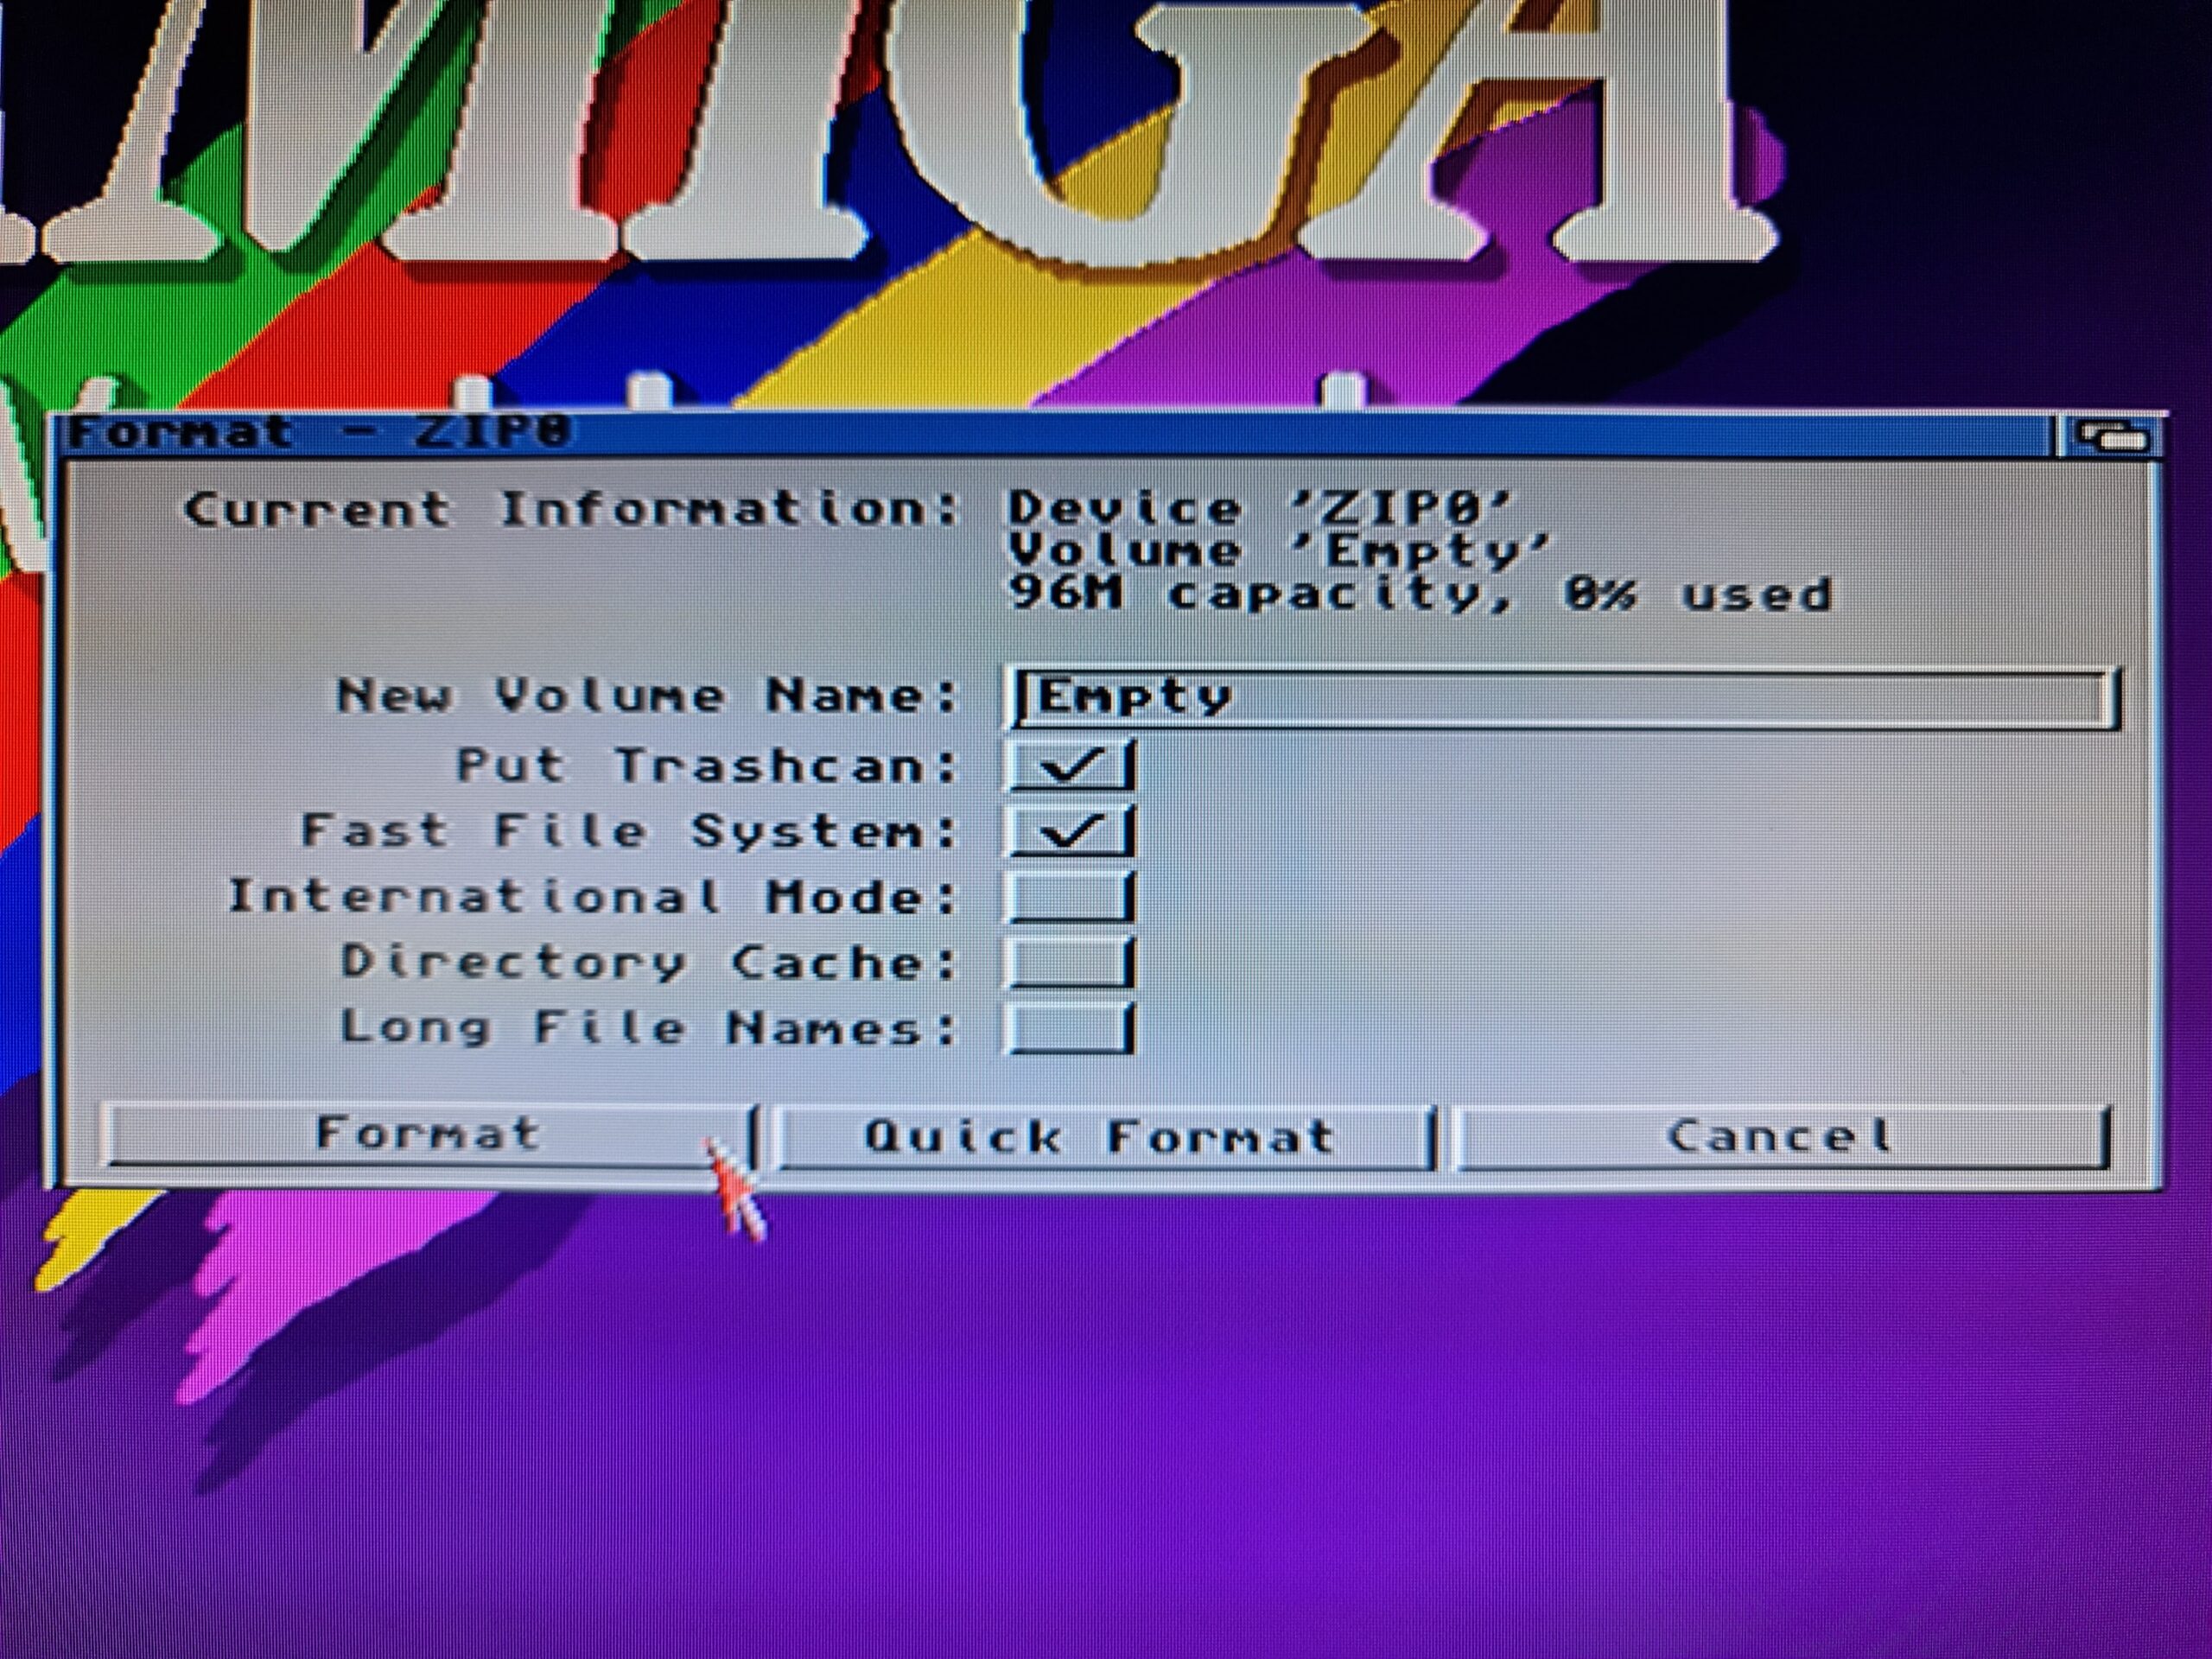
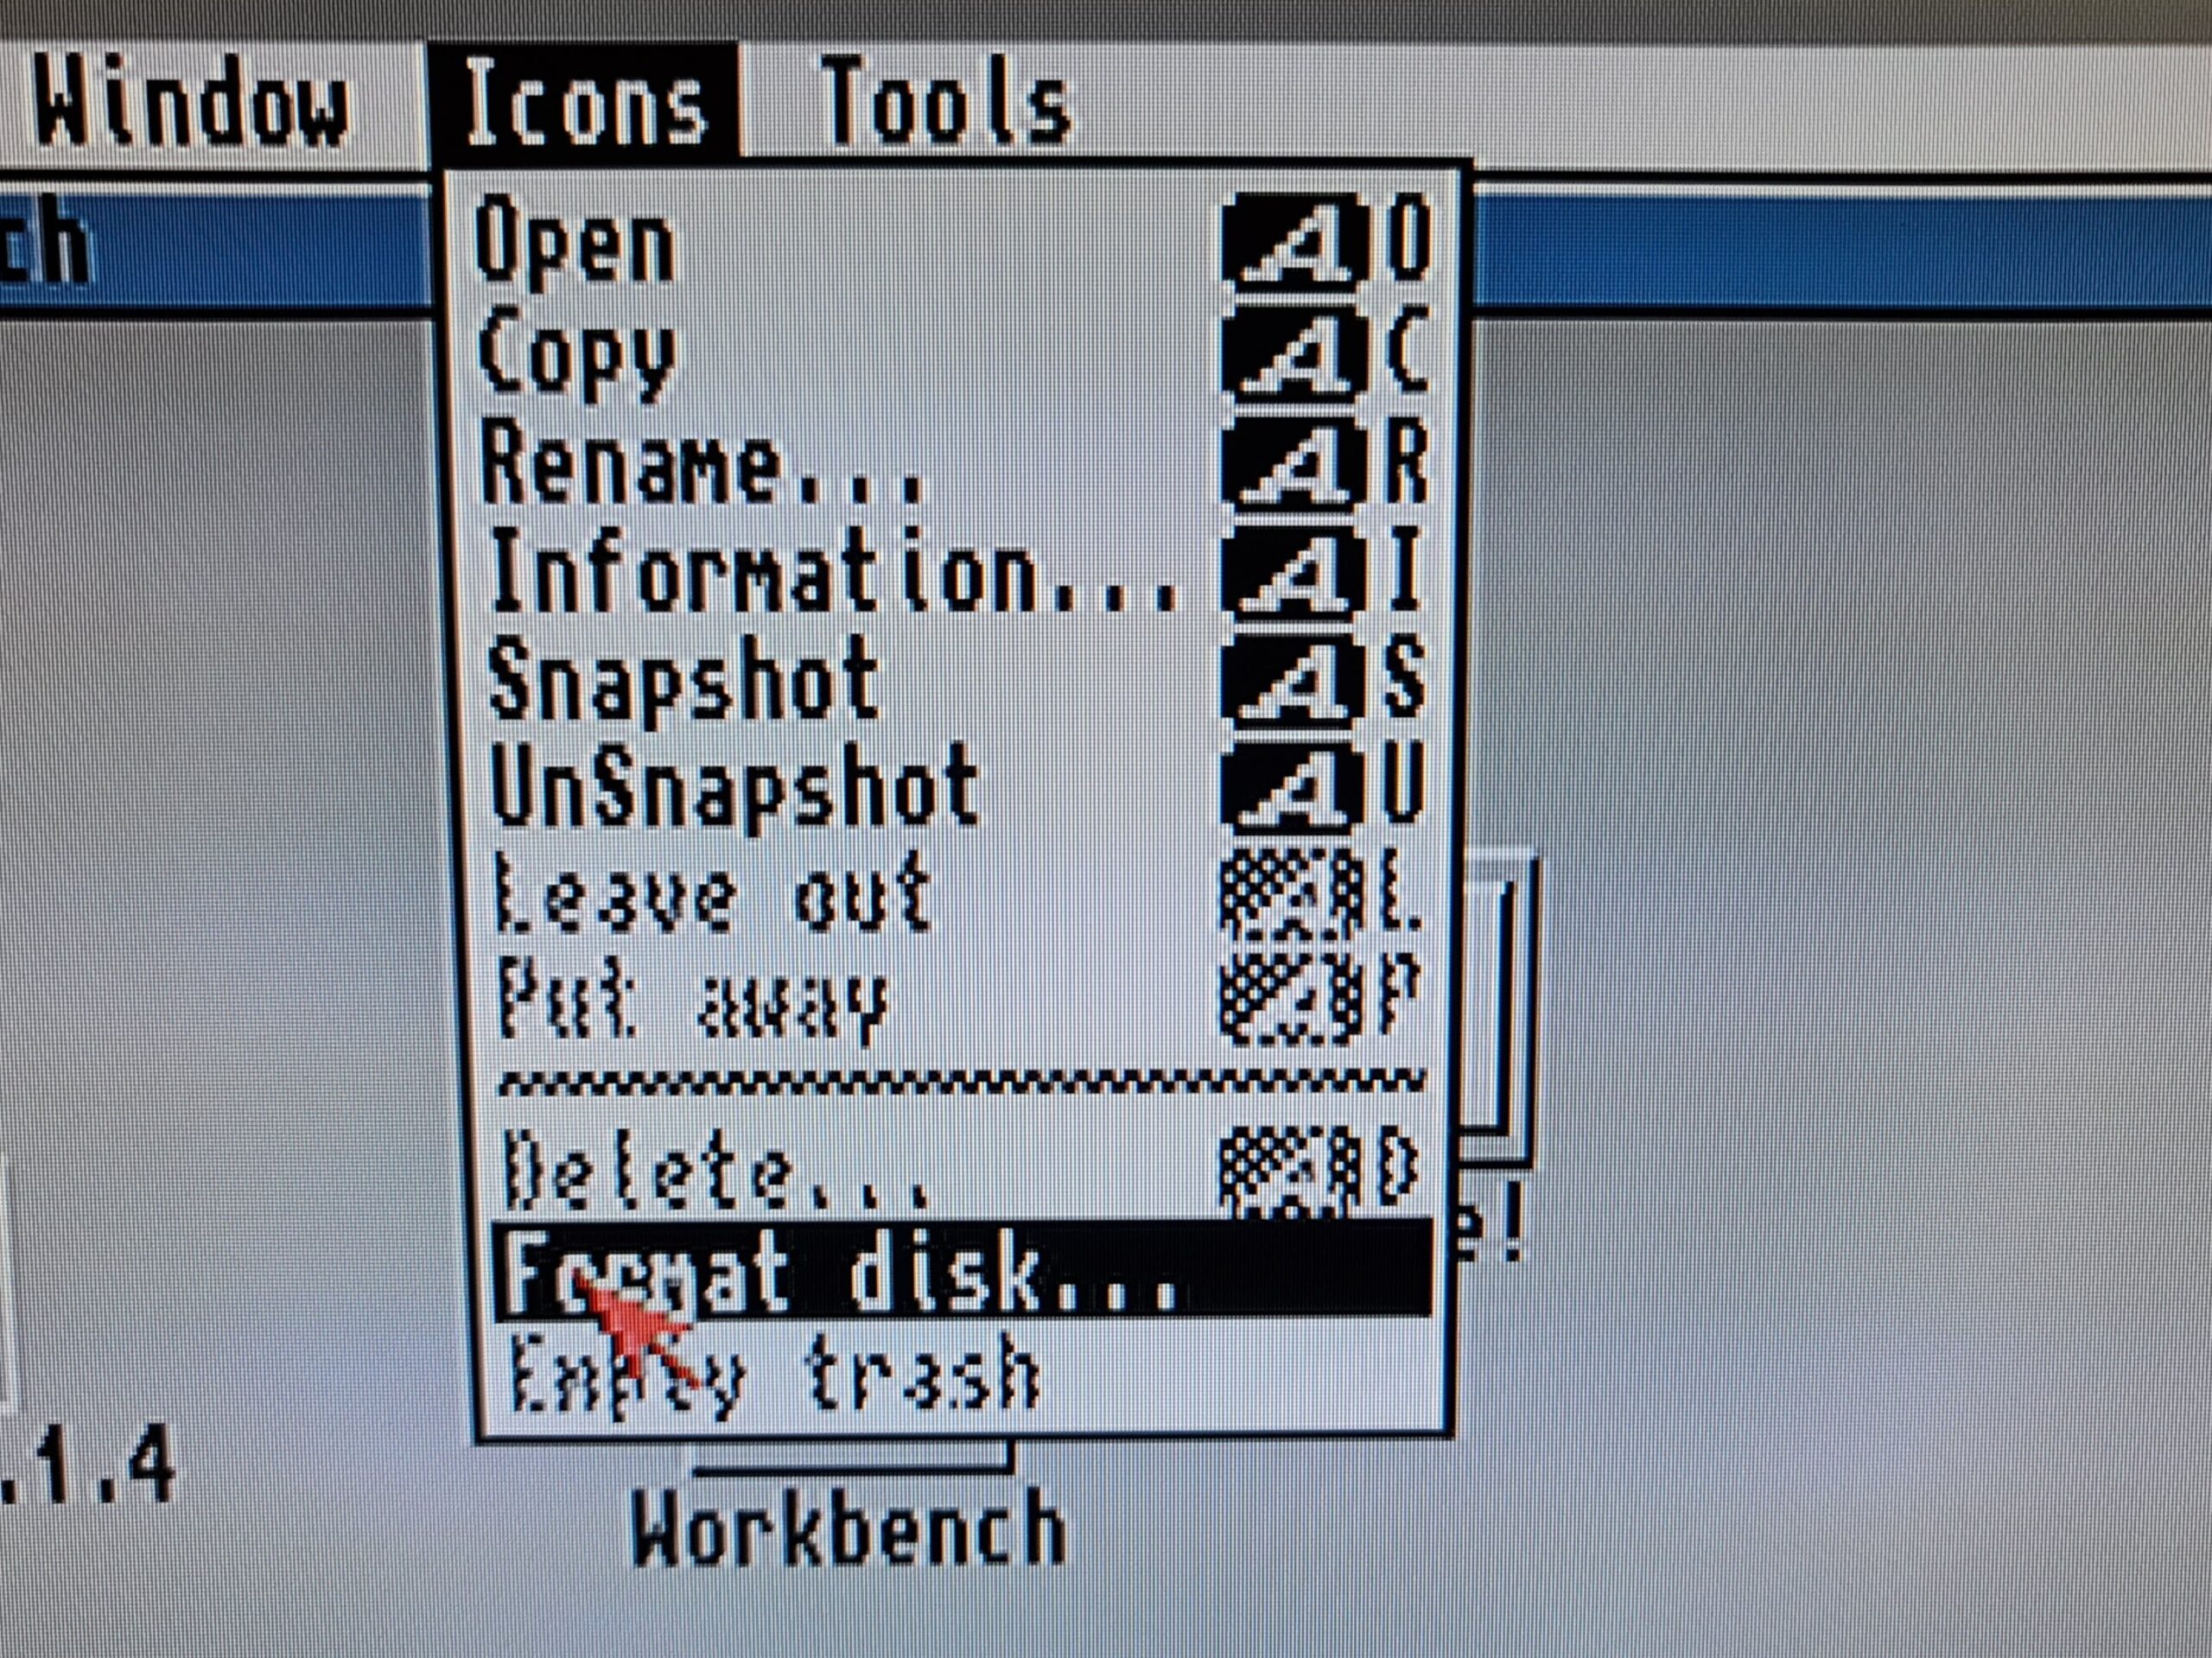
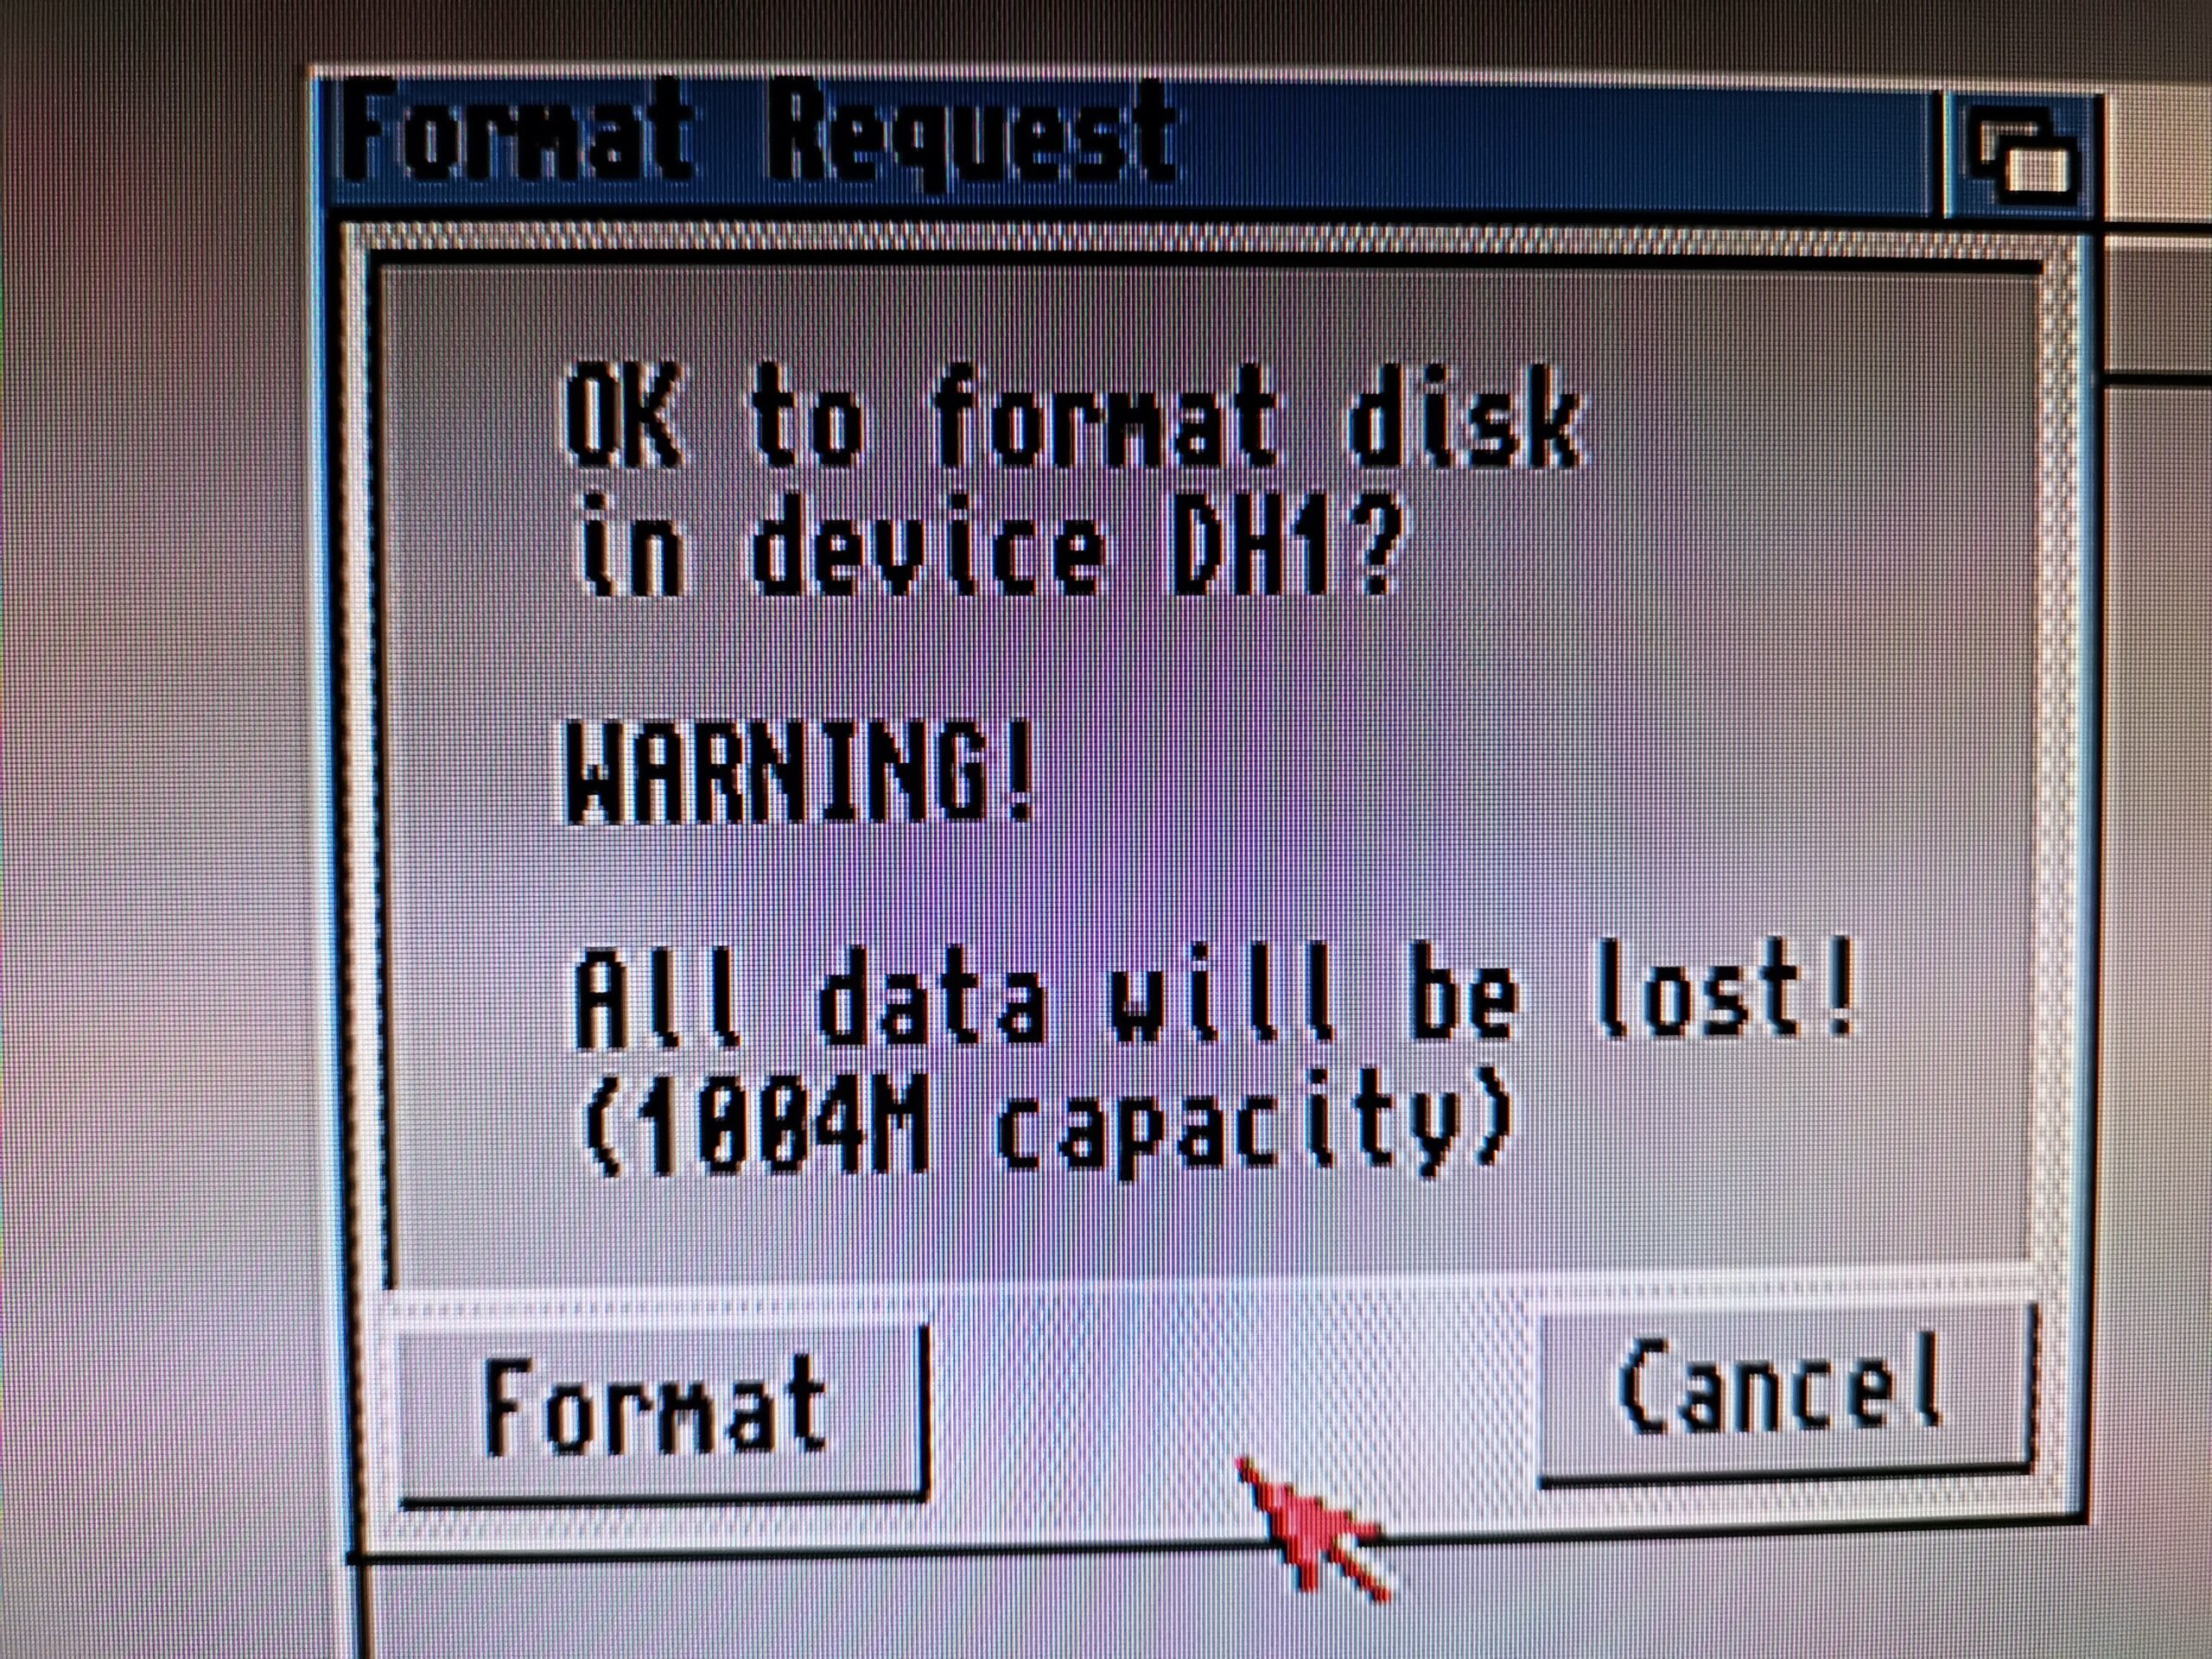
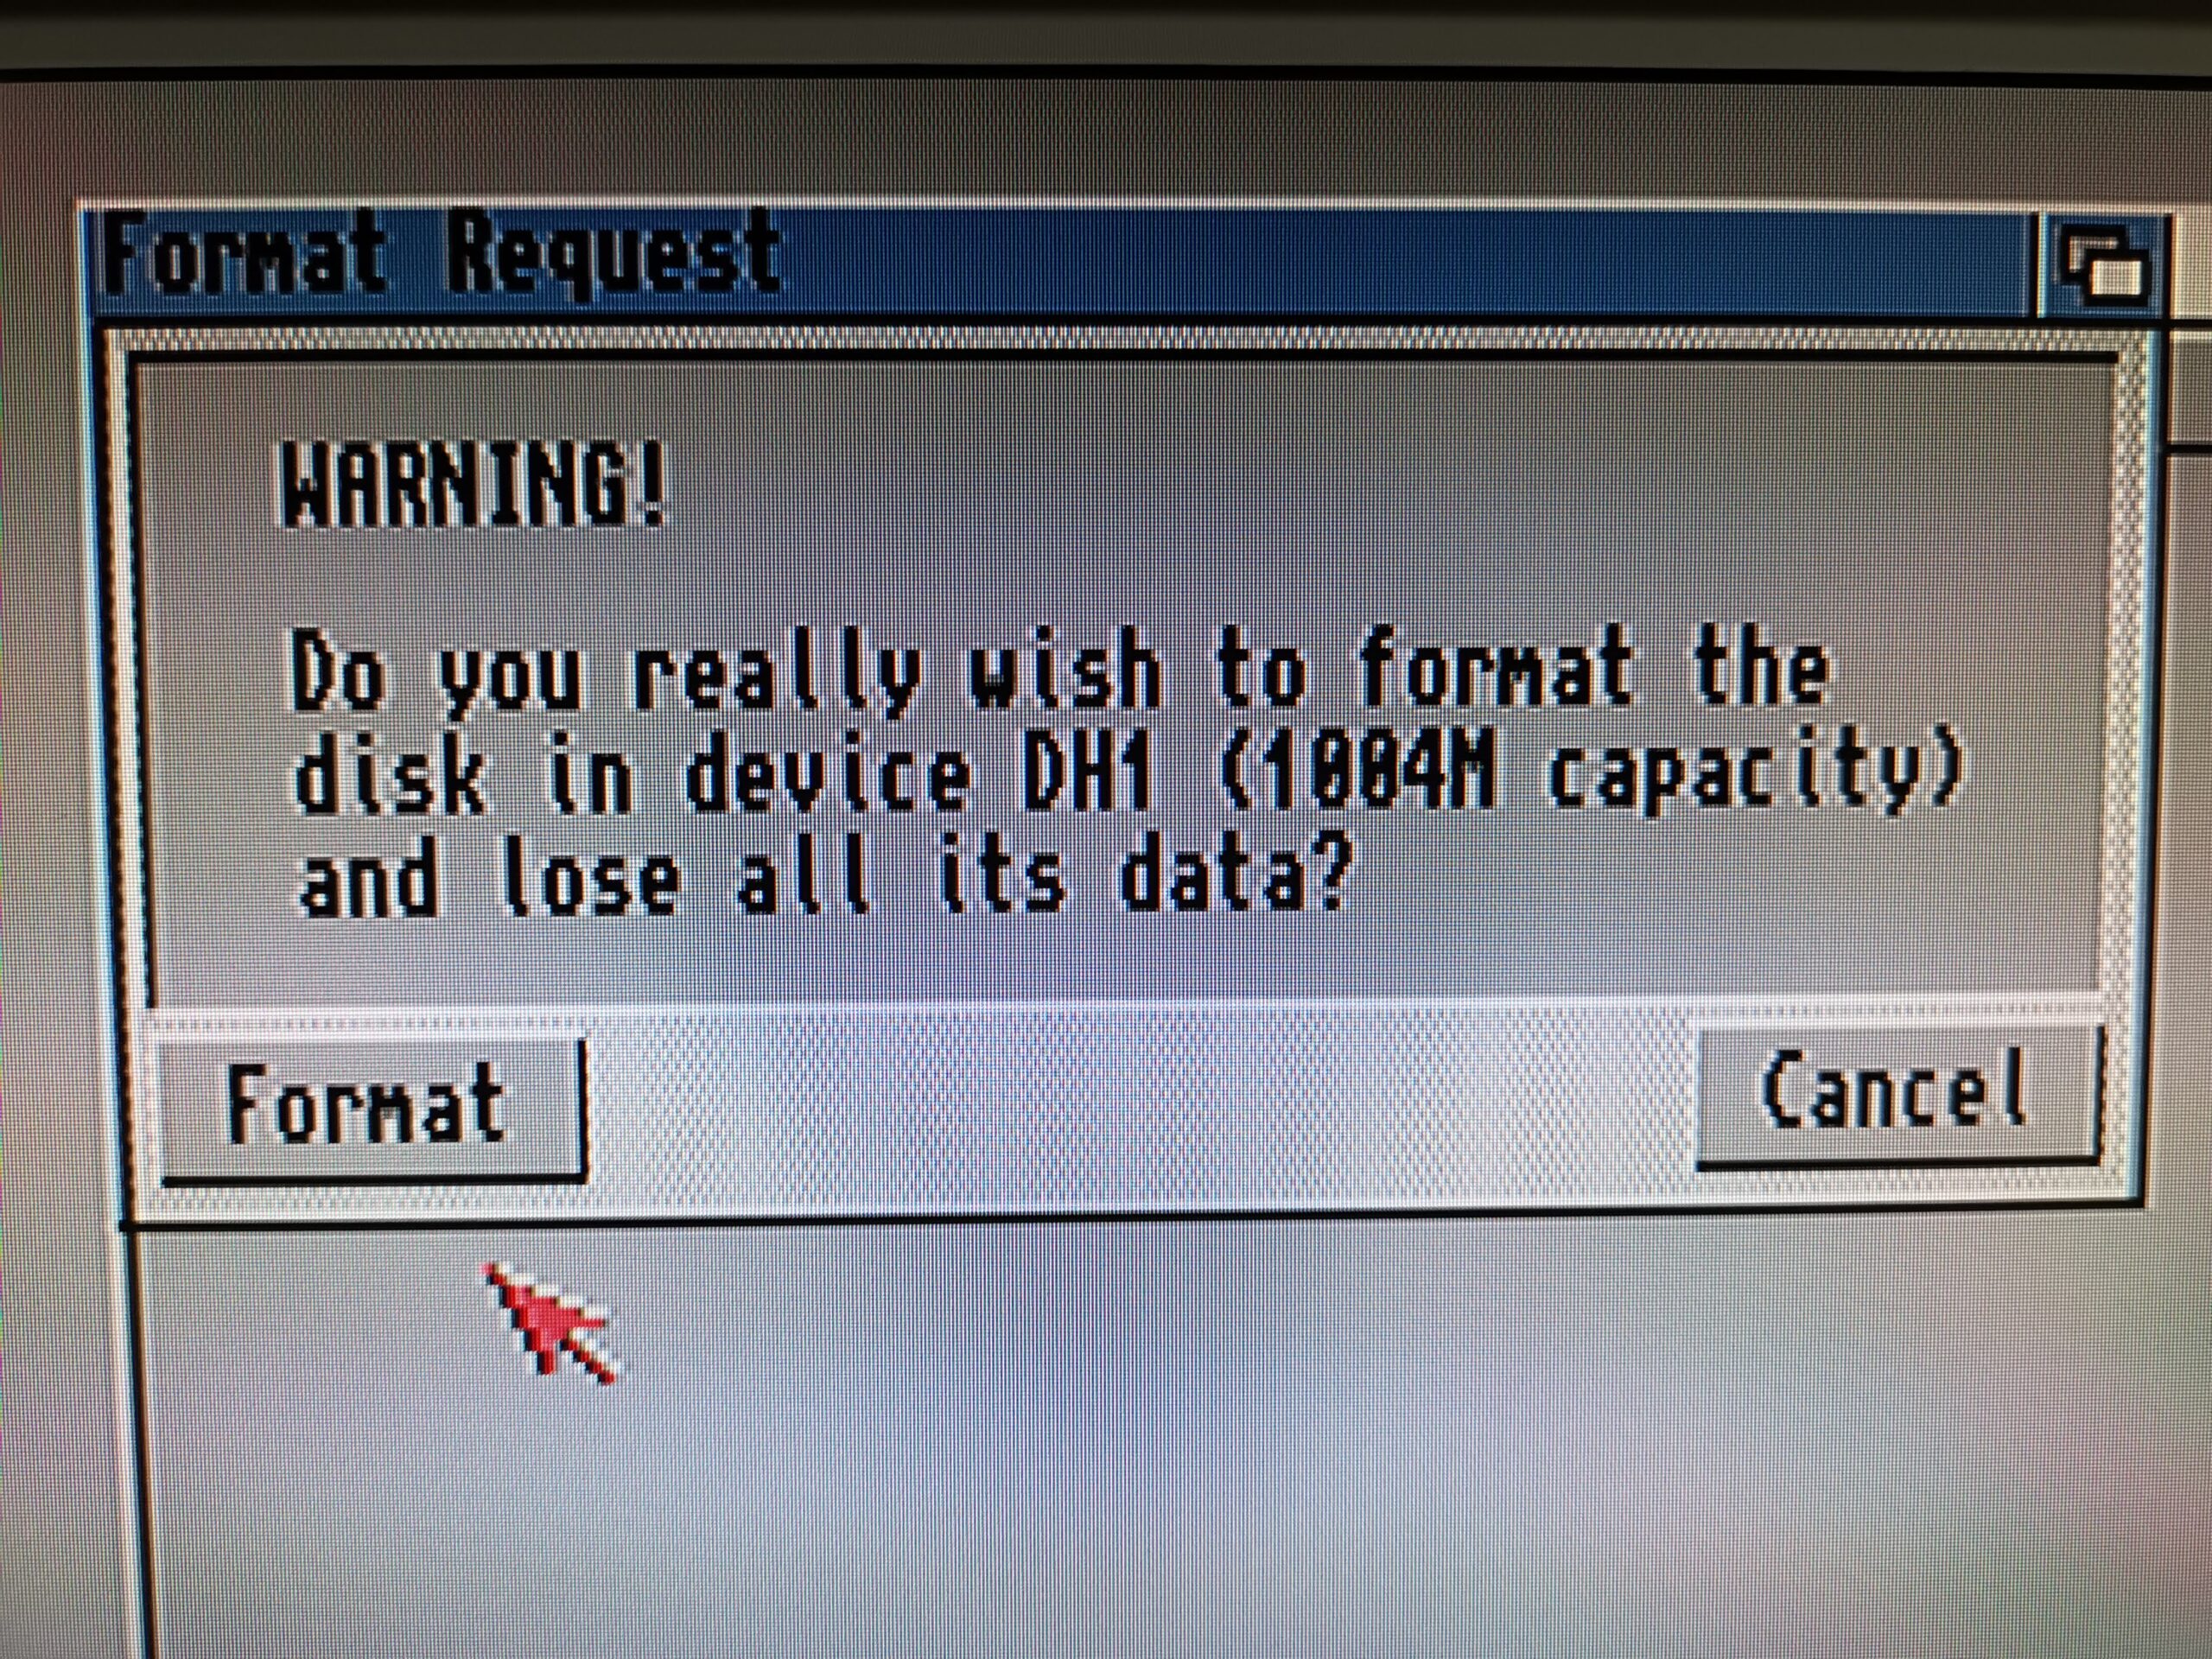
Zip disks come formatted for Macs/PC’s so they will need formatting before they are useable on the Amiga. Just format them as you would any regular floppy disk. Click on it and select ‘Format Disk’ from the Icon menu. Give the disk a name if you like or leave it as ’empty’ (you can always change it later). The rest of the settings can be left as they are. I strongly recommend you do a full format as these disks are old now – better to discover any issues with them before you start to use them rather than later on when it may be too late! Better yet use IOTools – more about this later.


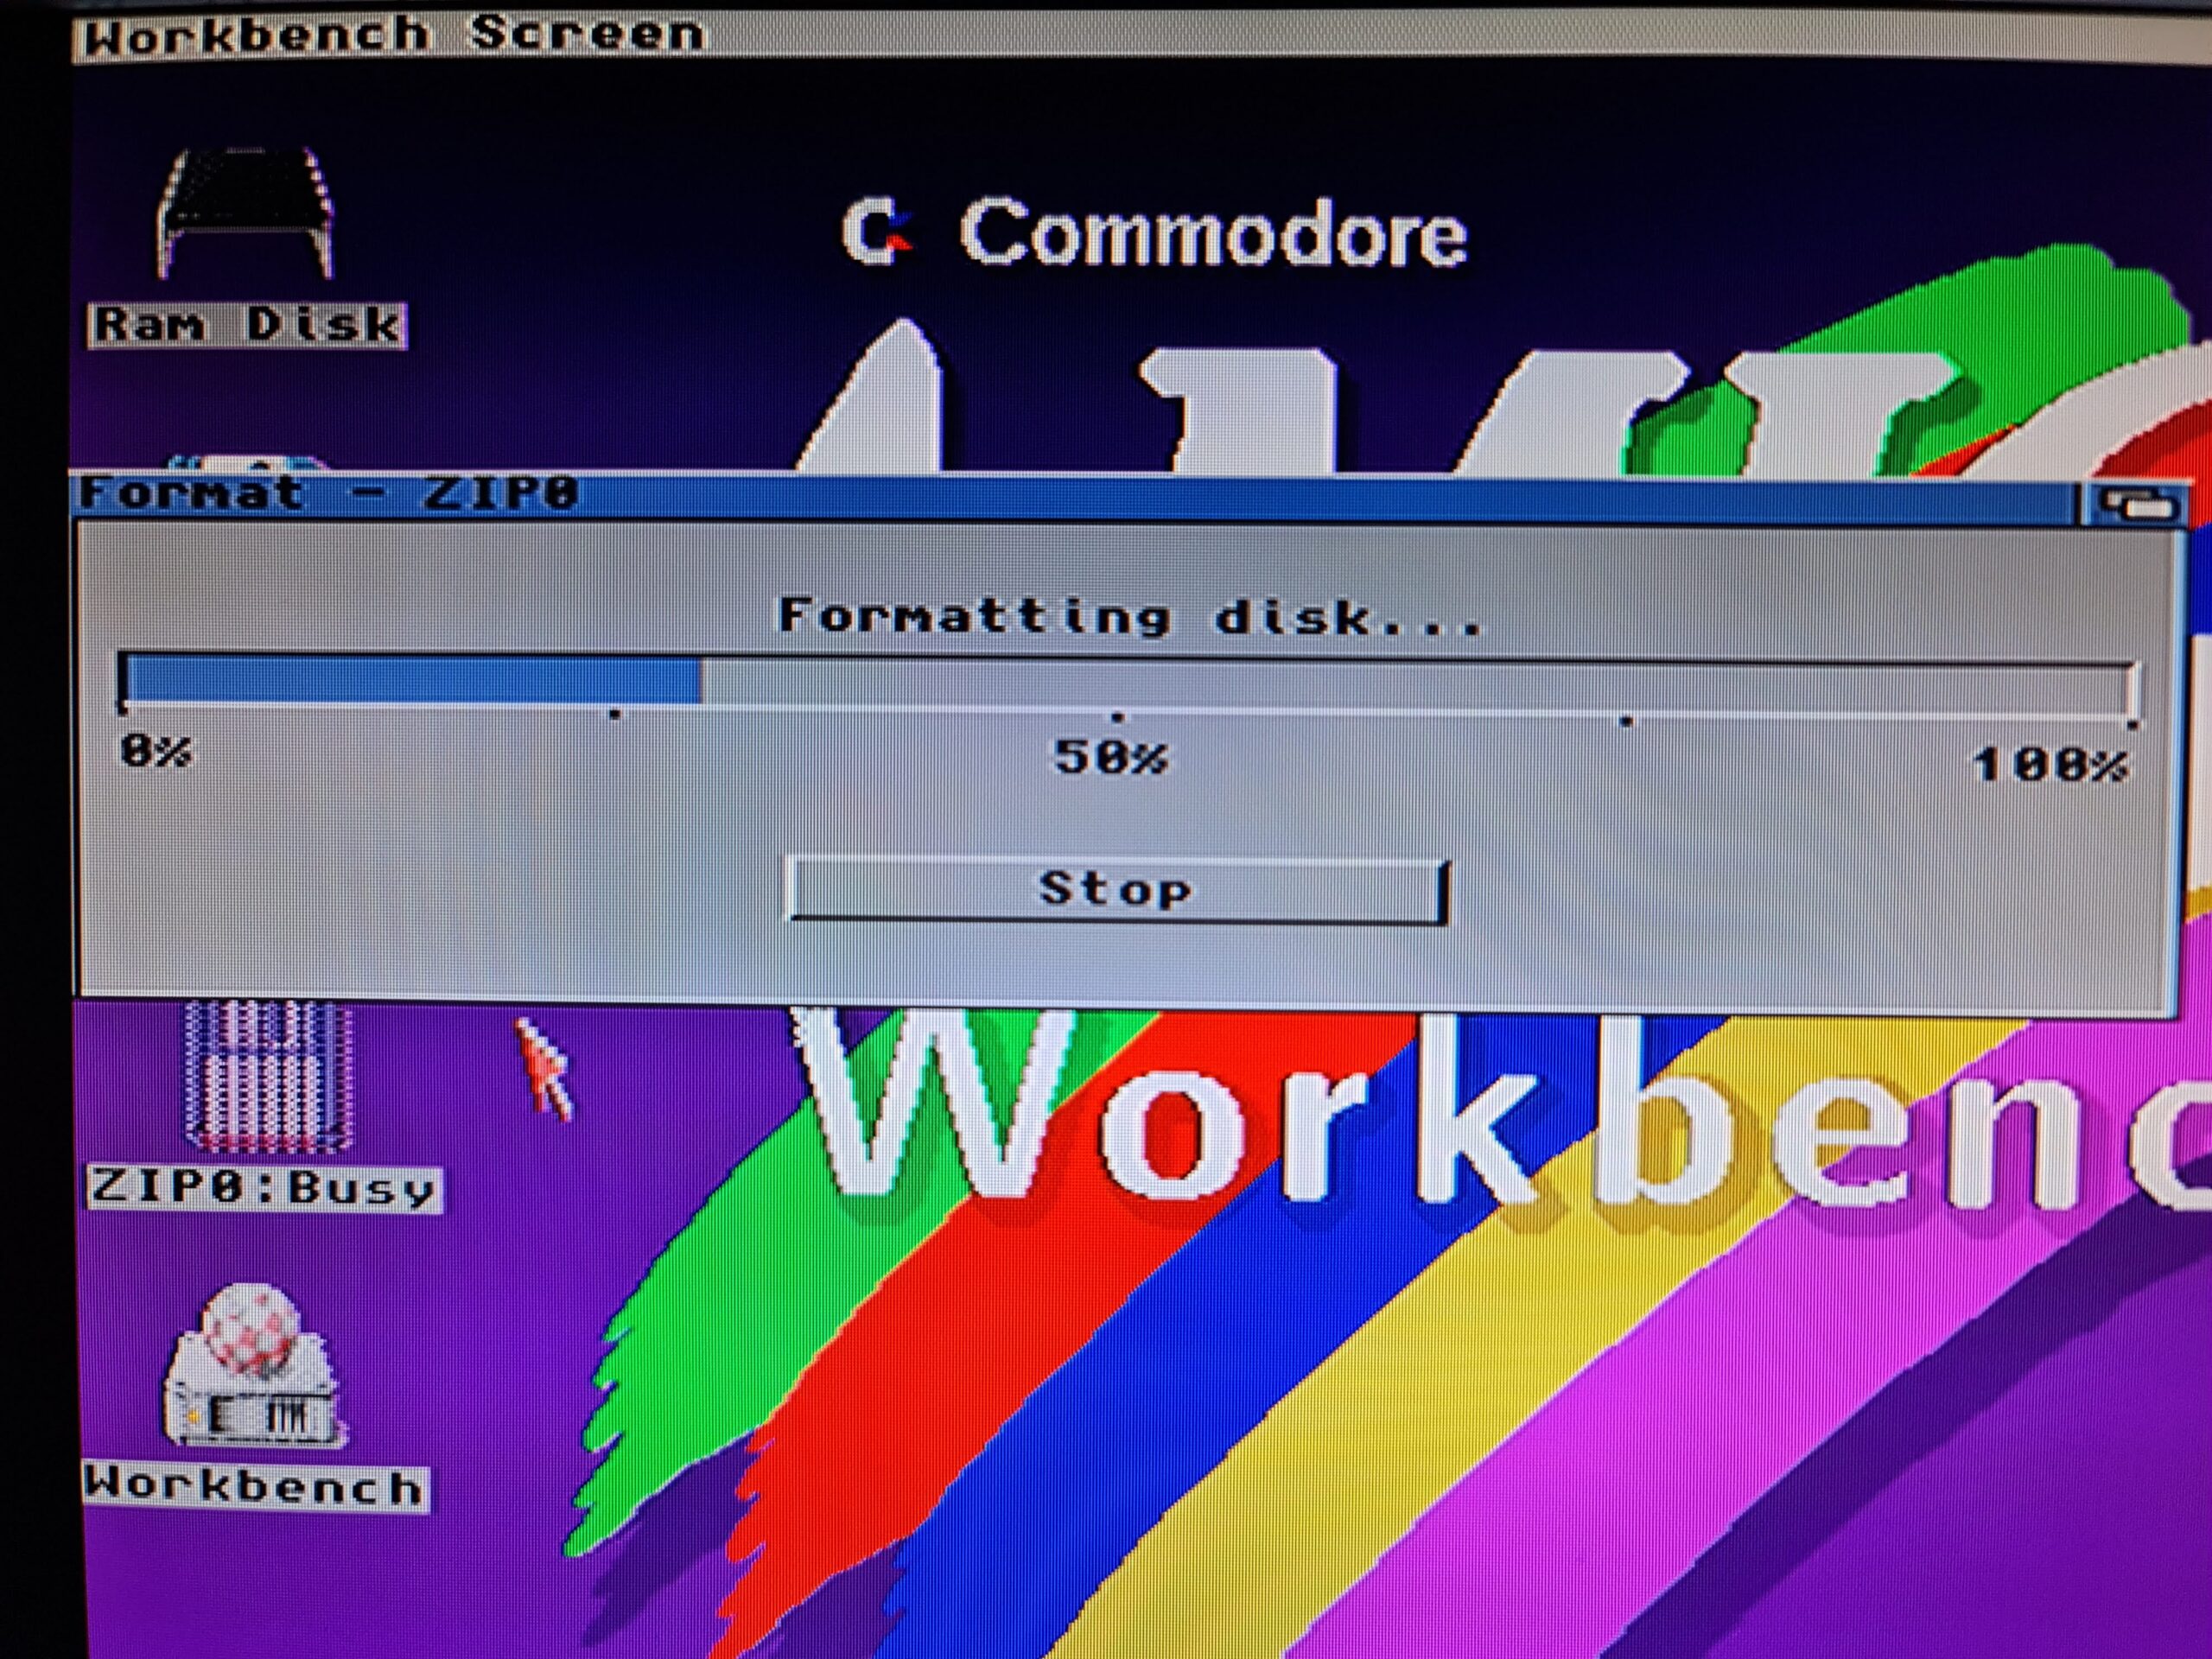
The Workbench Format Disk window for a Zip disk.


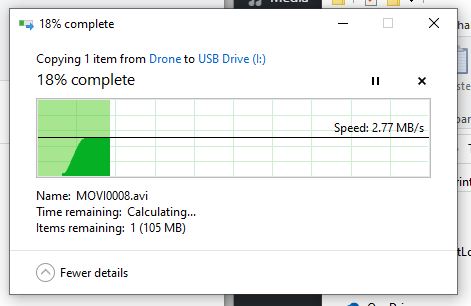
It takes around 5 minutes to do a full format of a Zip disk so go and have a cup of tea while it finishes.


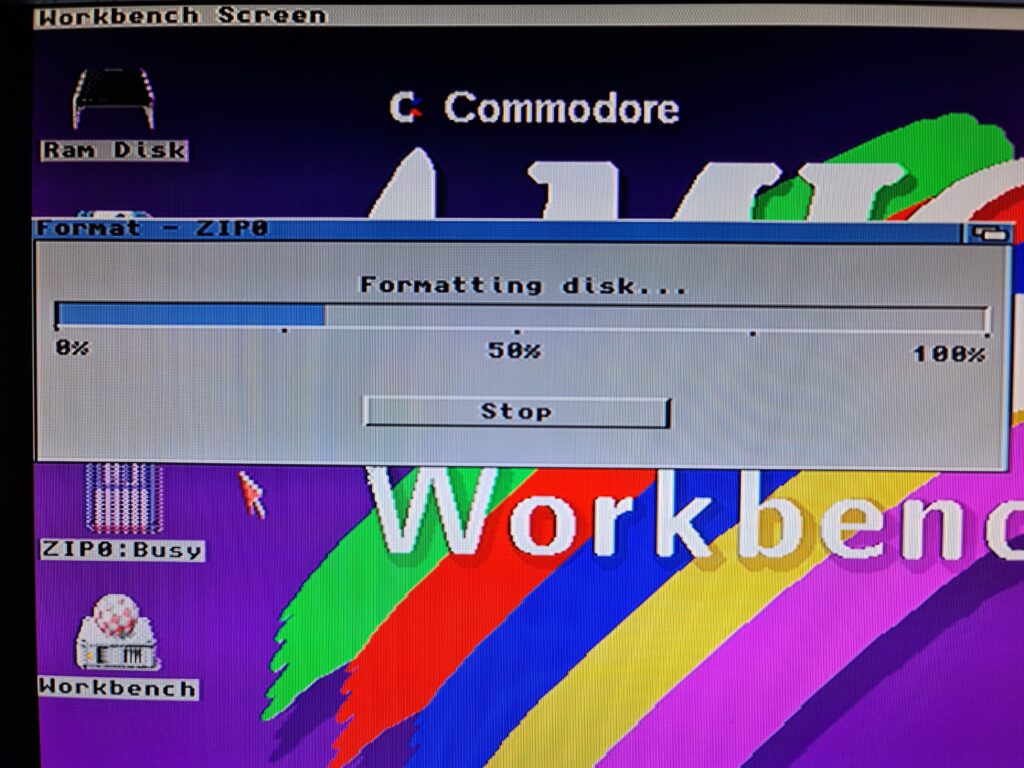
Formatting progress indicator.


Providing there are no errors you should be presented with a nice formatted disk icon.


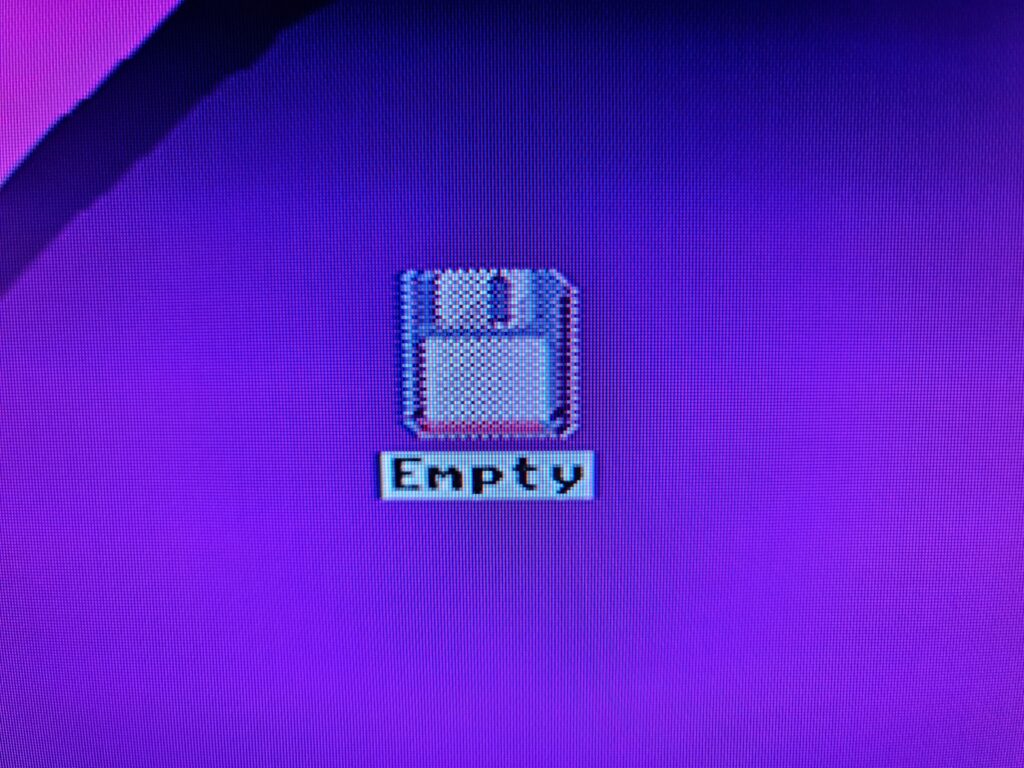
Formatted Zip disk icon.


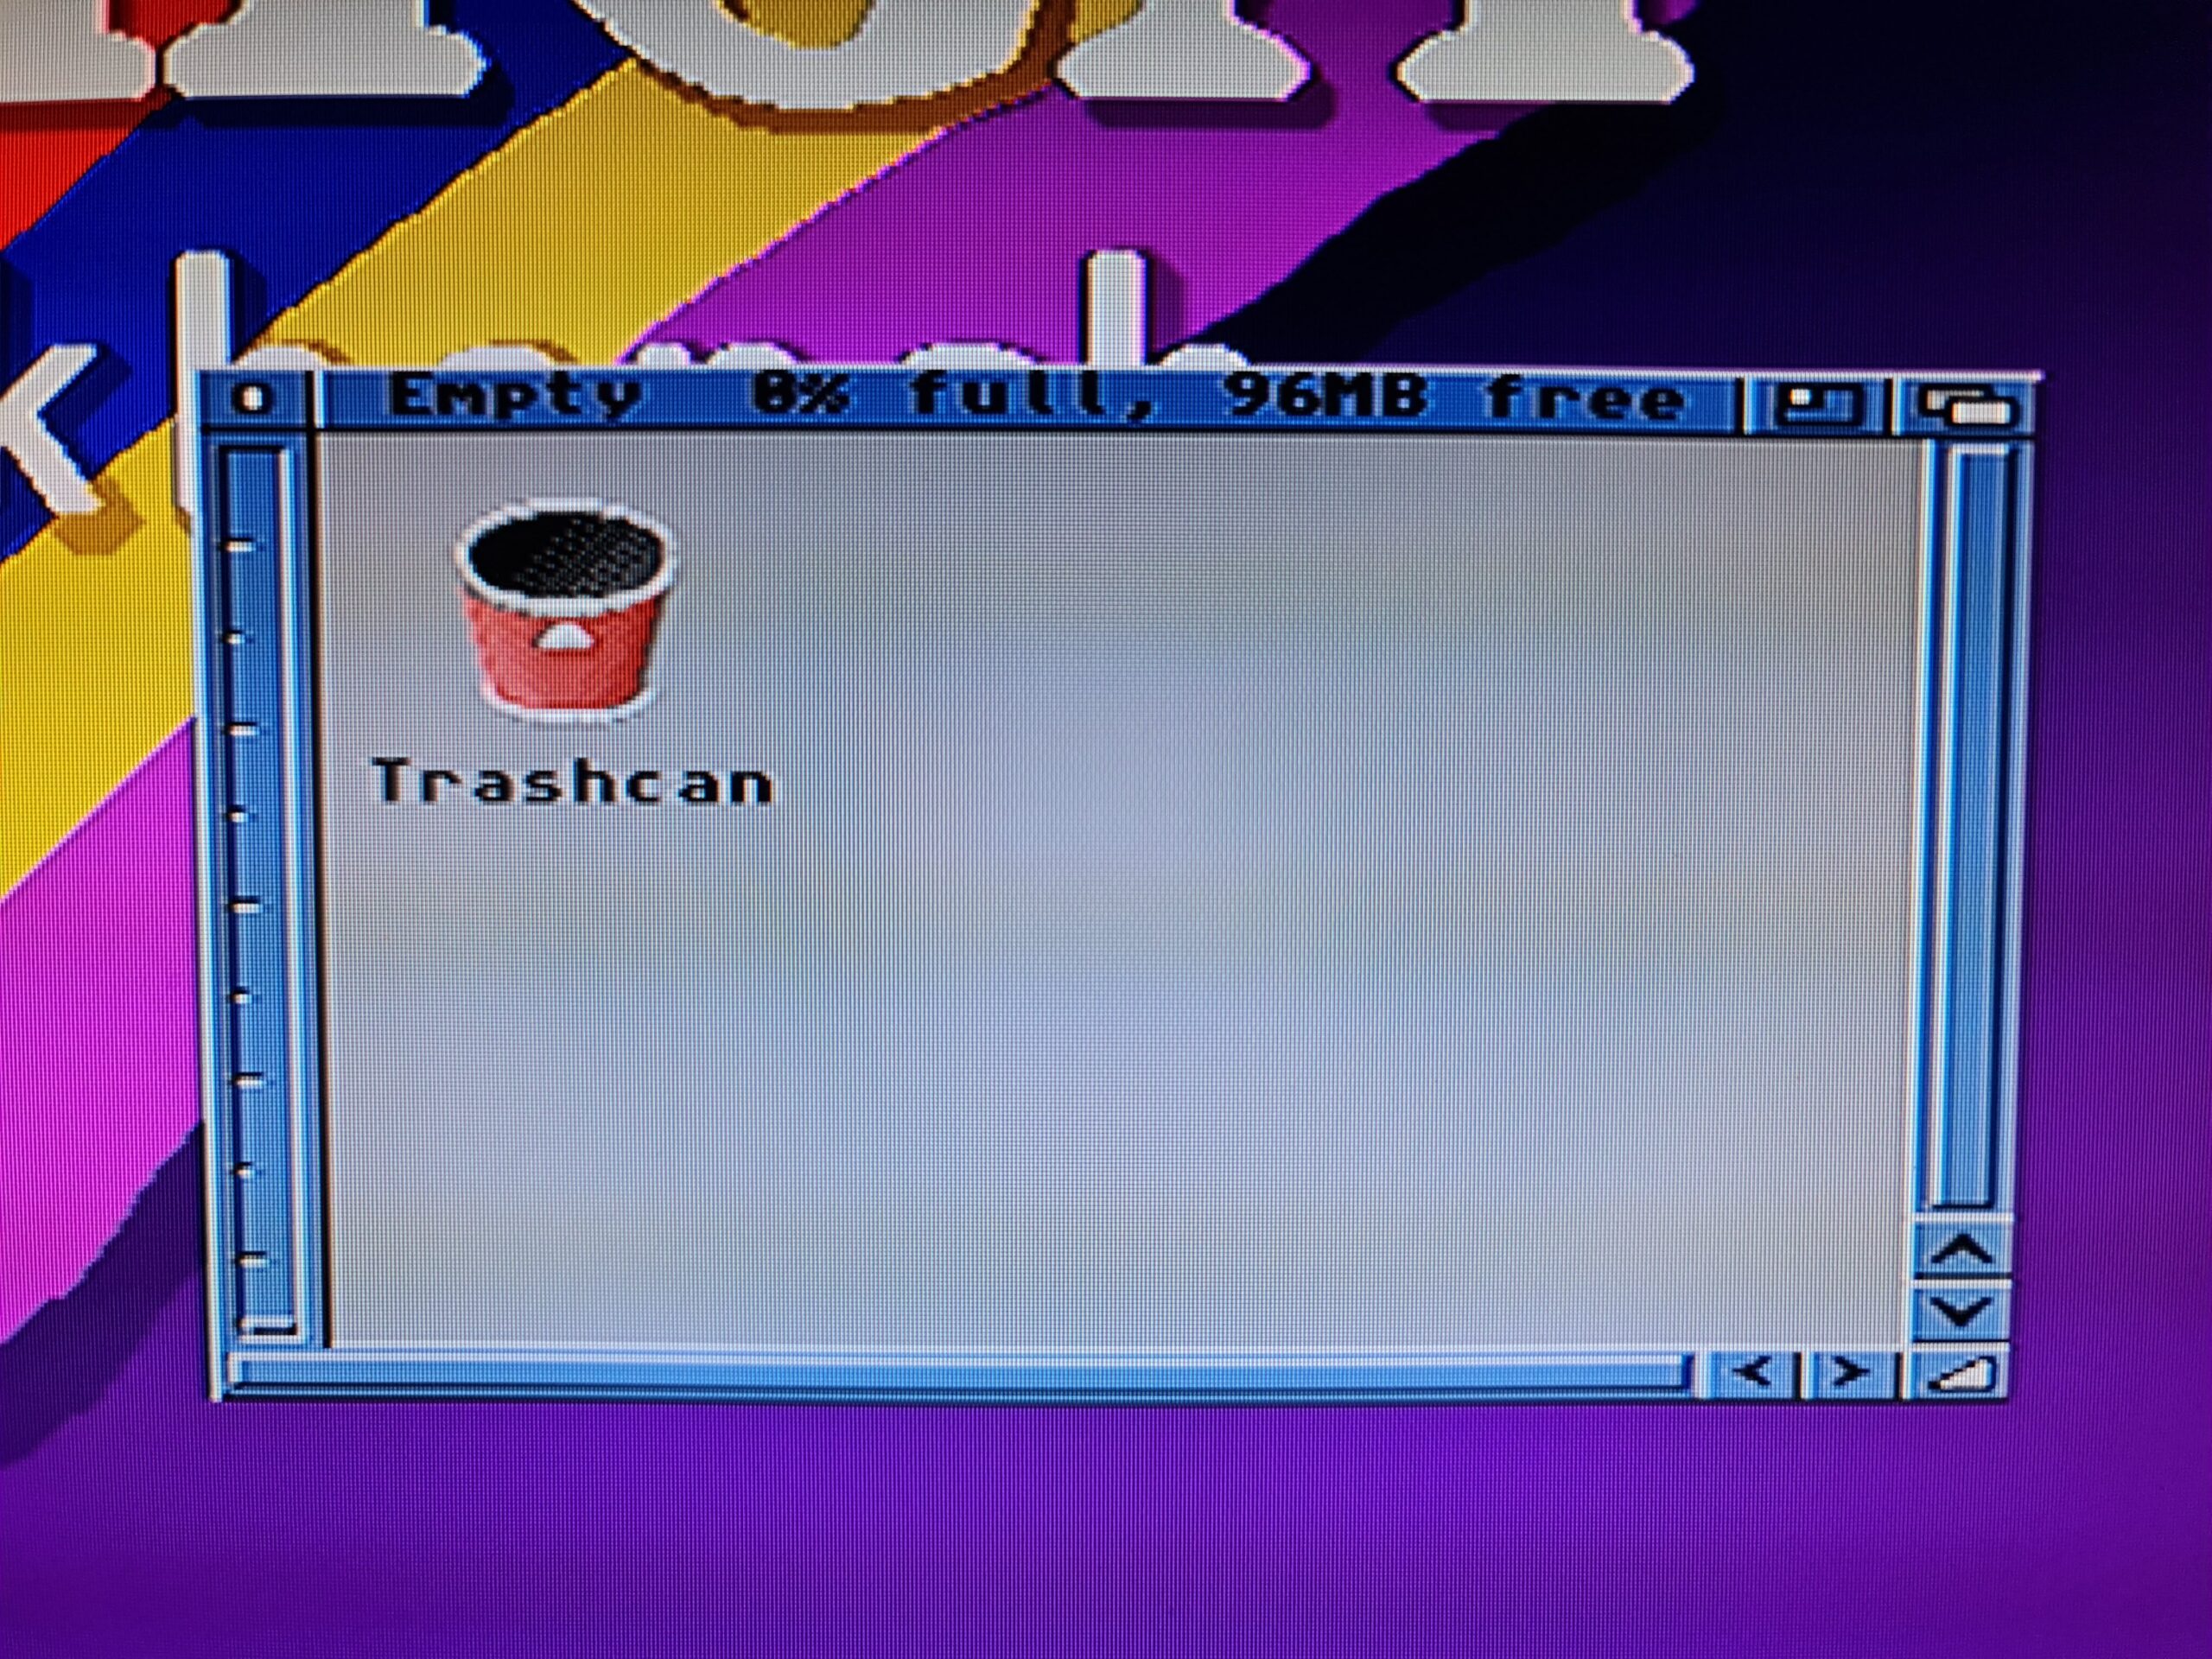
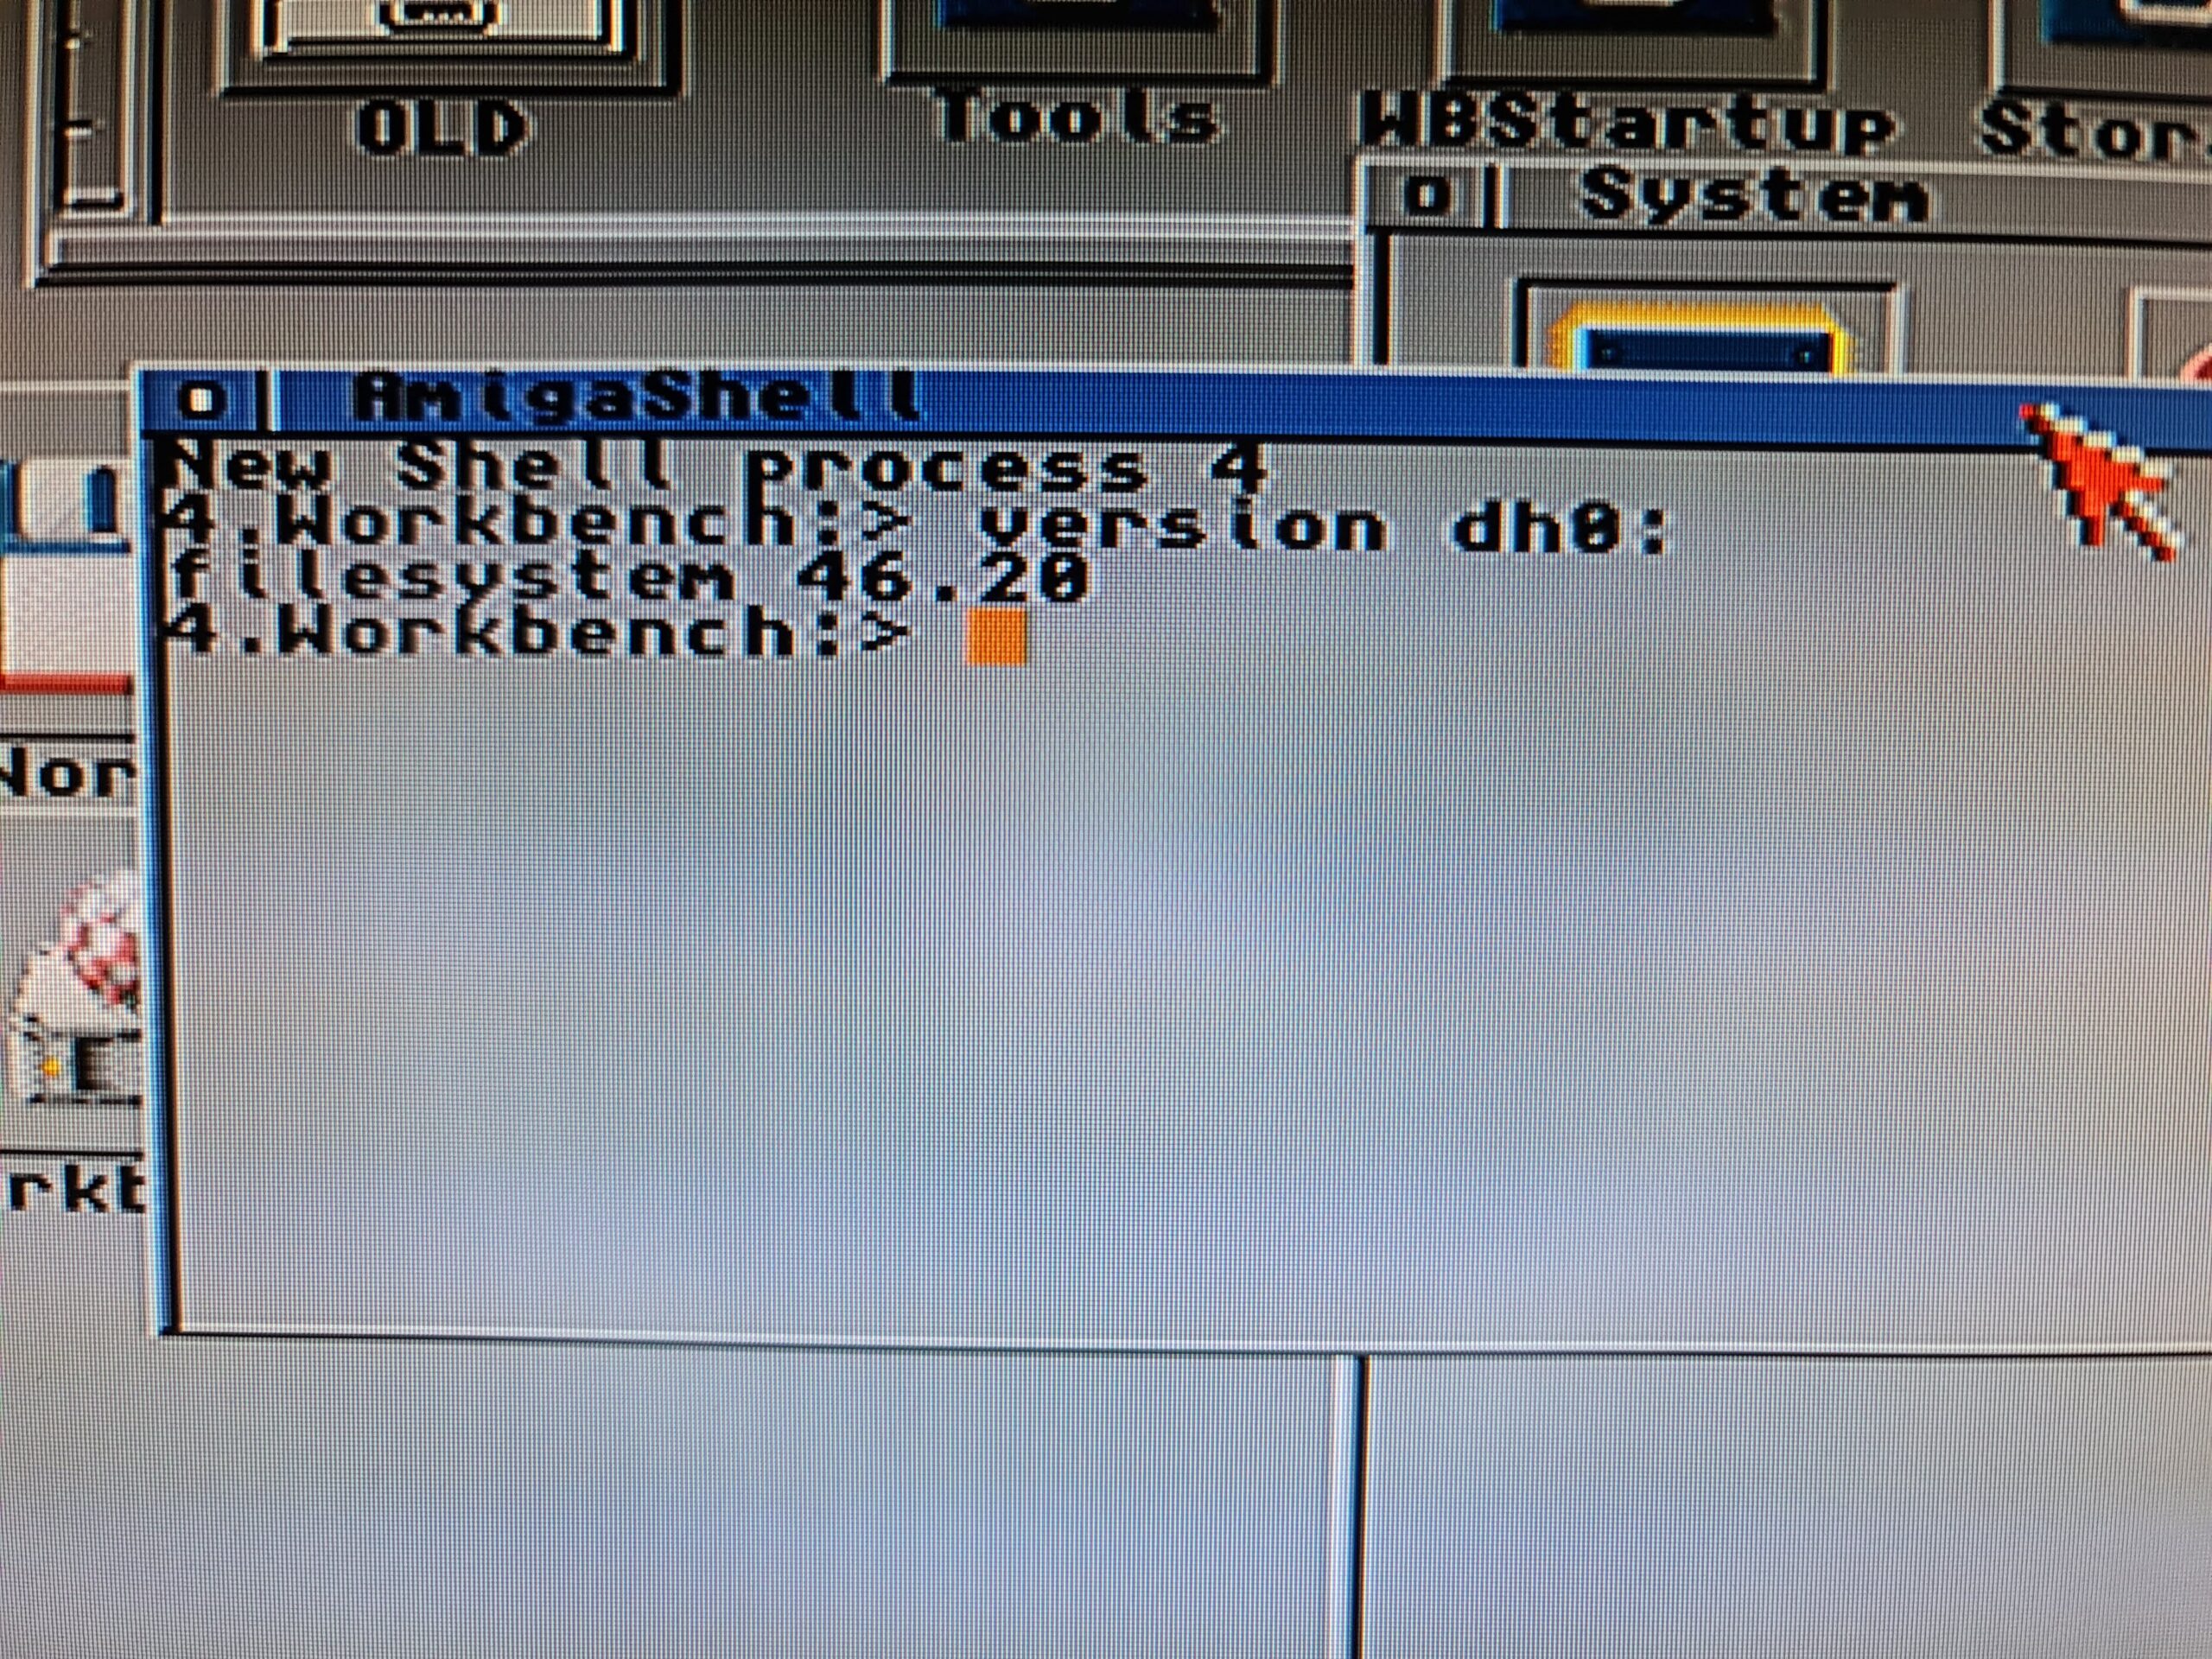
It may look like an ordinary floppy disk, but on closer inspection you can see that this disk has nearly 100MB of space available.


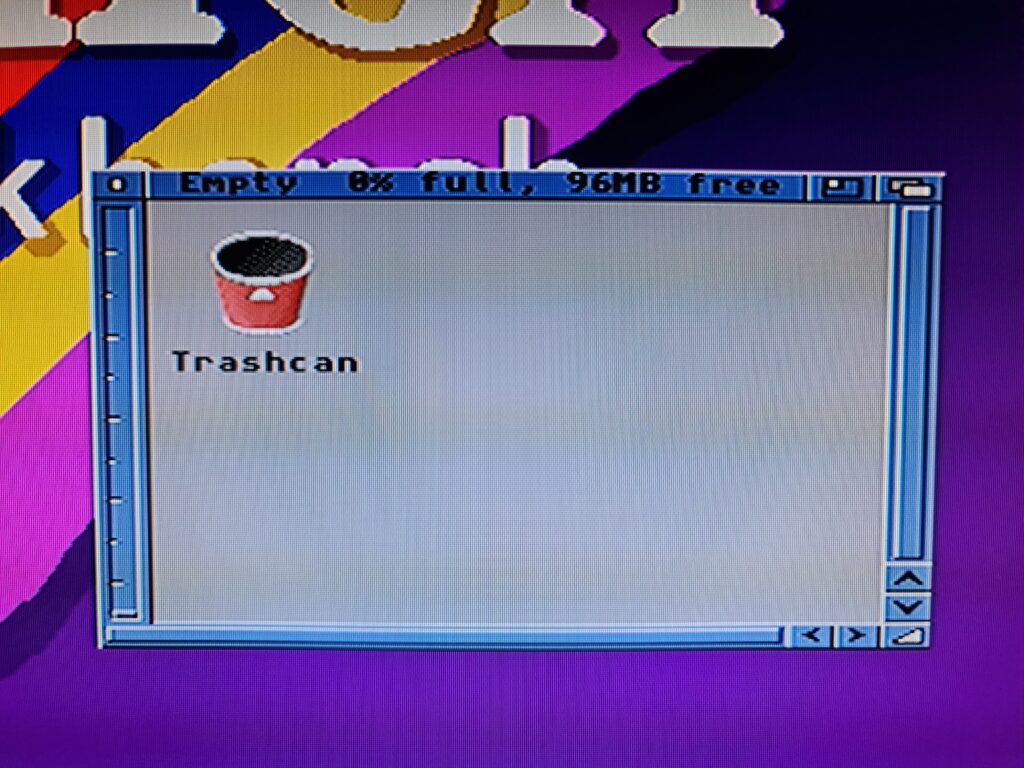
Zip disk with 96M free space.


Iomega Tools

Now by all means we could leave things here, I mean everything works as it should after all. However I’d recommend installing Iomega Tools as well. This software provides a lot of extra functionality that would otherwise be lacking from the Amiga experience. Things like a software eject, password protecting disks and access to hidden drive settings.

One of the main reasons I like this software is that it offers the ability to override the default sleep time of the Zip drive. By default your disk is kept spinning with the heads in constant motion for 15 minutes before spinning down after any disk activity. This will generate a lot of unnecessary wear and tear on both the disk and drive which is something we should be avoiding. Zip drives aren’t getting any younger after all!


Amiga IoTools

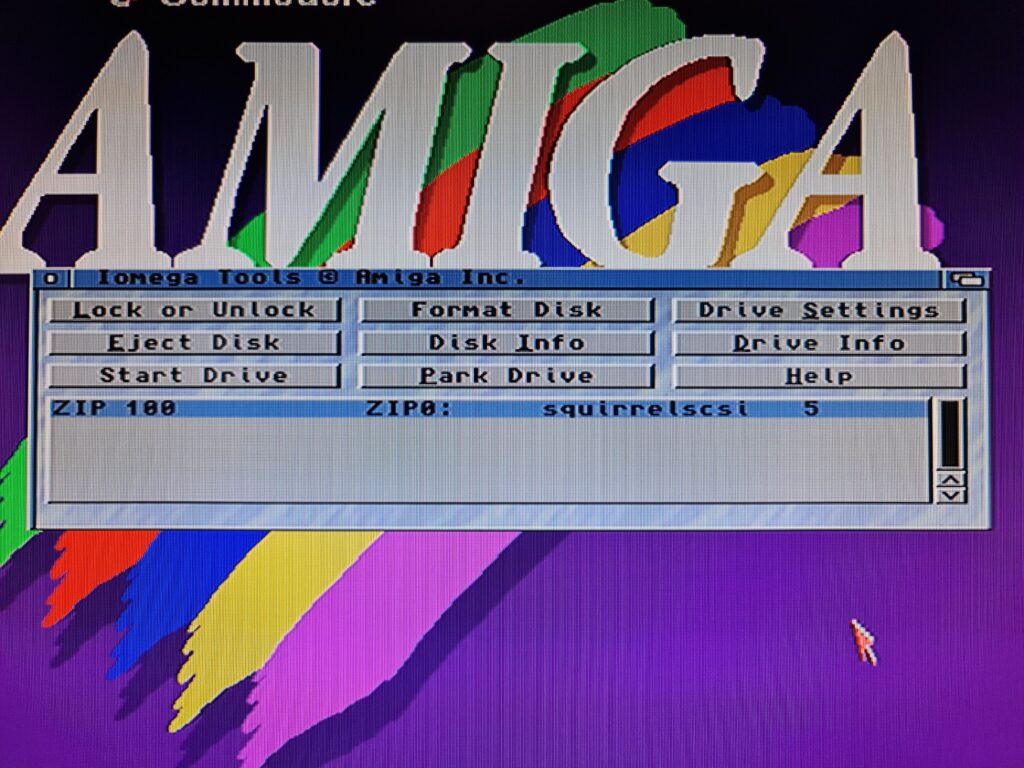
IoTools Main Window.


You can download this free software off Aminet. There is no installer – just copy the main IoTools program to either your WBStartup (recommended) or your Workbench Tools directory.

WBStartup is recommended so that the software is always running. Things like the sleep timer settings are stored in the software itself so it needs to be running to have any effect. You can still install it elsewhere if you don’t intend to use the Zip drive all the time and are happy to run it manually whenever you do use it. Alternatively you can select ‘Park Drive’ and ‘Start Disk’ to manually stop and start the drive respectively.


Amiga IoTools

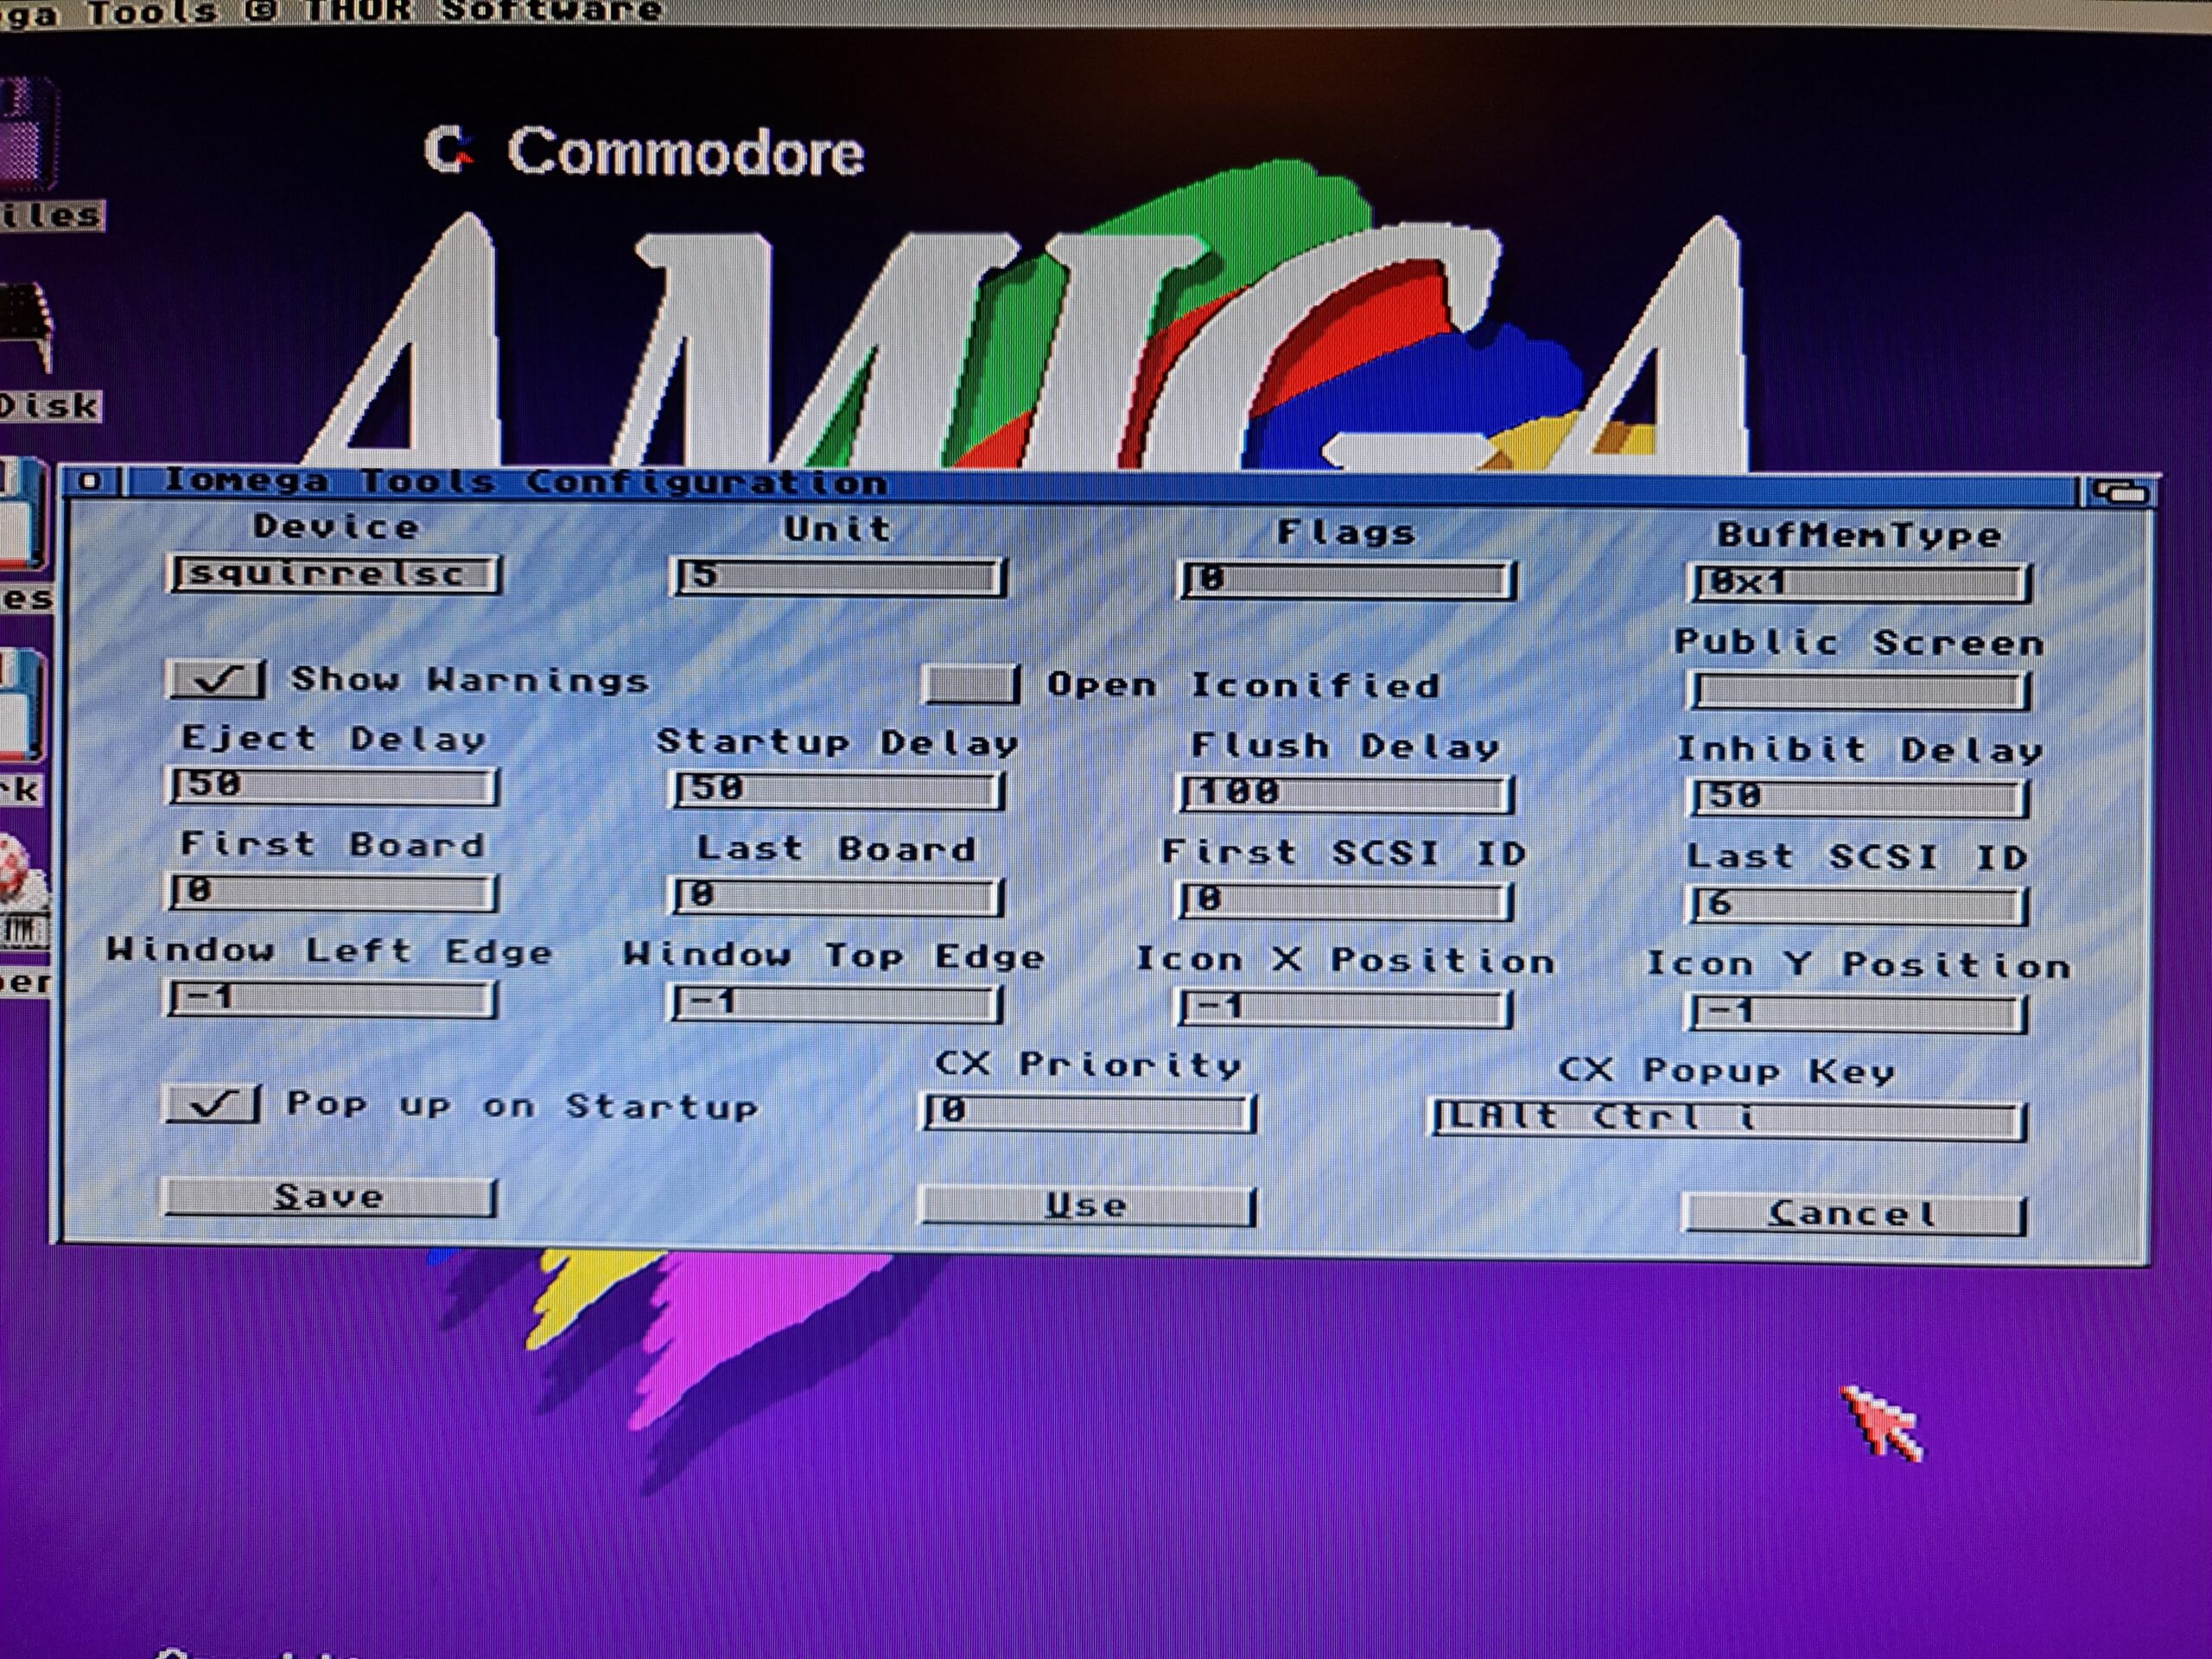
Amiga IoTools Settings Screen.


You need to configure the settings of your SCSI device and drive for the software to work fully. The settings that worked for me are shown in the image above. Most boxes are set to their default. The ‘Device’ setting which is truncated in the image is ‘squirrelscsi.device’. If you do have the software running every time you boot your Amiga then you might want to tick the ‘Open Iconified’ box which will help keep your Workbech screen tidy.

Drive Settings is where the sleep countdown is located. I recommend a time of 5 minutes as a good compromise between convenience and preservation.


Amiga IoTools

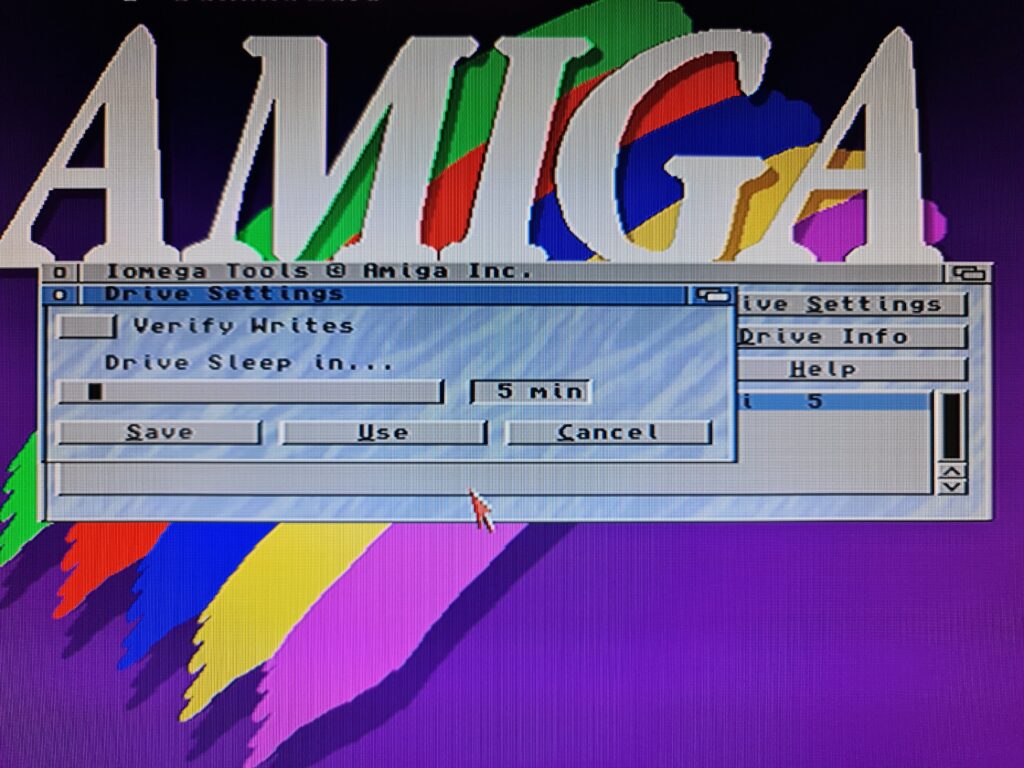
Zip Drive Sleep Settings.


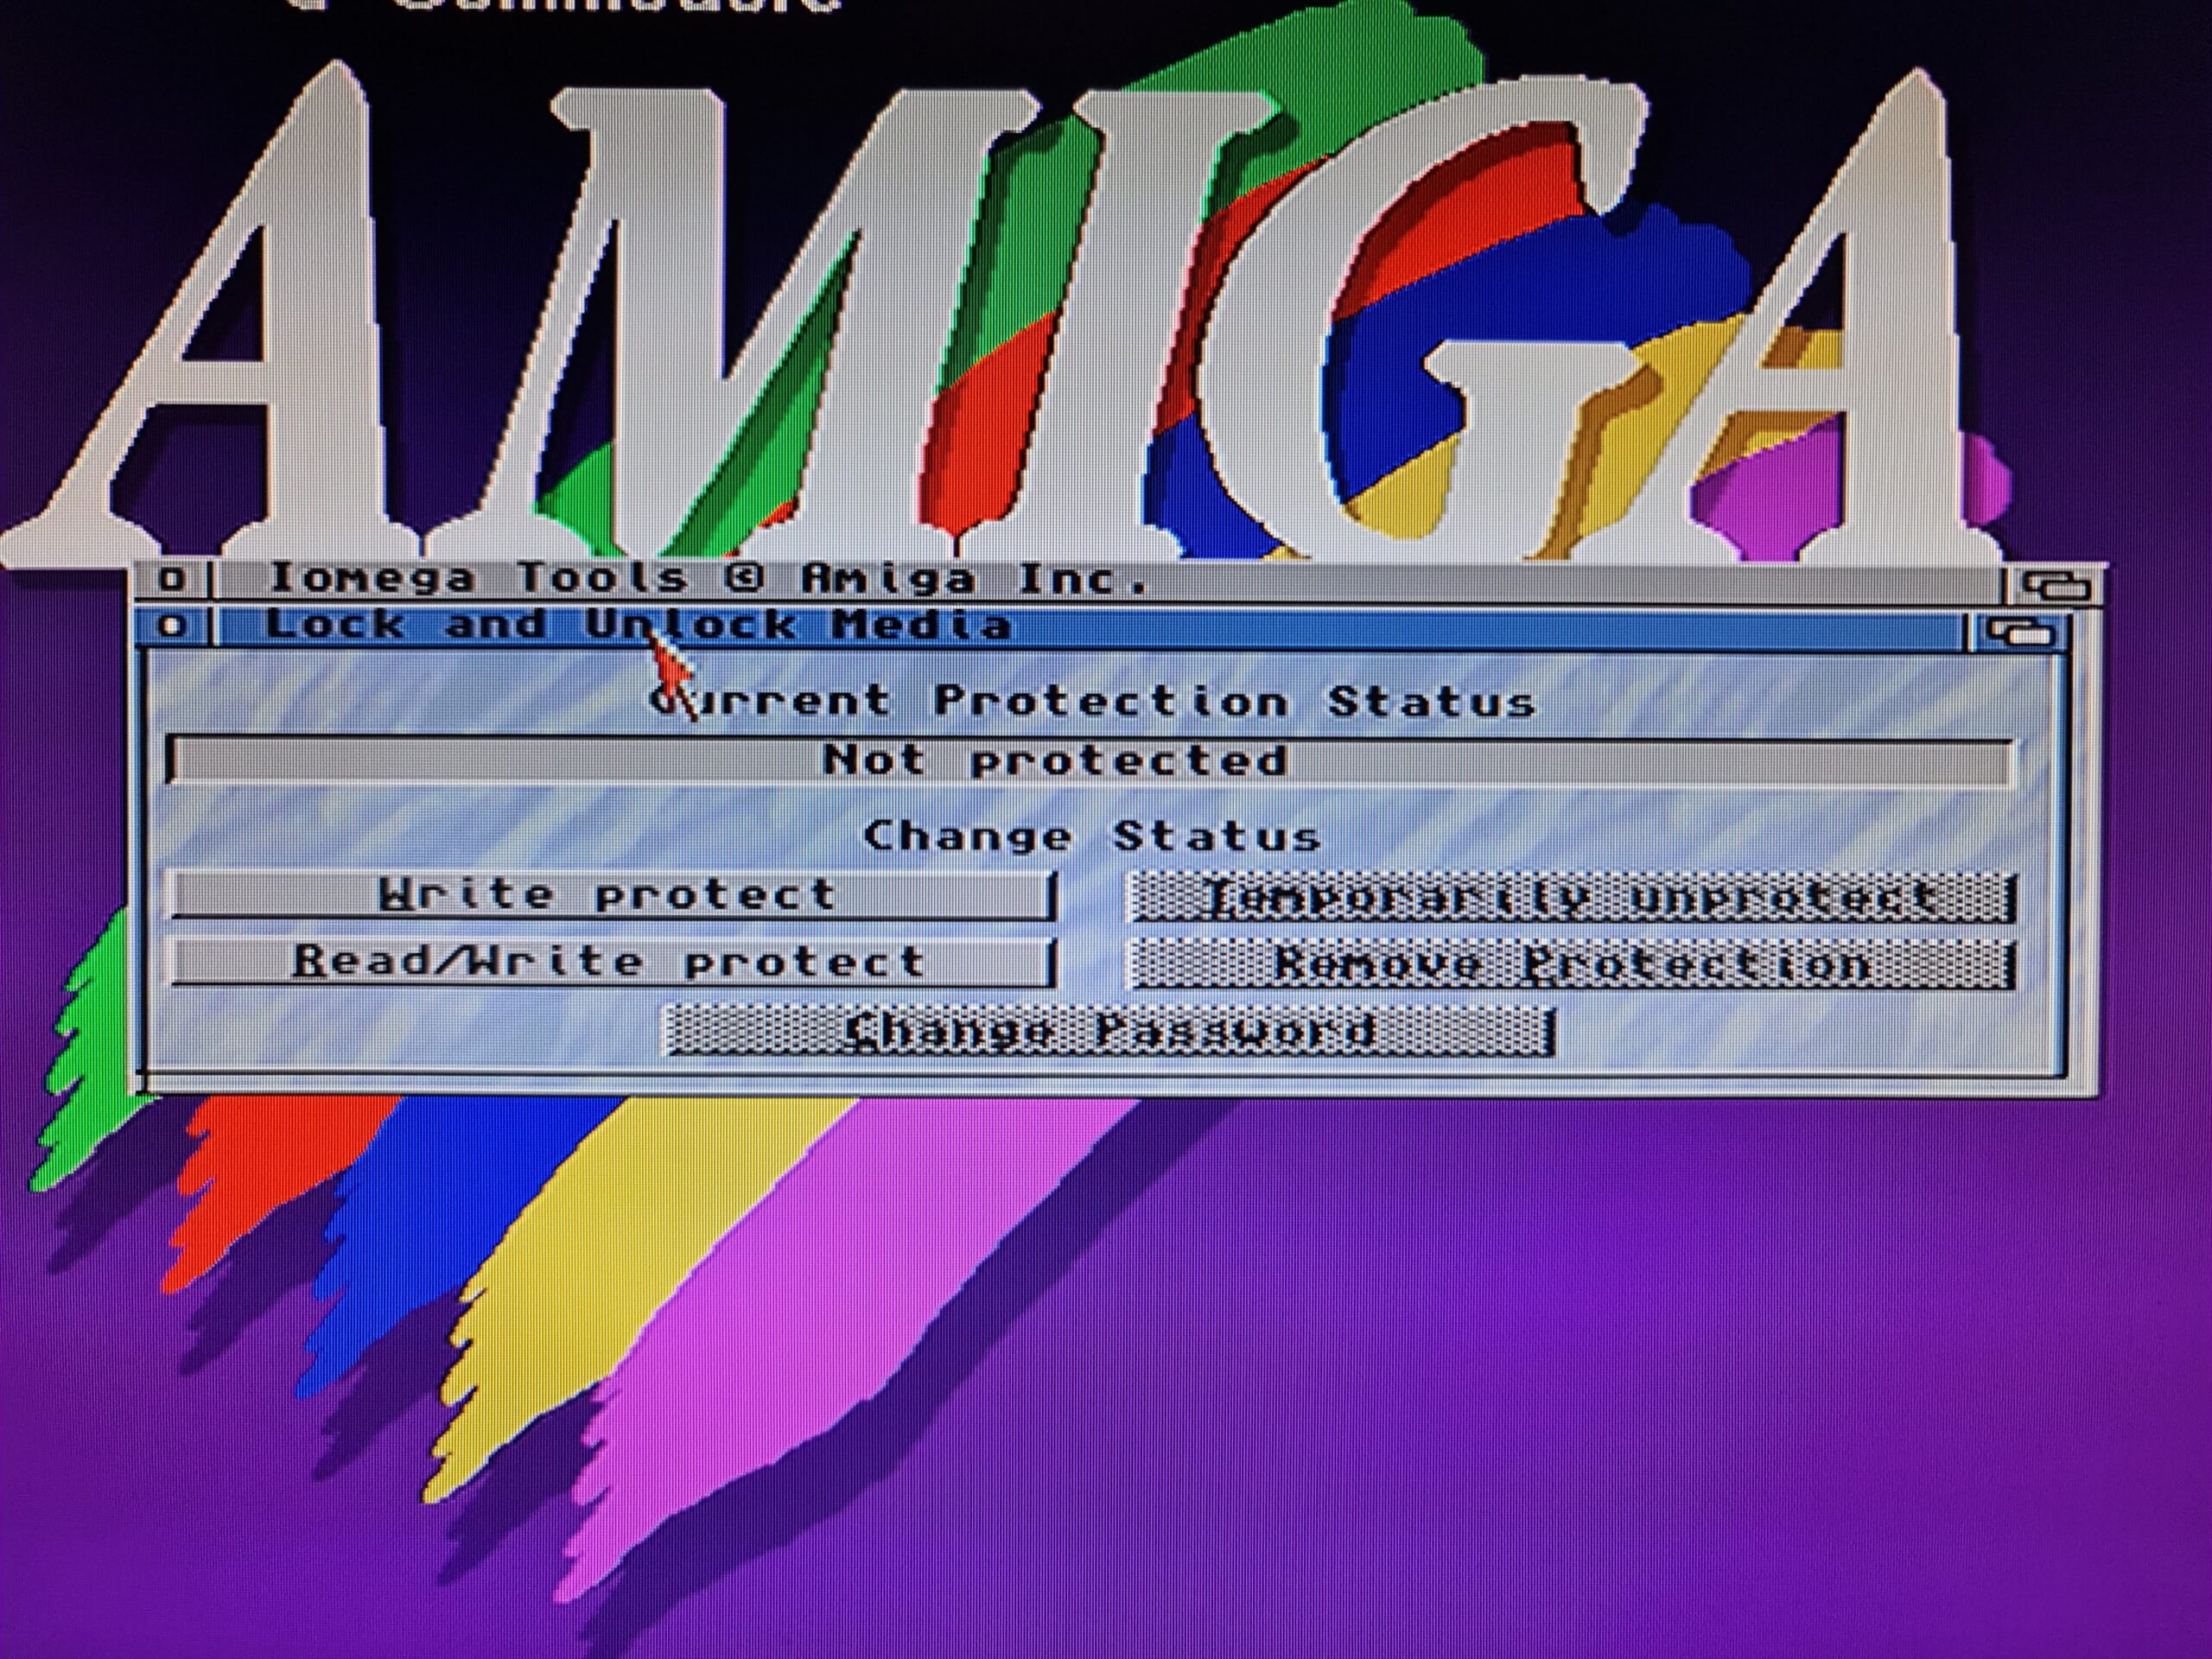
The Lock or Unlock Media screen is where you can password protect your disks or remove the protection completely.


Amiga IoTools

Password protect your Zip disks here.


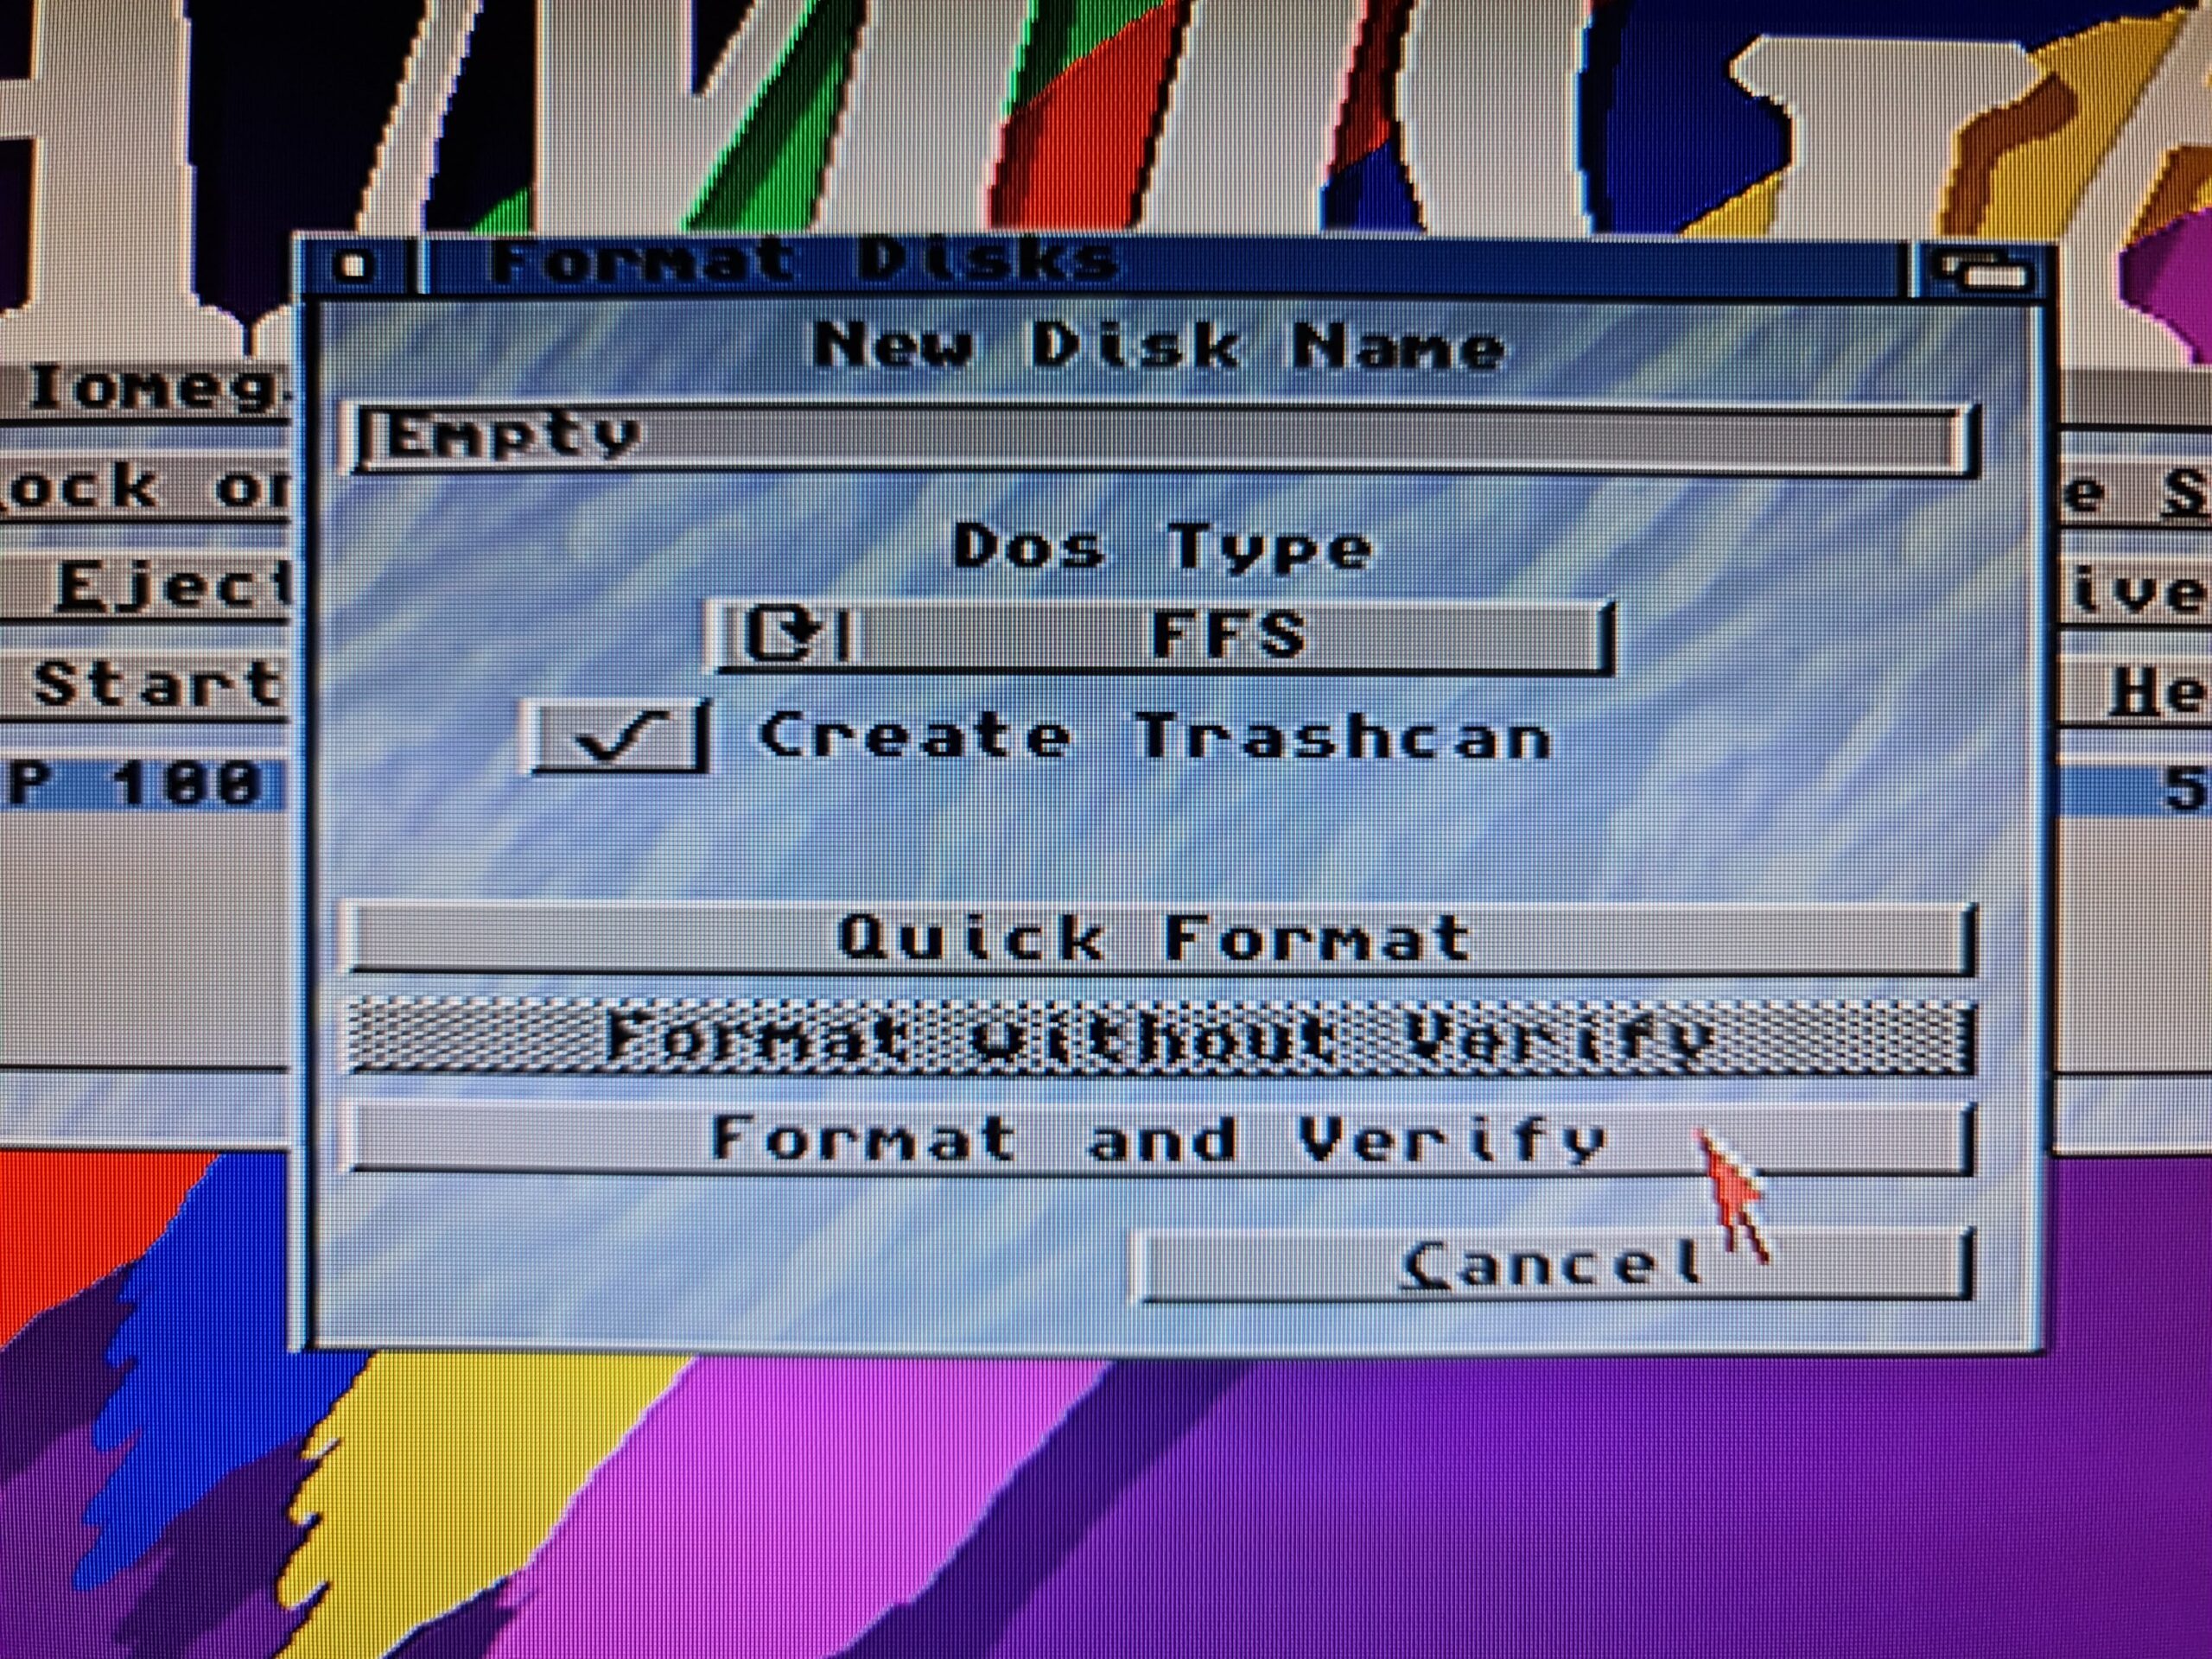
The Format Disk window is incredibly useful and is what I used to format all of my disks. Choose the Format and Verify option and it will do a full format whilst also performing a thorough check of the Zip disk, mapping out any bad sectors as it goes. This takes approximately 9 minutes per disk which is a lot longer than even the full format I mentioned earlier. However I feel it is worth the investment of time for the peace of mind it offers.


Amiga IoTools

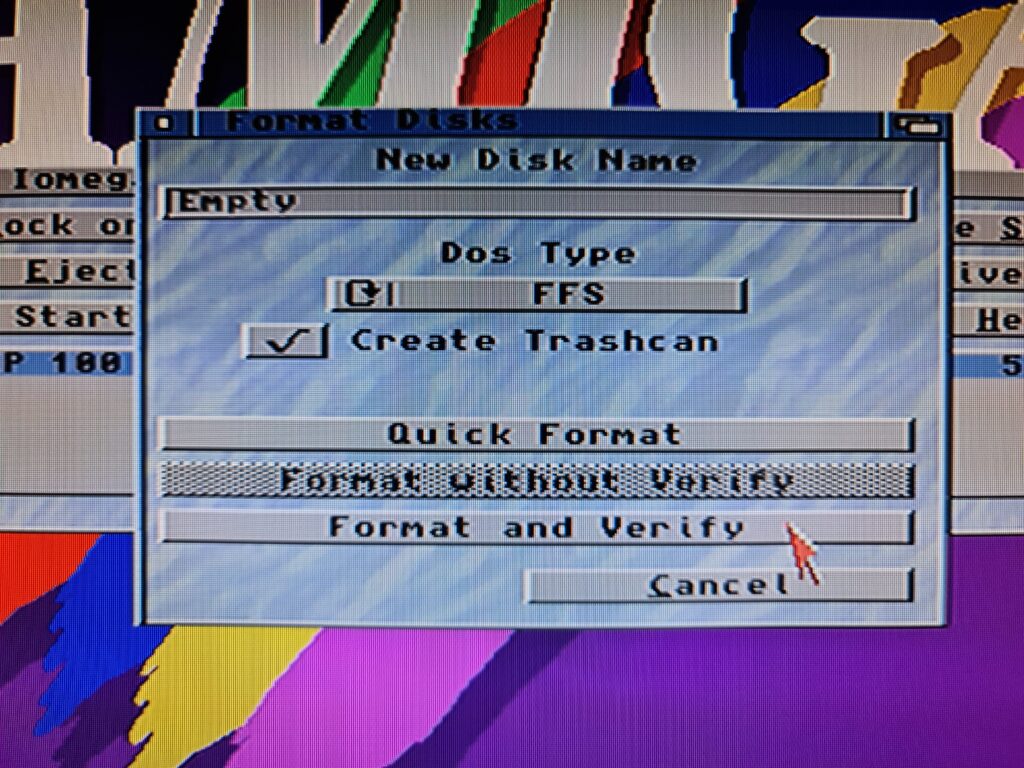
Format and Verify option will make sure your disks are in good shape.


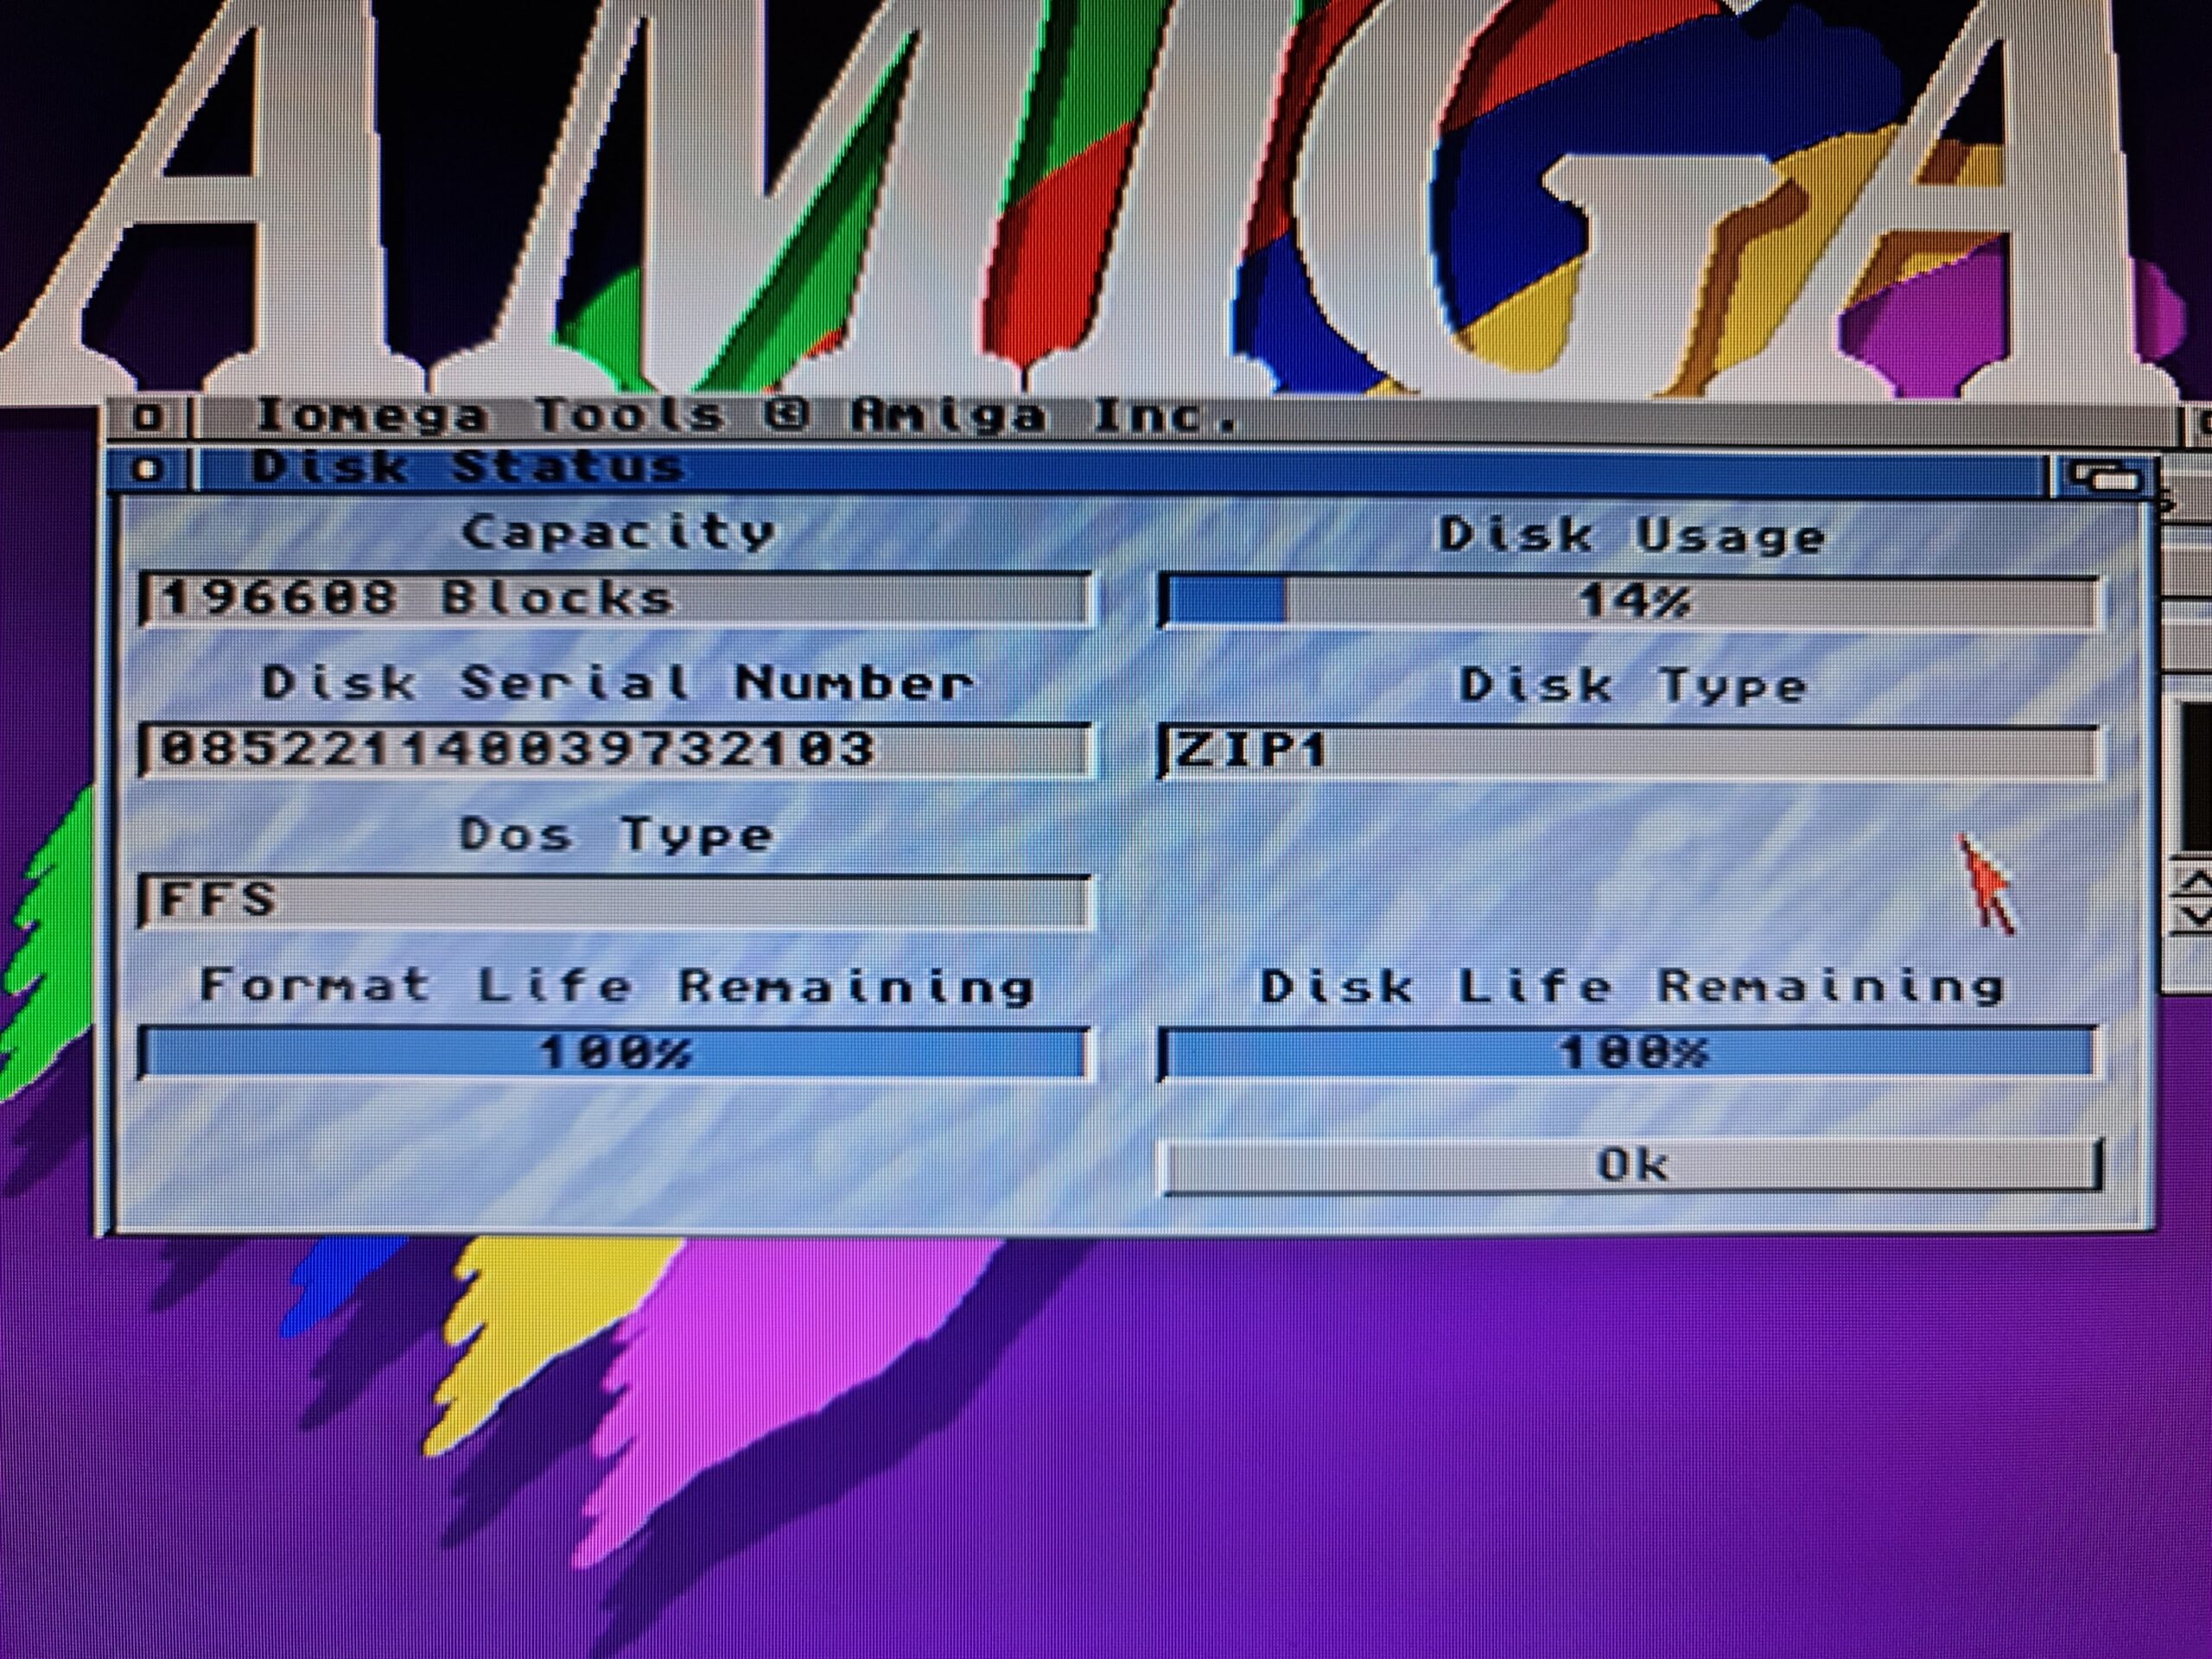
The Disk Status screen offers some interesting stats about the currently inserted Zip disk…


Amiga IoTools

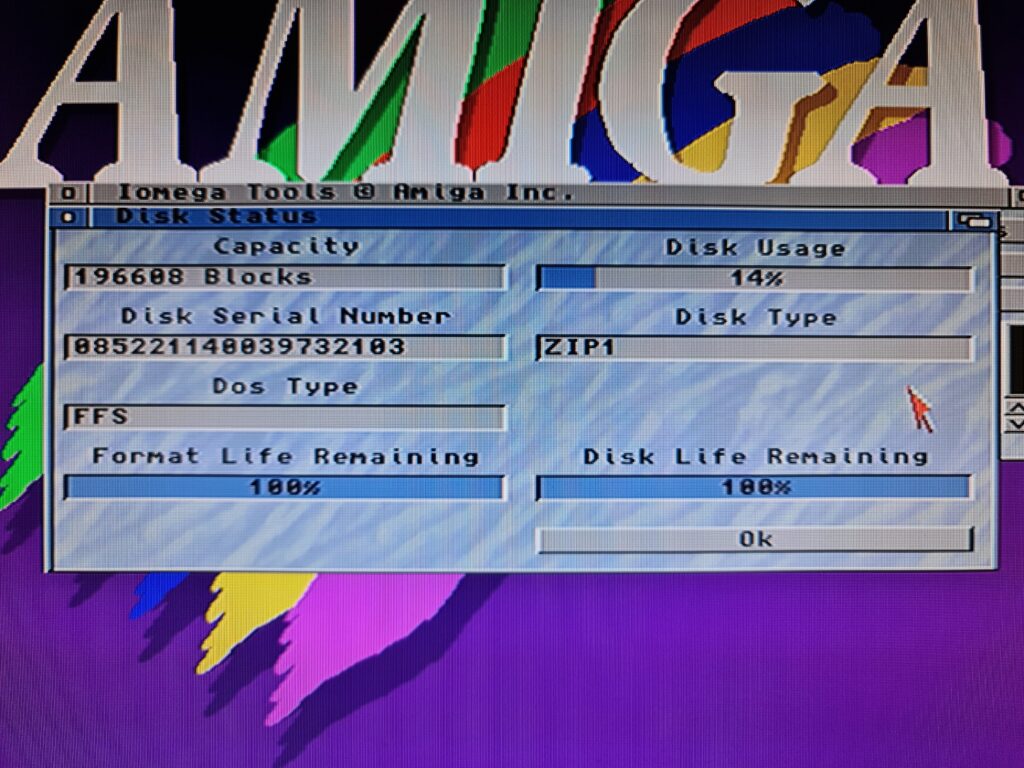
Amiga IoTools – Disk Status Screen.


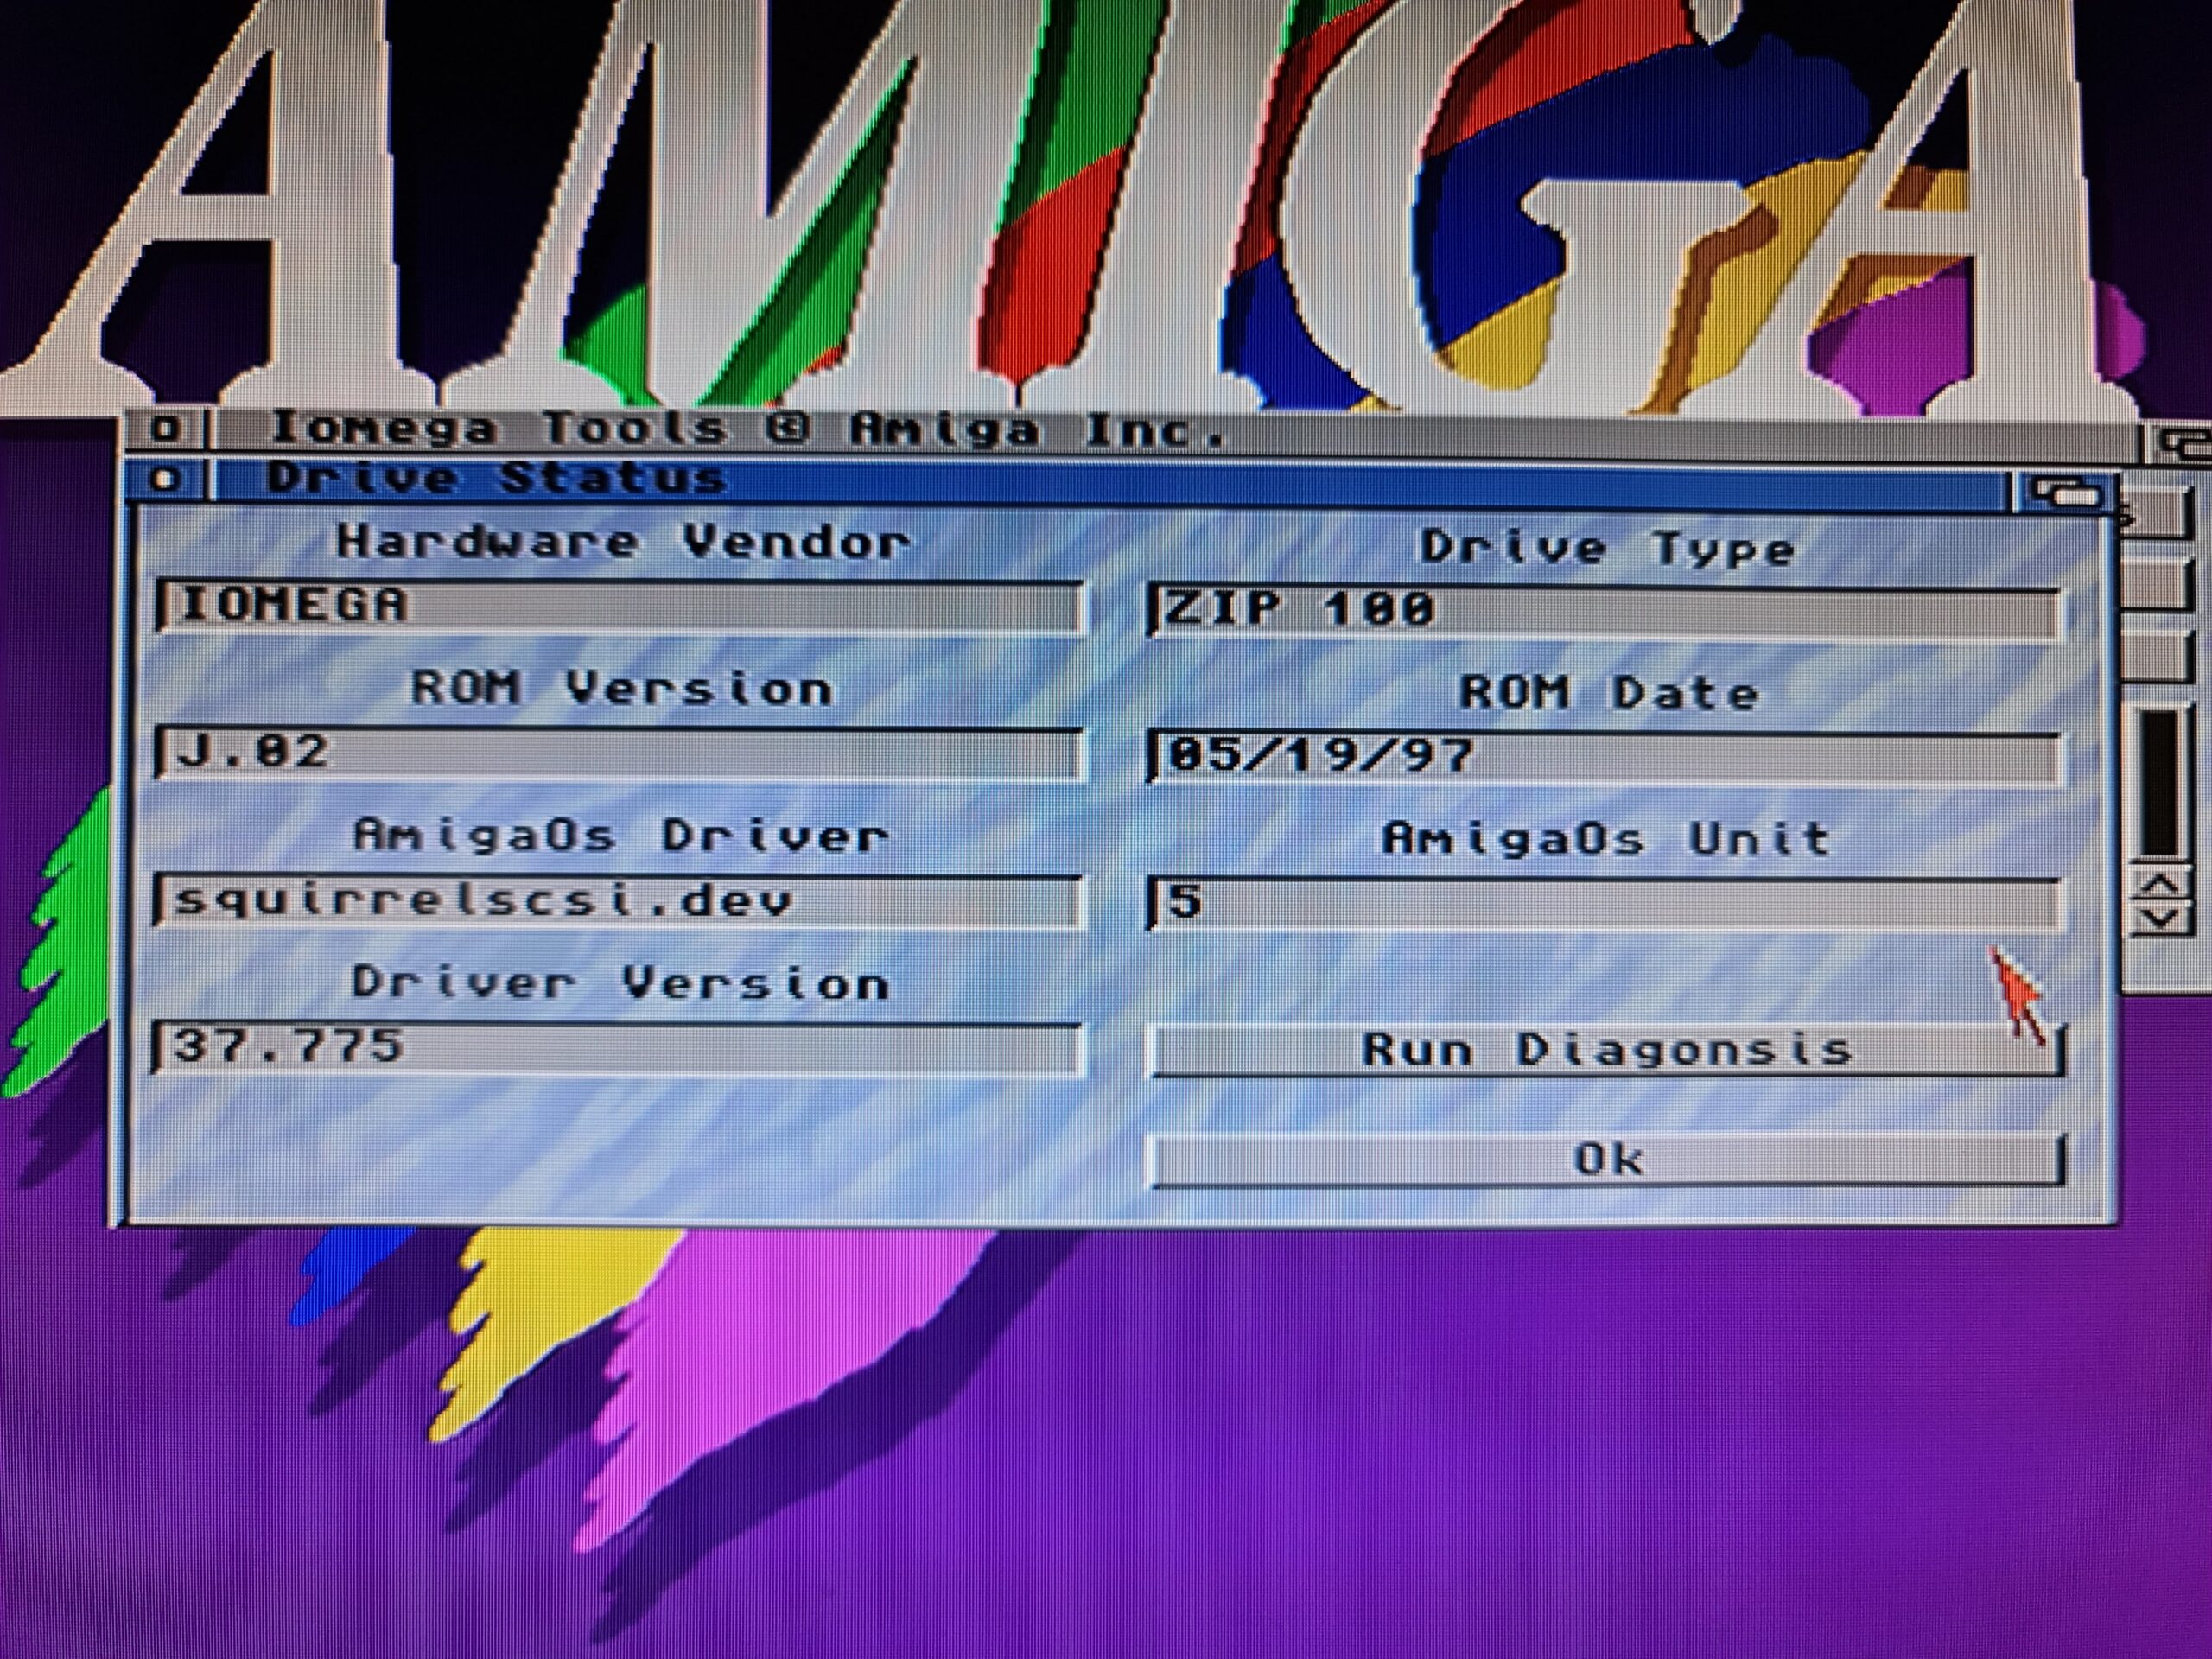
As does the Drive Status screen.


Amiga IoTools

IoTools Drive Status Window.


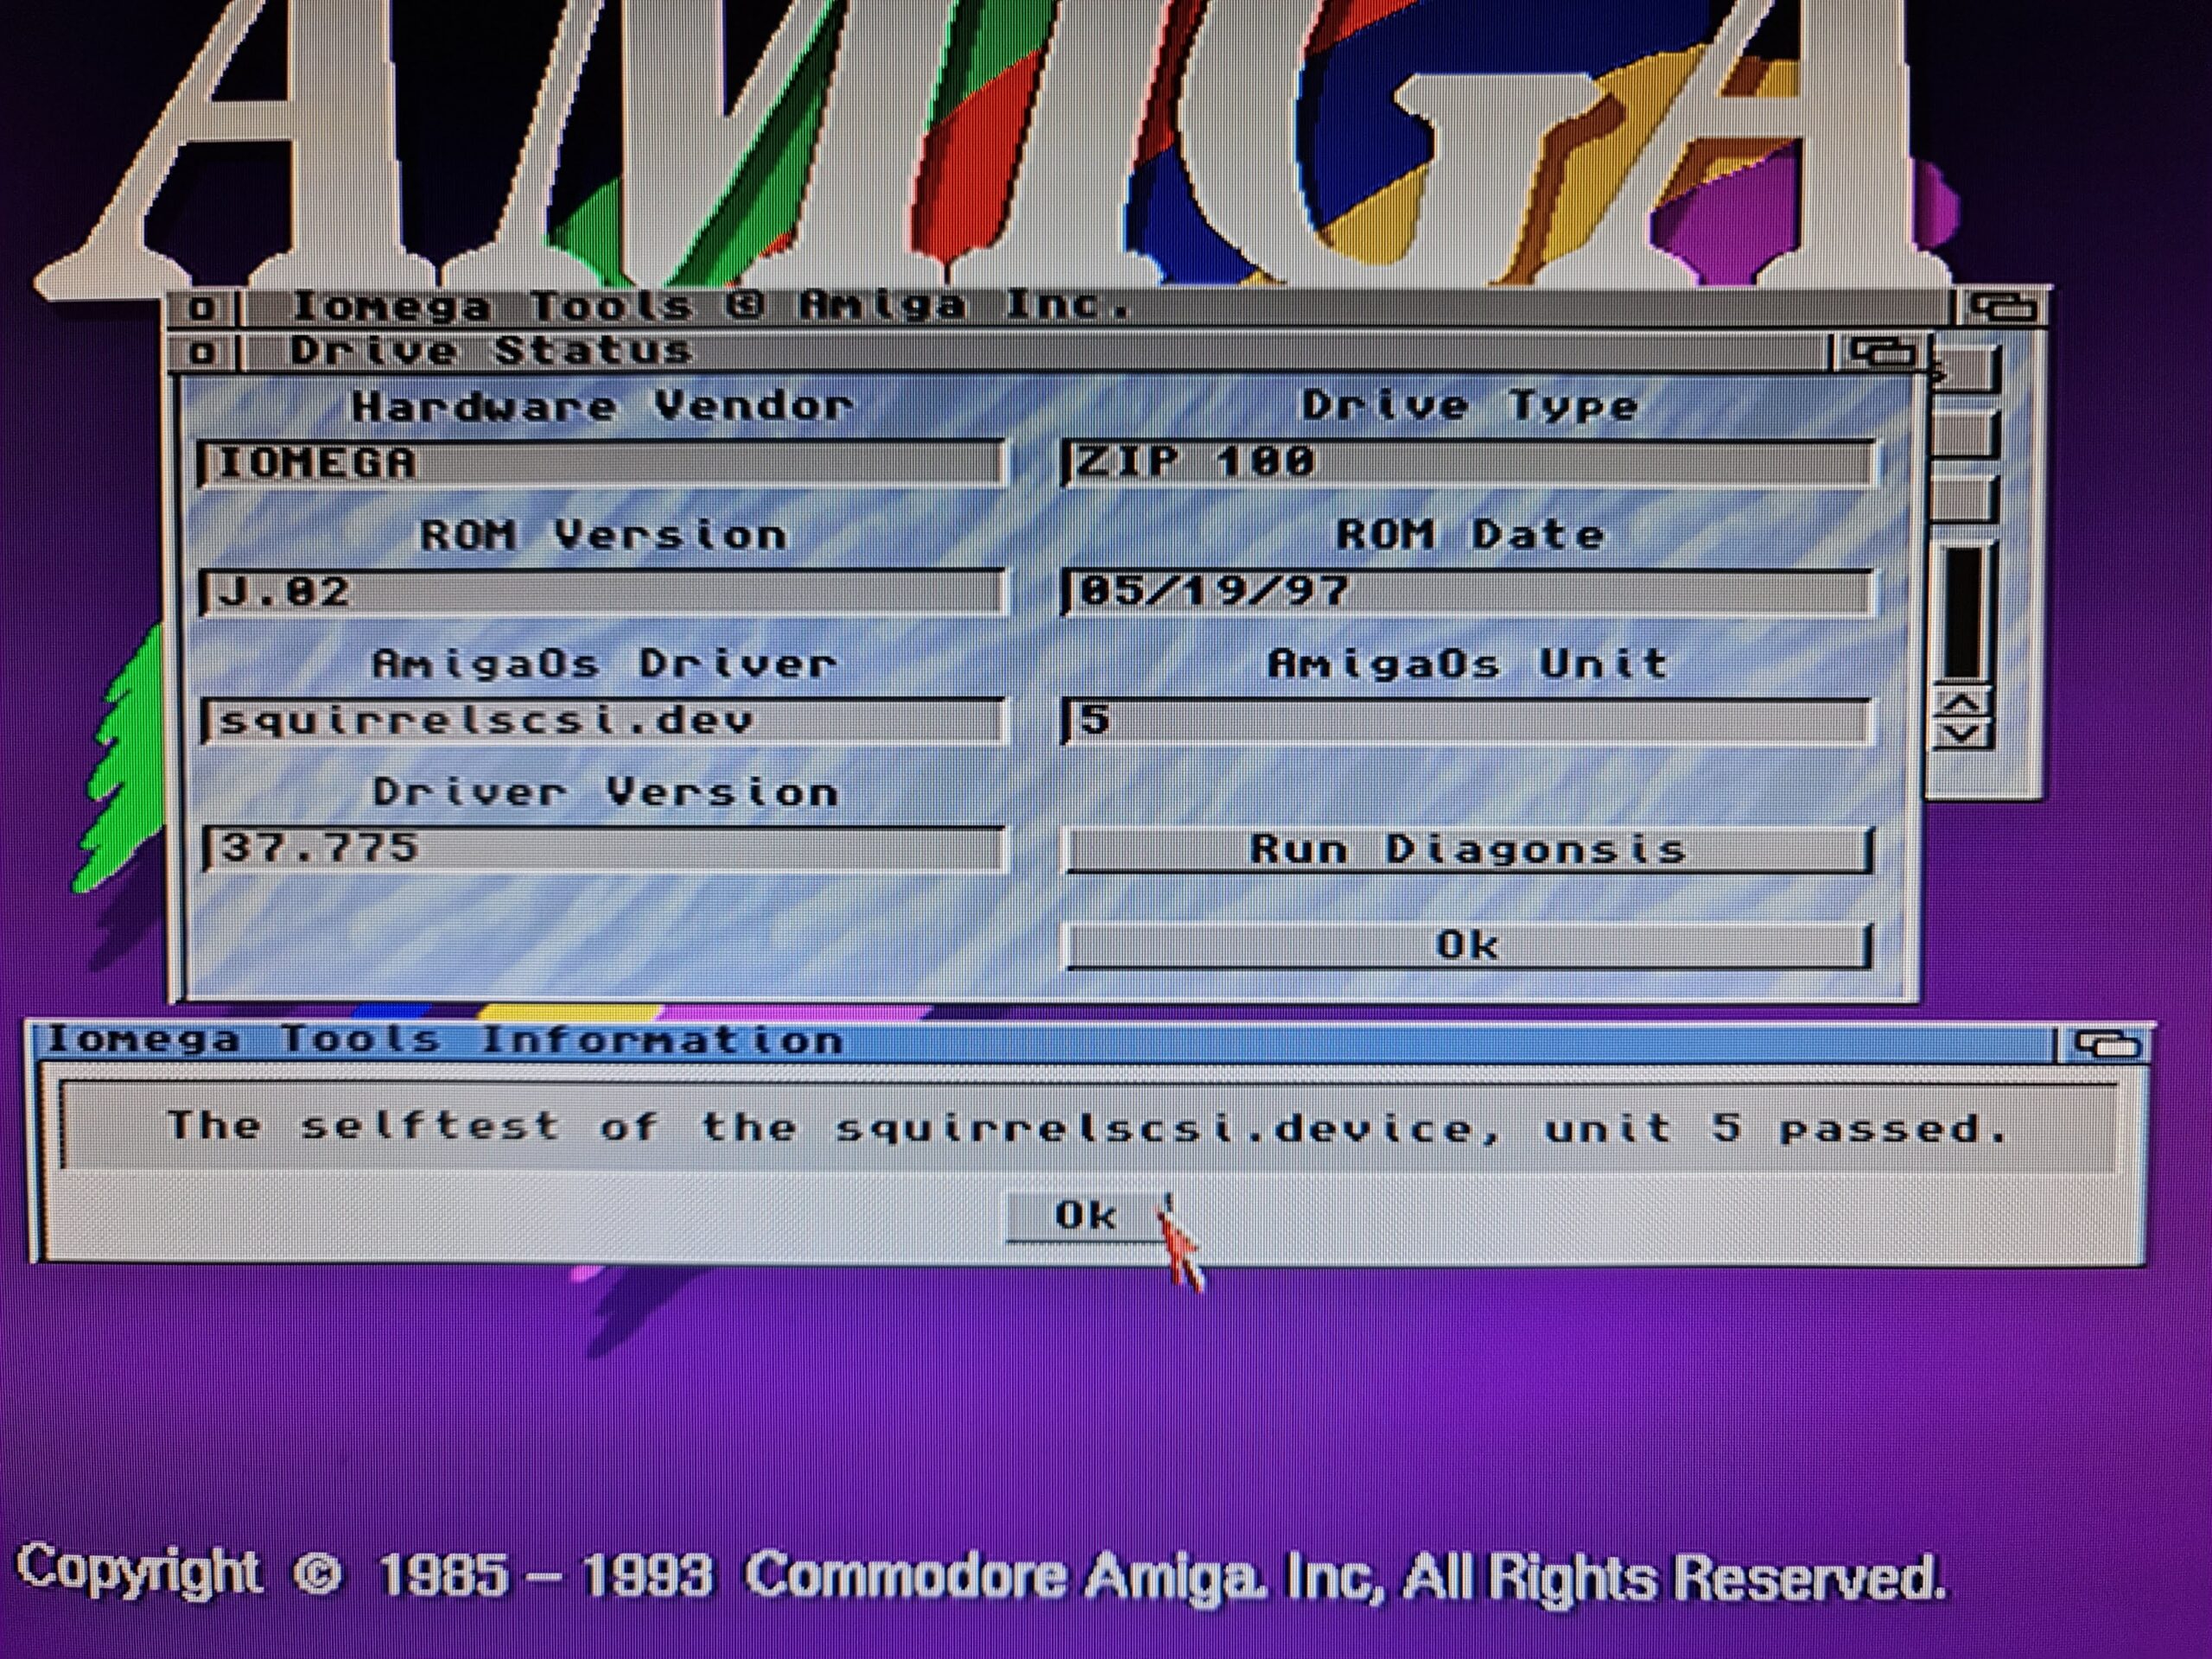
If you have a disk in the drive the ‘Run Diagnosis’ option will do a thorough check of the drive to make sure it is operating correctly (it doesn’t delete any info on the disk).


Amiga IoTools

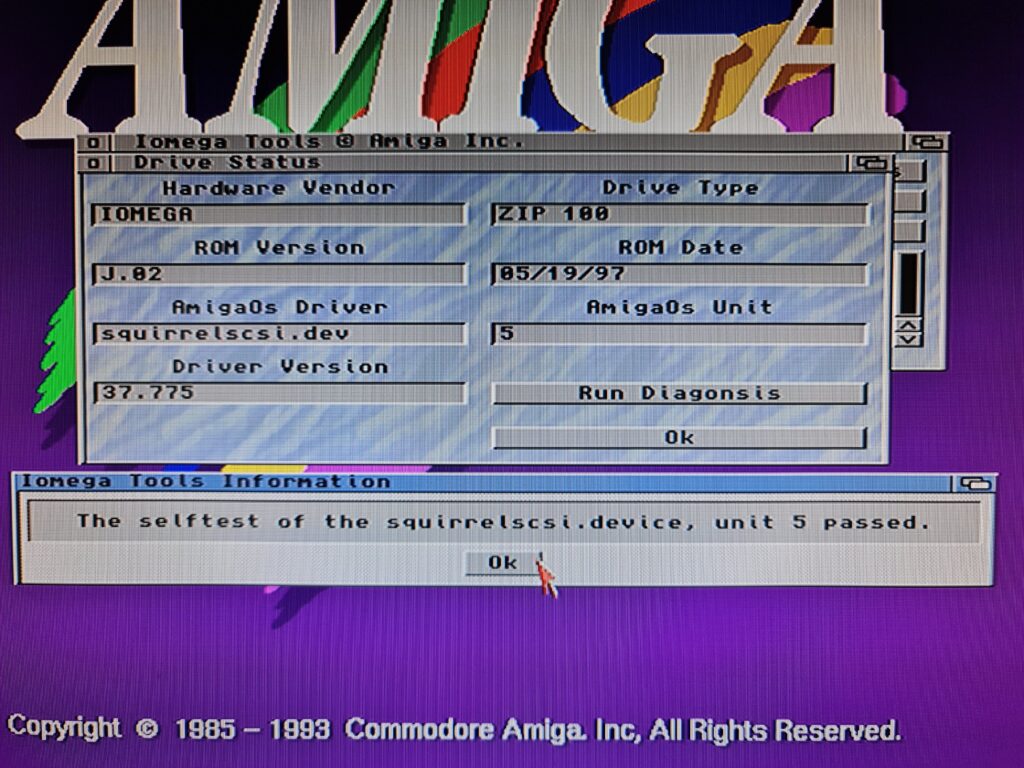
IoTools Drive Diagnosis complete.


Amazingly the software is still supported too – it was last updated in May 2020. I even contacted the author, Thomas Richter, with a query and he got back to me within minutes. How’s that for Amiga support!


Zip Drive Amiga

Zip Drive is now part of my A1200 setup.


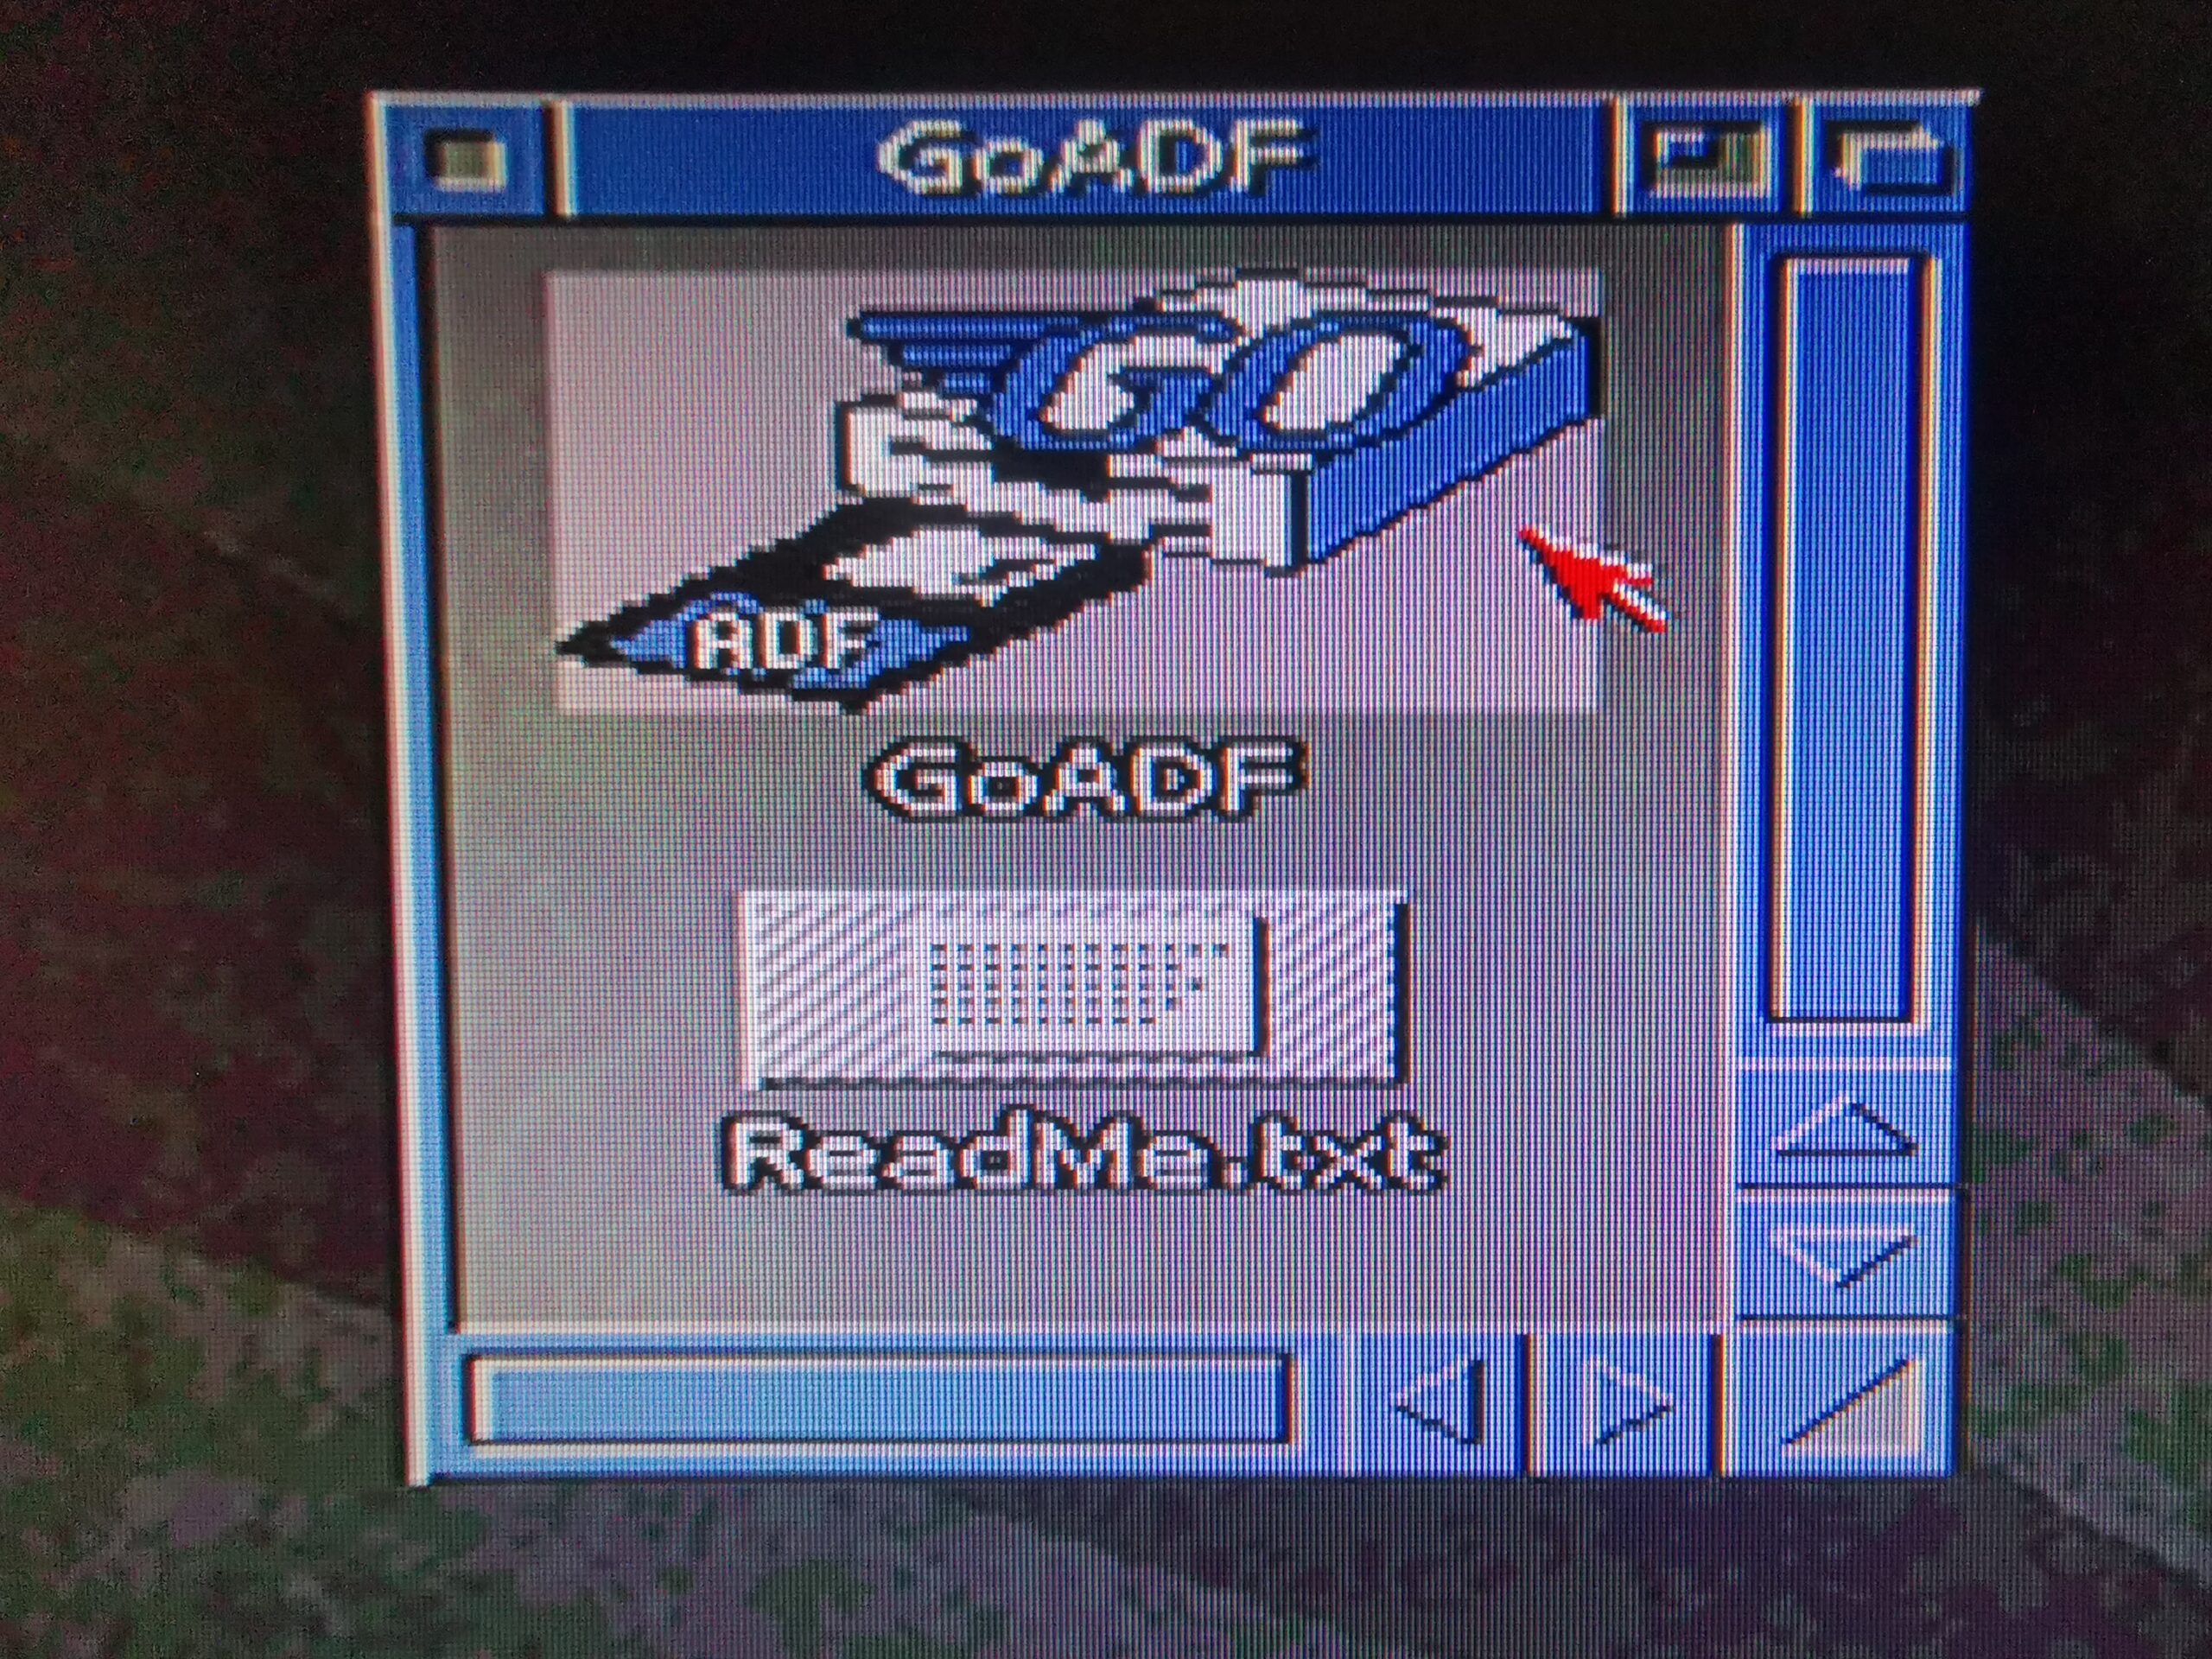
Anyway I really enjoyed my little Zip drive adventure and am making good use of it to organise my collection of Amiga ADF’s, Music and more.

I do hope you found the guide useful… it has taken me many an evening and weekend to pull all the info together and get it into a cohesive post. If you found it interesting/helpful then please let me know in the comments below!


Installing Amiga OS 3.1.4 – Part 5 – Finishing Touches

Amiga Workbench Wallpaper

In parts 1 through 4 of this guide I covered everything needed to install Amiga OS 3.1.4 on an Amiga 1200 from scratch. However there are still a few things that can be done to improve the installation.

I’m afraid this post ended up a lot longer than I anticipated so I’ve put some links below that will take you straight to each section.


Fancy Glowicons

If you’ve seen any screenshots of Amiga OS 3.1.4 on the internet you may well be wondering why we haven’t got any fancy new icons with our Workbench install. Well for some reason the installation of these was never automated so this is something you must do yourself. The good news is that these icons are tucked away on the ‘Storage’ disk and can be installed manually quite easily.

Boot your Amiga up and then insert the ‘Storage’ disk into the drive. Next, open up the Shell and enter the following command:

copy storage3.1.4:glowicons/#? sys: all

This will copy the icons off the floppy disk and onto your Amiga’s system partition.


Amiga CLI

This command will copy the new icons onto your Workbench drive.


There are quite a lot of icons to copy over so it will take a little while to complete. You should see a load of text scrolling up the window before the command prompt finally returns.


Amiga Shell or CLI

When you see the Workbench:> prompt appear the icons have finished copying over.


At this point you can close the Shell and reboot your Amiga.


Amiga Glowicons

New Workbench 3.1.4 Icons!


When it reboots you should be greeted by much more colourful Workbench screen filled with lovely new icons. You may need to spend a little time re-arranging them to your liking but they definitely look a lot better than the old ones!


Amiga Preferences

Here you can see all the new Preferences Icons.


Setting the Screen Mode


By default your Amiga will have configured the screen mode to either PAL (640×256) or NTSC (640×200) High Res mode. This results in a very stretched looking Workbench screen and doesn’t give you much space to work with either.


Amiga Screen mode

Vertically stretched Workbench screen in PAL Hires mode.


Assuming your monitor will support it, I recommend changing the display mode to High Res Laced. This doubles the vertical resolution providing the correct aspect ratio for your Workbench screen and twice the space for icons and windows.


Amiga Screen mode

Amiga Screen modes


And here’s what Workbench looks like once the screen mode has been changed – much better!


Amiga Screen mode

So much more space and our icons are now the correct shape!


I’m very lucky with the screen I’m using with my Amiga. It’s an old LCD TV with a 720P screen. It supports RGB SCART and is able to display all of the standard Amiga screen modes. What’s more, because it’s an LCD panel, interlaced modes do not flicker like they used to do on CRT monitors. This means I can get all the benefits of the extra resolution that interlaced modes offer without any of the negatives! Twenty years ago I would have needed a very expensive Multiscan monitor or a flicker-fixer/scan-doubler to achieve this (or have to put up with the flicker!).


Overscan Settings

I noticed something a bit odd after installing Workbench… my screen wasn’t centred and there was a weird border on the left, top and bottom of the screen. Basically dead space that I wasn’t able to utilise… until I cast my mind back 25 years and remembered about overscan border settings with CRT monitors.


Amiga Preferences.


In a nutshell the overscan settings were a way to tweak your display to maximise the available screen space. Most CRT’s were housed in plastic cases that partially shrouded the outer edges of the tube by varying degrees and thus hid a part of the image. Typically beyond the limits of the designated display area the borders used to be black and you would adjust the overscan settings to get rid of this and have as much ‘picture’ filling the screen as possible.

Modern TV displays and monitors no longer have overscan as they are able to display 100% of the image thanks to flat LCD panels so we should be able to get our Amiga to fill that display completely.

To achieve this load up the ‘Overscan’ preferences to get the display shown below.


Amiga Overscan Preferences

Amiga Overscan Preferences


Click on ‘Edit Text Size’ to bring up the overscan adjustment screen shown below.


Amiga Overscan Adjustment.


As you can see from the above image, the borders I was seeing on my screen are perfectly illustrated here. To get rid of them what we need to do is click on those black squares and drag them to the very edge of the outer box like in the image below.


Amiga Overscan Settings.


If you notice the resolution of the screen has increased from 640×256 up to 692×275 which is a nice bonus. Click OK to save these settings and then click on ‘Edit graphics size’ and repeat the exact same process. Finally click on ‘Save’ to ensure that these settings are stored permanently.


Amiga workbench screen

Look ma, no borders!


Amiga OS 3.1.4.1 Update

Amiga OS 3.1.4 was released in 2018 and in 2019 a small update (3.1.4.1) was released which fixed a number of minor bugs. This update can be found on the appropriately named ‘Update 3.1.4.1’ disk that we created back in Part 1.


Amiga OS 3.1.4.1 Update

Starting the 3.1.4.1 update process.


Pop that disk in the drive and then look inside the Install directory and choose the installer in the language of your choosing. Next, run it and click on ‘Proceed’.


Amiga Installation Mode screen

Choose an installation mode.


Now you must select the installation mode. As this is a straightforward upgrade I chose Novice.


Amiga Language Selection Screen

Choose your language.


Then the language required for the install…


Amiga Installer progress

Installer doing its thing.


After which the update started to install. I think it took around a minute to complete.


Amiga installation complete message

Installation complete.


When the files have finished copying across a new window will appear to confirm the install has completed. Hit ‘Proceed’ and then reboot your Amiga.

We’re not quite finished with this update though as there is also a FastFileSystem v46.20 upgrade to perform which we will tackle next.


Installing FastFileSystem Patch 46.20


To begin this part of the upgrade process we need to launch HDToolBox (found in the ‘Tools’ directory) and then click ‘Partition Drive’. If you have more than one drive shown here then make sure you select the one you wish to update.


Amiga HDTooBox Window

Amiga HDTooBox Window


When the partitioning window appears select your boot partition (the one on the far left) and then tick the ‘Advanced Options’ box. A bunch of extra settings should appear below as you can see in the next image.


Setting Direct SCSI Transfer option for DH0:


Now what we need to do is make sure that the ‘Direct SCSI Transfer’ box is ticked for DH0. (Mine wasn’t).


Amiga Direct SCSI Transfer

Direct SCSI Transfer


We then need to ensure that this is also ticked for each of your other partitions. To do this just click on each of your partitions on the top bar in turn and tick the ‘Direct SCSI Transfer’ box for each one.


This slideshow requires JavaScript.


The next task is to apply the FFS patch to the drives. To begin the process click on the ‘Add/Update…’ button at the bottom of the window.


Amiga HDToolBox add update button

Add/Update button.


This should bring up the following window that lists all of the available file systems you can use.


Amiga File System Maintenance Window

File System Maintenance Window


Now the readme supplied with the update seems to be rather vague here. The first time I tried this update myself it didn’t work. In the above window you can see two file systems listed. Custom File System and Fast File System. What actually needs to appear here is ‘International (FFS)’.  So in the end to get this to work I clicked ‘Add New File System…’


Don’t touch this.


I didn’t change the default path in the box that popped and also accepted the following details that popped up without altering them (below image).


Amiga File System DosType

Don’t touch this either.


After I clicked ‘OK’ I was dropped back to the System Maintenance screen and this time my file system was listed at the top with the correct version number.


International (FFS) Now on the list.


I clicked ‘OK’ and was dropped back to the initial screen where I could see that there were changes waiting to be written back to the drive.


HDToolBox - with changes to be saved to drive.

HDToolBox – with changes to be saved to drive.


After clicking ‘Save Changes to Drive’ I got a very scary message warning me that it was going to destroy all the data on my drives.


Amiga Commit to Changes message

Dire warning message!


However the readme file does warn you about this message and insists that it can be safely ignored. Feeling suitable comforted I pulled the trigger and clicked ‘continue’ then rebooted my Amiga. Happily it rebooted without a hiccup – phew!.

The last thing to do was do a quick test to make sure the update had been successfully applied. To do this I opened a Shell window and entered the following command.

version dh0:


Amiga Shell

Version DH0 command


The version command returned ‘Filesystem 46.20’ which was spot on. Mission accomplished.


Fixing my GlowIcons!

There now remained just one nagging problem – throughout my whole time preparing this guide the appearance of my icons bugged me. They didn’t look as good as the ones in the screenshots I’d seen. My icons were displayed on a sort of background ’tile’ which should have been transparent. Basically they looked ugly and needed sorting!


Amiga Workbench Preferences Screen

Amiga Workbench Preferences Screen


After rummaging around the Preferences directory I eventually found ‘Workbench Preferences’ which contained the settings I needed to modify. On the right hand side is an Icons section and for some reason mine was set to ‘Poor Quality’ and ‘Large Border’. I have no idea why this was the case but I changed them immediately to ‘Best’ Quality and set the Border Size to ‘No Border’. I saved the settings and like magic my Icons were transformed into the beautiful little works of art they should have been all along.

I have to confess I don’t remember this particular preferences program from back in the day which is why it took me a while to figure it out. It could be a new feature of Amiga OS 3.1.4… or I might just have completely forgotten about it!


Amiga WBPattern Preferences Screen

Amiga WBPattern Preferences Screen


At this point I also decided to throw on some wallpaper to brighten up my desktop. This is easily done by heading to the WBPattern Preferences and setting Background Placement to ‘Workbench’ and Type to ‘Picture’. Then it’s just a matter of clicking ‘Select Picture…’ and browsing to an image of your choice. Amiga IFF images of 256 colours or less work best here as they load instantly and don’t gobble too much of your precious Chip RAM. Pictures using over 256 colours will also be dithered which spoils their appearance which is another reason to choose wisely.

A few people have requested that I share the wallpaper I used for my Workbench backdrop so I’ve included the .iff image to download below.


AmigaWallpaper.zip


Incidentally if you are looking for a way to view Amiga .iff files on your PC then I highly recommend XnView Classic (shown below). Not only can it display .iff files but it can convert them to other more modern formats and vice versa. It’s completely free for personal use and can be downloaded here.


XnView Classic displaying an Amiga IFF image.

XnView Classic displaying an Amiga IFF image on a PC.


And that pretty much wraps up Part 5 of my Amiga OS 3.1.4 installation guide. Enjoy the fresh lick of paint and tune-up this gives your Amiga!

Installing Amiga OS 3.1.4 – Part 4 – Installing Workbench

Having created the physical floppy disks in Part 1, installed the 8GB CF card and ROMs in Part 2 and partitioned the CF card in Part 3 it is now time to look at installing Workbench 3.1.4.

The first thing to do is boot up the Amiga using the 3.1.4 ‘Install’ disk. Once the desktop has loaded open the Install disk and look inside the ‘Install’ directory. There will be a bunch of different language installers so run the one that you need, which for me was the English one.


Installing Workbench

Various Workbench installers in different languages…


This will load up the Installer and give you a little introduction about what it will do. Click ‘Proceed’ to begin.


Starting the installation.


Now you will be presented with another window that will allow you to add additional languages to an existing install. As this is a clean install just click on ‘Install Release 3.1.4’.


Requester giving option of installing another language.


Next you need to choose the installation mode – I chose Intermediate.


Installing Workbench

Selecting Installation Mode.


Installation Mode?

After selecting either Novice, Intermediate or Export User and then ‘Proceed with Install’ you are presented with the Installation Options screen. Here you can choose to ‘Install for Real’ or ‘Pretend to Install’. I believe this could well be unique to the Amiga? I certainly don’t recall ever having the option to do a pretend install on any other system. It can be useful to perform a pretend install on occasions as it lets you discover any potential issues and gives you a chance to fix them before committing to the actual install. However as this is a clean install we’re going to select ‘Install for Real’ and then boldly hit that ‘Proceed’ button.


Install for Real… or Pretend?


You should see a brief message about ‘Release 3.1.4’ being installed on the Workbench partition. This is because it has detected it is the first bootable partition – if you gave yours a different name back in Part 3 then it will be shown here.


Installing Workbench

This is where the actual installation starts.


Click the ‘Yes’ button to begin the installation and then choose which language(s) you want installing on the next screen. For my install I just wanted English so just left that option ticked.


Installing Workbench

Pick what languages you want installing.


Next you need to select what printer drivers you want. I selected them all because space is not an issue and you never know what you might want to hook up to your Amiga in the future.


Amiga Printer Driver Request Screen

Choosing a which printer drivers to install.


Another decision needs to be made on the next screen about which keymaps are required. Or in other words what language setting do you want for your keyboard. In my case as I live in the UK I chose a British layout before clicking ‘Proceed’.


Choosing a keyboard language or ‘keymap’.


Let the Disk swapping commence!

After a few moments you will be asked to insert the Workbench disk. There should be no need to click proceed, your Amiga should detect the presence of the swapped disk and continue automatically.


Installing Workbench

Insert Workbench Disk Screen


A bunch of files will be copied across to your new System drive.


Amiga copying files across.

Workbench install – copying files.


And then you will be asked to insert the Locale disk.


Insert Locale Disk Screen


Which will copy more files across… before asking for the next disk – Fonts.


Insert Fonts Disk Screen


Then the Storage disk…


Insert Storage Disk Screen


And then finally it will ask you to re-insert the Install disk.


Insert Install Disk Screen


Now at this point I was faced with the following warning as I had an accelerator installed with a 68030 CPU. I was able to click ‘Proceed’ and carry on but a version of this warning would pop up every single time I booted up my Amiga until I sorted it. Click here and then head down to the bottom of the page for information on how to resolve this issue.


Installing Workbench

CPU Warning.


And that should be your Worbench 3.1.4 install complete!


Installing Workbench

Congratulations – Workbench Install Complete!


Remove the floppy disk from your Amigas drive and reboot it. If all has gone to plan your Amiga should silently boot into Workbench 3.1.4 looking a lot like the photo below with all your partitions visible on the desktop.


Amiga Workbench

Amiga Workbench 3.1.4 Screen.


And that concludes Part 4 of my Amiga OS 3.1.4 installation guide – Installing Workbench.

Now we could leave it here, after all we now have a fully operational installation of Workbench 3.1.4 on our Amiga. However there are a few more things we can do to tweak and improve the install and I will cover these in Part 5.

Installing Amiga OS 3.1.4 – Part 3 – Partitioning a Compact Flash Card

Compact Flash Card

Having created the physical floppy disks in Part 1 and installed the 8GB CF card and ROMs in Part 2 it is now time to set about partitioning and formatting the compact flash card so we can install Workbench 3.1.4 on it (in Part 4).

To start the process of partitioning a compact flash card I booted my Amiga off the 3.1.4 Install disk. Once it booted I ran the HDToolBox program found inside the ‘HDTools’ directory.


HDToolBox

HDToolBox Program


This brings up the window below where you can see all of your installed hard drives. Mine is listed as a SCSI unit which is normal as this is how the Amiga sees the internal IDE controller.


Amiga HDToolBox

Amiga HDToolBox Main Window


Clicking on ‘Change Drive Type’ brings up the window below. As this is a new CF card there is nothing on it yet so you must click on ‘Define New’.


Amiga HDToolBox - Selecting a Drive

Amiga HDToolBox – Defining a New Drive


Which brings up the the ‘Define a New Drive Type’ screen. You need to click ‘Read Configuration’ at this point which will bring up another message. Simply click ‘continue’ to move on here.


HDToolBox

Informational Message


The software will then take a moment to scan the CF and identify the size and parameters needed to access it.  After the scan has completed it will display this info in the window as seen below.


HDToolBox

Drive Parameters


Now you can simply click ‘OK’ to get back to the ‘Drive Type’ window and then click ‘OK’ once more. At this point you will be warned ‘Are you sure you want to change the drive type for the current drive?’ Clicking ‘Continue’ will return you to the main HDToolBox screen once more.


Amiga HDToolBox

Back to the main screen but now with a ‘Changed’ drive status.


Now that HDToolbox knows the ins and outs of our CF card it is time to partition it into drives. Of course we could just make it one big 8Gb partition, after all Amiga OS 3.1.4 now natively supports large drives. However I always like to split mine into at least 2 partitions to keep things organised.

To start this process click on ‘Partition Drive’.


Partitioning a CF (Compact Flash) Card

Select ‘Partition Drive’.


Which should bring up the partitioning window as shown below.

I chose to make my first partition 500MB, this will be my System/Workbench drive. To select the size you simply drag the little triangle pointer and slide it along the bar. It’s virtually impossible to size a partition exactly so just get it as close as you can.

You need to give the partition a name – I called it DH0. I also ticked the box to make it bootable as this is the first partition and will be the one the Amiga will boot off.


Partitioning a CF (Compact Flash) Card

Creating the first partition.


To create another partition you click ‘New Partition’. Don’t be tempted to click the ‘OK’ button until you have finished creating all your partitions. For my second partition I called it DH1 and made the size approximately 1.5GB. I will be using this to install applications and save documents to. I will probably keep a small selection of music on this drive too.


Partitioning a CF (Compact Flash) Card

Creating the second partition.


I left my biggest partition for last so it could use all of the remaining space on the card. This worked out at a little less than 6GB in total. I called this partition DH2 and this will be where I install WHDLoad games.


Partitioning a CF (Compact Flash) Card

Creating the third partition.


You can click each of your partitions in the bar to check their details. Once you are happy that they are all exactly the way you want them to be, hit ‘OK’. You should then be back to the main HDToolbox window.


Partitioning a CF (Compact Flash) Card

HDToolBox with ‘changed’ drive status.


You must now click ‘Save Changes to Drive’ for all the settings you have configured up to this point to be written to the disk (CF card). The window should then change to look like this:


Amiga HDToolBox

HDToolBox back to ‘Not changed’ status.


Congratulations! Your new Amiga drive has now been prepped and partitioned! The final step is to format the partitions. To do this you need to reboot the Amiga whilst leaving the Install disk in the drive so it can boot off it.


Uninitialized Amiga Disks

The three partitioned but currently ‘uninitialized’ drives created earlier.


When your Amiga has finished rebooting you should see a screen similar to the one above. You will notice that the partitions show either as ‘Uninitialized’ or just as a weird name (or both in my case).


Amiga Icons Menu

The Format Disk menu item.


They now need to be formatted so that the Amiga can actually use them. To format a partition you just click on its icon and then select ‘Format Disk’ from the ‘Icons’ menu.


Formatting a Partition

Formatting and Naming DH0.


In the above example I called my DH0 partition ‘Workbench’ but you can call yours whatever you like. If you are interested in the new long file names feature of 3.1.4 now would be a good time to select that tick box.


Disk Format Warning

First format warning…


Make sure you select ‘Quick Format’ or you’ll be waiting a very, very long time for the format to finish. You will get a couple of scary warnings that give you an opportunity to back out if you’ve accidentally selected the wrong disk to format.


Disk Format Warning

Second and final format warning.


Click ‘Format’ in response to both of the warning messages to seal the deal. A few seconds later a drive on your newly partitioned and formatted compact flash card should appear on the workbench screen. Now simply repeat this process for each partition you created earlier.

And that concludes Part 3 of my Amiga OS 3.1.4 installation guide – Partitioning a Compact Flash Card.

I must admit I had originally intended to include the Workbench install in this part too but decided against it as I thought this post was long enough already. Therefore I will be covering the installation of Workbench in Part 4 shortly.

Installing Amiga OS 3.1.4 – Part 2 (Fitting a CF Card & Kickstart 3.1.4 ROMS)

Having created the physical floppy disks in Part 1 of this guide it is now time to fit the IDE Compact Flash adapter and the 2 Kickstart 3.1.4 ROMS.

Fitting the IDE Compact Flash Adapter

For this I needed to open up my A1200 to gain access to the mainboard.


Location of the 5 case screws.


Removing the top half of my A1200’s case was just a matter of turning it over and removing five screws. I’ve circled their locations in the photo above. There were three along the front edge and one each side of the case. The two rear edges of the case are held together by some little lugs and recesses in the case itself.


Pin 1 of ribbon cable aligned with pin 1 on mainboard.


Fitting the IDE Compact Flash adapter simply involved fitting the 44 pin cable connector to the IDE header on the board. Notice how the coloured strip of the ribbon cable aligns with PIN 1 on the board. I chose an 8GB CF card for my install as Workbench 3.1.4 now natively supports large drives. However a smaller card would work just as well. I think my original A1200 had an 80MB (yes I do mean Megabyte!) drive back in the 90’s so 8GB is an insane amount of storage!


Foam pad fitted to insulate underside of adapter.


As the compact flash adapter has lots of solder pads on the base, I stuck a thick foam pad on the underside. This will ensure that the contacts don’t short out when sat on top of the metal drive bracket. (This drive bracket would have been used to house a 2.5″ IDE HDD back in the day).


CF adapter in it’s final resting place.


Removing the old Kickstart ROMS

Luckily the Kickstart ROMS have their own little cut-out in the metal RF shielding so there is no need to remove the shield to access them.


Kickstart 3.0 ROMS

The original Kickstart 3.0 ROMs. Note the empty socket pins on the left!


I used my trusty chip puller to remove these, gently alternating pressure from one side to the other until they popped out. You could use a small flat bladed screwdriver to do this. Make sure to alternate from side to side, lifting the chips one millimetre at a time so you don’t bend the pins. If you want to make life even easier, use an old screwdriver and bend the blade 90′ at the end to make getting it under the chip easier.


Kickstart 3.0 ROMS

Pulling out the Kickstart 3.0 ROMS.


Fitting the new Kickstart ROMS

With the old ROMs removed it was time to fit the new ones. After making sure the pins would line up OK (they were splayed out a little too far) I began to fit them.

It’s vitally important they are fitted correctly and besides the usual static precautions there are three things to watch out for.

  1. The chips have to go in the right sockets. The chip marked as ‘HI’ must go in the front slot. The chip marked ‘LO’ must go in the rear slot.
  2. The chips must be oriented correctly. The end with the notch must be fitted so that it is on the same side as the notch in the socket.
  3. The sockets have 42 pins whereas the chips only have 40! You must make sure to leave the 2 pins on the left side of each socket empty.


Kickstart 3.1.4 ROMS

The 2 new Kickstart ROMS fitted correctly.


Thankfully testing the ROMS is pretty straightforward. Flicking on the power should display a brand new boot screen. That boing ball is definitely new! You can also see the updated ROM version and copyright message.


Kickstart 3.1.4 ROMS

The brand new Hyperion Amiga boot screen.


That concludes Part 2. In Part 3 I will deal with partitioning and formatting the Compact Flash card.

Installing Amiga OS 3.1.4 – Part 1 (Obtaining the Disks)

For my ‘new’ Amiga 1200 I decided I wanted to have the latest Workbench running on it so I ordered myself a copy of AmigaOS 3.1.4 from Sordan in Ireland. It arrived a few days later in a small cardboard box and consisted of a ROM Installation Guide, 2 Kickstart chips and a bunch of labels for you to stick to your own Amiga OS 3.1.4 Disks.


Amiga OS 3.1.4 Disks

This is what you get when you purchase Amiga OS 3.1.4


Registering my Purchase

To actually obtain digital copies of the disks I had to register my serial number (found on the top of the Kickstart ROM’s) on the Hyperion Entertainment website. After doing that I was able to download a bunch of ADF files and a few other things (Wallpapers, Icon packs and documentation mainly) on my PC.


Box of Blank 3.5" Floppy Disks

Time to crack open a nice box of 3.5″ Floppies.


It would have been nice to have received the disks in the box but it’s no real hardship creating my own and it cuts down the price quite a lot. I love working with real floppy disks anyway, the tactile feel of them in use and listening to the whirring of the drive as it accesses them*.

*I hate working with grotty, mouldy, faulty old disks that end up giving me nothing but aggravation and a headache.


3.5" Disk made in England

You don’t see this much any more…


I decided to use my trusty Amiga 500 to create the disks as it has an SD Card reader that makes transferring the files across from my PC a doddle. Once I’d copied the ADF files over I loaded up my favourite ADF software, GoADF and dug out a box of new 3.5″ DS DD floppy disks and set about creating my 6 Workbench disks.


GoADF


Creating the Workbench Disks

I started with the Workbench disk first, selecting it from the list of ADF files provided. Double-clicking the name of the ADF loads the image into the software.


Amiga OS 3.1.4 Disks

Here we can see all the Amiga OS 3.1.4 Disk images in GoADF.


Alternatively you can click the ‘Load image’ button on the bottom left of the screen.


GoADF

Load (ADF) Image.


As I wanted to create a physical disk from the ADF files I selected ‘Image to disk…’


GoADF

To write ADF images to a real floppy you must select the ‘Image to disk’ option.


Which loads up the disk creation window. Here you can select which drive you want to use and whether you want to format and/or verify the disk.


GoADF

My disks were IBM PC formatted hence the ‘not a valid DOS disk’ warning.


I opted to both format and verify the disk. You simply can’t be too careful when working with floppy disks these days. Most DS/DD floppy disks have to be at least 20 years old by now as new ones haven’t been manufactured in a long time.


GoADF

At this point it might be a good time to check that the disk you have inserted really is the one you want to use!


Writing the First Disk

Clicking ‘write image to disk’ brings up the obligatory warning that the disk will be overwritten. Clicking ‘yes’ begins the process which starts off with the disk being formatted.


GoADF

Formatting the disk…


GoADF features a neat virtual representation of the floppy disk marking each sector white as it’s formatted…


GoADF

Writing the data to the disk…


Then blue as the data is written to it…


GoADF

Verifying the disk…


And finally places a small black dot in it after the data has been successfully verified. A couple of minutes later a little box appears to confirm the disk has been created successfully.


GoADF

Hurrah – one down, five to go!


And here’s the completed disk with it’s snazzy label affixed.


Amiga OS 3.1.4 Disks

Amiga OS 3.1.4 Workbench Disk.


Now it was just a matter of repeating the process for the other 5 ADF’s to give me a complete set of Workbench disks.


Amiga OS 3.1.4 Disks

A full set of Workbench 3.1.4 floppy disks!


However there’s a couple of other disks that needed creating – ones that no labels are provided for. The first is the ‘Modules Disk’ and the second is a new ‘3.1.4.1’ update that has recently been released containing the latest Workbench bug-fixes. The update disk was a separate download from the Workbench disks but is provided free for registered users.


Amiga OS 3.1.4 Disks

The extra disks needed. Sadly no professionally printed labels for these!


In Part 2 I will cover installing the ROM chips and performing a clean install of Workbench on a new CF/HDD.

Blizzard 1230 MkIV Accelerator Card

Blizzard 1230 MkIV

I recently managed to pick up a nice Blizzard 1230 MkIV accelerator off eBay which arrived a couple of days ago. I reckon I was probably just as excited to get this one in 2020 as I was back in the 90’s when I got my first one!

After opening it up I gave it a good visual once over and everything looked to be in good order. Not sure why the markings have come off the top of the chips but I won’t see them once it’s installed anyway.

Some Information about the Blizzard 1230 MkIV

My 1230 was made by Phase 5 Technologies which is the original manufacturer of the cards. Unfortunately Blizzard went out of business so later cards were manufactured by a company called DCE. Ironically it looks as though DCE still exists to this day making electronic circuit boards!


Blizzard 1230 MkIV

I’m guessing this was manufactured some time in 1995 looking at the board.


As standard the Blizzard 1230 MkIV comes with a 50Mhz Motorola 68030 Processor and can be fitted with a single 72 pin SIMM up to 128MB in size. Mine came fitted with a 64MB SIMM. The exposed edge connector is where an optional Blizzard 1230-IV Fast SCSI-II controller module can be attached. The SCSI module actually incorporates a second 72 pin SIMM slot meaning you could theoretically add a whopping 256MB of FAST RAM to your A1200 if you wanted to! Of course now I want to do just that but the SCSI modules are super rare these days!


Blizzard 1230 MkIV

The Motorola 50Mhz 68030 CPU (on the right) and 50Mhz 68882 FPU (left).


I made sure I got one with the FPU installed as this was not included as standard. These were never strictly necessary and most software didn’t benefit from having one. However VistaPro (one of my favourite programs) is just one such title that relies heavily on having one. The FPU really makes a significant speed difference for programs like this that involved performing a lot of complex mathematical calculations.


Blizzard 1230 MkIV

View of the reverse side of the board.


Fitting the card

I’d forgotten just how snuggly the Blizzard 1230 fitted inside an A1200. After triple-checking it was correctly aligned I needed to gave the card a worryingly forceful push before it finally clicked into position.


Blizzard 1230 MkIV

This is how the card looks fitted inside my A1200. The edge connector, visible on the upper left, is for the optional SCSI module. If I ever come across one I’ll add it to my setup for sure.


Of course the real moment of truth was turning the Amiga on. Happily this proved to be completely uneventful. Workbench booted up without a hitch and reported 65,957,656Mb of Fast RAM which was a great start.


Workbench Screen showing Chip and Fast RAM levels.

From 0 to 65,957,656Mb. A good start!


Speed Test

The next test was to load up the classic Sysinfo and make sure the CPU and FPU were correctly identified, which they were. Of course you can’t load Sysinfo and not run a quick speed test! My Blizzard equipped Amiga topped out at 9312 Dhrystones, or 9.72 Mips. Basically twice as fast as a 25Mhz A3000 which is exactly what you would expect.

Of course it’s nowhere near as fast as my Vampire equipped A500 and it actually cost quite a bit more too. But you know what? I don’t care. This just ‘feels’ right. The best way I can describe it is if you imagine upgrading a classic car. The Blizzard is like fitting a period authentic performance exhaust and carburettor to the engine whereas the Vampire is like replacing the whole engine with an electric one. Don’t get me wrong, the Vampire is an amazing piece of hardware and you can’t beat it in terms of value for money. However absolute power is not my goal here… it’s having an authentic Amiga experience.


Blizzard 1230 MkIV Speed Test

SysInfo Speed Report.


Real Time Clock Test

Anyway enough of that. There was one final test that would take a little longer to complete. The Blizzard incorporates a 3V rechargeable battery backed clock for keeping track of the date and time. However when I plugged the card in the date/time were completely wrong. The seller told me the card hadn’t been used in years which is why he was selling it so this wasn’t unexpected.

To test the battery I set the date and time correctly and then left the Amiga turned on for a couple of hours before going to bed. This would hopefully give it a chance to get some charge before turning it off for the night. Booting it up the following evening revealed it had retained the correct time so the battery was still working! Of course the battery may no longer hold enough charge to last for extended periods but for now I’m happy that everything appears to work perfectly!


Amiga keeping the correct date and time!


MMU Library

With the card installed and tested there was just one niggle for me to sort out. Every time I booted my A1200 I was getting the following error about no MMU library being installed:

“This system is running from a 32-bit CPU (68030, 68040 or 68060) which may require specific CPU libraries to be installed in the LIBS: directory of your hard disk.”

It then goes on to recommend you either install these files off the disk that came with your accelerator card or search Aminet. As I didn’t receive a disk with the card I went straight to Aminet and had a rummage around. Sure enough there was an MMULib.lha download for just such a scenario. I ran the installer and let it install an mmu.library and a bunch of 680×0 library files and then rebooted. And just like magic the error was gone – happy days!

Now I just need to get hold of that SCSI module!

Welcoming an Amiga A1200 into the fold.

Today the Lyonsden computer collection just got a little bit bigger with the arrival of a Commodore Amiga A1200 computer! 🥰 This is actually something I’ve been hankering after for a long time now. I’ve missed being able to play those old AGA games and also wanted to get back to using an ‘original’ machine. Not only that but the A1200 is just a more capable and expandable machine. It has an internal IDE interface as standard and a PCMCIA slot that can be used for a multitude of things. Wi-Fi and ethernet network cards, card readers, SCSI interfaces and so on. That AGA chipset is not just for games either, it provides a range of improved workbench screen modes that support up to 256 colours too!

Amiga A1200

View from the left.

The A1200 has been recapped already so hopefully it will provide many more years of faithful service now. It’s a really nice example and hasn’t been modified in any way which is how I intend to keep it. I’ve already heavily modified my A500 so hopefully I’ve scratched that particular itch well enough already!

Amiga A1200

View from the right. Original floppy disk drive fully intact.

The plan is to operate the Amiga A1200 just like I would have done 25+ years ago. That’s not to say I’ll be keeping it stock… oh no. But it does mean I won’t be fitting a modern FPGA accelerator into it for example. Whether I can operate it without a Gotek remains to be seen but I’m certainly going to try!

Amiga A1200

View from above.

Upgrades on the way…

I’ve already got a Blizzard MkIV 68030 accelerator on the way for it and a SCSI CDROM drive is sat on the desk ready to be hooked up too. These are both accessories that I had back in the 90’s and so meet my criteria for keeping things original. I also plan to fit a hard drive (well CF card) and install the very latest AmigaOS 3.1.4 on it too. Basically lots of new projects to look forward to!

Amiga A1200

View showing the serial number and silver Commodore label.