Lyonsden Blog

Tag - sd card

SDBox Review

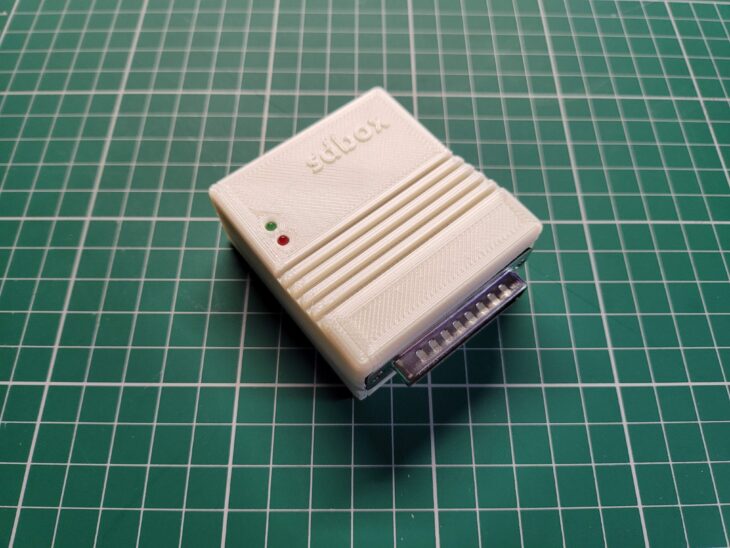
SDBox

If there was one take-away from my recent clean install of AmigaOS3.2 it was that transferring files across to a stock Amiga system is a real pain in the arse. Sure you can use CrossDOS, but that is limited to 720K files. If you have a CD drive then you can burn stuff to a CD which raises the limit considerably to 650mb. However this is pretty time consuming and my drive refuses to read CDRW discs so means I have to use CDR’s which is downright wasteful.

Enter the SDBox – a little expansion for any Amiga system that enables it to read and write data to MicroSD Cards. A few years ago I wrote a post about adding an SD Card to an A500, however that relied on having a Vampire accelerator card. This device just requires a parallel port to operate, something which all Amiga’s have.

What’s Included

The SDBox is actually a public domain Amiga community project that you can construct yourself (see here). However due to the inclusion of some surface mount components I chose to buy one ready made from Amigastore.eu. I can normally solder stuff OK but dealing with tiny surface mount components is beyond my skill level.


SDBox

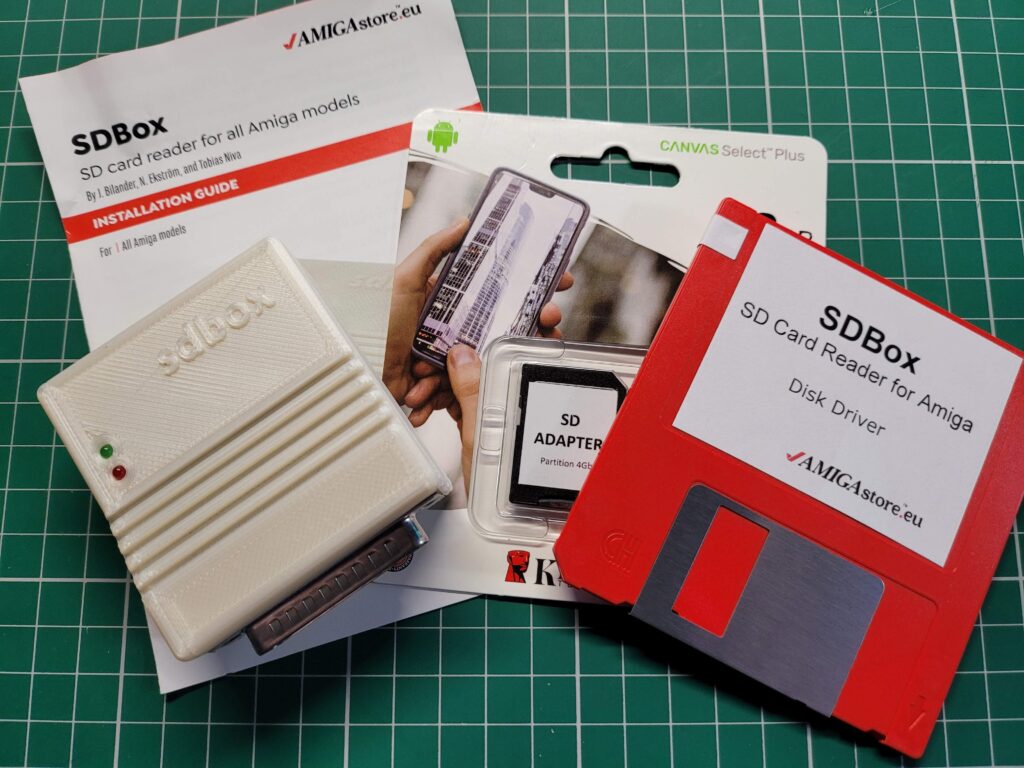
SDBox – package contents.


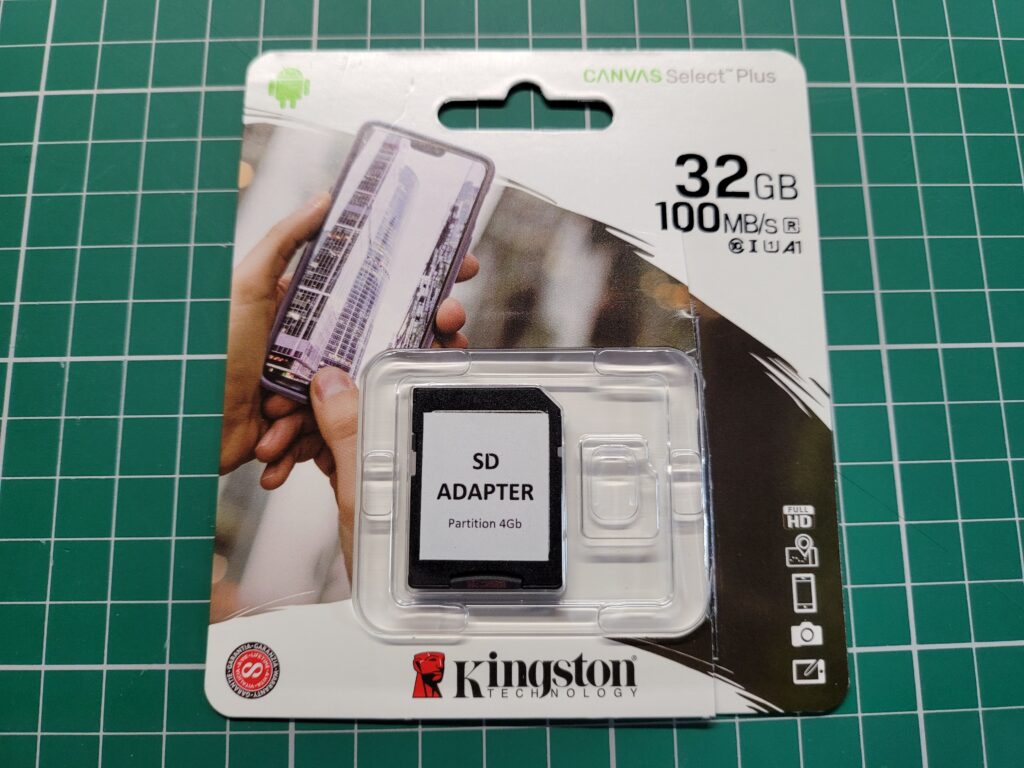
Included in the package was the SDBox device in a nice 3D Printed case, a 4GB MicroSD Card with adapter*, instruction booklet and a 3.5″ floppy containing the software to make it all work. A mini USB cable was an option too but I’ve accumulated dozens of them over the years so didn’t see the point in getting another one.


Connecting the SDBox

With the Amiga turned off the SDBox simply plugs into the parallel port socket round the back. It also requires 5V of power to function which can be provided via a mini USB cable.


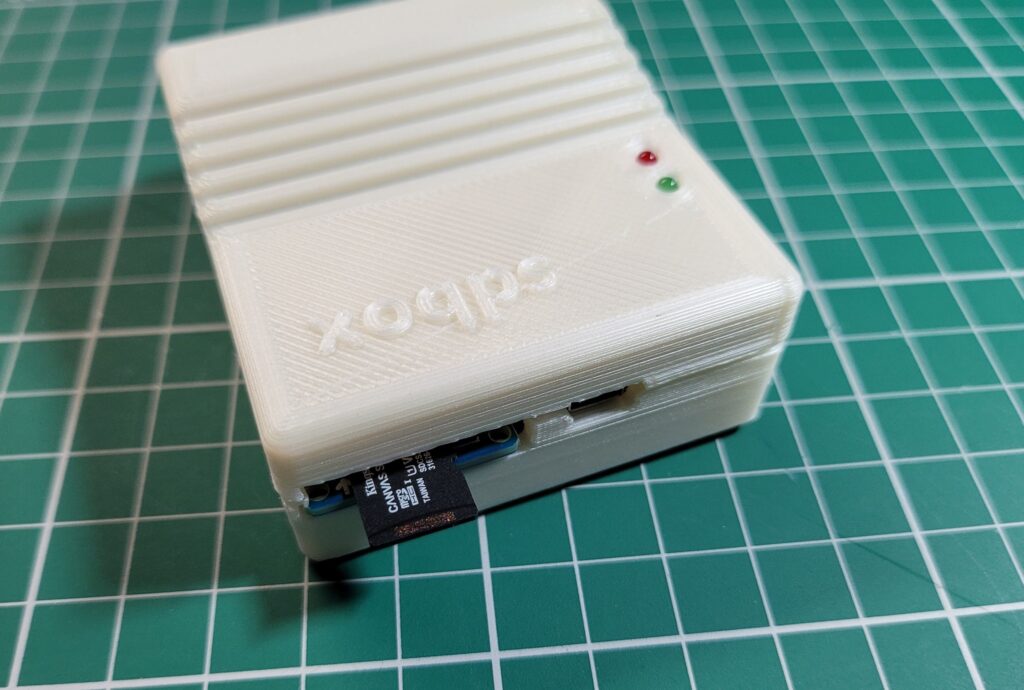
SDBox

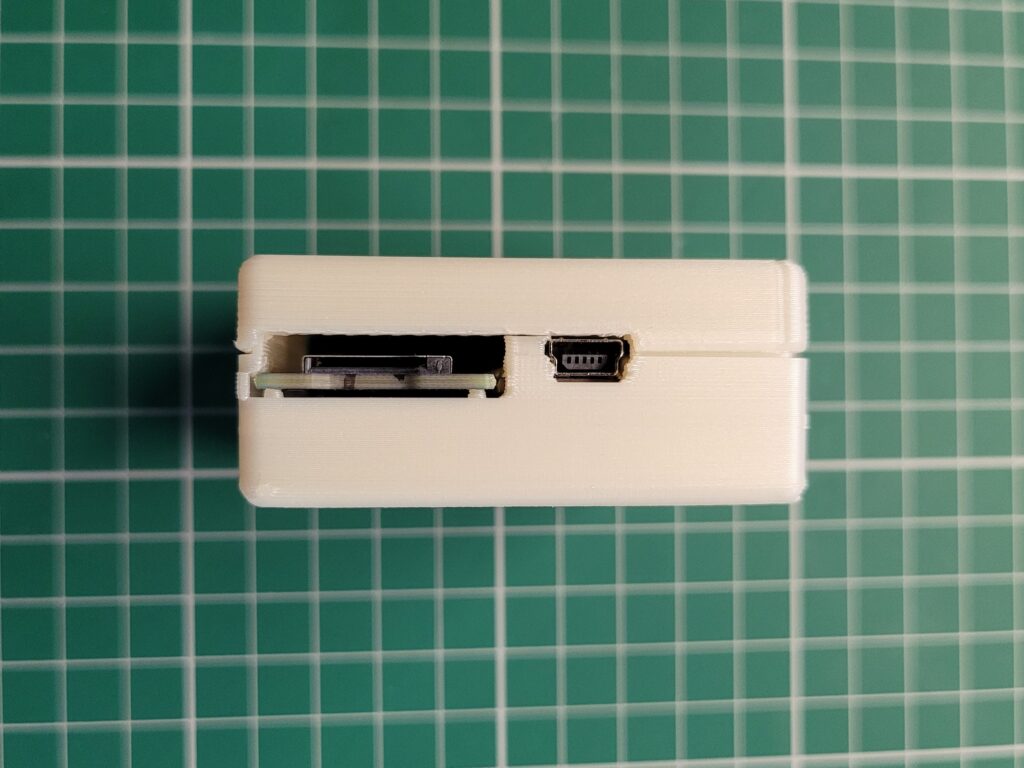
The Micro SD card slot and Mini USB power socket on the back of the SDBox.


I found there was just enough clearance at the side for it to not interfere with my RCA audio plugs but this might not be the case if you have thicker plugs.


SDBox

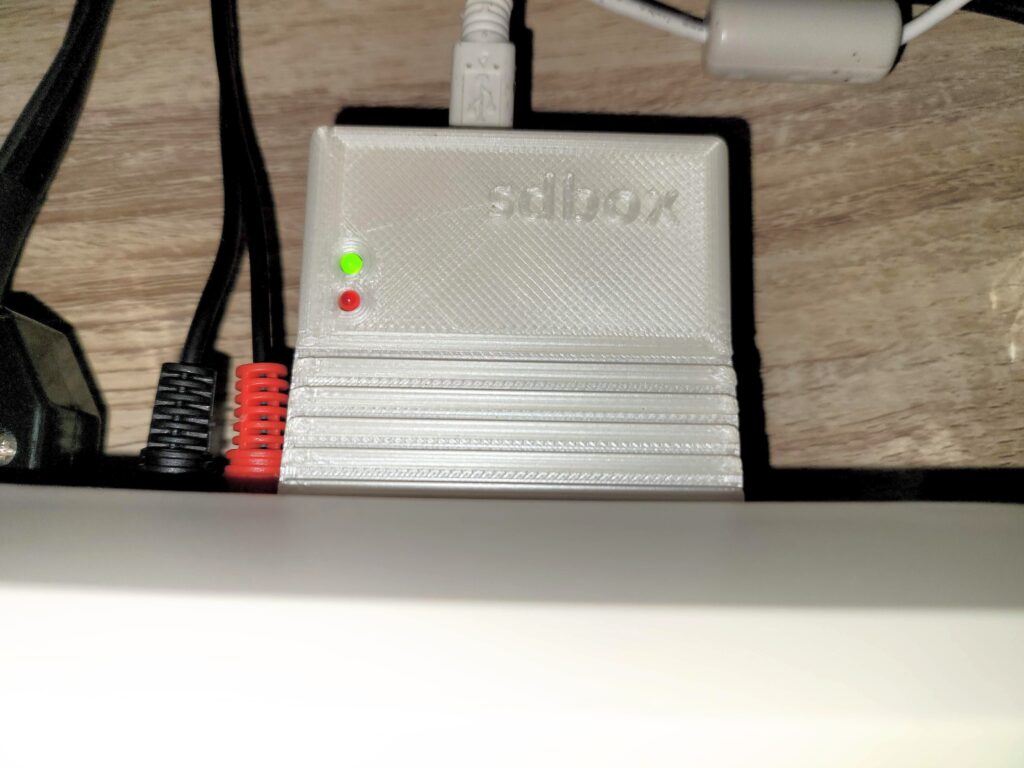
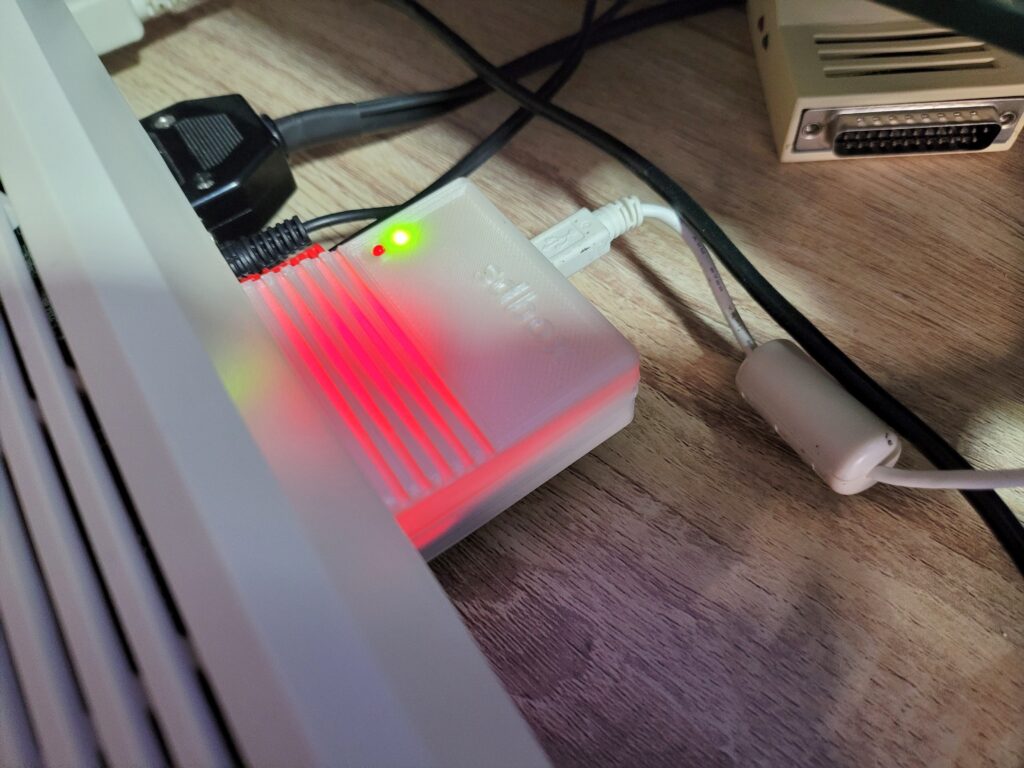
The SDBox plugged into the parallel port.


When powered on the box glows red from inside – presumably this illumination comes from an LED on the Arduino Nano. It’s not quite as noticeable as the photo below would have you believe and it’s not a big deal.


SDBox

Red glow from the Arduino Nano inside.


Installing the Drivers

With the hardware powered on and connected the next task is to pop in the floppy and run the installer to install the driver software.


SDBox

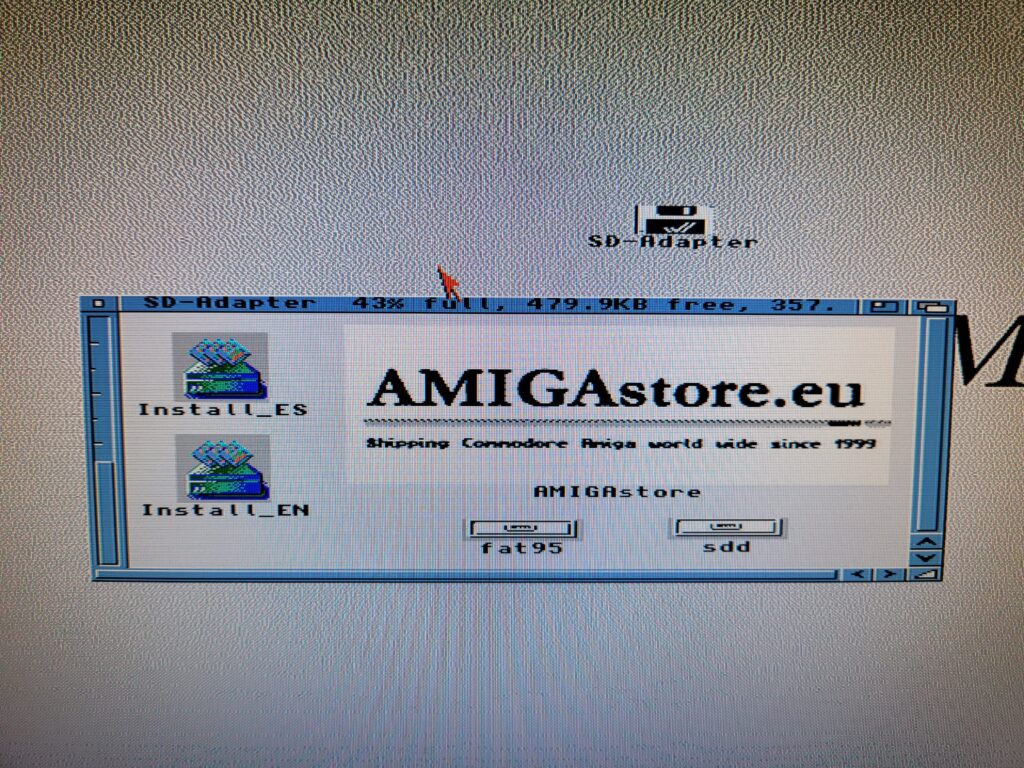
Contents of the floppy disk.


The floppy comes with a handy installer (in both English and Spanish) to copy over and configure everything necessary to use the SDBox.


SDBox

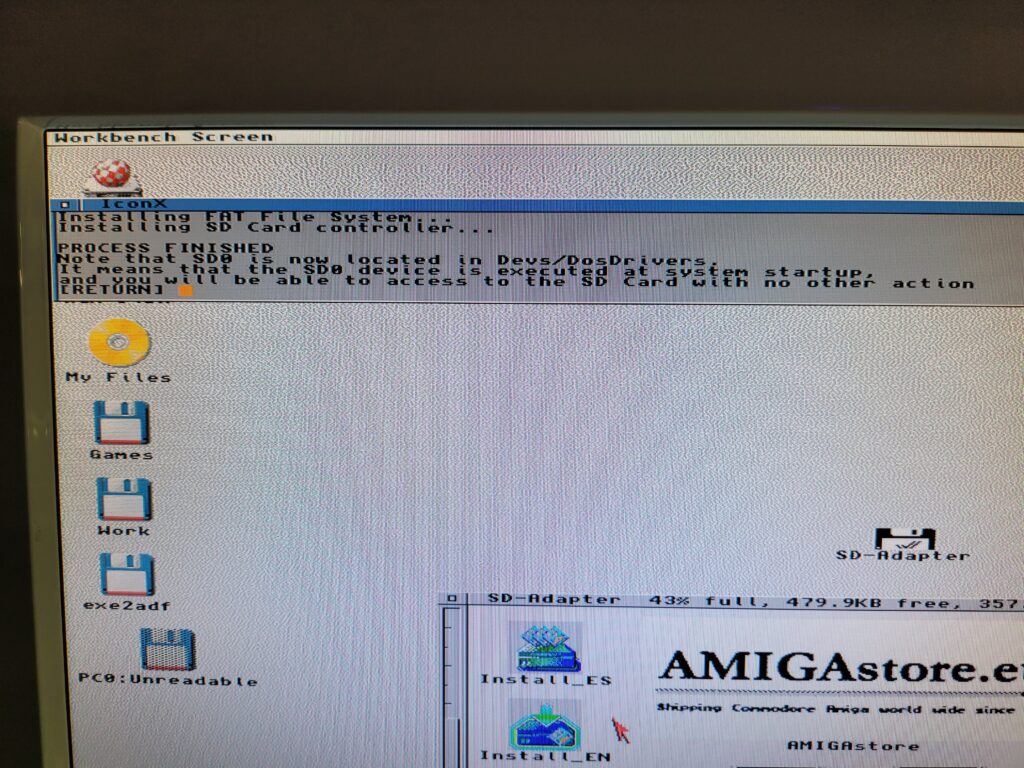
SDBox Installer now finished.


A few moments later a message appears on the screen to inform you that the install is complete and where it has put the SD0 device.


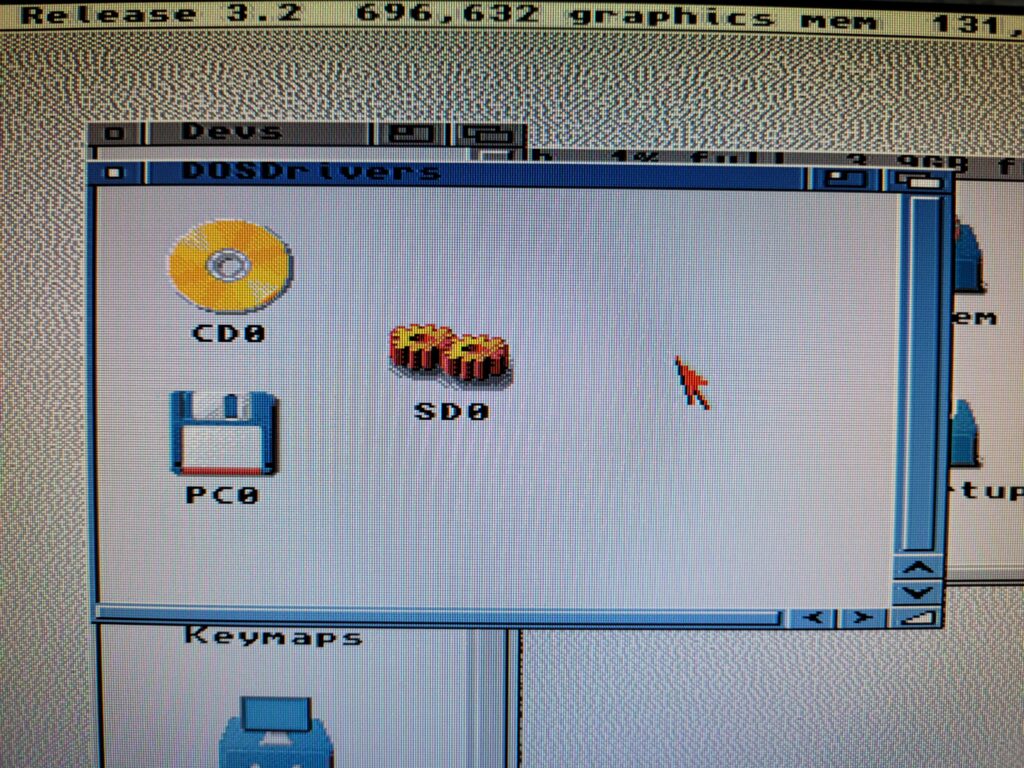
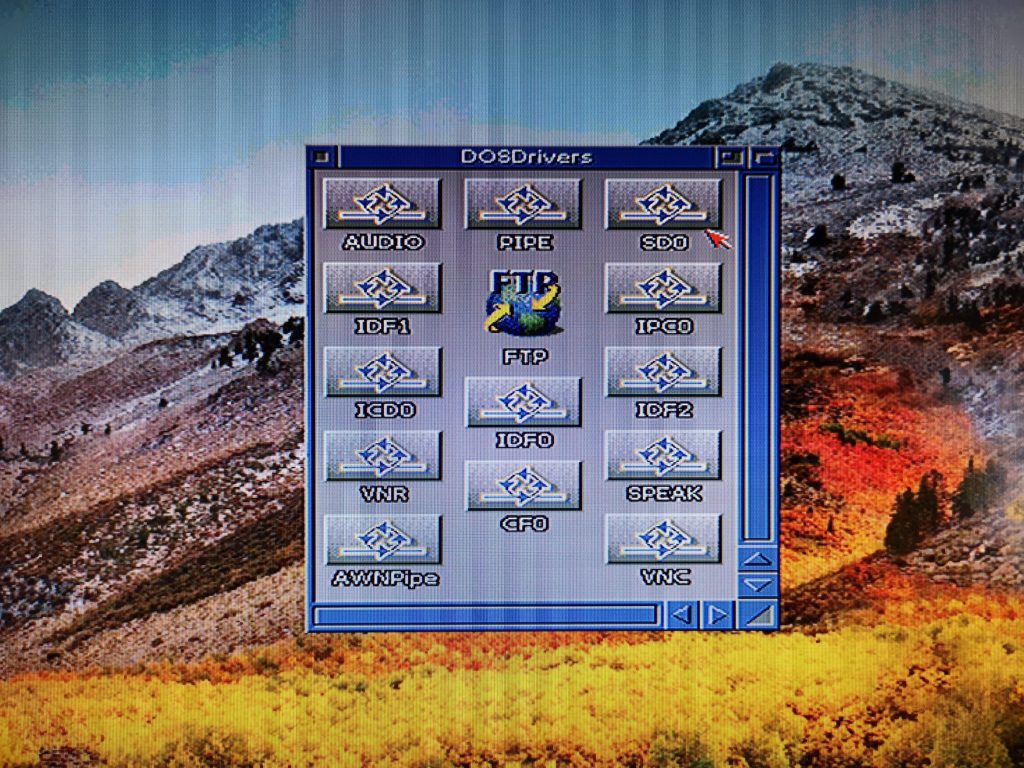
SD0 DOSDriver

This is the SD Device it installs in DEVS/DOSDrivers.


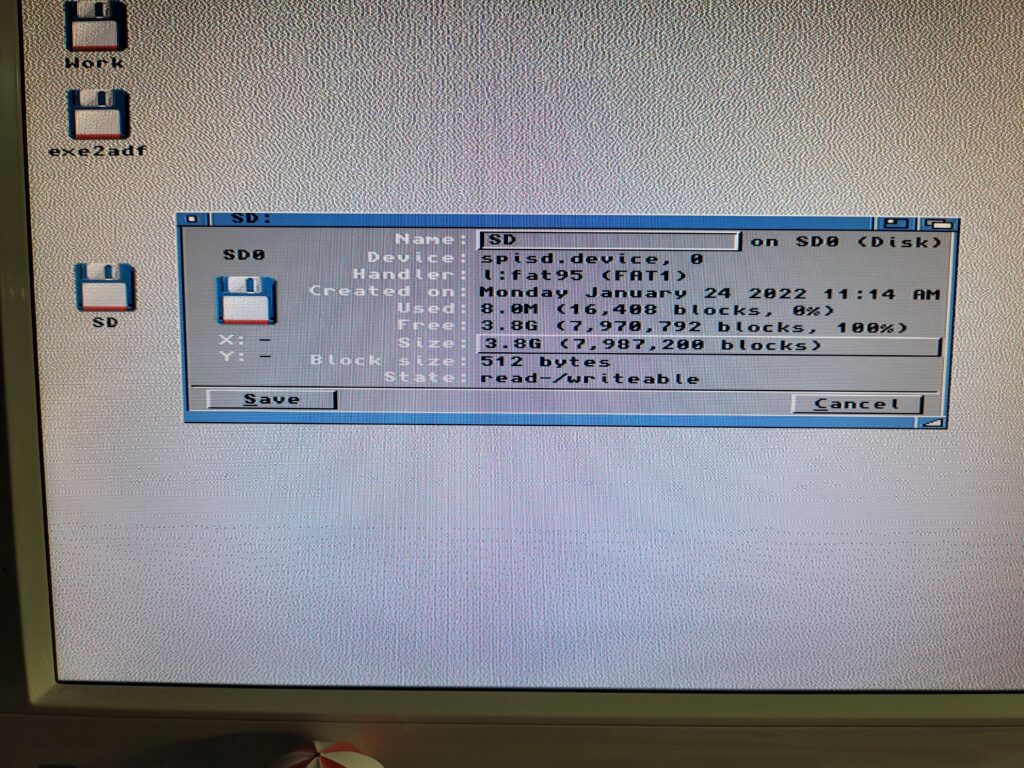
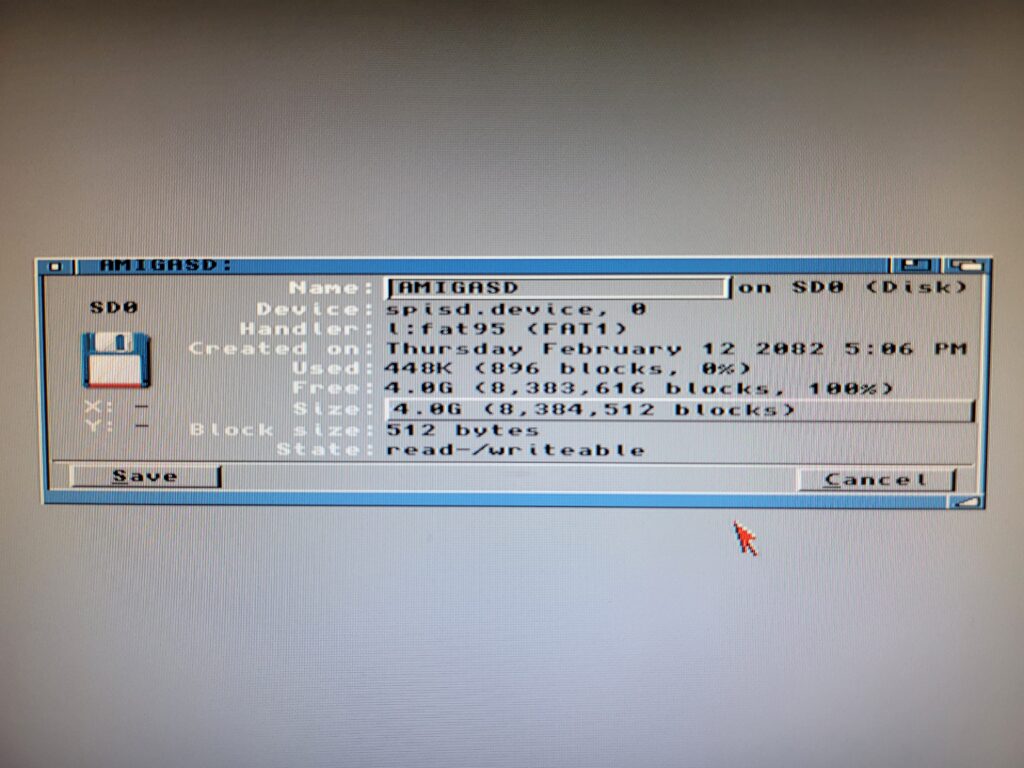
A quick reboot and my SD card was showing up on my Workbench screen, just like any other drive would. I brought up the drive info window for SD0 to confirm it was reading the card properly.


SD0 Information

Icon Information for the SD card.


SD Cards

I chose to get an SD Card with my SDBox but you can use any MicroSD card you may have lying around. The one caveat is the device is only capable of accessing 4GB partitions so if you have a bigger card you must create a 4GB (or smaller)  partition on it for it to work. There’s some info at the end of this post describing how to partition a MicroSD card in Windows if you need it.


SDBox

If you look carefully you can see the packaging has been opened already…


*Clearly AmigaStore.eu were unable to source a 4GB card for me as they actually sent me a 32GB MicroSD card that had been manually partitioned to 4GB.


Using the SDBox

In use the SDBox performed well and exactly as described. It’s not going to set any speed records but given it’s hooked up to a parallel port that’s to be expected. To give an idea of transfer times I copied an 880K ADF file from my RAM Disk to both my internal CompactFlash card and the SDBox. It took about 1 second to transfer to the CF card and 6 seconds to the SDBox. Next I tried a bigger file;  AmiSSL 4.12 which was 5.7MB. It took 6.5 seconds to transfer to my CF card and 39 seconds to complete the transfer via the SDBox. Approximately six times slower but still perfectly acceptable.


SDBox

MicroSD card being inserted in the card slot.


The SDbox doesn’t support swapping thecard whilst the Amiga is running so don’t expect it to update the contents if you do – it’ll just result in an error. It requires a full reboot to refresh the contents of the card but again this is not a great inconvenience.


Fly in the Ointment – Conflict with Indivision AGA Mk3 Flicker Fixer

On a slightly more sour note I did encounter one issue with my unit. Whenever the SDBox was accessed, whether that be reading or writing data, my screen flickered/wobbled around. You can see exactly what I’m on about in the little video clip I recorded below. After testing all sorts of things I narrowed it down to an issue with using interlaced HIGHGFX screenmodes on my Indivision AGA Mk3 flicker-fixer. Normal Amiga screenmodes, including interlaced ones, worked just fine as did non-interlaced HIGHGFX modes (all of these still going through my flicker-fixer).

Naturally Sod’s law meant that my screen was utilising ‘HIGHGFX Super-High Res Laced’ which is why I witnessed the issue from the start. It’s certainly not a deal-breaker – it’s more of an irritation than anything else (especially if you are a bit of a perfectionist). It doesn’t affect the operation of the SDBox and I can certainly live with it – just something to bear in mind for anyone with a similar setup.


I tried many things to get rid of the issue and also contacted the manufacturer of the Indivision card but so far I do not have a solution. If I ever get to the bottom of the issue I’ll update this post.


How to make a 4Gb partition on a larger SD Card.

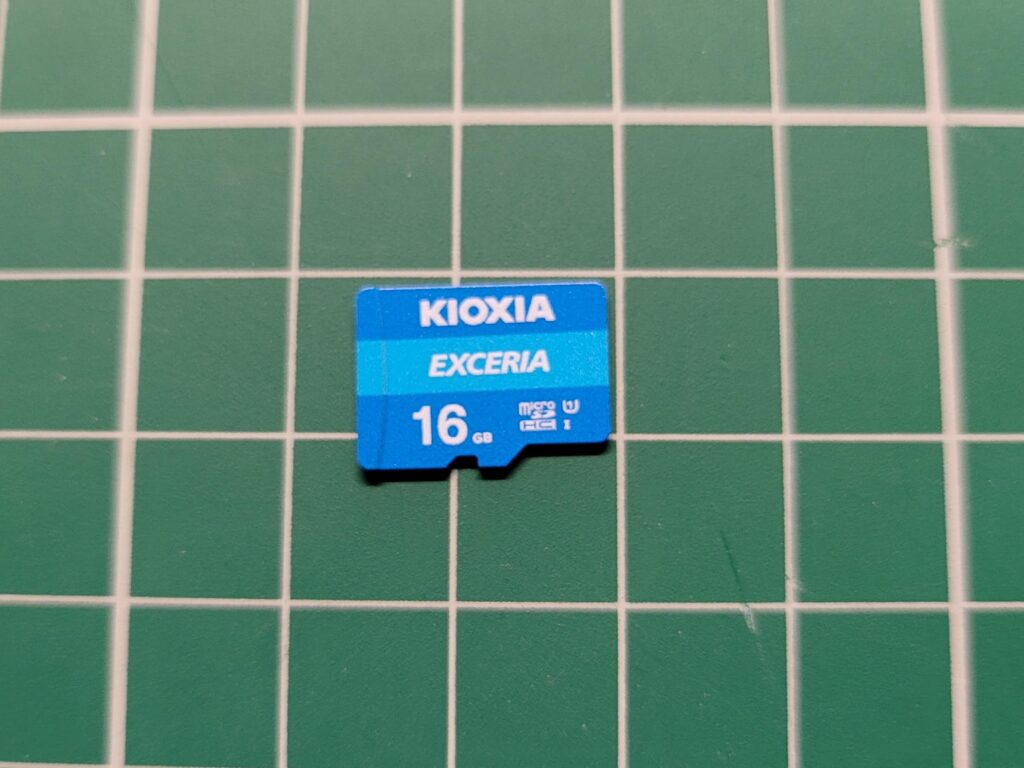
This is a pretty straightforward task to accomplish in Windows. I used a nice bit of free software called ‘MiniTool Partition Wizard‘ to do the job along with a spare 16GB MicroSD card that I had lying around.


MicroSD Card

A generic 16GB MicroSD card I used for testing.


Basically what you need to do is load up the software and then find your card in the list of drives. They normally show up slightly smaller than the stated capacity. For instance I popped in a 16GB card and it showed as 14.43GB under the list of available drives.

Once you’ve located it simply right-click it and select ‘Delete Volume’ then do the same again but select ‘Create’ to make a new, smaller partition. On the ‘Create New Partition’ screen select ‘FAT’ as the file system (see screenshot below) and it will shrink the size of the partition down to 4GB automatically. Give it a name (this will appear on your Amiga workbench) and then click ‘OK’ and then ‘Apply’ to make all these changes happen.


Partition Wizard

Partition Wizard – New Partition Settings


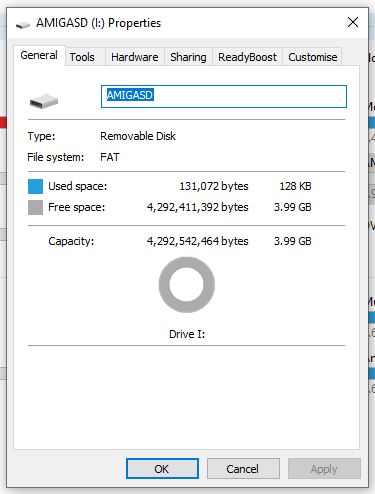
Now if you right-click the SD card and select ‘Properties’ in Windows you should get the screen below showing that the card is now recognised as being 4GB and formatted with the FAT file system.


Windows 10 Drive properties

Checking the size/format of the card in Windows.


Back over to the Amiga – pop the card into the SDBox and boot up your Amiga. You should now see the card appear on Workbench with the name you gave it in Windows. You can go to ‘Icon’ > ‘Information’ to bring up a similar properties screen to check it’s all setup correctly.


SDBox

SD Card properties displayed on Workbench


And that’s all there is to re-partitioning an SD card to work with the SDBox. Enjoy!


Modding Amiga 500 Floppy LED to Display IDE Activity

Introduction

Unlike the Amiga 1200, the A500 was never designed to allow the fitment of an IDE Hard Disk Drive (HDD) inside it so naturally it never included an HDD activity LED. For the longest time this was never really an issue. Sidecar expansions such as the A590 were the only way to add HDD’s to the A500 and they came with their own drive activity LED. However, now that many owners are fitting expansions like the Vampire into their Amiga 500, things are a little different. These new devices facilitate the use of 2.5″ HDD’s or Compact Flash (CF) cards inside the casing of the A500, something that was never possible before.

The problem with this is the lack of a drive activity light. It can be quite disconcerting at times when you turn on your ‘Vampired’ Amiga 500 and nothing appears to happen. You sometimes wonder if it’s actually booting up or simply frozen. The same issue crops up whilst loading a game or running a program. There’s simply no way to tell if your Amiga is doing anything, especially if you’re using a CF card as they are completely silent. At least if you have a 2.5″ HDD they do at least make some sounds whilst being accessed.

Wouldn’t it be great if you could add a hardware activity light to your A500 to solve this issue? Well, recently I stumbled across a nifty little mod from Arananet that claimed to allow you to do just that by using the Amiga 500 floppy disk activity LED to show IDE HDD/CF activity. It’s called the ‘IDELED’ and is only €7 plus postage so I ordered one and sat back waiting for it to arrive. (Direct link to the Amiga 500 IDE activity LED can be found here).

Incidentally, if you fancy making this modification yourself all you need is a phillips screwdriver (to open the A500 case up), some wire cutters/strippers and a soldering iron. Don’t worry if you’re not an expert solderer, I’m rubbish at soldering but this is very basic stuff and should be well within most peoples capabilities.

A closer look at the IDELED device

The device arrived in a little anti-static bag with no instructions. It’s a tiny little 1″ square circuit board that incorporates an 8 pin socket one one side and 8 pins on the other. There is also a small hole for you to solder a wire to, plus a few components that allow it to ‘do its thing’.

This slideshow requires JavaScript.

Getting Started

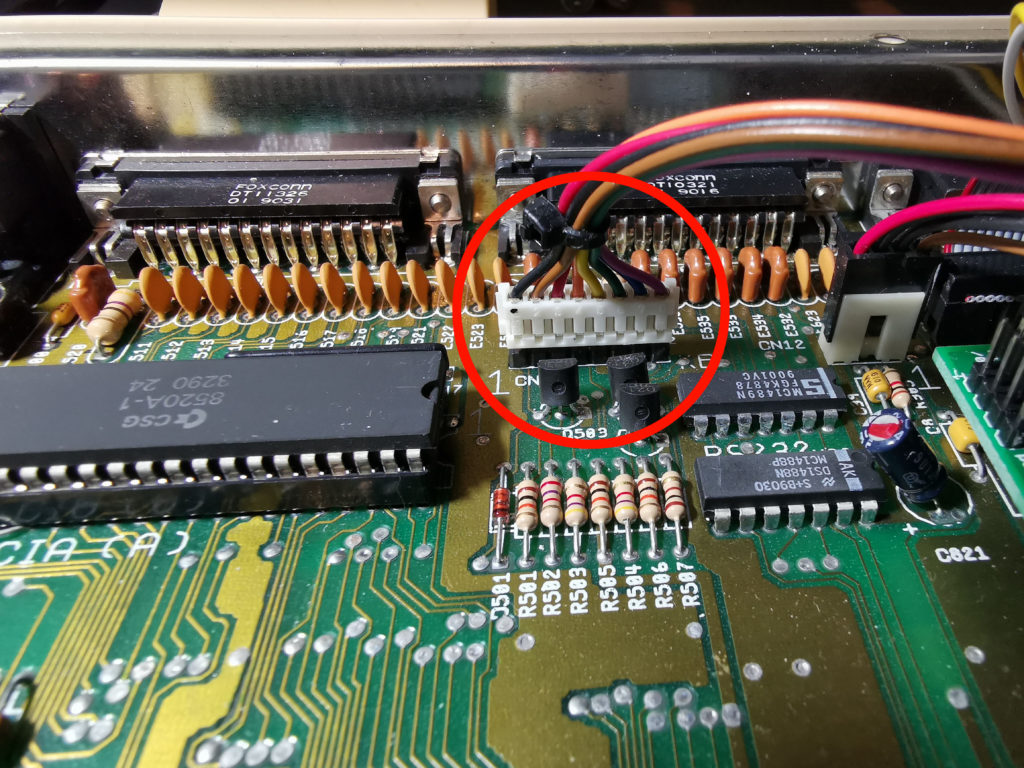
The IDELED is designed to sit between the Amiga 500’s keyboard connector and the keyboard cable. This gives it access to the floppy drive LED circuit and allows that to be used as an IDE activity LED in your Amiga 500. After opening up your A500 the first thing you need to do is carefully unplug the keyboard connector, lift away the keyboard and set it to one side.


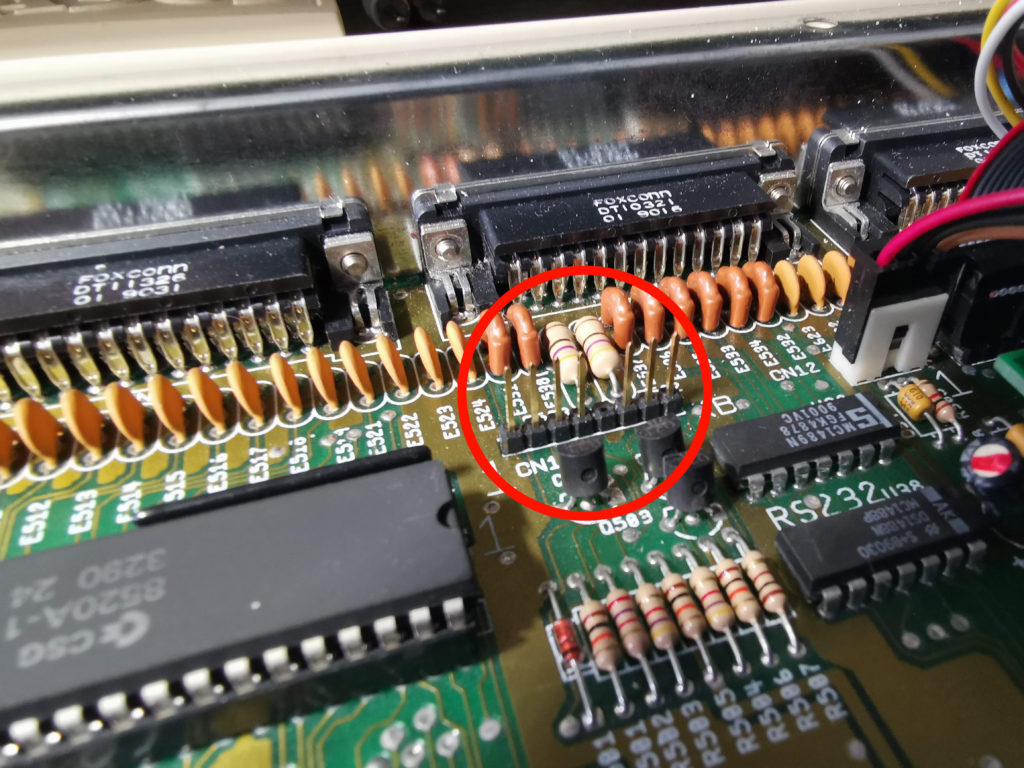
Amiga 500 keyboard connector

Unplug the keyboard connector (circled in red).


You’ll then have access to the 8 pin keyboard connector on the mainboard which will look like this:


Amiga 500 keyboard connector pins

Keyboard connector pins


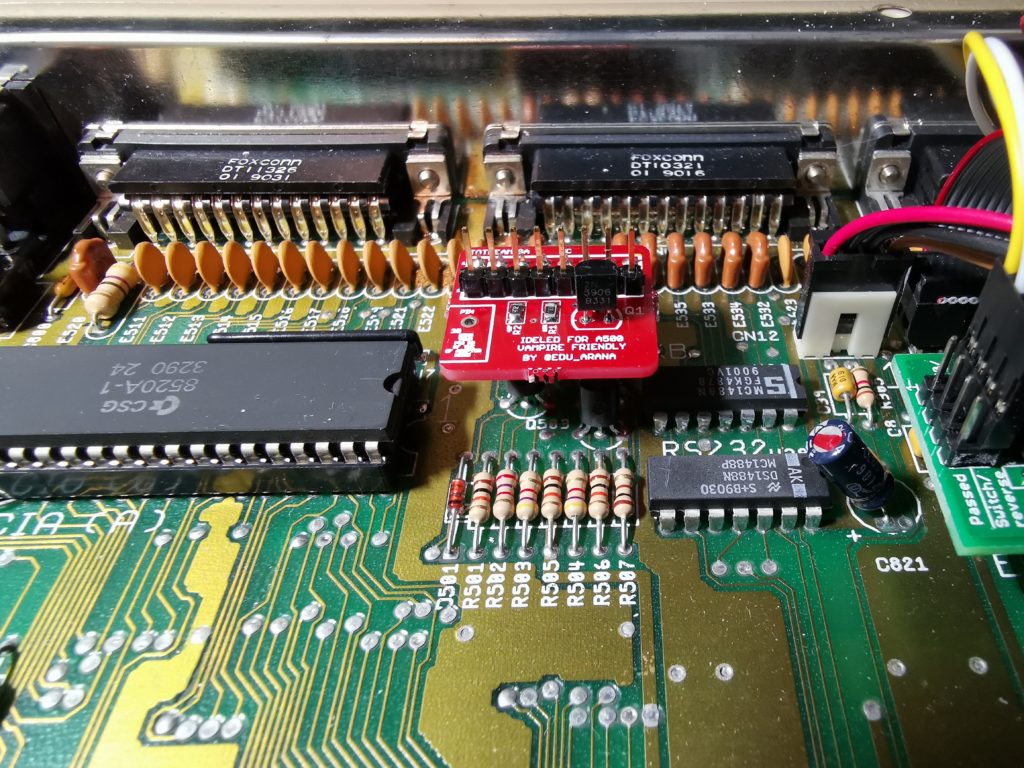
Next you need to attach the IDELED board to the keyboard connector pins on the mainboard. Make sure that you connect it the correct way around – orient the board so that the keyboard connector is at the back if you are looking at it from the front of your Amiga. It should then look like this:


IDELED board

IDELED fitted to keyboard connector


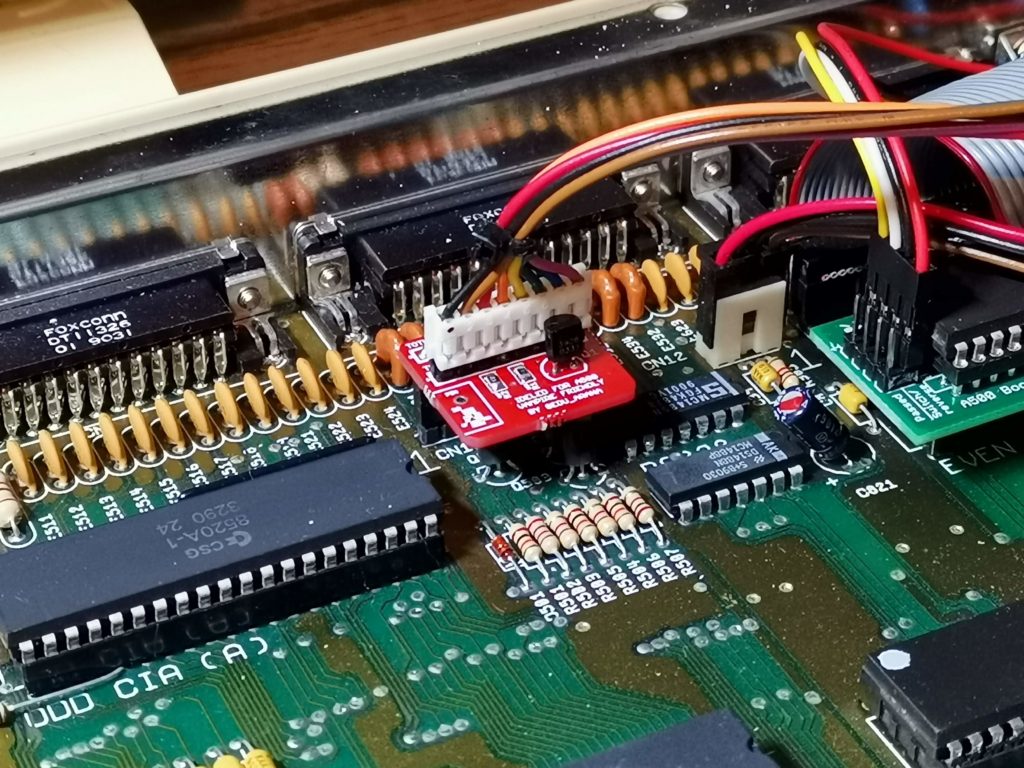
At this point I connected the keyboard to the pins on top of the IDELED board. You might want to leave doing this until after you’ve soldered the connecting wire but I needed to experiment a bit and wanted the A500 powered on and the LED’s working. At this stage the project looked like this:


Amiga IDELED board

IDELED board fitted between mainboard and keyboard cable


Solder time

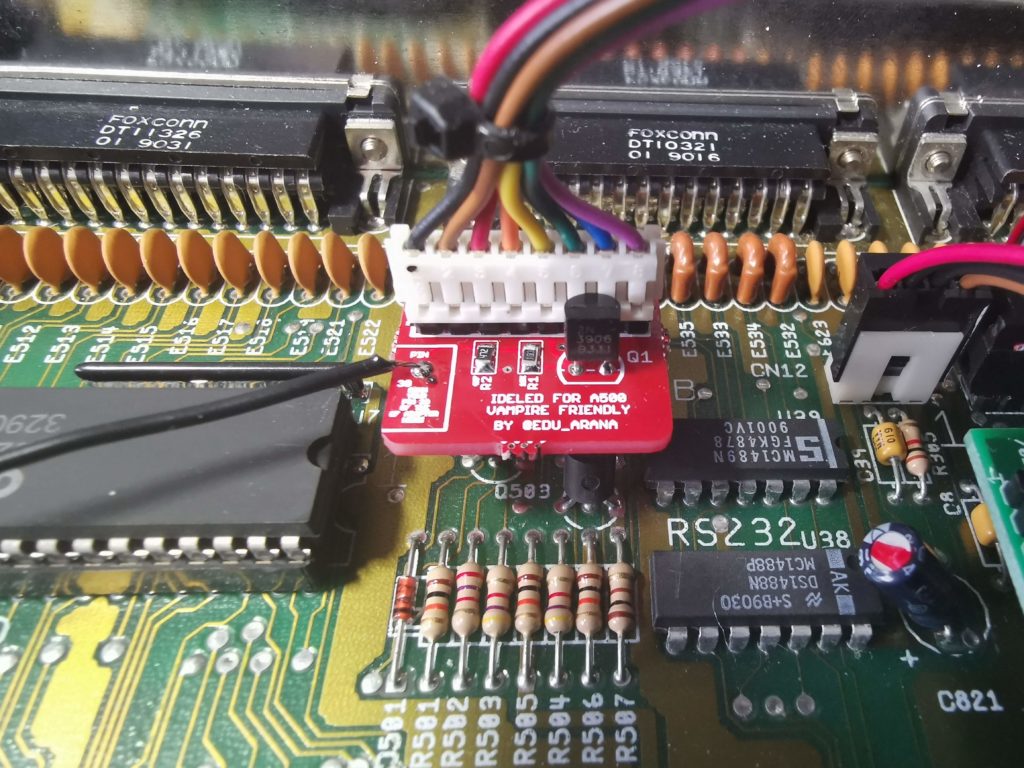
The next job is to attach a short wire to that little solder point on the left side of the IDELED board. The wire needs to be long enough to reach the IDE connector on top of your Vampire (or other accelerator card) with enough slack so that it’s never under any strain if you have to move things around in the future. You will need to strip off a few millimeters of insulation from each end of the wire before you go any further. It’s much easier to do this before one end of the wire is attached to anything. I’d also suggest ‘tinning’ the exposed wire each end as this makes soldering them easier.

Insert one stripped and tinned end of the wire into the little hole in the board and apply a blob of solder. You should now have something looking like this:


Amiga 500 IDELED board

IDELED board with ‘activity’ wire soldered on


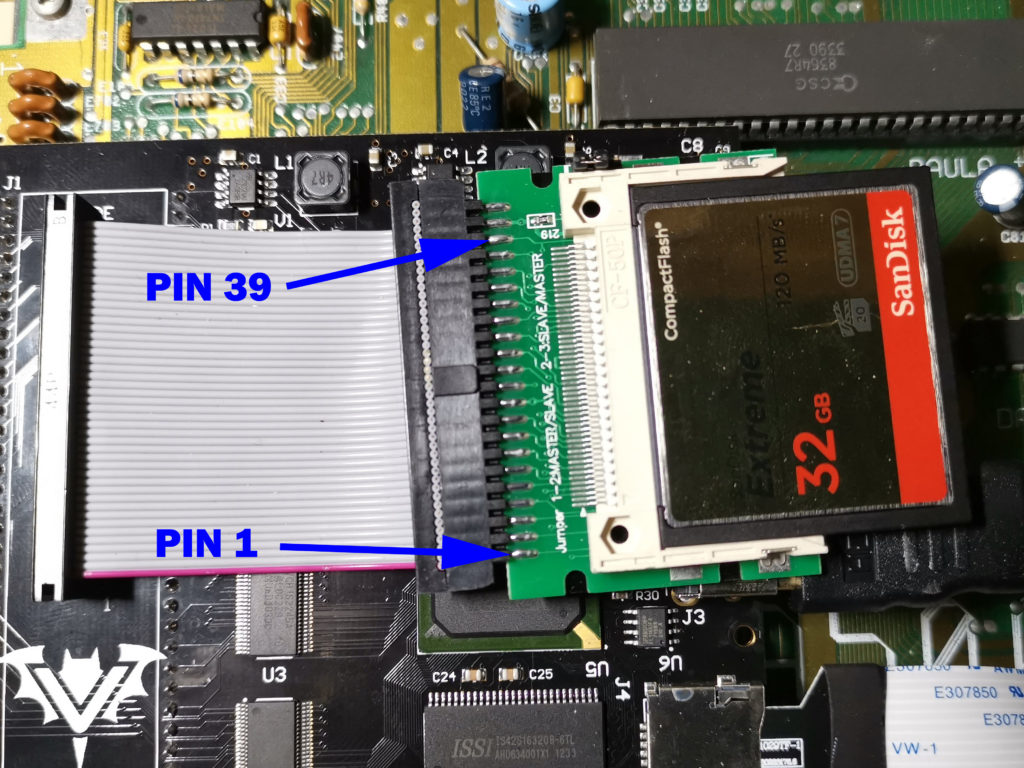
Locating pin 1 and 39

The other end of the wire needs to go to ‘pin 39’ on your IDE adapter. This is the pin responsible for transmitting drive activity. If you have a CF adapter like mine (pictured below) then you should be OK to just hook the wire up to the same pin as I did.


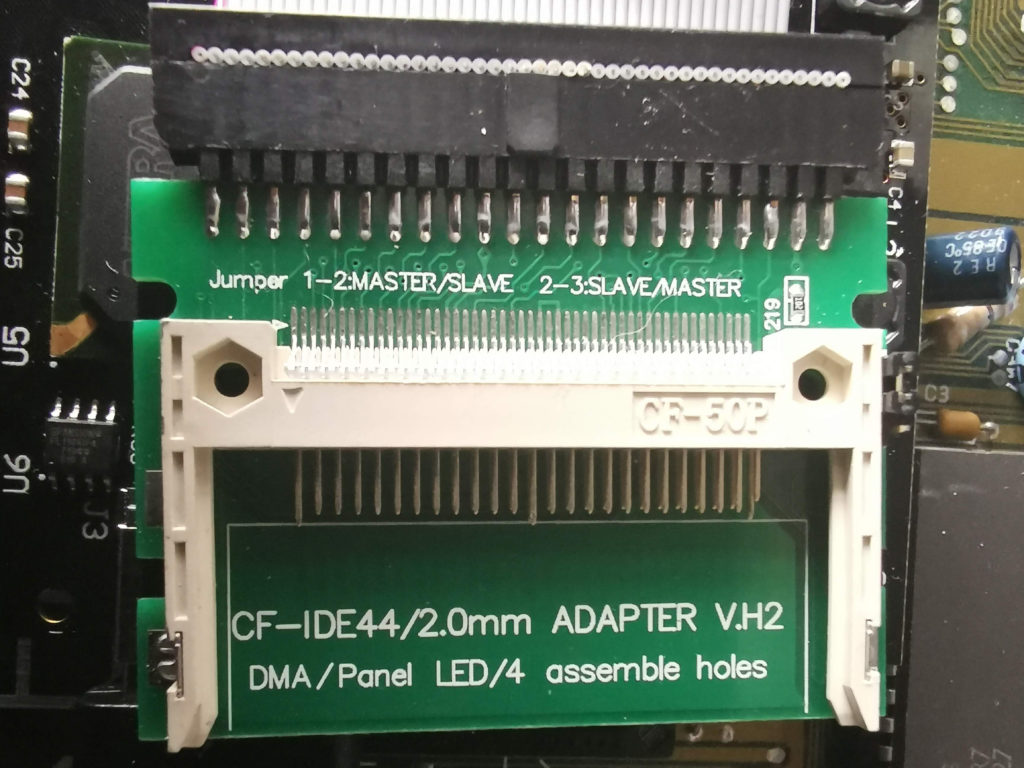
Amiga Compact Flash IDE adapter

A closer look at my IDE CF adapter (without CF card fitted)


Amiga Vampire CF flash adapter pins

Locations of pins 1 and 39 on my 44 pin IDE adapter


To locate ‘pin 39’ on my adapter I used the 44 PIN IDE connector diagram below for reference. Note the way the pins are numbered – it alternates up and down with 1 top left, 2 bottom left, 3 back to top row and so on. My particular adaptor has the upper row of 22 PINs connected to the top of the circuit board and the lower row of 22 pins to the underside.


Diagram showing pin numbering of a 44 pin IDE connector

2.5″ 44 PIN IDE pin layout & numbering


Provided it was connected up the correct way round originally, the purple edge of the ribbon cable indicates which side ‘pin 1’ should be. Thankfully the Vampire card clearly indicates where ‘pin 1’ is (see the little ‘1’ above the bats head in the photo above) so my cable was oriented correctly. Once I was sure of the location of ‘pin 1’ it was a simple matter of counting along to identify ‘pin 39’. Obviously if you have a different kind of adapter then you will have to confirm its location yourself. Hopefully the information above will help you out.


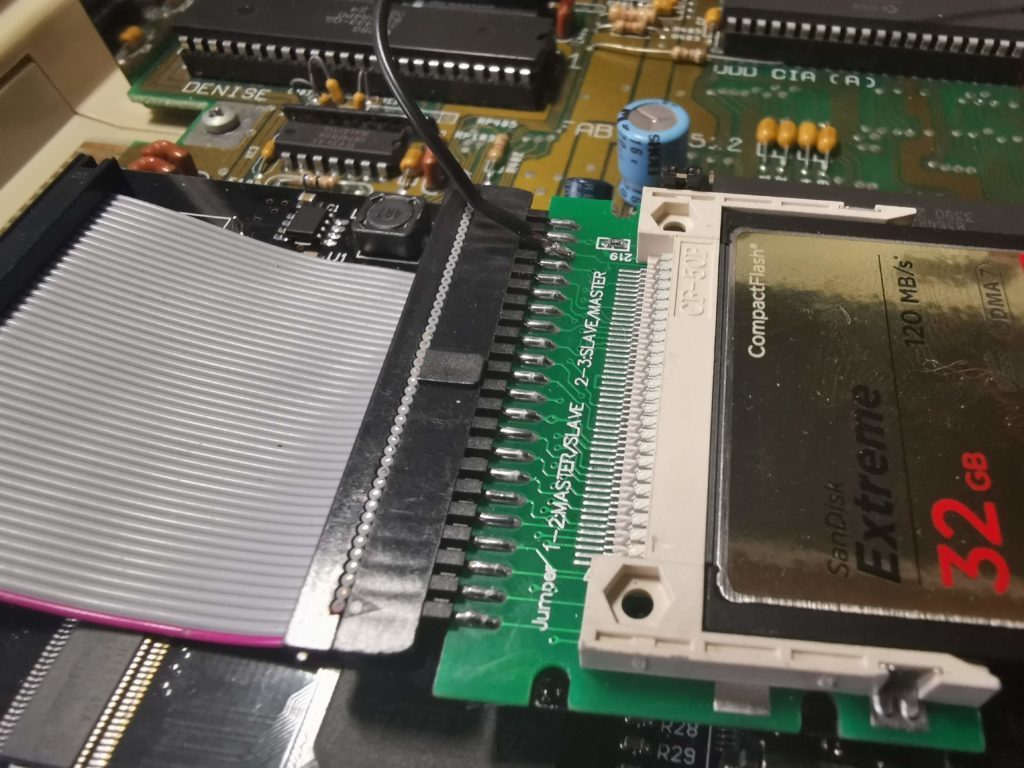
Amiga 500 IDE activity LED - pin 39 activity wire soldered on

Wire soldered to pin 39 – not the prettiest soldering job in the world but it does the job.


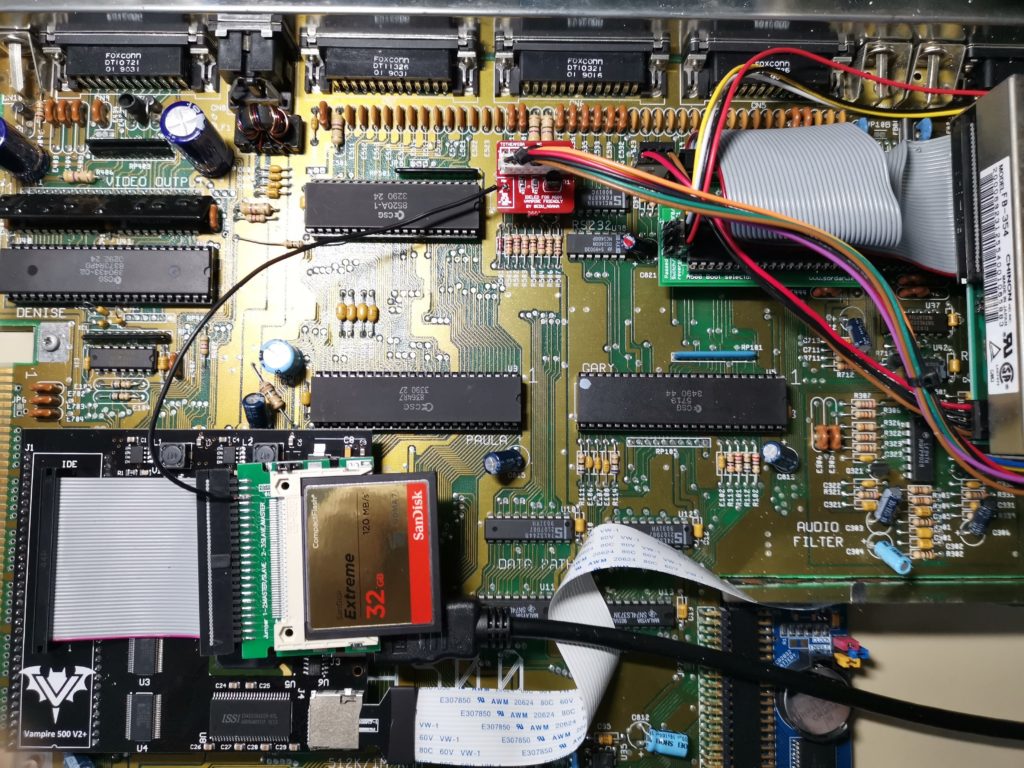
The completed modification


Amiga 500 IDE activity LED fitted

View showing the completed modification in its’ entirety.


Assuming you’ve connected everything up correctly (check  before you screw the case back together), you should now how a fully working IDE activity LED on your A500.


Demonstration

In the video below you can see my Amiga 500’s new IDE activity LED flashing away whilst it boots into Workbench. The loud clicking sound is just my empty floppy drives clicking – the anti-click software doesn’t run until workbench has finished loading.

I’m really pleased with this mod, it was cheap, pretty simple to implement and above all else, really useful. No longer will I be in the dark about when my CF card is being accessed!


But wait, there’s more!

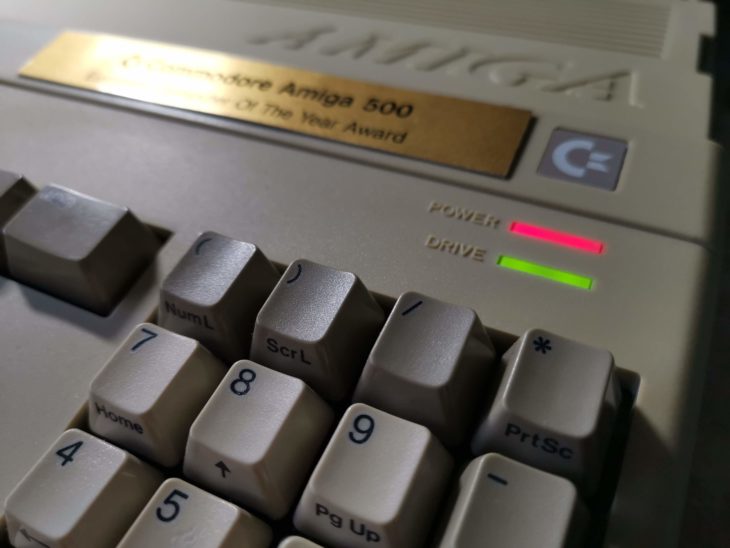
When you pop in a floppy disk the activity LED still flashes away as usual so there is no loss of functionality. Quite the opposite in fact as the LED even flashes when I use an SD card (the Vampire supports SD card storage too) which is totally awesome and something I definitely wasn’t expecting. An added bonus is that because Commodore simply labelled the A500’s floppy activity light as ‘Drive’ it’s still labelled correctly! How’s that for future-proofing!?
Anyway that about wraps this article up for now. I do hope you found this article both interesting and useful. If you did, please let me know by leaving a comment below, I’d love to hear from you.

How to Format an SD Card for Amiga to PC File Transfer

SD Card Amiga PC Transfer

Introduction

The whole benefit, to me at least, of having an SD card reader on my Amiga 500 is to allow me to transfer files to and from a PC. In order to do this the SD card needs to be formatted in such a way as to be readable by both systems. Turns out it’s not too hard to do. This post will show you exactly how to achieve this and also serve as a reminder for myself in the future when I inevitably forget what I did!
 

Stuff You’ll Need

I used a MicroSD card for this task but the process would be the same for a regular full-size SD card too. I have personally got this working with a 32GB card and more recently with a 200GB MicroSD card! Please note that I have a Vampire Card in my Amiga (which has a MicroSD card slot) and use Apollo OS (Coffin R34 – Amiga OS 3.9). This solution is based on that scenario. If you want to find out more about my Vampire upgrade please read about it here and adding an SD card reader here.


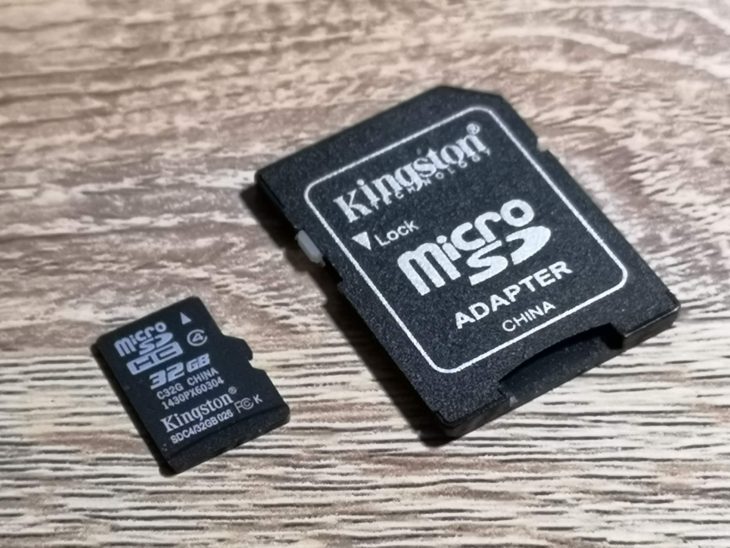
By the way, this should work with most SD cards you may have lying around. I used to link directly to the card I bought but time stays still for no man and it is no longer available. However this 32GB MicroSD Card is almost identical.


Formatting the card on a PC

First things first – the card MUST be formatted on the PC, not the Amiga. The format we need to use is FAT32 as this is easily readable on the Amiga whilst still being compatible with the PC. The main disadvantage with FAT32 is it has a 4GB file size limit but this should never really be an issue with the Amiga as most of the files we will be dealing with are only a few MB in size.

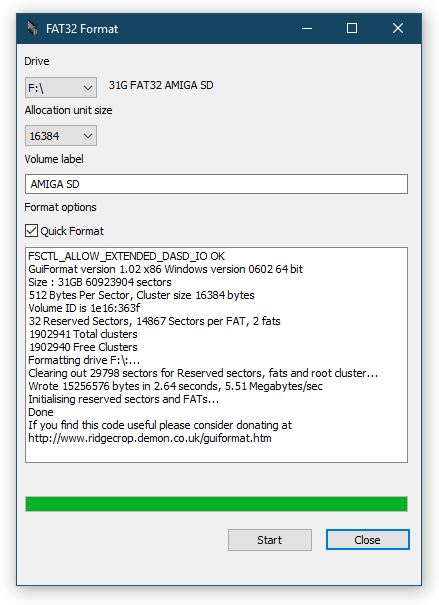
I’m using Windows 10 which annoyingly doesn’t have a native FAT32 format option (only NTFS or exFAT). After searching around I settled on this free 3rd party FAT32Format app to get the job done. If you already have some FAT32 formatting software then by all means go ahead and use that. If not then this one is free and very simple to use, you don’t even need to install it, just run the executable.

  • Run the .exe file you just downloaded and make absolutely sure that the drive letter under ‘Drive’ matches that of your SD card.
  • Leave the ‘Allocation unit size’ at the default setting.
  • Give your card a name under the ‘Volume label’ heading but keep it short. No more than 11 characters and avoid using any symbols. In the example below I called mine ‘AMIGA SD’.
  • Ensure ‘Quick format’ is ticked (otherwise it’ll take forever) and then click ‘start’.
  • When the format warning box pops up click on ‘OK’.


SD Card Amiga PC Transfer

View after the card has been formatted


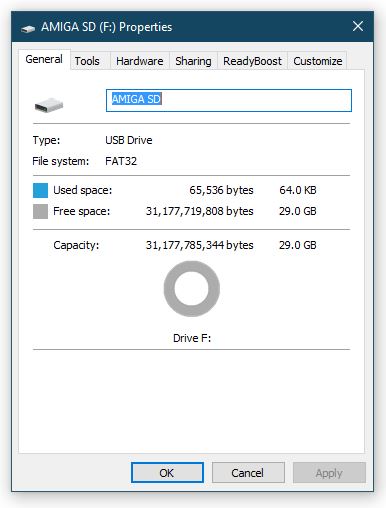
A few moments later you should have a nicely formatted FAT32 SD card! As you can see from the image below it has been correctly formatted as FAT32 and shows approx 29GB of free space. It’s perfectly normal to lose some space when formatting disks so don’t worry that it doesn’t exactly match the capacity of your card.


SD Card Amiga PC Transfer

SD card properties viewed in Windows after formatting.

Configuring the Amiga side of things

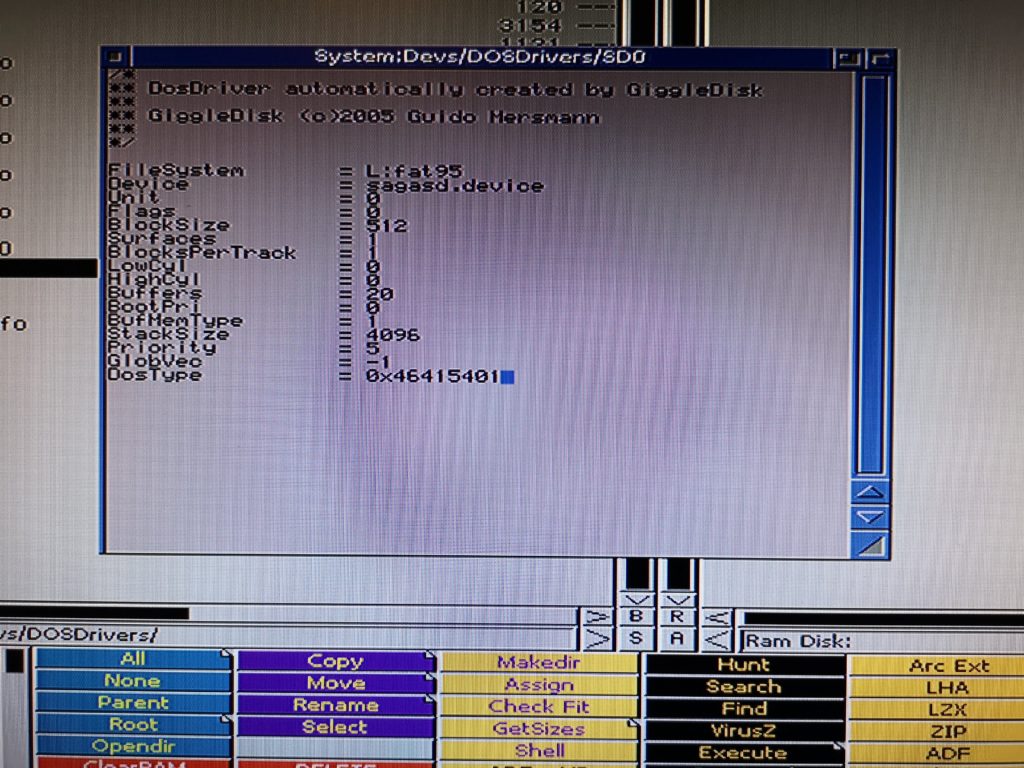
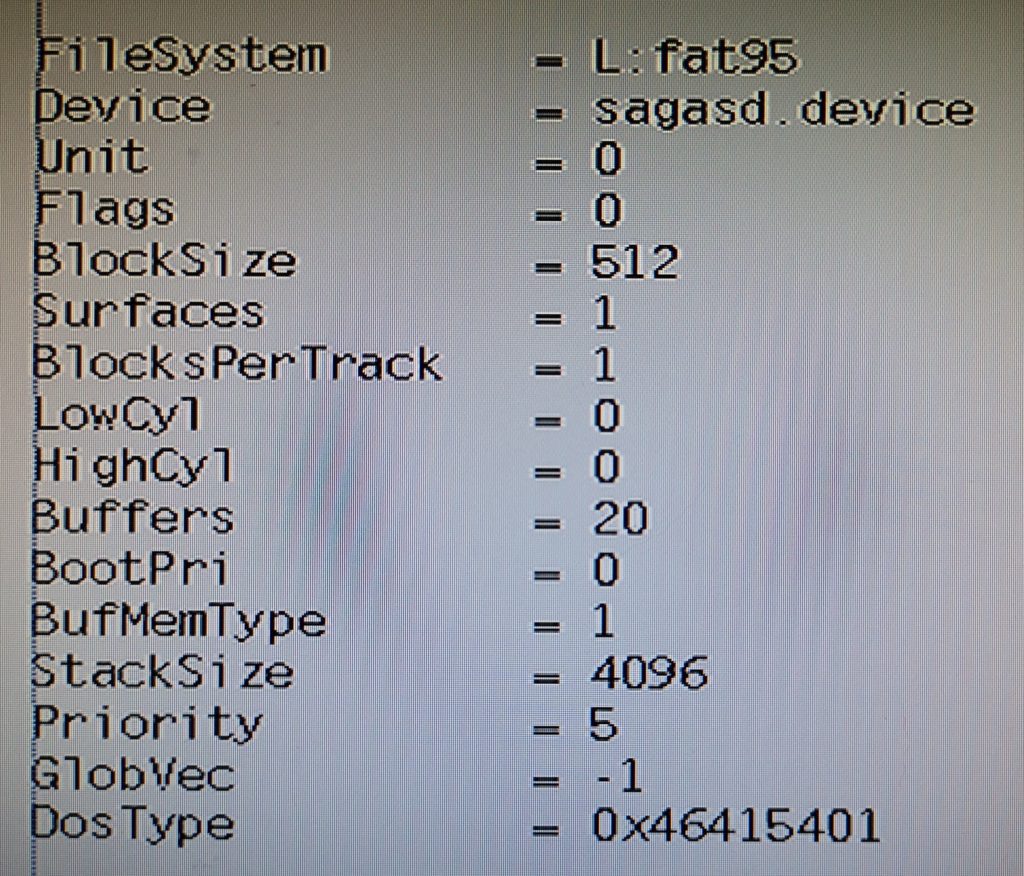
Now it’s time to take the SD card over to your Amiga for the next stage of the process. This is going to involve editing a DOSDriver on the Amiga with the parameters needed to successfully read and write to your SD card. Unless you’ve been messing around with SD Cards already there won’t be an SD0 device in your Amiga’s SYSTEM:DEVS/DOSDrivers directory. Fear not though because you can finding it lurking in the STORAGE directory (SYSTEM:Storage/DOSDrivers) waiting to be put to good use. Find the SD0 file and open it in your editor of choice, for me that’s the one built into Directory Opus. Edit the file so that the contents look exactly like the one in the image below:


SD Card Amiga PC Transfer

SD0 DOSDriver File contents (shown in Directory Opus Editor)


SD Card Amiga PC Transfer

Slightly clearer copy of the config (pasted into Wordworth to make it clearer to read)


Save your changes to SD0 and close the editor. This next part is particularly crucial otherwise, despite all your efforts thus far, the card will still be unreadable. You need to move the file OUT of SYSTEM:Storage/DOSDrivers and place it INTO the actual SYSTEM:DEVS/DOSDrivers directory. Doing this will force the Amiga to read the config on boot and enable it to recognise an SD card when present. You can do this in a number of different ways but again my preferred method is Directory Opus.


SD0 DOSDriver File Content

Edited SD0 correctly placed in DOSDrivers Directory


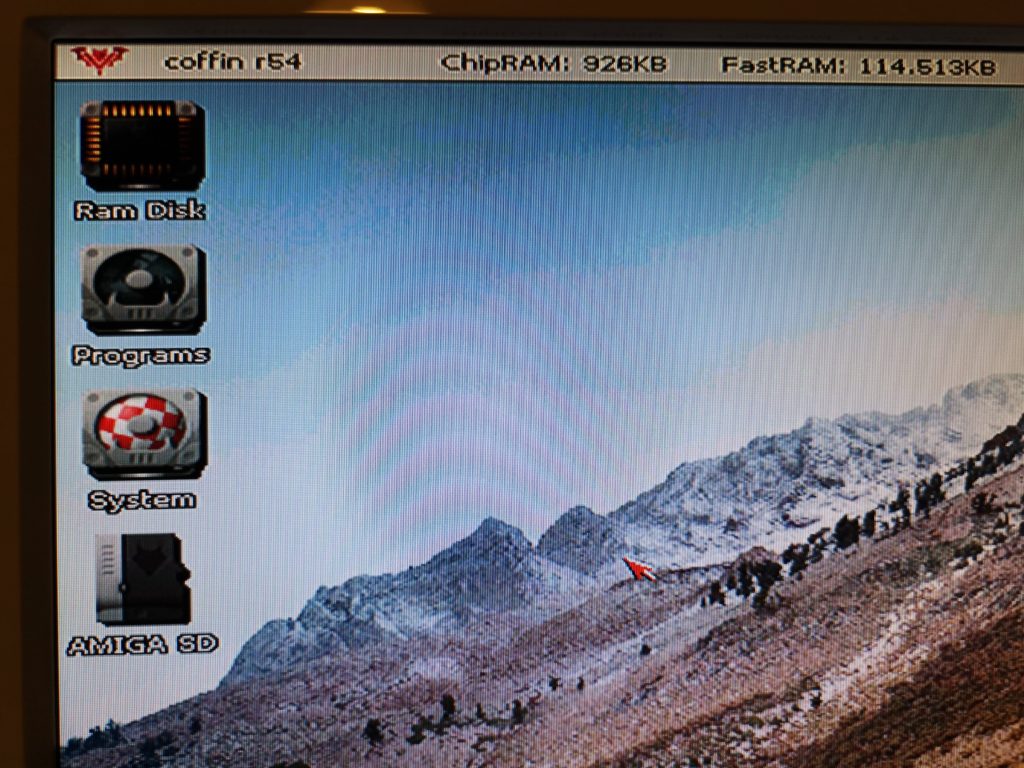
Once you’ve done this, assuming the card is already inserted, reboot your Amiga (CTRL-A-A) and when Workbench has loaded back up you should see a lovely SD card icon on the screen similar to the one below.


SD Card Amiga PC Transfer

SD0 Icon on Workbench


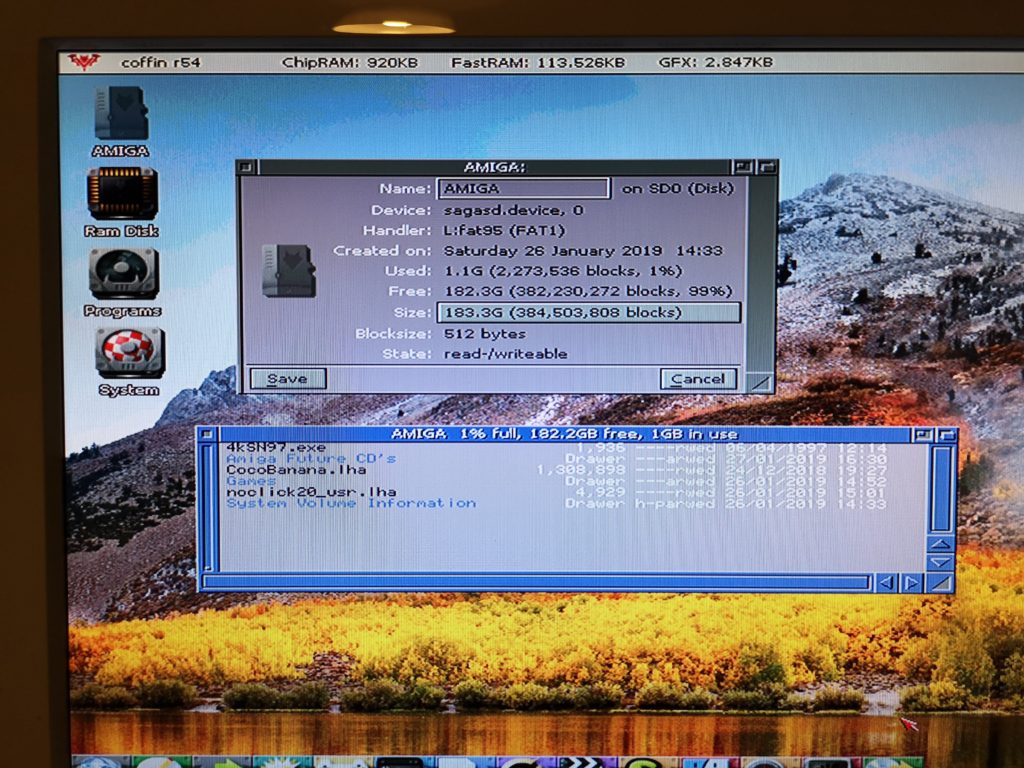
The next image shows a 200GB MicroSD card working and you can see the Amiga recognising the card capacity as 183.3G.


SD Card Amiga PC Transfer

200GB MicroSD card working on the Amiga. 183.3GB of space 🙂


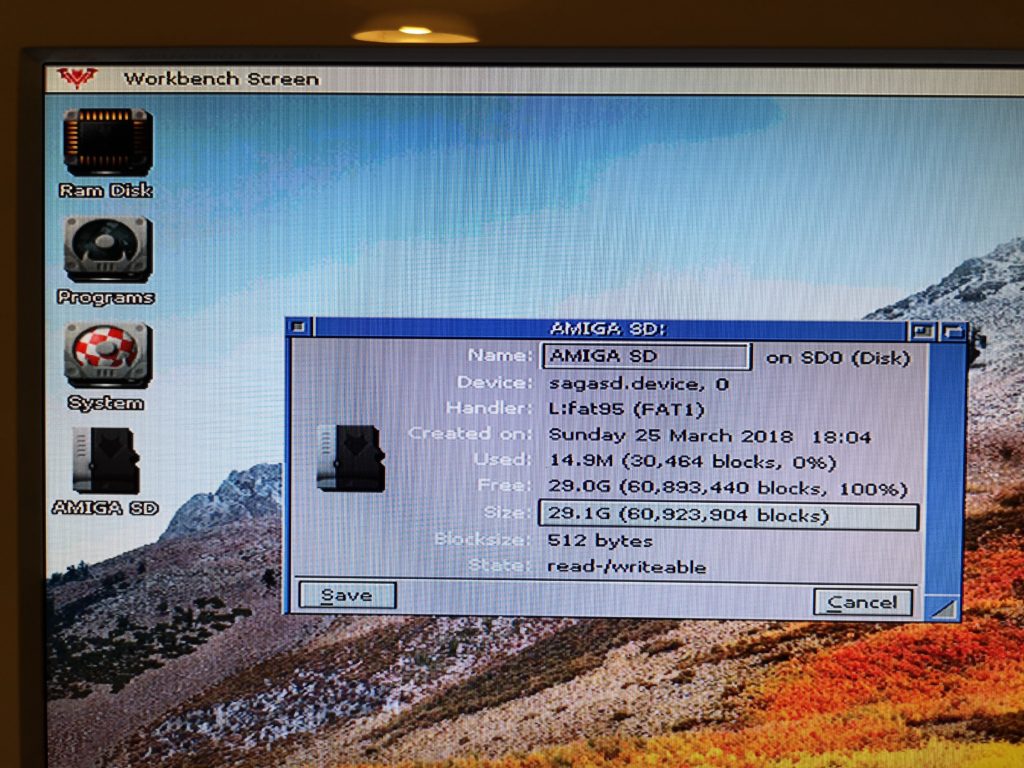
Here’s a regular 32GB card working recognised as being 29.1GB capacity. If you remember from earlier on that reported size is pretty much the same as how Windows saw it.


SD Card Amiga PC Transfer

32GB MicroSD card working on the Amiga. 29.1GB of space.


SD Card Amiga <-> PC Usage


I find my Amiga/PC formatted SD card incredibly useful, not only for transferring files between systems but also for storing CD’s on. I don’t have a CD drive on my Amiga but I do on my PC. Any Amiga CD’s I get, such as the Amiga Future Coverdisks, I simply copy into a folder on the card and they’re instantly available on the Amiga. The 200GB card is particularly useful for this purpose as it can potentially hold nearly 300 CD’s plus all my other stuff.


I have noticed that SD cards work a little differently on the Amiga. You can’t just insert one and expect it to appear in Workbench. The card needs to be present in the card slot before you boot your Amiga up. Likewise, if you remove it, it will still show the icon on your Workbench. For these reasons I’d recommend always inserting the card whilst your Amiga is off and not removing the card until you’ve shut down your Amiga just to be safe. If I ever find a way around this I’ll update this post.


Anyway, I hope this post proves useful for a few people, I know it took me quite a lot of stumbling around before I brought all the parts of the puzzle together!


Adding an SD Card Slot and HDMI port to an Amiga 500

SD Card Slot and HDMI port to an Amiga 500

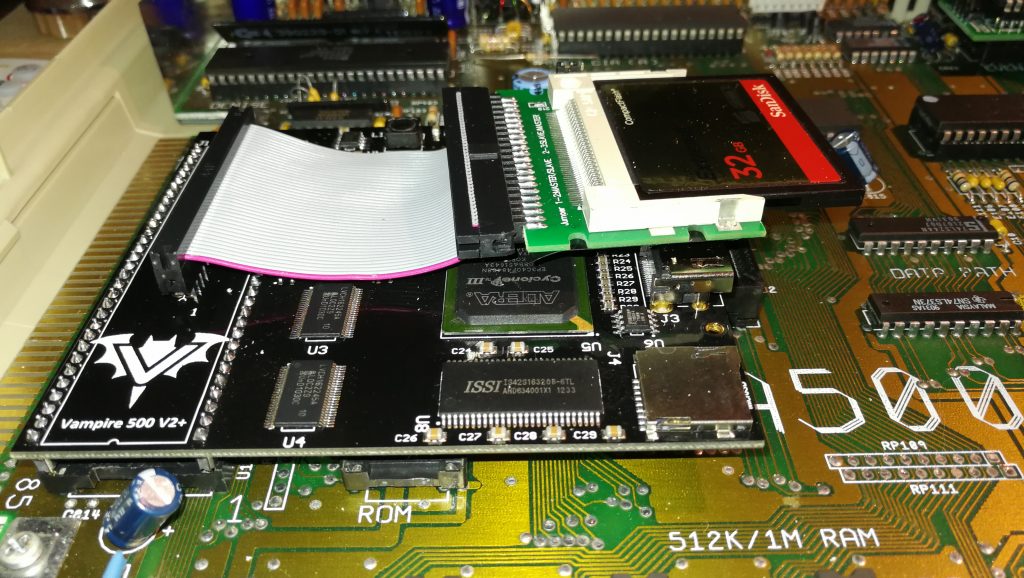
So you may be aware that the Vampire V500 V2+ Card gives your vintage Amiga 500 both a MicroSD card slot and an HDMI port for hooking up to a modern display.  Trouble is the ports are on the board itself which is rather inconvenient if you don’t want to leave the top of your Amiga’s case off.  After doing a little research and searching around I discovered that you can get some nifty little extension cables for both ports which will allow you to ‘move’ them to the exterior of the Amiga’s case.  This post will explain how to add both an SD Card Slot and HDMI port to an Amiga 500 computer.

SD Card Slot and HDMI port to an Amiga 500

Location of the HDMI and MicroSD ports on the Vampire card. Not exactly easily accessible once the lid is back on!

Purchasing the right cables for the job

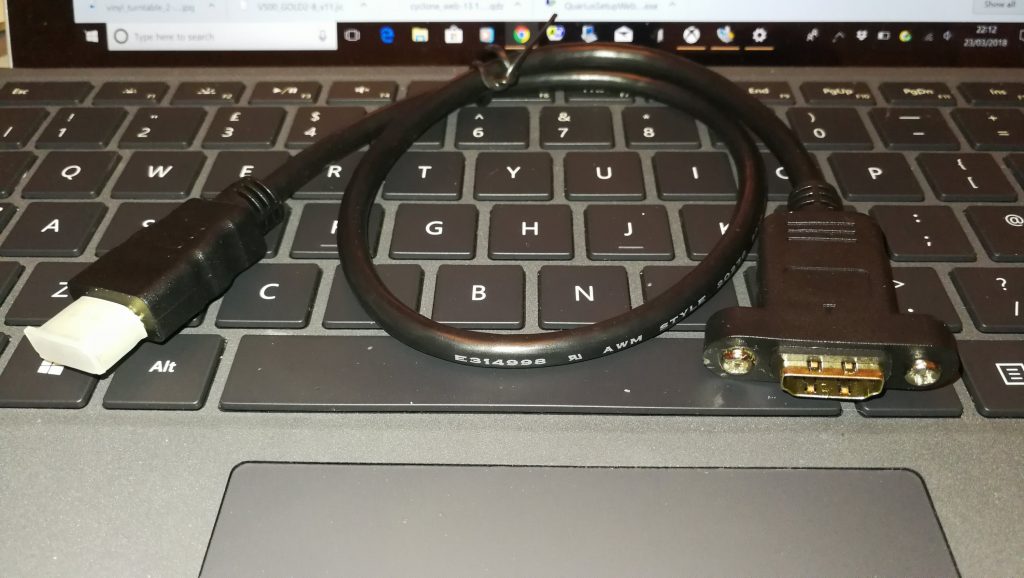
The HDMI cable was a little tricky to locate at first as there are just so many options. Once I got the search term correct I stumbled into the right cable for the job.  The cable I bought (below) was an Adafruit Panel mount HDMI Cable – 40 cm which you can pick up from Amazon.  It’s just the perfect length and almost seems tailor made for the Amiga!

SD Card Slot and HDMI port to an Amiga 500

40cm HDMI extension cable

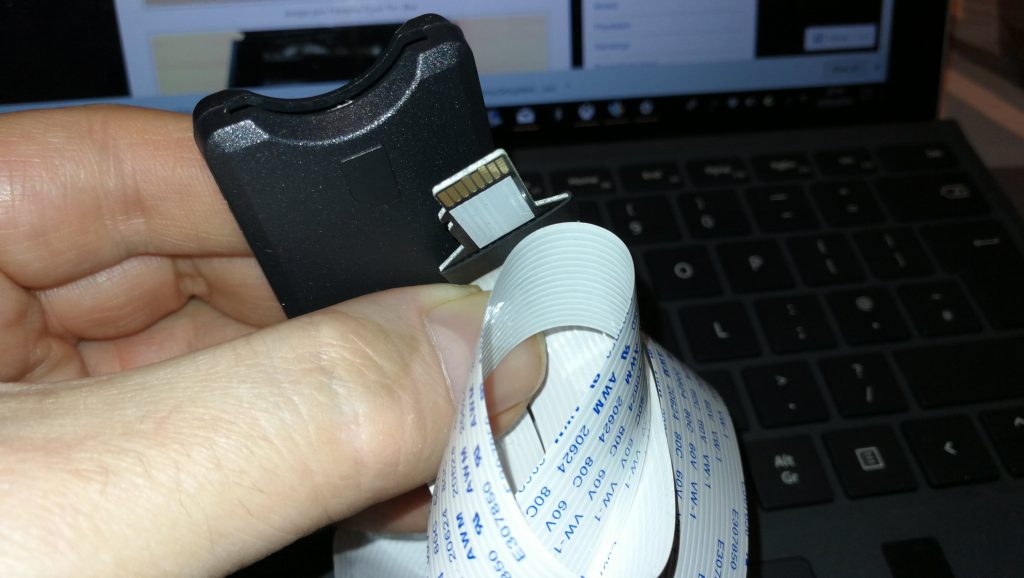
The MicroSD slot extender was a much easier product to locate.  This Micro SD to SD Card Extension Cable I picked up from Amazon is perfect.  You will find that you can actually get both MicroSD to MicroSD and also MicroSD to SD extender cables.  I decided to chose the MicroSD to SD option as I thought it would allow a little extra flexibility in terms of what cards I can use with it.  With it I have a choice of using both regular SD cards or  MicroSD cards now with the use of a MicroSD adapter card.

SD Card Slot and HDMI port to an Amiga 500

MicroSD Extension Cable

Deciding where to locate the ports

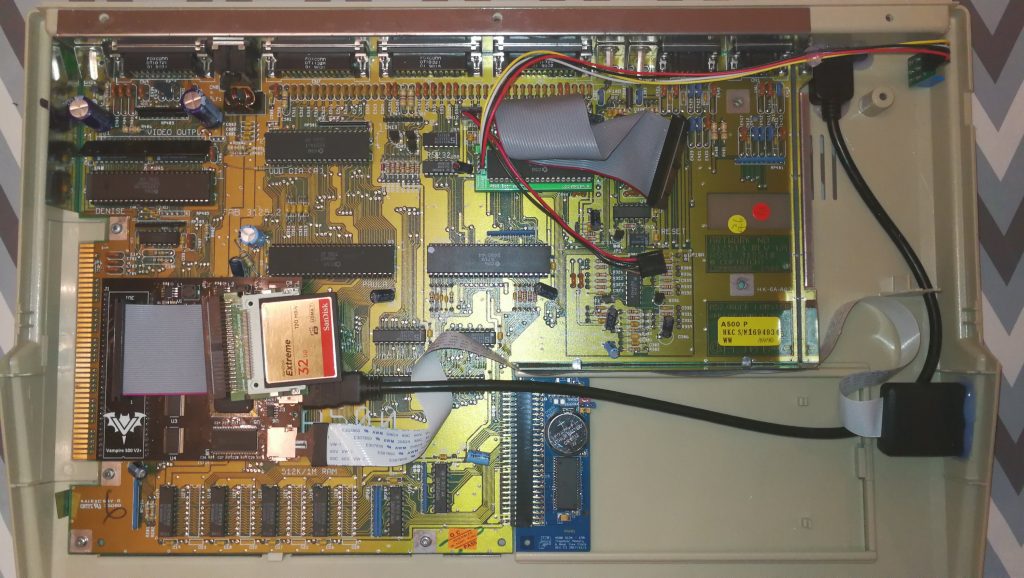
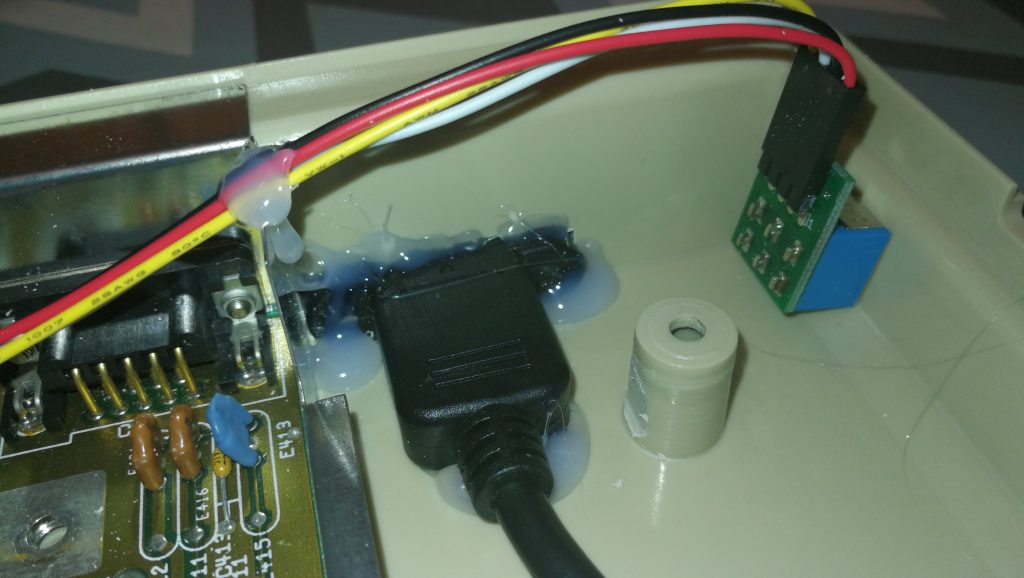
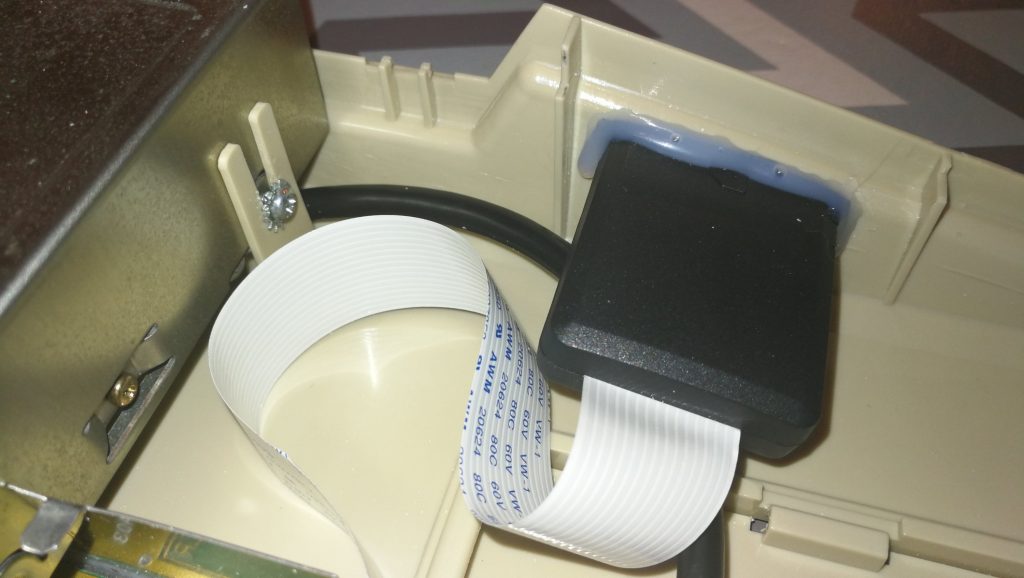
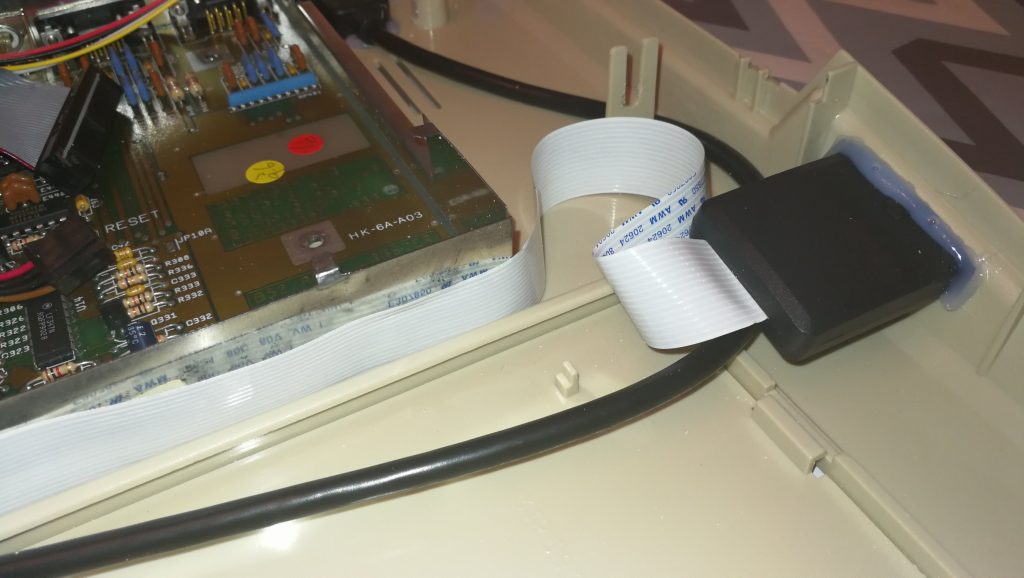
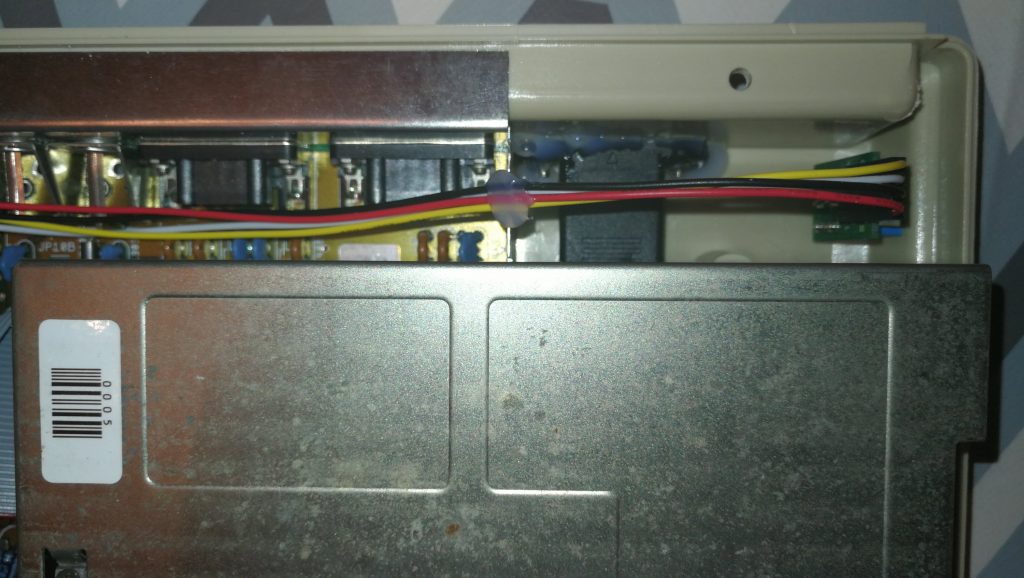
I decided the HDMI port needed to be at the back of my A500 but that the SD card would be much more useful if it was located somewhere along the side.  There is quite a lot of free space underneath the floppy drive, ample to accommodate the HDMI socket.  However because the SD Card Slot is housed in quite a chunky plastic case there wasn’t room for it under the floppy, plus I already have my floppy boot selector switch there anyway.  So, I chose a spot that sits just under the keyboard where there is plenty of space and it’s also super convenient for me to pop cards in and out.

SD Card Slot and HDMI port to an Amiga 500

Final Cable Routes


SD Card Slot and HDMI port to an Amiga 500

HDMI Socket secured with hot glue. It ain’t pretty but it’s very secure.


SD Card Slot and HDMI port to an Amiga 500

Plenty of clearance around floppy drive


SD Card Slot and HDMI port to an Amiga 500

SD Card Slot Hot Glued in position

Creating the SD Card and HDMI cut-outs in the Amiga case and securing the new ports

The slots for both ports were cut out using a Dremel tool (if you have one you should know instinctively how to do this!). Take care to use a low speed otherwise you risk melting the plastic.  The ports themselves are held in place with some hot glue, perfect for this sort of project as it flows freely around things before setting hard.  I used a few blobs of hot glue to keep the SD extension ribbon cable out of harms way too as it’s quite fragile.  It could easily become trapped and get damaged by the A500 keyboard when it is replaced if it was left unchecked.

SD Card Slot and HDMI port to an Amiga 500

Top view of HDMI Socket with floppy drive back in place


SD Card HDMI Amiga

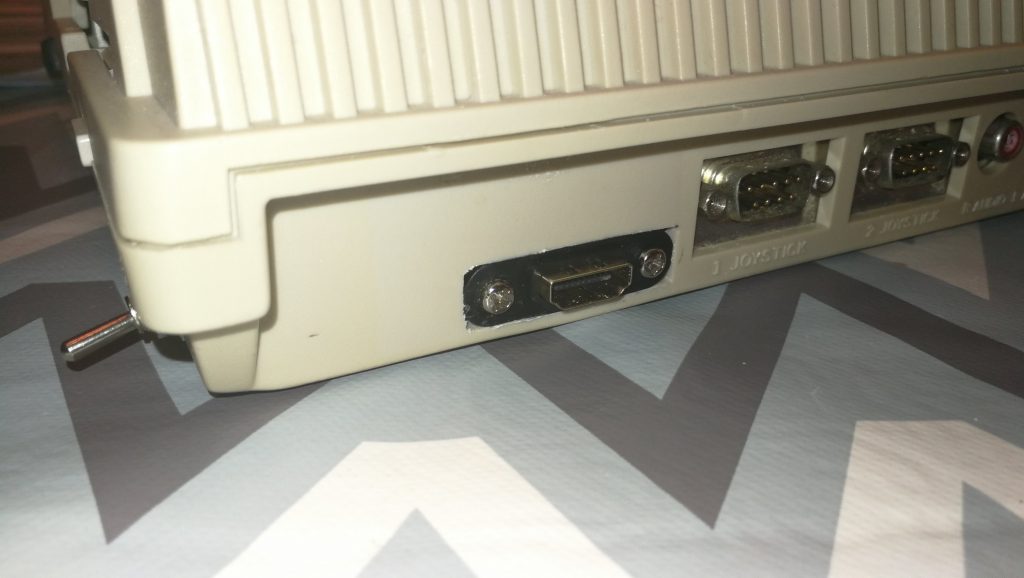
Finished HDMI Port


SD Card HDMI Amiga

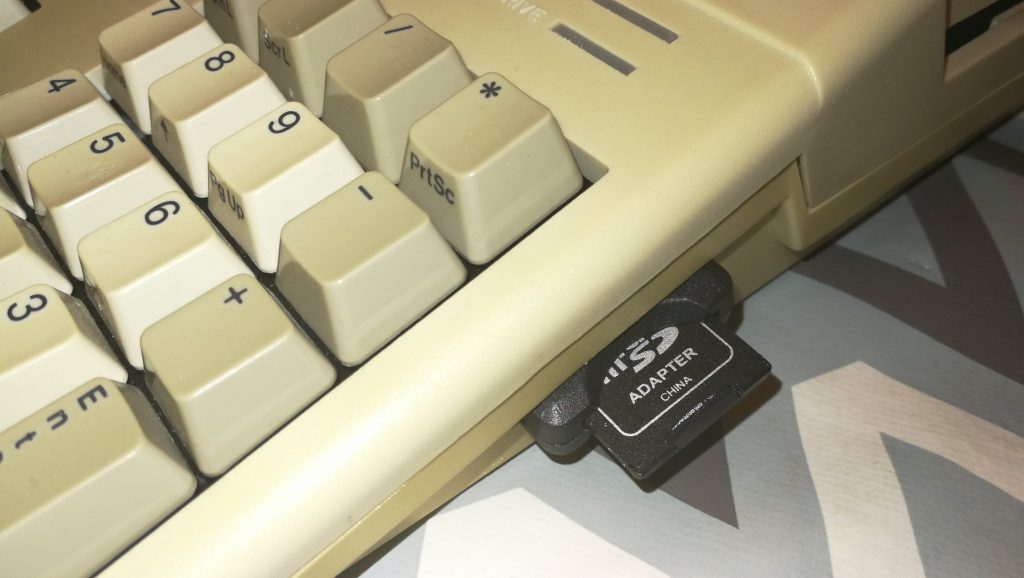
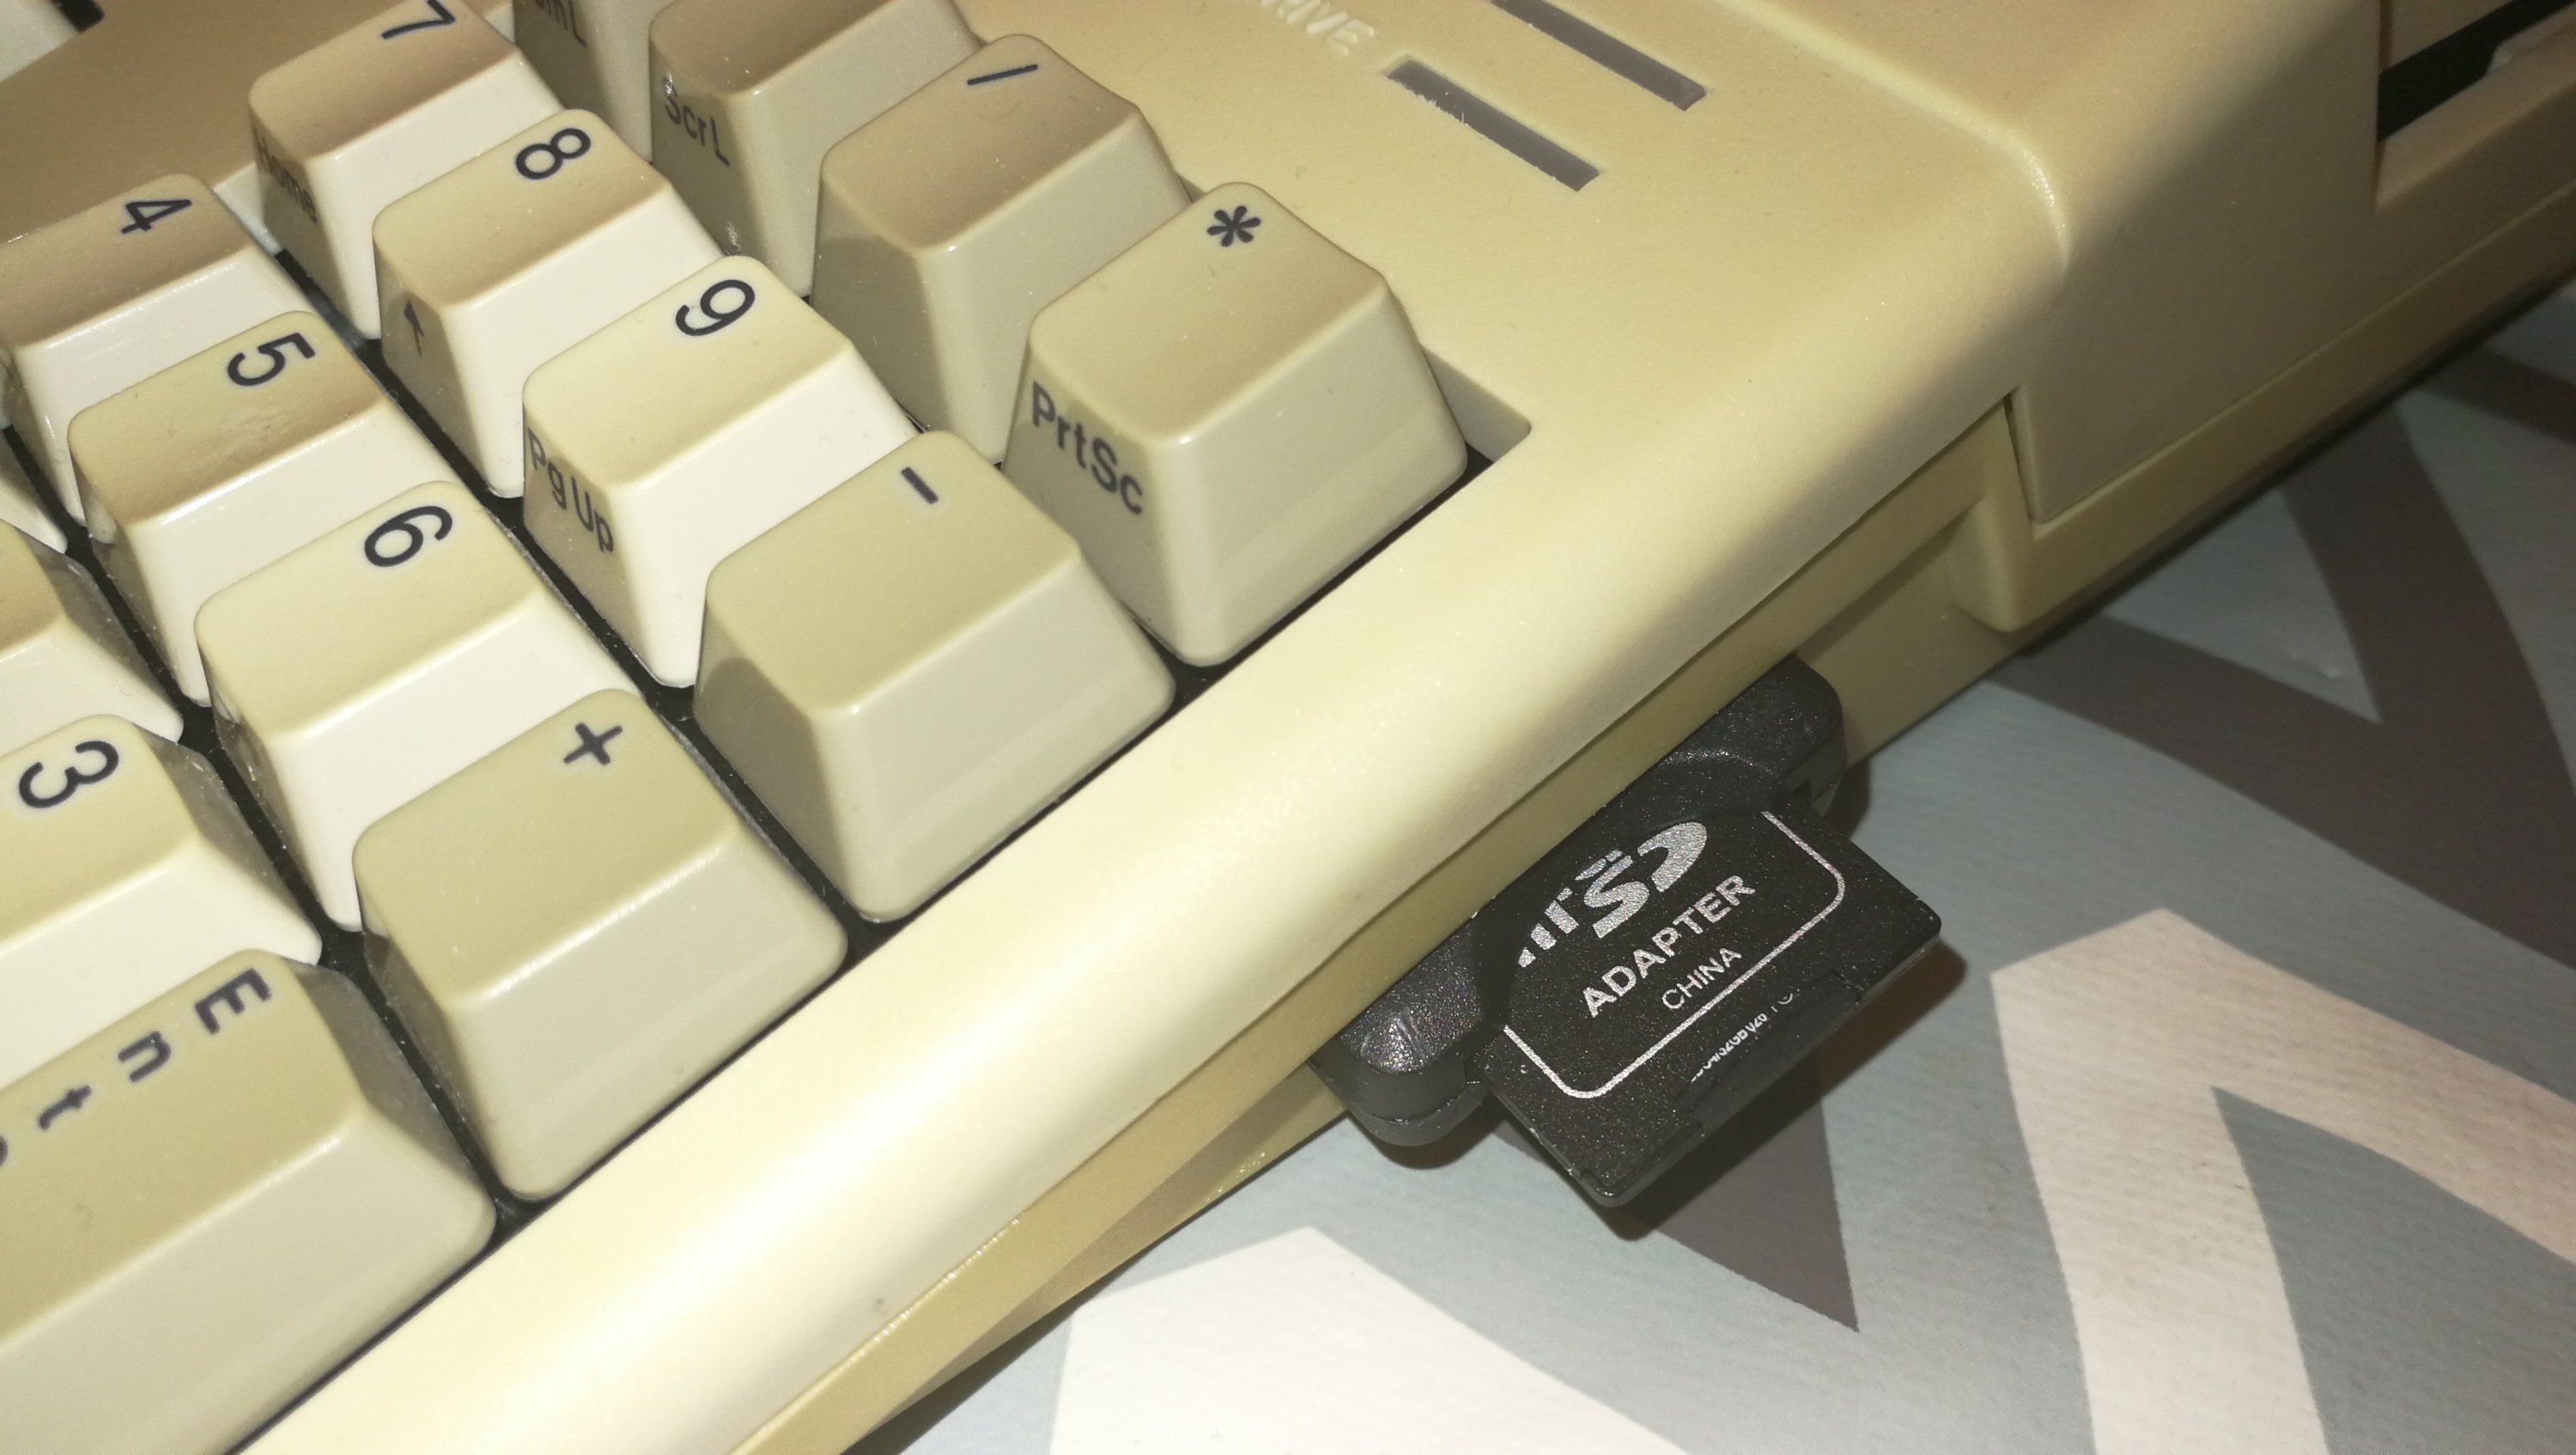
Finished SD Card Slot with MicroSD adapter sticking out

End Result

I’m pretty pleased with the end result, with hindsight I probably should have tidied up the HDMI cut-out a little with a file as there are a few rough bits left… but it’s around the back of the case and out of sight so no biggie.  The HDMI port is rock solid and should have no problem with me plugging and unplugging a cable in and out.  Likewise the SD card slot is nice and secure and more than up to the task of dealing with regular card swaps.  Perhaps a version in white (or off-white LOL) would have been better but I just couldn’t find one for sale anywhere.

Improvements?

Only other thing I might do in future is add an RJ45 extender when the Apollo Vampire team make the Ethernet port expansion option a reality.  Although I already have Ethernet through the use of the fantastic little plipbox device this is currently hogging my parallel port so I cannot print without first unplugging it – hardly ideal.

Formatting the SD Card

Incidentally, if you’d like to know how to go about formatting your SD Card check out my post – How to Format an SD Card for Amiga to PC File Transfer.


Fitting an SD Card Slot and HDMI port to an Amiga 500.