Lyonsden Blog

Category - CD32

Roguecraft Amiga Review

I’ve had my eye on Roguecraft ever since I heard Badgerpunch Games were making an Amiga version of their previous game, Rogue64. This game was released way back in 2022 and remains one of my favourite games for the Commodore 64 to this day.

When I heard they were releasing a physical boxed edition of Roguecraft for the Amiga I pre-ordered immediately. With the ‘Standard Edition’ costing a very reasonable £19.99 plus P&P it was just too tempting to pass up on.

Finally, after many months, the waiting is over and my copy of the game has arrived!


Roguecraft

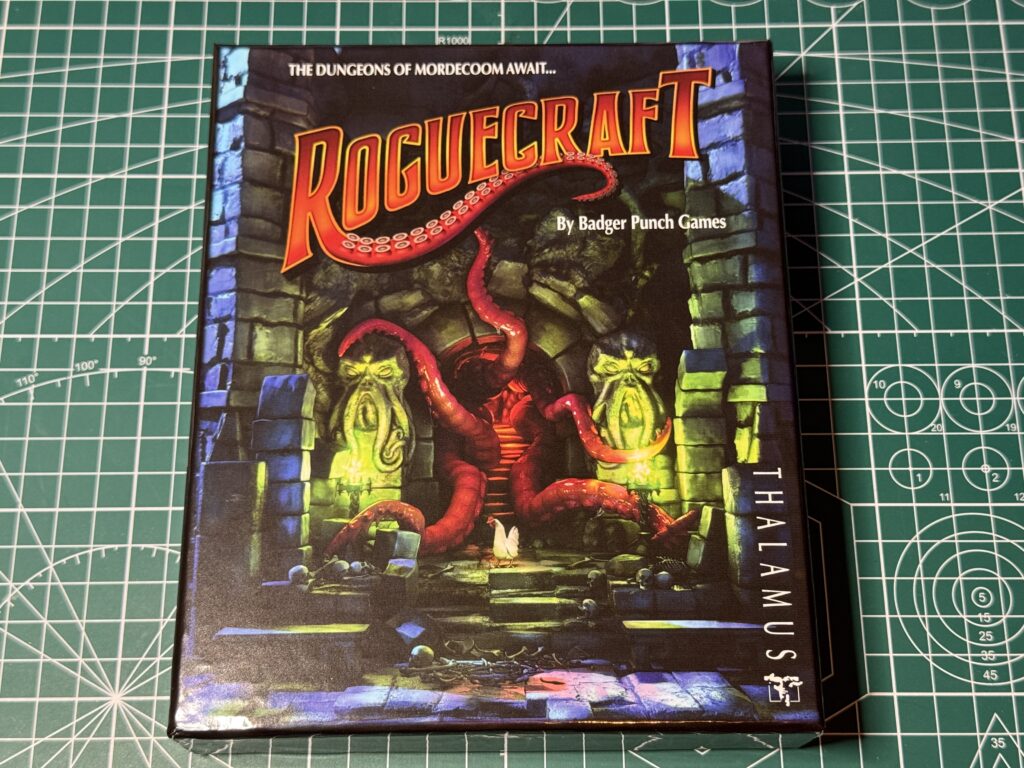
Roguecraft box artwork


The box itself is a thing of beauty featuring one of the tentacled monsters on the front in glorious, vibrant, glossy colour.


Roguecraft

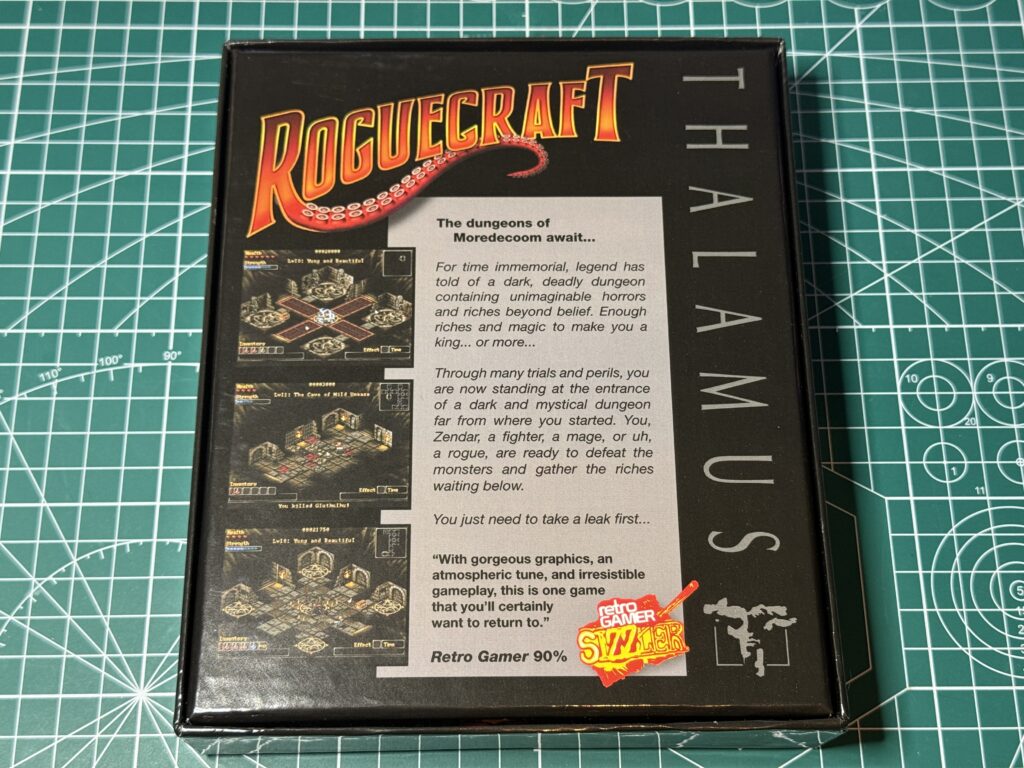
Back of the box


The back of the box features screenshots from the game to whet your appetite along with some scene-setting words and a Retro Gamer Sizzler seal of approval.


Roguecraft

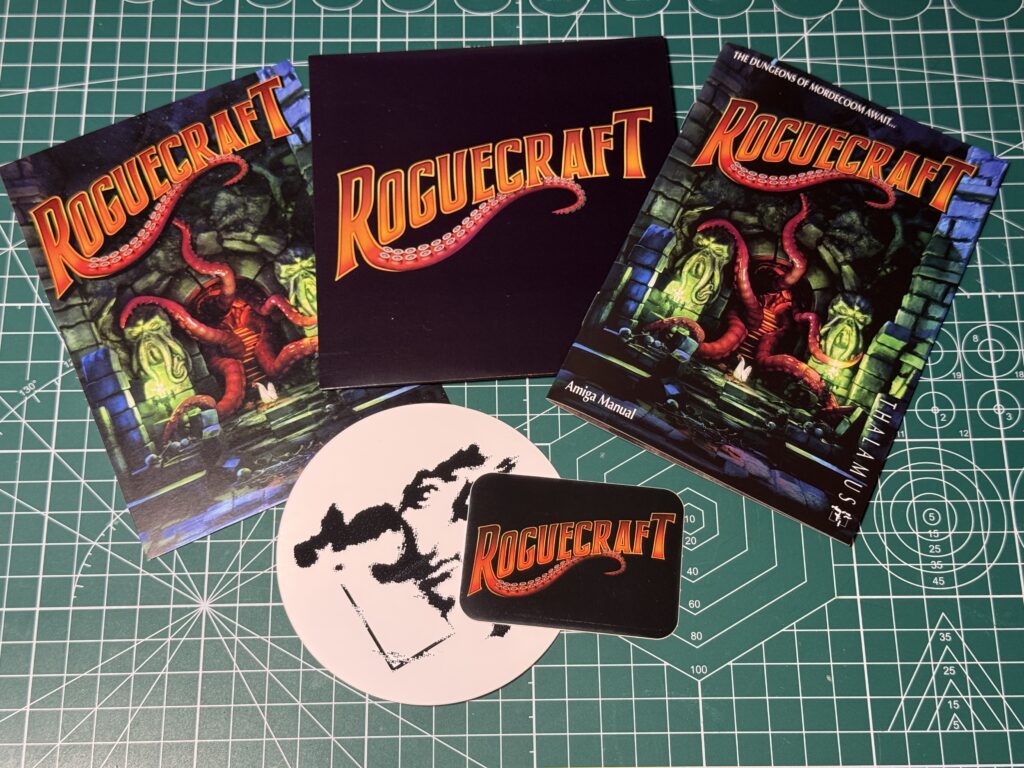
Lots of Roguecraft goodies!


Opening up the box reveals a variety of goodies inside, including the games instruction manual, a copy of the game for the CD32, A Roguecraft postcard, a Roguecraft floppy disk label and a Thalamus sticker.

I should point out that I was also emailed a digital copy of the game so I also have a bootable ADF and a WHDLoad version of the game and this is what you would get if you bought the game from their itch.io store.


Roguecraft

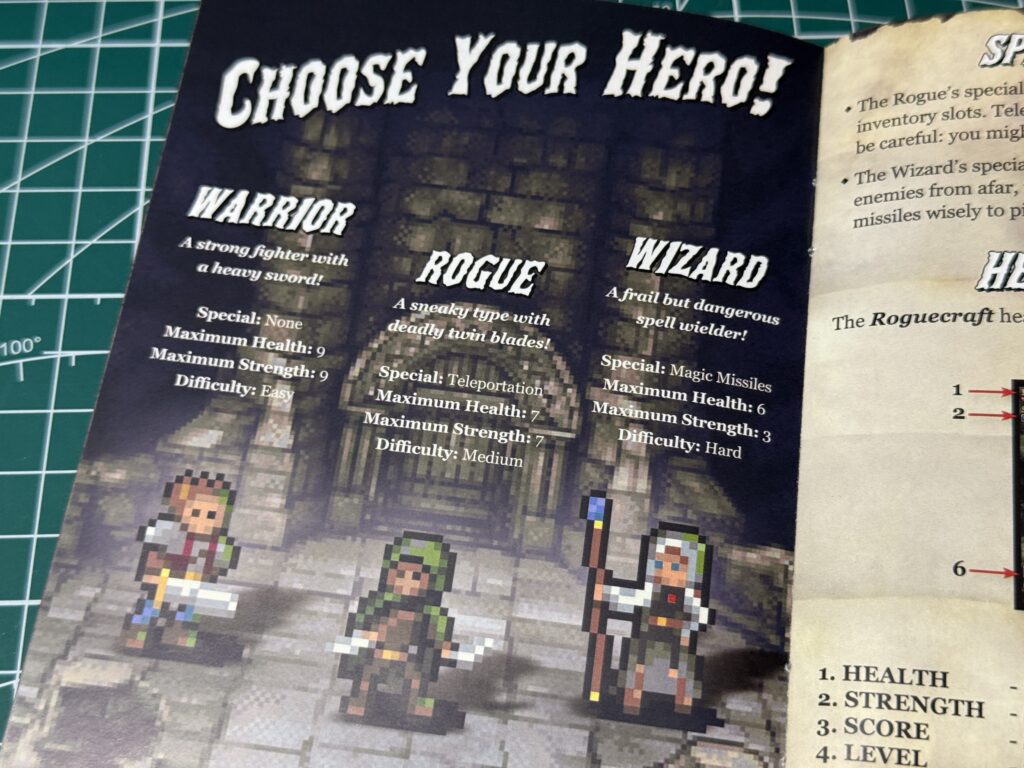
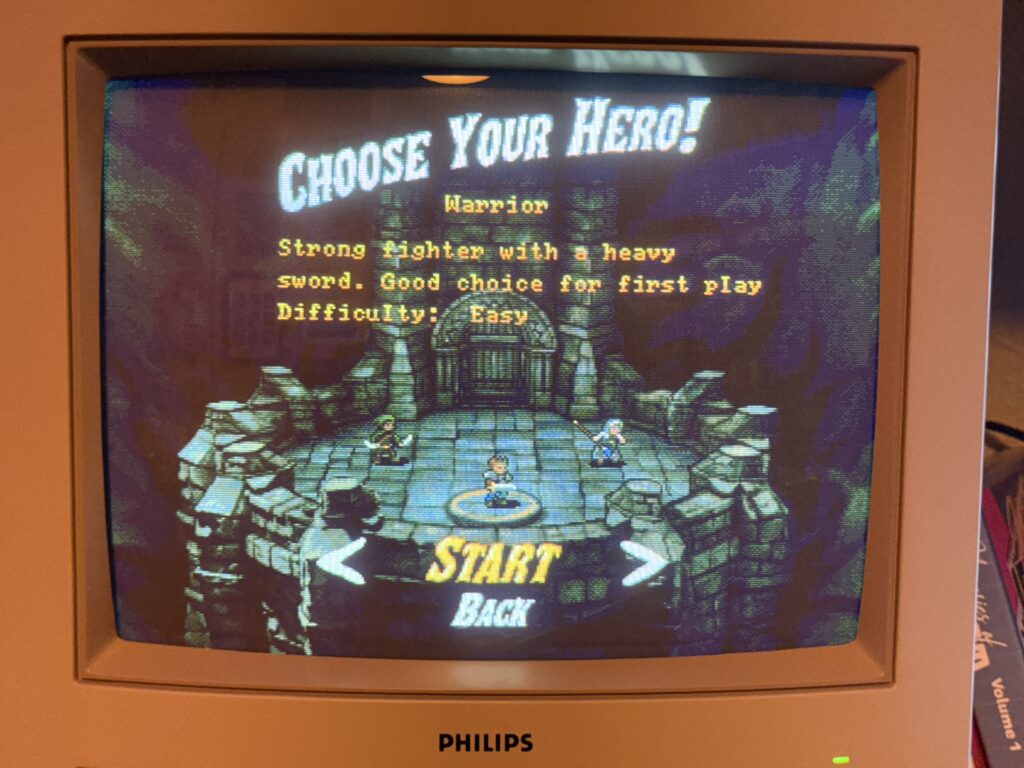
Choose your hero!


The excellent manual has been printed in full colour on glossy paper and takes you through the characters you can play…


Roguecraft

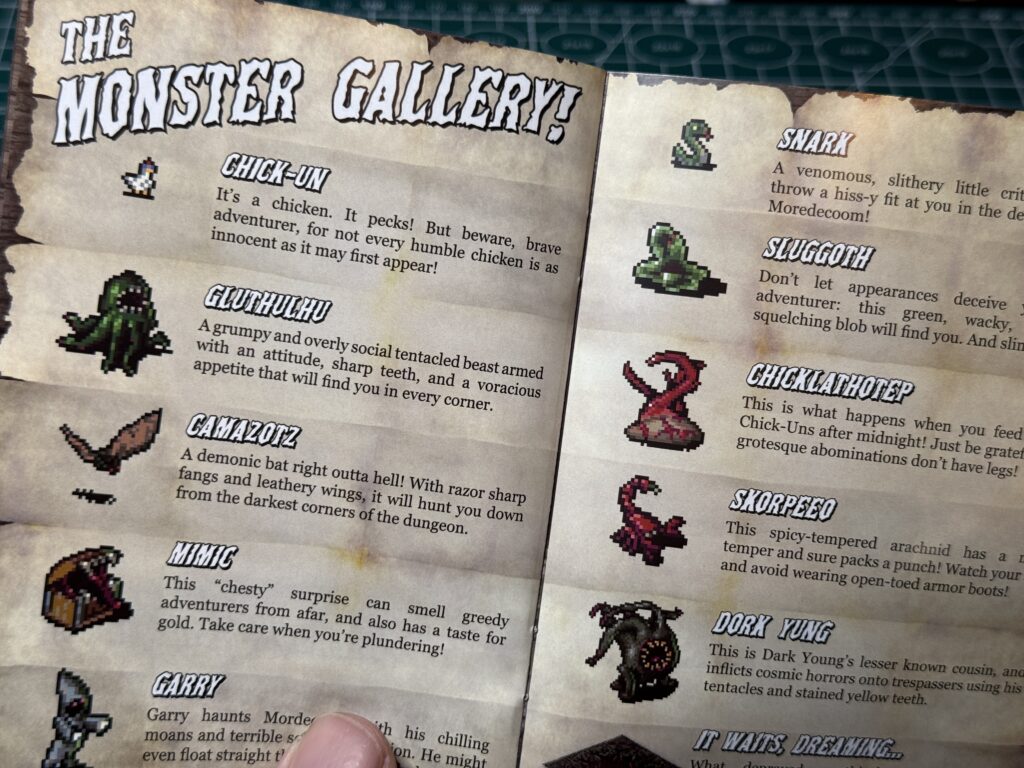
Some of the monsters you can expect to confront


Along with the monsters you’ll be battling as you venture further into the game world. There’s plenty of other information provided to enhance your Roguecraft experience too.


Roguecraft

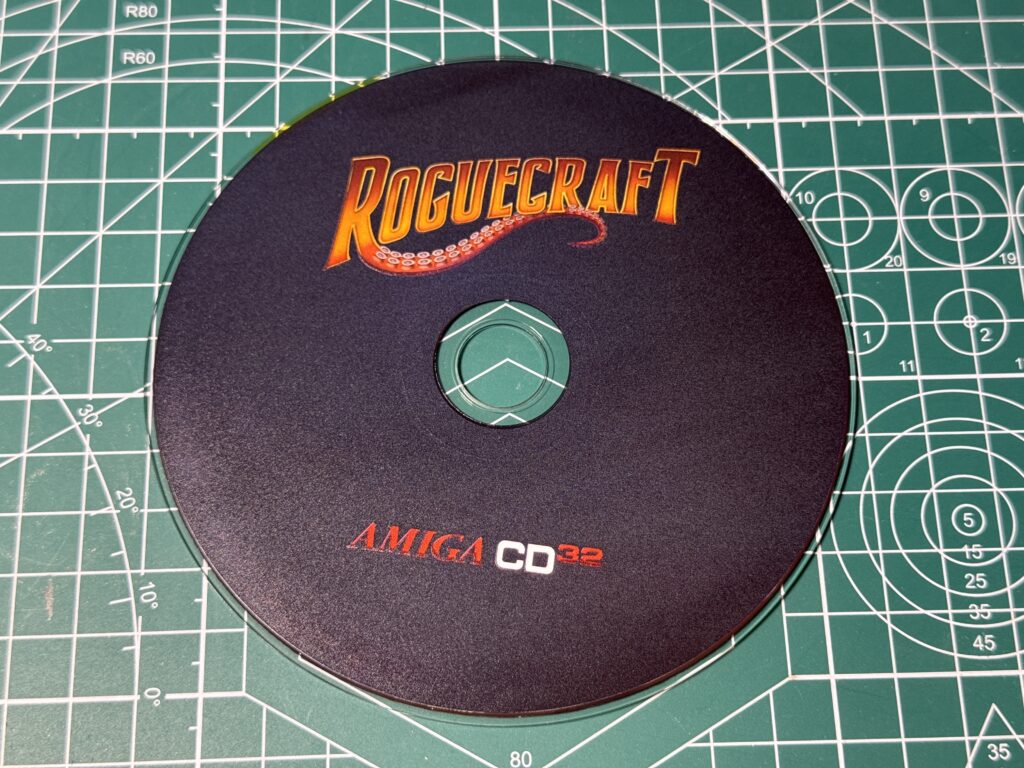
Roguecraft CD32 disc


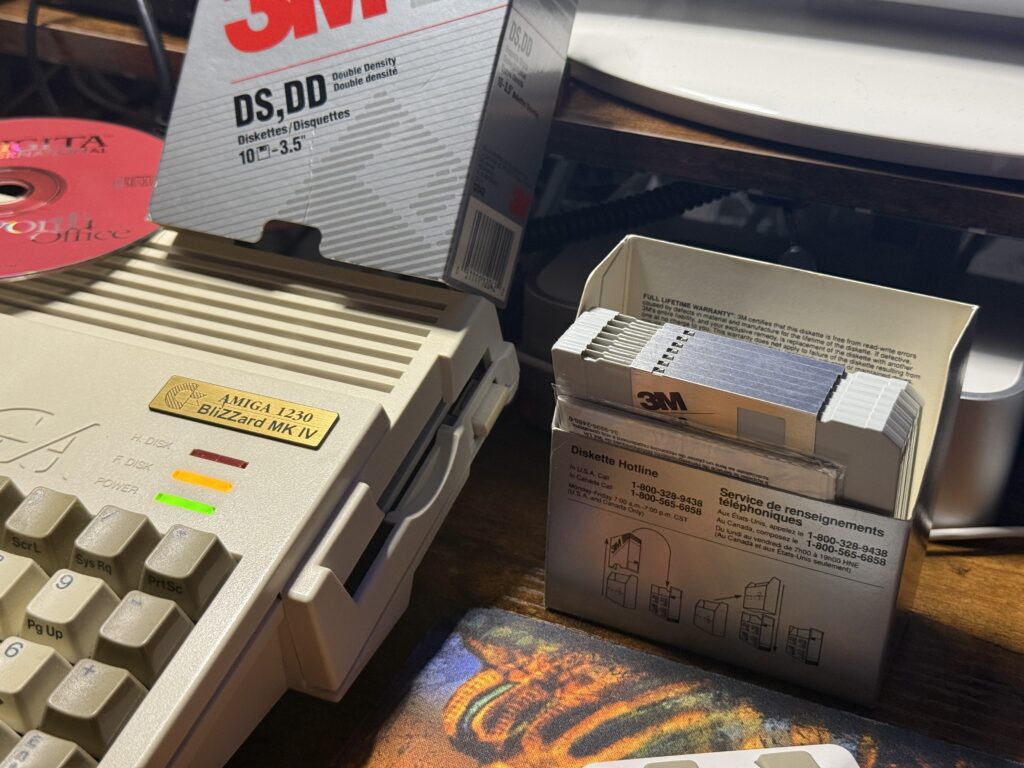
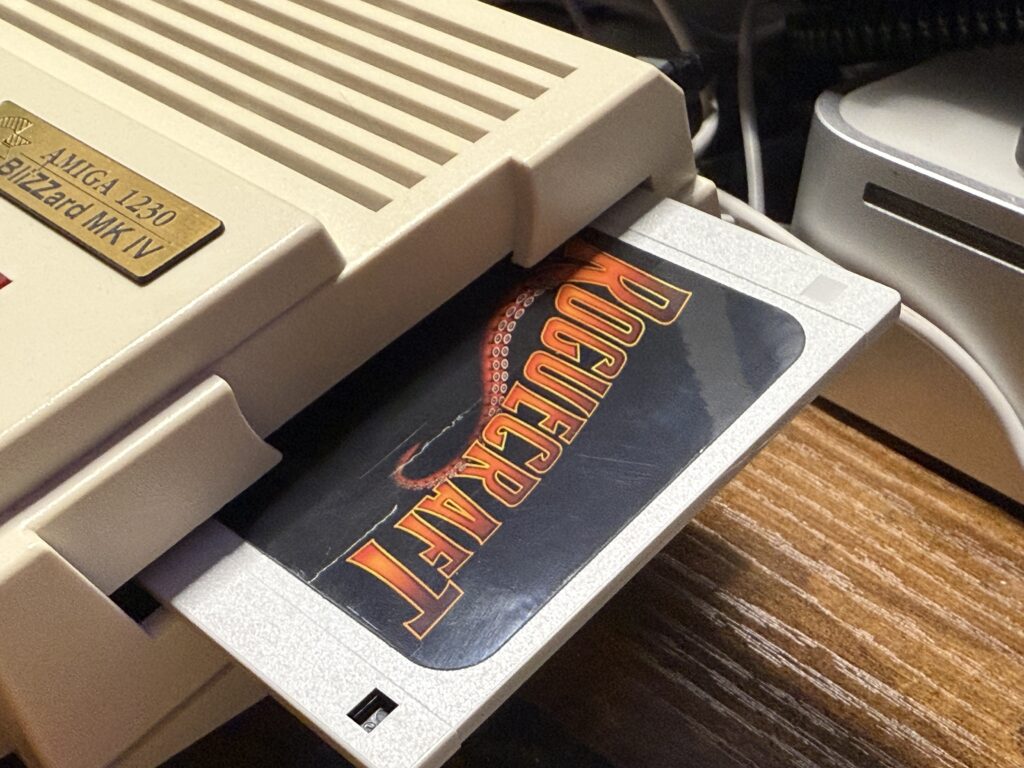
As there was a disk label included in the box and I have the ADF image of the game it would be remiss of me not to create my own ‘game disk’ so I can load it up off a proper disk on my A1200.


Floppy Disk

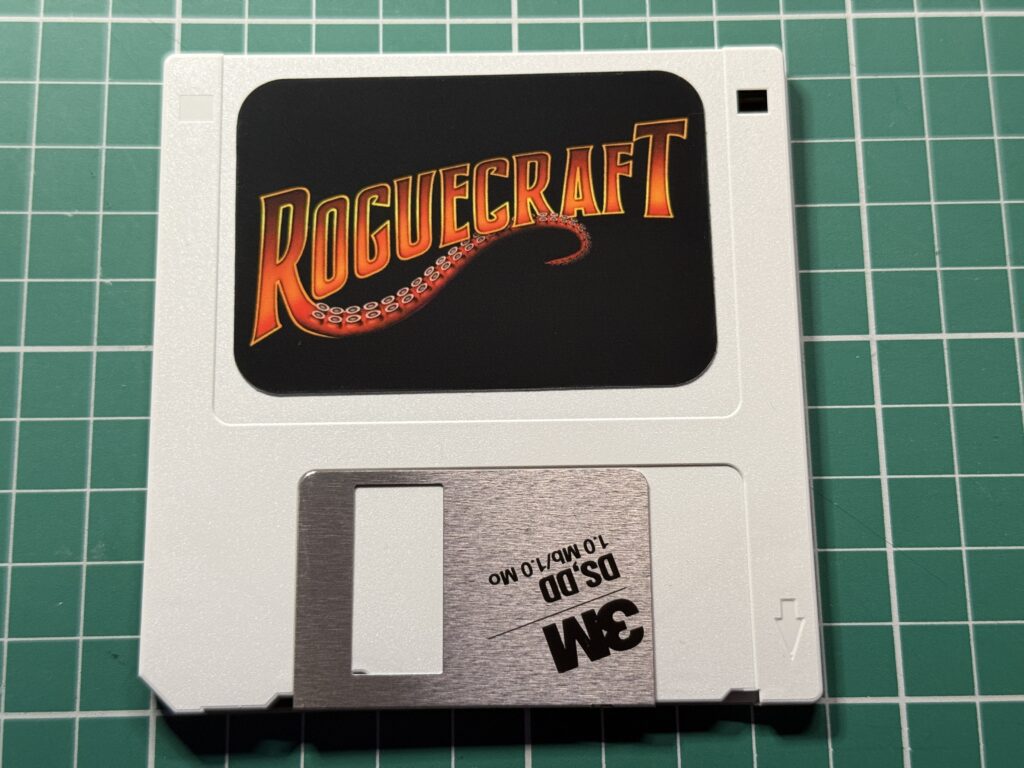
DIY Roguecraft Disk


I used the brilliant GoADF 2020 to write the image to a spare floppy disk…


Writing a 3.5" floppy dfisk

Writing the ADF image to a real floppy disk.


,,,and then popped it into my A1200’s internal floppy drive so I could load up the game the way nature Commodore intended.


Ready to load


Loading the game

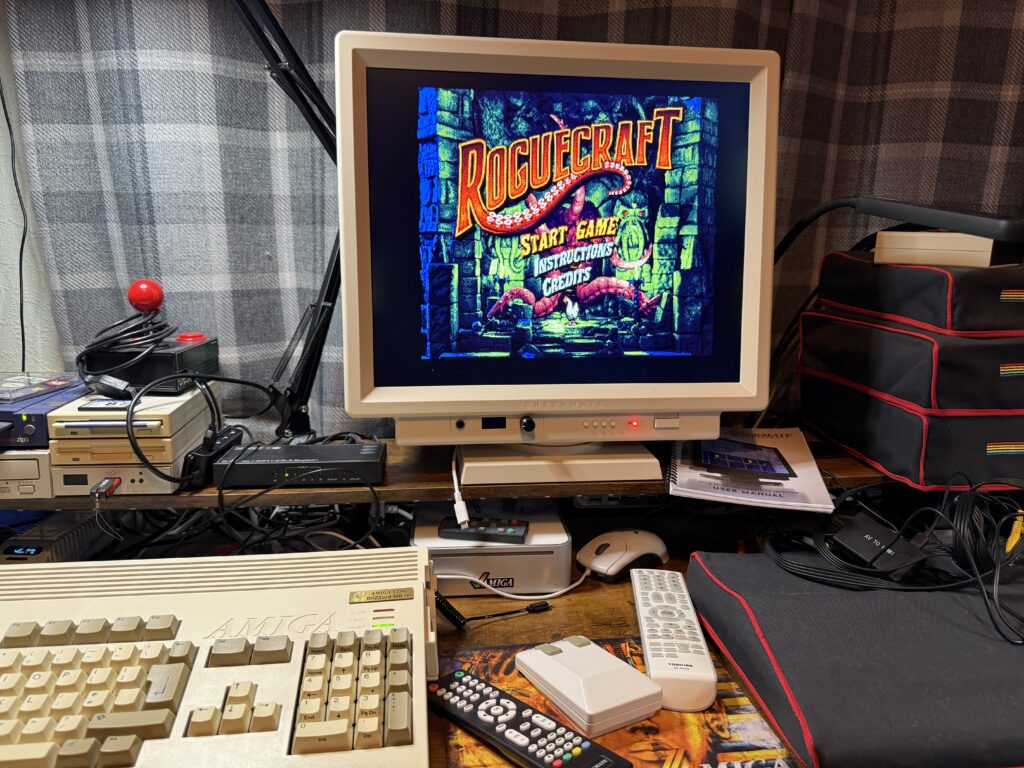
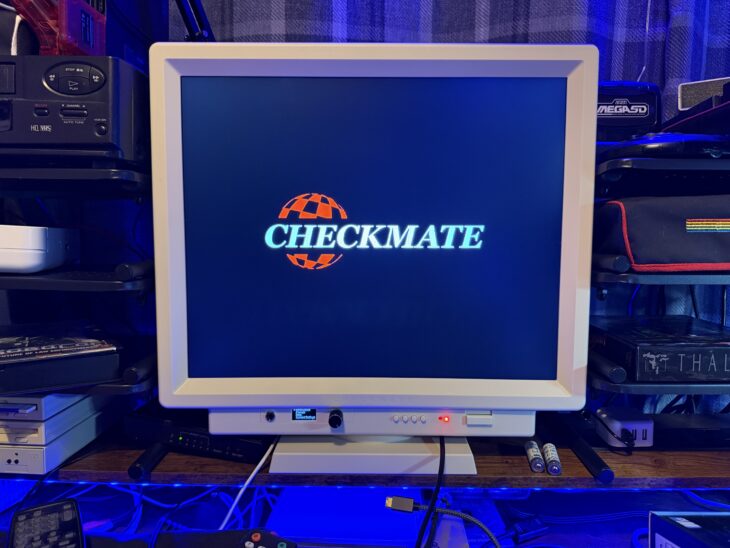
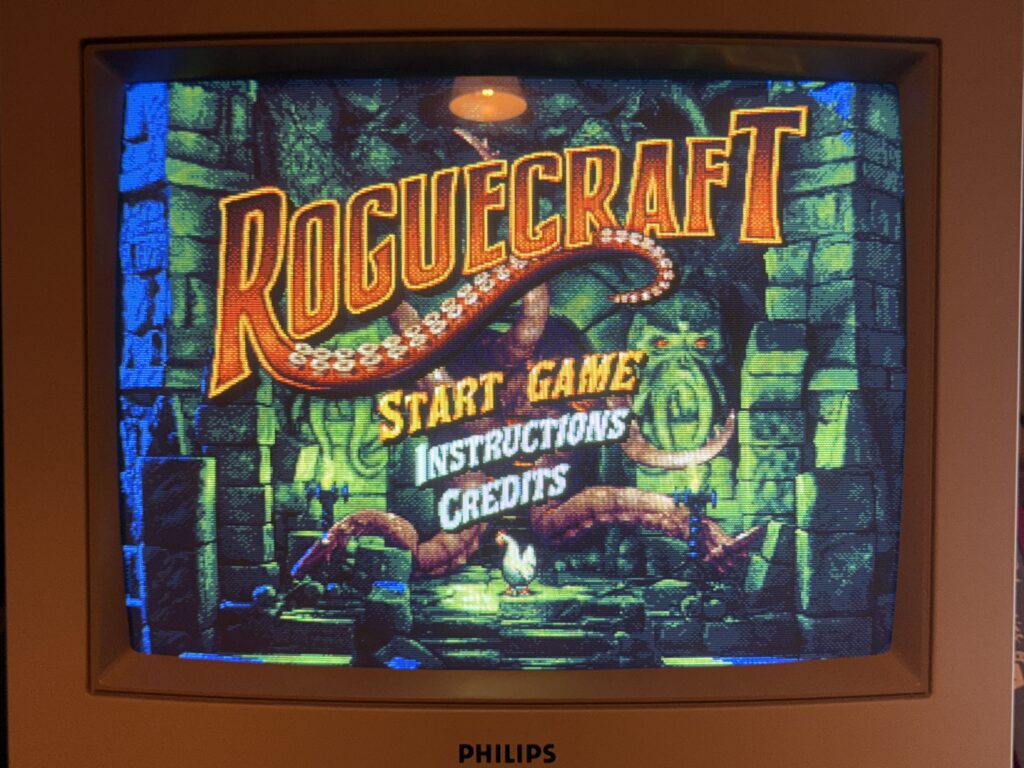
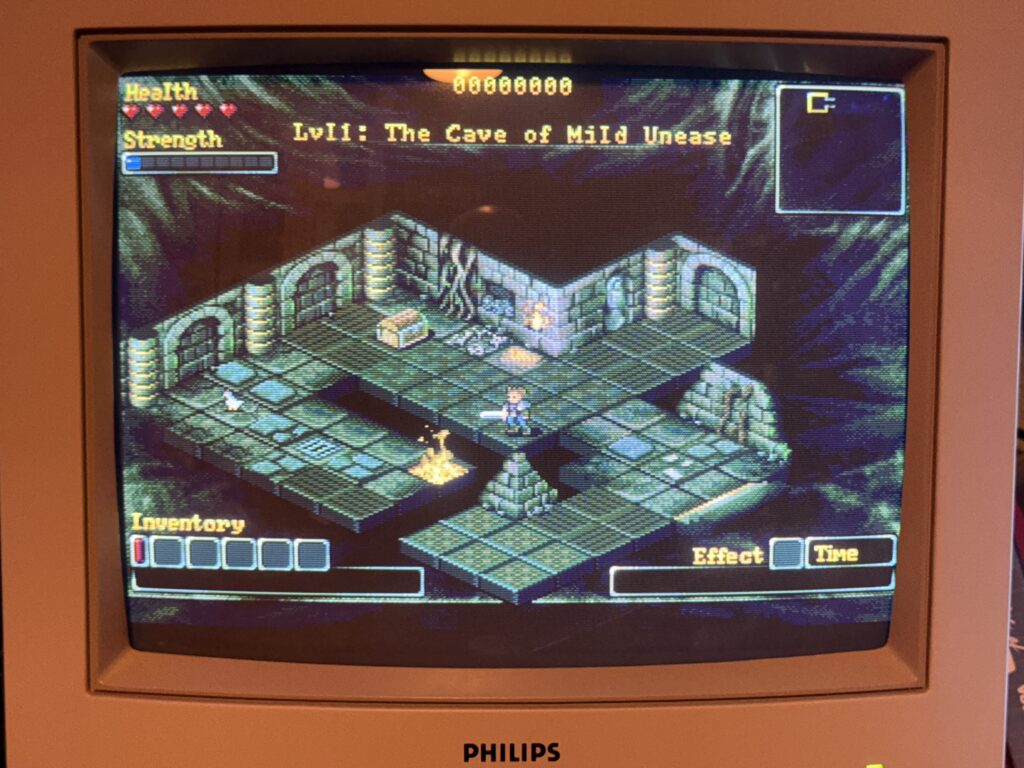
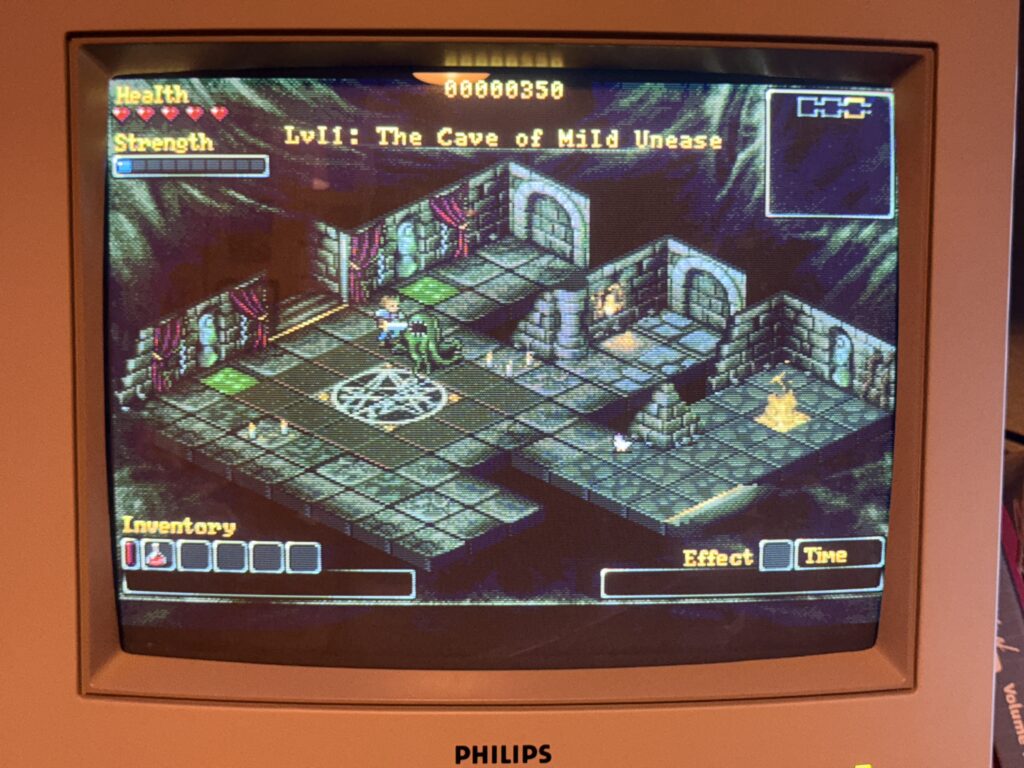
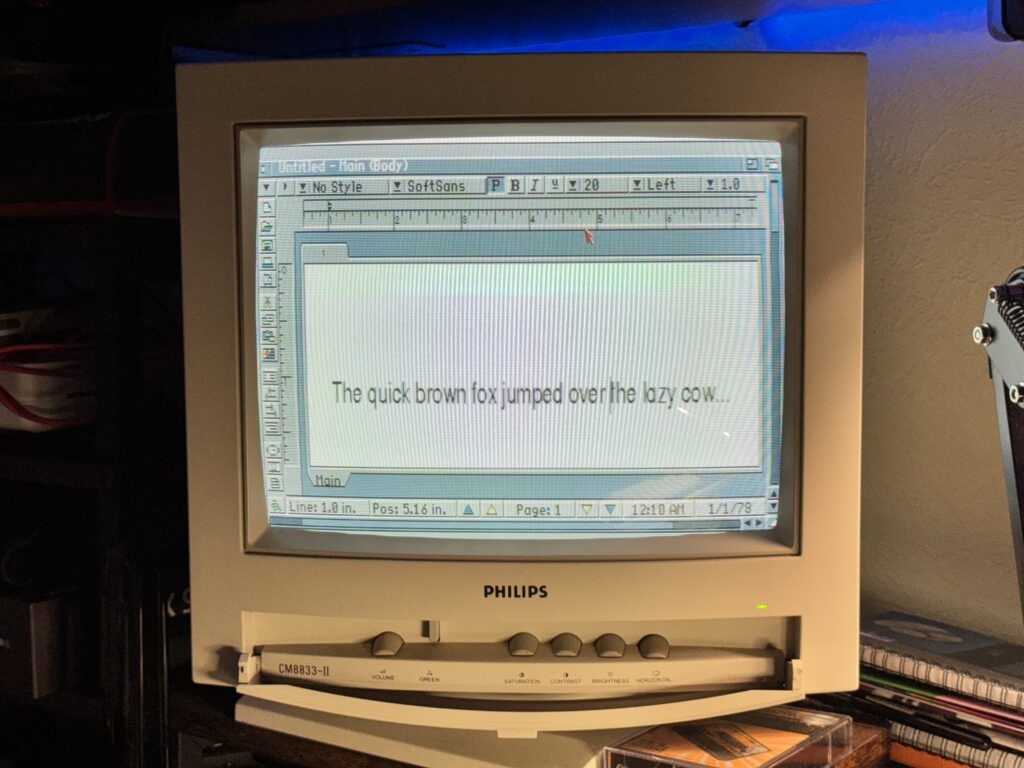
I loaded the game up on my CD32 and have to say it looks simply stunning displayed on my Philips CM8833-II monitor with vibrant colours that ‘pop’ right off the screen. The photo I took below doesn’t do it justice. It’s accompanied by a superb music track that sets the tone for the game proper.


Roguecraft

Roguecraft Title Screen


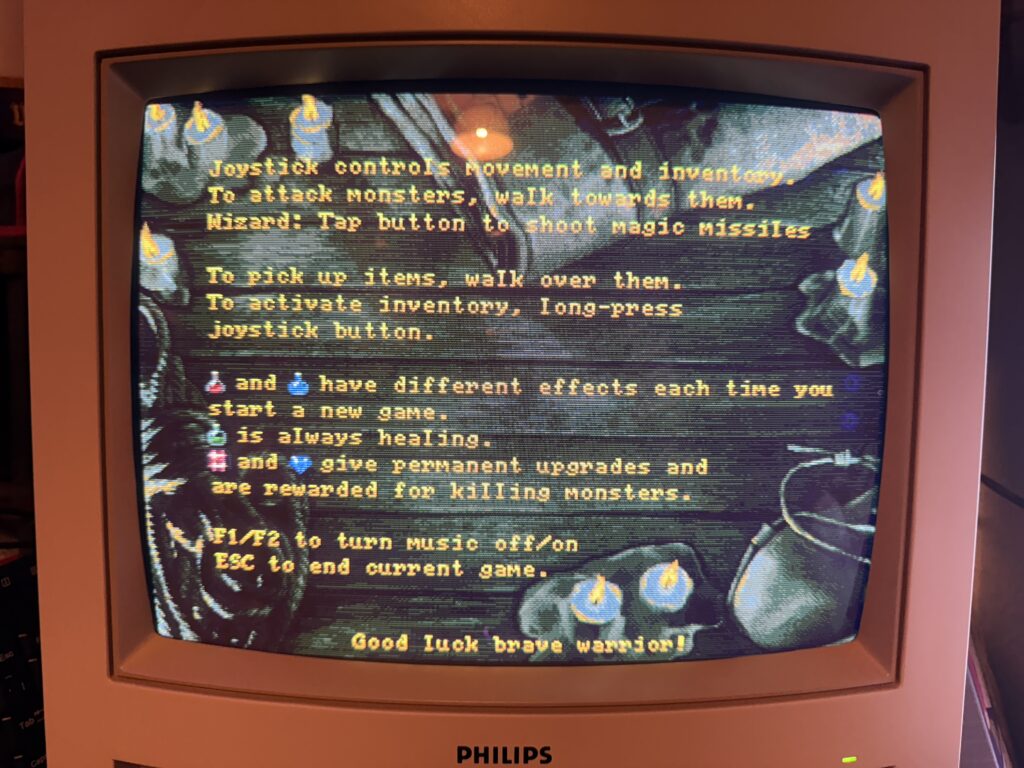
Before starting the game you can choose to view the credits or read the instructions. Very handy if you got the digital version of the game without the printed manual.


Roguecraft

Roguecraft instructions


I chose the ‘Warrior’ for my initial playthrough as it’s the default choice. Turns out this is also the ‘easy’ option too. The other choices on offer were the ‘Rogue’ and ‘Wizard’ which represent the ‘medium’ and ‘difficult’ options as they have progressively lower health and strength. The wizard is the only character to have a ranged weapon which should make for an interesting gameplay change. The Rogue has a unique ability too – he can teleport which can get him out of some tight spots.


Roguecraft

Choosing the ‘easy’ option


The graphics look simply gorgeous on my CRT monitor. If this game had come out 35 years ago it would have been a stonking success for sure.


There be treasure ahead!


CRT vs LCD

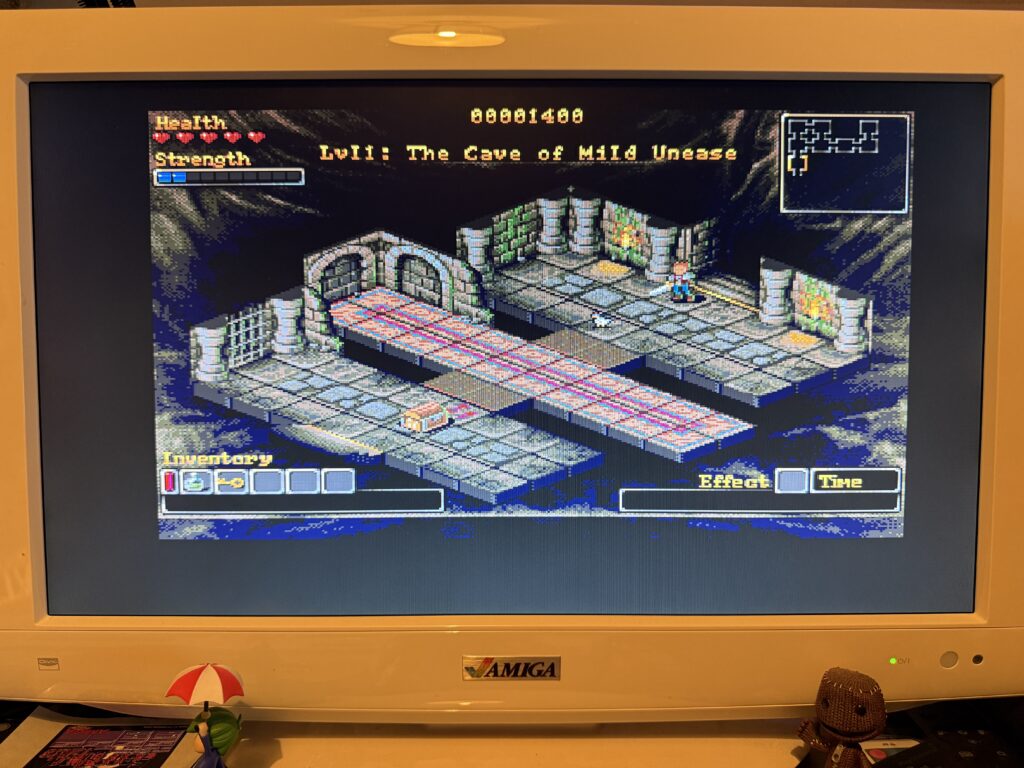
I tried the game on my accelerated A1200 too and whilst it still looked great I think it lost some of its charm when displayed on my LCD screen with black borders and crisp pixels. The picture just wasn’t as warm or vibrant and the dithered pixels were clearly visible.


Running on an LCD screen

It definitely loses something when played on an LCD screen


You can clearly see the difference in the two photos of the title screen taken from each screen type below.


This slideshow requires JavaScript.


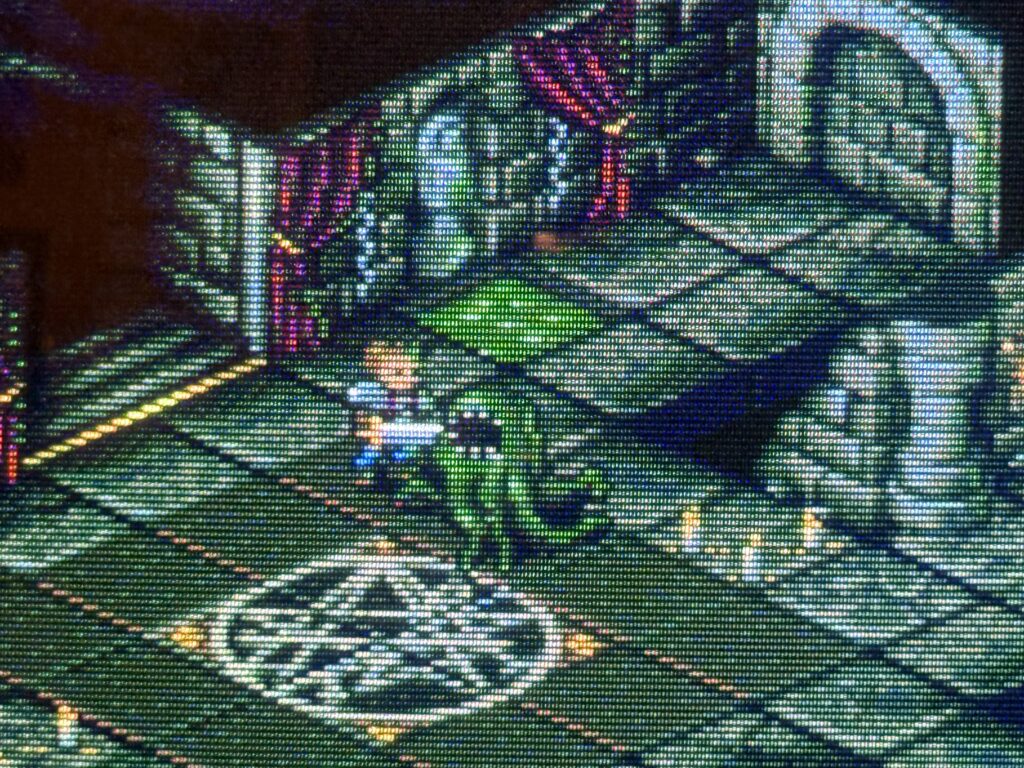
I think the CD32 version will be the way I play this going forward as this is the Amiga I have hooked up to my CRT. I mean just look at this close-up of the graphics on my CRT below – this is how it was meant to be played for sure. The dithered colours blend into each other and those natural scan lines look fantastic. It’s very clear that someone has spent a massive amount of time labouring over these graphics to get them ‘just right’. Your character and the monsters are fully animated too and look great as you navigate around the isometric levels.


Close-up of the game graphics on CRT

Look at the pixels on that….


Further enhancing the game is an amazing soundtrack composed by Jogeir Liljedalh. I’m a huge fan of the SID soundtrack from the original Rogue64 game and I can hear elements of it in this new Amiga version but Jogeir has knocked it out of the park with this one, It’s so good I went ahead and bought the soundtrack so I could listen to it whenever I wanted.


Gameplay

The aim of the game is the same as its predecessor – to progress down through the ten levels of the Mordecoom dungeons by locating the key hidden in one of the rooms on each. These levels are procedurally generated so no two playthroughs should ever be exactly the same. This is pretty essential really as being a rogue-like means you will be dying and replaying the levels a lot, hopefully progressing a bit further each time.

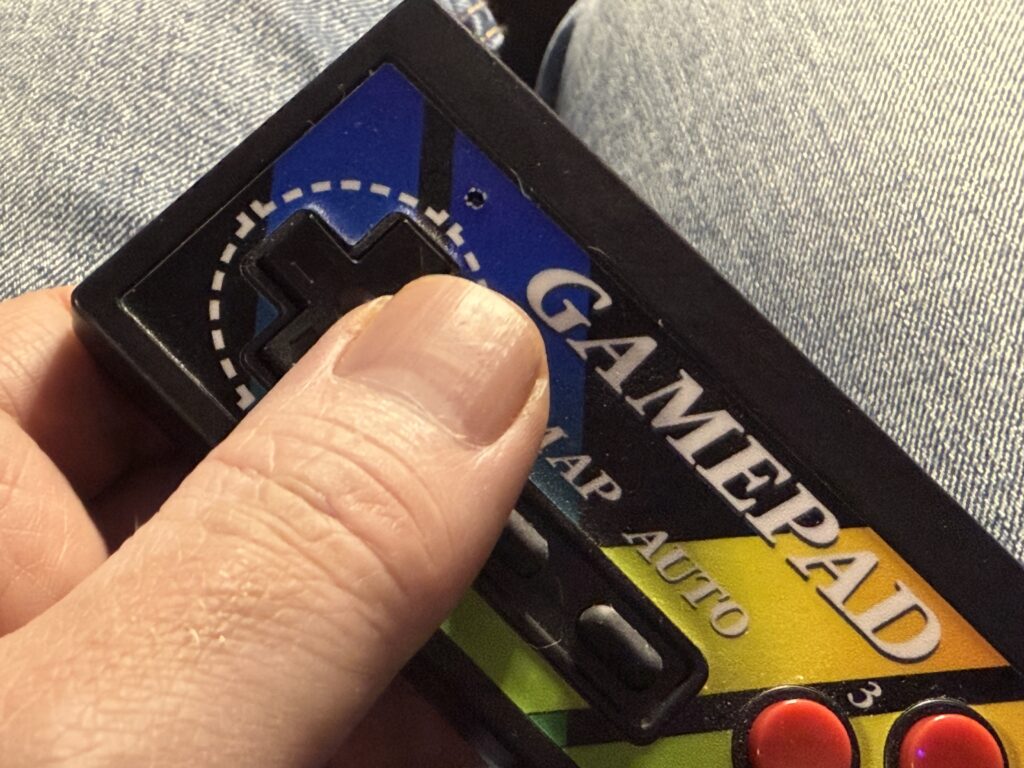
Controlling your character couldn’t be simpler – you simply push in the direction you want to go to both move and attack. Having said that, I did struggle with working out which direction on the D-pad corresponded to the direction I wanted to move on the screen. I’m sure it will become muscle memory in time but for now I found it infinitely easier to play with my controller held at a 45′ angle as you can see below. Steve Jobs was right all along – I was holding it wrong! Jokes aside I really did find directional control to be completely logical and intuitive when I held it this way.


Orienting my controller to match the screen!


Roguecraft is a turn-based game so you and the enemies take it in turns to move and attack. In true RPG fashion combat takes into account your relative strength against the enemy, active potions and also an element of RNG. Sometimes your attacks will miss their mark, same goes for the enemy attacks on you. However if they land a successful hit it reduces your health which is displayed in the top left corner. Underneath this is your strength which determines how much damage you do when attacking. Both your health and strength can be upgraded by finding red and blue gems respectively which are dropped by downed enemies after you’ve killed enough of them. You can replenish your health with hearts which can be found dotted around here and there. These are used immediately unlike the potions which you can carry so sometimes it’s better to save them until you are ready to progress to the next level rather than waste them.


Roguecraft

Battling a Gluthulhu


Speaking of potions there are numerous different types you will find peppered around the dungeons of Moredecoom. The green potions heal you but the red and blue ones effects are randomised at the beginning of each game. There’s a couple of new status effects in this version that I won’t spoil. Will they help or hinder your progress? There’s only one way to find out! In addition to the potions and gems there are also treasure chests in some rooms and opening these will boost your score.

Another new feature in this game are hazards which litter the floor, lave pits, acid pools, spikes, fires… you really need to watch where you tread now!

Just like it’s predecessor Roguecraft features an auto-mapping feature, but improves on it by clearly marking the ‘exit’ room on the map after you find it so it’s easier to back-track when you are ready to proceed down to the next level. In doing so it has addressed one of my criticisms of the first game and is all the better for it.

I love this game, it looks and sounds terrific and is a hell of a lot of fun to play. It feels more challenging now and I died a lot at the hands tentacles of the level one Gluthulhu monster as he’s quite tough to kill until you can boost your strength. Nevertheless it has that ‘just one more go’ factor in spades and is the perfect ‘pick up and play’ game when you have some spare time.

Converting a Simulant ‘Classic USB mechanical PC Keyboard’ to work natively with the Amiga

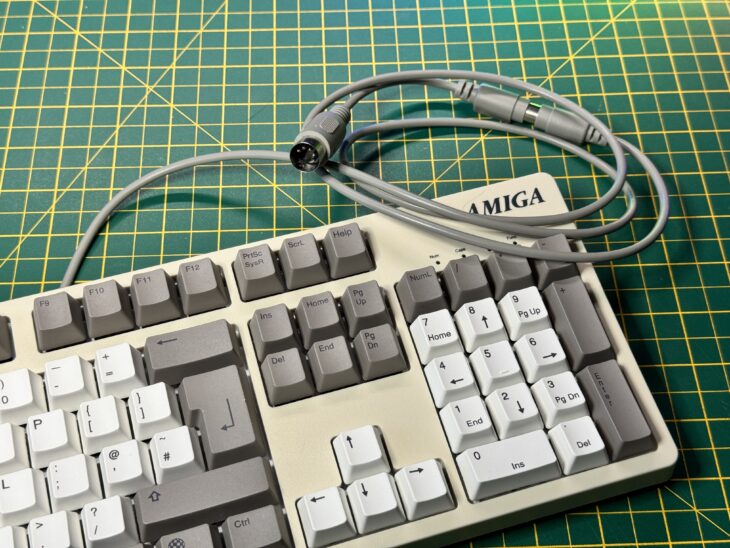
Amiga USB keyboard

Back when I purchased my Amiga USB keyboard in 2022 from Simulant it carried a disclaimer that it wouldn’t work with ‘real’ Amigas but that they were working on an adapter. That was about 18 months ago now and I had almost forgotten about it. However a few weeks ago I received an email saying they were taking pre-orders for the adapter so I jumped on board. It arrived a few days ago so I’ll go through the installation and how well it works in this post.


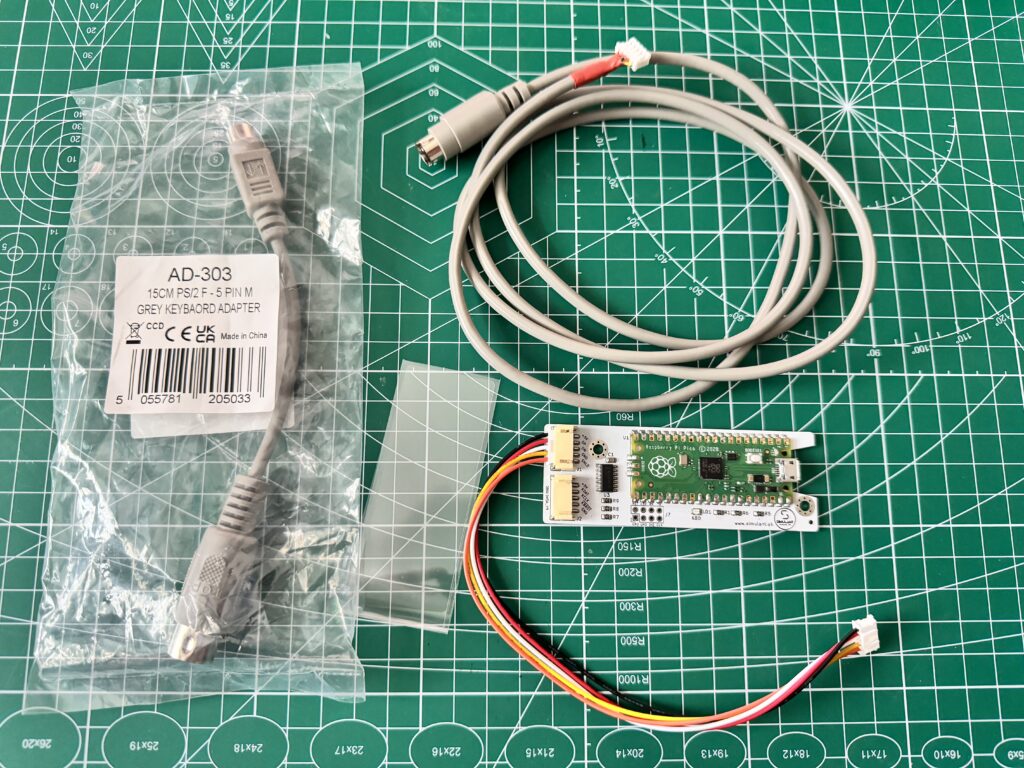
Amiga Conversion Kit Contents


The kit included the adapter, an A4000/CD32 keyboard cable, an A2000/A3000 adapter and a small strip of doubled-over plastic.


Raspberry Pi Pico


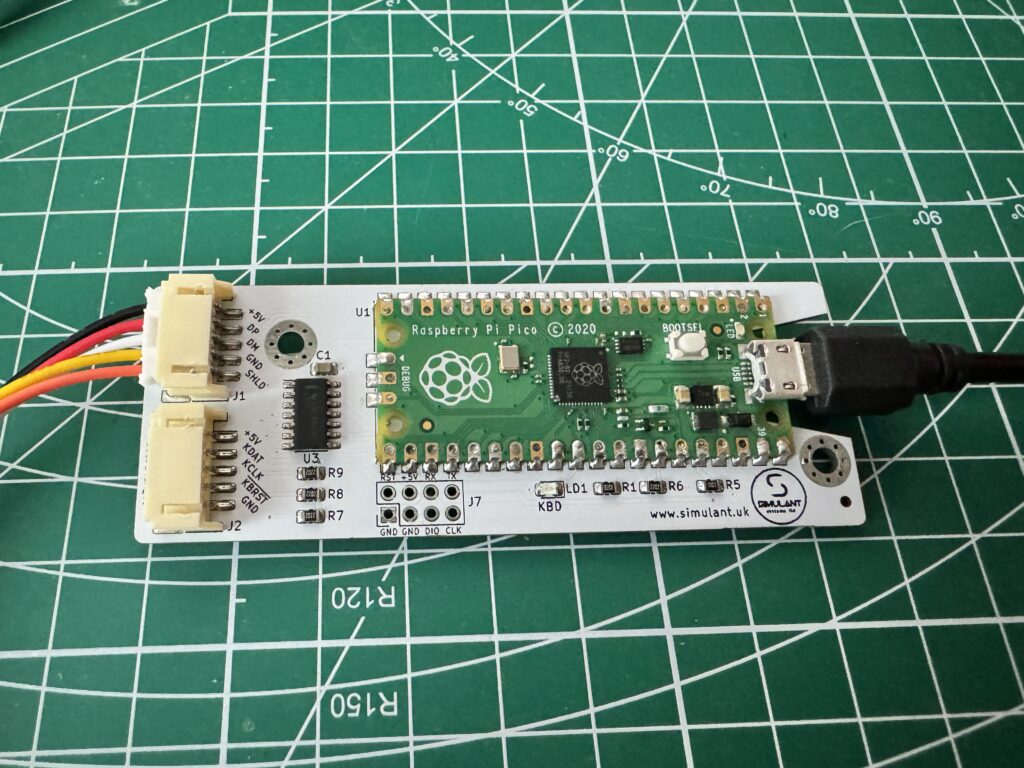
The adapter itself consists of a small Raspberry Pi Pico board affixed to a custom PCB that has some extra chips, sockets and circuitry to interface with the keyboard itself.


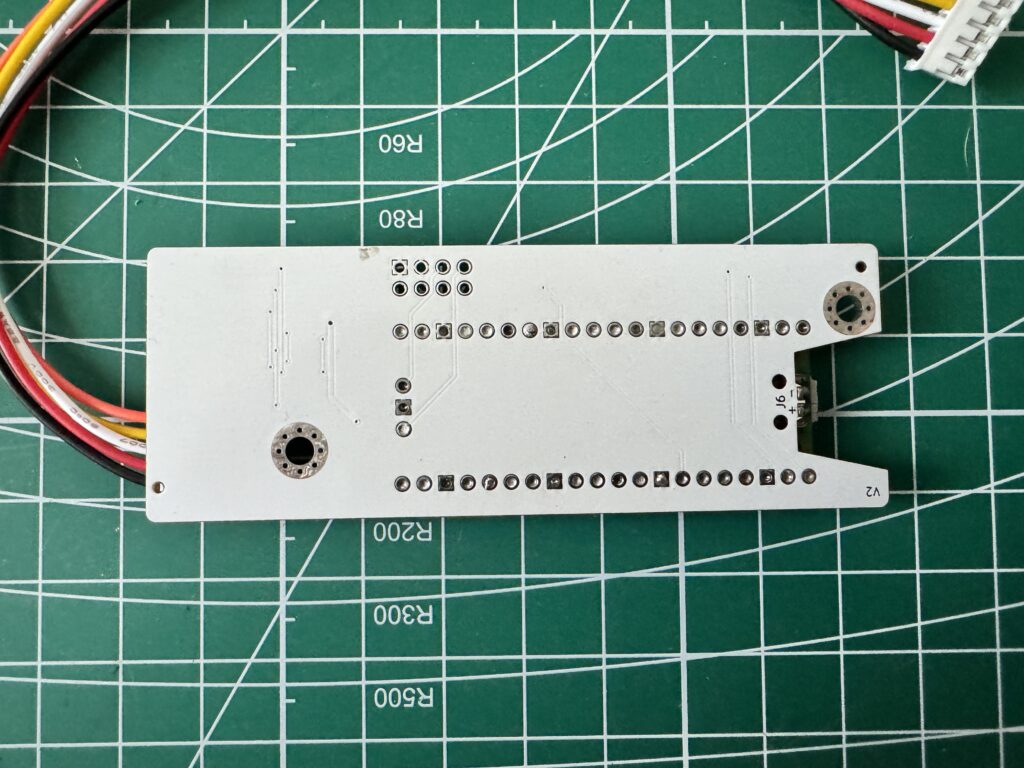
Back of the custom PCB


There were no instructions supplied with the kit at all, not even a bit of paper with a URL to visit for more info. Unsure if that was an oversight or not. Thankfully I received an email from them shortly before the delivery was due and it contained a link to download some new firmware for it. Within the zip file there was a small text file with basic instructions and a few photos. It was enough to set me on the path anyway.


Updating the Firmware

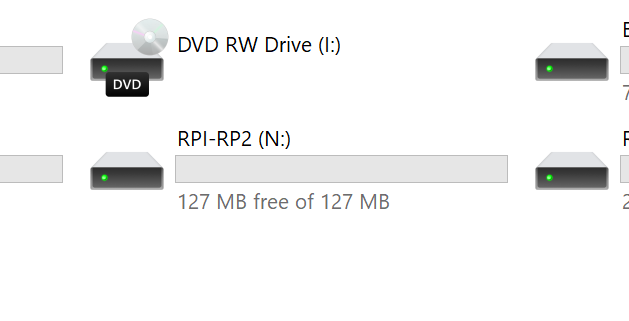
The very first task was to install the latest firmware on the Pico board. This was really straightforward and just required me to hook it up to my PC with a Micro USB cable whilst holding down the ‘BOOTSEL’ button on the Pico board. After a few moments it then appeared on my PC as a regular storage device; ‘RPI-RP2’ and I was able to copy the firmware across.


The RPI-RP2 mass storage device


The drive disappeared automatically once the firmware had successfully installed which was my cue to unplug it and move on to the next stage.


Dismantling the keyboard

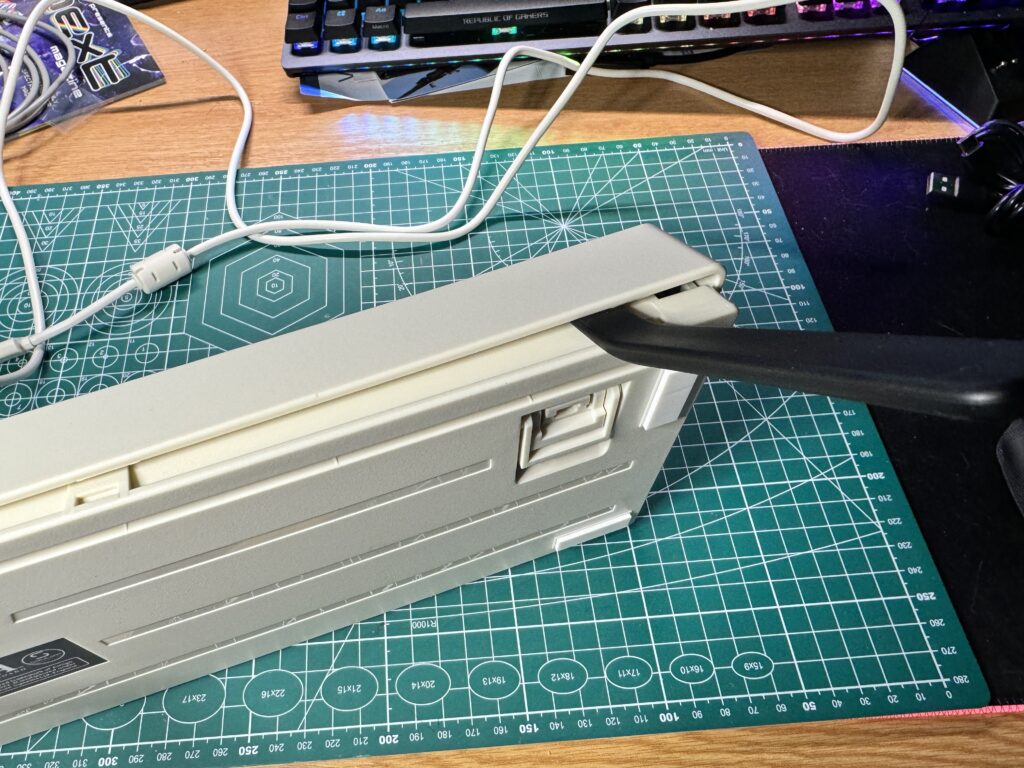
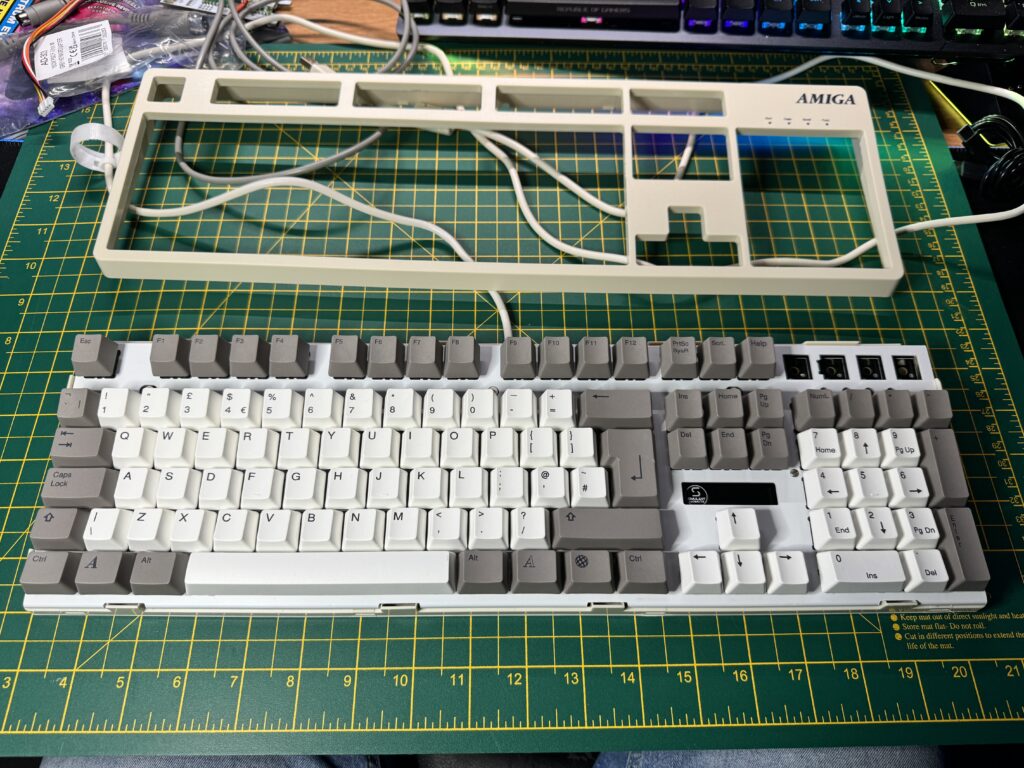
The next job was to get the keyboard opened up. The top half of the keyboard overlaps the bottom half and is held in place by a series of plastic clips. There are four along the front edge and another four along the back – there are none on the sides.


Spudger time!


The two halves fit together extremely snugly so to avoid any cosmetic damage I used a plastic spudger tool to gently prise the them apart and then slid it along, disengaging the clips as I progressed.


Amiga USB keyboard

Top half of case removed.


With all the clips dealt with the two halves separated easily and I was able to lift the top off and place it to one side.


Amiga USB keyboard

Keycap puller


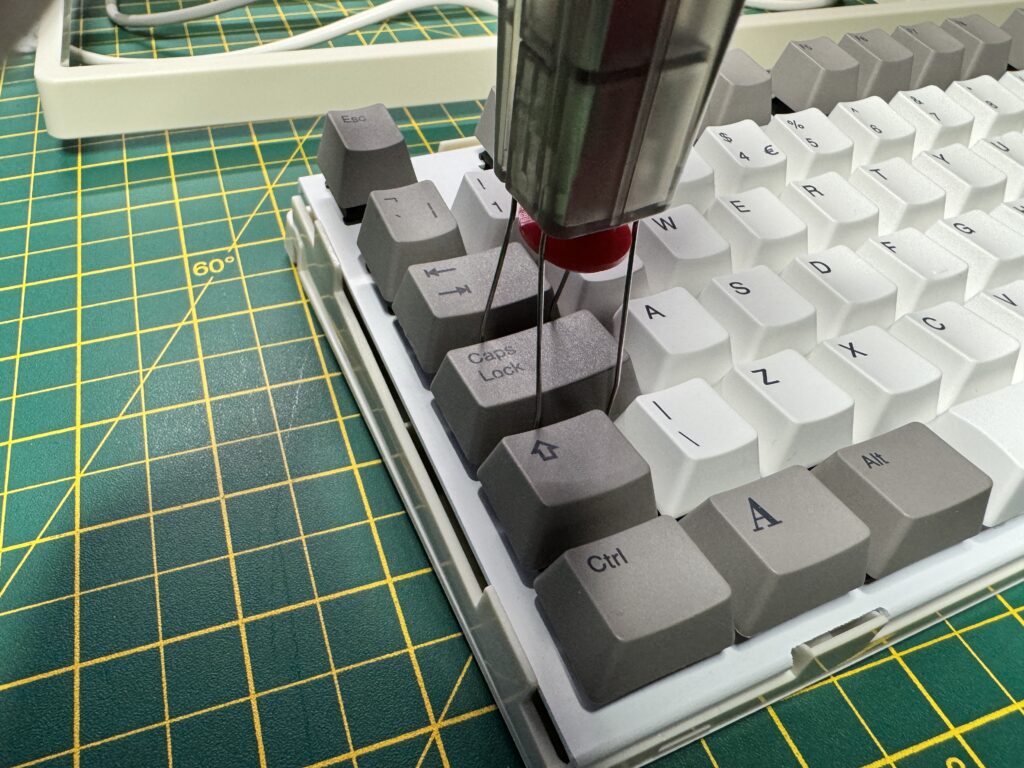
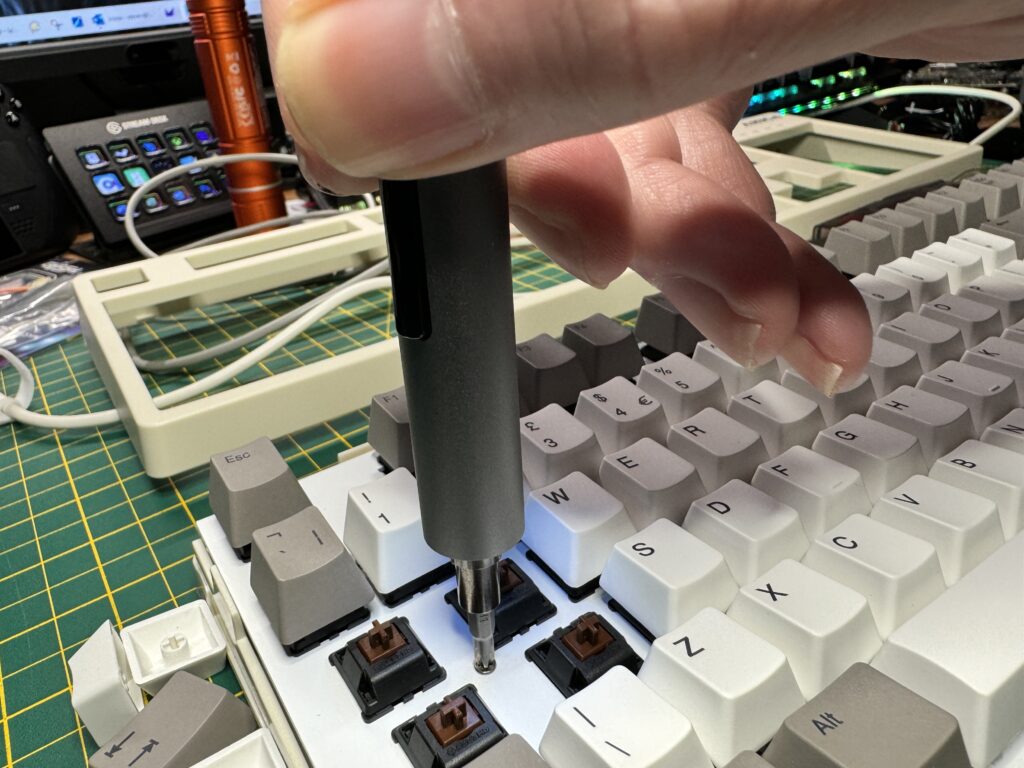
The next job was to remove some of the keycaps to gain access to the screws holding the keyboard and bottom of the case together.


Amiga USB keyboard

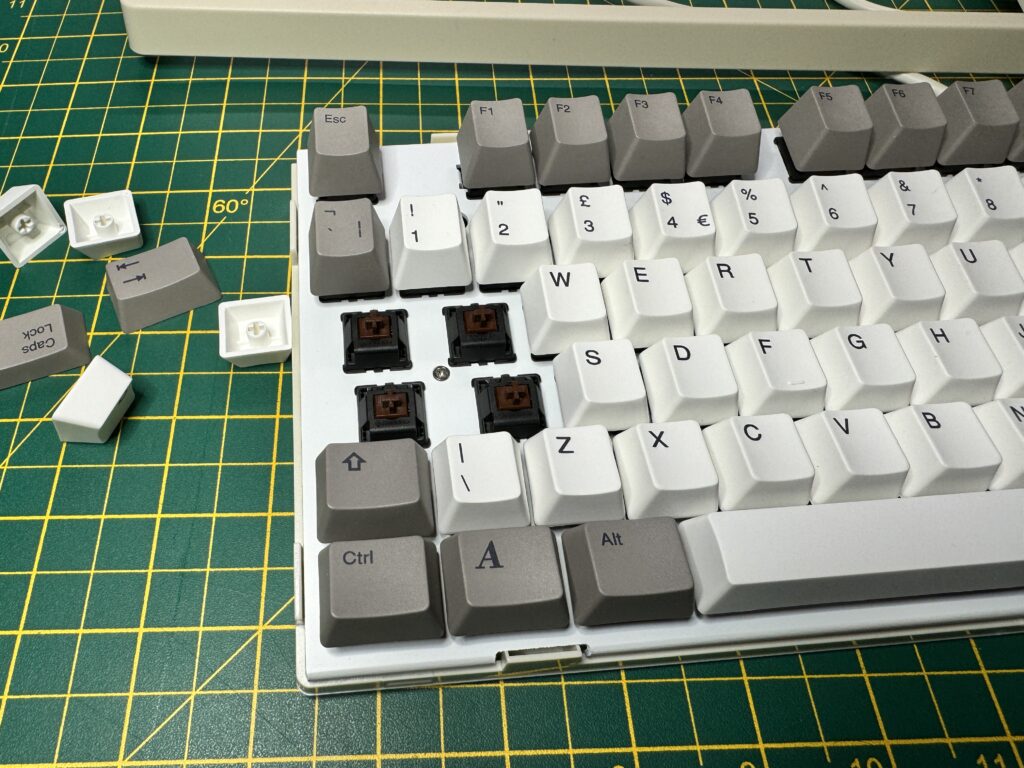
Keys removed revealing screw beneath.


First I removed the Caps Lock, Tab, Q and A keys on the left…


Amiga USB keyboard

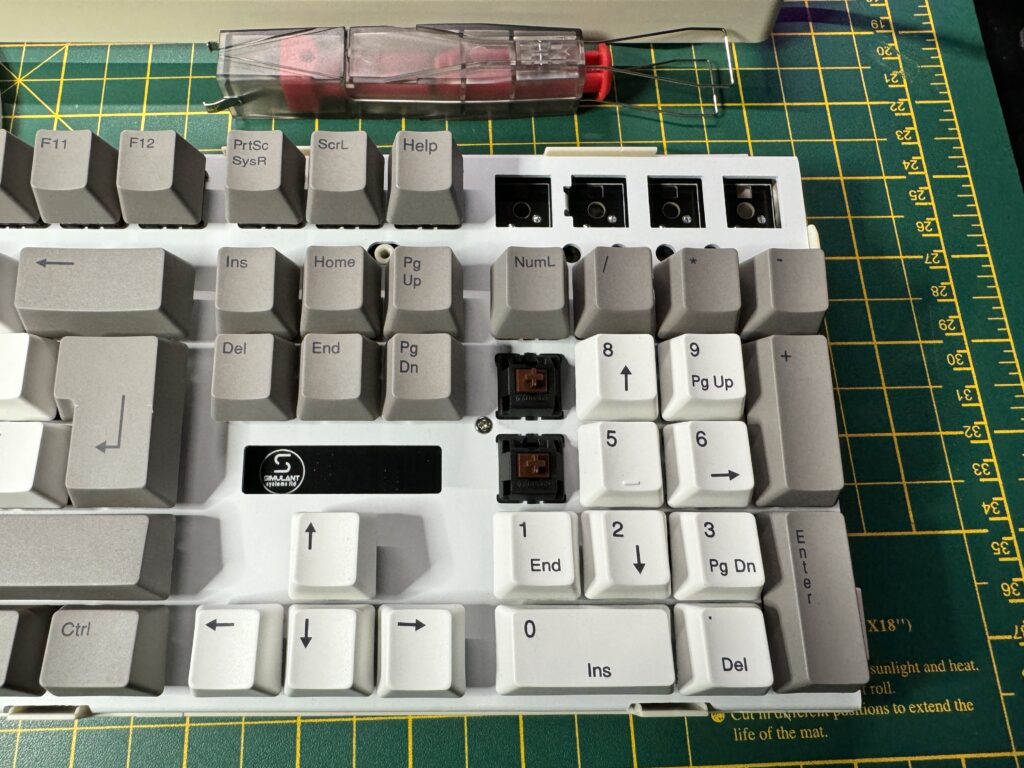
Keys removed revealing screw beneath.


Then the 7 and 4 keys from the numeric keypad on the right.


Removing the left-hand side screw.


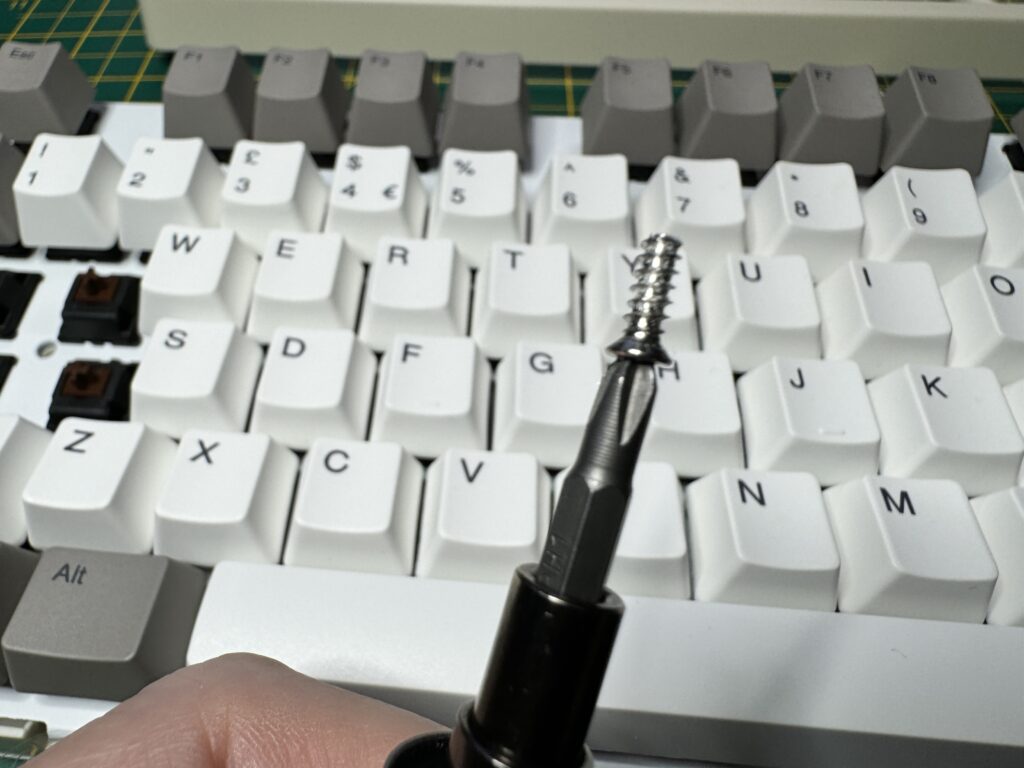
Then I removed the small phillips screw from each side of the keyboard…


It’s a screw!


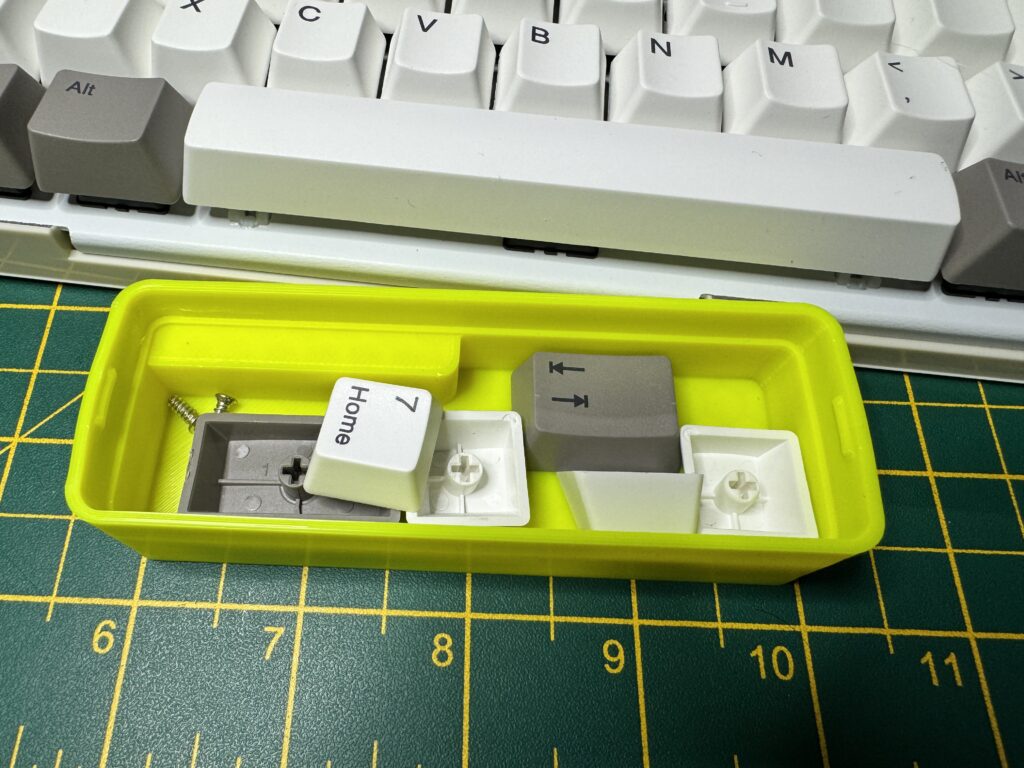
and placed them, along with the keycaps, somewhere safe so I wouldn’t lose them in the black-hole that is my desk!


Don’t want to lose these!


With the screws removed I was then able to separate the keyboard from the bottom of the case.


Amiga USB keyboard

Bottom of the keyboard released


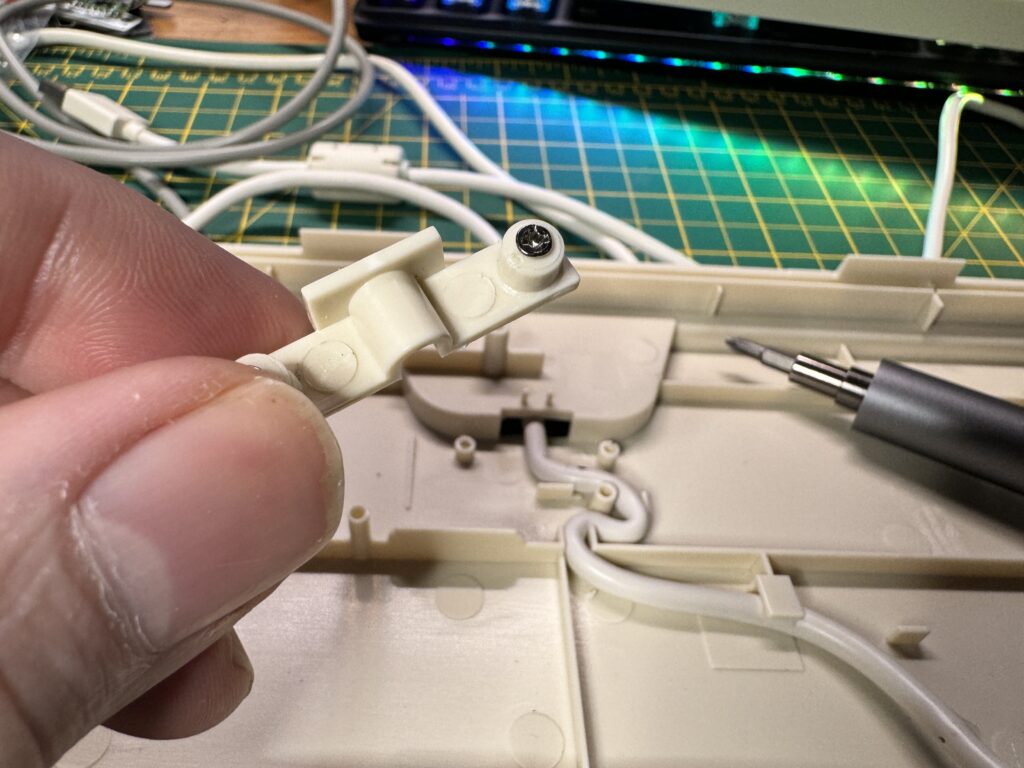
I then set about removing the cable clamp from the bottom of the case.


Removing the cable clamp screws.


The clamp was held in place by two phillips screws, smaller than the ones I had encountered earlier.


The cable clamp.


The cable was then free to be moved around to give me more slack to work with for the next stage.


The path of the cable is a curvy one…


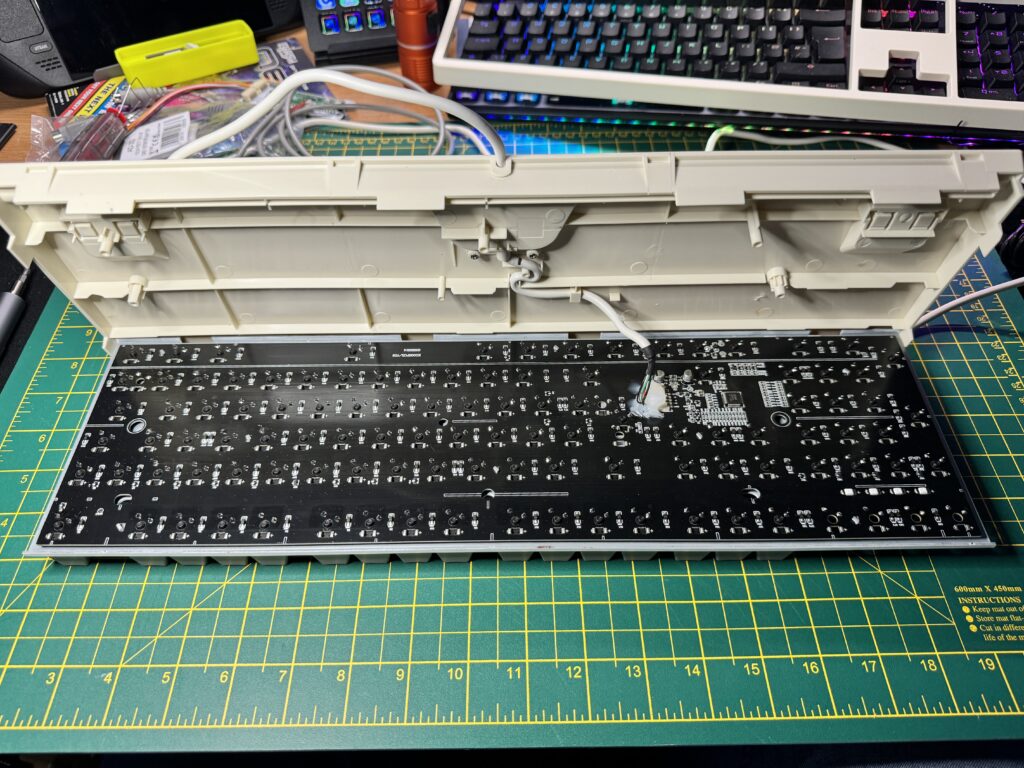
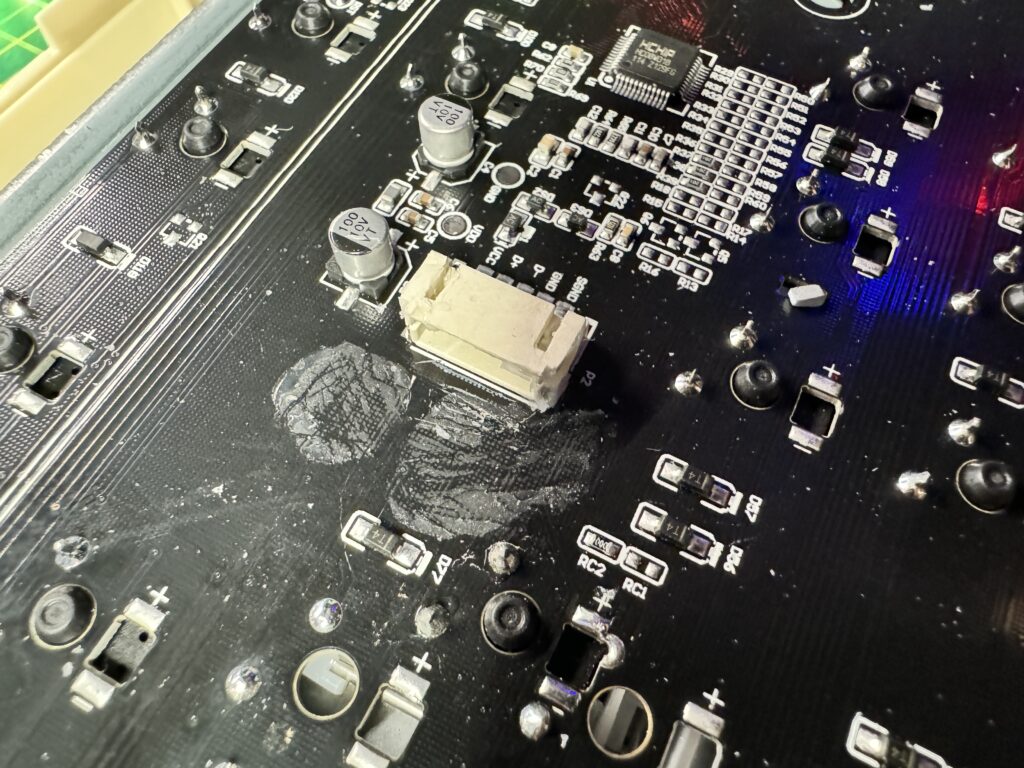
In order to fit the adapter I needed to remove the old cable from the keyboard circuit board.


Silcone…


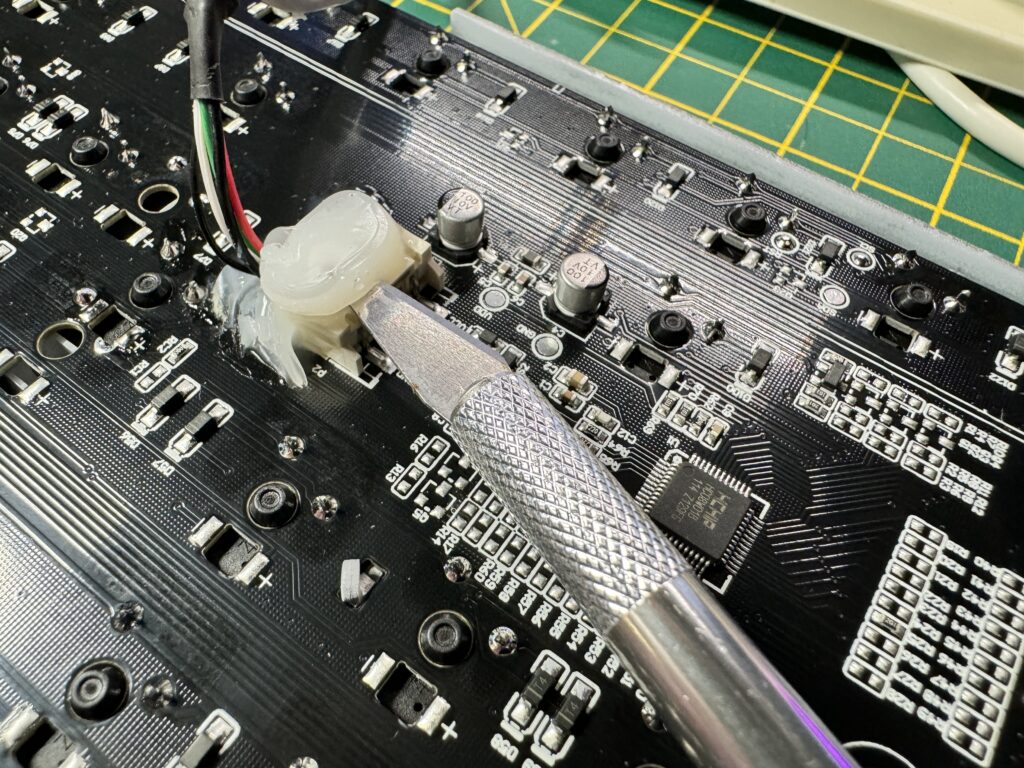
Unfortunately for me, whomever made it decided it would be a good idea to squirt lashings of silicone all over it.


Slcing the silicone off


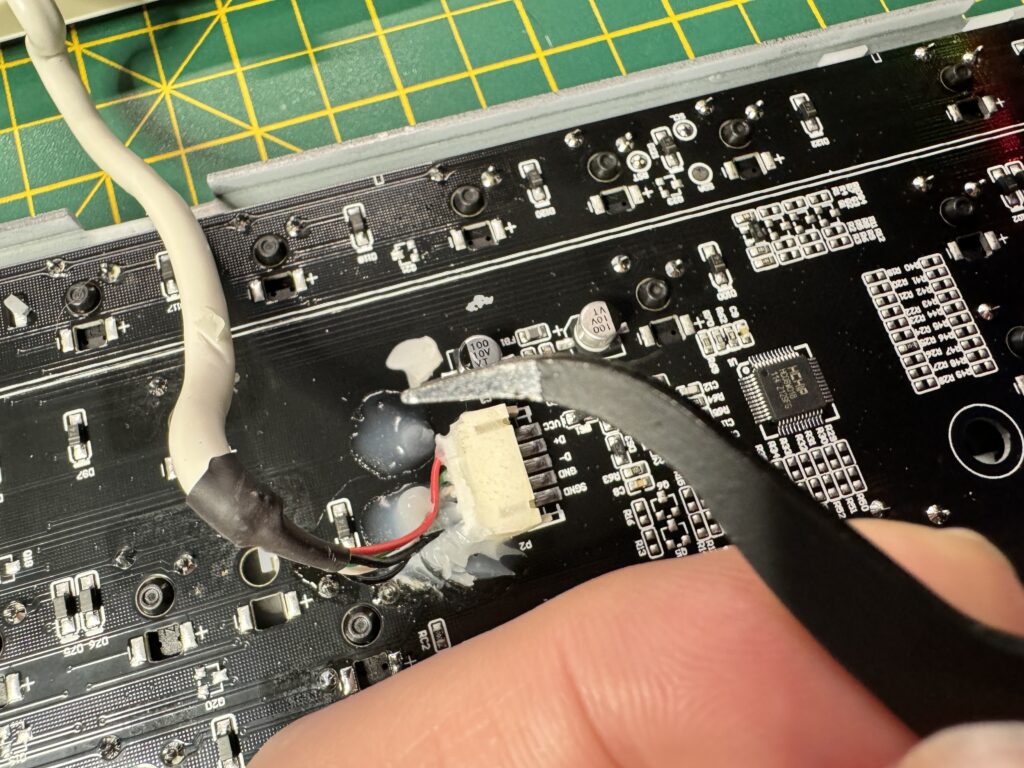
I spent the next 20 minutes very carefully removing chunks of silicone…


Another chunk of silicone removed…


using a combination of craft knife and tweezers, doing my best not to slice through anything I shouldn’t!


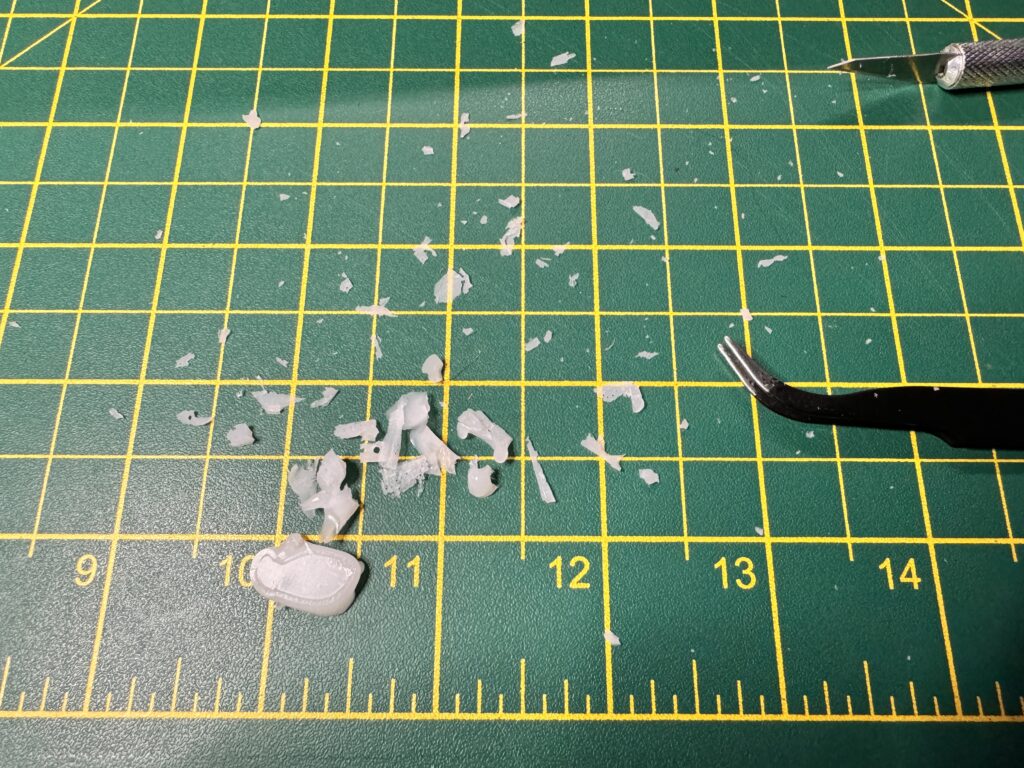
A lovely mess.


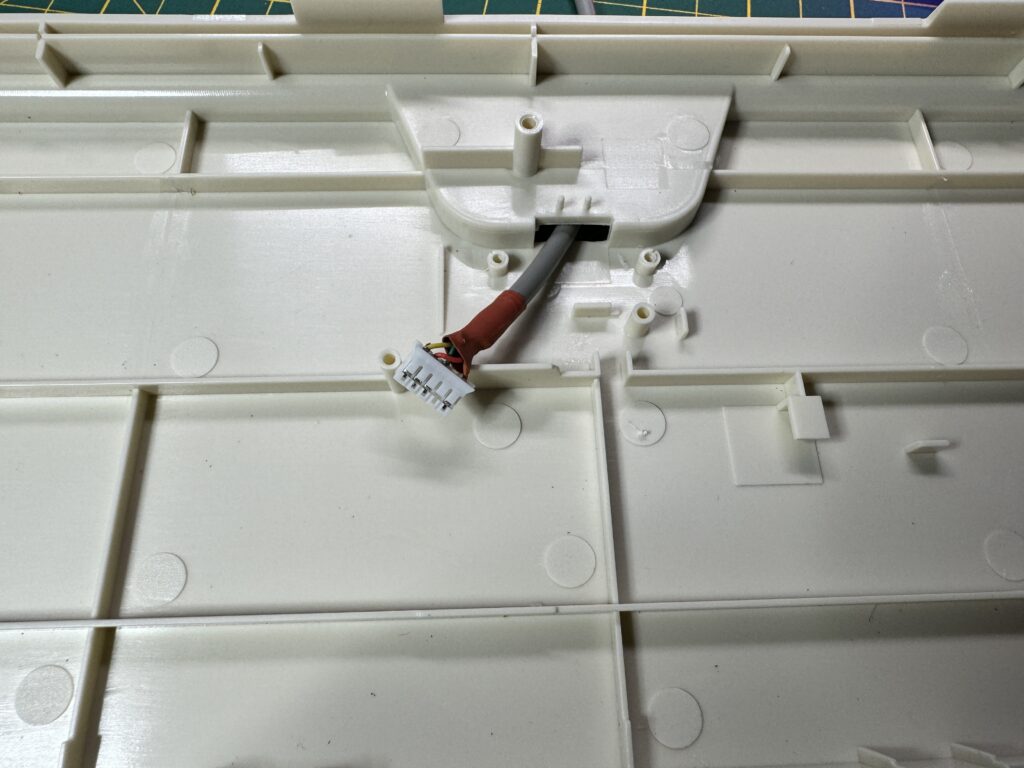
It was a pretty tedious task but eventually I had a small pile of silicone bits and I was able to remove the old plug from the socket and feed it back out through the small slot in the case.


Finally – all gone.


This eventually left me with a nice, silicone-free, keyboard cable socket!


Installing the adapter

Now it was finally time to install the adapter. I began by gently feeding it through the small slot in the base of the keyboard case until I had enough cable to work with,


Pushing the new cable through the slot.


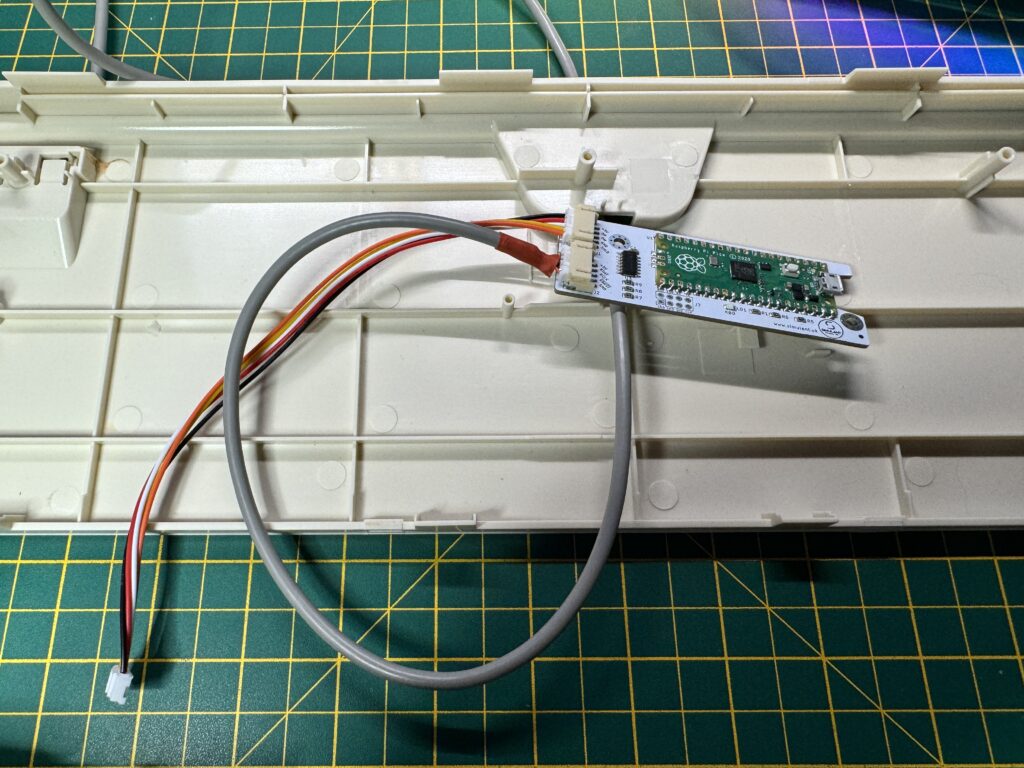
Next I connected the plug into the empty socket on the adapter board.


Cable now hooked up to the Pico board.


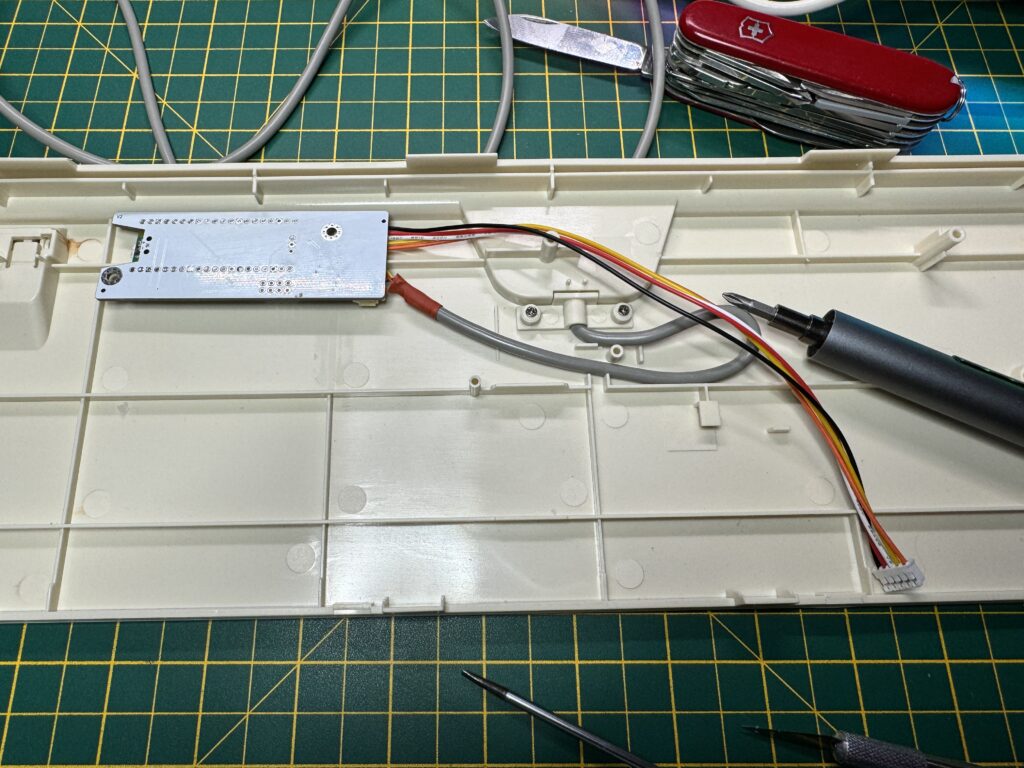
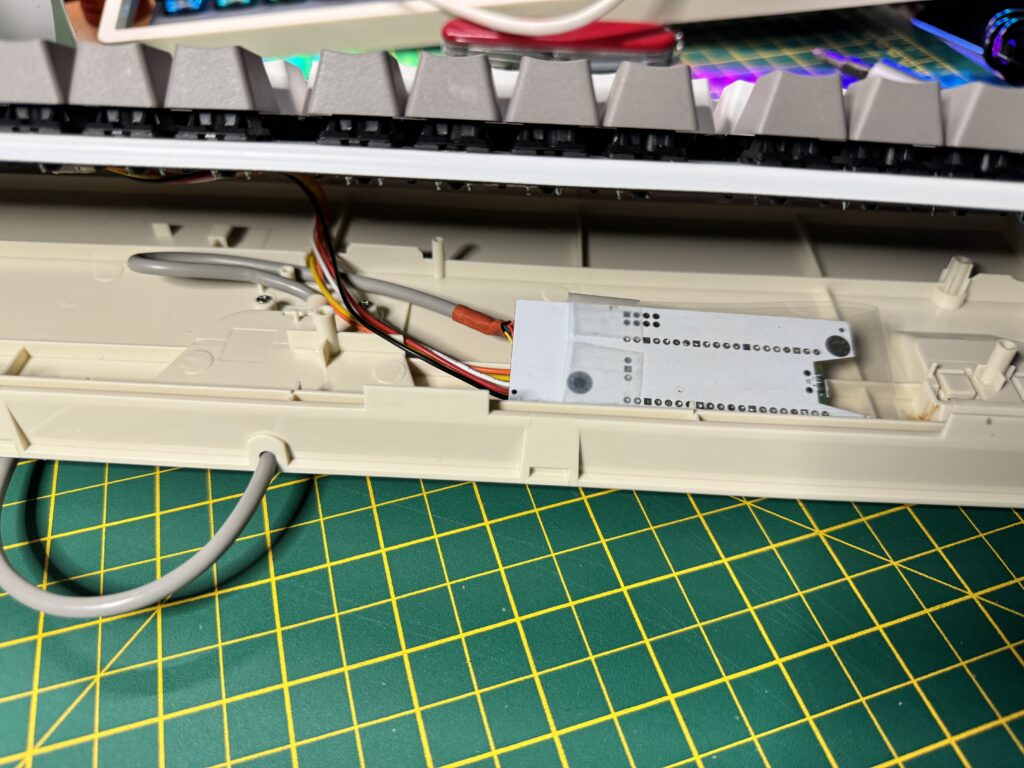
Simulant recommend the adapter be placed out of the way with the two sockets straddling the plastic ridge in the case so I placed it between the left foot and the cable entry point as shown below.


Placing the adapter board out of the way.


Once I’d placed the cables where I wanted them to go I re-attached the cable clamp to hold it in place.


Attaching to the keyboard.


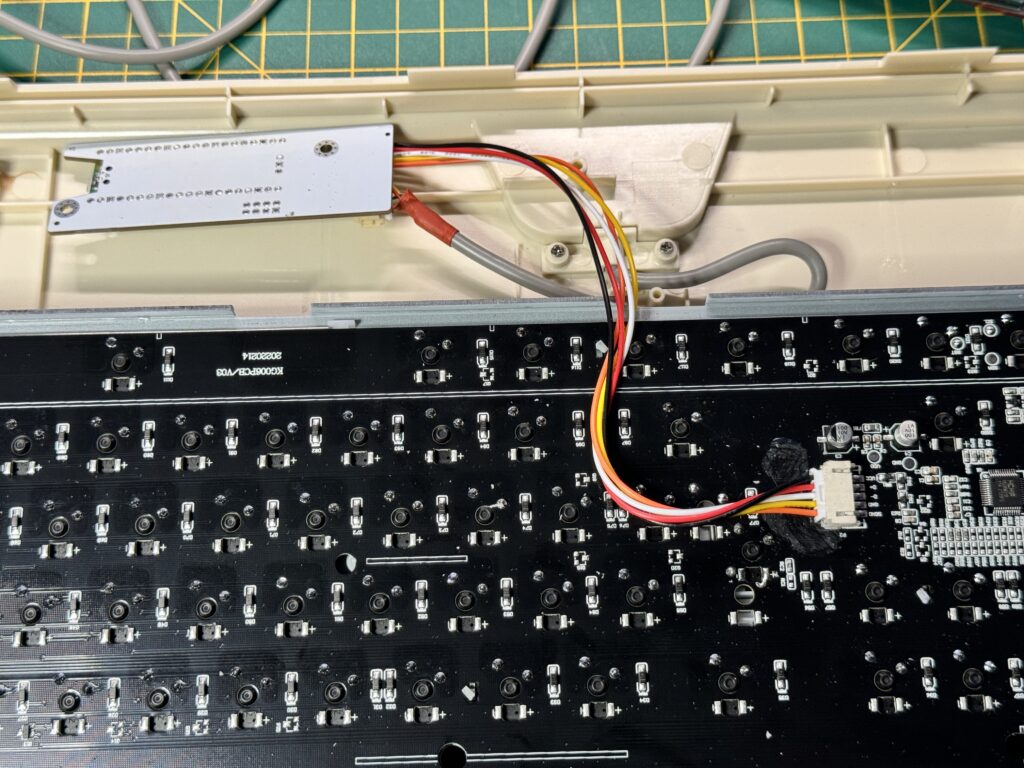
The final connection task was to plug in the short fly-lead running from the adapter into the socket on the keyboard (the one that was previously covered in silicone).


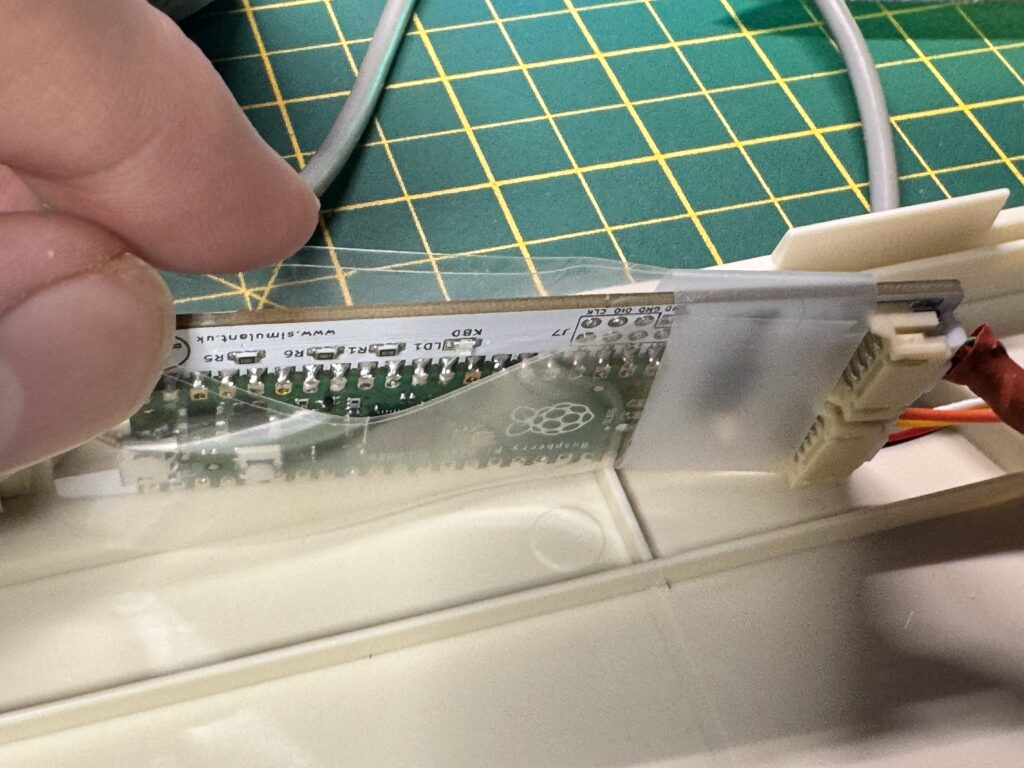
Plastic shielding.


Before closing everything up I wrapped the adapter in the plastic sheathing provided and secured it with a little sticky tape. This was there just to prevent any kind of electrical short occurring between the adapter and the bottom of the keyboard circuit board.


Making sure nothing gets trapped as the case is reassembled.


I then carefully mounted the keyboard back into the bottom of the case making sure that nothing got trapped in the process and then re-seated the top of the case over everything to hold it all together once more.


Ta-da!


Testing

The conversion was now complete so it was time to hook it up to my Amiga and put it through its paces!


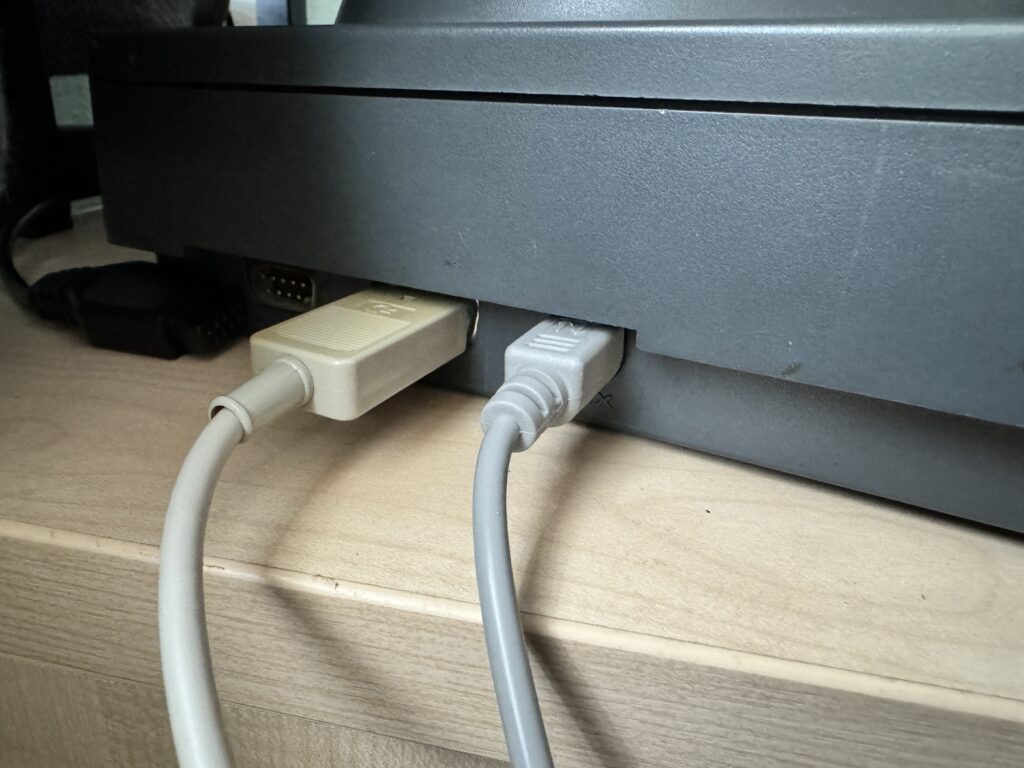
A4000 PS/2 connector.


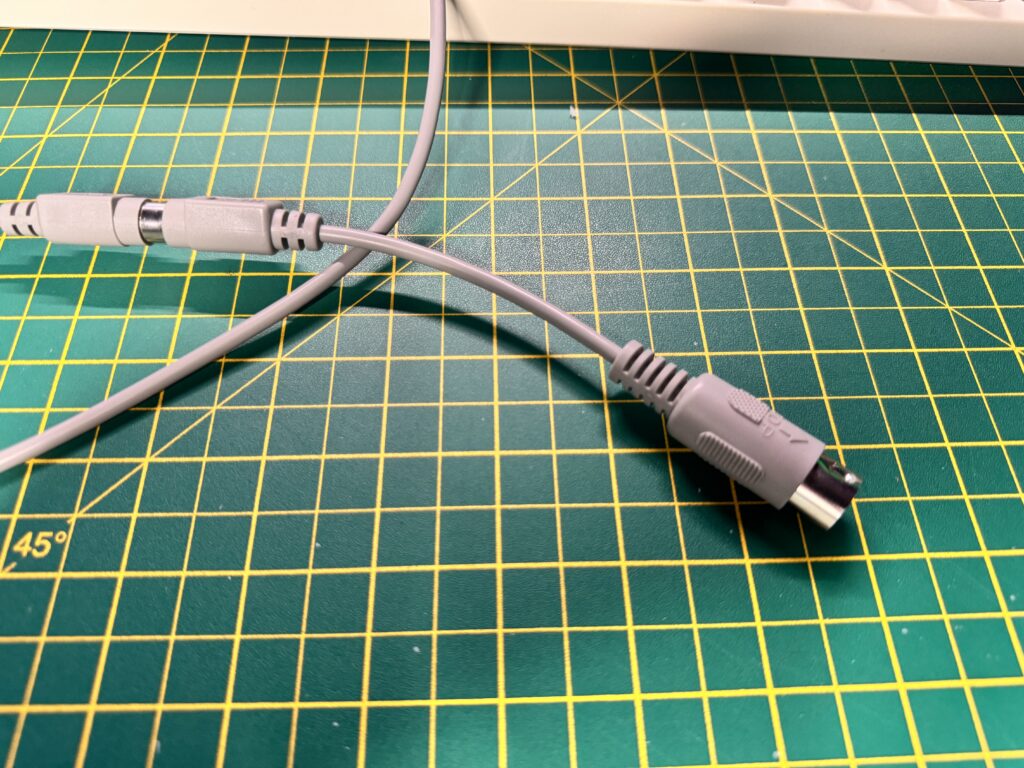
The standard cable it comes with ends in a PS/2 connector, like the one you would find on an A4000.


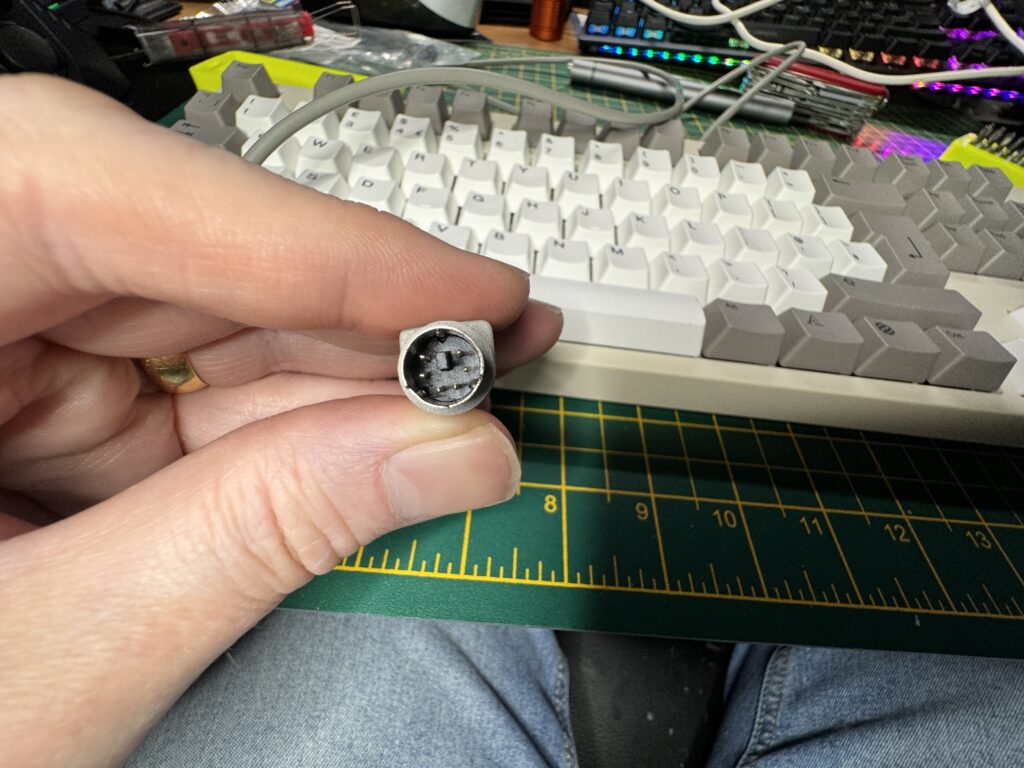
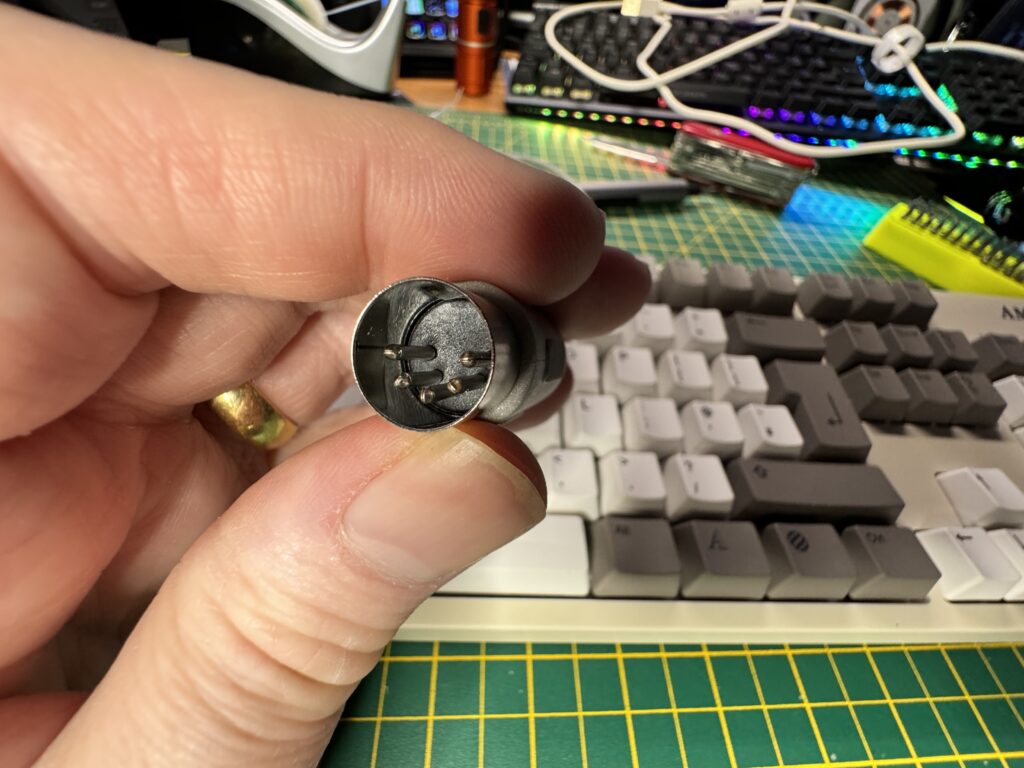
The 5-pin DIN adapter.


It also comes with an adaptor to convert it into a 5-pin DIN style connector more commonly found on A1500/2000/3000 machines.


The adapter cable.


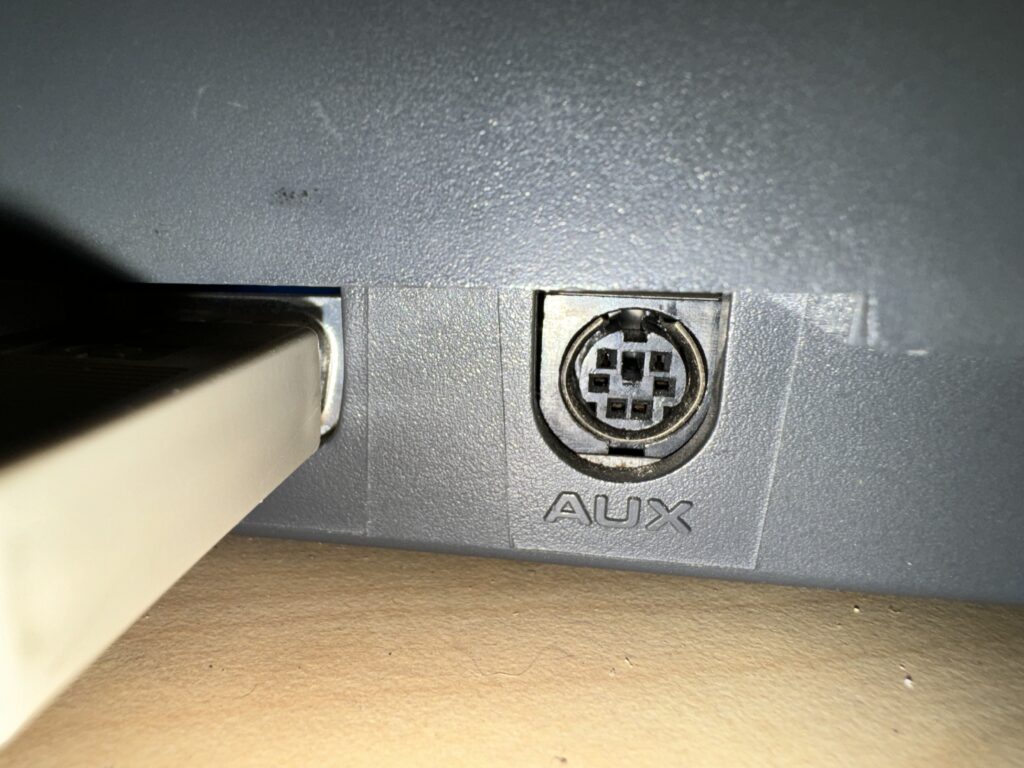
Sadly I do not own any kind of big box Amiga to test it out with… the price of these machines has skyrocketed in recent years and it’s difficult to justify the expense when they appear on eBay, However I do have a CD32 console and this is blessed with an A4000 style PS/2 socket so I used that for my testing.


CD32 PS/2 ‘AUX’ socket.


My CD32 is equipped with a ‘TerribleFire 330‘ which means I am able to run a fully loaded Workbench environment off a compact flash ‘hard drive’. I have it hooked up to my Philips CM8833-Mk2 monitor via RGB. Not as good as an A3000 with RTG but it’s still a nice setup.


New keyboard connected.


I loaded up a copy of Final Writer and began bashing away on the keyboard. It’s a lovely typing experience with plenty of tactile feedback without being too clicky and annoying. All the characters and punctuation marks appeared correctly including the likes of £, @ and $ (I’m in England so use a British keyboard layout). The caps lock key also functioned correctly as did the number lock key.


Final Writer.


One little quirk I did notice was that the hash key next to the Return key was basically redundant and had no function at all. Interestingly this is a blank key on my A1200 and doesn’t exist at all on my A500 so it makes more sense in light of this. It was not an issue anyway as the hash character was accessed using the key to its immediate left whilst the tilde character was accessible from the key to the left of the numeric 1 key (which is where it is located on a real Amiga keyboard).


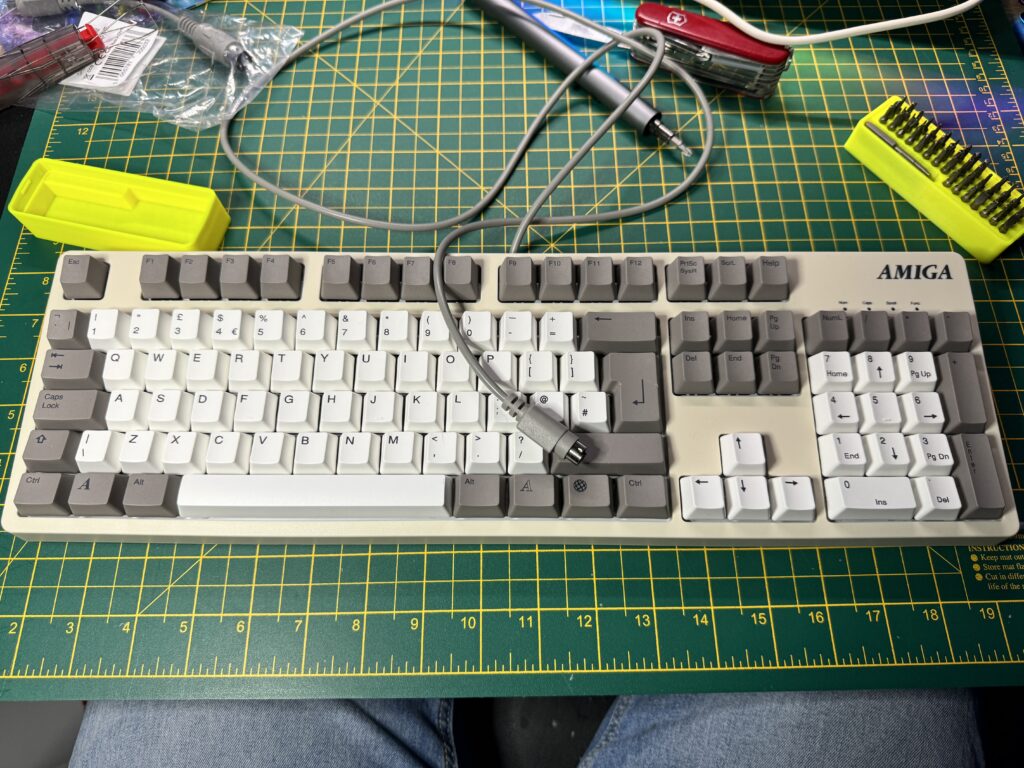
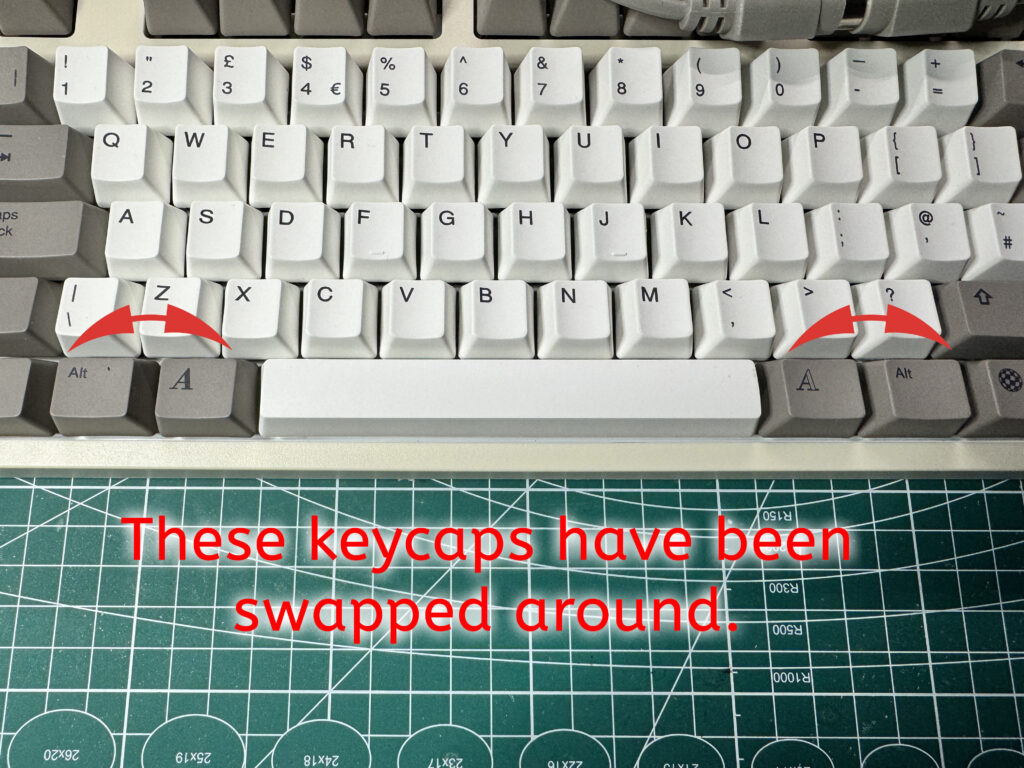
Proper Amiga keycap layout.


The other important thing I realised was that the Amiga keys didn’t work when trying to access Amiga shortcuts, however I found that the two ‘Alt’ keys did. I solved this by simply swapping the keycaps over so that the Amiga keys were placed directly either side of the space bar and the Alt keys adjacent to those. After that everything behaved correctly with shortcuts like ‘Amiga+ S’ to save and of course the ‘three finger salute’, CTRL, A + A to reset it proving to be no problem at all.


Rounding Off

At a shade over £50 this is not a cheap kit, especially when you’ve already shelled out over £100 for the Amiga USB keyboard. However it’s been well designed and does exactly what they said it would. Considering the price that original A4000 keyboards can go for on eBay it begins to look a lot more economical! It’s also been made in very small numbers so there’s no economies of scale at play either.

My only criticism would be levelled at the lack of any instructions included with the kit but maybe someone just forgot to throw them in the jiffy bag when they were packing mine? Additionally, and this is not a criticism – more of a request really, it would be great if they could give us the option to quickly switch from the original USB configuration to the Amiga one without having to take it all apart again. I’d like to continue using it with my MorphOS machine as well as with my emulated Amigas and not be forced into choosing one or the other. A first world problem for sure!

Anyway if you already have one of these Amiga USB keyboards and want to use it with a big box Amiga then I can heartily recommend this as it does exactly what it says on the tin!

Trade and Play Wirral

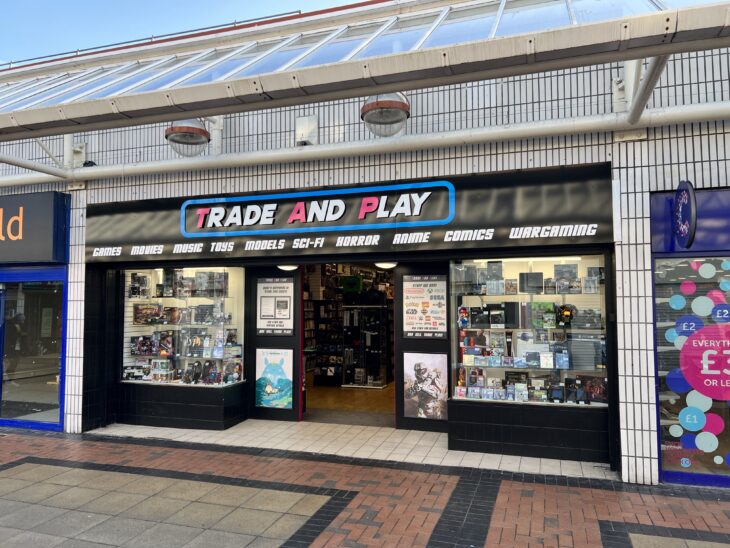
This is just a quick post I’m putting up after a recent visit I had to a Retro gaming shop called ‘Trade and Play’ in the Pyramids shopping centre in Birkenhead. Thought it might be of interest to anyone who lives in North West England as I was completely unaware of its existence until a friend tipped me off about it and I think it is well worth a visit. Spoiler alert – they stock Amiga games!

What sort of stuff does it sell?

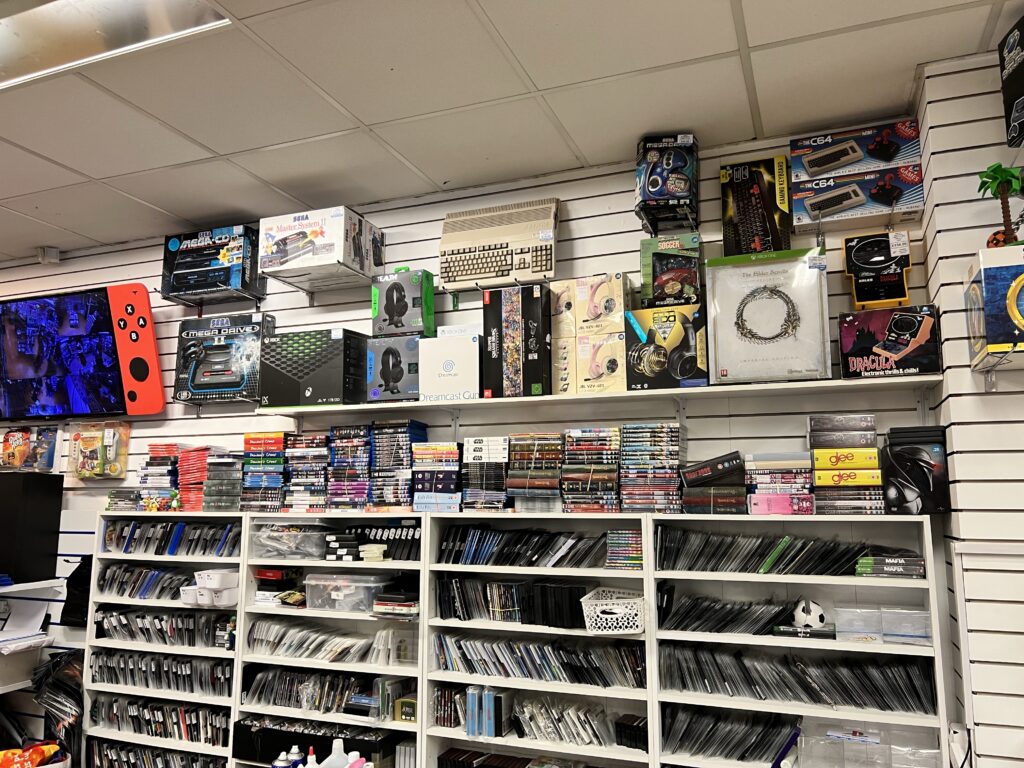
Though the shop does stock (and accept trade-ins for) current generation games and consoles, what really sets it apart from the likes of Game and CEX is the amazing amount of retro games and hardware they stock. Not just a few old PlayStation or Xbox games but masses of games for every system including the likes of the NES, SNES N64, MasterSystem, MegaDrive, Saturn, Dreamcast, PS1, PS2 plus all the handheld systems like the Gameboy, Game Gear, PSP and Vita. We’re talking original boxed hardware, peripherals, games and more. They even had an original boxed Atari 2600 for sale along with a stack of cartridges for it.

However what really excited me the most was that they actually stocked Commodore Amiga hardware and big box games for both the regular Amiga computers and the CD32. On one wall nestled amongst a boxed Sega MegaCD and Master System 2 there was a beautiful Amiga 500 for a not entirely unreasonable £150 supplied with mouse, PSU and cables. Imagine being able to buy that and walk back to the car with an actual Amiga 500 you just bought from a shop in 2023! I was sorely tempted I can tell you, but as I already have one, explaining getting another one to my wife (who was with me!) would have been challenging to say the least!

Incidentally the store also stocks a massive range of pre-owned DVD’s, Blu-Rays, books, comics and Sci-Fi memorabilia. It’s the kind of place you can browse around for hours and spend a fortune in should you let yourself.


Nostalgia Time

My visit to Trade and Play really brought back fond memories from when I used to buy Amiga games ‘off the shelf’ in the high street. One of my favourite places to go was Electronics Boutique in Lord Street, Liverpool. This was way back in the 1990’s before it got taken over by Game. I would often visit during my lunch hour and spend half an hour or more simply browsing the shelves. I don’t think there’s anything quite like being able to browse a selection of physical games in a shop. Looking at the cover art, flipping the boxes over to read about the the game itself and then studying the screenshots to get an idea of what the game would be like. When you finally made your choice you’d take it over to the till to buy it. The experience didn’t end there though, because now you entered the next phase; the fervent anticipation of actually playing the game and imagining just how great it was going to be. This phase could last for hours depending on when you bought the game and how long it would be before you got home. During this period you could open the box up and pour over the manual to get a taste of what it would be like. Occasionally you could also take a look at the included game map or the keyboard overlays to see what keys worked which weapons and so on. Very occasionally you could even read a Novella that would set the scene for a game and really get you hyped to start playing.

This all happened in a golden age before the Internet existed and the only prior knowledge you would have about a game was word of mouth, or a review in a magazine. Oftentimes I would buy a game blind though and rely totally on the screenshots to guide me. Sometimes I would end up with a real hidden gem of a game, sometimes not but it was always a pleasurable experience. Simpler, happier times in my book.


Trade and Play

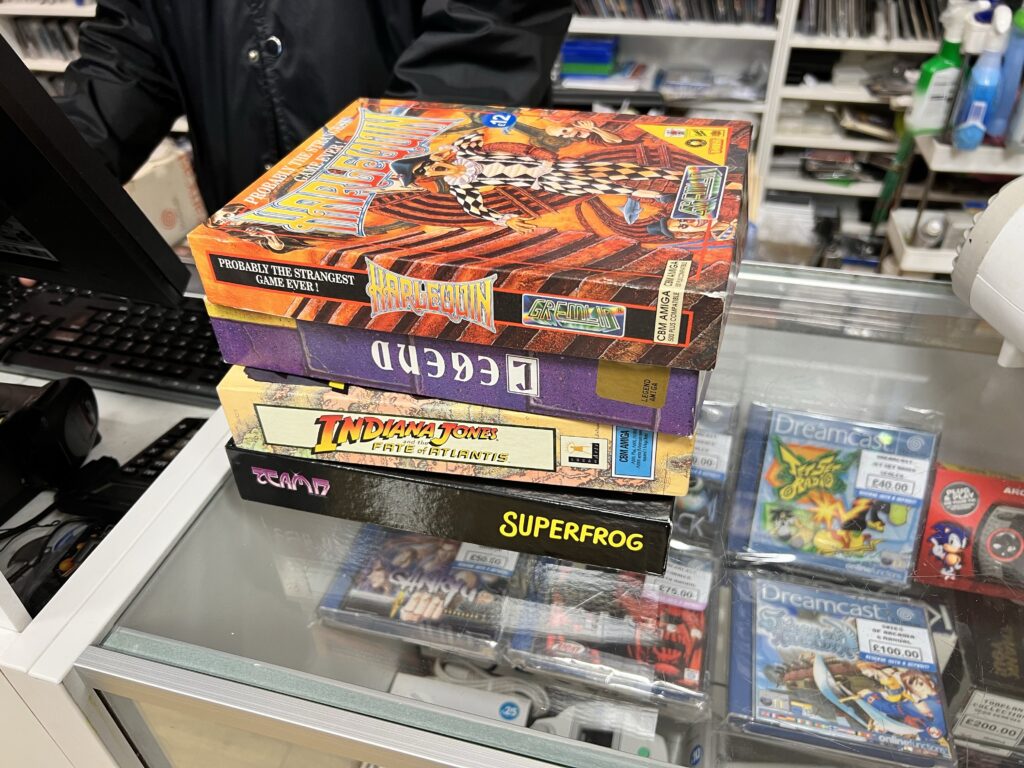
A look behind the counter at Trade and Play Wirral.


My Haul

Unlike Sega MegaDrive or SNES games (of which they stocked hundreds of titles) the selection of Amiga games was a lot more modest, we’re talking about maybe twenty titles in total here. However this is 2023 and I couldn’t name any other store that stocks even a single Amiga title so this is shopping nirvana as far as I’m concerned. The quality and condition of the Amiga games they did stock was outstanding and I would have been proud to add any of them to my collection.


Trade and Play

My haul from Trade and Play Wirral.


All the Amiga games I saw in Trade and Play were in superb condition and were offered in their original big cardboard boxes and included the manuals and disks. They guy in the store was really helpful too and dug out some Amiga games that weren’t even on display so I could have a look through them. He had no problem with me opening up the boxes to inspect the contents either. In the end I purchased four games in total, Harlequin, Legend, Superfrog and Indiana Jones and the Fate of Atlantis. I would say the prices I paid for them were reasonable too, certainly no more than you might (sensibly) expect to pay for them on eBay but often quite a bit less. They even had an Infocom adventure in stock – Leather Goddesses of Phobos! The only reason I didn’t pick this up was because I decided long ago to base my Infocom collection on their C64 releases, I simply don’t have the space to start an Amiga collection too!

Anyway here’s a closer look at each of the games I bought from Trade and Play Wirral so you can see the quality for yourself.


This slideshow requires JavaScript.


This slideshow requires JavaScript.


This slideshow requires JavaScript.


This slideshow requires JavaScript.

Commodore Amiga CD32 Dust Cover

CD32 Dust Cover

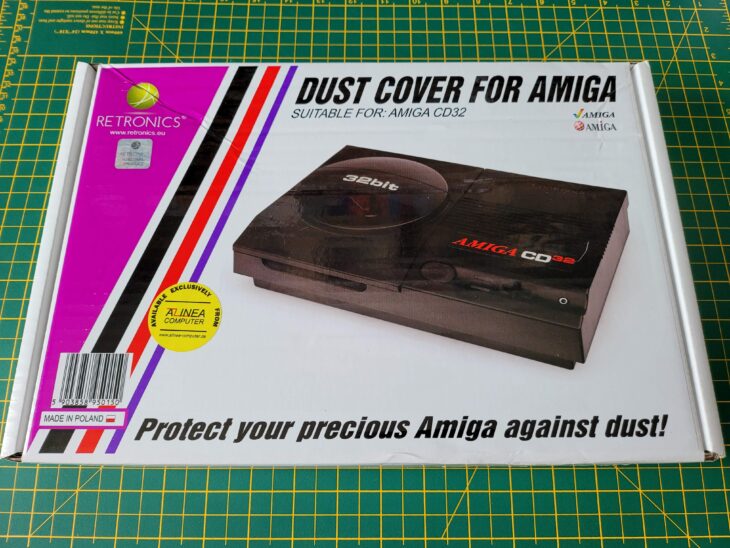
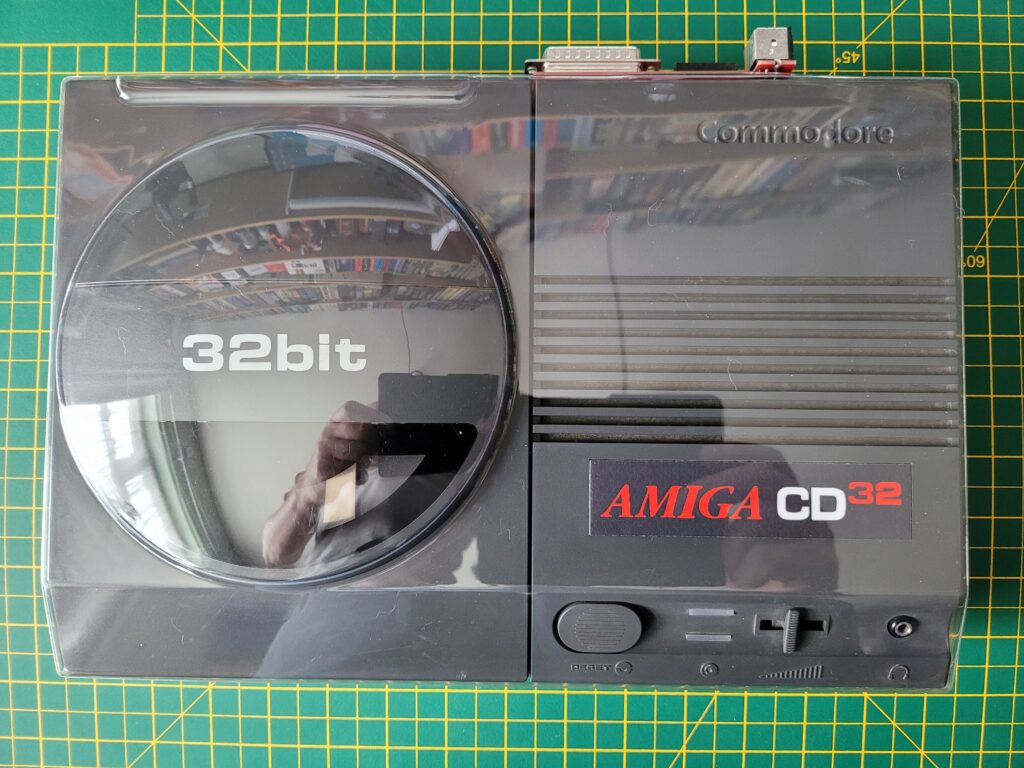
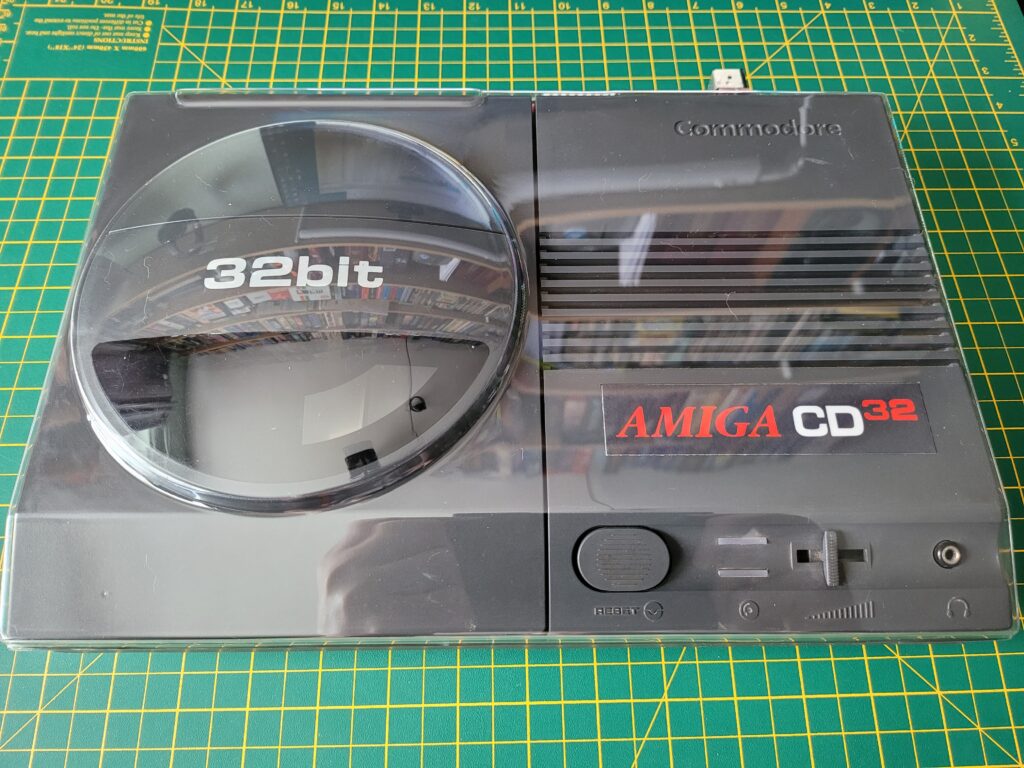
About a year ago I asked the guys over at Retronics if they would consider making a dust cover for the Amiga CD32 console. Their response at the time was that they would love to but they just didn’t have access to one to create the mould. Anyway they must have finally got hold of one because they’ve just added a CD32 cover to their line-up and here it is.


CD32 Dust Cover

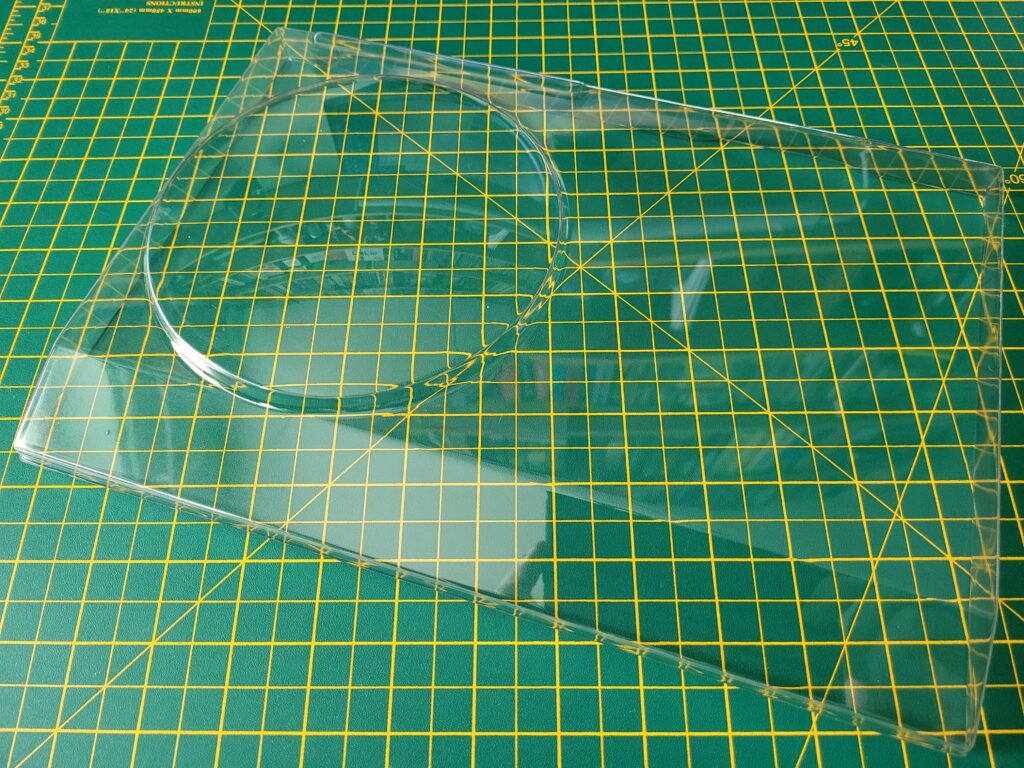
Naked Amiga CD32 Dust Cover.


I ordered one just as soon as I could and it arrived at the weekend so here’s a quick look at it. It was packed inside an attractive box displaying a photo of a CD32 console on the cover. Opening it up revealed the cover inside, safely tucked into a plastic bag.


Photos

I remember having trouble photographing the C2n Datasette cover and this was similarly tricky. Transparent shiny objects are awkward things to photograph!


CD32 Dust Cover

When not reflecting me trying to take a photo of it, the cover is almost invisible from most viewing angles.


The cover has all the angles, bumps and curves it needs to mate with the CD32 perfectly.


CD32 Dust Cover

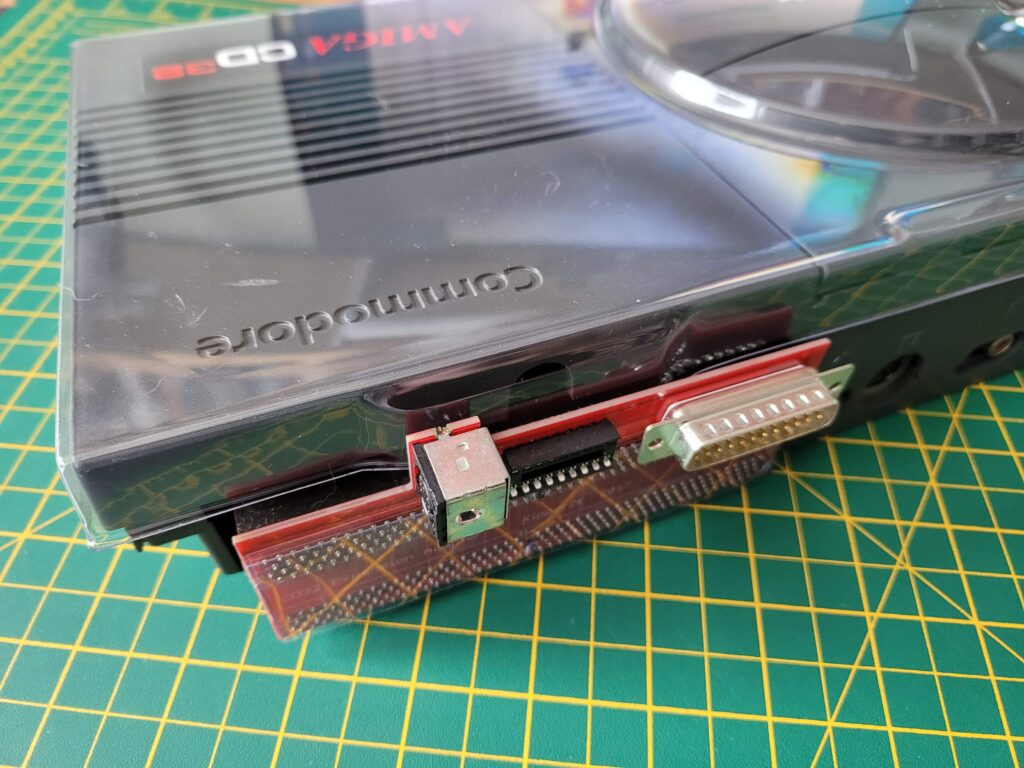
Cover fits nicely around the TerribleFire 330 riser card.


There’s a protrusion at the back where there would normally be a screw securing the expansion cover. Happily this doesn’t cause any problems with the riser card for my TerribleFire 330 expansion.


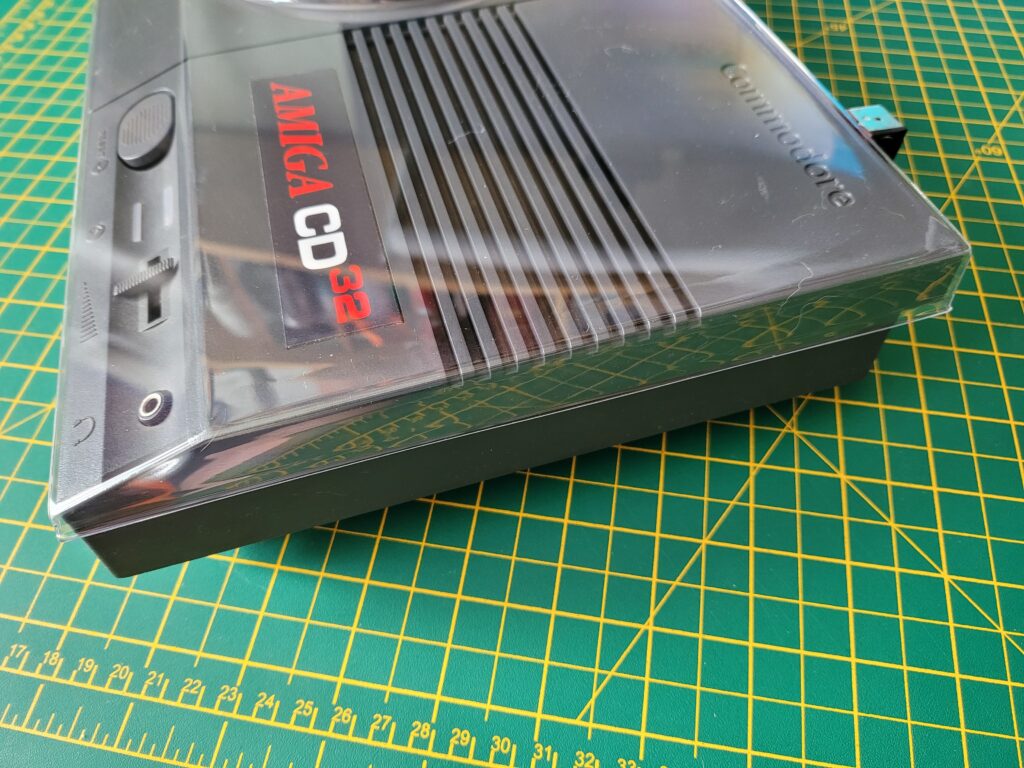
Side view of the dust cover.


So long as I made sure it slotted into the space between the case and riser card it fitted nicely.


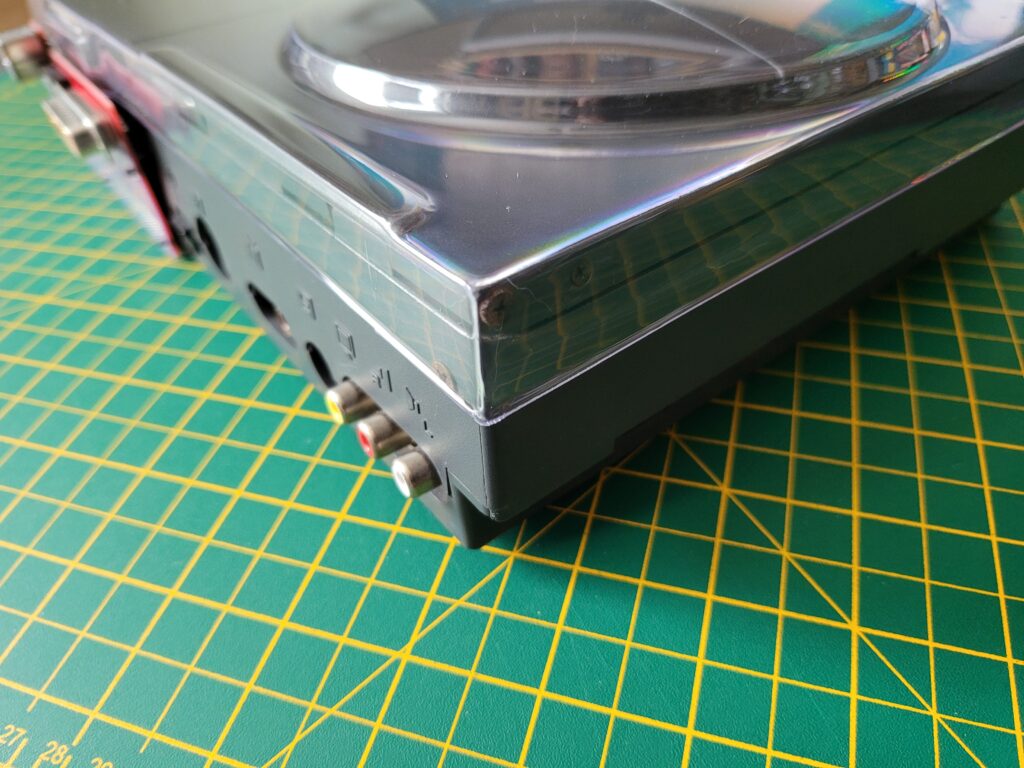
View of dust cover from rear.


The front is perfectly angled to match the contour of the case, as is the top where the raised dome aligns with the bump in the CD lid.


CD32 Dust Cover

More reflections!


This is pretty much an essential purchase if you own a CD32 console. It’s nicely finished, fits like a glove and above all keeps the dust at bay.

I also love the fact that these covers are all practically invisible when fitted so as not to spoil my enjoyment of admiring these old machines. Definitely worth a buy. You can pick one up on eBay direct from Retronics or from the Alinea online shop.

New CD32 Games… and some Disc Rot :(

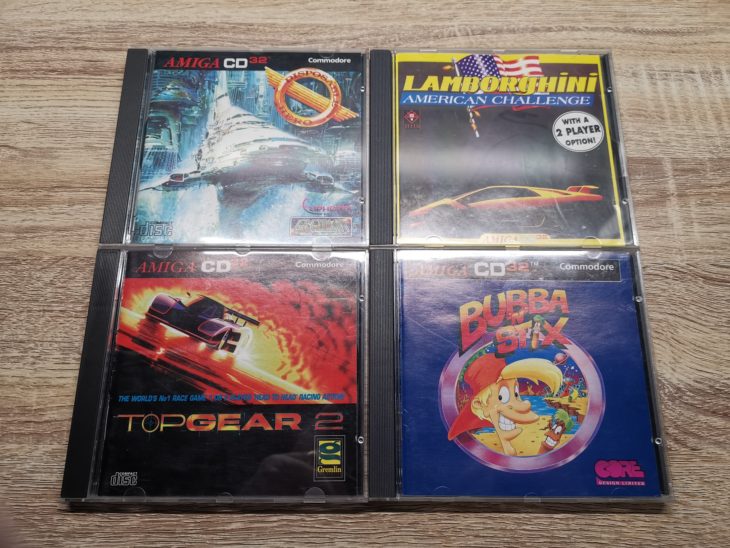
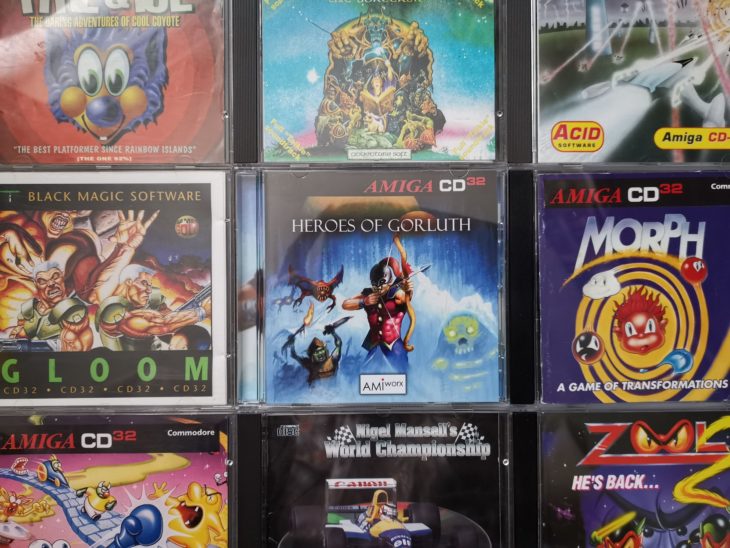
Recently managed to pick up four new games to bolster my Amiga CD32 collection. The packaging is in excellent condition and each game is complete with its instruction booklet. Sadly one of the discs has succumbed to disc rot but I’ll get to that shortly.

Happily all four games load up and run perfectly, even with my TerribleFire 330 installed. (I’ve added these titles to my TerribleFire 330 Game Compatibility list).

Screenshots

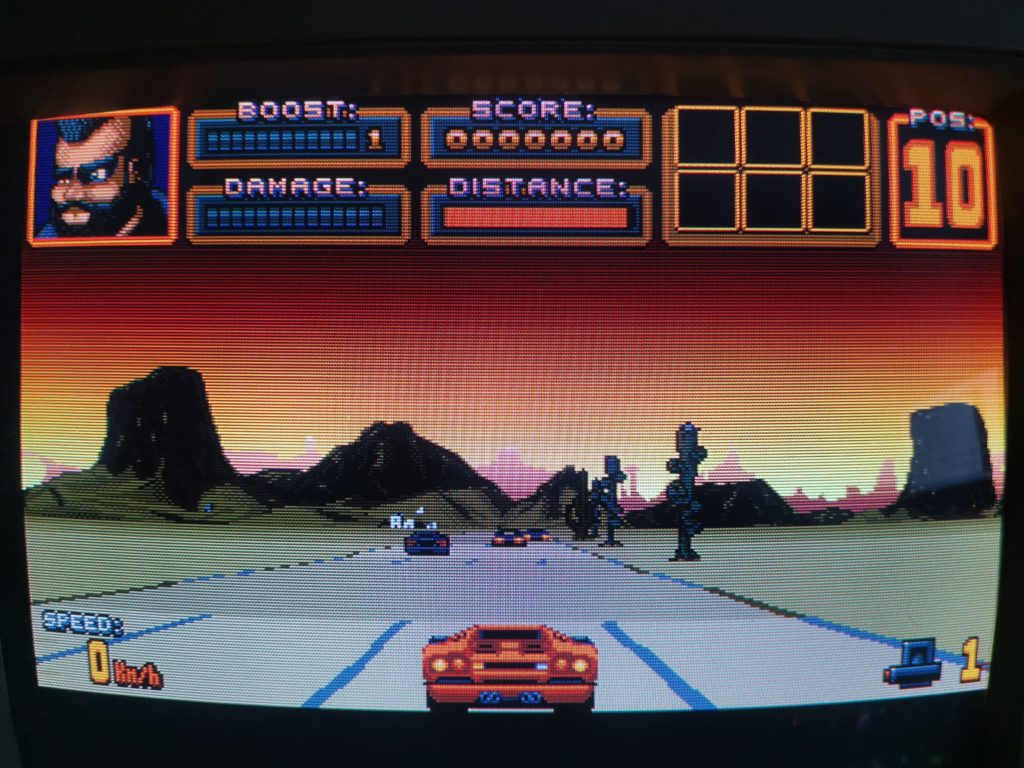
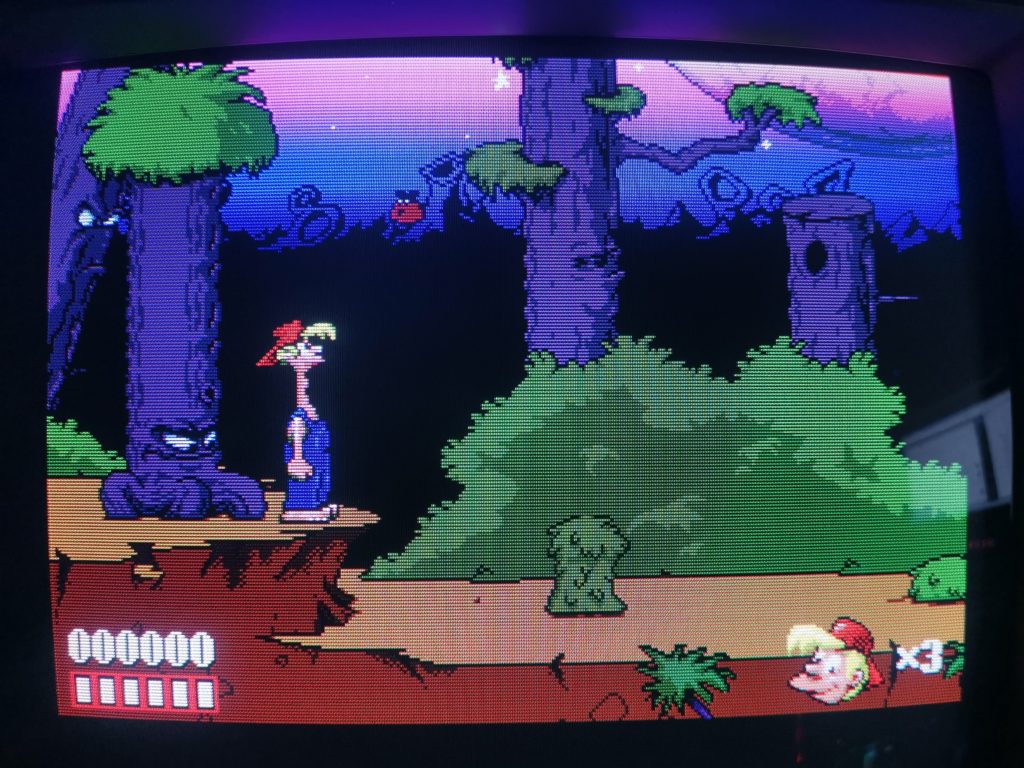
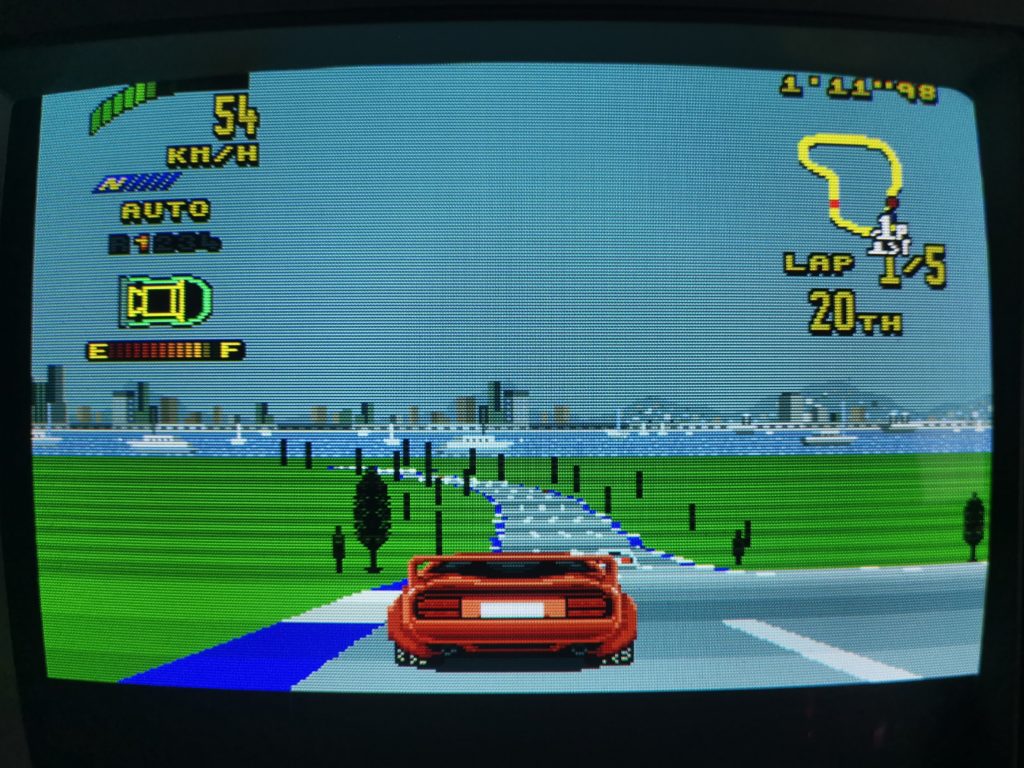
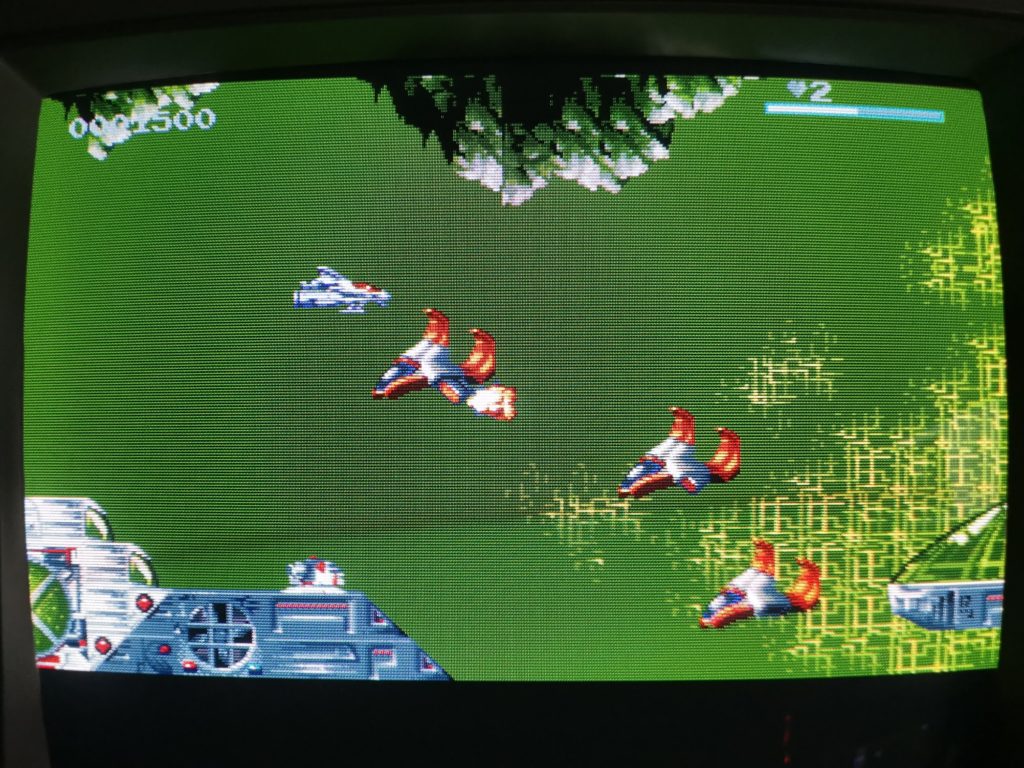
Here’s a screen shot of each game in action, seen running on my Philips CM8833-MkII CRT monitor.


CD32 Game Screenshot

Lamborghini American Challenge


CD32 Game Screenshot

Bubba n Stix


CD32 Game Screenshot

Top Gear 2


CD32 Game Screenshot

Disposable Hero


Disc Rot!

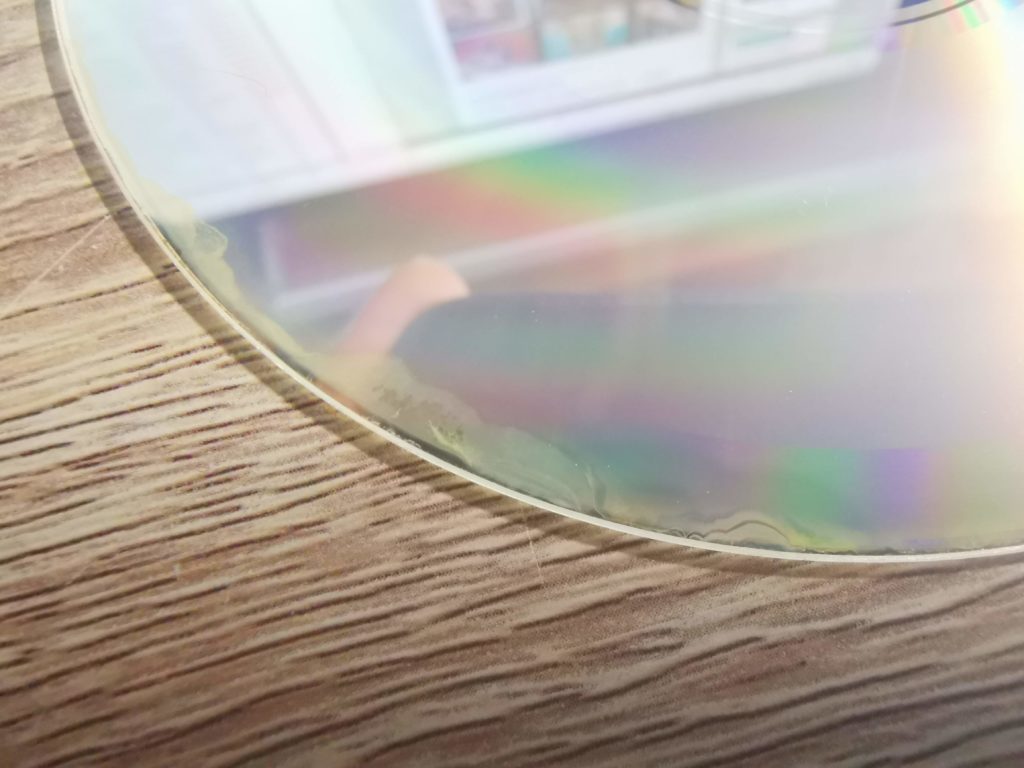
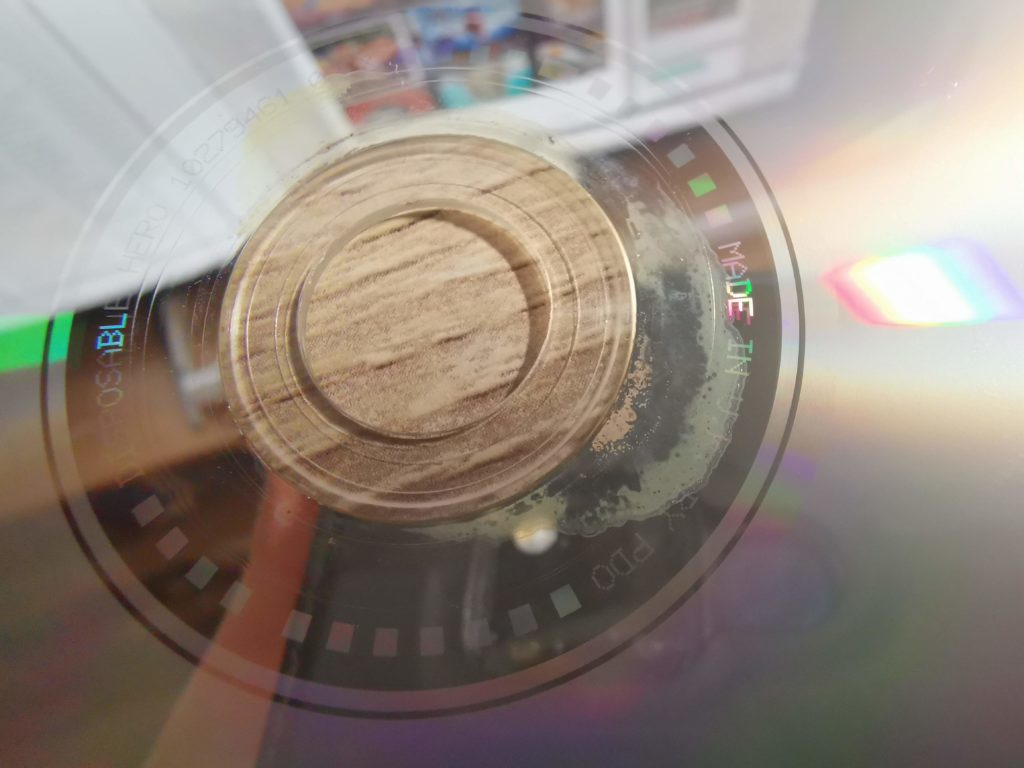
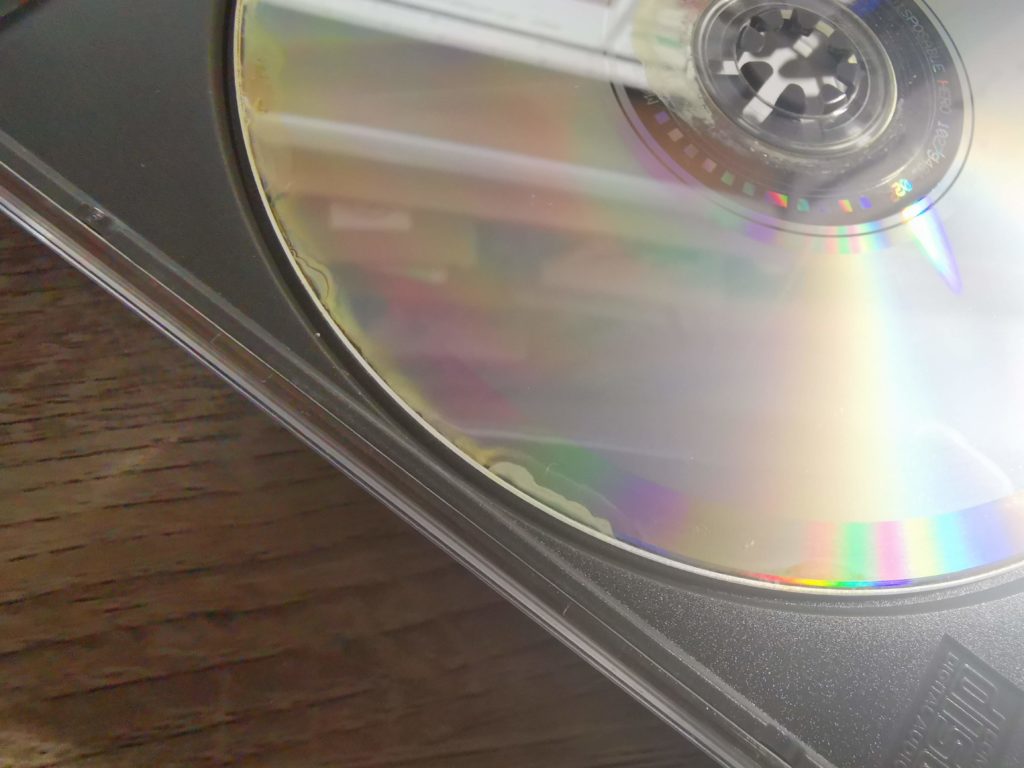
So the games all look great and loaded up fine which was fantastic. Unfortunately when I flipped over the Disposable Hero CD I noticed something I’ve never seen on any of my discs before. There were these strange brown marks, almost like oil stains around the circumference of the disc. There was also some strange marks around the centre of the disc. All these marks were beneath the surface and wouldn’t wipe off.


CD32 Disc Rot

Here you can see the disc rot creeping in from the edge


After a bit of internet searching I discovered that this a phenomenon known as ‘Disc Rot‘. Now I was already acutely aware that magnetic media deteriorates over time, especially 3.5″ Amiga floppies. However I’d always thought optical disks would last a lifetime if treated carefully. Apparently that’s not the case though as many people are now finding out. Over time the layers that make up a CD can become ‘de-bonded’ or the reflective foil where the data is stored can oxidise. In fact there’s a whole host of things that can go wrong with old CD’s and these CD32 discs are 30 years old now.


CD32 Disc Rot

Disc rot around the centre hub.


In the photo above you can clearly see how the reflective layer has turned a milky colour and in some places has disappeared altogether. If it ever reaches the area where the data is stored the CD will become useless.

At it’s worst the rot extends 4mm inwards from the outer edge of the CD32 disc. Thankfully it looks like the game ‘recording’ starts 8mm in from the edge so has not (yet) been affected.


CD32 Disc Rot

In this photo you can see that the rot hasn’t yet reach the area where the data has been written to the disc


Way Forward?


Luckily the disc still plays fine so the damage mustn’t have reached the important parts of the CD yet. I’m unsure if the rot was caused or exacerbated by how it was stored by the previous owner(s). As a result I don’t know if the rot will continue to worsen or if it will stop now the CD is being kept in a nice dry room?

So what am I going to do about it? Well this experience has been a bit of a wake up call for me. As I said earlier I was under the impression CD’s were pretty indestructible. Luckily now I know better.

I still have time to check and make copies of my precious CD32 games discs. As far as I’m aware CD32 discs weren’t copy protected so it should be easy enough to make copies. Luckily I have a nice stockpile of LightScribe discs too (remember those?) so I can make some half-decent looking backup copies… starting with Disposable Hero.

Amiga CD32 TerribleFire 330 – Game Compatibility List

TerribleFire Compatibility

This ‘compatibility list’ features all the games that I have played on an Amiga CD32 with a TerribleFire 330 card installed. I have indicated whether each game is compatible (green), partially compatible (amber) or incompatible (red).

Please note that I haven’t exhaustively tested each game to completion (as much as I’d love to, I simply don’t have the time). Consequently there could be the odd issue that I’ve yet to discover even if a game has been given a green light.

These games are all from my personal collection so if a game isn’t listed here then it’s because I don’t own it. If anyone reading this knows of any other titles that do or don’t work on a TerribleFire 330 equipped CD32 then please leave a comment below. I’ll make sure those titles are added to the list.

Last updated: 25th July 2023

TerribleFire 330 Game Compatibility List


Alfred Chicken

Works perfectly.

Alien Breed 3D

Crashes after inputting the code from the code book.

Alien Tower Assault

Doesn’t load.

Bridge Strike

As you would hope for a new game, this works perfectly.

Beneath a Steel Sky

Works perfectly.

Bubba n Stix

Works perfectly.

Chuck Rock

Works perfectly.

Dangerous Streets/Wing Commander

Dangerous streets won’t load and Wing Commander crashes at the start of the intro video.

D/Generation

Works perfectly.

Disposable Hero

Works perfectly.

Fire & Ice

Works perfectly.

Fury of the Furries

Works perfectly.

Gloom

Works perfectly and the extra grunt means you can run the game at max graphical settings with no slowdown!

Guardian

Works perfectly and the extra power of the 030 processor means the game runs really smoothly!

Gunship 2000

Works perfectly and the extra power of the 030 processor means the game runs better.

Heroes of Gorluth

This is a recent game and actually lets you select a special 68030 version of the game from a startup menu. Works better than on a stock CD32 as a result!

James Pond 2

Works perfectly.

James Pond 3

Crashes after intro video.

Jungle Strike

Won’t load at all.

Lamborghini American Challenge

Works perfectly.

Liberation

Works perfectly.

Lotus Trilogy

Works but the initial menu screen where you select Lotus 1, 2 or 3 doesn’t display. You can hear the music in the background and if you press fire it will load Lotus 1 just fine. You can access the other 2 games by blindly selecting them (pull down once or twice before pressing fire).

Lumberjack Reloaded

Plays fine but there is occasionally a little bit of audio corruption with the music.

Microcosm

Works perfectly.

Morph

Works perfectly.

Nick Faldo’s Championship Golf

Works perfectly!

Nigel Mansell’s World Championship

Works but graphics flicker during gameplay.

Oscar/Diggers

Both games work perfectly.

Pinball Fantasies

Initially appears to work then exhibits various weird behaviour during play like slowing to a crawl and ultimately crashing with a screen full of garbage.

Pirates!

Works perfectly.

Pong 4K

As would be expected for a brand new game this works flawlessly.

Reshoot-R

Gameplay is fine but there’s some annoying audio corruption (white noise occasionally playing instead of music) that I’ve not got to the bottom of. So far I’ve only experienced this problem with this game and Lumberjack (both new games).

Roadkill

Works perfectly.

Sabre Team

Works perfectly.

Seek & Destroy

Works perfectly.

Sensible Soccer – European Champions

V1.1 European Champions edition appears to load, music plays but screen is blank. (Thanks to xubidoo for this info). The v1.2 World Cup Edition also doesn’t work and fails to load. (Thanks to Warren for this info).

Simon the Sorcerer

Works perfectly!

Star Crusader

Works perfectly.

Subwar 2050

Works perfectly.

Super Putty

Works perfectly!

Super Skidmarks

Works perfectly!

Super Stardust

Locks up after completing the first level.

Tales of Gorluth

This is a recent game and actually lets you select a special 68030 version of the game from a startup menu. Works better than on a stock CD32 as a result!

The Chaos Engine

Refuses to even load.

Top Gear 2

Works perfectly.

Wing Commander

This loads with all the colours messed up when the TF330 is installed, however if you search online there is a fixed ISO which runs properly. Game runs much better than on a stock CD32 but does have a tendency to lock up so save often. I’m hoping this might be due to my PSU being inadequate so will update this if I manage to get hold of a more powerful replacement.

UPDATE: So I bought a stronger PSU for my CD32. A 57W unit capable of providing stable 5V (up to 4.2A) and 12V (up to 3A) and… it didn’t make a blind bit of difference to the performance of the game sadly.

Zool

Works perfectly.

Zool 2

Works perfectly!

CDTV Disc Reference Guide Book Review

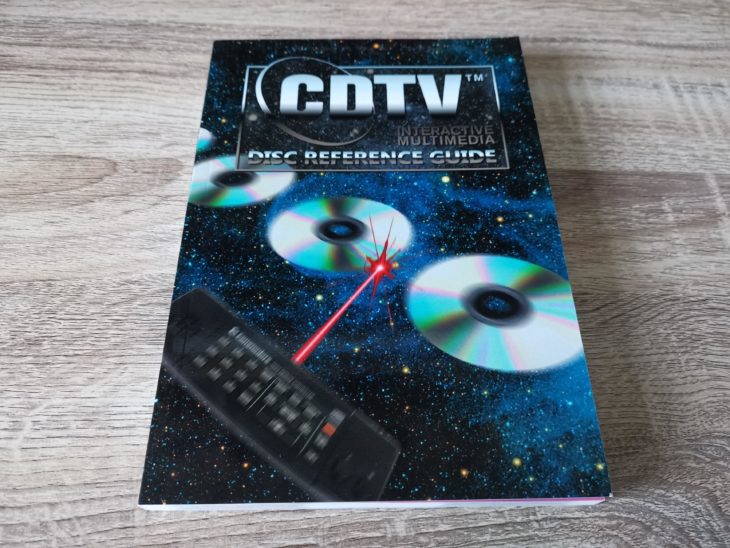
CDTV Disc Reference Guide

The CDTV Disc Reference Guide Book is a brand new title that has just been published by Castle Books. It’s been created by AmigaJay, the same guy who was behind the CD32 Scene magazines and ‘CD32 and Beer’ compilation CD’s.

The description on the back of the book goes as follows:

A comprehensive guide to Commodore CDTV software titles.

Over 190 titles fully catalogued, with screenshots and box-art, (over 850 images in total) with lots of other information on each disc, a perfect guide for collectors and owners alike.

Features of the book;

Each disc is catalogued into one of the six original categories, easily identifiable by the colour band on each page.

Biggest round-up of cancelled CDTV titles, over 130 in total!

New wave section, find out what new software has been available to buy for your CDTV in the last few years.

Did these games really come out in ‘Did They or Didn’t They?’

CDTV Stats

The book is A5 in size and has been produced in full colour and runs to 200 pages. The pages are thick and glossy making it around 10mm thick with quite a heft to it. It costs £19.99 plus £3.50 postage and packaging so £23.49 all in.


This slideshow requires JavaScript.


A look inside the book


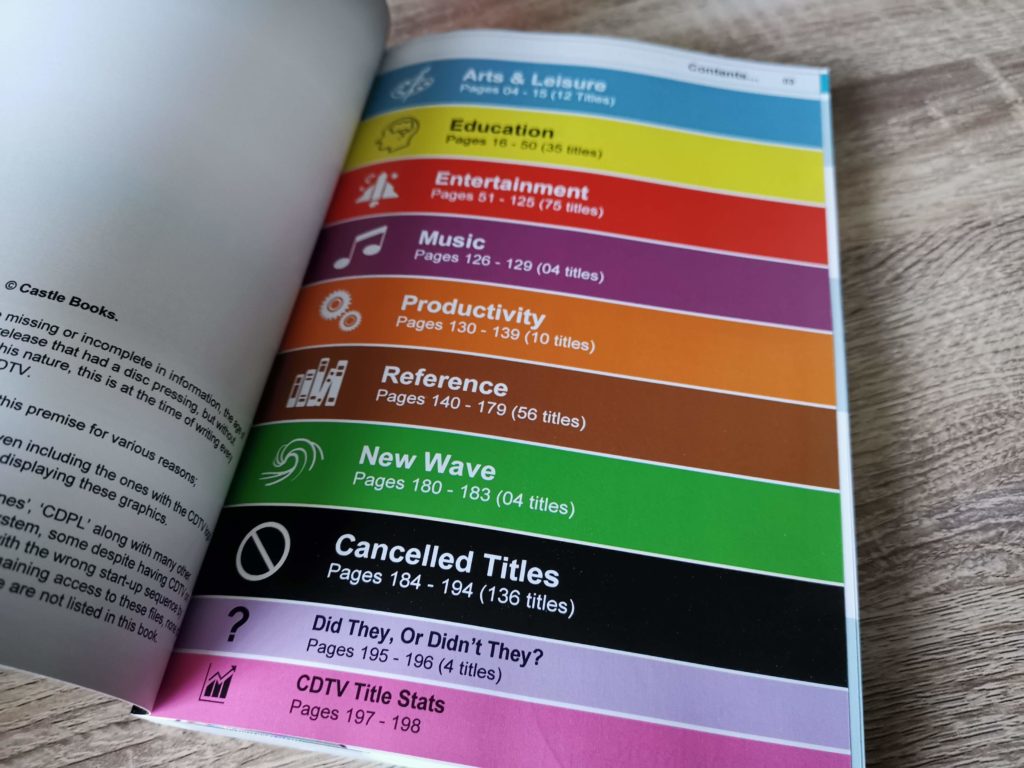
The book covers every single disc ever produced for the CDTV whether it be a PD release, encyclopaedia or game. All the discs are helpfully slotted into one of 6 main categories:

  • Arts and Leisure
  • Education
  • Entertainment
  • Music
  • Productivity
  • Reference


CDTV Disc Reference Guide

List of disc categories


There are also a couple of other categories for ‘Cancelled Titles’ and ‘New Wave’. The latter covers present day releases for the system such as PowerGlove Reloaded.

These colour co-ordinated categories are printed across the top of each page and are visible on the fore edge of the book. Titles are also arranged in alphabetical order within each category meaning you can easily track down ‘Lemmings’ in the ‘Entertainment’ section for example. Which is just as well because there is no index included within the book.

The vast majority of CDTV releases get their own page in the book barring a few exceptions. These exceptions are mostly stuff like yearly encyclopaedia updates and PD collections which are grouped together on a single page.


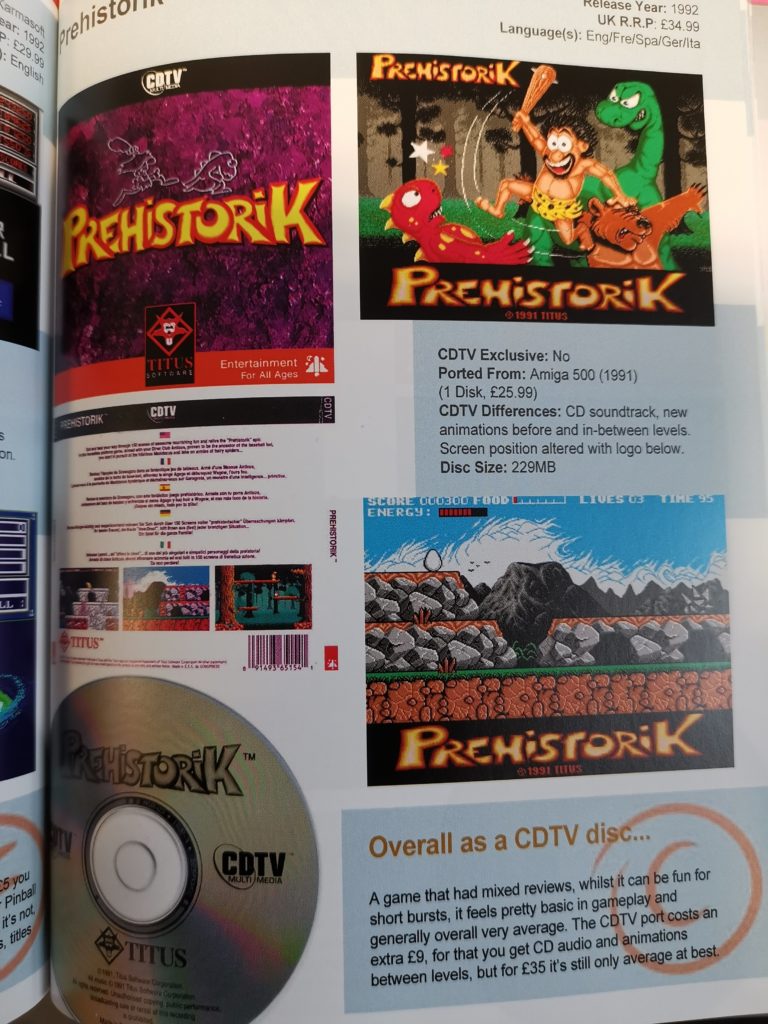
How CDTV titles are presented


Barring the exceptions mentioned above, each release is presented in the same format as shown below. There’s a photo of both the front and back of the CD packaging along with another of the disc itself. There’s also a couple of screenshots, usually featuring the title screen and the game or software in action. Other information provided includes the year of release, cost, languages, whether it was exclusive to the CDTV and if not, how it differed from the stock Amiga 500 version.


CDTV Disc Reference Guide

Example of how each CDTV title is featured in the guide.


The part I found most useful was the little rating box at the end. Every release has been rated from A to F and is accompanied by what I can best describe as a ‘micro review’. It’s hardly comprehensive but it gives you a fair indication about whether a particular release is worth tracking down or not.


This slideshow requires JavaScript.


The book contains 200 pages and as most of the 190+ titles it covers get their own page this leaves some pages free for other content. Consequently there’s a few additional sections at the end of the book, detailed below.

  • Cancelled Titles – lists all the games that never quite made it to release along with the reasons why (if known). Sadly there’s quite a lot of games in this section.
  • Did they or didn’t they? – delves into a handful of mysterious releases that were advertised but the author was unable to track down.
  • CDTV Stats – provides information such as ‘least/most expensive release’ and ‘disc with least/most amount of content on it’ amongst various other things.


Worth a buy?


As a recent buyer of a CD32 console (most CDTV titles will work on a CD32) I’ve found this book to be quite a valuable resource . By referring to this guide I’m able to quickly see what titles are available and whether they were actually any good (I only collect stuff I will actually play/use).

The included images of packaging makes it much easier to spot them when ‘shopping’ and helps ensure you don’t buy something with dodgy home-made covers for example.

Personally I would have much preferred for it to come spiral bound so the pages could be opened easier and the book laid flat. Presumably that would have added to the cost though. However that’s just a minor niggle, it’s definitely usable as it stands.

It’s not something you are likely to sit down and read at length, it is a reference guide after all, but the content is interesting, useful and well presented. I’d say this was a recommended purchase for anyone who owns or is thinking about getting either a CDTV or CD32 system.

Amiga CD32 Vertical Display Stand Review

CD32 Vertical Stand

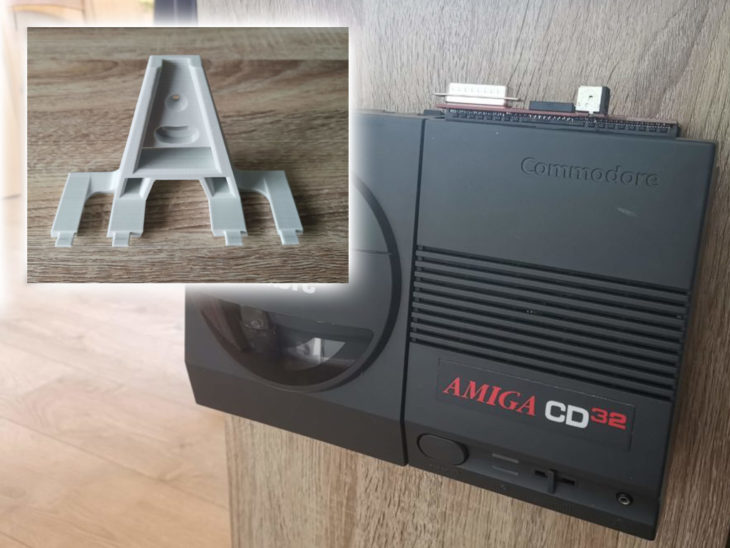
I was browsing around AmiBay one day when I stumbled across a guy selling stands/brackets that you can use to display Commodore equipment with. His stand for the CD32 caught my eye and was pretty cheap (€12.50) so I thought it was well worth a punt. The stands are made in Italy and delivery to the UK took less than a week.

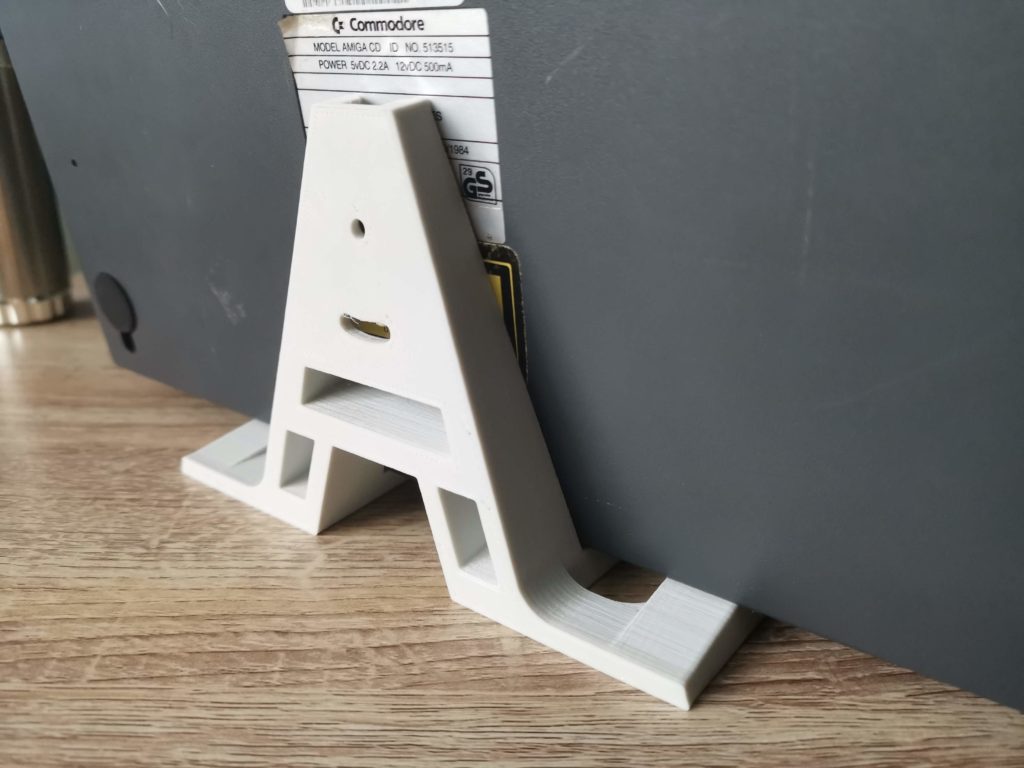
The stand itself is 3D printed and is finished to a very hight standard. It’s also incredibly strong unlike many 3D printed objects thanks to some sort of exotic ‘ngen’ plastic used in its construction. The end result is a very attractive and sturdy stand that is available in three different colours. Champagne Gold, Clear Grey and my choice, Light Grey.


This slideshow requires JavaScript.

How it fits the CD32

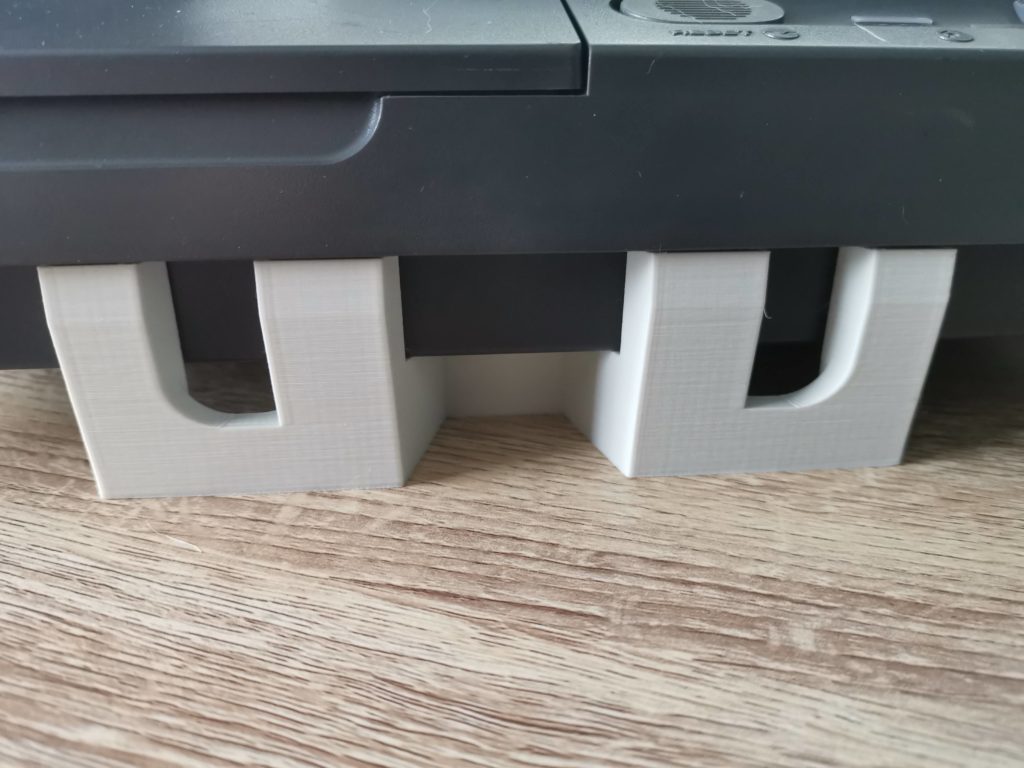
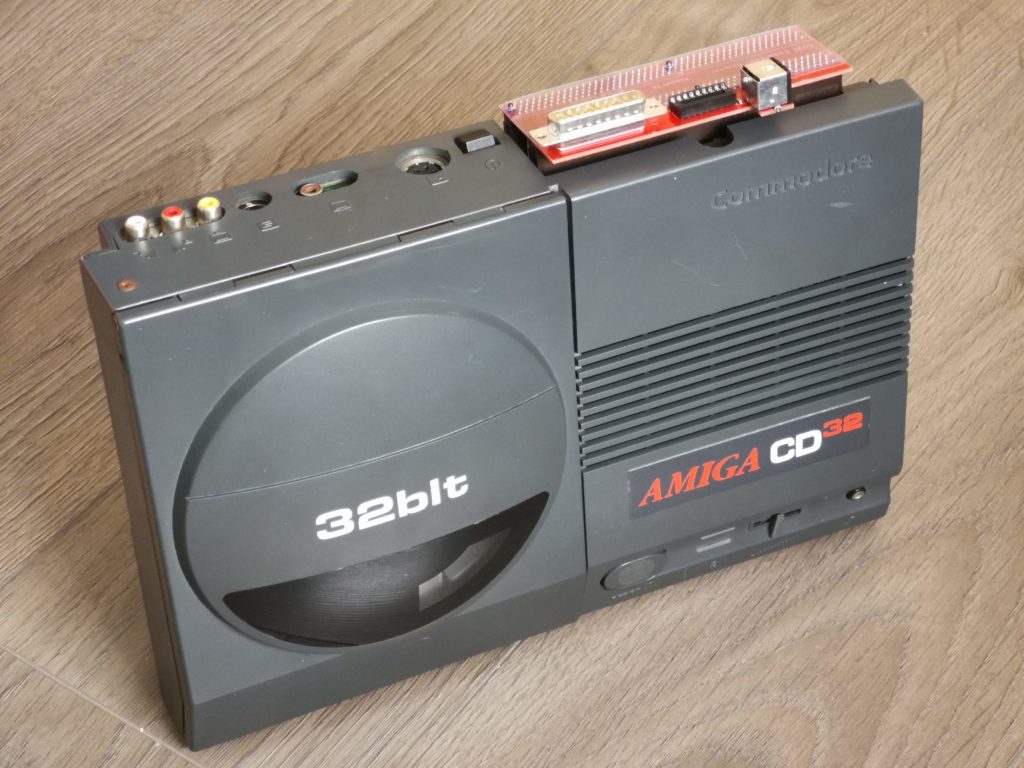
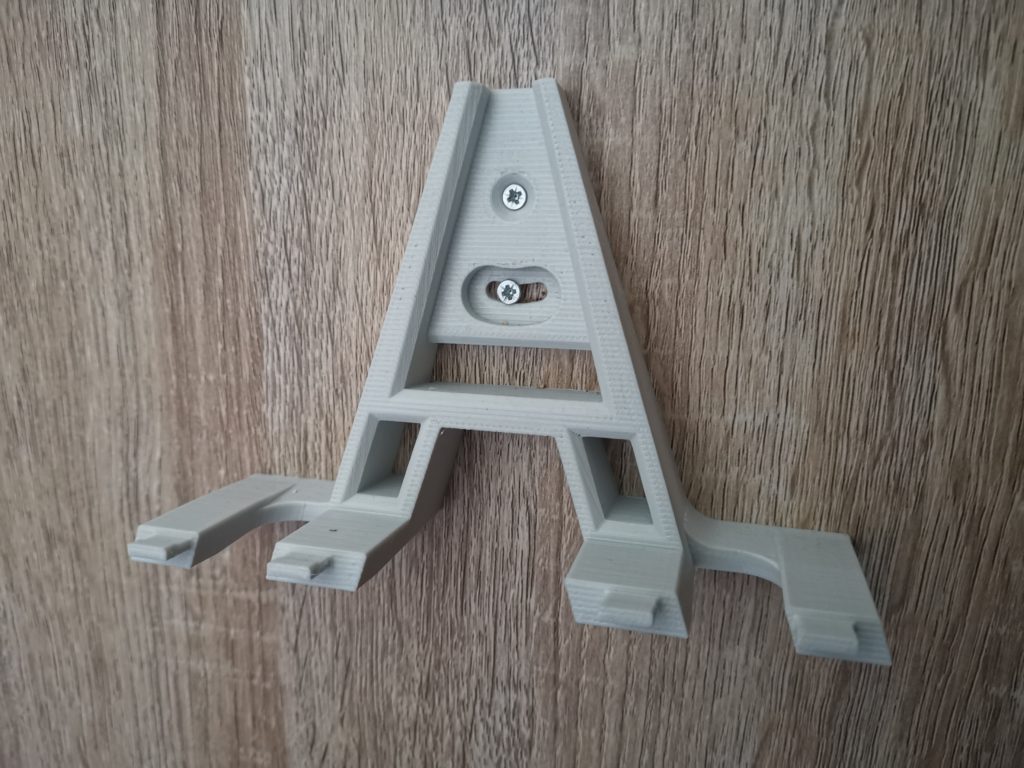
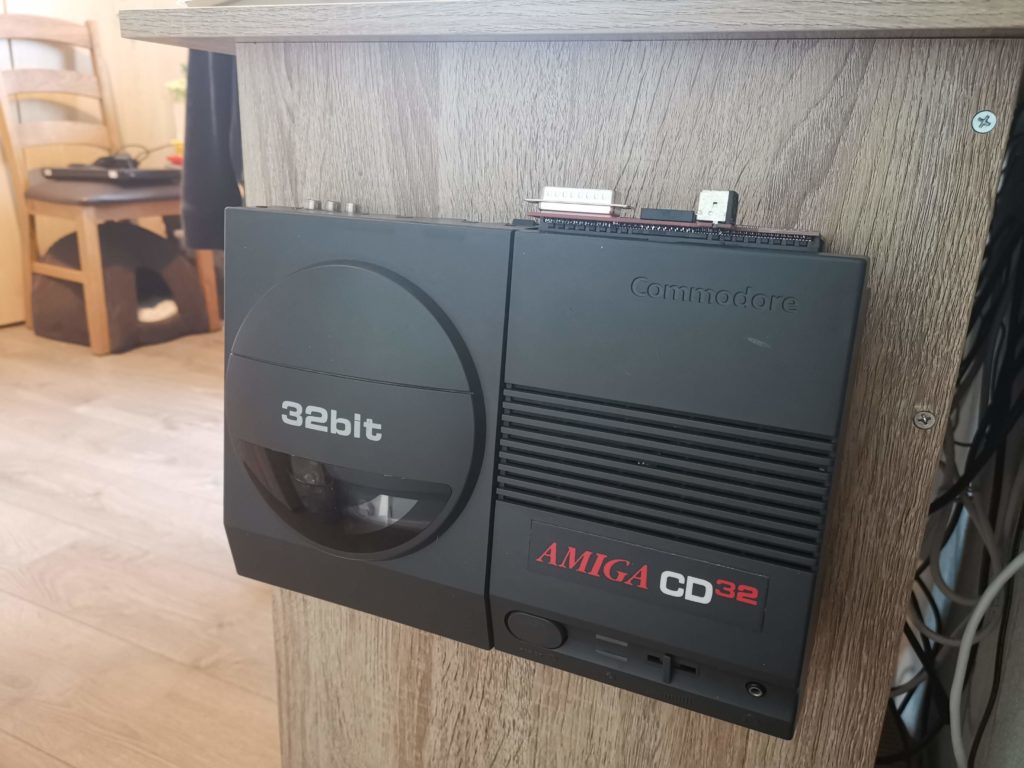
The stand features four prongs along the bottom that hook into the slots under the front lip of the CD32. A gently sloped back means your CD32 is held at an angle ensuring it won’t tip forward. There stand also incorporates a couple of holes so it can be mounted on a vertical surface.


CD32 Stand

Here are the slots that the prongs of the stand fit into.


CD32 Stand

Here you can see the prongs securely located into the slots.


Use as a Display Stand

The design of the stand allows it to be used in two different ways. The most straightforward is as a simple shelf stand to display your console on, as you can see in the photos below. This works really well and if you have the space is a great way to show off your kit.


CD32 ‘Display’ Stand – seen from behind.


CD32 ‘Display’ Stand – seen from the front. Hard to tell from the photo but it’s leaning back so there’s no danger of it falling over.


Use as Wall Bracket

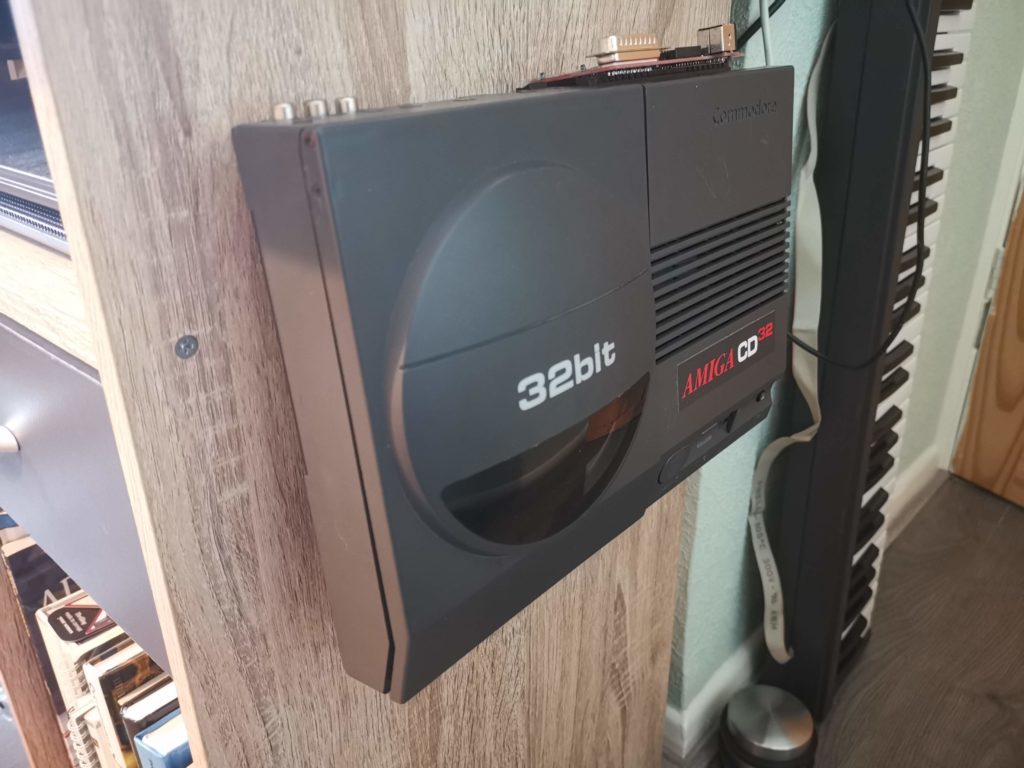
The other way of using it, and the reason I bought it in the first place, is as a wall bracket. Used this way you can actually gain a little bit of extra space in your man cave. This is because when affixed to a wall or other vertical surface your CD32 no longer needs shelf or cupboard space. As an added bonus it looks awesome whilst stored this way too!


CD32 Stand

Here you can see the stand/bracket securely attached to the side of my computer desk. The curved screw slot allows easy alignment/levelling.


There are two screw holes used to mount the stand/bracket vertically. You put the first screw in the top hole as normal. The next screw goes through the curved slot below which allows the bracket to pivot left and right so you can align it. Get the bracket level and then tighten both screws and bob’s your uncle!


CD32 Stand

CD32 ‘bracket’ simultaneously displaying and storing my CD32.


I’ve actually owned this product for several months before getting around to producing this post. Consequently I’ve had plenty of time to test it out. I’m happy to report that it works brilliantly. I feel confident that my CD32 is held securely thanks to both the way the prongs lock into the slots and the angle it is held at. I have mine attached to the side of my desk and I walk past it several times a day. It’s never been knocked off, even when I’ve accidentally bumped into it. It has rocked forward a couple of times but the prongs prevent it from ever tipping over.


CD32 Stand

CD32 ‘bracket’ simultaneously displaying and storing my CD32.


Lifting the console off the bracket does take a little getting used to. You need to angle it just right and then pull it out and up at the same time for it to break free of the prongs. I didn’t find it a big issue though and I’d rather it was held securely than risk it falling off the bracket because it was too loose! Once you’ve done it a few times you develop a knack for it. I’ve also had it on and off the bracket dozens of times now and it is showing no signs of wear.

Verdict

Whether you want to store your own CD32 vertically or put it on display I’d happily recommend this product. It’s well made, priced fairly and does exactly what it sets out to do. The guy has a website where you can order them from here: ComputerGrafica3D. He also sells brackets for the breadbin cased Commodore 64 or VIC20 computers which I will be reviewing soon.
TerribleFire 330 – CD32 Upgrade

TerribleFire 330

One of the things I’ve always loved about the Amiga is it’s expansion possibilities. There was always some upgrade or gizmo you could add that would let you do something new, or do something faster. The TerribleFire 330 is touted as being able to do both of these things and then some. Naturally, as soon as I spotted it on AmiBay I wanted one…

What is it?

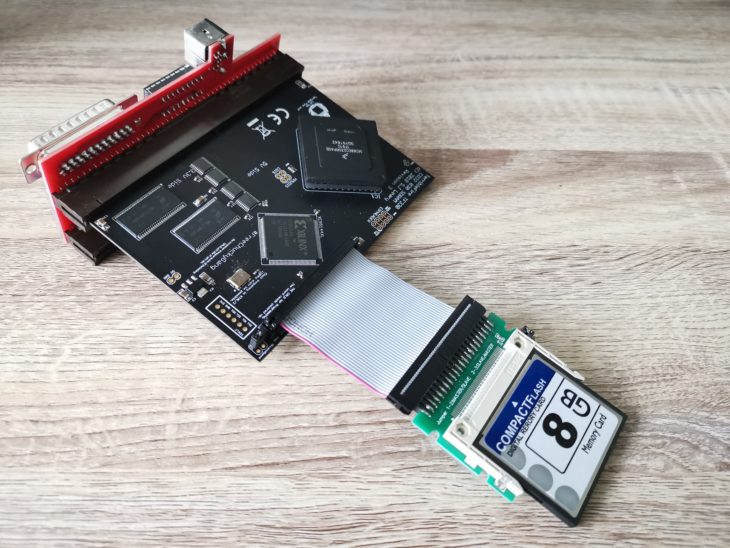
The TerribleFire 330 is an expansion for the Amiga CD32 that adds many new features to the console. It’s attached by means of a ‘Riser’ card to the expansion port which itself offers some benefits to the user. Here’s a quick run-down of the extra features it offers:

  • 68030 CPU over-clocked to 50Mhz
  • 64MB Fast Ram
  • IDE Interface
  • RGB Video Port (on the riser)
  • PS/2 Keyboard port (on the riser)

In a nutshell, it converts your CD32 into a souped up Amiga 1200 with built-in CD-ROM drive.


A Closer Look at the TF330


TerribleFire 330

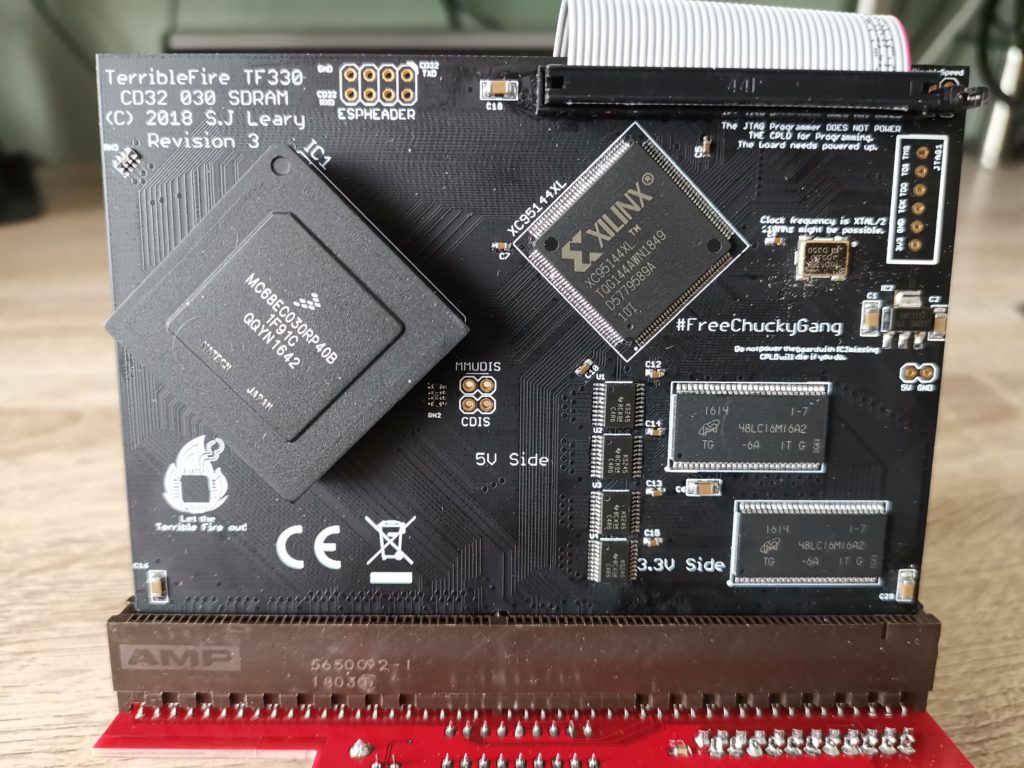
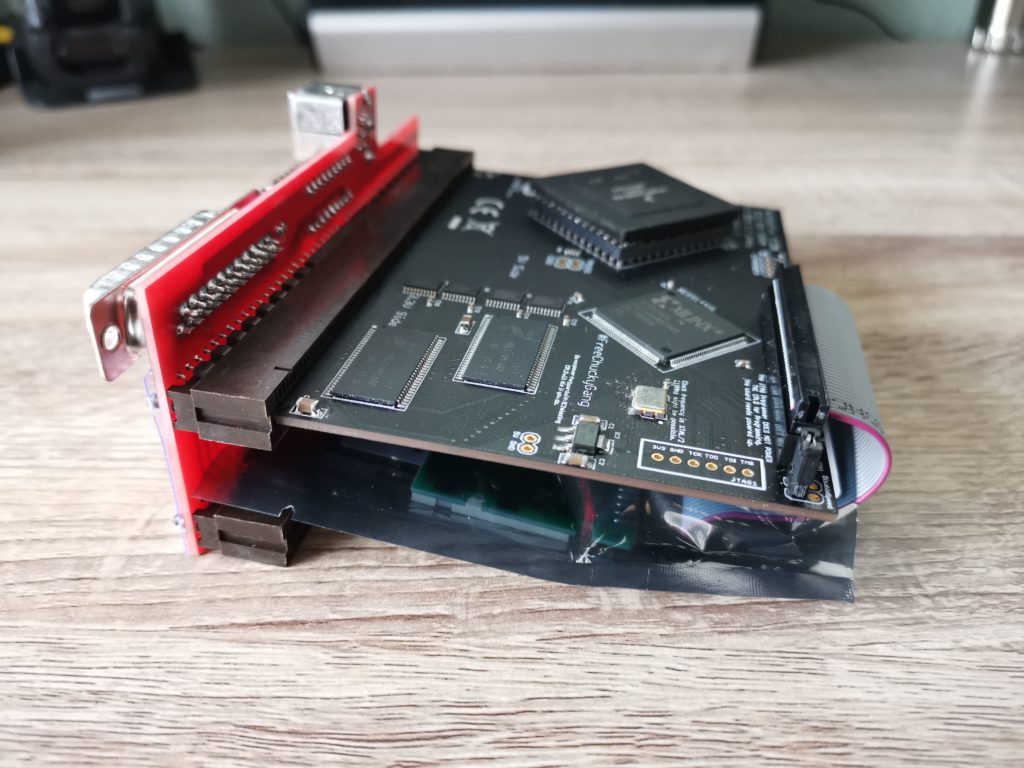
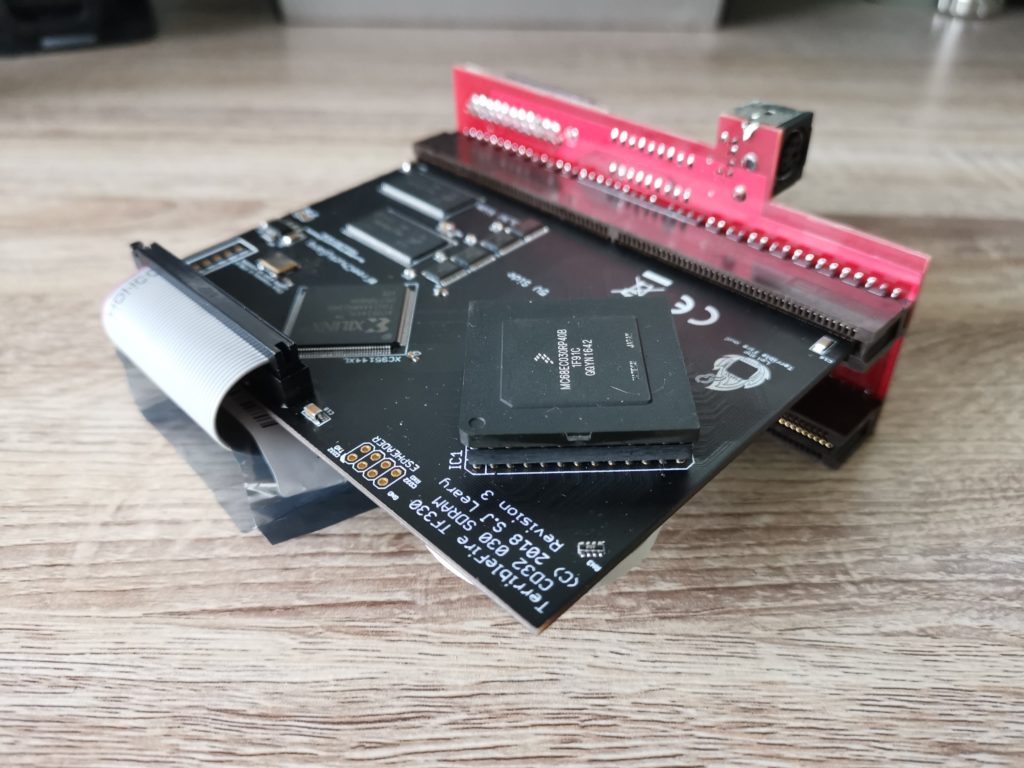
Here’s a close-up of the top of the board. CPU on the left, IDE connector top right.


TerribleFire 330

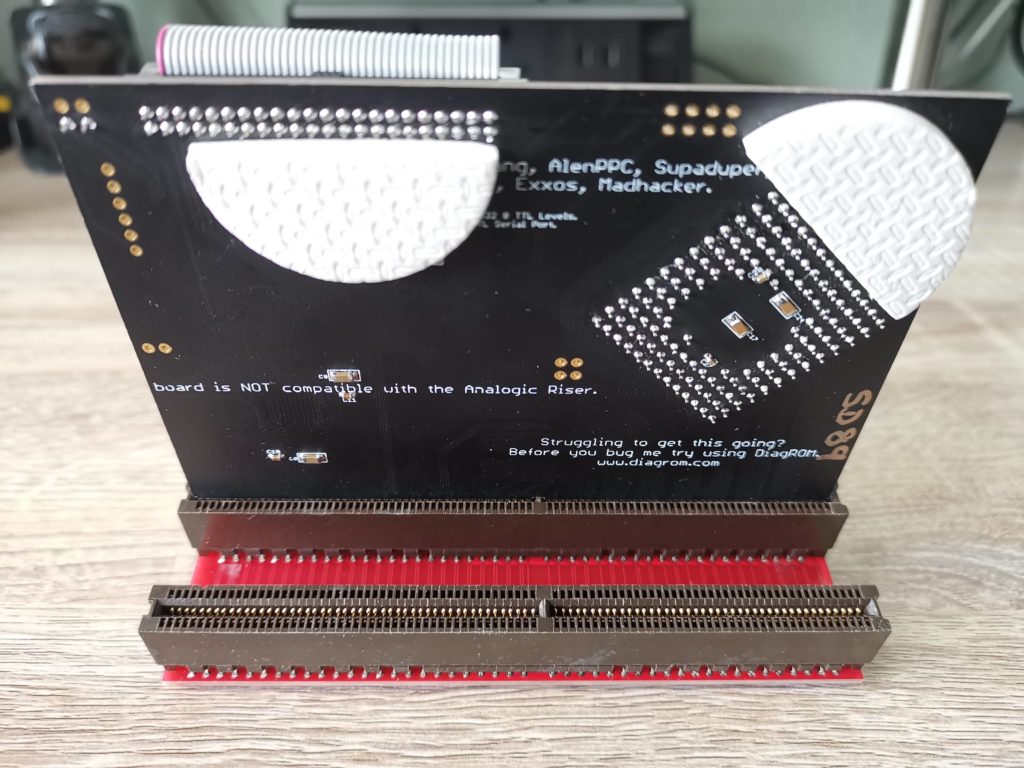
Here’s a view of the underside of the board. Foam pads are present to prevent the exposed solder pads from touching the metal shielding cover inside the CD32 when inserted.


TerribleFire 330 Riser Board

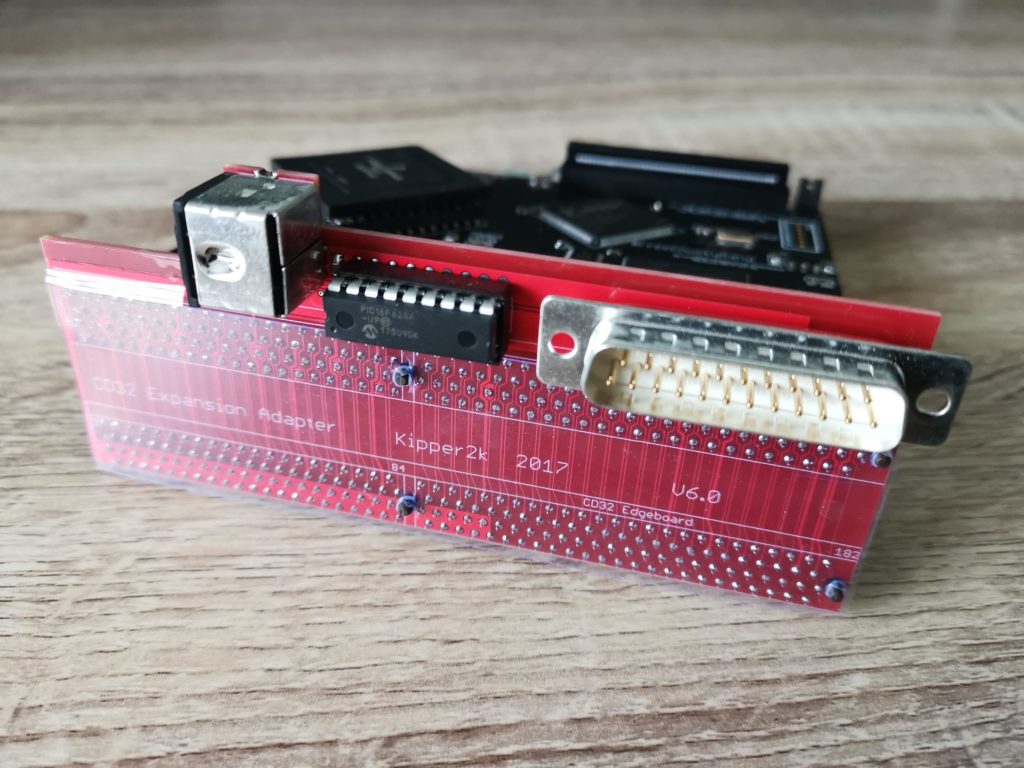
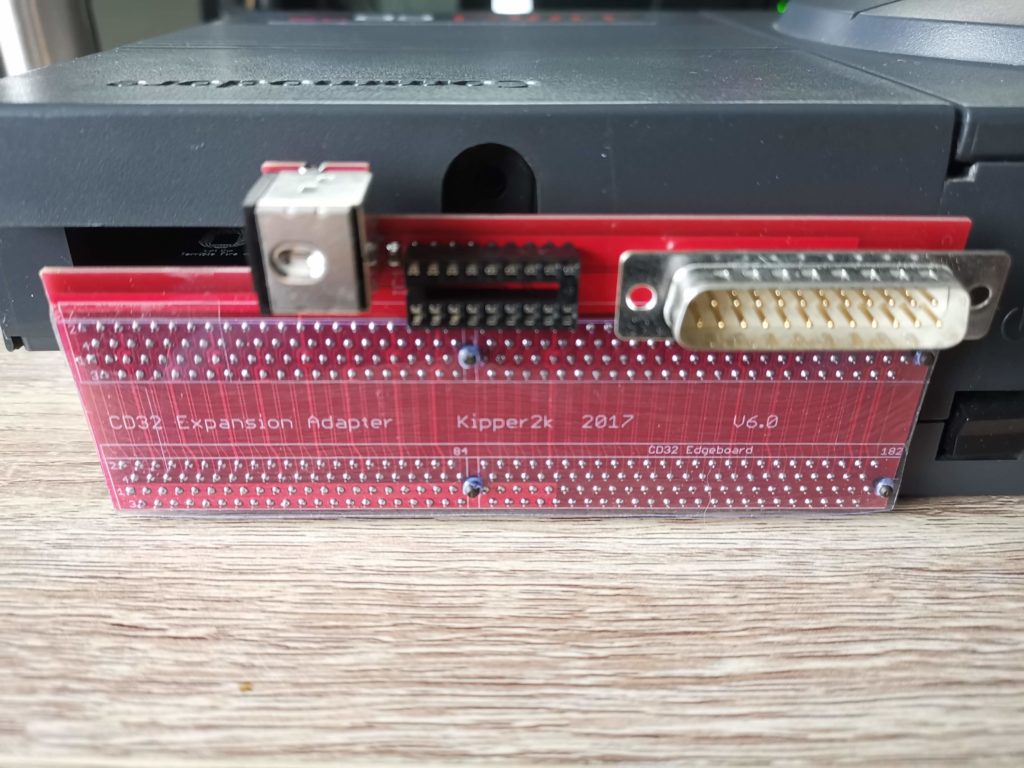
Here’s a view of the riser board.


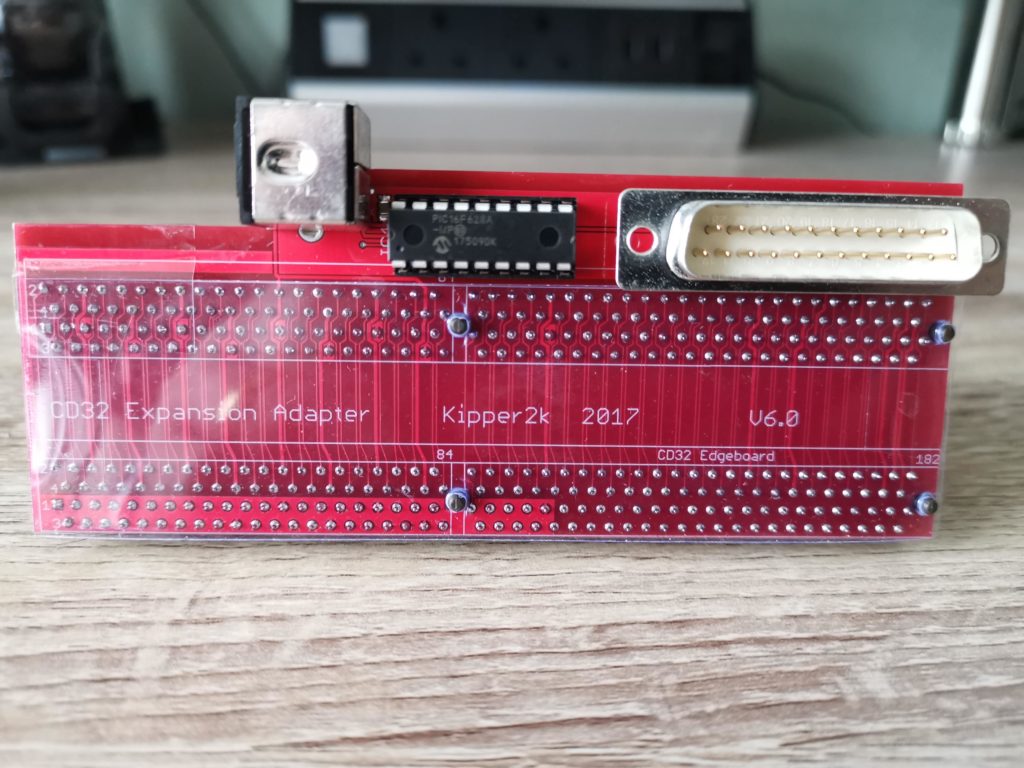
Riser Board

The is a straight-on view of the riser board. The male DB25 port on the right is for hooking up an RGB video cable for vastly improved picture quality. The PIC chip in the center provides a means of converting the inputs from a PS/2 PC keyboard into key presses that will the Amiga will recognise.


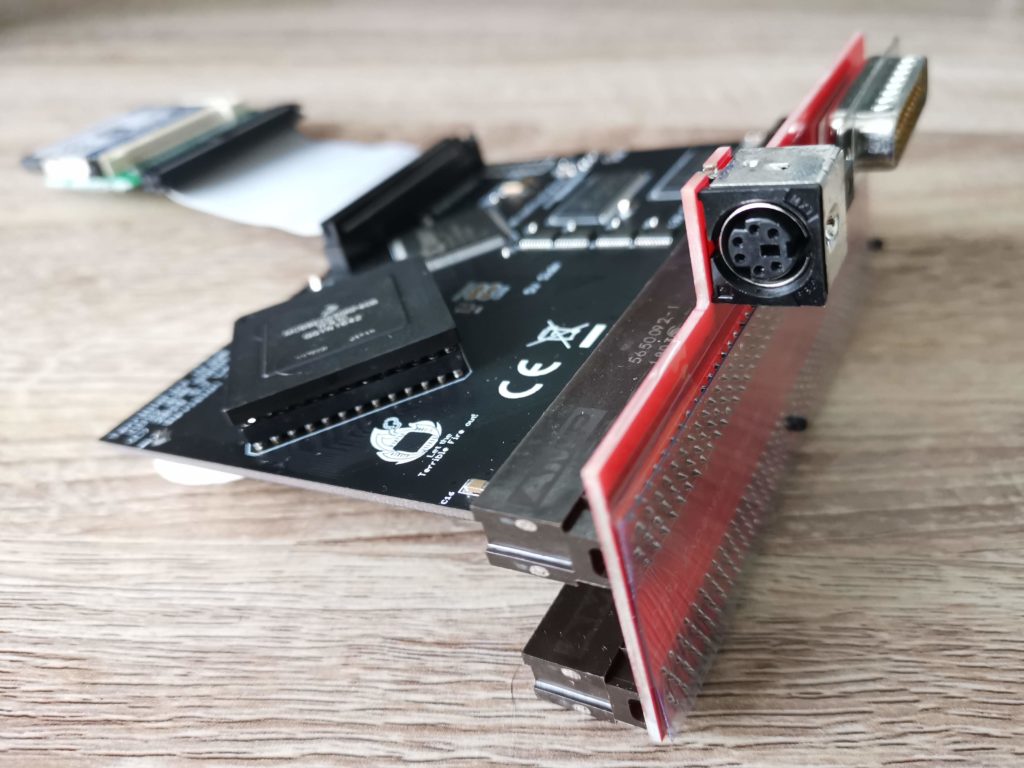
TF330 PS/2 Port

A better view of the PS/2 port.


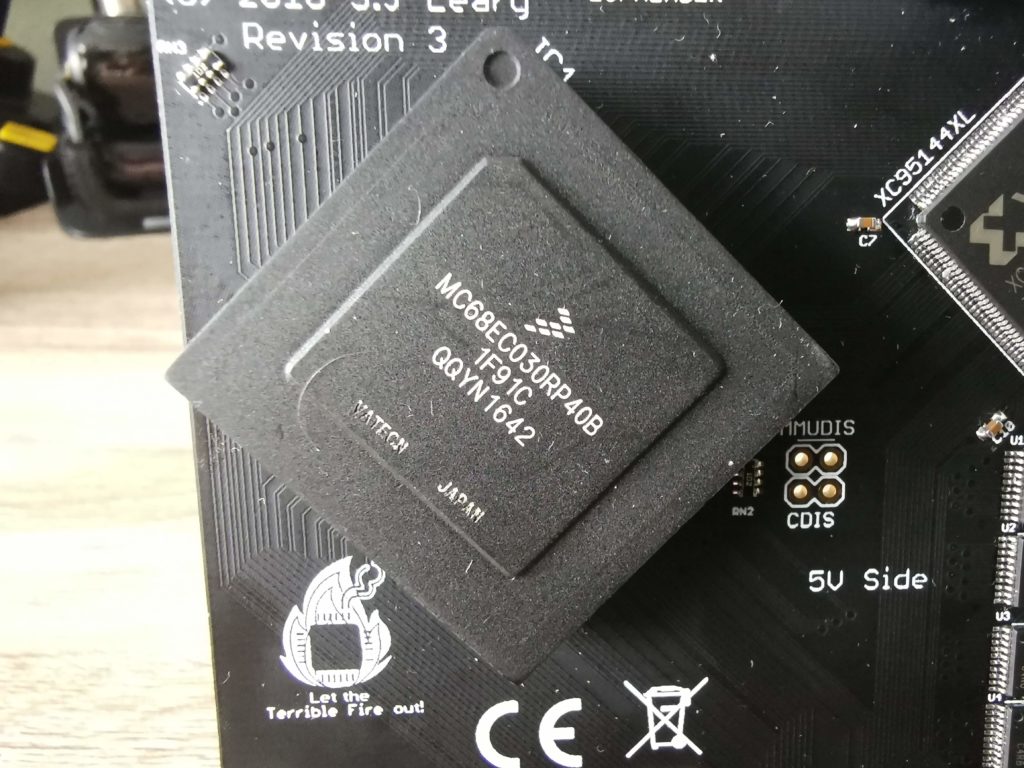
TF330 68030 CPU

Close-up of the 68030 CPU. As you may notice it’s officially rated at 40Mhz. On the TF330 board it has been overclocked to run at 50Mhz.


TerribleFire 330

Side view of the TF330 – note how the CF card can be tucked underneath.


TerribleFire 330

Another view of the TerribleFire 330 card.


Installing the TerribleFire 330


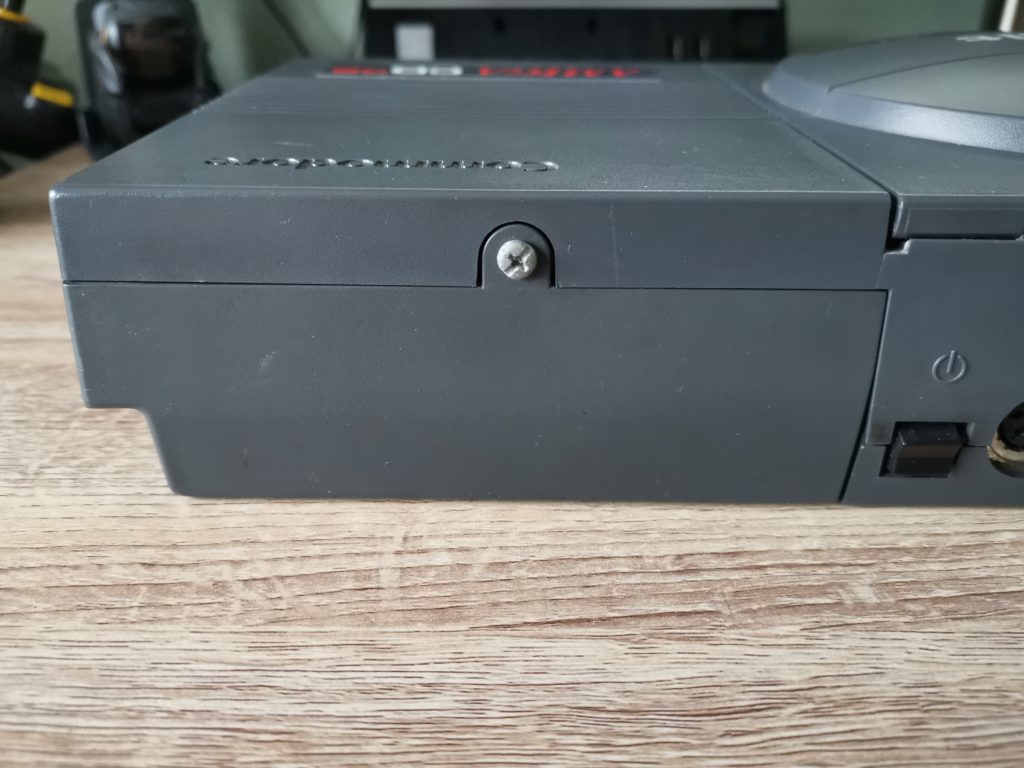
Installation is pretty straightforward and involves removing the plastic expansion cover on the back of the CD32 console. There’s only one phillips screw to remove. Both the screw and the cover can be safely stashed away at this point as they won’t be getting used again.


CD32 Expansion Cover

This is the CD32 expansion bay where the TerribleFire card will be installed.


With the cover removed you can clearly see a big empty space left above the shielding. This expansion bay was original intended to allow the use of the official Commodore CD32 Full Motion Video Module.


CD32 Expansion Bay

Here’s a view of the expansion bay with the cover removed. The edge connector can be seen at the bottom of the image. The TerribleFire 330 card will occupy that empty space above the shielding.


You can simply install the TF330 as it comes but I found a nice little 3D printed clip to hold the IDE cable and CF card in place on eBay. With this fitted the card is securely held underneath the main TF330 board out of harms way. Not an essential purchase but as I store my CD32 vertically I thought it was a worthwhile extra to prevent things moving around.


This slideshow requires JavaScript.


Installing the TerribleFire 330

Here are some photos of the TF330 after I installed it. It does protrude from the back of the console somewhat and it certainly ain’t ‘pretty’ but I’m more than happy to overlook this given the features it offers.


Installed TerribleFire 330

TF330 fully installed – you can clearly see that it protrudes about 1″ from the back of the console to the edge of the PS/2 port.


TF330 Riser installed

The transparent plastic stuck over the circuit board protects it from being shorted out accidentally. The PIC chip is missing for reasons that I will explain later…


Booting up for the first time

My TerribleFire 330 came with a pre-installed copy of Workbench on an 8GB Compact Flash card. To boot into Workbench all you need to do is turn on the CD32 without a disc inside it. After a few seconds the CD activity light starts to flicker away and then up pops the workbench screen.


TF330 Workbench Screen

You can see the 68030 CPU recognised along with the extra 64MB of RAM on the title bar of the screen.


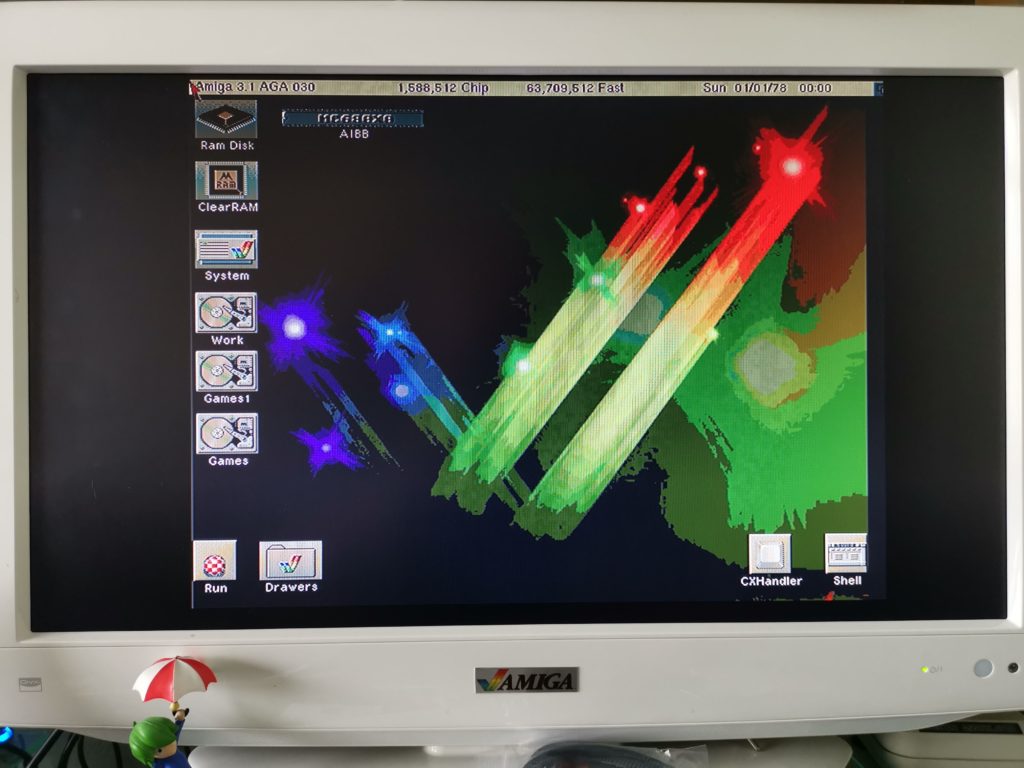
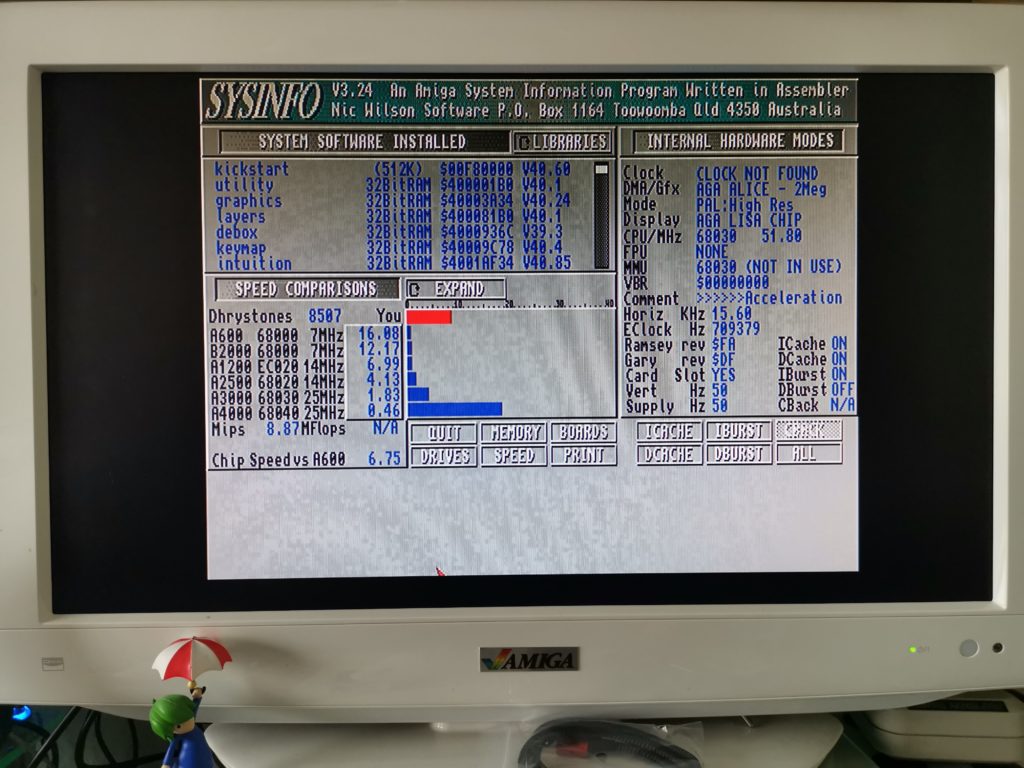
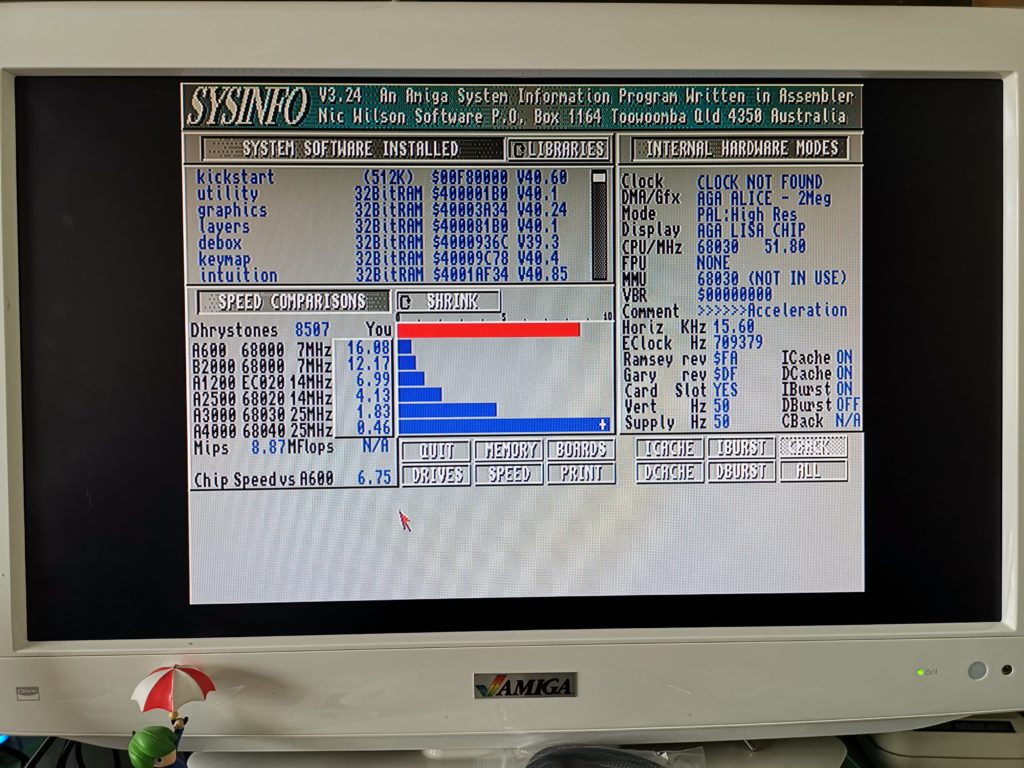
As with any accelerator upgrade for the Amiga I couldn’t resist loading up Sysinfo to see how my pimped out CD32 fared against other systems in the Amiga range. I was not disappointed, it ranked between the Amiga 3000 and 4000 which is impressive. It’s almost twice as fast as a stock A3000 which has a 25Mhz 030 processor.


TerribleFire 330 Sysinfo

SYSINFO: Nearly half as fast as an Amiga 4000…


TerribleFire 330 Sysinfo

SYSINFO: Zoomed in view.


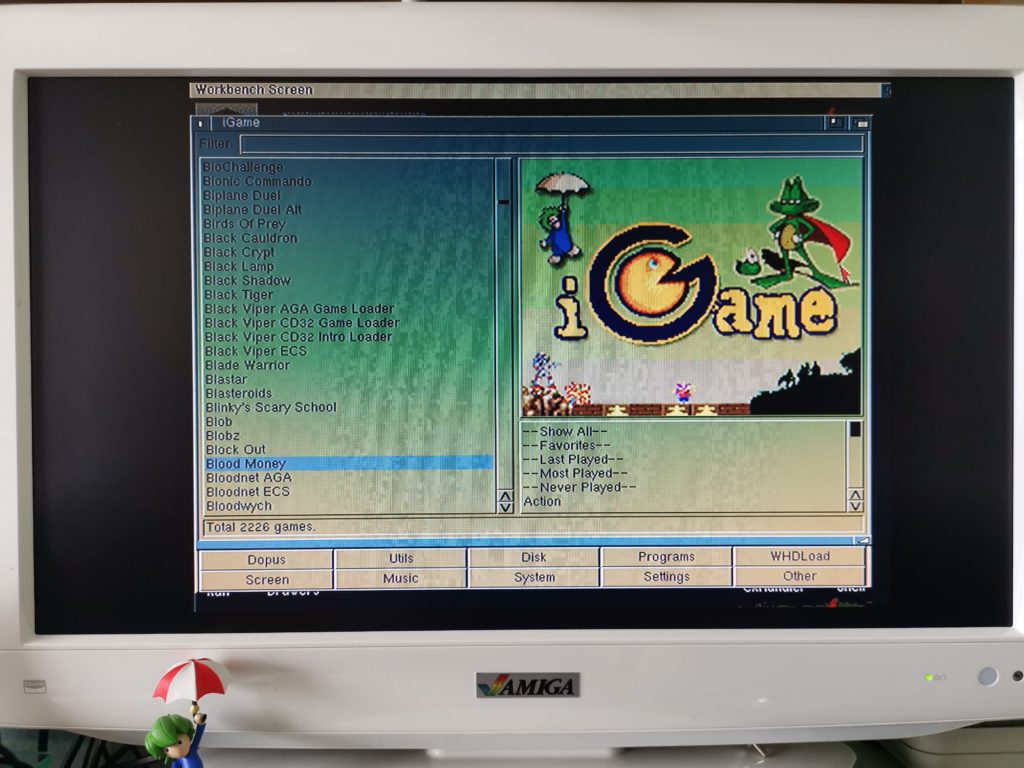
And of course with the ability to run Workbench off an installed CF card comes the option of using WHDLoad! My card came pre-installed with hundreds, if not thousands of games all ready to play with a few clicks of a mouse. The CD32 already has the required 2Mb chip RAM and with the TF330 it also has plenty of Fast RAM now too. Throw in a PS/2 keyboard and you can also exit games cleanly back to Workbench and play games like Star Crusader that require one.
 

CD32 WHDLoad

TerribleFire 330 lets you use WHDLoad on the CD32.

Compatibility

I’ve now tested all the games I own and listed the results on my CD32 Game Compatibility page.

The board was described as having a ‘disable jumper’. Removing it is supposed to make it invisible to the CD32 so it can boot up as normal. However in my testing this simply doesn’t work, in fact removing the jumper prevented my console from booting up at all. I contacted the seller on AmiBay who said there’s still a bug with this and that it would hopefully be fixed in a future firmware update. If that ever happens I’ll update this article.

As things stand right now I can either remove the board if I come across an incompatible CD32 game or see if there’s an alternative version on the internet that has been patched to work. Alternatively I can also try the WHDLoad version.


RGB Video Functionality


The RGB port works exactly as described and offers a beautifully crisp, vibrant display with a regular Amiga RGB SCART cable. Much better than the composite I was having to use previously. Whether or not I was using Workbench or playing a game off CD this worked flawlessly.


TerribleFire330 RGB

A beautifully crisp display thanks to the TerribleFire 330’s RGB video output.


PS/2 Keyboard Functionality


Unfortunately I can’t say the same for the PS/2 port. The whole point of this is to allow people to use cheap PC PS/2 keyboards with the CD32 instead of super scarce Amiga ones. However I tried three different brands of PS/2 keyboard and only one of those worked… for about 10 minutes. No matter what I tried I couldn’t get that keyboard to work reliably. It turns out that the PS/2 keyboard compatibility is very poor with the riser card. People report greater success with really old keyboards rather than currently available ones. I was advised by the seller to get a CD32 AUX to PS/2 adapter.


This slideshow requires JavaScript.


I chose one of these on eBay for about £18. The seller was really helpful and even offered to refund me if the adapter turned out not to work. Thankfully that wasn’t necessary as it worked perfectly with my cheap Genius PS/2 keyboard that I picked up off Amazon. There’s some clever electronics hidden inside the adapter that converts stuff like the two ‘Windows’ keys into ‘Amiga’ ones so you can still do a soft-reset. It works really well and I highly recommend getting one, even if you don’t get a TerribleFire!


This slideshow requires JavaScript.


Actually there was one other issue that I had to solve before I was in PS/2 keyboard nirvana. The keyboard initially behaved like a key was stuck down. There is a conflict between the PIC chip on the Kipper 2K riser and the PS/2 Aux adapter. Simply removing the PIC chip solved this problem completely with no negative effects.

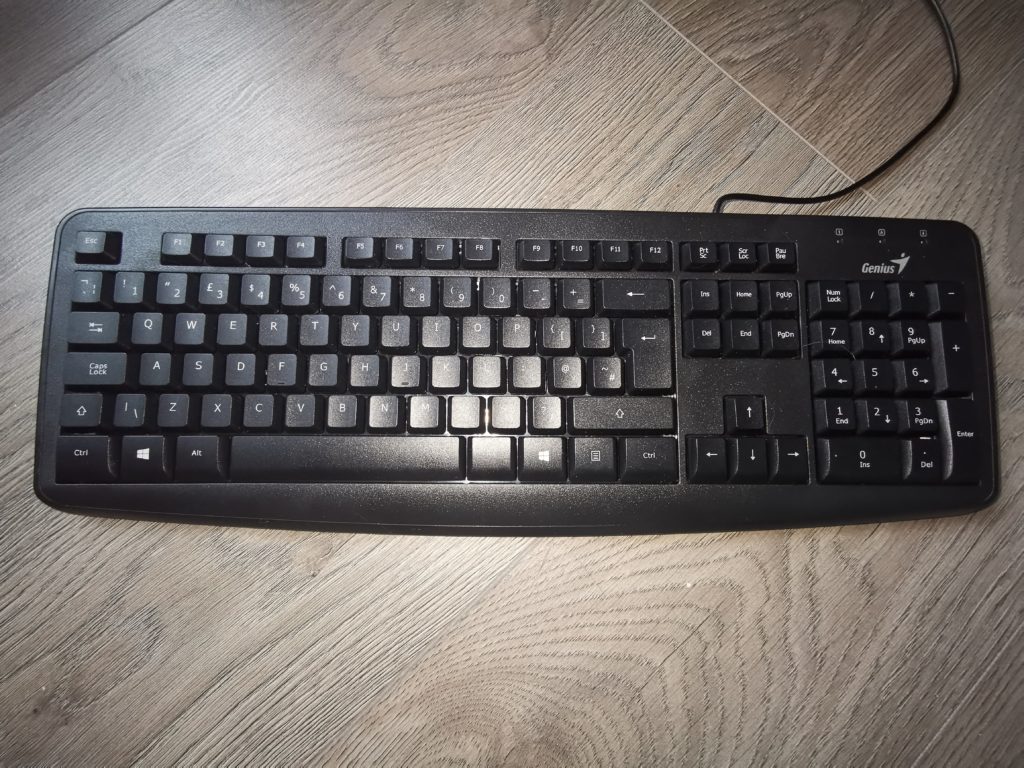
Here’s the PS/2 keyboard I’m using with my CD32, it’s just a cheap one I picked up off Amazon but it does the job and isn’t a bad match for the dark grey colour of the console either.


CD32 PS/2 Compatible Keyboard

CD32 PS/2 Compatible Keyboard


Conclusion

I can’t deny it’s shame the built-in PS/2 keyboard option doesn’t work as well as it could and that I can’t disable the board without removing it. However these small niggles don’t stop the TerribleFire 330 from being a beast of an expansion for the money. You’d be hard pressed to find anything else offering as much bang for your buck.

With the TerribleFire 330 installed my CD32 has become the ultimate Amiga gaming machine. It can play CD32 and CDTV titles and thanks to WHDLoad it can now play pretty much any other Amiga title as well. In fact with mouse and keyboard attached it can even be used for productivity stuff just like an A1200, only with a built in CD-ROM drive!

The extra grunt of the 50Mhz 030 also helps it run games like Alien Breed 3D, Frontier Elite 2 and Wing Commander at their very best. The addition of the RGB video port makes everything look its very best too! Bottom line, if you have a CD32 then the TerribleFire 330 is an essential upgrade for it.


Ultimate Amiga gaming machine

With the TF330 my CD32 has become the ultimate Amiga gaming machine.

My New Amiga CD32 Console

Amiga CD32

Introduction

I never owned an Amiga CD32 Console back when they launched in 1993. I remember reading about them in Amiga Format and wanting one desperately but could never justify or afford one at the time. Not long after they launched Commodore went out of business and so the CD32 quickly disappeared from the shelves and from my mind.

Fast-forward some 25 years and I recently found myself pining after one of these mythical beasts again. Reading numerous articles about them in magazines and on the ‘net added further fuel to the fire. So I did the only sensible thing a middle-aged bloke could do and bought my very own Amiga CD32! Here she is in all her 32-bit glory!


Amiga CD32

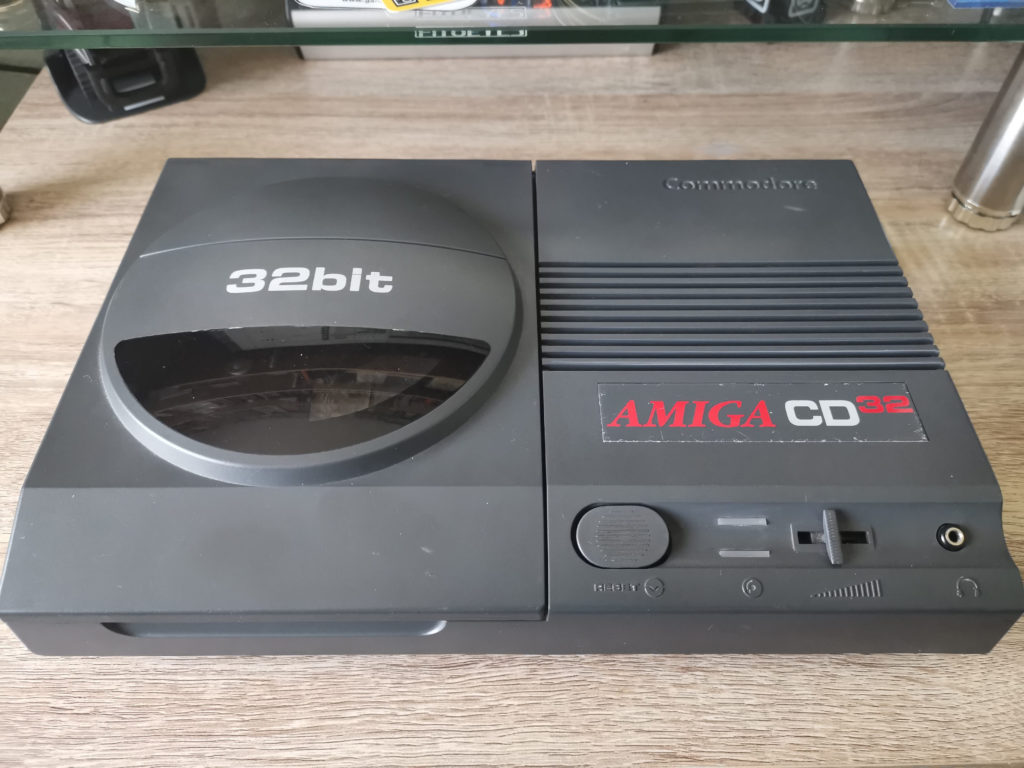
My new Amiga CD32 console


For it’s age and what I paid for it I think it’s in great condition. Sure there’s a couple of blemishes and the badge is scratched but for a 26 year old machine I’m more than happy with it. It’s already been fully re-capped so I don’t have to worry about that side of things either.


Amiga CD32

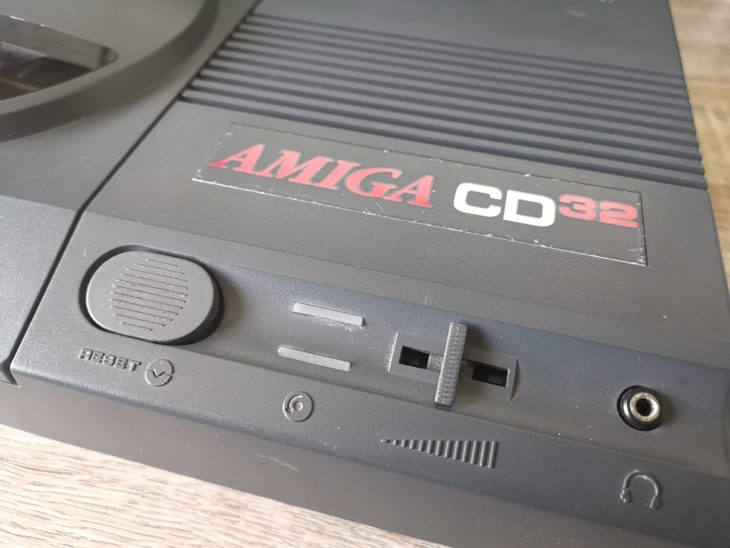
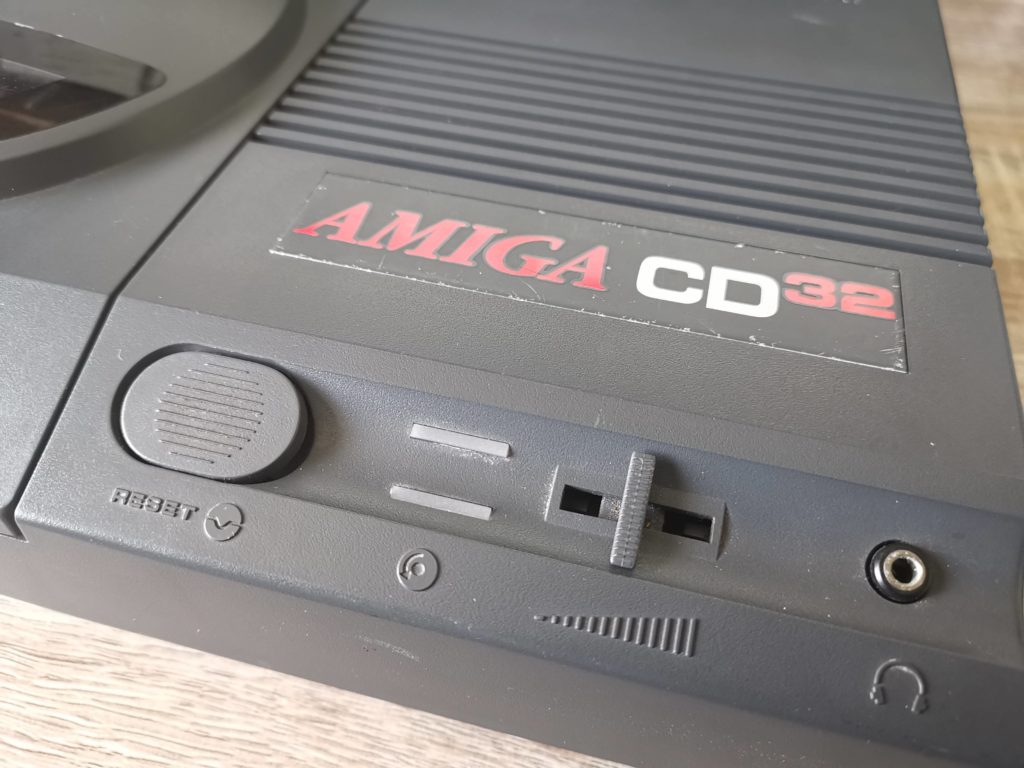
Close-up of the Amiga CD32 control panel. From left to right: reset button, power and drive activity LED’s, volume slider and headphone socket.


All the ports, buttons and outputs work as they should. However I can’t really see myself using it as a CD player much but at least the option is there should I want to!


Connectivity


Amiga CD32

Amiga CD32 expansion port


Amiga CD32 expansion port

A look inside the CD32 expansion port


There’s an expansion port on the back which can be used to install all manner of wonderful contraptions. In the past there were FMV cartridges, floppy drives and the SX-1 which could convert the CD32 into a full blown computer. Nowadays you can hook up a TerribleFire expansion which offers extra RAM, faster CPU’s, IDE interface and more. I’ll definitely be looking to utilise this port soon!


Amiga CD32

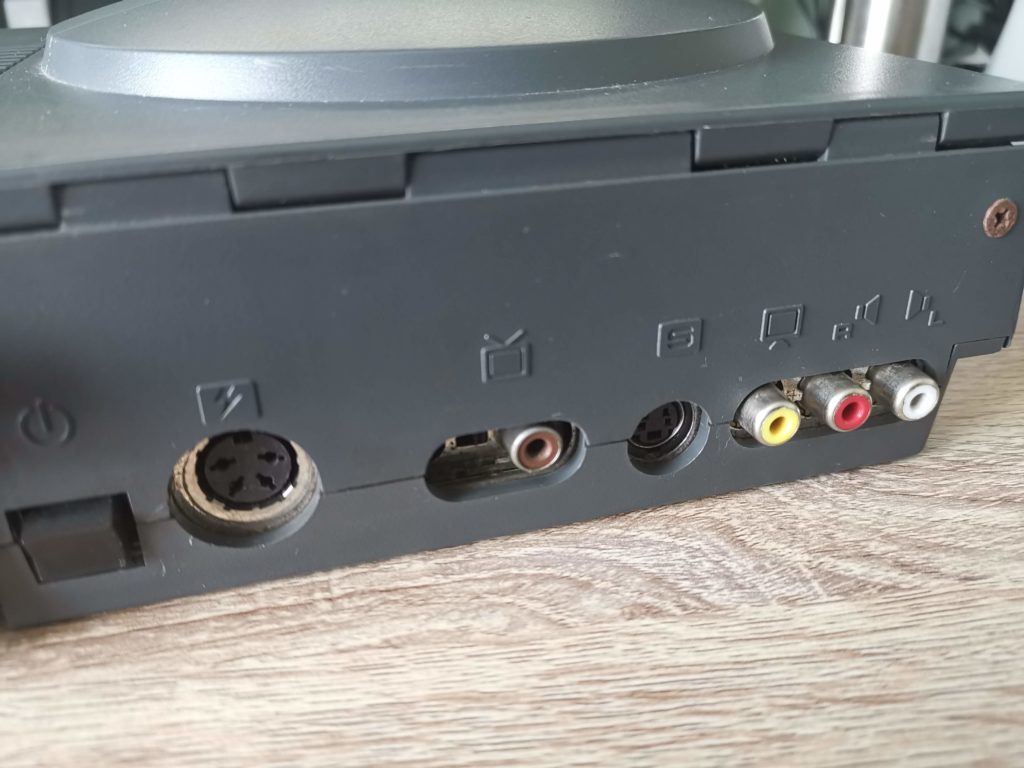
Amiga CD32 rear connectivity. From left to right: power rocker switch, power socket, RF aerial output, s-video, composite video and right/left audio RCA sockets.


There’s plenty of connectivity round the back as standard. No less than 3 video output options, RF, composite and S-video. The latter provides by far the best picture if you have a TV capable of utilising it.
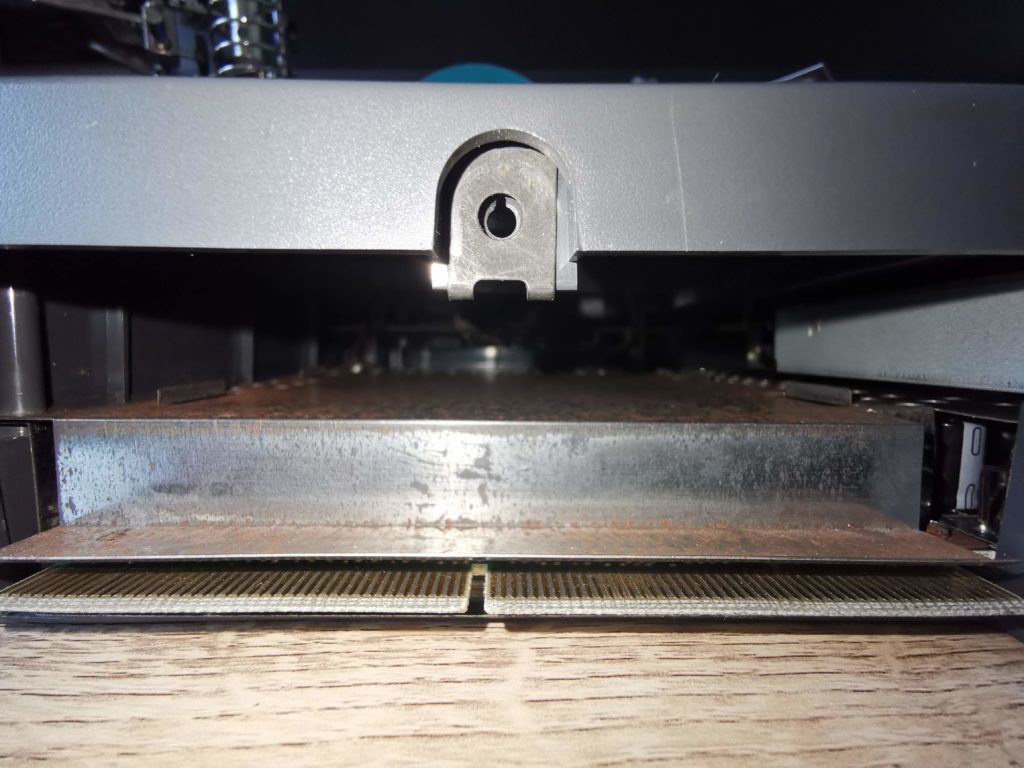
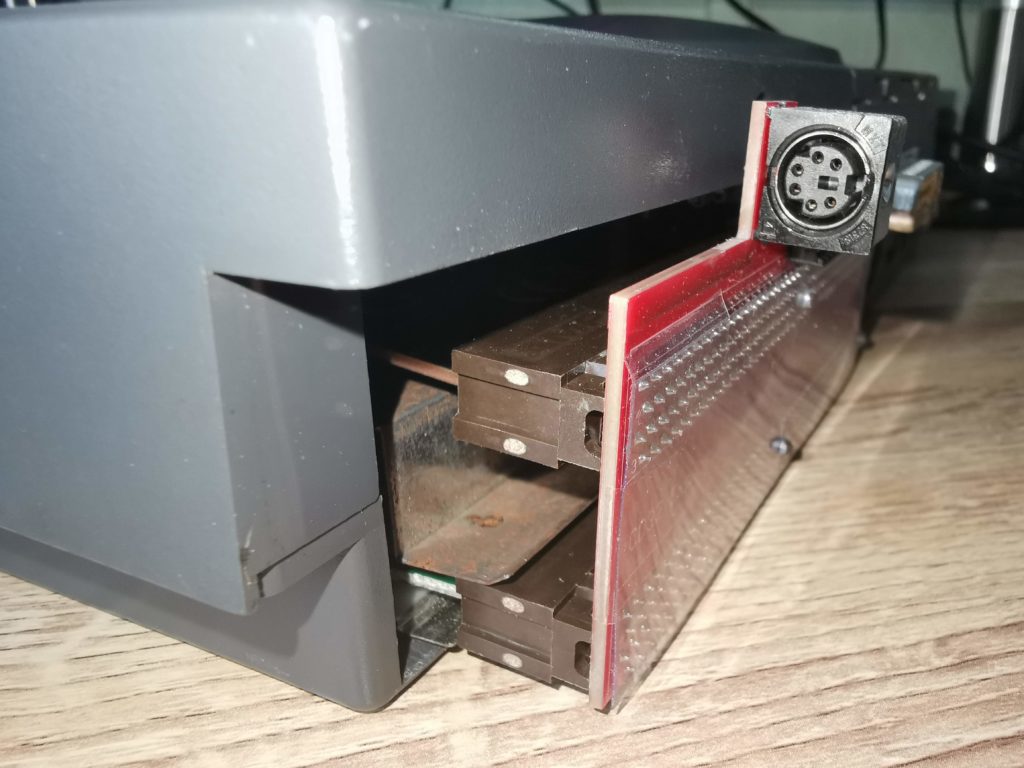
 

Amiga CD32

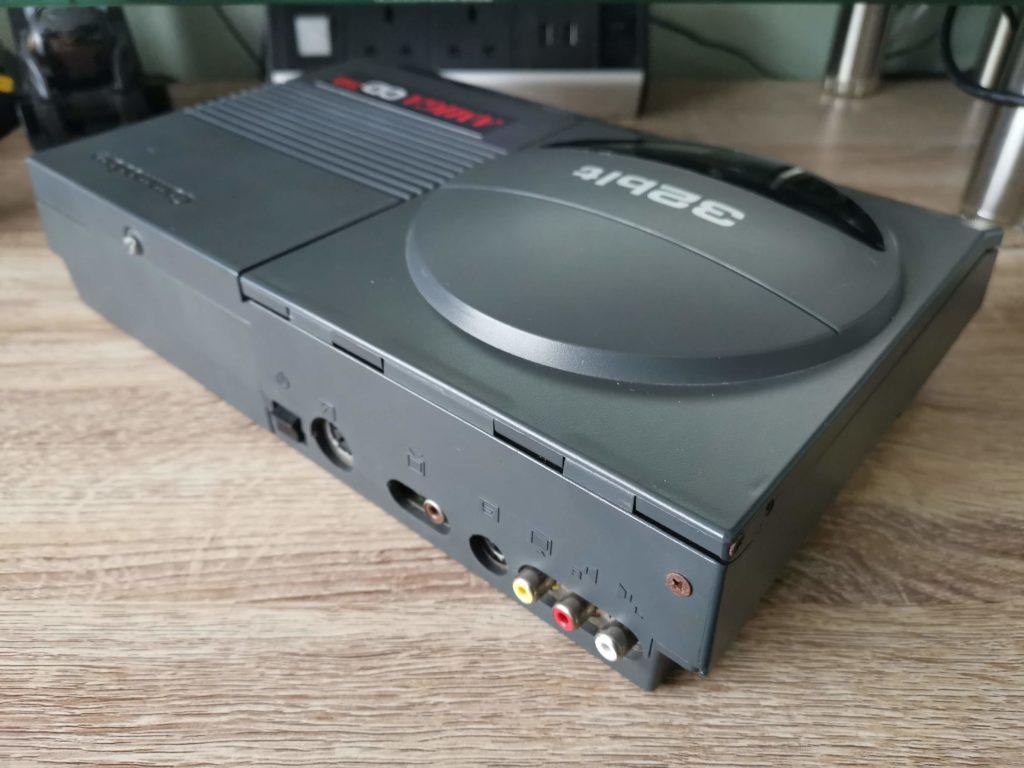
View of the Amiga CD32 rear – that rusty screw definitely needs sorting…


Amiga CD32

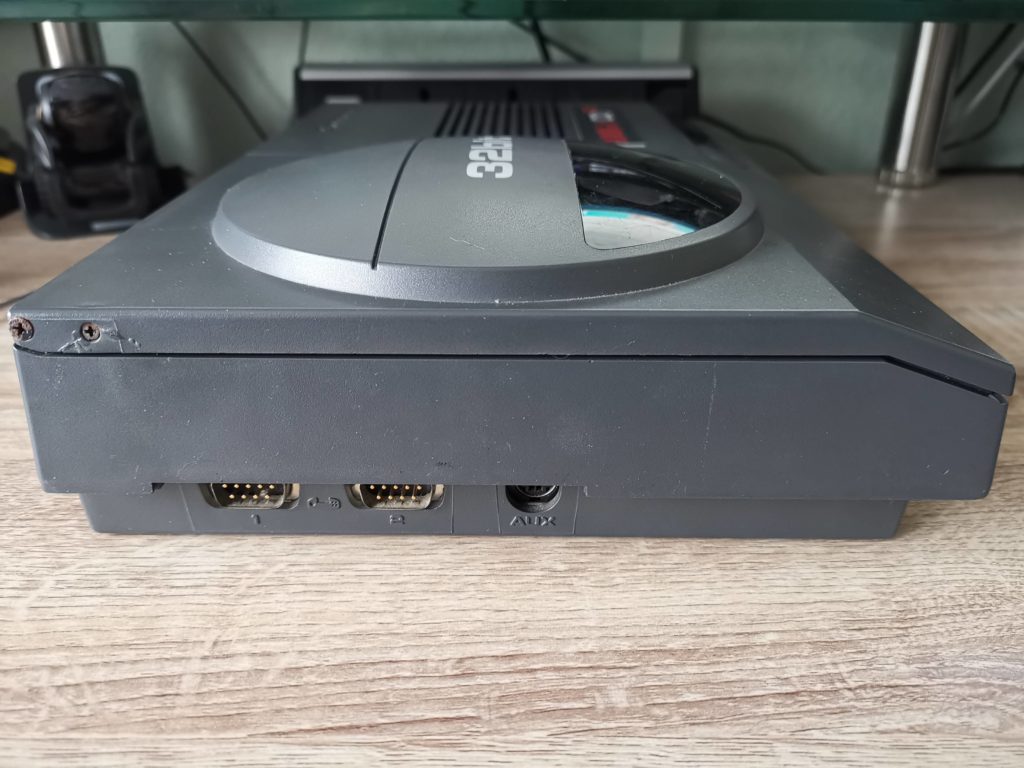
Amiga CD32 left side. From left to right: controller port 1 (for gamepads), controller port 2 (for gamepads or a mouse), aux port (for an Amiga keyboard).


Amiga CD32

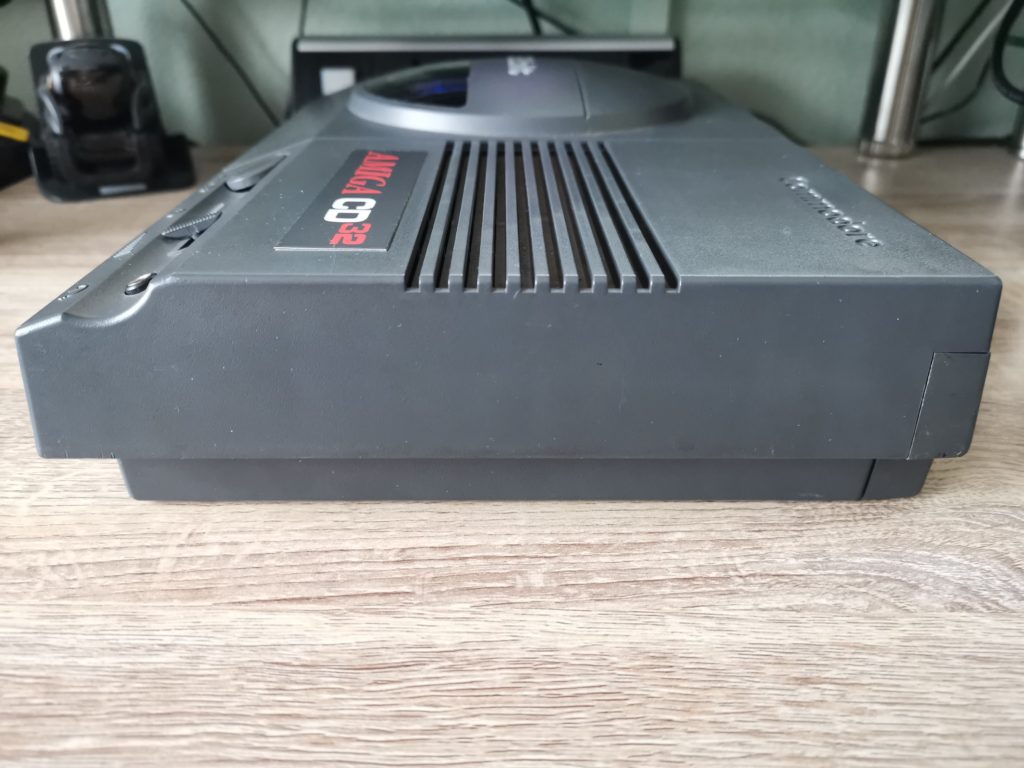
Amiga CD32 right side. Not much to see here really.


Amiga CD32

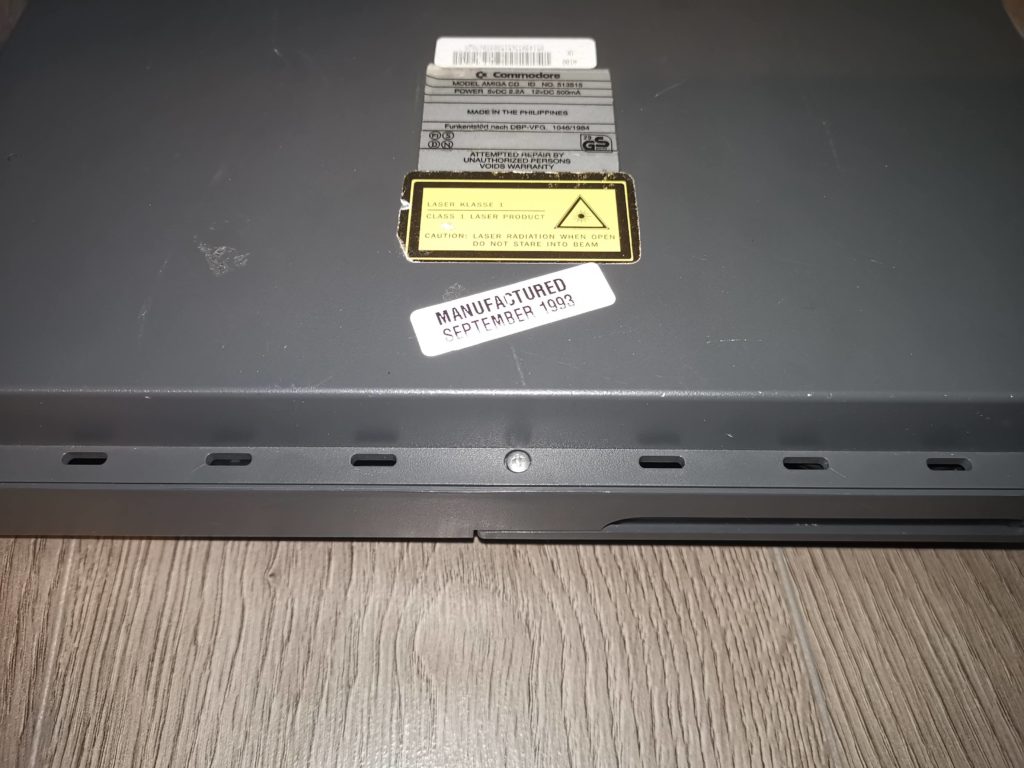
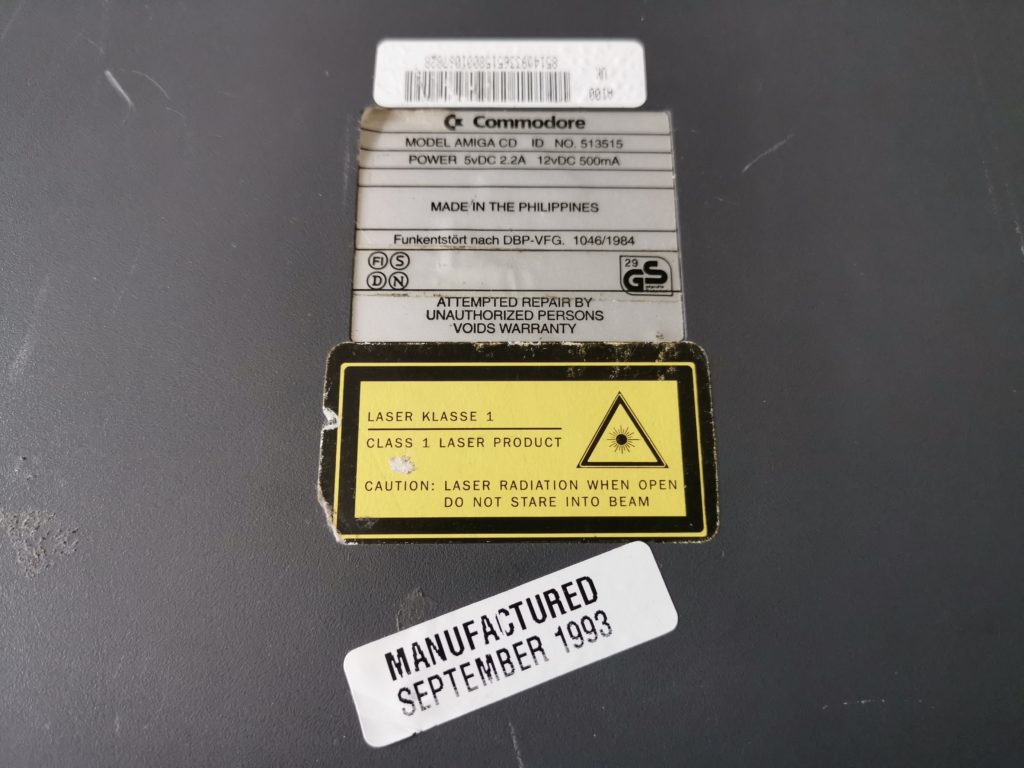
Made in 1993 in the Philippines.


Amiga CD32

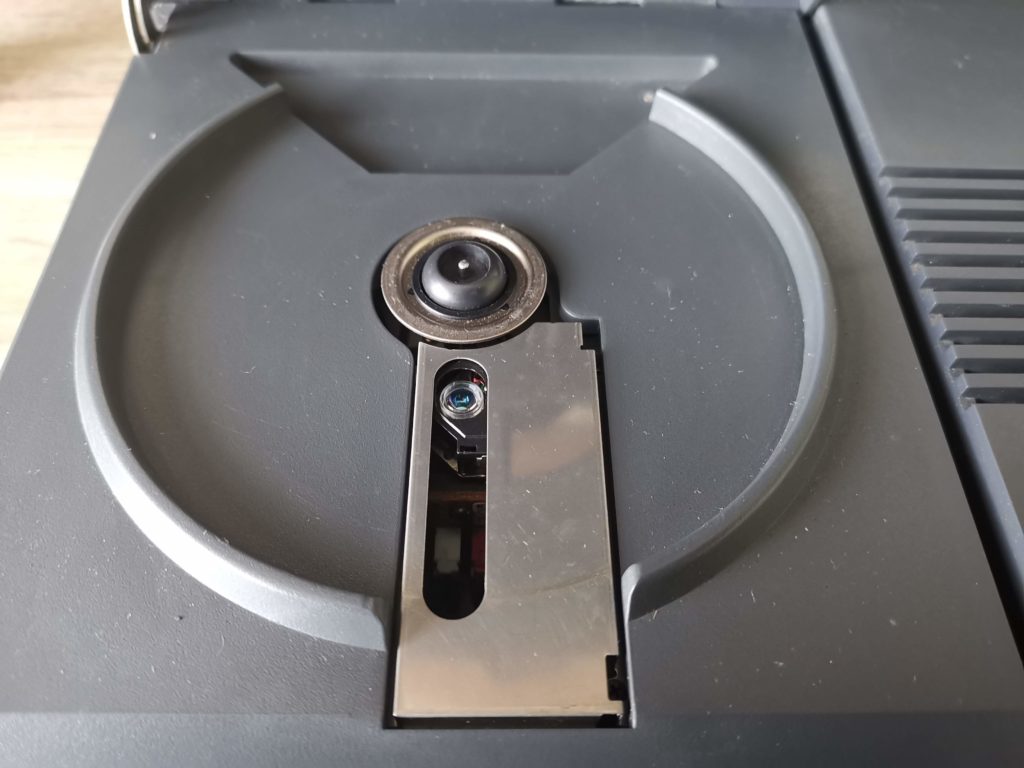
View of the CD tray and laser pickup.


The CD mechanism is pretty basic but it gets the job done. My CD32 came with a spare laser pickup assembly but hopefully I won’t need to use it for a long time! Discs don’t click into place like on a lot of modern CD players. Instead they’re held in place by the friction of the lid pressing down on the CD when it closes.


Amiga CD32

Inside of the lid. This is what presses down on a CD to grip it.


A Few Issues


This slideshow requires JavaScript.


If there’s one facet of this CD32 console that concerns me, it’s this rear left corner. The rusty screws are an eyesore but also easily rectified. No, the thing that worries me is that it looks like the lid has cracked at some point and been glued back together. The repair actually looks quite effective and from a normal viewing distance isn’t that noticeable (I’ve zoomed in close in the above photo). However there is a spring loaded lever underneath this corner which ‘lifts’ the lid up automatically once you start to raise it and so this area is presumably under a lot of strain. I’m not going to do anything with it for the time being other than keep on eye on it. I will however be keeping my eyes peeled for a replacement lid just in case!


A Quick Peek Inside

Because, why not? Had to make sure that it had actually been re-capped as advertised (it had) at the very least! Also wanted to take a look at the Akiko chip which is only found in the CD32. This is the chip that allows it to convert planar to chunky graphics in hardware for 3D games.


This slideshow requires JavaScript.


CD32 Controller

The controller that came with my Amiga CD32 console is in superb condition. In fact I’d go as far as to say it’s in mint condition. It doesn’t look like it has ever been used. Sadly though it actually proved to be faulty – the D-pad ‘up’ just doesn’t work at all. Very disappointing – no idea what is wrong with it so will have to open it up and take a look soon.


This slideshow requires JavaScript.


Amiga CD32 Competition Pro Controller


Luckily I was able to pick up this Amiga CD32 compatible ‘Competition Pro’ gamepad off eBay pretty cheaply. Although it doesn’t look as cool as the official controller it works perfectly. At the end of the day that’s all that matters so I can still play with my new toy until I get around to sorting the original controller!


This slideshow requires JavaScript.


At the request of a reader here are some photos of the inside of the controller. The photos show that is is actually a ‘Honey Bee SF-3’ which is both on the back of the pad and printed onto the circuit board itself. Upon opening it up I also discovered that the insides were absolutely filthy! The board and contacts received a good cleaning with Isopropyl Alcohol before being reassembled. I hope the images prove useful and if anyone has any further interesting info about the controller please let me know I will be sure to update this page.

This slideshow requires JavaScript.


PSU

Sadly my CD32 console didn’t come with an original Commodore PSU but rather this modern one made by LaCie. Although given the ropy nature of some of the official C= PSU’s maybe that’s a good thing?


This slideshow requires JavaScript.


That Badge – Revisited & Fixed!

OK, I’ll confess that the scratched Amiga CD32 metal badge annoyed me more than I thought it would. I started hunting around for a possible replacement. Replacement badges are quite commonplace for the Commodore 64 and Amiga computers so I had planned to replace my scratched up old one with a brand new one. Turns out CD32 badges are quite hard to come by. However I did come across a guy in Switzerland selling vinyl CD32 stickers on eBay that he claimed fitted exactly so I ordered one.


This slideshow requires JavaScript.


True to his word, the vinyl sticker was indeed a perfect fit in terms of size. It’s also a very close match in colour and tone to the original, certainly close enough for me anyway. It was a little tricky to get it lined up perfectly, but now it’s in place I think it looks fantastic. Sure it’s not quite as glossy as the original, it’s got more of a silk finish, but I’m very happy with the end result.

FYI, I didn’t remove the original badge – I simply stuck the new one on top of the old metal one. The reason I did this was so that if I ever wanted to go back to a 100% original finish I could simply peel the new one off.


We have ignition!

Here’s a quick video I did of the awesome CD32 boot-up sequence. This must have been amazing back when it launched, two years before Sony’s original PlayStation in the UK! The quality is a little bit ropy as it’s only connected up to my TV using composite video at the moment.


Definitely time to dig out my CD32 Scene magazines and see what games I need to buy to start my collection!