In this post I’m going to explain just how you can use an Iomega Zip 100 Drive with an Amiga 1200. The software side of this will be applicable to other Amiga models too but the hardware required is specific to the Amiga 600/1200 series as it utilises the PCMCIA port.
A Little bit of history
Before I delve into the guide a little bit of history. Back in the early 1990’s the most common media format available to Amigan’s was the humble 3.5″ DS/DD Floppy Disk. HD floppy drives were available too but were expensive and only offered double the storage capacity anyway.
This was when Iomega launched their Zip 100 Drive, along with a new disk format that could hold a whopping 100MB. This was a big deal to me back then as standard Amiga floppies could only hold 880K of data and Hard Disk drives cost a fortune! The disks were very similar in size and shape to regular disks and about twice as thick as you can see in the photo below.
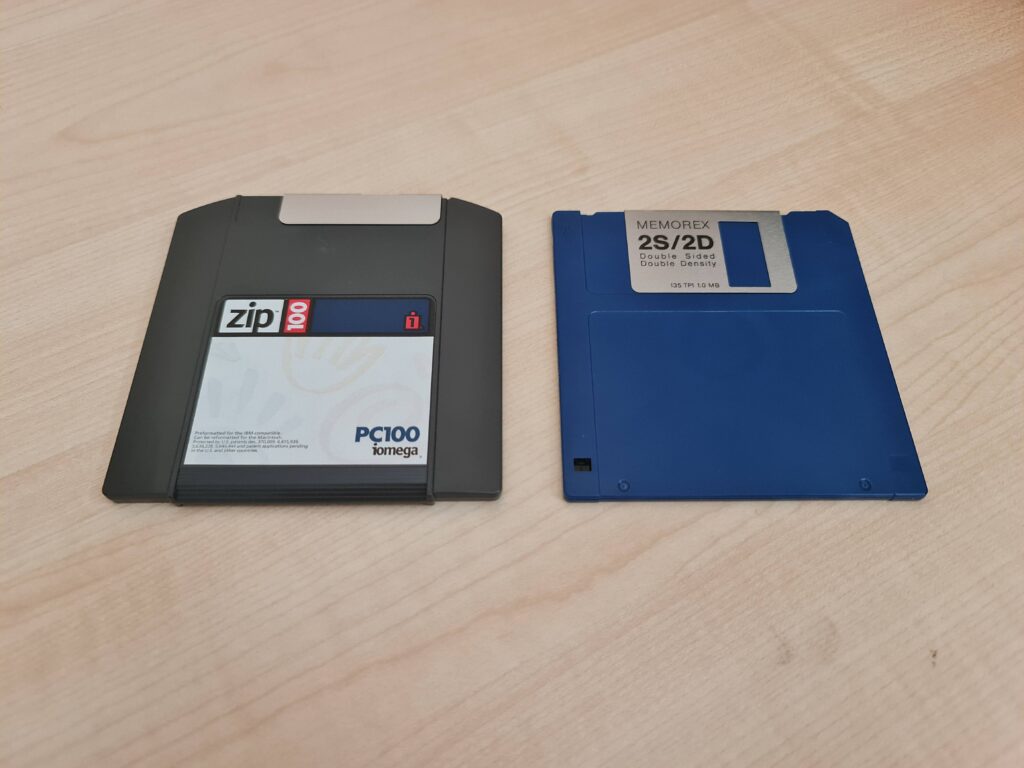
Zip 100 Disk next to a standard 3.5″ disk.
These drives were aimed at the PC and Apple Mac markets but enthusiasts quickly facilitated the use of them with Amigas too. There were three versions of this drive made that hooked up in one of three different ways; parallel port, SCSI and later a USB version too. However it is important to note that only one version is actually suitable for Amiga use and that is the SCSI version. (The parallel version can be made to work but it requires physically modifying the Amiga’s parallel port which is something I have no intention of doing).
If you have a big box Amiga there’s actually a fourth version – they made an Internal version of the drive with an ATAPI IDE interface but that’s a project for another time… if I ever get my own ‘big box’ Amiga system!
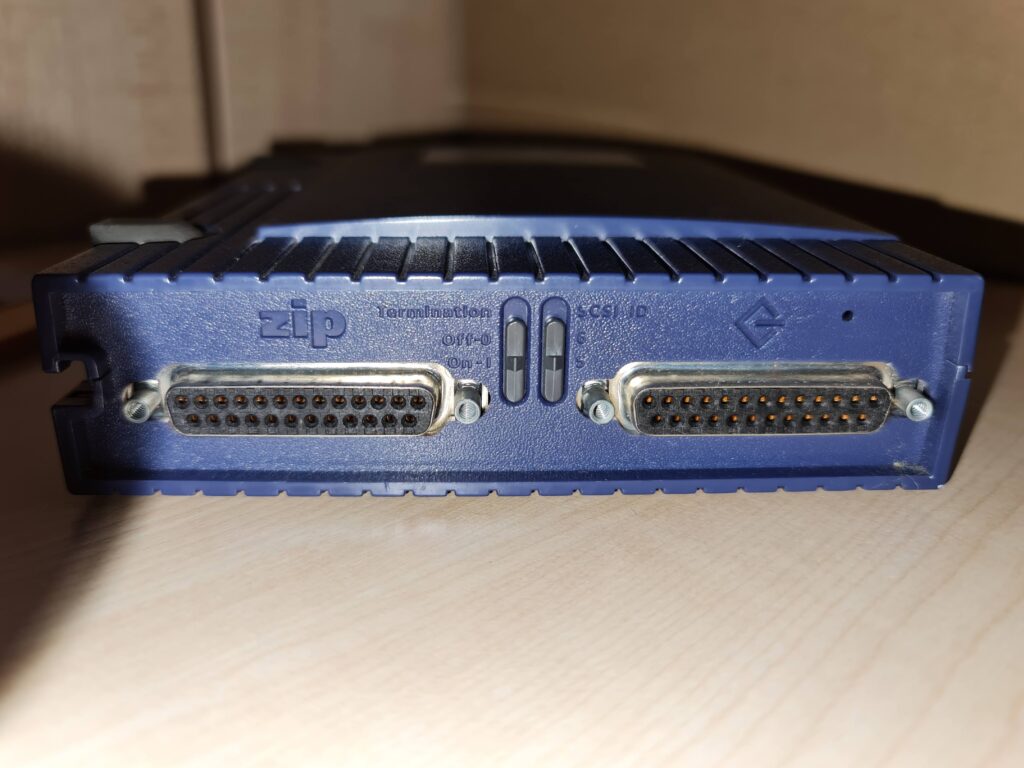
This is what the back of a SCSI Zip 100 drive should look like. If it doesn’t look like this then don’t buy it – it won’t work.
Now of course by todays standards 100MB is a trifling amount, my mobile phone has 256GB of storage for example. My Amiga 1200 also has an 8GB CF card so technically I don’t really need any more storage. However all that misses the point. In my eyes, to have an authentic Amiga experience and relive the 90’s you need to use the appropriate hardware. Besides, most of the fun of using retro computers is getting old stuff working again… not because you need to, but because you want to!
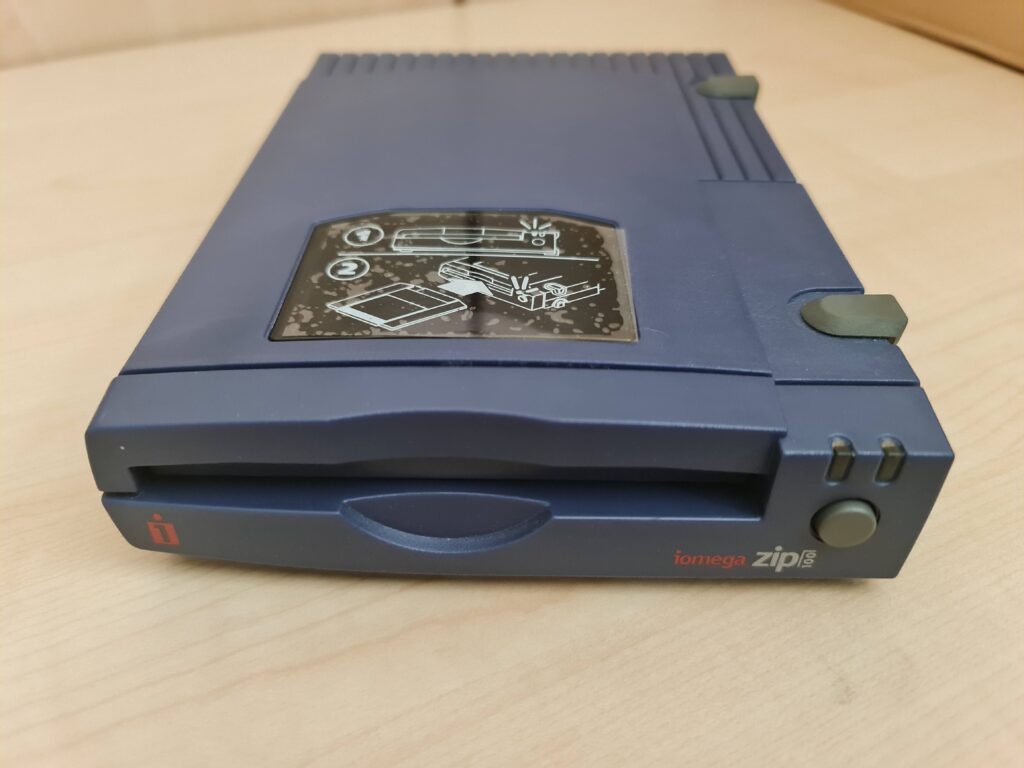
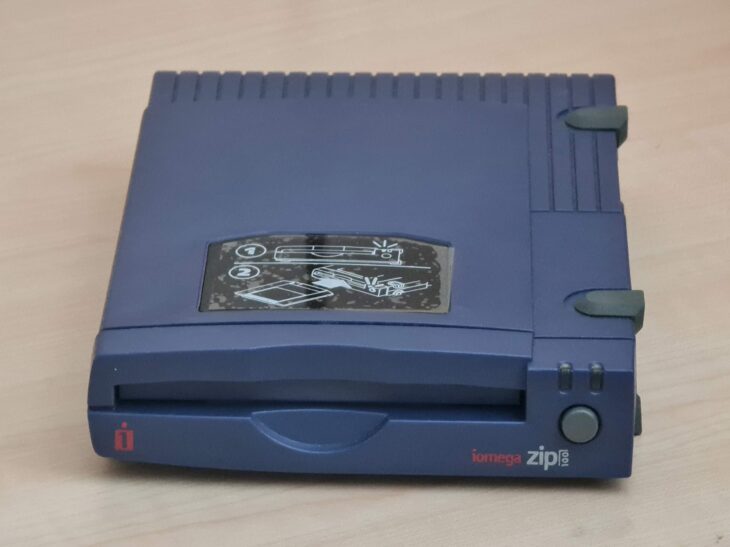
My ‘new’ Zip 100 Drive still sporting the ‘how to insert a disk’ sticker on the top.
Buying a Zip 100 Drive
Zip drives went out of production a long time ago so your only source is the second hand market now, which for most people will be eBay. There’s always a few on there in various conditions with prices ranging from around £40 to £120. Now of course what you buy is entirely up to you but from my own personal experience I’d say it is worth paying extra for a drive that has been fully tested and confirmed working. I tried the cheap and cheerful approach and ended up with three duds before I decided enough was enough and paid £90 for a fully tested one. Cheaper in the long run and a lot less hassle for sure!
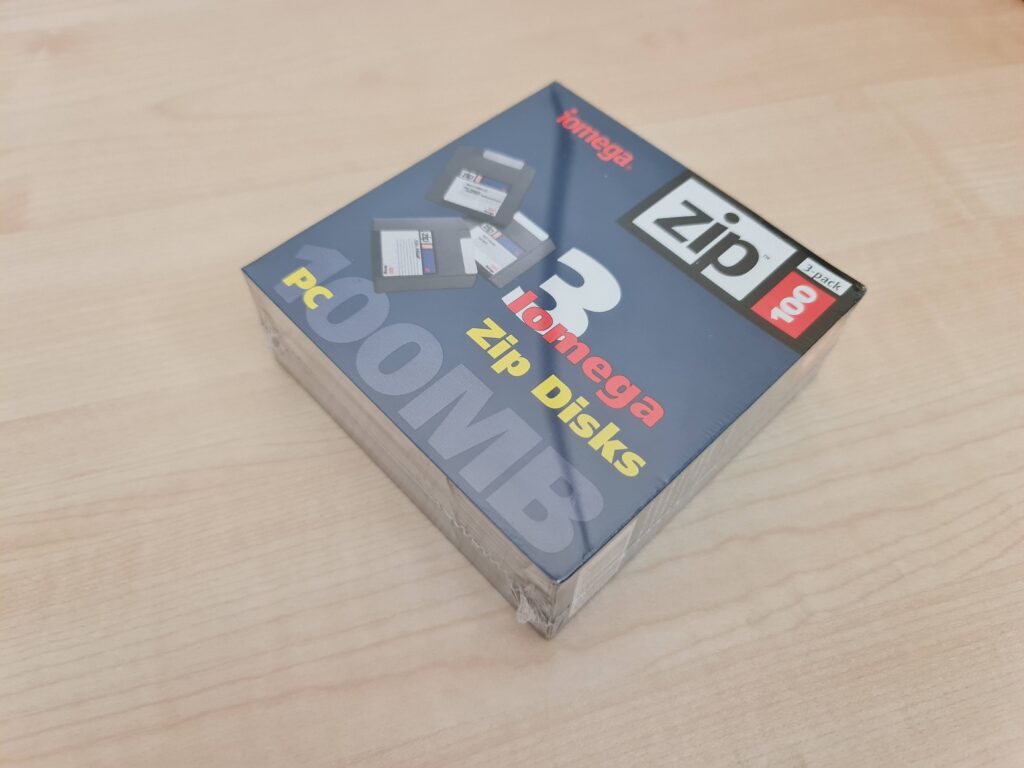
New Old Stock (NOS) Zip 100 disks are still readily available.
The disks can be bought very cheaply and there’s plenty out there, even brand new and sealed. Expect to pay between £1.50 and £4 per disk depending on quantity being sold and whether they’re new or used. You can even pick yourself up some rainbow Zip disks and caddy boxes to store them all in!
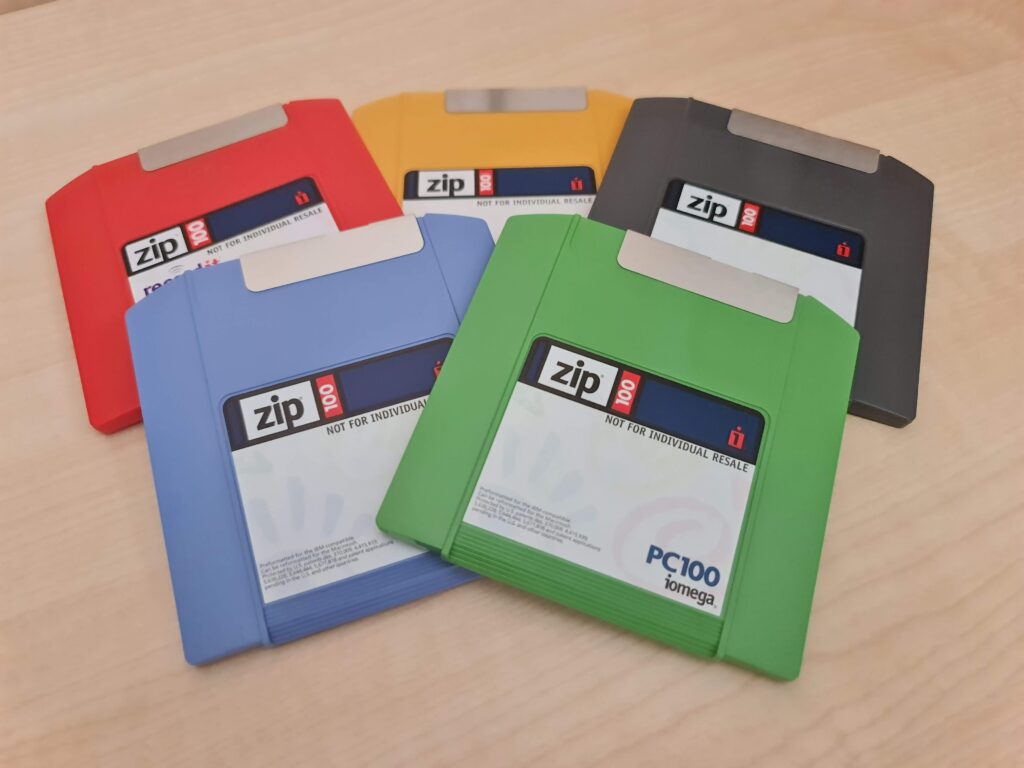
Rainbow Zip 100 Disks.
Adding SCSI to the Amiga 1200
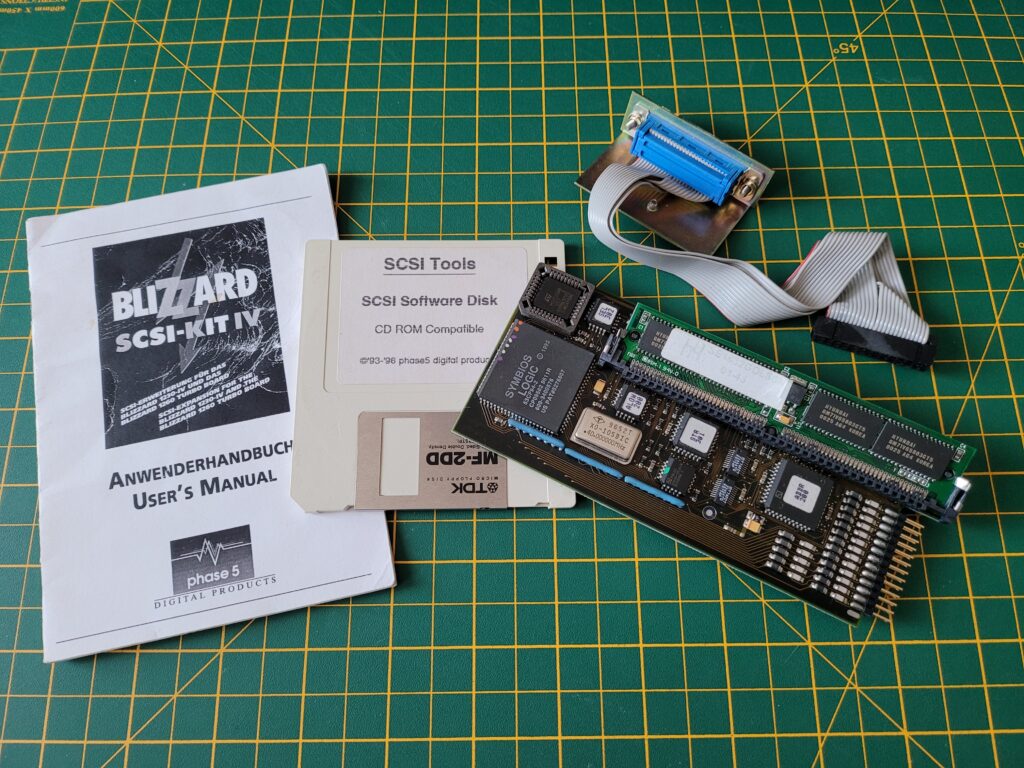
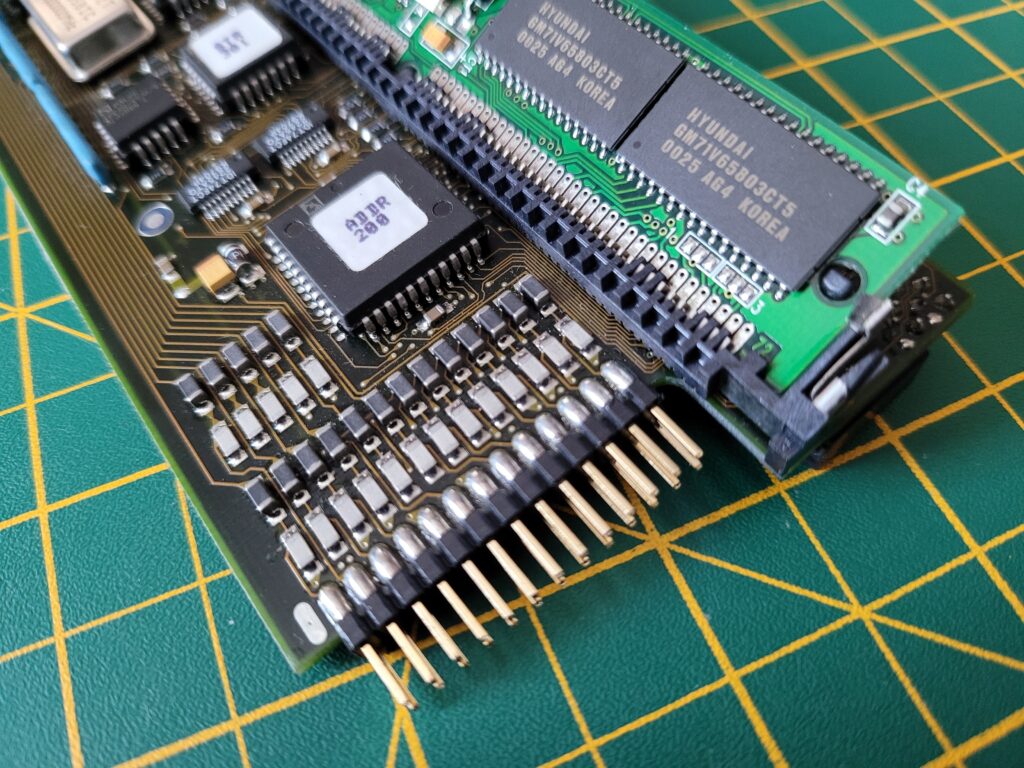
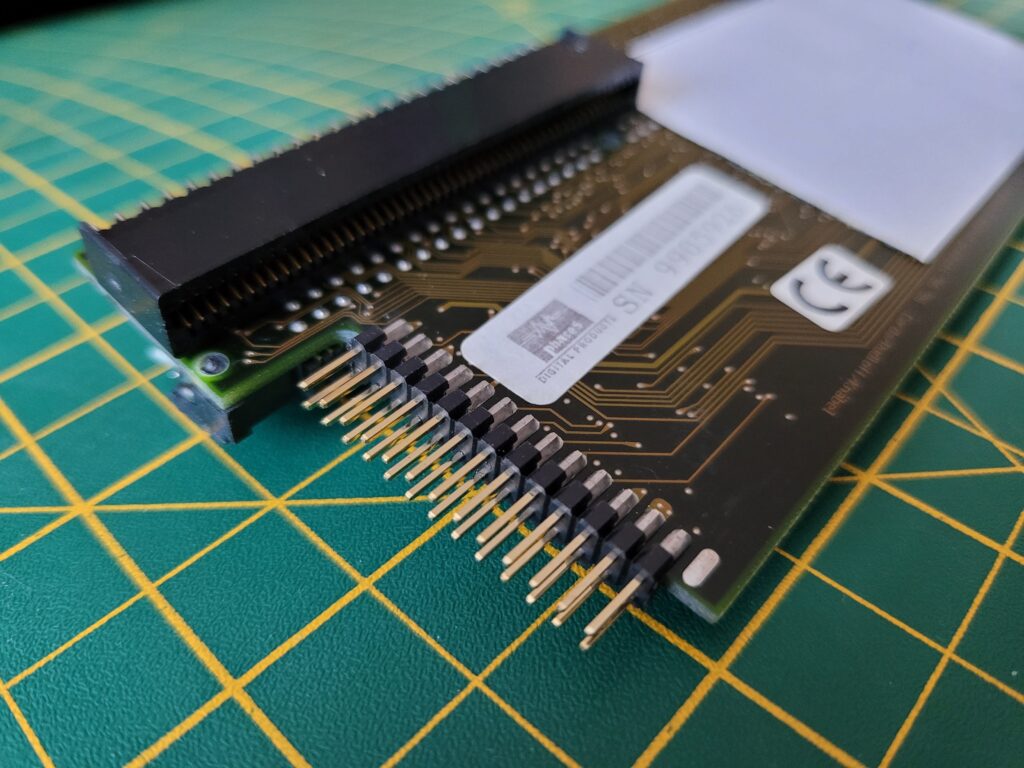
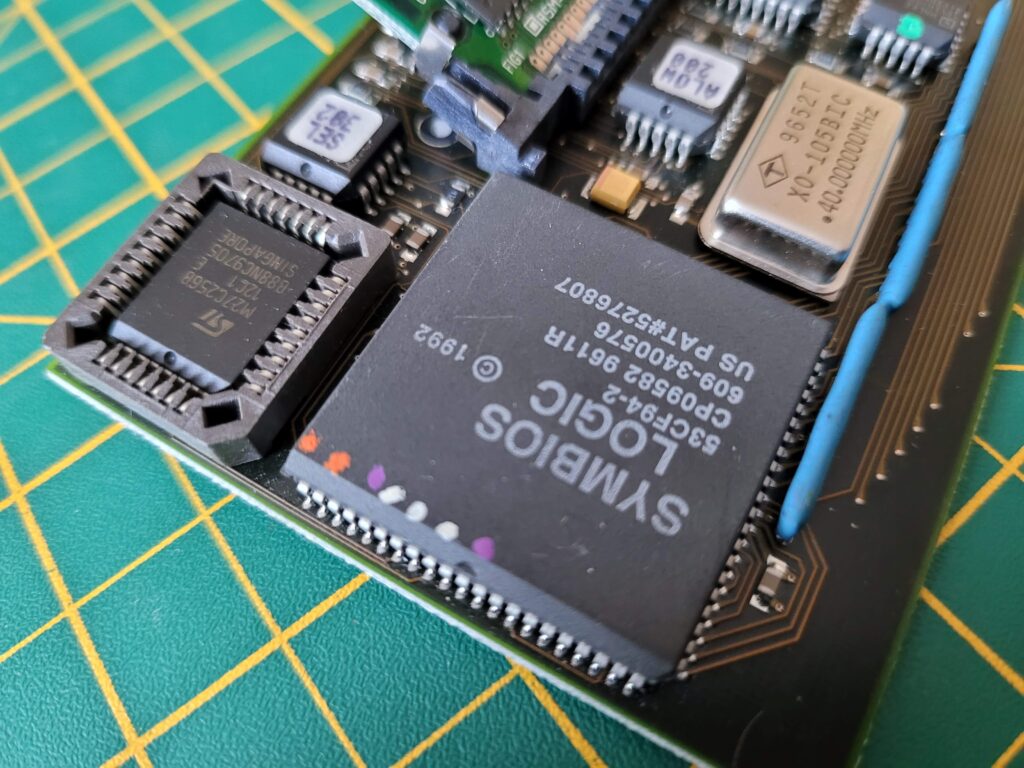
Despite it’s name, the SCSI.device on the A1200 is actually the internal IDE interface. That’s not going to work with our Zip drive so we need to get hold of a SCSI adapter of some kind. If you have a Blizzard trapdoor accelerator card then there was a SCSI expansion made for that. However these are pretty rare nowadays so I would recommend you pick up a Squirrel SCSI interface instead. These devices were made to slot into the Amiga 600/1200’s PCMCIA expansion port and opened up a whole new world of SCSI devices to Amiga enthusiasts.
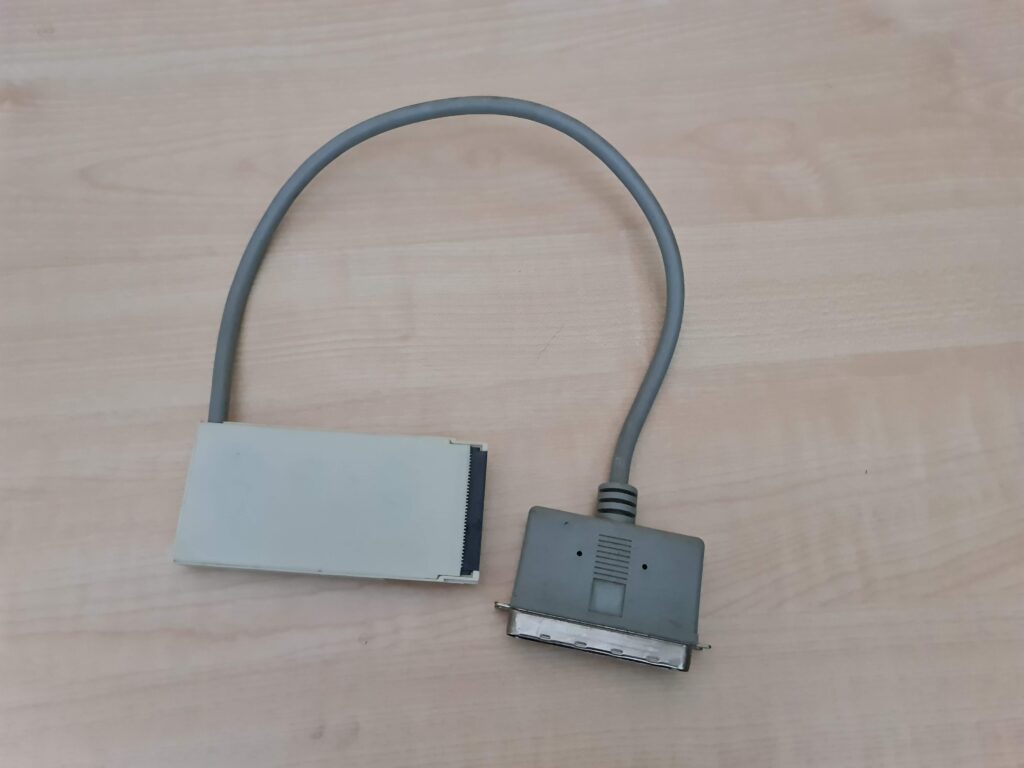
Amiga Squirrel SCSI Device.
The Squirrel SCSI Interface was made by a company called HiSoft but other companies would often bundle it with their own products. I picked up mine as part of a Power Computing CD-ROM drive bundle. Interestingly Power Computing is still going strong, although not surprisingly they don’t sell anything for the Amiga any more.
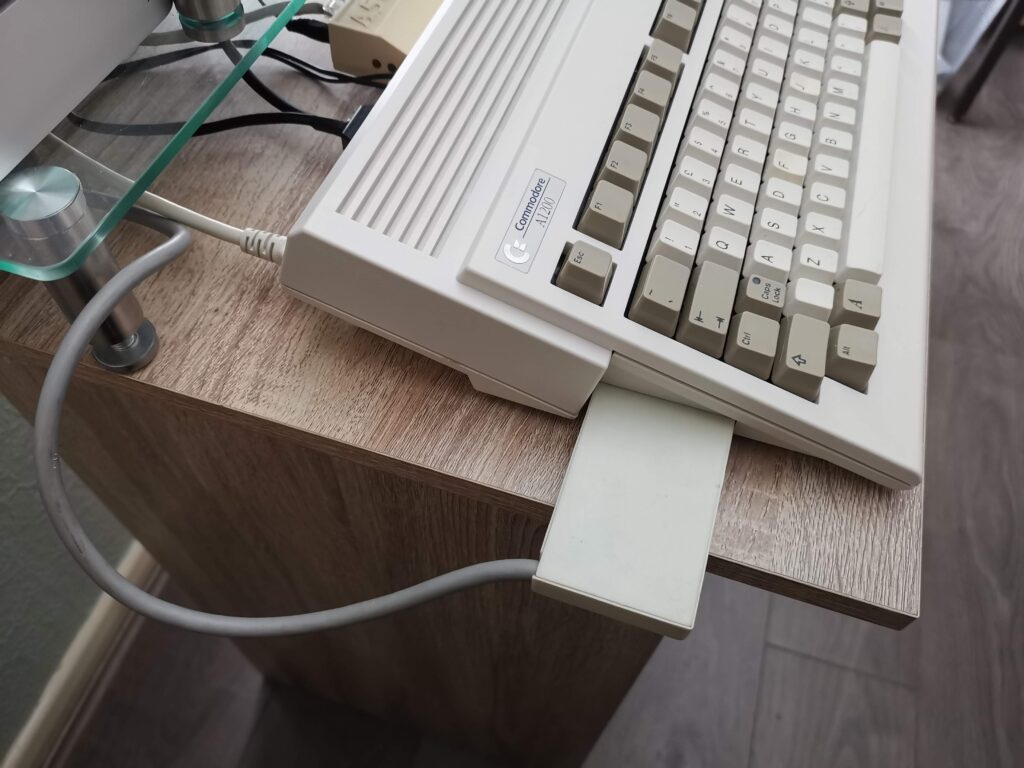
Squirrel SCSI Adapter plugged into my A1200’s PCMCIA Expansion Port.
The Squirrel is just a small box that plugs into the PCMCIA port and has a short cable with a 50 pin male SCSI connector permanently wired into it. No matter whether you buy the Squirrel on its own or with another device we now have another issue.
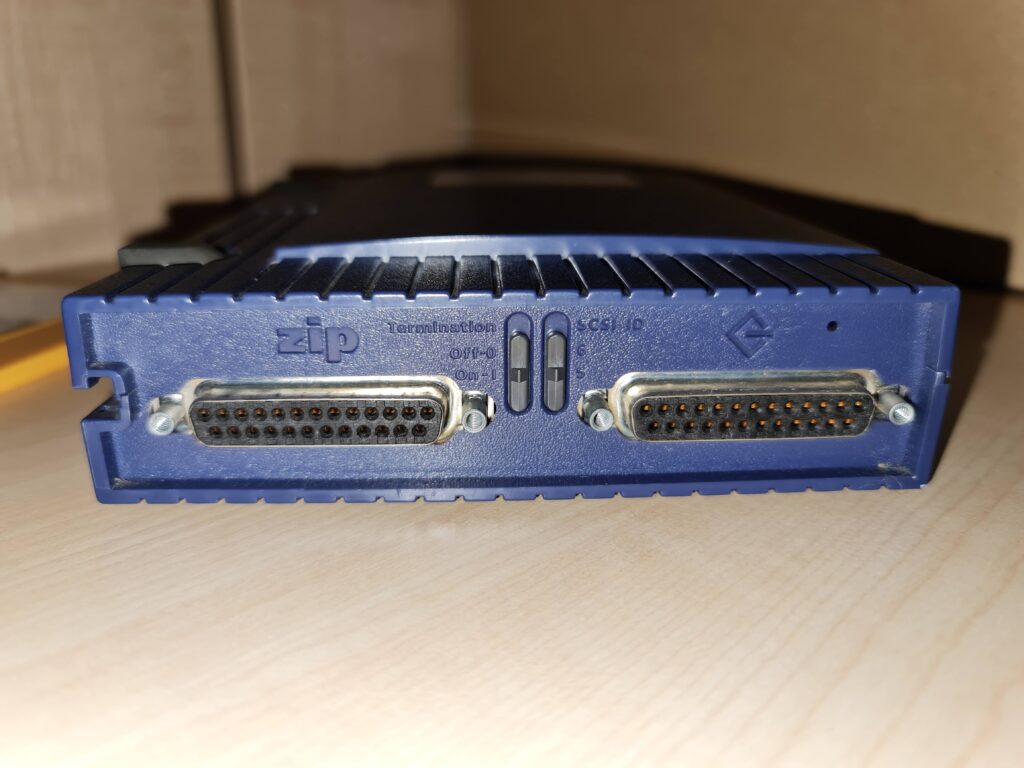
No way our Squirrel SCSI is connecting to these out of the box…
The Zip drive has two D25 female connectors on the back but our only connector from the Squirrel is a male 50 pin Centronics plug. They don’t fit together so we need to get creative with our cabling. Ideally we would need a cable with a female 50 pin Centronics connector one end and a male D25 connector at the other but I was unable to locate one.
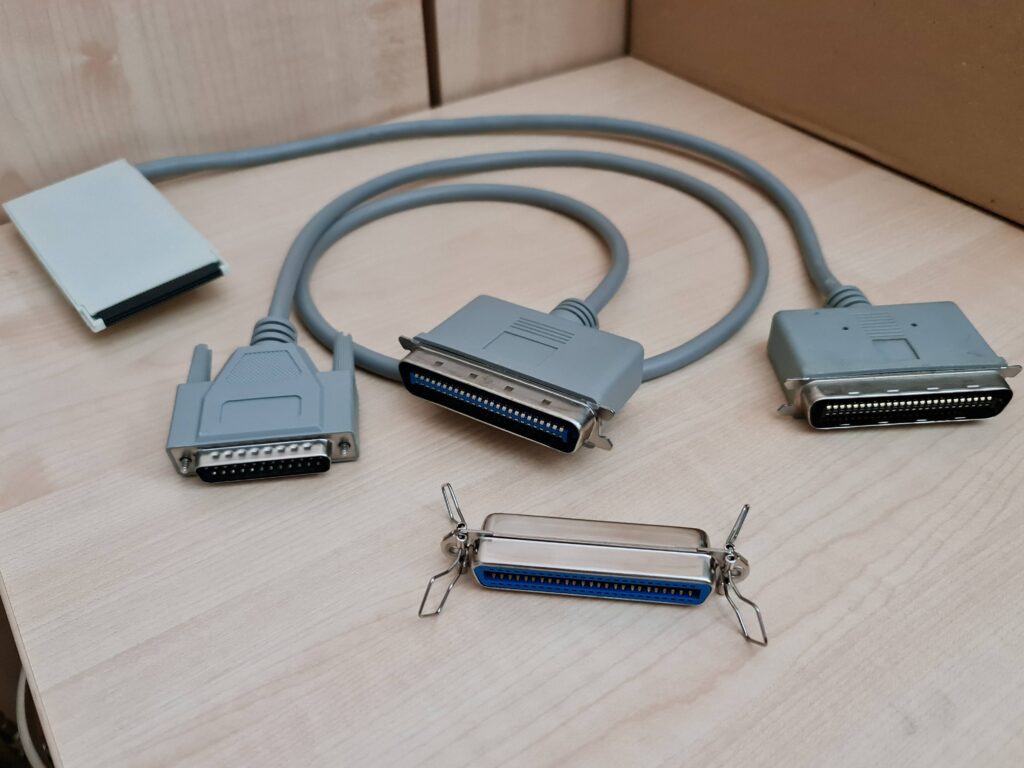
All the hardware needed to connect our Zip 100 Drive.
Fortunately there are still a variety of cables and connectors cheaply available. What I ended up having to do was get a male D25 to male 50 pin Centronics cable and a ‘gender changer’ connector. The latter is basically a double sided female 50-pin Centronics connector.
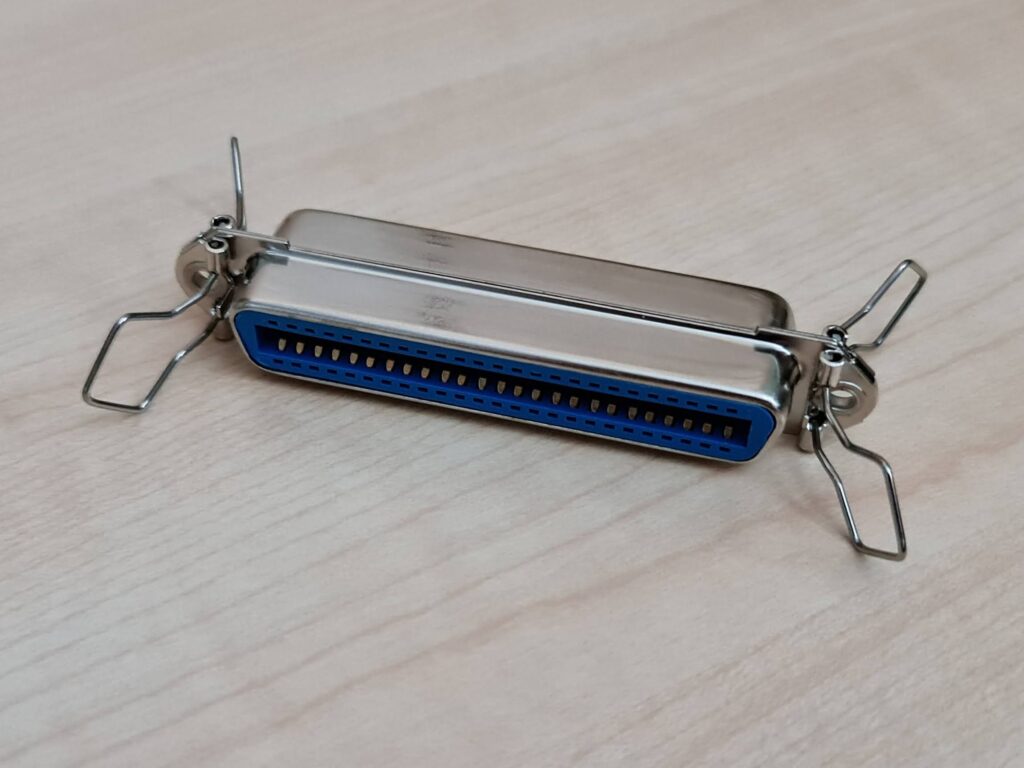
A closer look at the SCSI gender changer.
The gender changer allows us to join the two male connectors from the Squirrel and the D25-Centronics cable together as you can see in the next image.
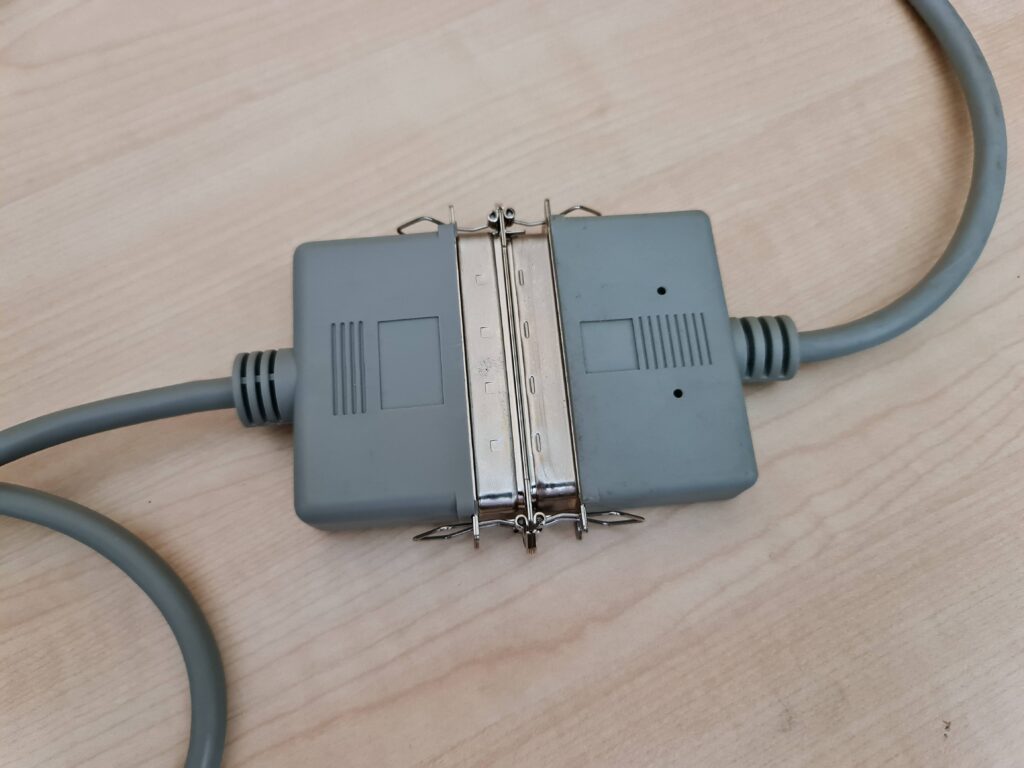
Two male 50-pin Centronics cables connected by means of a gender changer.
SCSI Chains
So now we have our Squirrel SCSI Interface fitted with cables that can actually connect to our Zip 100 Drive. However, before actually connecting everything up we just need to check that Termination is enabled on our Zip drive.
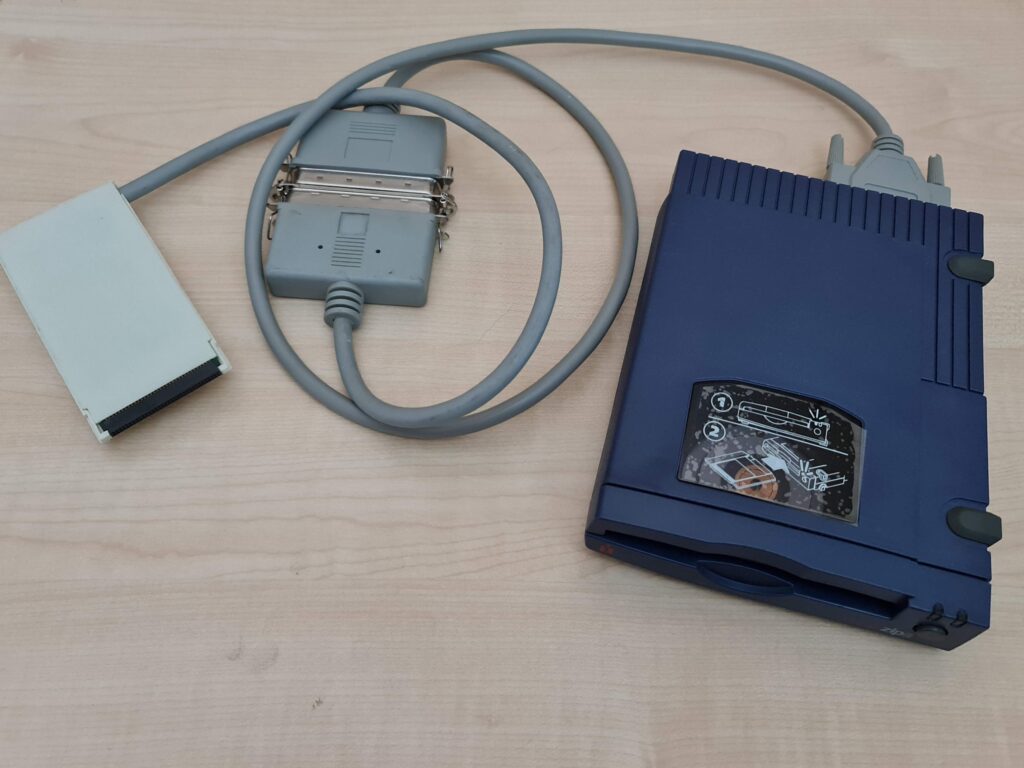
Zip 100 Drive connected to Squirrel SCSI.
I’m not going to go into great detail here but suffice to say that SCSI (an acronym for Small Computer System Interface) is a system that allowed the daisy-chaining of multiple devices to a computer. To enable the computer to be able to identify each device in the chain they were all allocated an ID number from 0 to 7. In the case of our Zip drive we have the choice of selecting ID 5 or 6 via the little switch at the back. As this is our only device either ID will work but I will be using ID 5 for the rest of this guide.

Zip 100 Drive with termination set to ‘on’ and ID set to ‘5’.
The other peculiarity with SCSI chains is that both the first and last devices on the chain have to be ‘terminated’. The Squirrel SCSI adaptor is actually classed as the first device (ID 0) and is already terminated. The Zip drive will be the last device on our chain and so must also be ‘terminated’. Often times on other devices you would have needed to plug a physical Terminator (a bit like a blank plug) into an empty socket to terminate a device. Fortunately the Zip drive has the circuitry built-in and selectable via the switch on the back.
Once the switches are set correctly (as shown in the image above) the Zip drive can be hooked up to the Squirrel and we are ready to proceed onto the next phase.
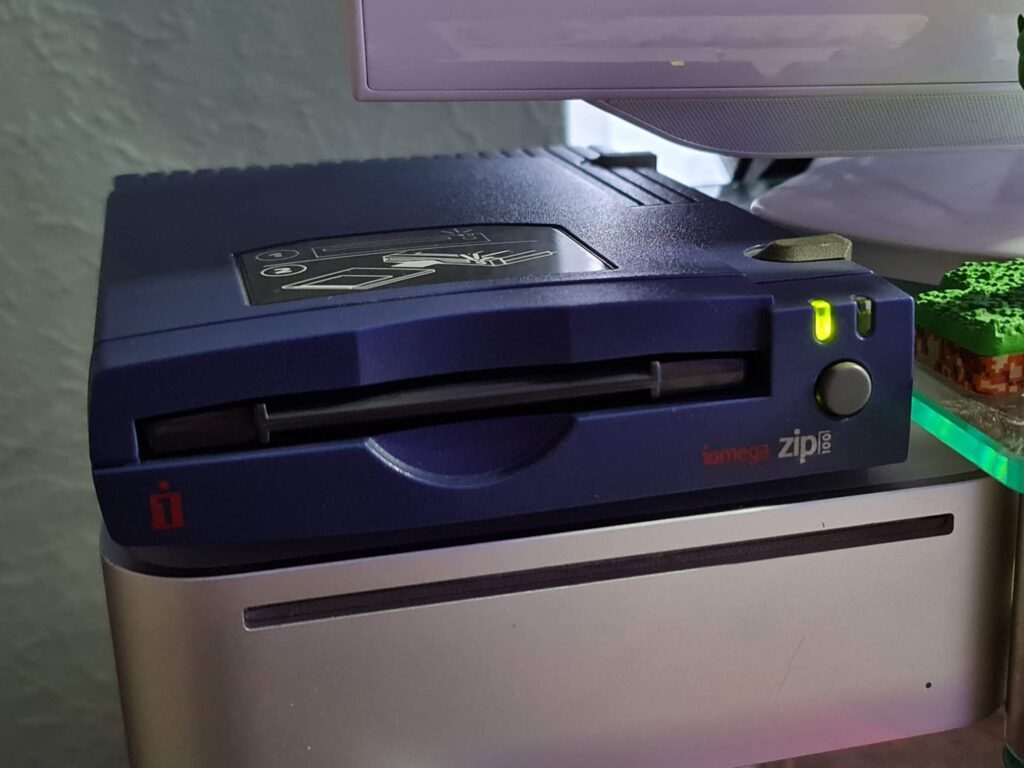
My Zip Drive (sat on top of my MorphOS machine).
Getting the Zip 100 Drive to work with Amiga Workbench
I’m using AmigaOS 3.1.4.1 but I would assume this will work just as well with 3.0 and above.
To get the Amiga to actually read and write to our Zip disks we need to create a ‘Mountlist’ for them. It actually took me a few days of tinkering with different mountlists off Aminet before I found one that would actually work reliably. I’ve successfully formatted several dozen disks with this mountlist so I’m pretty happy with it now.
Now I could have created a mountlist that would allow the reading of PC formatted disks but as Zip drive PC compatibility ceased with with the demise of Windows XP I didn’t feel it would be very useful. Consequently this mountlist is purely for Amiga use.
Now as you will discover, there is no mountlist on your Amiga for Zip disks, even in the storage directory, so we must make our own. To do this we need to copy a spare one from the Storage/DOSDrivers directory and place it into the Devs/DOSDrivers directory. I used the AUX mountlist but any of them will do. This can be achieved by opening up a Shell prompt and typing the following commands:
copy sys:storage/dosdrivers/aux sys:devs/dosdrivers/ZIP0
This copies the AUX mountlist to the correct location and renames it at the same time.
We also need the icon file so press cursor up to bring back your last command and edit it to look like this:
copy sys:storage/dosdrivers/aux.info sys:devs/dosdrivers/ZIP0.info
Now open up that newly created ZIP0 file in the editor of your choice. If you don’t have one then simply enter this command into the Shell to use the built in text editor:
ED sys:devs/dosdrivers/zip0
Delete all the existing text in the file and then enter the following exactly as shown below:
FileSystem = L:FastFileSystem
Flags = 0
Surfaces = 2
BlocksPerTrack = 64
SectorSize = 512
Mask = 0x7ffffffe
MaxTransfer = 0x0ffffffe
Reserved = 2
Interleave = 0
LowCyl = 0
HighCyl = 1535
Buffers = 50
BufMemType = 0
StackSize = 600
Priority = 10
GlobVec = -1
DosType = 0x444f5301
It should look like this on the Amiga:
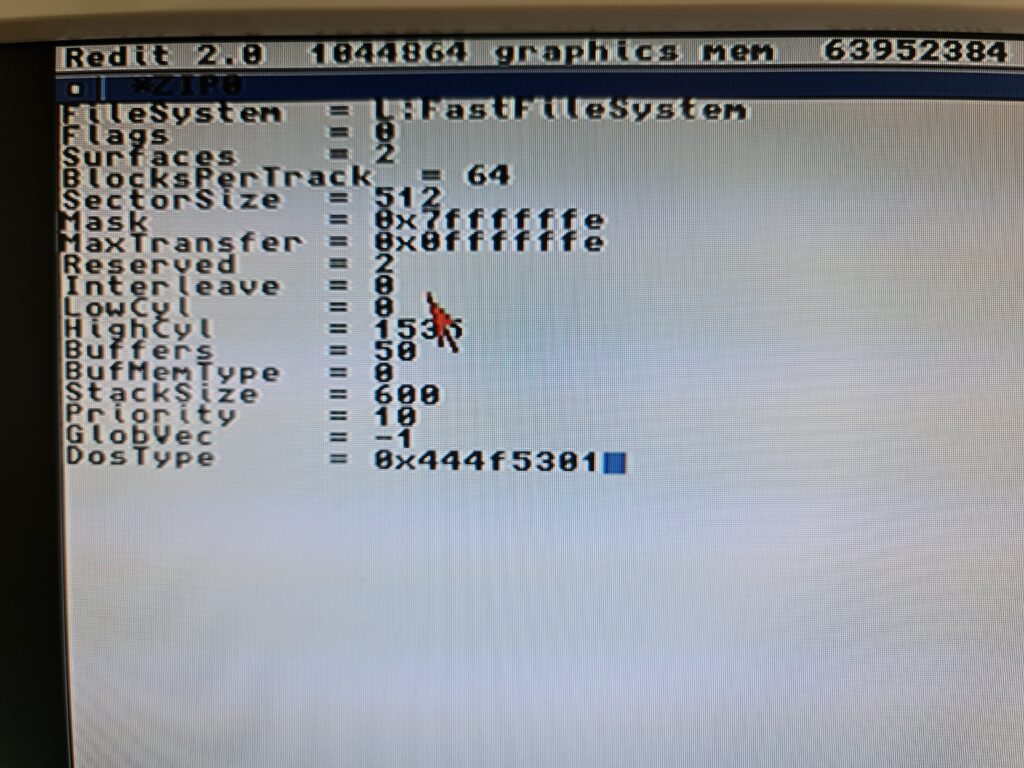
ZIP0 Mountlist entries
Once you’ve entered everything above, triple check it. Once you are certain it is correct make sure you save the edited file!
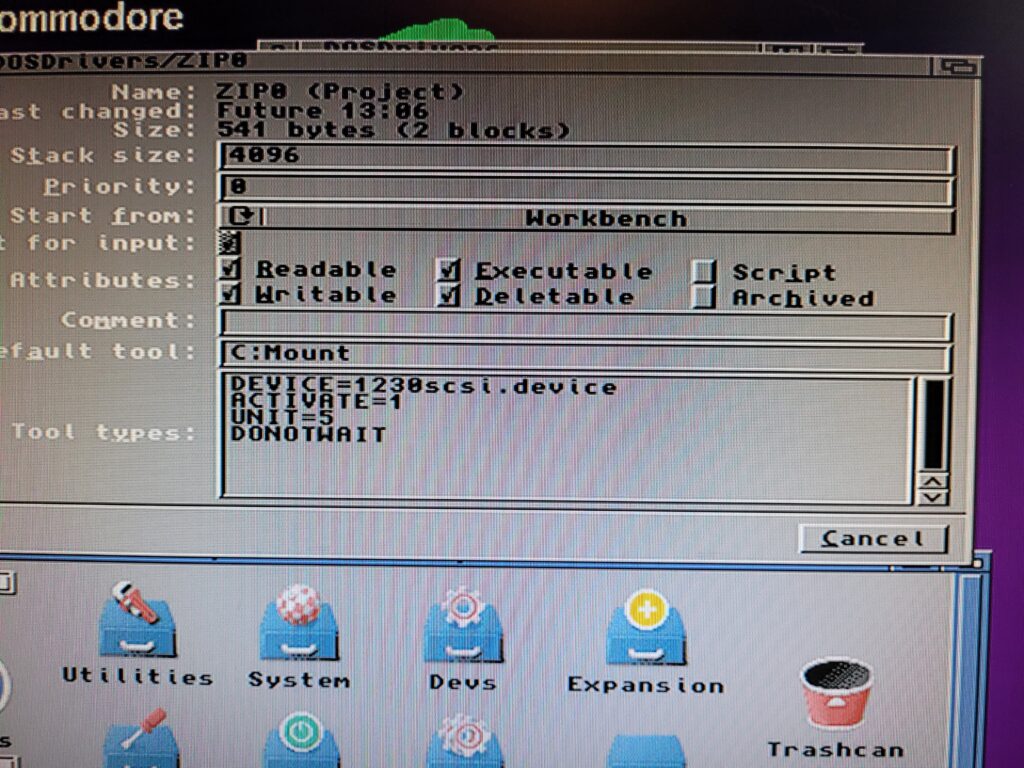
We’re not quite done yet. We need to add a few Tooltypes to provide the Amiga with a bit more info to go on. Click on the ZIP0 icon and select ‘Information…’ from the Icon Window and edit the Tooltypes.
Delete any existing entries that may be in the Tooltypes window and replace them with these:
DEVICE=squirrelscsi.device
ACTIVATE=1
UNIT=5
DONOTWAIT
It should look like this when you’re finished:
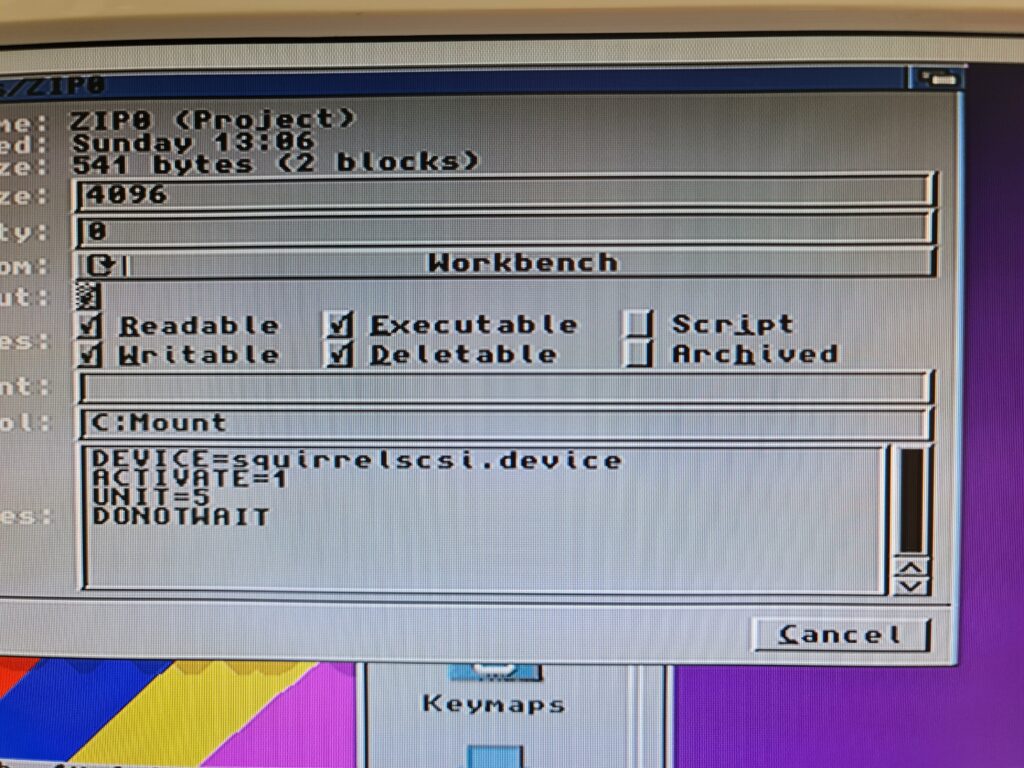
ZIP0 Icon Tooltype entries
Check what you’ve entered is correct and then click save and reboot your Amiga. Pop a Zip disk in the Zip drive and it should pop up on the desktop looking like the image below. If it doesn’t then you will need to go back through the above and check you’ve got everything right.
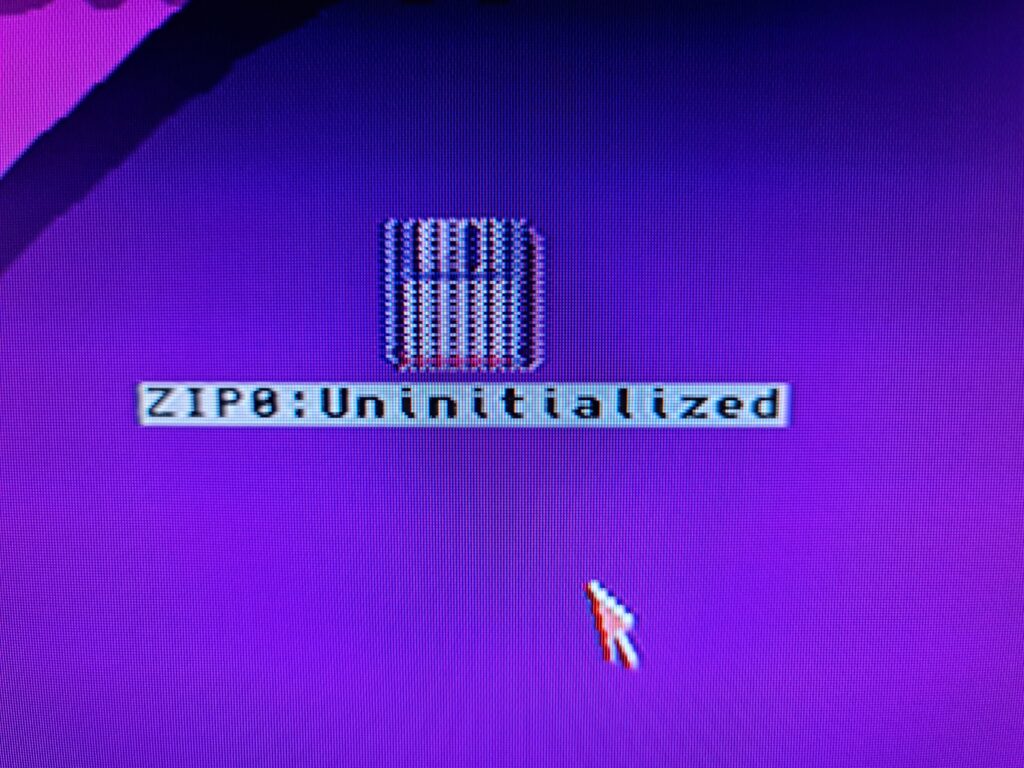
An uninitialized Zip disk.
Zip disks come formatted for Macs/PC’s so they will need formatting before they are useable on the Amiga. Just format them as you would any regular floppy disk. Click on it and select ‘Format Disk’ from the Icon menu. Give the disk a name if you like or leave it as ’empty’ (you can always change it later). The rest of the settings can be left as they are. I strongly recommend you do a full format as these disks are old now – better to discover any issues with them before you start to use them rather than later on when it may be too late! Better yet use IOTools – more about this later.
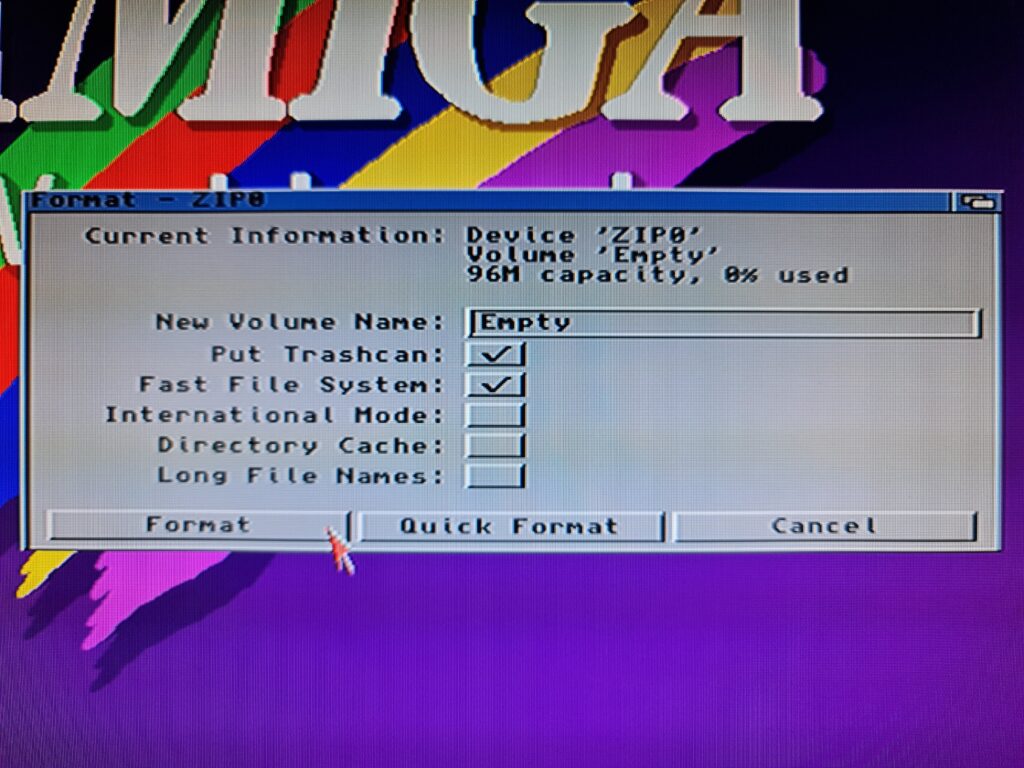
The Workbench Format Disk window for a Zip disk.
It takes around 5 minutes to do a full format of a Zip disk so go and have a cup of tea while it finishes.
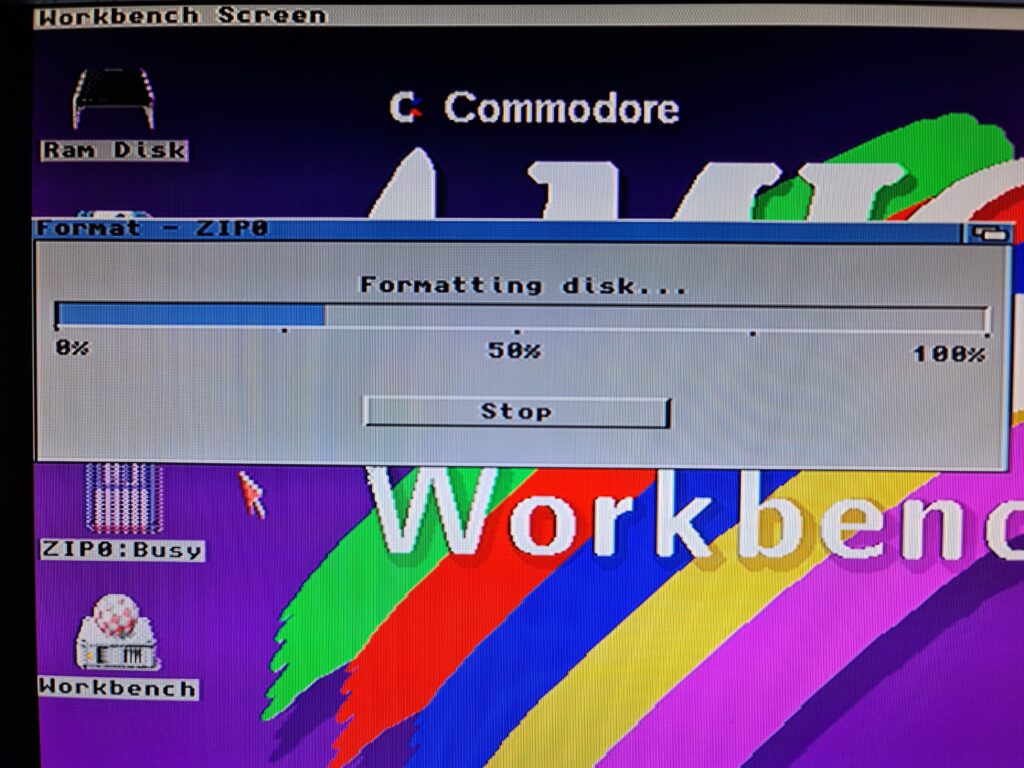
Formatting progress indicator.
Providing there are no errors you should be presented with a nice formatted disk icon.
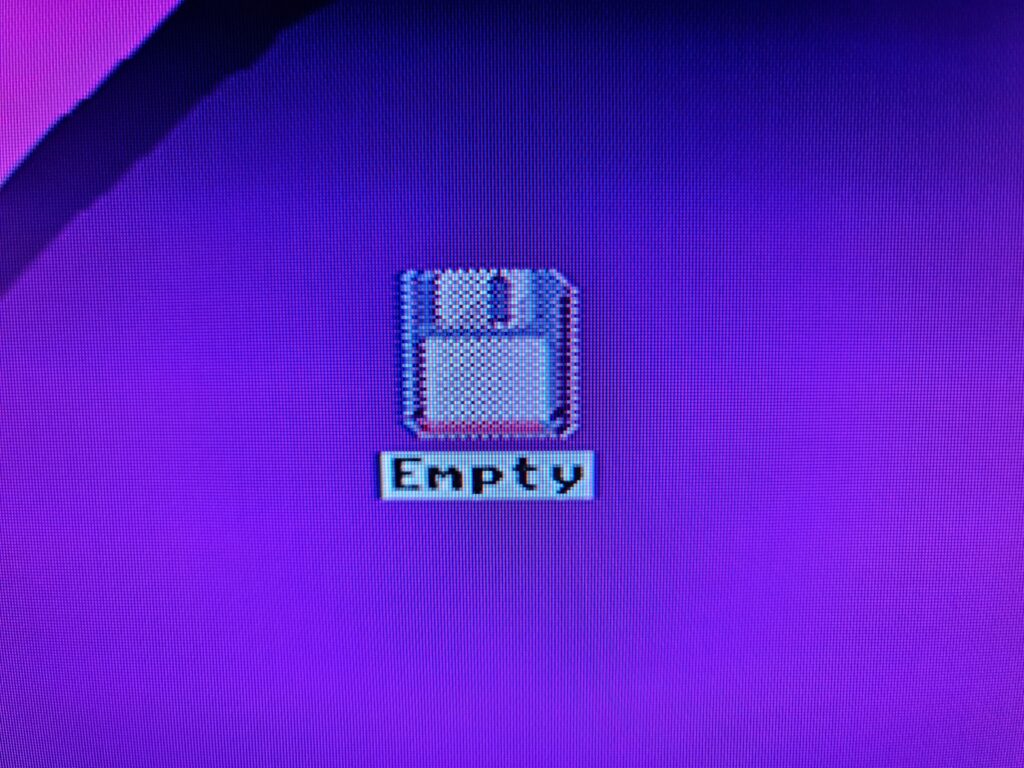
Formatted Zip disk icon.
It may look like an ordinary floppy disk, but on closer inspection you can see that this disk has nearly 100MB of space available.
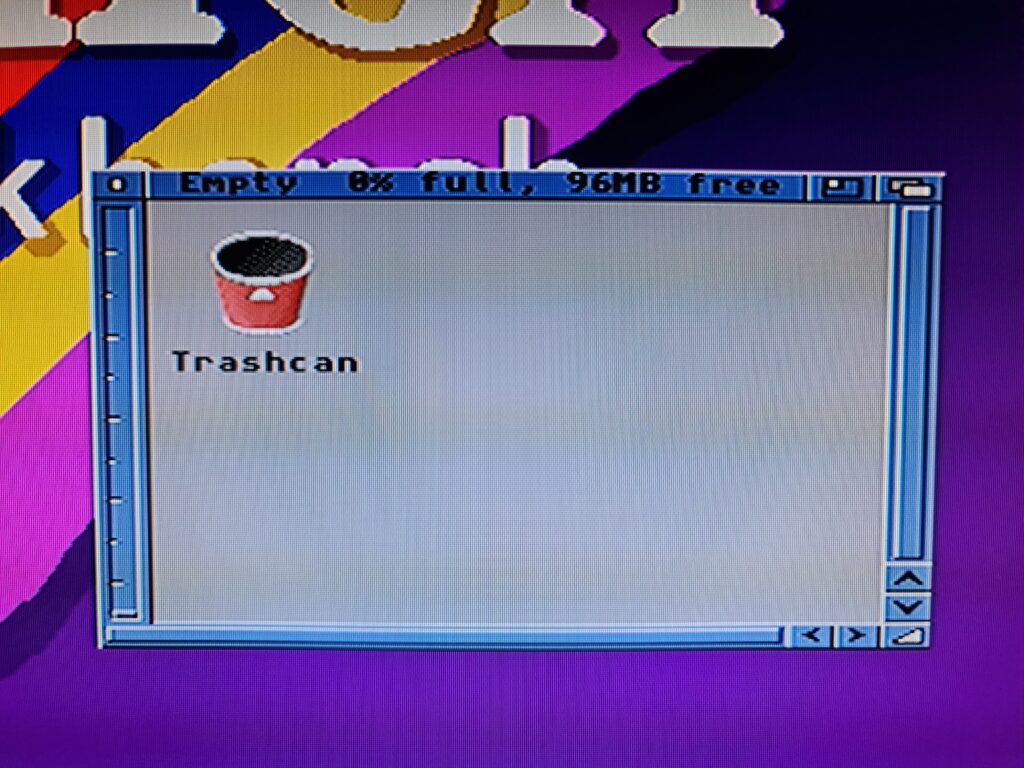
Zip disk with 96M free space.
Iomega Tools
Now by all means we could leave things here, I mean everything works as it should after all. However I’d recommend installing Iomega Tools as well. This software provides a lot of extra functionality that would otherwise be lacking from the Amiga experience. Things like a software eject, password protecting disks and access to hidden drive settings.
One of the main reasons I like this software is that it offers the ability to override the default sleep time of the Zip drive. By default your disk is kept spinning with the heads in constant motion for 15 minutes before spinning down after any disk activity. This will generate a lot of unnecessary wear and tear on both the disk and drive which is something we should be avoiding. Zip drives aren’t getting any younger after all!
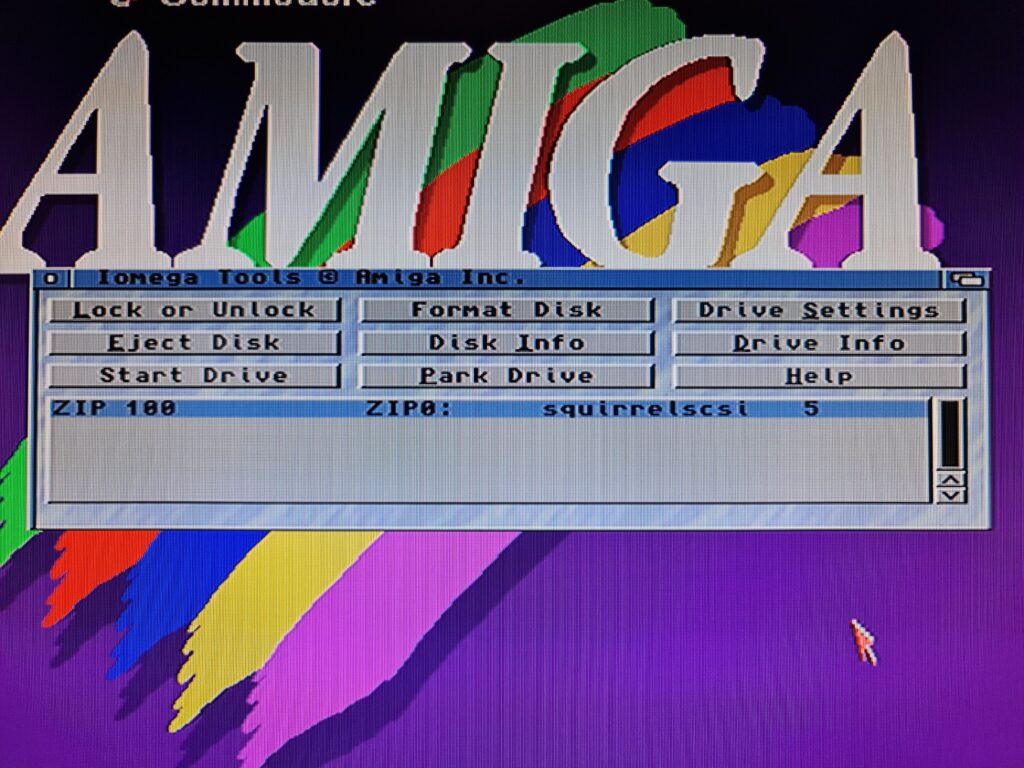
IoTools Main Window.
You can download this free software off Aminet. There is no installer – just copy the main IoTools program to either your WBStartup (recommended) or your Workbench Tools directory.
WBStartup is recommended so that the software is always running. Things like the sleep timer settings are stored in the software itself so it needs to be running to have any effect. You can still install it elsewhere if you don’t intend to use the Zip drive all the time and are happy to run it manually whenever you do use it. Alternatively you can select ‘Park Drive’ and ‘Start Disk’ to manually stop and start the drive respectively.
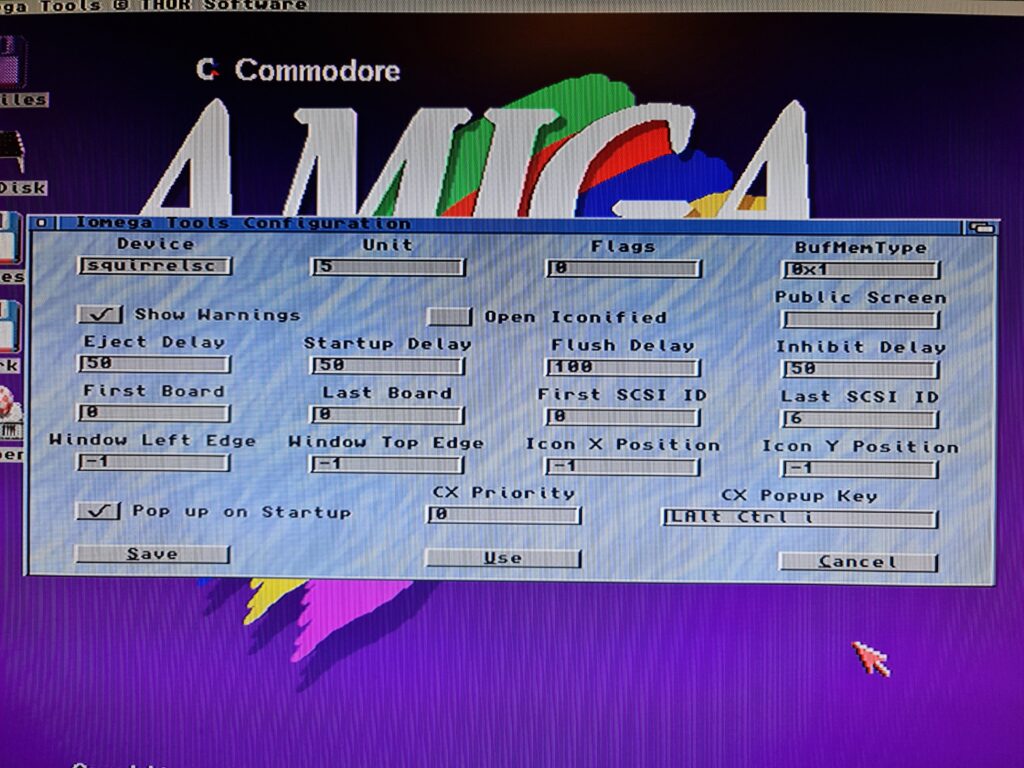
Amiga IoTools Settings Screen.
You need to configure the settings of your SCSI device and drive for the software to work fully. The settings that worked for me are shown in the image above. Most boxes are set to their default. The ‘Device’ setting which is truncated in the image is ‘squirrelscsi.device’. If you do have the software running every time you boot your Amiga then you might want to tick the ‘Open Iconified’ box which will help keep your Workbech screen tidy.
Drive Settings is where the sleep countdown is located. I recommend a time of 5 minutes as a good compromise between convenience and preservation.
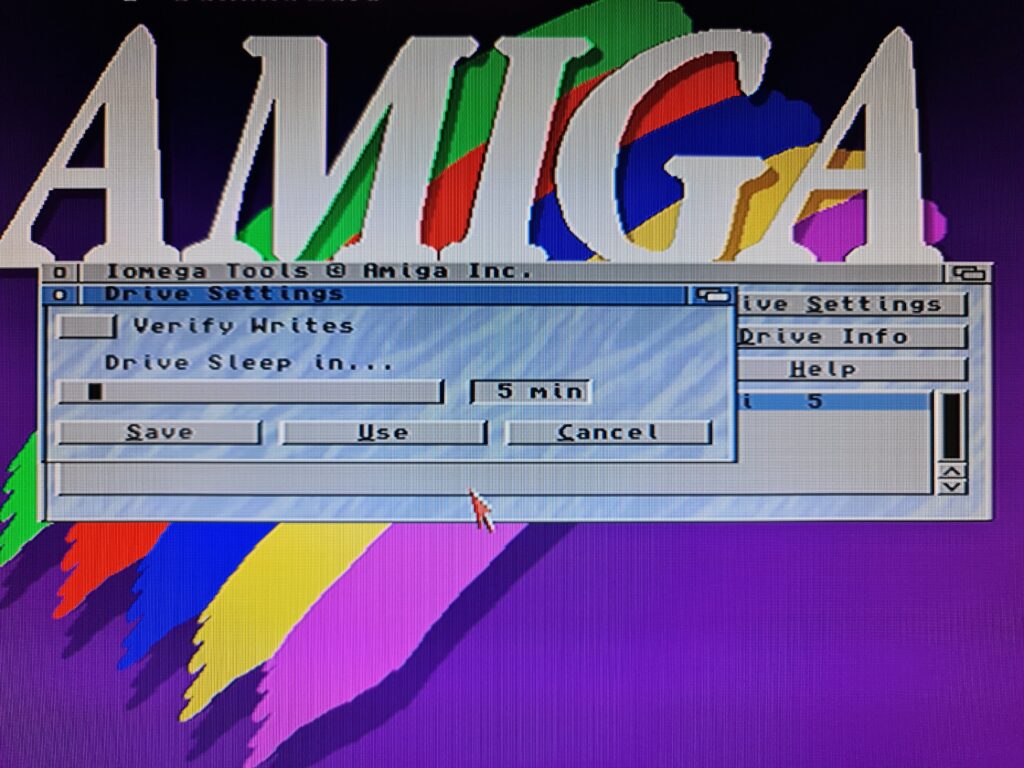
Zip Drive Sleep Settings.
The Lock or Unlock Media screen is where you can password protect your disks or remove the protection completely.
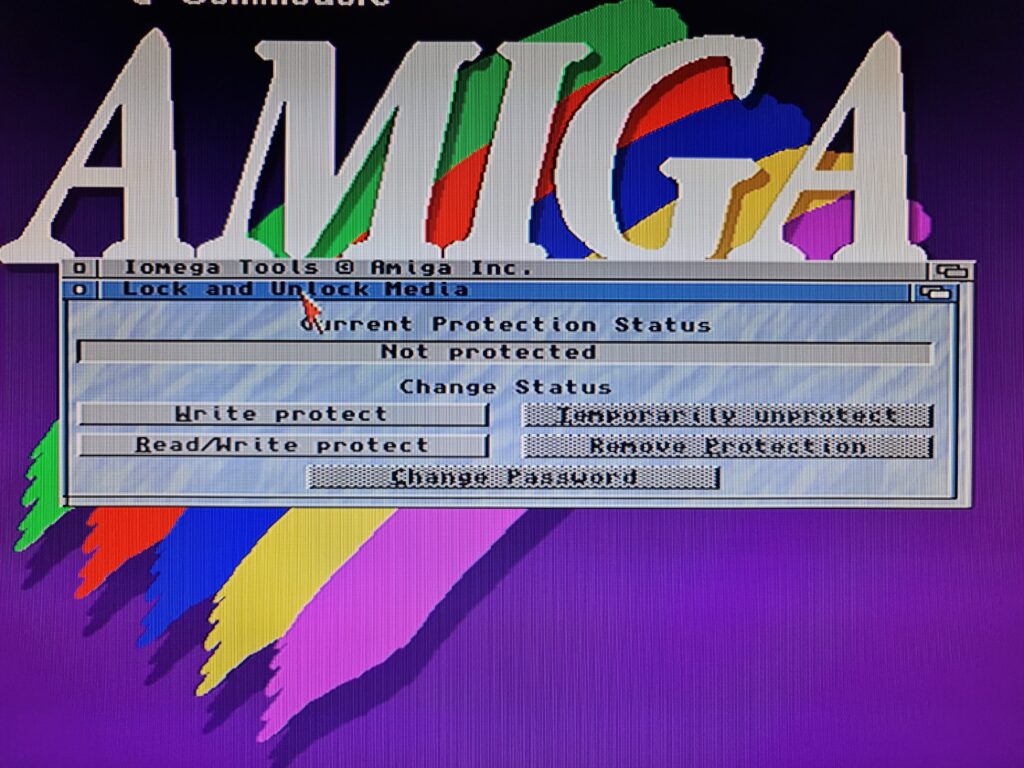
Password protect your Zip disks here.
The Format Disk window is incredibly useful and is what I used to format all of my disks. Choose the Format and Verify option and it will do a full format whilst also performing a thorough check of the Zip disk, mapping out any bad sectors as it goes. This takes approximately 9 minutes per disk which is a lot longer than even the full format I mentioned earlier. However I feel it is worth the investment of time for the peace of mind it offers.
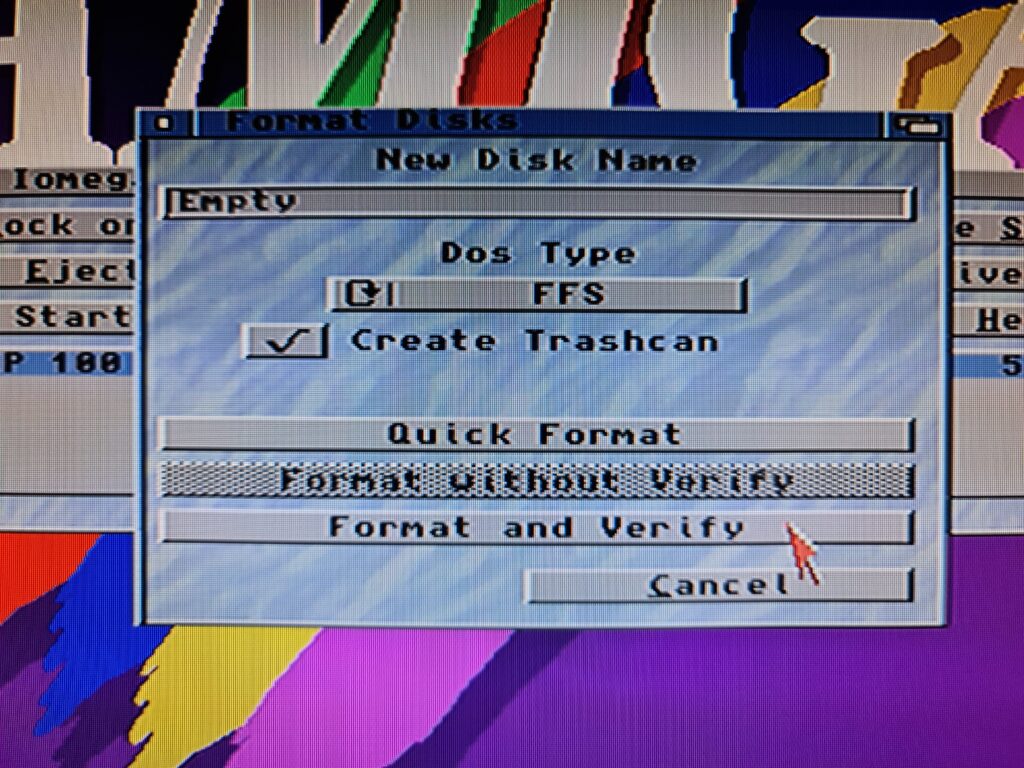
Format and Verify option will make sure your disks are in good shape.
The Disk Status screen offers some interesting stats about the currently inserted Zip disk…
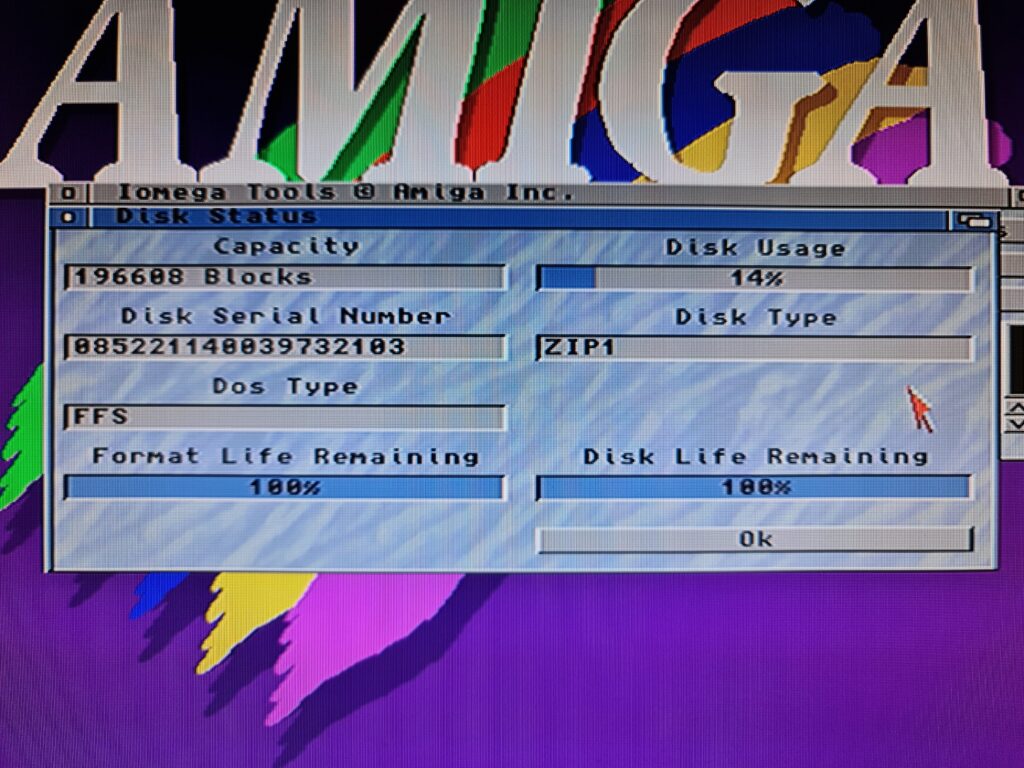
Amiga IoTools – Disk Status Screen.
As does the Drive Status screen.
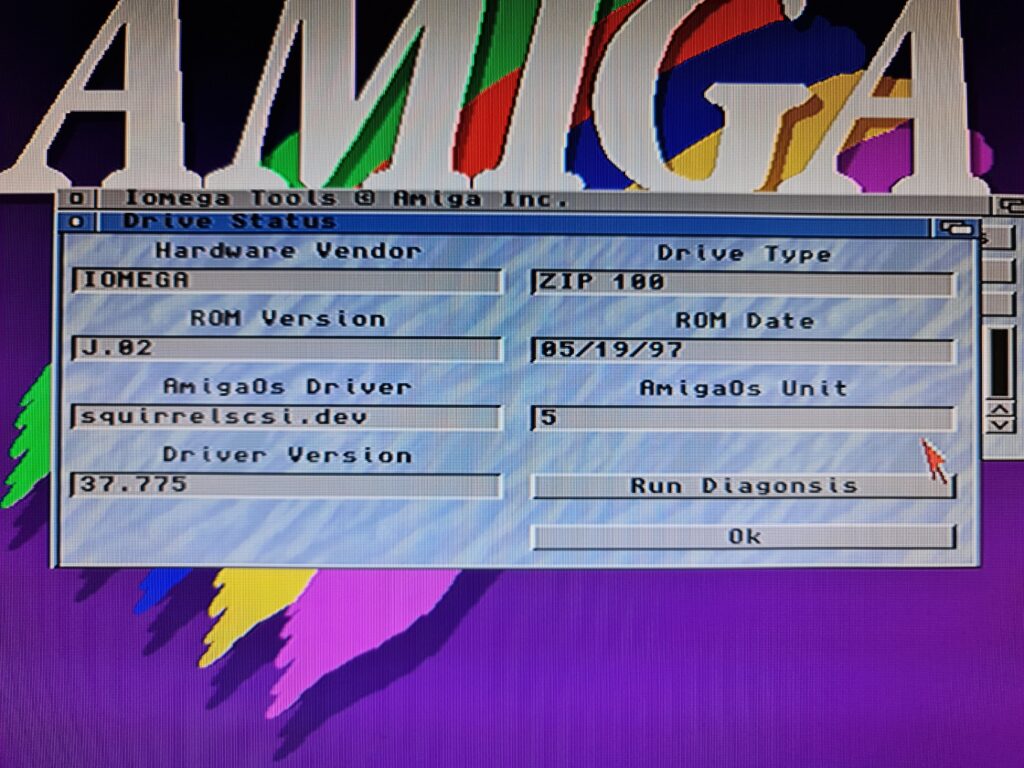
IoTools Drive Status Window.
If you have a disk in the drive the ‘Run Diagnosis’ option will do a thorough check of the drive to make sure it is operating correctly (it doesn’t delete any info on the disk).
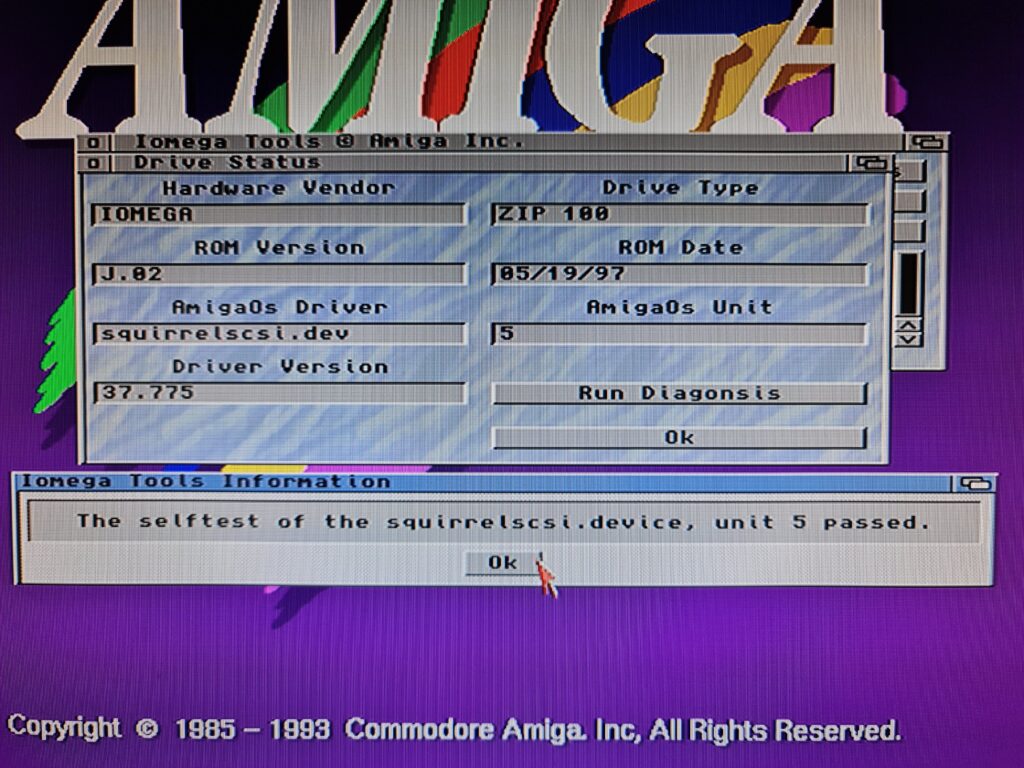
IoTools Drive Diagnosis complete.
Amazingly the software is still supported too – it was last updated in May 2020. I even contacted the author, Thomas Richter, with a query and he got back to me within minutes. How’s that for Amiga support!
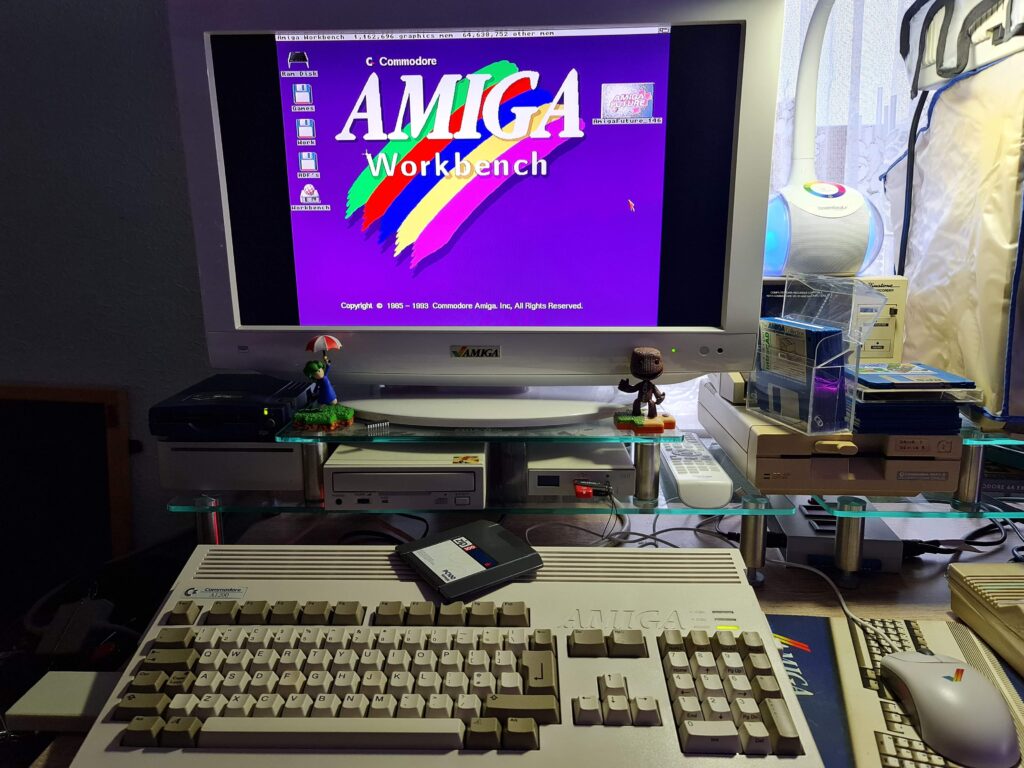
Zip Drive is now part of my A1200 setup.
Anyway I really enjoyed my little Zip drive adventure and am making good use of it to organise my collection of Amiga ADF’s, Music and more.
I do hope you found the guide useful… it has taken me many an evening and weekend to pull all the info together and get it into a cohesive post. If you found it interesting/helpful then please let me know in the comments below!
