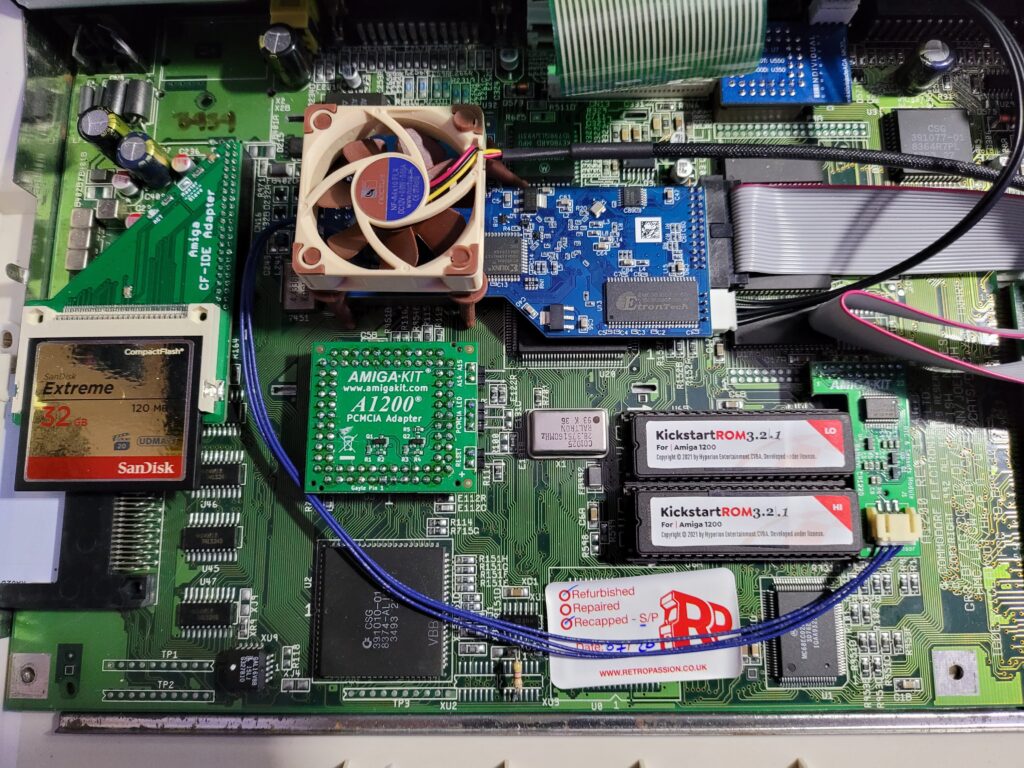
The A1200 PCMCIA reset bug is an annoying glitch in the implementation of the card slot on the A1200 that was never fixed by Commodore. In a nutshell the Amiga 1200’s Gayle chip fails to reset PCMCIA cards during system resets such as when you press ‘CTRL A A’. Whether this is an issue for the user largely depends on the card being used but my network card is definitely one of those that is affected by the bug. Without either a software or hardware fix it requires a full power cycle to restore card functionality every time the bug manifests.
I’ve written about this issue before where I described fixing it using two command line programs called CardPatch & CardReset on Aminet. That software solution served me pretty well up until recently when I ran into the issue again after doing a clean AmigaOS3.2 install. After scratching my head wondering why Roadshow wasn’t working I decided it was time for a permanent hardware fix so that I would never encounter the issue again.
My Hardware Fix
A quick browse around my favourite Amiga suppliers revealed that AmigaKit made one such device and they had it in stock. Fast forward a couple of weeks and I had one sitting on my desk.
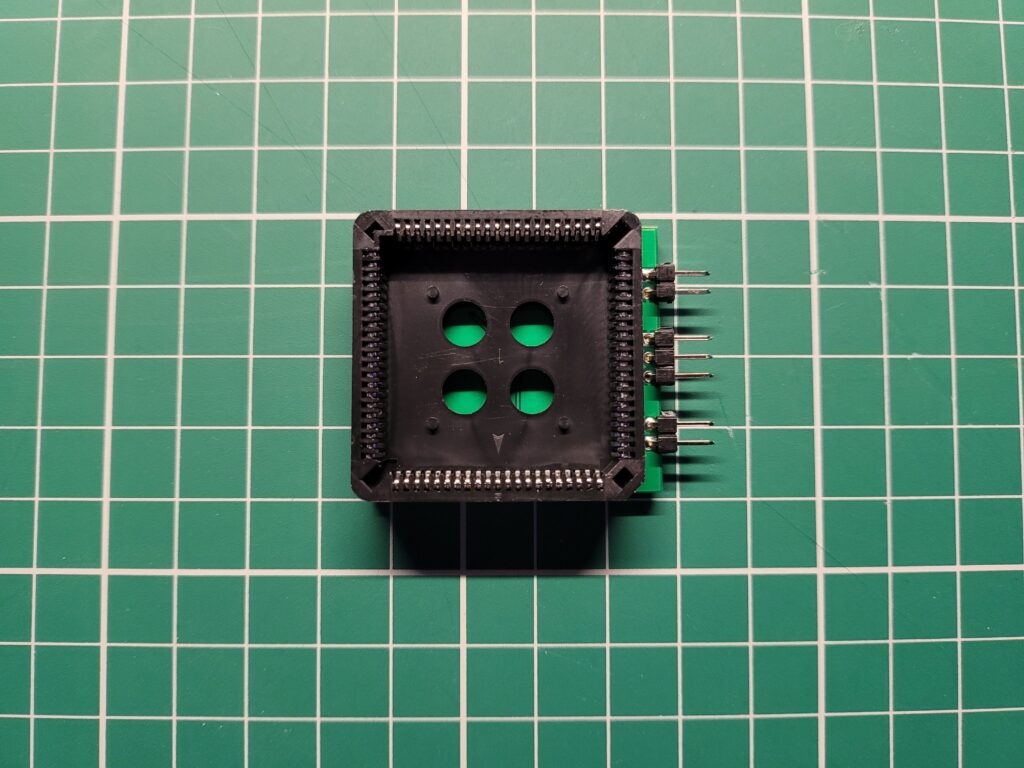
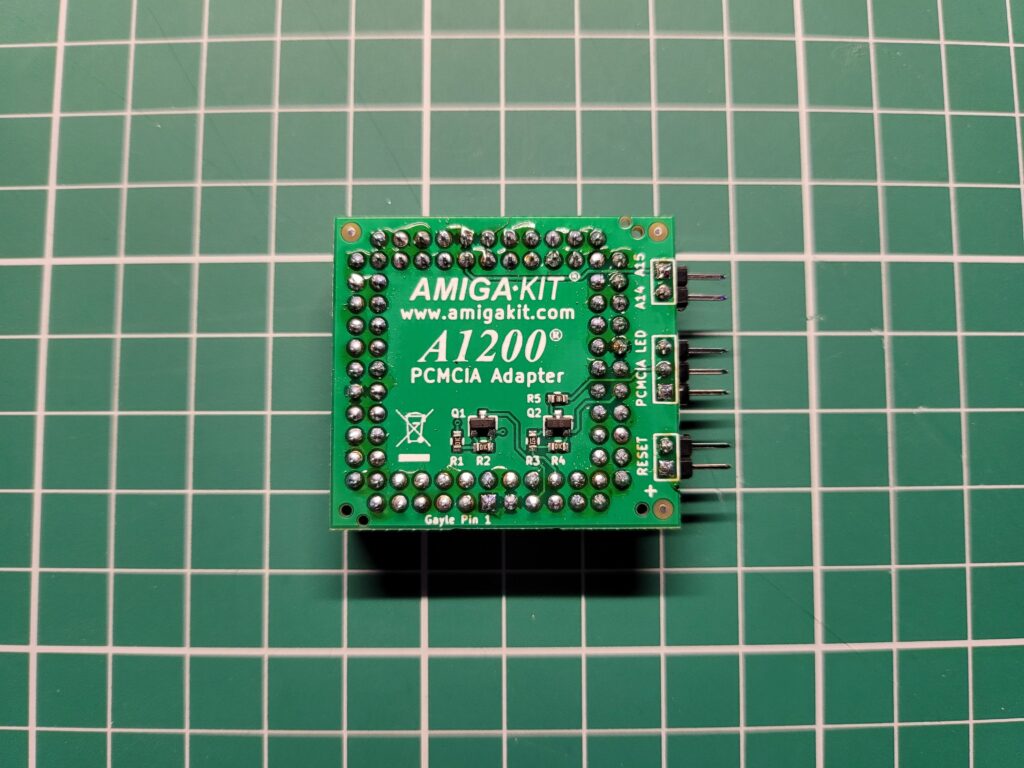
The adapter consists of a PLCC socket attached to a small circuit board that contains the electronics for the fix.
Besides the reset bug fix the device also includes pin headers for attaching a reset switch, a PCMCIA activity LED and also A14 and A15 signals for other devices such as clockport expanders. It’s a well made, neat little device.
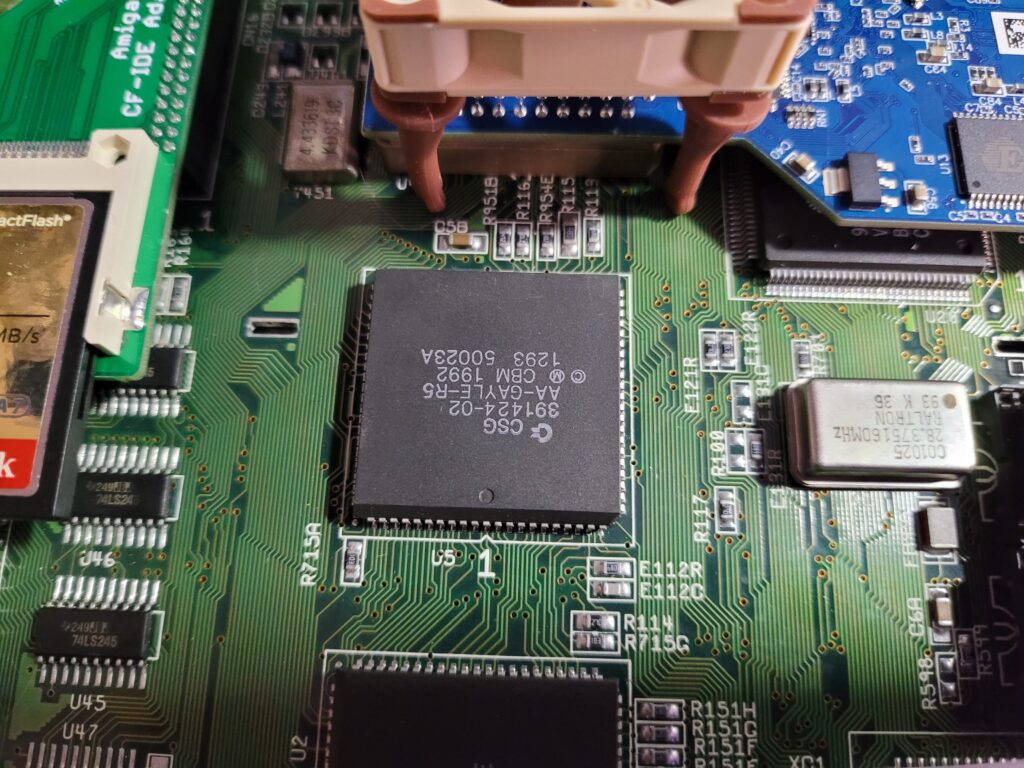
The device is designed to sit on top of the A1200’s ‘GAYLE’ chip which is where the fault stems from.
Installing the Adapter
To install the hardware fix you simply place the PLCC socket over the top of the GAYLE chip. However before doing this you must make sure that the device is oriented correctly otherwise it won’t work and may even damage your Amiga.
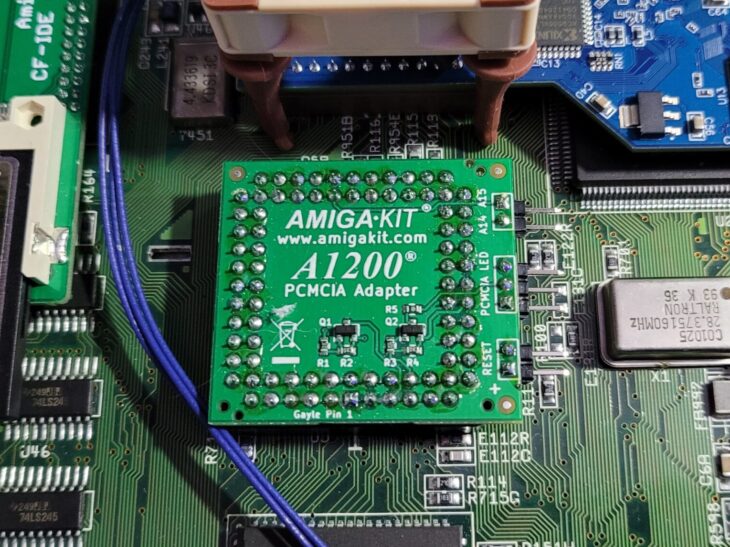
The adapter circuit board has ‘Gayle Pin 1’ written along the bottom edge and if you look closely on the A1200 mainboard below the Gayle chip you will see a ‘1’ marked beneath it (when viewing from the front). Make sure that these two are on the same side. Another, probably easier, way to tell is that the writing on the board should be the right way up once installed (viewing from the front). The pin headers should point towards the right hand side of the machine where the floppy drive is and away from the PCMCIA port too.
It takes a some force to get it to seat properly and the top of the board is not particularly finger friendly so be careful. It should click into place securely and not wobble around at all.
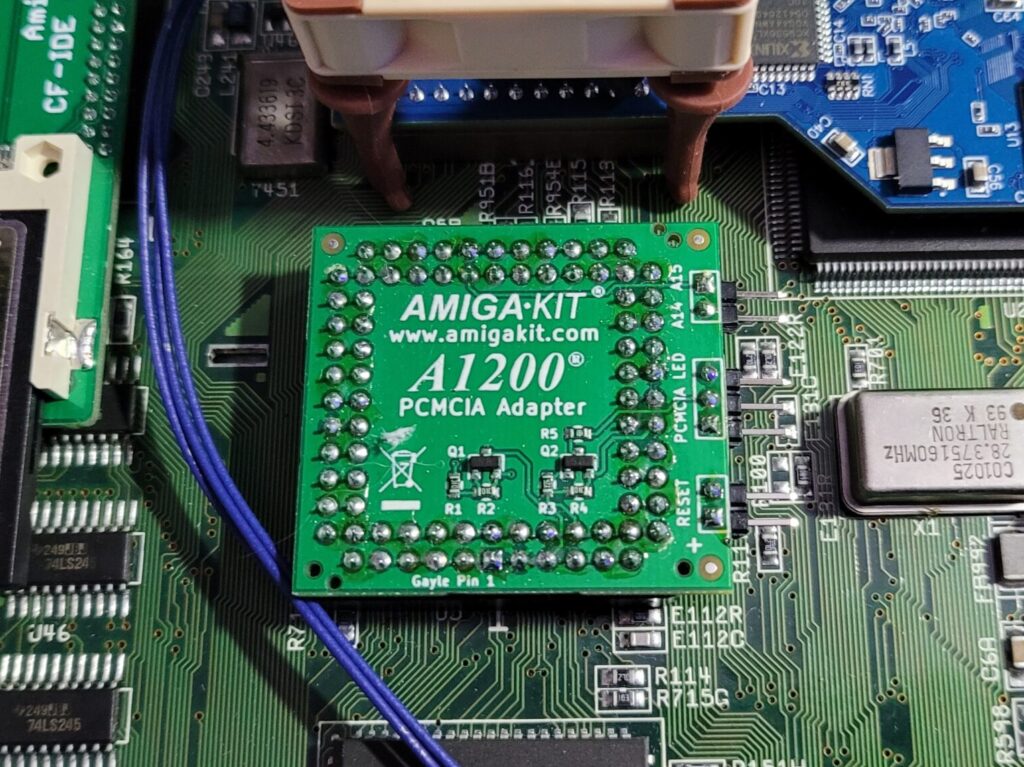
AmigaKit PCMCIA Reset Fix installed on the Gayle chip. Note how ‘Gayle Pin 1’ on the adapter lines up with the ‘1’ on the mainboard.
There’s nothing else to connect and no software to install. Once the device has been installed you can close up the A1200’s case and switch it on.
If everything has gone to plan the Amiga will boot up normally with no visible signs that anything has changed… except that PCMCIA cards will just work as intended now. No more unresponsive network cards after a reset from now on then!
I’ve had the device fitted for a week now and experienced no issues with my cards since. It does exactly what it says on the tin.
The expansion pin headers on the board are an interesting addition. I’ll probably add a reset switch to it in the near future as that would definitely come in handy. Not sure about the PCMCIA LED as I don’t use my CF adapter that often.
Anyway, if you are coming up against the A1200 PCMCIA reset bug and want a ‘fit and forget’ solution I highly recommend this; it’s cheap, easy to fit and does the job.


