Lyonsden Blog

Tag - Floppy Drive

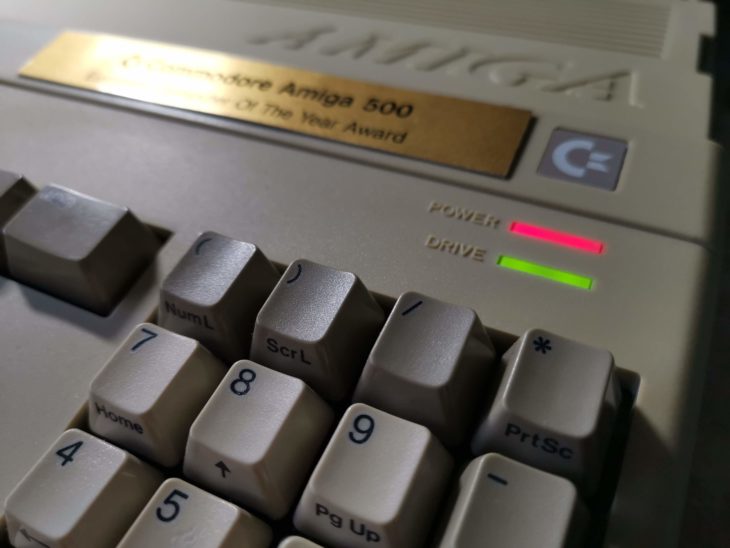
Modding Amiga 500 Floppy LED to Display IDE Activity

Introduction

Unlike the Amiga 1200, the A500 was never designed to allow the fitment of an IDE Hard Disk Drive (HDD) inside it so naturally it never included an HDD activity LED. For the longest time this was never really an issue. Sidecar expansions such as the A590 were the only way to add HDD’s to the A500 and they came with their own drive activity LED. However, now that many owners are fitting expansions like the Vampire into their Amiga 500, things are a little different. These new devices facilitate the use of 2.5″ HDD’s or Compact Flash (CF) cards inside the casing of the A500, something that was never possible before.

The problem with this is the lack of a drive activity light. It can be quite disconcerting at times when you turn on your ‘Vampired’ Amiga 500 and nothing appears to happen. You sometimes wonder if it’s actually booting up or simply frozen. The same issue crops up whilst loading a game or running a program. There’s simply no way to tell if your Amiga is doing anything, especially if you’re using a CF card as they are completely silent. At least if you have a 2.5″ HDD they do at least make some sounds whilst being accessed.

Wouldn’t it be great if you could add a hardware activity light to your A500 to solve this issue? Well, recently I stumbled across a nifty little mod from Arananet that claimed to allow you to do just that by using the Amiga 500 floppy disk activity LED to show IDE HDD/CF activity. It’s called the ‘IDELED’ and is only €7 plus postage so I ordered one and sat back waiting for it to arrive. (Direct link to the Amiga 500 IDE activity LED can be found here).

Incidentally, if you fancy making this modification yourself all you need is a phillips screwdriver (to open the A500 case up), some wire cutters/strippers and a soldering iron. Don’t worry if you’re not an expert solderer, I’m rubbish at soldering but this is very basic stuff and should be well within most peoples capabilities.

A closer look at the IDELED device

The device arrived in a little anti-static bag with no instructions. It’s a tiny little 1″ square circuit board that incorporates an 8 pin socket one one side and 8 pins on the other. There is also a small hole for you to solder a wire to, plus a few components that allow it to ‘do its thing’.

This slideshow requires JavaScript.

Getting Started

The IDELED is designed to sit between the Amiga 500’s keyboard connector and the keyboard cable. This gives it access to the floppy drive LED circuit and allows that to be used as an IDE activity LED in your Amiga 500. After opening up your A500 the first thing you need to do is carefully unplug the keyboard connector, lift away the keyboard and set it to one side.
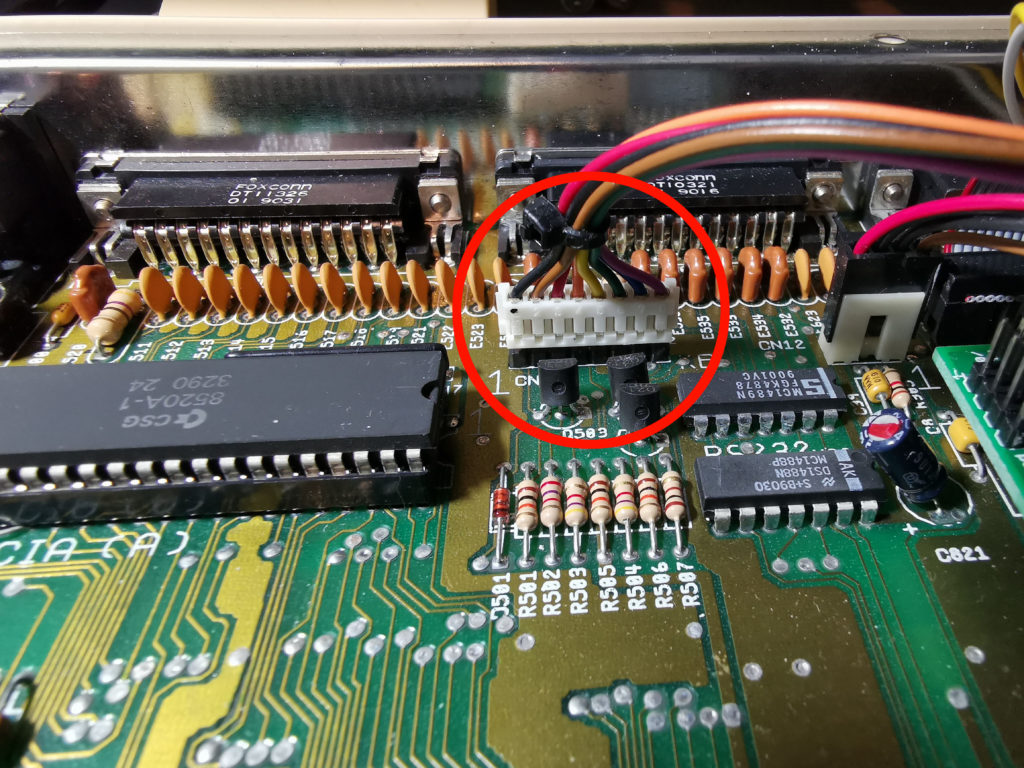
 

Amiga 500 keyboard connector

Unplug the keyboard connector (circled in red).


You’ll then have access to the 8 pin keyboard connector on the mainboard which will look like this:
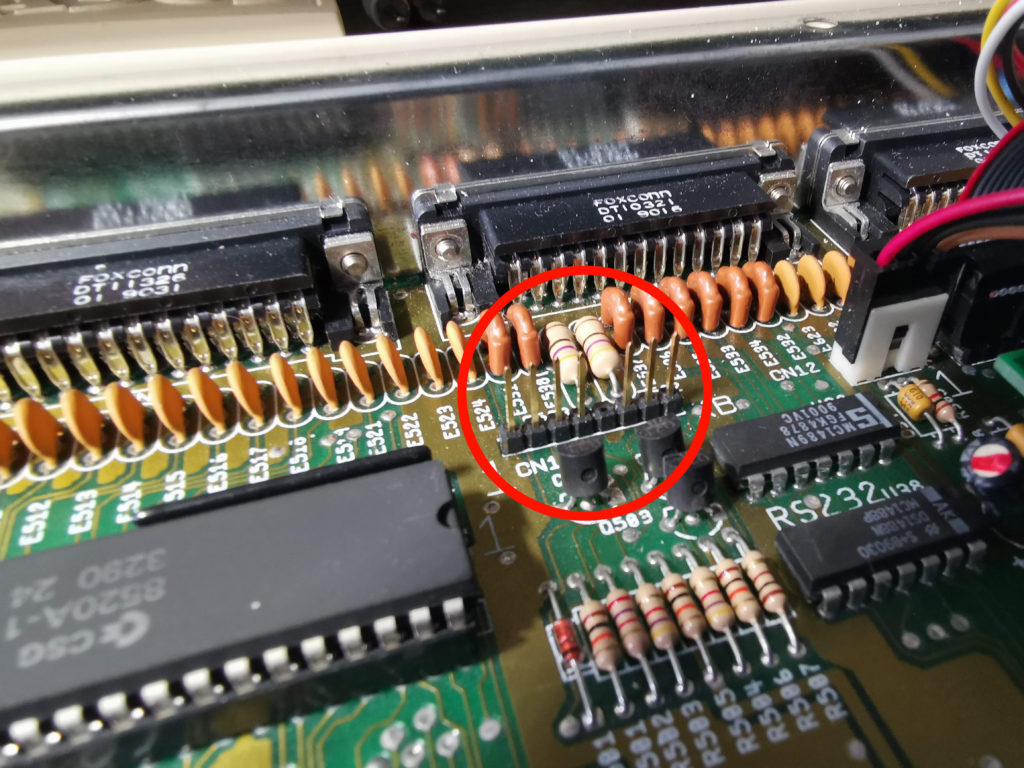
 

Amiga 500 keyboard connector pins

Keyboard connector pins


Next you need to attach the IDELED board to the keyboard connector pins on the mainboard. Make sure that you connect it the correct way around – orient the board so that the keyboard connector is at the back if you are looking at it from the front of your Amiga. It should then look like this:
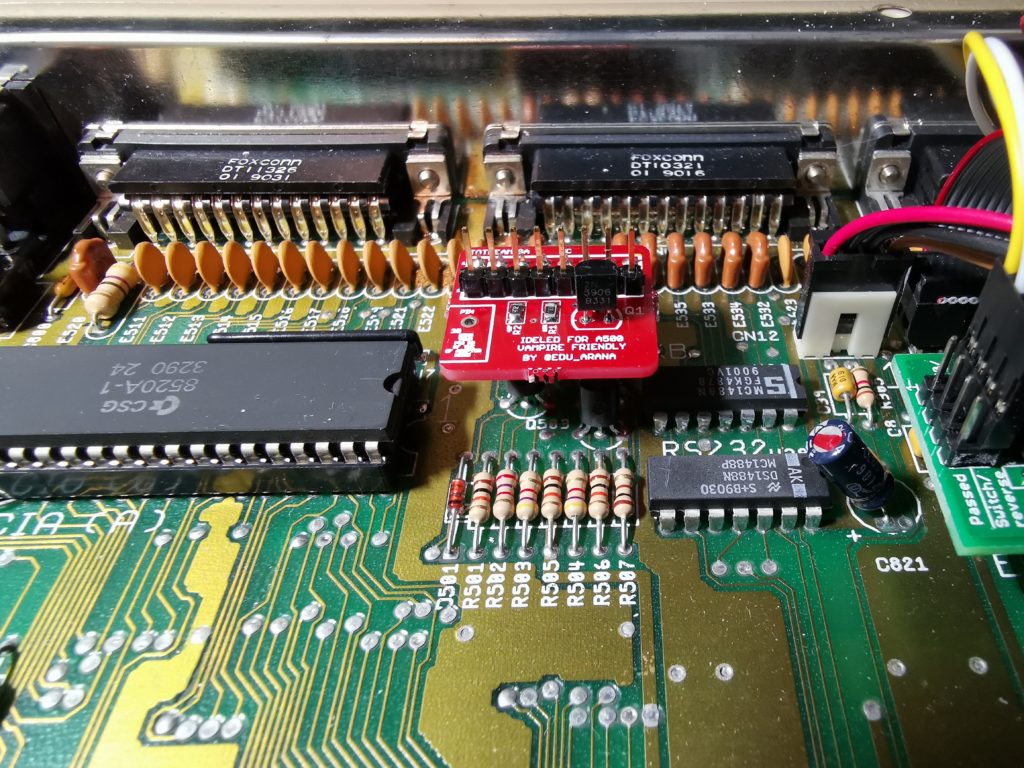
 

IDELED board

IDELED fitted to keyboard connector


At this point I connected the keyboard to the pins on top of the IDELED board. You might want to leave doing this until after you’ve soldered the connecting wire but I needed to experiment a bit and wanted the A500 powered on and the LED’s working. At this stage the project looked like this:
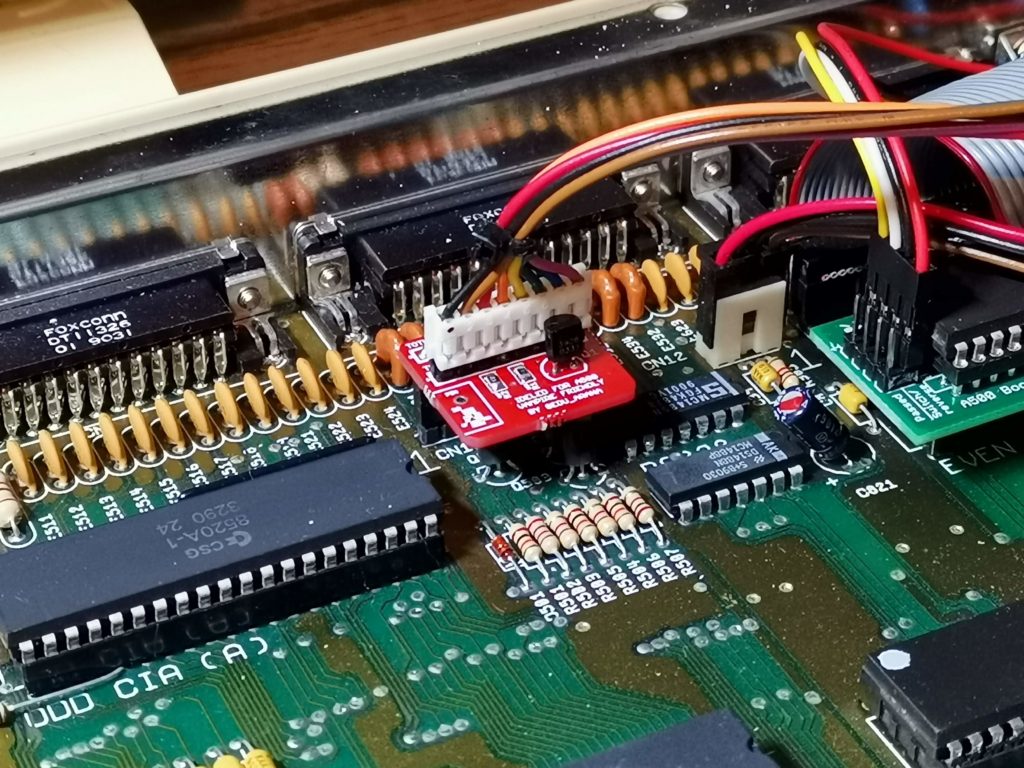
 

Amiga IDELED board

IDELED board fitted between mainboard and keyboard cable


Solder time

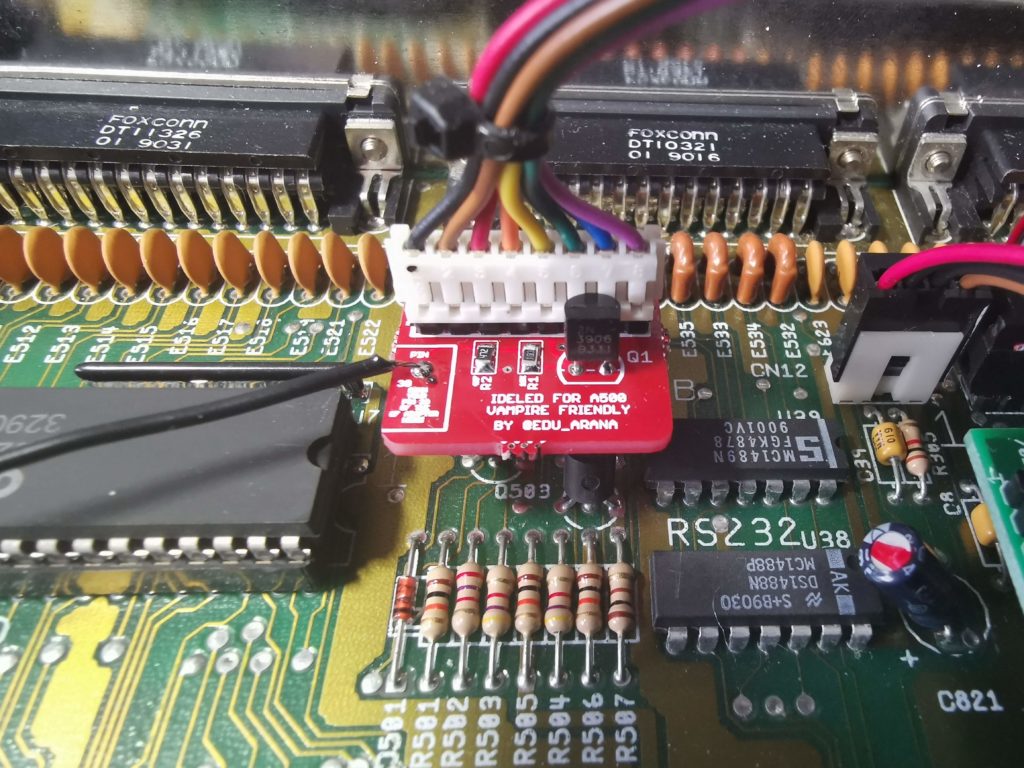
The next job is to attach a short wire to that little solder point on the left side of the IDELED board. The wire needs to be long enough to reach the IDE connector on top of your Vampire (or other accelerator card) with enough slack so that it’s never under any strain if you have to move things around in the future. You will need to strip off a few millimeters of insulation from each end of the wire before you go any further. It’s much easier to do this before one end of the wire is attached to anything. I’d also suggest ‘tinning’ the exposed wire each end as this makes soldering them easier.

Insert one stripped and tinned end of the wire into the little hole in the board and apply a blob of solder. You should now have something looking like this:
 

Amiga 500 IDELED board

IDELED board with ‘activity’ wire soldered on


Locating pin 1 and 39

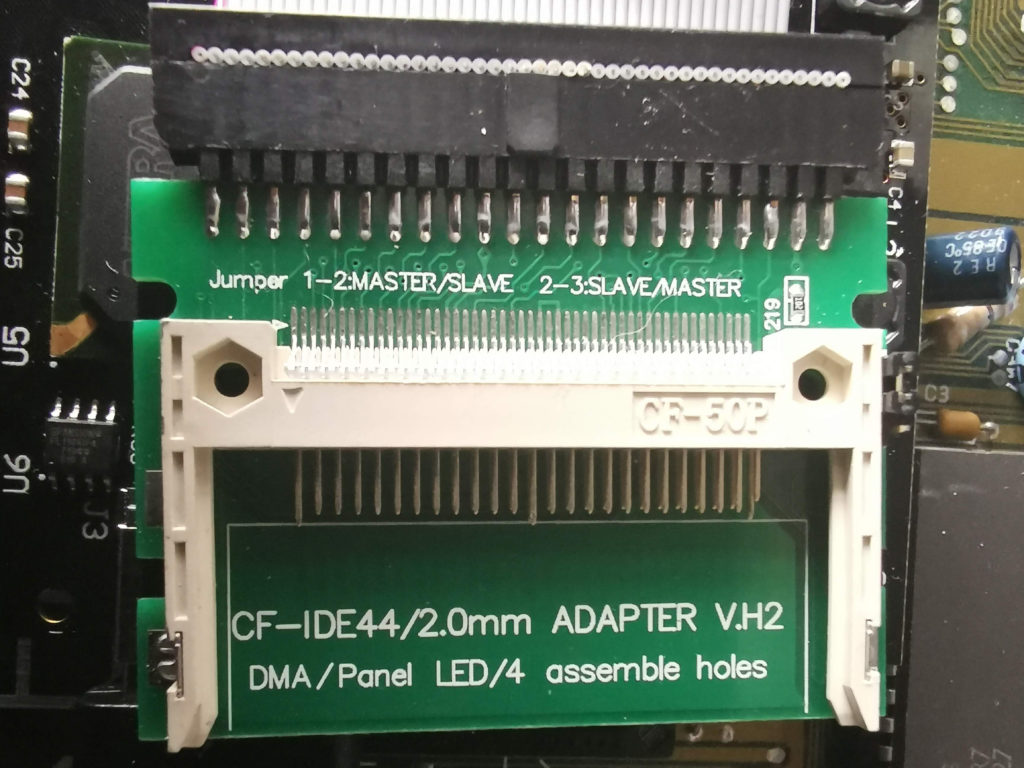
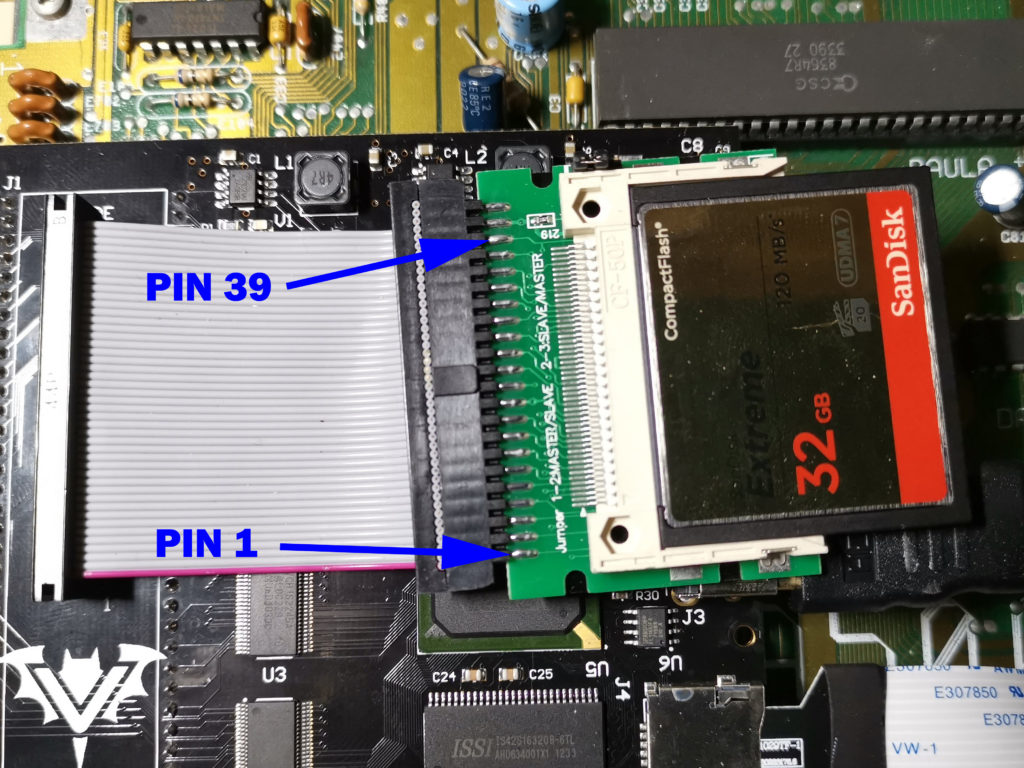
The other end of the wire needs to go to ‘pin 39’ on your IDE adapter. This is the pin responsible for transmitting drive activity. If you have a CF adapter like mine (pictured below) then you should be OK to just hook the wire up to the same pin as I did.
 

Amiga Compact Flash IDE adapter

A closer look at my IDE CF adapter (without CF card fitted)
 

Amiga Vampire CF flash adapter pins

Locations of pins 1 and 39 on my 44 pin IDE adapter


To locate ‘pin 39’ on my adapter I used the 44 PIN IDE connector diagram below for reference. Note the way the pins are numbered – it alternates up and down with 1 top left, 2 bottom left, 3 back to top row and so on. My particular adaptor has the upper row of 22 PINs connected to the top of the circuit board and the lower row of 22 pins to the underside.


Diagram showing pin numbering of a 44 pin IDE connector

2.5″ 44 PIN IDE pin layout & numbering


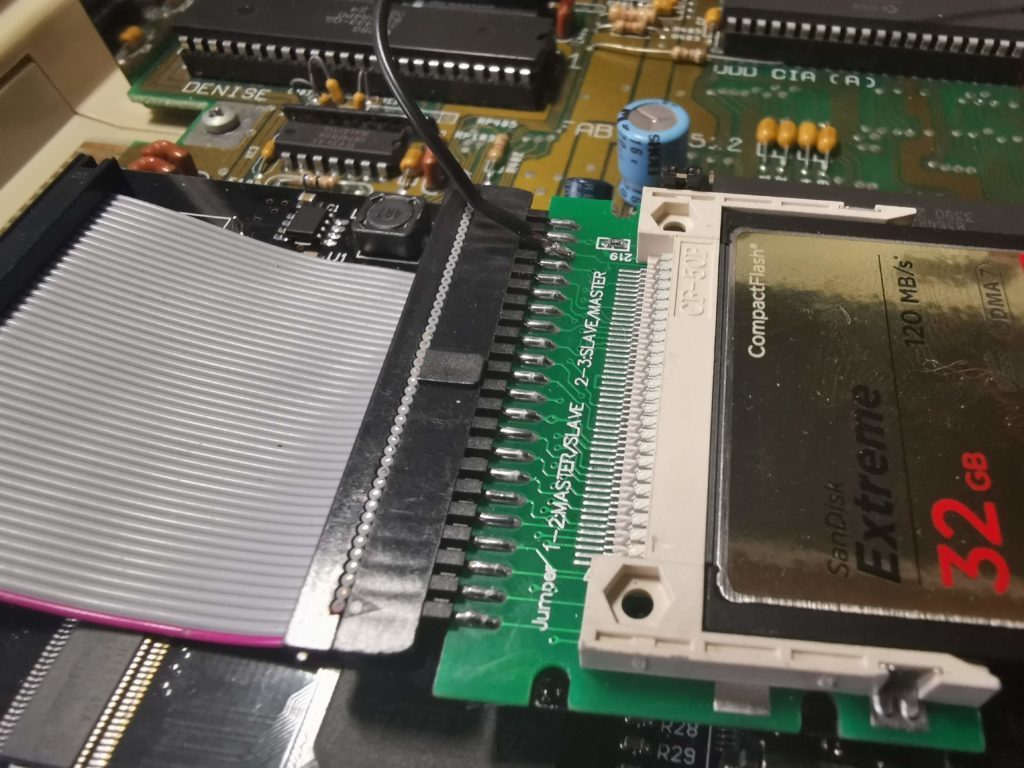
Provided it was connected up the correct way round originally, the purple edge of the ribbon cable indicates which side ‘pin 1’ should be. Thankfully the Vampire card clearly indicates where ‘pin 1’ is (see the little ‘1’ above the bats head in the photo above) so my cable was oriented correctly. Once I was sure of the location of ‘pin 1’ it was a simple matter of counting along to identify ‘pin 39’. Obviously if you have a different kind of adapter then you will have to confirm its location yourself. Hopefully the information above will help you out.
 

Amiga 500 IDE activity LED - pin 39 activity wire soldered on

Wire soldered to pin 39 – not the prettiest soldering job in the world but it does the job.


The completed modification
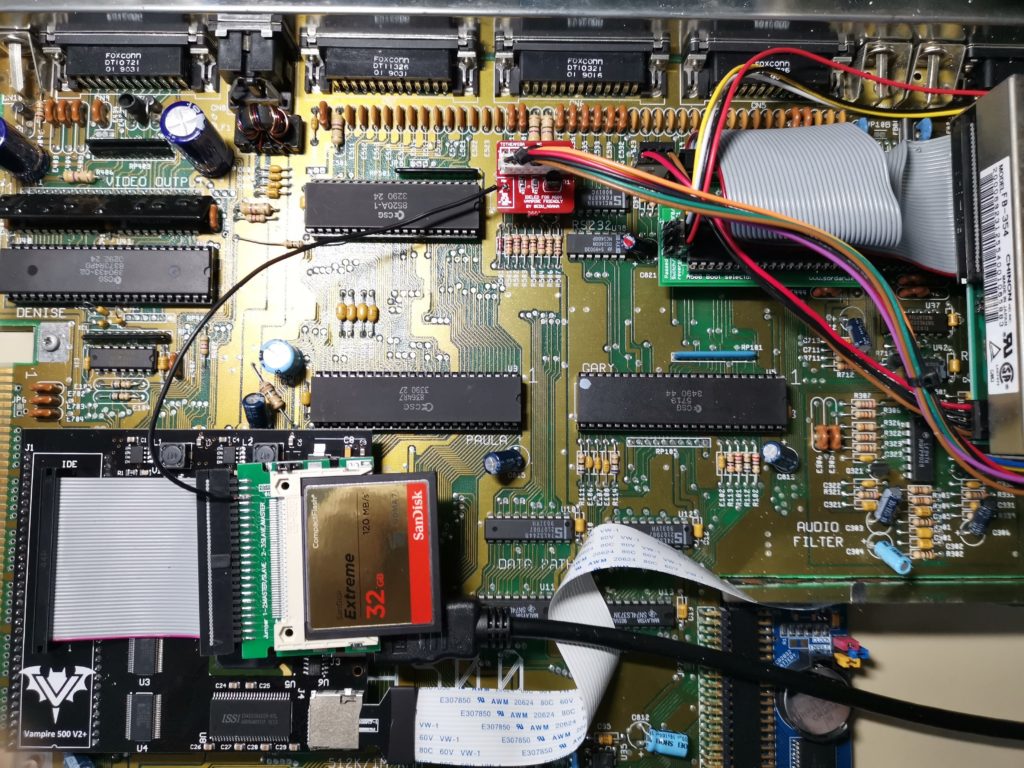
 

Amiga 500 IDE activity LED fitted

View showing the completed modification in its’ entirety.


Assuming you’ve connected everything up correctly (check  before you screw the case back together), you should now how a fully working IDE activity LED on your A500.


Demonstration

In the video below you can see my Amiga 500’s new IDE activity LED flashing away whilst it boots into Workbench. The loud clicking sound is just my empty floppy drives clicking – the anti-click software doesn’t run until workbench has finished loading.

I’m really pleased with this mod, it was cheap, pretty simple to implement and above all else, really useful. No longer will I be in the dark about when my CF card is being accessed!


But wait, there’s more!

When you pop in a floppy disk the activity LED still flashes away as usual so there is no loss of functionality. Quite the opposite in fact as the LED even flashes when I use an SD card (the Vampire supports SD card storage too) which is totally awesome and something I definitely wasn’t expecting. An added bonus is that because Commodore simply labelled the A500’s floppy activity light as ‘Drive’ it’s still labelled correctly! How’s that for future-proofing!?

Anyway that about wraps this article up for now. I do hope you found this article both interesting and useful. If you did, please let me know by leaving a comment below, I’d love to hear from you.

Stop that Amiga drive clicking noise!

stop Amiga drive clicking noise

Ah, the Amiga’s Drive clicking noise… For some this is the Amiga’s heartbeat, for others like me, it’s a source of increasing irritation the longer I have to listen to it. The same was true back in the 80’s and it’s still true now, especially as I have 4 drives that all click in unison! It only occurs when the drives are empty so you could stick a disk in each one to shut them up, but I’ve never been fond of that solution.

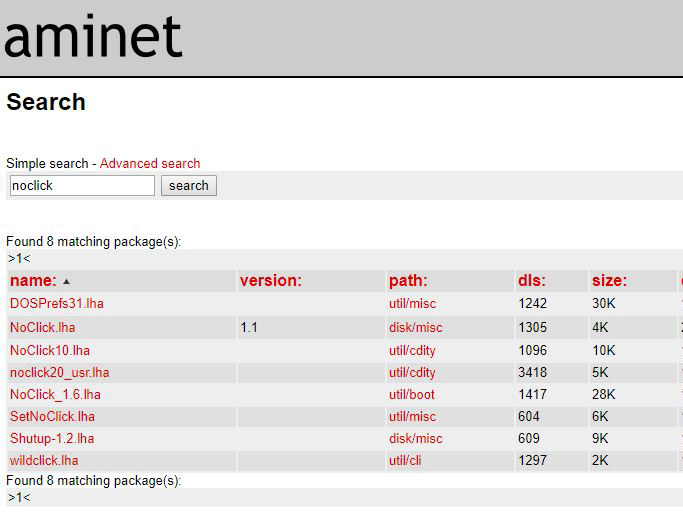
Originally back in the 80’s I installed a ‘Noclick’ program off a magazine coverdisk that silenced my drive. Sadly I no longer have either so I had to find something else. The good news is that there are quite a few on Aminet (yes Aminet is still alive and kicking!). I tried several before finding one that would reliably silence all my drives. By the way, as a rule of thumb – if any ‘noclick’ program doesn’t silence your drive after about 10-20 seconds after running it then don’t use it – it’s incompatible with your drive type and could possibly damage it over time.


stop Amiga drive clicking noise

There are quite a few ‘noclick’ programs to choose from but not all worked for me…


The one that worked for me is:

noclick20_usr.lha – http://aminet.net/util/cdity/noclick20_usr.lha

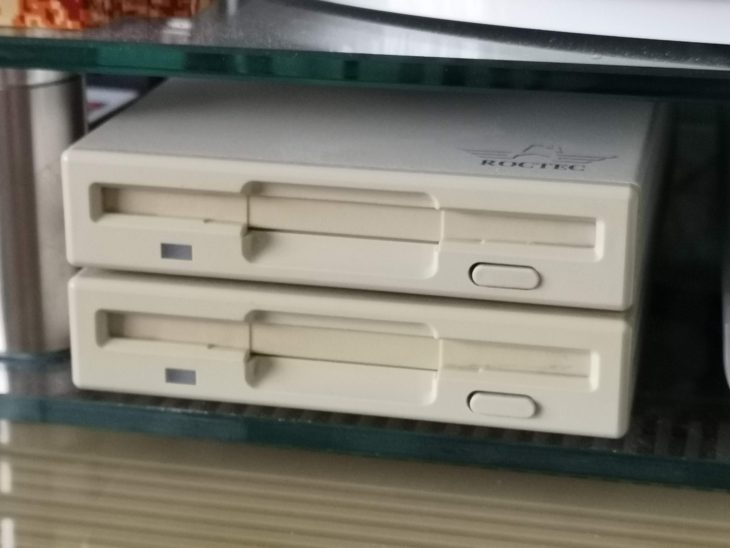
For the record I have four drives (1x internal Chinon drive, 2x external Roctec drives and 1x Gotek with sound mod) and it silenced all of them.


Amiga drive clicking noise

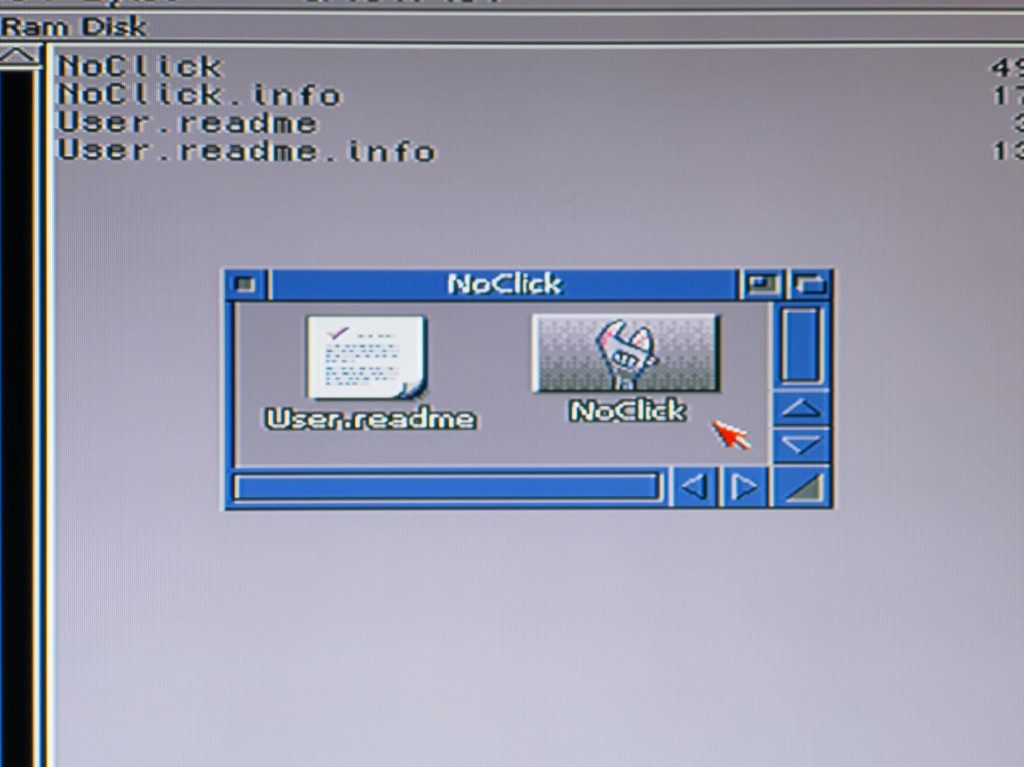
Here’s the contents of the noclick20_usr.lha archive decompressed to my Ram Disk.


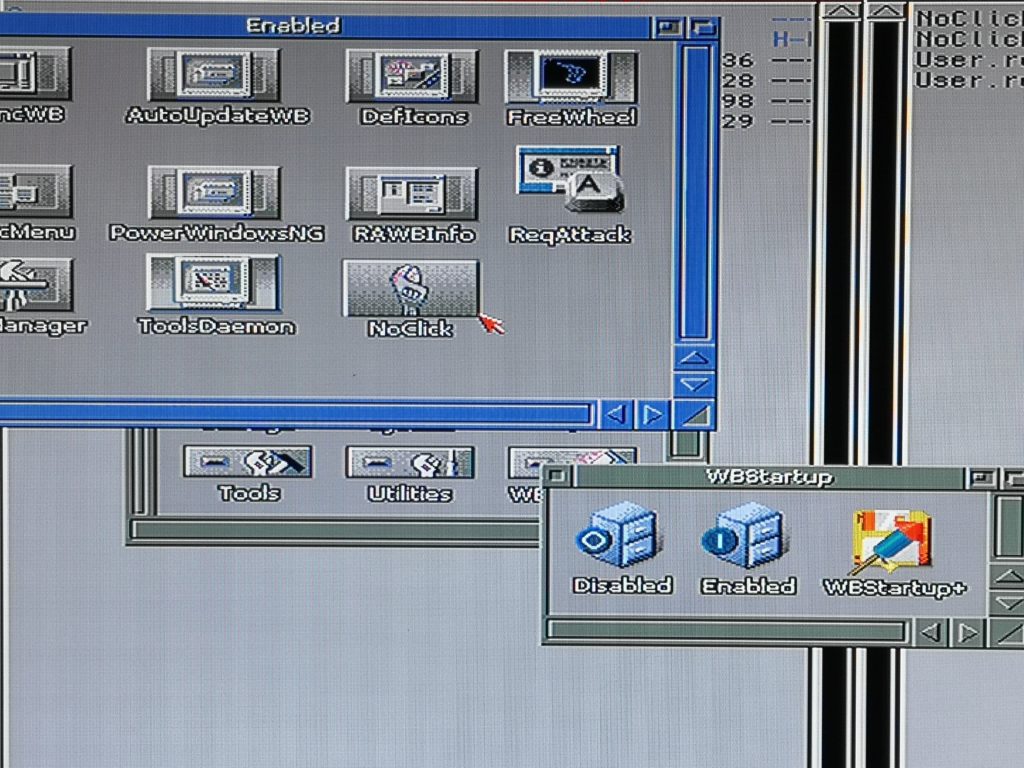
Like most things on Aminet it is compressed using LHA so use something like Directory Opus to unpack it to your RAM Disk. Once there you can copy it to a location of your choice to run as and when you need it. If you want it to run all the time then copy it to your WBStartup directory which will cause it to run automatically every time your boot your Amiga up.


stop Amiga drive clicking noise

Copy NoClick to your WBStartup directory to have it run each time you boot up your Amiga.

Repairing a Roctec Floppy Drive for an Amiga

Repairing a Roctec floppy drive

This is a guide to repairing a Roctec floppy drive for an Amiga 500 computer.  I thought I’d write this up as much for my own benefit as other peoples so I can refer back to it in another 20 years! LOL.

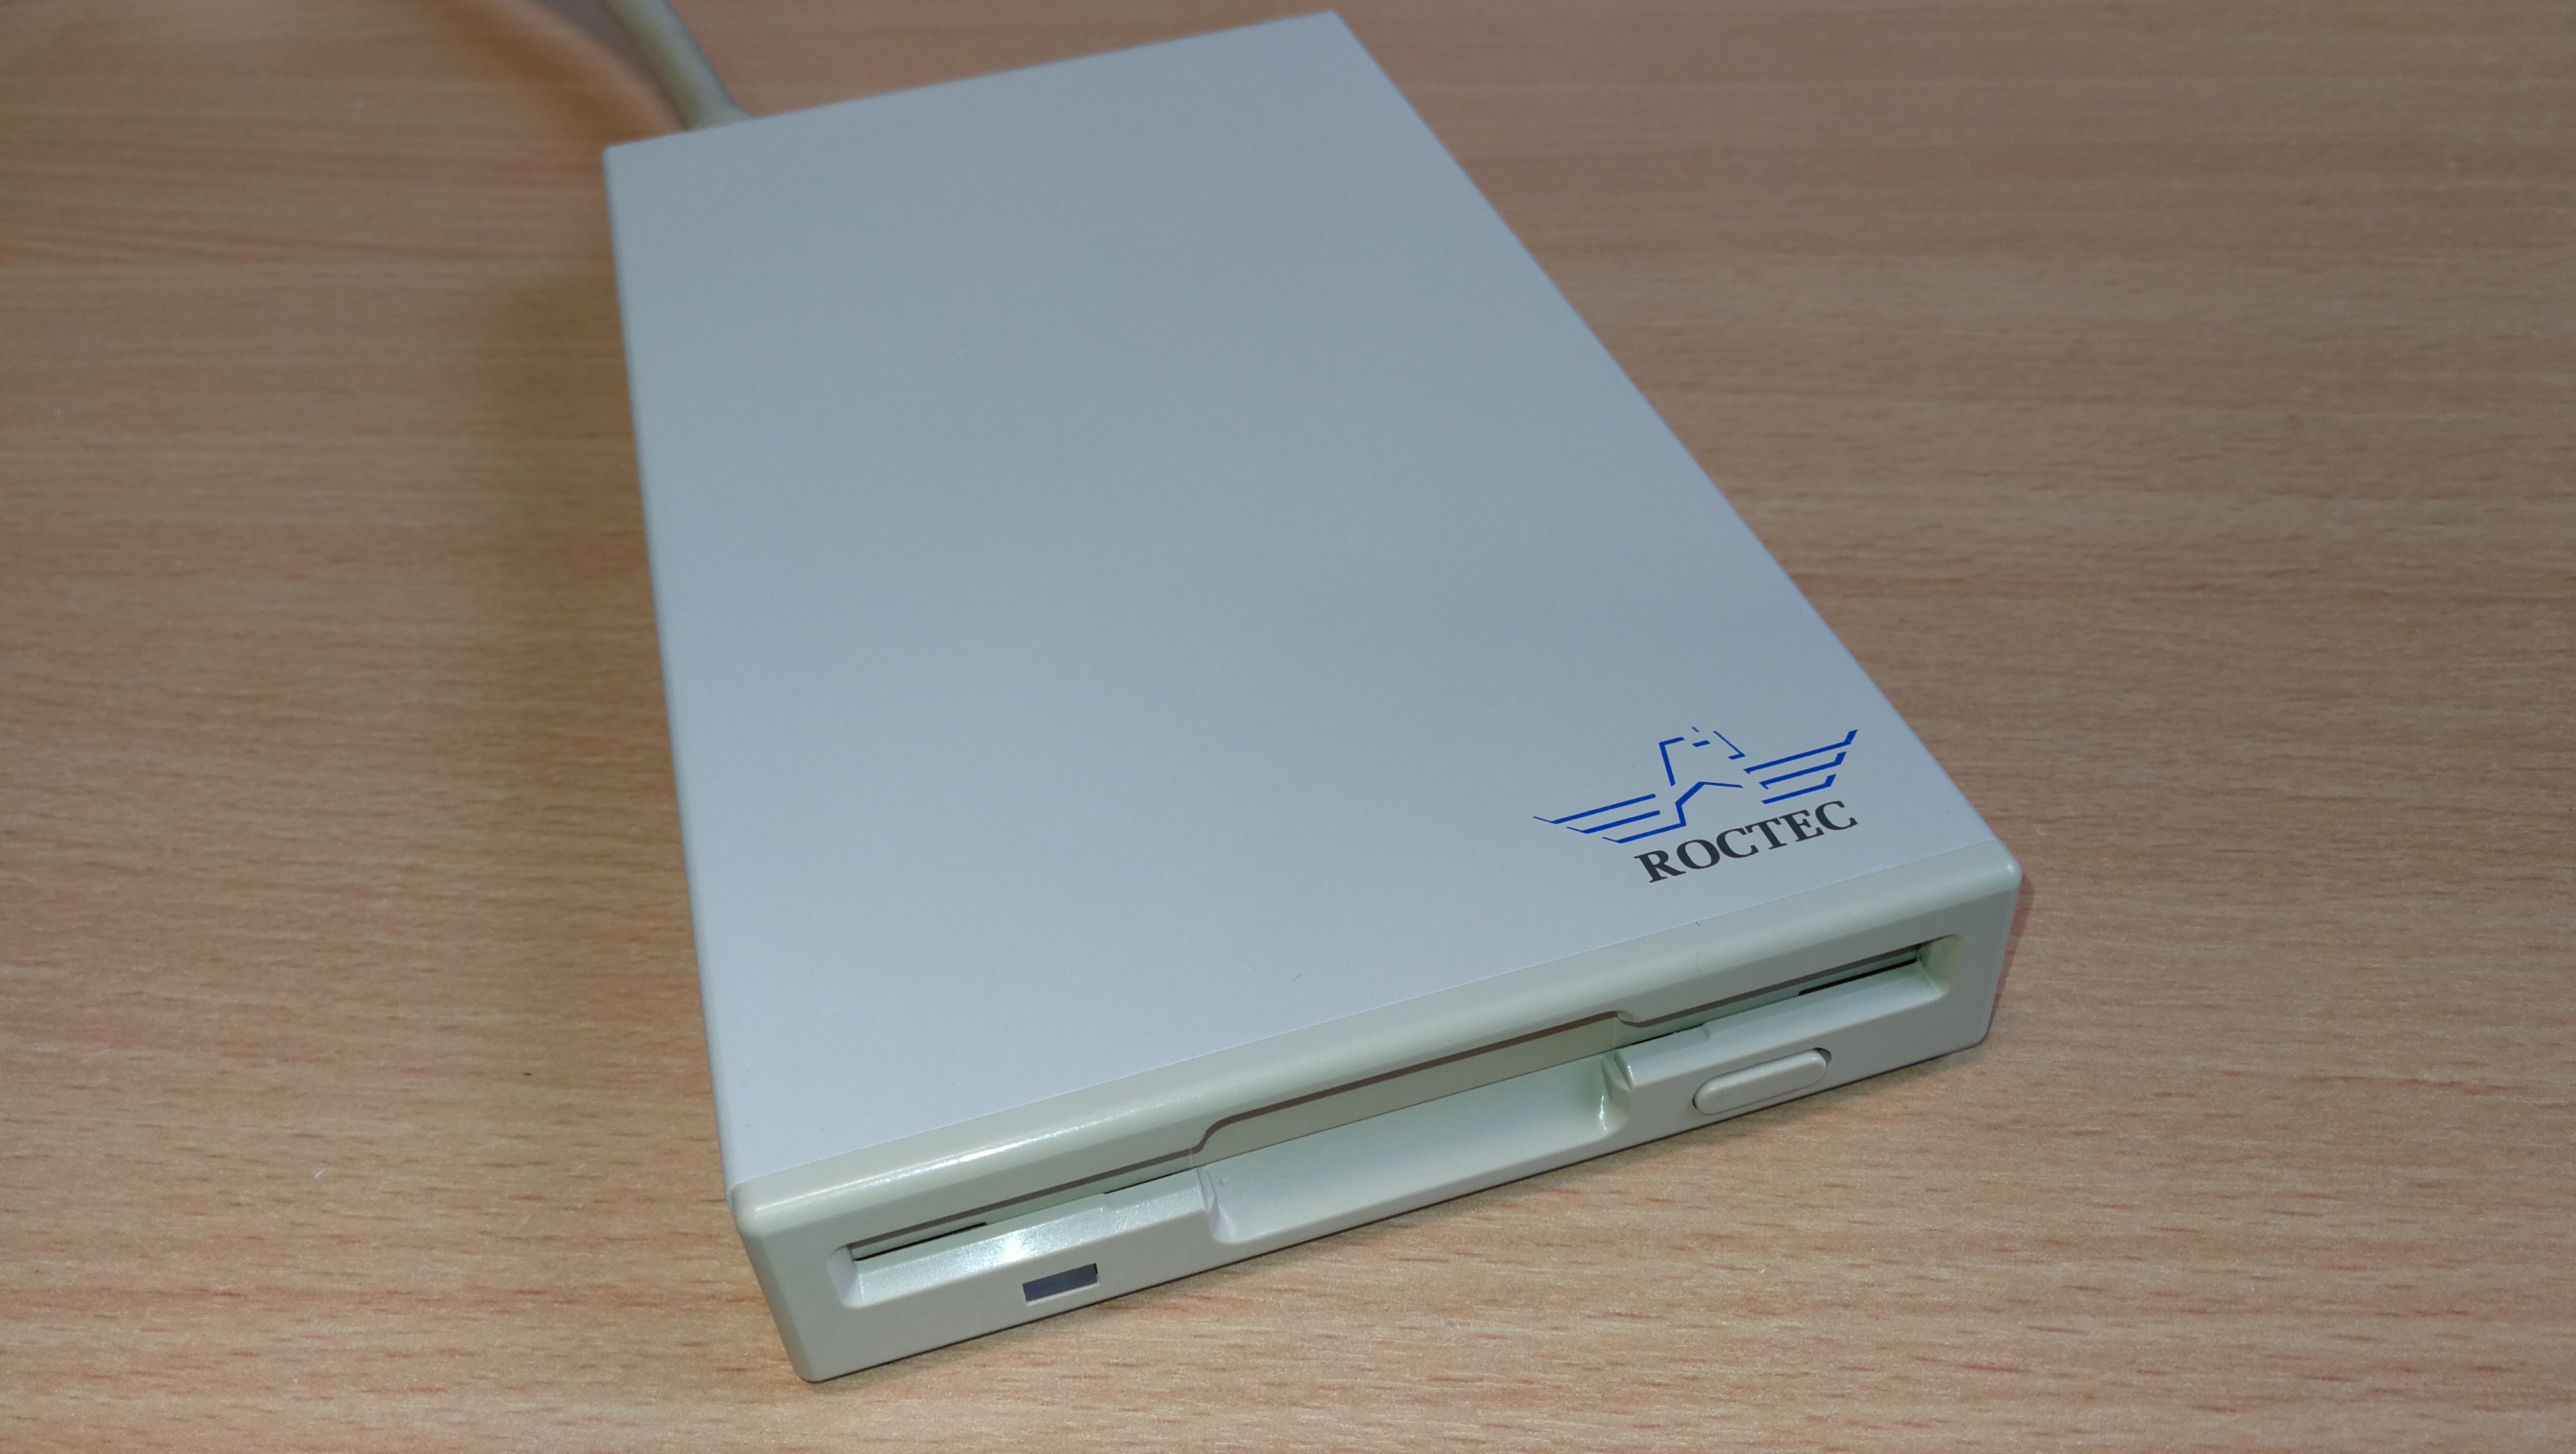
Roctec Amiga external floppy drive

Roctec Amiga external floppy drive

If you ever pop a disk in your external Roctec drive and hear a strange whirring noise and can’t read any of your disks then the chances are you are suffering from a perished or broken drive belt.

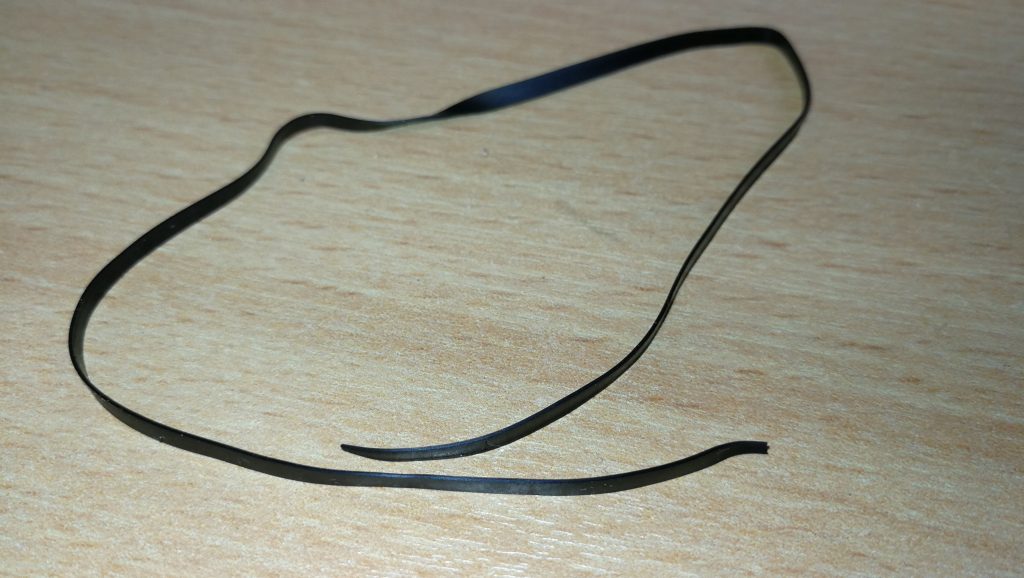
Perished Drive Belt

Perished Drive Belt

These drives use a rubber belt to connect the drive motor to the spindle hub. The rubber belt only has a finite life and given most of these drives are getting on for 30 years old now it’s hardly surprising that they expire.

cof

No tension in old perished belt

The good news is that it’s pretty easy to replace them and I’ll give an overview of what you need to do here.

Getting Started on the Repair

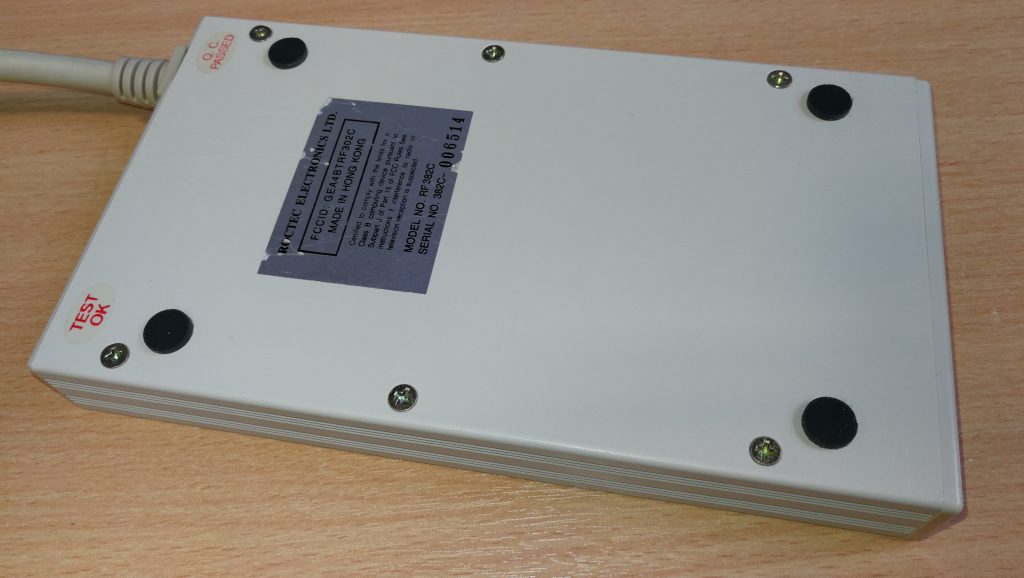
The first thing you need to do is undo the 6 screws on the underside of the drive case using a small philips screwdriver.

Underside of drive case

Remove these 6 phillips screws.

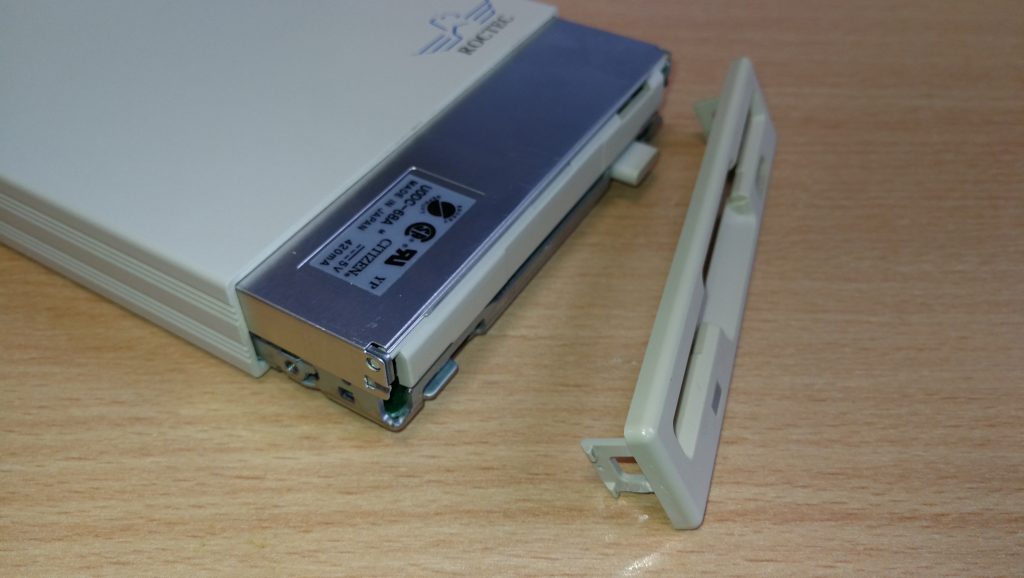
This particular drive case is made from a solid metal rectangular tube so you need to slide the floppy drive out. The aim here is to slide everything out of the BACK of the case. The first step is to gently slide the floppy drive forward out of the case far enough to detach the plastic fascia from the front of it. Unless you do this it won’t slide right into the case and out the back. There are 2 small tabs on each side of the fascia which you can gently bend with a small flat-bladed screwdriver and it will pop right off. Don’t force anything or it will break – it should come off easily.

Drive Fascia removed

Drive Fascia removed

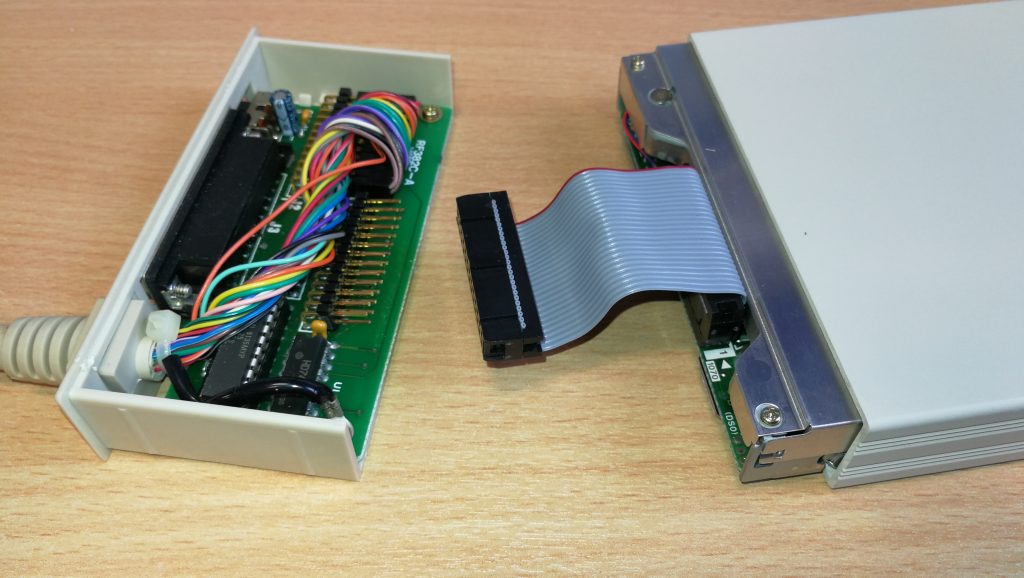
Now you need to prise the back part of the drive out of the case using something thin enough to slide into the tiny gap between the case and the backplate, I found the blade of my pocket knife to be perfect for this but be careful not to injure yourself or damage the plastic/paint on your drive! Once you’ve got it moving slide it out slowly (a slight side to side wiggle can help here). It will be attached to the floppy drive via a ribbon cable so keep going until you’ve got the floppy drive out too.

Roctec floppy drive detached

Roctec floppy drive detached from controller board

The floppy drive has a thin metal cover that protects the mechanical innards and it is held in place by some little tabs on the edges and a solitary screw at the back right (when viewed from the front).

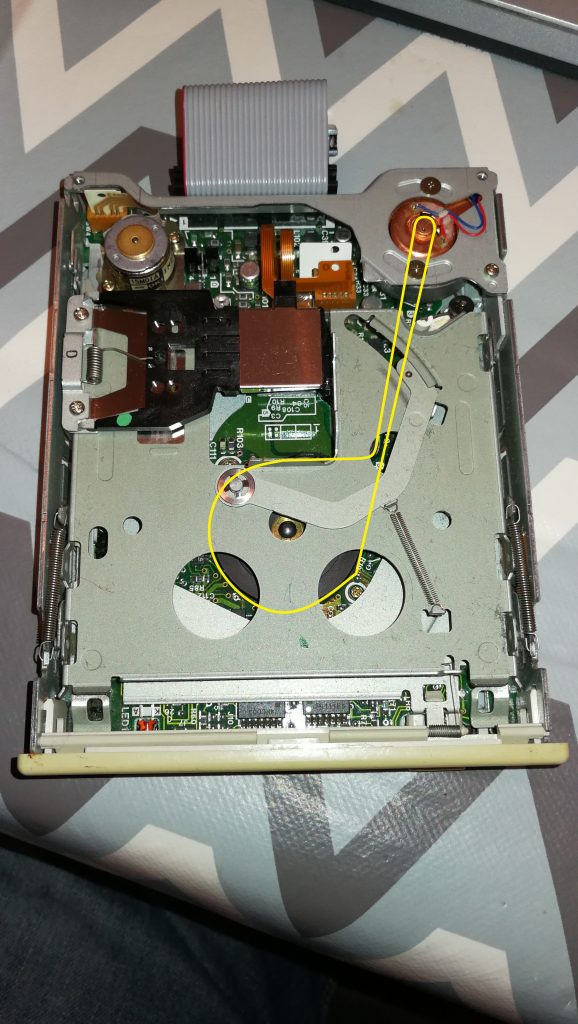
Roctec Floppy Drive Rubber Belt Path

Roctec Floppy Drive Rubber Belt Path

Replacing the Belt

Once the top is off you can see the drive mechanism, motors, heads and so on. Carefully remove what’s left of the old belt with a pair of tweezers. Be careful not to touch the drive heads with anything metallic or you may damage them. The photo above shows the path the rubber belt follows, indicated by the yellow line.

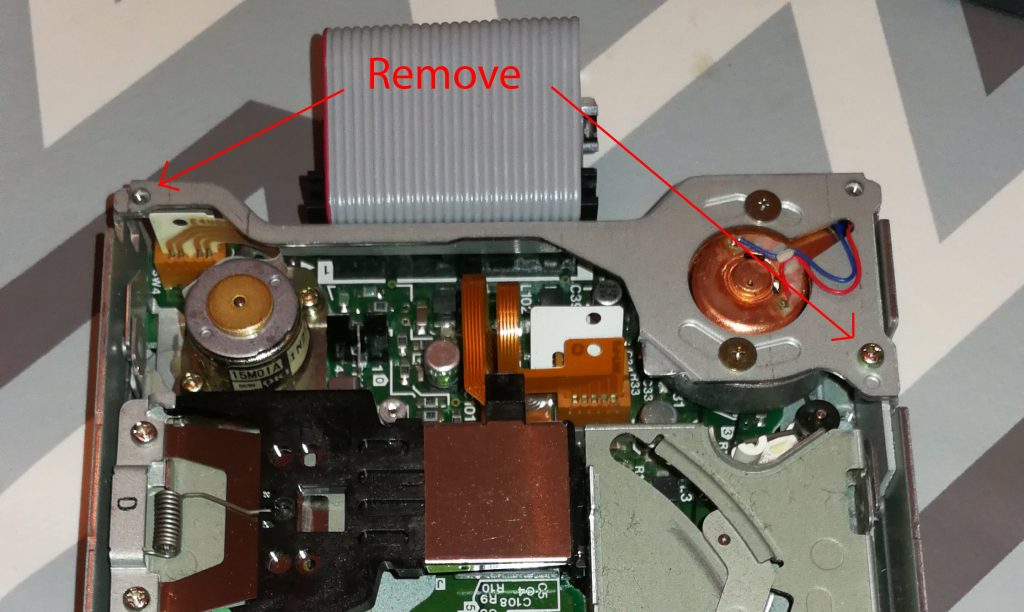
The next step is to remove the drive motor which is attached to a metal bracket that runs across the back of the drive. It is held in position by one screw in the far left corner and another on the right a few cm down from the corner. Don’t touch the two screws with the large flat heads either side of the motor. Be careful you don’t pull the bracket too much as there are two tiny wires connecting the motor to the circuit board here so be careful to support the bracket whilst you are handling the drive to replace the belt.

How to detach the motor and bracket

How to detach the motor and bracket

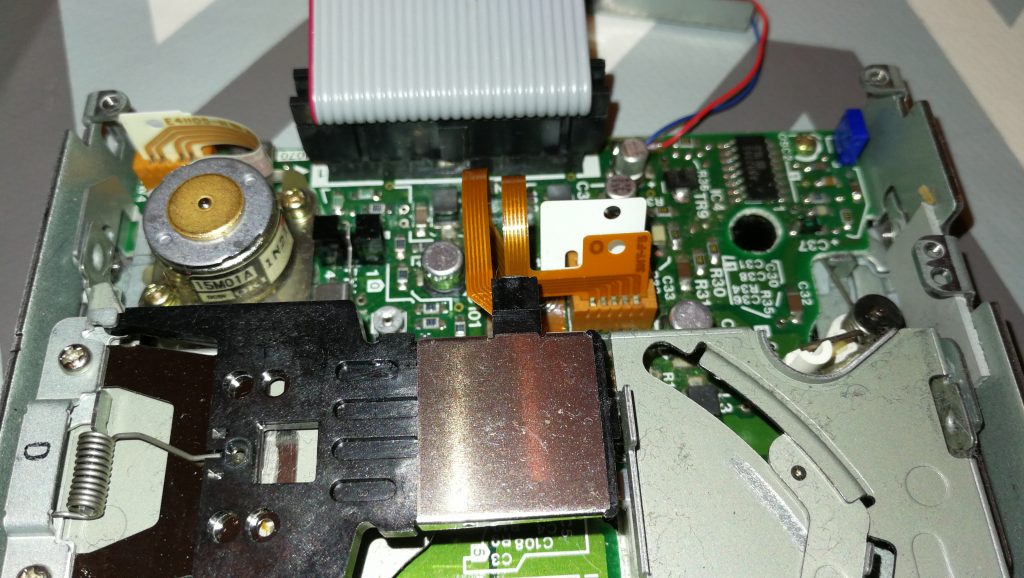
Drive motor and bracket removed

Drive motor and bracket removed

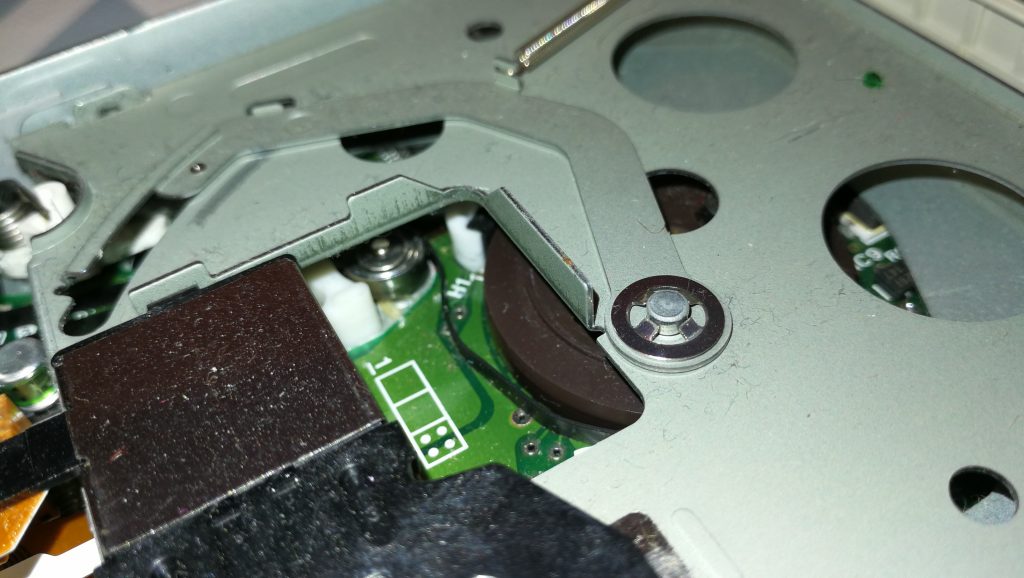
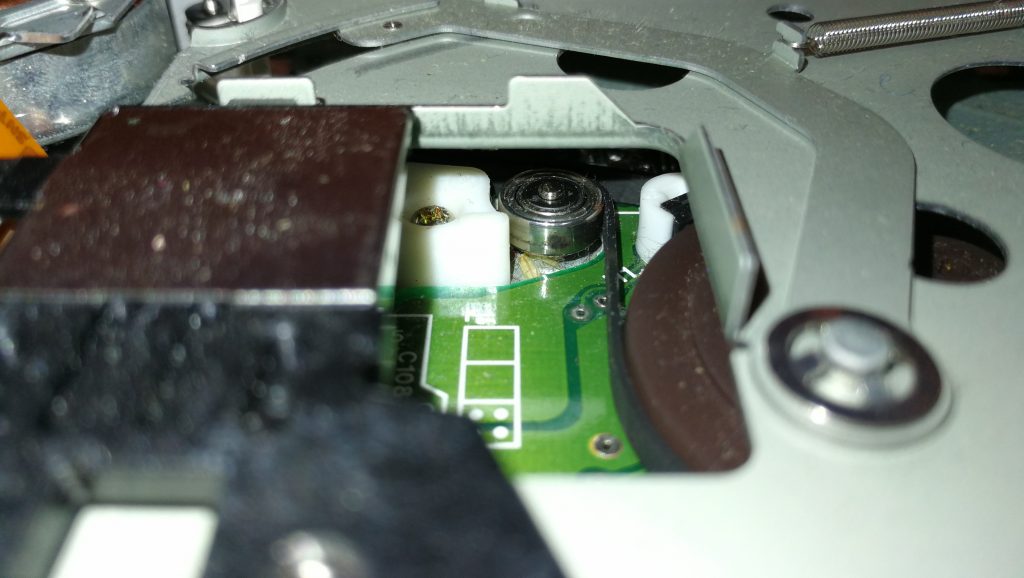
Once the bracket and motor are out of the way you can carefully thread a replacement belt around the large drive wheel, small tension wheel and keep a loop ready at the top right to go on the motor spindle. Follow the yellow path in the earlier photo and take your time as it can be a little tricky to get the belt into place. A small flat bladed screwdriver and a pair of tweezers are essential for this. Don’t forget the belt needs to thread behind the small silver pully wheel as this is what tensions the belt.

Close-up of the small tension wheel you need to thread the belt behind

Close-up of the small tension wheel you need to thread the belt behind

Once you’ve got it threaded around the wheels correctly you need to get the final loop onto the motor spindle. It helps if you grab the loop with some needle nosed pliers here and pull it taught with one hand whilst guiding the motor spindle into the loop with the other. Once this has been achieved (it may take a few goes as it’s quite fiddly) place the bracket back in place and rotate the large drive wheel slowly and check the belt stays on, is running where it should and isn’t fouling any components.

Look carefully through the tiny gaps in the top of the drive motor you should be able to see the motor armature slowly rotating as you move the belt. If it is then job  done, time to put it all back together! If it isn’t then don’t fret, just double check the belt is following the correct path, isn’t twisted anywhere and hasn’t slipped off any of the wheels.

Congratulations, your Roctec drive should now be fit for active duty for another several years now!