Lyonsden Blog

Tag - Commodore

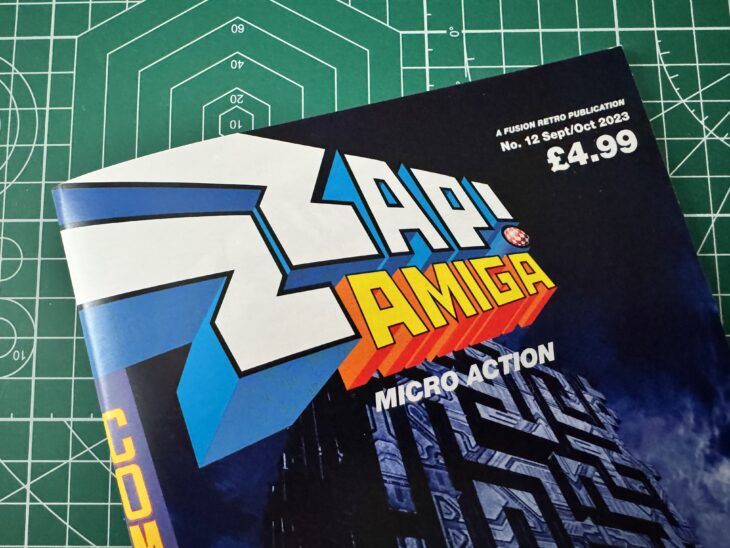
Zzap! Amiga Issue #11 is out now

Zzap! Amiga Issue #11

My weekend reading material is looking pretty good this week, what with with Freeze 64 arriving yesterday and now Zzap! Amiga Issue #11 dropping through my letterbox too.

This magazine, published by Fusion Retro Books, has been running for a good 18 months or more now and this is the 11th issue.


Zzap! Amiga Issue #11

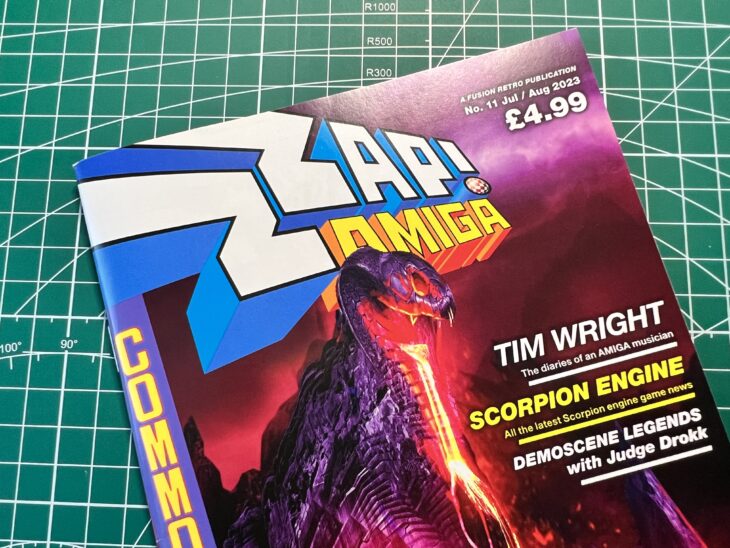
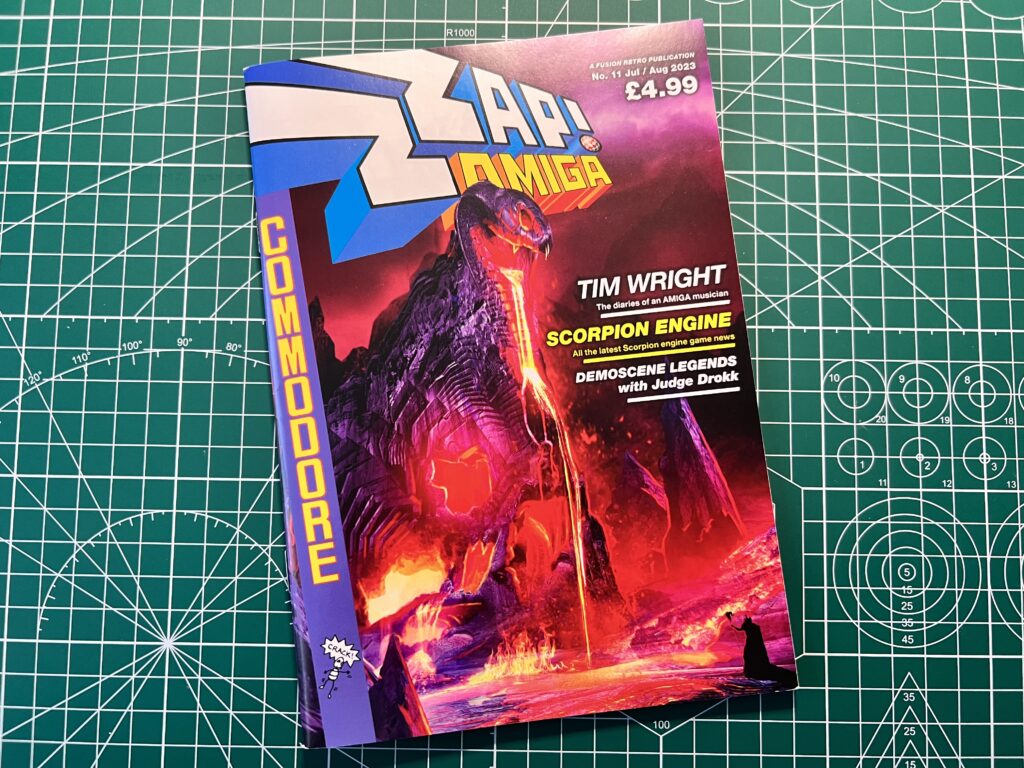
Zzap! Amiga Front Cover


A Look Inside


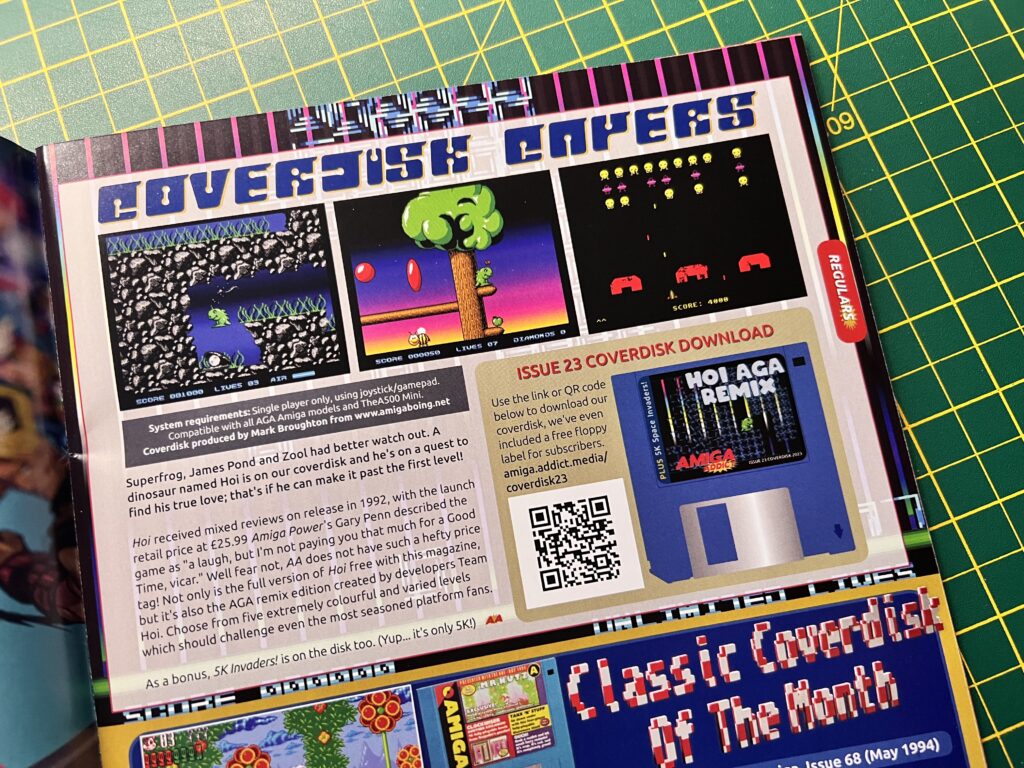
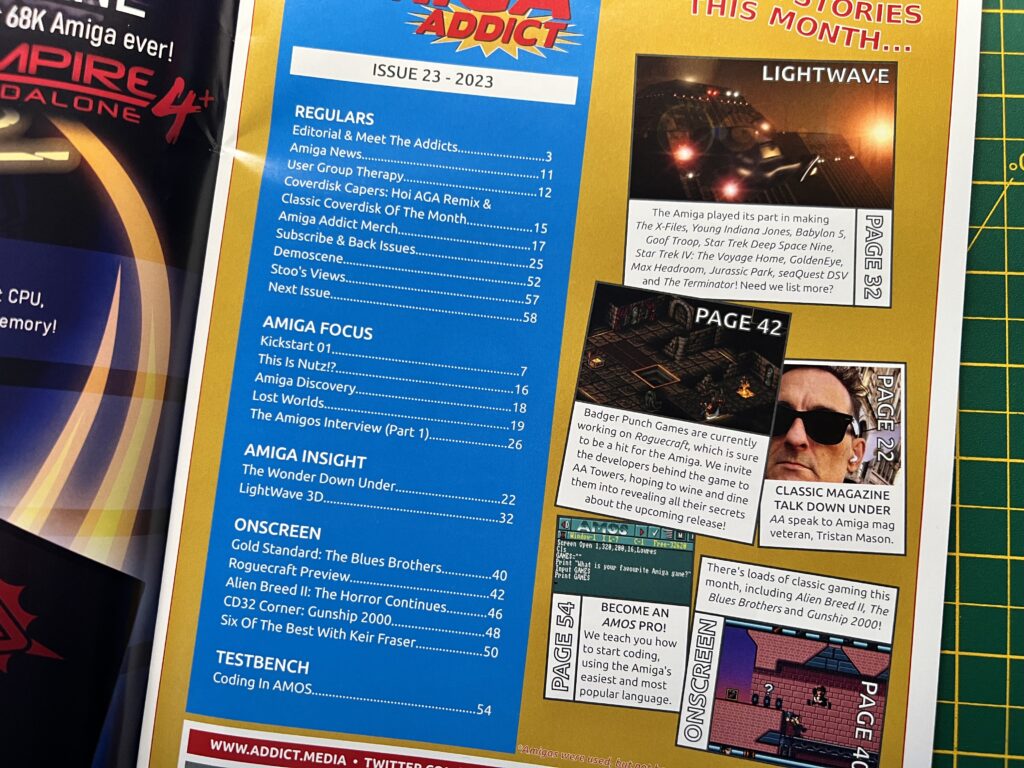
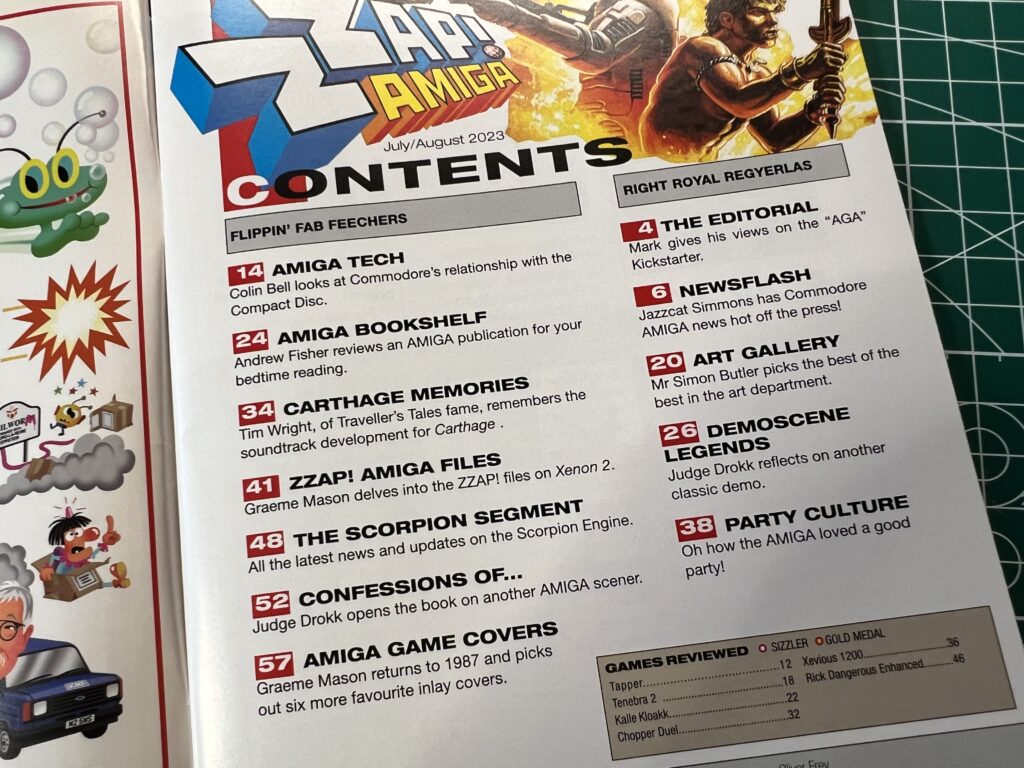
Here’s a quick peek at the contents page and a handful of the 60 pages within this edition.


Zzap! Amiga Issue #11

Zzap! Amiga Issue #11 Contents Page


This slideshow requires JavaScript.


At £4.99 plus postage for 60 pages of Amiga goodness it’s a no-brainer for me and a worthy addition to my retro magazine collection. Don’t forget you can get 15% off a copy of your own with code ‘LYONSDENBLOG’ at the checkout!

Head on over to Fusion Retro Books to pick up your own copy of Issue #11.

Building a Mini PET Kit

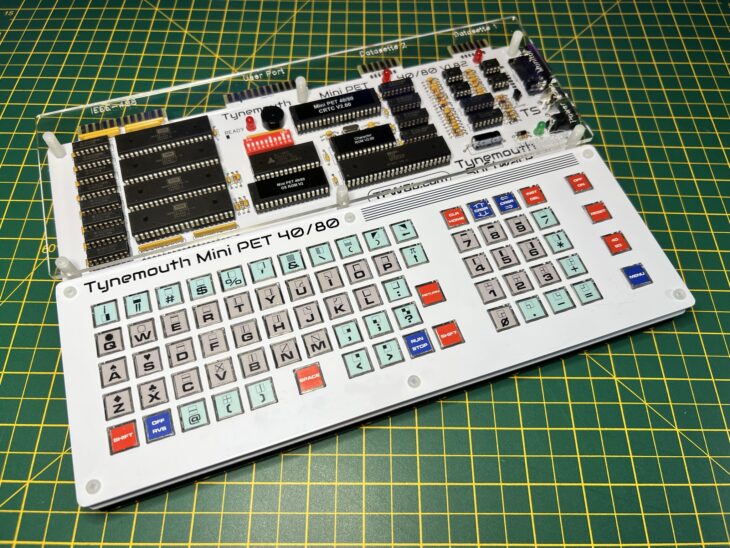
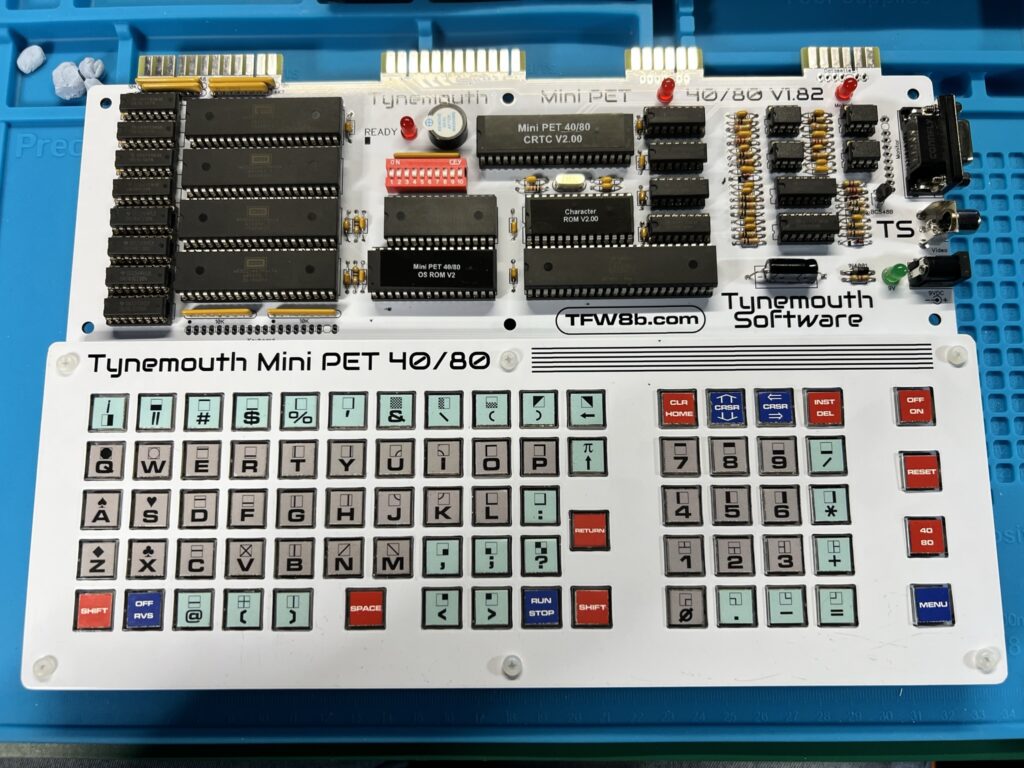
Mini PET

I’ve long been a fan of those little electronic DIY kits that Maplin used to sell for a few quid. They would have little Xmas trees made up of LED’s, alarm clocks with a handful of digital number displays, that kind of thing. So when I spotted the Mini PET micro-computer kit over at TFW8b I snapped one up straight away. Of course this kit was £350 – a far cry from the inexpensive little packs I used to pick up in Maplin so I was quite nervous about starting the project and messing it up. To reduce the chances of this happening I bought a few inexpensive electronics kits to practice my soldering skills on before letting myself loose on the Mini PET.


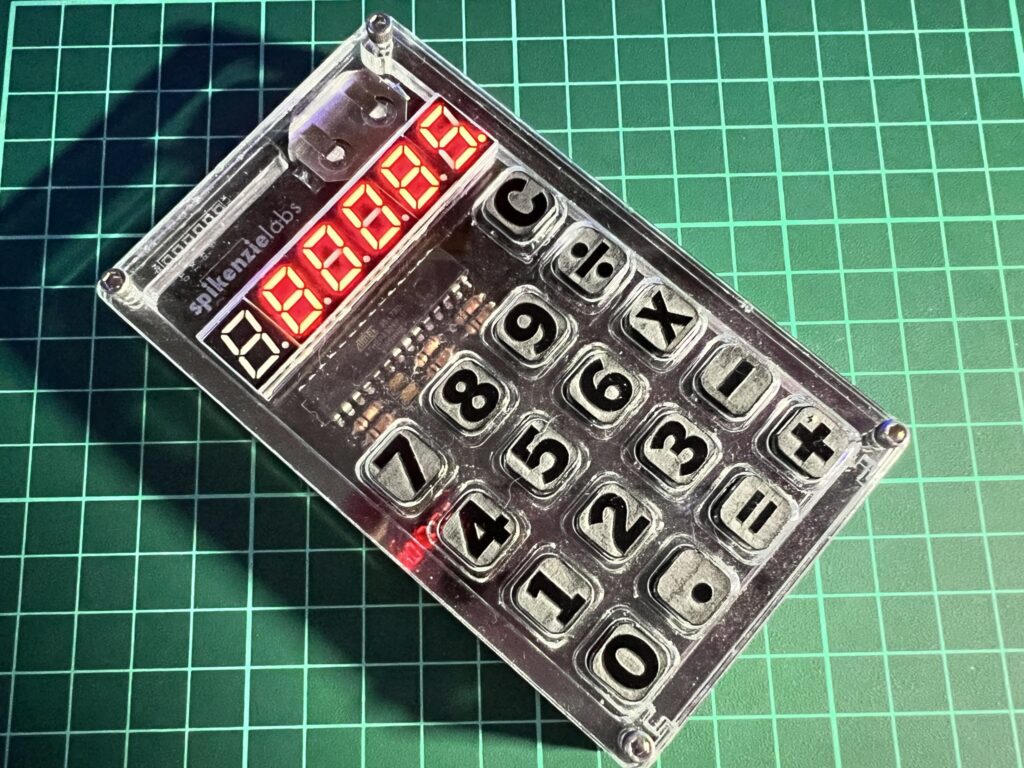
SpikenzieLabs calculator

My completed SpikenzieLabs calculator kit.


Probably the most fun and useful kit was the calculator pictured above that I picked up from SpikenzieLabs. I also picked up a Pinecil soldering iron which I can highly recommend. I paired the Pinecil with some leaded 60/40 solder which I find flows infinitely better than the lead-free stuff so prevalent nowadays. Suffice to say that I procrastinated, researched and practiced quite extensively before I finally felt ready to move on to the main event.


Mini PET

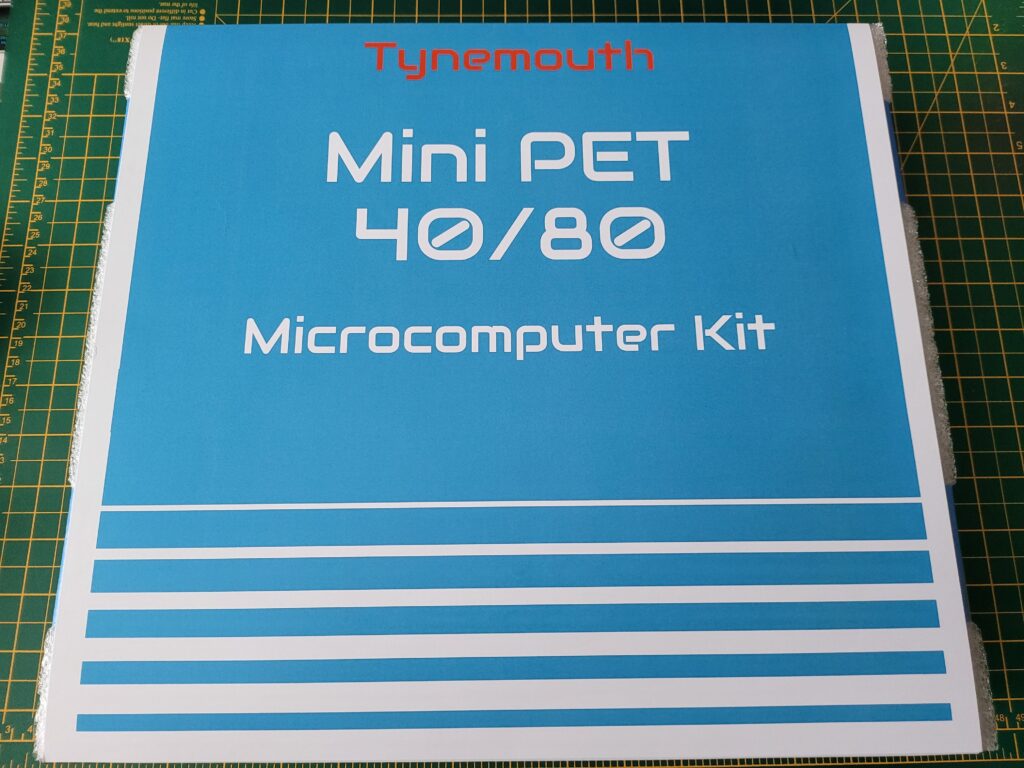
The Mini PET Kit box.


What do you get in the box?

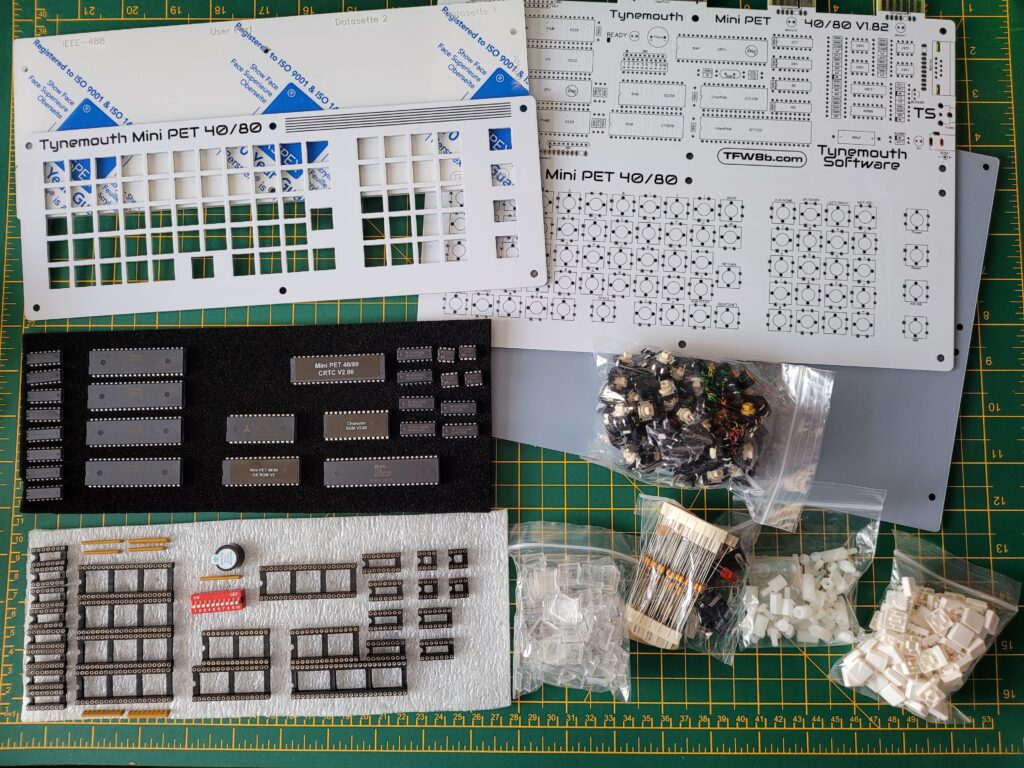
Inside the box you get everything needed to build a fully working ‘Mini PET’ computer including the motherboard, all electronic components, chips, sockets, switches, keys, keycaps and screws. You also get an attractive perspex case complete with stand-offs and screws to build around your completed computer. There’s also a suitable PSU supplied in the box.


Mini PET

Here’s all the Mini PET components included in the box.


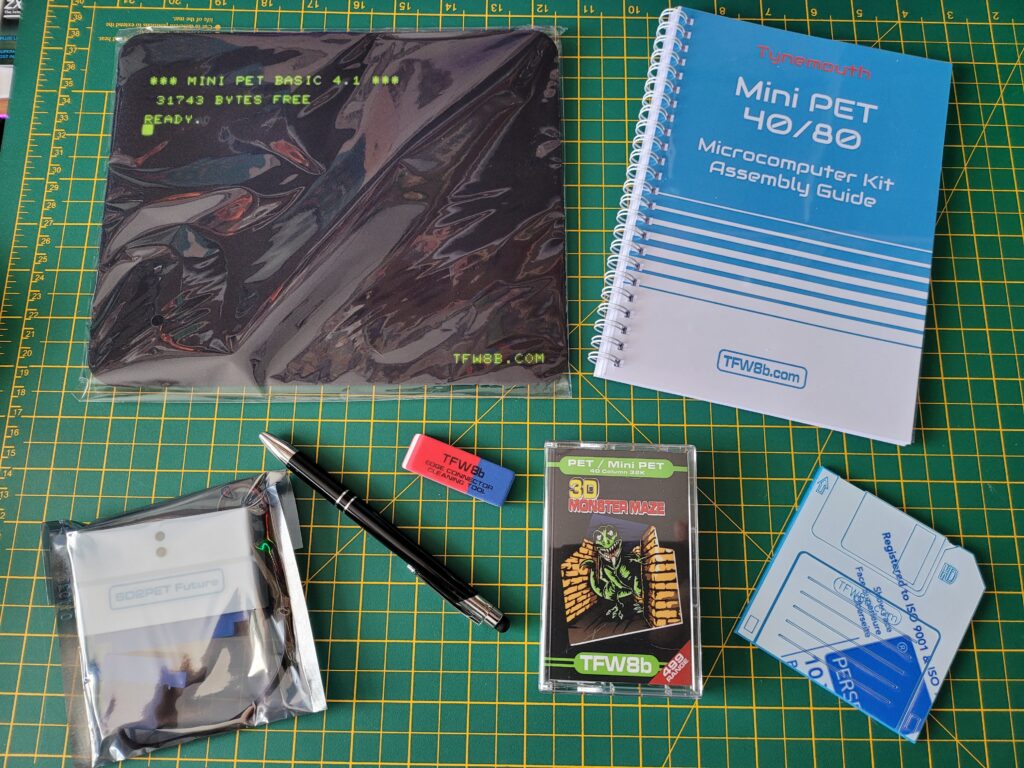
Besides the computer components you also get a comprehensive spiral bound assembly guide and a PET game on cassette; ‘3D Monster Maze’. Also included (as an optional extra) was an SD2PET device which I think is a pretty essential addition. There was also some fun merchandise included too; a fabric mouse mat, a ‘floppy disk’ coaster, a rubber and a snazzy biro/iPad stylus.


Mini PET

The rest of the box contents including the all important manual, SD2PET device and 3D Monster Maze game plus assorted merchandise.


Getting Started

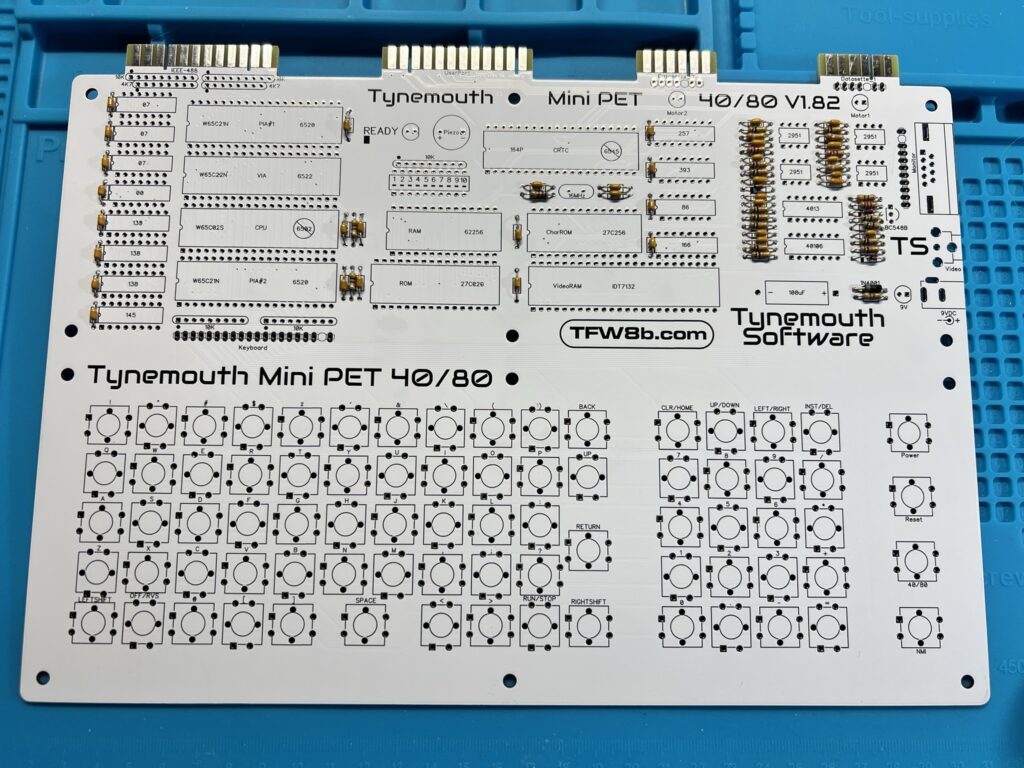
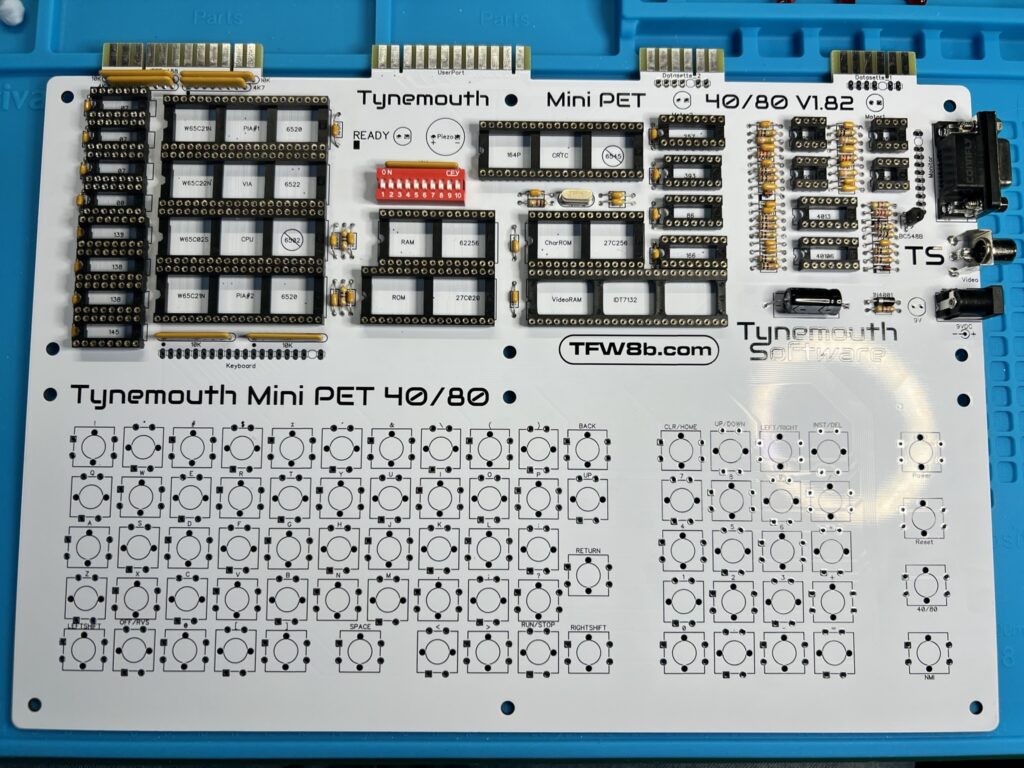
The first stage of building the kit involved fitting all the smaller electronic components to the board, starting with the resistors and capacitors. The instructions helpfully included colour code charts to help identify the correct resisters but I double checked each one with my multi-meter just to be on the safe side.  I found a magnifying glass to be pretty useful here too as some of the coloured bands are pretty small and the writing on the caps was almost invisible to my middle-aged eyes.


Mini PET

The Mini PET mainboard with resistors and caps installed.


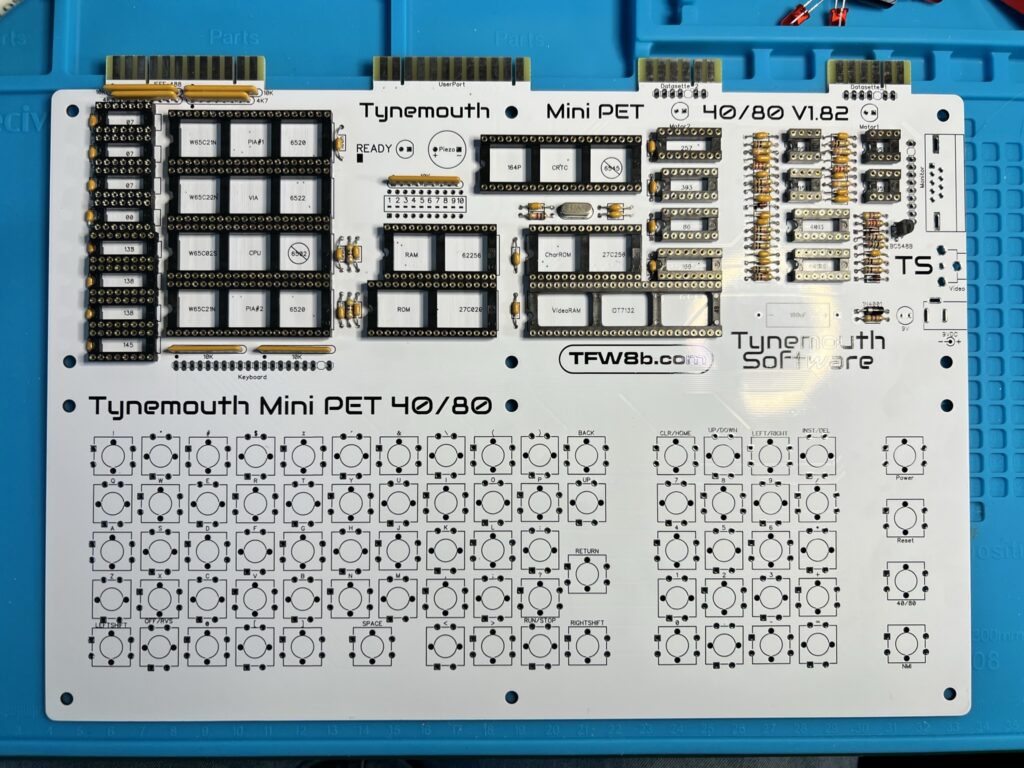
Next up was the fitting of the single timing crystal along with sockets for the chips and the resistor arrays. The sockets were a little tricky to install as I couldn’t bend over their legs like I could with things like resistors. I ended up using lumps of blue-tack to keep them fixed whilst soldering them as I found this worked really well.


Mini PET

The board now with added sockets, timing crystal and resistor arrays.


The DIP switch array, large electrolytic capacitor and the power and video sockets were installed next. The RGB socket in particular needed quite a bit of solder to anchor it into position so I whacked up the temp on my Pinecil temporarily to make this easier. Again blu-tack came to the rescue here to keep them in position whilst the board was upside down.


Mini PET

…with added DIP switch, ports and electrolytic capacitor.


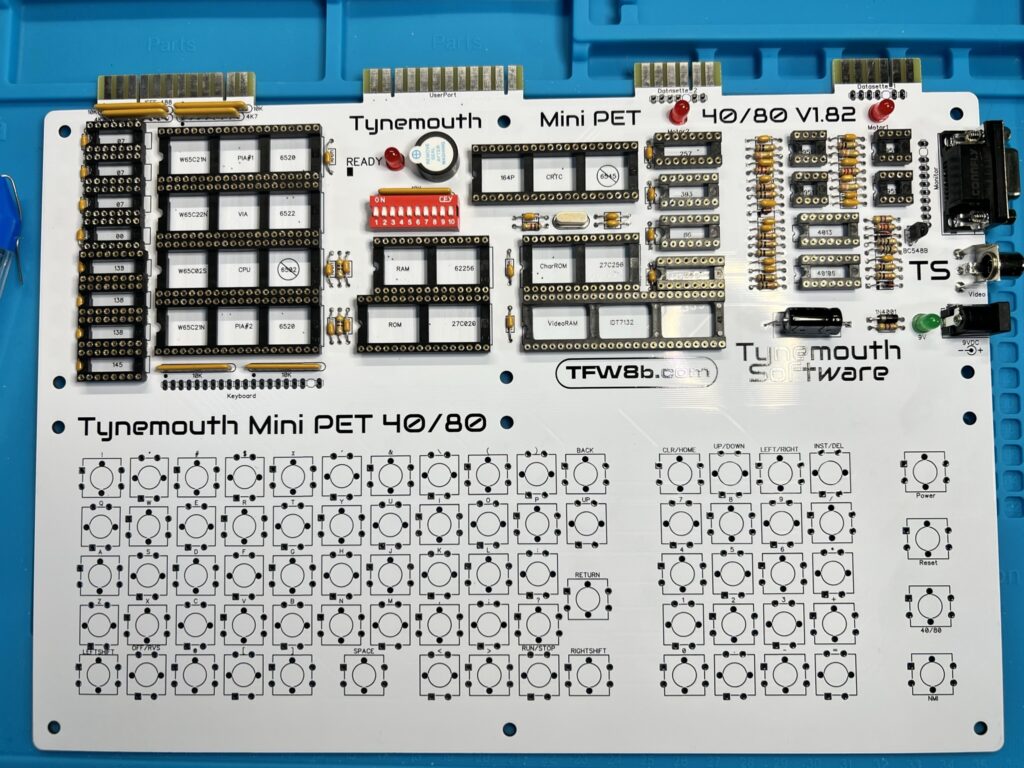
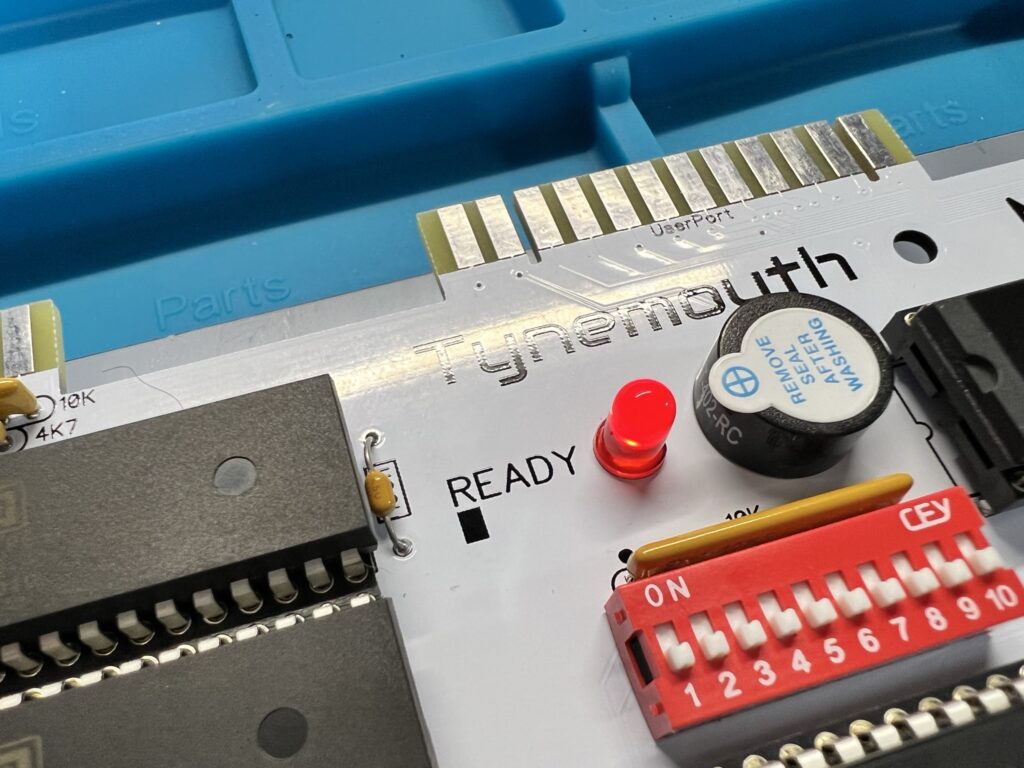
Following on from that it was time to install the piezo AC transducer (speaker) and the coloured LED’s. The green LED is used to show that the board is receiving power whilst two RED ones will indicate motor activity on the datasette ports. The other red LED is used to signify that the system is ‘ready’ and should be outputting a video signal. This is to aid in troubleshooting any issues further down the line.


Mini PET

…with added speaker and LED’s.


Building the Keyboard

Finally it was time for the part I’d been secretly dreading – constructing the keyboard. Each key is constructed using a physical key plunger attached to the mainboard, a keycap, a printed keycap label and a keycap cover.


Mini PET

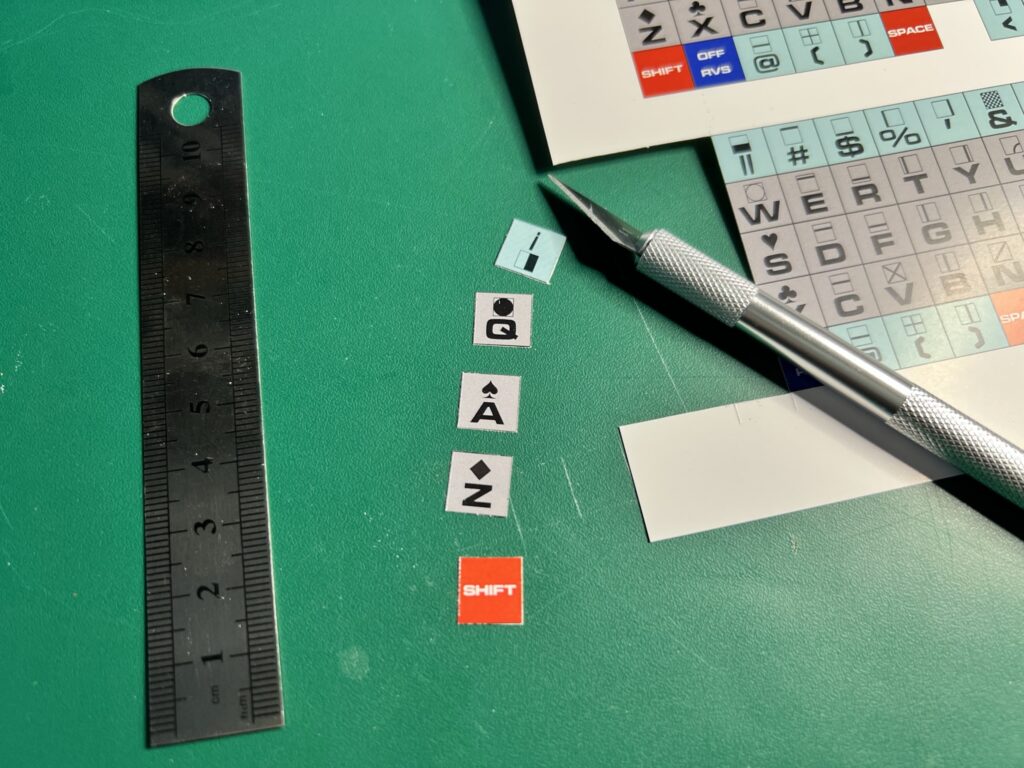
Carefully cutting out the keycap labels.


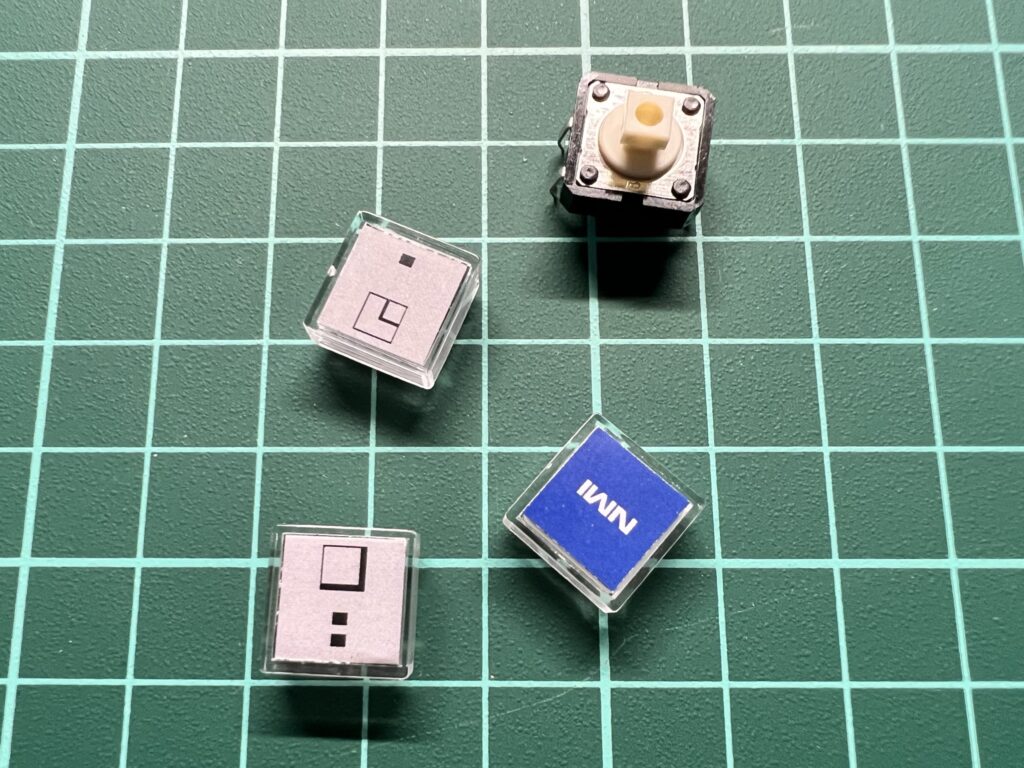
The coloured keycap labels were supplied on a glossy printed sheet and needed to be carefully cut out, one by one. For this I used a craft knife and a small steel ruler that I got out of a Christmas cracker! Immediately after cutting each label out I sandwiched it between a keycap and cover as you can see in the photo below. They were much less likely to get wafted off my desk and onto the floor like this!


Mini PET

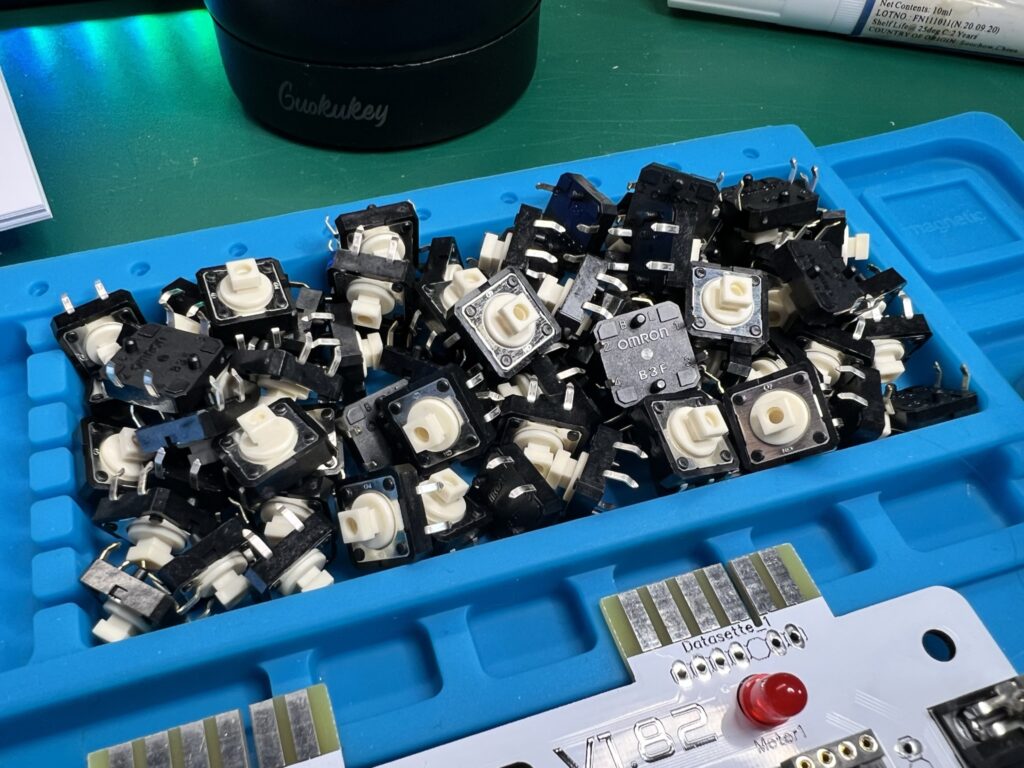
The keycaps and a plunger switch.


Now all the plungers needed fitting to the board. Thankfully from a soldering perspective their little wire legs grip the board really well so once attached they stay put.


Mini PET

This pile of plunger switches aren’t going to solder themselves…


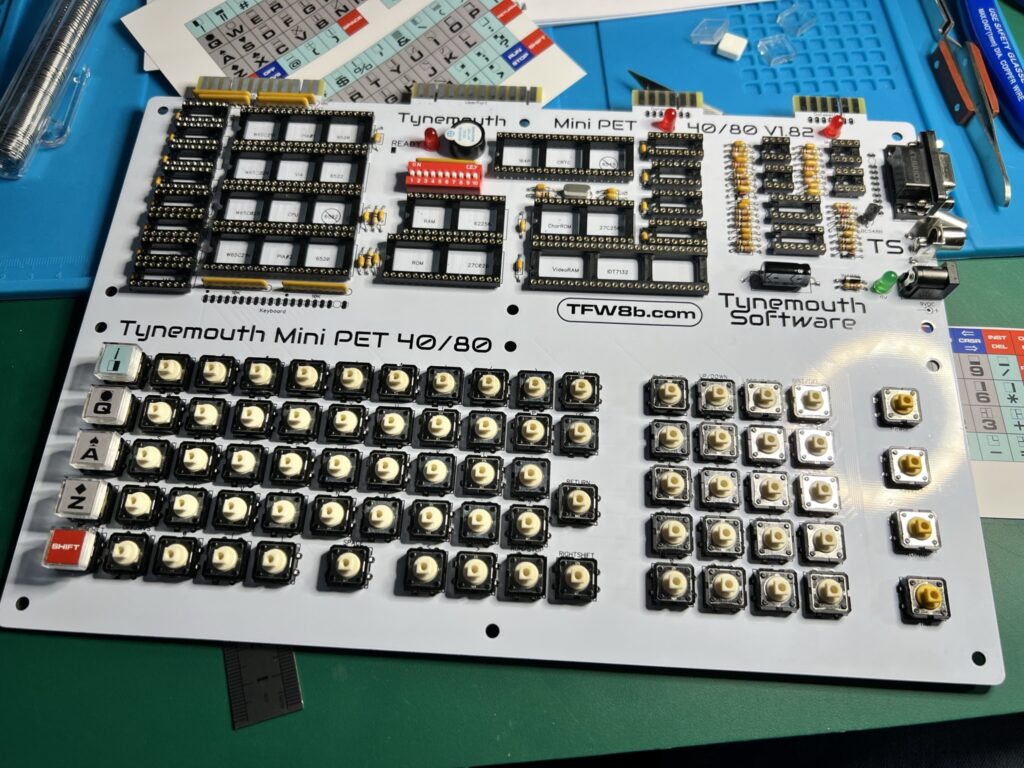
This was a very good thing indeed as you cannot solder them to the board yet – you have to attach all the keycaps to the plungers before proceeding any further.


Mini PET

Keyboard starting to take shape now.


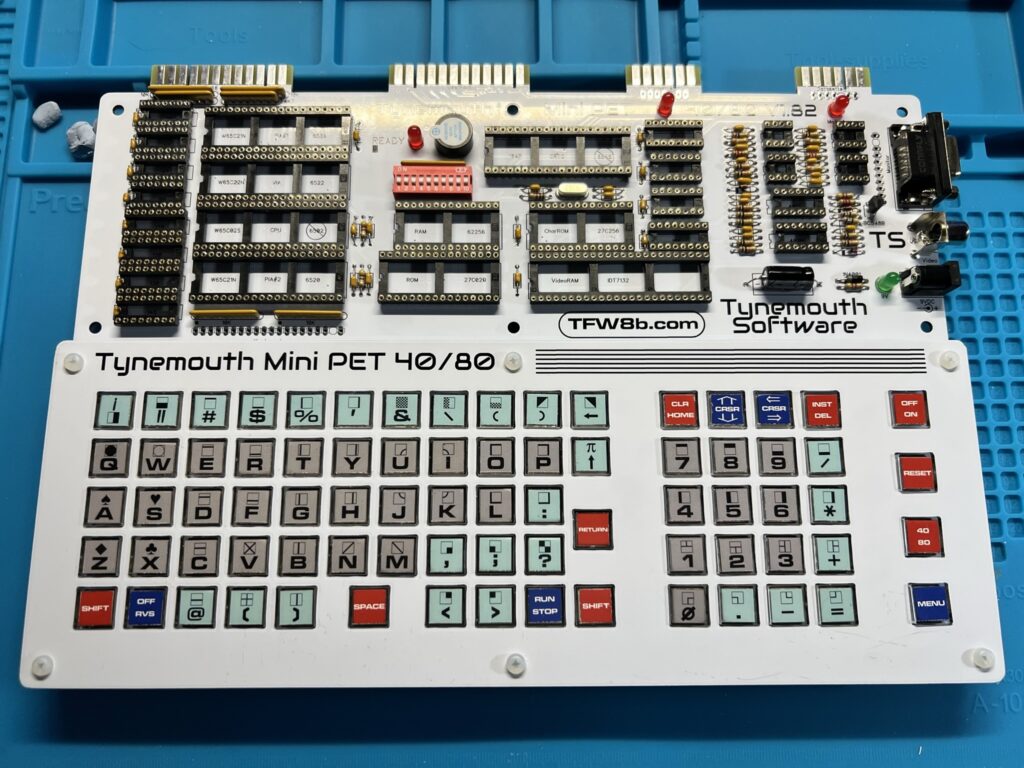
You also have to fit the keyboard overlay over the keycaps and fasten it to the mainboard too. This is to ensure that all the little plungers are perfectly aligned before they are permanently soldered into position.


Mini PET

Really starting to look like a computer now!


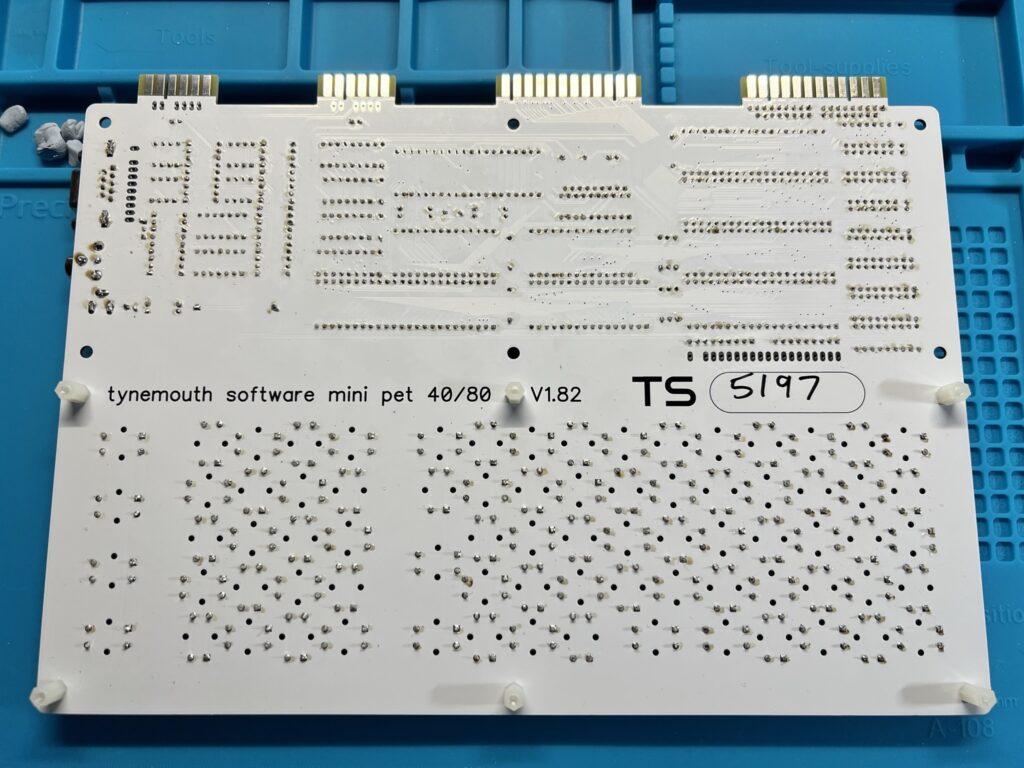
So began a marathon soldering session. Each of the 77 keys needed soldering to the board. Each key has four pins so that’s over 300 little pins that needed to be soldered. Once you get into a rhythm it’s not too bad though. Before I knew it they were all done and I was ready to begin installing the chips.


Mini PET

Each of these little pins (below the text) need soldering…


Installing the Chips


Mini PET

All of the ‘brains’ of the PET have been installed now.


Helpfully all the chips were already correctly positioned on the anti-static protective foam. Consequently it was just a matter of transposing them to the corresponding sockets on the mainboard. Most of the chips had legs that were splayed out too far and needed bending into position to fit into their socket. If I had to do this again I’d probably buy a proper tool to achieve this. As it was I used my desk surface whilst applying a slight rotational force to the chip to bend the legs into the correct position. It got the job done but not always on the first or even second try!


This slideshow requires JavaScript.


Above you can see some close-up photos of the various chips used in the kit.


Powering On!

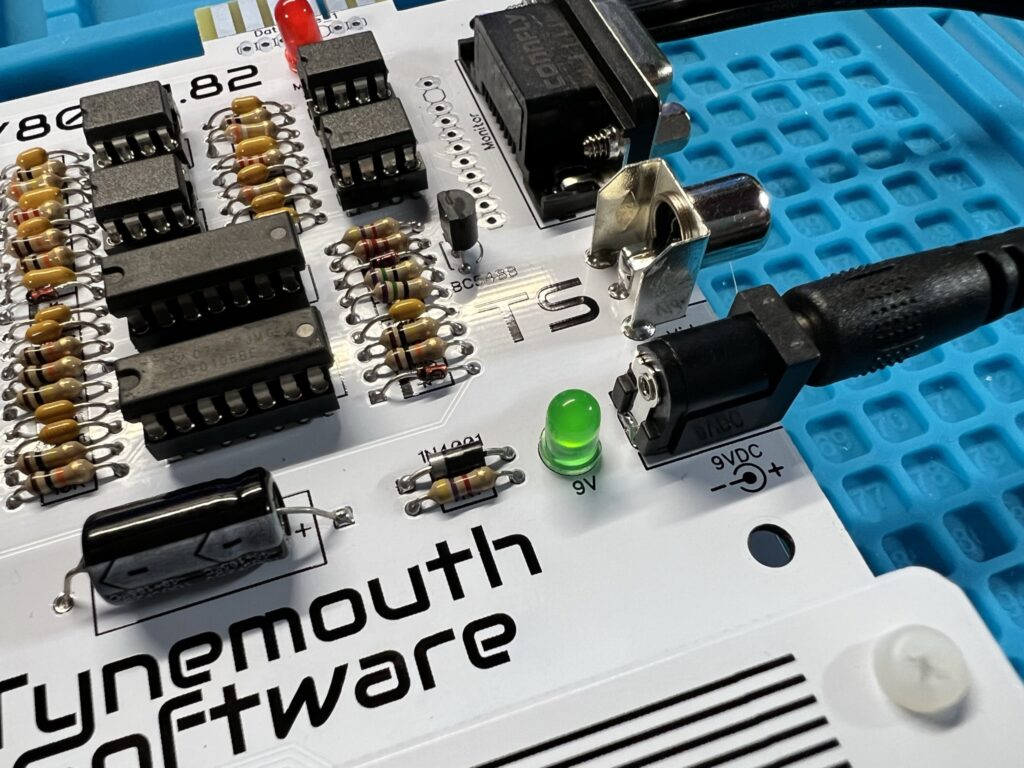
With all the chips installed it was time for best bit of all – powering on for the first time. I was obviously pretty nervous but I plugged in the PSU and switched it on. A dim green LED lit showing the board had power but the red ‘ready’ LED wasn’t lighting up.


Mini PET

Mini PET Power LED.


For a few moments I thought I’d really messed something up, until I remembered that there’s a key on the keyboard that turns the PET on/off. Doh! Pressing that button elicited a little electronic ‘chirp’ and the ‘ready’ light lit up. Hurrah!


Mini PET

Mini PET ‘Ready’ LED.


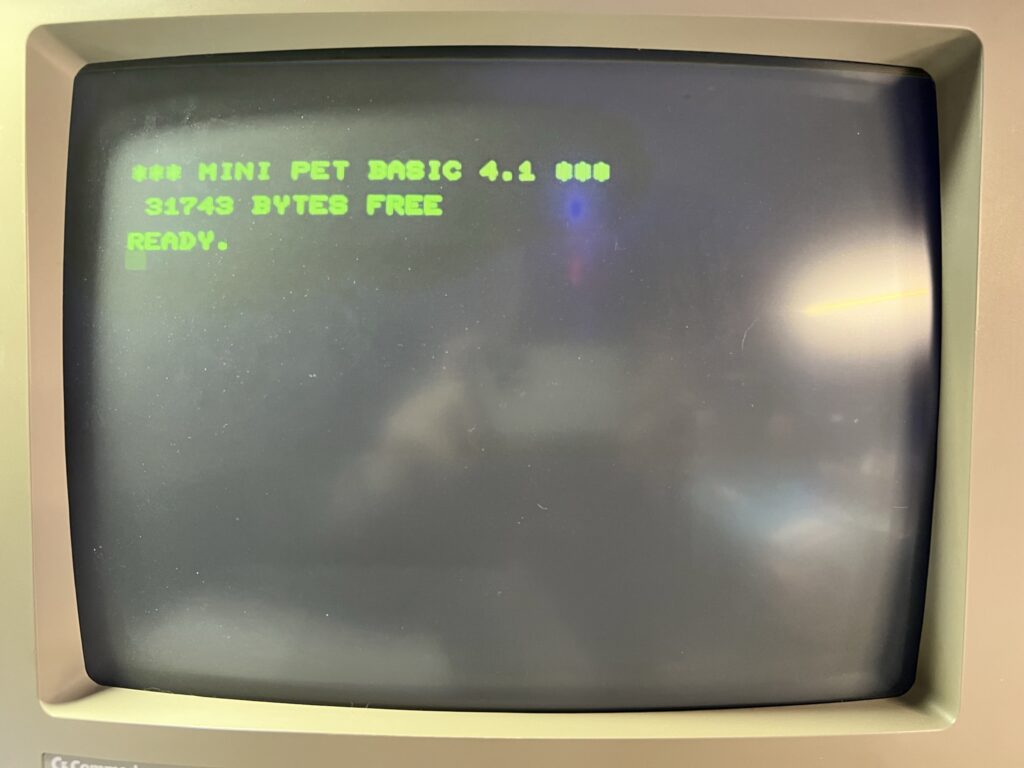
I hooked the PET up to my trusty Commodore 1084 monitor and was delighted to see a “MINI PET BASIC 4.1 – 31743 Bytes Free” message appear. So far, so good.


Mini PET

Mini PET boot screen.


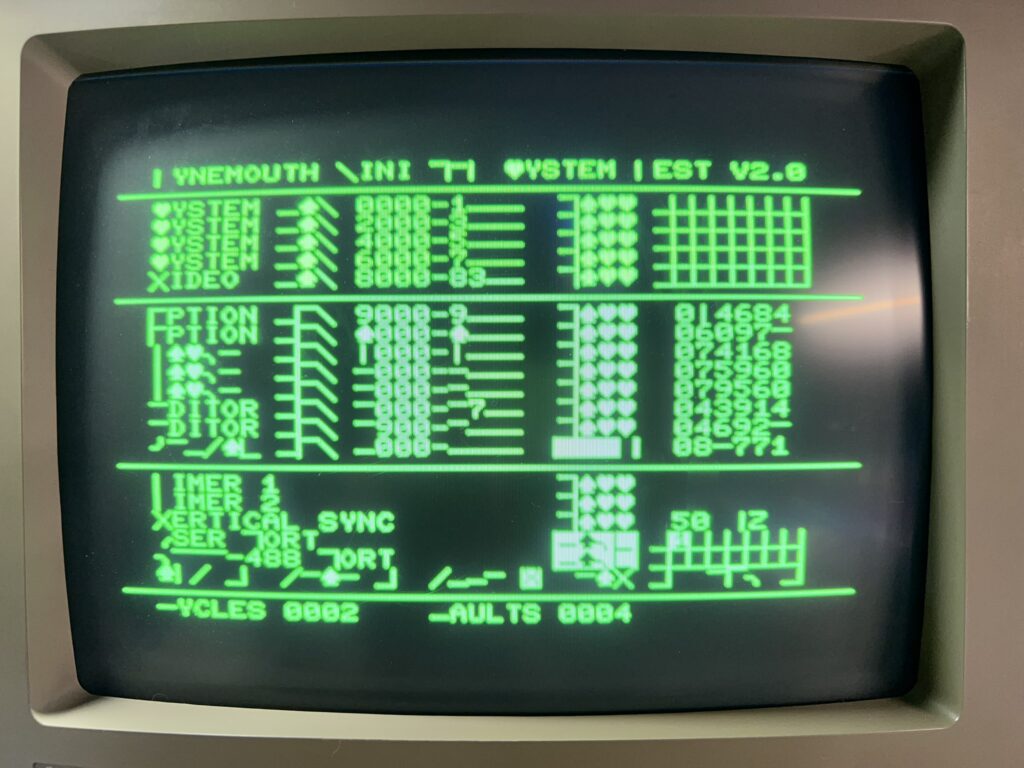
The instruction guide referred to a built in test you could run to make sure everything was working properly. It’s accessed by entering the command “SYS 40960″… I entered the command and hit Return and immediately knew something wasn’t right. All the text was garbled, showing graphics characters in place of some of the letters as you can clearly see in the photo below.


Mini PET

Uh oh – test failed 🙁


I powered it down, got out the magnifying glass and carefully inspected every single solder joint for issues. Sure enough I found 5 pins across the various chip sockets that I had somehow managed to miss completely with the soldering iron. I heated the iron back up and soldered the ones that had got away and tried running the test again.


Mini PET

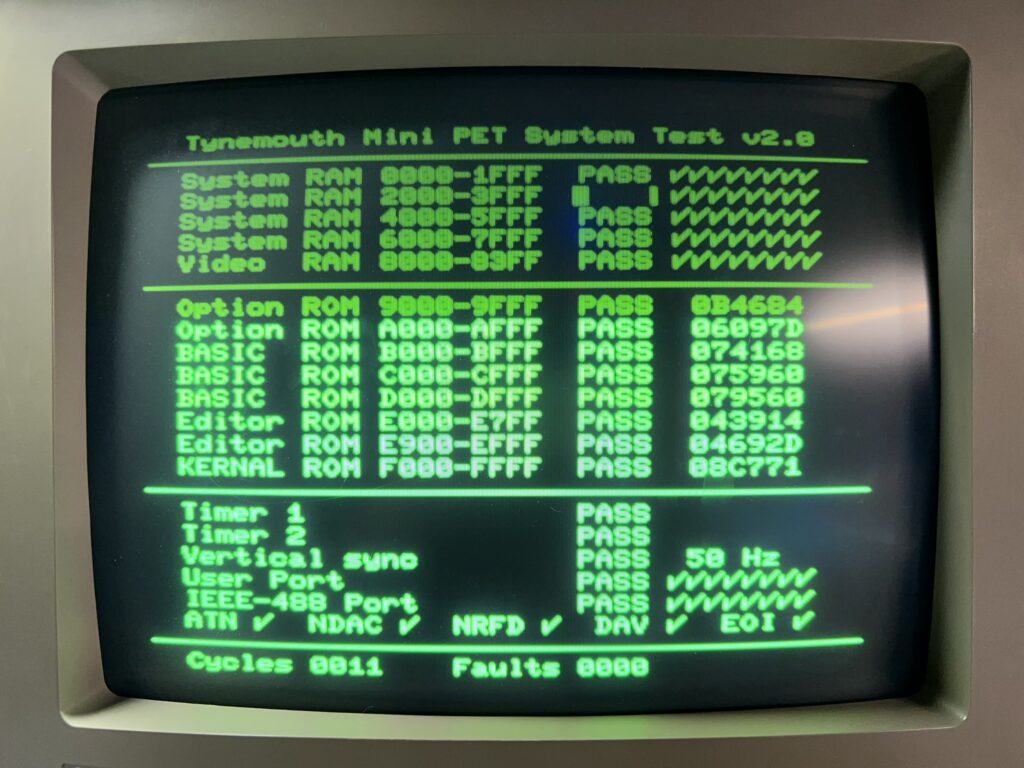
Mini PET- test passed! 🙂


Bingo! This time everything passed with flying colours. Just to be on the safe side I let the test run for a while but happily every test cycle completed successfully. Not really sure how I managed to completely miss soldering some of the pins but I was just glad it was a simple, easily rectifiable issue.

With the tests complete it was time to install my new baby inside it’s protective Perspex case. This was a simple matter of peeling off the protective film from the Perspex sheets and fastening them together with the supplied plastic stand-offs and screws.


Mini PET

Looking good.


I have to say it looks amazing in its case and I love the way it has a transparent top section so I can admire my hard work. I think it looks really cool and ‘industrial’ showing the chips inside and having the little LED’s lit up.


Mini PET

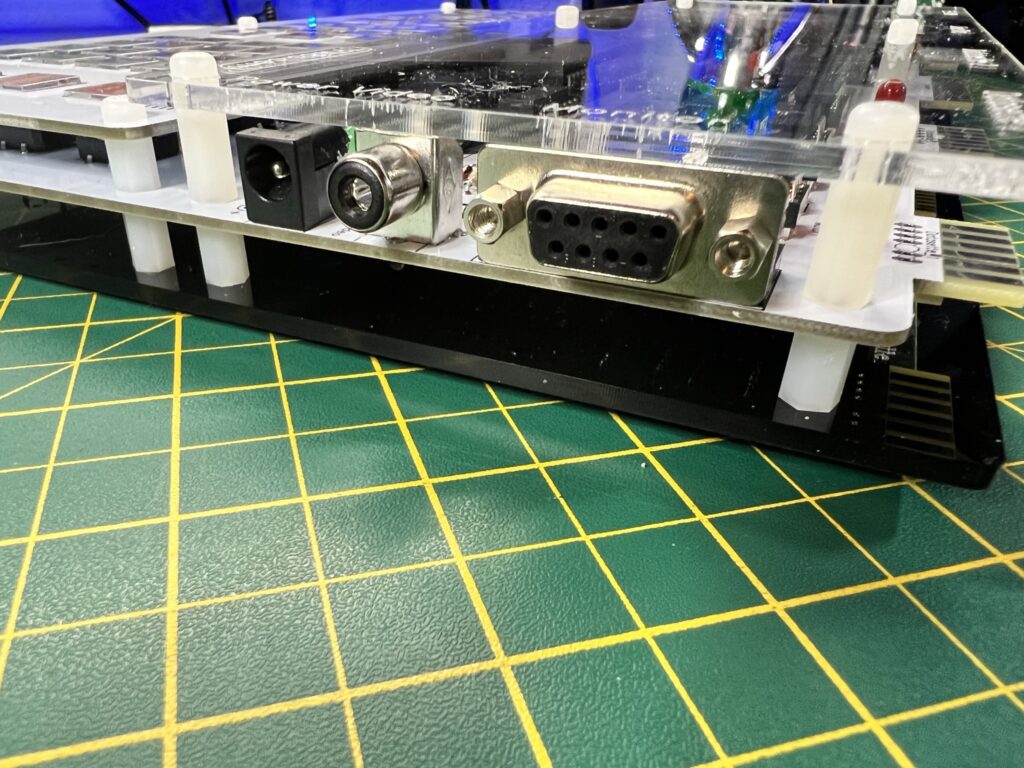
Power and video sockets.


The photo above shows, in order from left to right; the power socket, composite video output and RGB video output.


Mini PET

View of the rear ports.


This next photo shows the ports at the rear of the Mini PET. From left to right, Datasette Port 1, Datasette Port 2, User Port and finally the IEEE-488 Interface Port.


Mini PET

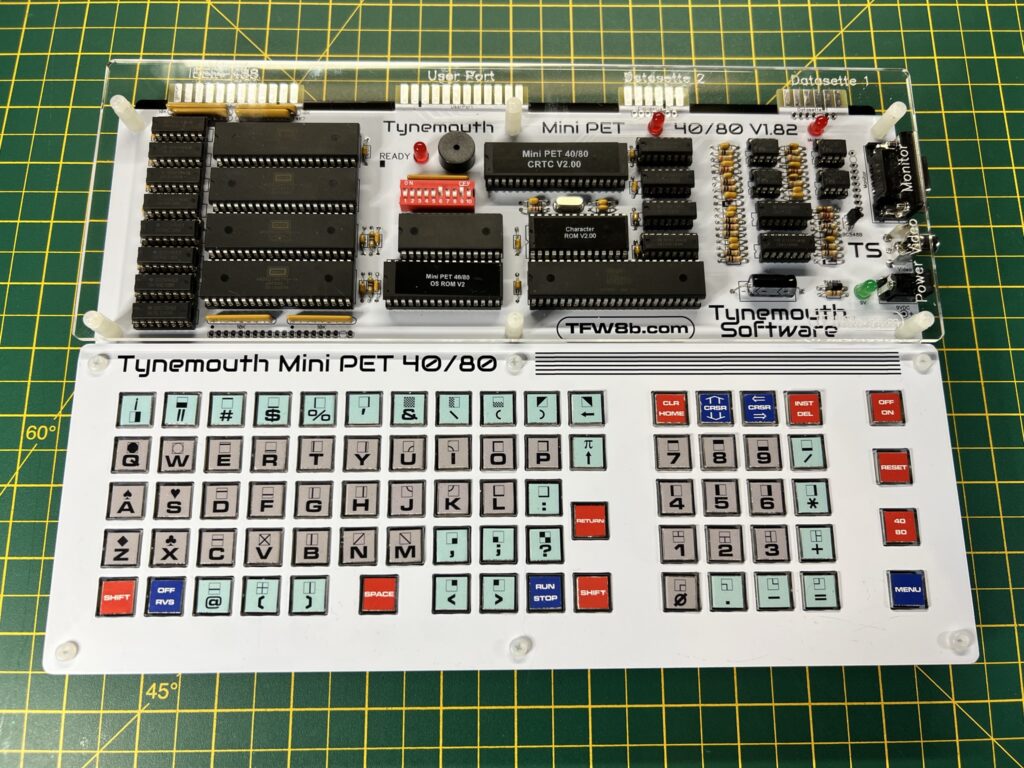
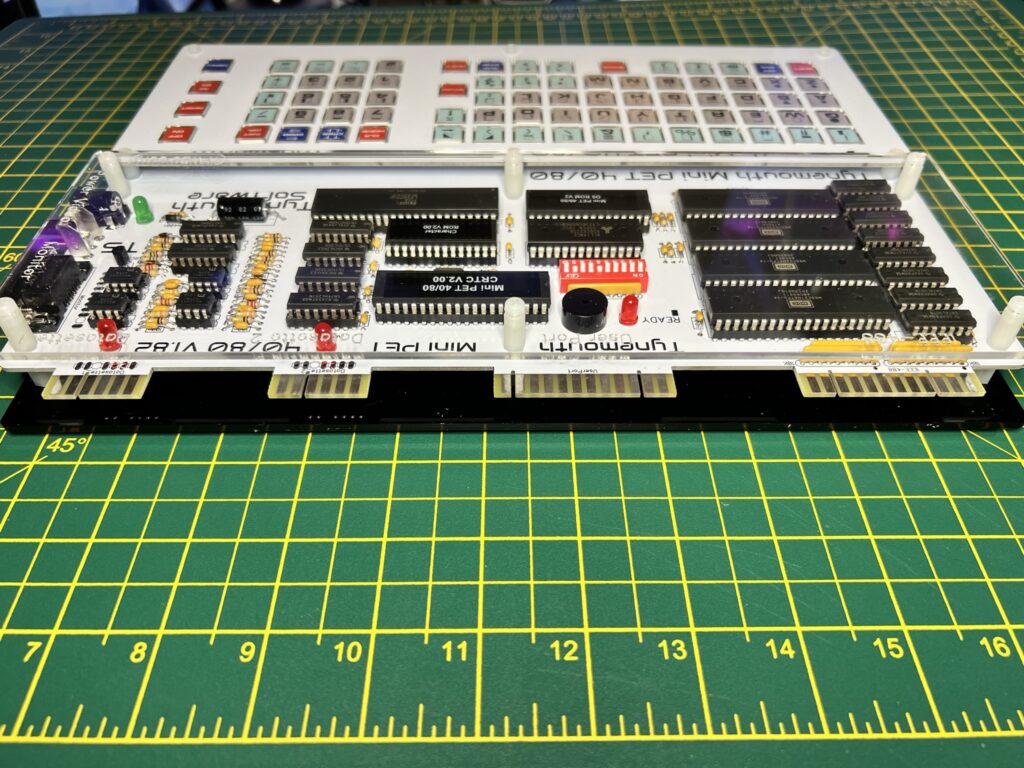
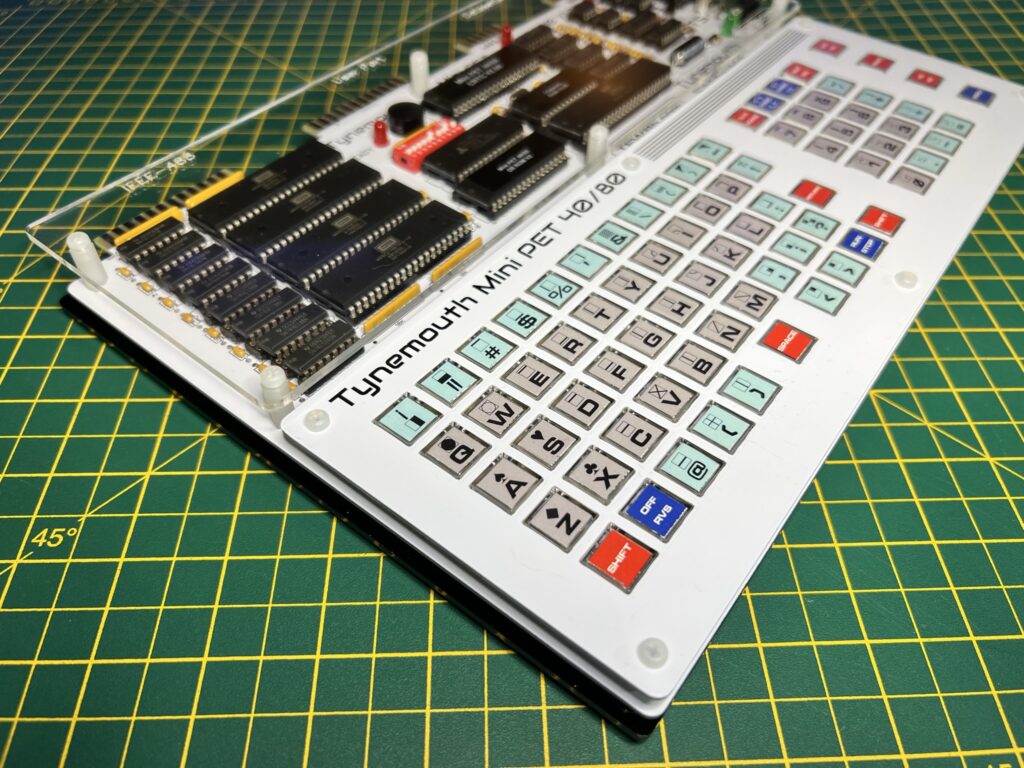
The finished kit in all its glory.


Just look at those sleek lines… Bootiful – as Bernard Mathews used to say… An additional neat touch is that the names of all the ports and sockets are etched into the Perspex case itself. You can just make this out in the photo above.


Mini PET

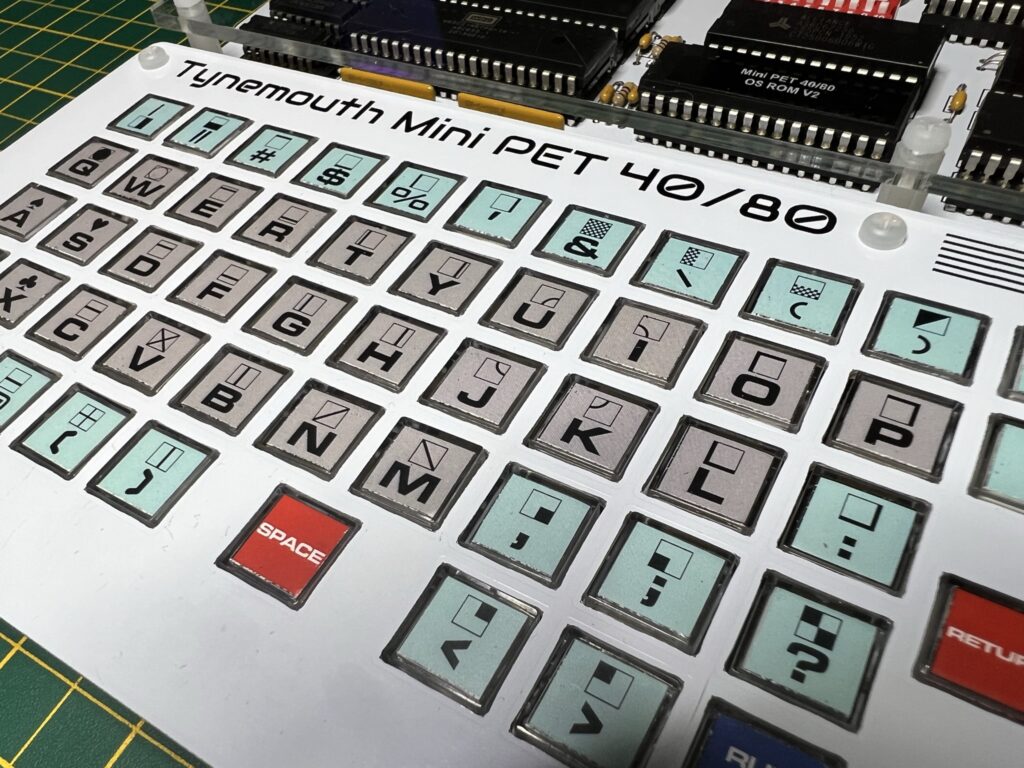
Chiclet style keyboard up close.


Here’s a close-up of the keyboard. It’s been designed to replicate the chiclet style keyboard of the original PET machines and I think it does an admirable job. It’s actually quite comfortable to type on too – I’ve certainly used worse keyboards on other devices that’s for sure!

SD2PET Device


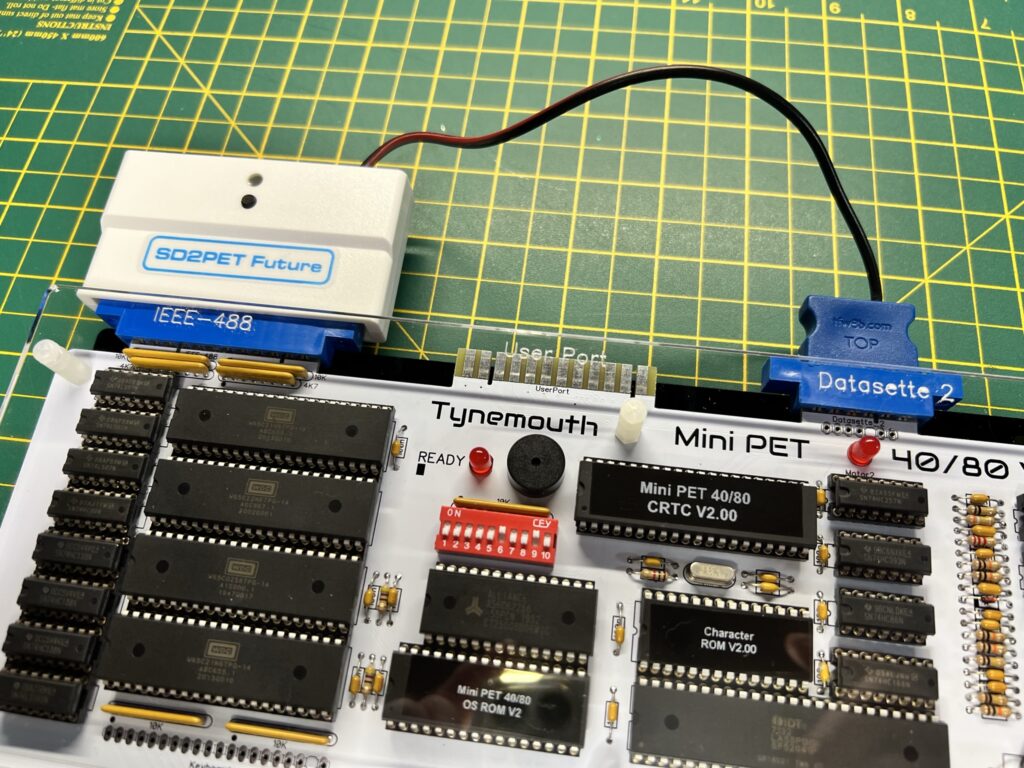
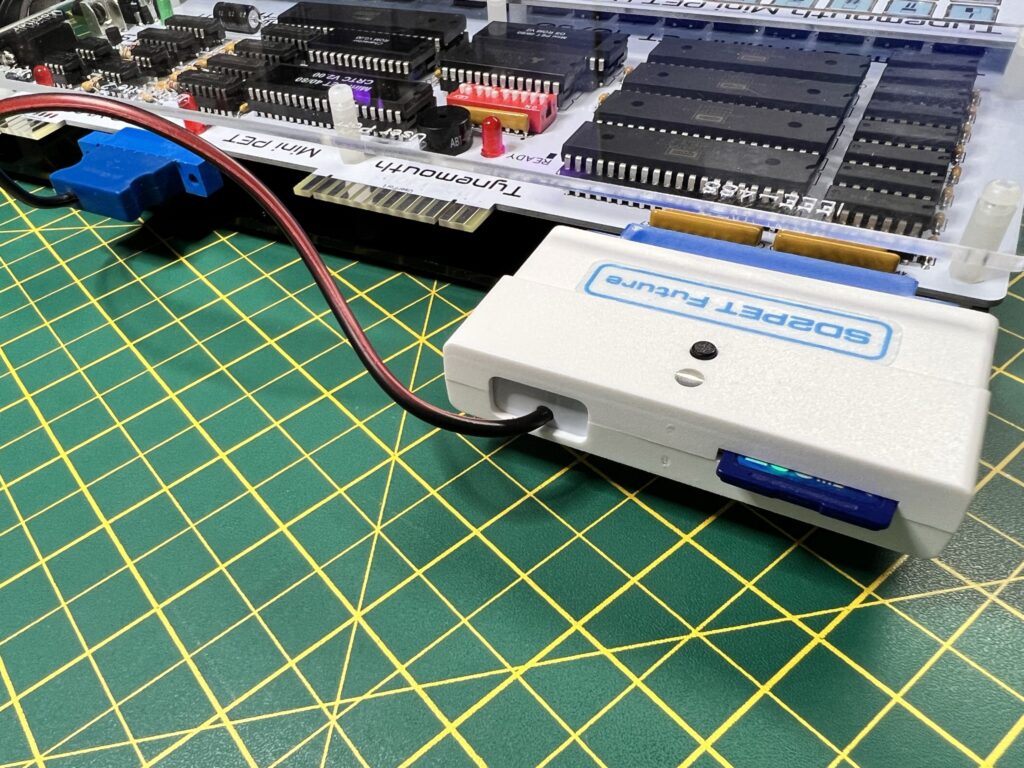
With my Mini PET build complete it was time to put it to good use. I hooked up my SD2PET device to the IEEE-488 port and Datasette 2 port (for power). This is a clever little device that fools the computer into thinking it has a floppy disk drive attached. Files on the card appear as virtual disks to the PET.


SD2PET

SD2PET plugged into back of Mini PET.


The SD card must be formatted as FAT32 which is easy enough to do on a Windows 11 PC. Next I transferred a few PET games and demos to the card, inserted it into the SD2PET and fired up the Mini PET.


SD2PET

SD2PET – Rear view.


The Mini PET has a nifty little feature if you press the dedicated MENU key (bottom right).


SD2PET

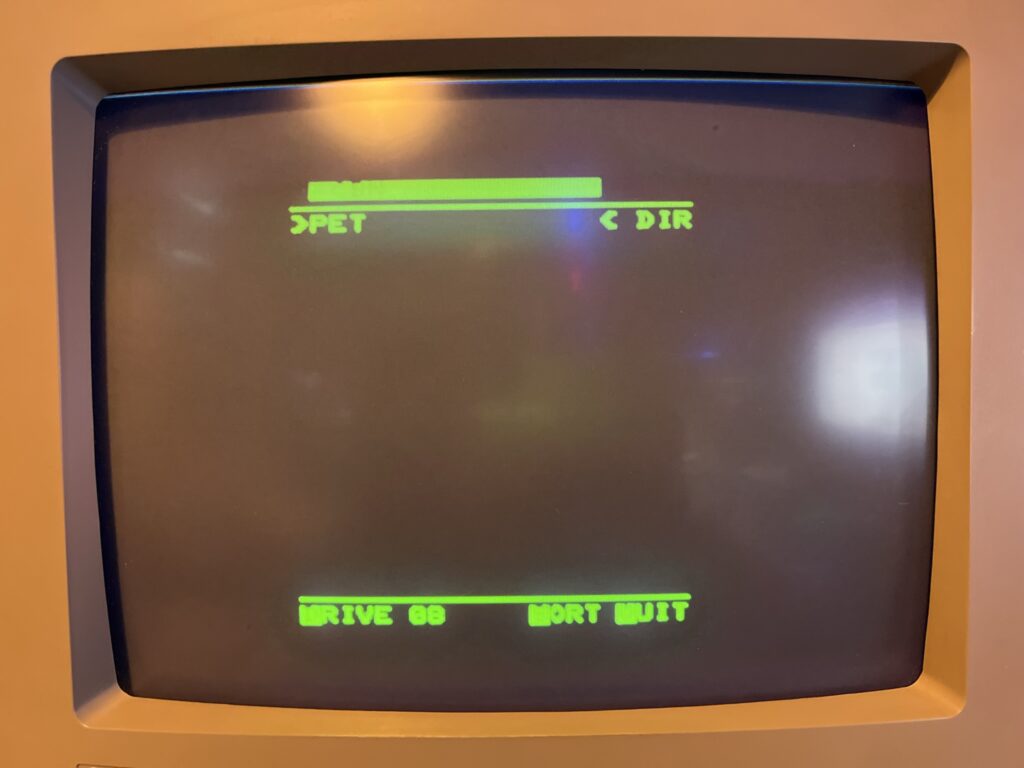
SD2PET File Browser.


It brings up the file browser for the SD2PET allowing you to select a program to run straight away as shown in the photo above. By the way, I apologise for the quality of the photos in advance. I found it very hard, if not impossible to achieve an exposure that could both capture the bright green luminous display on my 1084 CRT and avoid the flickering scanlines. The images look pin sharp and vibrant in real-life but not so much in my photos…


Demos and Games


PET Games

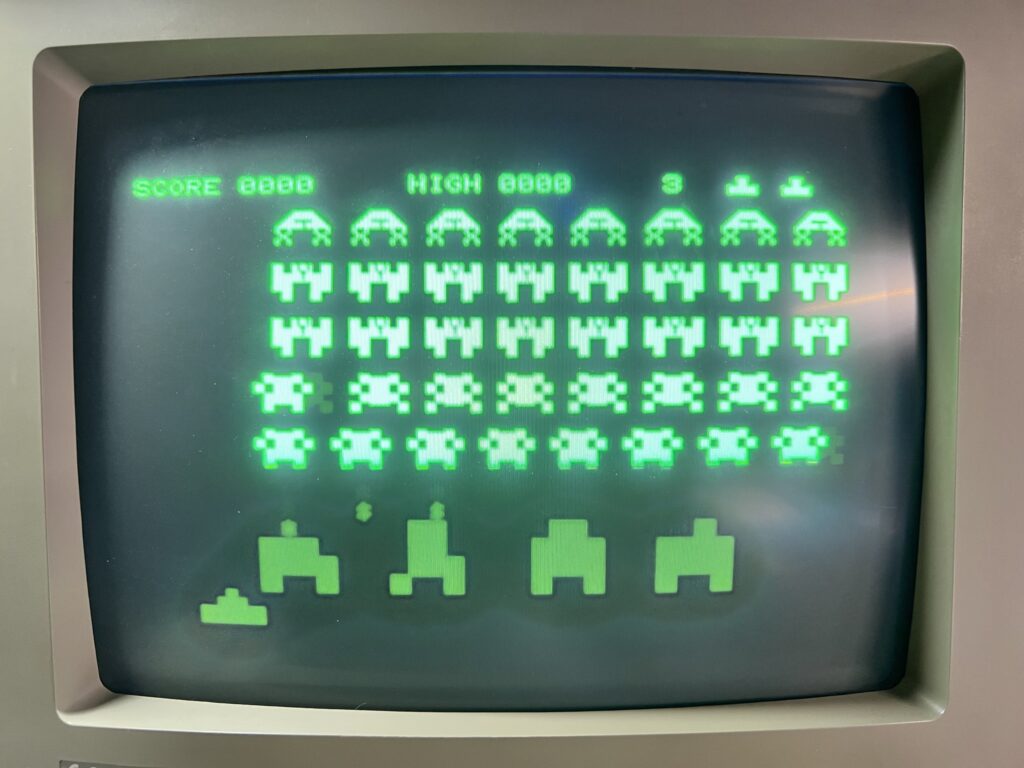
Space Invaders


I found a really terrific version of Space Invaders that both looked and sounded the part and was as addictive as ever to play with keyboard controls.


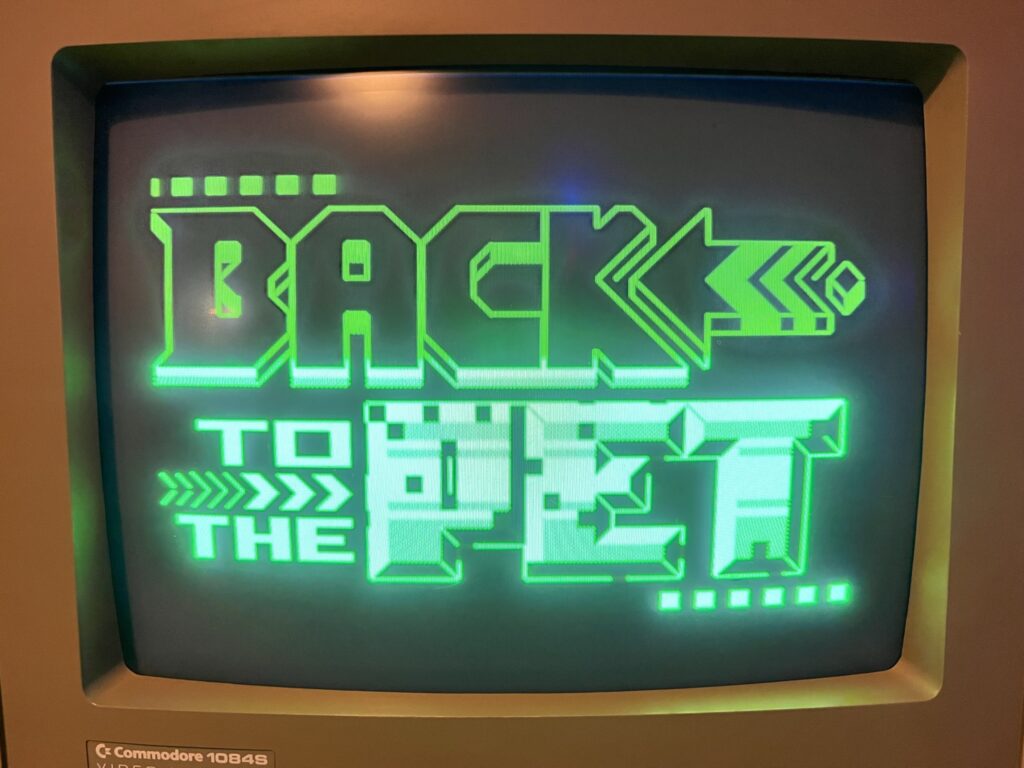
PET Demo

Back to the PET demo.


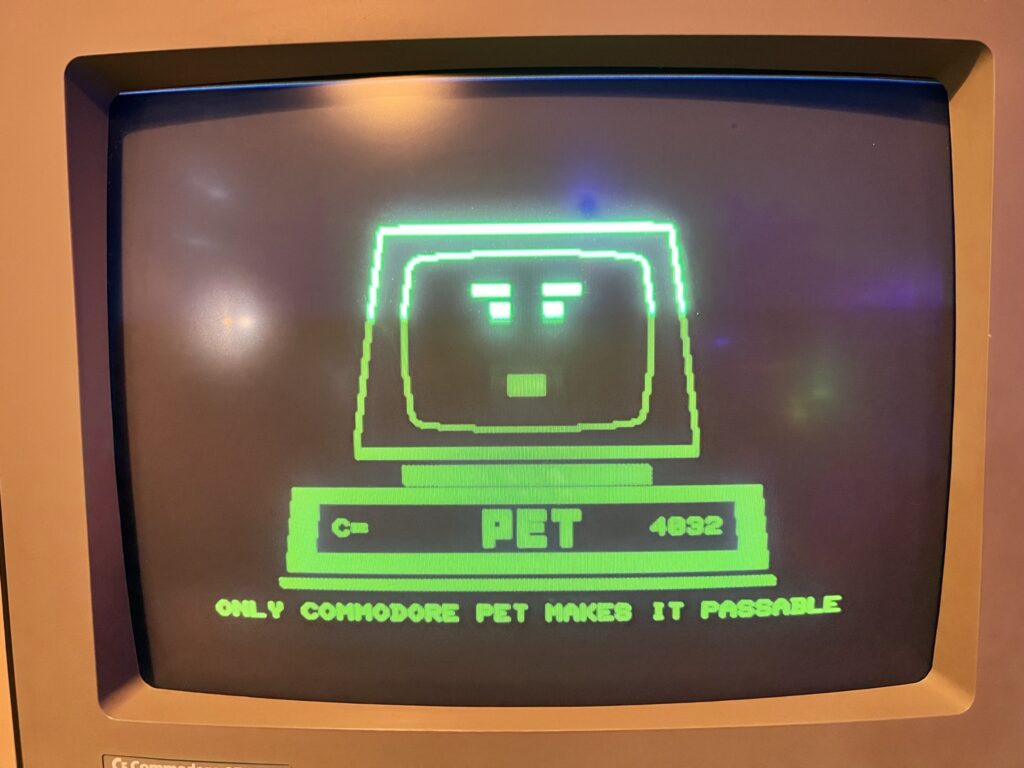
I also ran a few demos and was particularly impressed by one called “Back to the Pet”. It featured some pretty groovy music given the hardware it was running on and some flashy graphics including parallax scrolling. This demo was only released this year so it really pushes the limits of what the PET can achieve. I certainly never thought the humble PET was capable of something like this!


Back to the PET demo.

Another Back to the PET capture.


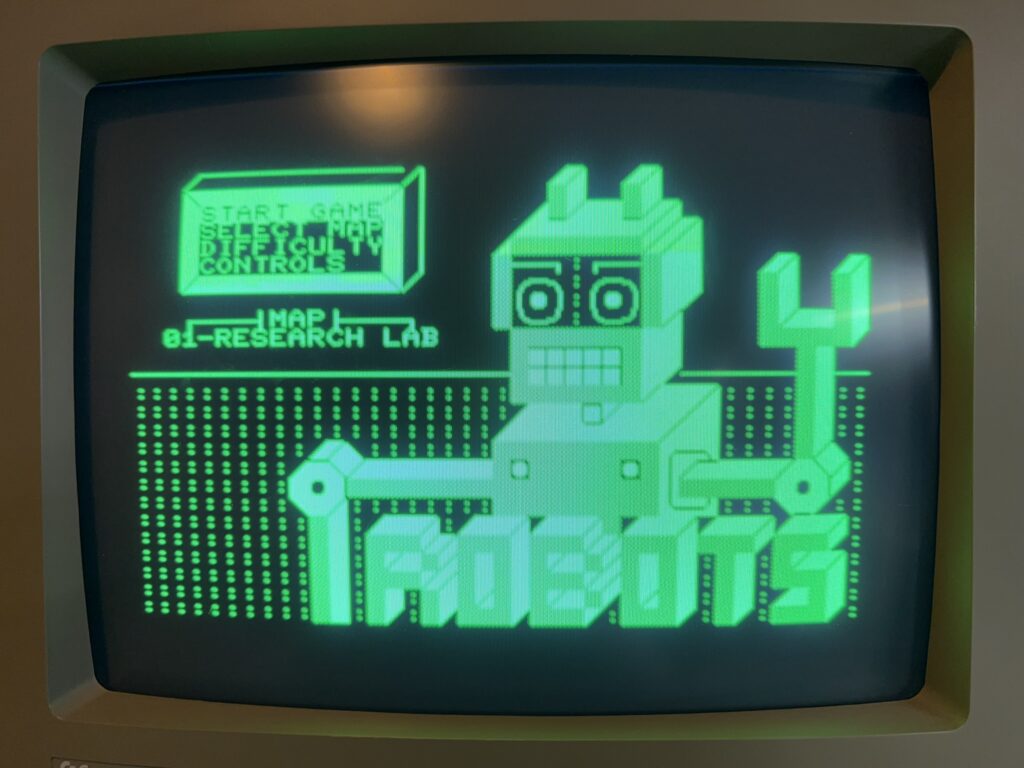
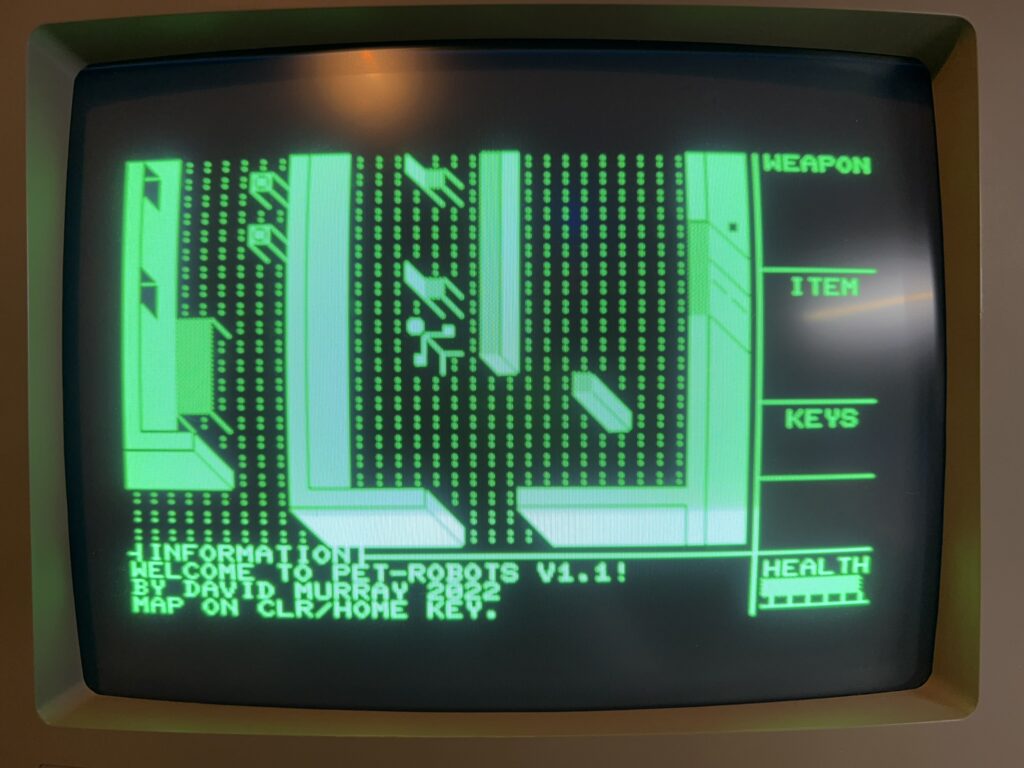
I also tried Attack of the PETSCII Robots which felt appropriate given the name and was pretty impressed with how well it ran.


Attack of the PETSCII Robots

Attack of the PETSCII Robots Title Screen.


This game actually allows you to swap out the physical character ROM chip in order to get some enhanced custom graphics. This involves programming an EPROM and is something I might look into as a project for the future but right now I was content to just play the game ‘as is’.


Attack of the PETSCII Robots

Attack of the PETSCII Robots Game Screen.


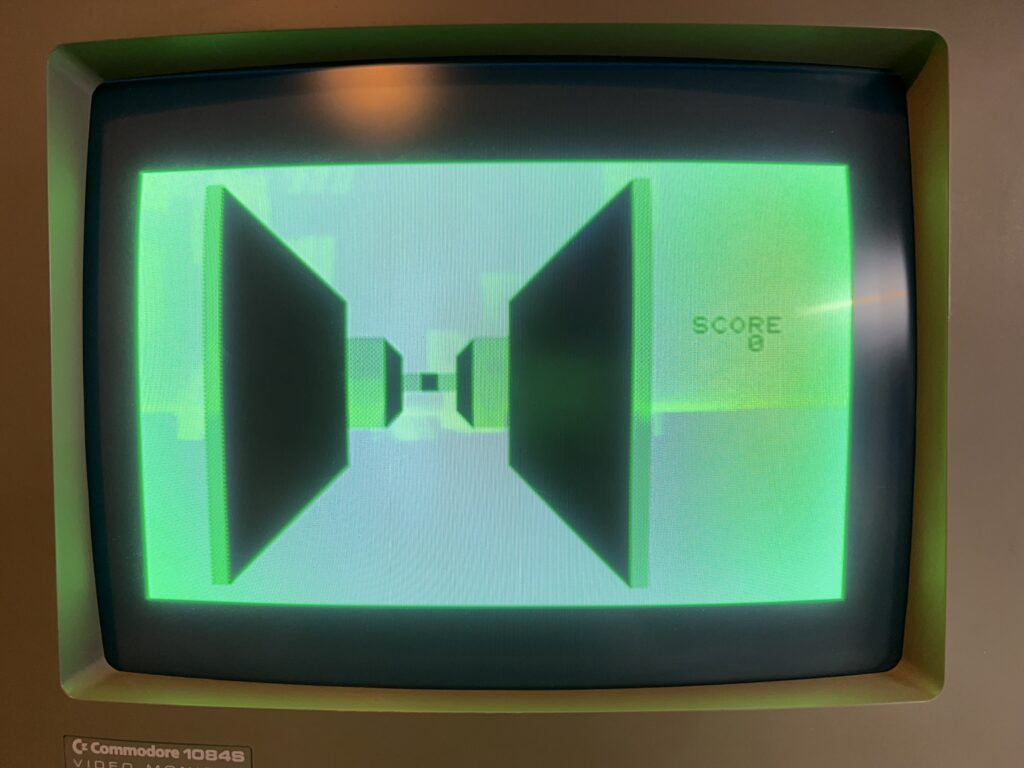
At this point I remembered that a copy of 3D Monster Maze was included in the box so I hooked up my Datasette to Port one and loaded it up.


Graphically this is quite a simplistic game but it ran really well.  It was easy to control with the keyboard and I had a fun experience while it lasted.


Rounding Off

All in all I’m super impressed with the Mini PET. It was much easier to build than I’d anticipated and I definitely wish I had gotten round to making it sooner instead of putting it off. Although it probably cost almost as much as a real Commodore PET on eBay it’s built with new components so should be much more reliable. It’s also a fraction of the size of those behemoth PET machines plus I’ve had the satisfaction of building it myself.

My experience of building the Mini PET computer has certainly left me a lot more receptive to the idea of building my own retro machines in the future now too. If they ever offer a build your own Commander X16 kit then I’m all in!

The Future

TFW8b sell a hardware expansion for the Mini PET and some more games on cassette so I’ve ordered these and will post some more updates when they arrive. I’ll also be keeping a look out for any books or magazines containing BASIC listings for the PET computer so that I can have a go at typing them in in true 1980’s style!


The C64 Collectors Guide to Mastertronic Kickstarter Bundle

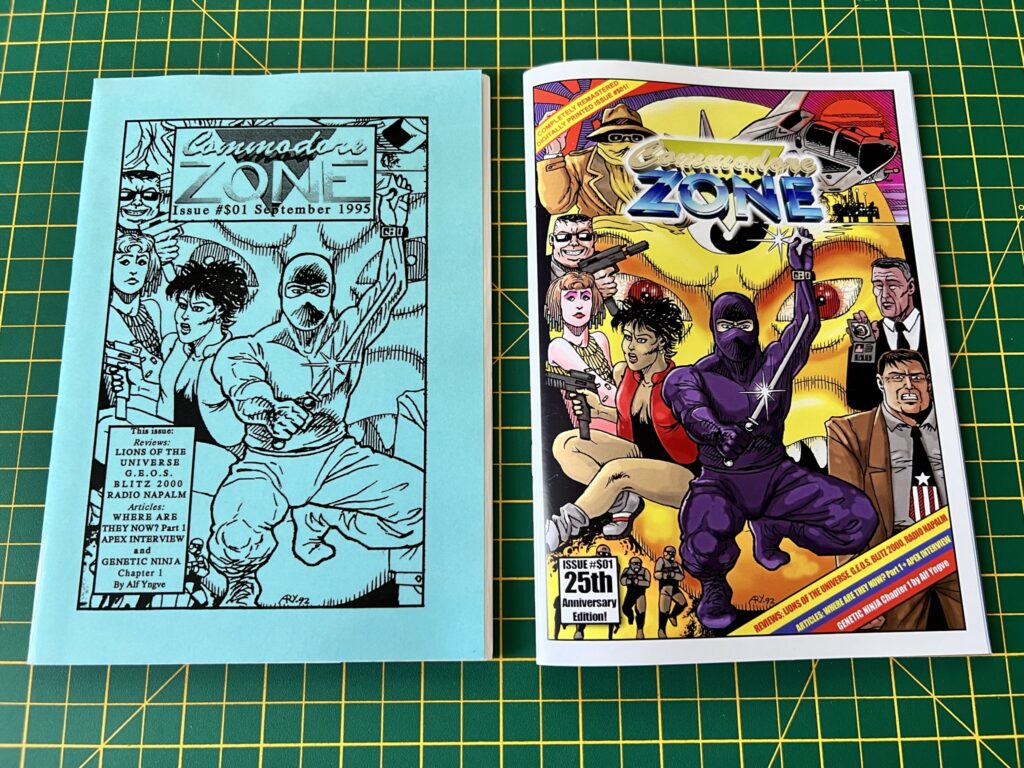
This is a compilation of mini reviews of stuff I got with ‘The Commodore 64 Collectors Guide to Mastertronic’ on Kickstarter a couple of months ago. It includes the book itself, ‘Hammer Down’ C64 game, ‘Classic C64 Soundtracks’ Tape/CD and a 25th Anniversary remaster of the first edition of Commodore Zone magazine.


Collectors Guide to Mastertronic

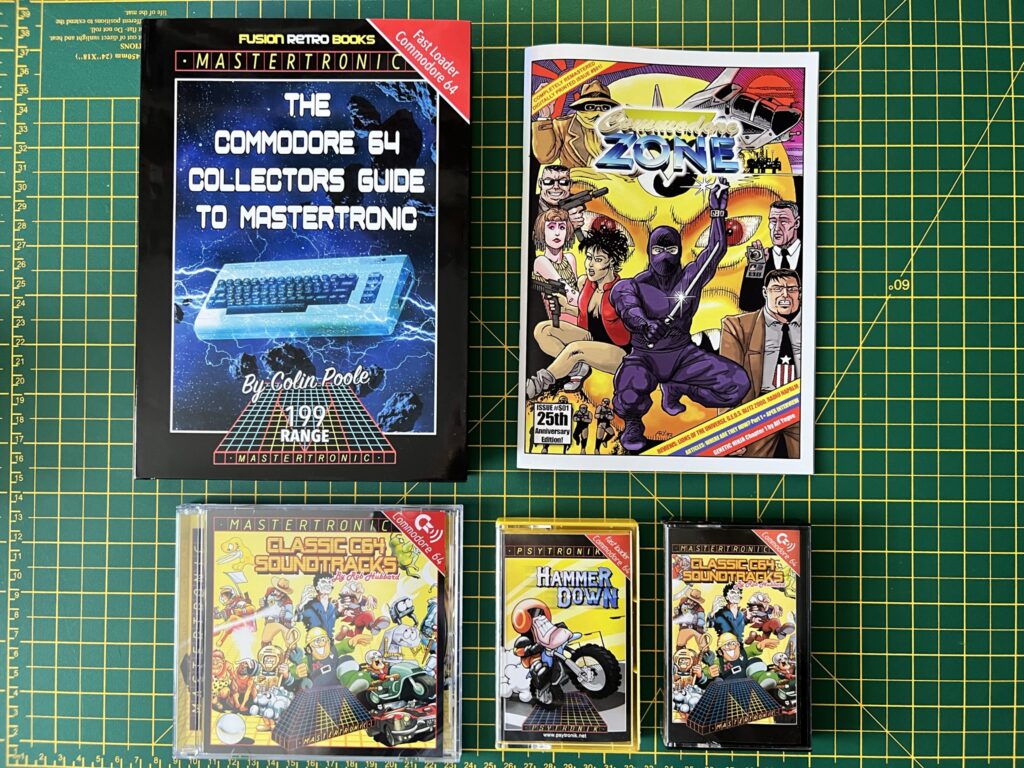
What I received in my bundle.


As you can see in the photo above I received quite a few items in the bundle. The book, a reproduction Commodore Zone magazine, Classic C64 Soundtrack CD and Cassette tape and a C64 game on cassette; Hammer Down. ‘Didn’t he do well!’ as Brucie used to say.


Collectors Guide to Mastertronic

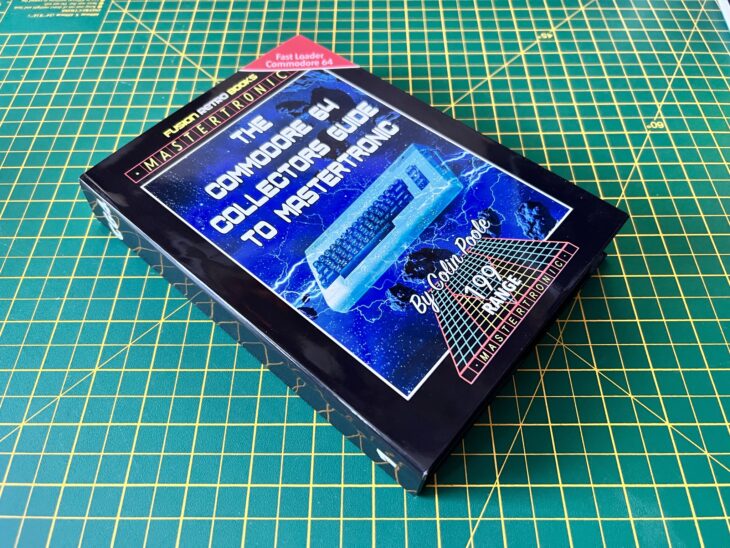
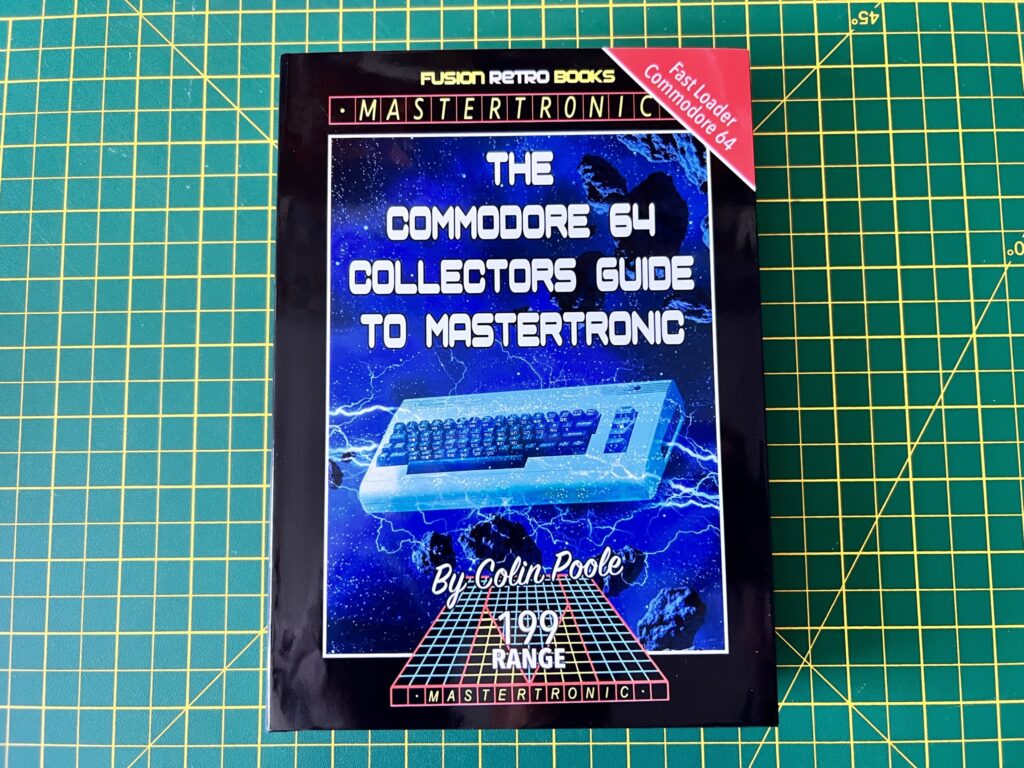
The Commodore 64 Collectors Guide to Mastertronic.


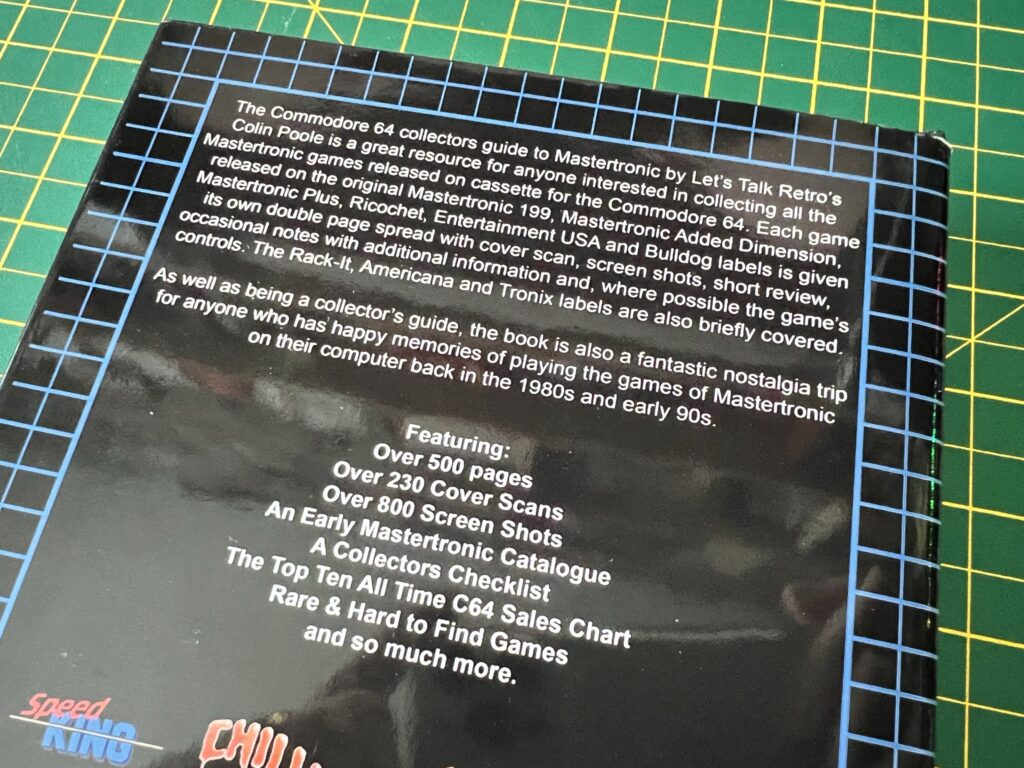
The hardback book itself is a weighty tome, coming in at over 500 pages complete with glossy protective jacket. The cover takes its styling cues from the Mastertronic £1.99 range of its subject matter and is visually very appealing.


Collectors Guide to Mastertronic

The back cover.


Inside the Collectors Guide to Mastertronic Book

Inside there is coverage of every Mastertronic game ever released for the Commodore 64 alongside screenshots, game descriptions and mini reviews. It’s basically an encyclopaedia of everything Mastertronic for the C64. The presentation of the book is lovely with full colour box art and screenshots on glossy paper with a real premium feel to everything. The original Zzap! 64 scores for the games are also included where they exist (they may be present for every game but I certainly haven’t read every page in the book to check).


This slideshow requires JavaScript.


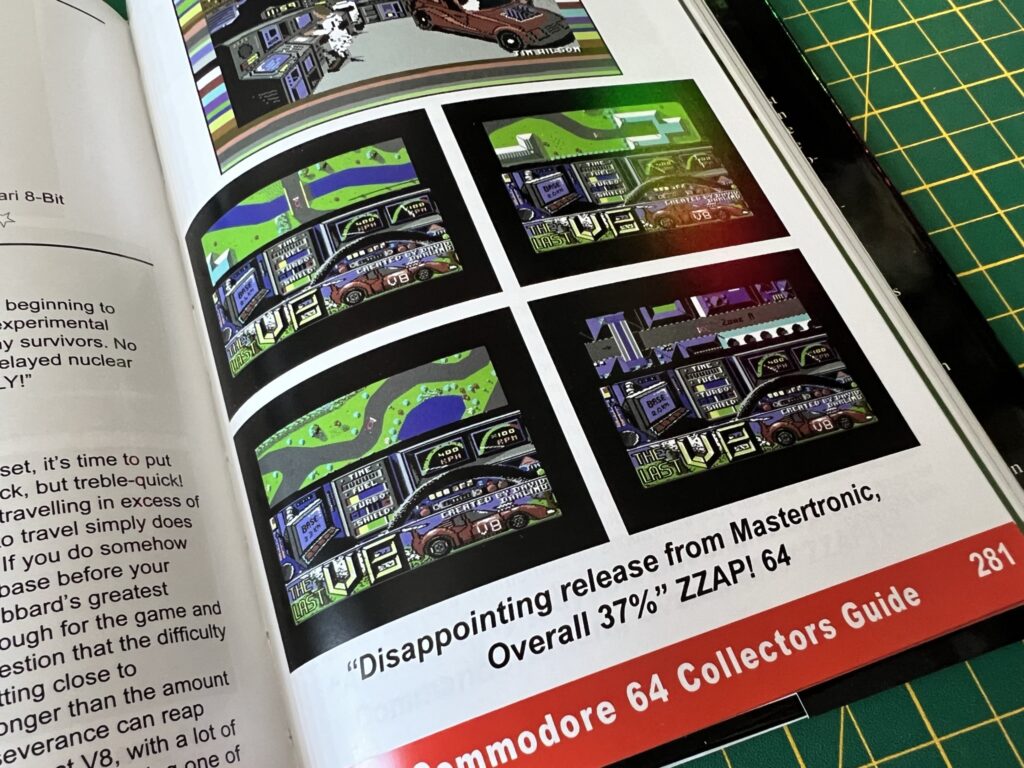
I’ve had a lot of fun just randomly browsing through the book, stopping when a particular game catches my eye. I was quite shocked to discover that one of my favourite Mastertronic titles scored a measly 37% in Zzap! 64. I’d have given it at least double that score as it entertained me for many a rainy Sunday afternoon as a kid until I finally completed it.


Collectors Guide to Mastertronic

Shockingly low score for The Last V8!


Although I got the Collectors Guide to Mastertronic book as part of a Kickstarter campaign, it is available to be purchased separately from the Fusion Retro Books website. If you want to pick yourself up a copy don’t forget to use my code ‘LYONSDENBLOG’ to get yourself a whopping 15% off the price.


Collectors Guide to Mastertronic – C64 Soundtracks

Also included in the bundle was a collection of excellent C64 SID soundtracks on both CD and Cassette. Each contains exactly the same tracks but I wanted both just so I could play them on both my Hi-Fi and Walkman. There are 13 tracks in total and most are native SID tracks but there are also a couple of orchestral versions at the end taken from the 8-bit Symphony album.


This slideshow requires JavaScript.


Just like the book, the design of the albums is based on typical Mastertronic releases from the past. This is especially true for the cassette version which would look right at home amongst my collection of classic games.


This slideshow requires JavaScript.


The cassette features full colour labels and a J-card complete with track listings. The recording, whilst on a standard ferric cassette, sounded terrific and has been completed to a high standard.


This slideshow requires JavaScript.


The CD is a thing of beauty too. The music has been recorded onto one of those vinyl record style black CD’s which makes it look like a diminutive 7″ single. It features an expanded version of the cassette artwork on the front and needless to say it also sounds fantastic.

Sadly I don’t think the soundtracks are available to buy anywhere now as they were limited edition runs.


Hammer Down Game

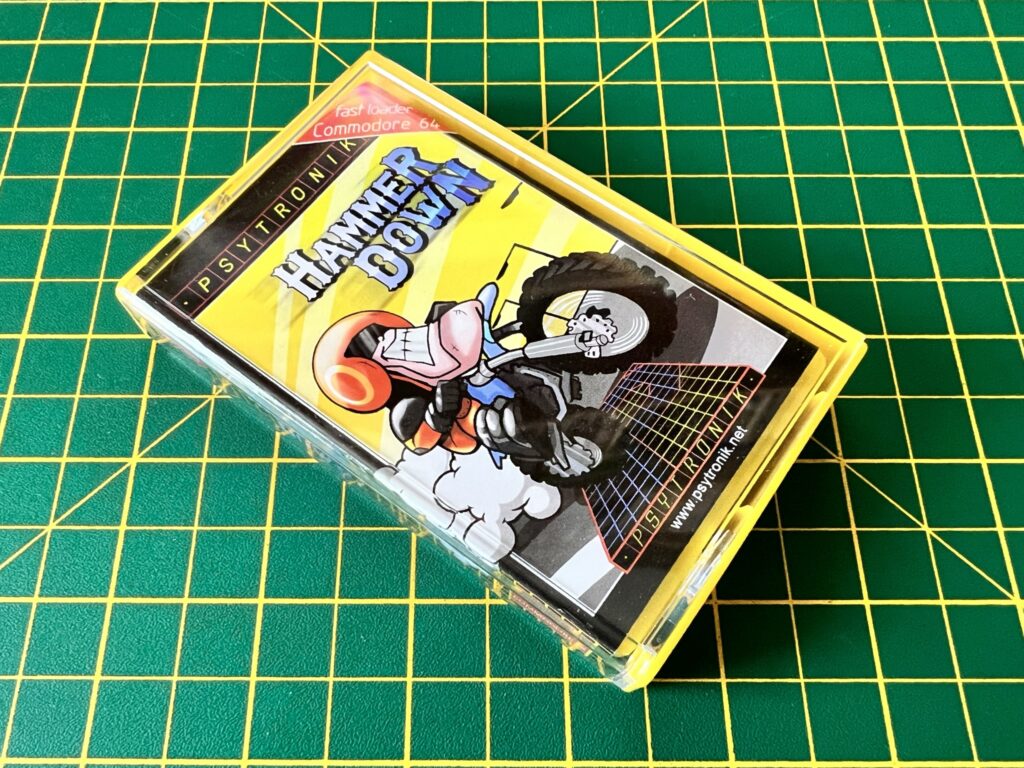
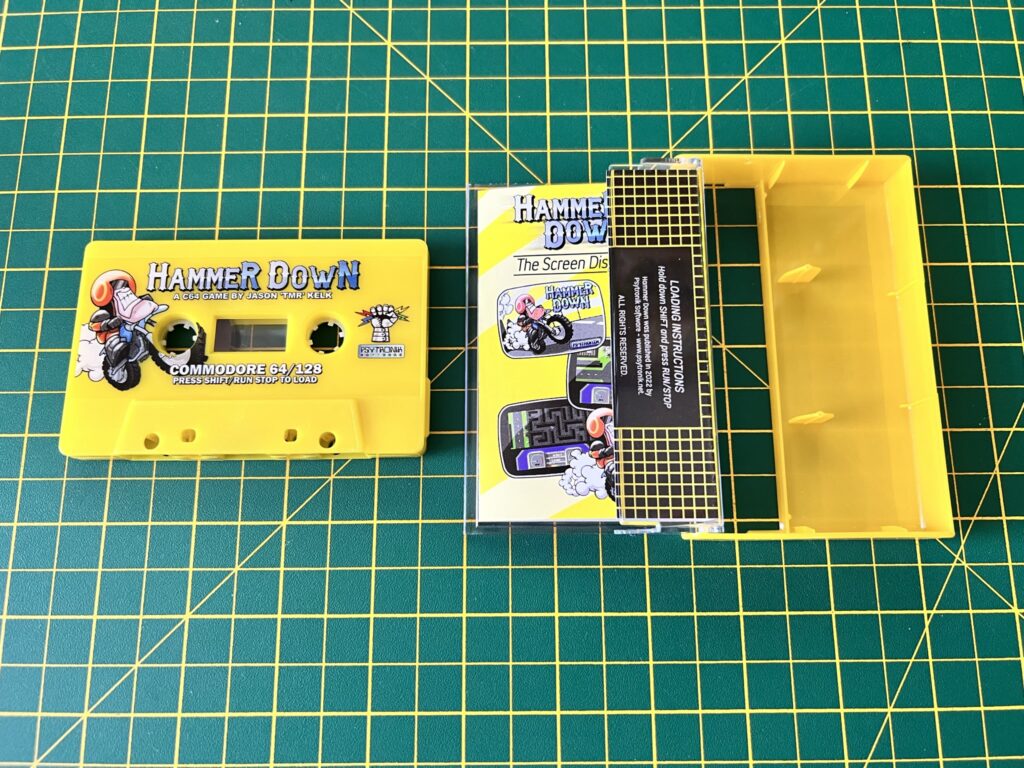
Also included in my Collectors Guide to Mastertronic bundle was a new original game for the C64 called ‘Hammer Down’. The game comes on cassette with a suitably Mastertronic style cover. Look carefully though and you will see that it’s actually made by Psytronik, the prolific modern day C64 game publisher.


Hammer Down C64.

Hammer Down cassette case.


The yellow cassette is very eye-catching and has colour artwork screen-printed directly onto it and looks fantastic.


Hammer Down C64.

Hammer Down tape and cassette case.


Likewise the yellow case and full colour J card complete with screenshots looks equally great.


Hammer Down C64.

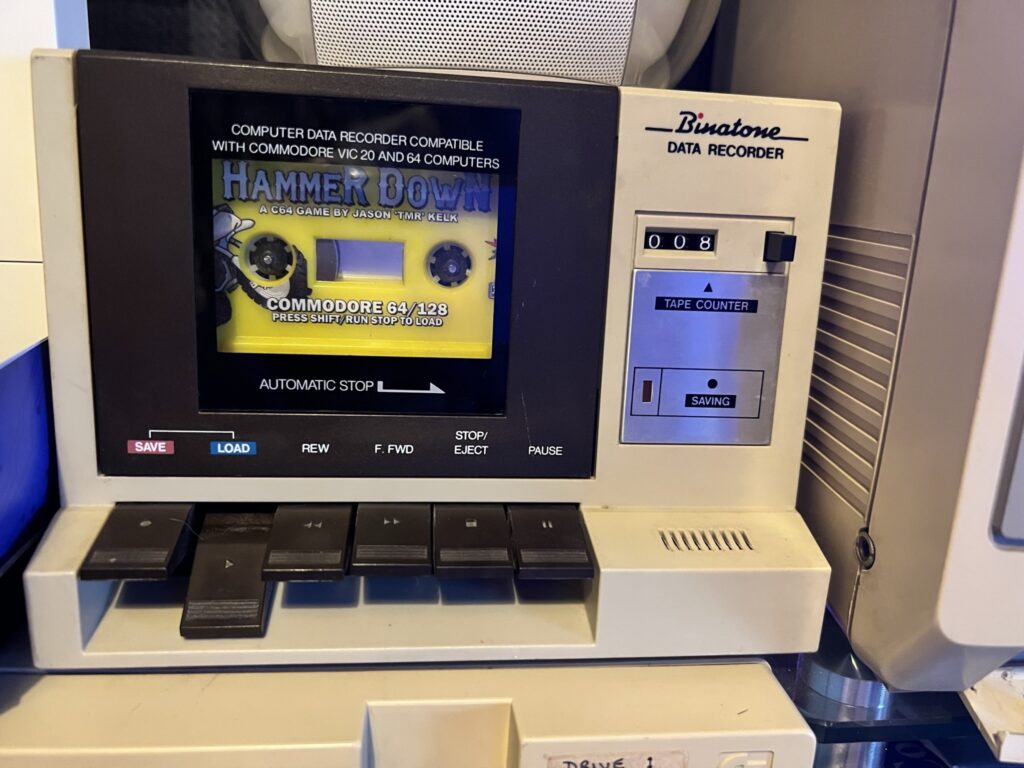
Binatone Data Recorder – Loading…


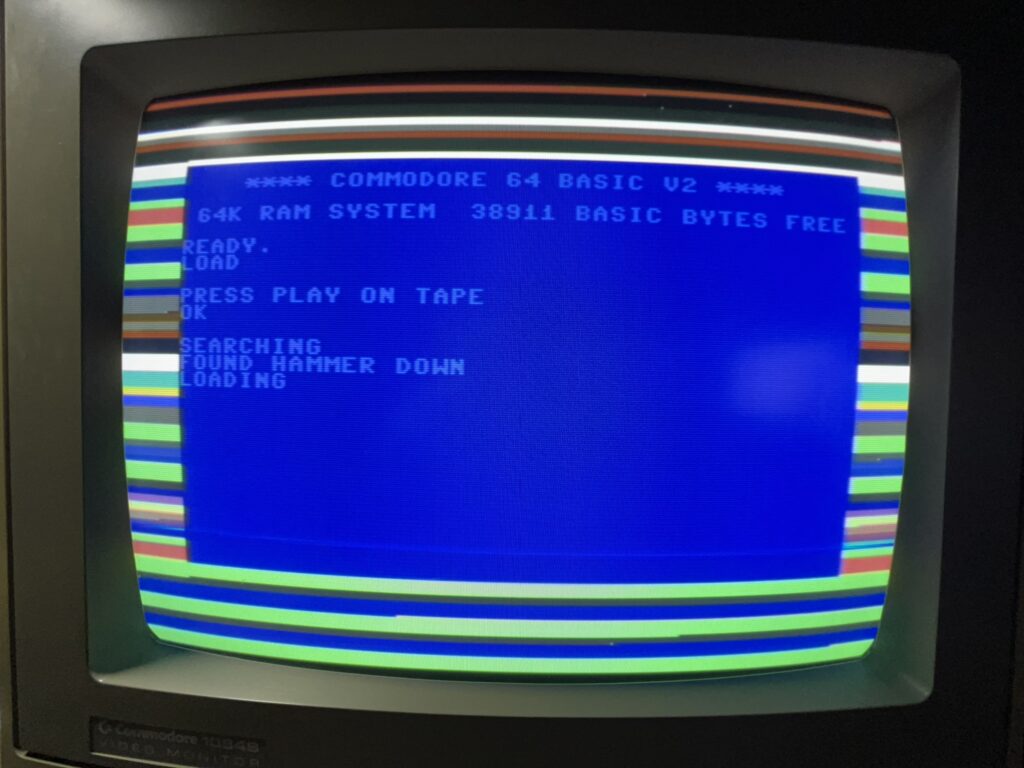
The game takes a few minutes to load but during that time you are entertained by a very catchy SID tune and some great game artwork.


Hammer Down C64.

Press Play on Tape.


Hammer Down C64.

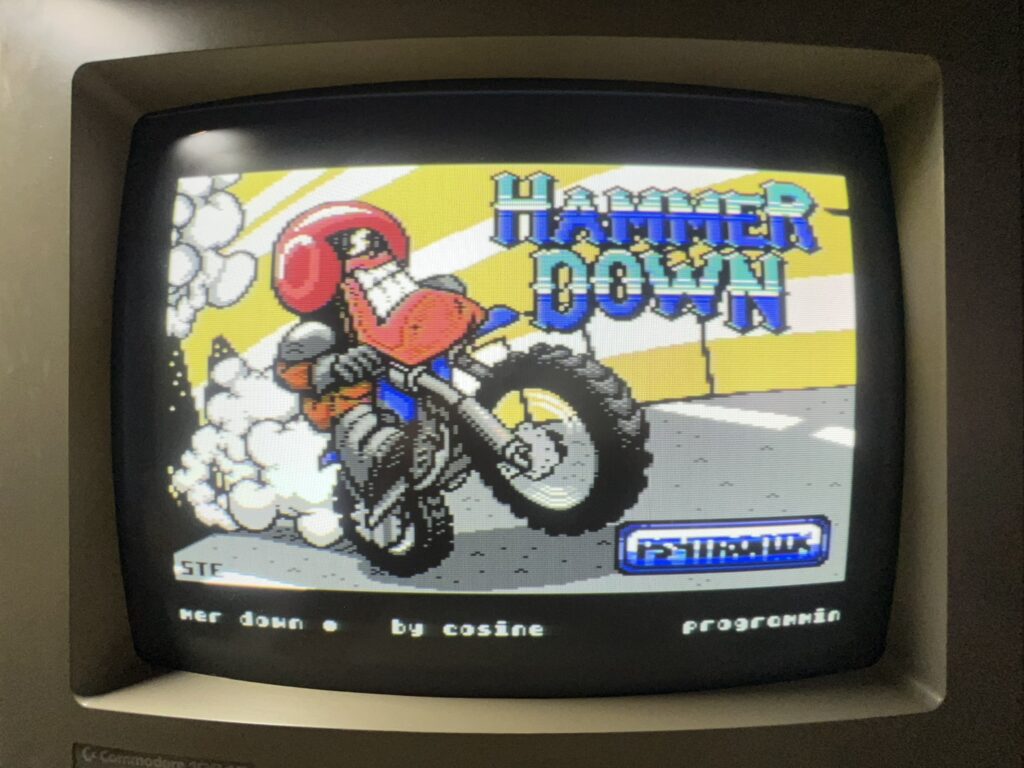
Hammer Down Loading Screen.


The game itself is like a cross between ‘The Last V8’ and ‘Action Biker’ which is no bad thing. The gameplay side of things comes from ‘Action Biker’ whilst the top-down view (rather than isometric) comes from ‘The Last V8’.


Hammer Down C64.

Hammer Down Title Screen.


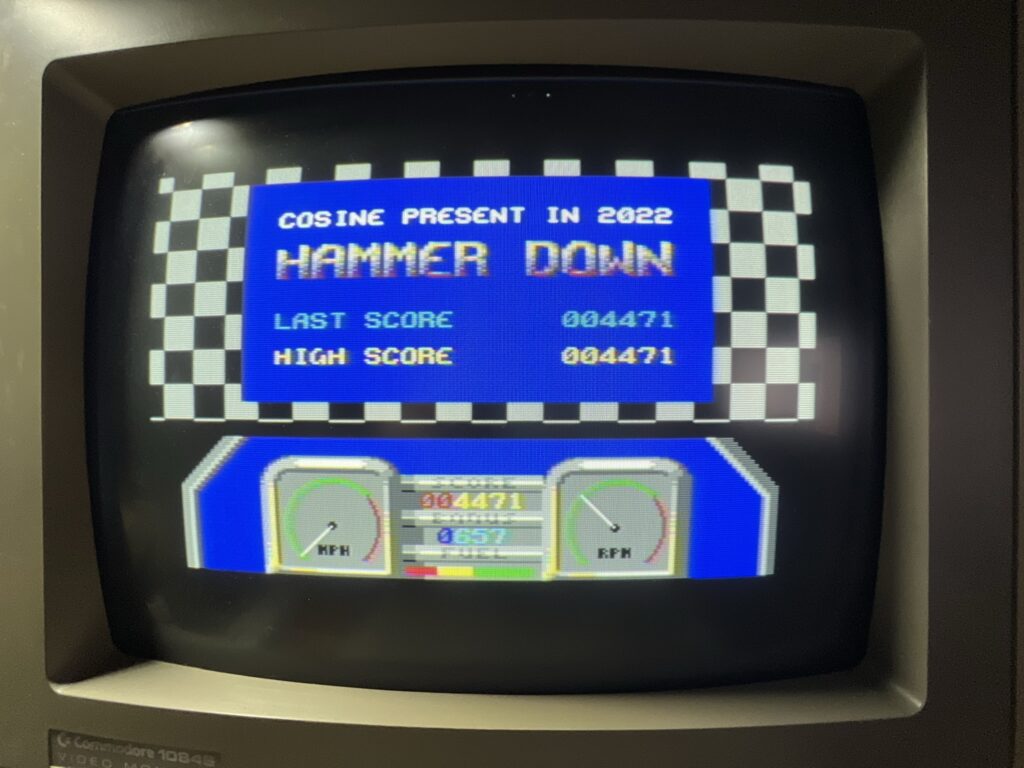
Once the gamer finishes loading you are greeted with a neat ‘chequered flag’ title screen along with another great piece of SID music. This screen also displays your high score and the games credits. A really nice touch here is that the MPH and RPM dials become VU meters with needles that bounce away in sync to the music.


Hammer Down C64.

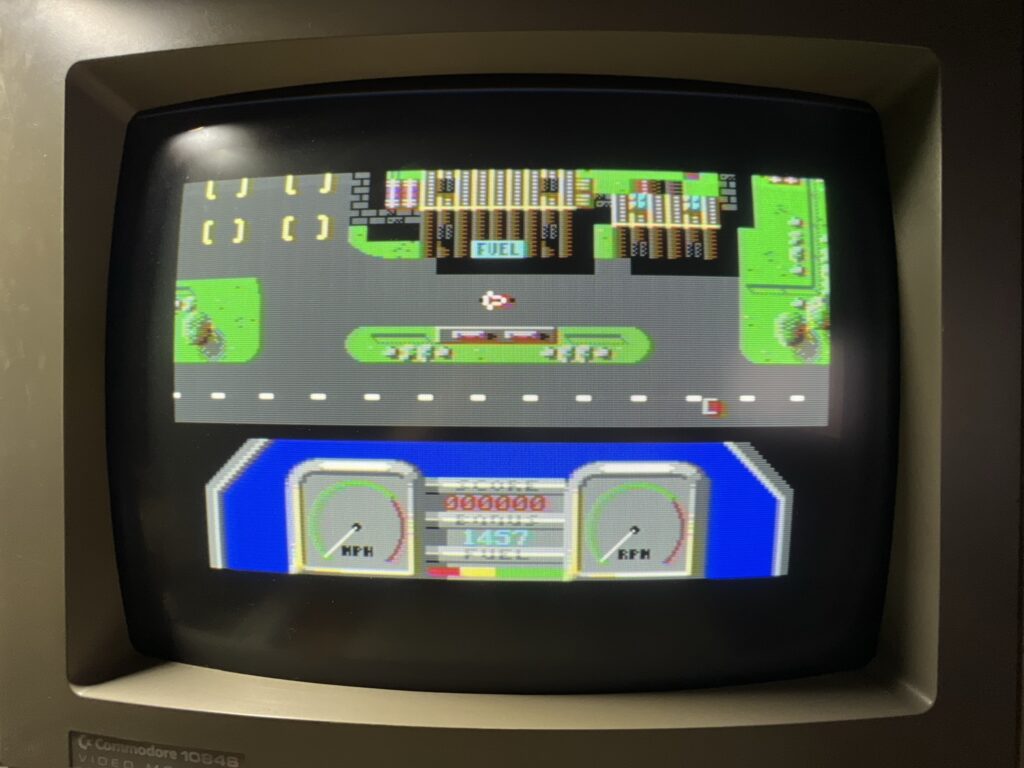
Never forget where the petrol station is!


You play as a motorcycle courier who must ride around and collect all the packages dotted around a small town. Of course it’s never quite that simple so in time honoured tradition you have 3 lives and will lose one if you hit an object or run out of fuel. Your fuel level drops at quite an alarming rate so you need to keep a close eye on it. Thankfully a warning will sound when the level gets critically low. Fill-ups are free so it really pays to keep your tank topped up.


Hammer Down C64.

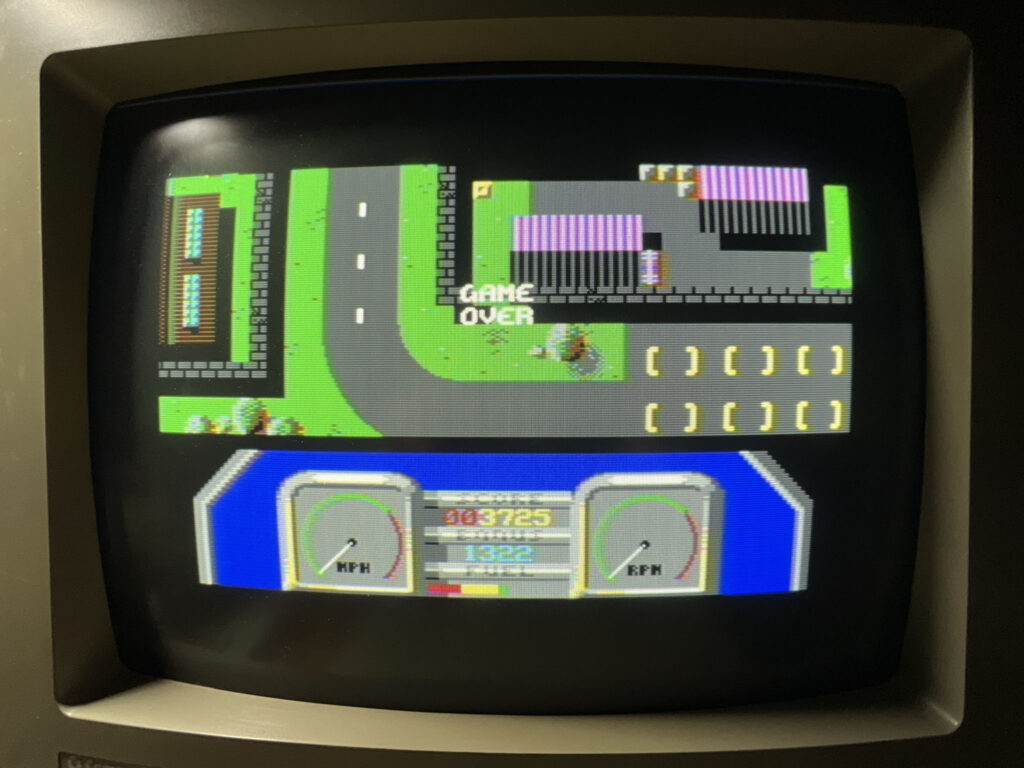
GAME OVER – Expect to be seeing this screen a lot!


Like the games upon which it is based, controlling the bike in Hammer Down is quite tricky and takes some getting used to and navigating the scenery can be tough. The main problem is discerning what elements of the environment are fatal if touched and those you can get away with. For example there are thick black areas around walls and buildings which I thought would kill me. After a few minutes I realised they were shadows and I could safely drive through them. Conversely sometimes elements I thought were road markings turned out not to be resulting in a life lost. Basically a lot of trial and error is required but that’s all part of the fun.

Another skill that needs to be mastered is the U-turn! Your bike has no reverse so if you head down a dead end (which you must do to collect many of the packages) a U-turn is your only option! The bike has a pretty small turning circle but it can still be extremely tricky to turn around without hitting something!

There’s limited sound effects in the game, being mainly limited to explosions, a low-fuel warning/refuelling ‘glug’ and a parcel pickup chime. However the SID music that plays during the game more than makes up for this. It’s a terrific rendition of ‘The Return of the Los Palmas 7’ by Madness. They were one of my favourite bands back in the 80’s so this added greatly to my enjoyment of the game. Obviously your mileage may vary here!

All in all this is a terrific little game and I’m really glad I chose to add it to my Kickstarter bundle. I highly recommend it, especially if you are a fan of either ‘The Last V8’ or ‘Action Biker’. It definitely has that ‘one more go’ appeal as you strive to collect a few extra parcels on your next round and beat your high score.

If you would like to get yourself a copy Psytronik will be selling it on their website soon.

Commodore Zone 25th Anniversary Edition

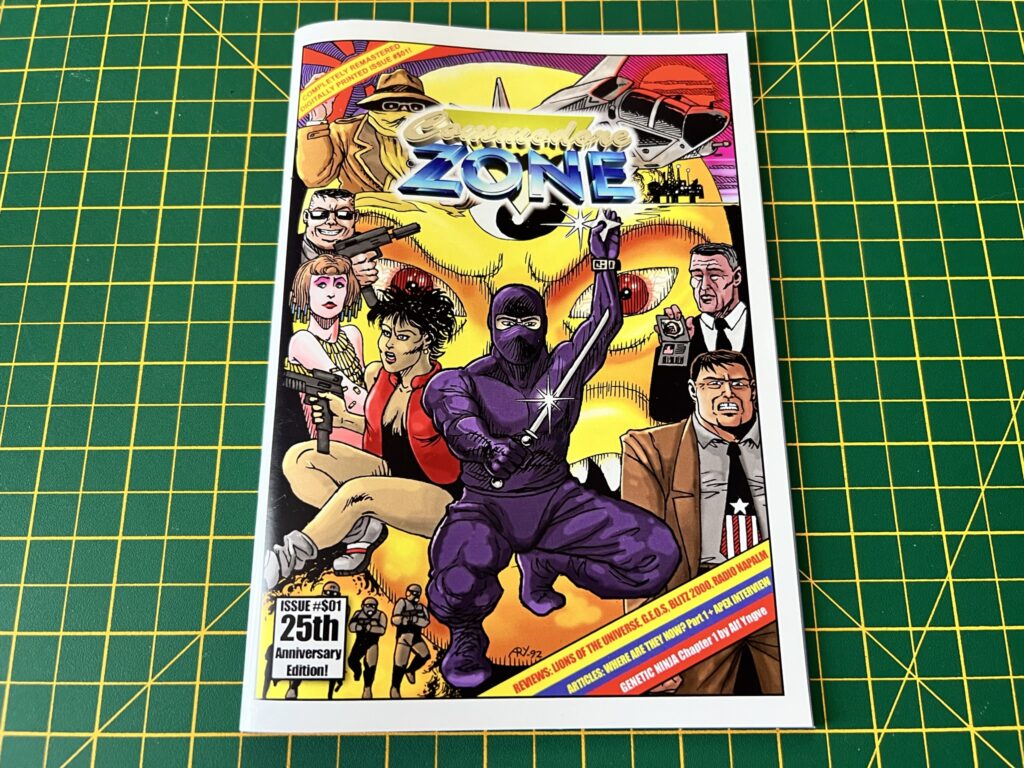
Last but by no means least I picked up a ‘remastered’ 25th Anniversary Edition of the first issue of Commodore Zone magazine. For those unfamiliar with Commodore Zone it was a fan made A5 magazine produced in the UK in the mid 1990’s and ran for 16 issues.


Commodore Zone

Commodore Zone Remastered edition.


The original magazine was completely black and white, even down to the cover. Access to a colour printer was a luxury most of us couldn’t afford back then!  The photo below shows the original magazine from September 1995 on the left for a direct comparison.


Commodore Zone

Original and remastered edition side-by-side.


Clearly a lot of work has gone into this as you can see from the comparison photos below. It’s not just the addition of colour but also many of the pages have been completely redesigned to incorporate a more modern look and feel. The guys that did this have done a tremendous job and I really hope that they give the same treatment to the rest of the back-catalogue in the near future.


This slideshow requires JavaScript.


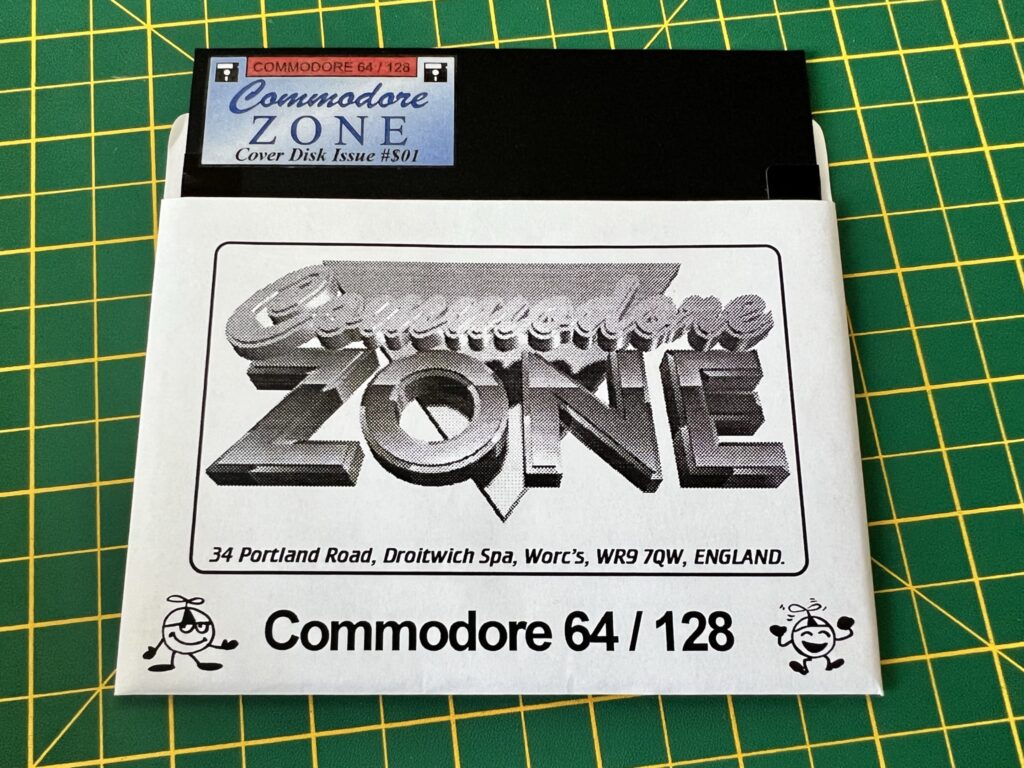
The only thing missing is the coverdisk but as I have all the original discs already that’s no great loss. Here’s a photo of the (double-sided) disk I received with issue one 27 years ago!


Commodore Zone

The original coverdisk from issue 1.


Sadly printed versions of Commodore Zone aren’t available to purchase anywhere today (unless you get lucky on eBay). However you can buy a CD containing scanned copies of all 16 magazines along with .d64 versions of all the coverdisks here.

The A500 Mini Review

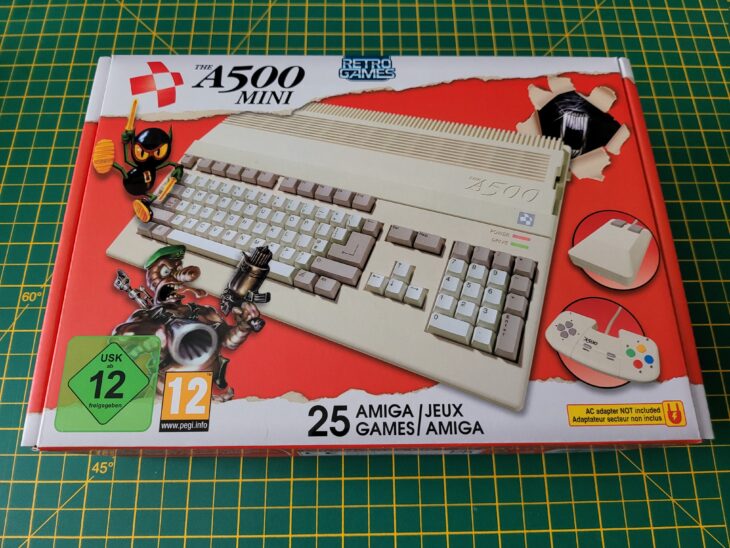
Despite the fact that I already own a real A500 an A1200 and a CD32 I still pre-ordered ‘The A500 Mini’ as soon as they were announced, such is my love for these old Commodore machines. I also picked up both ‘The C64 Mini’ and Maxi despite owning a VIC20 and C64 which they both emulate. I suppose even if I never use them much they’re still really cool devices to own and display but the truth is I just can’t resist these (or any) sort of gadgets.

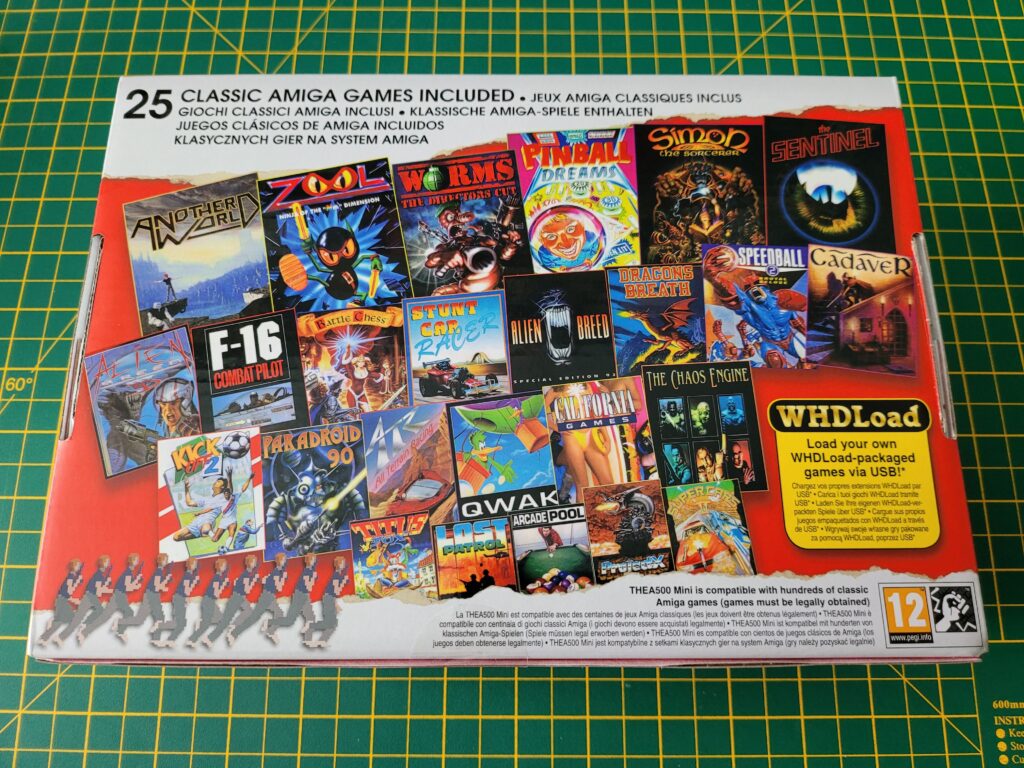
First impressions were terrific. The A500 Mini came in a very attractive and colourful box adorned with pictures of the computer and peripherals on the front and a gallery of the included games on the back. The box was surprisingly heavy too, something I definitely wasn’t expecting.


The A500 Mini

Back of The A500 Mini Box.


The A500 Mini comes with the following 25 games pre-loaded:

Alien Breed 3D
Alien Breed: Special Edition’92
Another World
Arcade Pool
ATR: All Terrain Racing
Battle Chess
Cadaver
California Games
The Chaos Engine
Dragons Breath
F-16 Combat Pilot
Kick Off 2
The Lost Patrol
Paradroid 90
Pinball Dreams
Project-X: Special Edition 93
Qwak
The Sentinel
Simon the Sorcerer
Speedball 2: Brutal Deluxe
Stunt Car Racer
Super Cars II
Titus The Fox: To Marrakech And Back
Worms: The Director’s Cut
Zool: Ninja Of The “Nth” Dimension


What’s in the Box?

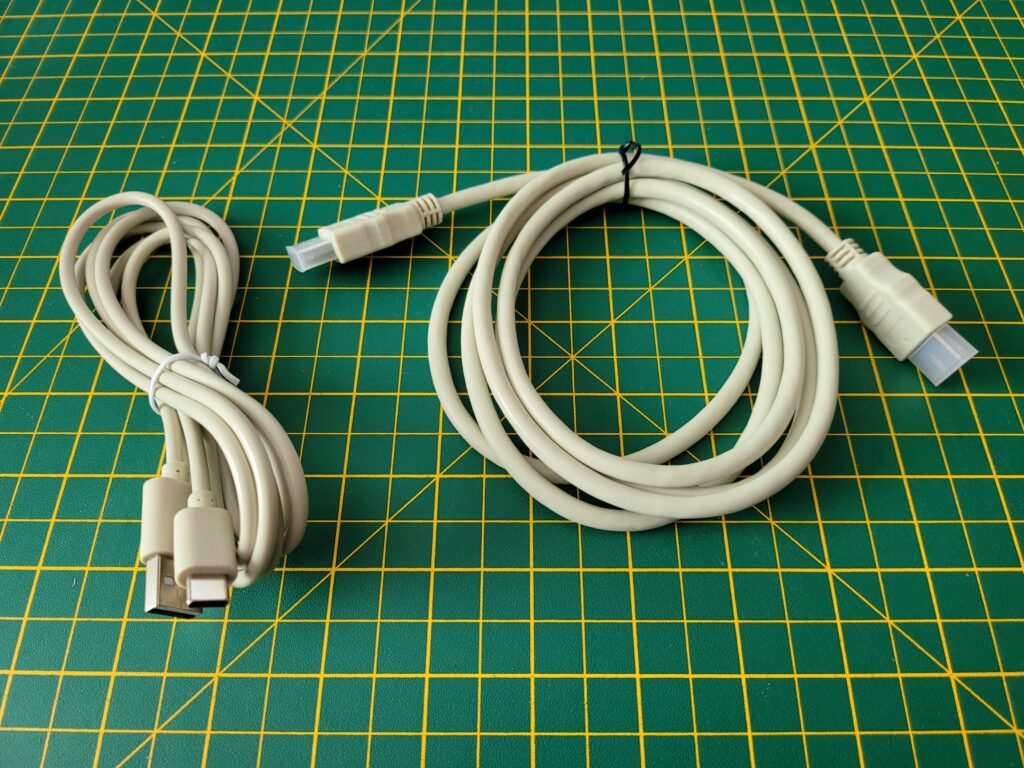
Opening up the box revealed the A500 mini itself, an optical USB Tank mouse, CD32-esque USB controller, quick start guide, HDMI cable and a USB C power cable.


The A500 Mini

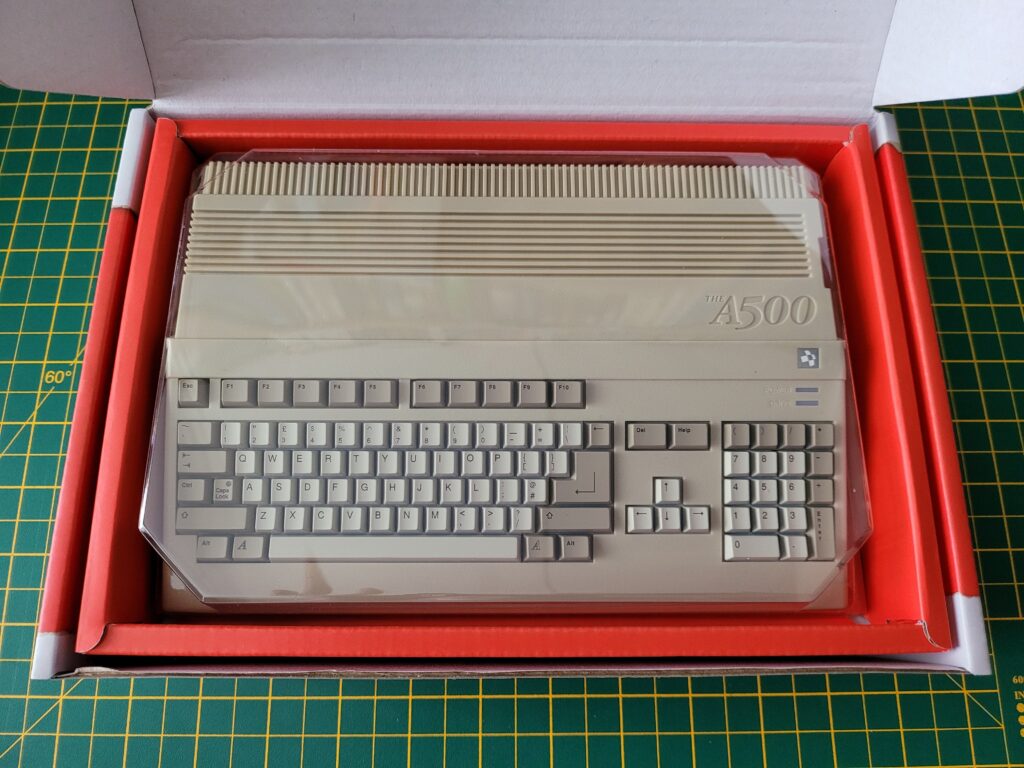
The A500 Mini (with plastic cover).


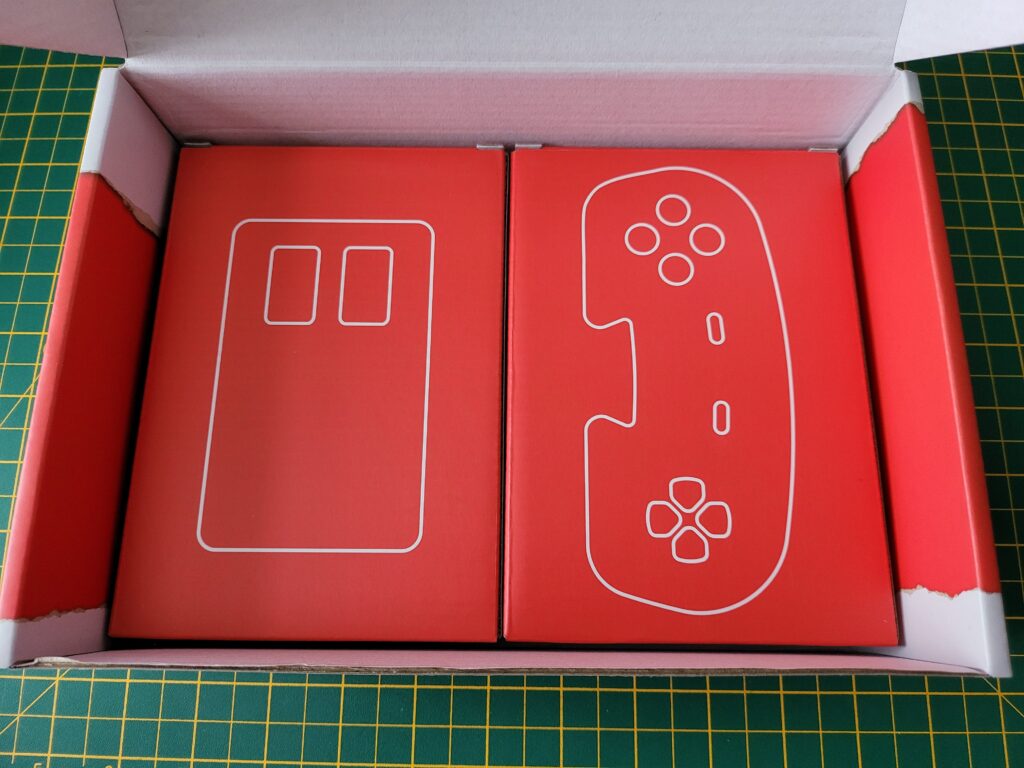
The mouse and controller were tucked away under the A500 Mini inside their own little boxes.


The A500 Mini

Controller and Mouse Boxes.


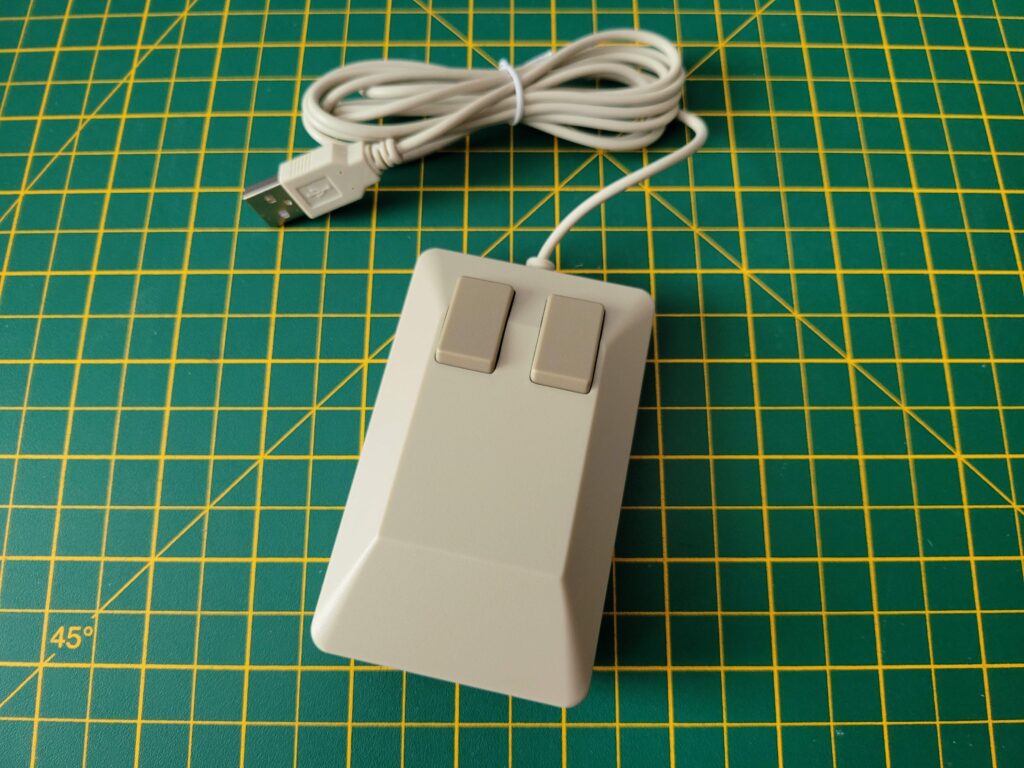
The tank mouse is a perfect, slightly smaller replica of a real Amiga tank mouse.


Tank Mouse

The A500 Mini Tank Mouse.


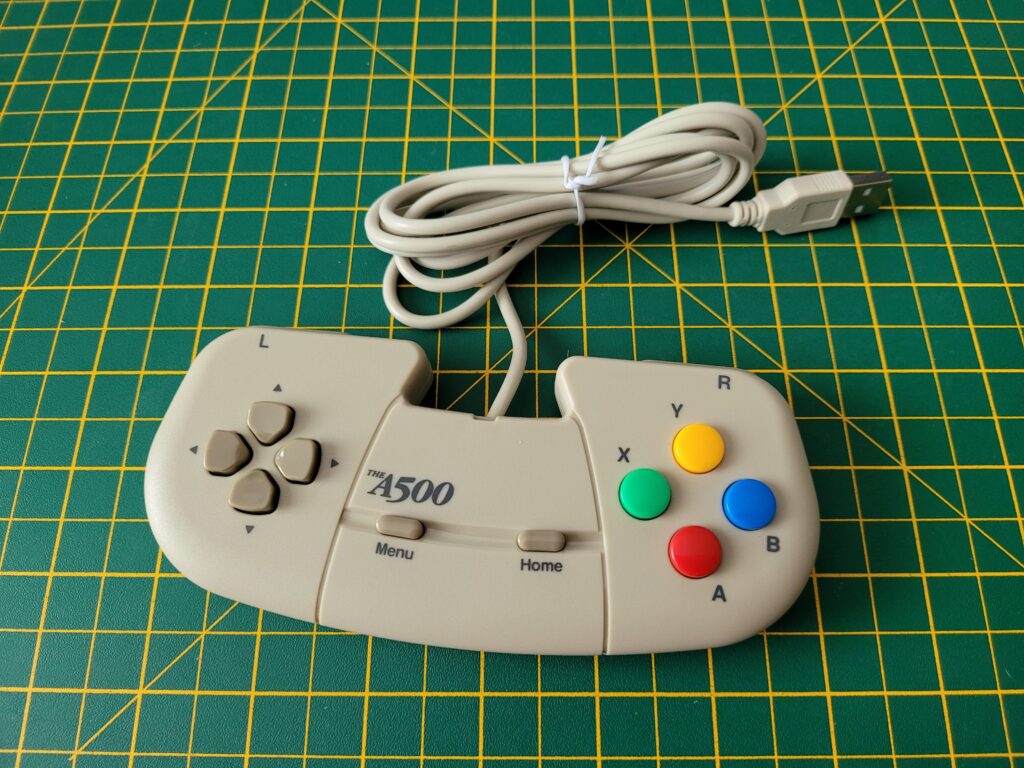
The design of the gamepad was clearly inspired by the CD32’s controllers.


The A500 Mini

The A500 Mini Controller.


A suitably beige USB C power cable and HDMI cable are also included. I have to admit it was nice to see the adoption of USB C for the power as most of my modern day kit uses this standard now. You have to provide your own USB power socket but that was to be expected – most of us have plenty of these lying around.


Cables

USB C Power and HDMI Cables.


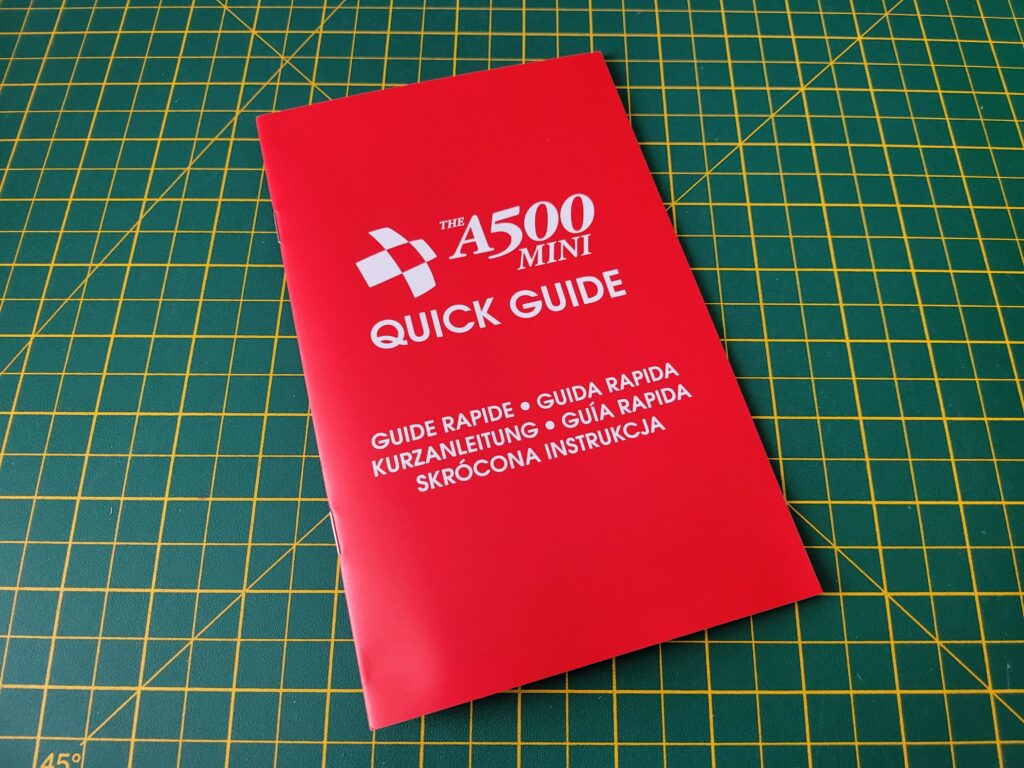
The Quick guide is literally just that. Strip away all the pages devoted to other languages, health and safety gubbins and a list of the package contents and you are left with a meagre 2 pages of instructions. The full 48 page English instruction manual is provided online – here’s the URL given in the quick guide. For a retro product I did find this disappointing and would much rather have had all of this info in a nice spiral bound or hardback manual. Hopefully they release this as an optional extra shortly like they did with the ‘The C64 User Manual‘.


The A500 Mini Guide

The A500 Mini Quick Guide.


A Closer Look at the A500 Mini

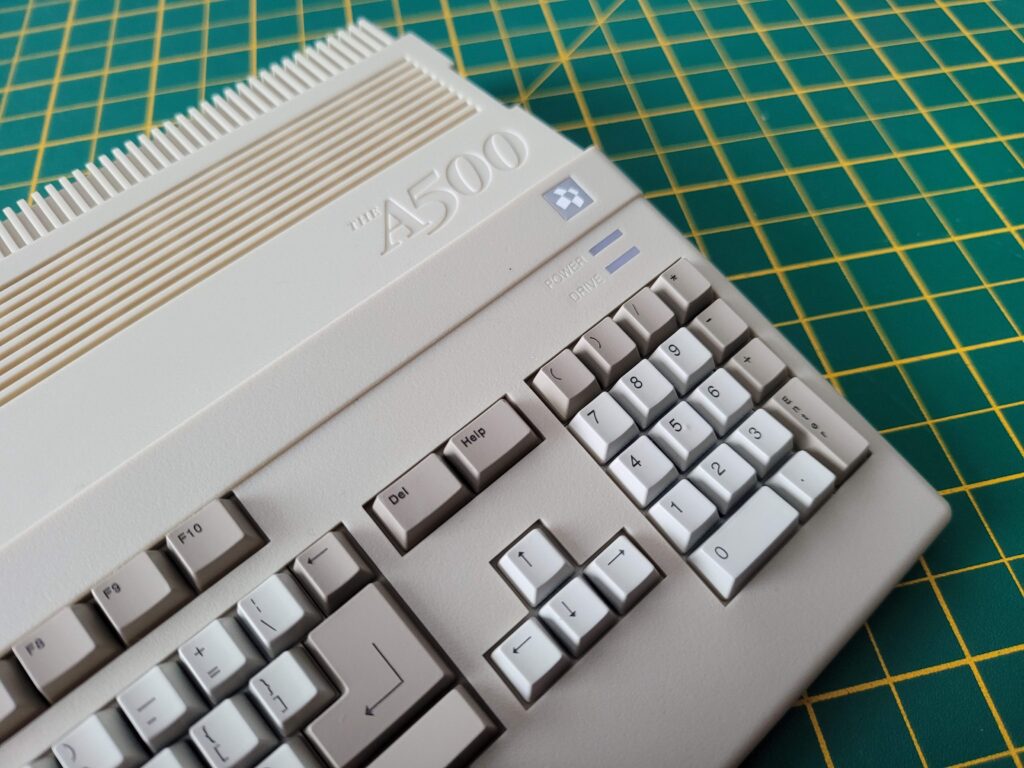
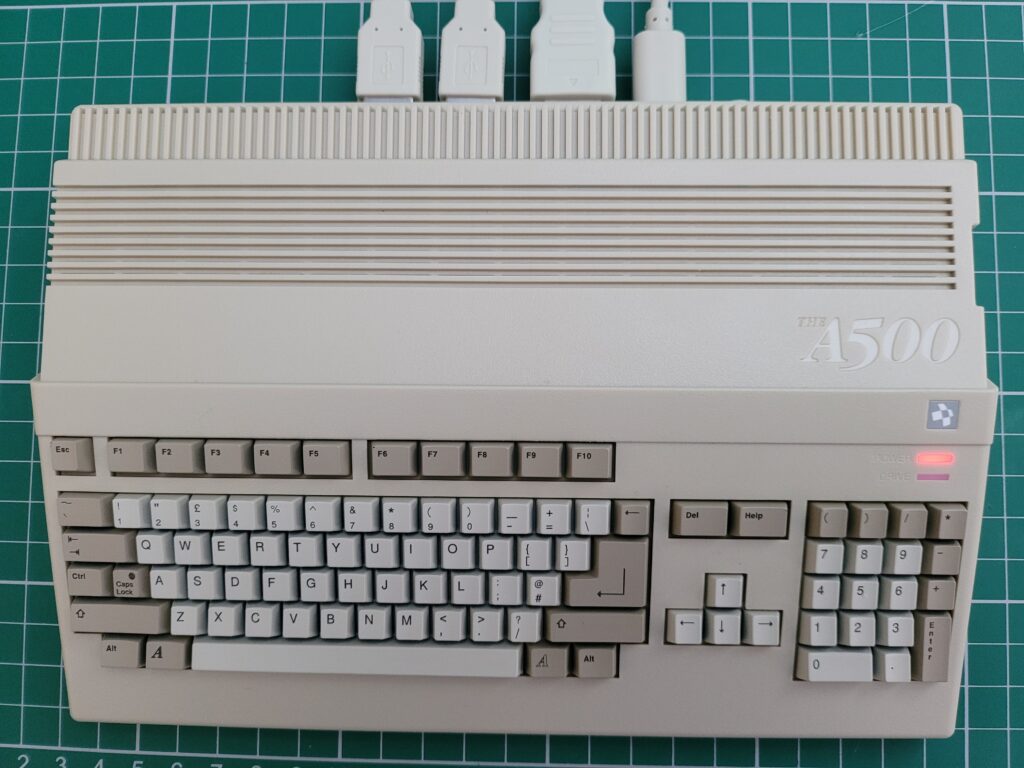
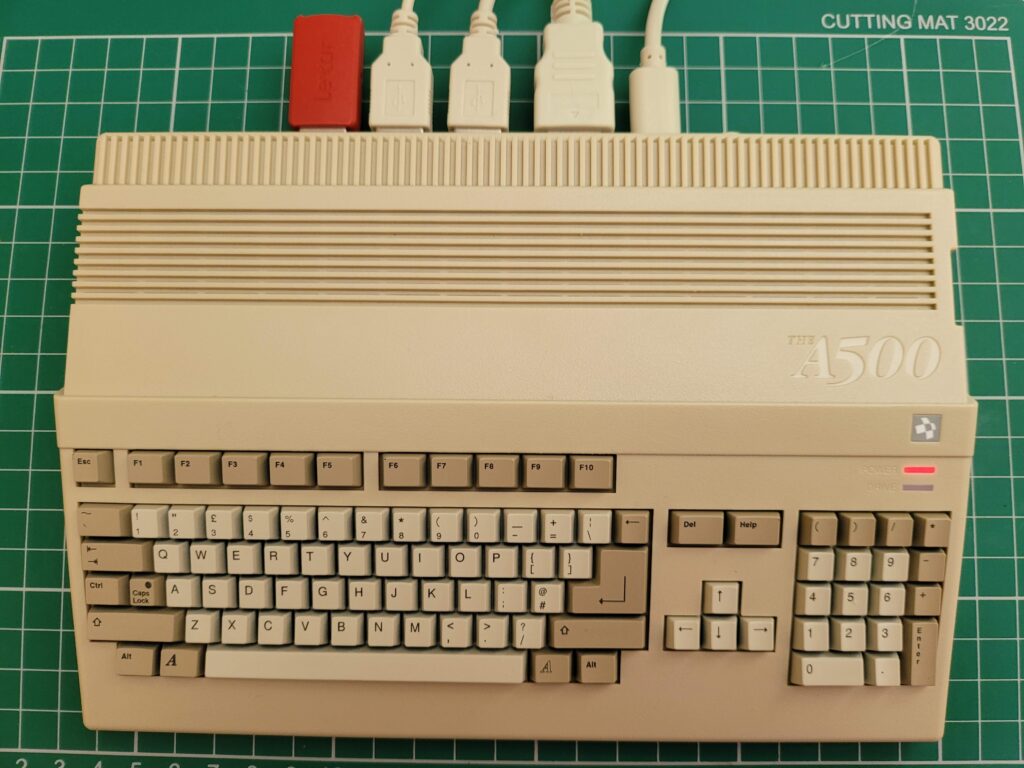
From the photos you could certainly be forgiven for mistaking the A500 Mini for a real A500 especially if you last used one in the 80’s or 90’s. Obviously it doesn’t have the Commodore logo on display but it’s only really when you see the USB ports on the back that you realise something isn’t quite right.

If you try to press any of the keys you will quickly realise something else isn’t right too. Just like with The C64 Mini the keyboard is completely non-functional and just for show. It’s certainly very convincing visually though with each key perfectly formed!


This slideshow requires JavaScript.


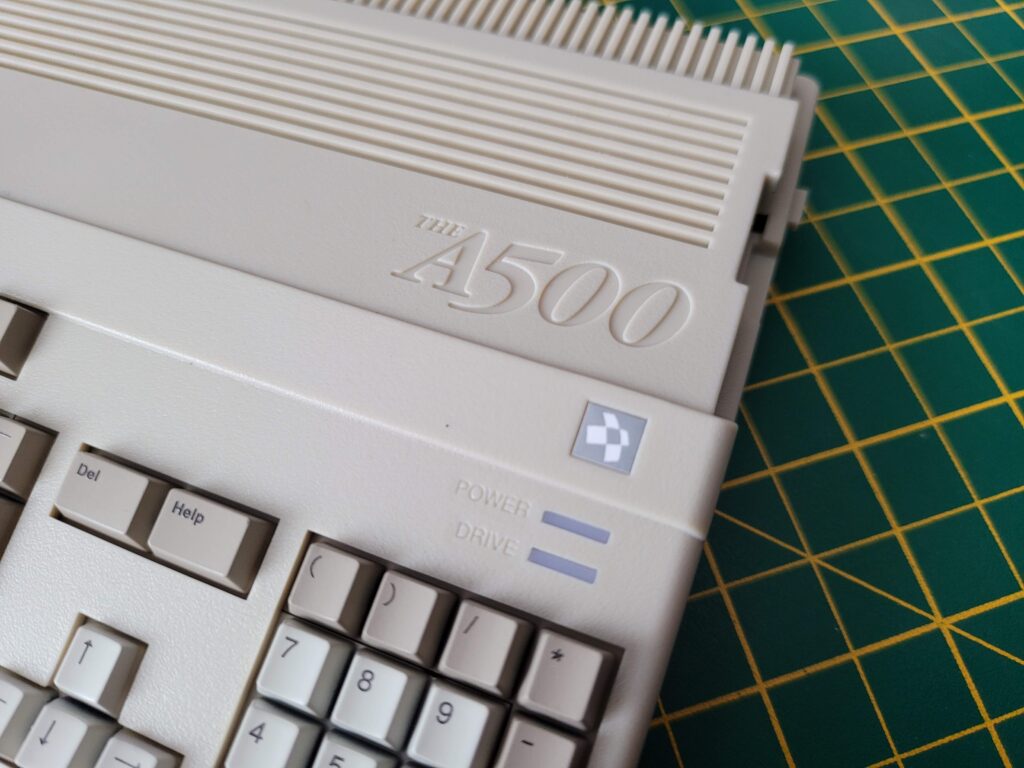
The attention to detail on the case is amazing and really makes me wonder why I’ve been waiting for four years now for my ‘Compatible A500 case’ to be made!


The A500 Mini

Spot the subtle differences from a real A500.


The case displays the wording ‘The A500’ rather than Amiga and their own logo rather than the familiar Commodore ‘Chicken head’ which is obviously for copyright reasons.


The A500 Mini

Those keys look so real!


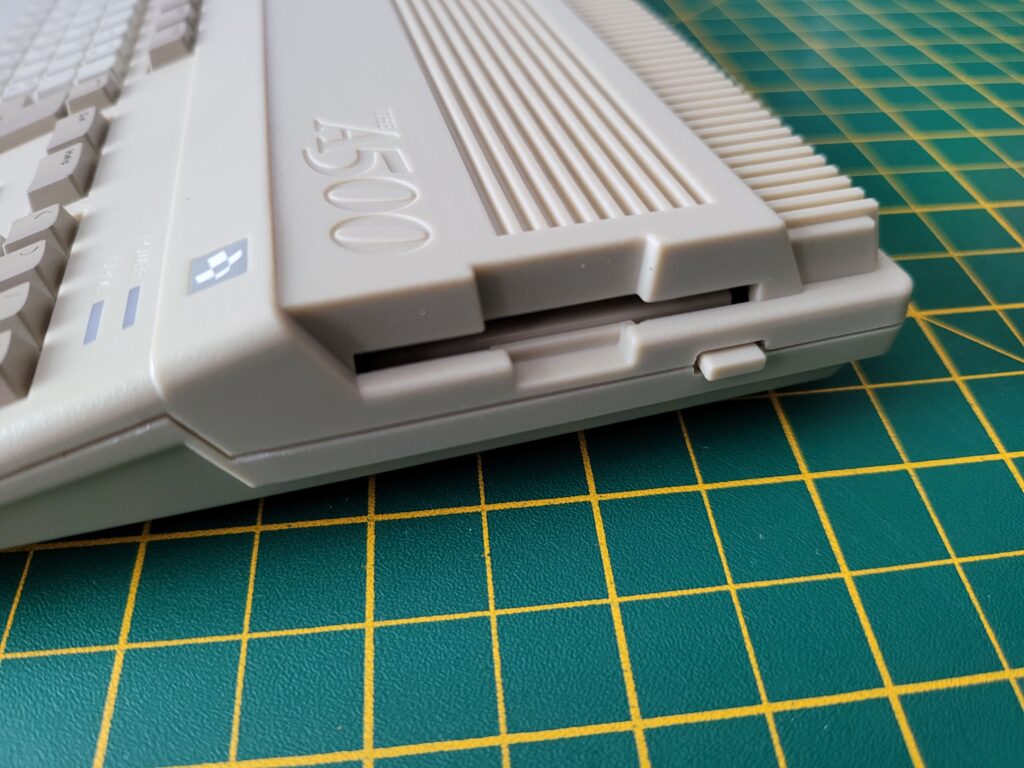
The floppy drive and eject button are very convincing but totally non-functional. Its a real shame they didn’t incorporate an SD card slot for expanding your game library here. At the very least they should have put an extra USB port here so we could insert our USB stick like it was a floppy disk…


The A500 Mini

Close-up of the non-functioning ‘floppy disk drive’.


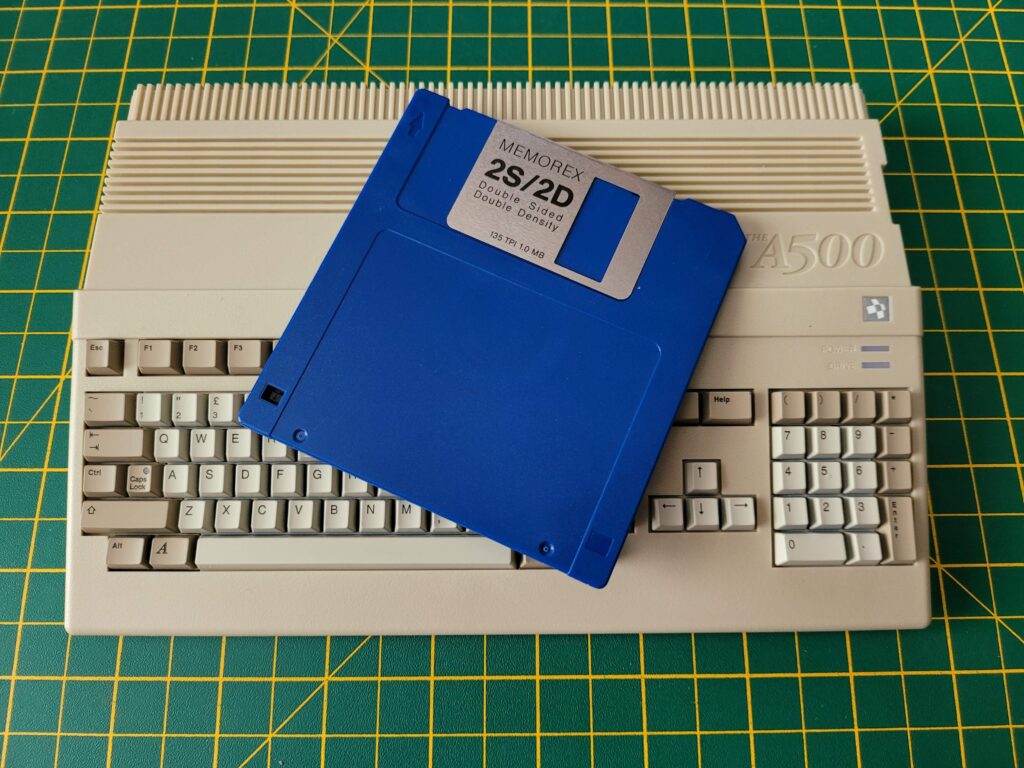
The diminutive scale of The A500 Mini becomes instantly apparent when compared to a 3.5″ floppy disk!


The A500 Mini

A500 Mini Compared to 3.5″ Floppy Disk.


Ports

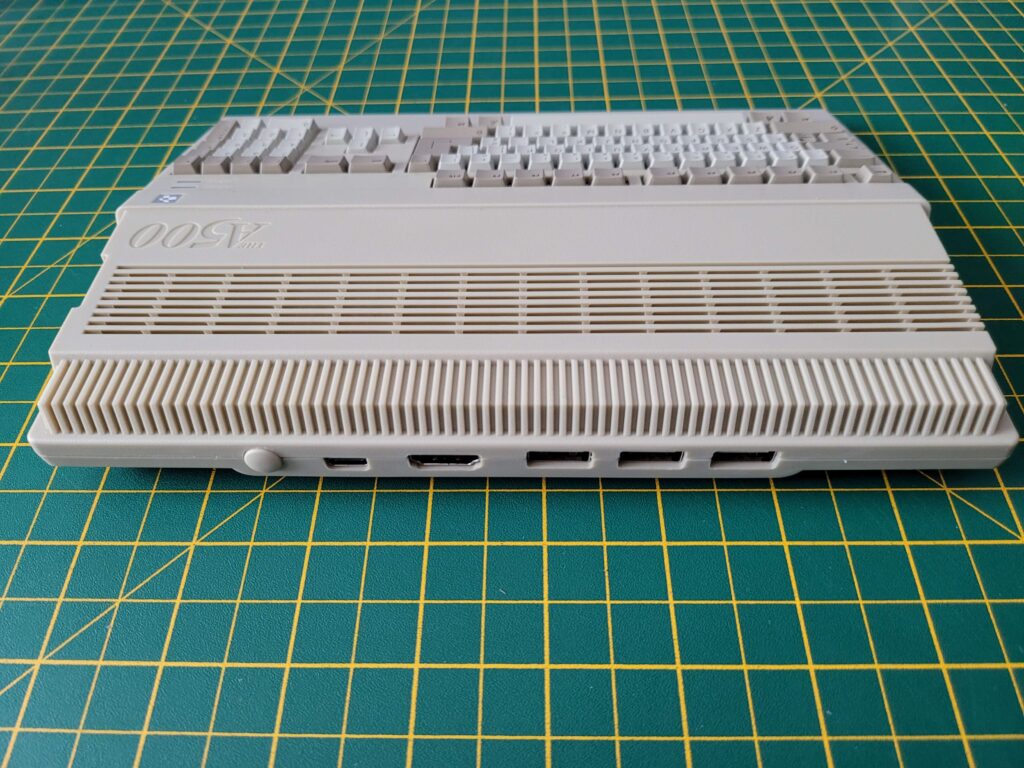
Unlike the original A500 the The A500 Mini come with a very modest selection of ports comprising USB-C for power, a full-size HDMI for video and 3 USB ports for the mouse, controller and memory stick with extra games on. There’s also a power switch included on the back.

I really think there should have been an extra USB port included here for attaching a USB keyboard. If all you are interested in is arcade style games then you’ll be fine. However if simulation games are more your thing (like the Microprose games that needed keyboard overlays) then you are going to need a USB hub to add a keyboard which is going to make for a very messy setup indeed.


The A500 Mini

Connectivity: From left to right, Power button, USB-C power socket, HDMI Video, 3x USB ports.


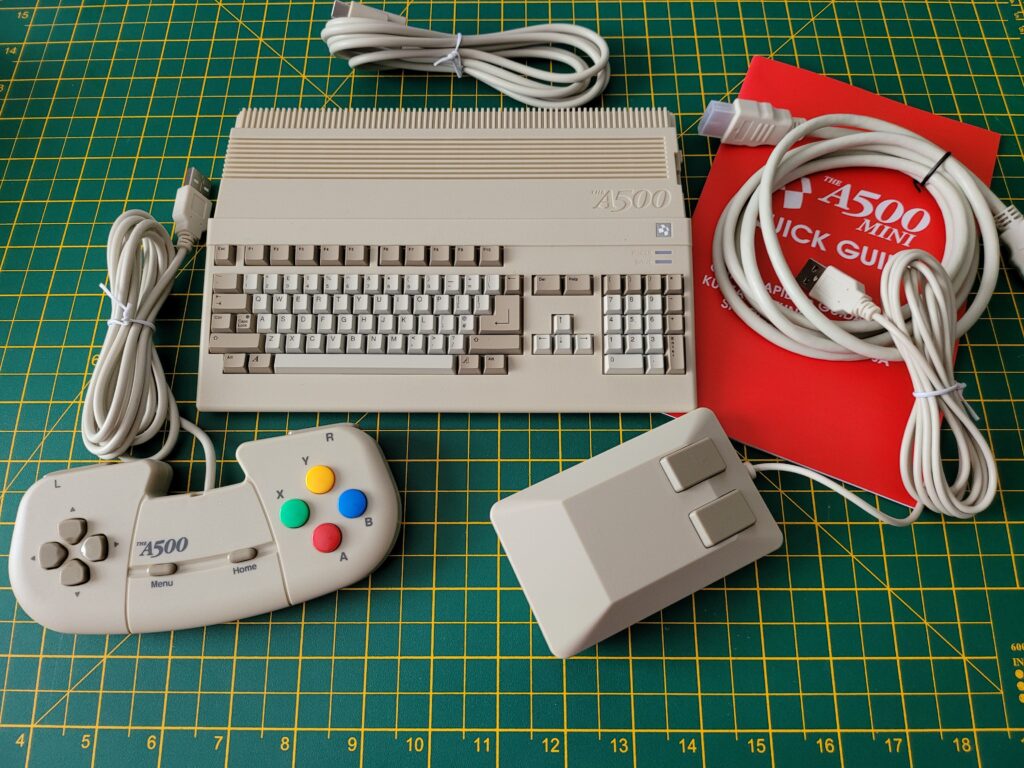
Here’s a photo of everything you get inside the box. The relative size of the A500 Mini becomes apparent when it is sat next to the mouse and gamepad.


The A500 Mini

Contents of the box.


What’s it like to use?

After plugging all the cables in and pressing the on/off switch the power LED came to life. Surprisingly the drive activity light doesn’t actually operate when loading the UI or any of the included games.


The A500 Mini

All plugged in and ready to go!


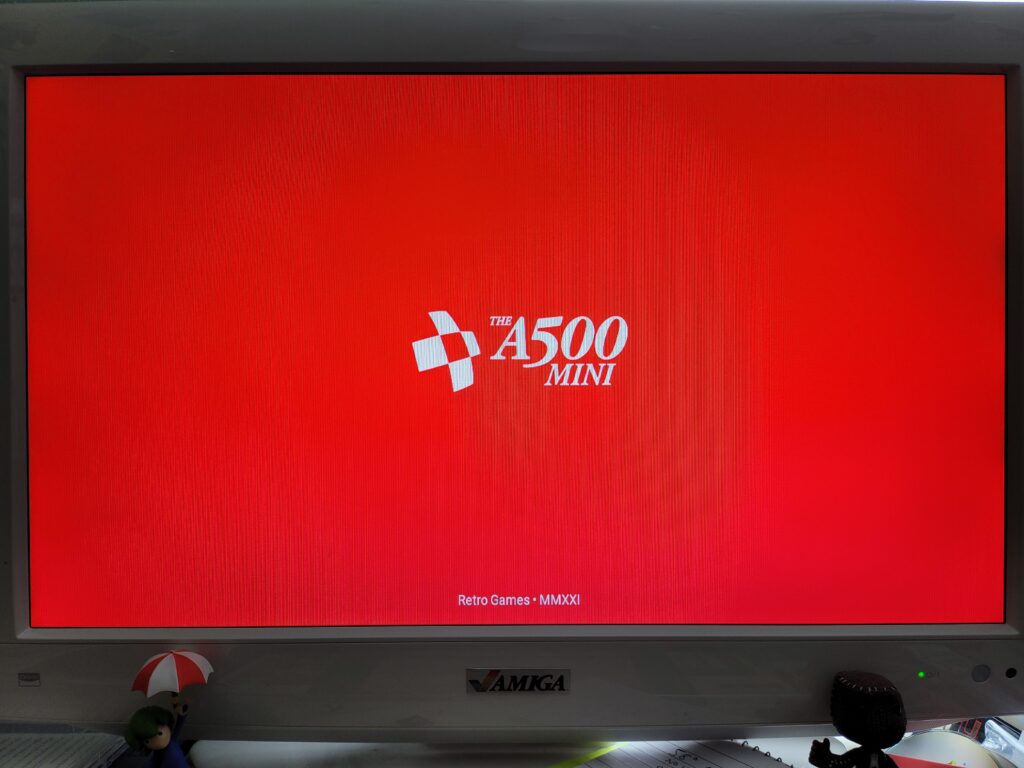
After approximately 8 seconds of staring at a blank TV whilst it booted up a very snazzy red and white A500 Mini splash screen appeared.


The A500 Mini

The A500 Mini Boot Screen.


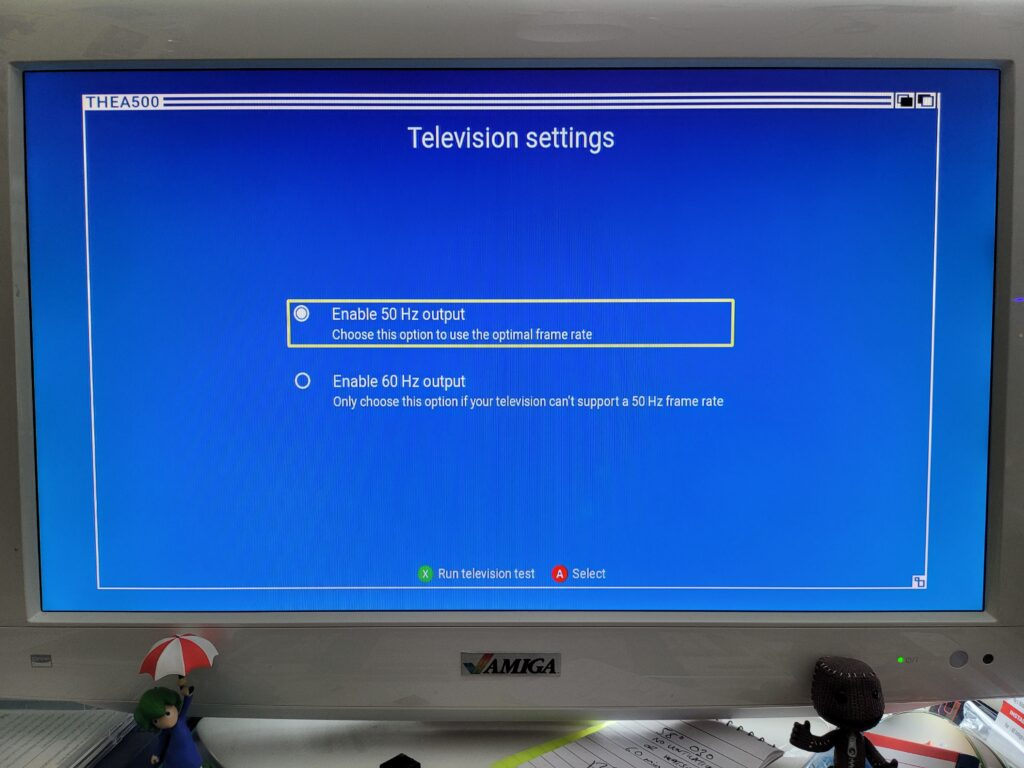
As this was the first time the device had been used a couple of configuration screens popped up allowing me to choose my language and also whether I wanted to use 50Hz or 60Hz.


The A500 Mini

TV Settings Screen.


Naturally being in the UK I chose the superior 50Hz option for the optimal frame rate. 🙂


The A500 Mini

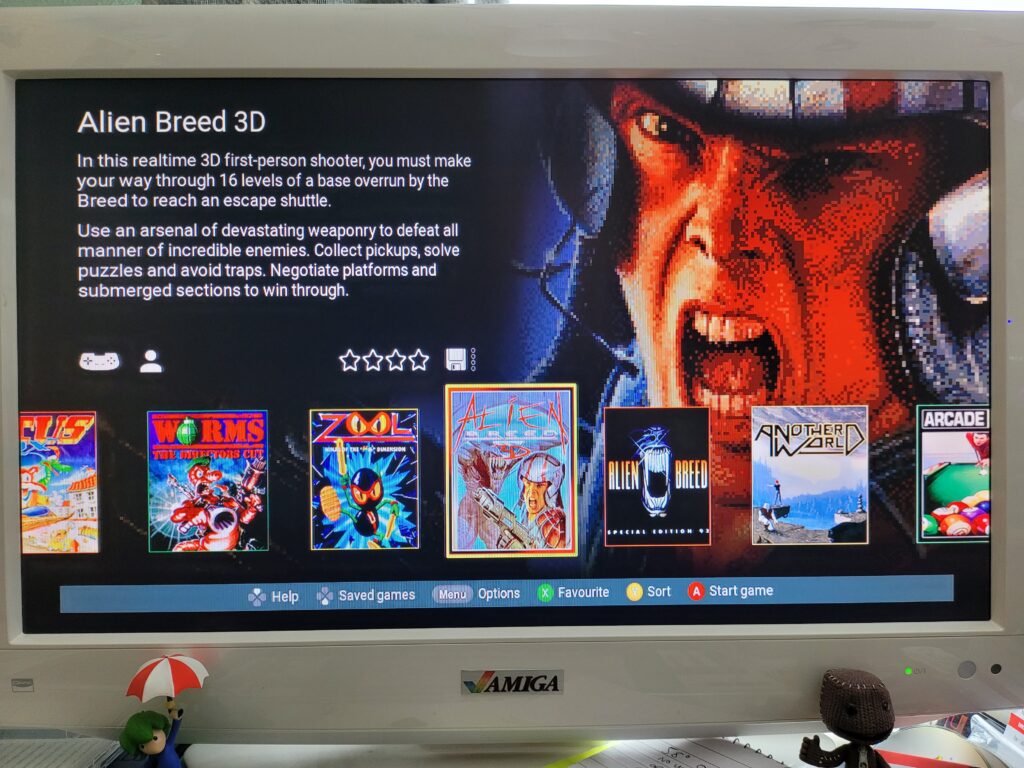
The A500 Mini User Interface.


After a quick test to make sure the mode was compatible I was presented with a gorgeous user-interface (UI). The UI features a scrolling carousel of Amiga game box art along with changing graphic montages from each game in the background. Some very relaxing ambient synth music plays softly whilst you navigate the UI too.

There are icons showing whether each game utilises the controller and/or mouse and how many players it supports. Each game can have a user star rating too, from 1 to four stars. As the carousel allows you to change the sort order between Author, Genre, Year, Publisher and Favourite this affords you the option of having the games displayed by order of preference should you want it.


The A500 Mini

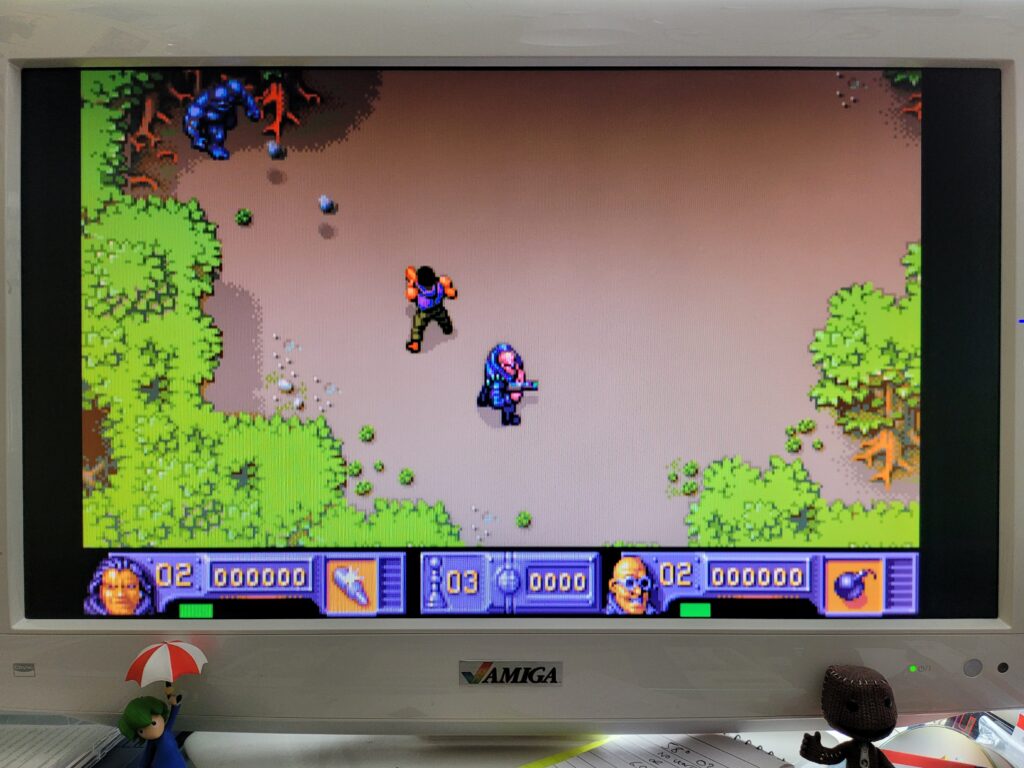
The Chaos Engine playing as good as ever.


Over the course of an afternoon I had a lot of fun trying out all of the pre-installed games on The A500 Mini and they all ran perfectly. I didn’t do any side by side comparisons but nothing gave me pause for concern and I was very impressed with just how slick everything was. Games loaded in seconds – there’s no simulated loading times here.

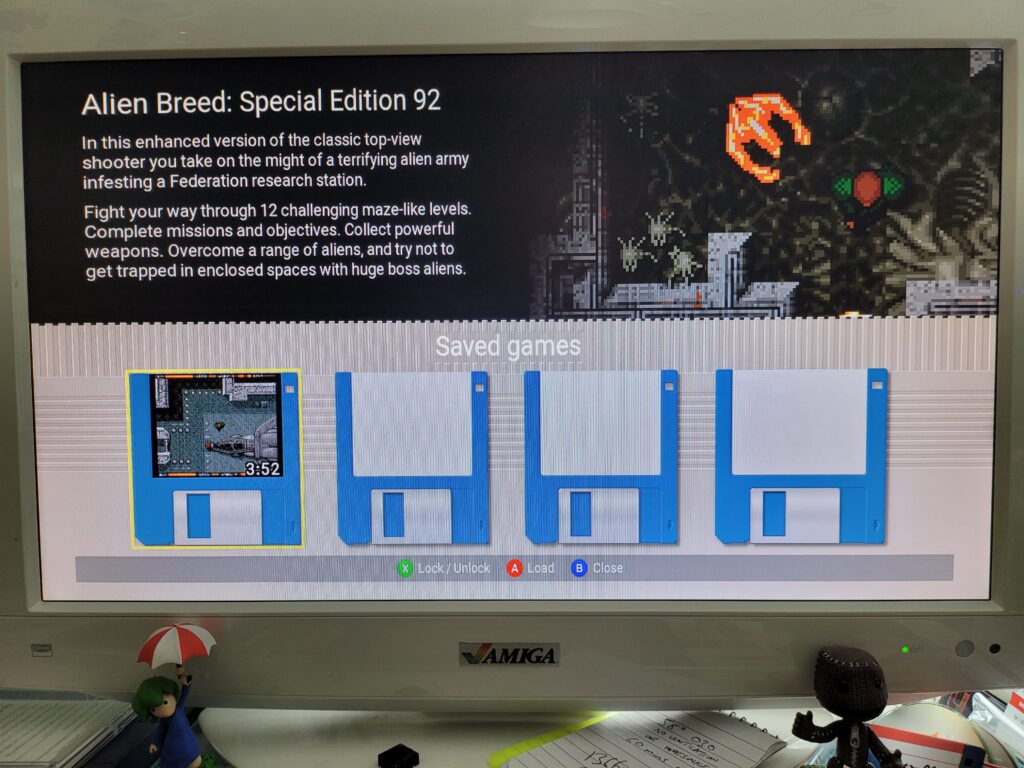
There are plenty of quality of life features too. For example each game supports up to 4 ‘save states’ allowing you to instantly save your progress at any point in any game. It even includes a ‘disk label’ incorporating a screen capture of exactly what you were doing at the moment you created the save state to help you recognise it in future! I think these are a great feature and who knows – in 30 years time someone might be using using a PS5 mini console and using save-states to brute force through a boss encounter in Elden Ring…


The A500 Mini

Alien Breed Save State with thumbnail ‘disk label’.


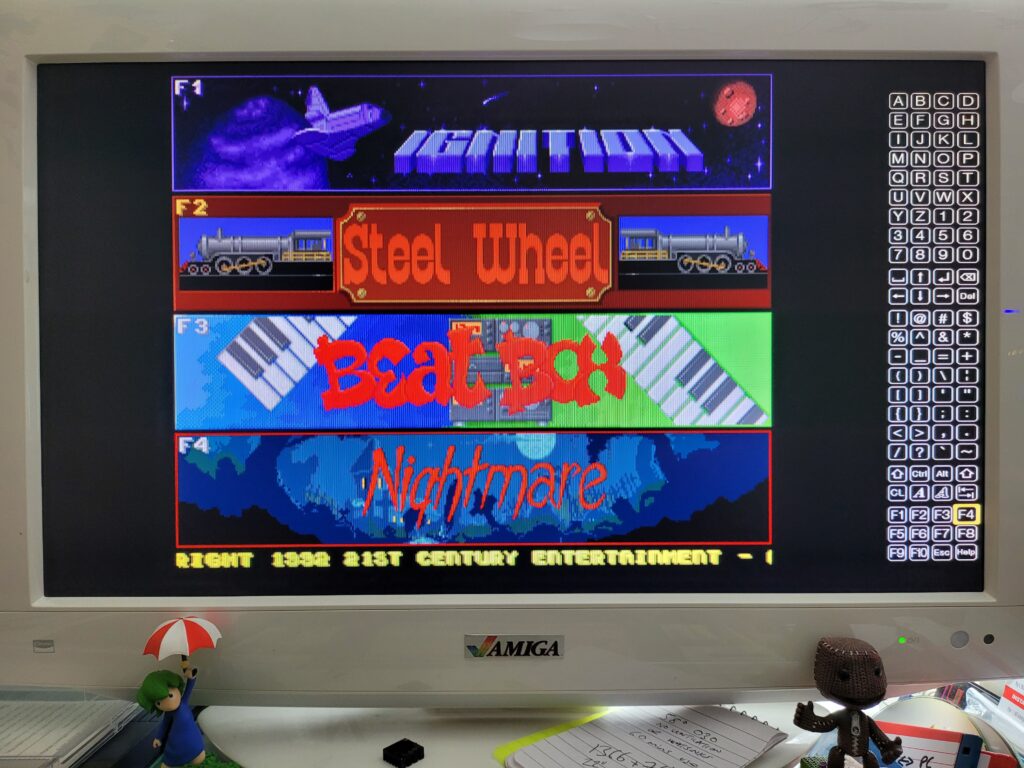
Some of the included games need rudimentary keyboard support in order to work. Pinball Dreams is a good example, requiring the use of the function keys to select which level you want to play. The handy virtual keyboard (invoked by tapping the menu button) worked like a charm here. However for games that require frequent keyboard inputs or text adventures like The Pawn you would definitely need to use a USB keyboard.


The A500 Mini

Selecting a level in Pinball Dreams using the virtual keyboard.


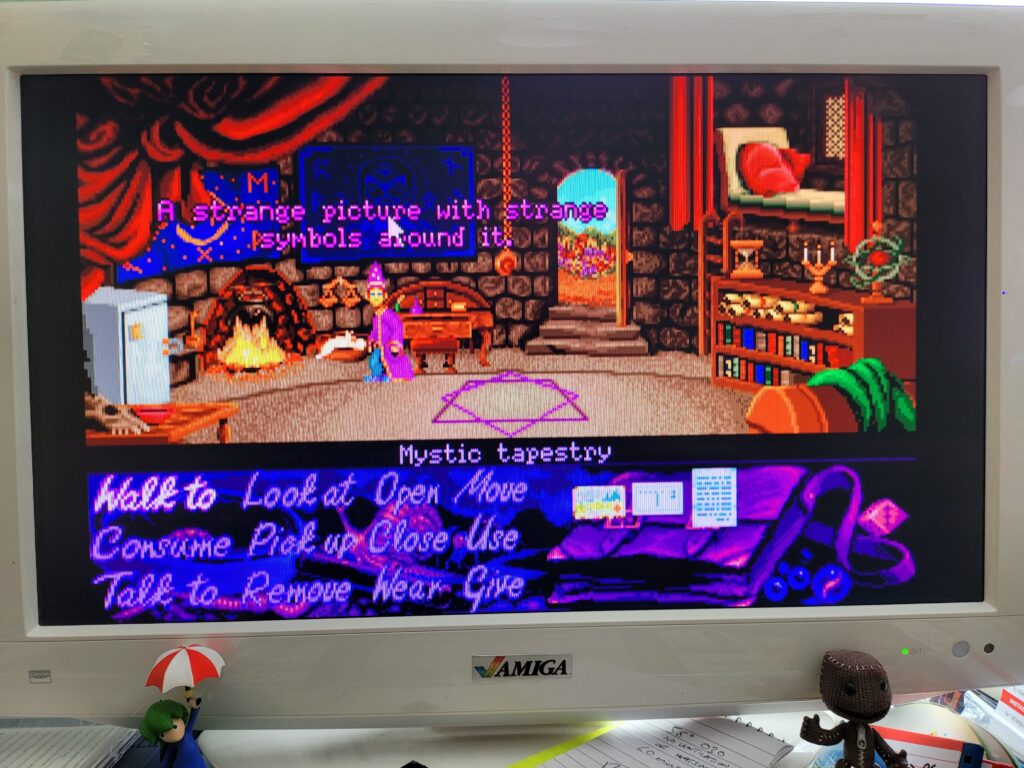
Happily the tank mouse is a pleasure to use in the games that support it, in Simon the Sorcerer for example. I should point out that the main UI doesn’t support it at all though – you must use the controller to navigate around that.

Unlike the original A500 mouse this new one incorporates a modern optical sensor under the hood and is all the better for it. I’m not really nostalgic about the old ball mice – they were a pain and required constant cleaning. Even when new they were not as accurate in use as a cheap optical mouse is now. I’ve been using optical mice with all my Amiga machines for years which should speak volumes.


Simon the Sorcerer

Using the mouse in Simon the Sorcerer.


Tweaking the settings

So the included games all work like a charm – but there’s still room for improvement. There’s a bunch of options you can mess around with to alter each game to your personal preference. The settings screens all feature a Workbench 1.3 Window effect which is a nice nod to the past and another example of the thought that has gone into this product.


The A500 Mini

Display Options.


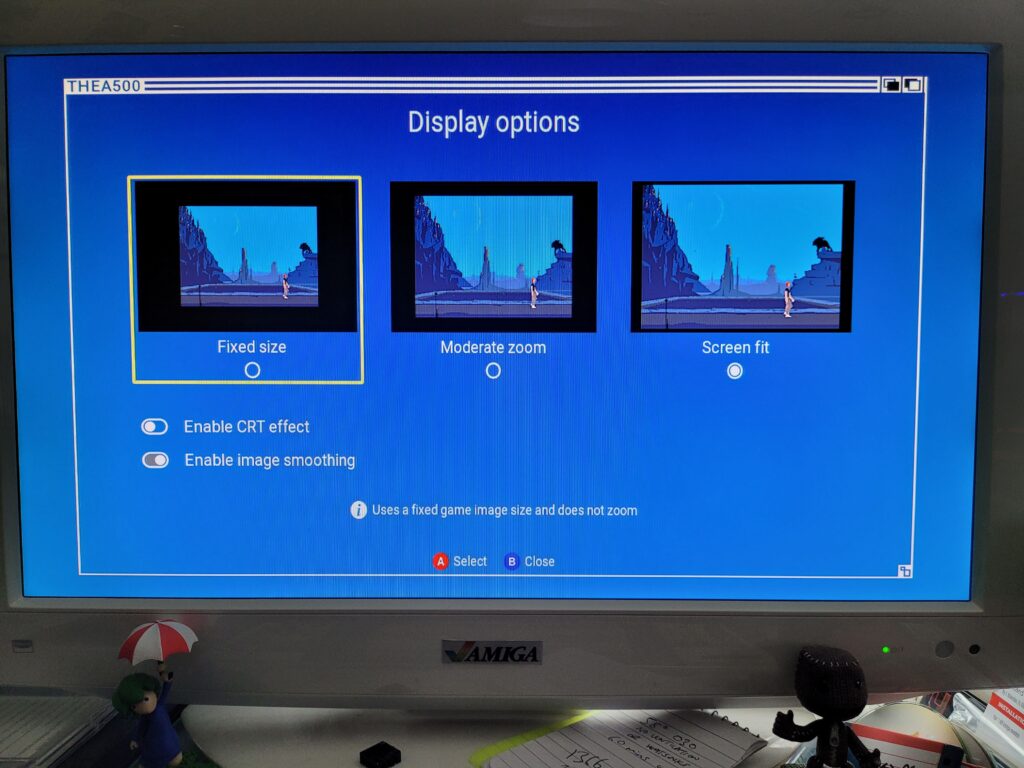
The Display Options screen allows you to select the zoom size of the screen. Some games are displayed as small 4:3 windows so you can use these settings to make the screen fit your display better. There’s also a CRT effect filter that adds scanlines to the image to make it appear as if its displayed on an old CRT monitor.


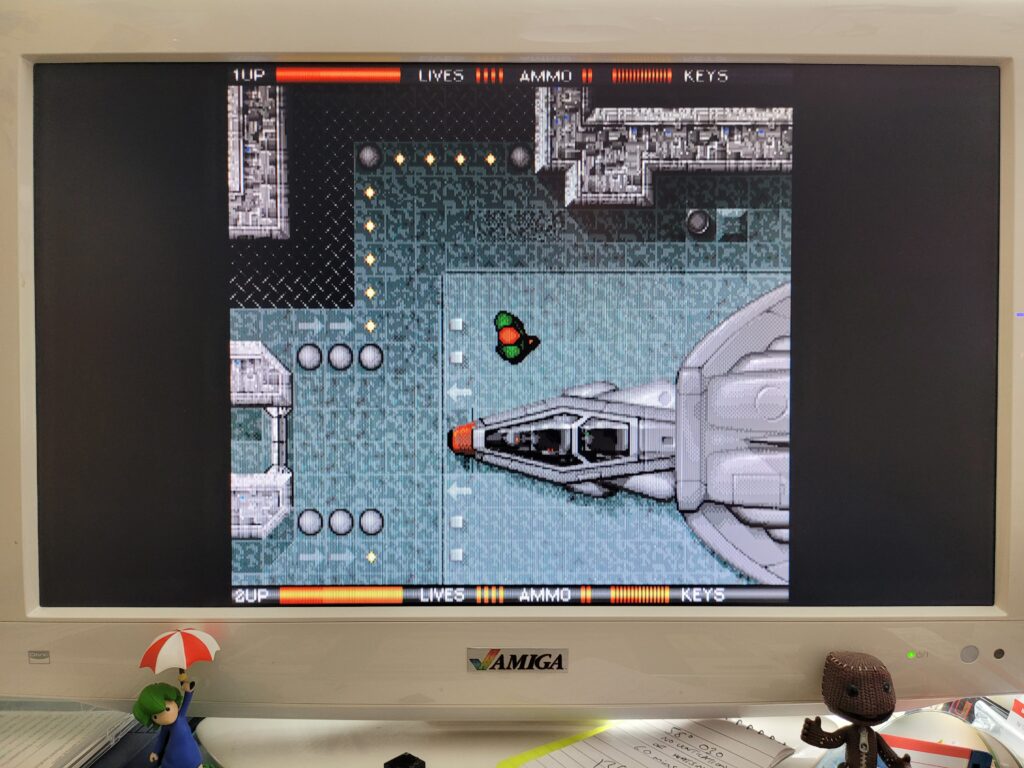
Alien Breed

WITHOUT CRT Effect.


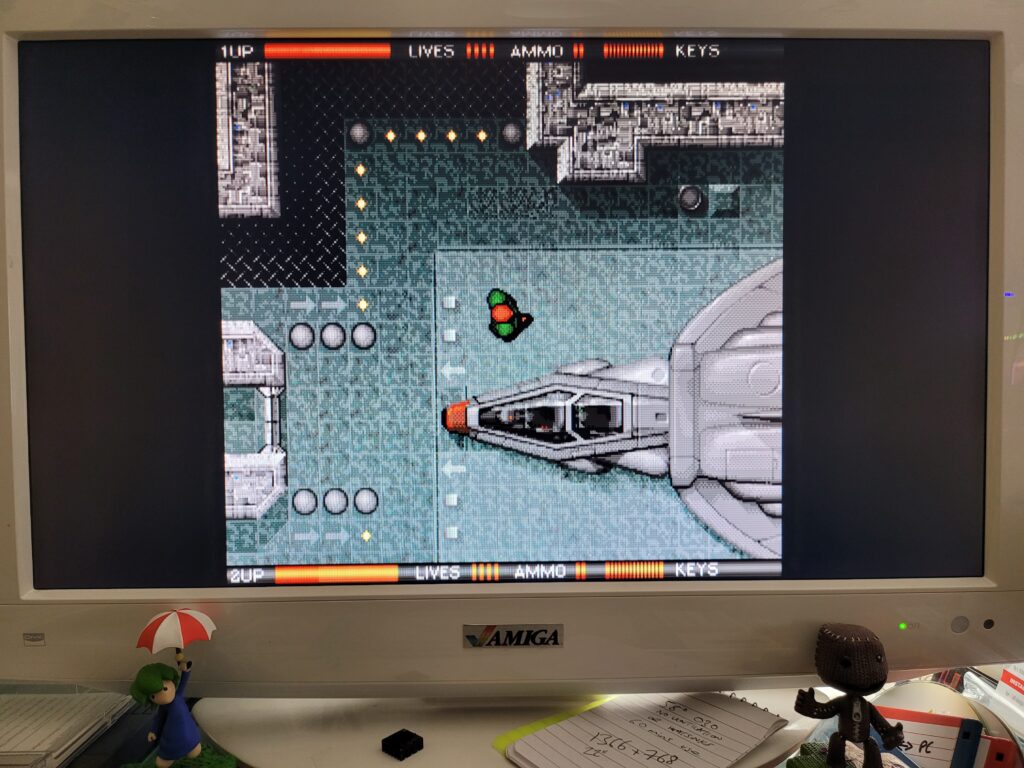
The effect is subtle but quite effective which you can hopefully see on the two screenshots. Above is a screenshot taken without the CRT filter and below with it turned on.


Alien Breed

WITH CRT Effect.


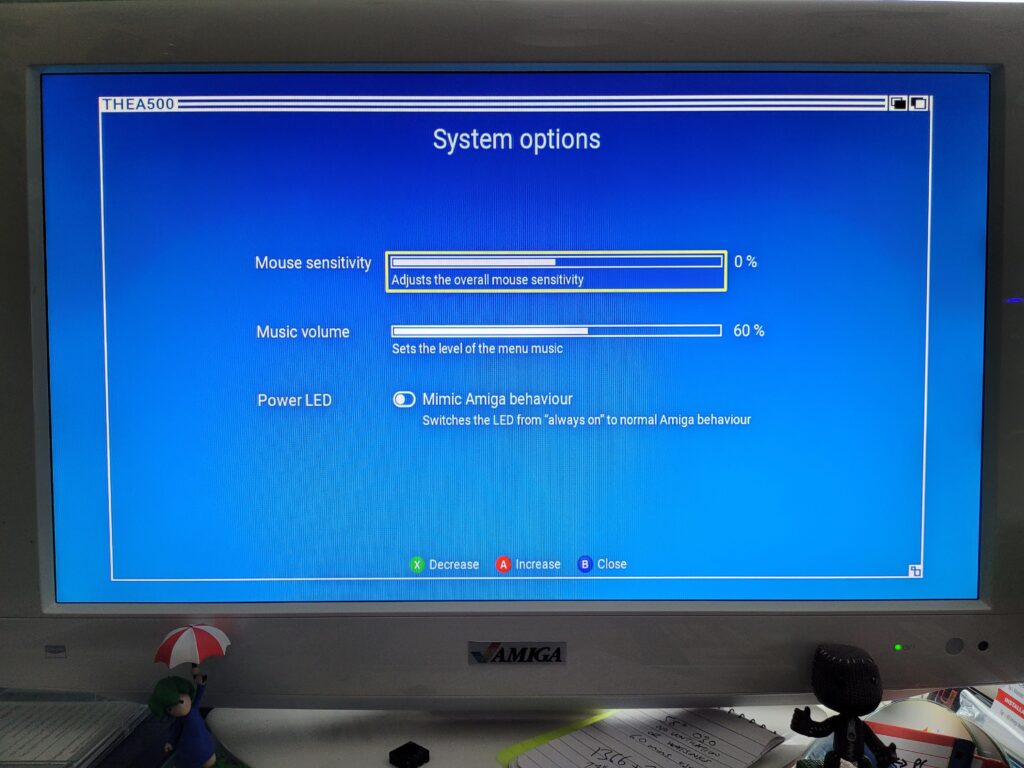
The System Options screen allows you to adjust the mouse sensitivity, music volume and Power LED behaviour. The ‘mimic Amiga behaviour’ option just made the LED act weird when loading WHDLoad games (it would keep turning off) so I left this option disabled.


The A500 Mini

System Options Screen.


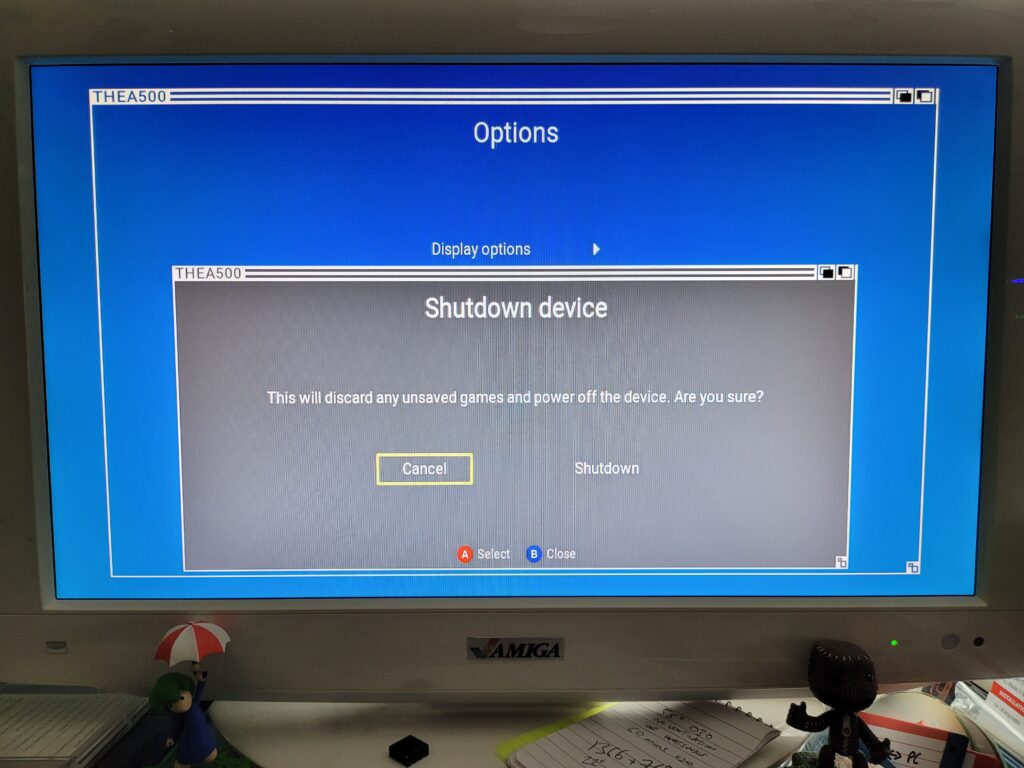
The Shutdown Device option allows a safe way to shutdown the A500 Mini and will probably be my go-to method for powering it off. If I invest a lot of time into a game and save my progress I don’t want to come back and find it’s been corrupted due to me pulling out the plug!


The A500 Mini

Safe Shutdown.


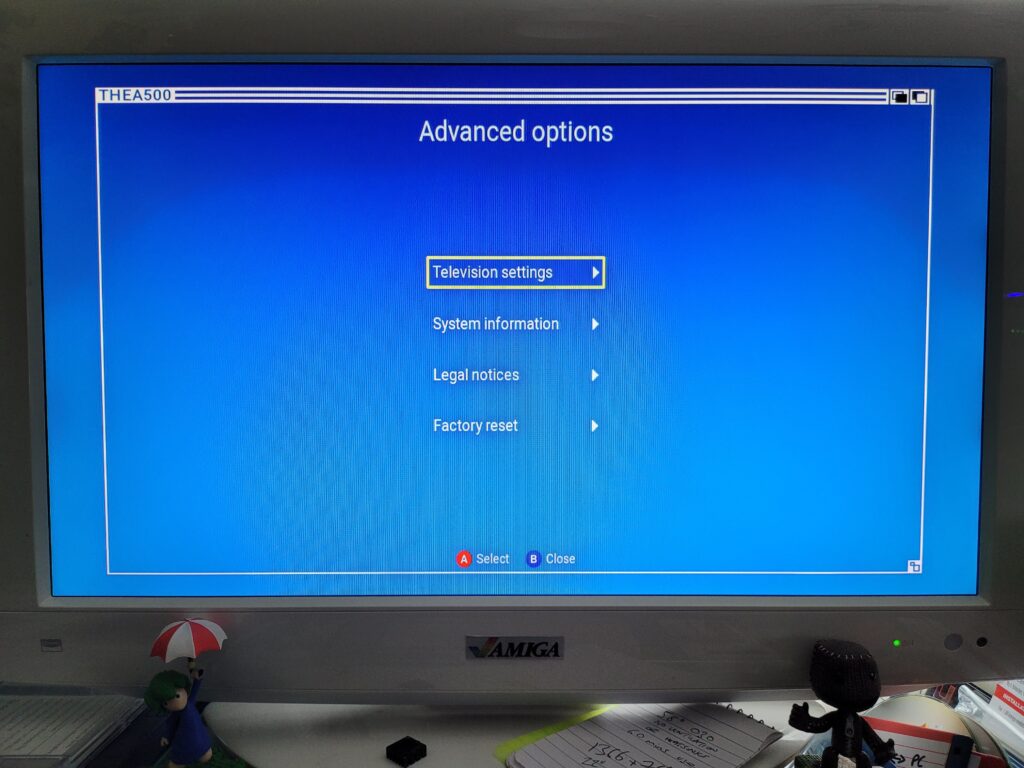
There’s also an ‘Advanced Options’ screen which is home to some less frequently needed settings. Here you can re-visit the 50/60Hz mode options, tweak whether a game should utilise the ‘border’ section of the screen, access System info, creator credits and also perform a factory reset.


The A500 Mini

Advanced Options Screen.


Loading Your Own Games

One of the advertised features of the console is being able to play your own selection of games on the device. However this isn’t explained at all in the Quick Guide, for this info you need to head online to their website: THEA500 Mini support (retrogames.biz)

In a nutshell these are the requirements for getting your own games onto The A500 Mini.

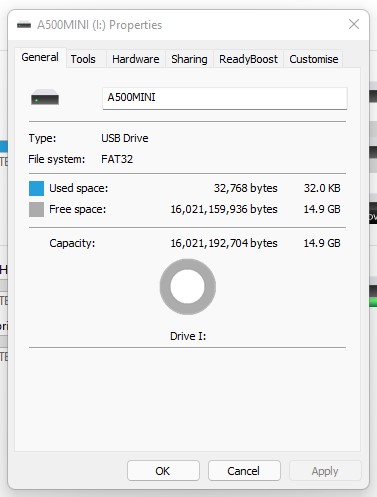
  • A USB stick formatted using FAT32.
  • The USB stick must have ‘THEA500 WHDLoad Package’ installed on it.
  • The WHDLoad programs all have to be LHA files.
  • The WHDLoad programs must be a complete archive of the program and
    not just the program’s WHDLoad installer.


My FAT32 Formatted 16GB USB Stick.


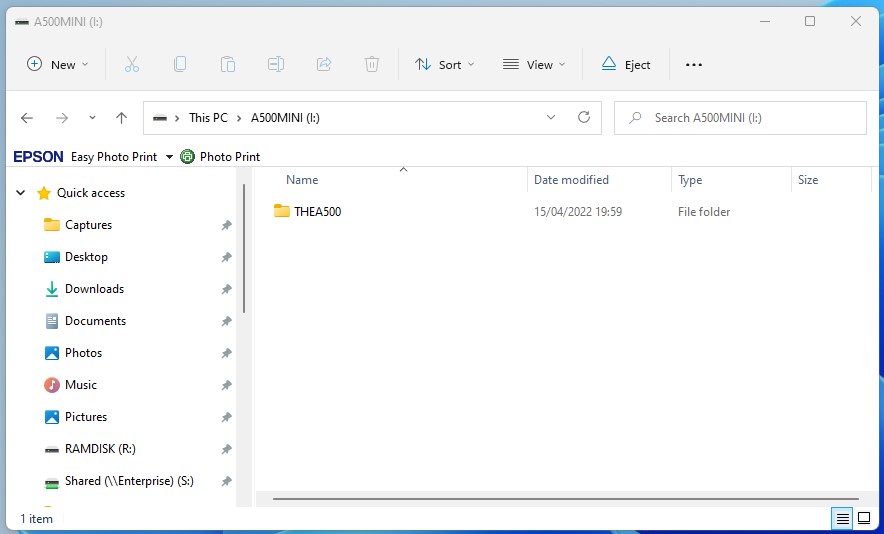
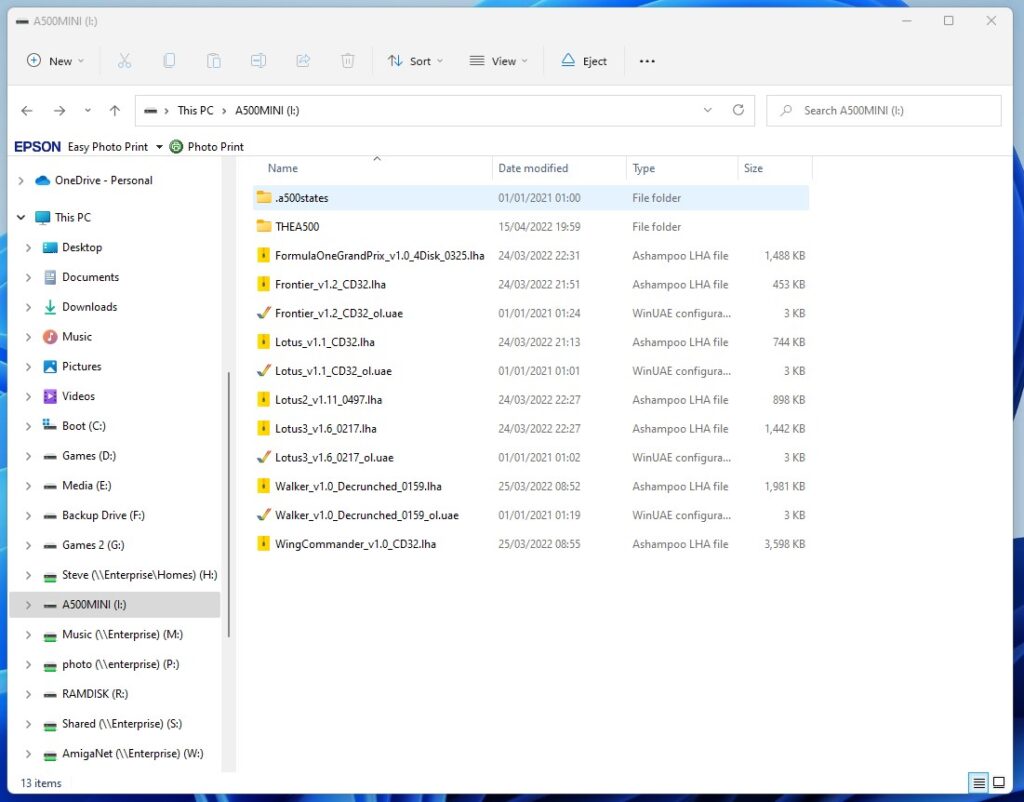
Once you’ve downloaded the ‘THEA500 WHDLoad Package v1.0.1 ‘ you simply unzip it to the ROOT of your USB stick. It should look like the screenshot below if you’ve done it correctly.


Games are simply copied into the root of the USB stick as well, or if you have a lot then you can also organise them into directories too. All the games must be in LHA format. I put a handful of games on my stick and it looked like the screenshot below. Note the ‘states’ directory and the various .uae files. These were all created by the A500 Mini itself and contain the save states and configuration options for my custom games. Don’t delete these files!


My USB Stick with a bunch of games ‘installed’.


The USB stick plugs into the spare USB port at the rear of the A500 Mini – assuming you aren’t using a USB keyboard of course.


The A500 Mini

A500 Mini with USB Stick plugged in.


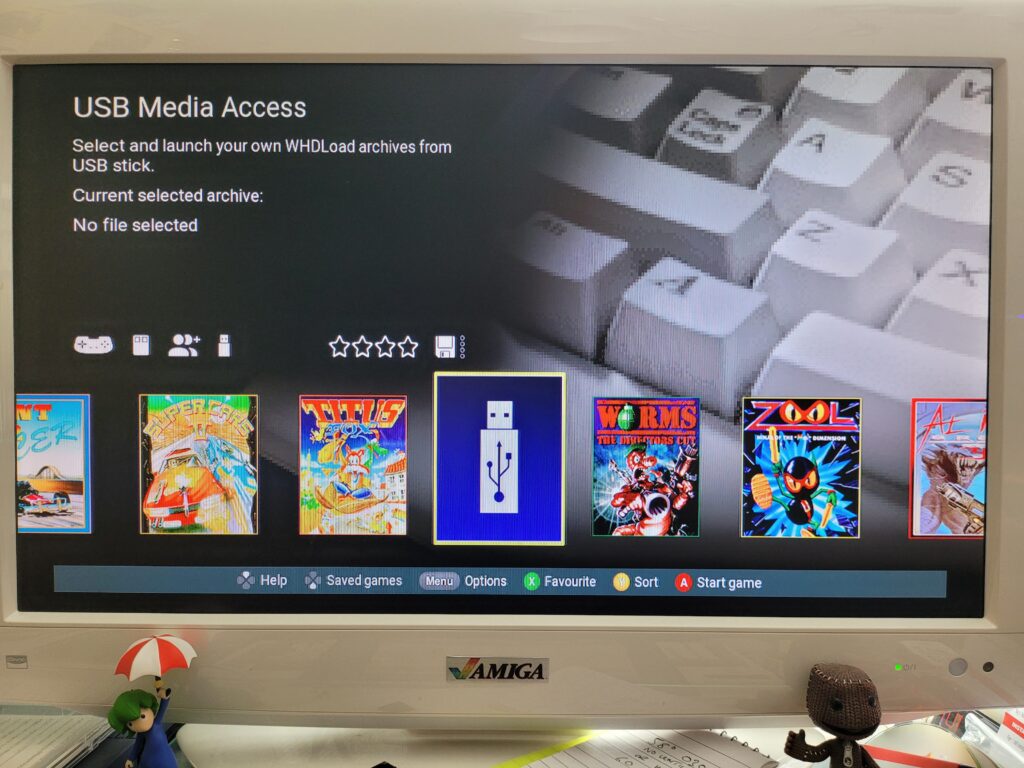
If it has been setup correctly then a USB Stick icon should appear on the carousel as shown in the photo below.


The A500 Mini

USB Stick icon on the carousel.


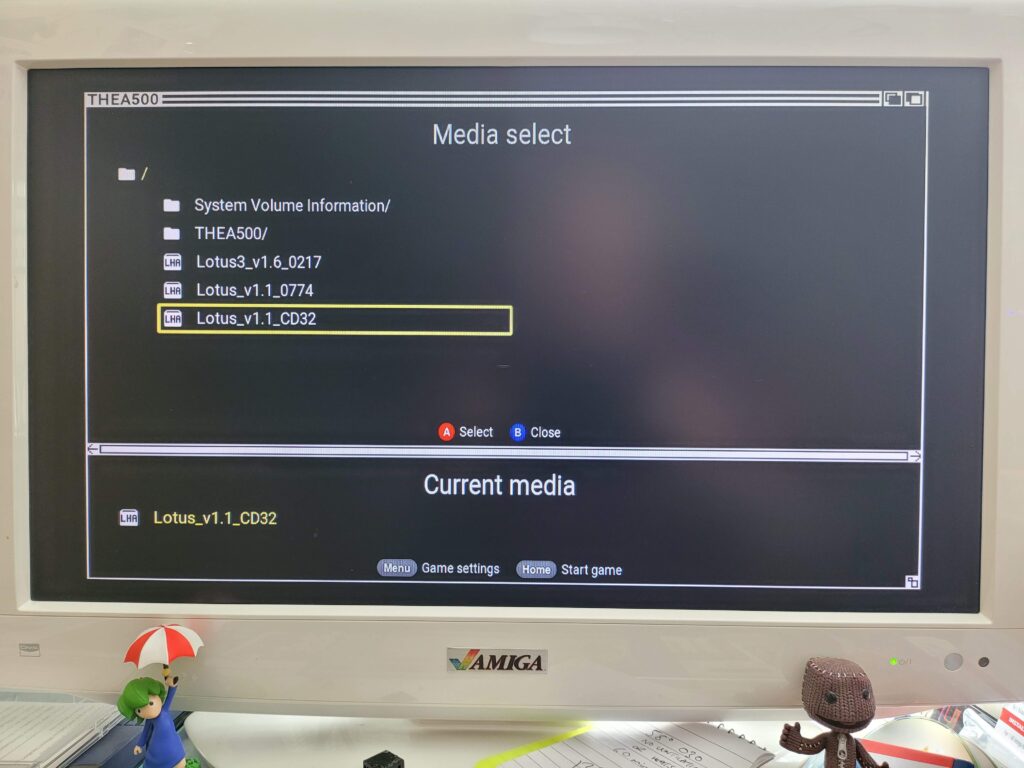
Clicking ‘Start Game’ will then bring up the contents of the stick. In my example below I had put a few Lotus games on my USB stick to experiment with.


The A500 Mini

Selecting a custom game.


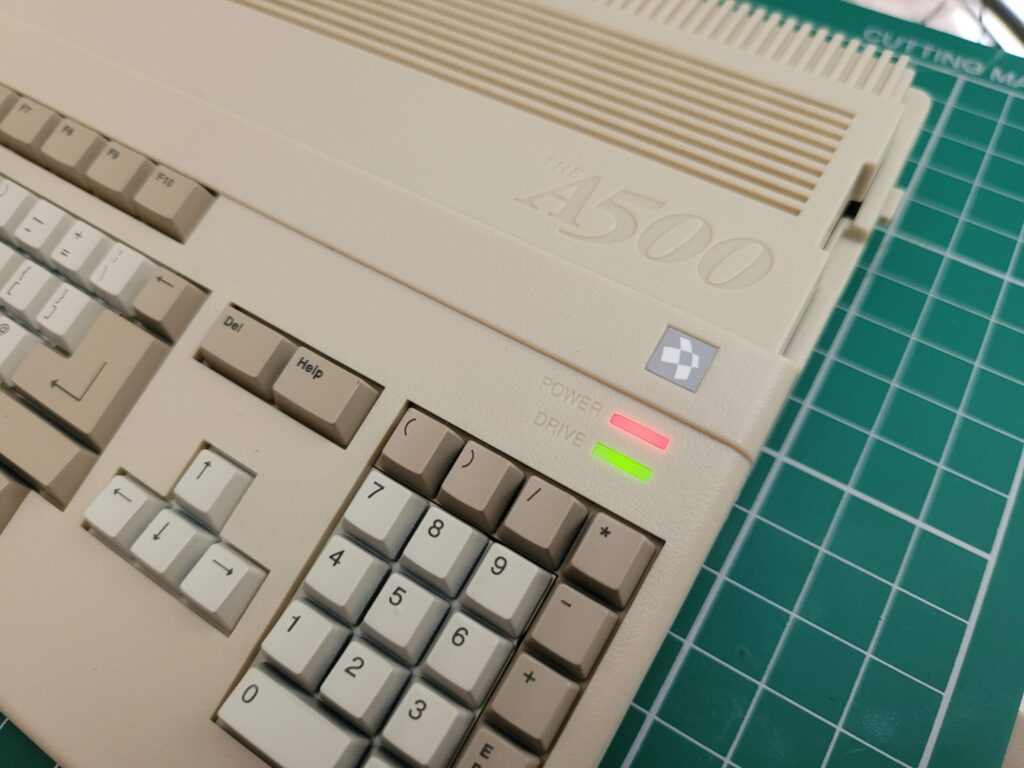
When loading the games the drive activity LED finally sprang into life!


The A500 Mini

The A500 Mini Drive activity light.


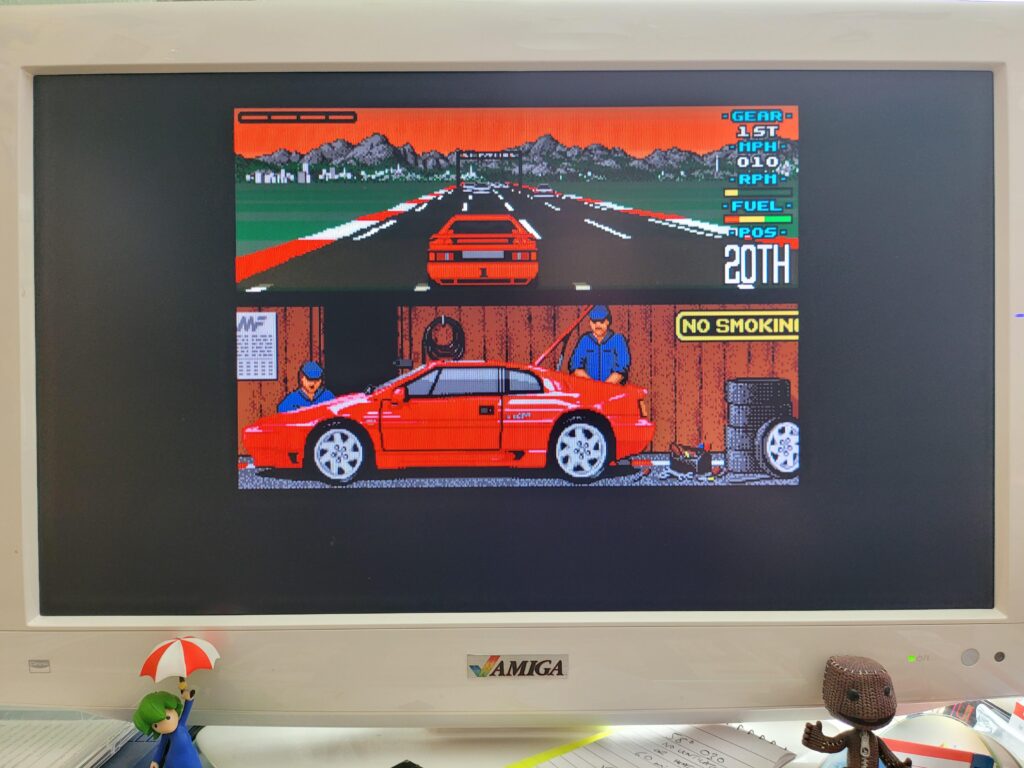
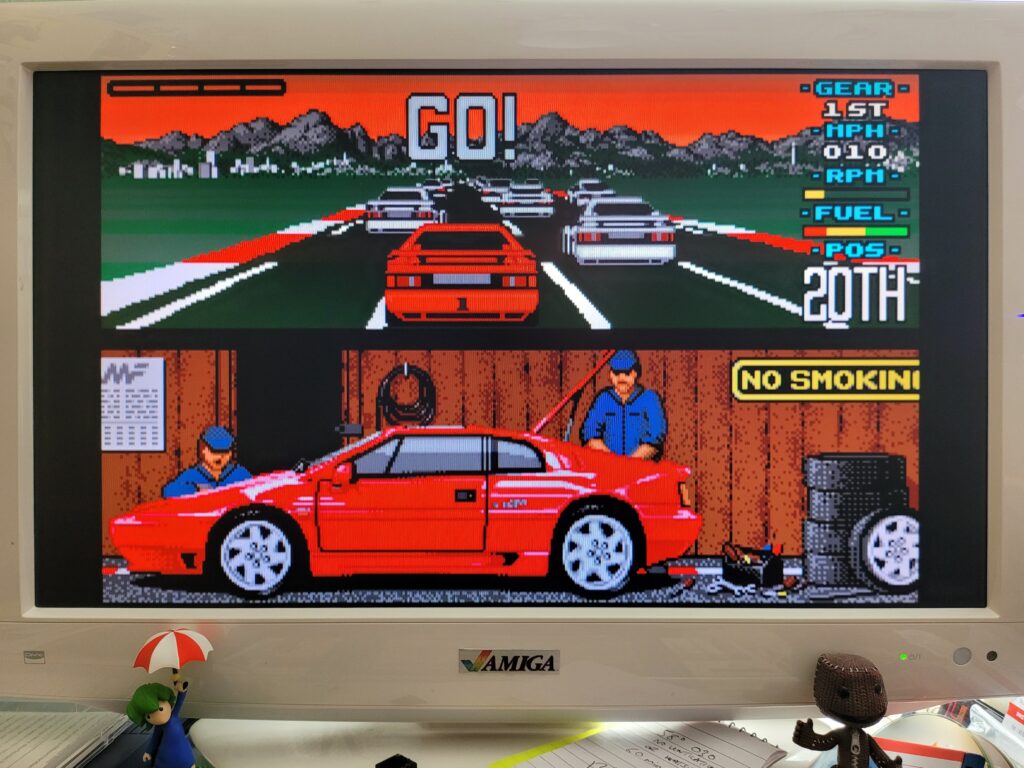
Lotus 1 loaded up and played just fine, but it was only using a fraction of the available screen space…


Lotus Turbo Esprit Challenge.


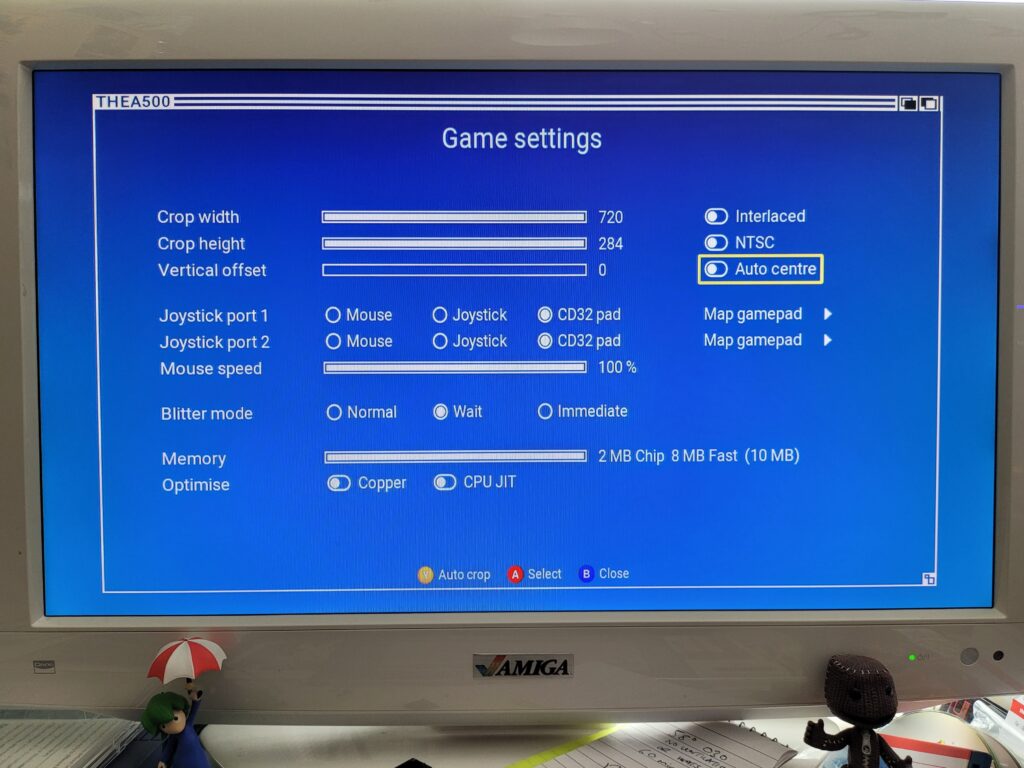
The Game Settings screen offers numerous tools to tweak how the game runs, including how it appears on screen.


The A500 Mini

Game settings screen.


By using a combination of auto-centre and auto-crop I was able to achieve the result in the next photo which was infinitely better. These settings are remembered for each custom game too which means once you’ve only got to configure things the way you like then the one time.


Lotus Esprit Turbo Challenge looking much better now that it’s using most of the available screen.


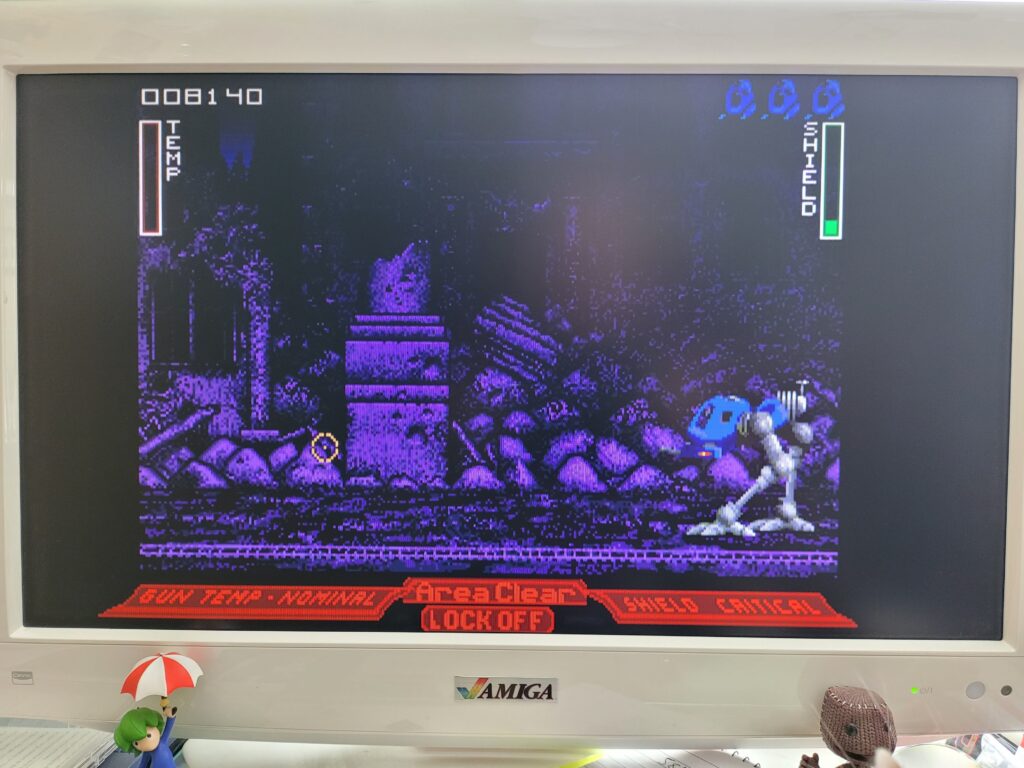
Mouse support is disabled by default which I discovered when I loaded up Walker for a quick blast. This was easily solved by going into the Game Settings screen and enabling the Mouse on Joystick Port 1. I also had to adjust the sensitivity as it seemed way over-sensitive to me. Once I’d sorted those two things it played perfectly.


Walker.


I’m not sure exactly how powerful the A500 mini is but it’s definitely much faster than a stock Amiga 500 that’s for sure. Here’s a video of it running the intro from Frontier Elite 2. Anyone who has seen this running on a stock A500 will know that it really struggles to keep up the framerate during most of this 3D animated sequence. The A500 Mini on the other hand makes it seem effortless.


Wing Commander also ran super smooth too which I remember being another game that really needed a decent CPU to shine. It actually runs better on the A500 Mini than it does on my TerribleFire 330 equipped CD32 which has a 50Mhz 68030 CPU.


ADF Support

You may have noticed that I’ve made no mention of loading ADF disk images so far and that’s because they are simply not supported. I have to say that this is a huge disappointment for me personally as I’ve purchased a lot of modern day Amiga games and many of them only came in ADF format. I’ve also converted many of my old original physical game disks into ADF images and I’m unable to use any of them. Furthermore I have no idea how to create WHDLoad versions of any of my games so I am faced with either not being able to play these games on the A500 Mini or having to search around to see if anyone else has created WHDLoad versions of them. I really hope Retro Games Ltd. add this feature in a firmware update soon as it really limits the devices appeal at the moment for me personally.

Verdict

The A500 Mini is a beautifully designed and executed piece of kit and it seems evident to me that the guys who created it are passionate Amiga fans. The UI is beautiful and I love the slick implementation of save-states and simple to configure options to tweak my gameplay experience. The mouse and controller both look the part and work really well. Most importantly of all, the games appear to run great on the device and at an improved frame-rate too, for games that support it. The lack of a decent printed manual is a bit disappointing but hardly a deal-breaker. The lack of ADF support on the other hand is a bit more troubling and quite a let-down for me personally. If using ADF images is important to you too then maybe hold off until Retro Games Ltd. announce they’re going to add support for them. For anyone else thinking of taking the plunge though, just get one – you won’t regret it.

Installing AmigaOS3.2

Seems like it was only yesterday that AmigaOS3.1.4 was released and yet here I am with AmigaOS3.2! I actually bought this in June last year but I’ve only just got around to having a play around with it. For the time being this release is only available physically on CD which is fine by me. Hyperion say there will be a digital download version of it at some point in the future.

I will preface this post by saying that things didn’t go smoothly during my first install attempt. Hopefully someone can benefit from the issues I experienced and how I overcame them.


A closer look at the what you get…

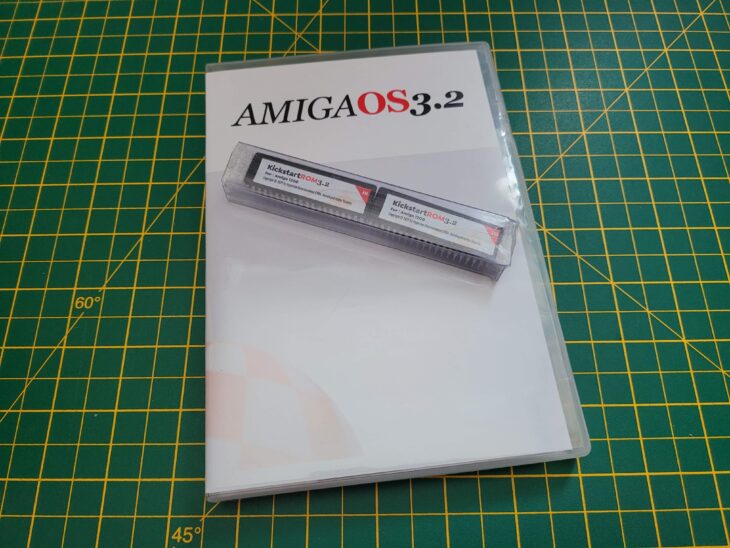
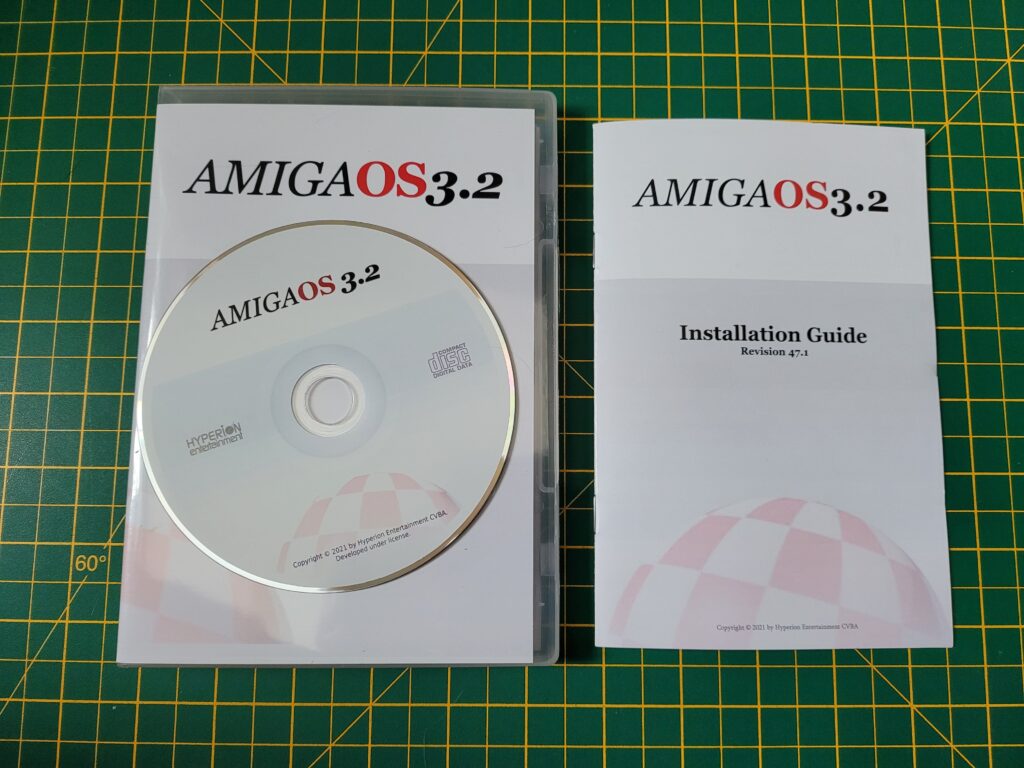
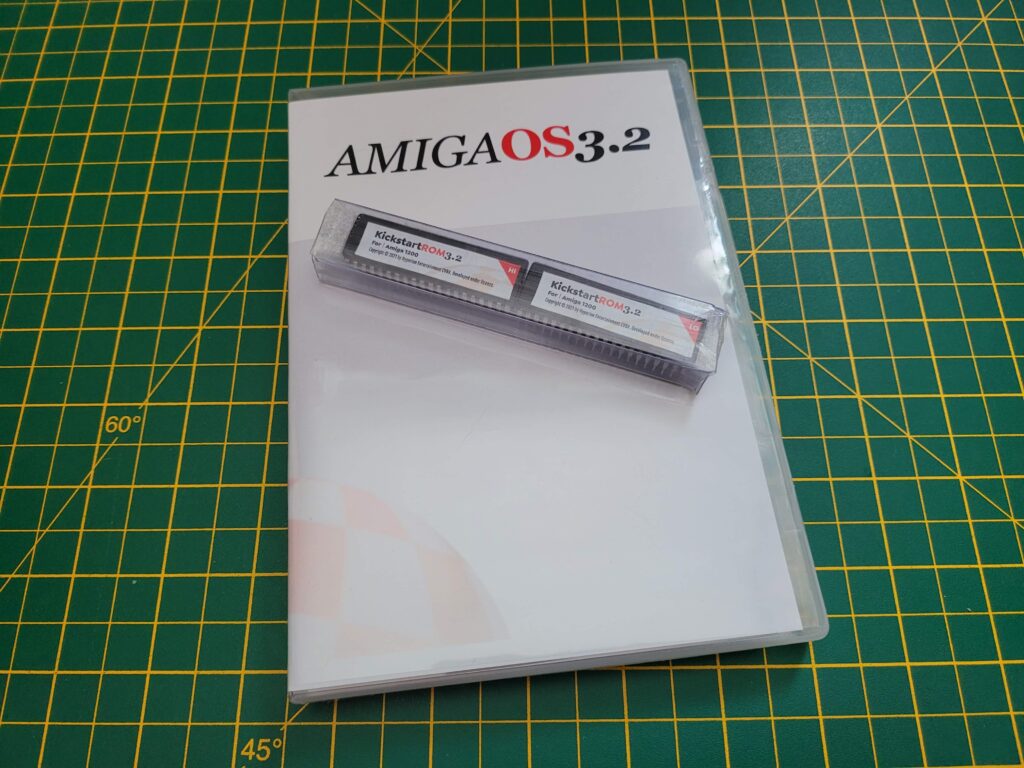
Anyway I ordered the CD along with the Kickstart ROMs for my A1200 from Amigastore.eu. I have to award top marks for presentation as the CD came in a very attractive DVD style case along with professionally printed jacket. Inside there is a 14 page manual and the silk-screen printed CD itself. Finally but by no means least there were 2 new Kickstart ROMs to replace the existing chips.
 

AmigaOS3.2

The AmigaOS3.2 case, CD and manual.


The serial number is on a little sticker affixed to the cellophane wrapping on the outside of the box – don’t make the mistake I did of throwing it in the bin. Luckily I realised before the bin was emptied! The code is needed to register your purchase on the Hyperion site in order to be eligible for future updates.
 

AmigaOS3.2

AmigaOS3.2 ROMS.


Workbench 3.2 actually spans a grand total of 35 floppy disks now which is why the decision was made to supply it on CD. Although half of those disks are either country or machine specific but it’s still a lot. The CD contains ADF images of all the discs should you wish to create your own physical versions. Likewise it contains the new ROM images so you can use them with a Vampire, map the ROMs to RAM or just use them with an emulator.


Fitting the 3.2 Kickstart ROMS


AmigaOS3.2 ROMS

Kickstart 3.2 ROMS Installed.


Naturally the first thing I did was to open up my A1200 and fit the two new ROM chips. If you are looking for detailed instructions on how to do this you can follow my detailed guide here. The important things are to get the ‘HI’ and ‘LO’ chips in the correct sockets (see photo above), that you orient them correctly (notched end of chip goes next to notched socket) and finally that you leave the last pair of pins in each socket empty as the sockets have 42 pins whereas the ROMS only have 40!
 

Compact Flash Card

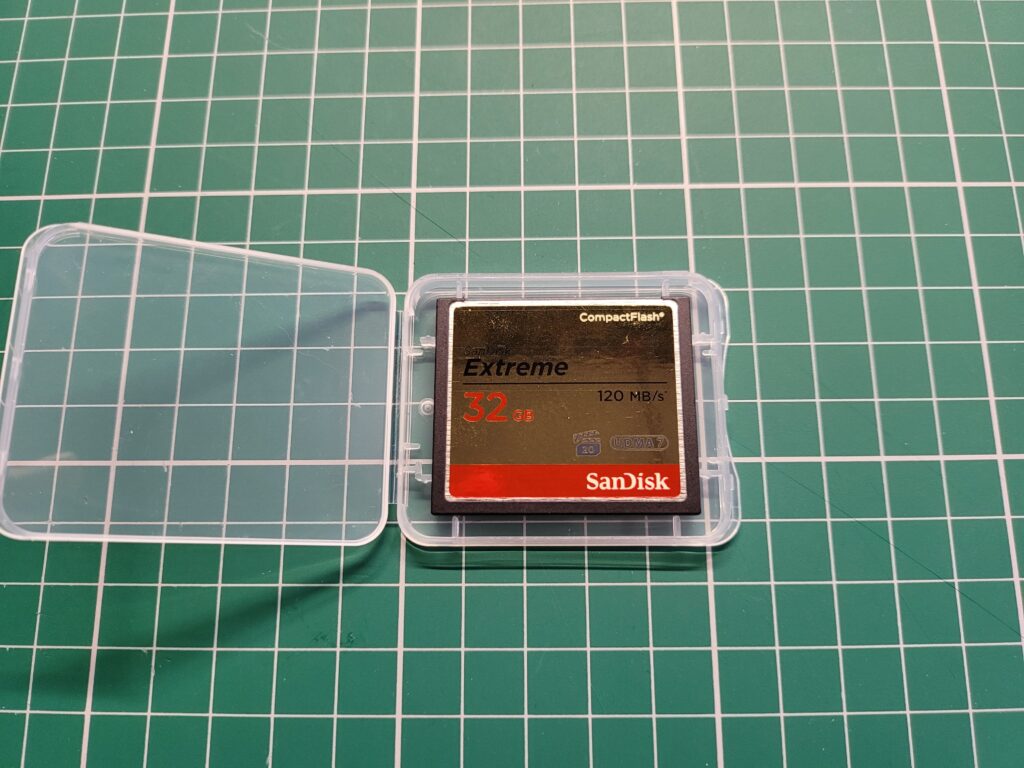
My new A1200 hard drive – a 32GB SanDisk Extreme Compact Flash card.


Whilst I had the case open I thought it would be a good time to install the new Compact Flash card I’d bought for the occasion. I opted to go with a nice big 32GB card this time around as it’s surprising how quickly you fill these things up without even trying. The card I bought was a SanDisk Extreme 32GB Compact Flash. I wanted something that would prove reliable and SanDisk is a brand I trust.
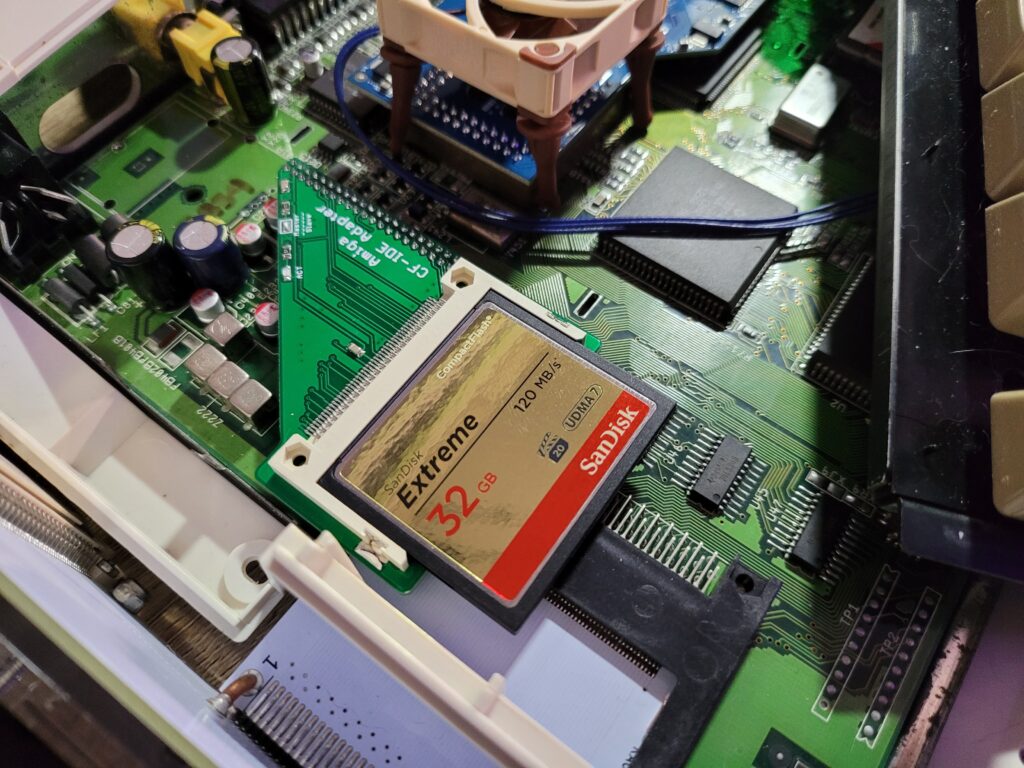
 

Compact Flash Card

32GB Card installed.


With the ROMS and new Compact Flash card installed it was time to power up my A1200 and make sure everything was working.
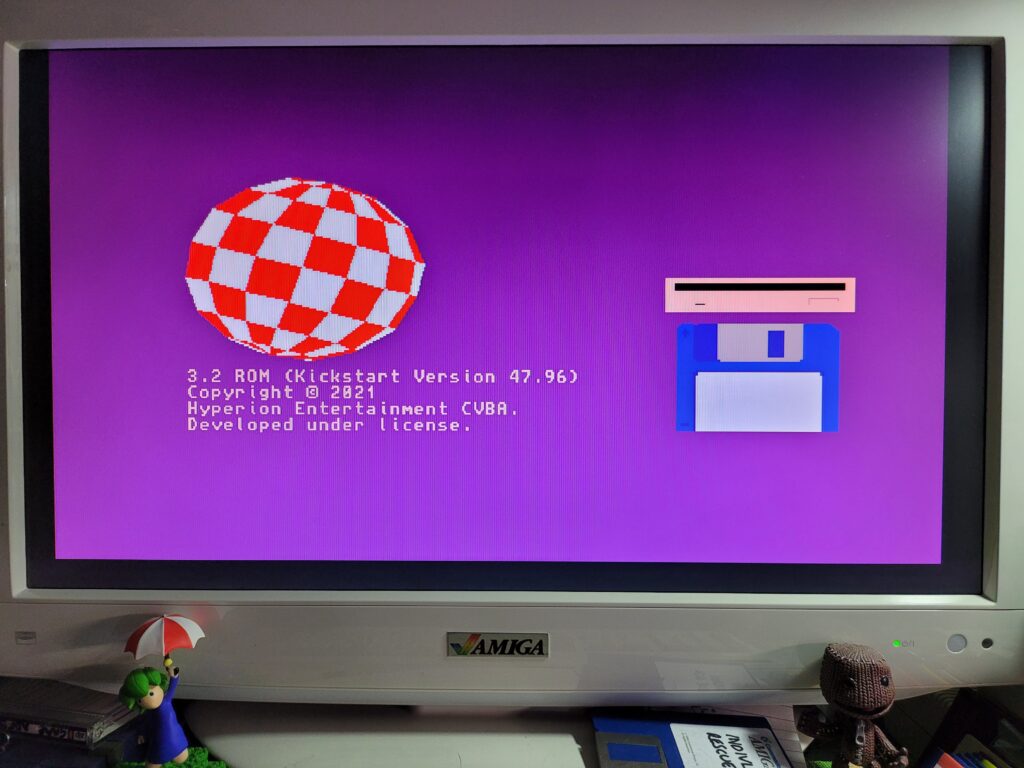
 

AmigaOS3.2

The new 3.2 ROM boot screen.


Just a few moments after turning the power back on I was greeted with a brand new boot screen. Gone was the multi-colour tick that has been there for the last thirty years – replaced by the Amiga ‘boing’ ball. Commodore’s name has also been removed and replaced with Hyperion’s. Anyway, mixed feelings aside, so far so good! Now it was time to get cracking with the Workbench install.


Prepping the disks

(The Discovery of problem no. 1)

As I mentioned previously there are a whopping 35 disks in total for this install. Even after I weeded out all the language specific variations it still left 11 disks to install. Thankfully the CD contains all the disks as ADF images and if you have a Gotek drive available it’s a simple matter of copying them across to a USB flash drive and using that. This time around there are no snazzy pre-printed disk labels included either so that was another reason not to bother making physical copies of the ADF images. There are a bunch of PNG images included on the CD for you to print your own labels should you wish to though.
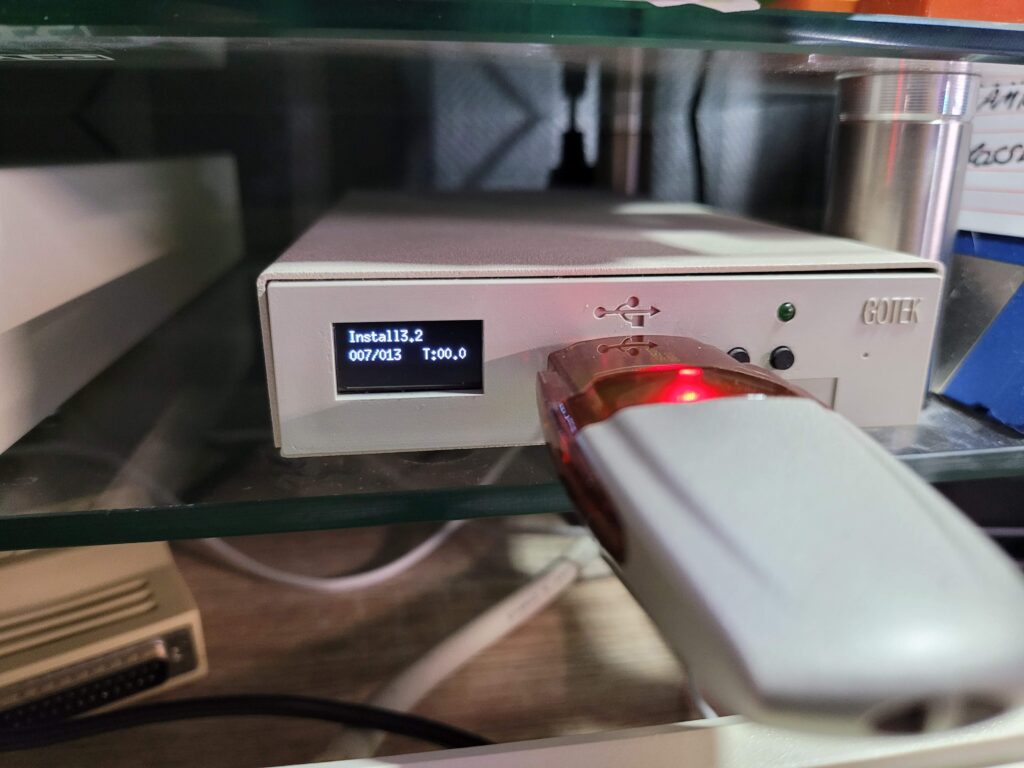
 

External Gotek Drive

The Install3.2 ADF selected ready to boot on my Gotek drive.


The journey starts with the ‘Install3.2’ disk so I selected that on my external Gotek and then selected DF1 as the boot device from the A1200’s Boot options screen. (Accessible by holding down both mouse buttons on bootup until the power LED flashes). If you have a Gotek configured as DF0 then you won’t need to do this.
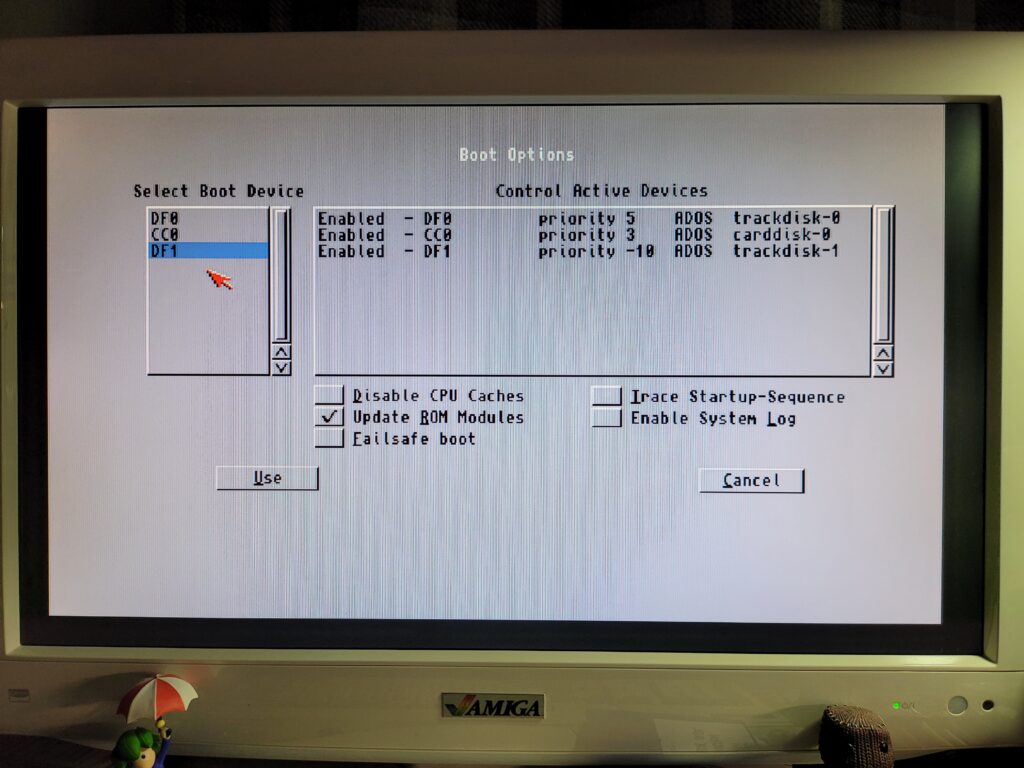
 

Amiga 1200 Boot Options Screen

Amiga 1200 Boot Options Screen


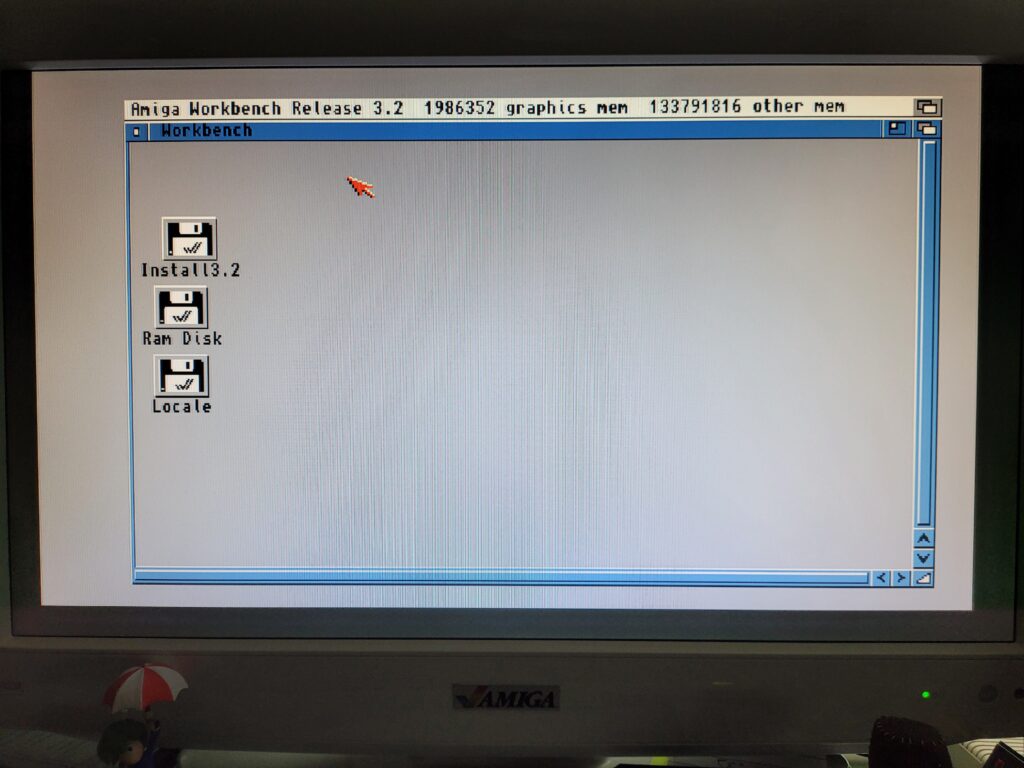
A short while later I was greeted with a basic Workbench screen and I thought I was on my way. Well you know what thought did… Everything looked OK but the mouse pointer was completely frozen – likewise the keyboard wouldn’t respond either. I tried to boot a few more times with no success. I unplugged all my peripherals, PCMICA card, audio cables, SCSI devices until all that was left was power, video and my external Gotek. Still it wouldn’t work. Maybe it didn’t like my Gotek, or the fact it was hooked up as DF1? So I created a physical Install3.2 floppy disk, disconnected my external Gotek and tried again with a real floppy in DF0. Another fail. So it wasn’t that either.
 

AmigaOS3.2

AmigaOS3.2 Workbench Screen (with frozen mouse).


I tried all sorts of things like re-formatting my USB flash drive and copying across the ADF’s again. I even tried a different flash drive and removing my Indivision Mk3 flicker fixer, all to no avail.

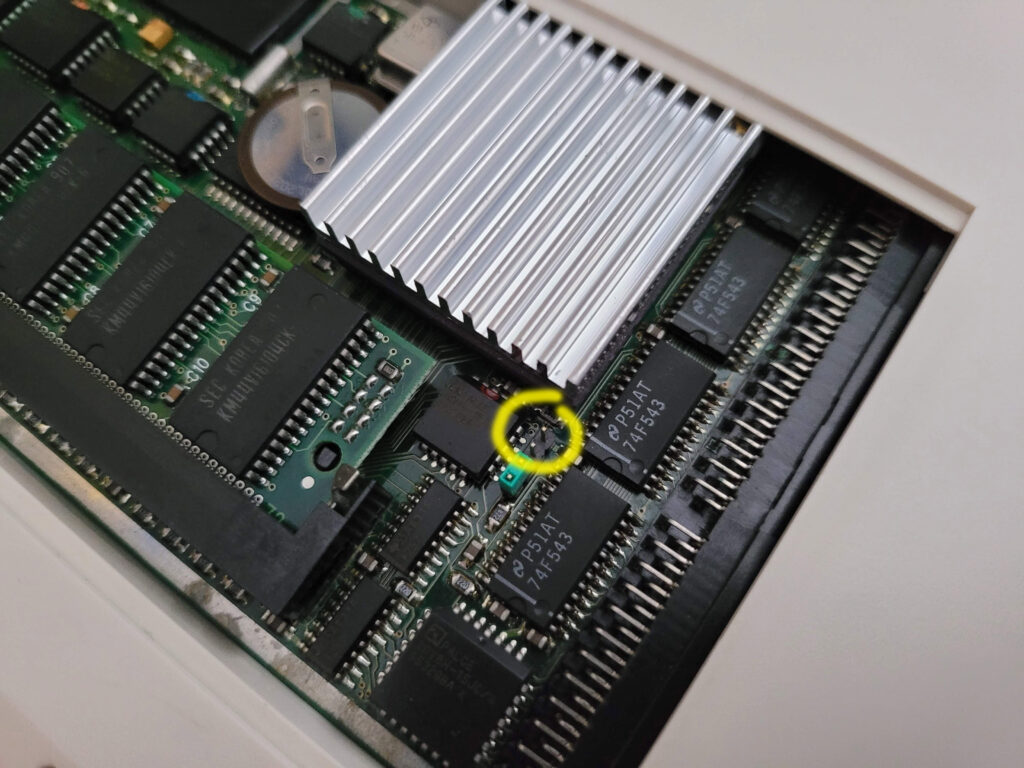
Eventually I was left with one thing I hadn’t tried – removing my Blizzard 1230 MkIV card. Luckily I remembered that the card could be disabled by holding down the ‘2’ key on boot so I gave it a try. Just like magic after doing this Workbench loaded fine and I could use my mouse and keyboard without any issues. Clearly something was up with my accelerator card.
 

Blizzard 1230 MKIV

Blizzard 1230 MkIV – MAPROM feature disabled with jumper removed.


More head scratching and investigations ensued until I finally discovered the source of the issue. I had the MAPROM feature enabled on my card which is supposed to speed the Amiga up by copying Kickstart into FASTRAM. However for whatever reason OS3.2 didn’t like that because from the moment I disabled it by removing the jumper (see photo above) the problem simply vanished. Happy days!


Prepping the Compact Flash Card

(The beginning of problem no. 2)


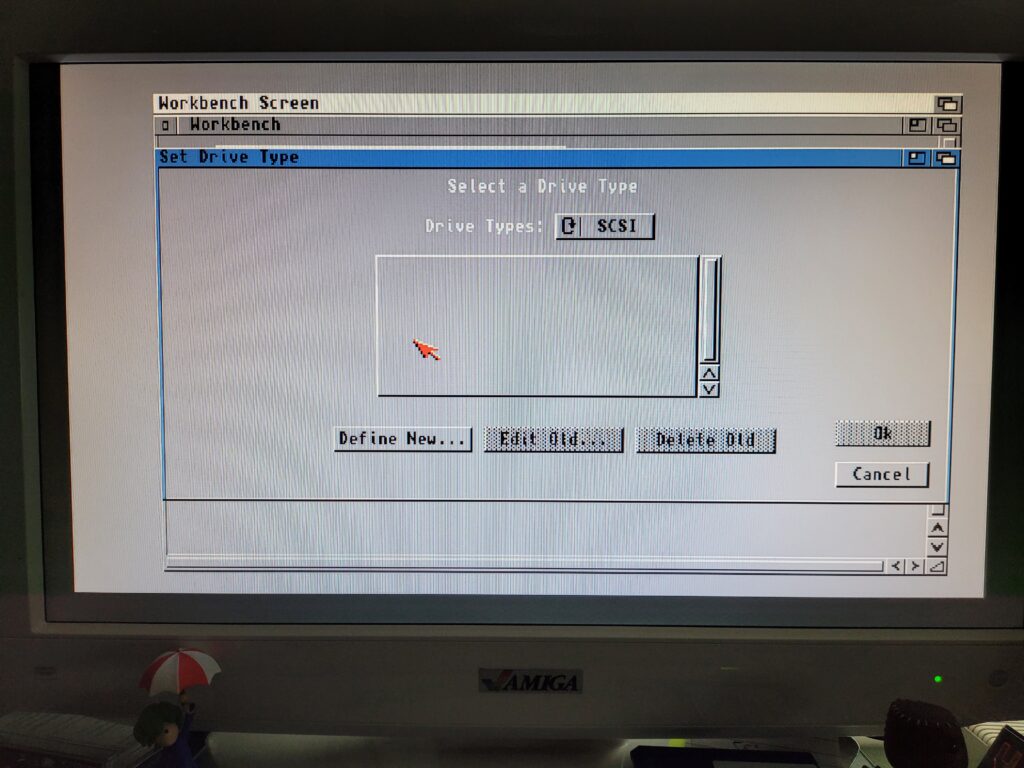
Now I had a working 3.2 Workbench it was time to Partition that nice shiny new Compact Flash card. I loaded up HDToolBox from the disk and clicked ‘Change Drive Type’.
 

Amiga HDToolBox

Amiga HDToolBox – Defining a New Drive


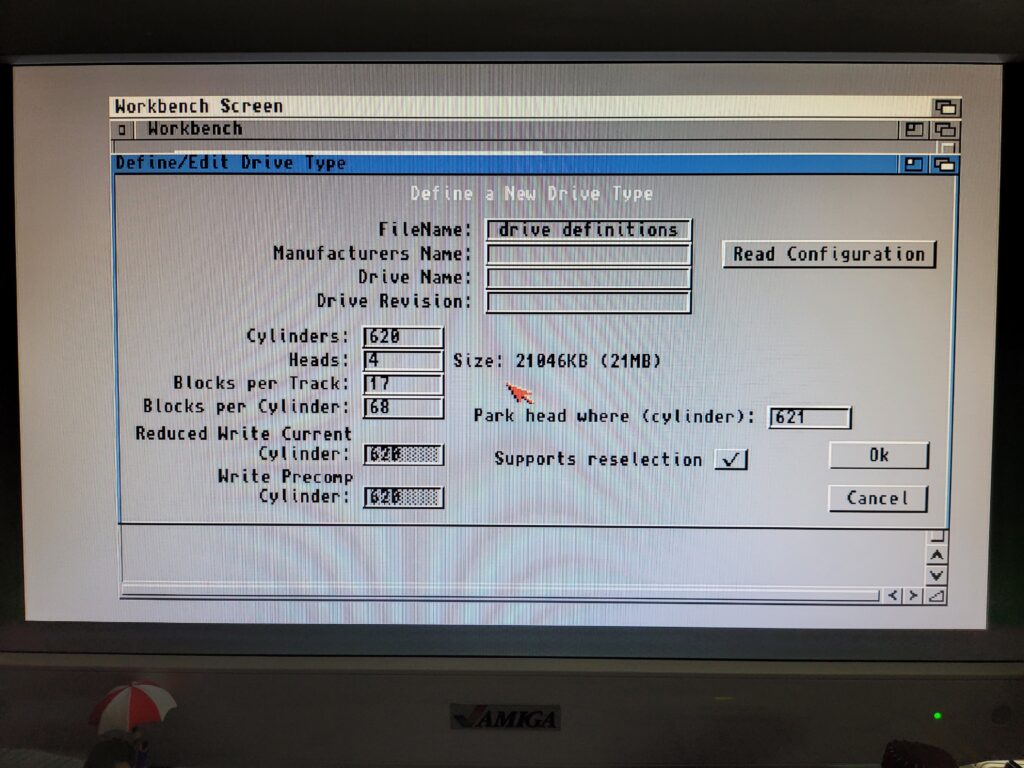
Next I clicked ‘Define New…’  which brought up the Define/Edit Drive Type window shown below.
 

Amiga HDToolBox

Drive parameters screen.


The Amiga is perfectly capable of doing all the heavy lifting here – I just needed to click on ‘Read Configuration’ to get it to extract all the necessary parameters from the card. A little info window popped up and I clicked ‘Continue’.
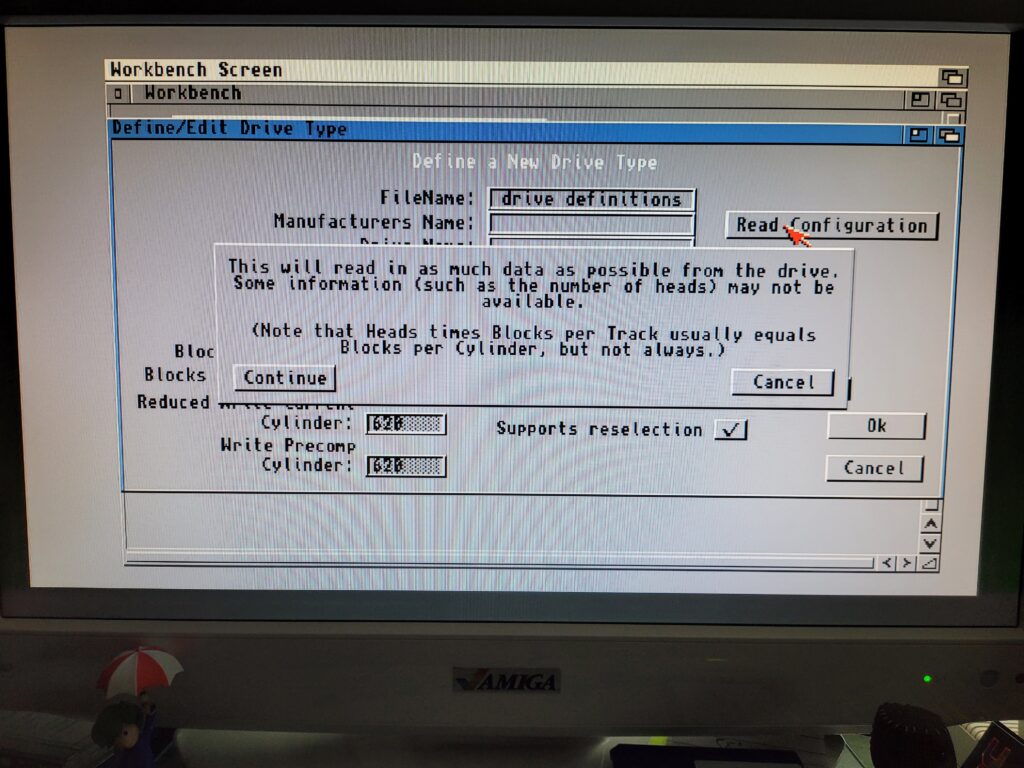
 

Amiga HDToolBox

Info Message


A second or so later and all the parameters had been pulled from the card and filled out on the screen.
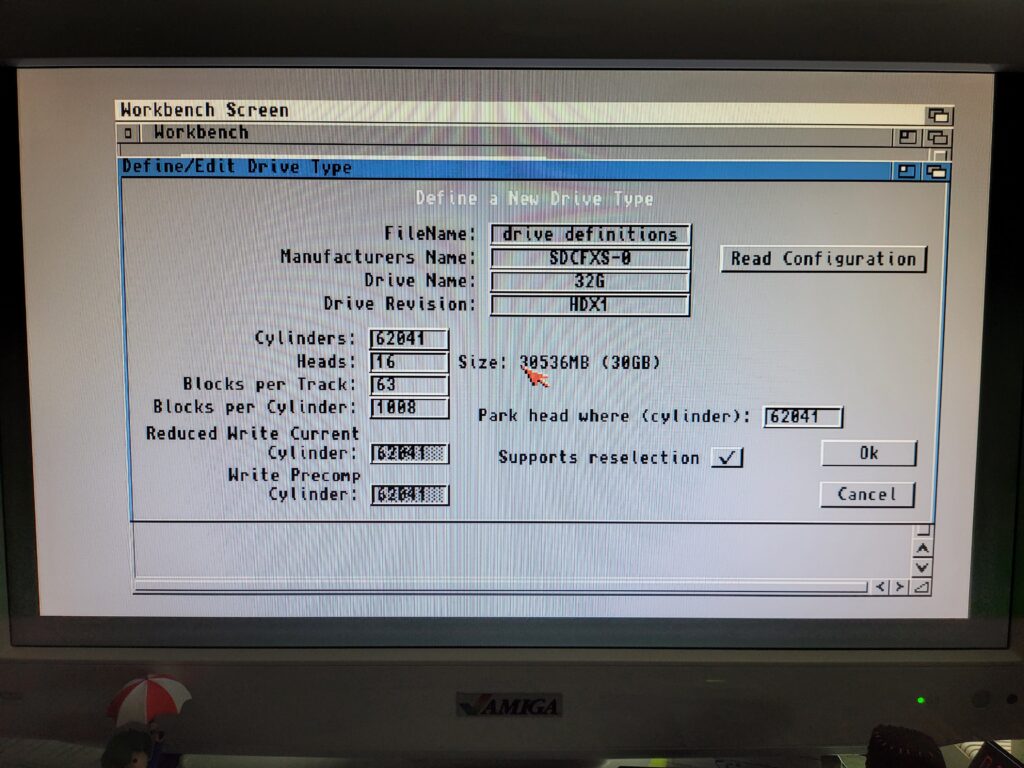
 

Amiga HDToolBox – Defining a New Drive

All drive parameters configured.


Clicking ‘OK’ brought me back to the ‘Set Drive Type’ window where I could see my newly created drive listed as ‘SDCFXS-0 32G’.
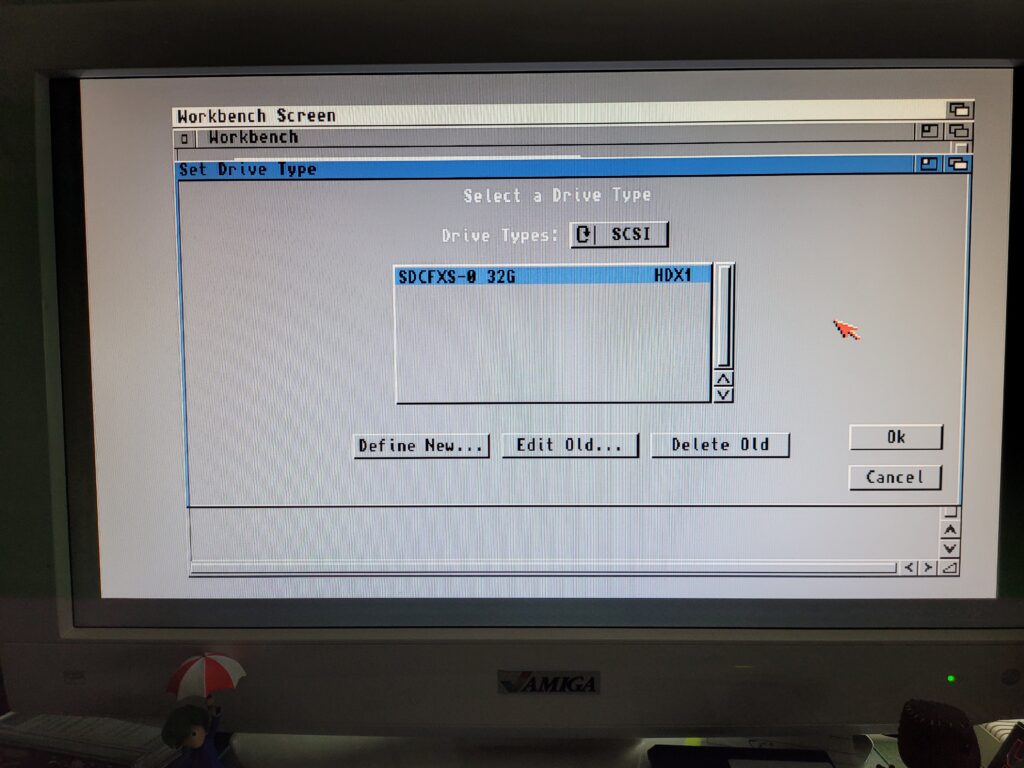
 

HDToolBox

Newly configured drive now listed.


Clicking ‘OK’ again brought me back to the main HDToolBox screen, shown below.
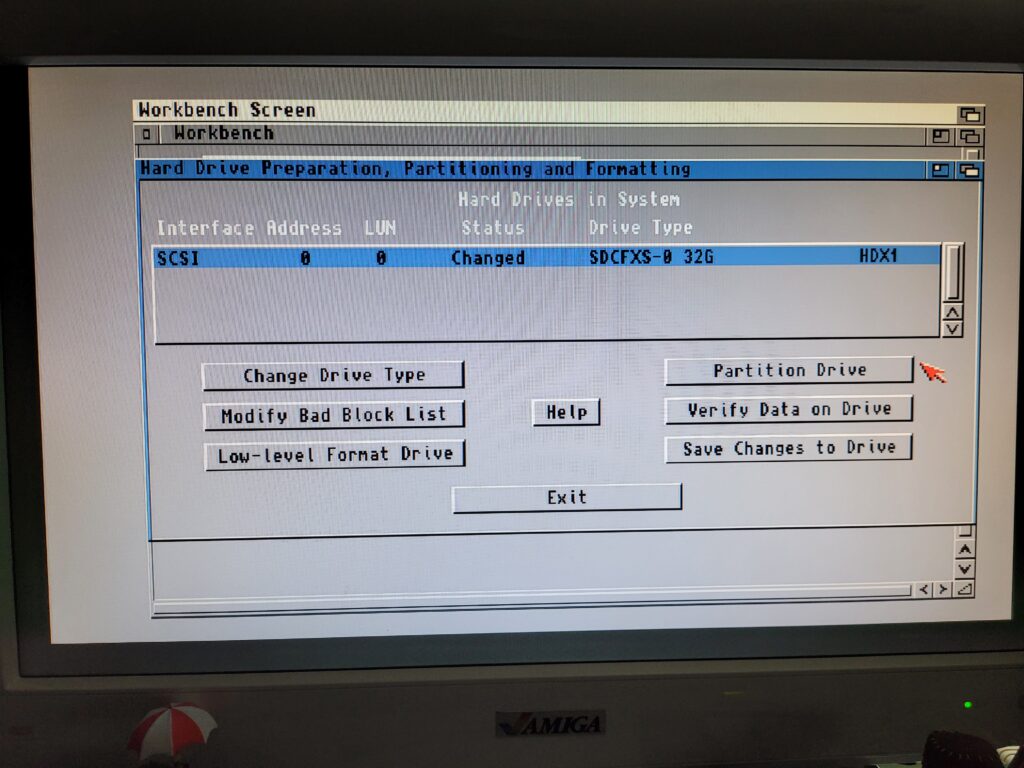
 

Amiga HDToolBox

Don’t click SAVE just yet…


Partitioning the Card

Now it was time to partition the drive by clicking on the appropriately named ‘Partition Drive’ button.
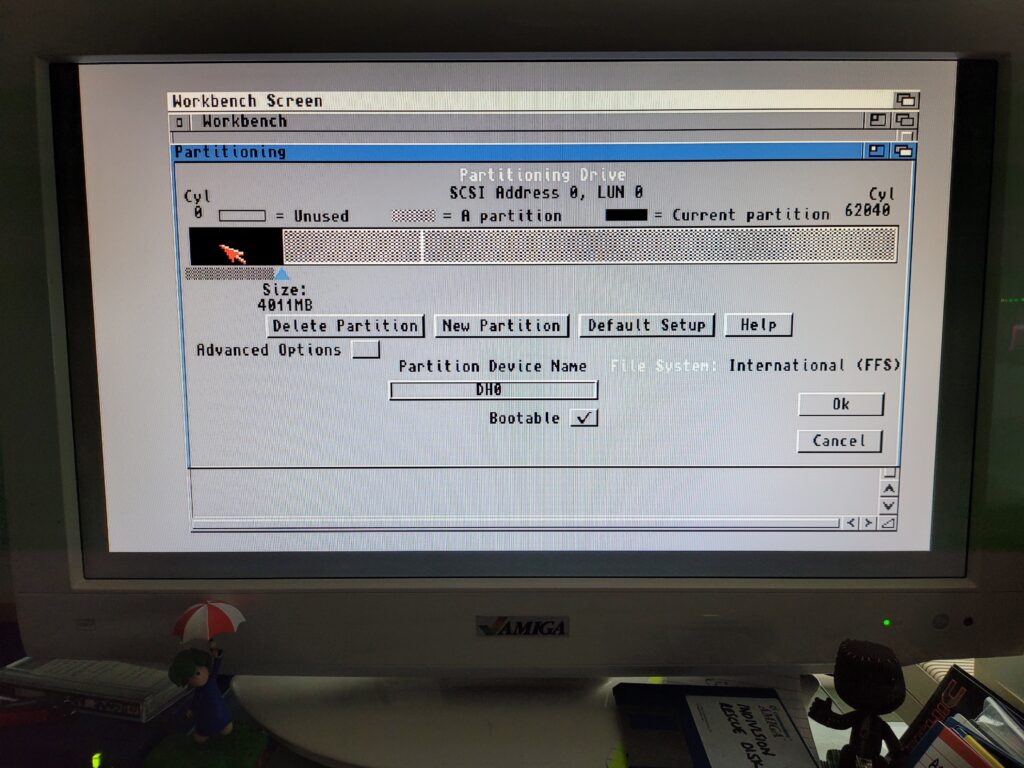
 

Amiga HDToolBox

Configuring my DH0 partition.


I chose to make my first partition 4GB, this would be my System/Workbench drive. To select the size I simply dragged the little triangle pointer and slid it along the bar. Annoyingly it’s still impossible to size a partition exactly so I just got it as close as I could which was 4011MB.

I called the first partition ‘DH0’ as this is the time honoured name for the Amiga’s boot drive and what most software expects to see by default. I also ticked the box to make it bootable as this is the first partition and the one the Amiga boots off.
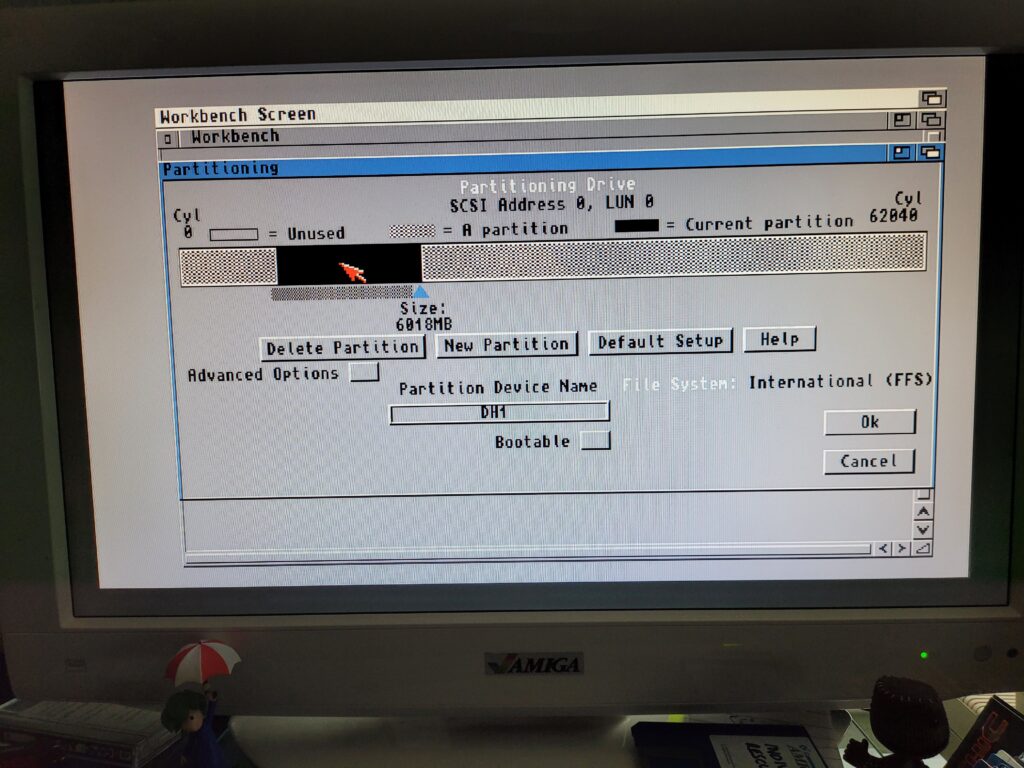
 

Amiga HDToolBox

Configuring my DH1 partition.


I made the second partition 6GB (6018MB) and called it DH1. To do this I clicked ‘New partition’ and then clicked on an unused portion of the card in the visual representation on the screen.
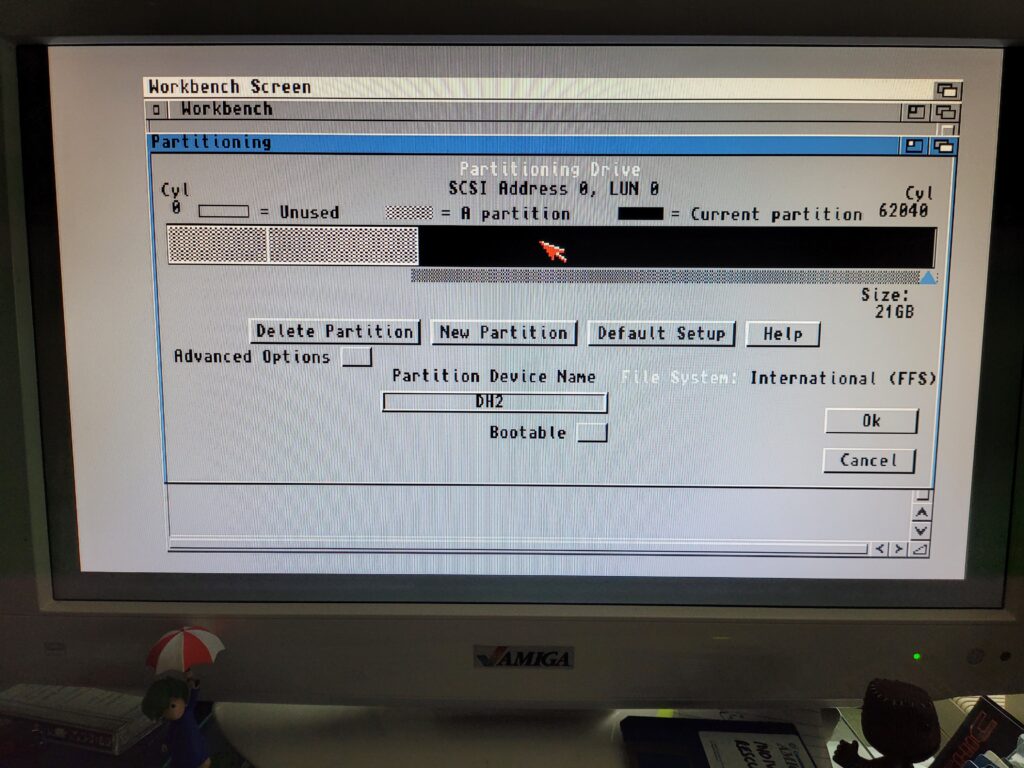
 

Amiga HDToolBox

Configuring my last partition; DH2.


Finally I used all the remaining space to make one big 21GB partition and called it DH2. This will be were I install games, whether they be WHLoad or otherwise.

Once I was happy that all my partitions were sized and named exactly the way I wanted them I hit ‘OK’. (You can click each of the partitions in the bar to check their details before committing). This took me back to the main HDToolbox window shown below.
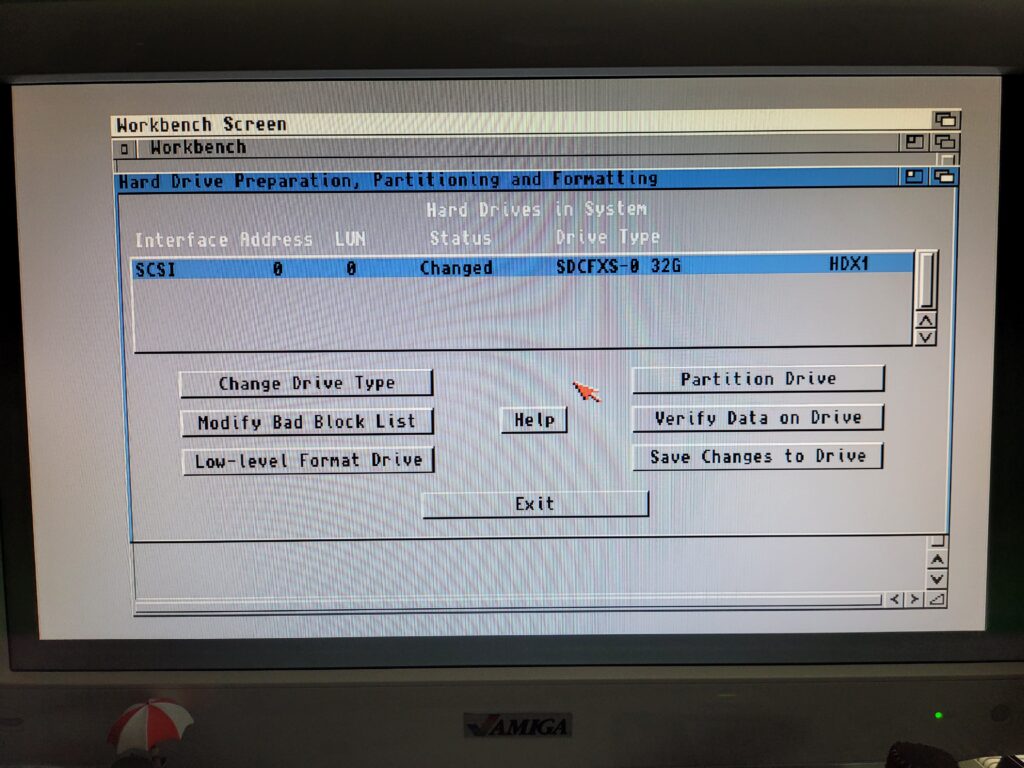
 

Amiga HDToolBox

Drive with changes waiting to be saved back to it.


To save all that configuration info and partition detail I clicked ‘Save Changes to Drive’ which flagged up a message (shown below) that a reboot was required. I then clicked continue to finish the process and write all the settings to the compact flash card.
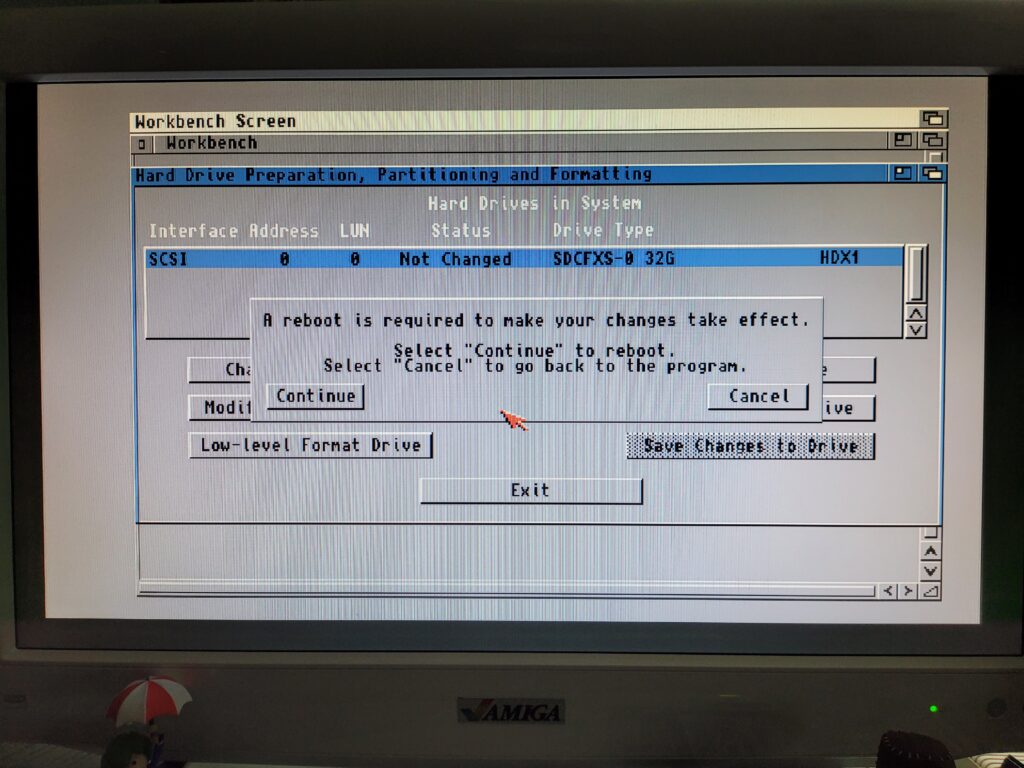
 

Amiga HDToolBox

‘Reboot Required’ message.


Next I rebooted my Amiga off the Install3.2 ADF disk so I could begin formatting them. Unfortunately this was were I encountered problem number 2…
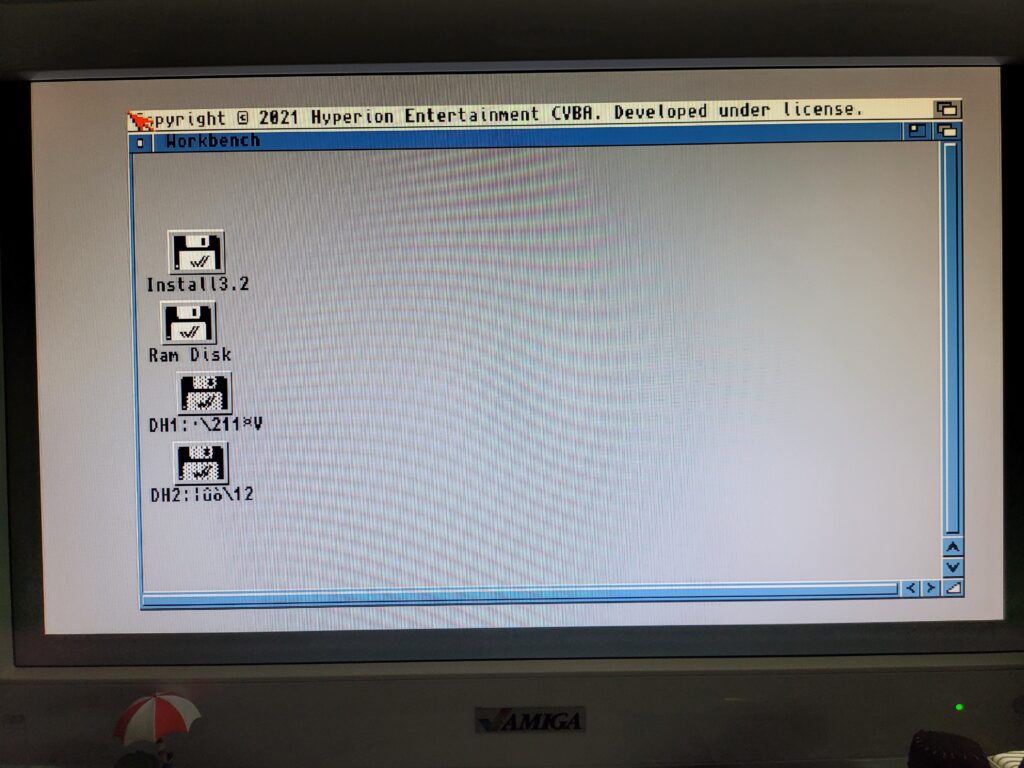
 

Missing DH0 partition

Spot the missing drive 🙁


There should have been three additional icons on the desktop, one for each of the partitions I had created. However for some reason DH0: was not being displayed. I tried going back through the HDToolbox configuration and making DH0 smaller and even making it the only partition on the card. Nothing worked.


Fixing the Problem

It turns out that for whatever reason, some cards are created with all the sectors on them filled with ‘1’s’ instead of ‘0’s’ and the Amiga doesn’t like that one bit.  So I had to remove the Compact Flash card from my A1200 and hook it up to my PC via a USB card reader.

I loaded up a piece of drive management software on my PC called ‘MiniTool Partition Wizard‘ (available as a free download). I then clicked on ‘Disk and Partition management’ which is the large green button near the bottom of the menu screen in the image below.
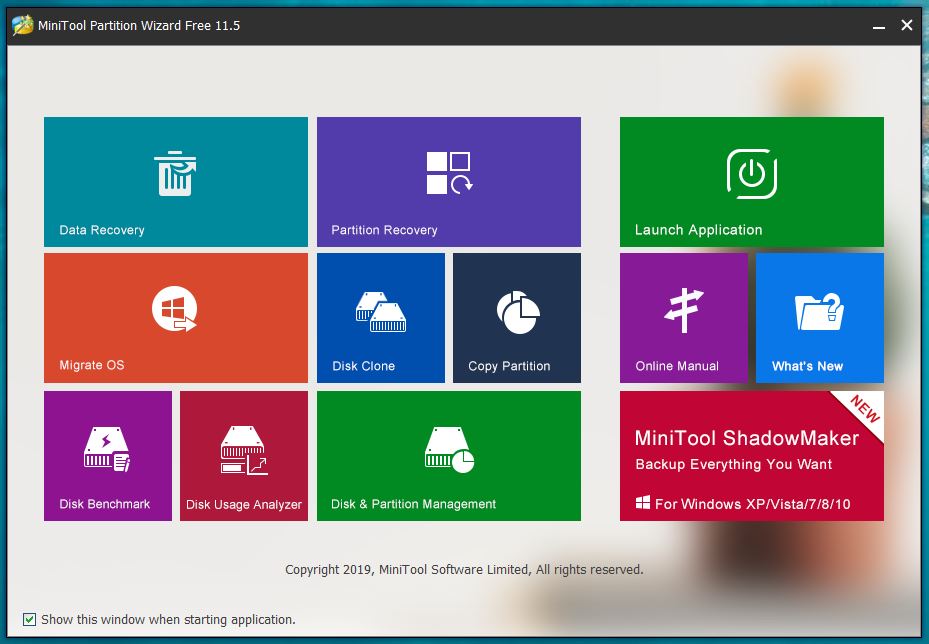
 

Mini Tool Partition Wizard

Main Menu Screen.


Next I needed to select my CF card from the list of available drives as can be seen in the image below. I knew my card was 32GB so it was pretty easy to spot – it appeared as a 29.82GB drive. It’s imperative to select the correct drive here – the consequences of picking the wrong one don’t bear thinking about!
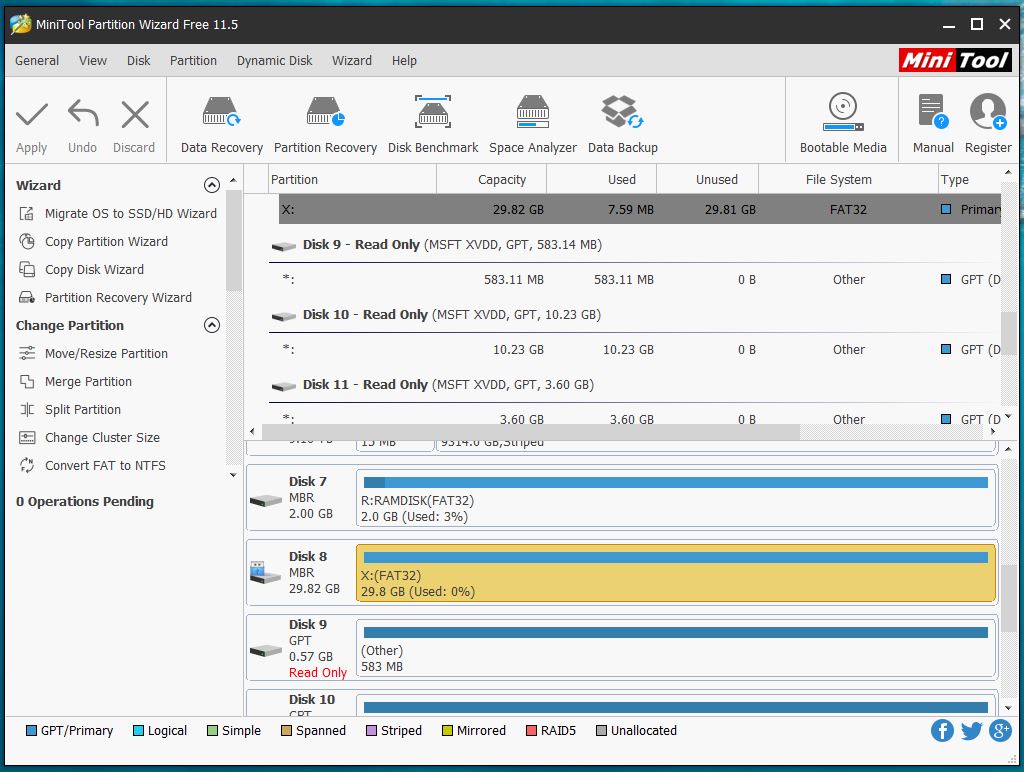
 

Mini Tool Partition Wizard

Selecting my Compact Flash card from the list of drives.


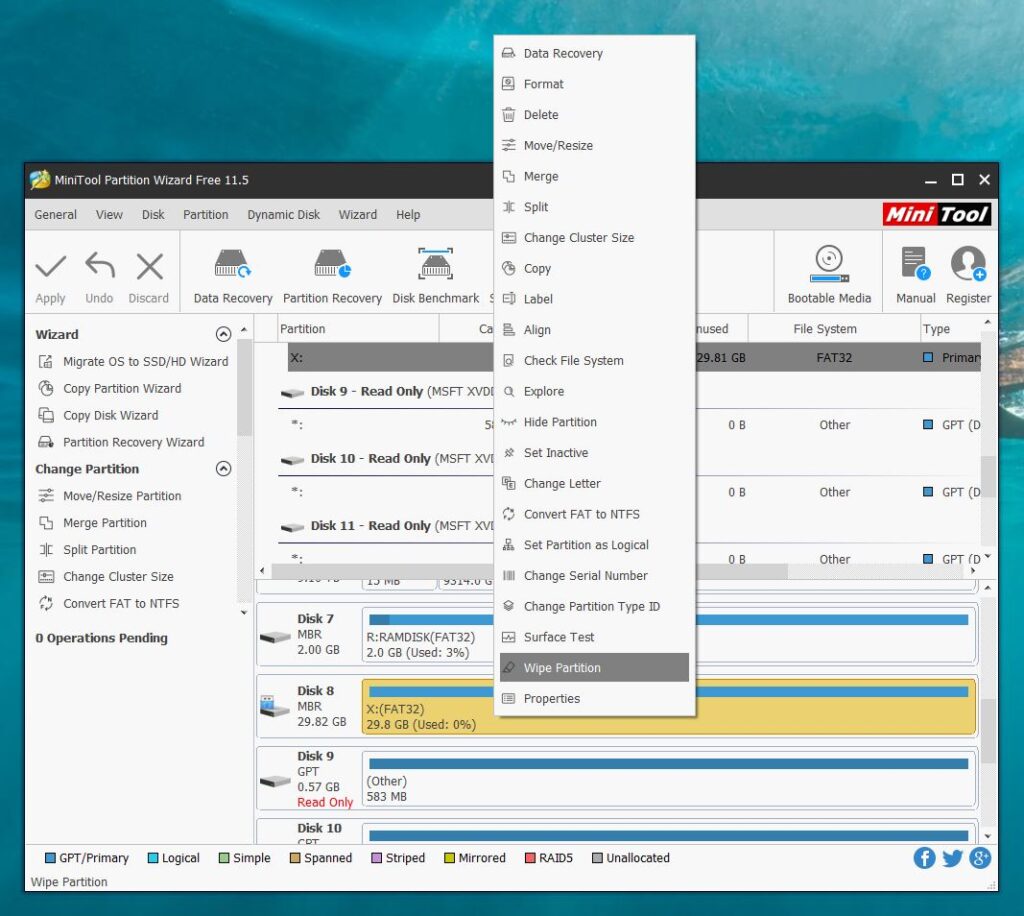
With my CF card highlighted I right clicked on it to bring up the menu and selected ‘Wipe Partition’.
 

Mini Tool Partition Wizard

Selecting the ‘Wipe Partition’ option.


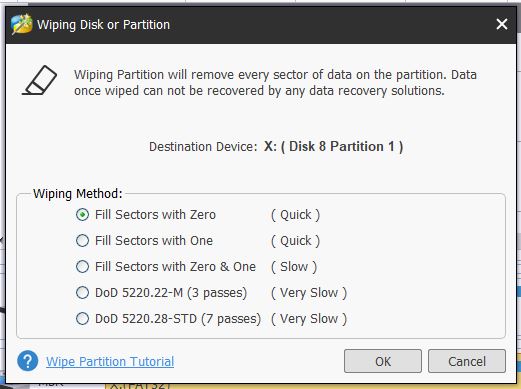
This brought up another window along with a warning that doing this is irreversible so once again I made absolutely sure I had the correct drive selected. Definitely better to be safe than sorry when messing with partitioning software! Anyway the option to fill all sectors with zeros was already selected by default so I simply clicked ‘OK’ here.
 

Mini Tool Partition Wizard

Choosing how to wipe the drive.


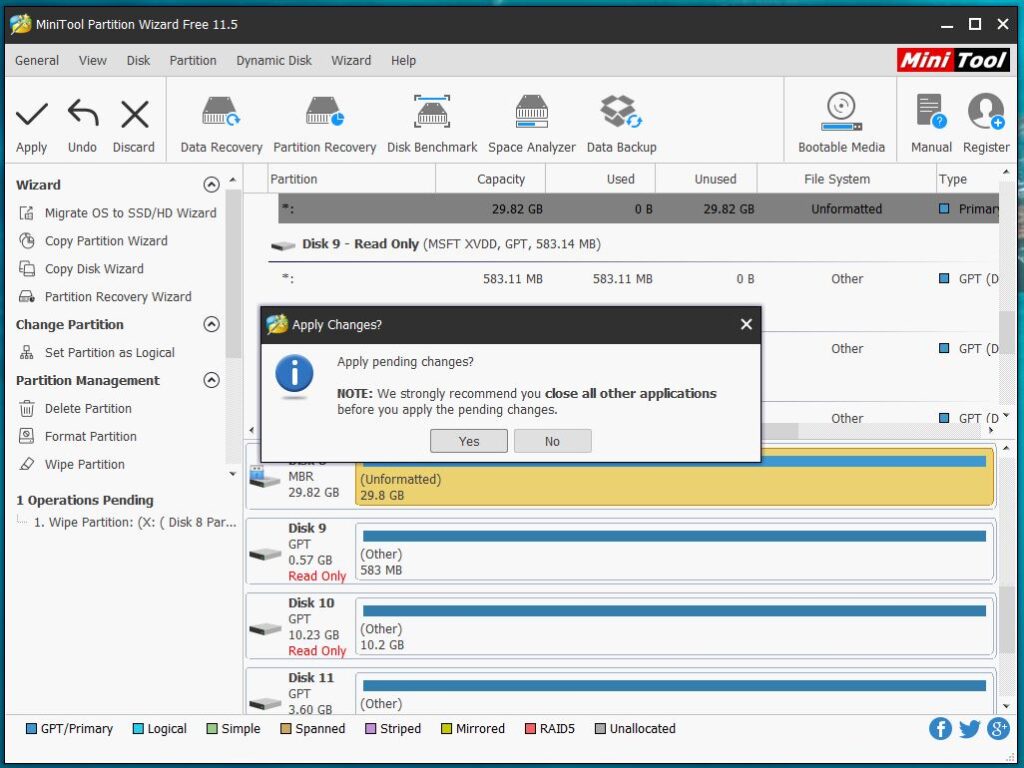
This took me back to the main screen. Up until this point no changes had actually been made to the drive. To actually wipe the drive I needed to click ‘Apply’ in the top left hand corner. A warning then popped up about not running any other applications whilst applying the changes and then I clicked ‘Yes’.
 

Mini Tool Partition Wizard

Applying the pending changes to the card.


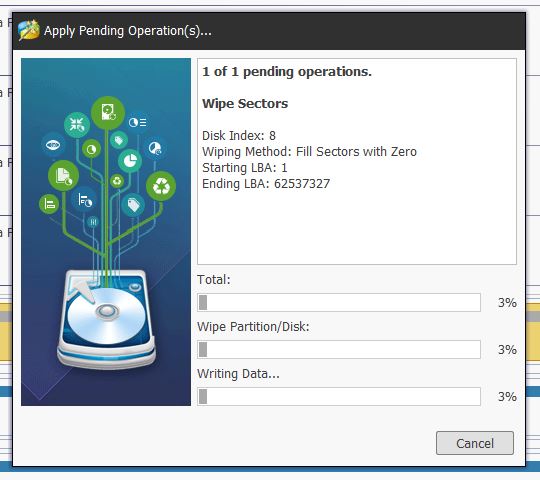
Finally the ‘Apply pending operations’ window popped up and a progress bar slowly made its way across the bottom as my card was being fill with zeros.
 

Mini Tool Partition Wizard

Operation Progress Window.


The whole operation took around 5 minutes or so to complete successfully at which point I was able to close down the program and remove the card.


Mini Tool Partition Wizard

Mission Accomplished.


Back on Track.

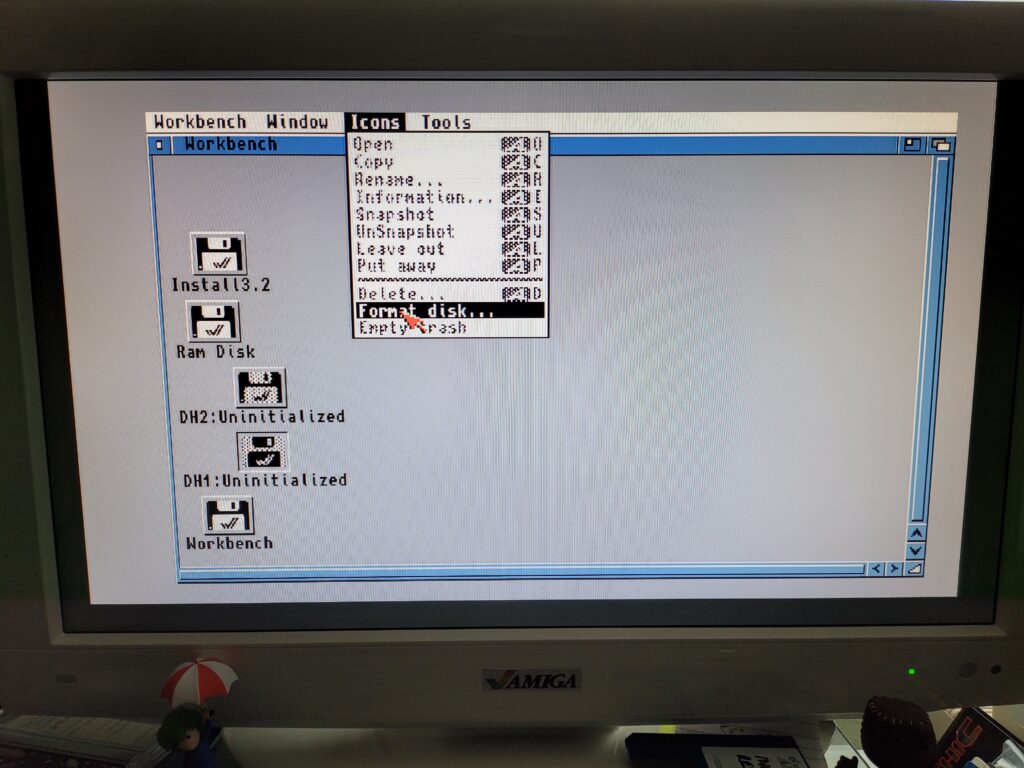
Now that I finally had a correctly prepared Compact Flash card, I re-installed it into my A1200 and begin the entire Partitioning process again, choosing exactly the same options as before. When I rebooted at the the end of it this time I was greeted with the Workbench screen I’d been looking for. One with all 3 drive icons showing on the screen waiting to be formatted as shown below.
 

AmigaOS 3.2

Unformatted drive icons.


To format each drive I selected the relevant icon and then selected ‘Format disk…’ from the Icons menu.
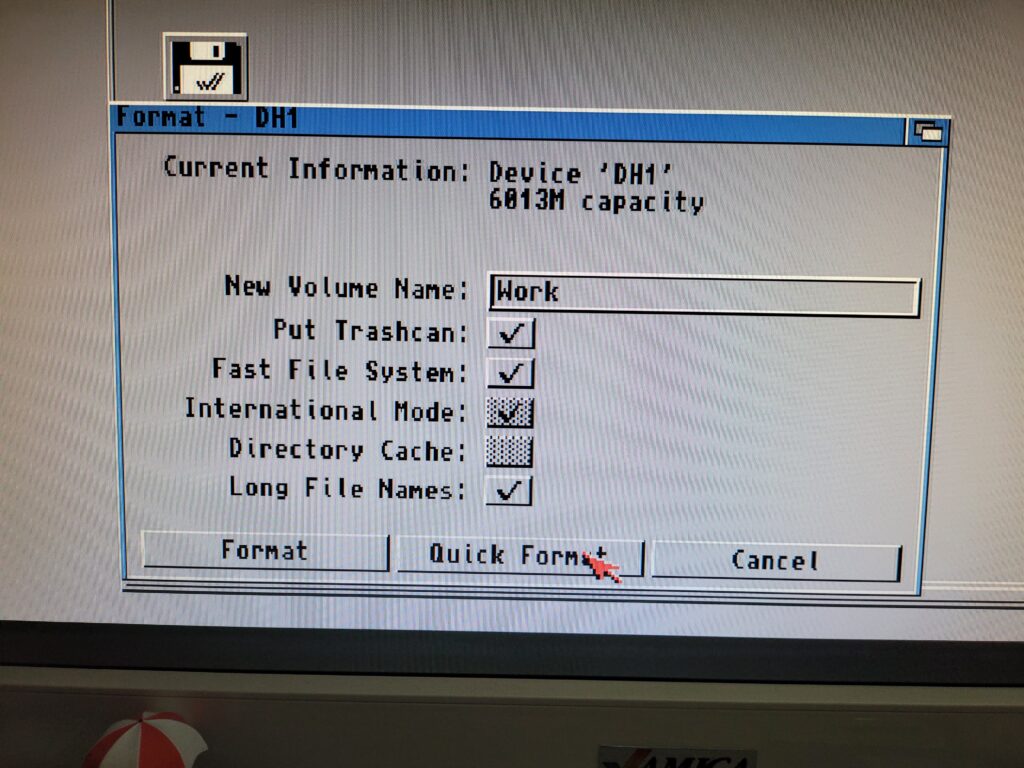
 

AmigaOS 3.2

Amiga format disk window.


I named DH0 ‘Workbench’, DH1 ‘Work’ and DH2 ‘Games’. I also made sure that long file name support was ticked along with the Trashcan and Fast File System.
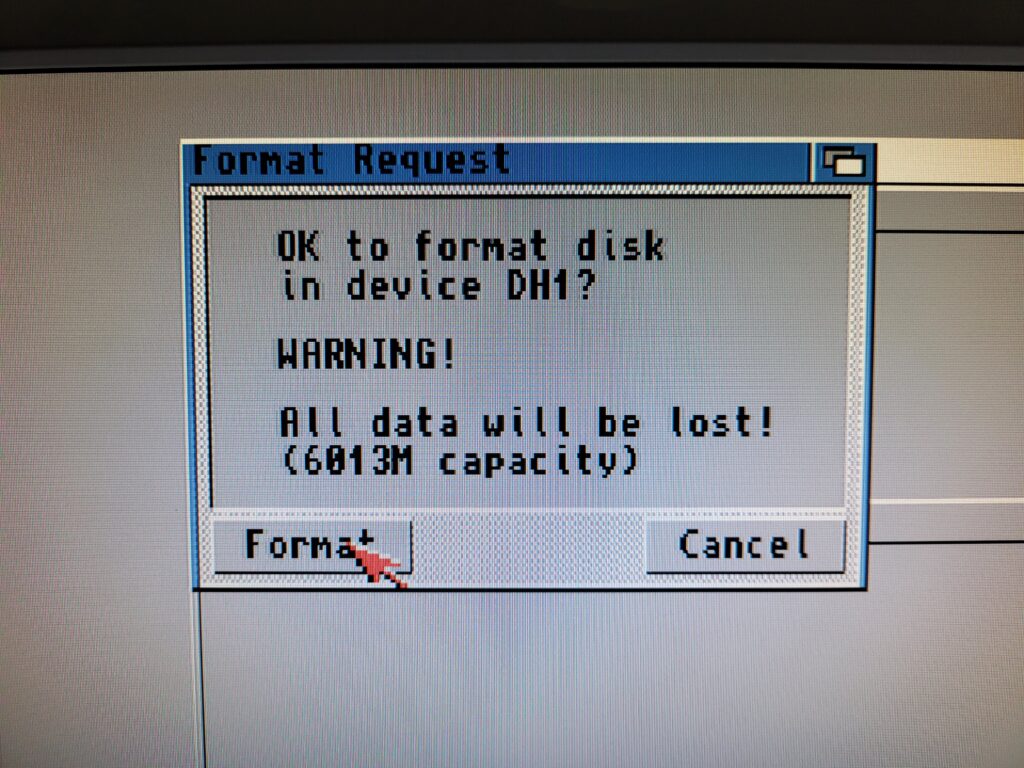
 

Amiga format disk request

Obligatory data loss warning.


I used the ‘Quick Format’ option otherwise I’d be waiting all day for the format to finish! It’s totally unnecessary for large drives anyway – the only time I ever do a full format is on floppy disks.

A couple of warning messages popped up reminding me that all data would be lost. I simply clicked ‘Format’ on both of them to get the job done.
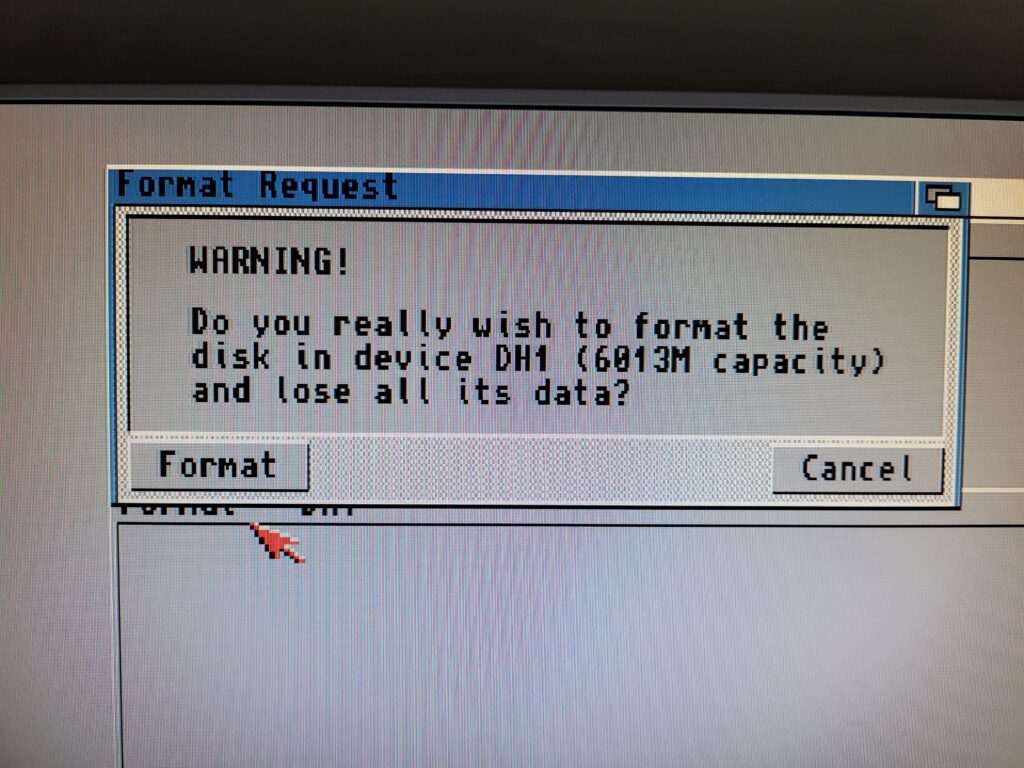
 

Amiga format disk request

Last chance to bail if you’ve selected the wrong drive by mistake!


The format was almost instantaneous and once I’d done all three drives I ended up with a screen looking like the image below.
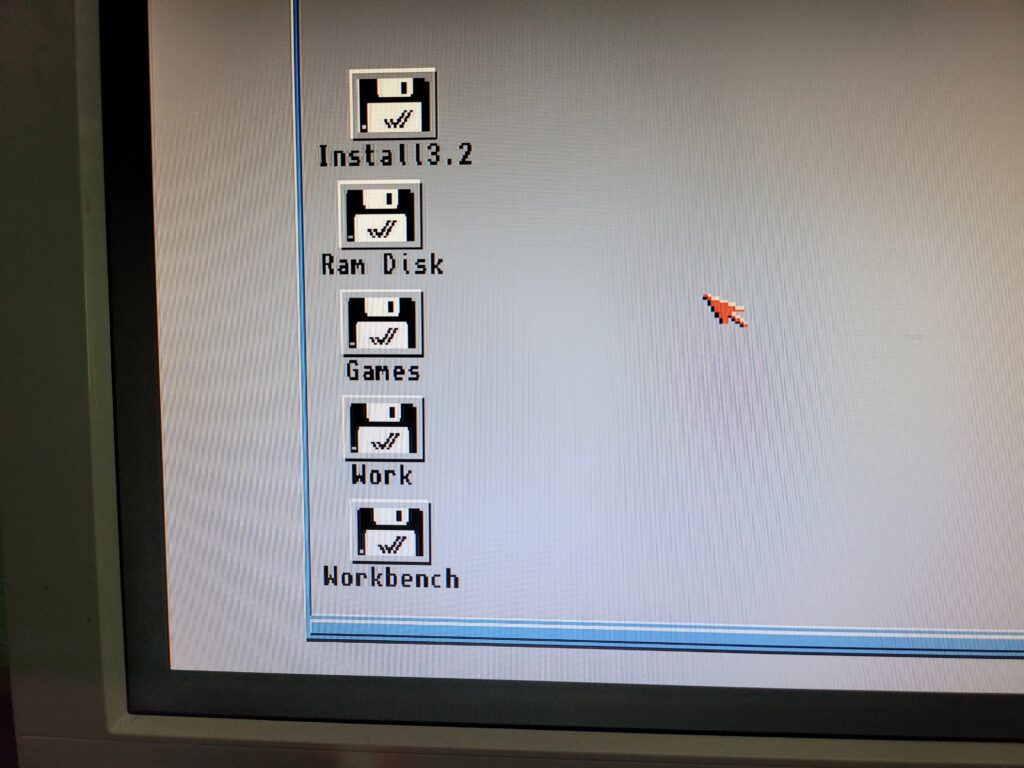
 

Amiga Workbench

All partitions successfully formatted.


Installing Workbench 3.2

Finally it was time to install Workbench for real. I opened the Install3.2 disk and ran the English(British) installer from within the Install folder.
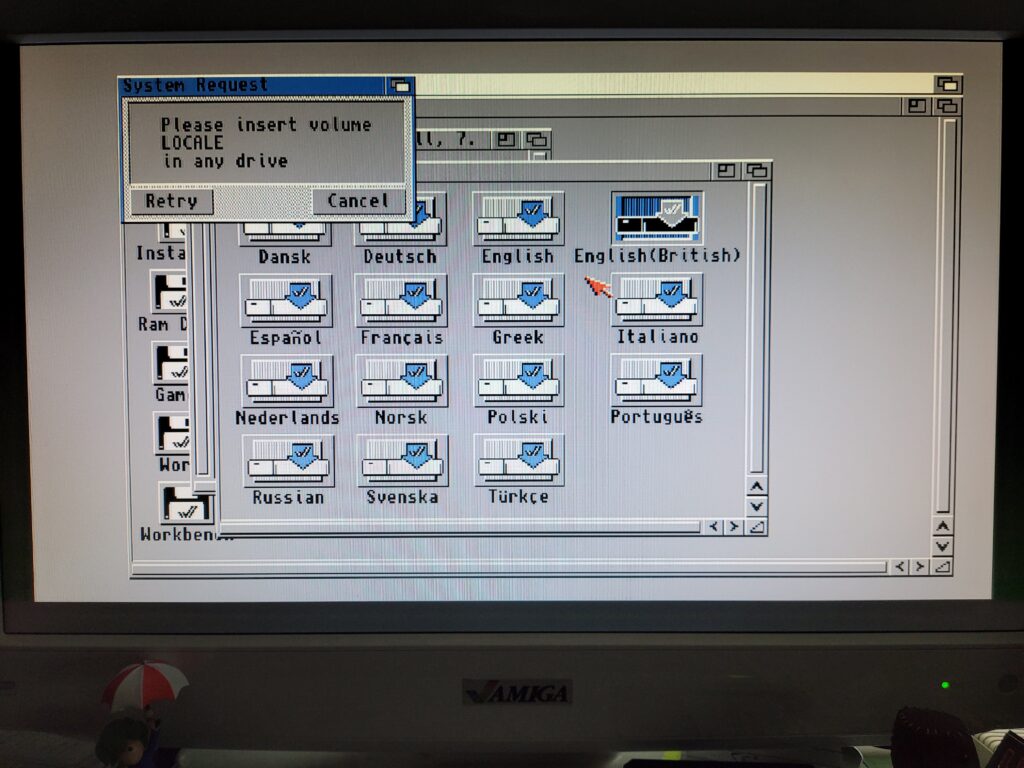
 

AmigaOS3.2

AmigaOS3.2 English(British) Installer.


This invoked the first of many disk swaps. Thankfully I had all the ADF images on my USB flash drive so it was simply a matter of flicking through to the correct ‘disk’ and then letting the install continue.
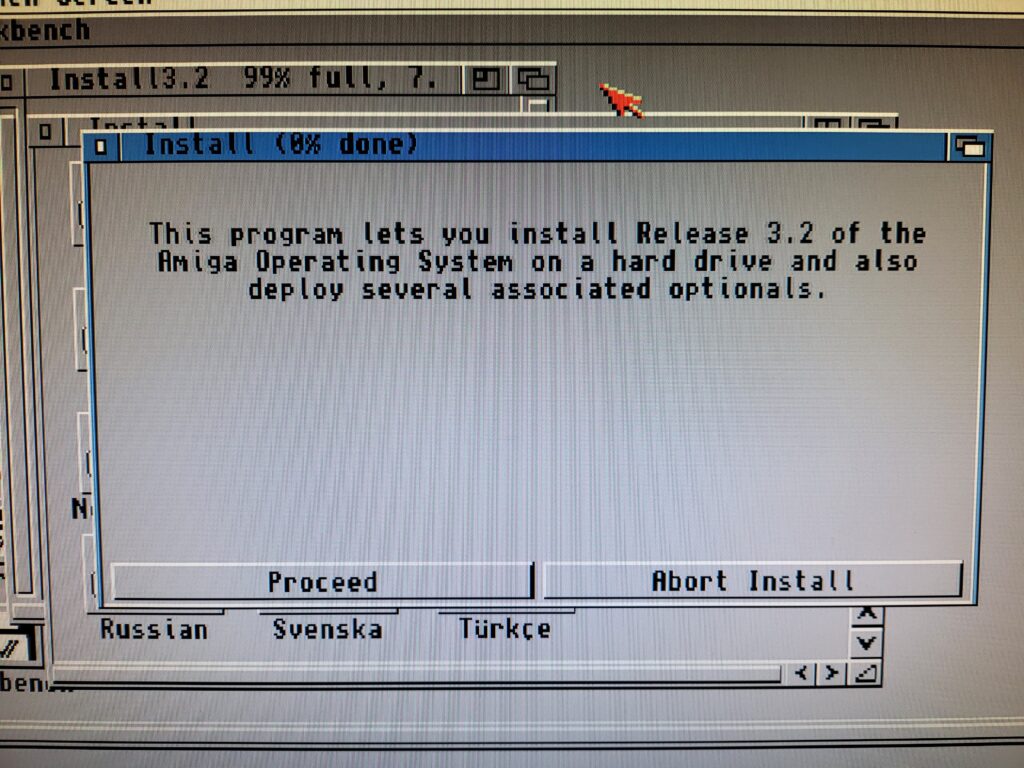
 

AmigaOS3.2

Beginning the 3.2 install.


I clicked ‘Proceed’ on the first menu to appear as the other options are concerned with amendments/additions to an existing install.
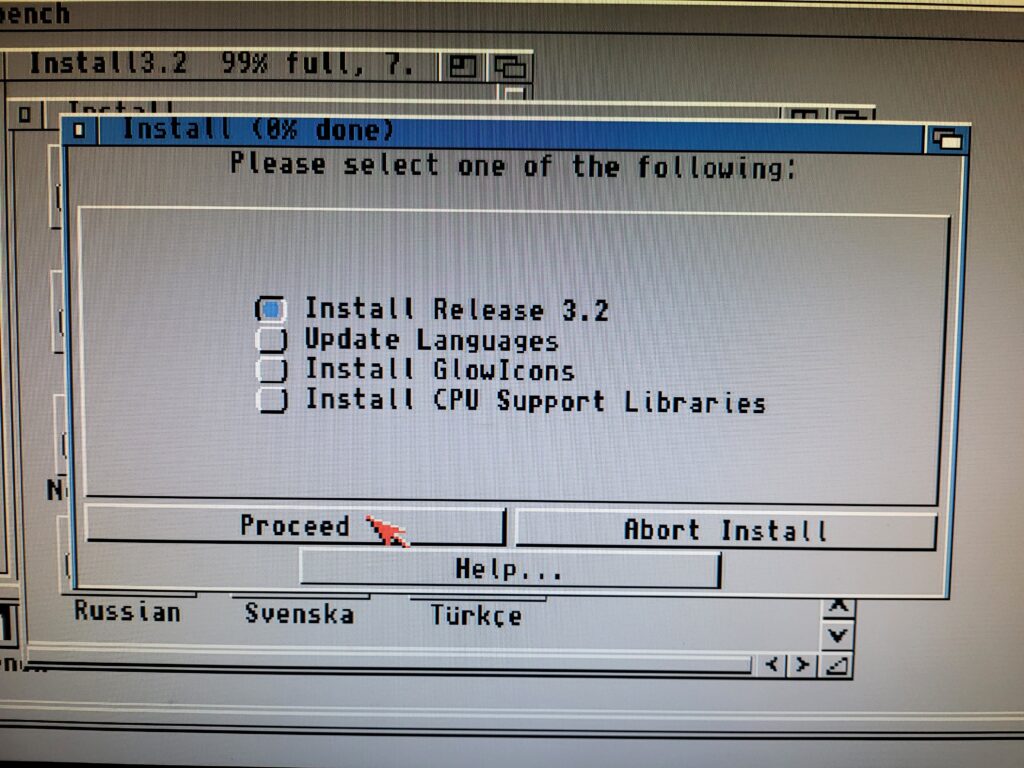
 

AmigaOS3.2

Selecting the 3.2 Install option.


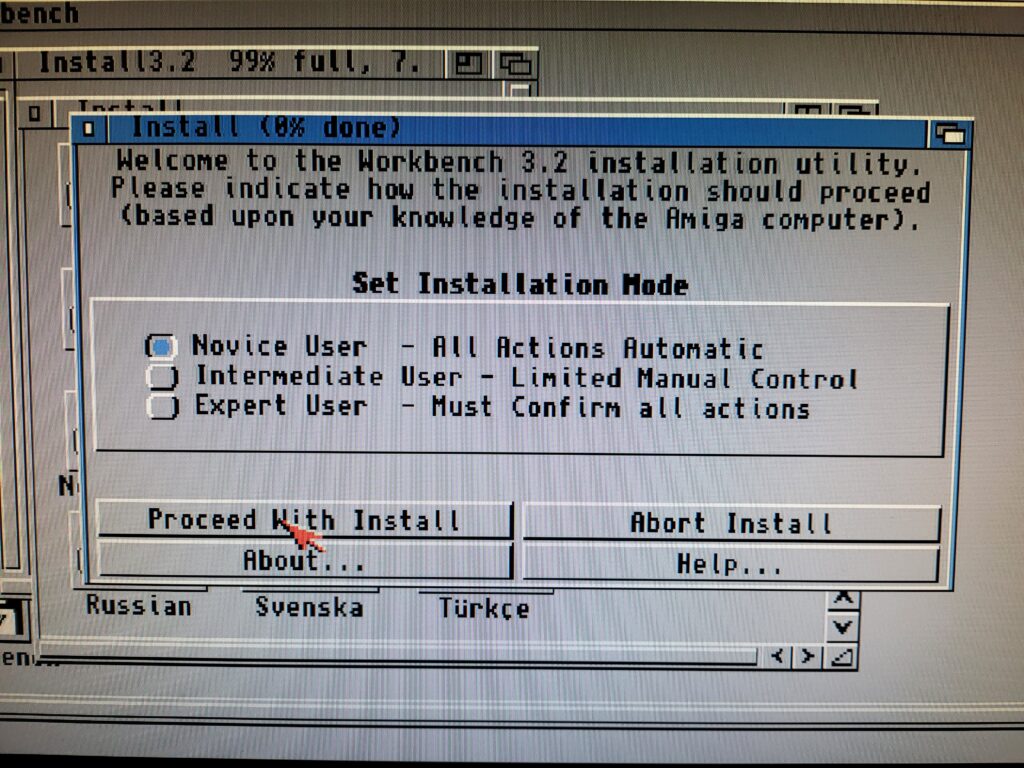
As I was doing a straightforward ‘clean install’ I left the Installation Mode set to ‘Novice User’ and then clicked ‘Proceed With Install’.
 

AmigaOS3.2

Selecting the Installation mode.


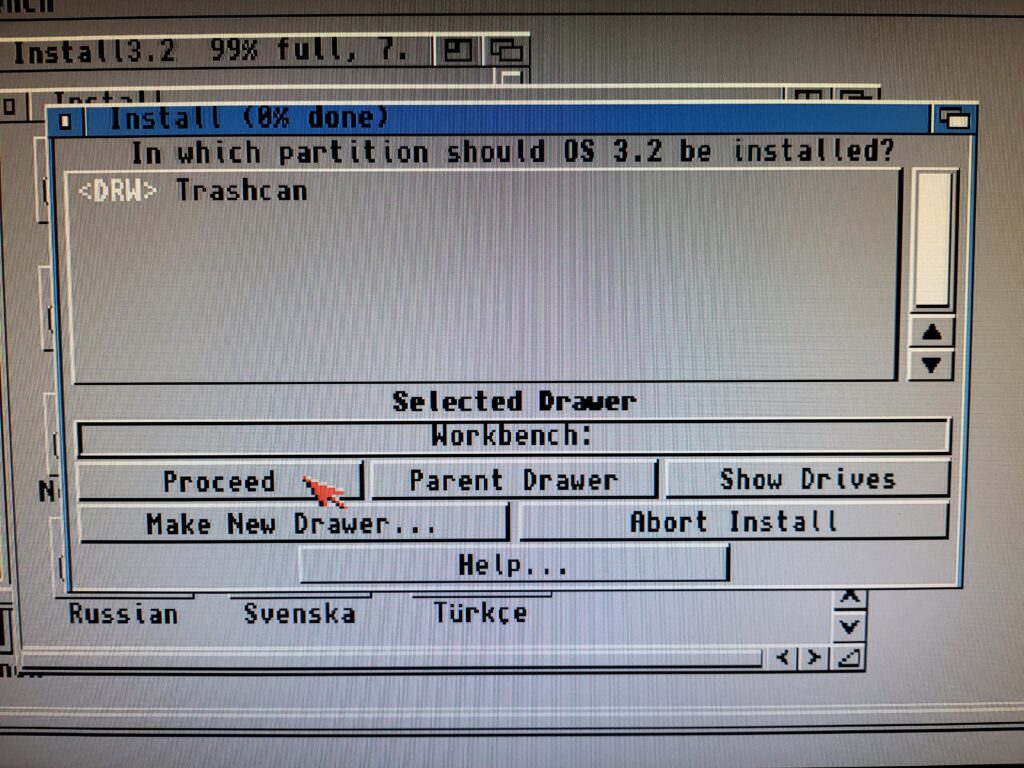
The next screen asked where I wanted to install OS3.2. I selected my ‘Workbench:’ partition and then clicked on Proceed.
 

AmigaOS3.2

Selecting where to install AmigaOS3.2.


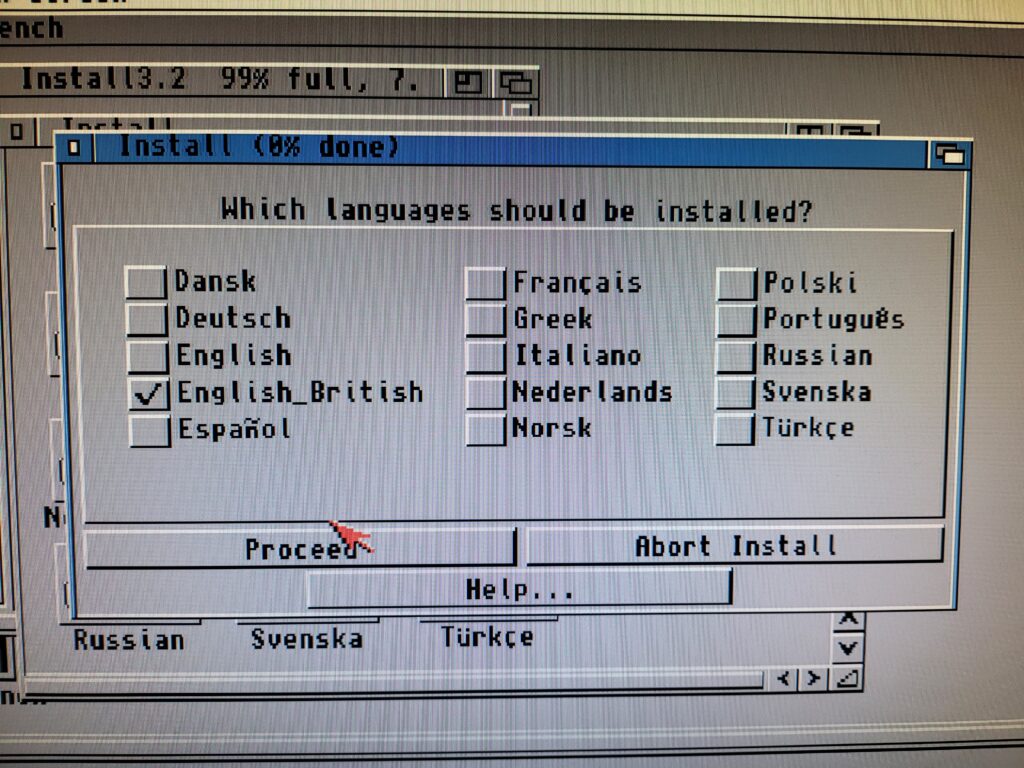
The installer asked me which language(s) to install so being in the UK I naturally chose ‘English-British’ before hitting ‘Proceed’.
 

AmigaOS3.2

AmigaOS3.2 Language Selection Screen.


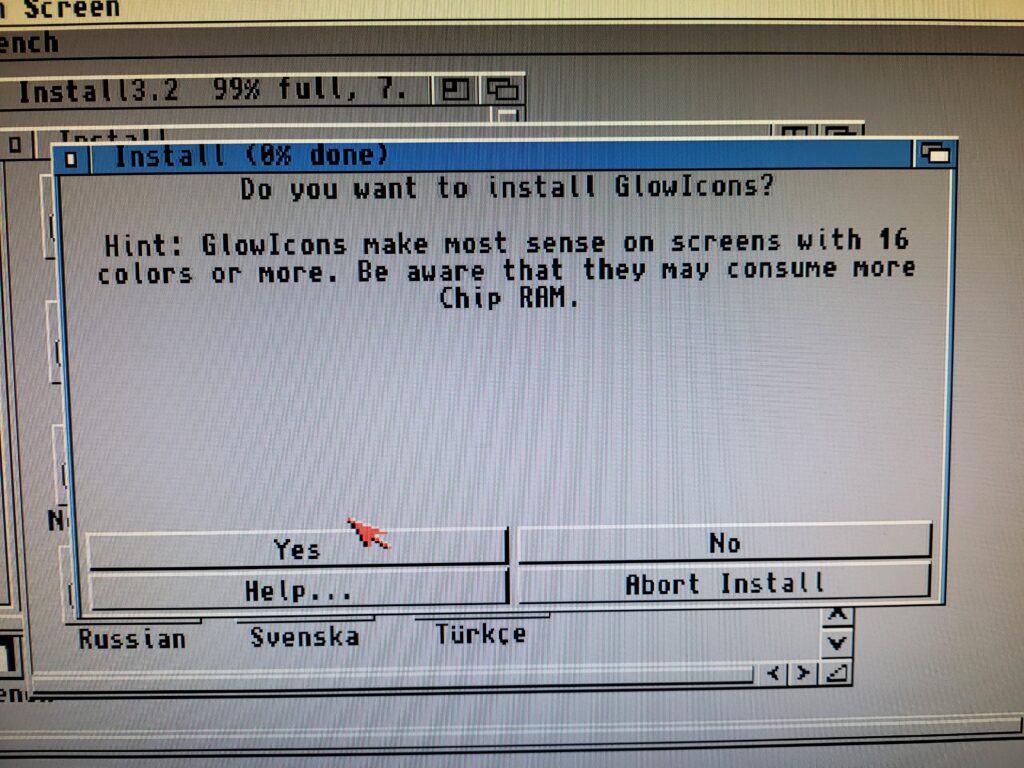
The next choice to present itself was whether I wanted to install GlowIcons or not. I most definitely did so I clicked on ‘Yes’.
 

AmigaOS3.2

GlowIcons option.


I spent the next several minutes swapping ADF disks as the installer plucked files from everywhere based on the choices I’d selected.
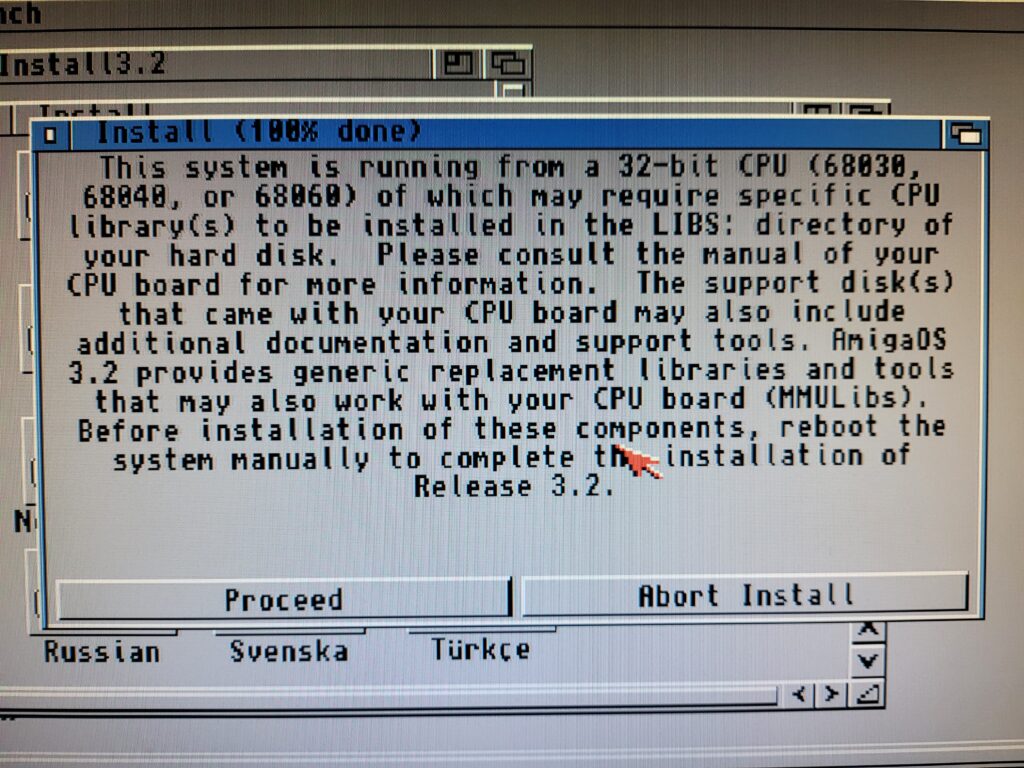
 

AmigaOS3.2

CPU Library warning.


Eventually the installation reached 100% and then popped up a message telling me I would need to install some CPU specific library files to support my 68030 CPU.
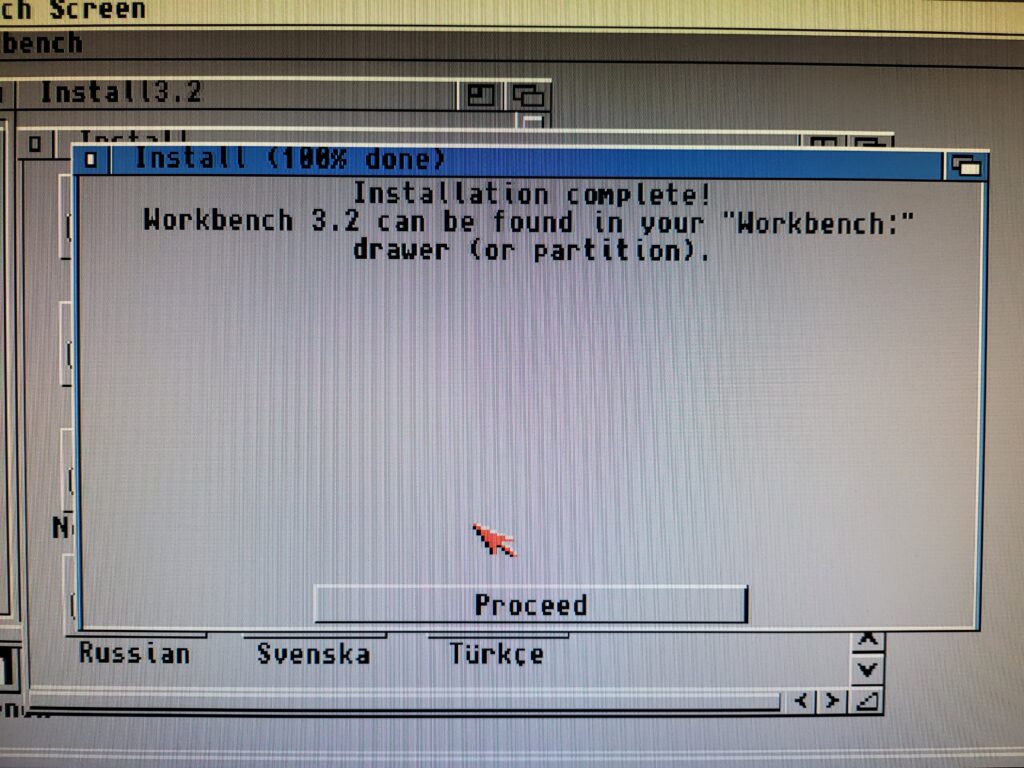
 

AmigaOS3.2

Installation complete.


Hitting ‘Proceed’ on that screen and then on the next concluded the first part of the install.


Booting Workbench for the First Time

A reboot was required to test out the new install so I reset my A1200 and hoped for the best…
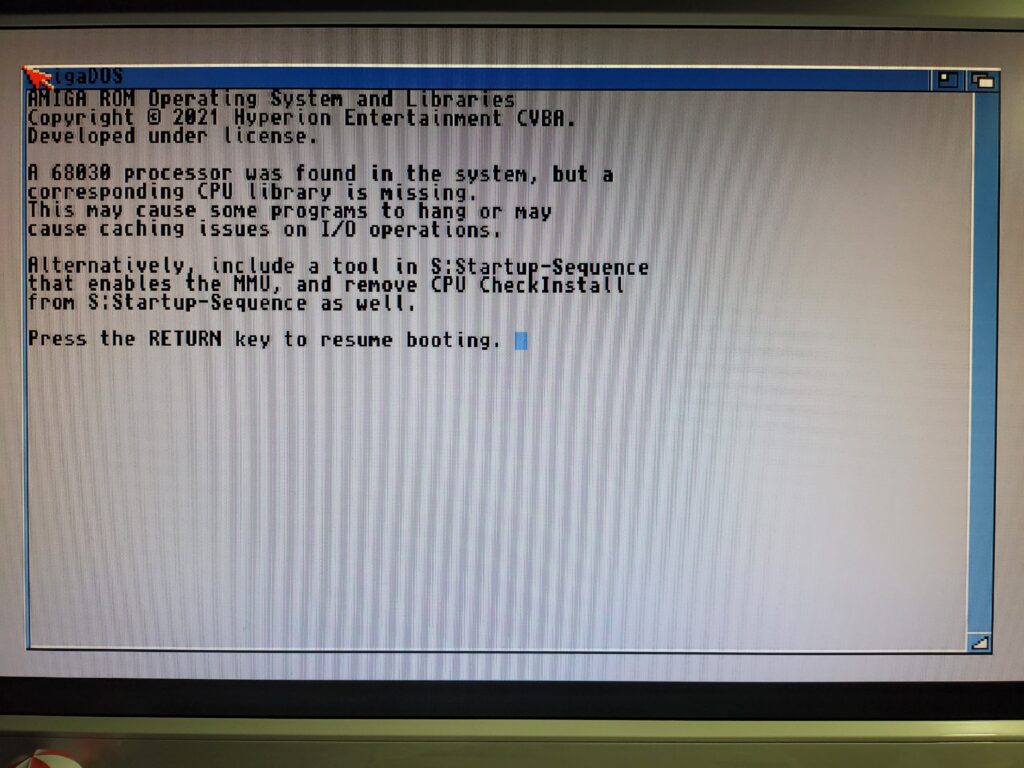
 

AmigaOS3.2

Missing CPU library nag screen.


Soon I was greeted with yet another reminder that I had an 030 CPU but no library for it. I hit ‘Return’ to continue booting and a few moments later I reached the AmigaOS3.2 Workbench screen complete with backdrop and snazzy GlowIcons.
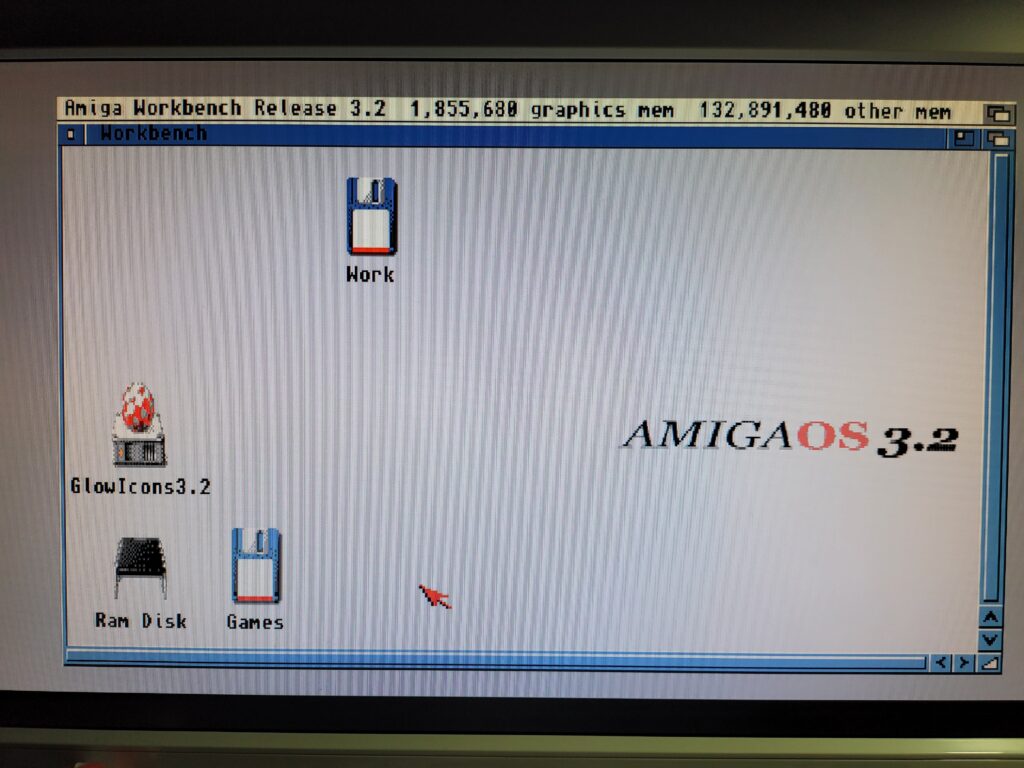
 

AmigaOS3.2

AmigaOS3.2 Workbench Screen.


Content with the knowledge that Workbench was working nicely it was time to fix that CPU library issue.


Installing CPU Support Libraries

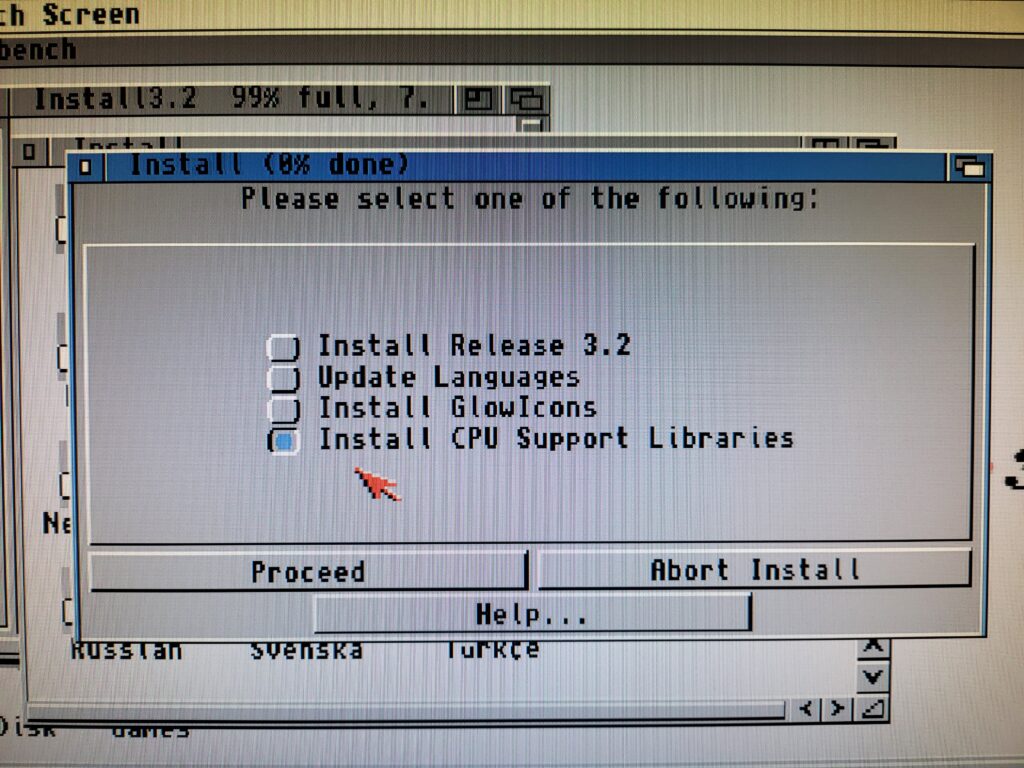
Back when I installed AmigaOS3.1.4 I remember having to source the necessary MMULIBS files from Aminet. Thankfully that’s now a thing of the past as 3.2 can install the required files itself. In order to do so I needed to re-run the installer and this time select ‘Install CPU Support Libraries’ from that initial menu.
 

AmigaOS3.2

Installing CPU Support Libraries.


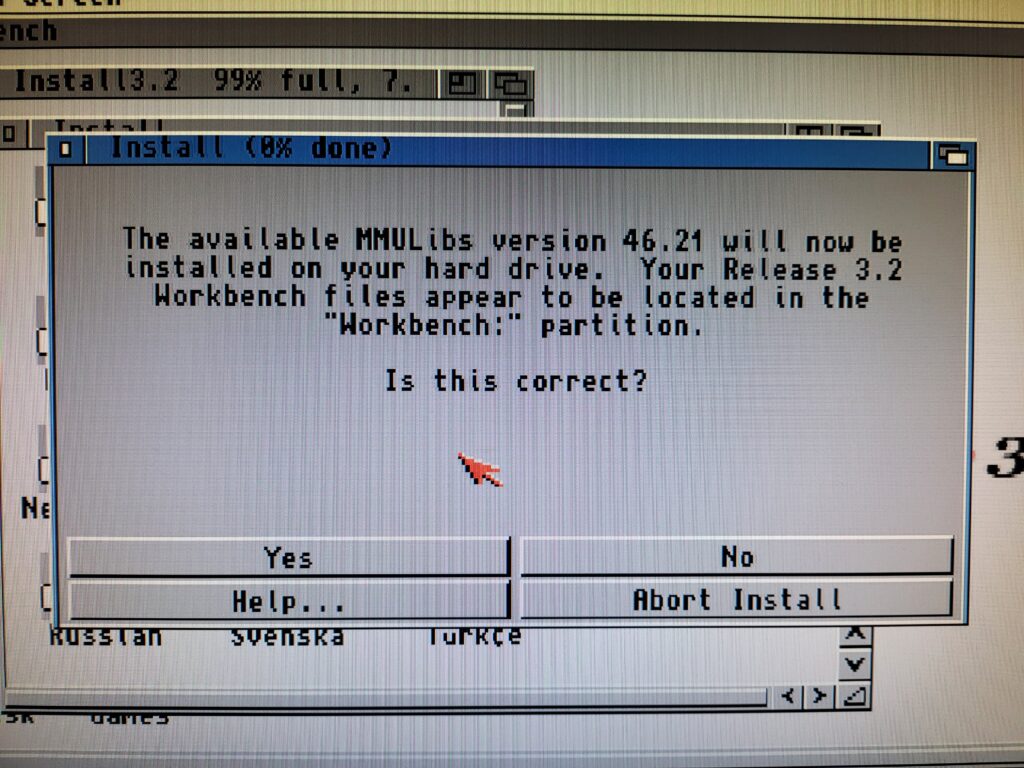
A confirmation window popped up and I simply responded with ‘Yes’ to proceed.
 

AmigaOS3.2

Confirming the location of my Workbench install.


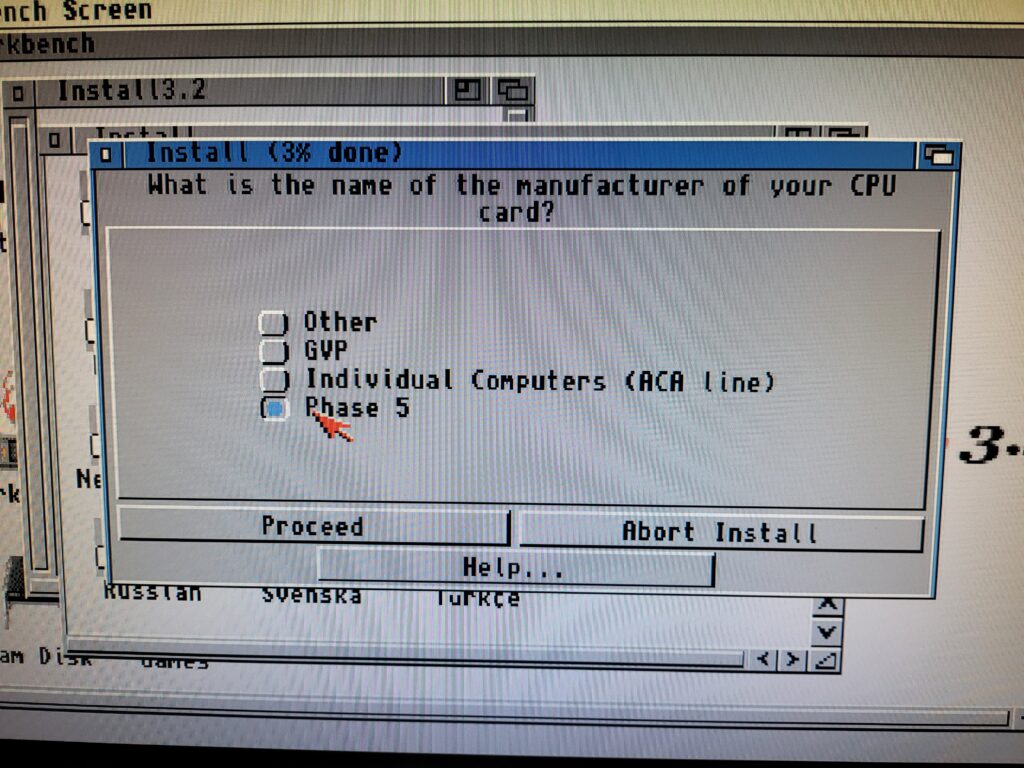
The following dialogue wanted to know which model of accelerator card I had installed. As I have a Blizzard 1230 MkIV I chose ‘Phase 5’ from the list and then clicked ‘Proceed’.
 

AmigaOS3.2

Selecting my accelerator manufacturer.


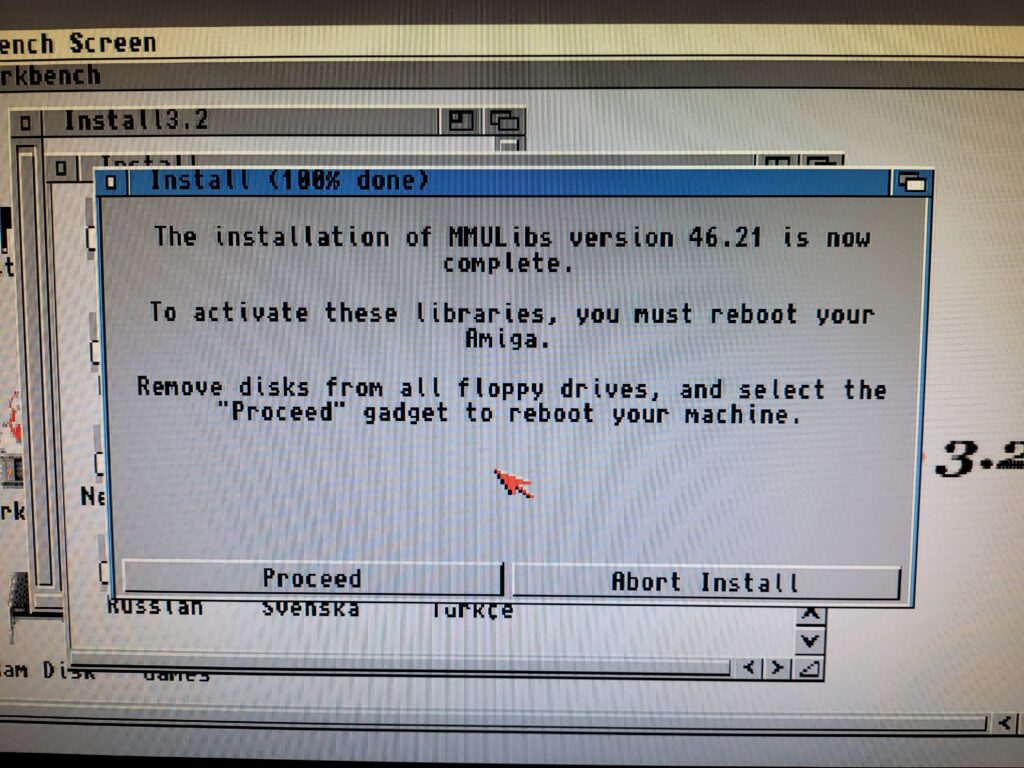
A few moments later and the installation was complete – all I needed to do now was reboot my A1200 and make sure all the warning messages had all cleared. (They had).
 

AmigaOS3.2

CPU Library Installation Complete.


Configuring CD Access

There was one other quick configuration change I could make to round off my install and that was to get my CD drive working. OS3.2 includes a CD filesystem so I didn’t need to install anything extra.

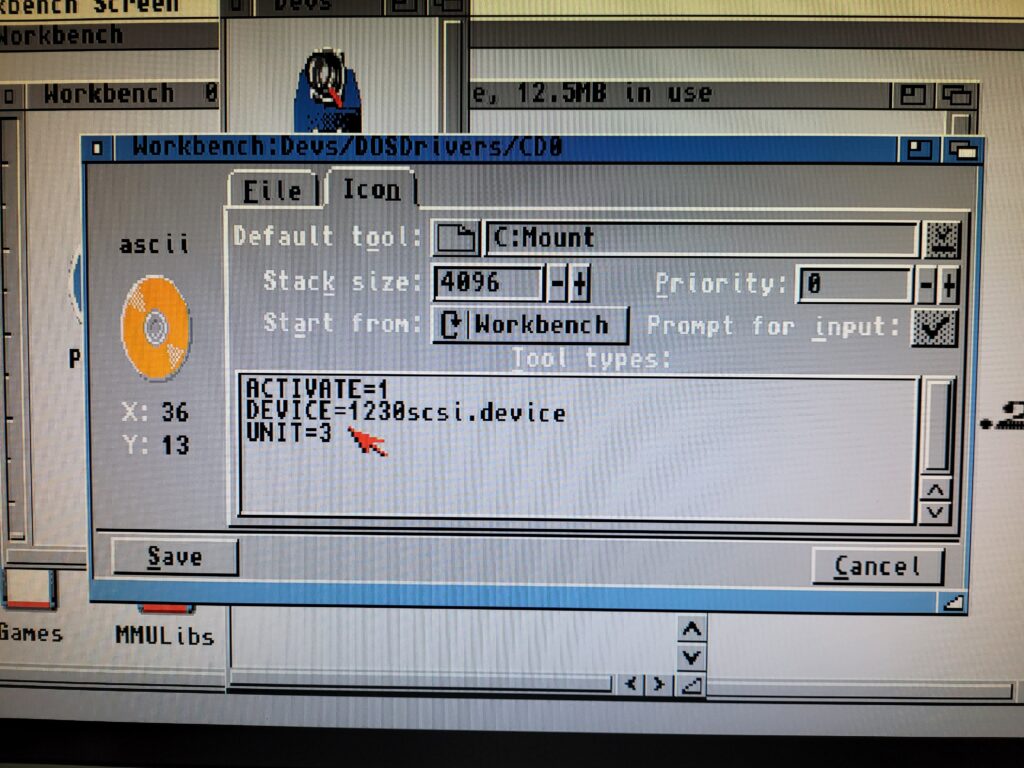
The first thing to do was drag the CD0 device from STORAGE/DEVS/DOSDrivers to DEVS/DOSDrivers and bring up the Icon Information window to edit the Tooltypes. The Information window has changed a little bit under 3.2 so the Tooltypes now reside under a Tab called ‘Icon’.
 

AmigaOS3.2

Setting the CD ToolTypes.


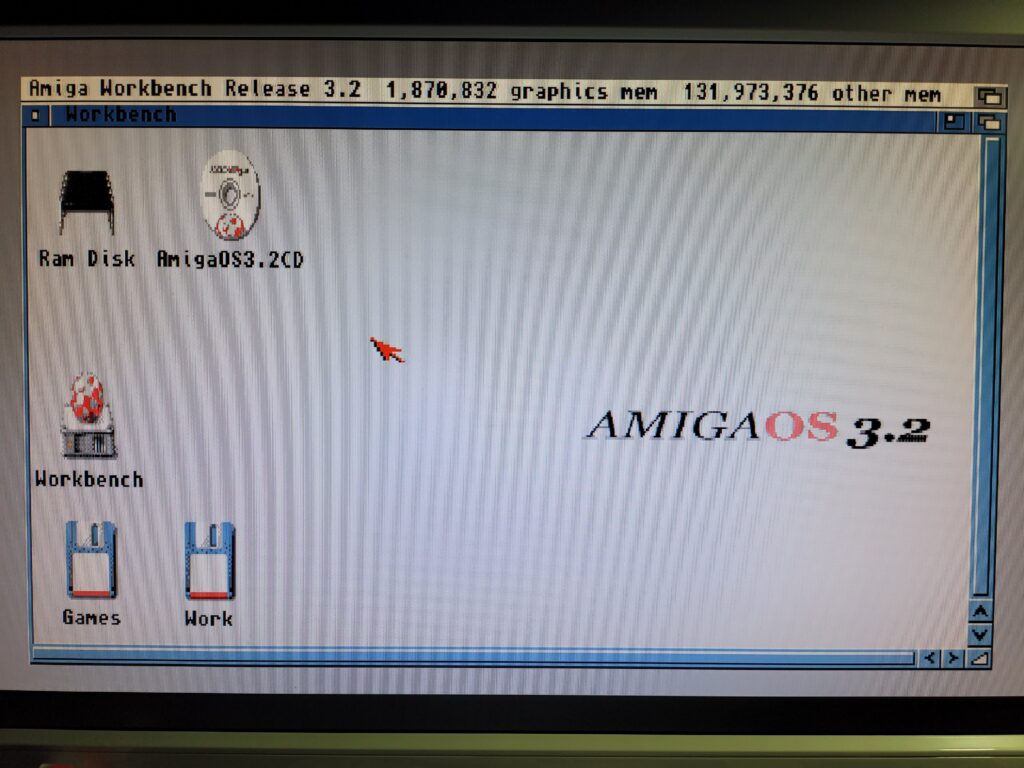
There were two tooltypes I needed to alter; ‘DEVICE’ and ‘UNIT’. As I have a Blizzard SCSI card I needed to set ‘DEVICE=1230scsi.device’ as that is what my SCSI device is called. My CD drive has a SCSI ID of 3 so I set ‘UNIT=3’ and then saved my changes. As no CD device had been mounted up to this point I simply double-clicked the CD0 icon to test if the new settings worked and popped in my 3.2 CD. Happily a few moments later I could see a fancy little AmigaOS3.2 CD icon on my Workbench. Another job done.
 

AmigaOS3.2

Workbench 3.2 Installed and CD access working too.


With Workbench 3.2 successfully installed it was now time to get busy sorting out internet access and installing all my apps and games once more…

I’ve covered all that stuff before with 3.1.4 but if anything crops up that poses an unexpected issue I’ll add to this post.
Zzap! Amiga Micro Action – Brand new UK Amiga magazine!

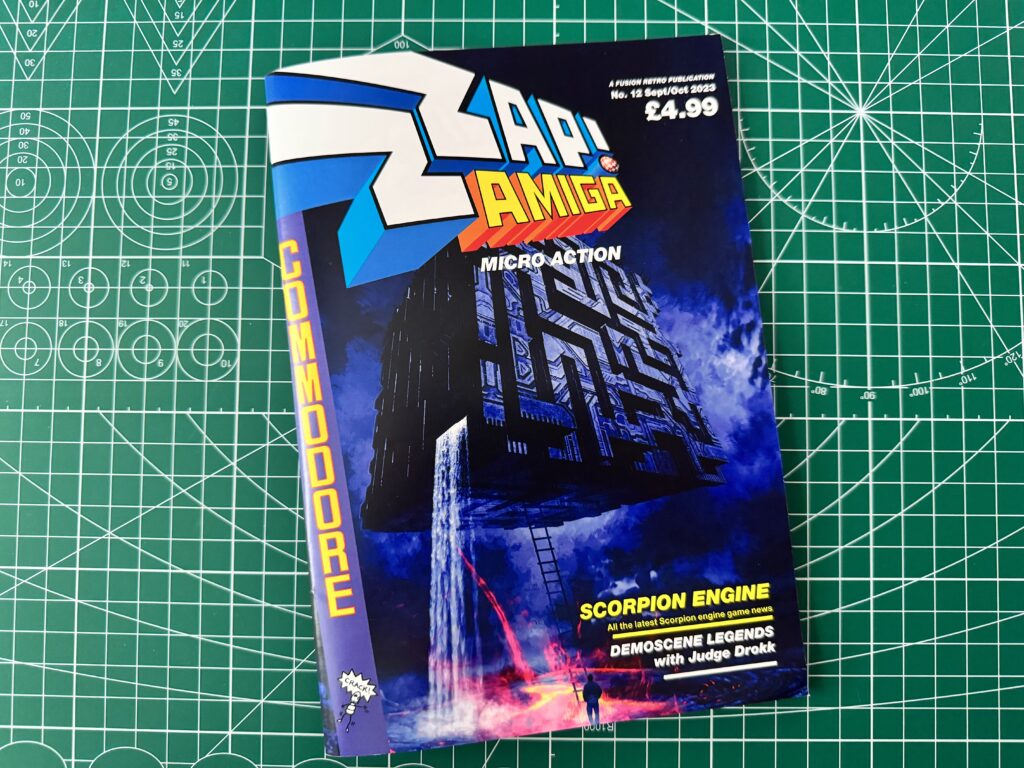
2021 was a great year for Amiga magazines. Back in January there was the launch of Amiga Addict, then towards the end of the year, another brand new magazine appeared; Zzap! Amiga – Micro Action from the same guys who resurrected Zzap! 64 – Fusion Retro Books.

Zzap! Amiga

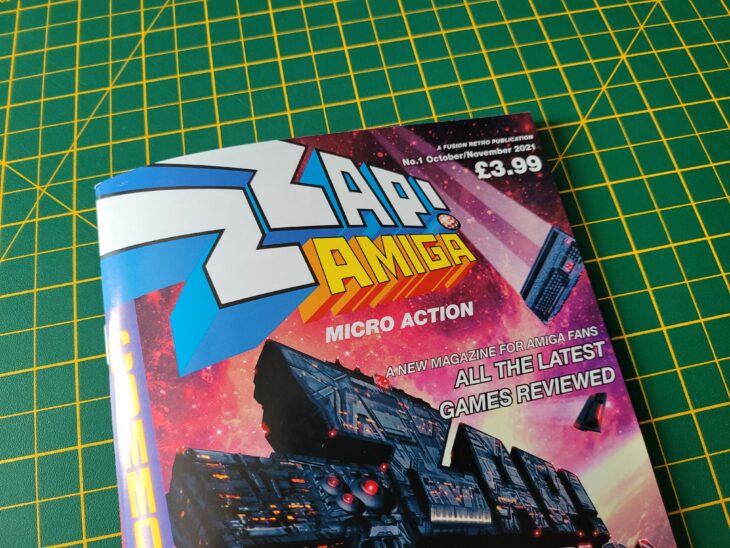
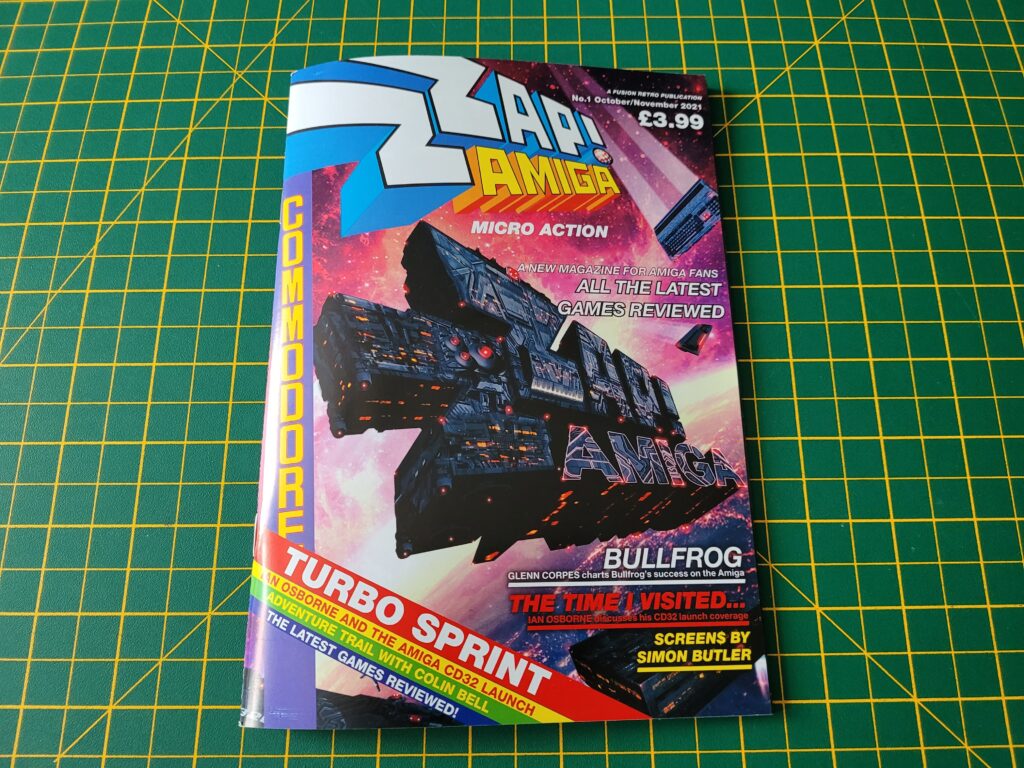
Zzap! Amiga Front Cover

The cover design adopts the familiar Zzap appearance and represents, perhaps, what we might have seen back in the late 80’s had Zzap fully transitioned over to the Amiga.

The magazine itself is A5 sized and is printed in full colour on thick glossy glossy paper, stapled at the centre. There’s a grand total of 58 pages sandwiched between the covers comprising mostly articles with a small smattering of adverts. From what I can gather Zzap! Amiga will be published 4 times a year (quarterly).

A Look Inside Issue 1

Zzap! Amiga

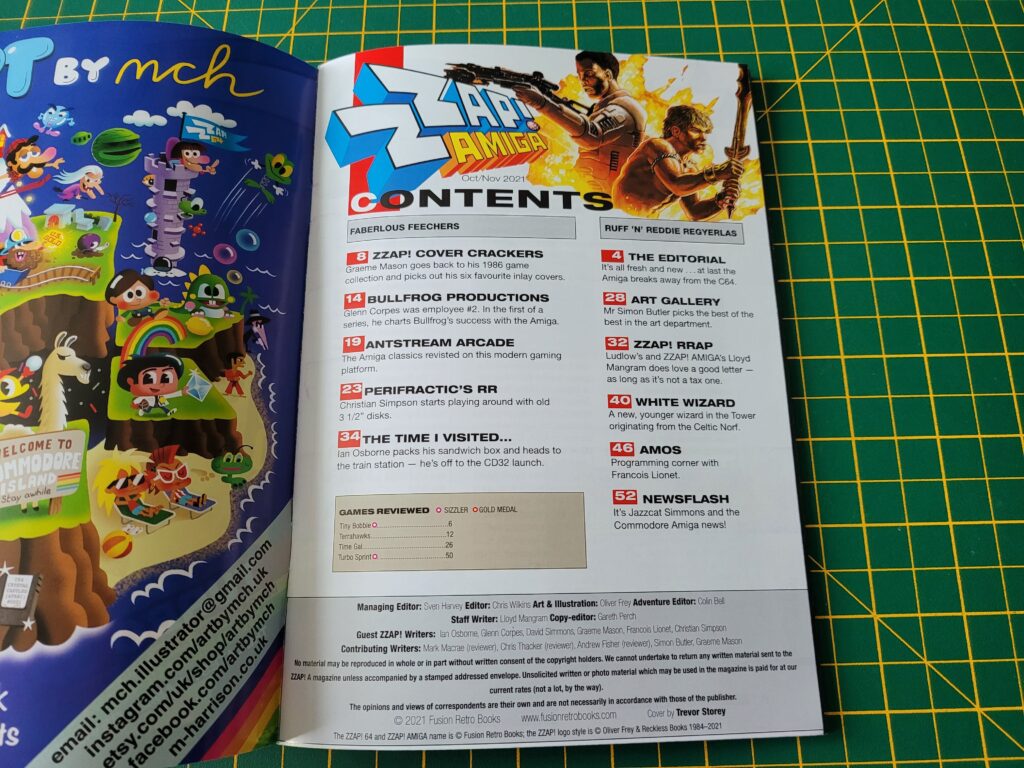
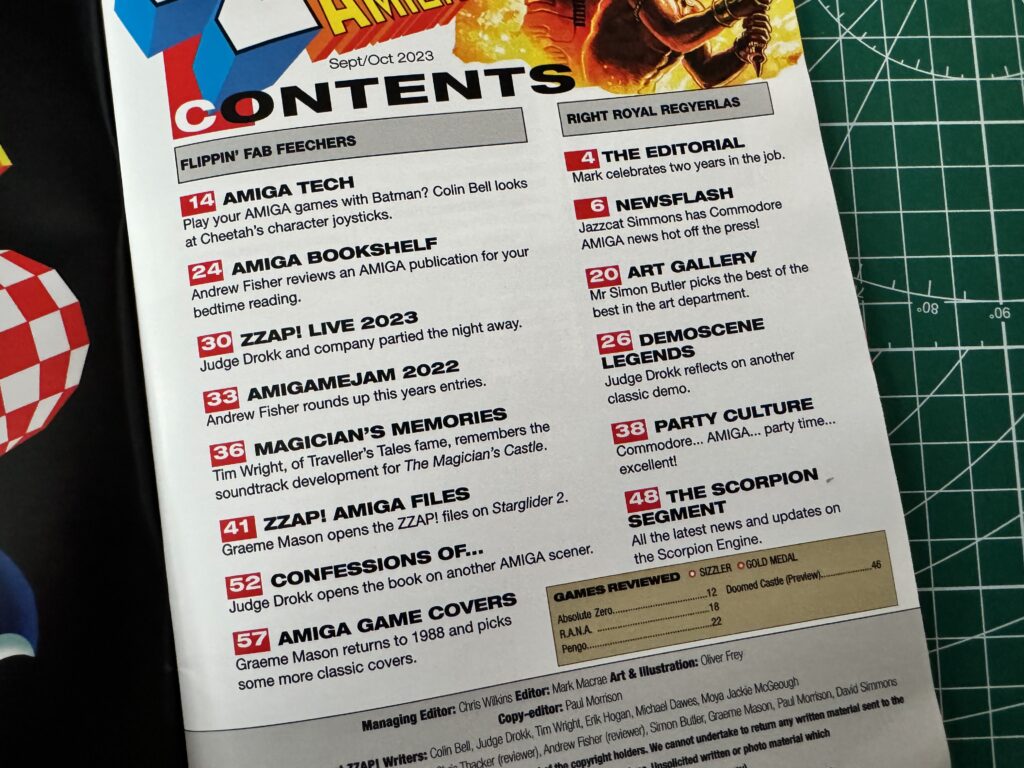
Zzap! Amiga Contents Page

There’s a clear emphasis on gaming here, which is to be expected considering Zzap’s heritage. This is probably why it’s only coming out quarterly too, allowing time for enough new games and news to surface. Some Zzap! regulars make an appearance including Zzap! Rrap (letters page) and The White Wizard (adventure gaming). RetroRecipes’ Chris Simpson (Perifractic) has his own section of the mag too whilst elsewhere there’s a 6 page article reminiscing about the CD32 console launch. There’s some cool featured Amiga art and a look at the success Bullfrog had with the Amiga. Of course there’s plenty of news from the Amiga gaming scene included too.

Zzap! Amiga

AMOS

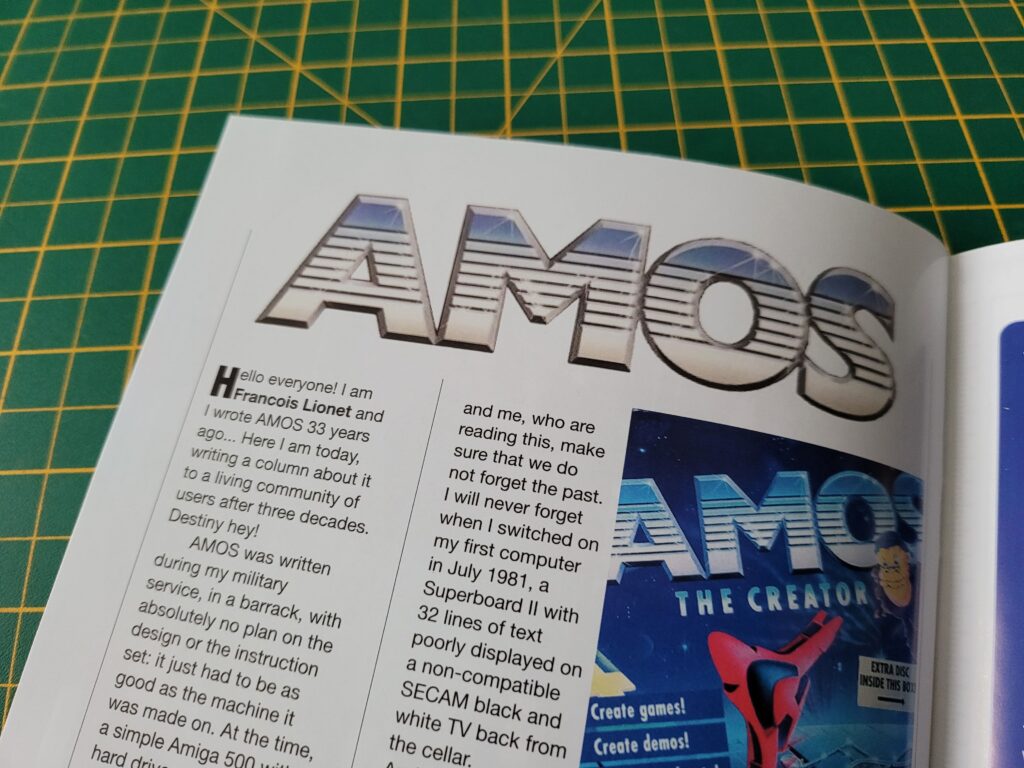
AMOS Coding

Finally I have to mention I was really pleasantly surprised to see that there was an AMOS coding section near the back of the magazine. It even included a type-in listing to enter! The article also contained information on how you can legally get a free copy of AMOS to experiment with. As a big Amiga tinkerer this was definitely right up my street. I have a boxed original copy of AMOS so this is just the excuse I need to dust it off and put it to good use! I sincerely hope to see more of this sort of stuff in the future.
This slideshow requires JavaScript.
All in all this was a great read, especially if you are an Amiga gamer. It was entertaining and informative without being dry and serious. I personally would have liked to see more game reviews – hopefully issue 2 will improve things in this respect.
At £3.99 plus postage it’s a no-brainer for me and a worthy addition to my retro magazine collection. Don’t forget you can get 15% off with code ‘LYONSDENBLOG’ at the checkout!

Head on over to Fusion Retro Books to pick up your own copy. At the time of writing issue 2 is about to be published too which I’ll definitely be getting.

CD64 Interface – First Edition Review

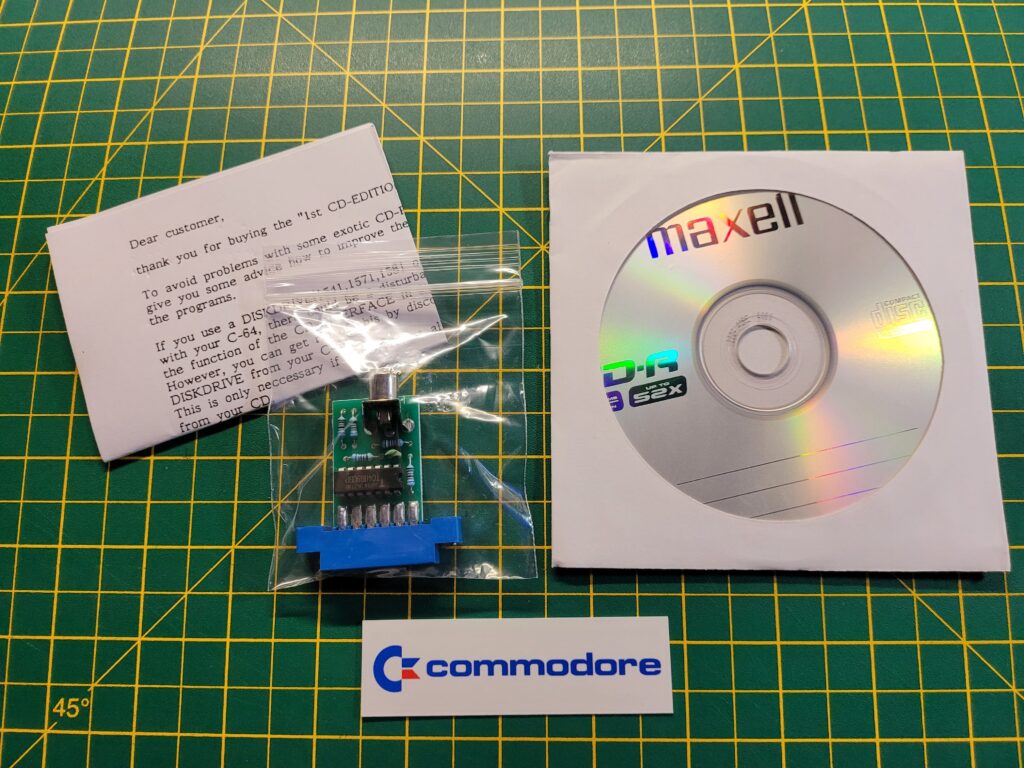
If you’ve ever wanted to use CD’s with your C64 then this could be the gadget for you. I spotted this little gizmo on the SharwarePlus website and wanted it immediately. It arrived quickly and well packaged. Inside the box there was a CDR containing a bunch of games, the CD64 interface itself, an instruction sheet and a small Commodore bookmark type thingy.


CD64 Interface Package contents.

CD64 Interface Package contents.


A Closer look at what’s included

The CD64 Interface comprises a small circuit board with a cassette port socket one end and a single RCA socket the other. The RCA socket actually gives the first clue as to how this device works.


This slideshow requires JavaScript.


The second big clue can be found when you insert the CD into a computer…


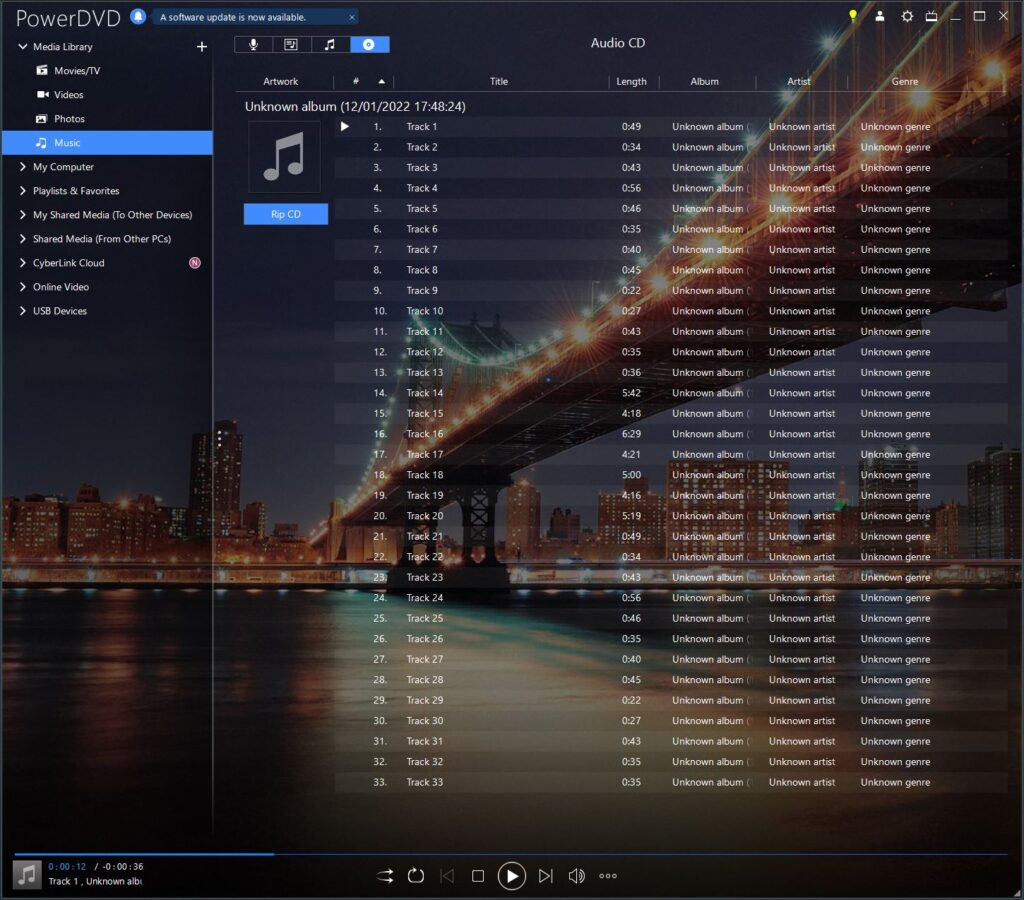
CD Tracklist showing all 33 tracks included on the CD.


If you haven’t already worked it out, the device lets you hook up the audio output of a CD player to the C64’s cassette port. The connected player then becomes a datasette of sorts albeit one with direct access to each program. The disc included is an audio CD and contains 33 audio tracks. Playing a track back through a stereo fills the room with that familiar screeching sound that most of us remember from the 80’s when copying games on cassette.


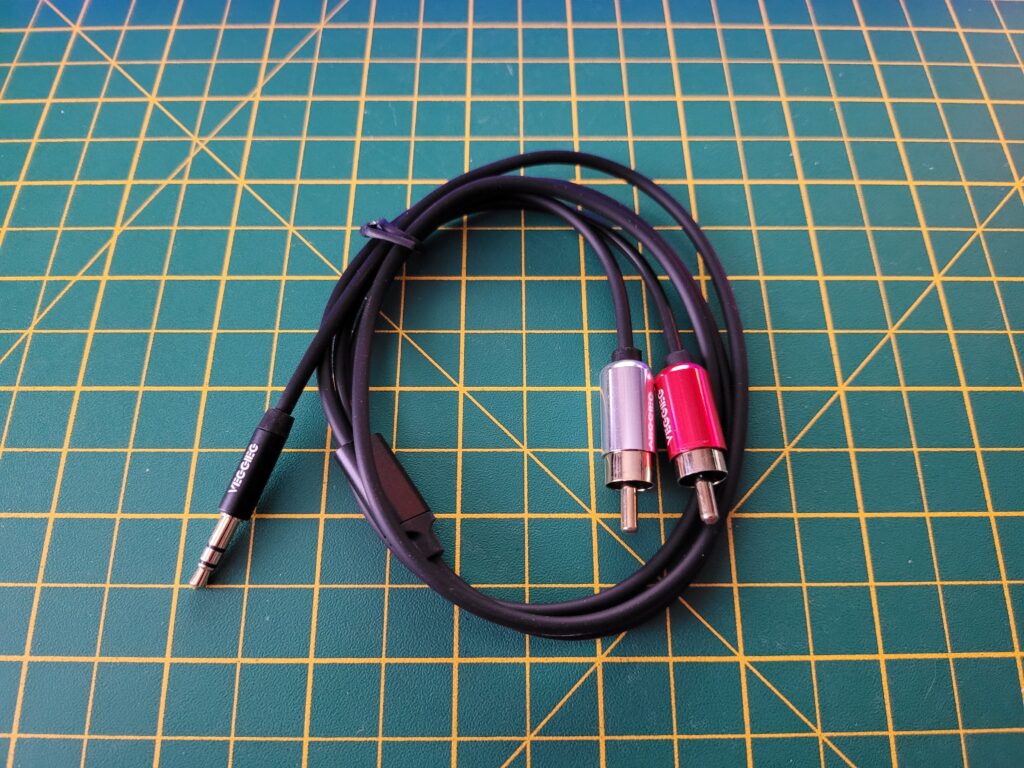
3.5mm headphone jack to Stereo RCA cable (not included).


In addition to the C64 game files there’s also seven Chris Hülsbeck music tracks on the CD which can be listened to on your CD player. Don’t try and do what I did and load them on the C64 thinking they were some sort of demo scene tracks – doh!


CD64 interface

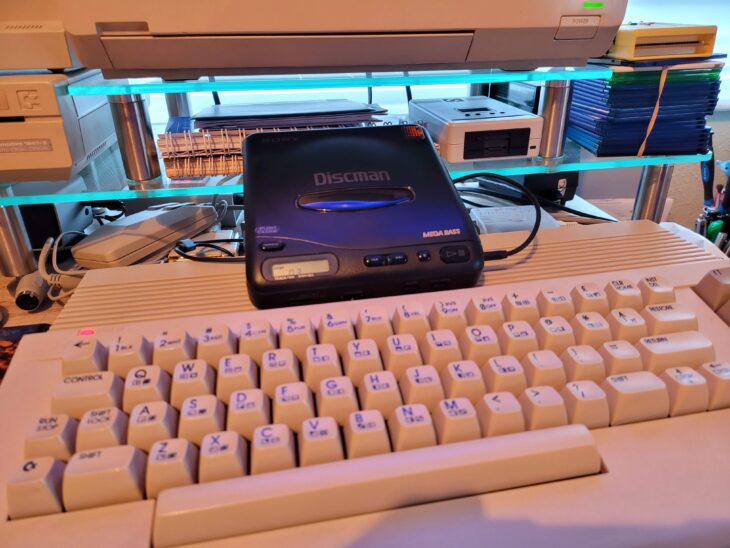
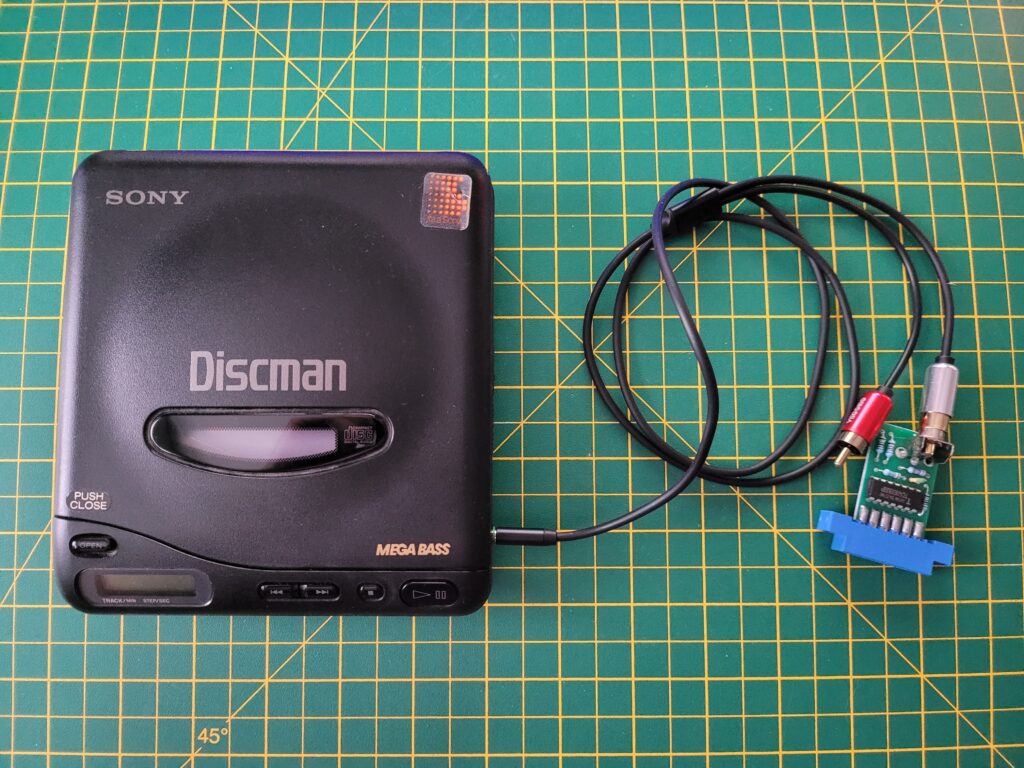
My Sony Discman D-11 attached to the CD64 interface with a 3.5mm headphone jack to stereo RCA cable.


To access the CD I used my old Sony Discman D-11 and a 3.5mm headphone jack to RCA cable to try it out. I listened to the CD with a pair of headphones first just to make sure that the sound was coming out of both left and right channels (it did). Consequently it doesn’t matter which RCA plug you use to hook up the CD64 Interface, both will work.


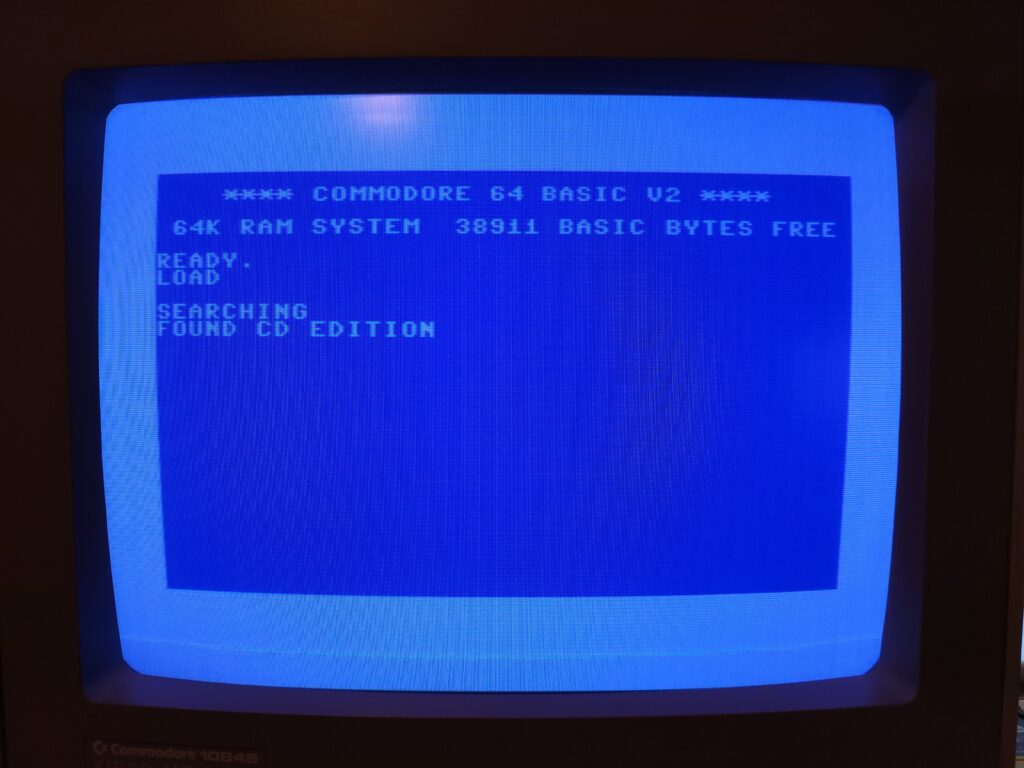
C64 LOAD Screen

First attempt at loading the Menu off CD.


Loading Programs off the CD

To load stuff off the CD you press the familiar SHIFT & RUN/STOP keys and then press PLAY on the CD player. I was very quickly presented with a ‘Found CD Edition’ message which means it had at least found the first data track on the CD. However for a while I couldn’t get any further than this. After reading the guide it suggested unplugging connected devices to remove any unwanted interference. Once I had removed my 1541 Ultimate-II+ cart and 1541-II floppy drive I began to make some progress.

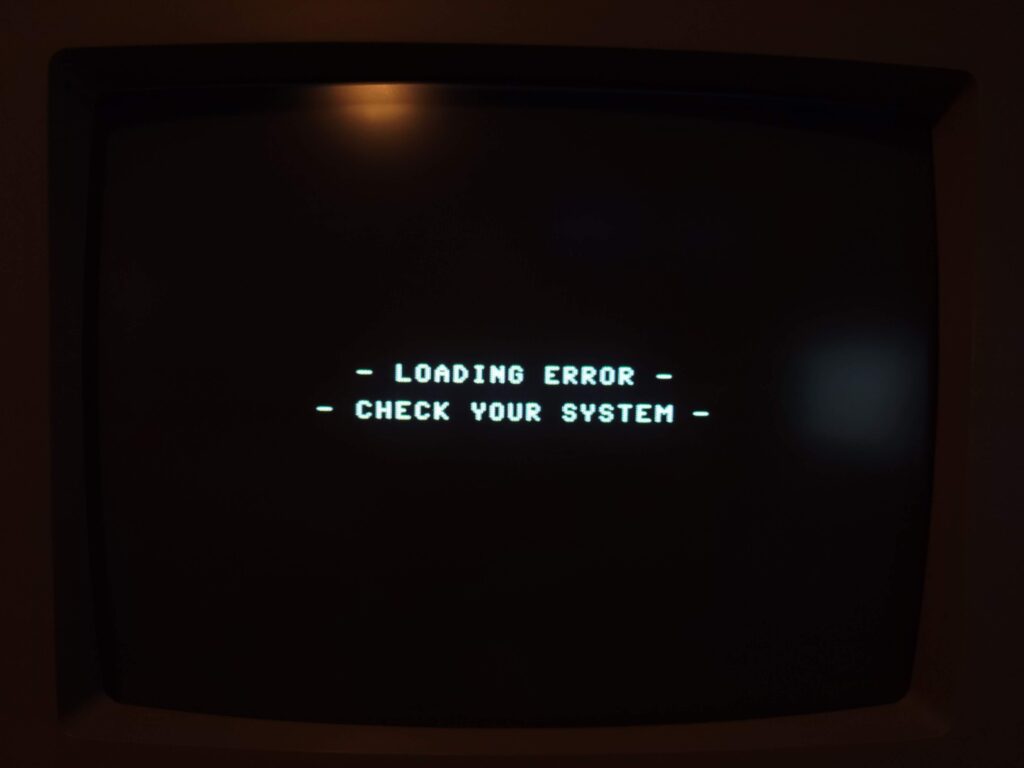
There was still a fair bit of trial and error to get the volume level right though. Too quiet or too loud and the programs failed to load – or loaded with an error.


Load error

Load Error.


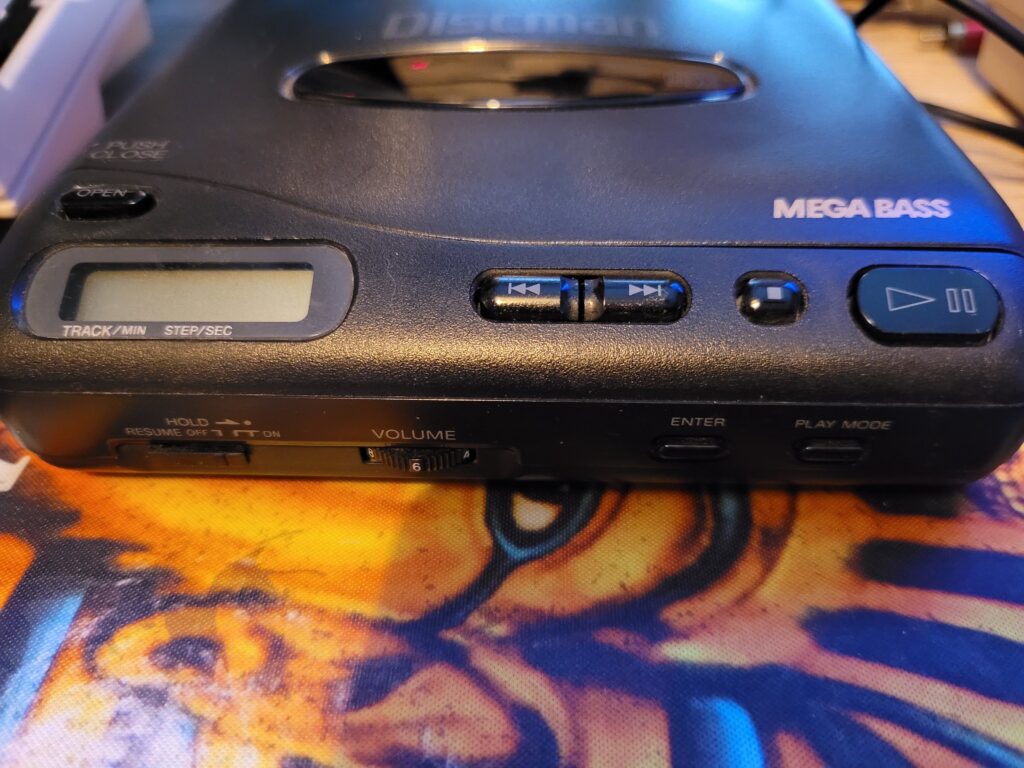
After about 20 minutes of trying different levels I finally found the sweet spot, which for me was a volume level of 6 (my player goes up to 10). I also saw an improvement by setting the Megabass feature to the medium setting (as opposed to being turned off). Of course every player is going to be different in this respect – the key thing is to experiment.


Sony Discman D-11

Setting my volume level to 6 seemed to give the best results.


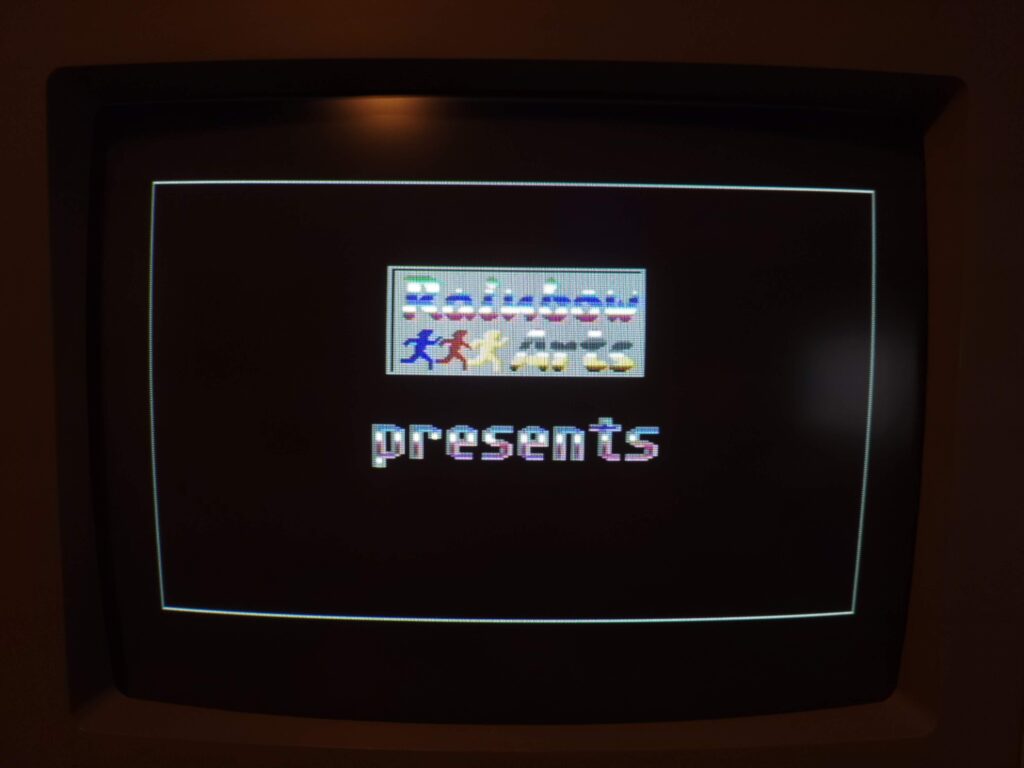
Now that I had the volume level set correctly I was finally able to get to the animated ‘Rainbow Arts’ Title Screen.


Rainbow Arts Title Screen.

Rainbow Arts Title Screen.


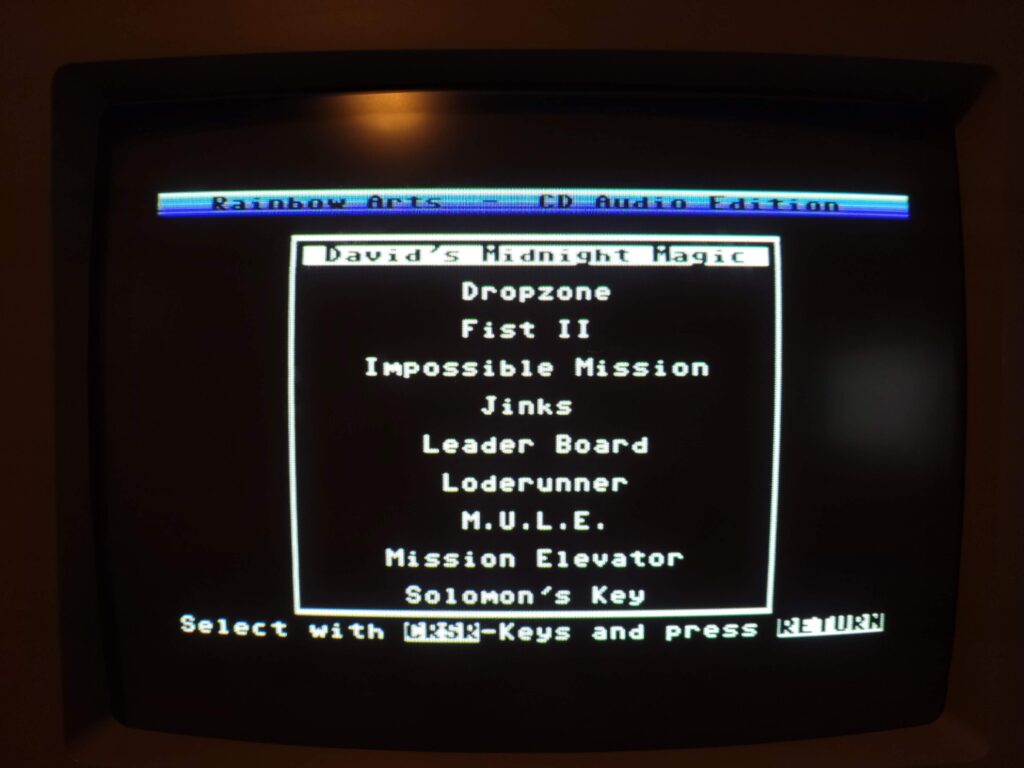
From here I could access each of the included 10 games via a simple menu screen.


Rainbow Arts Menu Screen.

Rainbow Arts Menu Screen.


To operate the menu it was simply a matter of selecting a game from the list with the cursor keys and then hitting RETURN.


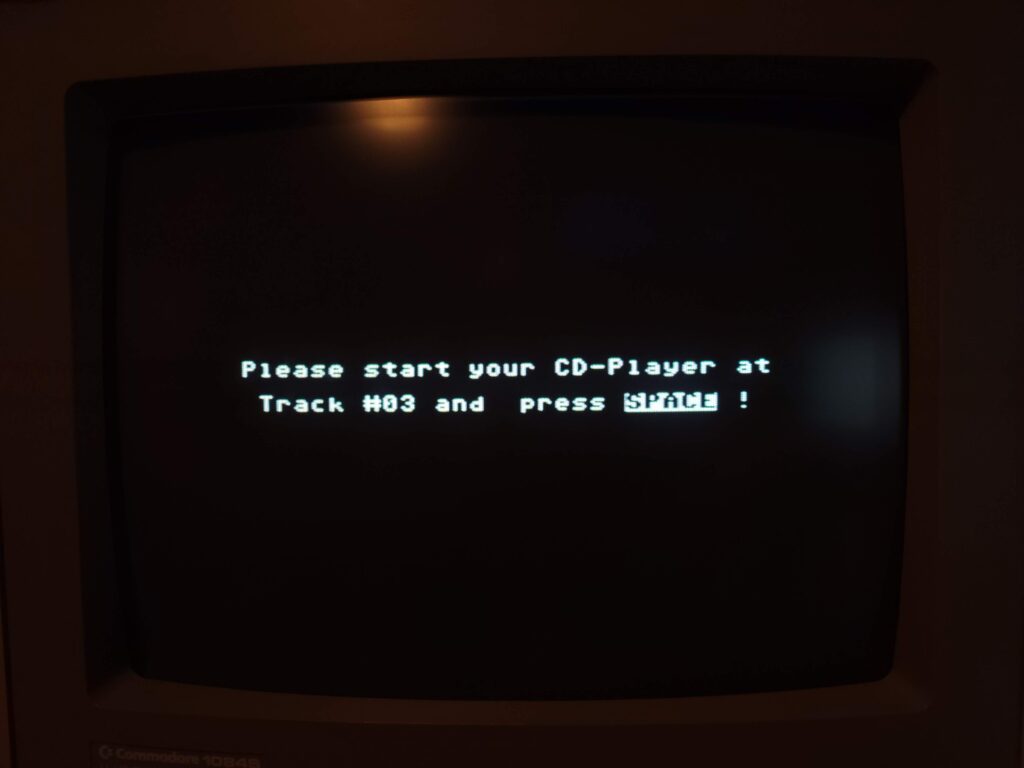
Instructions for selecting the correct track on the CD.

Instructions for selecting the correct track on the CD.


The program then tells you which track to select on your CD player before pressing SPACE to begin loading it.


C64 high speed loader

All programs utilise high speed loaders.


All the games utilise very efficient high-speed loaders so load in no time at all. Impossible Mission took about 35 seconds to load, Dropzone just 15 which is pretty impressive.


A Few of the Included Games

This slideshow requires JavaScript.


CD Contents

Here’s a complete rundown of the CD contents:

1. Start menu,

2. David’s Midnight Magic (Broderbund, flipper),

3. Dropzone (U.S.Gold, action),

4. Fist II – The Legend Continues (Melbourne House),

5. Impossible Mission (Epyx, action),

6-7. Jinks (Rainbow Arts),

8. Leaderboard Golf (Access, golf simulation),

9. Loderunner (Broderbund, jump&run),

10 & 11. M.U.L.E. (Electronic Arts),

12. Mission Elevator (Softgold, action),

13. Solomon’s Key (U.S. Gold),

14 to 20. Music pieces by Chris Hülsbeck,

21 to 33. Repetition of tracks 1 to 13.


Conclusion

This is a great little device once you’ve spent some time tweaking the sound levels. Being able to select which program to load by using the <</>> buttons on the CD player is far more convenient than using FF/RW on a Datasette so it’s shame there aren’t more compilation CD’s like this.

Although there’s only ten games on the CD there’s no reason why you can’t create your own CD compilations. I would think using something like TapWav to convert C64 .TAP files into digital WAVE files and then burning those to an audio CD would work. This is definitely something I’ll have a play around with when I have a spare moment in the future.

I had a lot of fun playing around with this little accessory and the included 10 games too. If you’d like to get hold of one for yourself then head on over to The Shareware PLUS Commodore 64 & 128 Blog and and grab one.

Commodore Amiga CD32 Dust Cover

CD32 Dust Cover

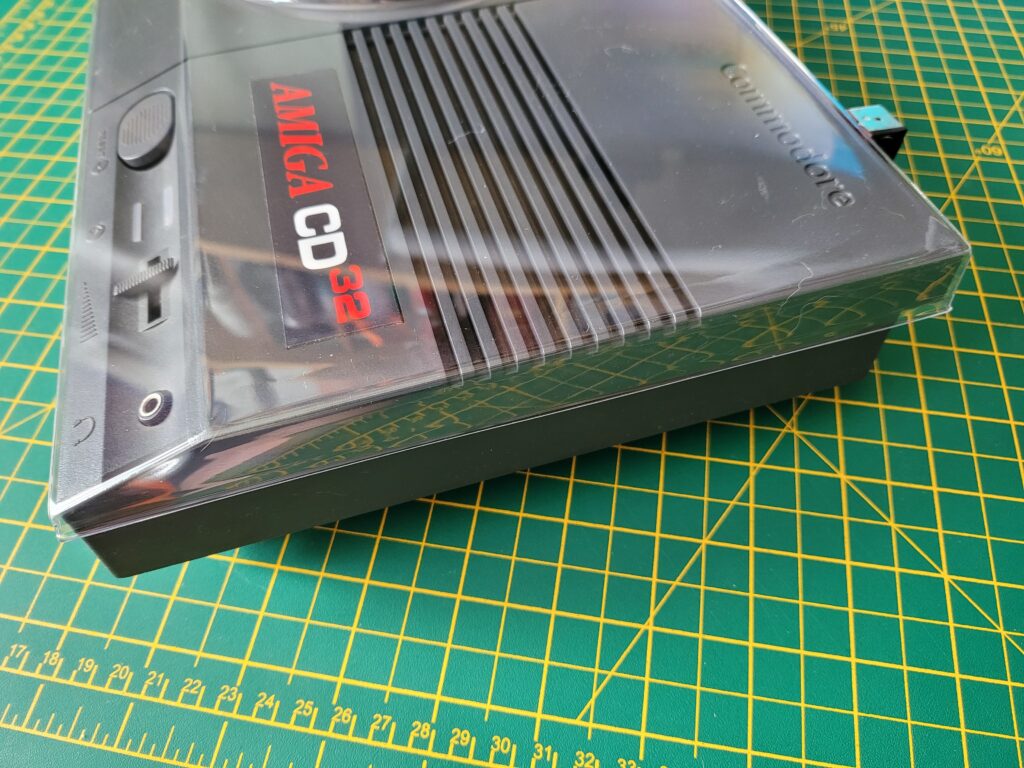
About a year ago I asked the guys over at Retronics if they would consider making a dust cover for the Amiga CD32 console. Their response at the time was that they would love to but they just didn’t have access to one to create the mould. Anyway they must have finally got hold of one because they’ve just added a CD32 cover to their line-up and here it is.


CD32 Dust Cover

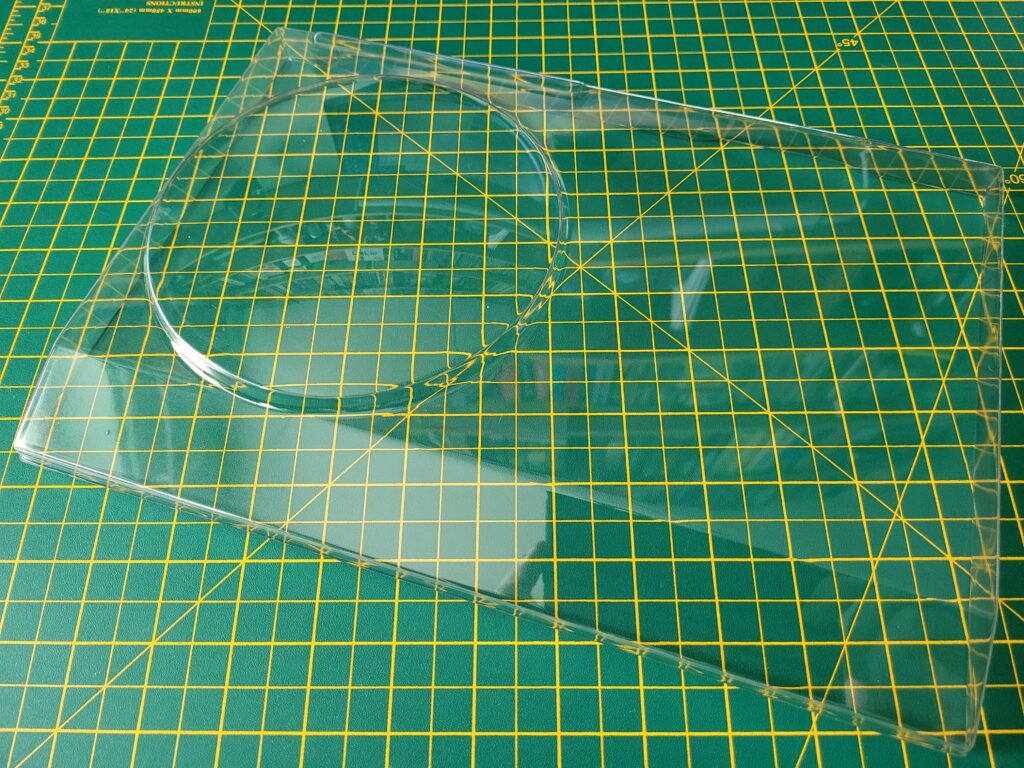
Naked Amiga CD32 Dust Cover.


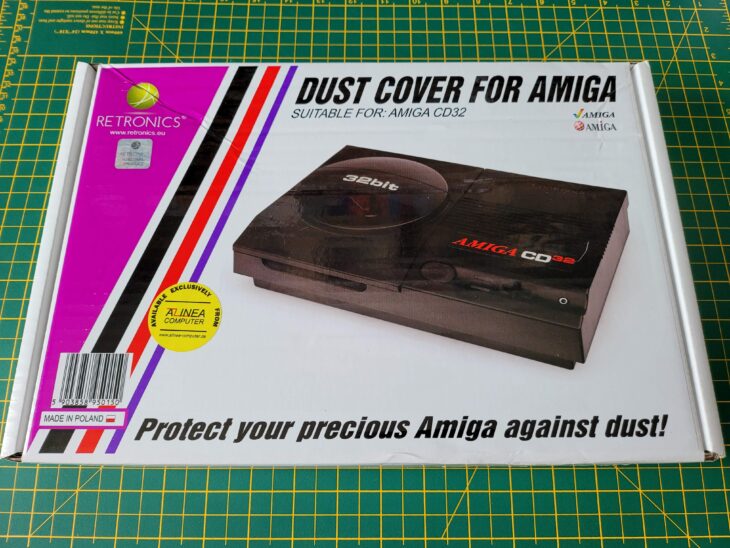
I ordered one just as soon as I could and it arrived at the weekend so here’s a quick look at it. It was packed inside an attractive box displaying a photo of a CD32 console on the cover. Opening it up revealed the cover inside, safely tucked into a plastic bag.


Photos

I remember having trouble photographing the C2n Datasette cover and this was similarly tricky. Transparent shiny objects are awkward things to photograph!


CD32 Dust Cover

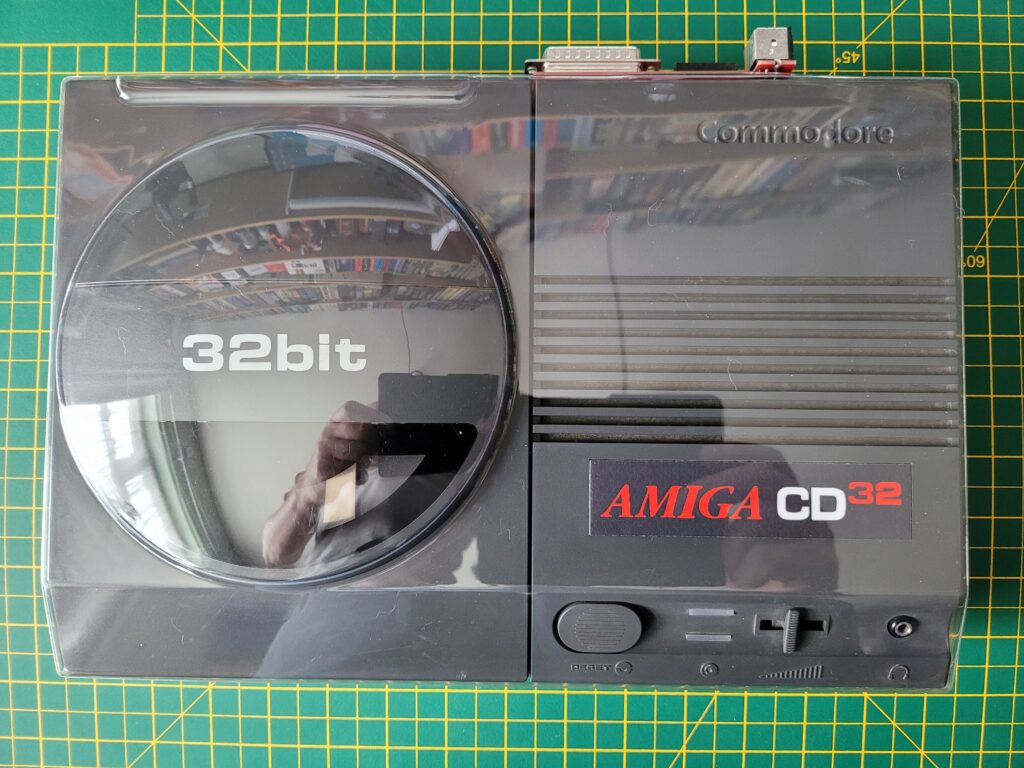
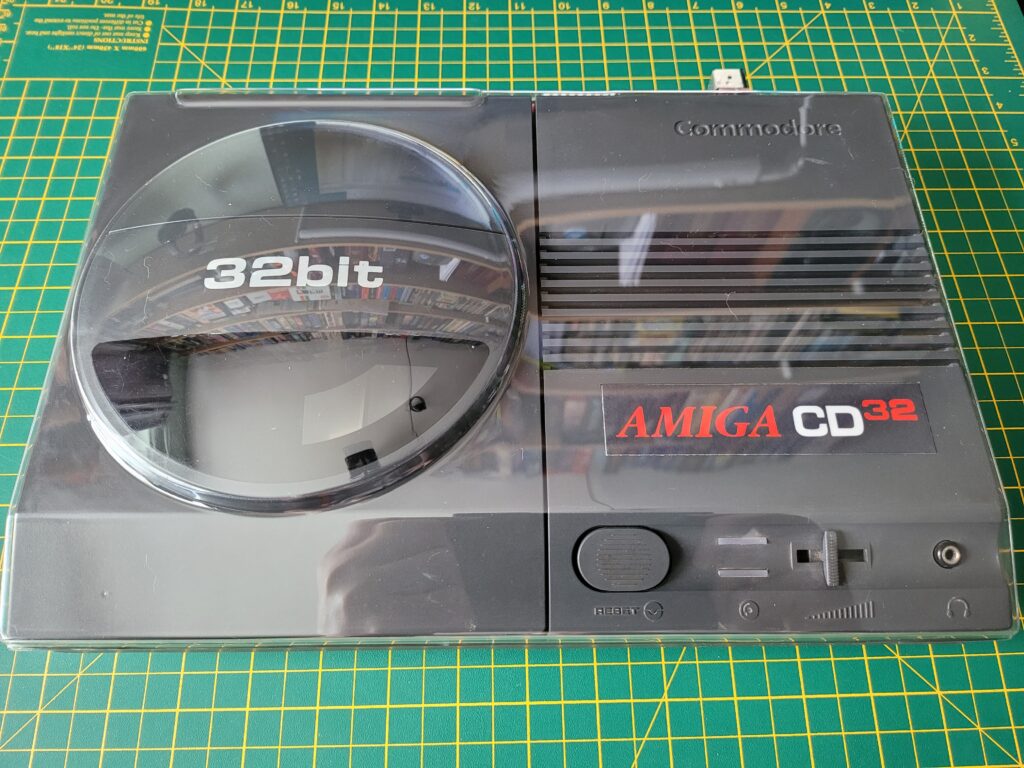
When not reflecting me trying to take a photo of it, the cover is almost invisible from most viewing angles.


The cover has all the angles, bumps and curves it needs to mate with the CD32 perfectly.


CD32 Dust Cover

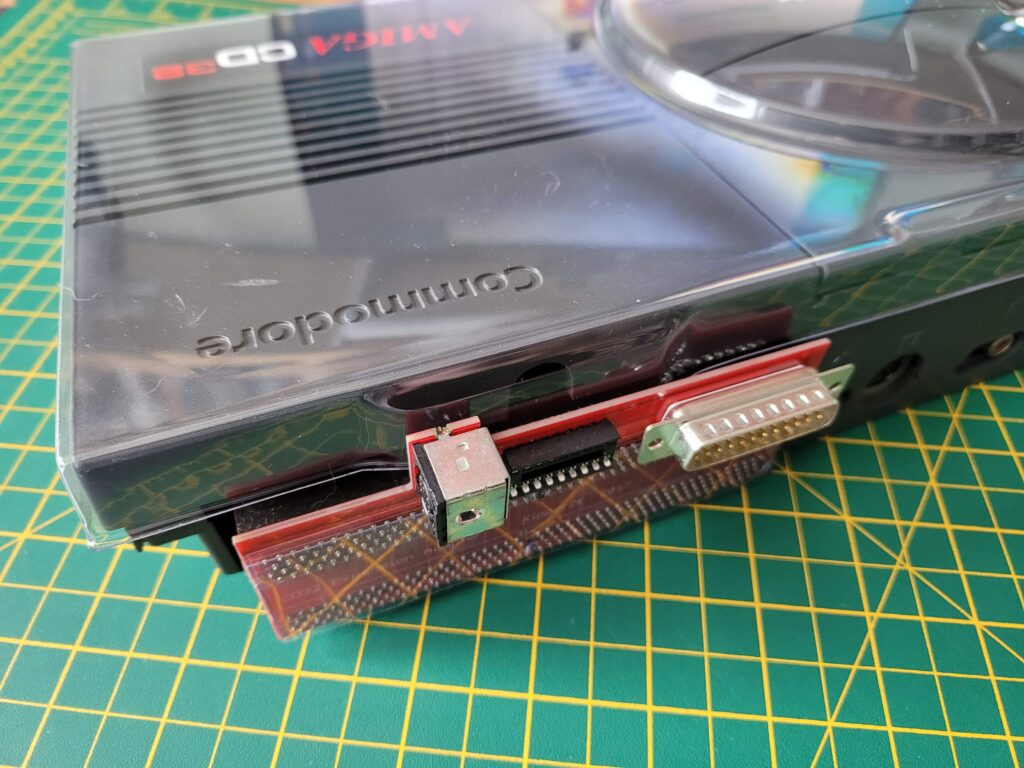
Cover fits nicely around the TerribleFire 330 riser card.


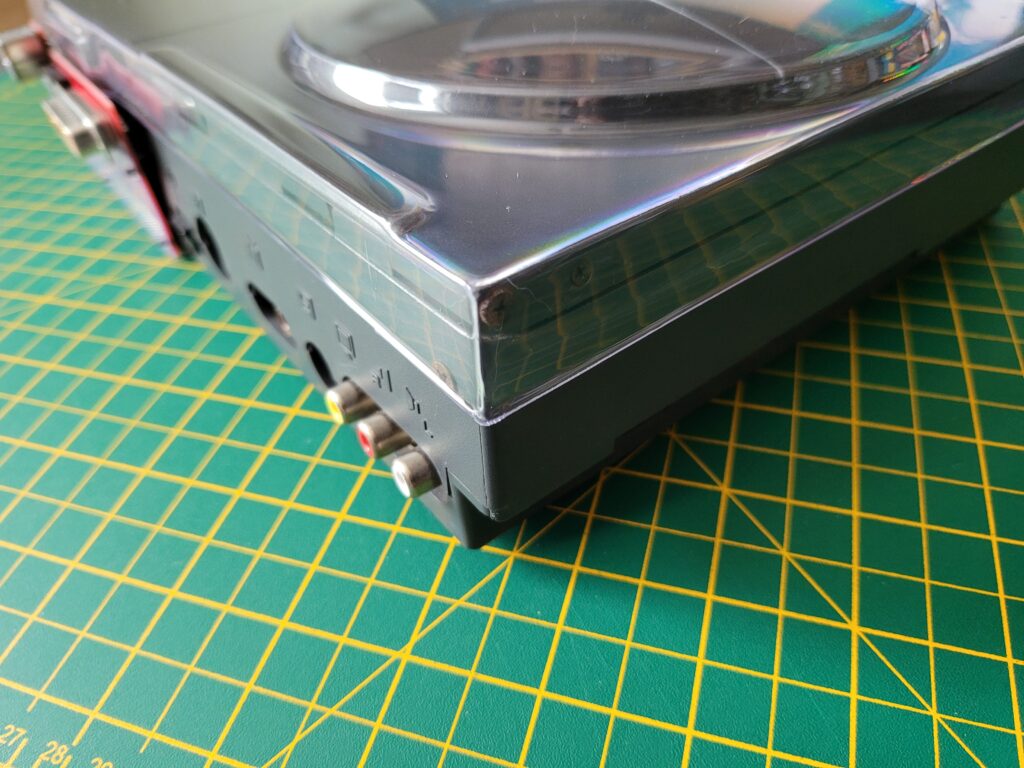
There’s a protrusion at the back where there would normally be a screw securing the expansion cover. Happily this doesn’t cause any problems with the riser card for my TerribleFire 330 expansion.


Side view of the dust cover.


So long as I made sure it slotted into the space between the case and riser card it fitted nicely.


View of dust cover from rear.


The front is perfectly angled to match the contour of the case, as is the top where the raised dome aligns with the bump in the CD lid.


CD32 Dust Cover

More reflections!


This is pretty much an essential purchase if you own a CD32 console. It’s nicely finished, fits like a glove and above all keeps the dust at bay.

I also love the fact that these covers are all practically invisible when fitted so as not to spoil my enjoyment of admiring these old machines. Definitely worth a buy. You can pick one up on eBay direct from Retronics or from the Alinea online shop.

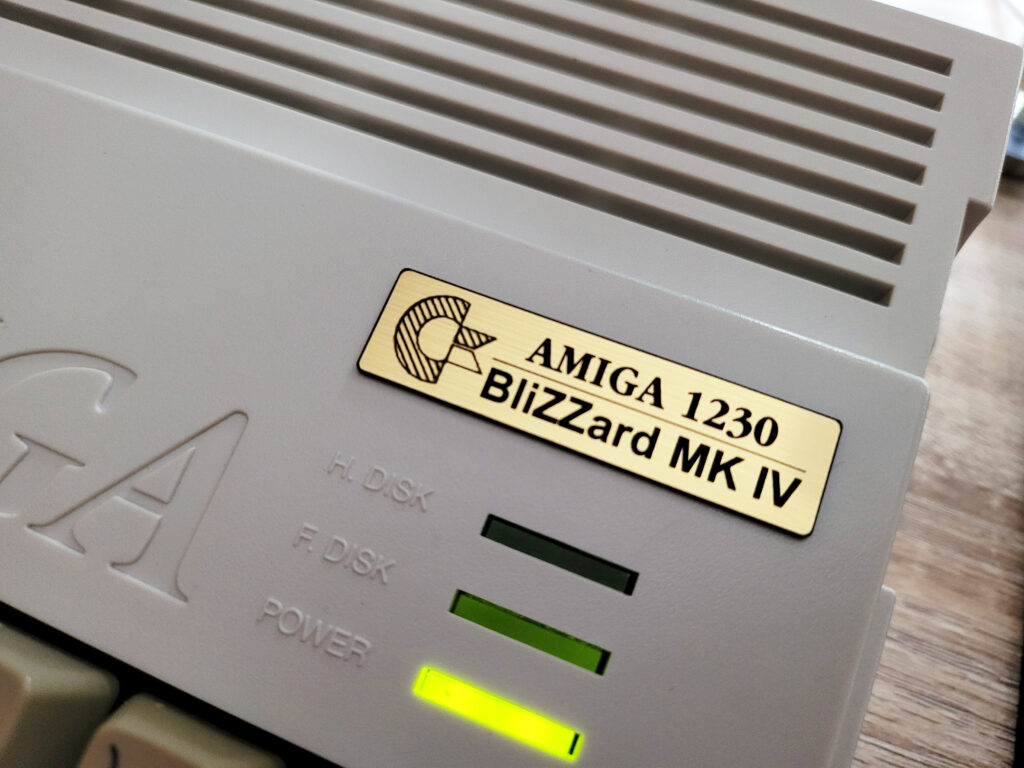
Blizzard 1230 Badge for my A1200

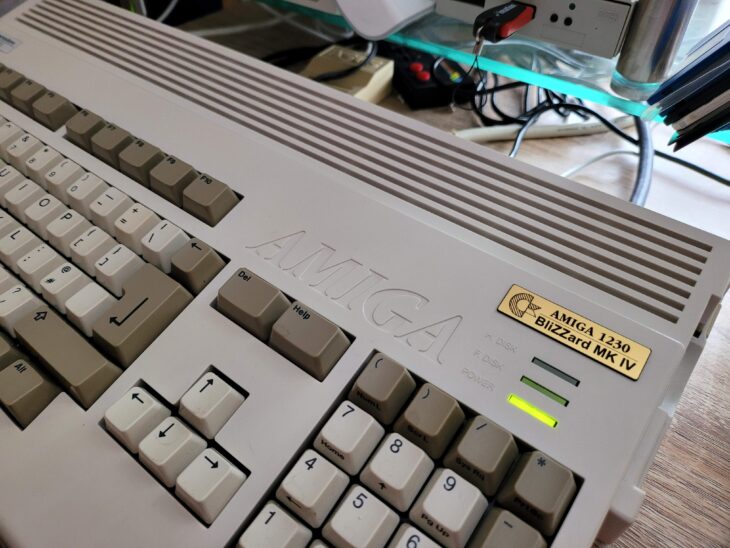
I spotted this Blizzard 1230 badge whilst ‘window shopping’ on eBay and thought it looked really cool. Costing less than a fiver I just couldn’t resist clicking on ‘Buy it Now’.

It has a plastic base with a brushed aluminium top layer finished in a very attractive metallic gold colour. The text and logo are etched into the surface whilst a self adhesive layer on the reverse allows it to be affixed to anything easily.

It’s actually designed as a direct replacement for the stock A1200 badge. It fits perfectly too if that’s something you wanted to do. However I didn’t want to deface my A1200’s case so I chose to place it elsewhere and settled on a position above the drive lights. It’s basically a mirror image of the official Commodore badge on the left now.


Blizzard A1200 Badge

Close-up of my Blizzard 1230 Mk IV A1200 Case Badge.


It’s been professionally manufactured to a really high standard and I think it looks fantastic. You can find this particular badge on eBay here. The same seller also does a whole range of different badges for other Commodore systems in his shop, here. They actually do several for the Vampire accelerator so I may well end up ordering one of those for my Amiga 500 in the future.

Amiga Addict – A Brand New Monthly UK Amiga Magazine!

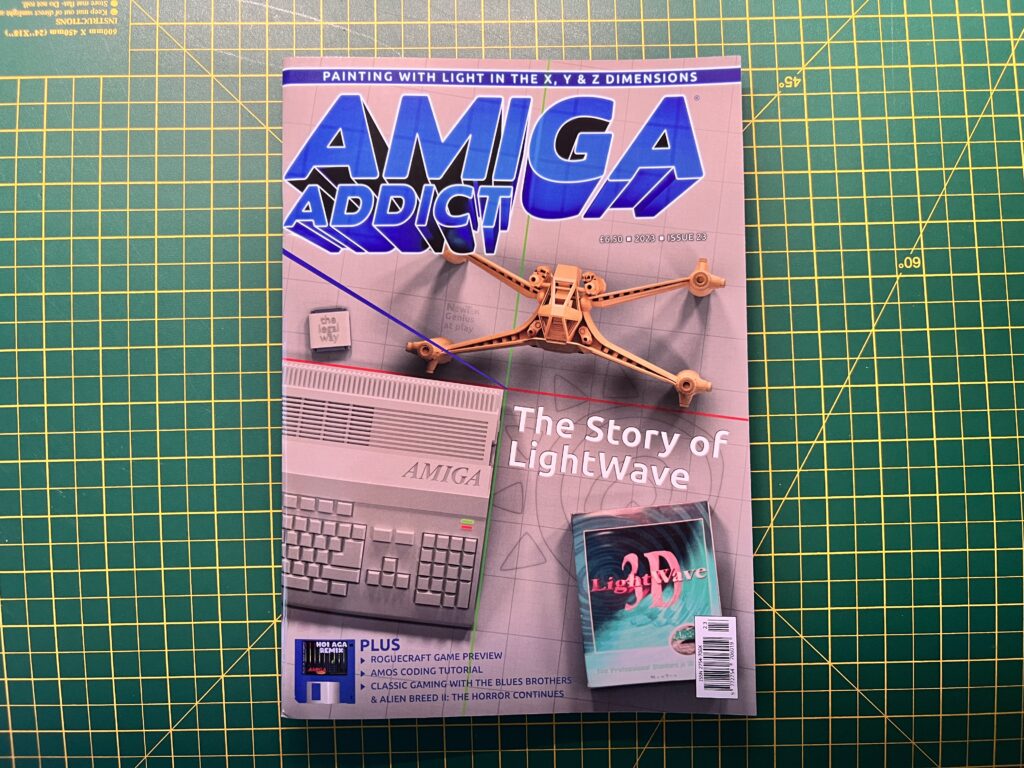
Amiga Addict

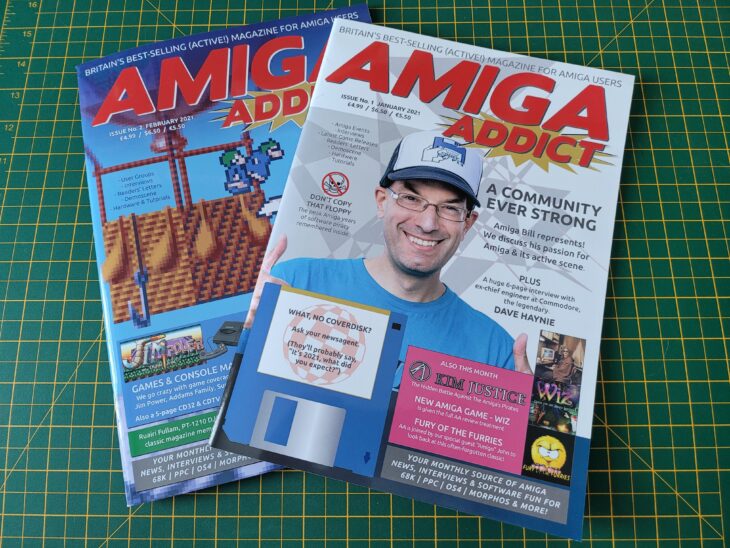
Who would have thought that the beginning of 2021 would see the launch a brand new monthly UK Amiga magazine? But that’s exactly what has happened with the publication of ‘Amiga Addict’ magazine.  Of course there are quite a few Amiga-centric mags out there now and I have covered these in the past but I believe this is the first UK Amiga mag and certainly the only one released on a monthly basis. Issue 1 was released in January, issue 2 in February and the March issue has just appeared on their website now too!


This slideshow requires JavaScript.


The cover design looks comfortingly familiar, and certainly wouldn’t have looked out of place on a 1980’s WH Smith shelf. At first glance it could easily be mistaken for a copy of Amiga Format but the magazine makers make no bones about the fact that they were inspired by all those great Amiga mags from the 80’s and 90’s.


Amiga Addict

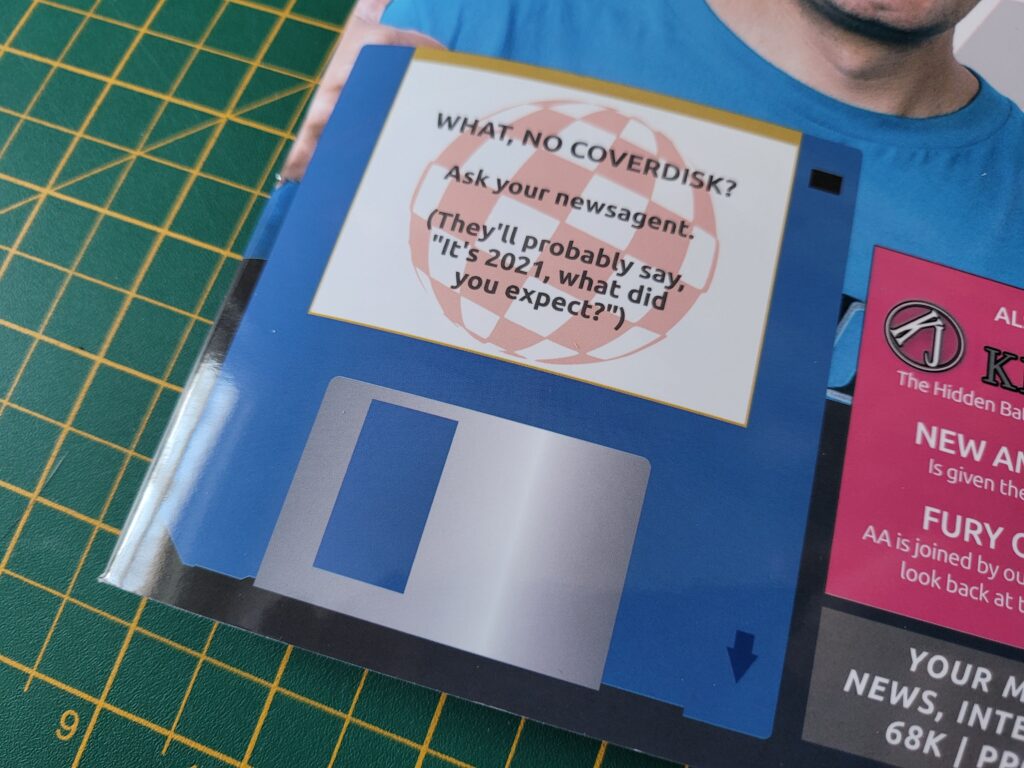
Someone’s nicked my coverdisk!


I thought the tongue-in-cheek picture of a 3.5″ floppy disk with the message ‘What no coverdisk? was a particularly fun touch. It certainly brought a smile to my face along with fond memories of seeing this message under my coverdisks after peeling them off back in the day. It would have been awesome to have a coverdisk as an option with the first issue but I fully understand why this wasn’t practical.

The magazine itself is A4 sized and has a premium glossy cover with silk finished pages inside. Both issue 1 and 2 run to 55 pages in total and feature a number of adverts from the current Amiga scene too. I always enjoyed browsing the adverts to see what games and gizmos I could get for my Amiga back in the day and I still get that same enjoyment from doing the same thing now with Amiga Addict.


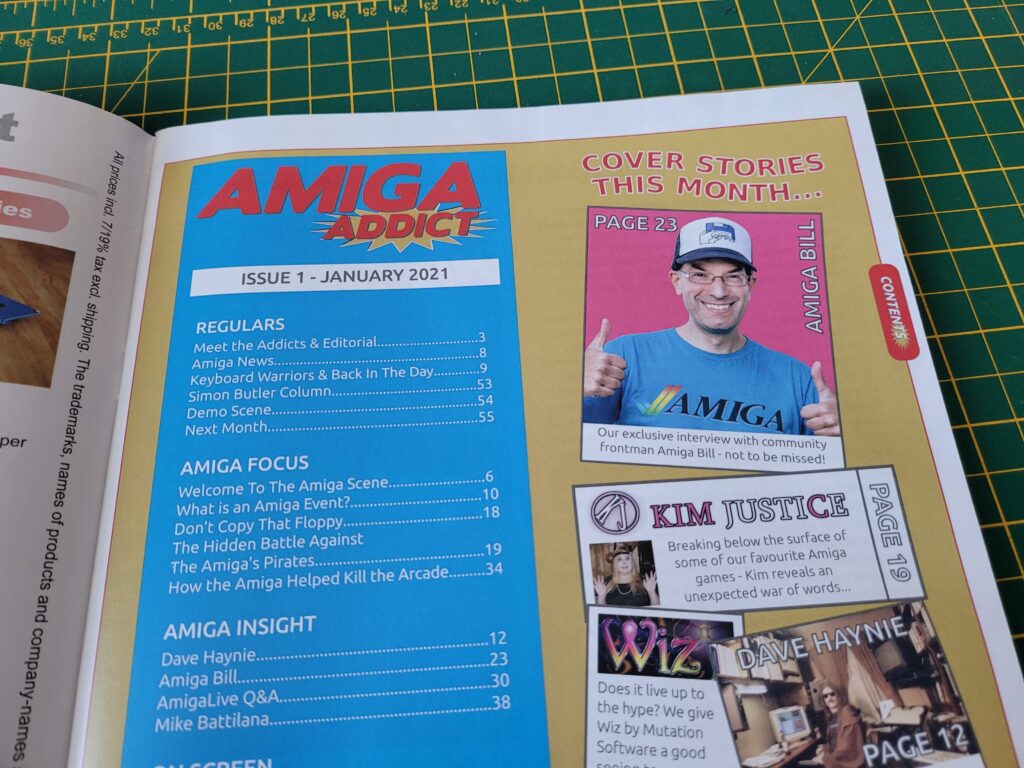
Amiga Addict Contents Page

Contents Page.


A Look Inside Issue 1

Inside issue 1 there’s healthy mixture of gaming, news, letters, reviews, interviews and ‘how to’ articles. It aims to cater to all Amiga users whether they be using classic 68k machines, emulators or FGPA systems. I’ve only read issue one so far but I have to say I was really impressed with it.

The writing style is terrific and very entertaining and I could feel the passion that the authors have for the Amiga throughout their writing. It was refreshing to find a real sense of humour in a lot of the articles that constantly made me smile too. I do appreciate some light hearted banter in my magazines – it helps elevate them to something that I really look forward to, to lift my mood and provide some much needed escapism. This could well just be a British thing but it’s something I don’t find much of in the other current Amiga mags.


Amiga Addict

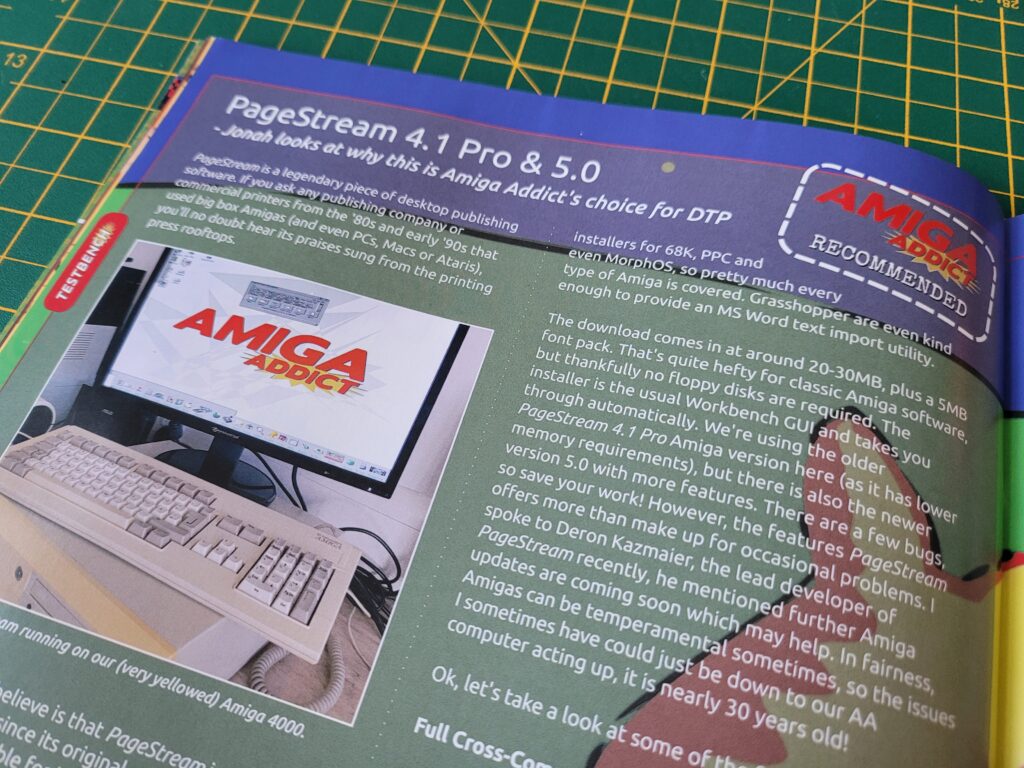
A review of the PageStream DTP software that is used to create some of the pages of Amiga Addict!


I found the reviews to be excellent; very informative and entertaining in equal measure. I discovered a couple of great new games that I was unaware of and proceeded to order them straight away. At the end of the day this is what it’s all about – helping to keep the Amiga community informed and thriving. Of course much of this info is probably available online… but it is likely spread across various social media and other retro oriented sites which can sometimes feel impossible to keep track of. Personally I think it’s fantastic to have all this info distilled into a single monthly publication. Something that I can read at my leisure without any political posts, irrelevant ads or trolls to annoy and distract me. Spoken like the true grumpy old man that I am.

What I personally find really impressive is that the entire magazine is actually laid out using PageStream on an Amiga X5000. You certainly couldn’t ask for a better demonstration that the Amiga is still relevant today! Suddenly I now how a strong hankering for an X5000 myself!

Anyway here’s a look at just few of the articles that can be found in the inaugural issue.


This slideshow requires JavaScript.


I’ve still got issue 2 to read and have just ordered issue 3 so am eagerly awaiting the arrival of that in the post soon!

If the magazine looks interesting to you then head over to the Amiga Addict website straight away and order yourself a copy – it deserves all the support it can get. Copies are available both digitally and physically and discounted subscriptions are available too!

Commodore 64 IRQ LED Mod

This Commodore 64 IRQ LED mod is a fun little hack that I spotted on eBay last year. Since my C64 mainboard has just come back from being re-capped I finally took the opportunity to fit this whilst I had the case open.

It’s a very simple little device that changes the colour of the C64 (or VIC20) power LED according to IRQ activity. When the computer is just idling the LED will glow red as usual. However when the CPU is active and generating interrupt requests (IRQ’s) the colour changes to green. This allows you to instantly see at a glance if your C64 is doing something. Anything that causes rapid IRQ’s will actually make the LED appear to be orange as it flicks rapidly between red and green.


Commodore 64 IRQ LED Mod

Everything supplied in the regular breadbin kit.


I picked up two of the devices, one for my 64 and the other for my VIC. I should point out that this isn’t a destructive hack. Nothing is permanently altered or damaged in any way and it can easily be reversed if desired. The device itself is really simple and there’s (usually) no soldering required. It consists of a tiny circuit board containing an LED, a couple of resistors and a single chip that detects the IRQ signals and triggers the LED colour changes. Connected to the board are 3 wires that are terminated with IC clips. These clips attach to the cartridge port pins and this is how the device monitors IRQ’s.


Breadbin Install


VIC20 Power LED.

Original VIC20 Power LED.


For breadbin C64’s and VIC20 computers fitment is extremely simple. You just unplug and remove the existing power LED and replace it with the little circuit board. There’s a small black plastic ring on the inside that needs pulling off and then the LED should push into the case from the outside with a little bit of force.


Removing a VIC20 Power LED.

Removing a breadbin C64/VIC20 Power LED.


There’s a spare black plastic collar for mounting the LED supplied in the kit in case you break the existing one. Also supplied is a little double-sided adhesive pad that you can use to fix the board in place. The new LED will need a little pressure to snap it into place and with the help of the adhesive pad it should be held nice and secure.


Commodore 64 IRQ LED Mod

Fitted board – held in place with a double-sided sticky pad sandwiched between the case and the chip.


Now it’s just a matter of wiring the board up. The 3 wires need to be attached to the front row of cartridge port pins using the IC clips as indicated below.


Commodore 64 IRQ LED Mod

IC clips connected to VIC20 cartridge port.


One the VIC20 the green clip goes onto pin 22 (Ground), Red – Pin 21 (+5V) and White – Pin 19 (IRQ).

On the C64 it gets wired up as follows; Green – Pin 1 (Ground), Red – Pin 3 (+5V), White – Pin 4 (IRQ).


Commodore 64 IRQ LED Mod

View showing the completed mod fitted.


Time for the moment of truth – putting the case back together and giving it a test drive. The LED in my kit had been soldered on in reverse so when my VIC was idle it lit up green and when busy it changed to red. I could have solved this by de-soldering it and flipping it round but it really doesn’t bother me so I left it alone. Other than that it works exactly as advertised and I’m really happy with the result.


This slideshow requires JavaScript.


C64C Install


UPDATE [March 2024]

Tim over at SharewarePlus now produces a version specifically for the C64C too incorporating a rectangular LED and also a much longer set of cables to allow the clips to actually reach the cartridge port as the LED is on the opposite side to the older ‘breadbin’ style machines.


C64C Version.


This makes the installation process just as simple as it was for the breadbin case one.


Close-up view of the C64C version with rectangular LED.


I’ll leave the details of my original installation modification below just in case anyone else finds themselves needing to fit a round peg into a rectangular hole. However realistically this info is now obsolete so long as you are getting one after March 2024 as you can just choose the right one for the job when you buy it.


ORIGINAL INSTALL

I hinted earlier that non-breadbin installs aren’t quite so simple. I have a C64C and as supplied the mod will not work with this model. There’s a couple of reasons for this. The most obvious being the C64C has a rectangular LED rather than the usual round one found in Breadbin style machines.


Commodore 64 IRQ LED Mod

Board supplied without a round LED and a rectangular one waiting to be fitted.


The other problem becomes apparent once you open up the case. As can be seen in the photo below the power LED is at the opposite end of the case to the cartridge port so the supplied wires are too short.


Commodore 64 IRQ LED Mod

Here you can see that the supplied wires in the kit only reach half-way across the board.


Fortunately these issues are easy to sort. I mentioned about the LED to the seller (Tim Harris who runs Shareware Plus) and he kindly supplied the board without an LED fitted so I could fit a rectangular one myself. These ones here are a good fit: rectangular LED’s on eBay.


Commodore 64 IRQ LED Mod

LED fitted to 10′ long wires to allow it reach across.


In order for the LED to fit in the existing hole I soldered it to three 10 inch lengths of wire and then soldered the wires to the circuit board. I fitted some heat shrink tubing over the joints to insulate them. This allowed me to mount the circuit board close to the cartridge port and also have the LED in the correct place.


Commodore 64 IRQ LED Mod

Here you can see the mod fully fitted and wired up. Note there are several other IC clips on this photo – these are from my SIDFX (twin SID chips).


I attached the board with a small double-sided sticky pad to hold it in place. I also carefully bent the wires on the LED 90 degrees so the cables would lie flat along the top of the case.

The IC clips were connected to the cartridge port pins as follows:

  • Green – Pin 1 (Ground)
  • Red – Pin 3 (+5V)
  • White – Pin 4 (IRQ)


Verdict

After giving it all a quick test I put the case back together and had a play around with it. When idle the LED lights up red as normal – a much more vivid red than the photos show. When the CPU is actively generating an IRQ such as when loading off a disk the LED with light green. Rapid IRQ activity that can happen when playing a game makes the LED appear orange.

I’m really impressed with this little mod. It’s one of those things that’s kind of pointless but also completely essential at the same time. I love having a visual indicator that my computer is doing something and during loading or saving operations it functions as a kind of drive activity light.

You can see it working clearly in the video below, taken whilst I was loading a program off a floppy disk.


If you enjoy tinkering and like the idea of having an activity light on your C64 or VIC then I can thoroughly recommend this. Did I mention that it costs less than a tenner too? A real no-brainer for me. You can pick up either version from Tim over at SharewarePlus.

VIC20 Game Box Preservation

It’s winter here in the UK so recently I decided to spend a particularly cold and rainy afternoon on a little VIC20 game box preservation project I’ve been meaning to do for some time.

Why did I want to do this?

Unfortunately, unlike Sega games which came in sturdy plastic clamshell boxes, Commodore cartridges were supplied in flimsy cardboard boxes. Consequently many of these have not stood the test of time – as a quick glance at all the box-less cartridges on eBay will attest to. I’m really proud that my collection has remained largely in tact for almost 40 years but for them to survive another 40 I figured they’d need a little helping hand.

I’d already found some great looking box protectors on eBay and also picked up some sachets of Silica Gel off Amazon for good measure. All I needed was a some time to apply them to my VIC20 cartridge collection.


Sachets of Silica Gel

Sachets of Silica Gel


The Silica Gel sachets came in a sealed bag of 100. The moment you open the pack they will start absorbing any moisture in the air so it’s important to minimise their exposure and keep them in a sealed container once opened.


VIC20 Box Protector

A VIC20 Box Protector folded flat (this is how they are supplied).


The Box Protectors

The box protectors are made of PET material which according to Wikipedia “makes a good gas and fair moisture barrier, as well as a good barrier to alcohol (requires additional “barrier” treatment) and solvents. It is strong and impact-resistant”. The boxes were supplied with a protective film on them to prevent scratches in transit. I have to admit I hadn’t realised this at first and was wondering why they looked slightly opaque. When the penny dropped and I removed the film they were crystal clear. You can see the difference clearly in the photos below.


This slideshow requires JavaScript.


Protect and Preserve

After ensuring that my game boxes were dust free and that the cartridge inside was similarly clean I added a couple of sachets of gel inside each box. The plastic box protectors should do a good job of protecting the contents from the environment but they’re not air-tight so the gel will absorb any moisture that makes its way inside. This should prevent any mould from forming on the contents. At some point in the future the sachets will need replacing but as I’m keeping the games in a nice warm room they should be fine for years.


VIC20 Cosmic Jailbreak Cartridge

Game box, with the cartridge and instruction manual laid out alongside it.


If I was placing them in a damp, cold basement, loft or garage then they would need replacing far sooner. However in those locations the games would need to be sealed in an air-tight box too.


VIC20 Game Box Preservation

Silica gel sachets placed inside the bottom of box.


The protective cases were supplied flat-packed so needed folding into shape before they could be used. I found this really easy to do and it took less than a minute per box.


VIC20 Game Box Preservation

A completed box… with the protective film still attached in this photo!


Now it was simply a matter of carefully sliding the game box into the protective case. The cases were a very snug fit so I did need to ensure the box went in straight before it would fit inside.


VIC20 Game Box Preservation

Game box fitted inside a protective case.


There is a seam down one edge (where the box spine is) so I made sure to position that at the back when displaying them on my shelf.


VIC20 Game Box Preservation

Notice how the game on the far left looks slightly opaque – this box still had the protective film on it. It has been removed from the other two.


I think the games look terrific inside the boxes and from most angles you can’t even tell they’re inside a cover.  In fact I’d go as far as saying some of my games looked much better inside the protective cases. Take the Menagerie game shown below which has suffered some box crushing and creasing over the years.


Before…


This slideshow requires JavaScript.


Because the protective covers are such a snug fit they actually force the game boxes back into their original shape when inserted. In effect the covers act as a kind of exoskeleton, almost eliminating the effect of the creasing. The creases are still there of course but just far less noticeable now.


After…


This slideshow requires JavaScript.


All in all I’m really pleased with how this project worked out. It was inexpensive, effective and the whole project only took me a couple of hours to complete. That included taking the photos for this post too.


VIC20 Game Box Preservation

A bunch of VIC20 games in their new protective covers.


My VIC20 games not only look better than before but I feel much happier knowing that I’ve taken steps to ensure they last for another 40 years!


VIC20 Box protectors

Row of protected games on my shelf.

Brucie Bonus

I discovered that the protectors are also a perfect fit for the Commodore 64 Microprose style boxes. This means they’ll also fit similar style boxes from the likes of Rainbird and Level 9. I can see another batch being ordered very soon!


C64 Microprose box protector

The VIC20 box protector also happens to be a perfect fit for the popular Commodore 64 Microprose style game boxes!