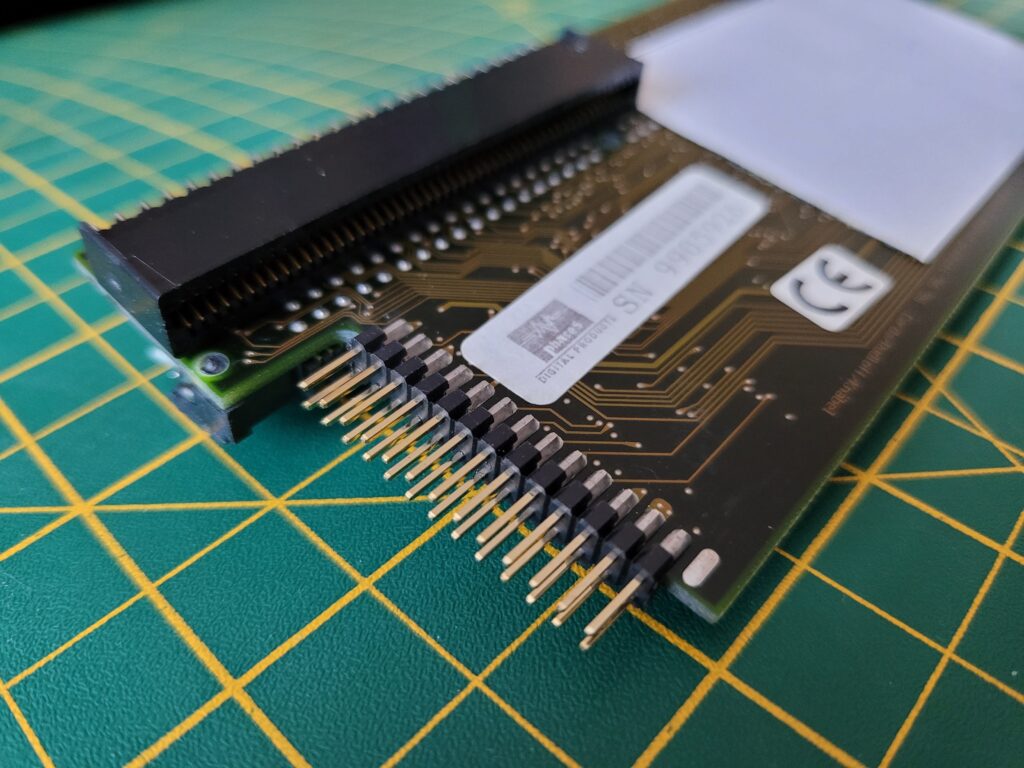
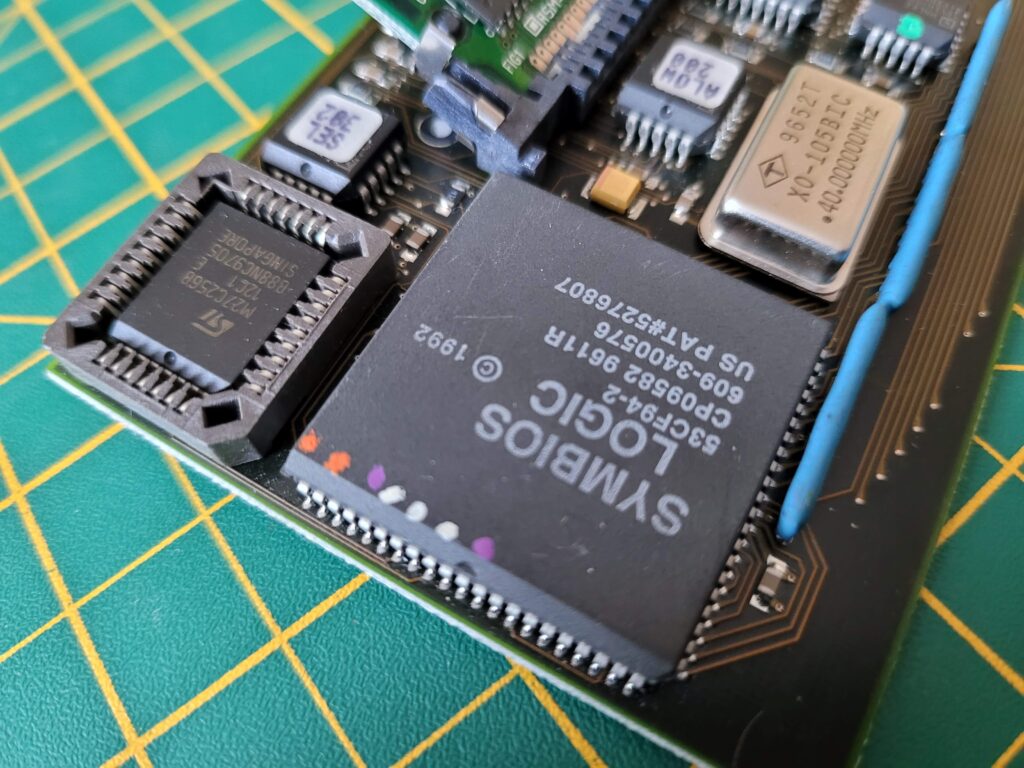
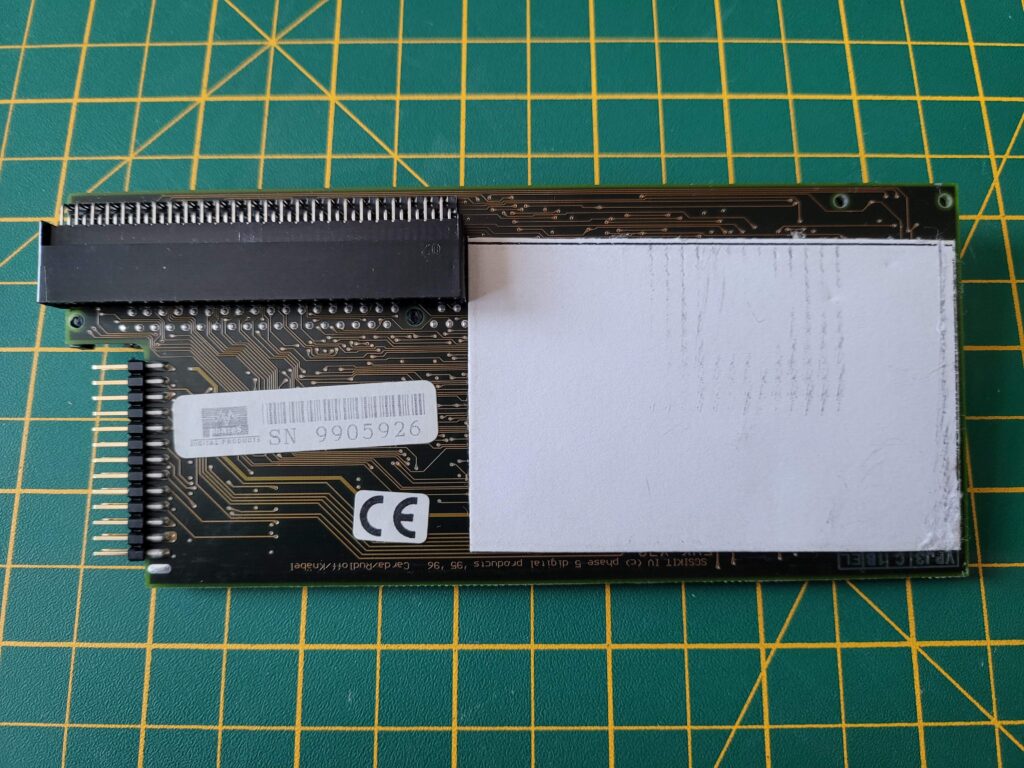
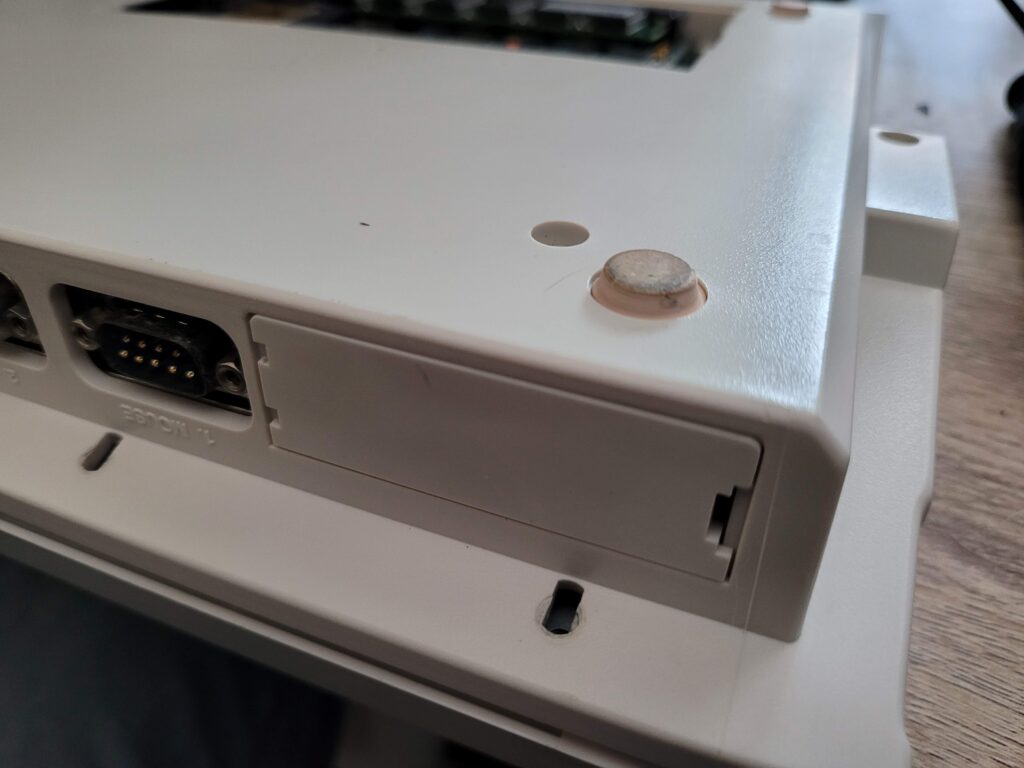
Lyonsden Blog

Tag - Amiga

SDBox Review

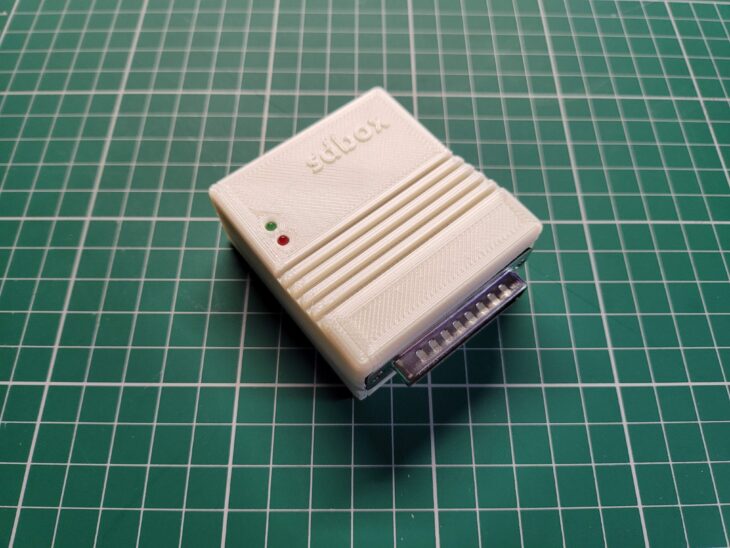
SDBox

If there was one take-away from my recent clean install of AmigaOS3.2 it was that transferring files across to a stock Amiga system is a real pain in the arse. Sure you can use CrossDOS, but that is limited to 720K files. If you have a CD drive then you can burn stuff to a CD which raises the limit considerably to 650mb. However this is pretty time consuming and my drive refuses to read CDRW discs so means I have to use CDR’s which is downright wasteful.

Enter the SDBox – a little expansion for any Amiga system that enables it to read and write data to MicroSD Cards. A few years ago I wrote a post about adding an SD Card to an A500, however that relied on having a Vampire accelerator card. This device just requires a parallel port to operate, something which all Amiga’s have.

What’s Included

The SDBox is actually a public domain Amiga community project that you can construct yourself (see here). However due to the inclusion of some surface mount components I chose to buy one ready made from Amigastore.eu. I can normally solder stuff OK but dealing with tiny surface mount components is beyond my skill level.


SDBox

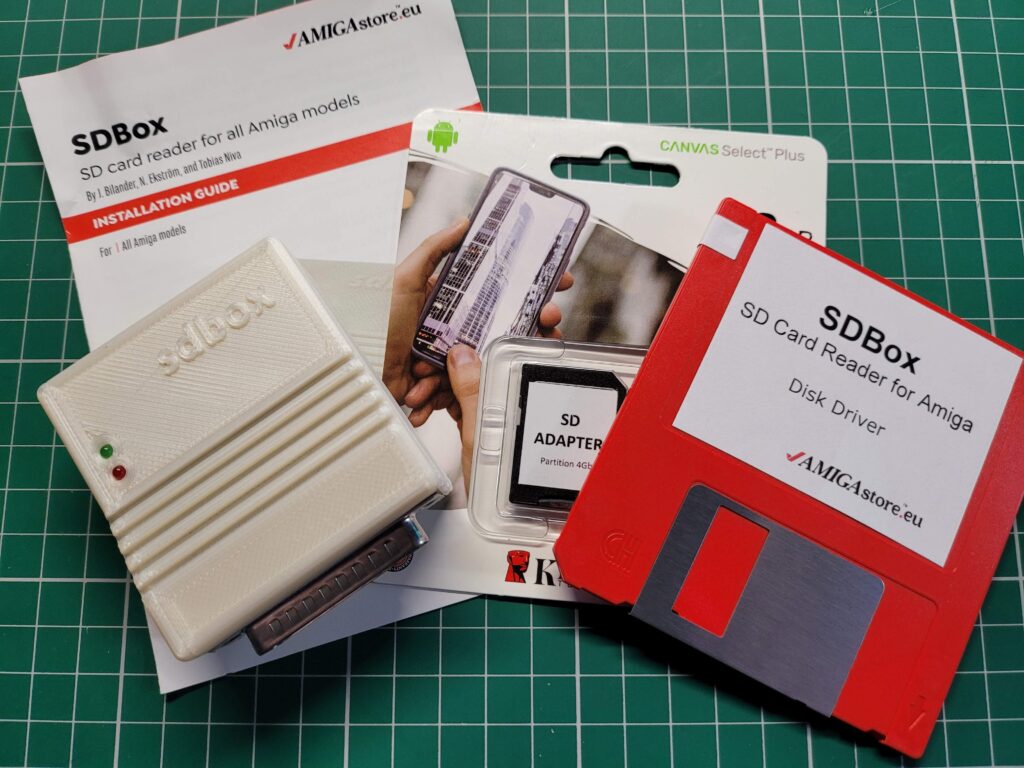
SDBox – package contents.


Included in the package was the SDBox device in a nice 3D Printed case, a 4GB MicroSD Card with adapter*, instruction booklet and a 3.5″ floppy containing the software to make it all work. A mini USB cable was an option too but I’ve accumulated dozens of them over the years so didn’t see the point in getting another one.


Connecting the SDBox

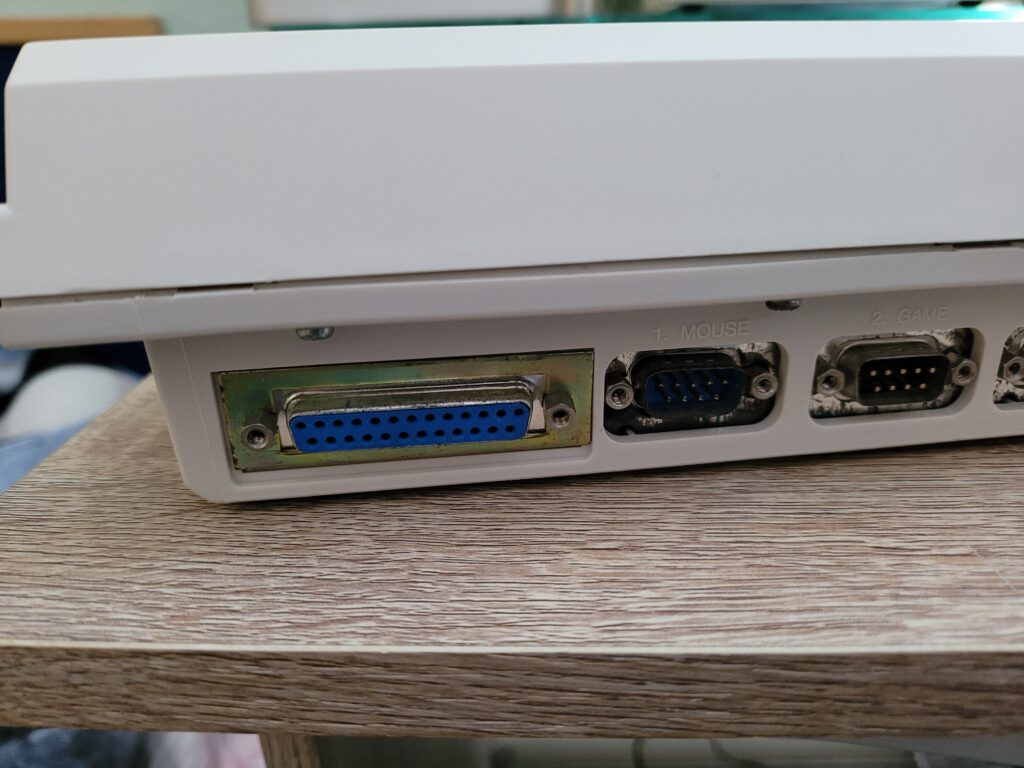
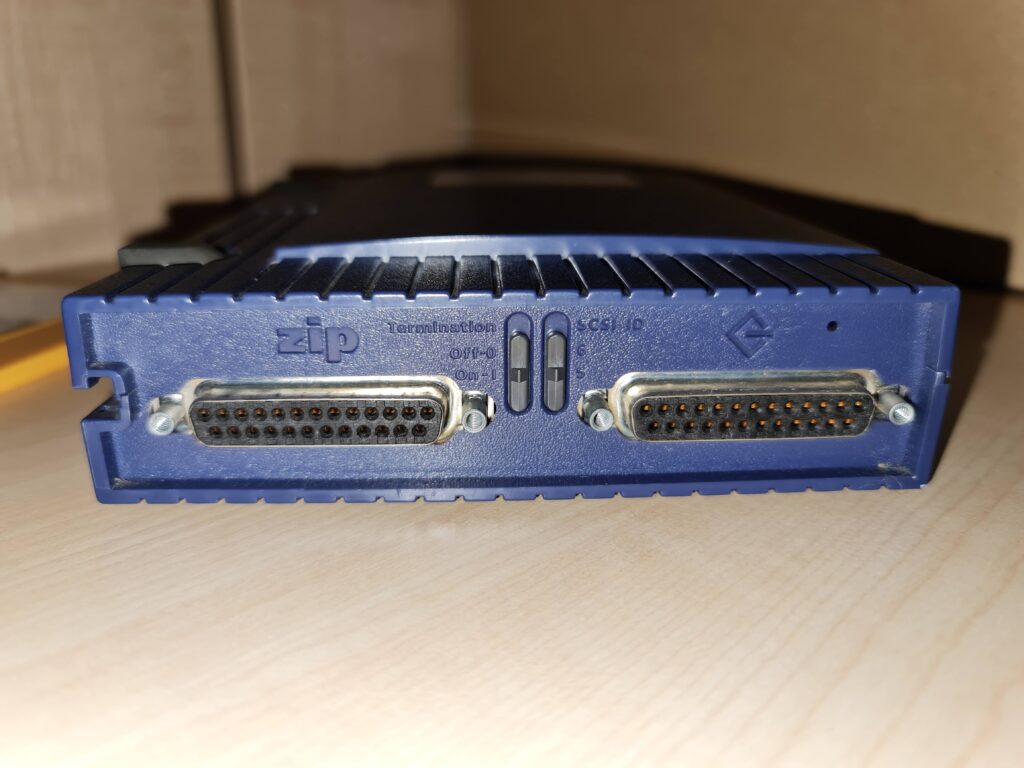
With the Amiga turned off the SDBox simply plugs into the parallel port socket round the back. It also requires 5V of power to function which can be provided via a mini USB cable.


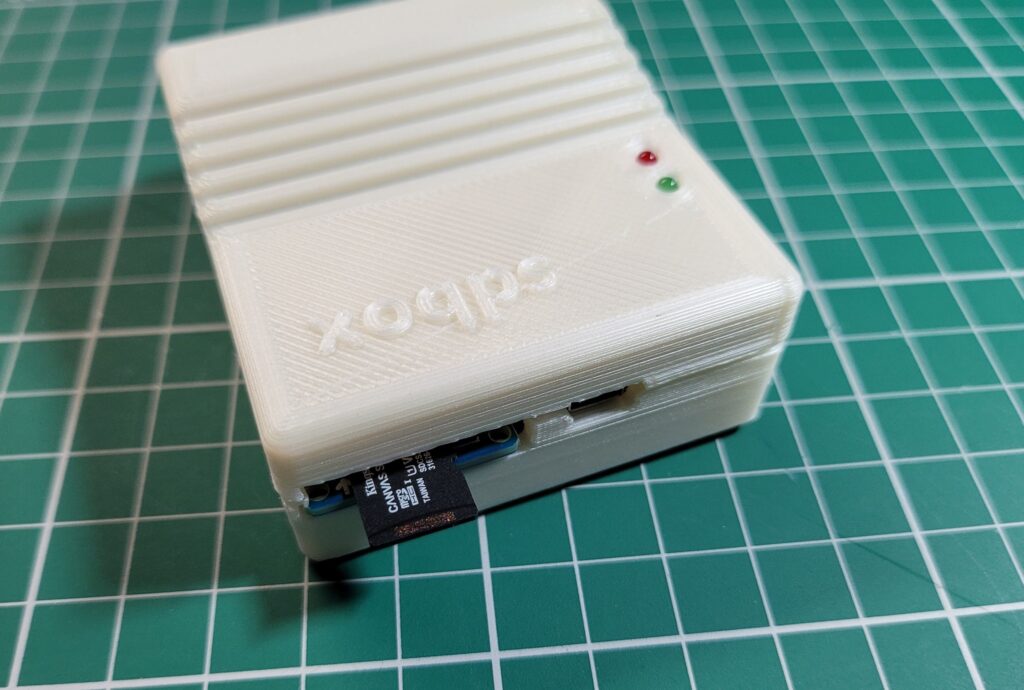
SDBox

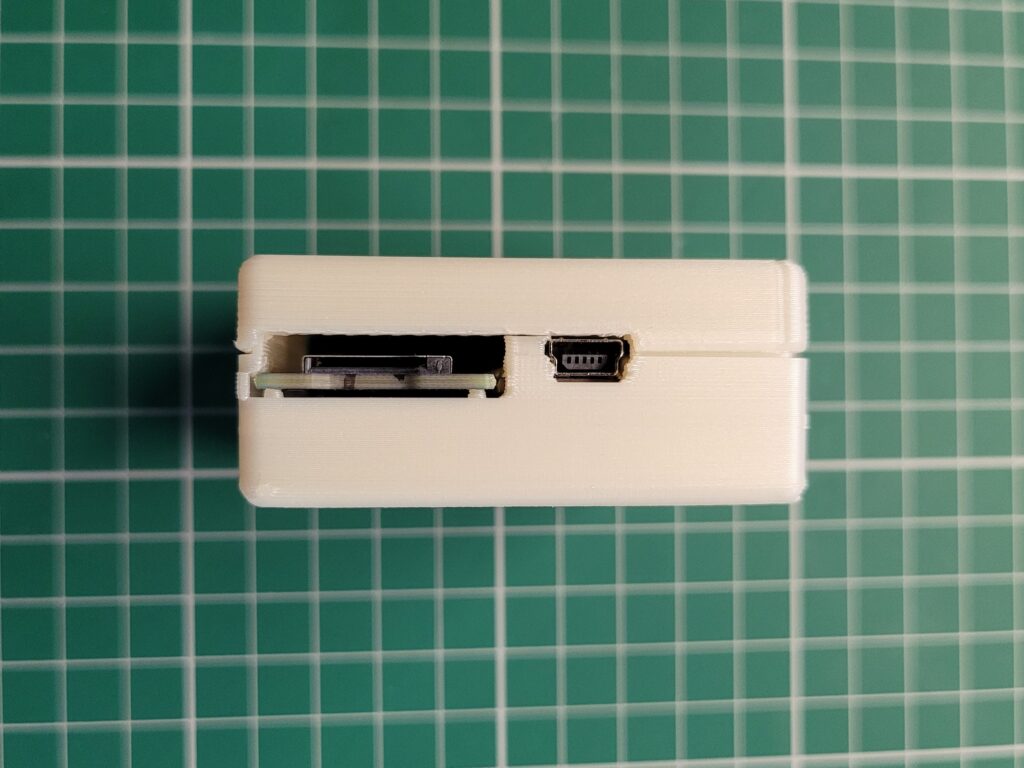
The Micro SD card slot and Mini USB power socket on the back of the SDBox.


I found there was just enough clearance at the side for it to not interfere with my RCA audio plugs but this might not be the case if you have thicker plugs.


SDBox

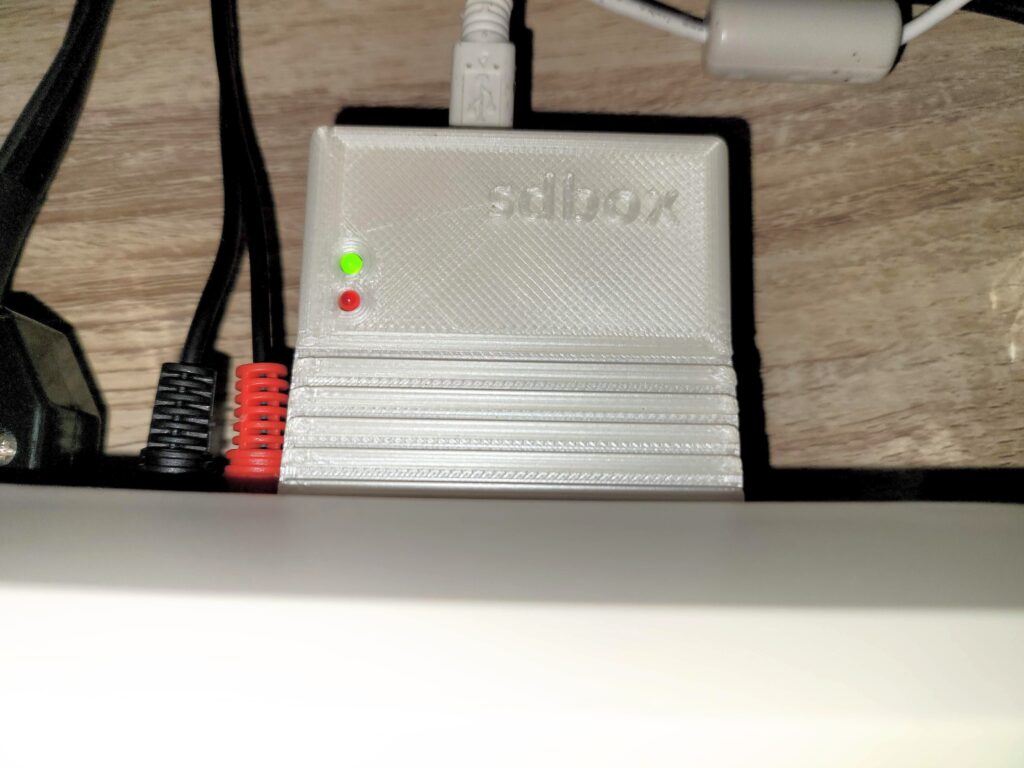
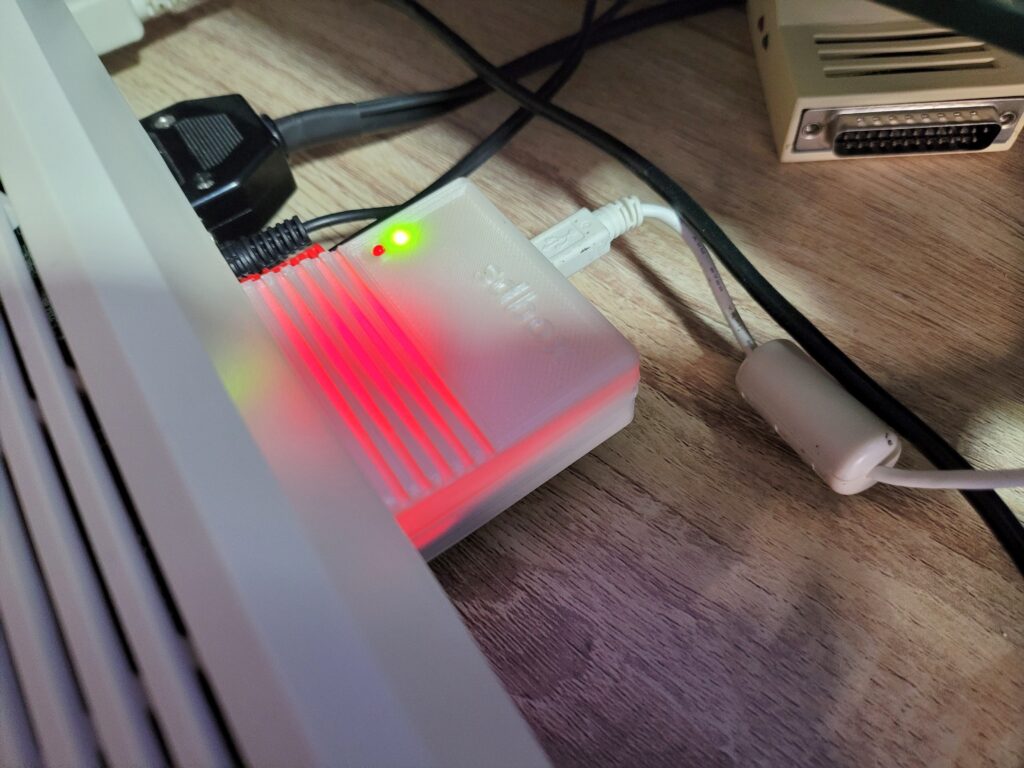
The SDBox plugged into the parallel port.


When powered on the box glows red from inside – presumably this illumination comes from an LED on the Arduino Nano. It’s not quite as noticeable as the photo below would have you believe and it’s not a big deal.


SDBox

Red glow from the Arduino Nano inside.


Installing the Drivers

With the hardware powered on and connected the next task is to pop in the floppy and run the installer to install the driver software.


SDBox

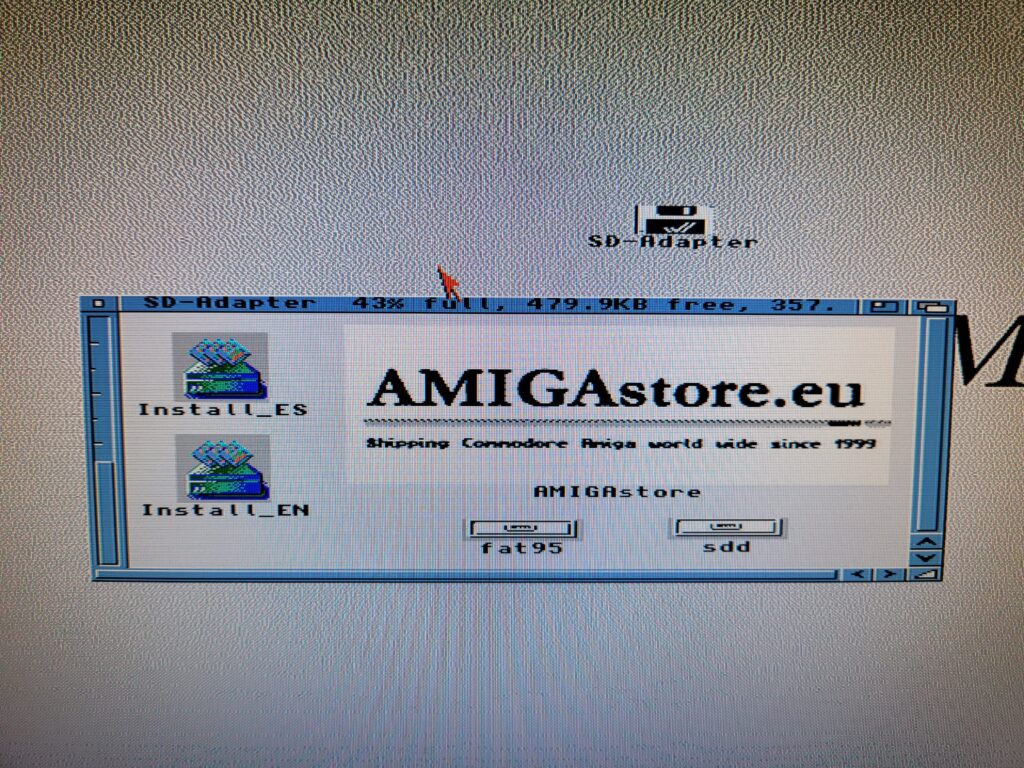
Contents of the floppy disk.


The floppy comes with a handy installer (in both English and Spanish) to copy over and configure everything necessary to use the SDBox.


SDBox

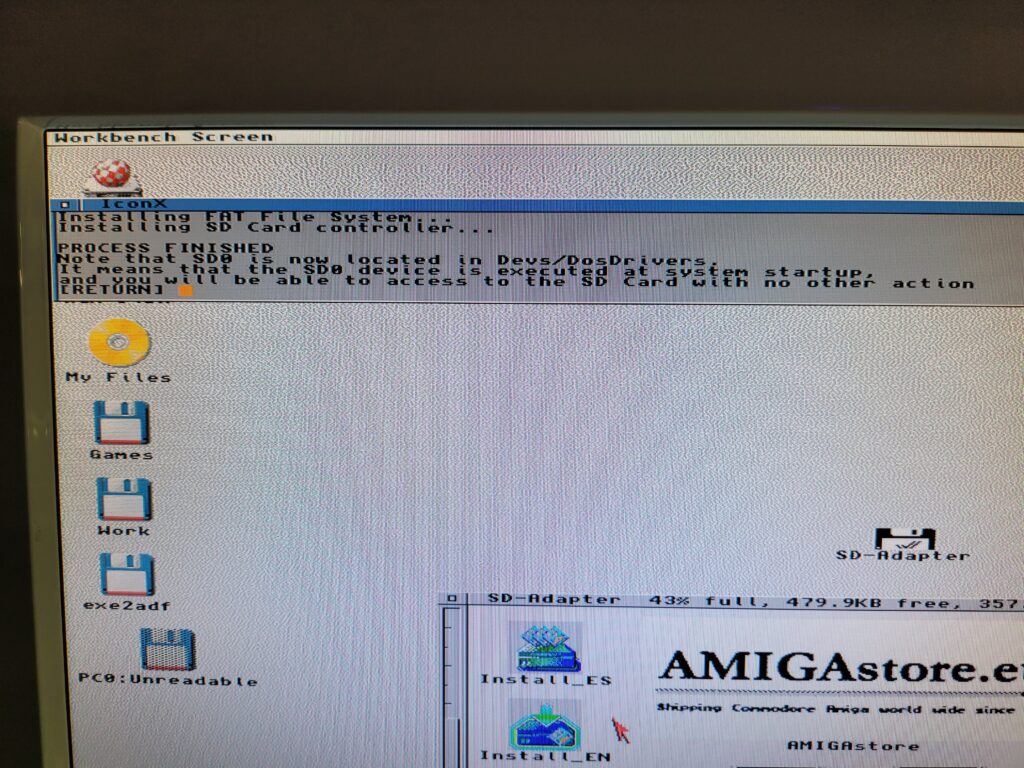
SDBox Installer now finished.


A few moments later a message appears on the screen to inform you that the install is complete and where it has put the SD0 device.


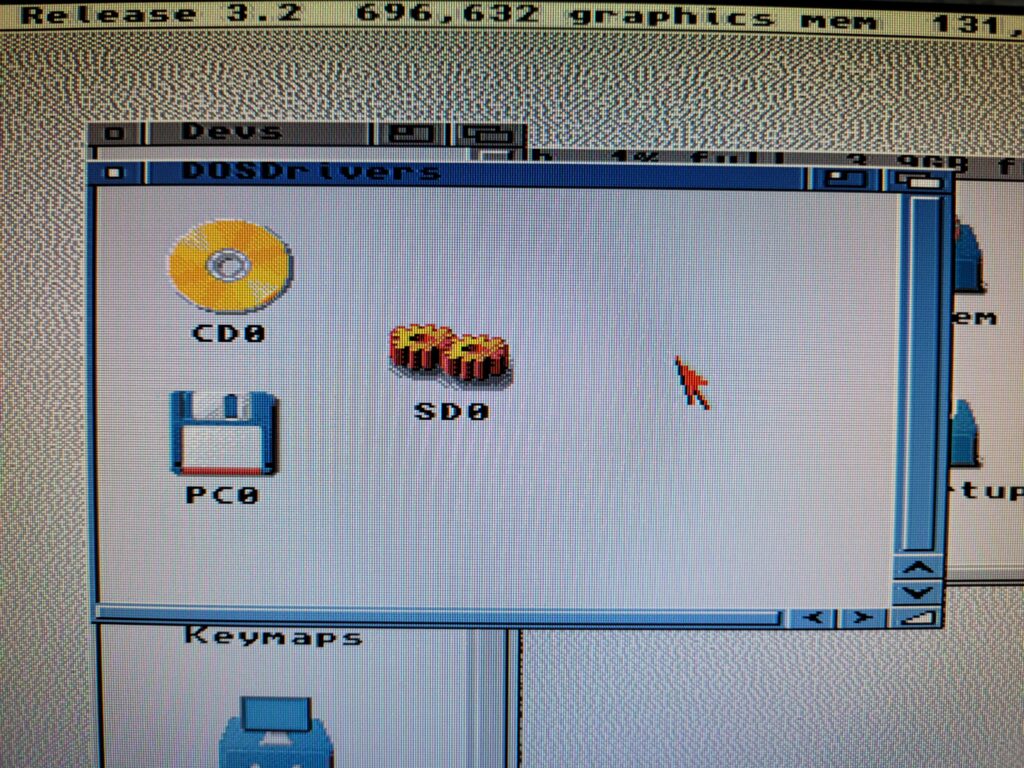
SD0 DOSDriver

This is the SD Device it installs in DEVS/DOSDrivers.


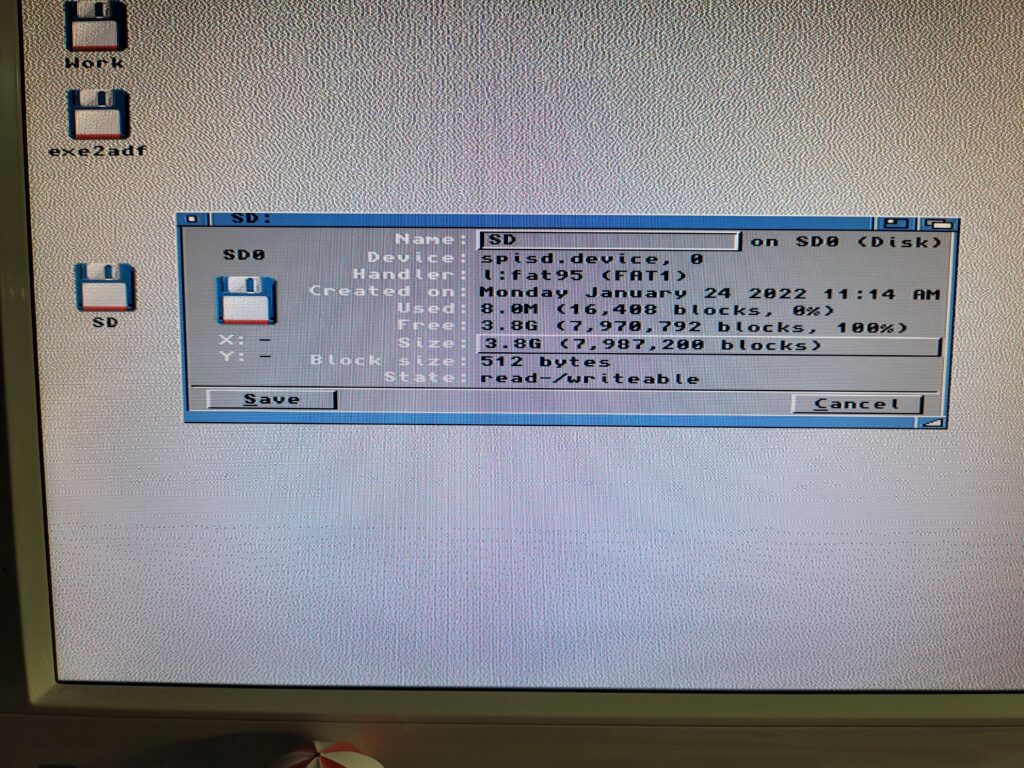
A quick reboot and my SD card was showing up on my Workbench screen, just like any other drive would. I brought up the drive info window for SD0 to confirm it was reading the card properly.


SD0 Information

Icon Information for the SD card.


SD Cards

I chose to get an SD Card with my SDBox but you can use any MicroSD card you may have lying around. The one caveat is the device is only capable of accessing 4GB partitions so if you have a bigger card you must create a 4GB (or smaller)  partition on it for it to work. There’s some info at the end of this post describing how to partition a MicroSD card in Windows if you need it.


SDBox

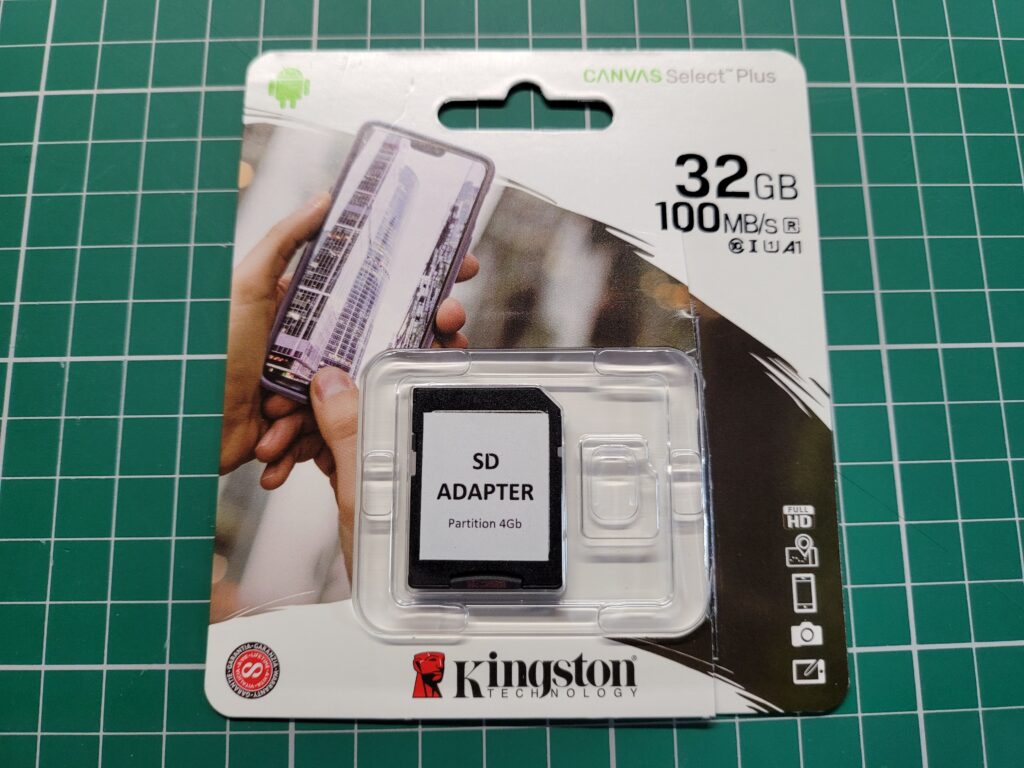
If you look carefully you can see the packaging has been opened already…


*Clearly AmigaStore.eu were unable to source a 4GB card for me as they actually sent me a 32GB MicroSD card that had been manually partitioned to 4GB.


Using the SDBox

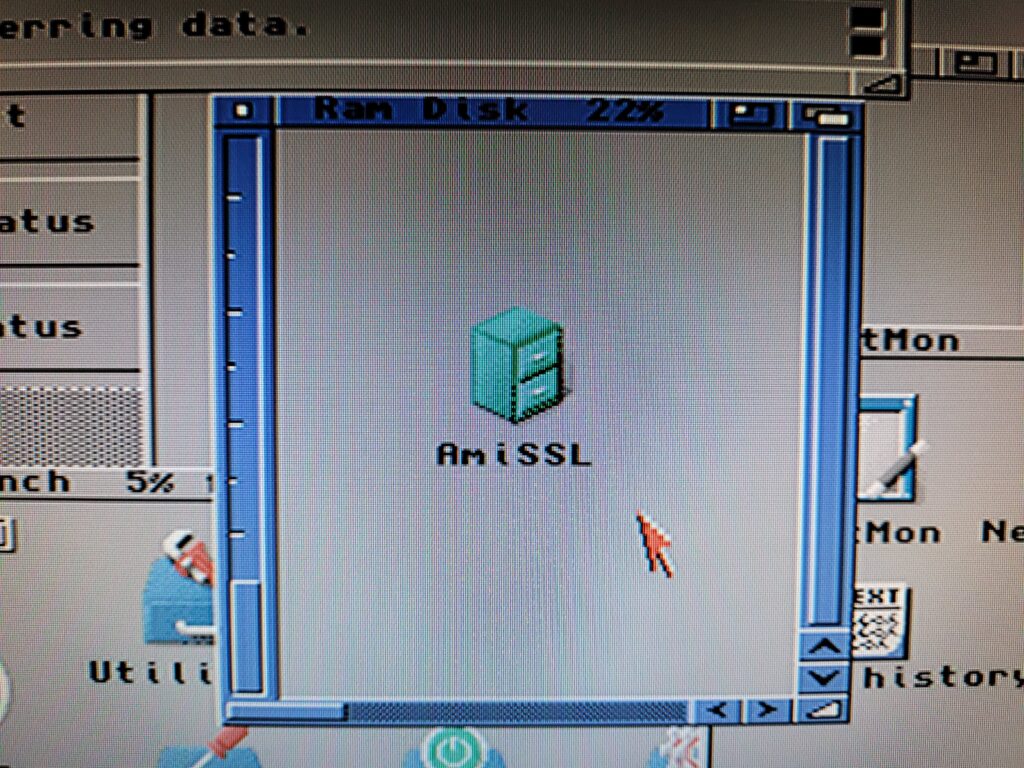
In use the SDBox performed well and exactly as described. It’s not going to set any speed records but given it’s hooked up to a parallel port that’s to be expected. To give an idea of transfer times I copied an 880K ADF file from my RAM Disk to both my internal CompactFlash card and the SDBox. It took about 1 second to transfer to the CF card and 6 seconds to the SDBox. Next I tried a bigger file;  AmiSSL 4.12 which was 5.7MB. It took 6.5 seconds to transfer to my CF card and 39 seconds to complete the transfer via the SDBox. Approximately six times slower but still perfectly acceptable.


SDBox

MicroSD card being inserted in the card slot.


The SDbox doesn’t support swapping thecard whilst the Amiga is running so don’t expect it to update the contents if you do – it’ll just result in an error. It requires a full reboot to refresh the contents of the card but again this is not a great inconvenience.


Fly in the Ointment – Conflict with Indivision AGA Mk3 Flicker Fixer

On a slightly more sour note I did encounter one issue with my unit. Whenever the SDBox was accessed, whether that be reading or writing data, my screen flickered/wobbled around. You can see exactly what I’m on about in the little video clip I recorded below. After testing all sorts of things I narrowed it down to an issue with using interlaced HIGHGFX screenmodes on my Indivision AGA Mk3 flicker-fixer. Normal Amiga screenmodes, including interlaced ones, worked just fine as did non-interlaced HIGHGFX modes (all of these still going through my flicker-fixer).

Naturally Sod’s law meant that my screen was utilising ‘HIGHGFX Super-High Res Laced’ which is why I witnessed the issue from the start. It’s certainly not a deal-breaker – it’s more of an irritation than anything else (especially if you are a bit of a perfectionist). It doesn’t affect the operation of the SDBox and I can certainly live with it – just something to bear in mind for anyone with a similar setup.


I tried many things to get rid of the issue and also contacted the manufacturer of the Indivision card but so far I do not have a solution. If I ever get to the bottom of the issue I’ll update this post.


How to make a 4Gb partition on a larger SD Card.

This is a pretty straightforward task to accomplish in Windows. I used a nice bit of free software called ‘MiniTool Partition Wizard‘ to do the job along with a spare 16GB MicroSD card that I had lying around.


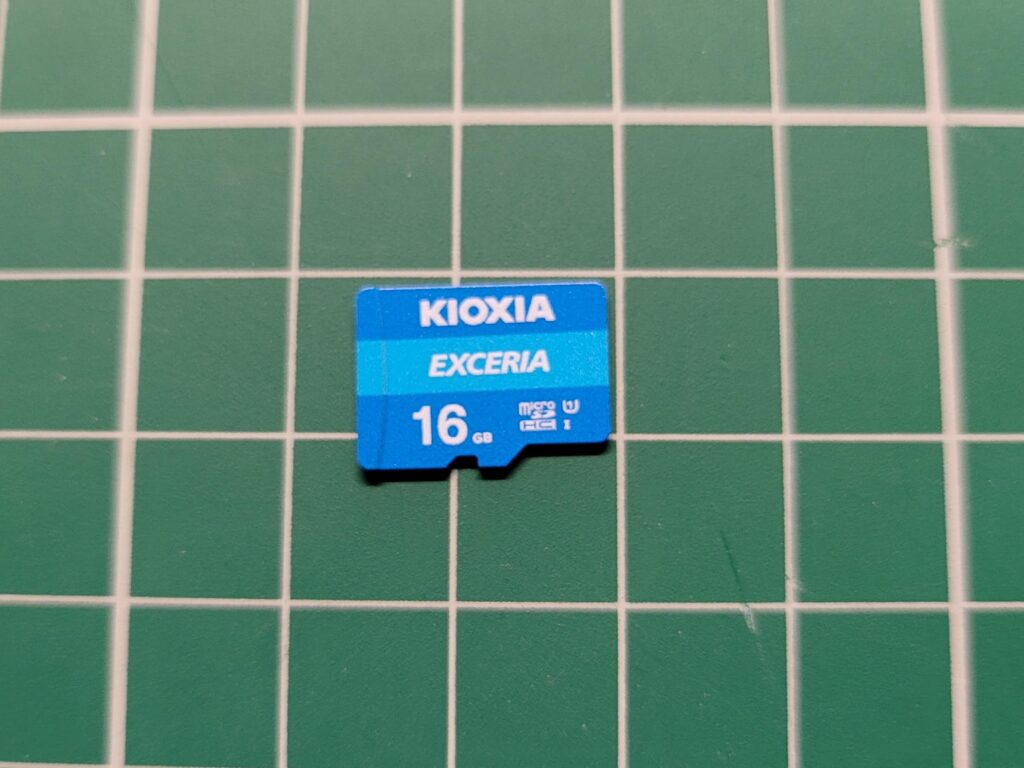
MicroSD Card

A generic 16GB MicroSD card I used for testing.


Basically what you need to do is load up the software and then find your card in the list of drives. They normally show up slightly smaller than the stated capacity. For instance I popped in a 16GB card and it showed as 14.43GB under the list of available drives.

Once you’ve located it simply right-click it and select ‘Delete Volume’ then do the same again but select ‘Create’ to make a new, smaller partition. On the ‘Create New Partition’ screen select ‘FAT’ as the file system (see screenshot below) and it will shrink the size of the partition down to 4GB automatically. Give it a name (this will appear on your Amiga workbench) and then click ‘OK’ and then ‘Apply’ to make all these changes happen.


Partition Wizard

Partition Wizard – New Partition Settings


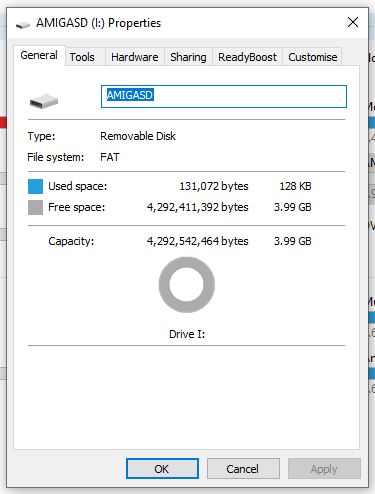
Now if you right-click the SD card and select ‘Properties’ in Windows you should get the screen below showing that the card is now recognised as being 4GB and formatted with the FAT file system.


Windows 10 Drive properties

Checking the size/format of the card in Windows.


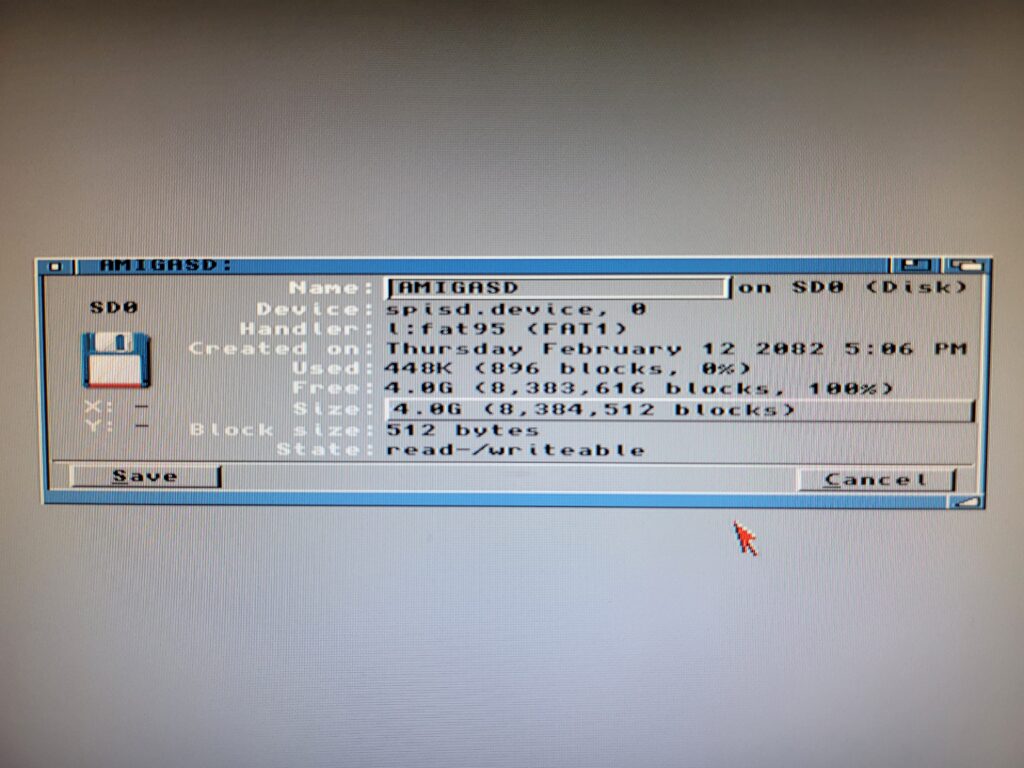
Back over to the Amiga – pop the card into the SDBox and boot up your Amiga. You should now see the card appear on Workbench with the name you gave it in Windows. You can go to ‘Icon’ > ‘Information’ to bring up a similar properties screen to check it’s all setup correctly.


SDBox

SD Card properties displayed on Workbench


And that’s all there is to re-partitioning an SD card to work with the SDBox. Enjoy!


Installing AmigaOS3.2

Seems like it was only yesterday that AmigaOS3.1.4 was released and yet here I am with AmigaOS3.2! I actually bought this in June last year but I’ve only just got around to having a play around with it. For the time being this release is only available physically on CD which is fine by me. Hyperion say there will be a digital download version of it at some point in the future.

I will preface this post by saying that things didn’t go smoothly during my first install attempt. Hopefully someone can benefit from the issues I experienced and how I overcame them.


A closer look at the what you get…

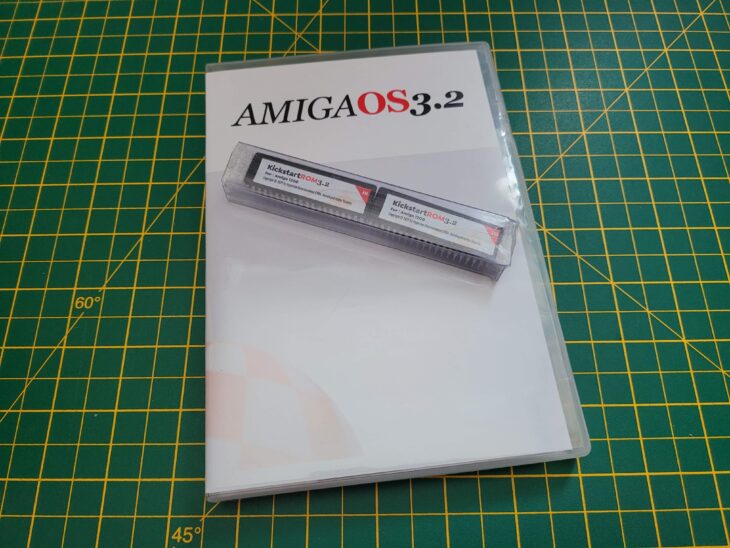
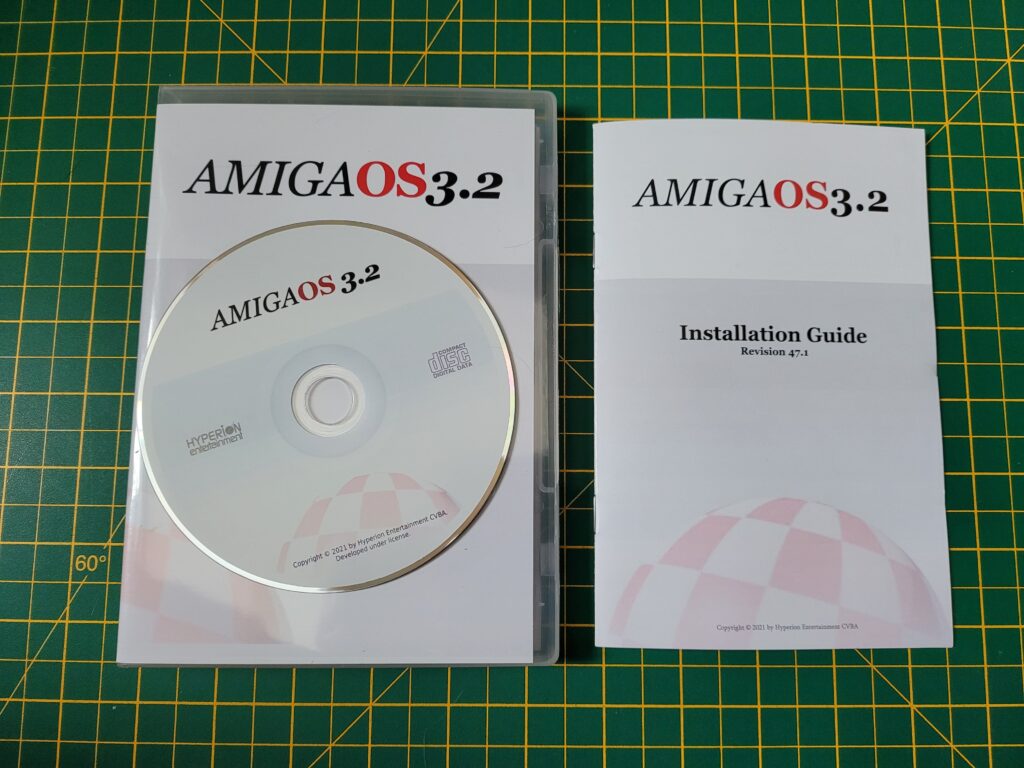
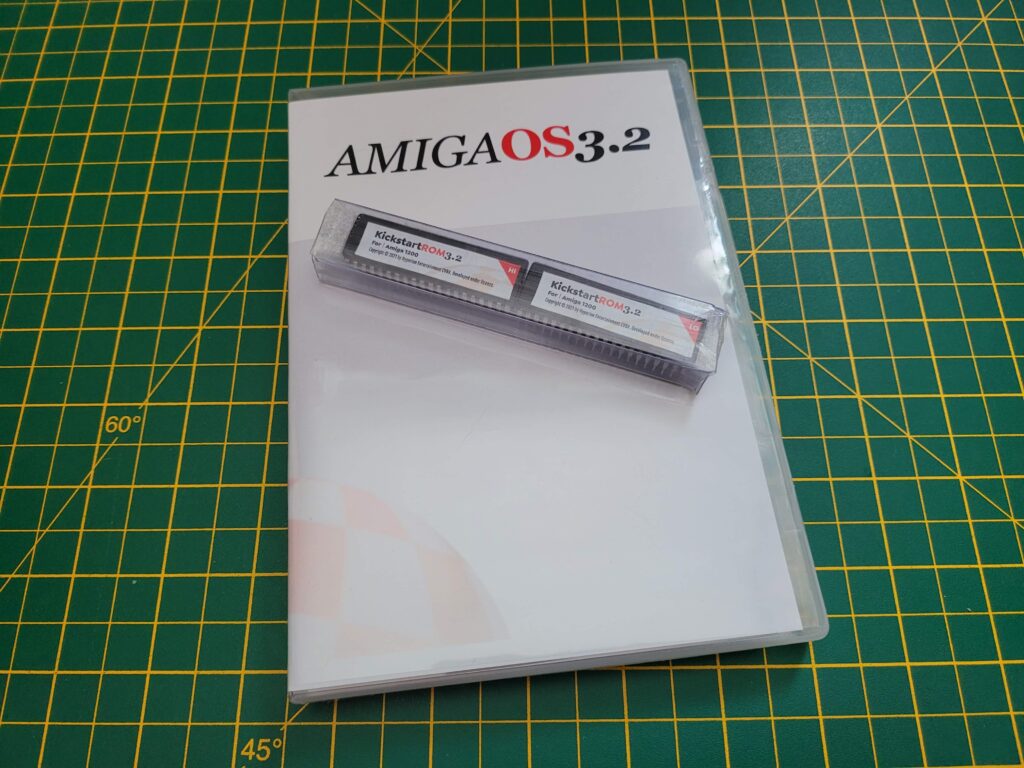
Anyway I ordered the CD along with the Kickstart ROMs for my A1200 from Amigastore.eu. I have to award top marks for presentation as the CD came in a very attractive DVD style case along with professionally printed jacket. Inside there is a 14 page manual and the silk-screen printed CD itself. Finally but by no means least there were 2 new Kickstart ROMs to replace the existing chips.


AmigaOS3.2

The AmigaOS3.2 case, CD and manual.


The serial number is on a little sticker affixed to the cellophane wrapping on the outside of the box – don’t make the mistake I did of throwing it in the bin. Luckily I realised before the bin was emptied! The code is needed to register your purchase on the Hyperion site in order to be eligible for future updates.


AmigaOS3.2

AmigaOS3.2 ROMS.


Workbench 3.2 actually spans a grand total of 35 floppy disks now which is why the decision was made to supply it on CD. Although half of those disks are either country or machine specific but it’s still a lot. The CD contains ADF images of all the discs should you wish to create your own physical versions. Likewise it contains the new ROM images so you can use them with a Vampire, map the ROMs to RAM or just use them with an emulator.


Fitting the 3.2 Kickstart ROMS


AmigaOS3.2 ROMS

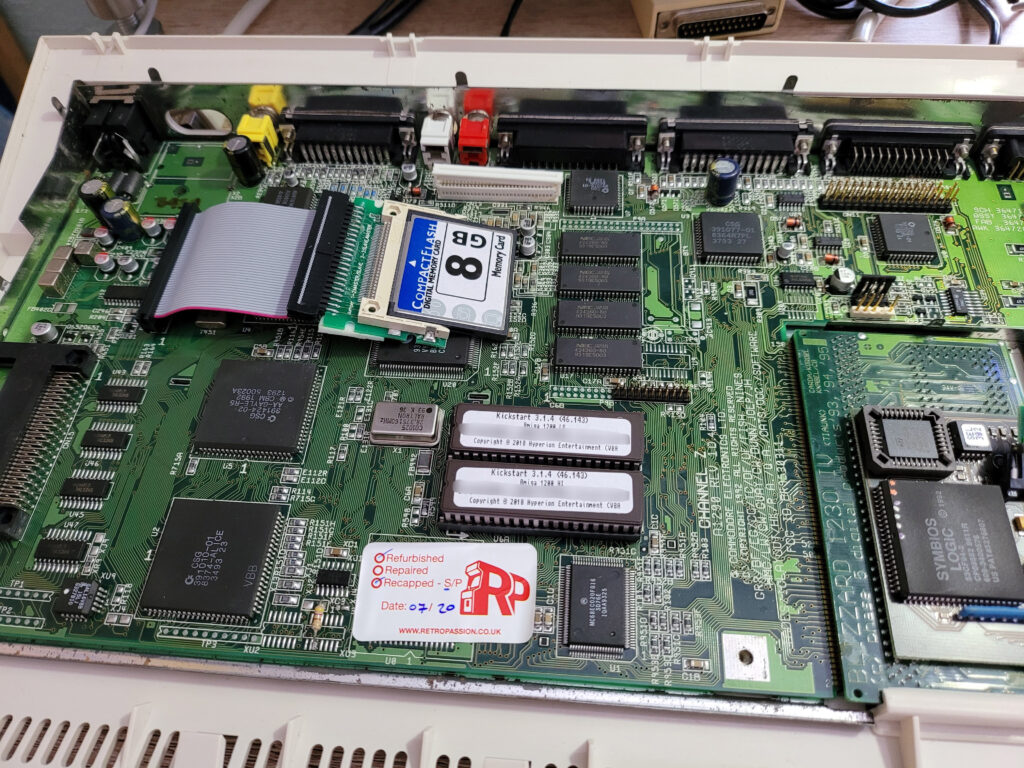
Kickstart 3.2 ROMS Installed.


Naturally the first thing I did was to open up my A1200 and fit the two new ROM chips. If you are looking for detailed instructions on how to do this you can follow my detailed guide here. The important things are to get the ‘HI’ and ‘LO’ chips in the correct sockets (see photo above), that you orient them correctly (notched end of chip goes next to notched socket) and finally that you leave the last pair of pins in each socket empty as the sockets have 42 pins whereas the ROMS only have 40!


Compact Flash Card

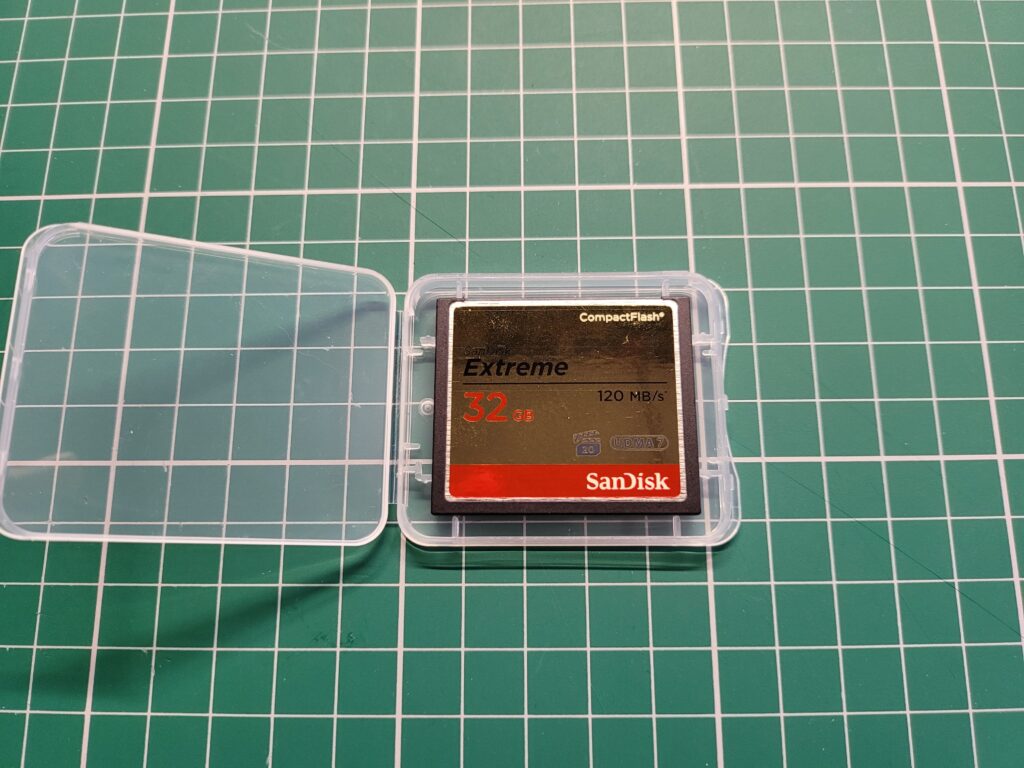
My new A1200 hard drive – a 32GB SanDisk Extreme Compact Flash card.


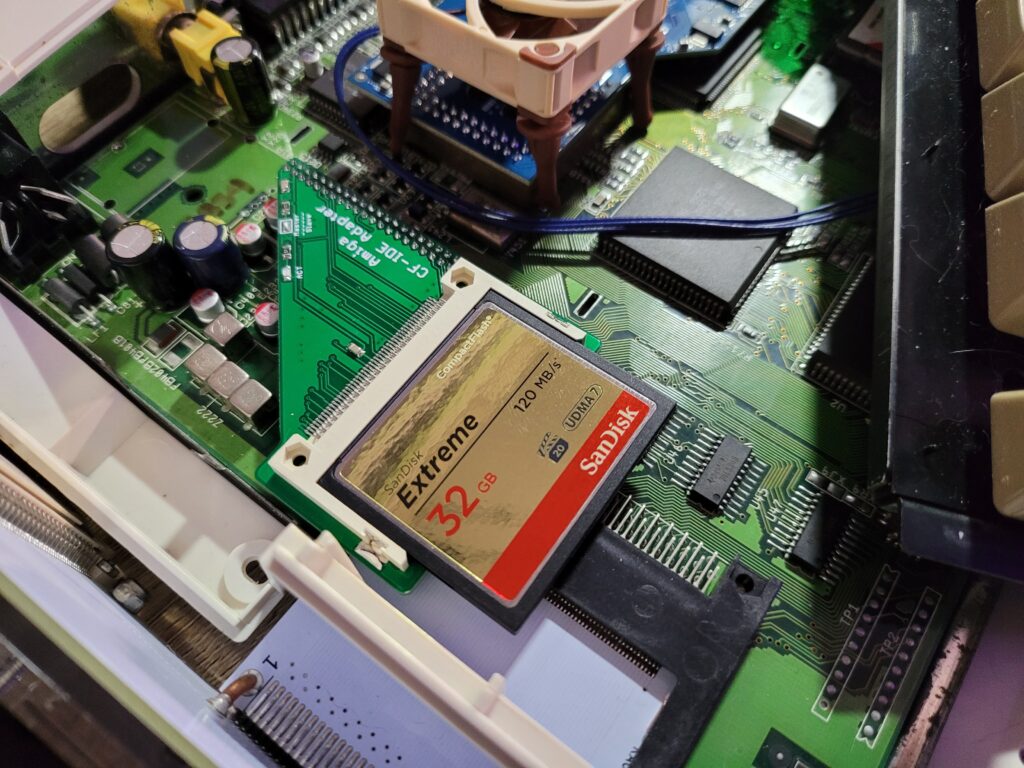
Whilst I had the case open I thought it would be a good time to install the new Compact Flash card I’d bought for the occasion. I opted to go with a nice big 32GB card this time around as it’s surprising how quickly you fill these things up without even trying. The card I bought was a SanDisk Extreme 32GB Compact Flash. I wanted something that would prove reliable and SanDisk is a brand I trust.


Compact Flash Card

32GB Card installed.


With the ROMS and new Compact Flash card installed it was time to power up my A1200 and make sure everything was working.


AmigaOS3.2

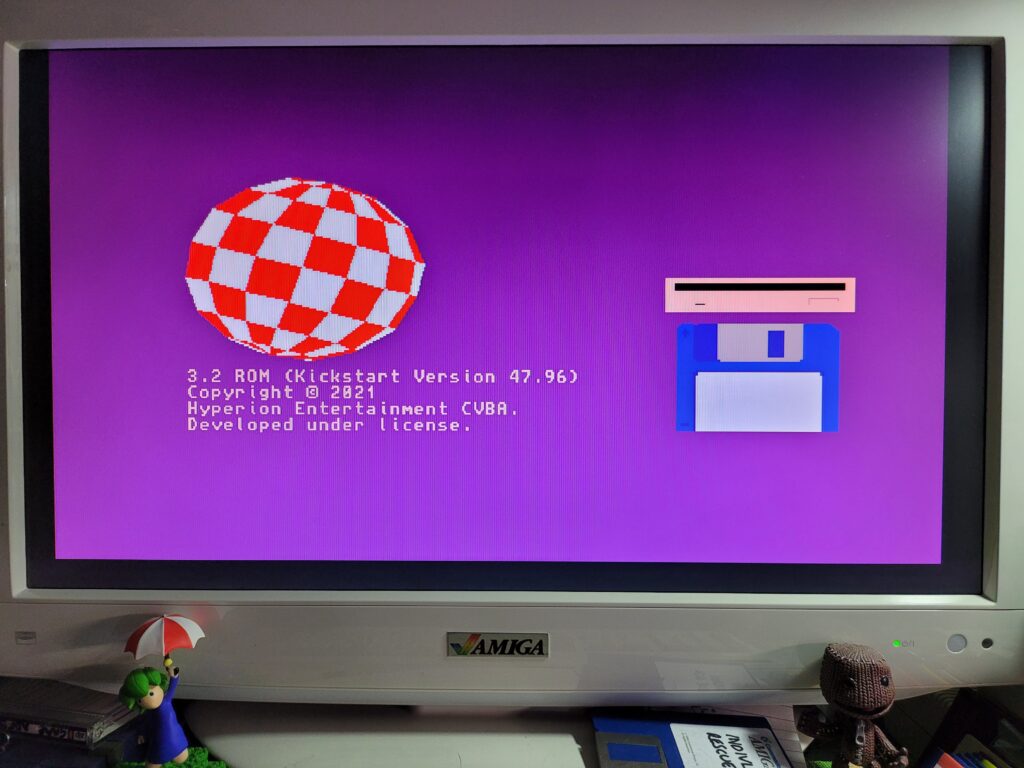
The new 3.2 ROM boot screen.


Just a few moments after turning the power back on I was greeted with a brand new boot screen. Gone was the multi-colour tick that has been there for the last thirty years – replaced by the Amiga ‘boing’ ball. Commodore’s name has also been removed and replaced with Hyperion’s. Anyway, mixed feelings aside, so far so good! Now it was time to get cracking with the Workbench install.


Prepping the disks

(The Discovery of problem no. 1)

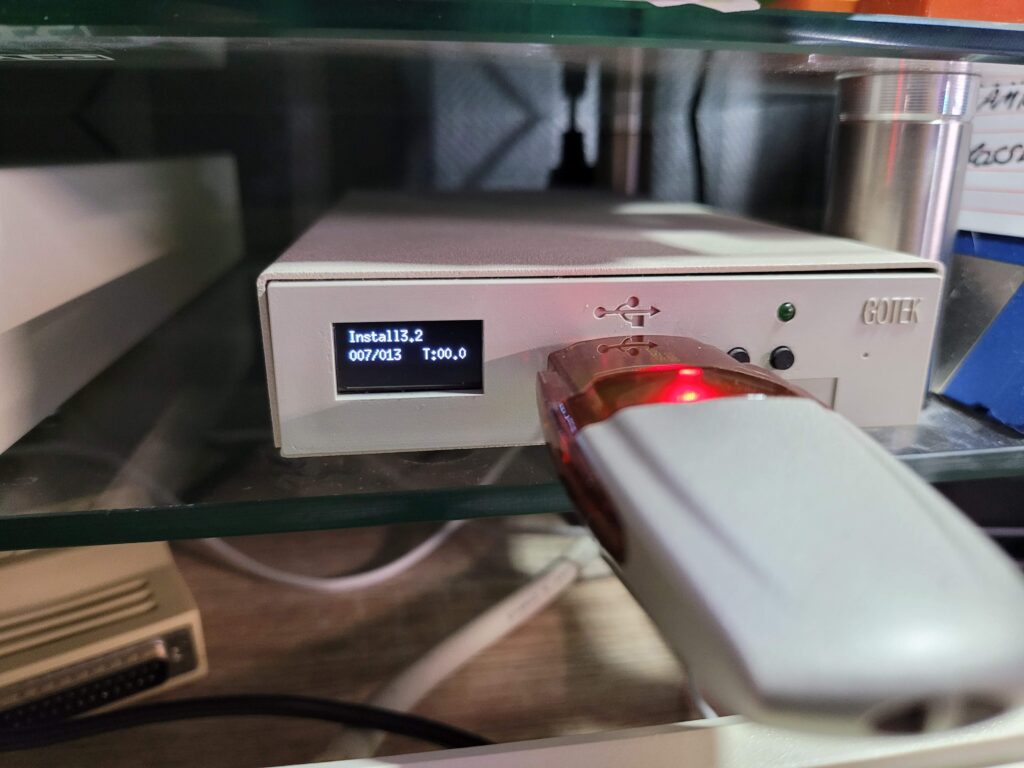
As I mentioned previously there are a whopping 35 disks in total for this install. Even after I weeded out all the language specific variations it still left 11 disks to install. Thankfully the CD contains all the disks as ADF images and if you have a Gotek drive available it’s a simple matter of copying them across to a USB flash drive and using that. This time around there are no snazzy pre-printed disk labels included either so that was another reason not to bother making physical copies of the ADF images. There are a bunch of PNG images included on the CD for you to print your own labels should you wish to though.


External Gotek Drive

The Install3.2 ADF selected ready to boot on my Gotek drive.


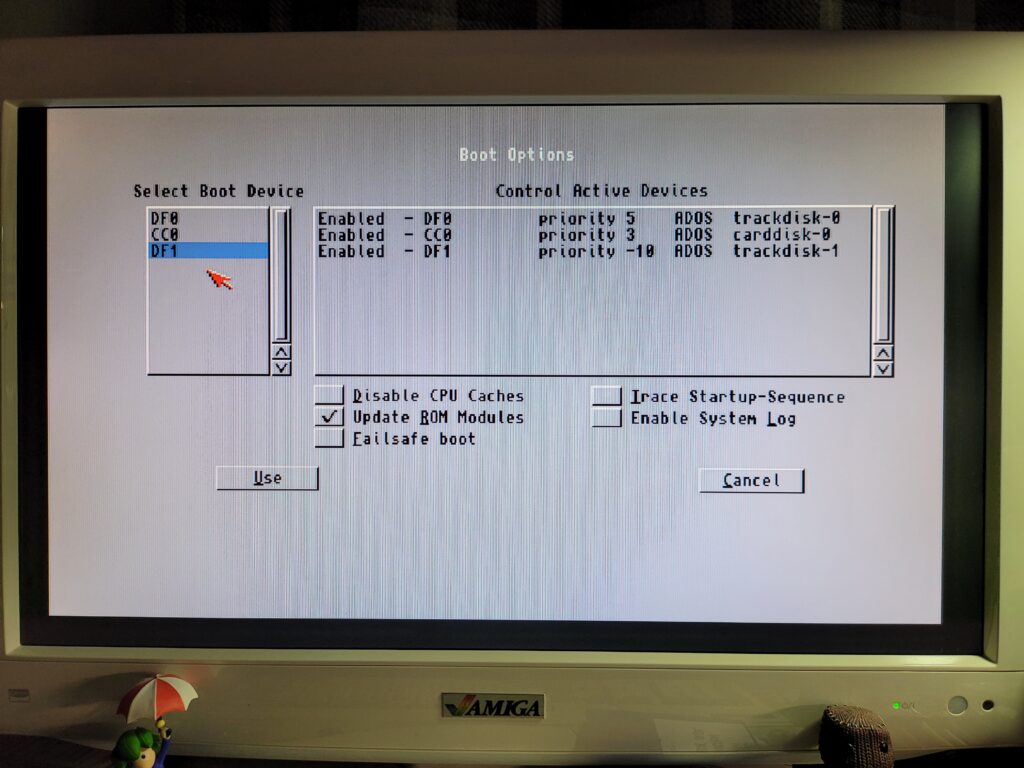
The journey starts with the ‘Install3.2’ disk so I selected that on my external Gotek and then selected DF1 as the boot device from the A1200’s Boot options screen. (Accessible by holding down both mouse buttons on bootup until the power LED flashes). If you have a Gotek configured as DF0 then you won’t need to do this.


Amiga 1200 Boot Options Screen

Amiga 1200 Boot Options Screen


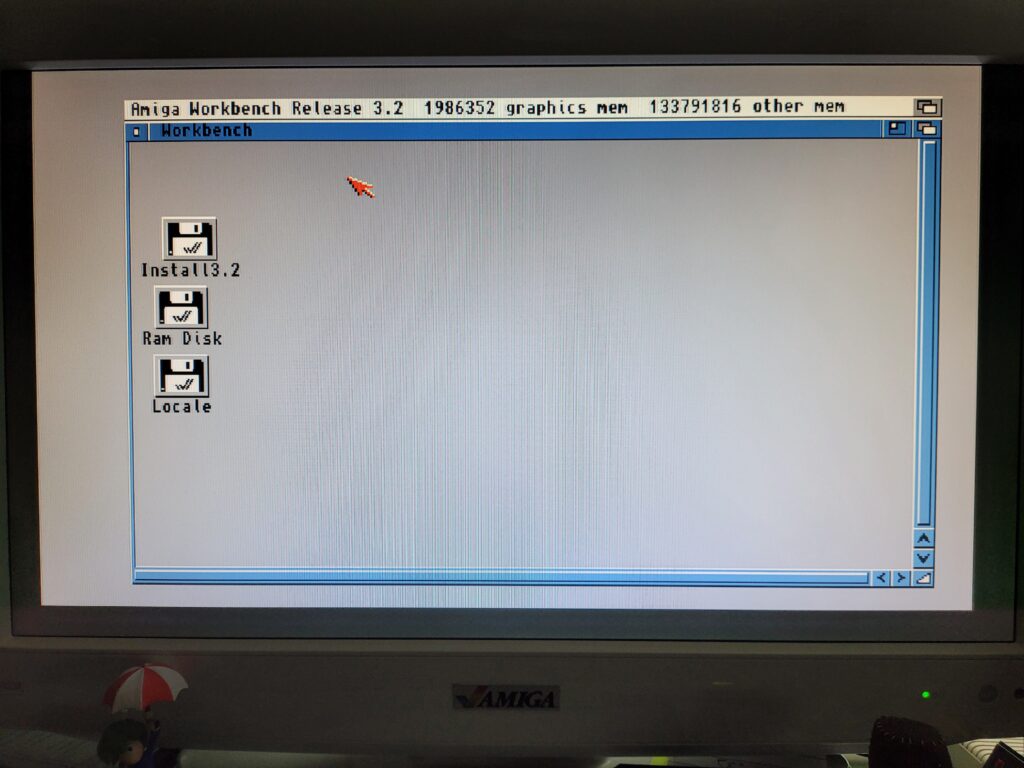
A short while later I was greeted with a basic Workbench screen and I thought I was on my way. Well you know what thought did… Everything looked OK but the mouse pointer was completely frozen – likewise the keyboard wouldn’t respond either. I tried to boot a few more times with no success. I unplugged all my peripherals, PCMICA card, audio cables, SCSI devices until all that was left was power, video and my external Gotek. Still it wouldn’t work. Maybe it didn’t like my Gotek, or the fact it was hooked up as DF1? So I created a physical Install3.2 floppy disk, disconnected my external Gotek and tried again with a real floppy in DF0. Another fail. So it wasn’t that either.


AmigaOS3.2

AmigaOS3.2 Workbench Screen (with frozen mouse).


I tried all sorts of things like re-formatting my USB flash drive and copying across the ADF’s again. I even tried a different flash drive and removing my Indivision Mk3 flicker fixer, all to no avail.

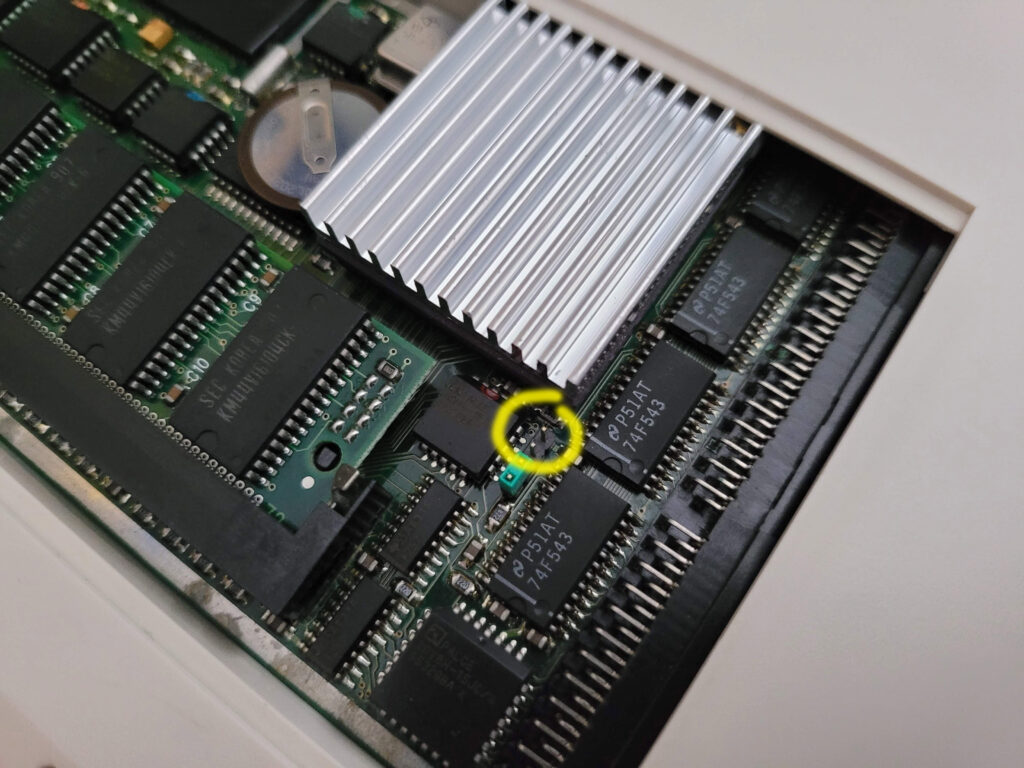
Eventually I was left with one thing I hadn’t tried – removing my Blizzard 1230 MkIV card. Luckily I remembered that the card could be disabled by holding down the ‘2’ key on boot so I gave it a try. Just like magic after doing this Workbench loaded fine and I could use my mouse and keyboard without any issues. Clearly something was up with my accelerator card.


Blizzard 1230 MKIV

Blizzard 1230 MkIV – MAPROM feature disabled with jumper removed.


More head scratching and investigations ensued until I finally discovered the source of the issue. I had the MAPROM feature enabled on my card which is supposed to speed the Amiga up by copying Kickstart into FASTRAM. However for whatever reason OS3.2 didn’t like that because from the moment I disabled it by removing the jumper (see photo above) the problem simply vanished. Happy days!


Prepping the Compact Flash Card

(The beginning of problem no. 2)


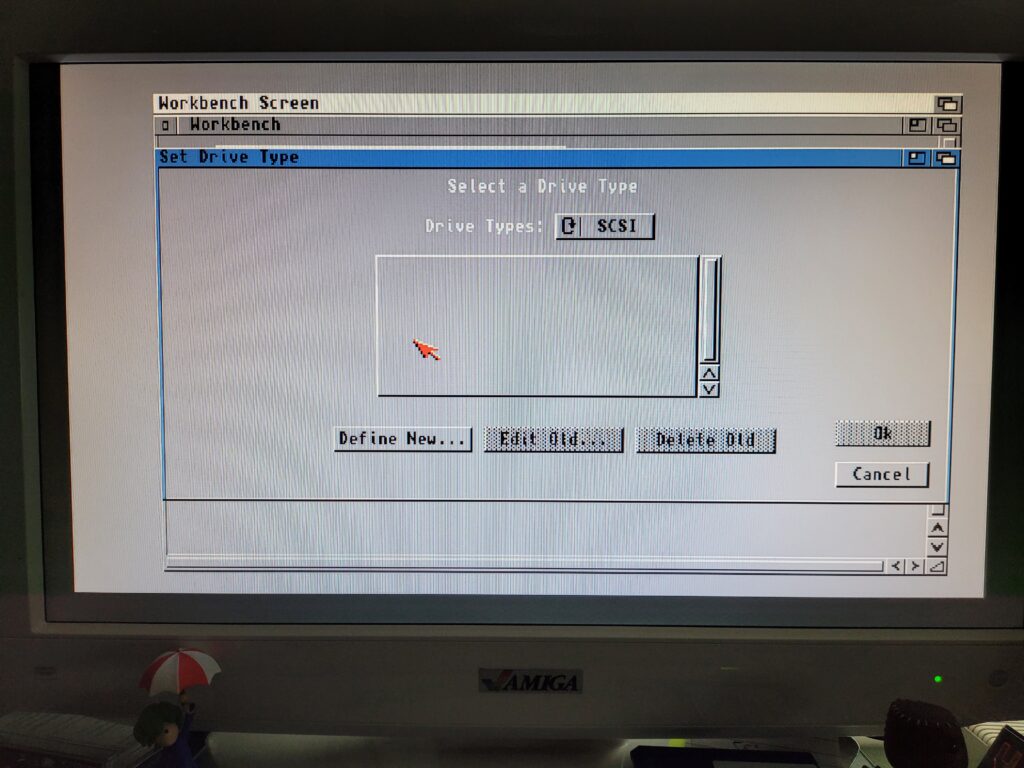
Now I had a working 3.2 Workbench it was time to Partition that nice shiny new Compact Flash card. I loaded up HDToolBox from the disk and clicked ‘Change Drive Type’.


Amiga HDToolBox

Amiga HDToolBox – Defining a New Drive


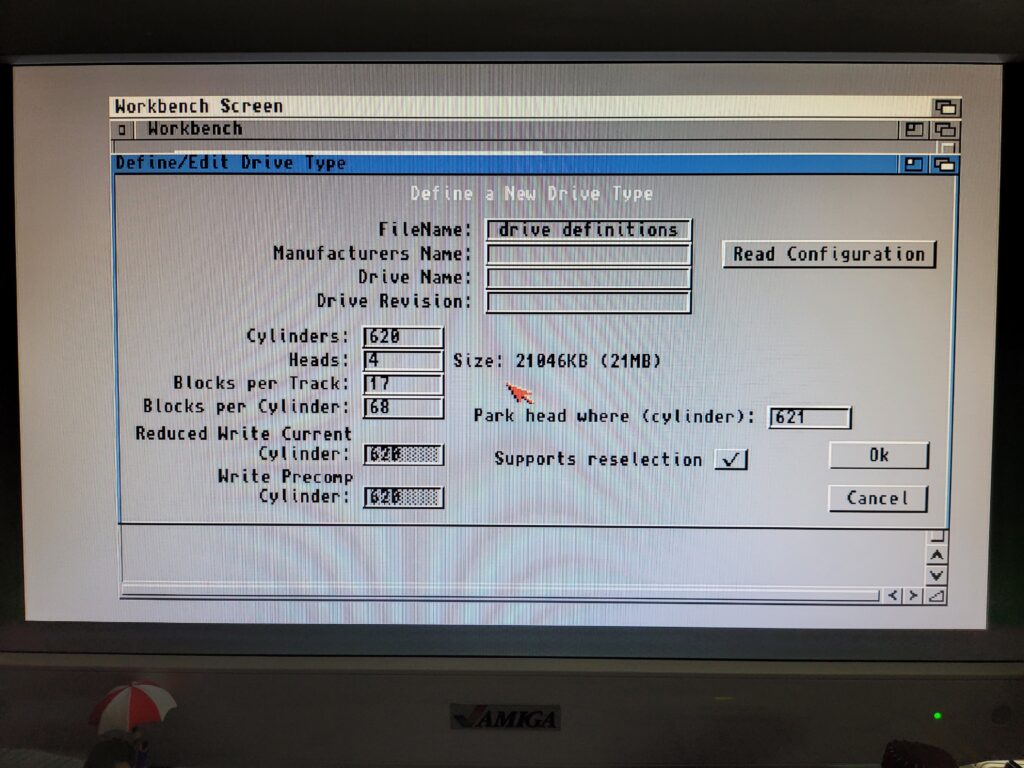
Next I clicked ‘Define New…’  which brought up the Define/Edit Drive Type window shown below.


Amiga HDToolBox

Drive parameters screen.


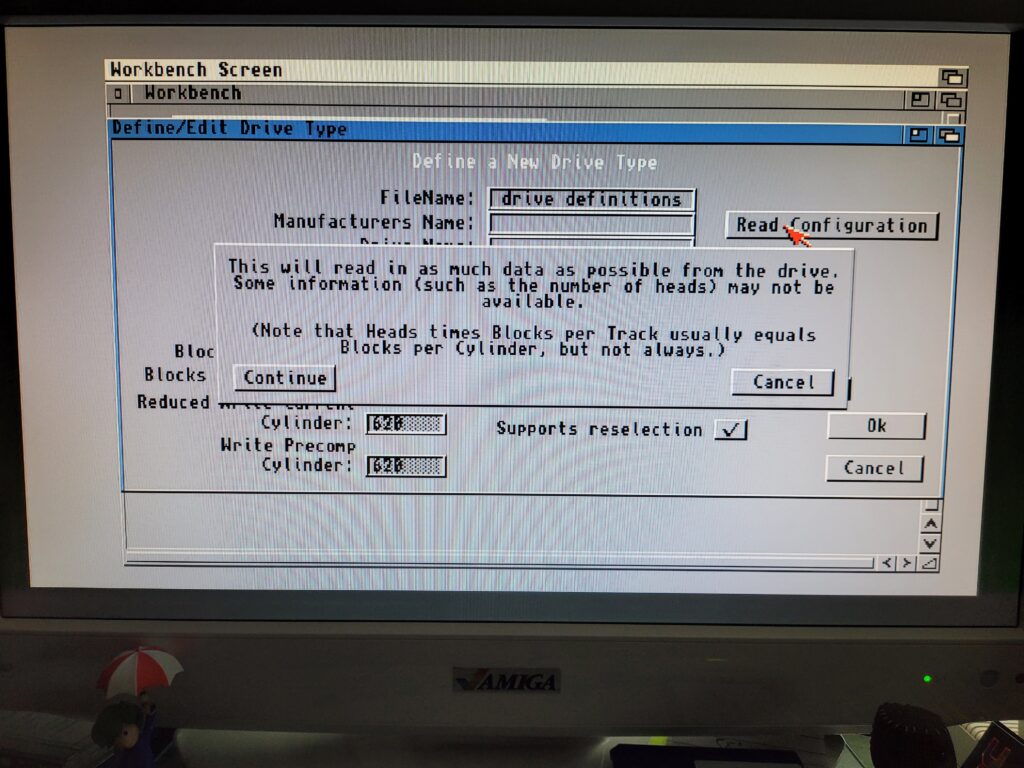
The Amiga is perfectly capable of doing all the heavy lifting here – I just needed to click on ‘Read Configuration’ to get it to extract all the necessary parameters from the card. A little info window popped up and I clicked ‘Continue’.


Amiga HDToolBox

Info Message


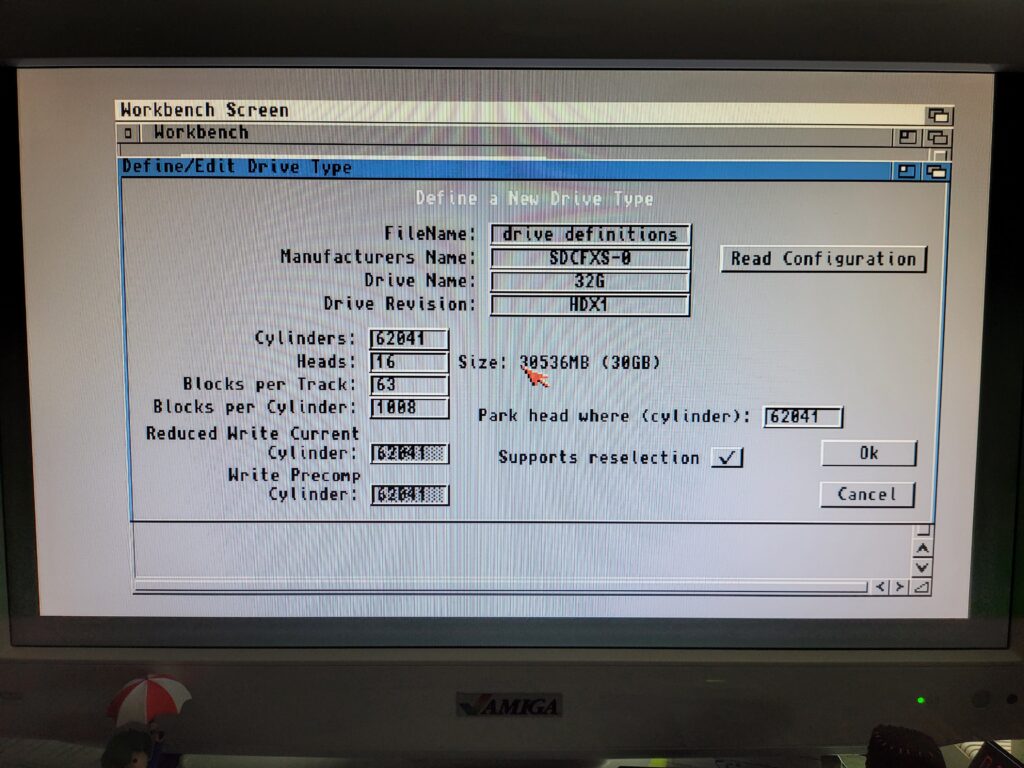
A second or so later and all the parameters had been pulled from the card and filled out on the screen.


Amiga HDToolBox – Defining a New Drive

All drive parameters configured.


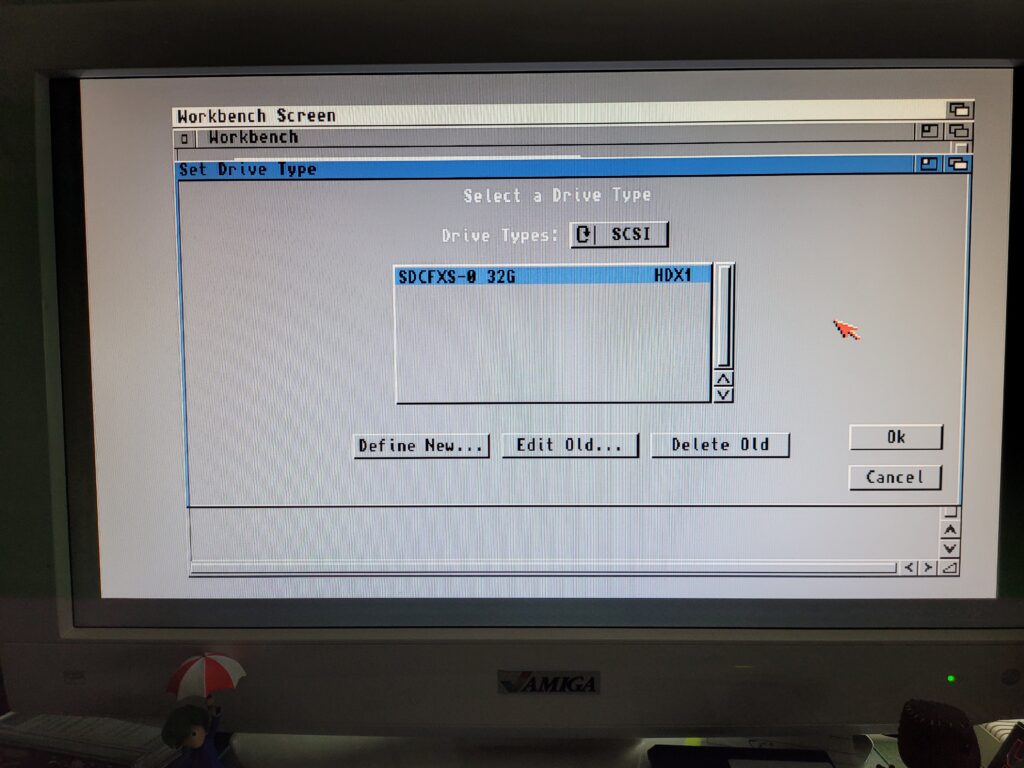
Clicking ‘OK’ brought me back to the ‘Set Drive Type’ window where I could see my newly created drive listed as ‘SDCFXS-0 32G’.


HDToolBox

Newly configured drive now listed.


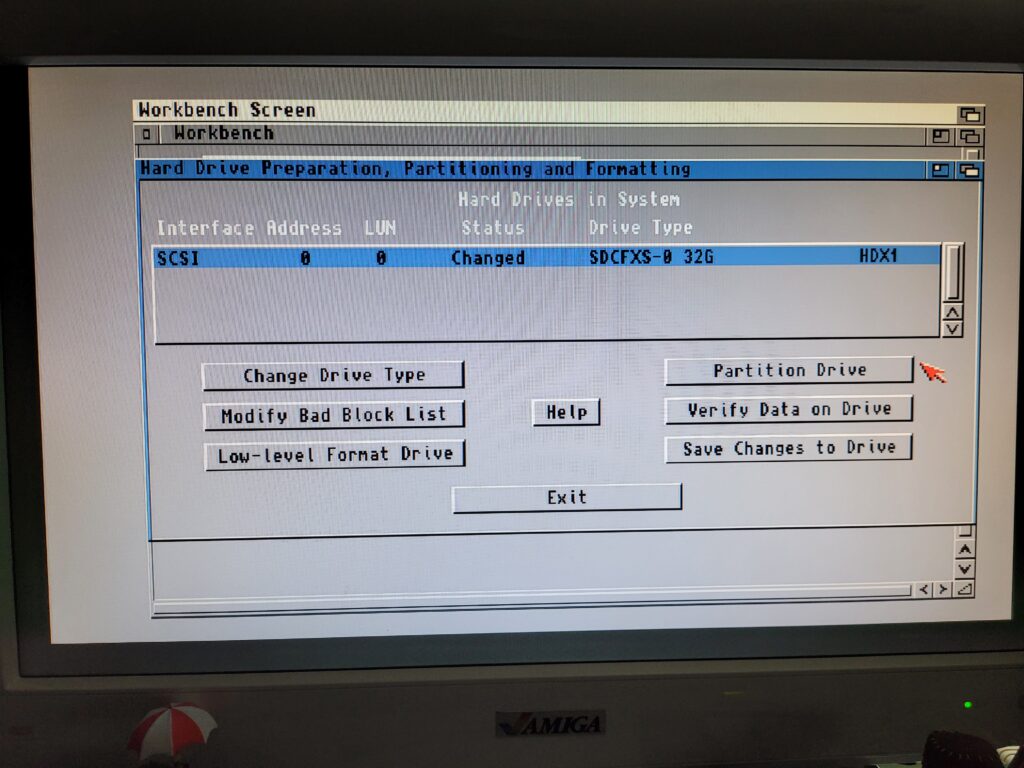
Clicking ‘OK’ again brought me back to the main HDToolBox screen, shown below.


Amiga HDToolBox

Don’t click SAVE just yet…


Partitioning the Card

Now it was time to partition the drive by clicking on the appropriately named ‘Partition Drive’ button.


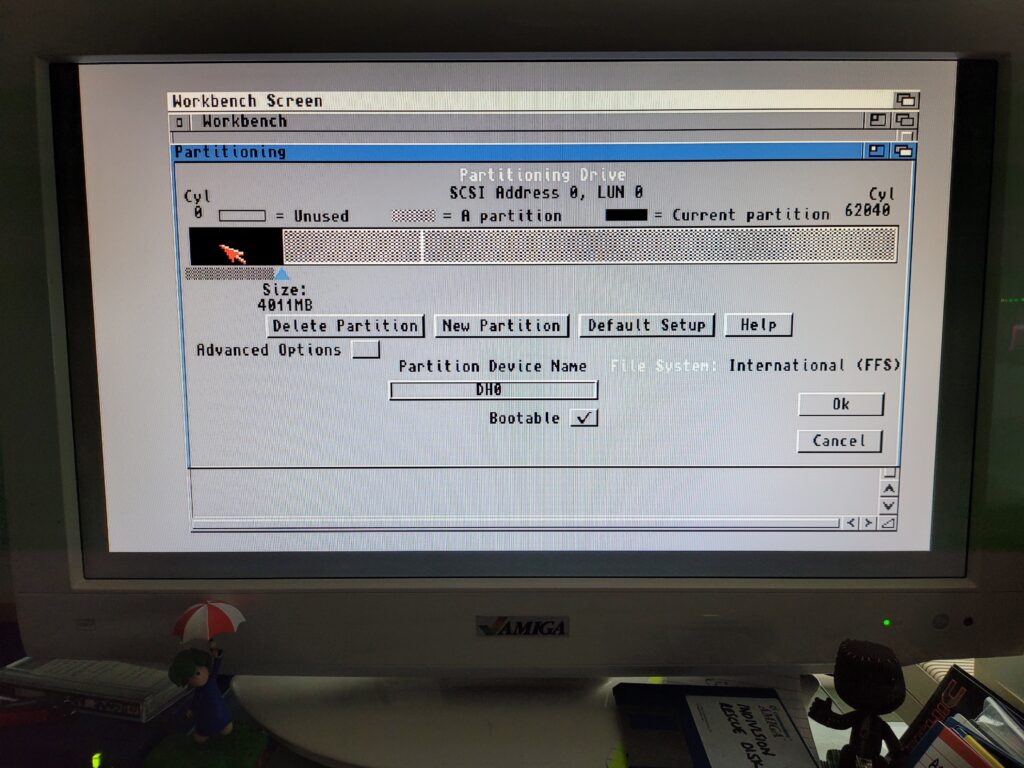
Amiga HDToolBox

Configuring my DH0 partition.


I chose to make my first partition 4GB, this would be my System/Workbench drive. To select the size I simply dragged the little triangle pointer and slid it along the bar. Annoyingly it’s still impossible to size a partition exactly so I just got it as close as I could which was 4011MB.

I called the first partition ‘DH0’ as this is the time honoured name for the Amiga’s boot drive and what most software expects to see by default. I also ticked the box to make it bootable as this is the first partition and the one the Amiga boots off.


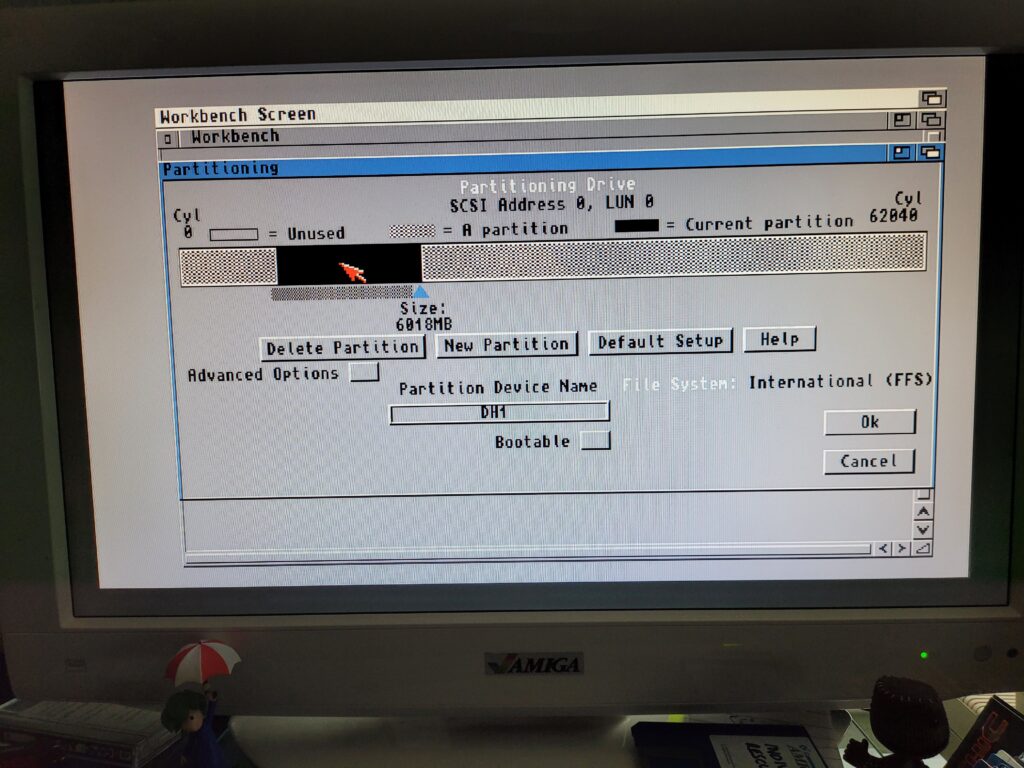
Amiga HDToolBox

Configuring my DH1 partition.


I made the second partition 6GB (6018MB) and called it DH1. To do this I clicked ‘New partition’ and then clicked on an unused portion of the card in the visual representation on the screen.


Amiga HDToolBox

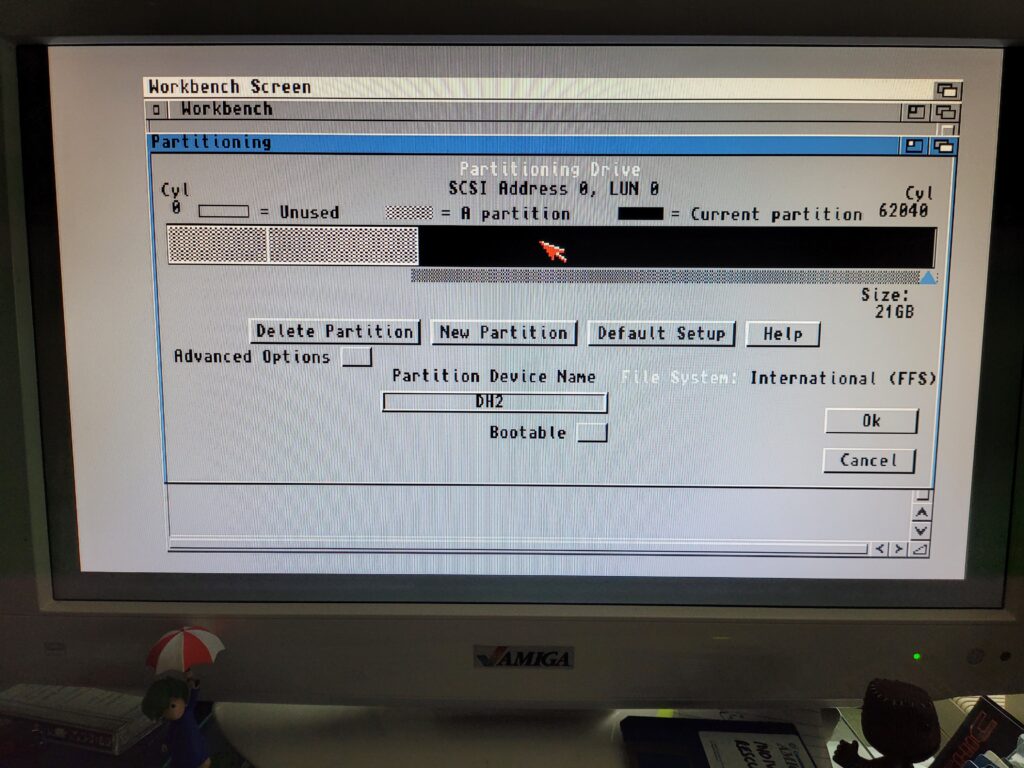
Configuring my last partition; DH2.


Finally I used all the remaining space to make one big 21GB partition and called it DH2. This will be were I install games, whether they be WHLoad or otherwise.

Once I was happy that all my partitions were sized and named exactly the way I wanted them I hit ‘OK’. (You can click each of the partitions in the bar to check their details before committing). This took me back to the main HDToolbox window shown below.


Amiga HDToolBox

Drive with changes waiting to be saved back to it.


To save all that configuration info and partition detail I clicked ‘Save Changes to Drive’ which flagged up a message (shown below) that a reboot was required. I then clicked continue to finish the process and write all the settings to the compact flash card.


Amiga HDToolBox

‘Reboot Required’ message.


Next I rebooted my Amiga off the Install3.2 ADF disk so I could begin formatting them. Unfortunately this was were I encountered problem number 2…


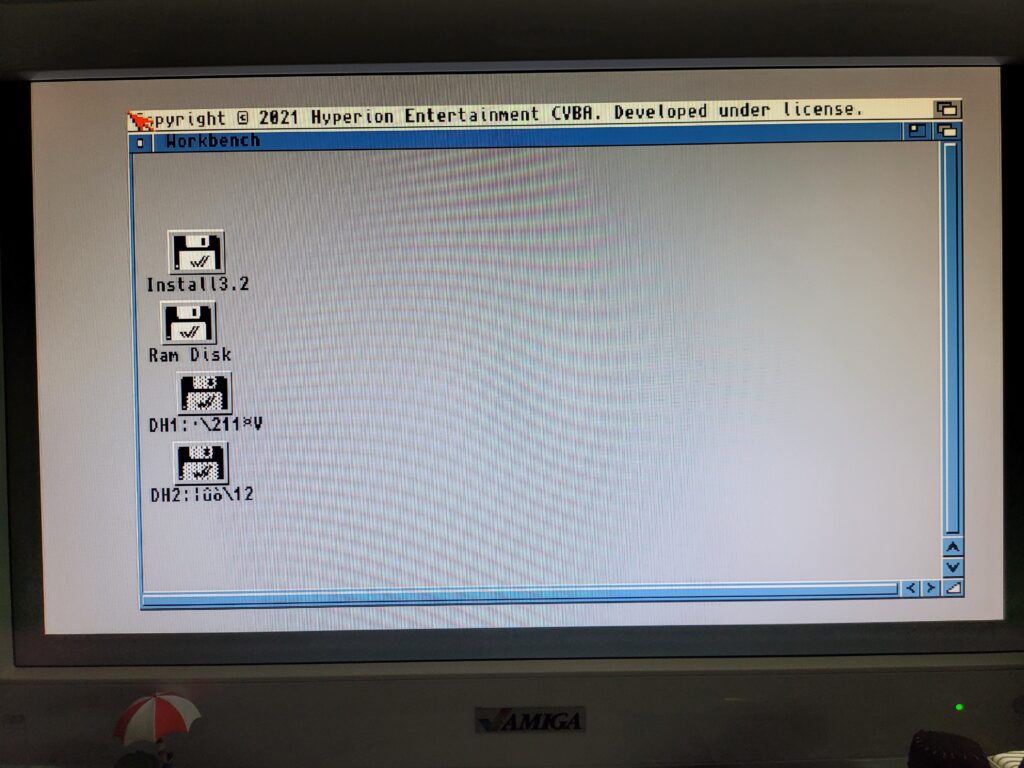
Missing DH0 partition

Spot the missing drive 🙁


There should have been three additional icons on the desktop, one for each of the partitions I had created. However for some reason DH0: was not being displayed. I tried going back through the HDToolbox configuration and making DH0 smaller and even making it the only partition on the card. Nothing worked.


Fixing the Problem

It turns out that for whatever reason, some cards are created with all the sectors on them filled with ‘1’s’ instead of ‘0’s’ and the Amiga doesn’t like that one bit.  So I had to remove the Compact Flash card from my A1200 and hook it up to my PC via a USB card reader.

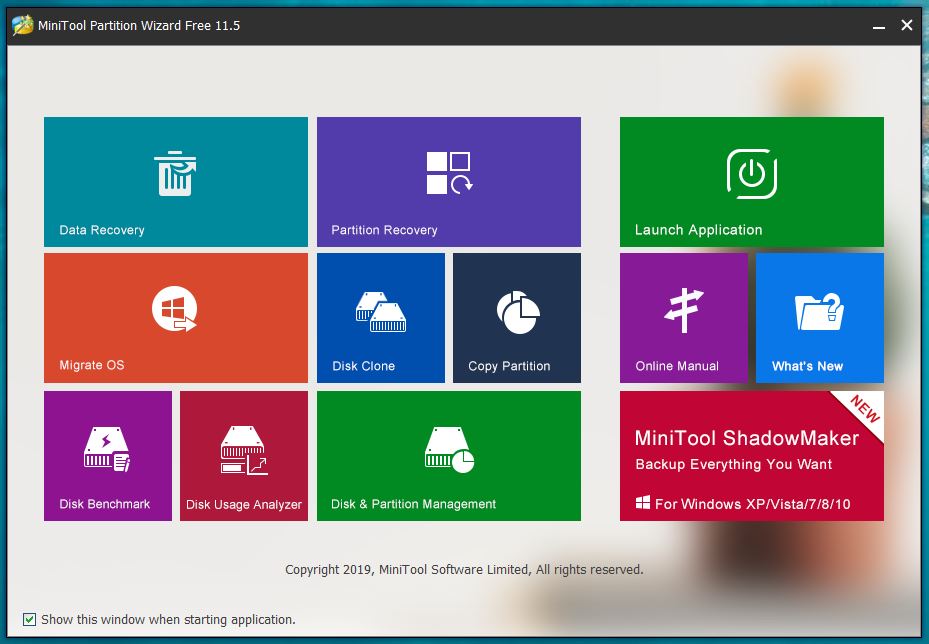
I loaded up a piece of drive management software on my PC called ‘MiniTool Partition Wizard‘ (available as a free download). I then clicked on ‘Disk and Partition management’ which is the large green button near the bottom of the menu screen in the image below.


Mini Tool Partition Wizard

Main Menu Screen.


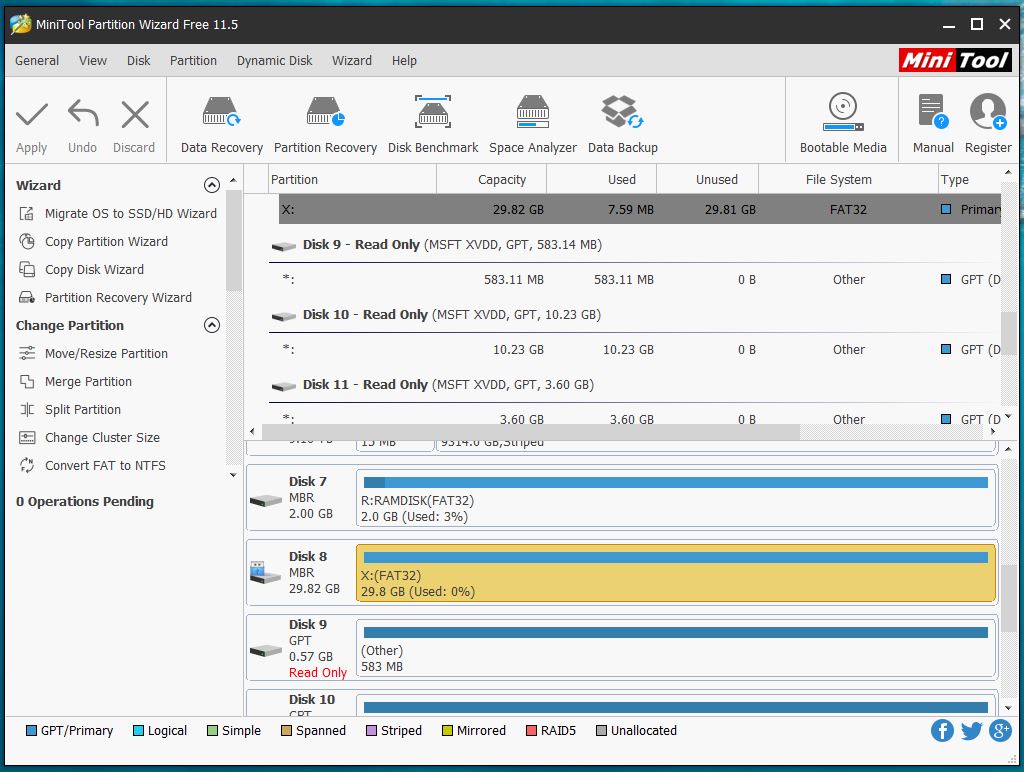
Next I needed to select my CF card from the list of available drives as can be seen in the image below. I knew my card was 32GB so it was pretty easy to spot – it appeared as a 29.82GB drive. It’s imperative to select the correct drive here – the consequences of picking the wrong one don’t bear thinking about!


Mini Tool Partition Wizard

Selecting my Compact Flash card from the list of drives.


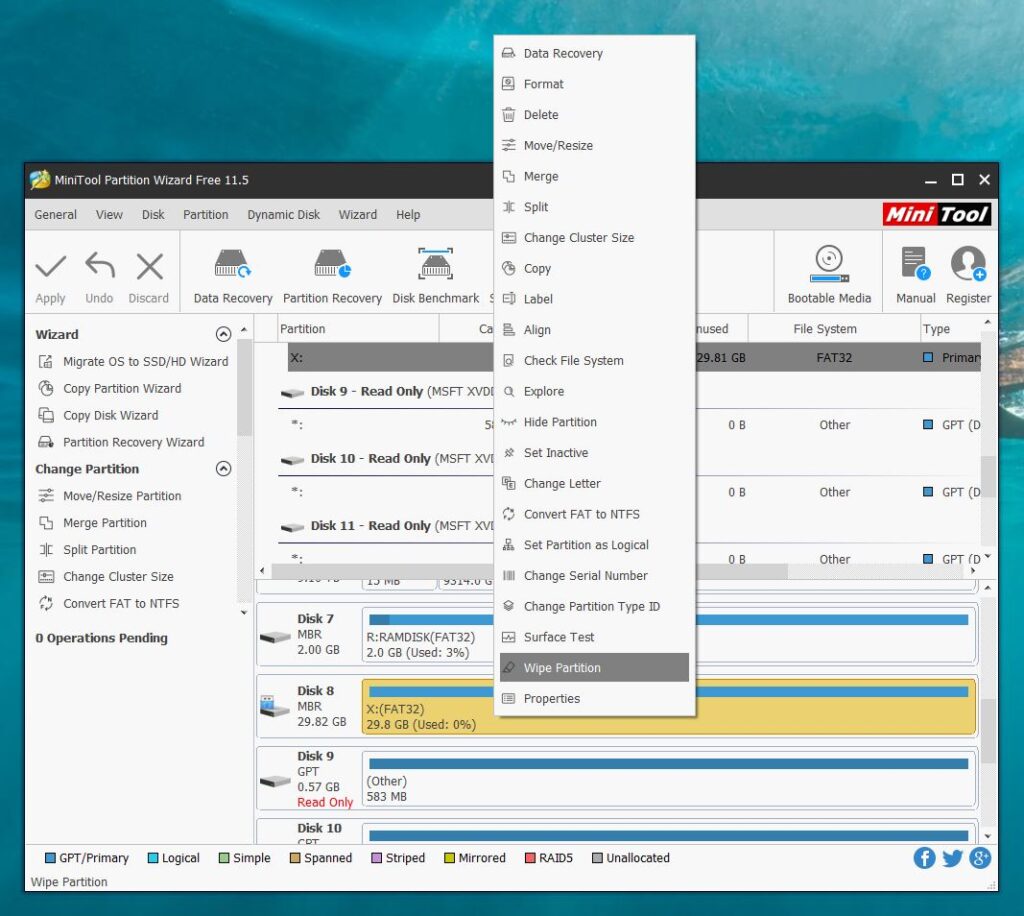
With my CF card highlighted I right clicked on it to bring up the menu and selected ‘Wipe Partition’.


Mini Tool Partition Wizard

Selecting the ‘Wipe Partition’ option.


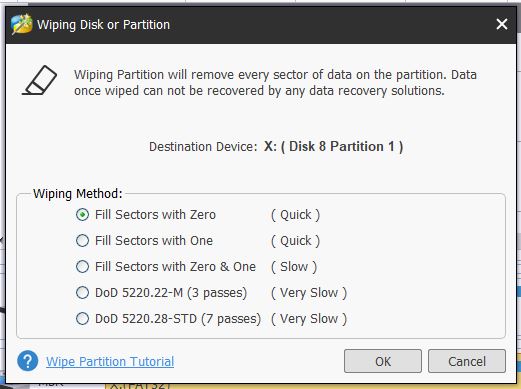
This brought up another window along with a warning that doing this is irreversible so once again I made absolutely sure I had the correct drive selected. Definitely better to be safe than sorry when messing with partitioning software! Anyway the option to fill all sectors with zeros was already selected by default so I simply clicked ‘OK’ here.


Mini Tool Partition Wizard

Choosing how to wipe the drive.


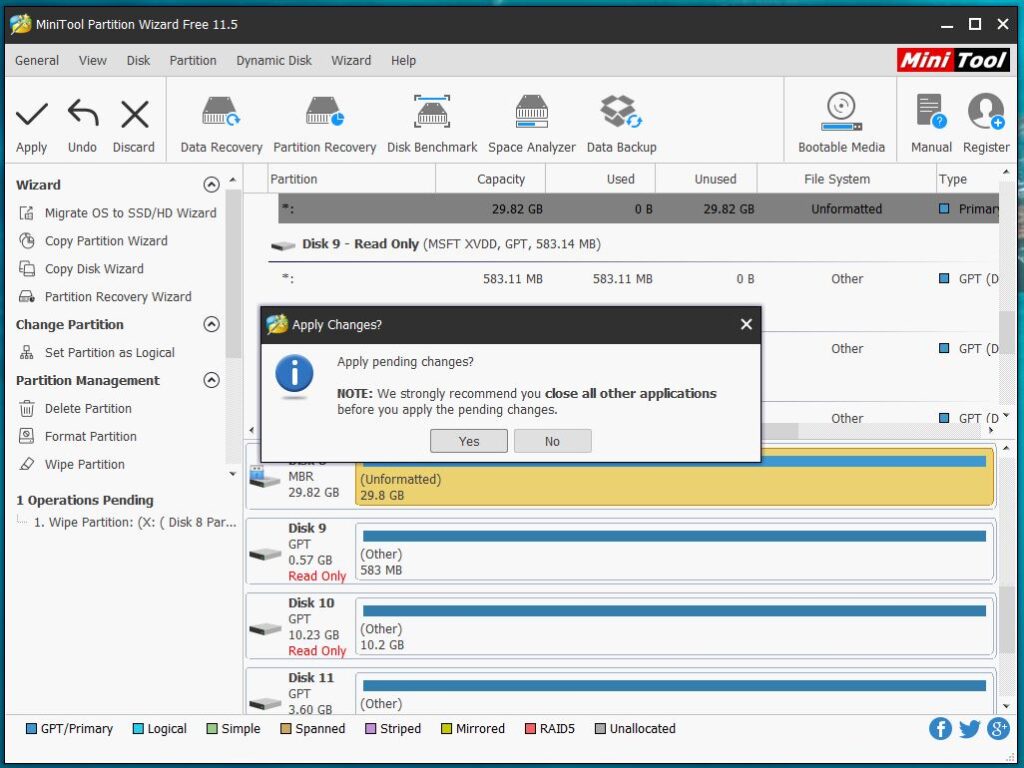
This took me back to the main screen. Up until this point no changes had actually been made to the drive. To actually wipe the drive I needed to click ‘Apply’ in the top left hand corner. A warning then popped up about not running any other applications whilst applying the changes and then I clicked ‘Yes’.


Mini Tool Partition Wizard

Applying the pending changes to the card.


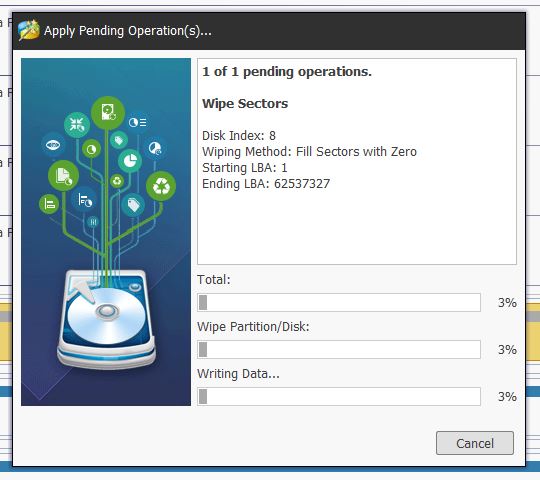
Finally the ‘Apply pending operations’ window popped up and a progress bar slowly made its way across the bottom as my card was being fill with zeros.


Mini Tool Partition Wizard

Operation Progress Window.


The whole operation took around 5 minutes or so to complete successfully at which point I was able to close down the program and remove the card.


Mini Tool Partition Wizard

Mission Accomplished.


Back on Track.

Now that I finally had a correctly prepared Compact Flash card, I re-installed it into my A1200 and begin the entire Partitioning process again, choosing exactly the same options as before. When I rebooted at the the end of it this time I was greeted with the Workbench screen I’d been looking for. One with all 3 drive icons showing on the screen waiting to be formatted as shown below.


AmigaOS 3.2

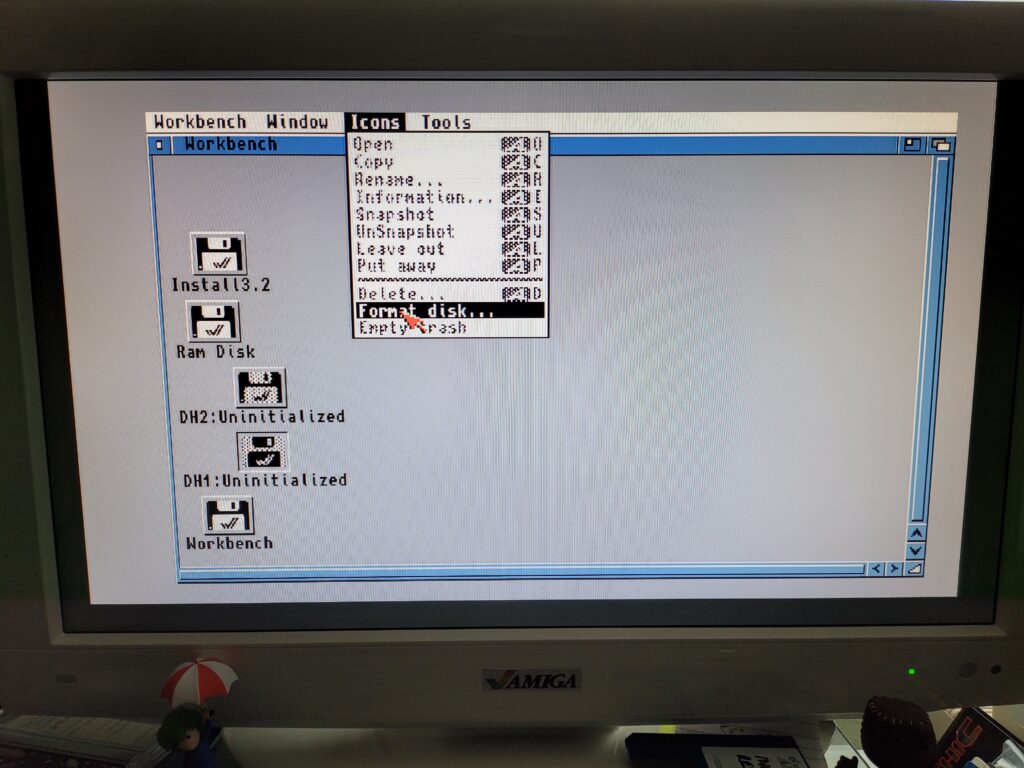
Unformatted drive icons.


To format each drive I selected the relevant icon and then selected ‘Format disk…’ from the Icons menu.


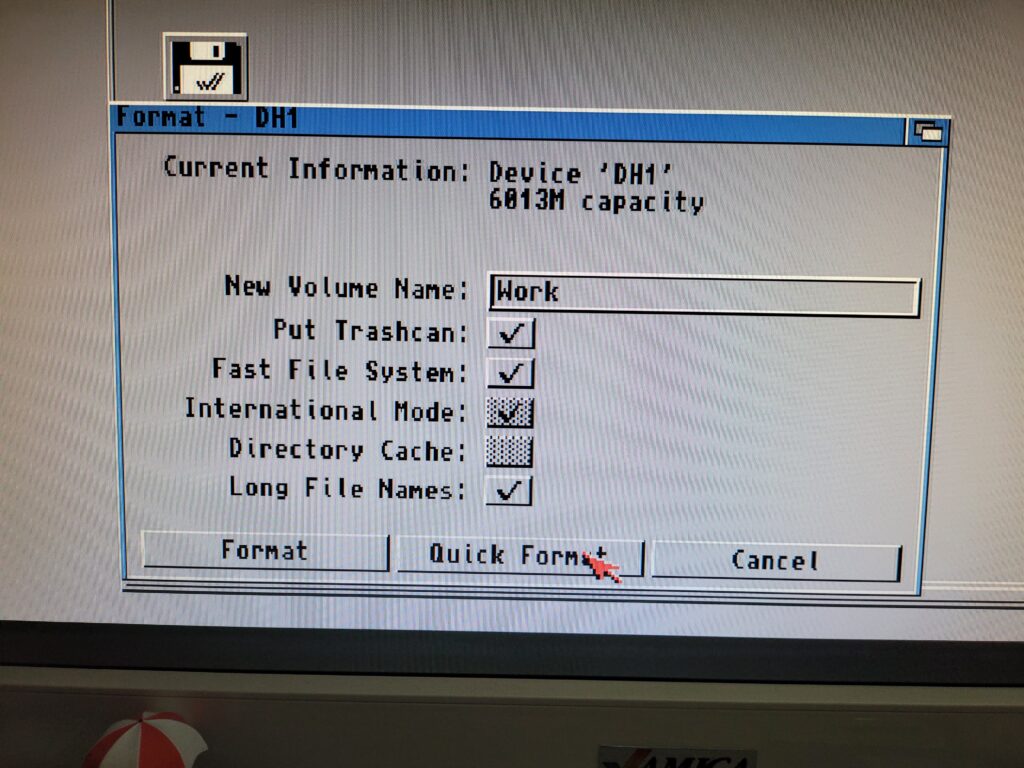
AmigaOS 3.2

Amiga format disk window.


I named DH0 ‘Workbench’, DH1 ‘Work’ and DH2 ‘Games’. I also made sure that long file name support was ticked along with the Trashcan and Fast File System.


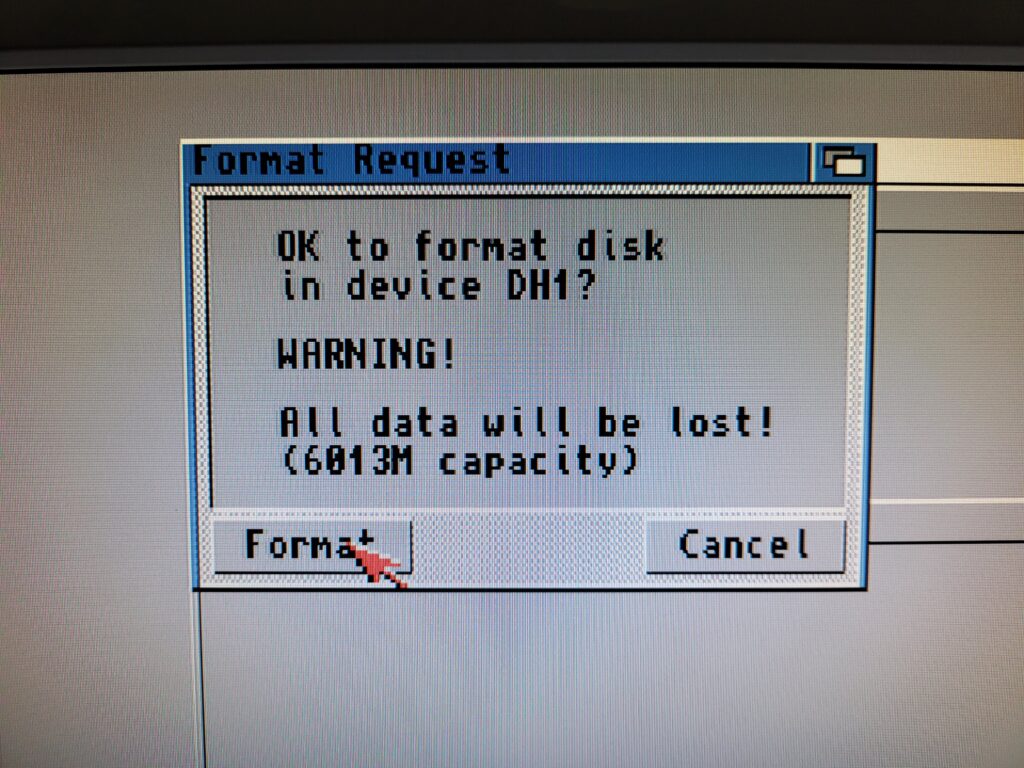
Amiga format disk request

Obligatory data loss warning.


I used the ‘Quick Format’ option otherwise I’d be waiting all day for the format to finish! It’s totally unnecessary for large drives anyway – the only time I ever do a full format is on floppy disks.

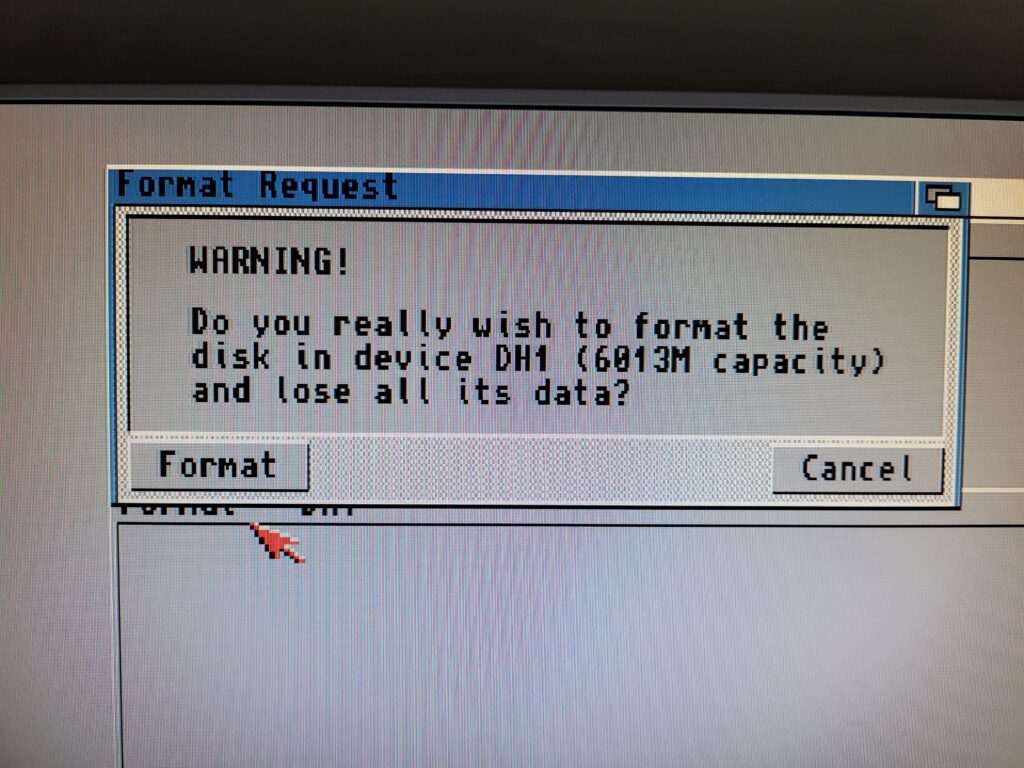
A couple of warning messages popped up reminding me that all data would be lost. I simply clicked ‘Format’ on both of them to get the job done.


Amiga format disk request

Last chance to bail if you’ve selected the wrong drive by mistake!


The format was almost instantaneous and once I’d done all three drives I ended up with a screen looking like the image below.


Amiga Workbench

All partitions successfully formatted.


Installing Workbench 3.2

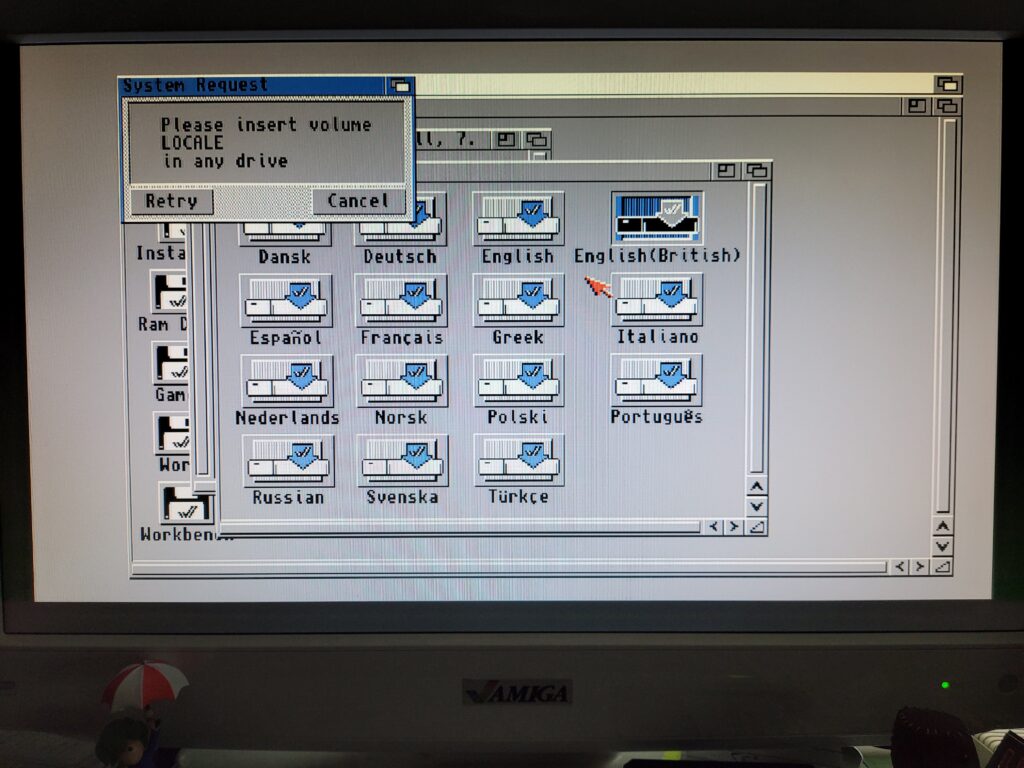
Finally it was time to install Workbench for real. I opened the Install3.2 disk and ran the English(British) installer from within the Install folder.


AmigaOS3.2

AmigaOS3.2 English(British) Installer.


This invoked the first of many disk swaps. Thankfully I had all the ADF images on my USB flash drive so it was simply a matter of flicking through to the correct ‘disk’ and then letting the install continue.


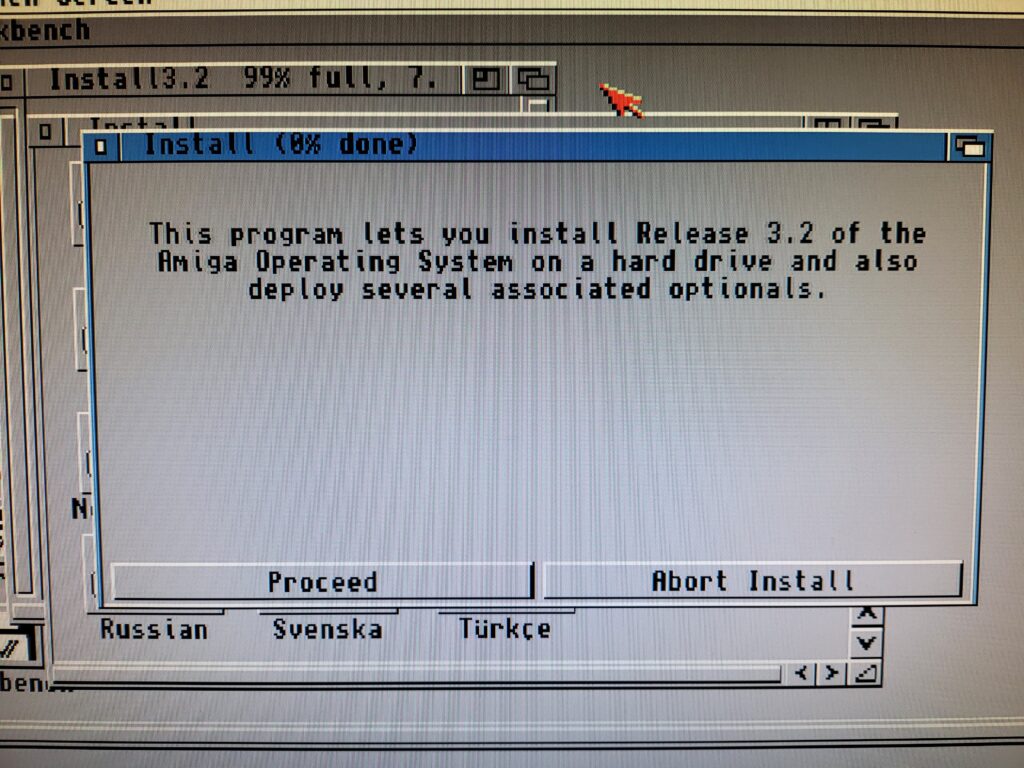
AmigaOS3.2

Beginning the 3.2 install.


I clicked ‘Proceed’ on the first menu to appear as the other options are concerned with amendments/additions to an existing install.


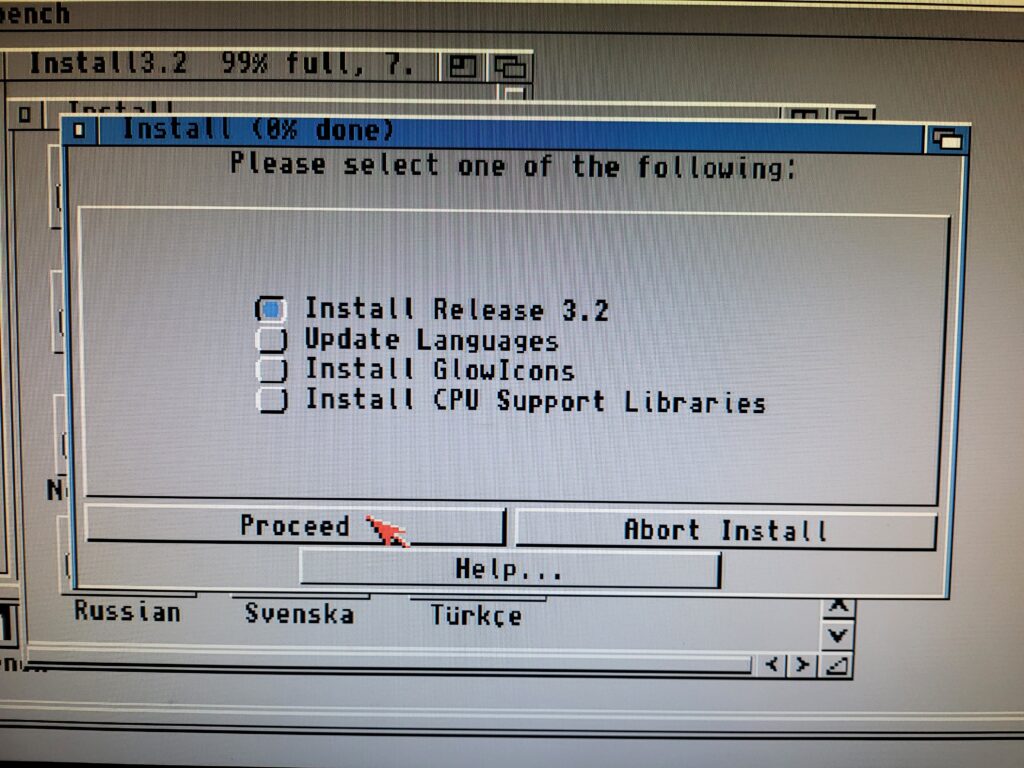
AmigaOS3.2

Selecting the 3.2 Install option.


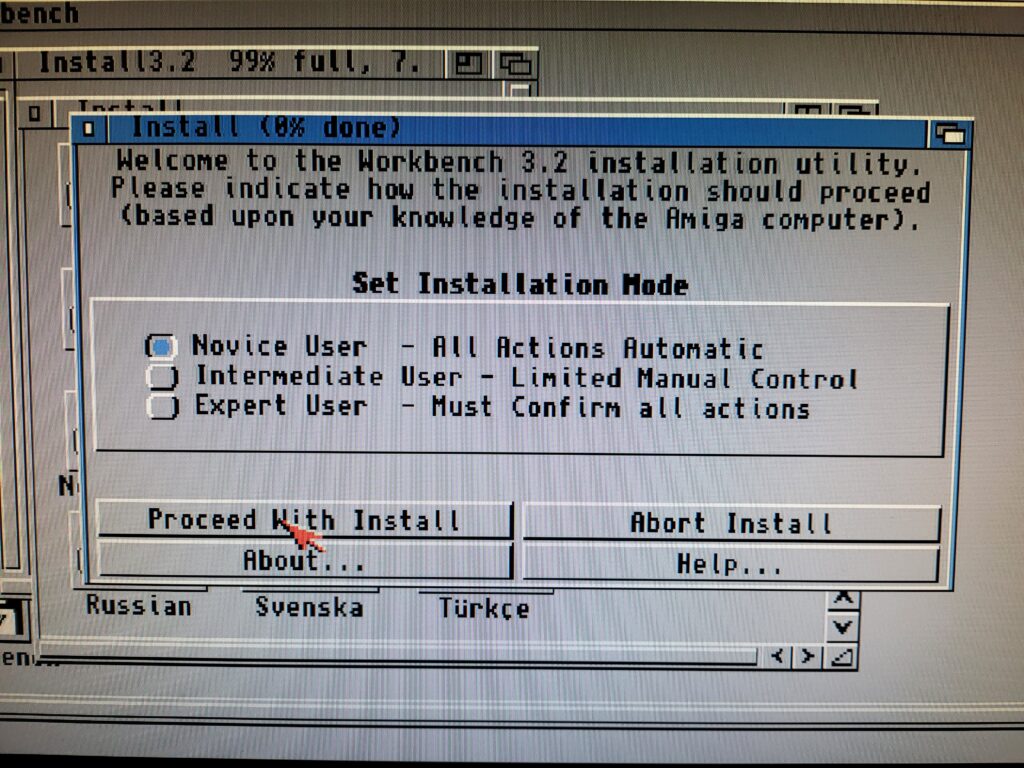
As I was doing a straightforward ‘clean install’ I left the Installation Mode set to ‘Novice User’ and then clicked ‘Proceed With Install’.


AmigaOS3.2

Selecting the Installation mode.


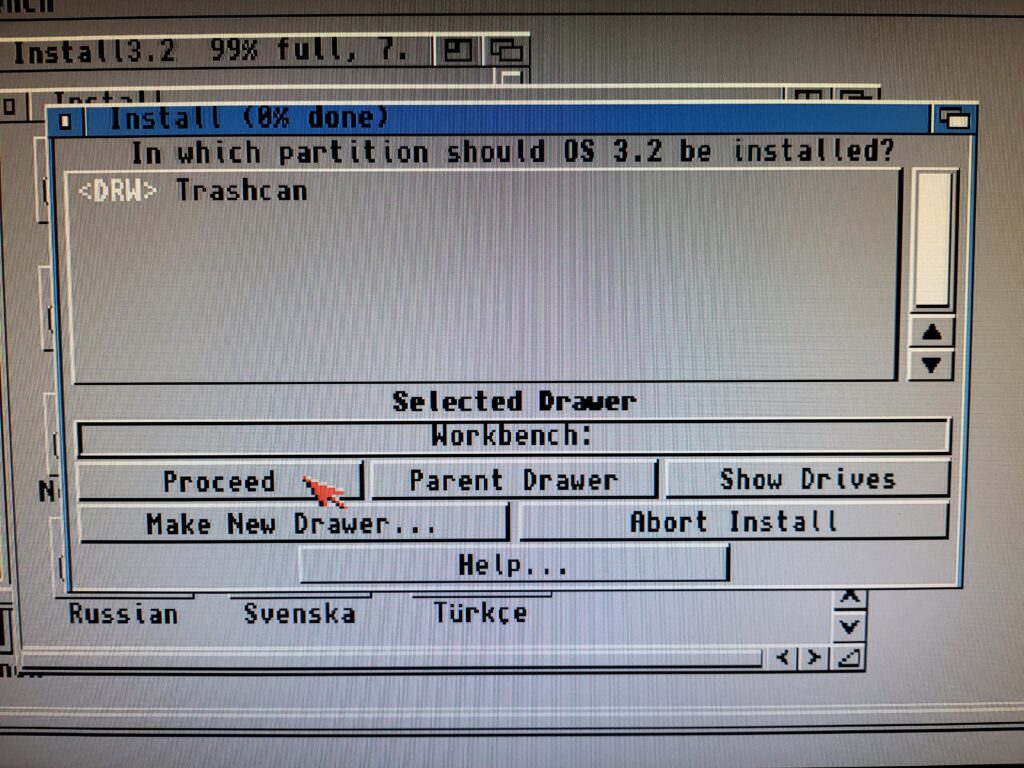
The next screen asked where I wanted to install OS3.2. I selected my ‘Workbench:’ partition and then clicked on Proceed.


AmigaOS3.2

Selecting where to install AmigaOS3.2.


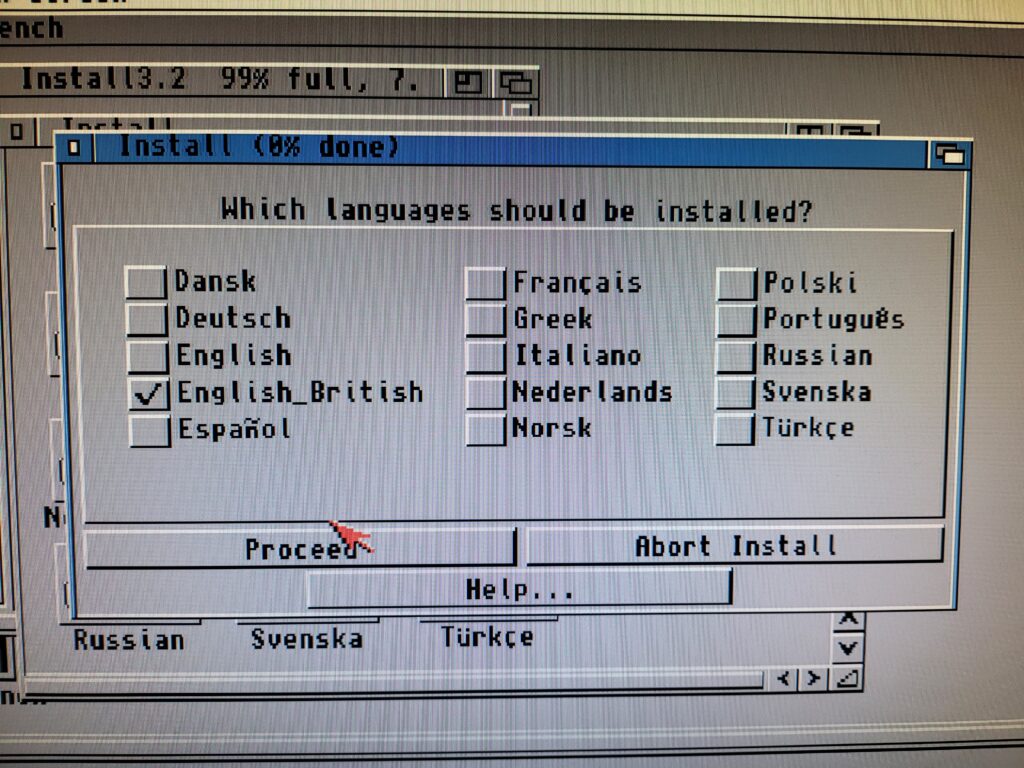
The installer asked me which language(s) to install so being in the UK I naturally chose ‘English-British’ before hitting ‘Proceed’.


AmigaOS3.2

AmigaOS3.2 Language Selection Screen.


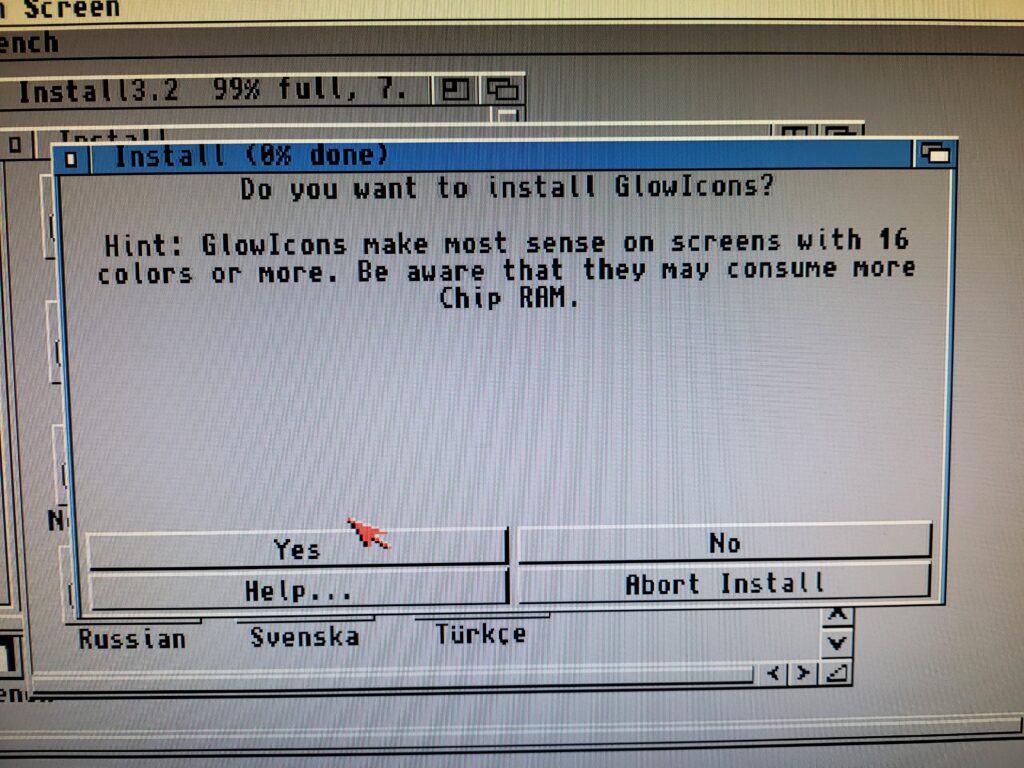
The next choice to present itself was whether I wanted to install GlowIcons or not. I most definitely did so I clicked on ‘Yes’.


AmigaOS3.2

GlowIcons option.


I spent the next several minutes swapping ADF disks as the installer plucked files from everywhere based on the choices I’d selected.


AmigaOS3.2

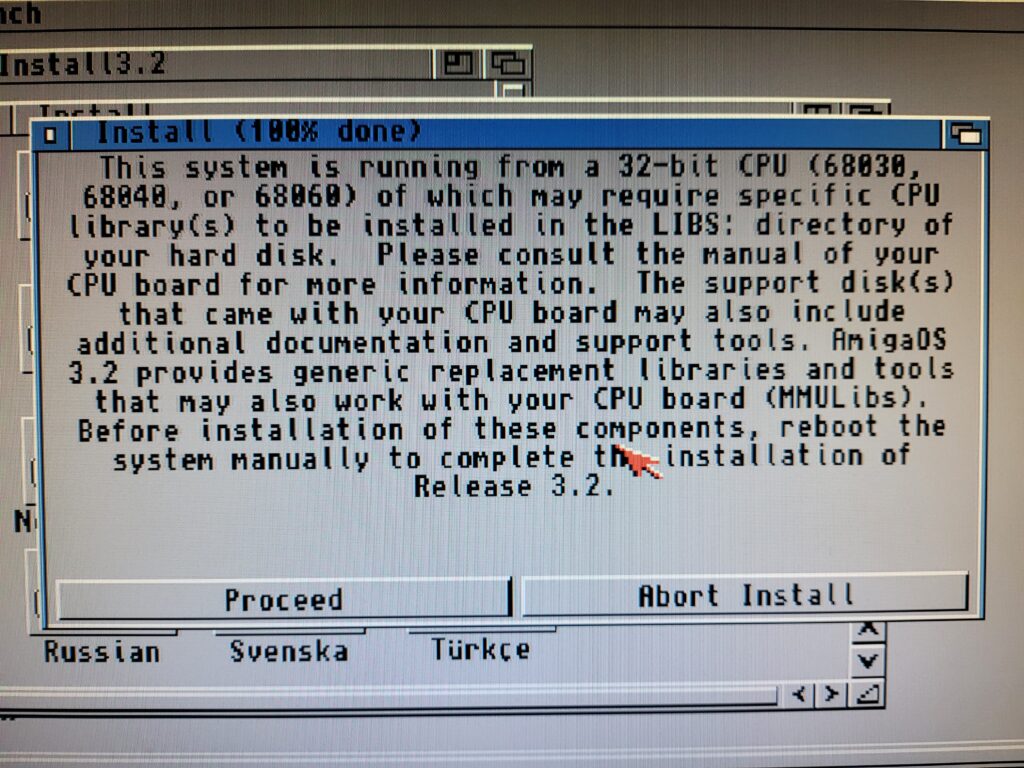
CPU Library warning.


Eventually the installation reached 100% and then popped up a message telling me I would need to install some CPU specific library files to support my 68030 CPU.


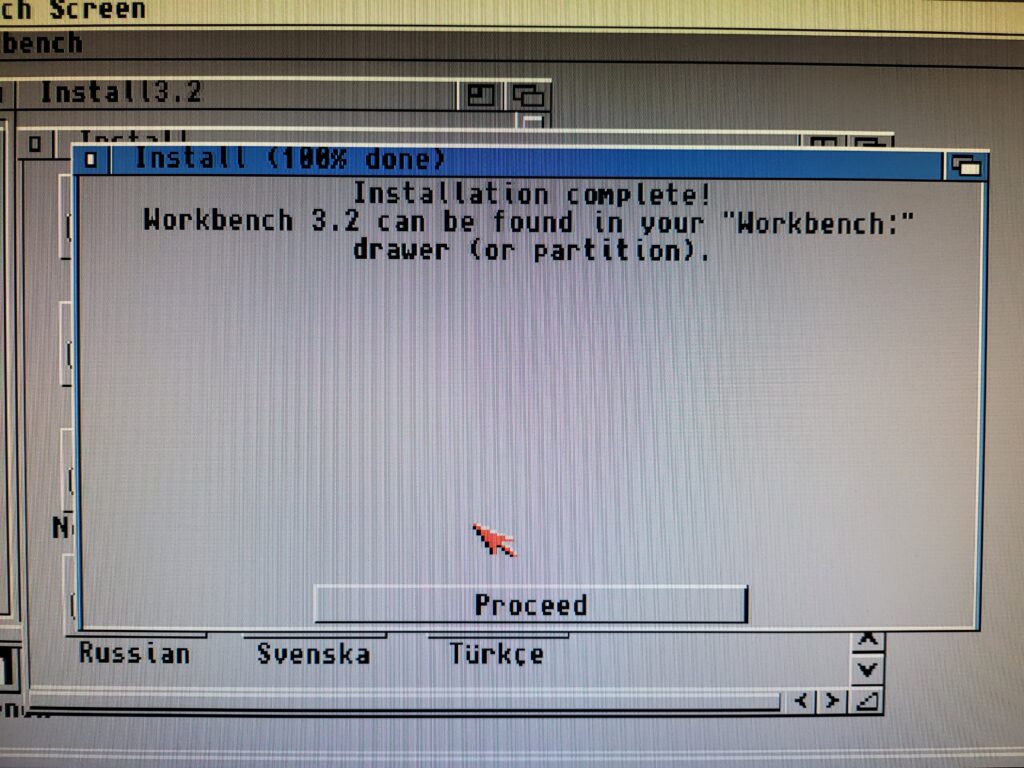
AmigaOS3.2

Installation complete.


Hitting ‘Proceed’ on that screen and then on the next concluded the first part of the install.


Booting Workbench for the First Time

A reboot was required to test out the new install so I reset my A1200 and hoped for the best…


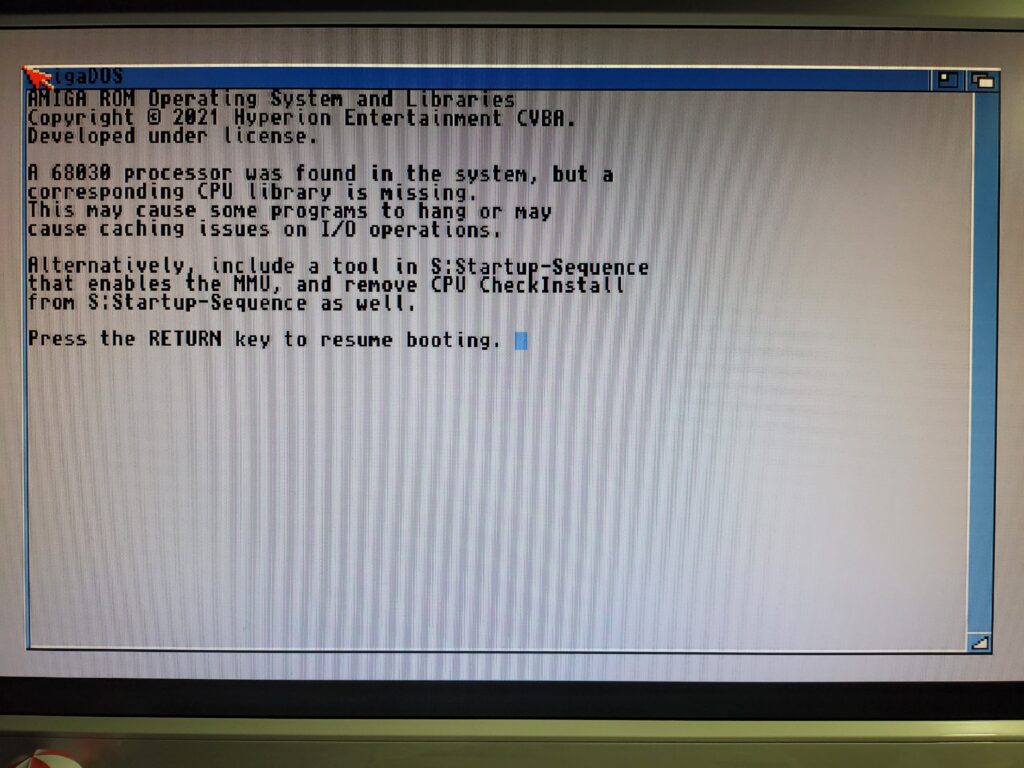
AmigaOS3.2

Missing CPU library nag screen.


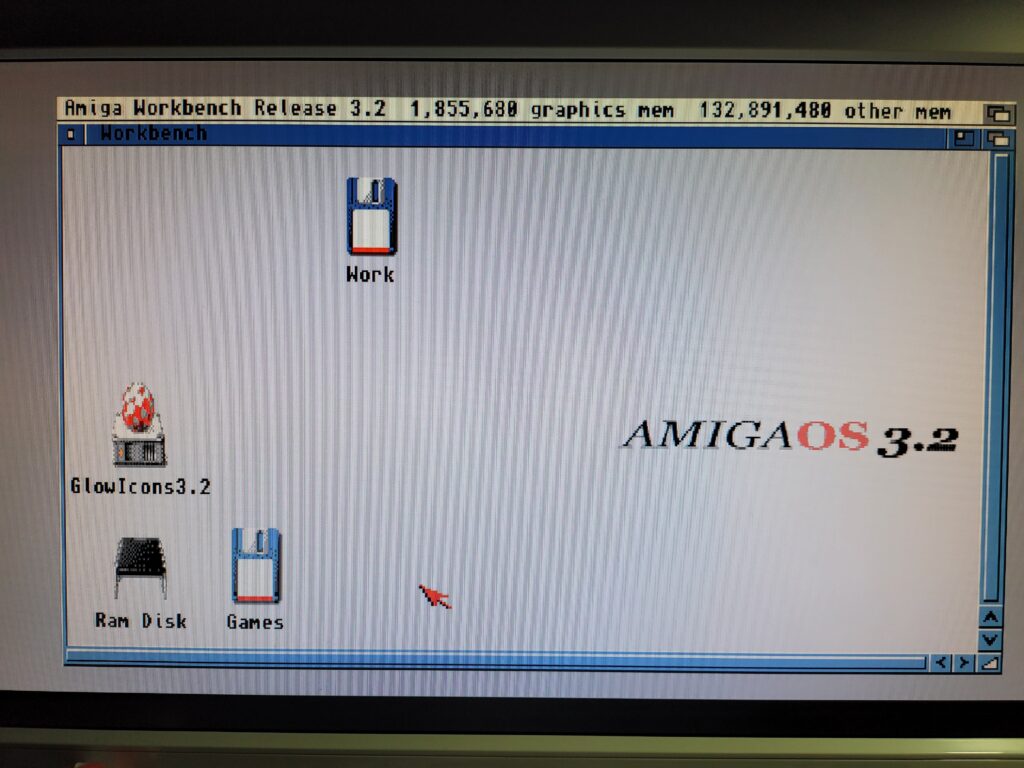
Soon I was greeted with yet another reminder that I had an 030 CPU but no library for it. I hit ‘Return’ to continue booting and a few moments later I reached the AmigaOS3.2 Workbench screen complete with backdrop and snazzy GlowIcons.


AmigaOS3.2

AmigaOS3.2 Workbench Screen.


Content with the knowledge that Workbench was working nicely it was time to fix that CPU library issue.


Installing CPU Support Libraries

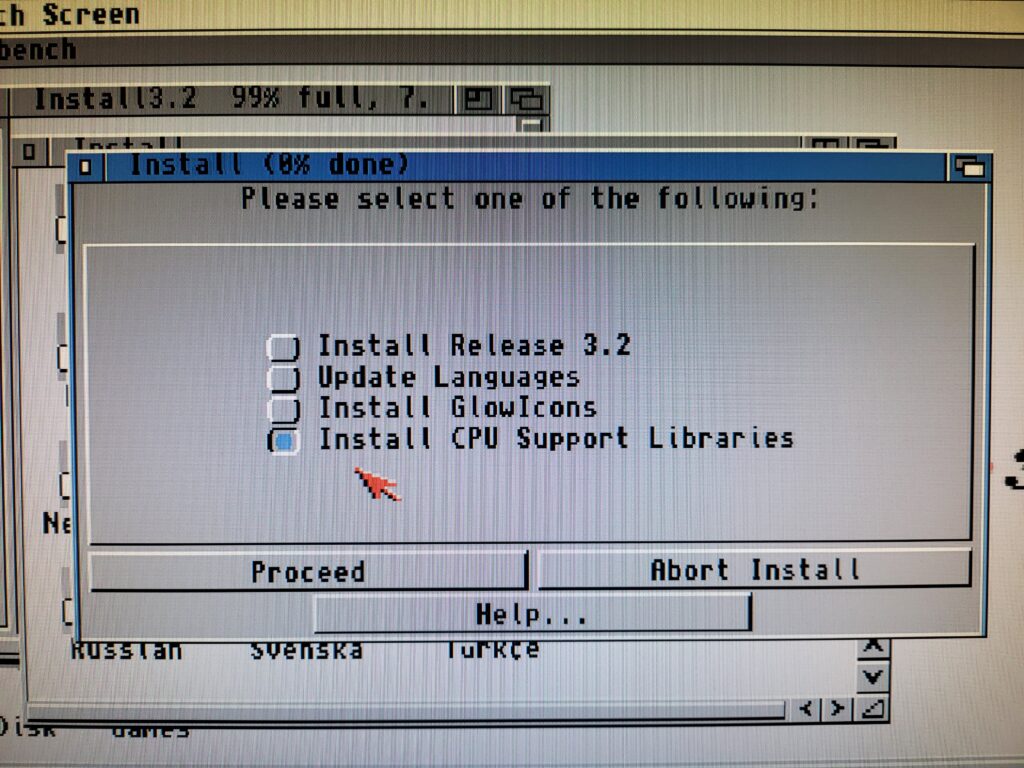
Back when I installed AmigaOS3.1.4 I remember having to source the necessary MMULIBS files from Aminet. Thankfully that’s now a thing of the past as 3.2 can install the required files itself. In order to do so I needed to re-run the installer and this time select ‘Install CPU Support Libraries’ from that initial menu.


AmigaOS3.2

Installing CPU Support Libraries.


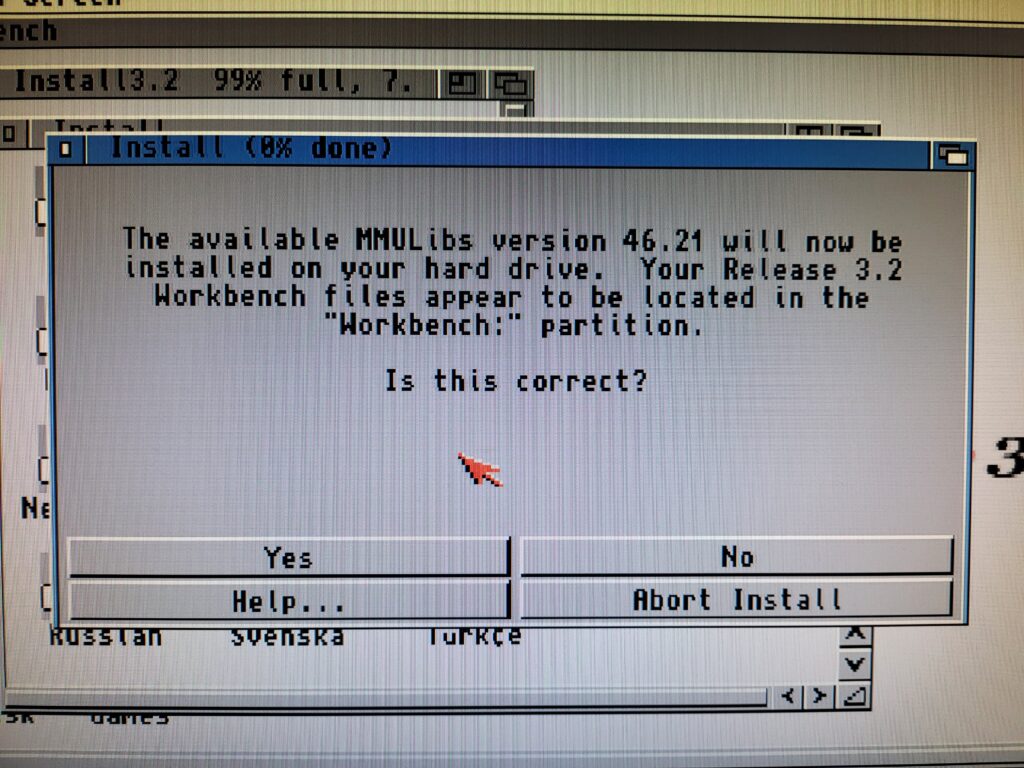
A confirmation window popped up and I simply responded with ‘Yes’ to proceed.


AmigaOS3.2

Confirming the location of my Workbench install.


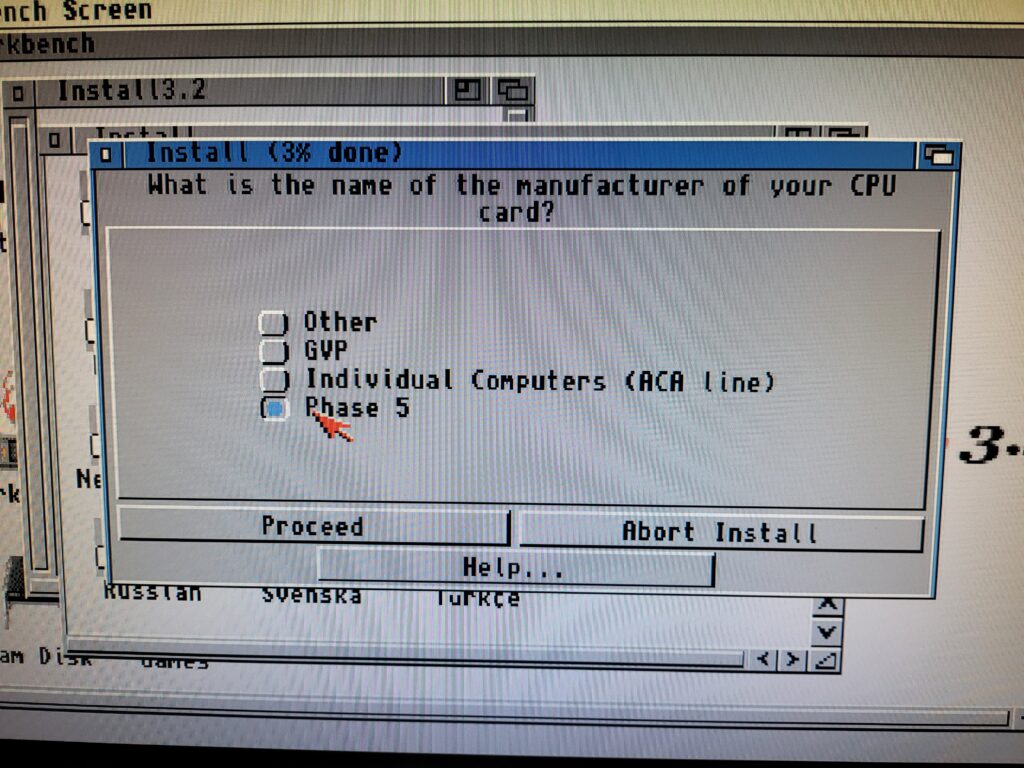
The following dialogue wanted to know which model of accelerator card I had installed. As I have a Blizzard 1230 MkIV I chose ‘Phase 5’ from the list and then clicked ‘Proceed’.


AmigaOS3.2

Selecting my accelerator manufacturer.


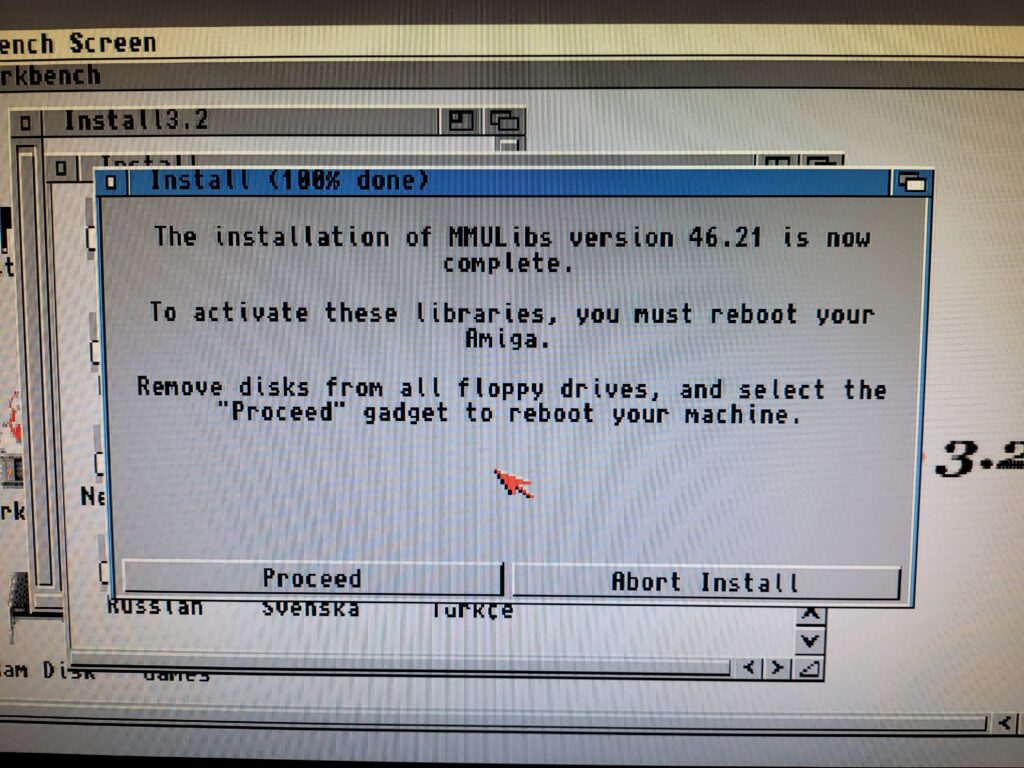
A few moments later and the installation was complete – all I needed to do now was reboot my A1200 and make sure all the warning messages had all cleared. (They had).


AmigaOS3.2

CPU Library Installation Complete.


Configuring CD Access

There was one other quick configuration change I could make to round off my install and that was to get my CD drive working. OS3.2 includes a CD filesystem so I didn’t need to install anything extra.

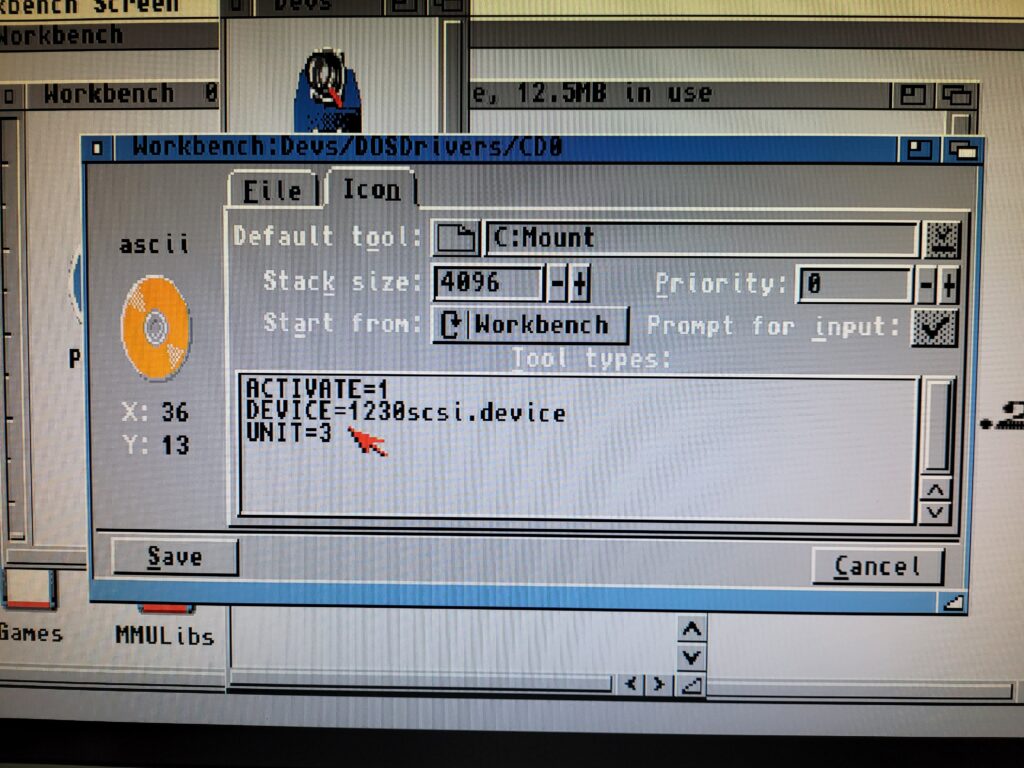
The first thing to do was drag the CD0 device from STORAGE/DEVS/DOSDrivers to DEVS/DOSDrivers and bring up the Icon Information window to edit the Tooltypes. The Information window has changed a little bit under 3.2 so the Tooltypes now reside under a Tab called ‘Icon’.


AmigaOS3.2

Setting the CD ToolTypes.


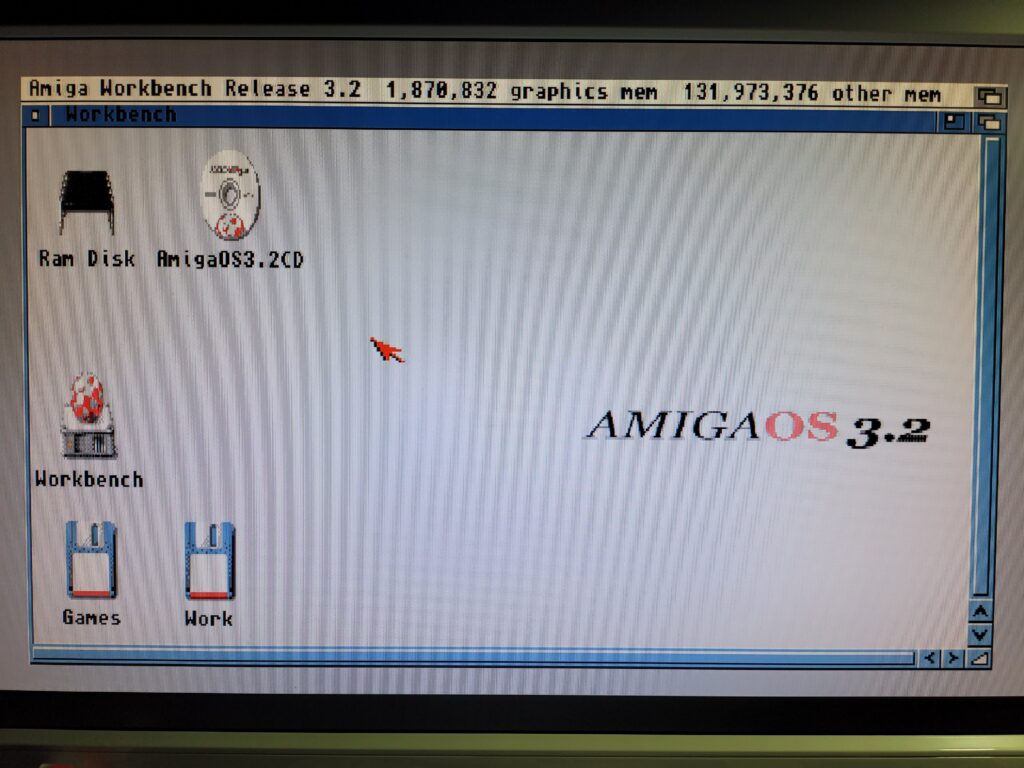
There were two tooltypes I needed to alter; ‘DEVICE’ and ‘UNIT’. As I have a Blizzard SCSI card I needed to set ‘DEVICE=1230scsi.device’ as that is what my SCSI device is called. My CD drive has a SCSI ID of 3 so I set ‘UNIT=3’ and then saved my changes. As no CD device had been mounted up to this point I simply double-clicked the CD0 icon to test if the new settings worked and popped in my 3.2 CD. Happily a few moments later I could see a fancy little AmigaOS3.2 CD icon on my Workbench. Another job done.


AmigaOS3.2

Workbench 3.2 Installed and CD access working too.


With Workbench 3.2 successfully installed it was now time to get busy sorting out internet access and installing all my apps and games once more…

I’ve covered all that stuff before with 3.1.4 but if anything crops up that poses an unexpected issue I’ll add to this post.

Zzap! Amiga Micro Action – Brand new UK Amiga magazine!

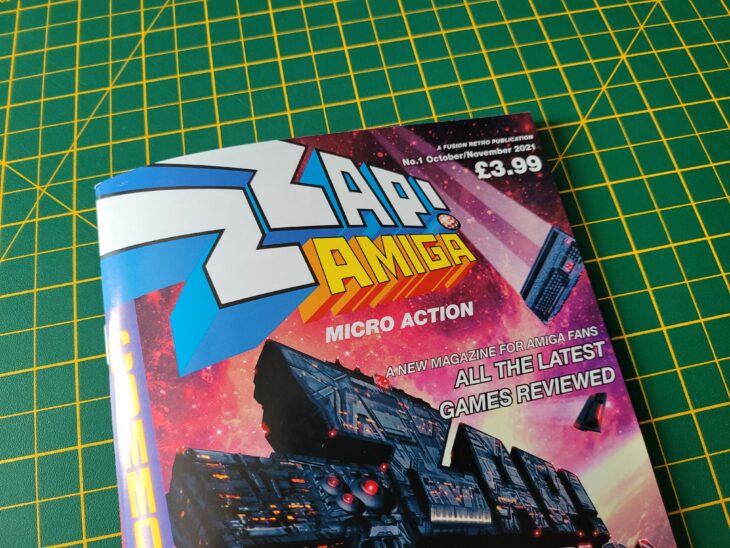
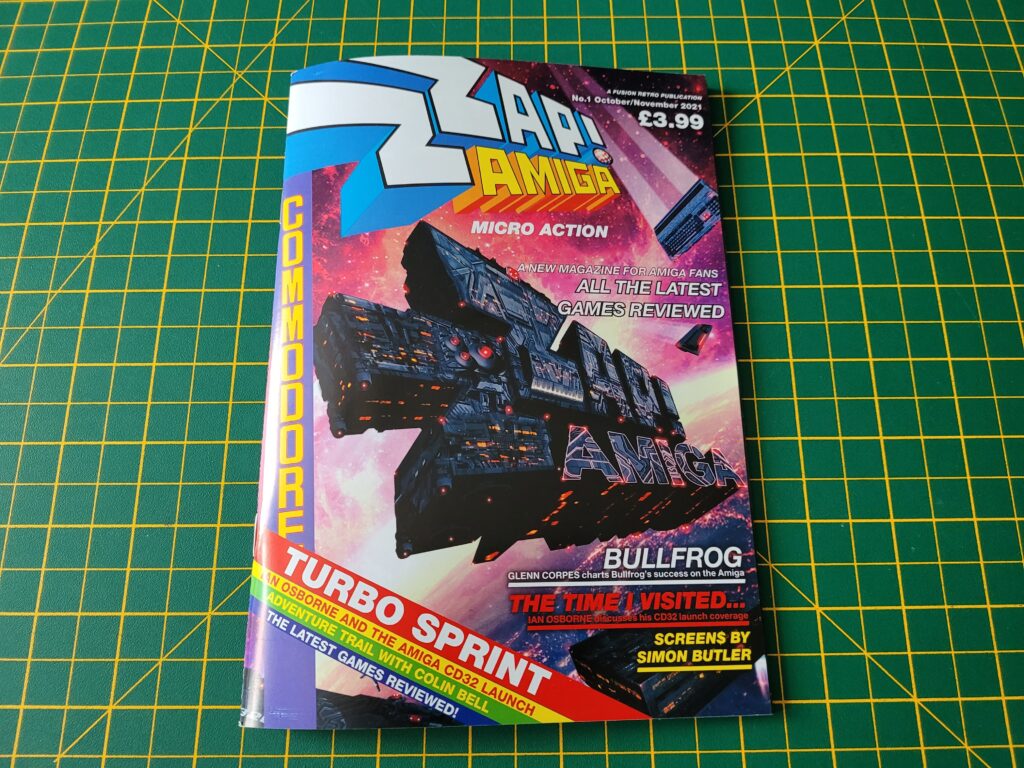
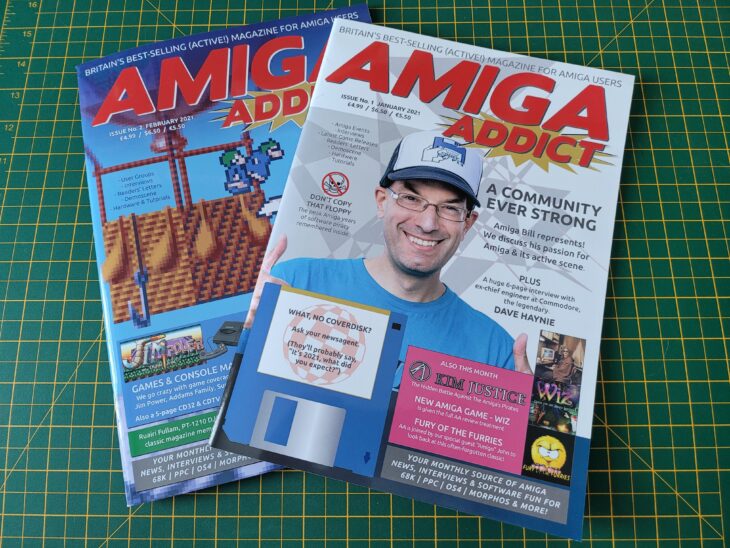
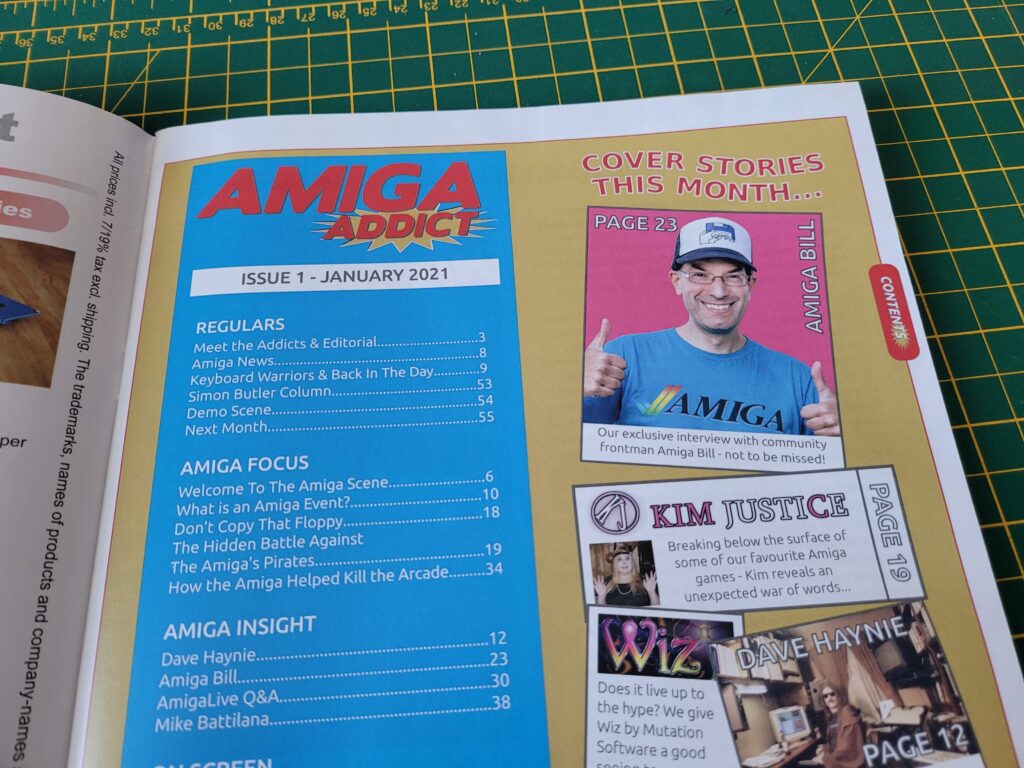
2021 was a great year for Amiga magazines. Back in January there was the launch of Amiga Addict, then towards the end of the year, another brand new magazine appeared; Zzap! Amiga – Micro Action from the same guys who resurrected Zzap! 64 – Fusion Retro Books.

Zzap! Amiga

Zzap! Amiga Front Cover

The cover design adopts the familiar Zzap appearance and represents, perhaps, what we might have seen back in the late 80’s had Zzap fully transitioned over to the Amiga.

The magazine itself is A5 sized and is printed in full colour on thick glossy glossy paper, stapled at the centre. There’s a grand total of 58 pages sandwiched between the covers comprising mostly articles with a small smattering of adverts. From what I can gather Zzap! Amiga will be published 4 times a year (quarterly).

A Look Inside Issue 1

Zzap! Amiga

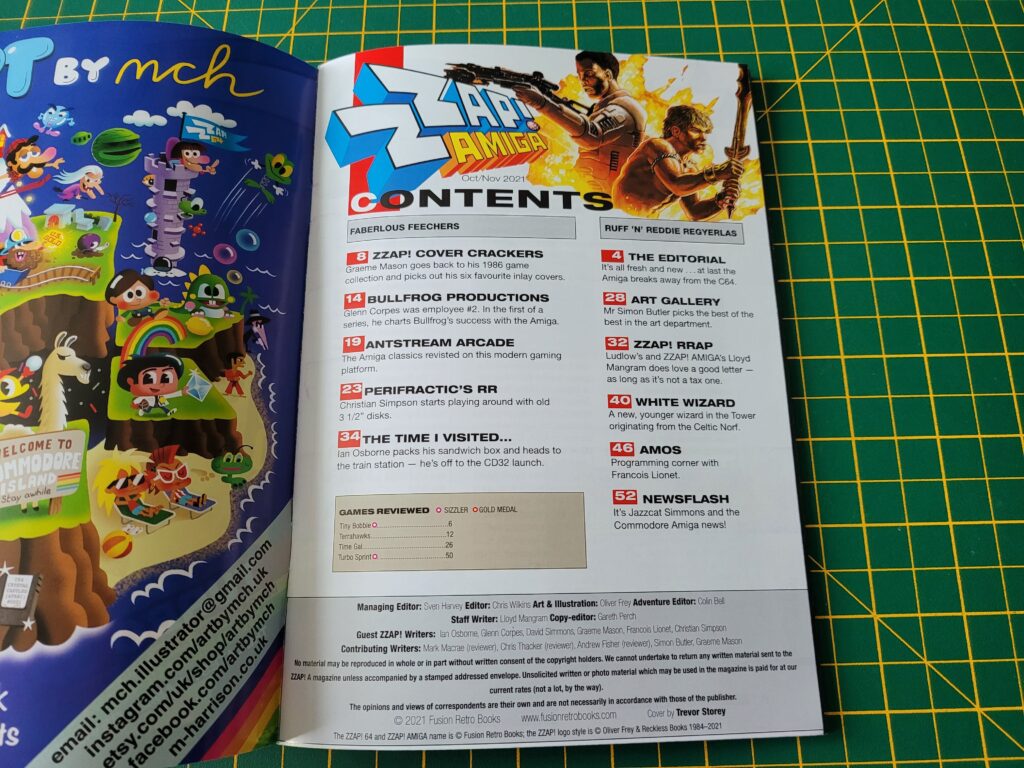
Zzap! Amiga Contents Page

There’s a clear emphasis on gaming here, which is to be expected considering Zzap’s heritage. This is probably why it’s only coming out quarterly too, allowing time for enough new games and news to surface. Some Zzap! regulars make an appearance including Zzap! Rrap (letters page) and The White Wizard (adventure gaming). RetroRecipes’ Chris Simpson (Perifractic) has his own section of the mag too whilst elsewhere there’s a 6 page article reminiscing about the CD32 console launch. There’s some cool featured Amiga art and a look at the success Bullfrog had with the Amiga. Of course there’s plenty of news from the Amiga gaming scene included too.

Zzap! Amiga

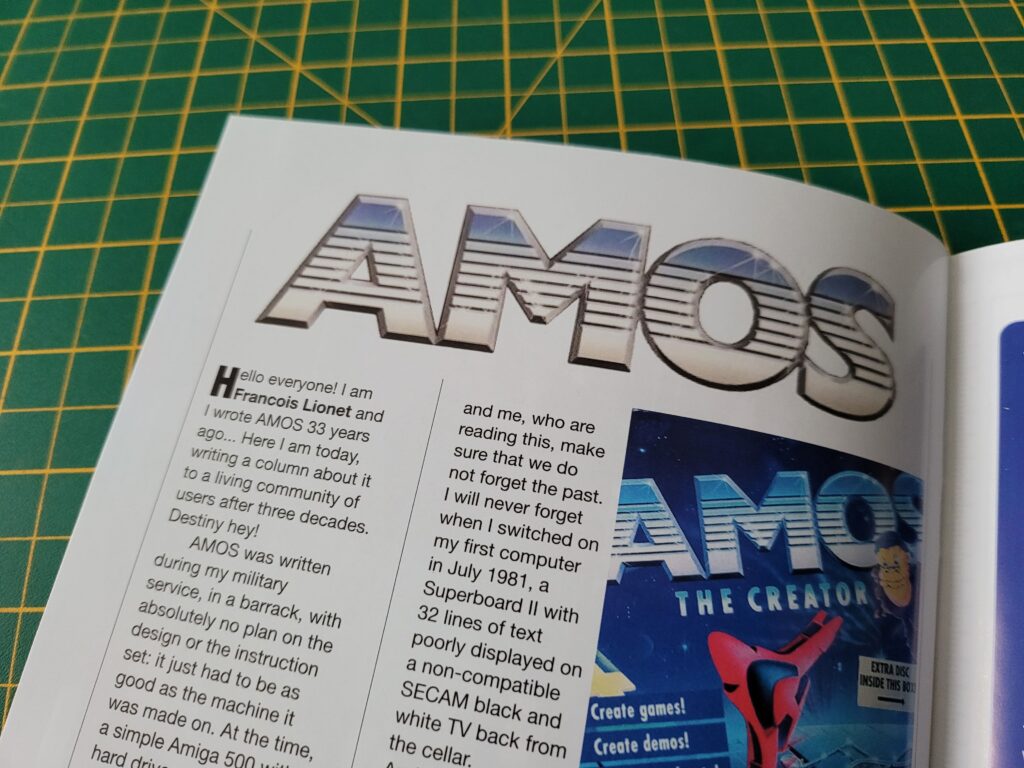
AMOS

AMOS Coding

Finally I have to mention I was really pleasantly surprised to see that there was an AMOS coding section near the back of the magazine. It even included a type-in listing to enter! The article also contained information on how you can legally get a free copy of AMOS to experiment with. As a big Amiga tinkerer this was definitely right up my street. I have a boxed original copy of AMOS so this is just the excuse I need to dust it off and put it to good use! I sincerely hope to see more of this sort of stuff in the future.

This slideshow requires JavaScript.

All in all this was a great read, especially if you are an Amiga gamer. It was entertaining and informative without being dry and serious. I personally would have liked to see more game reviews – hopefully issue 2 will improve things in this respect.

At £3.99 plus postage it’s a no-brainer for me and a worthy addition to my retro magazine collection. Don’t forget you can get 15% off with code ‘LYONSDENBLOG’ at the checkout!

Head on over to Fusion Retro Books to pick up your own copy. At the time of writing issue 2 is about to be published too which I’ll definitely be getting.

Indivision AGA Mk3 Flicker-Fixer

I’ve wanted an Indivision AGA Mk3 flicker-fixer for quite some time but have been stymied by a combination of Brexit and Covid-19. Individual Computers actually halted all shipments to the UK in December 2020 as a direct result of this situation. Undeterred, I kept checking the situation periodically to see if it had changed. Sure enough, towards the end of April I saw the news I’d been waiting for. Shipments to the UK were back on! I quickly ordered myself one and waited patiently for it to arrive.

Happily I didn’t need to wait for long as it arrived within a week and with no extra fees to pay too! Needless to say it was taken straight into my man cave to open it up!


Unboxing


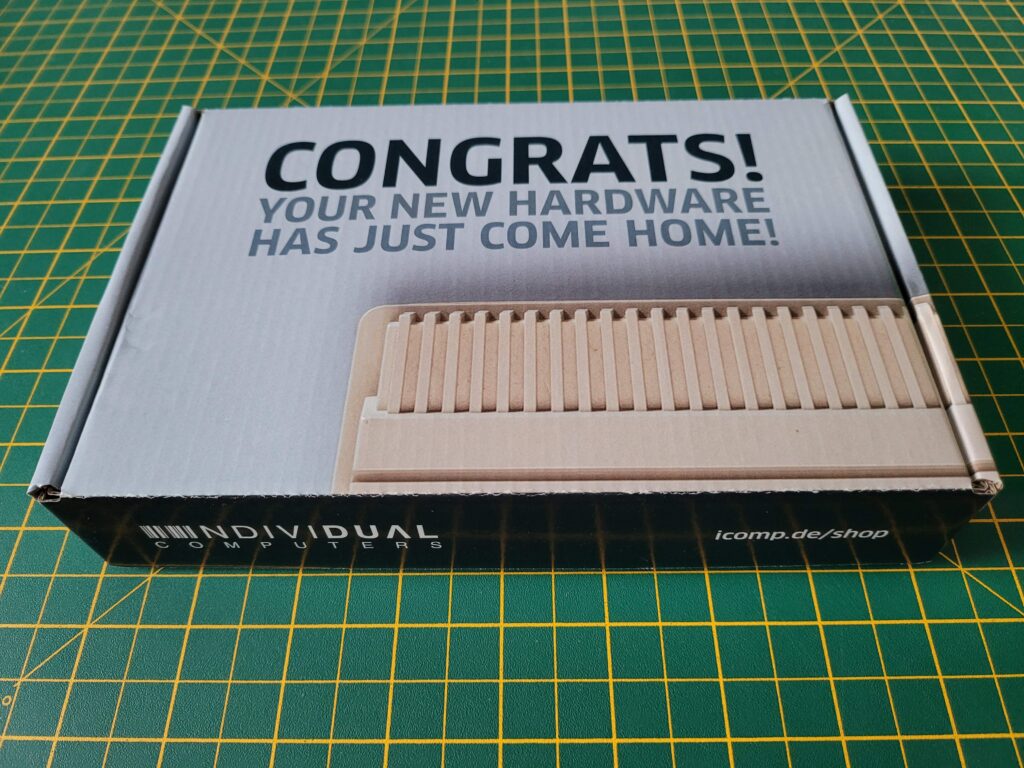
Indivision AGA Mk3

This is the box it comes supplied in.


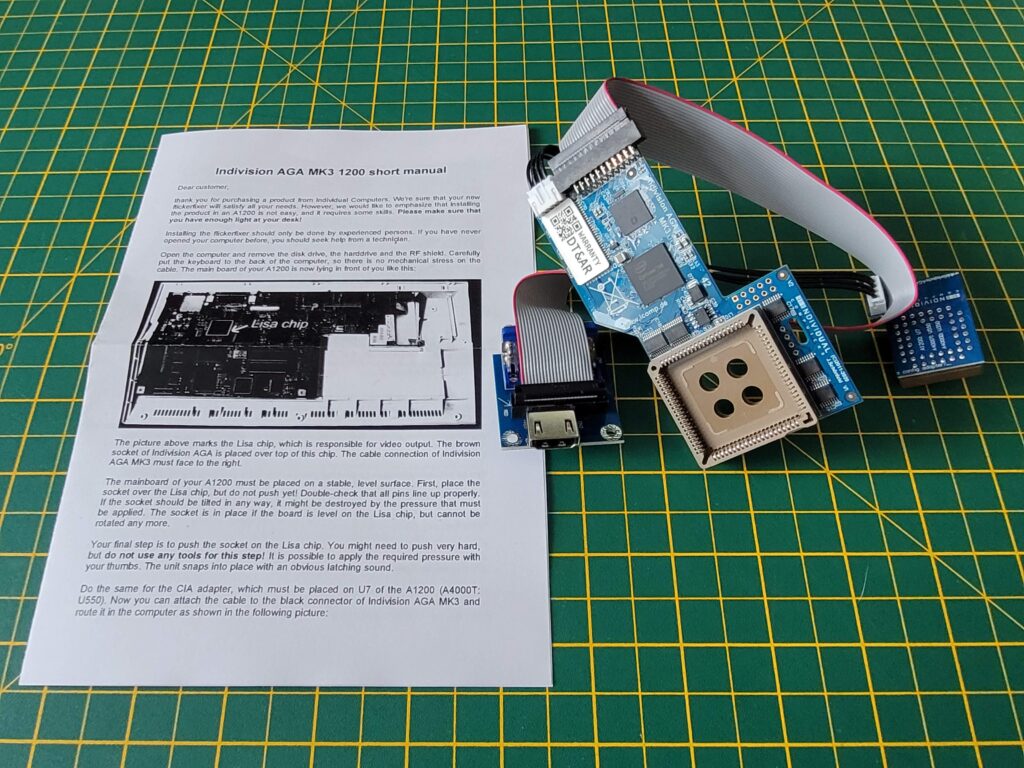
Inside the attractive cardboard box was the flicker-fixer, a single mounting screw and an instruction sheet.


Indivision AGA Mk3

Contents of the box.


The included instruction sheet wasn’t brilliant if I’m honest as the print quality was very poor. Thankfully there’s a much better version online on the icomp.de Wiki here.


Indivision AGA Mk3

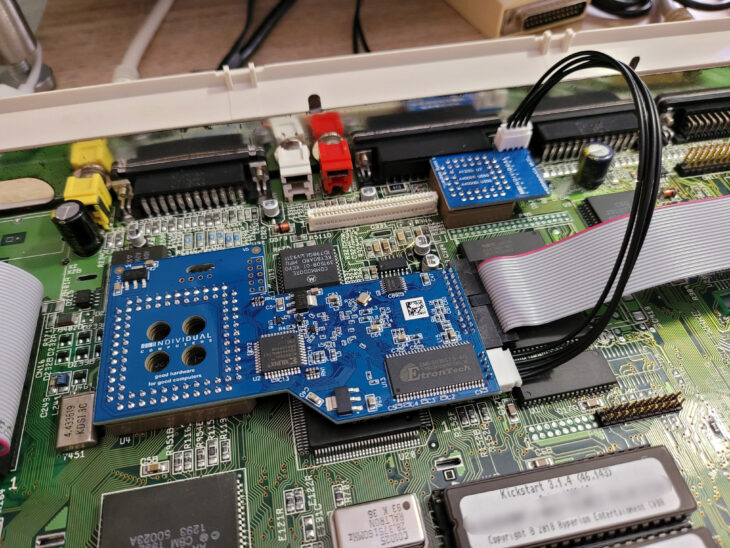
The Indivision AGA Mk3 in all its glory.


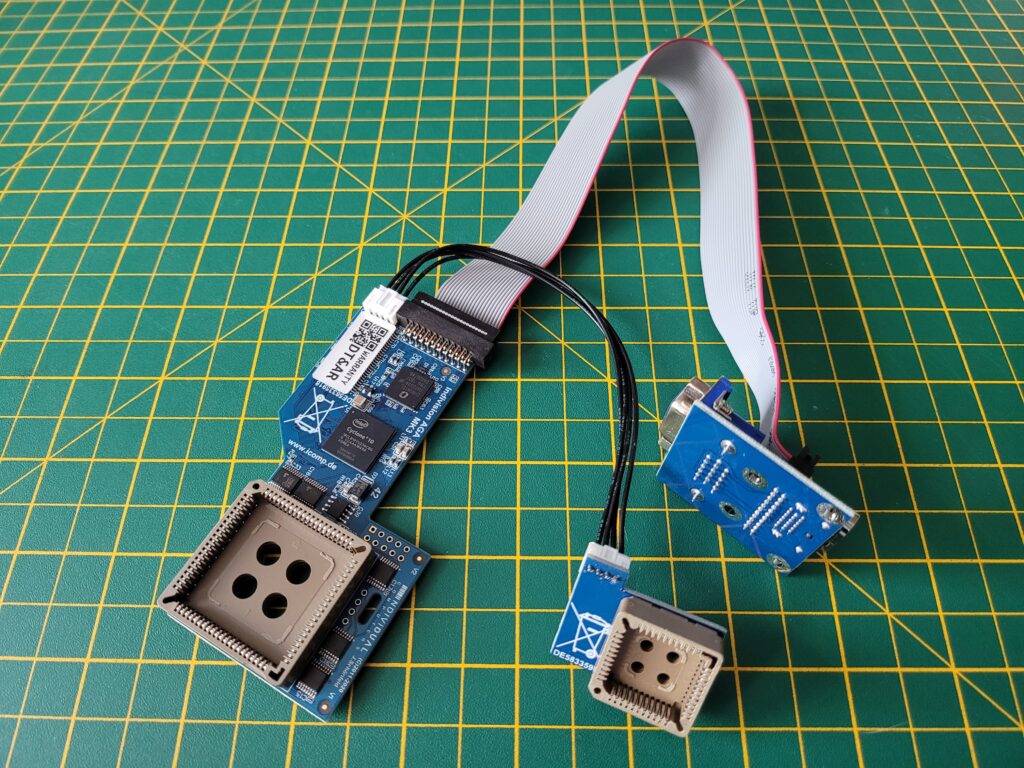
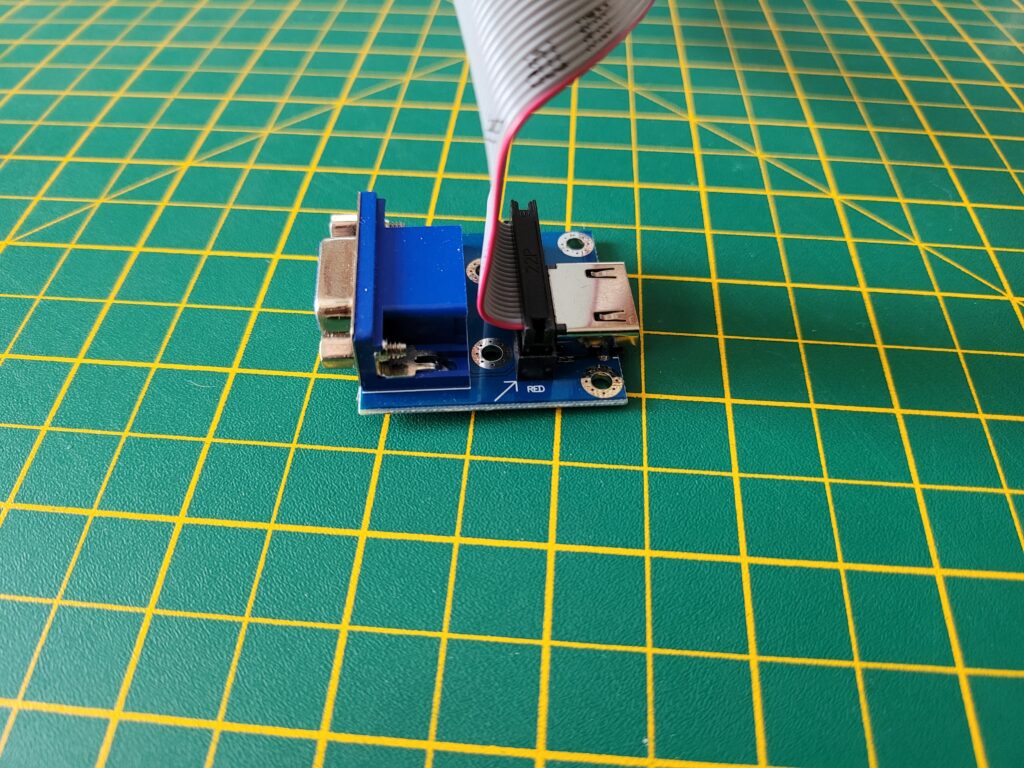
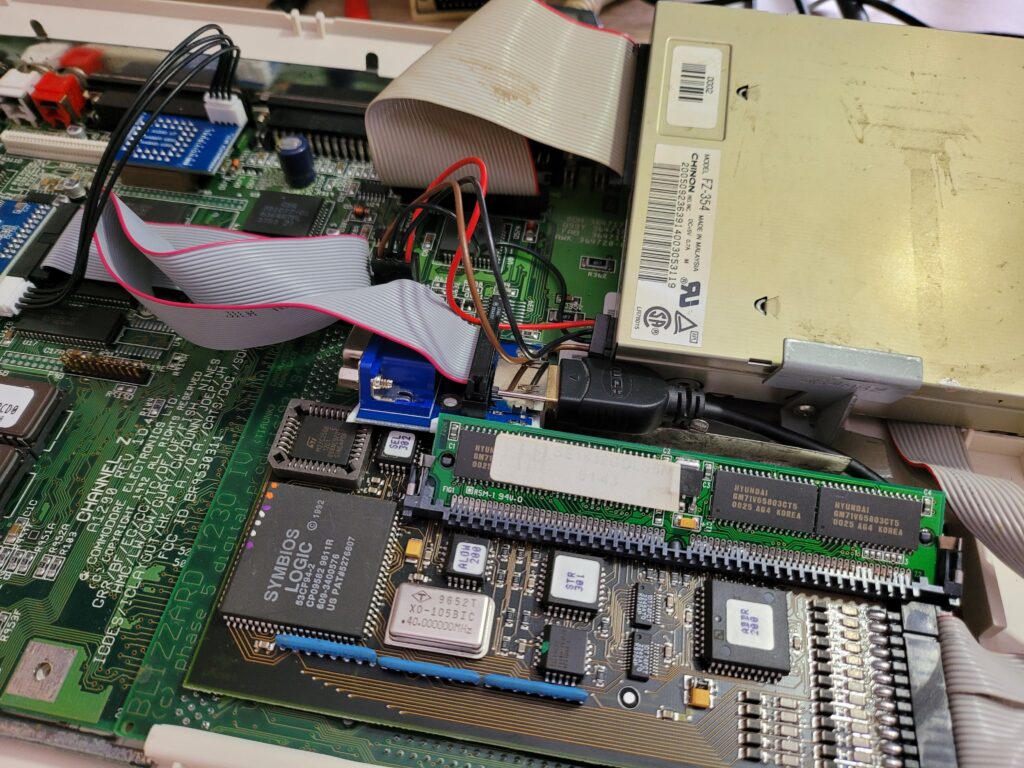
The Indivision AGA Mk3 consists of three main components. The largest circuit board is the actual flicker-fixer whilst a smaller board handles keyboard signals. Finally there is a VGA/HDMI connector attached by means of a ribbon cable to the main board.


Indivision AGA Mk3

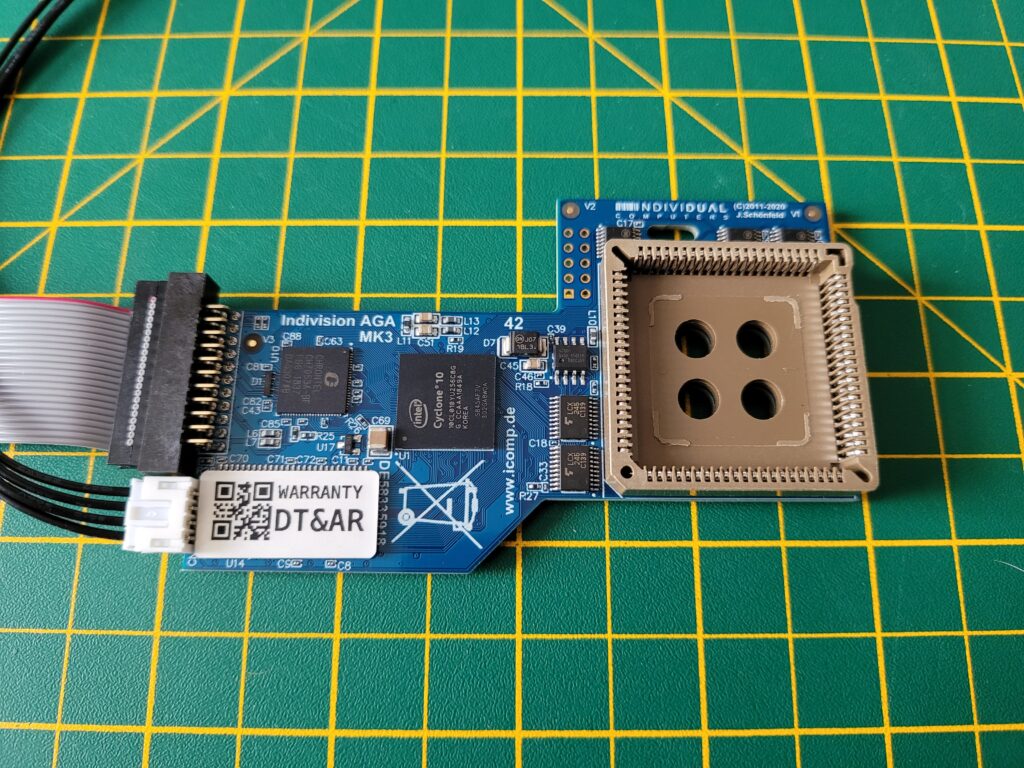
The main flicker-fixer board.


The main flicker-fixer board (above) features a large socket which allows it to connect to the Amiga 1200’s Lisa graphics chip and perform it’s scan-doubling and flicker-fixing duties.


Indivision AGA Mk3

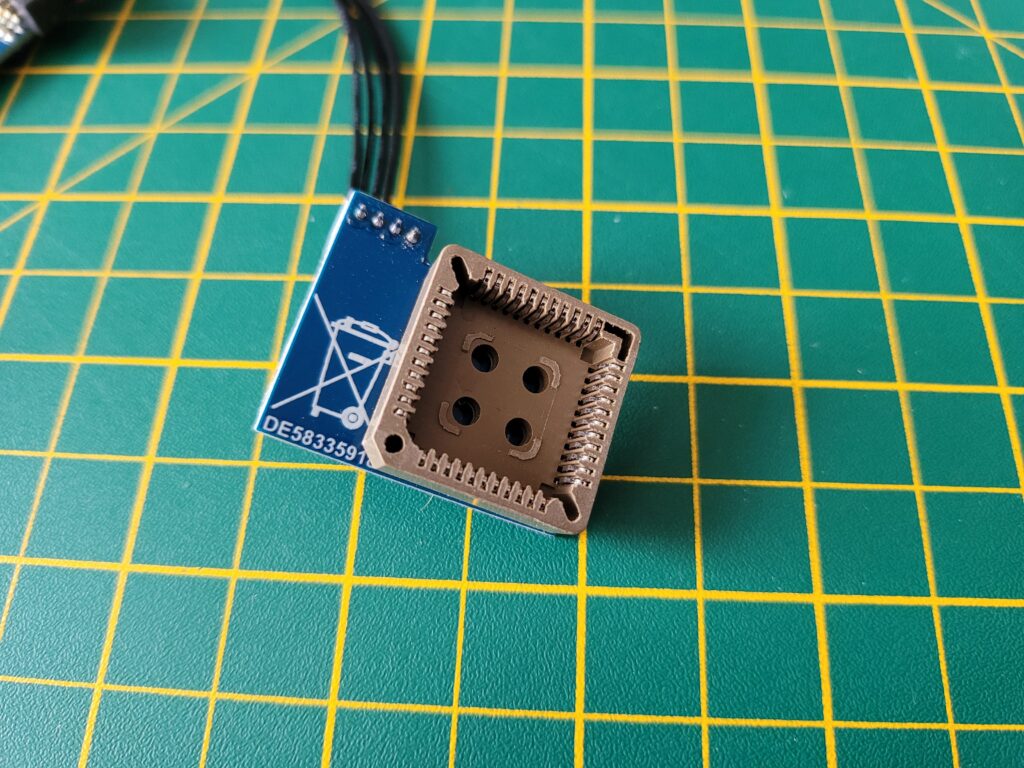
The U7 CIA chip interface.


The smallest board has a socket that connects to the U7 CIA chip. This allows it to check for a specific combination of key presses to bring up the ‘Live Edit mode’.


Indivision AGA Mk3

The double sided video connector board.


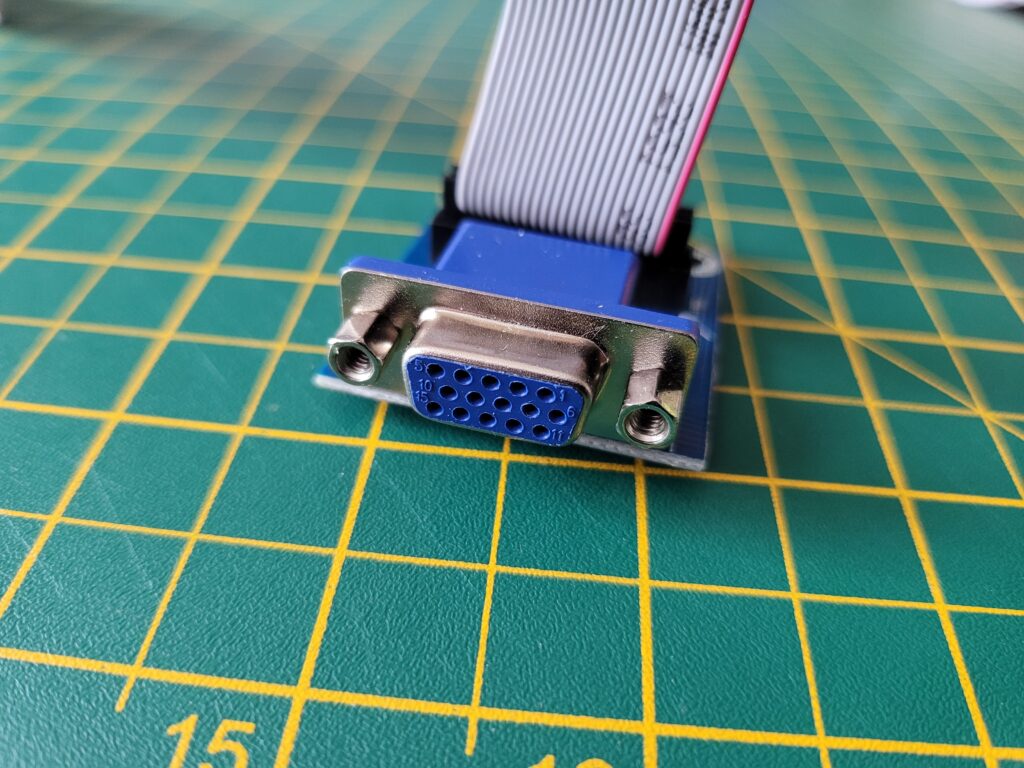
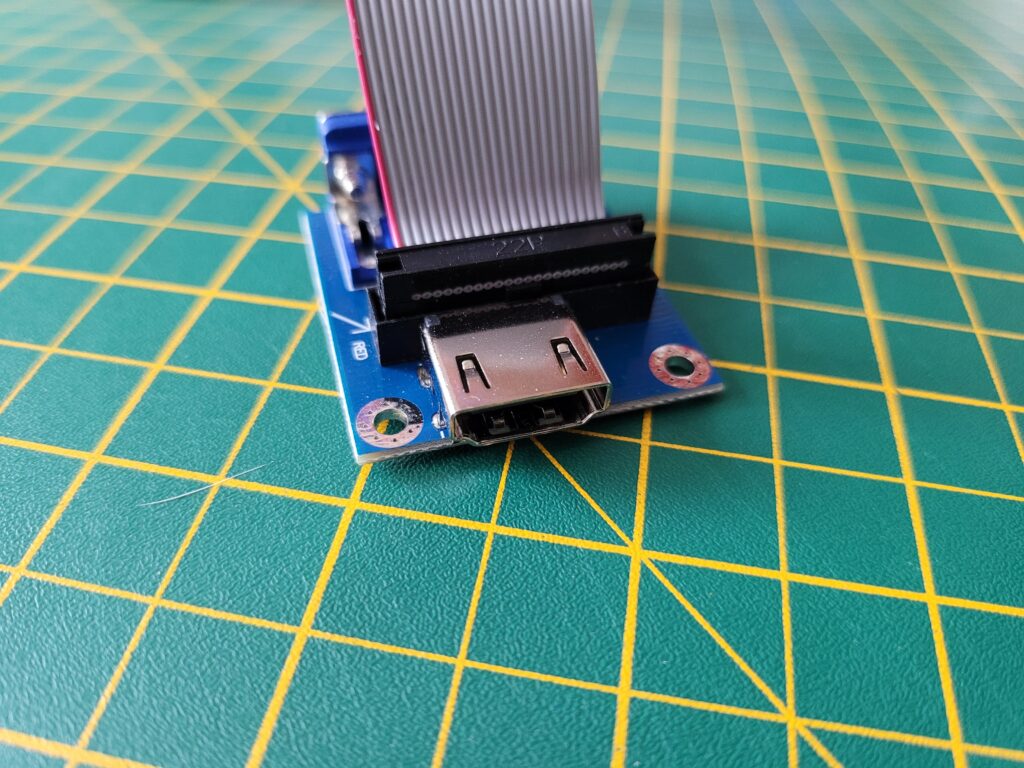
The Indivision AGA Mk3 supports both VGA and HDMI monitors by means of a board that incorporates both types of connectors on it.


Indivision AGA Mk3

VGA Connection.


You simply install the board with your preferred connection method facing outwards. It’s intended to fit in the A1200’s expansion port and a single screw is supplied to securely attach it to the bottom of the case.


Indivision AGA Mk3

HDMI Connection.


Preparation

The very first job was to remove the A1200’s metal RF shield which was blocking access to the areas of the mainboard I needed to get to. This necessitated removing the floppy drive, a couple of screws along the front edge of the board and bending up several little tabs all around the shield. Once I’d done this I was able to lift away the shield with only a little bit of leverage from a screwdriver required along the back edge. This resistance was most likely the result of the small amount of corrosion present on my RF shield.


Amiga 1200 RF Shield

RF Shield On.


With the RF shield removed I now had unrestricted access to the entire A1200 motherboard. I don’t think I will be putting it back on any time soon as it would need modifying to fit around the Indivision. Besides, with it permanently off I have easy access to the board for future projects.


Amiga 1200 motherboard.

RF Shield off. Motherboard revision information viewable. (Rev. 1.D.4)


Board Revision

Interestingly, with the shield off I could now see the information printed on my A1200’s motherboard. It was identified as being a Revision 1D4 board. These boards are also recognisable by the fact that the mouse port isn’t actually part of the board itself but rather connected to it via a ribbon cable. Earlier revisions had the mouse port on the board itself whilst the later R2 motherboard had the mouse port on a separate little board. My 1D board also has a half-width clock port header whereas earlier boards had full length ones.


Indivision AGA Mk3

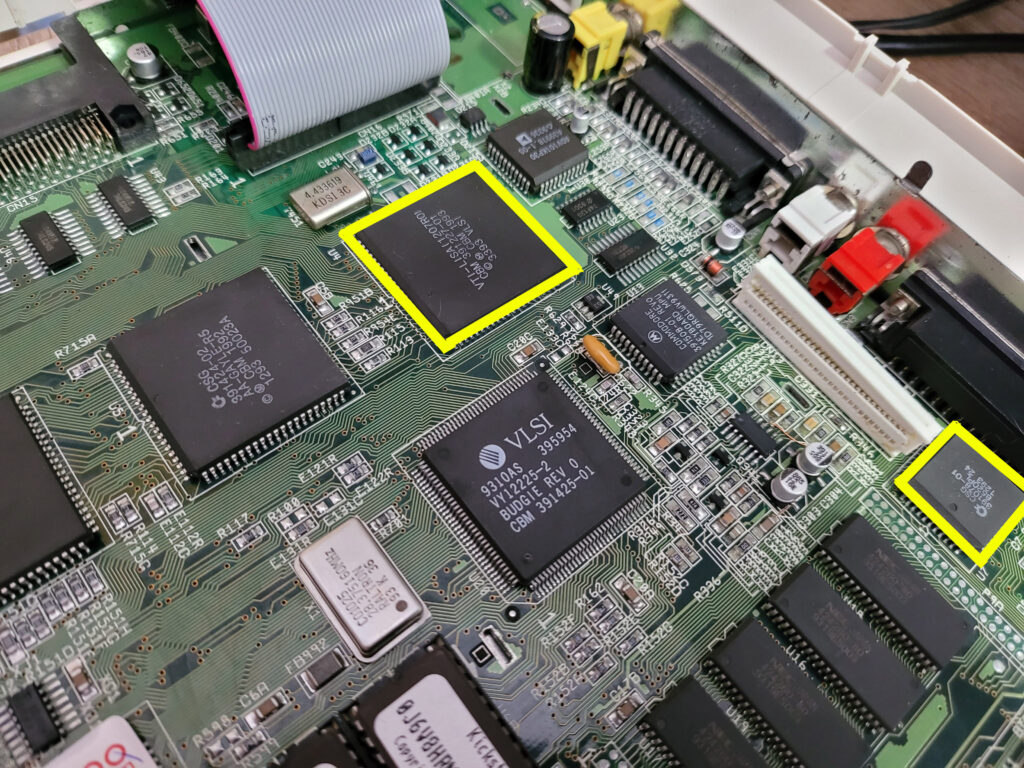
The chips outlined in yellow show where the Indivision AGA Mk3 connects to the A1200 motherboard. The larger chip is Lisa and the smaller one the U7 CIA.


Installation

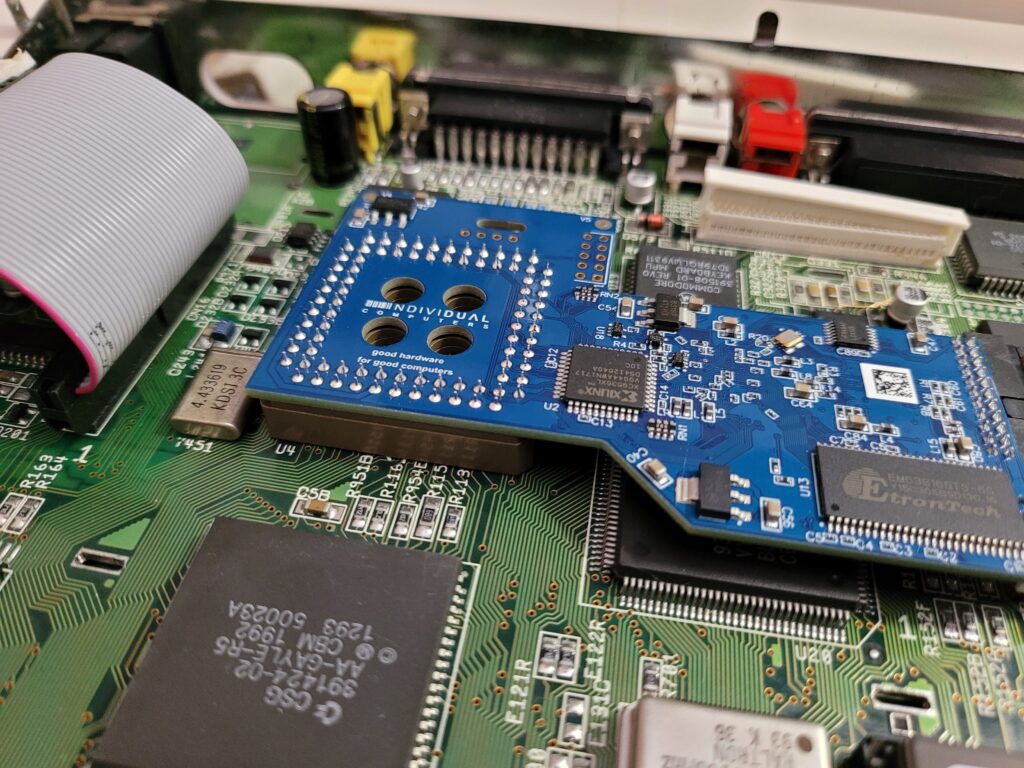
Fitting the main Indivision AGA Mk3 board was fairly straightforward as no tools or clips are required. The board employs an empty socket to latch onto the Lisa chip and grip it tightly. I made absolutely sure that it was aligned correctly and then carefully pressed it into place. The instructions make it very clear that it must ‘click’ into place to be properly installed and this does require quite a scary amount of pressure to be applied. After a few moments of applying steadily increasing force to the board it did eventually snap into place with a very satisfying ‘click’. I then made a visual check all around the Lisa chip to ensure it was seated completely flat.


Indivision AGA Mk3

The Indivision AGA Mk3 successfully mated to the Lisa chip…


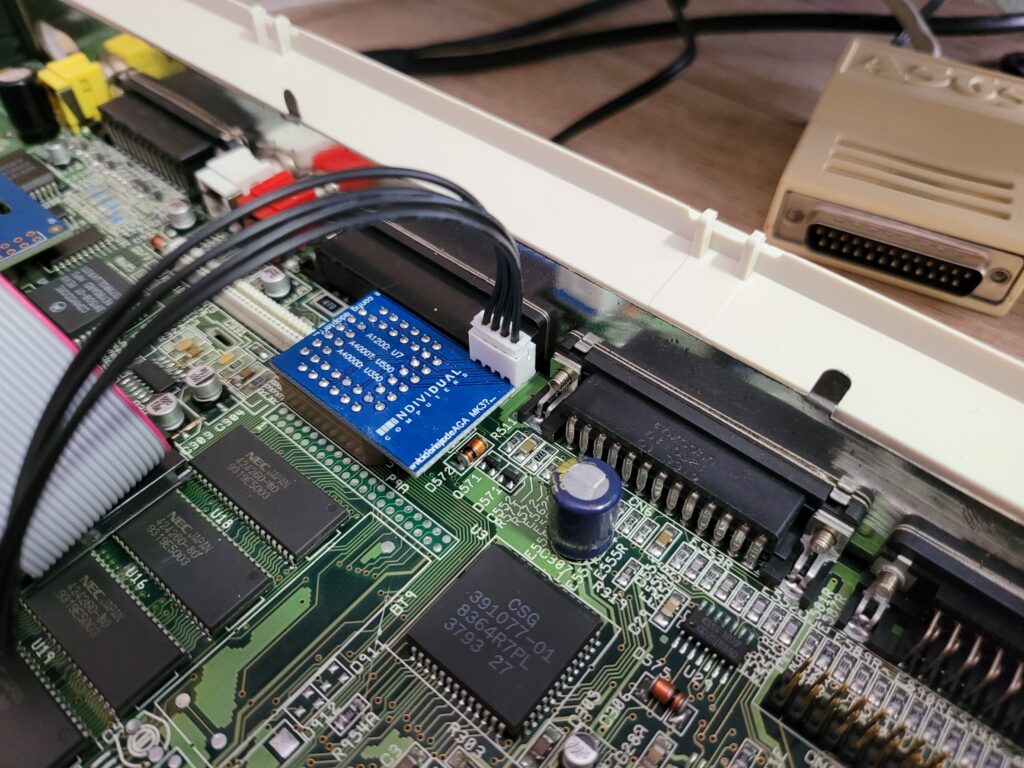
The next stage was to fit the U7 CIA chip connector.  I had to consult the wiki to check the location and orientation of this as the instruction sheet was so murky I couldn’t make it out. It’s quite a tight fit next to the keyboard connector but at least it didn’t require as much pressure this time.


Indivision AGA Mk3

…and the U7 CIA chip.


The final installation step was to find a home for the HDMI/VGA sockets. In an ideal world the connectors would fit into the expansion bay beneath the floppy drive but that space is already occupied by my Blizzard SCSI port. My A1200 has had the RF Modulator removed and I had hoped it would fit there but unfortunately there was insufficient width to accommodate it so this location was out  too.


Indivision AGA Mk3

My placement of the HDMI/VGA connector between the trapdoor expansion slot and the floppy disk drive.


After trying a few places I settled for a position between the floppy drive and the trapdoor expansion bay. It fits there nicely and allowed me to run the HDMI cable under the case and up through the trapdoor. I applied several strips of insulating tape to the base of the HDMI/VGA board to prevent any possible short-circuits. It’s not the perfect solution as I’m unable to unplug it without removing the case but it’s an acceptable compromise. I made sure to use a nice thin, flexible HDMI cable which made routing it through the trapdoor and underneath very straightforward.


Indivision AGA Mk3

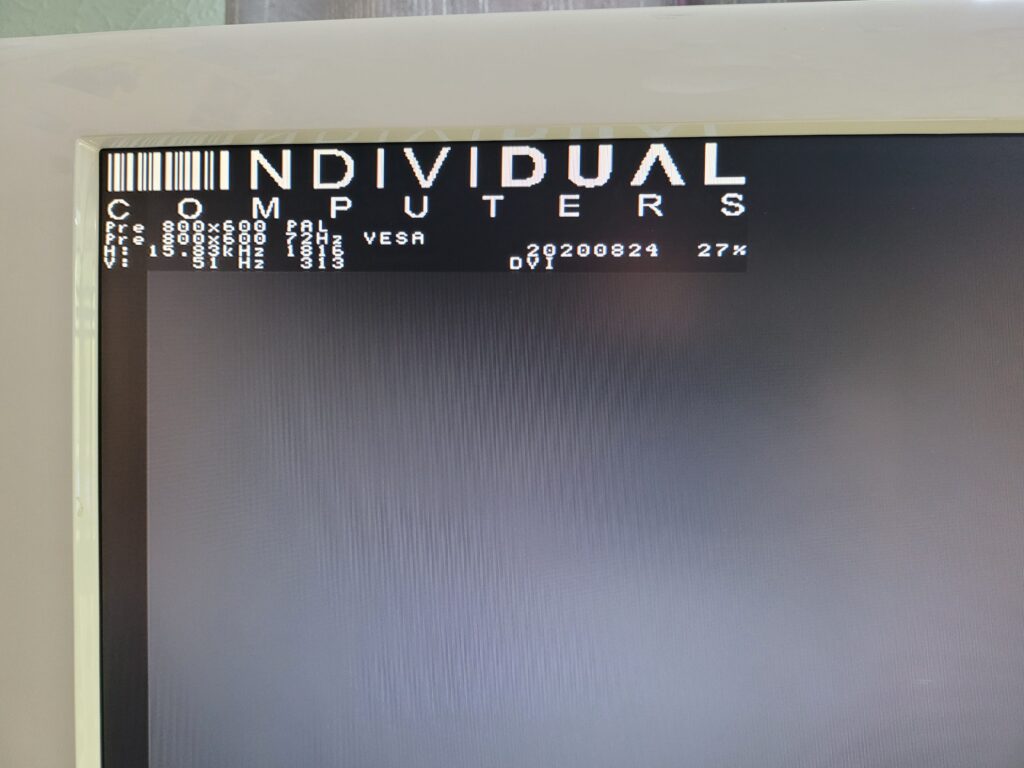
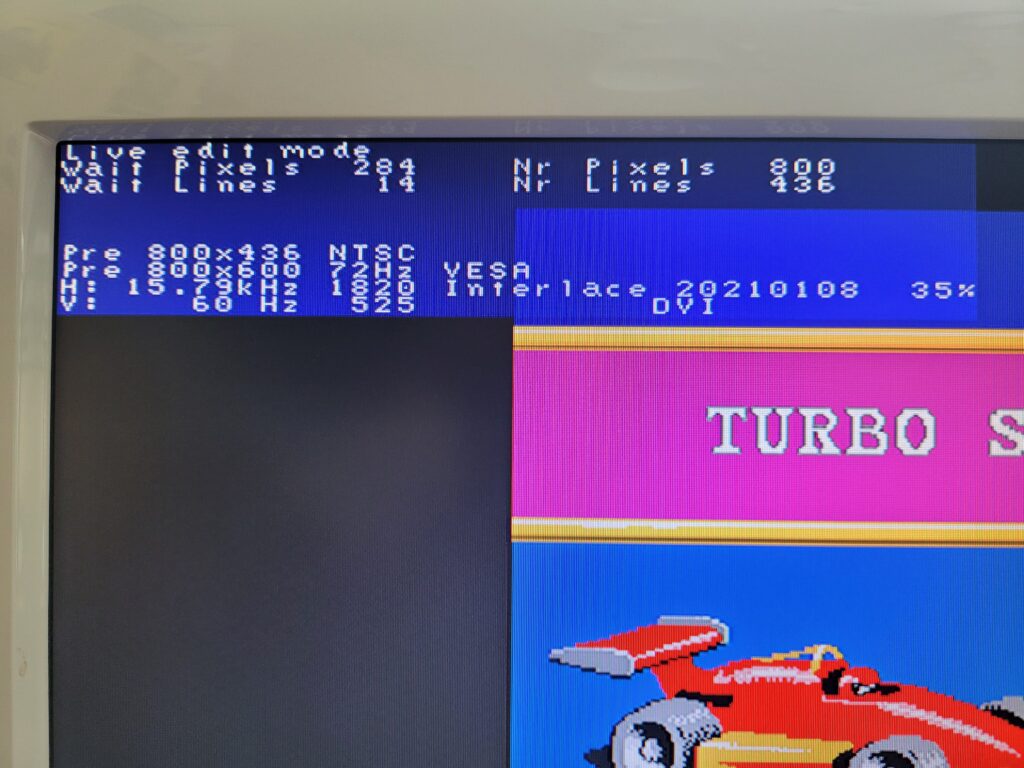
This is the screen overlay that provides info about the current screen mode.


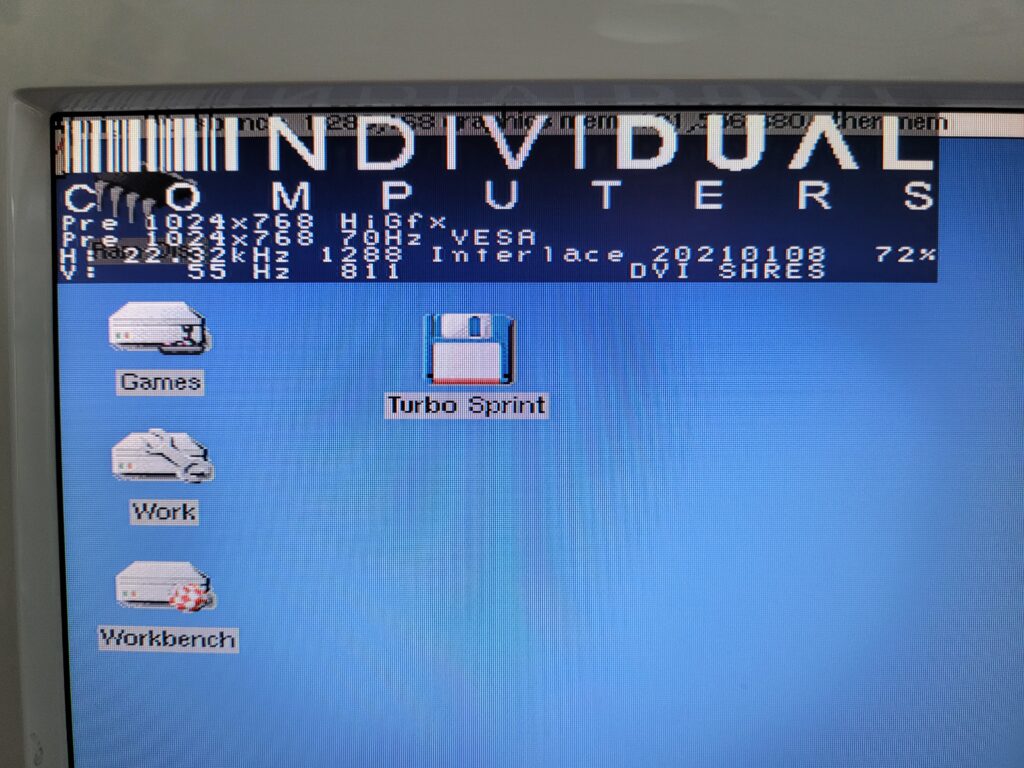
It was finally time for the moment of truth – the big switch on. After powering on my A1200 I waited patiently and after a few tense moments an Individual Computers overlay appeared in the corner of the screen. Having seen proof of life – it was now time to see what it could do!


Configuring a 16:9 Workbench Screen

I downloaded the HighGFX screenmodes off Aminet and also the Indivision config tool off the icomp.de website and set to work creating the perfect Workbench screen…


Indivision AGA Mk3

Adjusting the screen settings.


There are two sides to this – the Amiga screenmode and the Indivision mode. The way it works is the Indivision detects the screenmode the Amiga is using and then maps it to one of it’s built-in preset (monitor friendly) output modes. With the Indivision Config tool you are able to create your own modes too and there’s a plethora of settings to tweak if you have the patience. Thankfully the preset modes cover most of the common Amiga screenmodes so most people will probably be fine with what’s supplied ‘out of the box’.

Back to my perfect Workbench screen… I spent the next few hours fiddling about trying to get a proper 16:9 mode working on my HDTV with a native resolution of 1366×768. I was trying to get the HD720 HighGFX mode working which should have given a perfect 1:1 pixel aspect whilst also utilising the entire screen width. However I just couldn’t get any combination of Amiga screen mode and Indivision settings to display correctly, even after painstakingly tweaking the 1280×720 preset to perfectly fill my monitor screen.


Indivision AGA Mk3

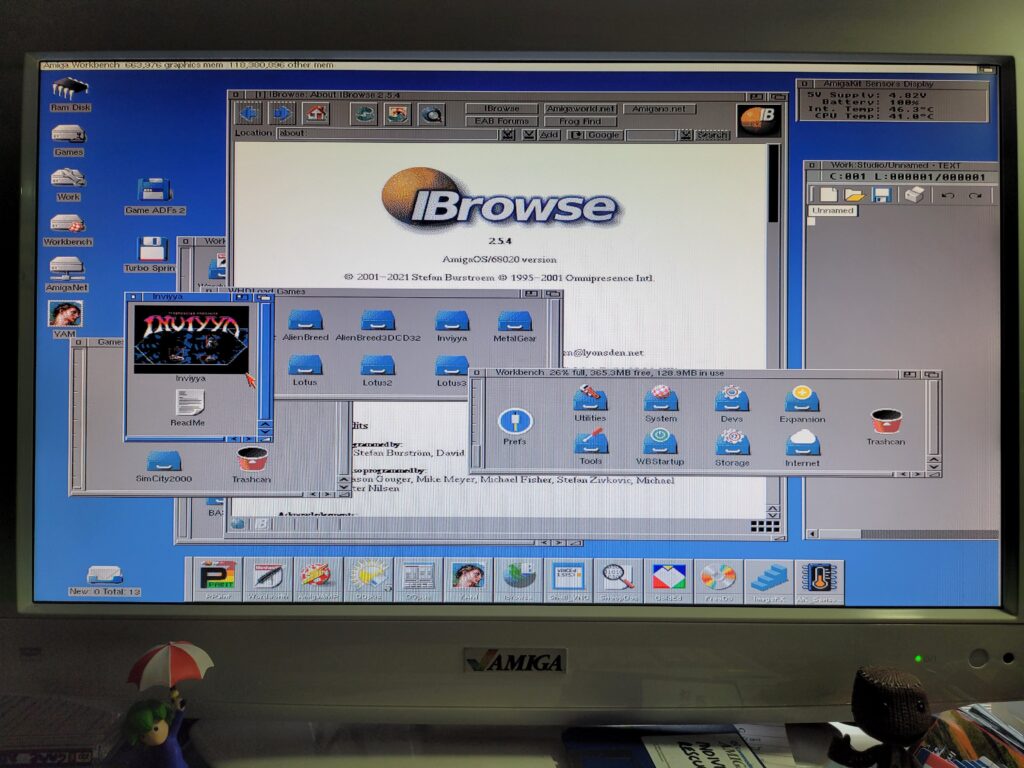
My widescreen Amiga display using just the output of the Lisa chip, no RTG required!


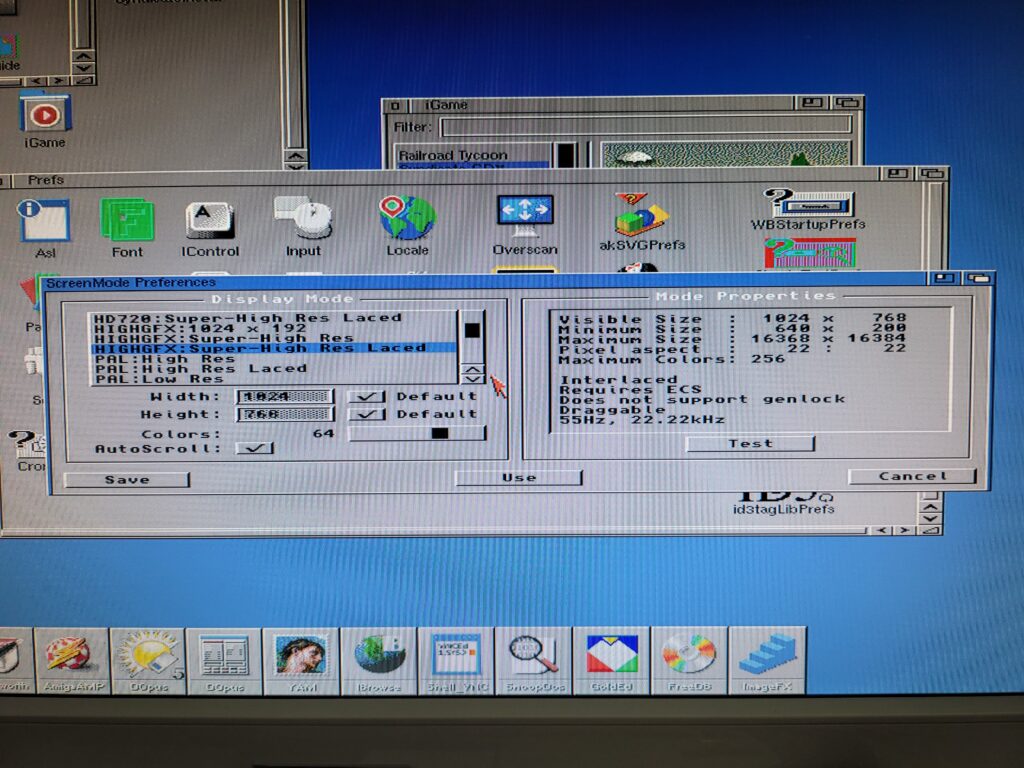
In the end I settled on the HighGFX Super High Res Laced 1024 x 768 mode which worked perfectly as the Indivision matched it to an existing VESA 1024×768 mode. The image fills my entire screen and is super crisp and vibrant thanks to the all-digital nature of the HDMI output. The only slight niggle is the image is very slightly stretched horizontally. This is because although the Amiga screenmode has a 1:1 pixel ratio – it’s intended to be used on a 4:3 monitor screen, not 16:9. However it’s by no means a deal-breaker and having such a massive (by stock Amiga standards) screen makes Workbench even more pleasurable to use.


Amiga screenmode preferences

Screenmode preferences showing HighGFX screen mode selected.


One day I will have another go at creating a perfect 1:1 16:9 Workbench screen but for the time being I’m satisfied with what I have now.


Indivision AGA Mk3

Indivision overlay showing both the detected Amiga screenmode and the preset mode being used to display it.


Configuration Tool

The card has its own dedicated configuration tool that you install to your Preferences folder. It allows you to create, test and tweak an almost limitless array of screenmodes, whether they be for productivity apps or PAL/NTSC games. Hidden away in the advanced section there is also an option to route audio through the HDMI cable too if you have a TV/Monitor that has speakers. I have my sound routed through a Bose Soundlink Mini as my TV speakers are pretty wimpy but this would be a great option otherwise.


Indivision AGA Mk3

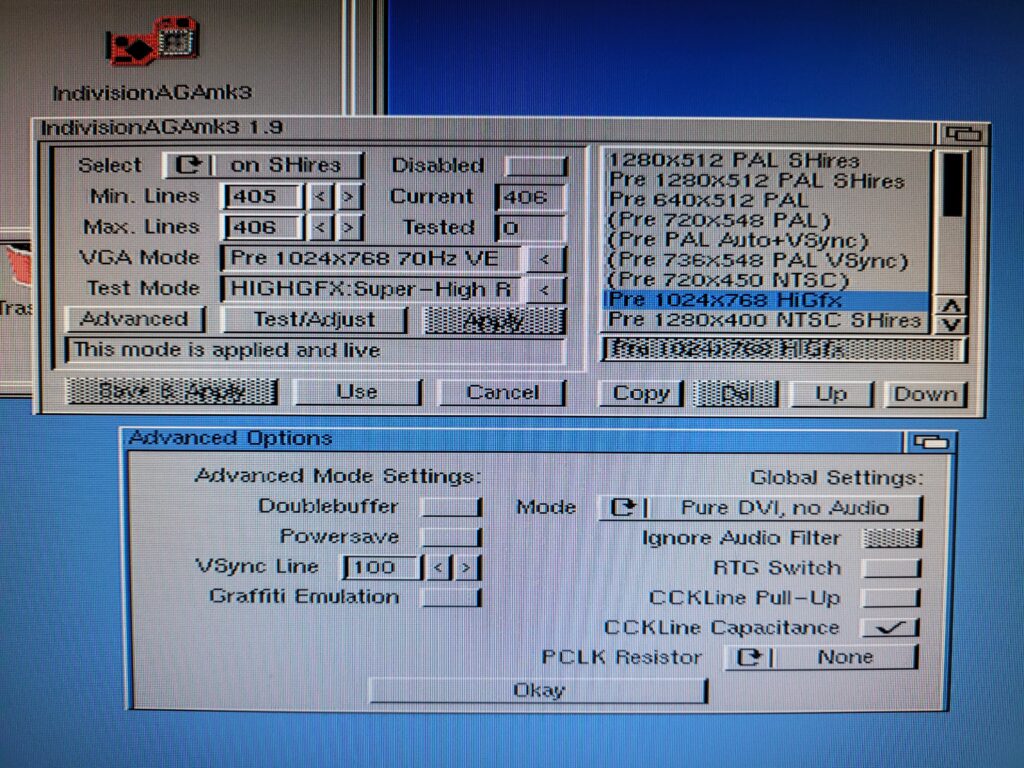
Indivision AGA Mk3 Configuration Tool.


Glitch in the Matrix

I did notice an issue after using the Indivision card for a few hours – I was seeing some random flickering pixels on my screen. It got worse as time went on, and my Amiga was getting very warm too, much warmer than it would normally do. Naturally I immediately thought there was a fault with the card but after I RTFM again I discovered that this is actually quite a common issue and isn’t a fault at all. I was able to eradicate it completely by using the config tool and enabling ‘CCKLine Capacitance’ from the advanced options. I’m not going to pretend I understand what this does but it definitely fixed the issue for me. There are other settings that can fix other glitches too but thankfully this is the only issue I came across. I am still not entirely happy about the extra heat it generates but I intend to sort that with a few upgrades very soon.


Indivision AGA Mk3

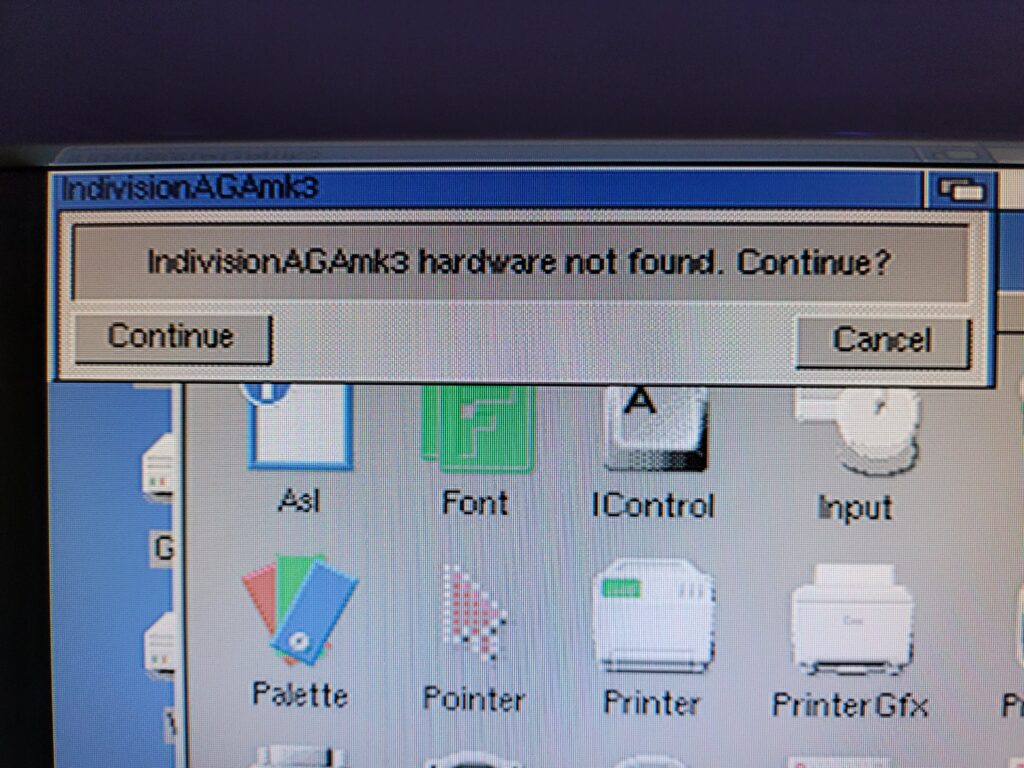
My Indivision card stopped being recognised!


Reports of my death have been greatly exaggerated

The Indivision card also tried to fake its own death at one point. I’m not entirely sure what happened but I had been messing around with the ‘live edit’ feature and the next thing I knew the Indi was no longer being detected. To make matters worse when I rebooted my Amiga it was using a screen mode that my monitor could not display so I couldn’t even see the screen. I tried removing the card and re-seating it but it still refused to work.

Now by this point I honestly thought it was dead and I’d have to return it. Then I remembered about the Rescue Disk recommendation I’d seen on the website. Amazingly I had read this and actually bothered to create one! I popped it in the drive, rebooted and after what felt like an eternity my Amiga booted up again and the card came back to life. I’ve never been so glad that I bothered to follow a set of instructions for once! I’m guessing I corrupted it’s firmware somehow and the repair disk re-flashed it but the main thing was my card wasn’t broken.

Live Edit Mode

Speaking of the ‘Live Edit Mode’ this is a utility that can be displayed at any time (even during a game) by holding down Left Shift, CTRL and Tilde. The fact this can be invoked at any time is thanks to that connection with the U7 CIA chip which allows it to detect the key-presses.


Indivision AGA Mk3

Indivision AGA Mk3 Live Edit Mode.


Whilst this mode is active you can move the on-screen image around your monitor with the mouse. You can also resize it whilst holding down the left mouse button in both the vertical and horizontal directions. This is a really useful feature and allows you to deal with any screenmodes that don’t have presets in the Indivision’s configuration. Once you’re happy with the screen layout simply press Tilde to exit Live Edit mode and ‘keep’ your adjustments. Whilst these ‘Live’ changes are not permanent by default (they are lost when power-cycling) there is an option to store them later in the config tools should you wish to.


This slideshow requires JavaScript.


In the example above I used the Live Edit mode to force Cannon Fodder to fill the screen of my 16:9 TV and remove all the black borders.


Do Adjust your TV Set

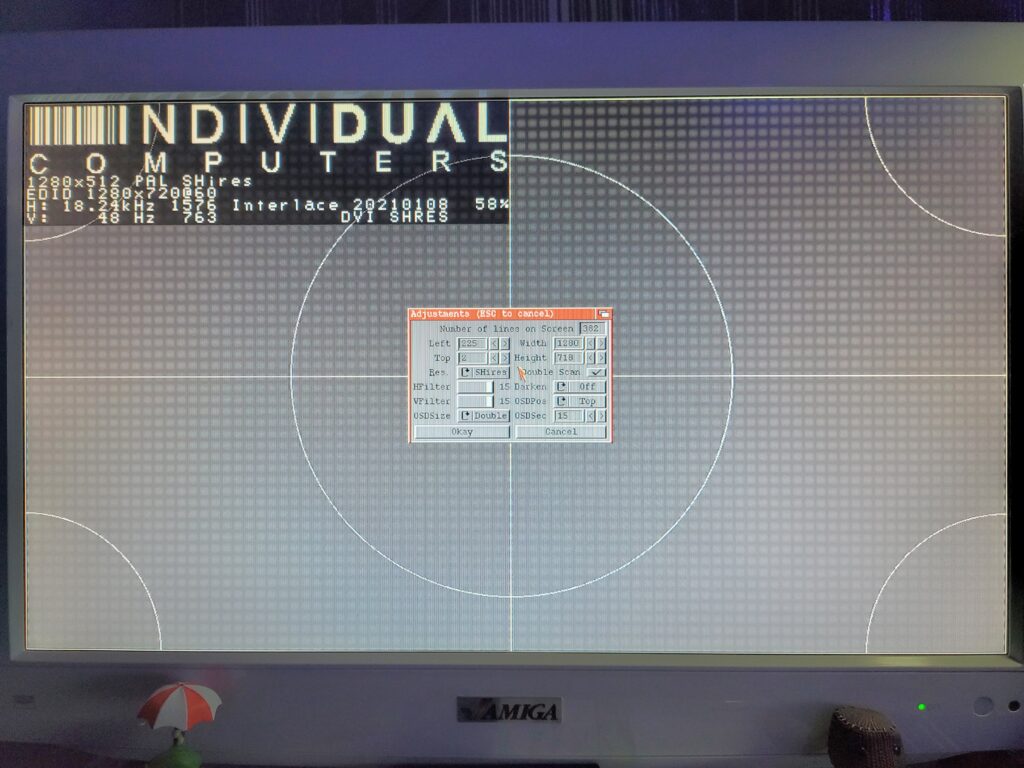
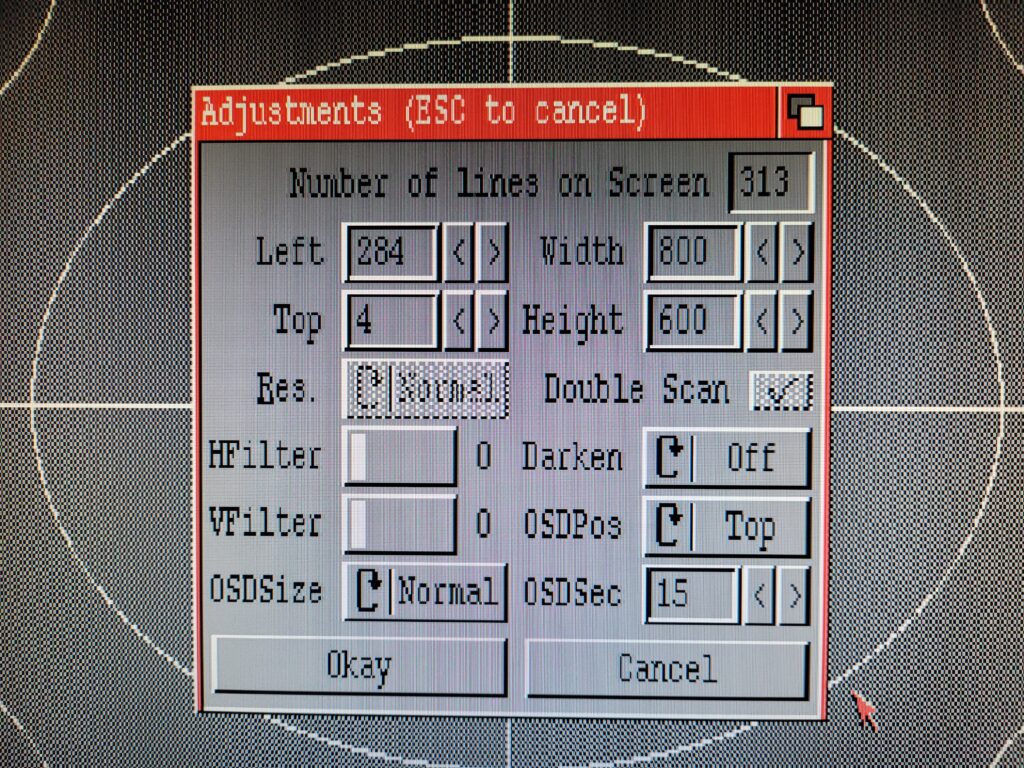
Many interesting settings are hidden away in the ‘Test/Adjust’ section, not least of which is the ‘Darken’ option. This basically emulates the scanlines of a CRT monitor on your modern flat screen monitor. Settings range from 6% to 75% depending on how strong you want the effect. It only works on Double-scan modes and defaults to being switched off. There are also several settings for the On-Screen Display so you can tweak the size, length of time it is displayed and also which corner it appears in. Of course you can also adjust the size and position of each Indivision display mode from here too.


Indivision AGA Mk3

Close-up of the Adjustments tool.


Summing Up

This is a terrific device for anyone who enjoys using the Amiga 1200 as a hobby machine and wants to get the best possible image from it. The Indivision AGA Mk3 definitely allows one to maximise the power of the AGA chipset by allowing it to display resolutions that would never have been possible before. It also allows hassle free connection to modern LCD monitors and TV’s via both HDMI and VGA which is another huge benefit.

Of course that’s not to say it isn’t great for gaming as well because it is. However if all you want to do is play games then I’d consider this to be overkill and there are much cheaper options available. It also requires a certain degree of… experimentation which the average gamer may find off-putting.

Short of getting an actual RTG card for the Amiga this is as good as it gets and when utilising HDMI the picture quality is simply stunning. Considering this is still using the A1200’s native AGA chipset to deliver the image it’s a really impressive sight to behold.

In short; if you have the funds, want to push your A1200 graphics to the limit and enjoy tinkering then I highly recommend this device.

Getting an A1200 Online Part 4 – Installing an Amiga Email Client

YAM Email on Amiga.,

Installing an Amiga Email Client (How to access Gmail on the Amiga in 2021)

In Parts 1, 2 and 3 we installed a network card, a TCP/IP stack, connected to the Internet and installed a web browser. In this part we’ll add another essential Internet tool to our Amiga 1200 – an email client.

This guide has taken me a lot longer to piece together than I expected because, well quite frankly accessing email on a classic Amiga is a minefield now. A few years ago I did a similar project getting my Amiga 500 with a Vampire accelerator to access IMAP emails with SimpleMail and it worked great. If you are interested you can read about it here. However trying to replicate that again in 2021 I discovered it just doesn’t work any more. SimpleMail hasn’t been updated for two and a half years now and trying to access anything via SSL results in it crashing out. AmiSSL was at version 4.1 when I set it all up last time, now it’s just hit v4.9. I’m guessing the two just don’t play nice together any more. IBrowse 2.5.3 needs the newer version of AmiSSL to function so I needed to find a solution that worked with that too.

So I thought, well OK if I can’t have IMAP at least I can still get Amiga email access via POP3 using good old YAM… So off I popped to Aminet to download the most recent version, 2.9p1, available here:

Aminet – comm/yam/YAM29p1-AmigaOS3.lha

I eagerly installed it… only to crash and burn as soon as I ran it because it was expecting AmiSSL 3.5. Any sort of secure POP3/SMTP access was immediately off the table and I was back to square one. I must admit I was starting to despair a little bit by this point. However I was determined to get email access on my miggy so I kept hunting for a solution and, eventually I found it.

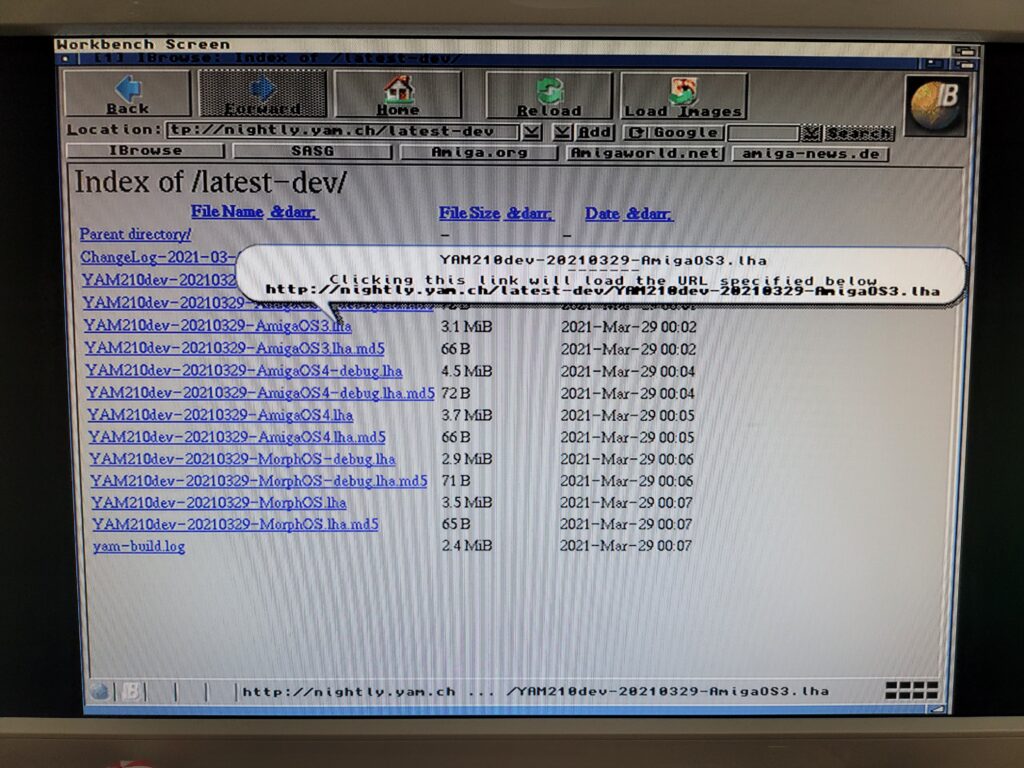
It turns out that YAM is actually still in active development and there was a new version released just last month! This new version is able to communicate with the new version of AmiSSL so I was back in business. Why they don’t publish it to Aminet I don’t know as that’s always been the first destination for Amigans looking for software. Anyway the latest version of YAM should always be available from the website below. At the time of me writing this article it’s at version 2.10 with a compiled date of 29th March 2021. I’m using AmiSSL 4.8 but over the course of doing this article I have since upgraded to 4.9 and everything still works perfectly. I just installed 4.9 over the top of 4.8.

Index of /latest-dev/ (yam.ch)
 

Amiga Email

Latest YAM ‘nightly’ build (actually more like monthly).


Installing YAM

OK before we get started there are a few pre-requisites that need to be considered before we attempt to get email on our Amiga.

Like most decent software on the Amiga, YAM requires MUI to be installed in order to function. It should also go without saying after my introduction that AmiSSL needs to be installed too. If you have followed the previous guides and got IBrowse up and running then you are good to go already. If not, head back to part 3 and install them first.

Also I’m not going to do a blow by blow account of how to install it. If you’ve been following along then you should be familiar with how to install programs on the Amiga by now. There are no surprises lurking within the installation. Besides, this article is long enough already!
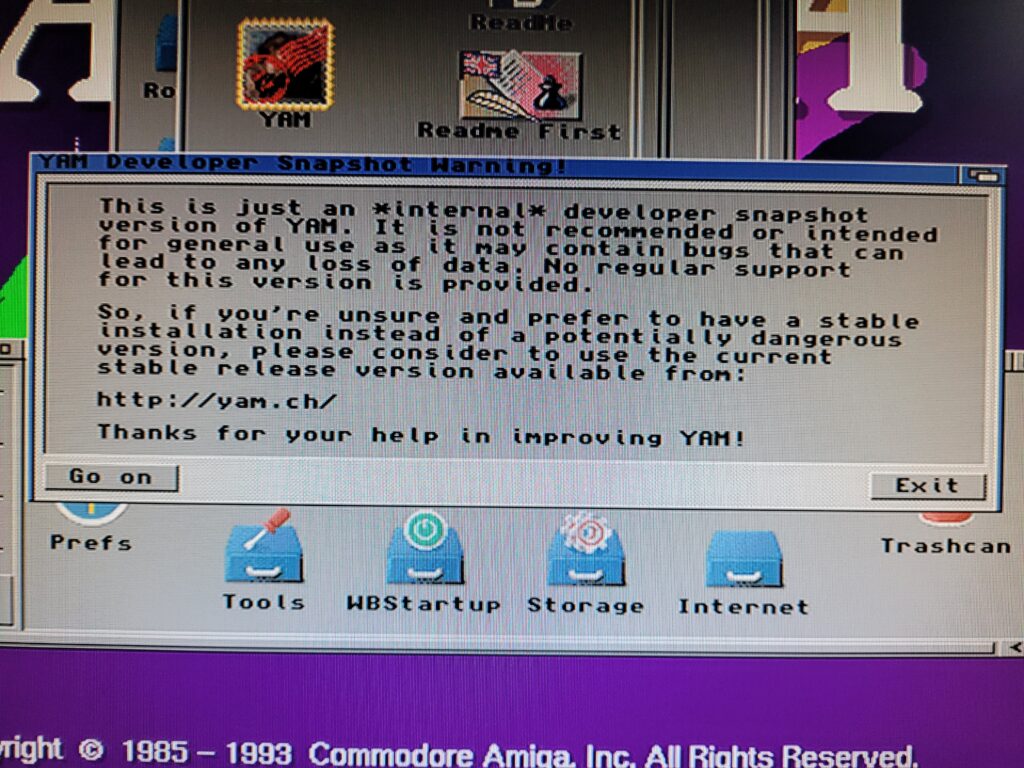
 

Amiga Email

A warning that this is a developer version.


Because this is classed as a ‘developer build’ a little nag box pops up each time you run YAM. It warns about it not being for general use and that it may contain bugs but it’s perfectly safe (and stable) to use.

YAM does take a little while to load, even more so the very first time you run it. All being well you should see a nice splash screen like the one below with a handy progress bar.
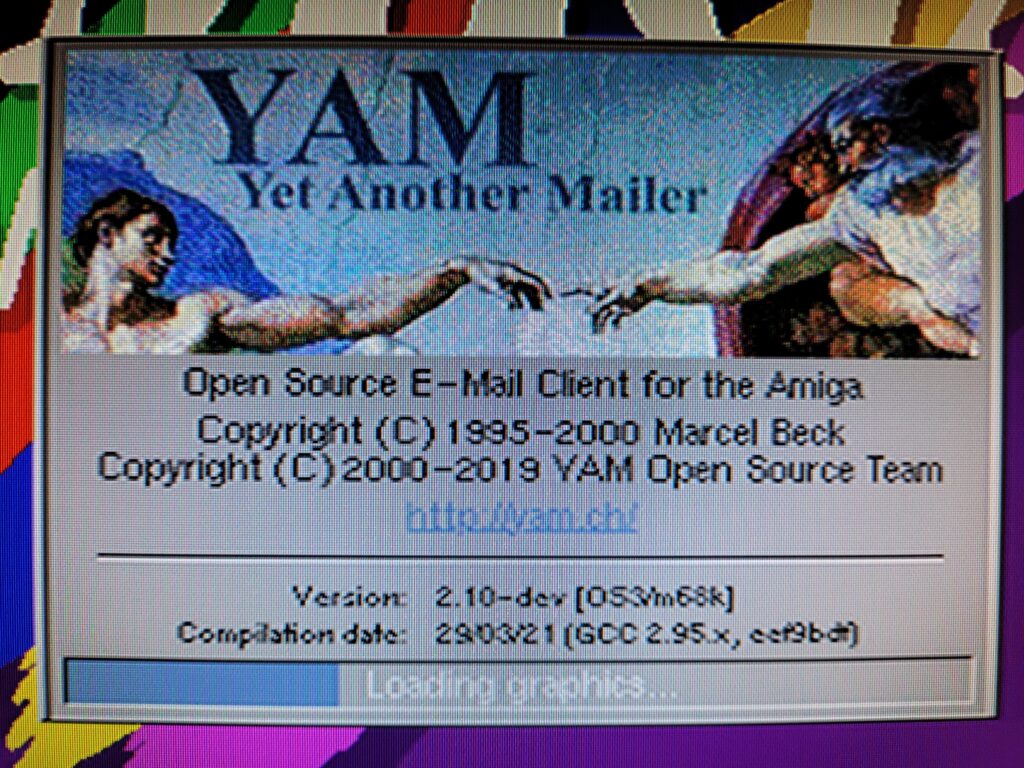
 

Amiga Email

The YAM Splash screen.


After around 60 seconds YAM should have finished loading and you can begin the process of configuring the program to get your emails.

The program screen should look similar to the image below. Please bear in mind that I had already configured a couple of email accounts and tweaked some of the GUI settings before taking this photo.
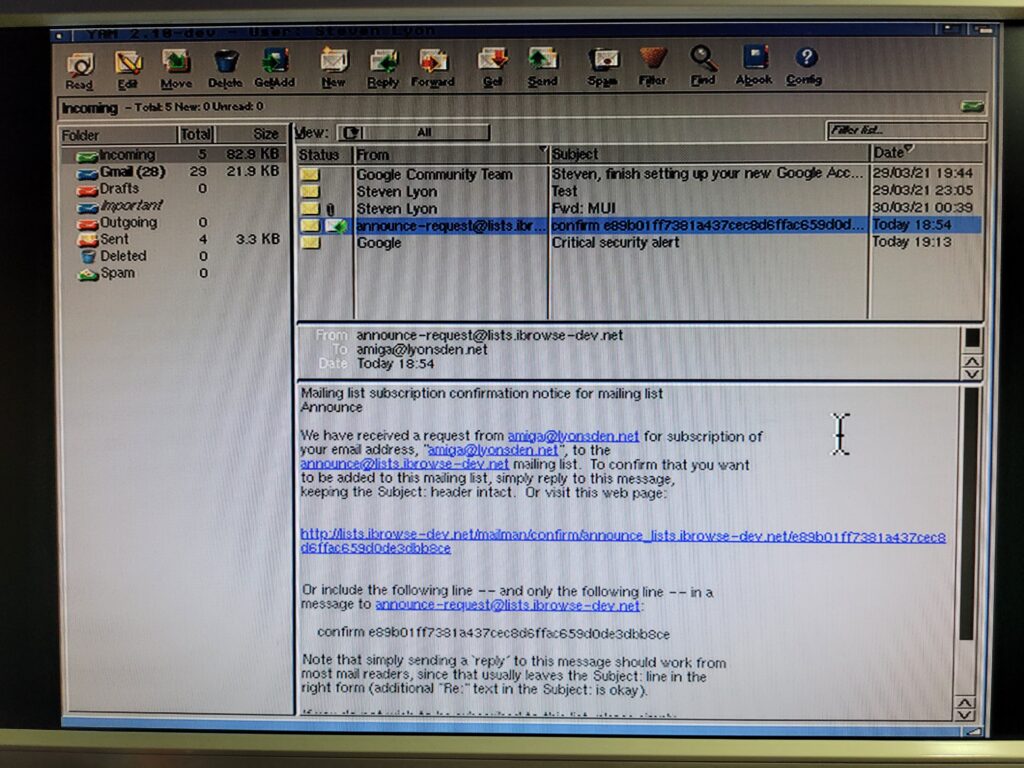
 

Amiga Email

The main YAM interface.


I have tested this out with Gmail and the mail service provided by my hosting company and had great success with both. I’d imagine that it should work with most POP3 mail services provided you are able to adapt the instructions below to fit your circumstances.


Want to use a Gmail account for your Amiga email? STOP now!

To get this working with Gmail there are a number of things we need to configure within Gmail itself before trying to access it on your Amiga. If you fail to do this it just won’t work at all. You have been warned!


Amiga email – IMAP v POP

Gmail normally uses IMAP to deliver your email to your devices. This is perfect as the mail stays on their server and you can check it from as many different devices as you like. If you delete an email on one device it will vanish on them all. POP works differently in that when you connect the messages are downloaded from the server and onto your device. They are normally then erased from the server. If you try to access your mail from another device there wouldn’t be anything there. There are steps that can be taken to mitigate the limitations of POP but the bottom line is ‘IMAP is better’.

OK, so now you are aware of the compromise we’re making by using POP rather than IMAP there are some configuration changes we must make to Gmail. Once more some compromises need to be made to make this work which I will explain shortly.


Enable POP Access in Gmail

By default Gmail does not support POP access. This is a feature that must be manually turned on. To do so follow the instructions below:

1. Click on the cog in the top right hand corner of the screen.

2. Click on ‘See all settings’.
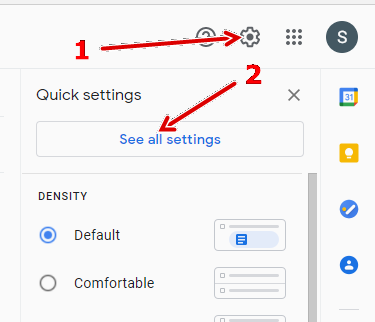
 

How to enable POP access in Gmail.

How to enable POP access in Gmail.


3. Click on ‘Forwarding and POP/IMAP’.

4. Click on ‘Enable POP for all mail’. If you are trying to access an existing account the chances are you have a ton of emails that you might not want/need to download to your Amiga. If this is the case click ‘Enable POP for mail that arrives from now on’.
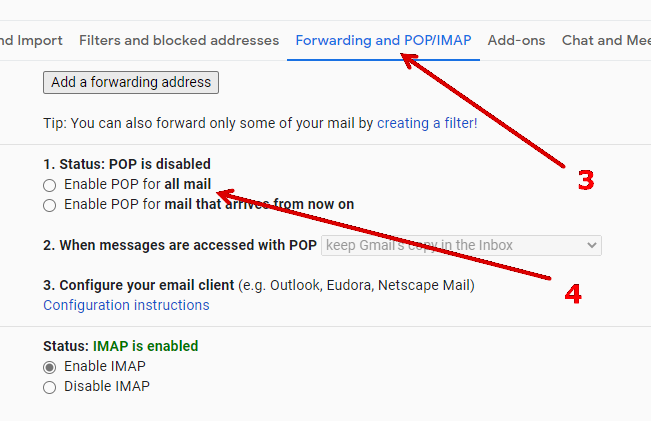
 

How to enable POP access in Gmail.

How to enable POP access in Gmail.

5. Select ‘archive Gmail’s copy’ next to ‘When messages are accessed with POP’. This will safely archive a copy of all the emails you download to your Amiga just in case you need to get them back at some point in the future. There are a few other options that you could choose here, this is just my preference.

6. Select ‘Disable IMAP’. Not strictly necessary as the two are mutually exclusive so even if you don’t disable it yourself Google will when you save the settings.

7. Click ‘Save changes’.
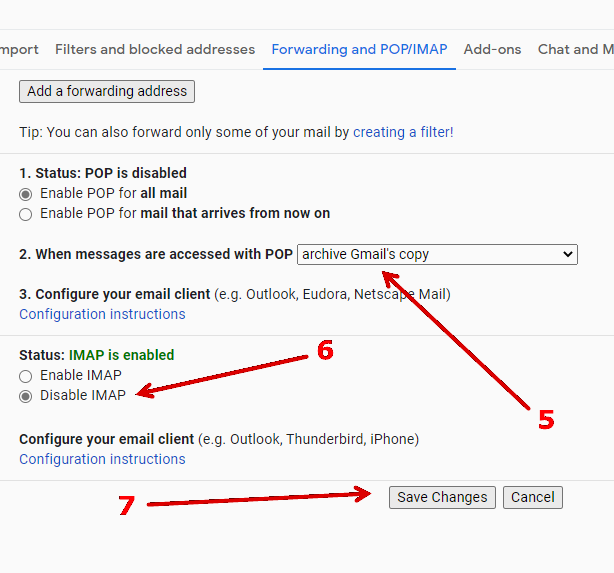
 

How to enable POP access in Gmail.

How to enable POP access in Gmail.


That takes care of enabling POP access and also what happens to your emails after you’ve downloaded them to your Amiga. However we’re still not done yet as there’s a few more security related settings that we need to tweak before Google will allow our decades old machine to talk to their servers!


Compromises

Remember when I mentioned about more compromises? Well this is where we have to make some more. You see in order to make their email service more secure, a few years ago Google introduced a new feature whereby ‘Less Secure Apps’ are blocked from connecting to their servers. Of course you’ve guessed it, our humble Amiga is most definitely classed as ‘less secure’.

There are a couple of ways around this problem, a quick and dirty way and a more involved but more secure way. Whichever method you choose is up to you. If you are using a dedicated Amiga Gmail account then the quick and dirty method should be fine. However if you are wanting to access your main Gmail account then I would recommend the second method. Also, if you happen to be using 2-factor authentication then you have no choice but to use the second method so skip right to that section now as you’ve already done the hardest part!

Basically if you’re here just to experiment or have a play around for nostalgias sake then create yourself a new Gmail account just for this purpose and choose the quick and dirty method. That way it doesn’t really matter one way or the other as the account will have nothing important stored on it. Likewise if you know what you are doing and can accept the calculated risk you can choose quick and dirty too – after all that’s how we rolled back in the 1990’s! Having said all that I recommend the second method.  The choice, as they say, is yours.

Quick & Dirty Method

OK the quick solution is to go back into Gmail settings by:

1. Clicking on the cog in the top right hand corner of the screen.

2. Then clicking on ‘See all settings’.


How to enable 'Less secure apps' in Gmail.

How to enable ‘Less secure apps’ in Gmail.


3. Click ‘Accounts and Import’.

4. Click ‘Other Google Account settings’.
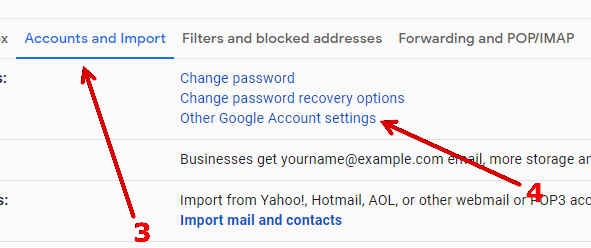
 

How to enable 'Less secure apps' in Gmail.

How to enable ‘Less secure apps’ in Gmail.


5. On the next screen click ‘Security’.
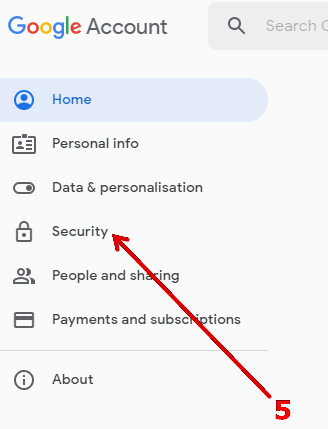
 

How to enable 'Less secure apps' in Gmail.

How to enable ‘Less secure apps’ in Gmail.


6. Now scroll down until you see the ‘Less secure app access’ section and click ‘Turn on access (not recommended)’.


How to enable 'Less secure apps' in Gmail.

How to enable ‘Less secure apps’ in Gmail.


7. Another warning will appear – you must click the little slider to allow less secure apps.
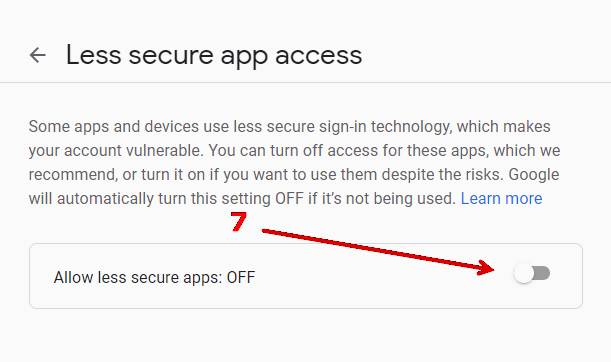
 

How to enable 'Less secure apps' in Gmail.

How to enable ‘Less secure apps’ in Gmail.


And that’s it for the quick and dirty method, you will get a ‘Critical Security Alert’ warning email off Google but you can ignore it as the change was made by yourself. You’re now free to skip ahead to the YAM Configuration section and start accessing your mails.


Safer Method to get around the ‘Less Secure Apps’ Issue

This method is much safer in the long run but requires extra setup and will add an extra level of complexity to logging into your Gmail account in the future from any device. This method entails enabling 2-factor authentication and then creating an ‘App password’ just for your Amiga to use. It’s something I have enabled on all my online accounts from Amazon right through to Zoho and I would recommend you enable it too. It’s probably one of the best methods of protecting your online accounts against intrusion there is right now.


Enable 2-Factor Authentication on Gmail

Head back into Gmail settings by:

1. Clicking on the cog in the top right hand corner of the screen.

2. Then clicking on ‘See all settings’.


How to enable '2-step verification' in Gmail.

How to enable ‘2-step verification’ in Gmail.


3. Click ‘Accounts and Import’.

4. Click ‘Other Google Account settings’.


How to enable '2-step verification' in Gmail.

How to enable ‘2-step verification’ in Gmail.


5. On the next screen click ‘Security’.


How to enable '2-step verification' in Gmail.

How to enable ‘2-step verification’ in Gmail.


6. Now scroll down until you see the ‘Signing in to Google’ section and click ‘2-Step Verification’.
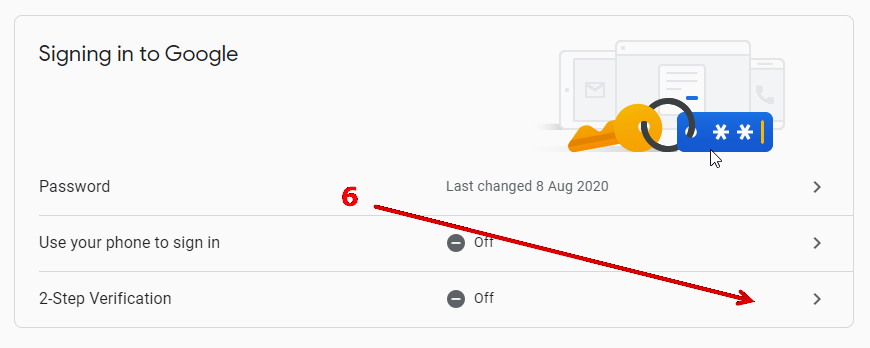
 

How to enable '2-step verification' in Gmail.

How to enable ‘2-step verification’ in Gmail.


7. Click ‘Get Started’ on the next screen.
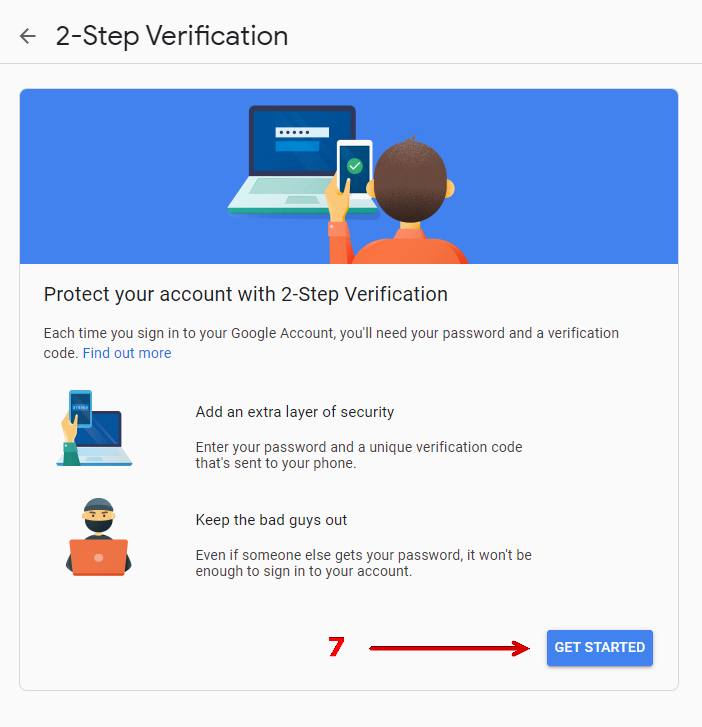
 

How to enable '2-step verification' in Gmail.

How to enable ‘2-step verification’ in Gmail.


8. On the next screen enter your mobile phone number.

9. Then click ‘Next’.
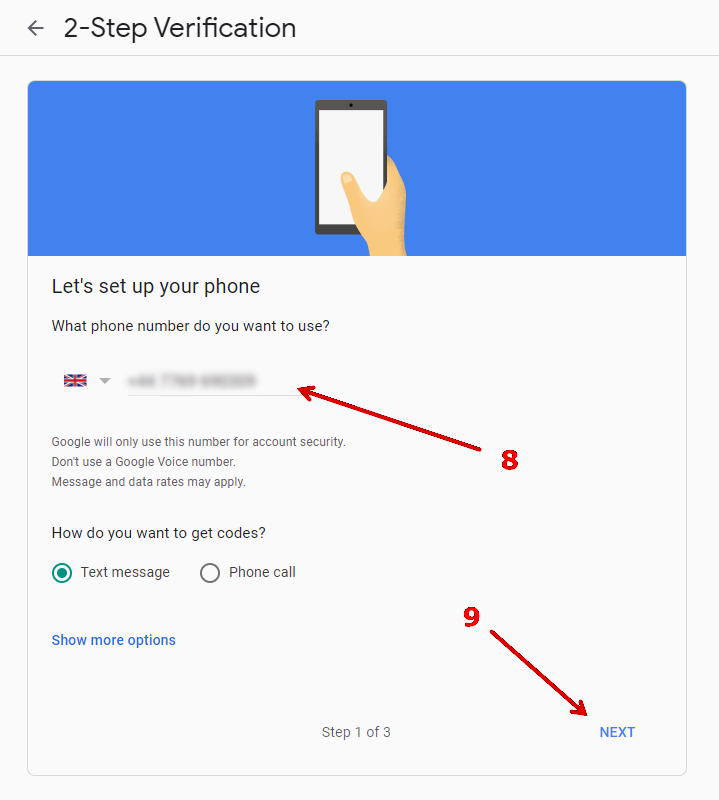
 

How to enable '2-step verification' in Gmail.

How to enable ‘2-step verification’ in Gmail.


10. You will now be sent a code via text message to your phone. Enter this code where specified on screen. This is what ensures the security of your account. In future you won’t be able to login without entering the correct code (which changes every time).

11. Click ‘Next’ to continue.
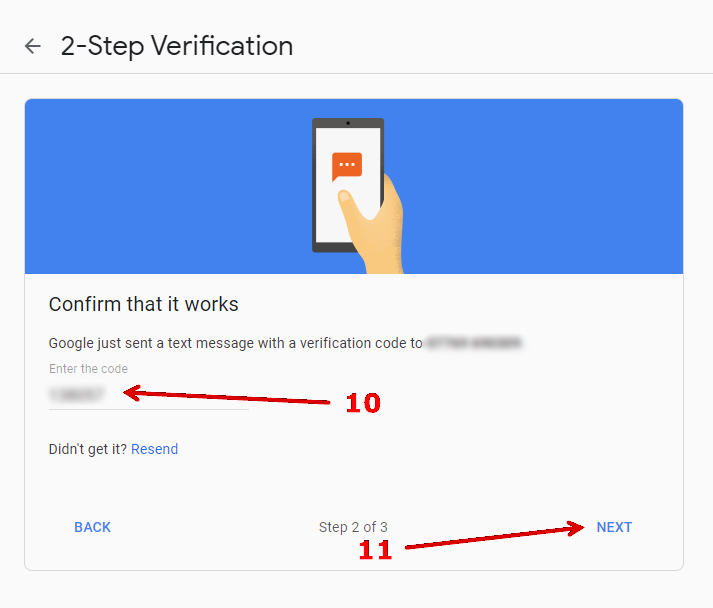
 

How to enable '2-step verification' in Gmail.

How to enable ‘2-step verification’ in Gmail.


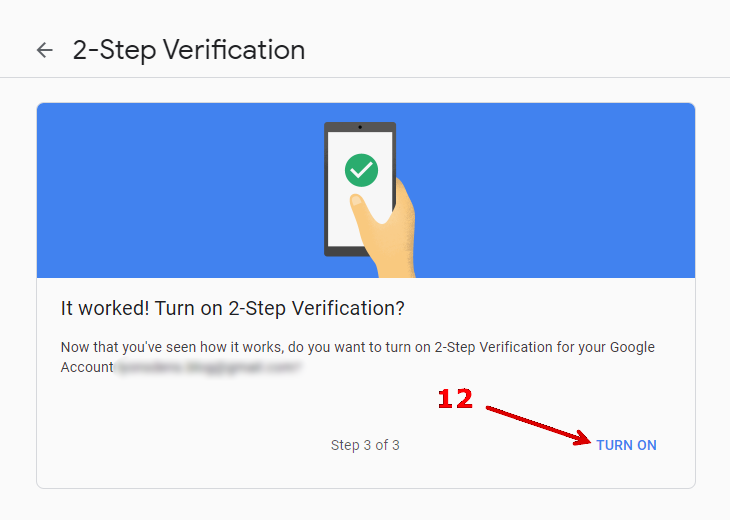
12. Provided you entered the correct code in step 10 then you should receive confirmation that it worked. You should now click on ‘Turn On’ to enable 2-step verification.
 

How to enable '2-step verification' in Gmail.

How to enable ‘2-step verification’ in Gmail.


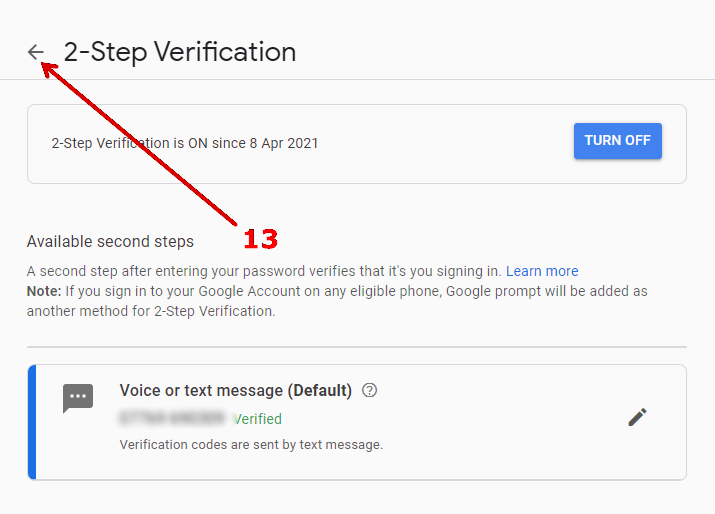
13. You should be greeted with confirmation that 2-step verification is now ‘ON’ on the next screen.  At some point you may want to revisit this section as there are a whole bunch of additional ways to provide the 2-step verification if you scroll down. However for now we’re good to go so click the ‘back’ button (left arrow) to go back to the Security screen ready to create your App password.
 

How to enable '2-step verification' in Gmail.

How to enable ‘2-step verification’ in Gmail.


Congrats – you’ve successfully got 2-factor authentication working – now you need to configure your ‘app password’.


Creating an Amiga email ‘App Password’

Follow these instructions to create a unique password especially for your Amiga to access your Gmail account. By the way, if you’ve just enabled 2-step verification following the guide above then you should already be on the correct screen so can skip to step 6 below, otherwise start at step 1.


1. Clicking on the cog in the top right hand corner of the screen.

2. Then clicking on ‘See all settings’.


How to create an 'app password' in Gmail.

How to create an ‘app password’ in Gmail.


3. Click ‘Accounts and Import’.

4. Click ‘Other Google Account settings’.


How to create an 'app password' in Gmail.

How to create an ‘app password’ in Gmail.


5. On the next screen click ‘Security’.


How to create an 'app password' in Gmail.

How to create an ‘app password’ in Gmail.


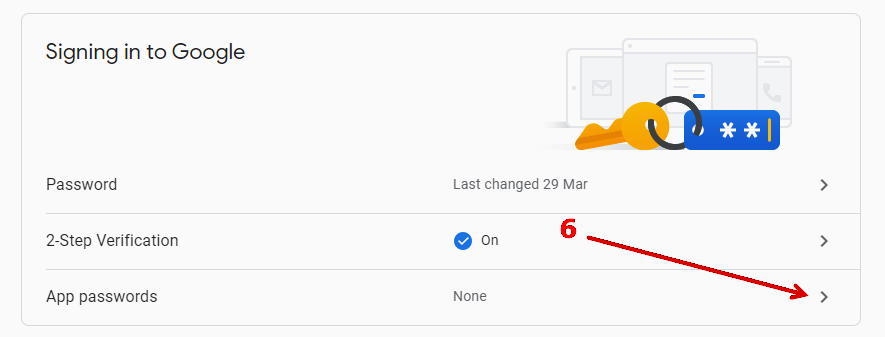
6. Now scroll down until you see the ‘Signing in to Google’ section and click ‘App passwords’.
 

How to create an 'app password' in Gmail.

How to create an ‘app password’ in Gmail.


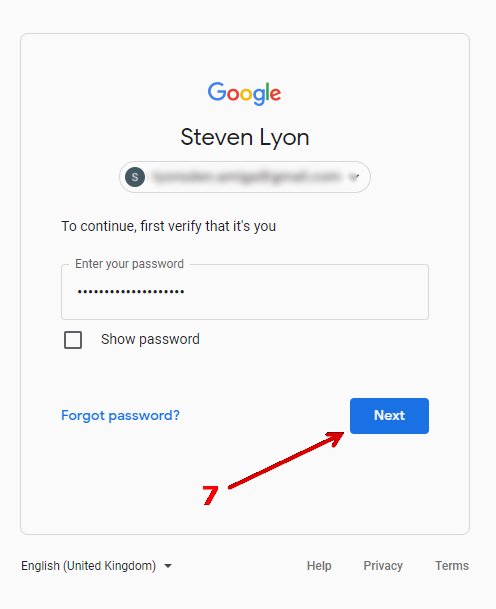
7. It will ask for your password so enter it and then click ‘Next’ to continue.
 

How to create an 'app password' in Gmail.

How to create an ‘app password’ in Gmail.


8. You should now see the ‘App passwords’ dialogue. Select ‘Mail’ from the drop-down menu where it says ‘Select app’. This means that the password only grants access to email on your account – nothing else.

9. Then select ‘Other (Custom Name)’ from the ‘Select device’ drop-down menu.
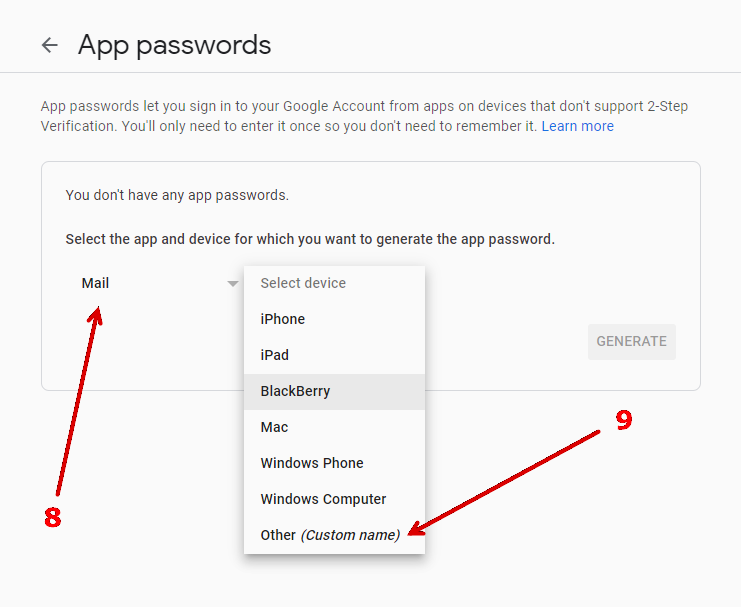
 

How to create an 'app password' in Gmail.

How to create an ‘app password’ in Gmail.


10. Give the device a name. I chose ‘Amiga Mail’ but you can use pretty much anything you like here.

11. Click ‘Generate’ when ready to have Google create your app password for you.
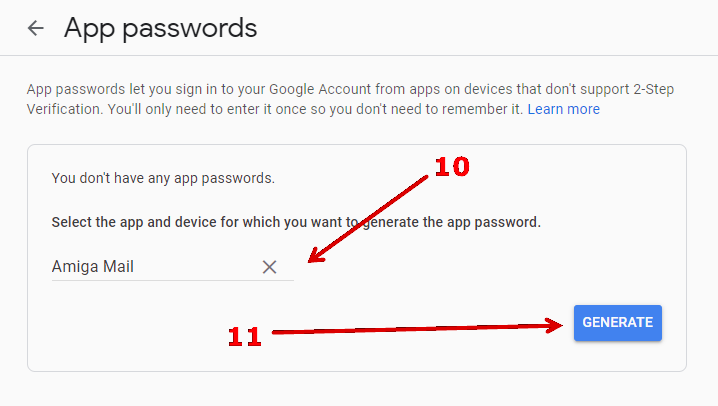
 

Amiga Email

How to create an ‘app password’ in Gmail.


12. A window should now pop up with your new Amiga email App password. Make a note of it as you will need it when you configure YAM and you will never be able to view it again once you move onto the next step!

13. Click ‘Done’ when ready.
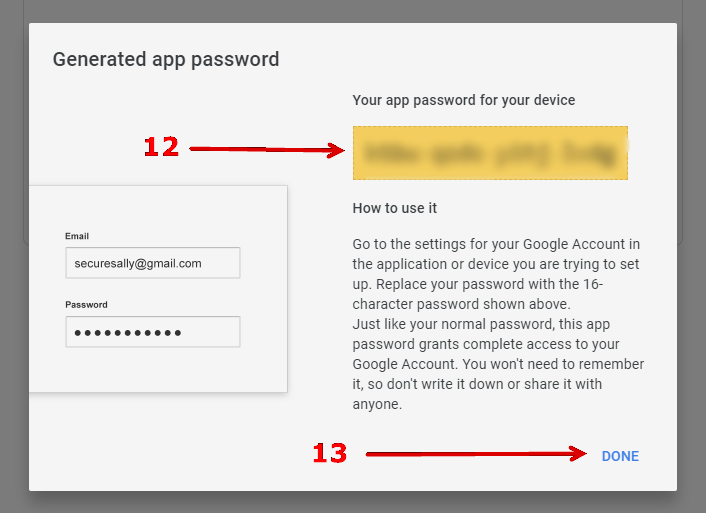
 

Amiga Email

Our Amiga email ‘app password’.


14. You should now be back on the ‘App passwords’ screen where your new Amiga email password should be listed. If at any point in the future you need to revoke access to your Amiga then you can delete this password from here.
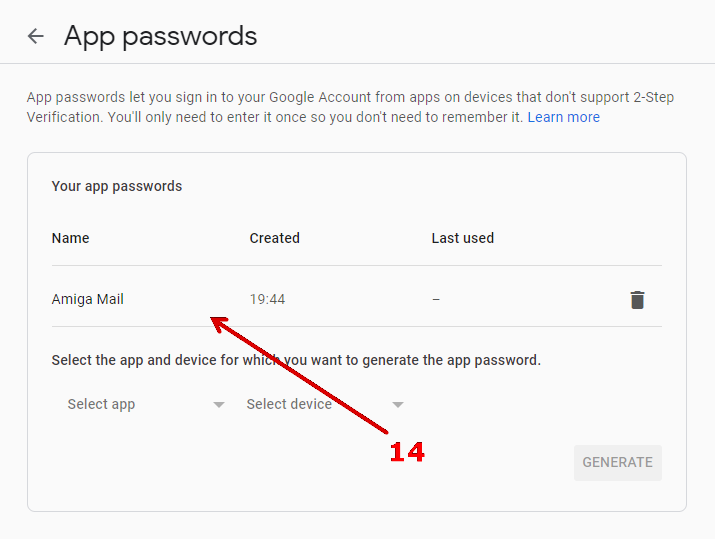
 

How to create an 'app password' in Gmail.

How to create an ‘app password’ in Gmail.


Now at long last you we’re ready to move back over to the Amiga to configure YAM.


Configuring YAM to connect to your Amiga email Provider

POP3 (Receive) Settings

To access the POP and SMTP settings screen click the ‘Config’ icon on the toolbar. It’s the last icon on the right with a question mark on it. The configuration screen should pop up after a few seconds. It’s a little sluggish so give it a moment before you start trying to choose a category to work on.
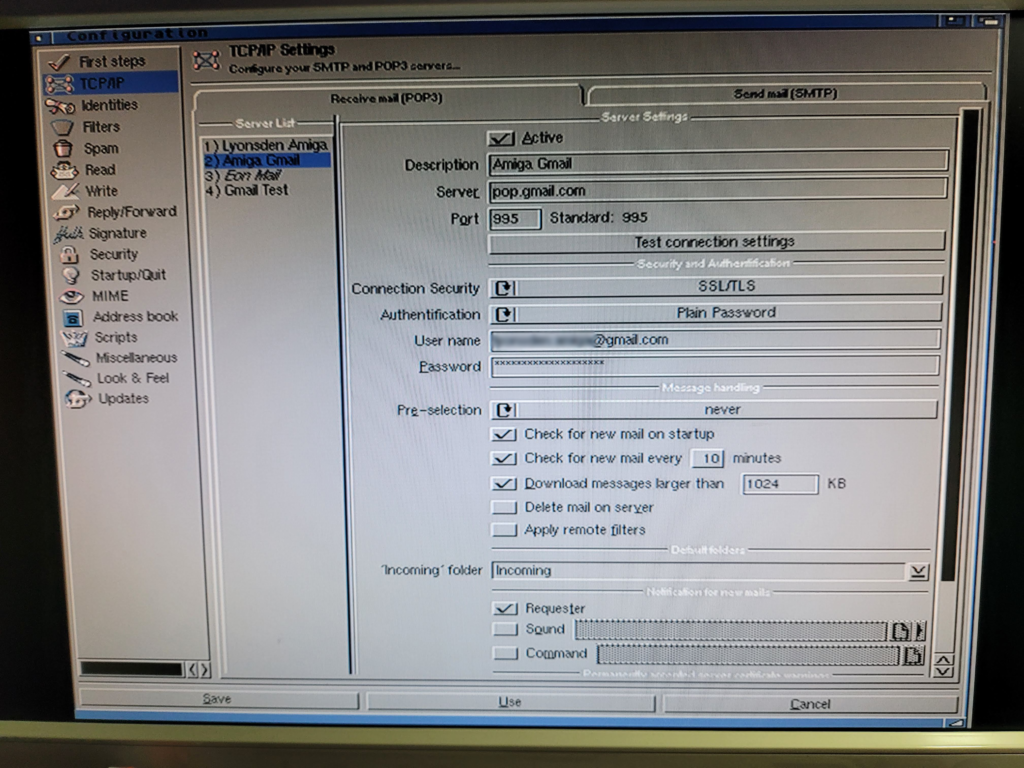
 

Amiga email

The YAM POP3 settings screen.


We need the TCP/IP section so click on that. For the remainder of this section I am going to assume that you are using Gmail and I will provide the settings required to get that working. Of course if you are using another provider then feel free to enter the settings required for your service.

Now enter the following information into the POP3 Server Settings section.


  • Active – Tick the box.
  • Description – ‘Amiga Gmail’ (though it can be anything you want).
  • Server – ‘pop.gmail.com’.
  • port – ‘995’.
  • Connection Security – SSL/TLS.
  • Authentication – Plain Password.
  • Username – Your full Gmail address (eg james.kirk@gmail.com).
  • Password – Your password.


The rest of the settings are down to personal preference and affect when and how often YAM will check for mail and whether you want it to delete emails on the server or not.

If you would like all your emails to be put into a specific folder when downloaded you can specify that in the ‘incoming folder’ section using the drop-down menu. By default all new messages will go into the ‘Inbox’ folder.

Once you are happy with your message handling settings, double check you have entered everything correctly and then click on ‘Test connection settings’.

This is the moment of truth when you will see if everything you’ve done so far has worked…

Be prepared to receive an SSL certificate warning as YAM doesn’t support SNI. This is not a major problem though as we can manually approve the certificate by clicking ‘Accept Permanently’.
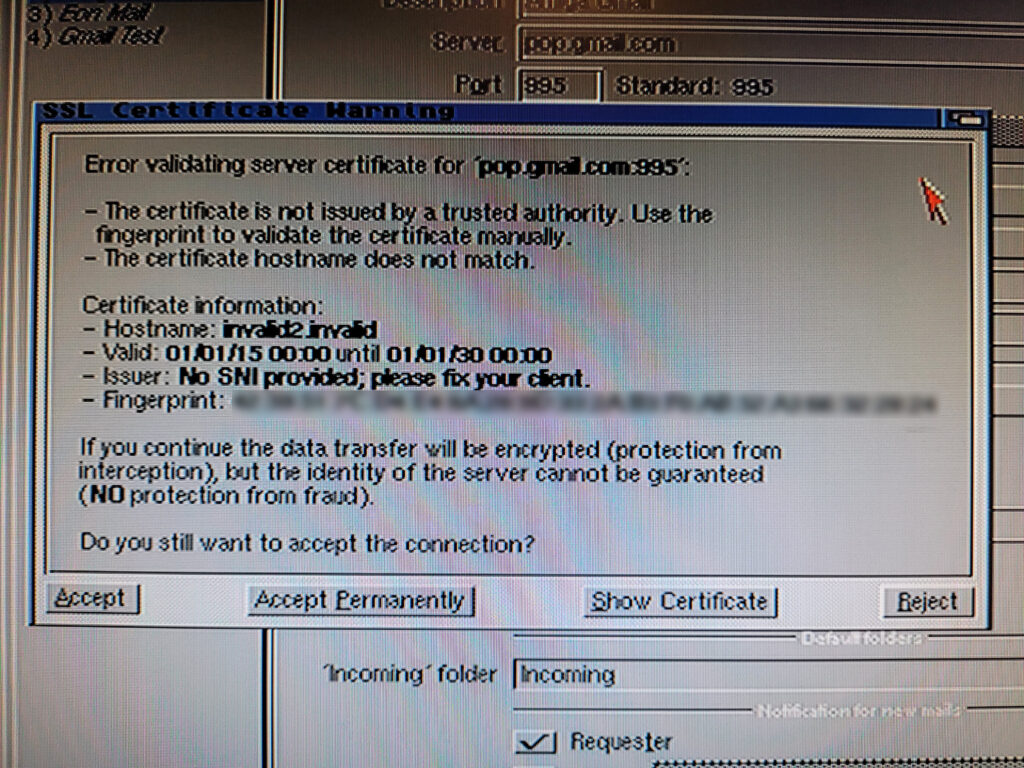
 

Amiga email

Manually accepting the Gmail SSL certificate in YAM.


All being well you should get a very satisfying little message appear like the one below stating ‘Connection to POP3 server ‘pop.gmail.com’ was successful.
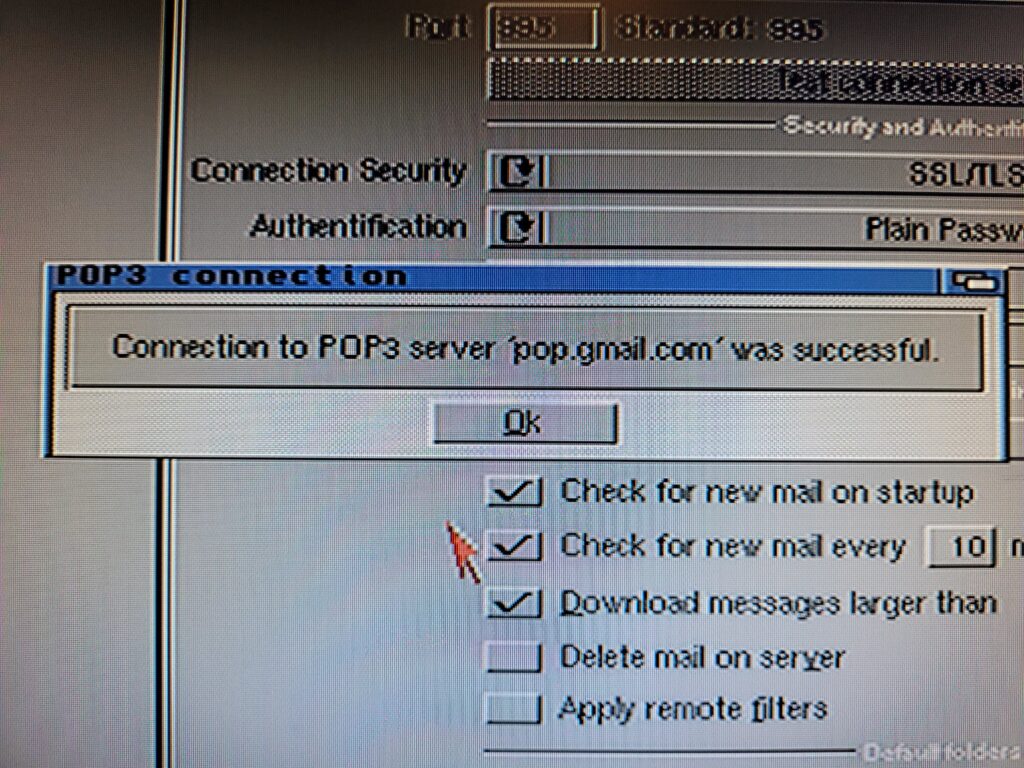
 

Amiga email

Successfully connected to Gmails POP3 server.


SMTP (Send) Settings

With POP3 configured to receive emails it’s now time to set up SMTP so we can send emails too. To reach the SMTP settings simply click on the ‘Send mail (SMTP)’ tab.
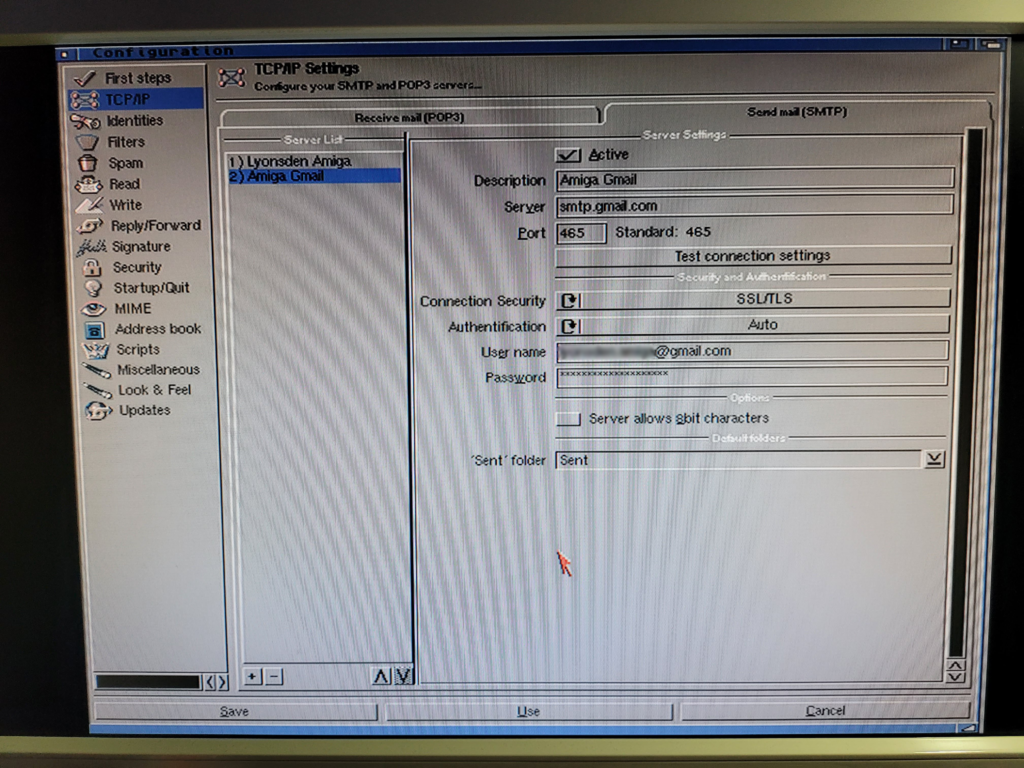
 

Amiga email

YAM’s SMTP configuration screen.


Enter the following information into the SMTP Server Settings section.

  • Active – Tick the box.
  • Description – ‘Amiga Gmail’ (though it can be anything you want).
  • Server – ‘smtp.gmail.com’.
  • port – ‘465’.
  • Connection Security – SSL/TLS.
  • Authentication – Auto.
  • Username – Your full Gmail address (eg james.kirk@gmail.com).
  • Password – Your password.

If you would like all your sent Gmail messages to be put into a specific folder you can specify that in the ‘Sent folder’ section using the drop-down menu.

As before double check you have entered everything correctly and then click on ‘test connection settings’.

With a bit of luck you should get a message confirming that ‘Connection to SMTP server ‘smtp.gmail.com’ was successful.

Congratulations – you’ve successfully configured YAM to work with Gmail/your email provider, enjoy!
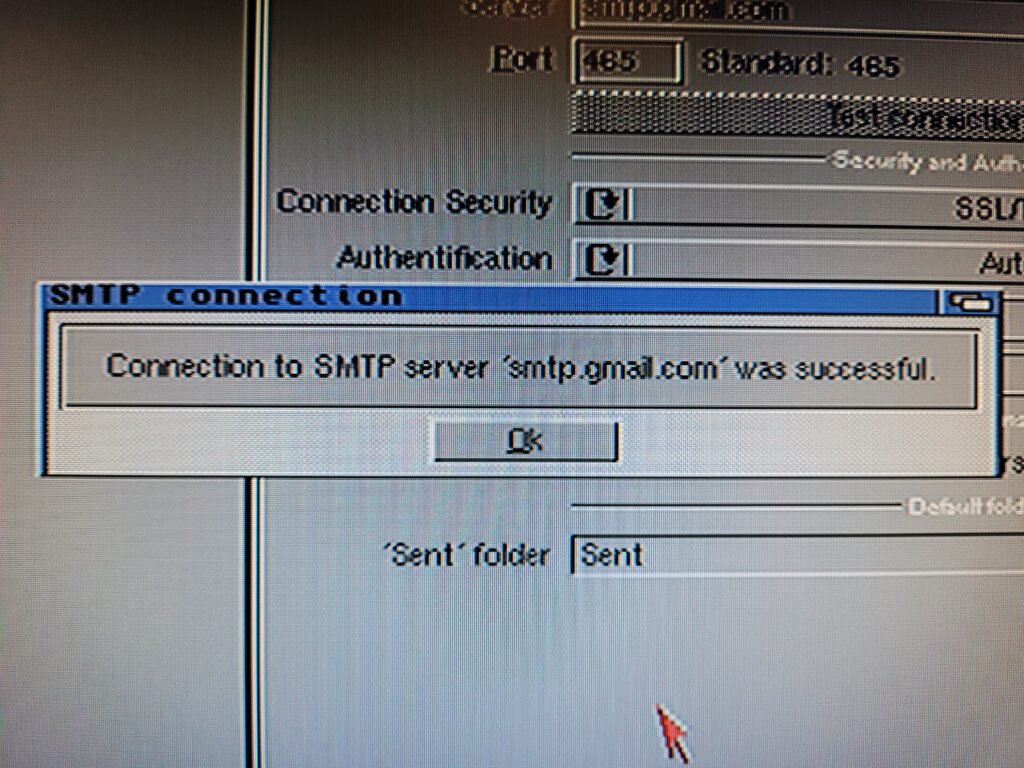
 

Amiga email

Successfully connected to Gmails SMTP server.


Tying up a few loose ends on our Amiga email project


YAM features a built in software updater that checks for updated dependencies periodically. It successfully informed me about two packages that needed updating the first time I ran the program but unfortunately it seemed unable to download either of them.
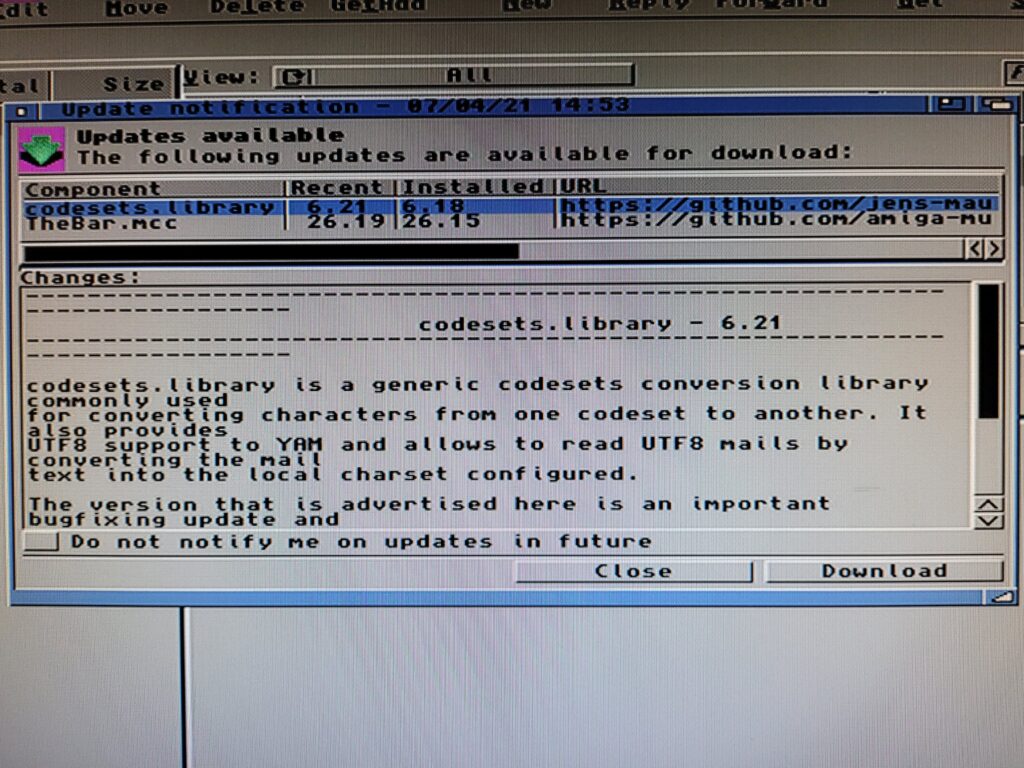
 

Amiga email

YAM’s automatic updater window.


Needless to say the OCD in me had to sort this out. Couldn’t be running a program knowing there are updates available – no matter how trivial the may be! Happily I was able to locate both of the updated packages on Aminet.

TheBar.mcc is available here: Aminet – dev/mui/MCC_TheBar. This version is actually slightly newer than the version reported in the updater.
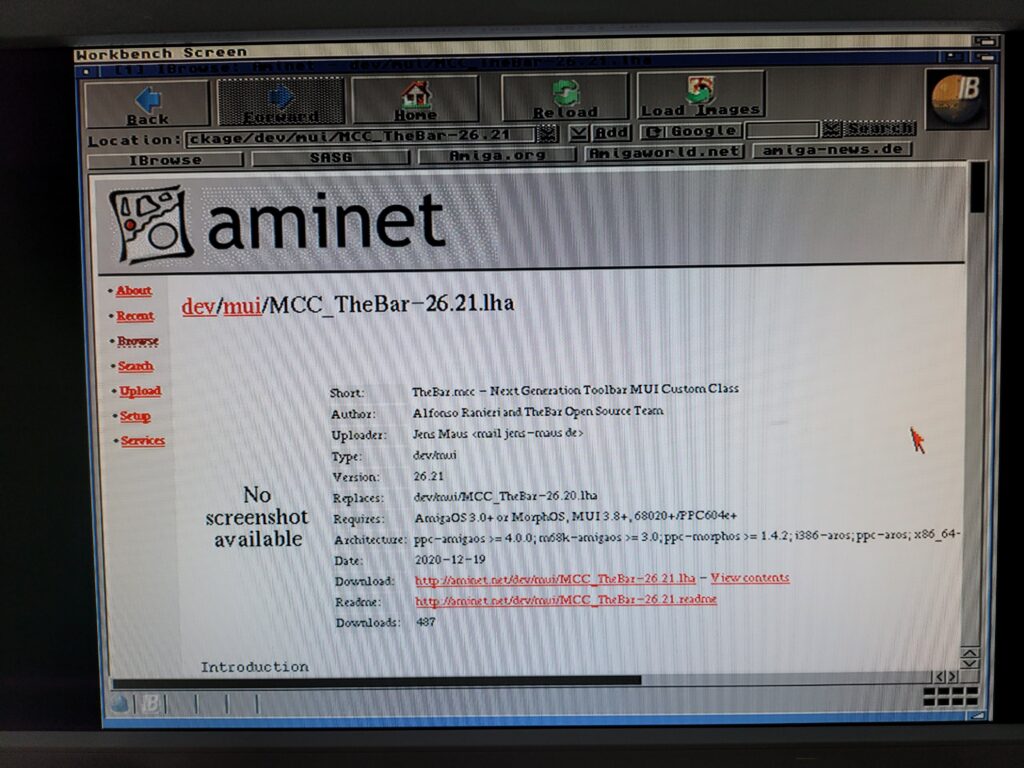


Amiga Email

Where to find TheBar on Aminet.


Whilst codesets.library is available here: Aminet – util/libs/codesets-6.21.lha
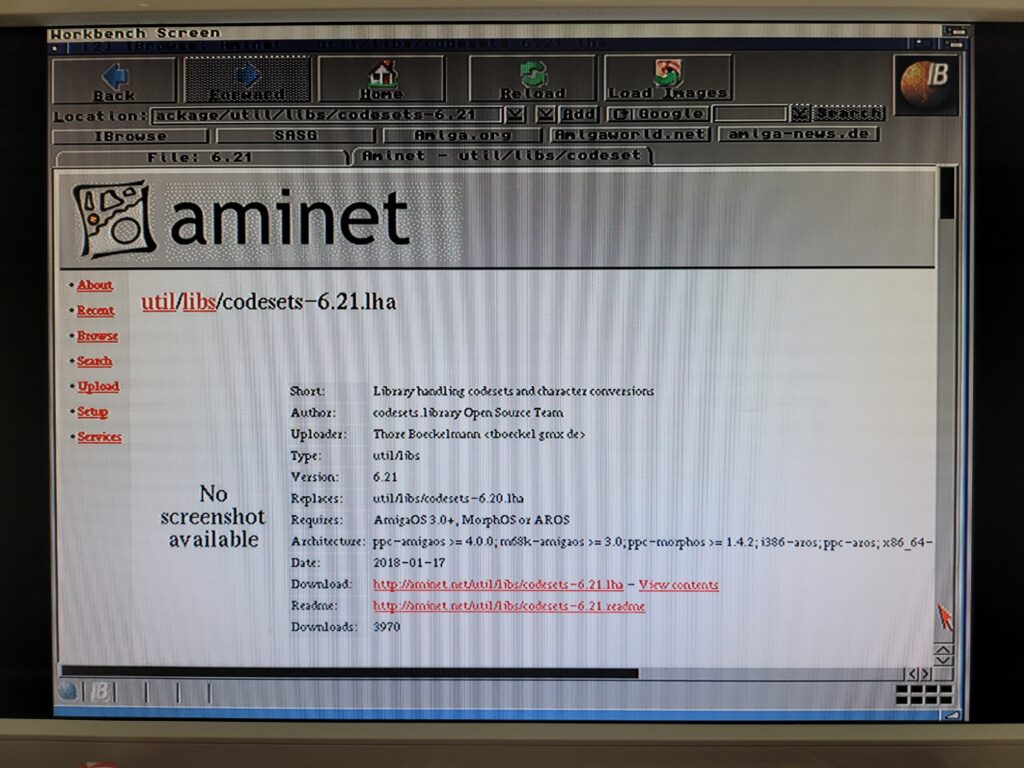
 

Amiga Email

Where to find codesets.library on Aminet.


They both had installers and were very straightforward to install. The Amiga needs a reboot before the new libraries can be accessed by YAM. So after dutifully rebooting my Amiga I ran the updater again and was greeted by a reassuring ‘no software updates available’ message. Happy days.
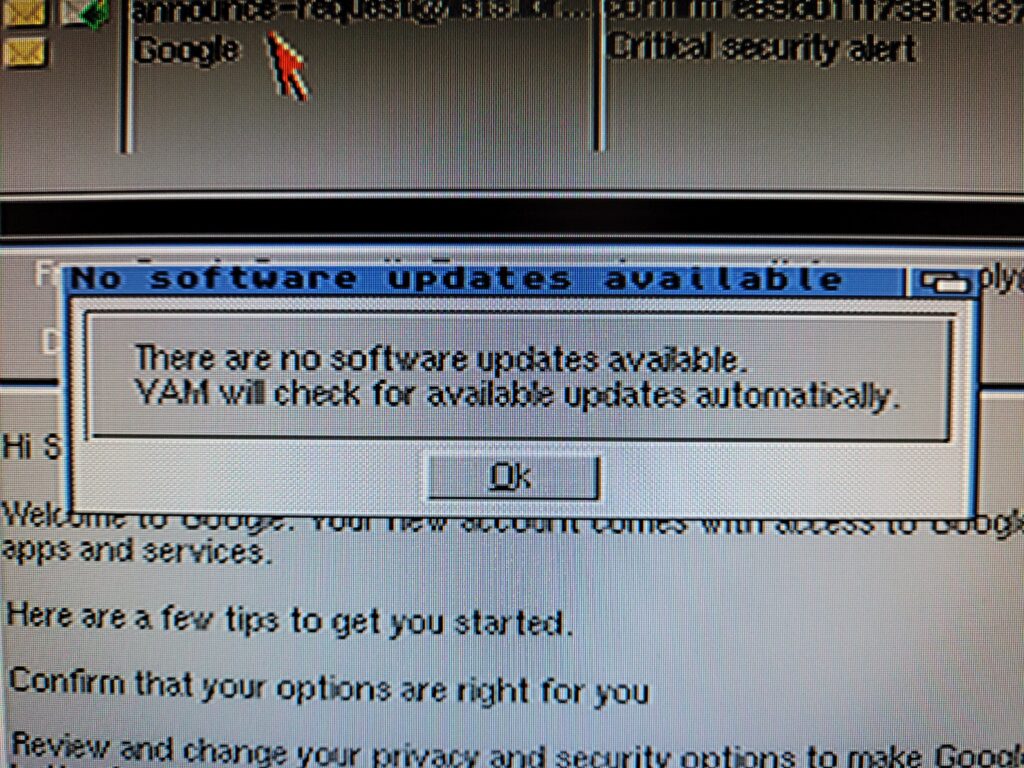
 

Amiga Email

Fully updated!


Obviously these files will be updated at some point in the future and the above links will stop working. However if you just search for the respective packages on Aminet without the version numbers there’s a very good chance you will find their newer incarnations.

Tweaks

I made the following tweaks to YAM in the ‘Look and Feel’ section of the configuration screen.

  • Changed the icons (there are a few sets to choose from) to the ones you see in the screenshots.
  • Turned off the fixed font size for viewing emails as I thought they looked terrible presented this way.
  • Reduced the size of some of the fonts used for various parts of the UI as the default size was too large to comfortably fit everything on screen.
  • Even after reducing the font size the toolbar icons didn’t fit and were truncated on the right hand side of the screen so I moved the icons across the top closer together to make sure they all fitted on the screen.

Mission accomplished! – There’s a tremendous amount of customisation on offer here that certainly puts a lot of modern mail software to shame. Windows 10 Mail app I’m talking about you!

Apart from being a little sluggish when opening up the config screen I found using YAM on the Amiga a delight. Pretty much everything you would expect from a modern mail package is available from spam filtering to mail filters. Very impressive for a free program running on 30 year old hardware!


Supporting YAM

Speaking of free, YAM has a homepage on Github here: https://github.com/jens-maus/yam and I would encourage you to visit it and maybe send them a PayPal donation if you appreciate their continued support of the Amiga. IMAP support is on their future ‘to do list’ and if you’d like to see that happen then let them know and support them in any way you can.


Rounding Off

And that concludes part 4 – Installing an Amiga email client. I hope you found it useful and easy enough to follow. It was quite a voyage of discovery for me but definitely a satisfying one by the end of it.

I realised by the time I had finished writing this that it had become more of a ‘how to get Gmail on the Amiga’ guide. This was never my intention when I started out – it was supposed to be a generic guide.  However there were so many things required to get Gmail working that I felt I should include them otherwise anyone following would hit a brick wall and give up. Mind you seeing as Gmail is by far the most popular email provider I suppose that may not be such a bad thing after all?

As new versions of YAM and AmiSSL come out I may update this article from time to time just to confirm everything still works… or not, as the case may be. Likewise if SimpleMail gets updated I’ll check that out and report back too.

I don’t think I’ll produce a ‘Part 5’ as I’ve covered the main features that one would expect to have for a ‘full’ online experience now. At some point I might do a separate article about connecting an Amiga to a local area network to access shared folders and such like. This is something I’d find very useful and I’d guess others would too. Anyway I hope you enjoy using your Amiga online in the 21st Century!

K&A Plus #17 Magazine Preview

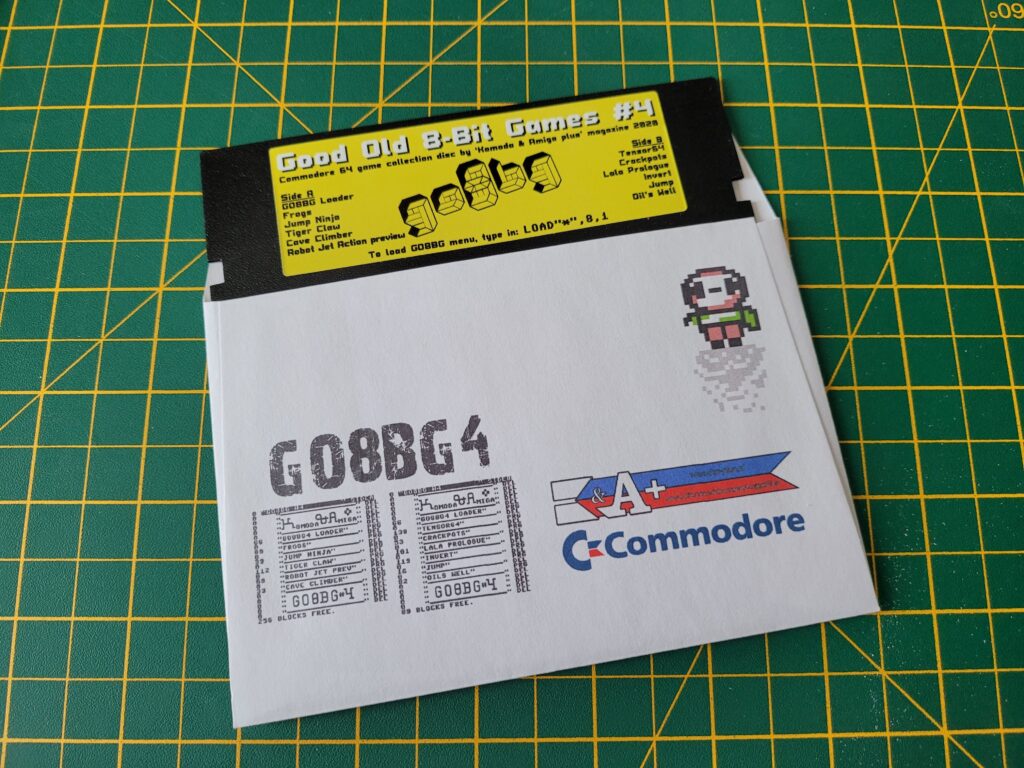
Received my copy of K&A Plus #17 a few days ago. As always I paid a little extra for the cover disk which I think is well worth it. The disk comprises the 4th instalment of a series of games compilations called ‘Good Old 8-Bit Games’.


K&A Plus #17

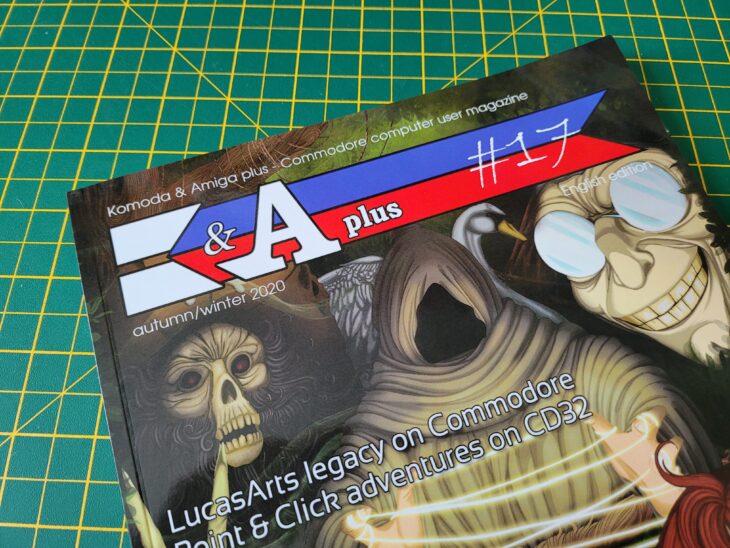
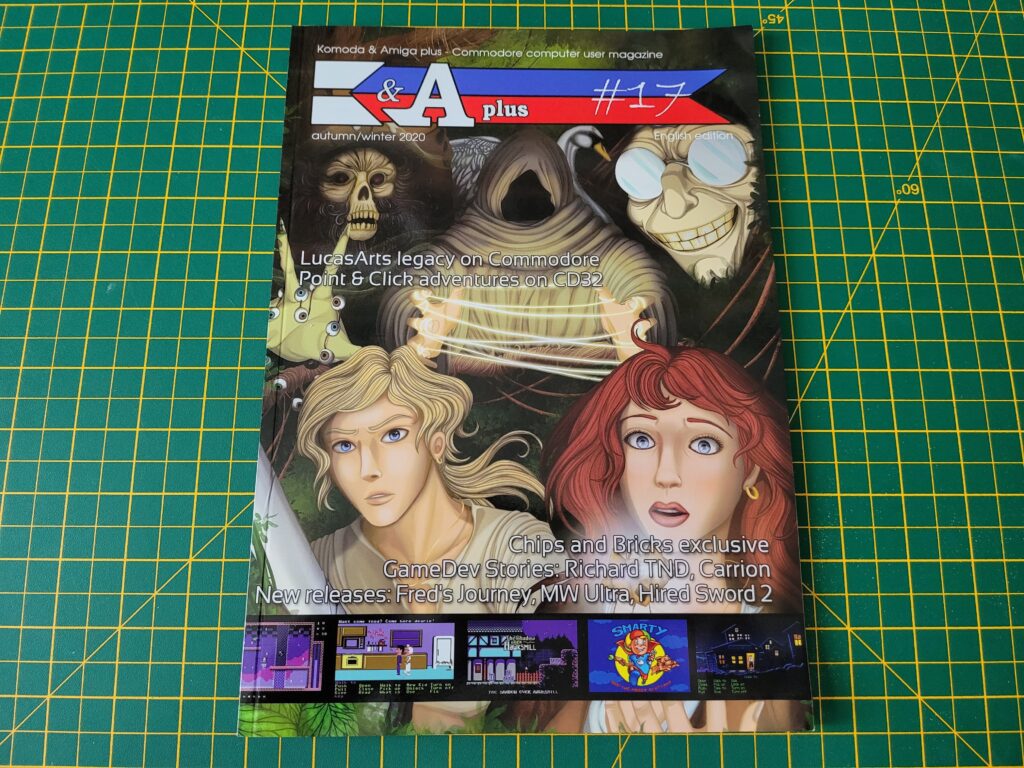
K&A Plus #17 Front Cover.


The 81 page magazine has a lovely piece of artwork featuring Guybrush and Elaine from Monkey Island adorning the front cover. The relevance of this becomes immediately apparent when reading the very interesting ‘LucasArts Legacy’ article.


The CoverDisk


Good Old 8-Bit Games

Good Old 8-Bit Games #4.


The double-sided floppy disk (complete with printed colour jacket) is packed with C64 games to help while away those rainy Sunday afternoons.


Good Old 8-Bit Games

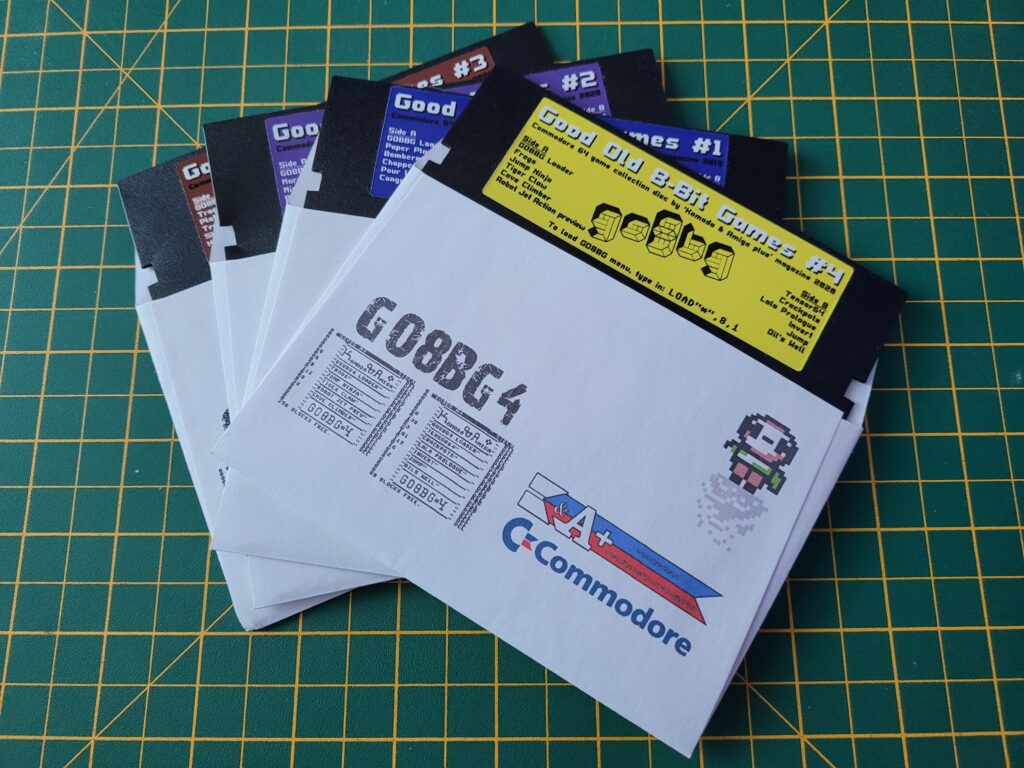
The Complete GO8BG Collection so far…


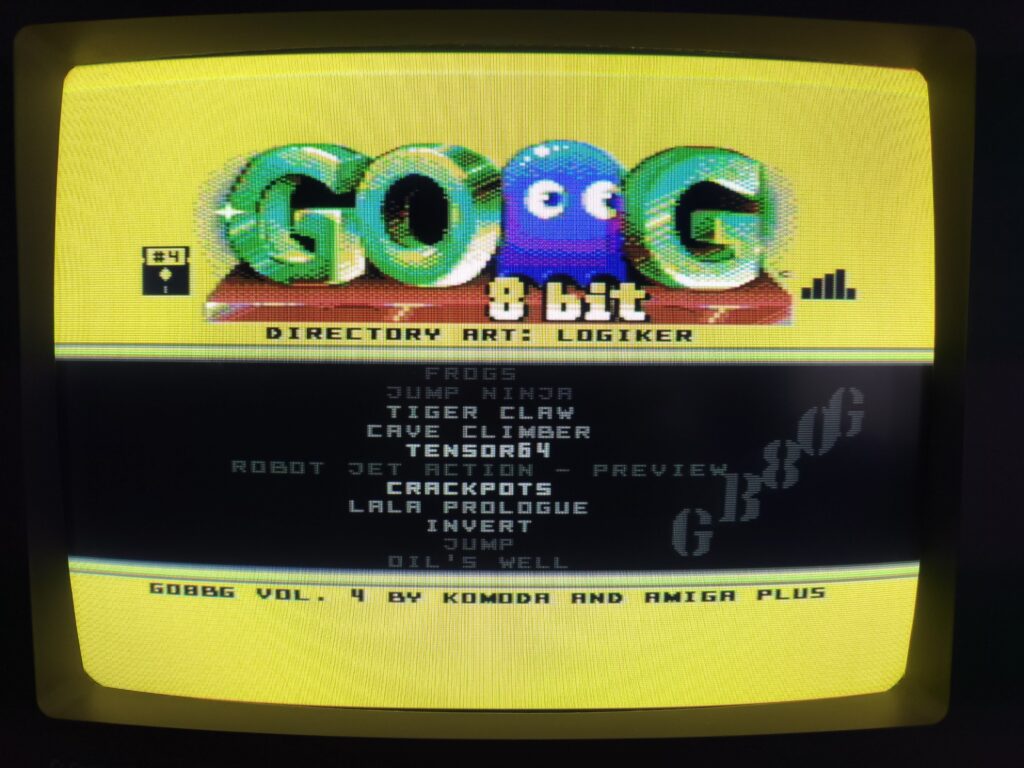
Once again the disk represents astounding value for money, packing in 11 great games across both sides. There’s a lovingly crafted custom loader for the disk with some terrific music playing in the background too.


Good Old 8-Bit Games

Custom Game Loader.


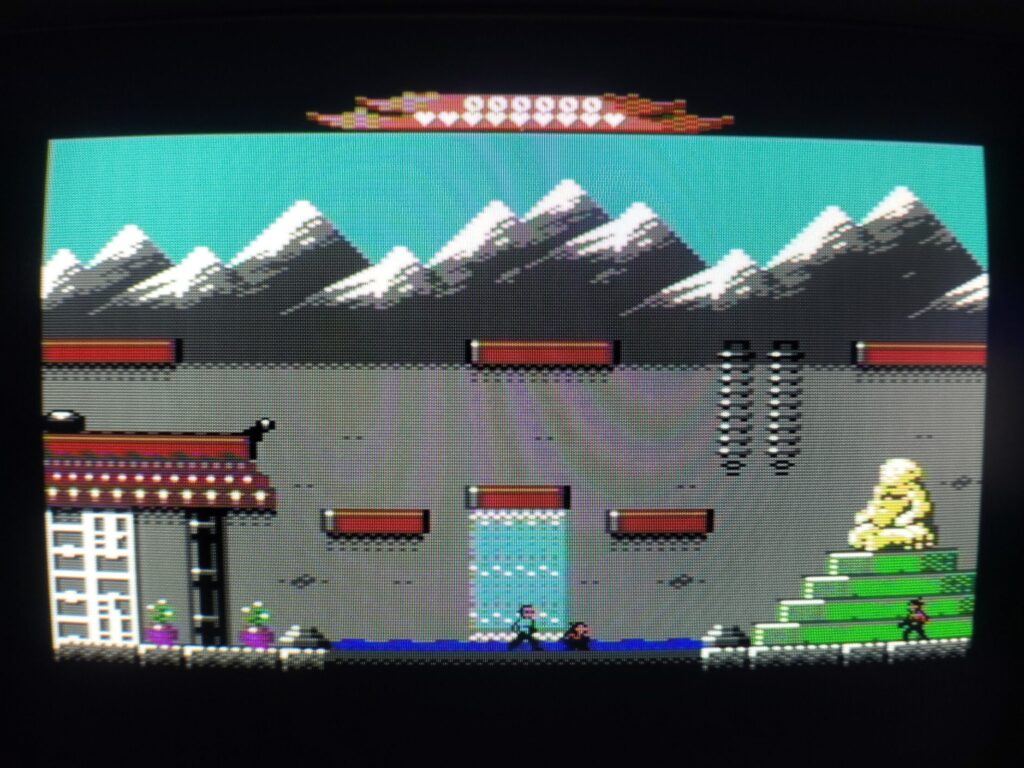
The highlight of the collection for me this time has to be Tiger Claw – a fun little Bruce Lee inspired beat ’em up.


Good Old 8-Bit Games

Tiger Claw


Here’s a full rundown of the games included on disk #4…


K&A Plus #17

Good Old 8-Bit Games #4 – Disk Contents.

Magazine Preview


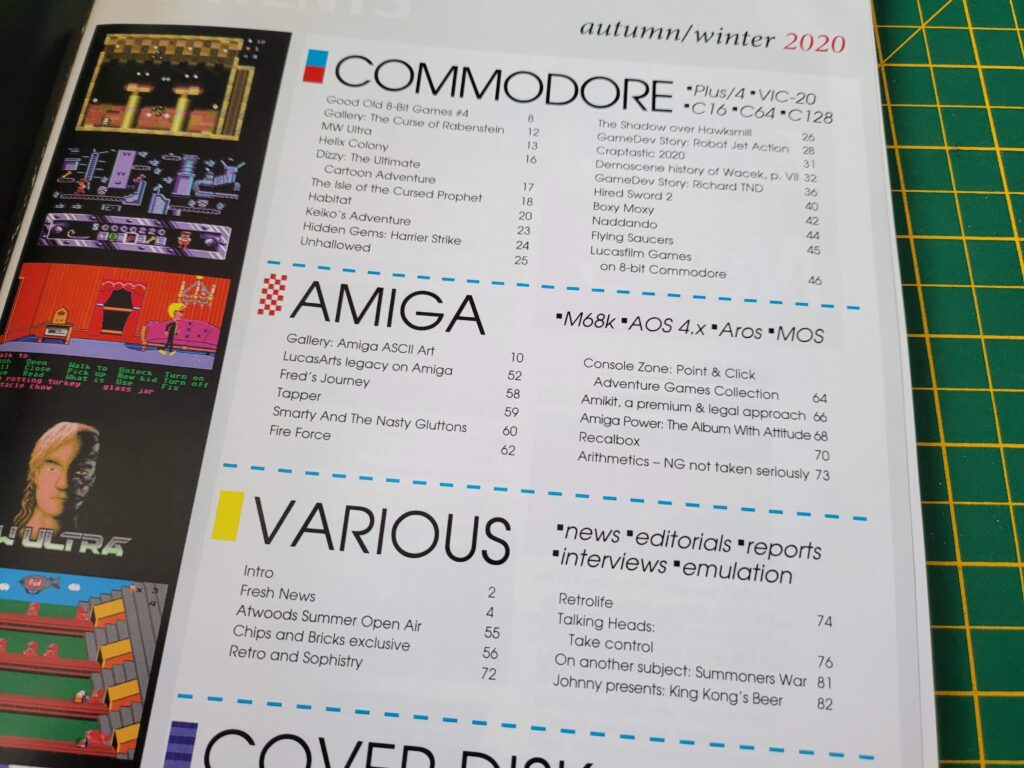
Here’s a quick look at the contents page of K&A Plus #17.


K&A Plus #17

K&A Plus #17 Contents.


And here’s a little preview of some of the great stuff in this issue:

This slideshow requires JavaScript.

This was a great read with loads of reviews and interesting articles to get stuck into. There’s enough here to keep any Commodore fan entertained for an entire afternoon. If you’ve never come across this magazine before you might want to take a look at some of my previews of previous issues here.

If you want to find out more about K&A Plus #17 or order yourself a copy, head on over to the Komoda & Amiga Plus website. The magazine is produced in Poland but they produce an English language version too. Shipping to the UK is pretty quick (COVID disruptions allowing of course).

Getting an A1200 Online Part 3 – Installing an Amiga Web Browser

Amiga Web Browser

Installing an Amiga Web Browser

In Parts 1 and 2 we installed a network card, a TCP/IP stack and connected to a network. By the end of this part we will have a fully functional modern web browser and be able to surf the internet in style on our Amiga 1200.

The browser we’ll be installing is IBrowse as it’s probably the best browser available for classic Amigas these days. It’s still in active development which means we should have a fighting chance at viewing present day websites.

Before we dive in there’s a few other things that need installing first. Namely AmiSSL and MUI. IBrowse won’t run unless MUI has been installed and AmiSSL is essential for accessing https websites.

MUI 3.8 is available to download from Aminet here:

Aminet – util/libs/mui38usr.lha

Unfortunately I can’t link to AmiSSL on Aminet as every time it is updated the link breaks (Aminet don’t keep the older versions online unfortunately). Also I can never be sure that a newer version will break what was previously working in my guide.

Hopefully the following link taken from AmiSSL’s github development page will prove to be a ‘permanent’ link to the archive.

https://github.com/jens-maus/amissl/releases/download/4.8/AmiSSL-4.8.lha

Installing AmiSSL

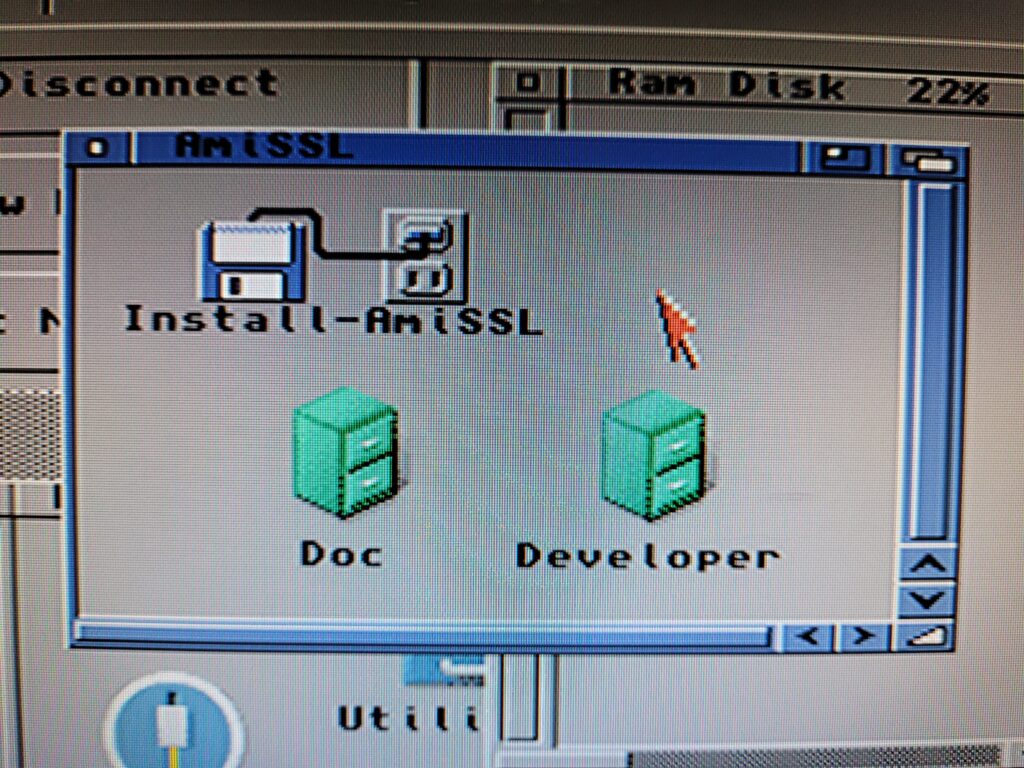
Once we have the AmiSSL archive on the Amiga it should unpack into a single folder as shown in the photo below.


AmiSSL

AmiSSL folder in RAM Disk.


Opening the AmiSSL folder reveals the Installer along with a couple of other folders that can be ignored.


AmiSSL

AmiSSL Installer.


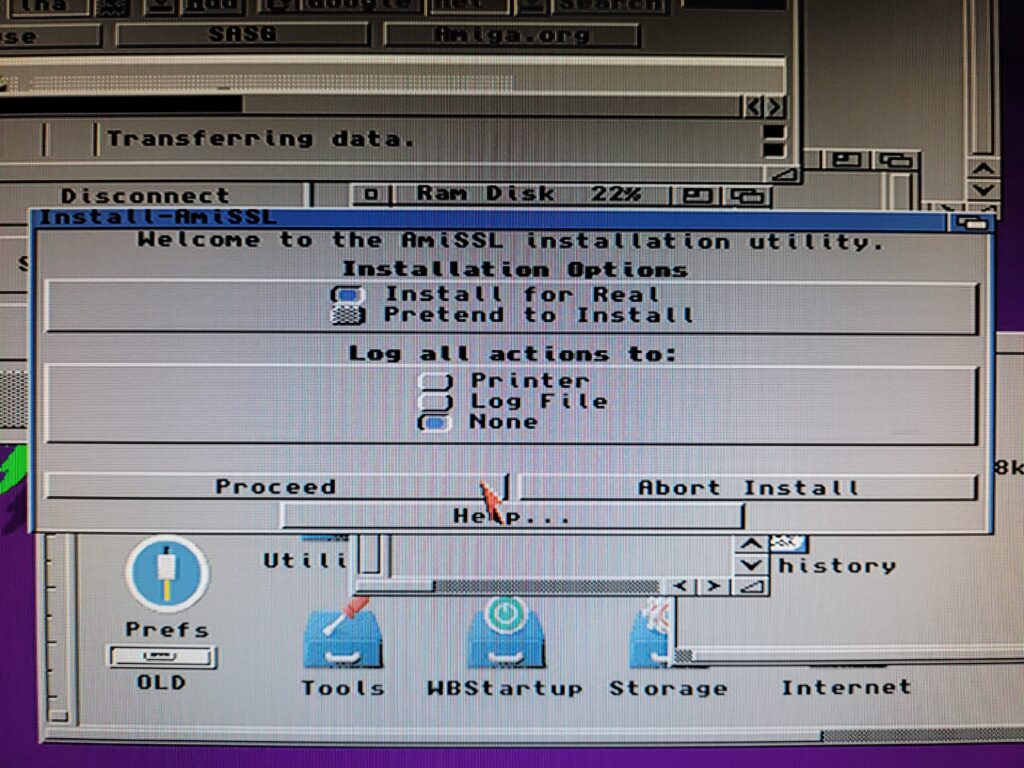
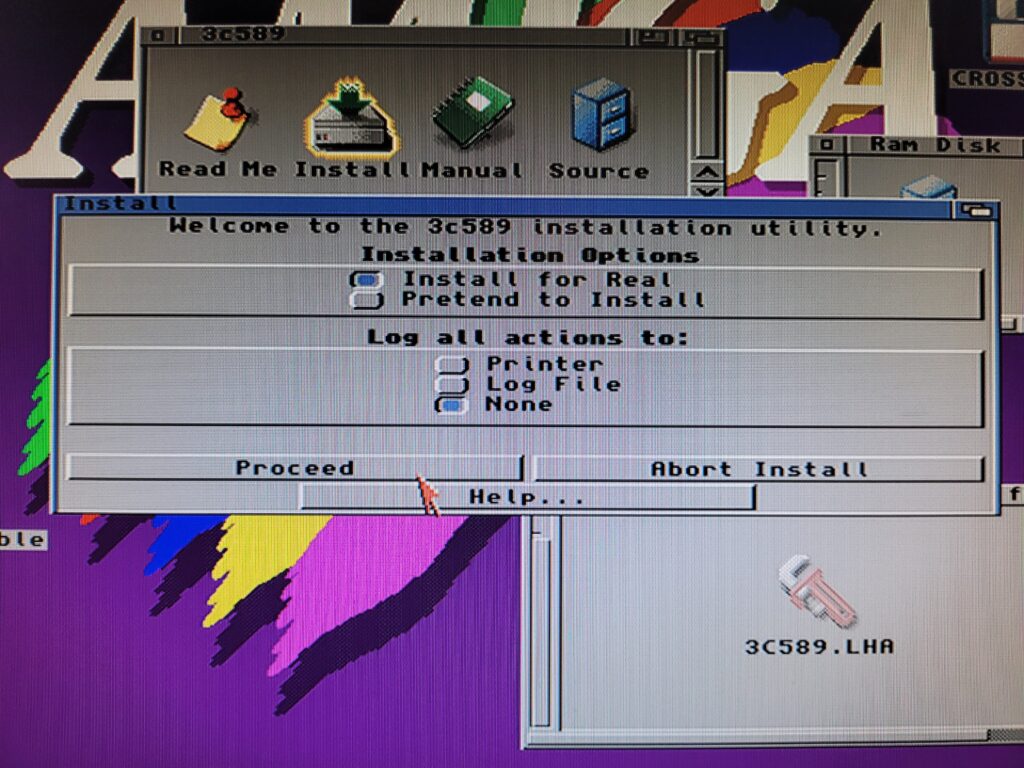
Double-click the installer to run it and progress to the screen shown below. Select ‘Install for Real’ before clicking on ‘Proceed’.


AmiSSL

AmiSSL – Install for real.


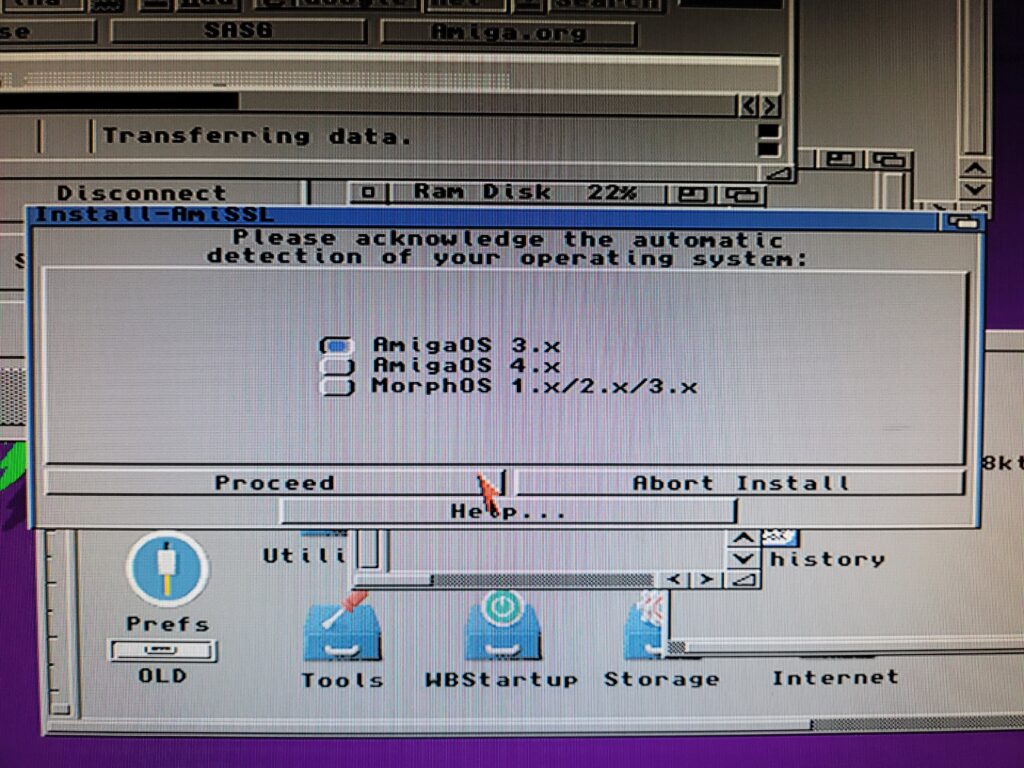
The installer should automatically detect the correct version of AmigaOS so just check it in the following window then hit ‘proceed’.


AmiSSL

Choosing your version of AmigaOS.


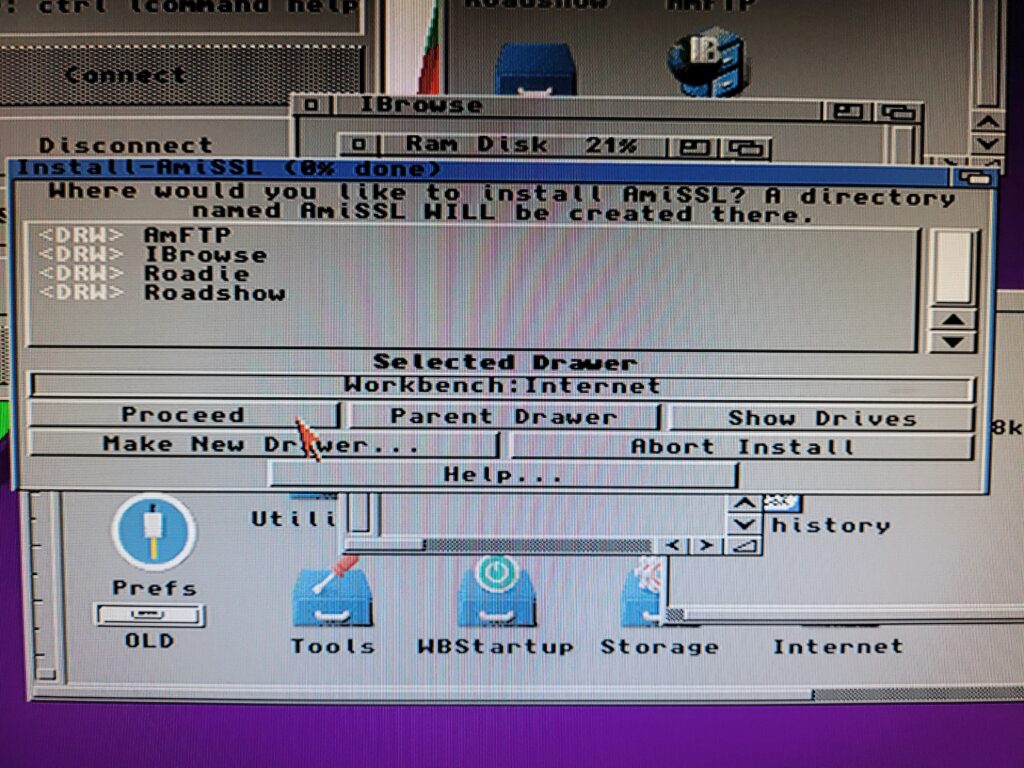
Next up it wants to know where to install everything. As before I chose to install it in the Internet folder I created earlier but it can go anywhere you want.


AmiSSL

Choosing where to install AmiSSL.


Unless you have a ‘060 accelerator board installed in your A1200 then the first option is the one we want on the next screen.


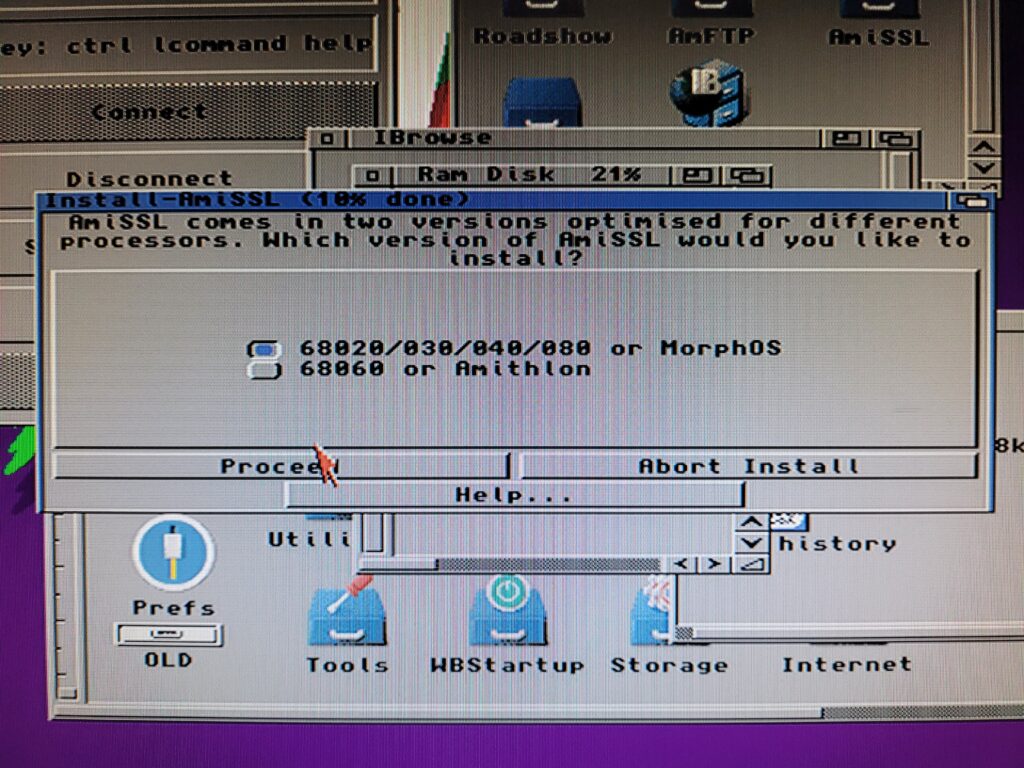
AmiSSL

Choosing the correct version of AmiSSL optimised for your CPU.


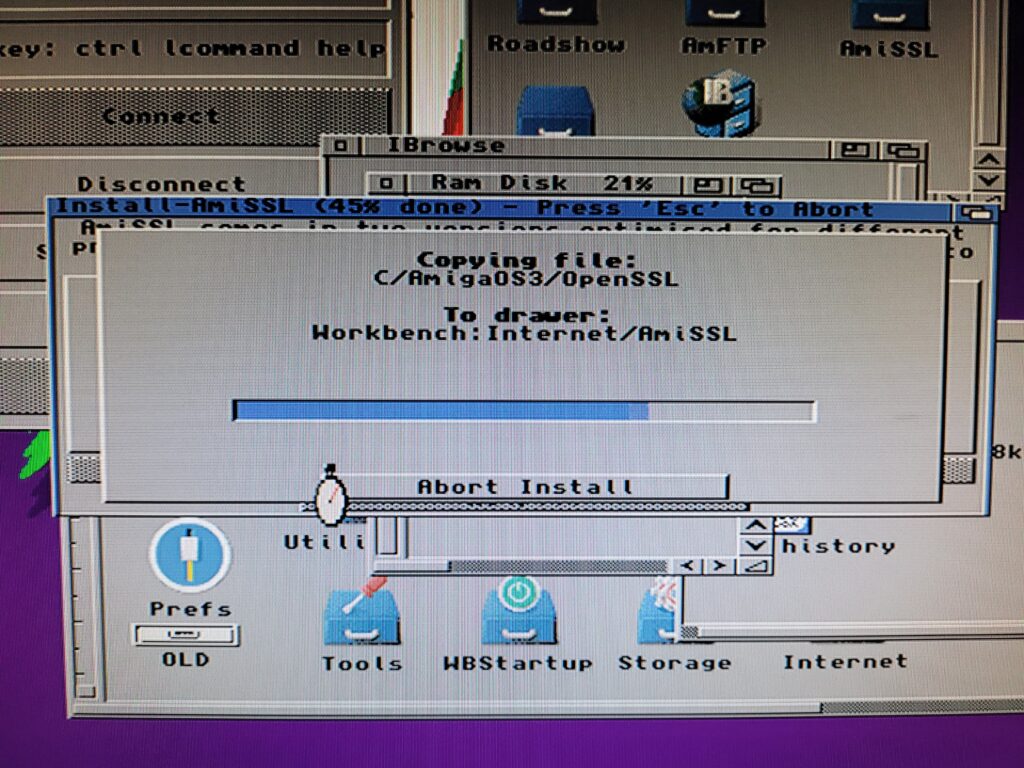
The installer will now get on with the task of installing OpenSSL and a whole bunch of certificates.


AmiSSL

Files being installed.


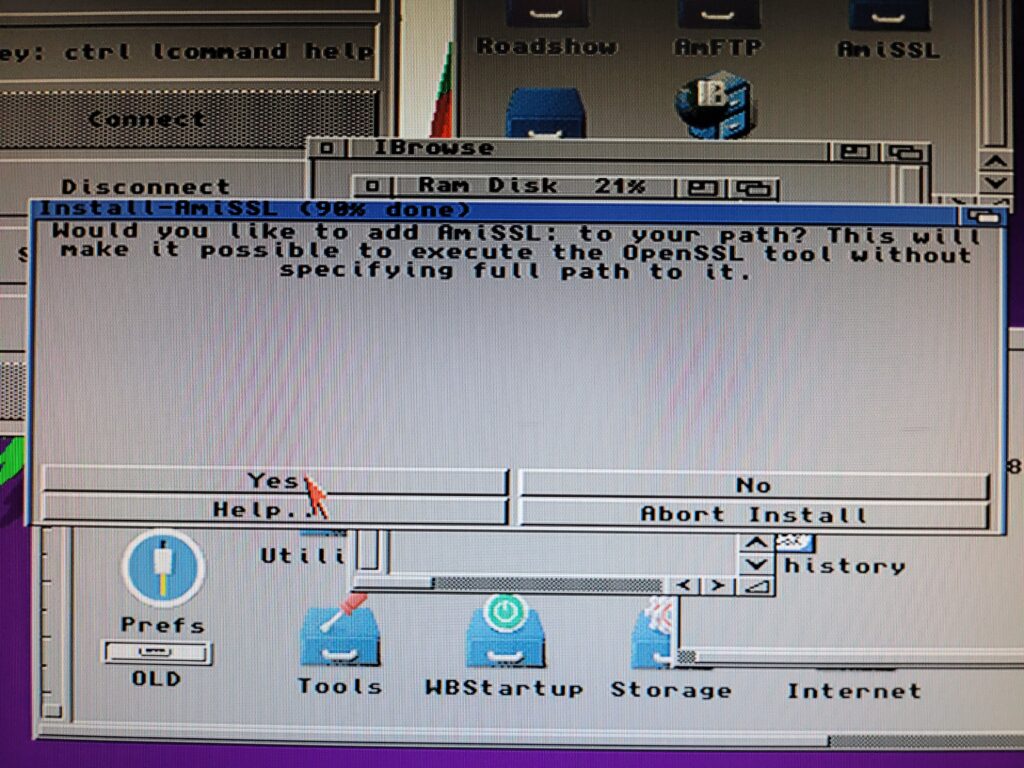
Once all the files have been copied over it will ask if you want to add it to your path. Answer yes to this to continue.


AmiSSL

Adding AmiSSL: to Workbench’s path.


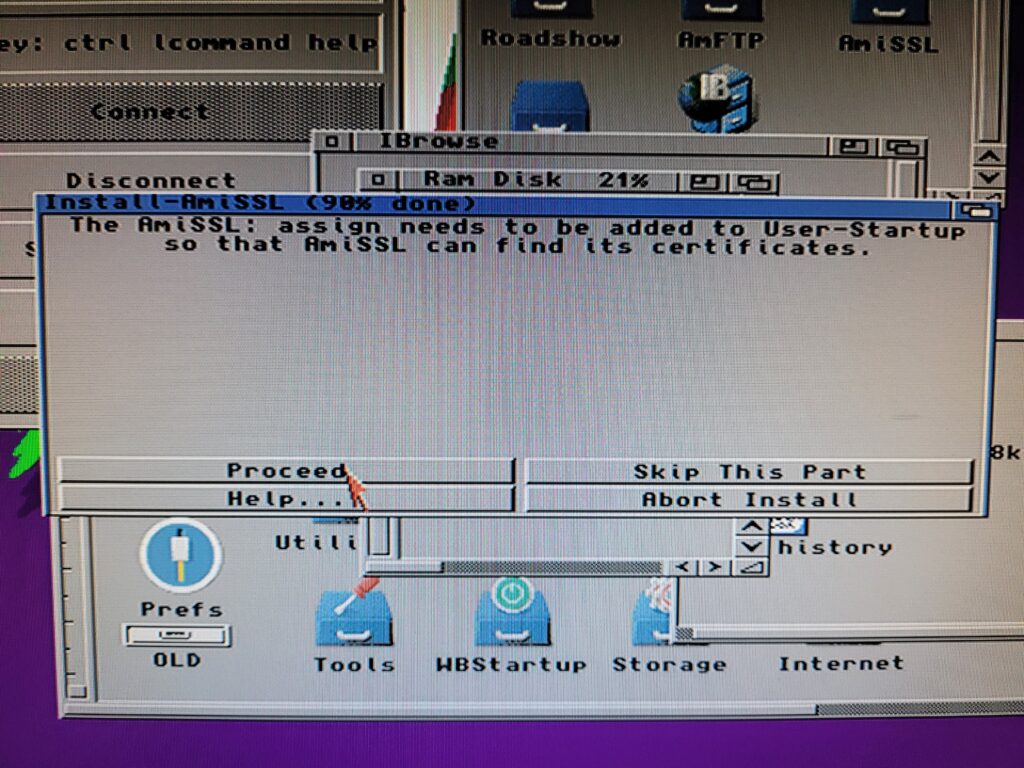
It also wants to add an assign to the user-startup. We need this to happen or it won’t work so click ‘proceed’ to let it do its thing.


AmiSSL

Adding an AmiSSL: assign to User-Startup.


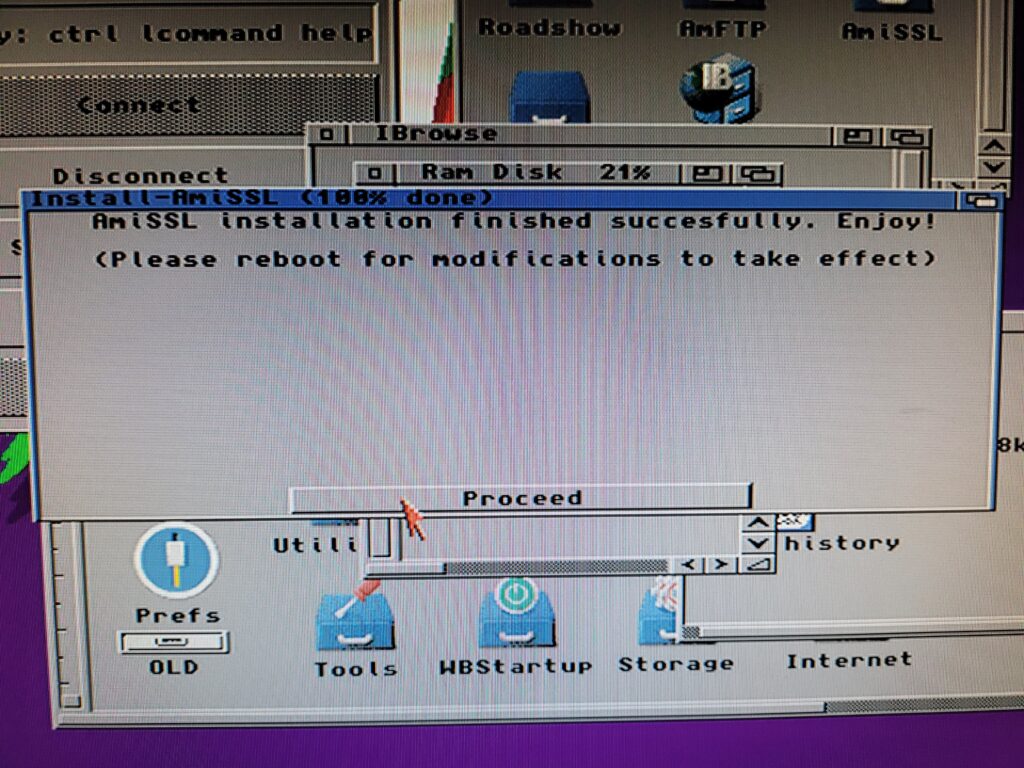
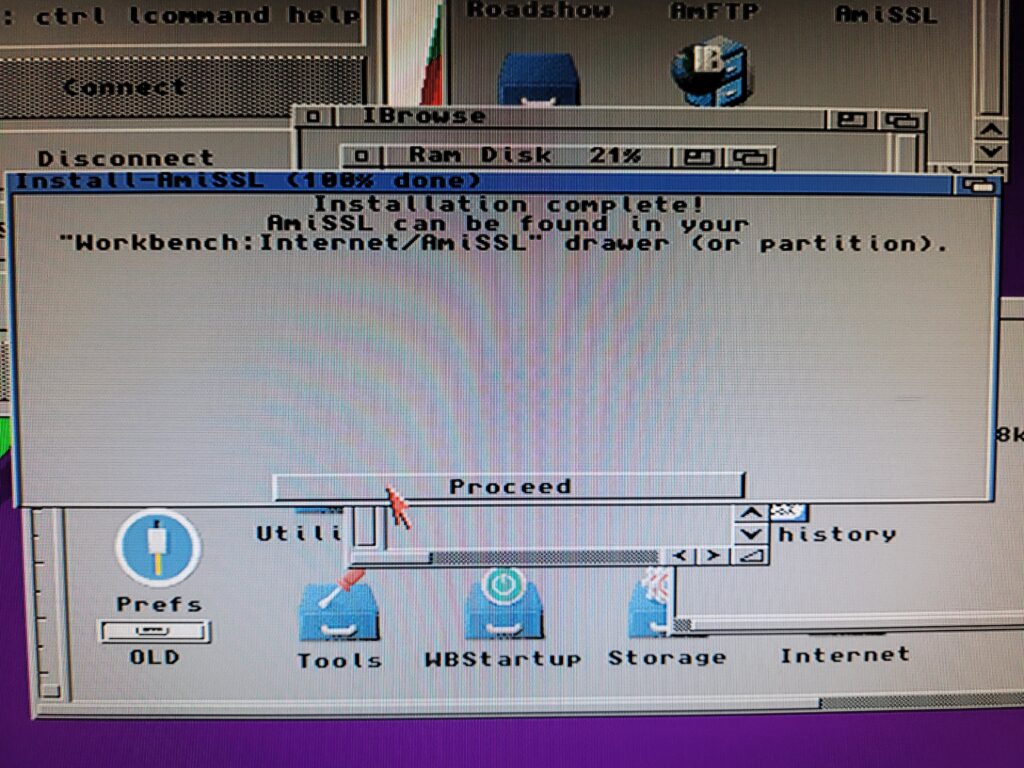
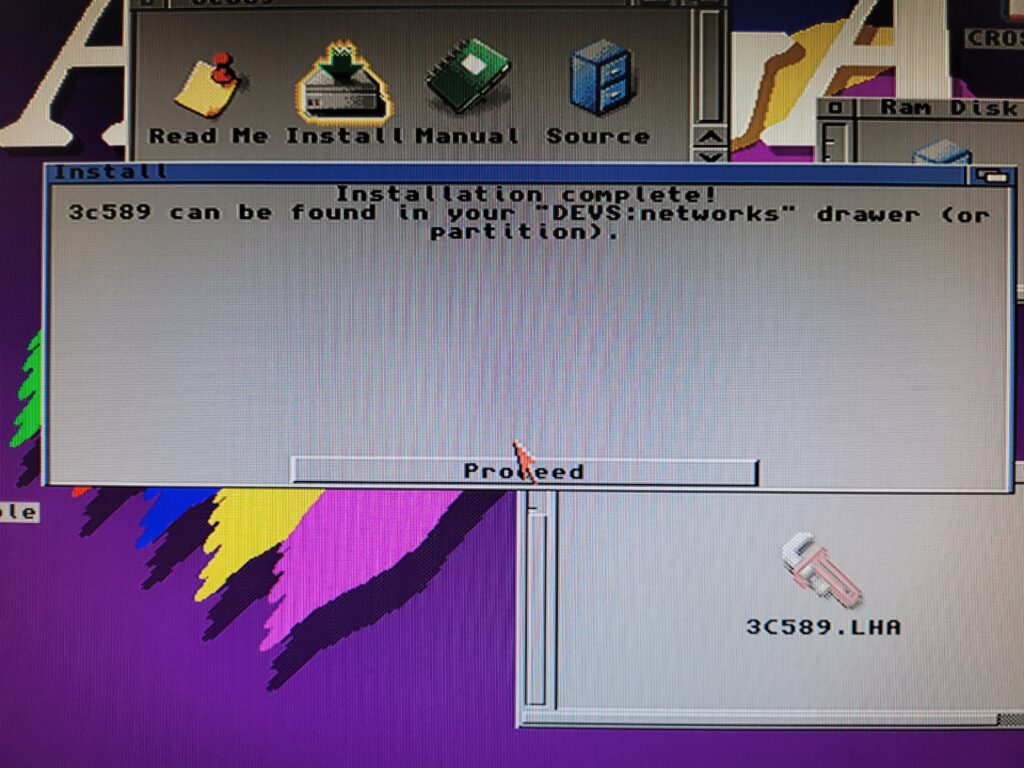
A message will pop up saying the computer needs to be (manually) rebooted before it will work. Hit proceed to continue.


AmiSSL

Mission accomplished – AmiSSL is now installed.


And that’s all there is to this one, AmiSSL is now installed and ready to provide secure internet access to any programs that require it.


AmiSSL

A reminder of where AmiSSL was installed.


Installing MUI 3.8

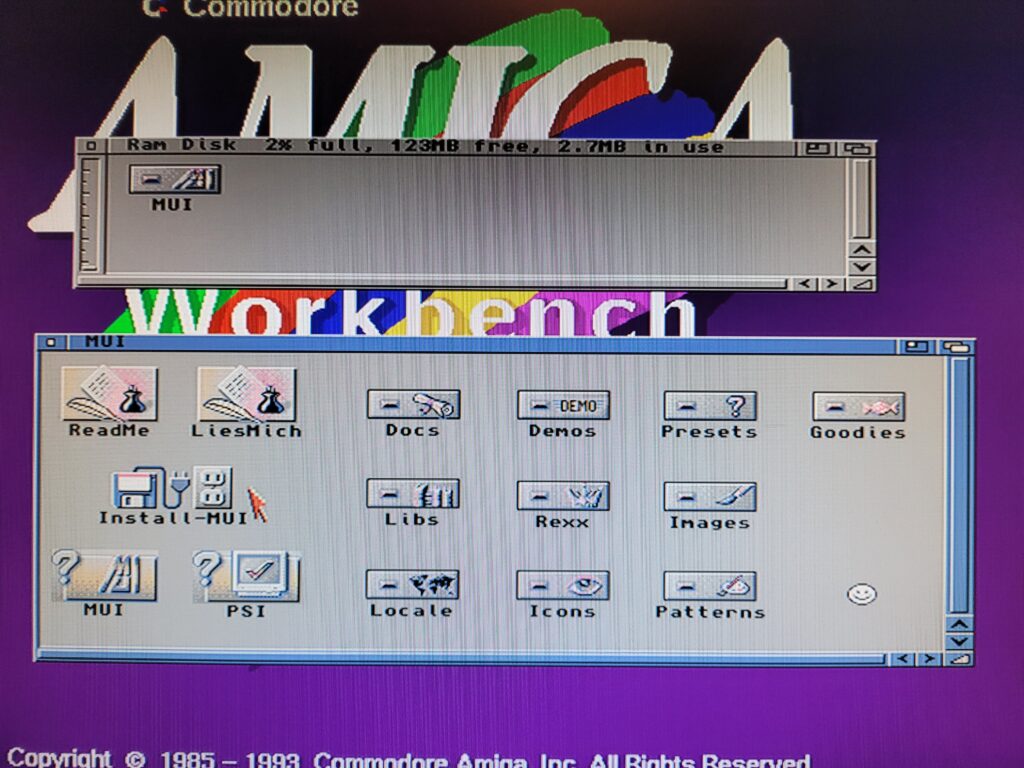
MUI 3.8 is a pretty big archive so will take a little while to unpack but once it does you should have a folder like the one below. Run ‘Install-MUI’ to get the ball rolling.


MUI3.8

This is how the unpacked MUI archive will look.


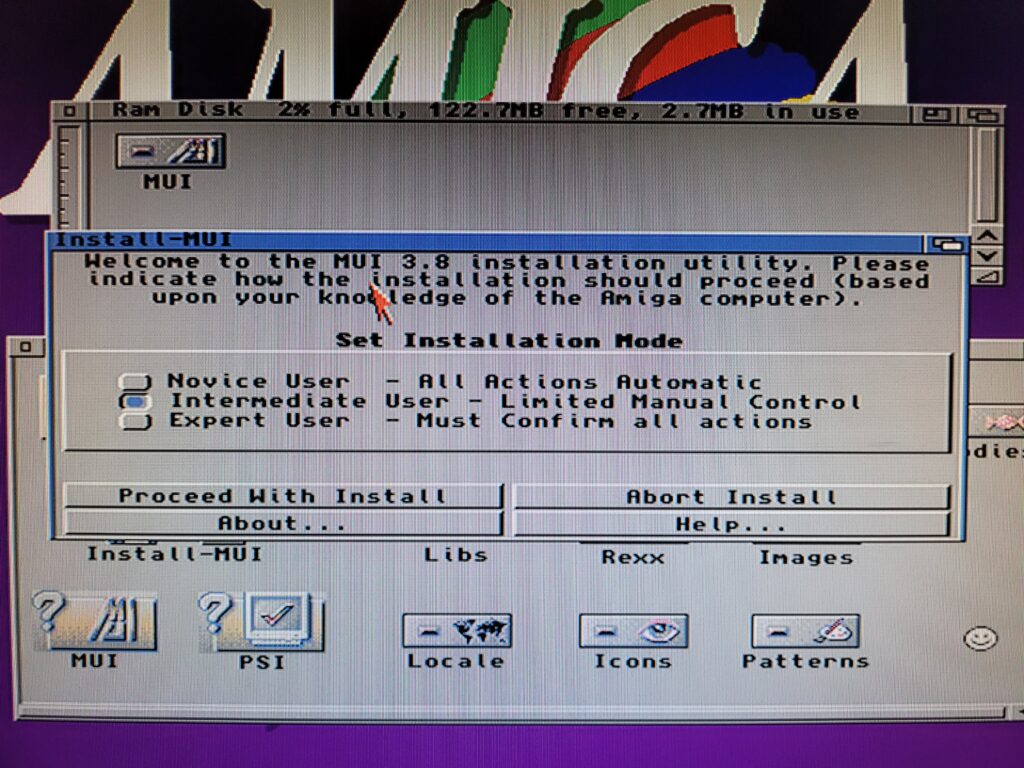
Select ‘Intermediate User’ otherwise you won’t be able to tweak the installation.


MUI3.8

Select ‘Intermediate User’.


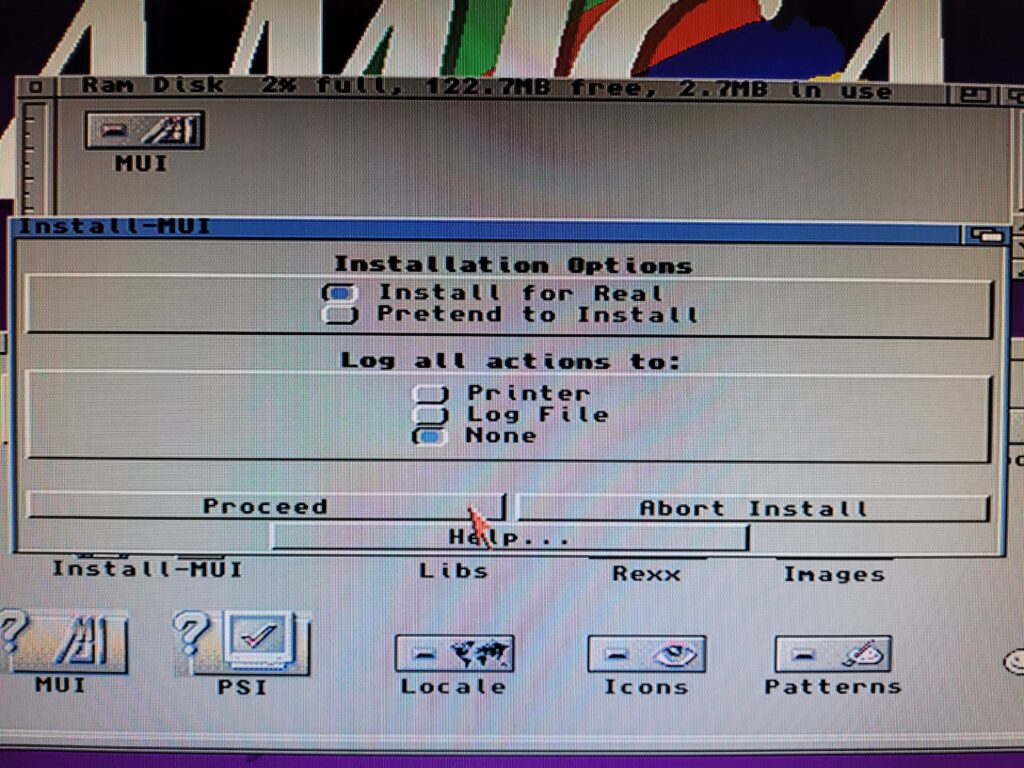
Obviously we want to actually install MUI so keep ‘Install for real’ selected.


MUI3.8

Installing for Real…


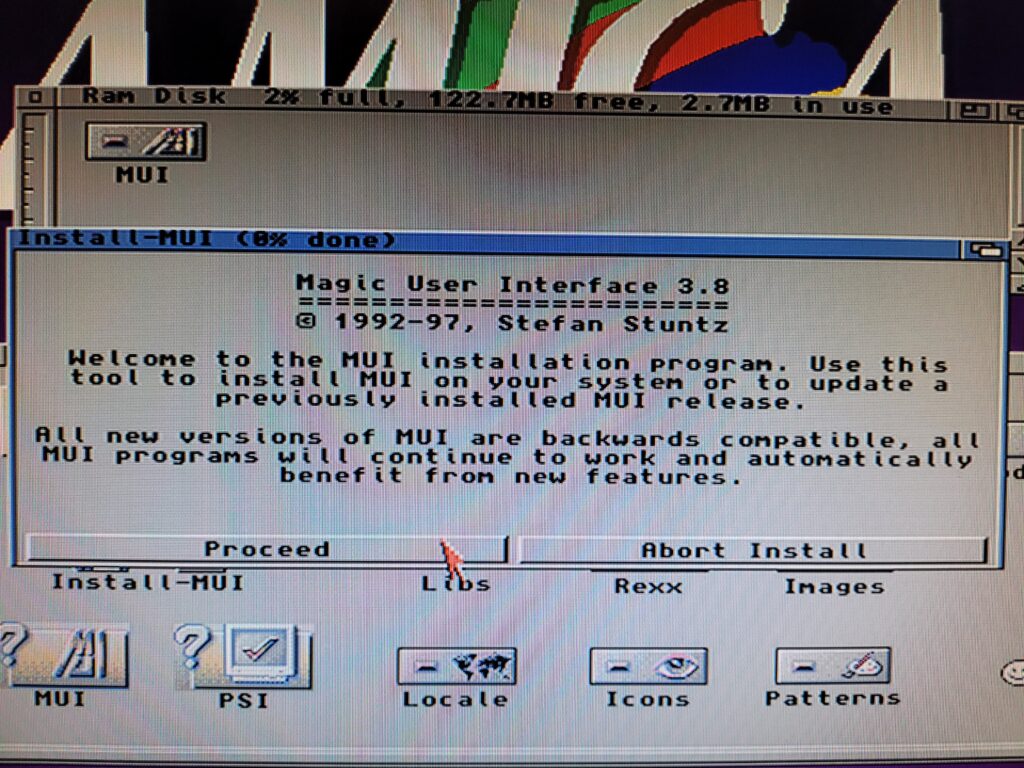
The next screen simply explains what the Installer is going to do so just click proceed here.


MUI3.8

A little intro from Stefan Stuntz.


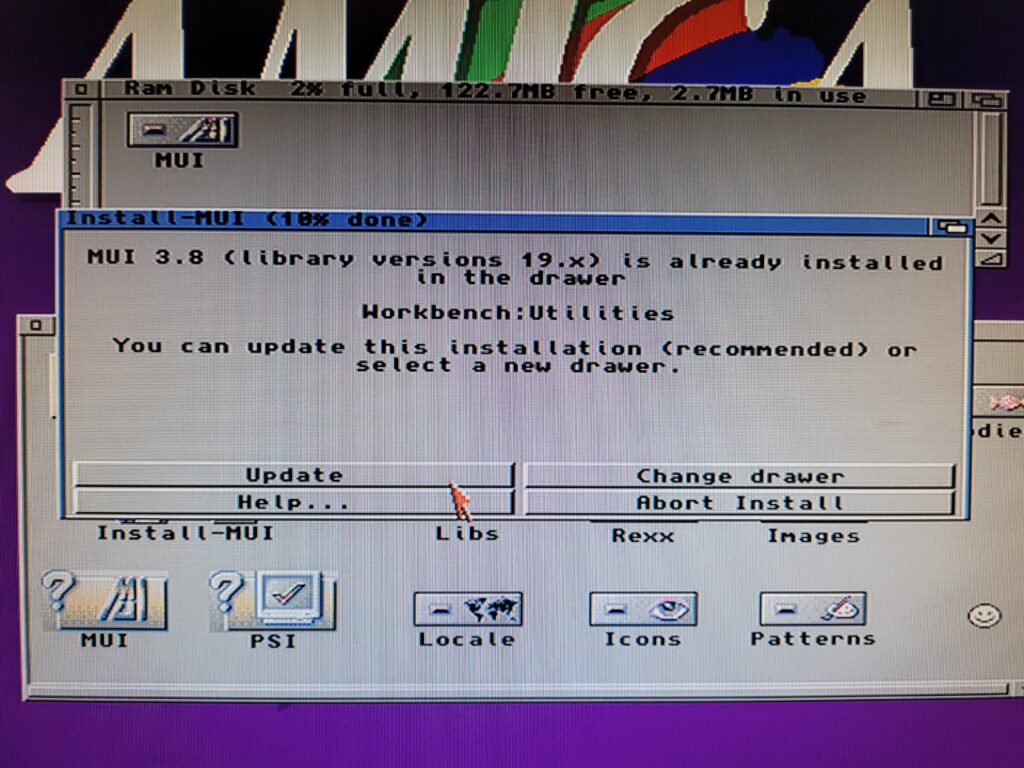
Choose where to install the software when the next screen appears. As I have already installed MUI before, when I ran the installer again (so I could get these screenshots) it gave me the option of changing where to put it. I mention this just to explain why the screenshot will differ from a regular first time install.


MUI3.8

Choosing where to install MUI3.8. (This screen will different slightly from a fresh install as I have already installed this before).


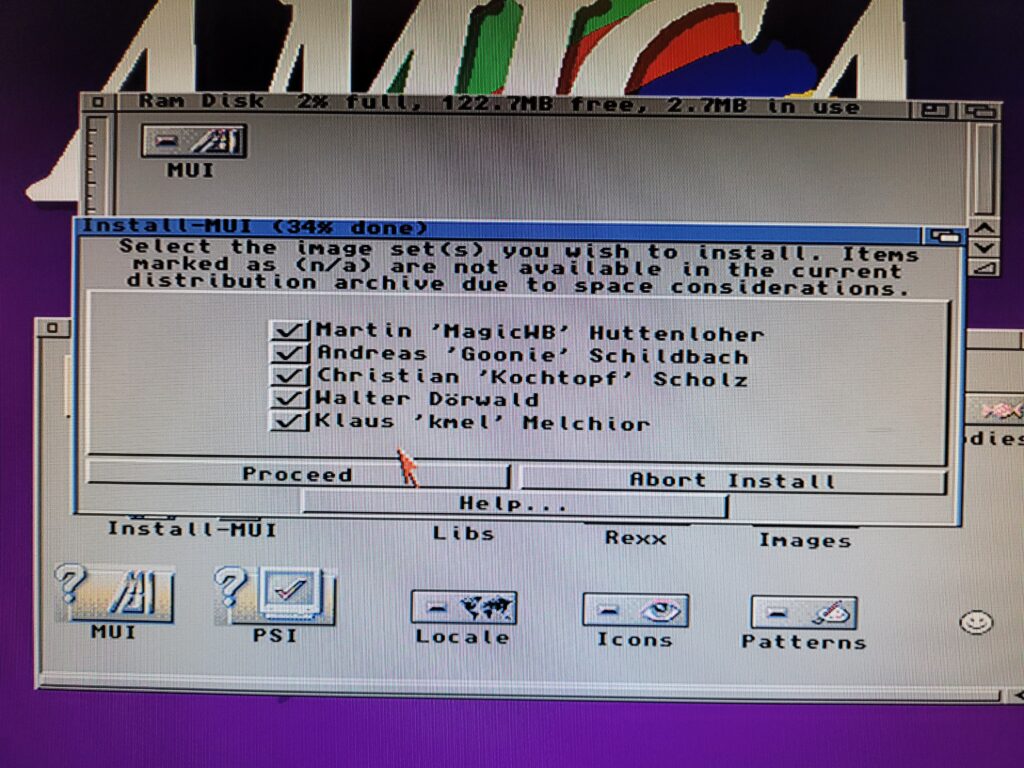
The following window gives you the option of choosing which image sets you want. Think of these as themes that will let you change the appearance of various aspects of the MUI interface. Leaving everything ticked will allow plenty of choice if we want to mix things up in the future.


MUI3.8

Choosing image sets.


Choose your language from the following screen and then click proceed.


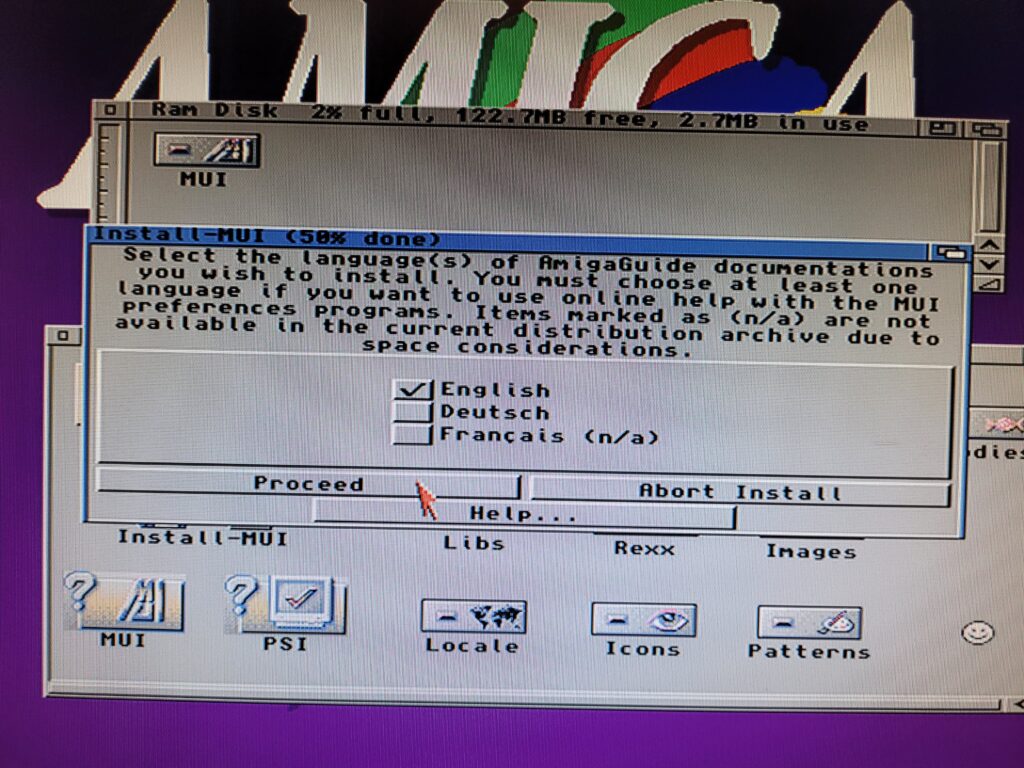
MUI3.8

Select the language for the AmigaGuide docs.


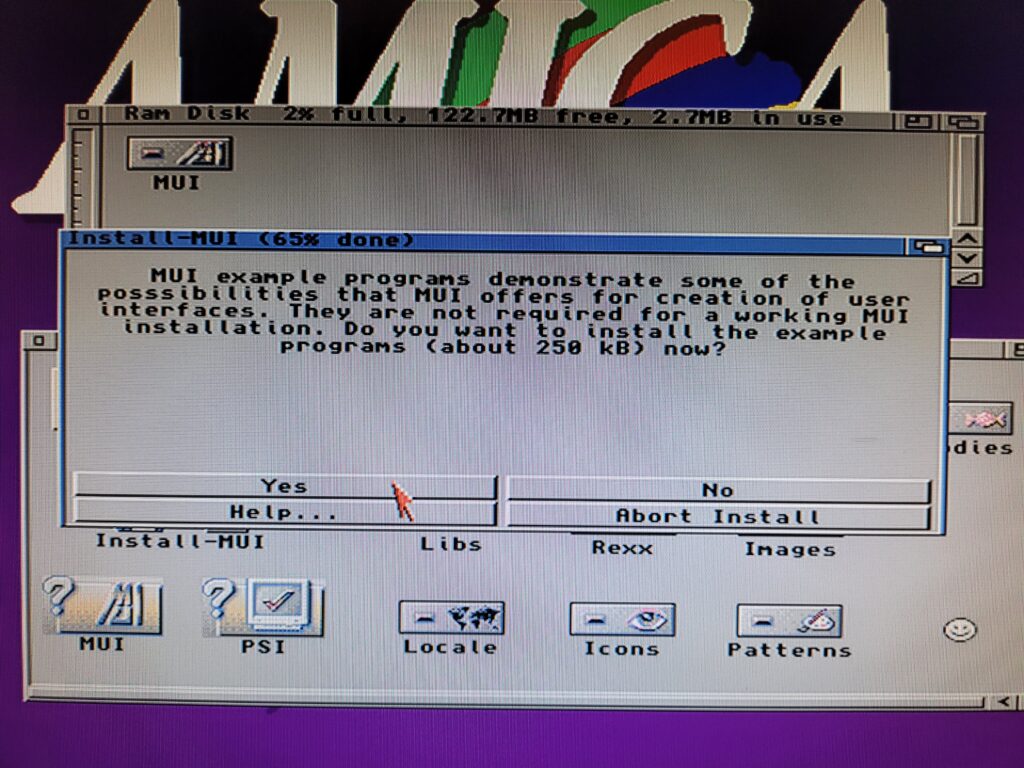
A bunch of demo programs can be installed from the next screen if you wish.  These are more geared towards developers to show what MUI is capable of. However they don’t take up much space so if you’re curious just click ‘yes’ to continue. Alternatively click ‘no’ – the installation will continue regardless of which option is chosen.


MUI3.8

MUI example programs.


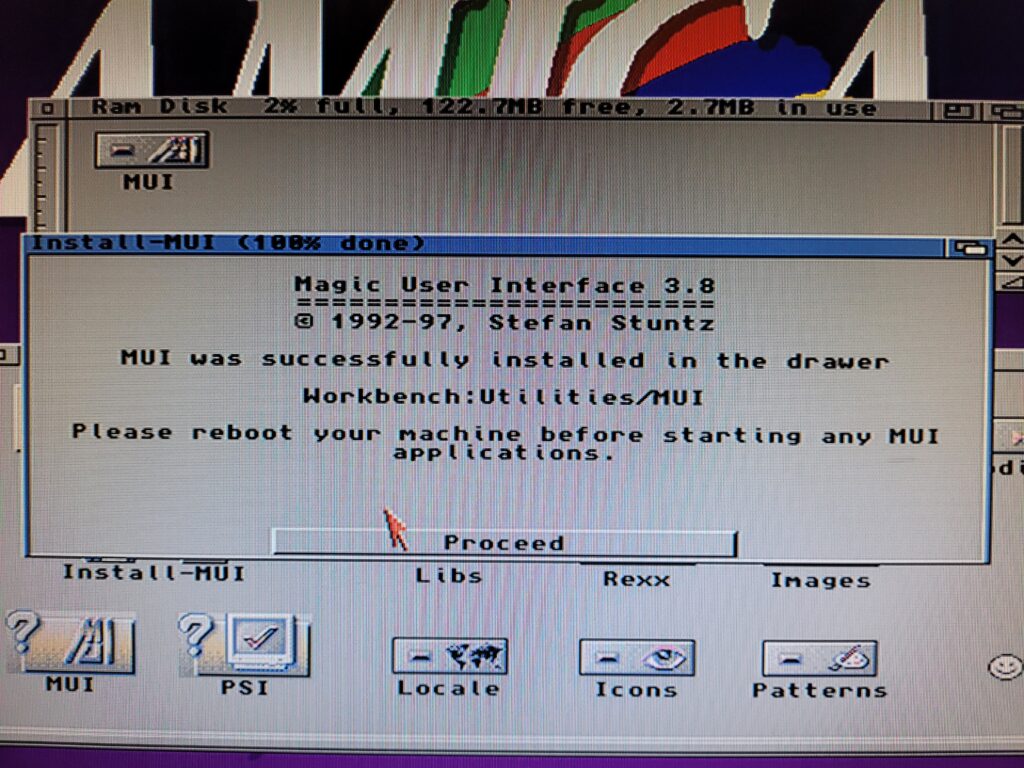
The installation will now finish and display the screen below and recommend a reboot.


MUI3.8

Congratulations – you’ve successfully installed MUI3.8.


MUI is now successfully installed and we can finally move on to installing our browser!

Reboot your Amiga before moving onto the next stage so that both AmiSSL and MUI are up and running.


Installing the IBrowse Web Browser

IBrowse can be downloaded from here:

IBrowse – web browser for Amiga computers / AmigaOS (ibrowse-dev.net)

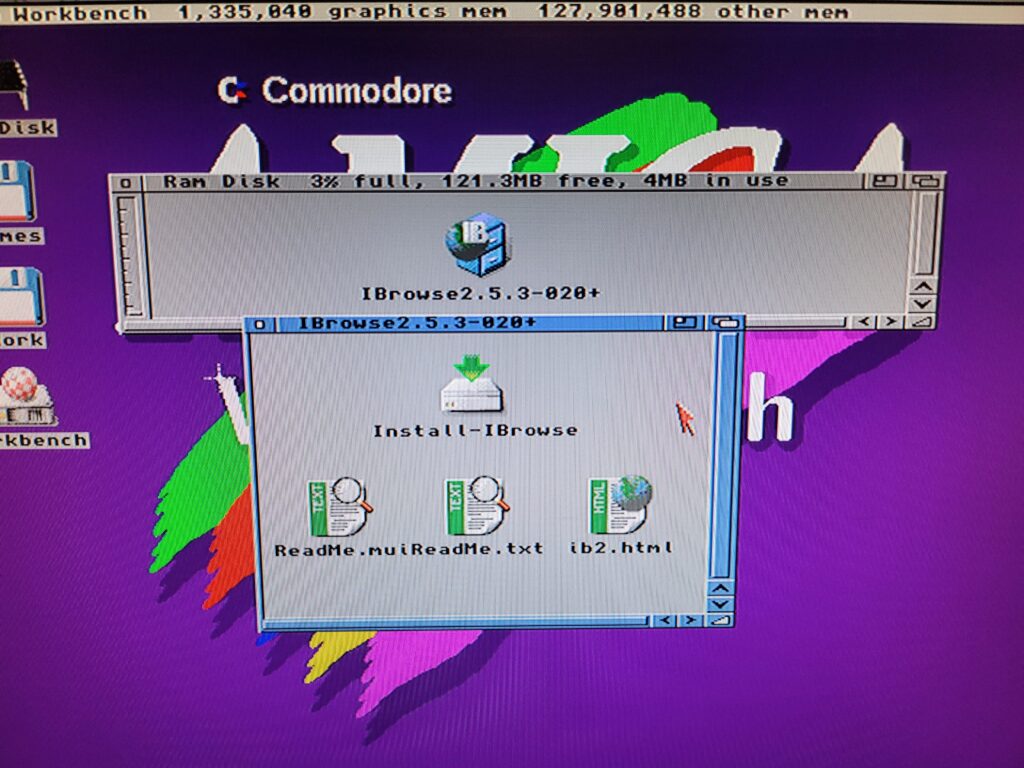
Unpack the archive to a folder on your Amiga and you should get a folder like the one shown below. Run ‘Install-IBrowse’ to get started.


Amiga Web Browser

The IBrowse archive unpacks to this…


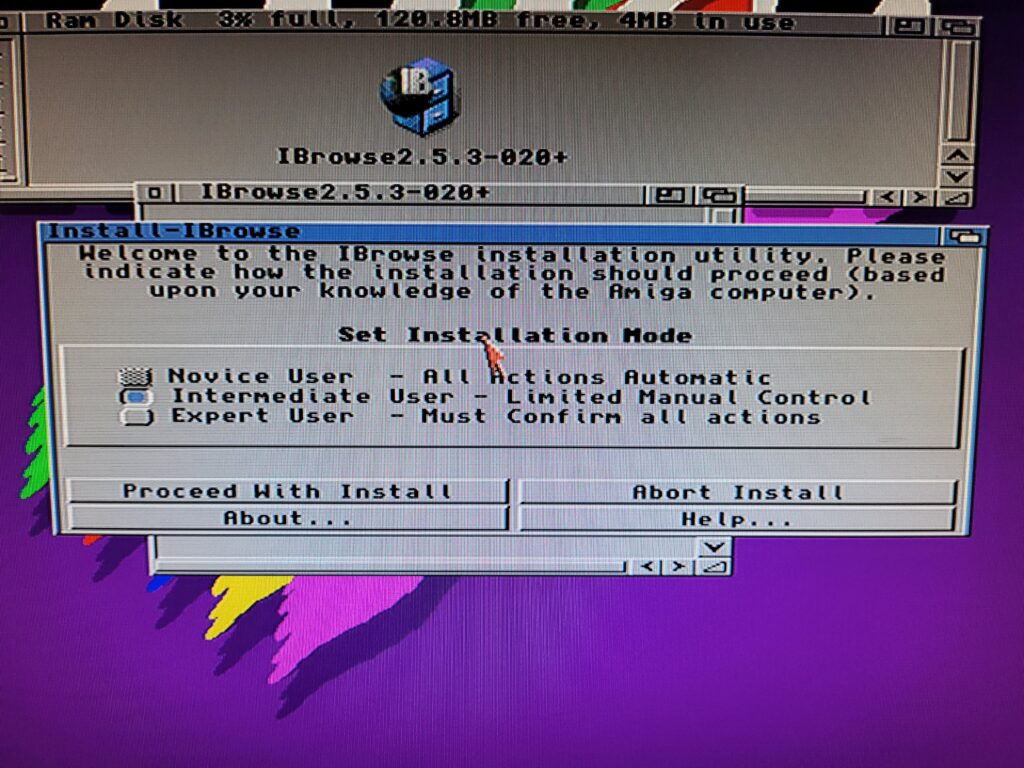
I selected ‘Intermediate User’ so I had some control over what goes where.


Amiga Web Browser

Select ‘Intermediate User’…


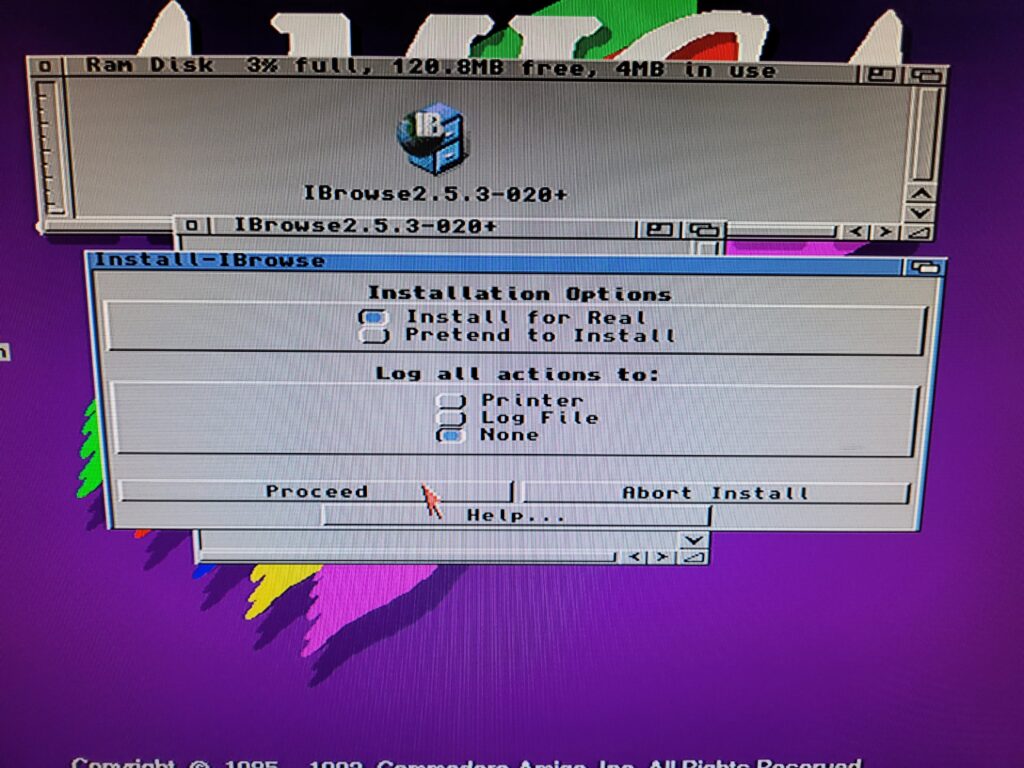
Next there’s the usual option to do a pretend install if you just want to see what it’s going to do or assess any potential problems in advance. Make sure to keep ‘Install for Real’ selected and click ‘Proceed with Install’..


Amiga Web Browser

…and Install for Real.


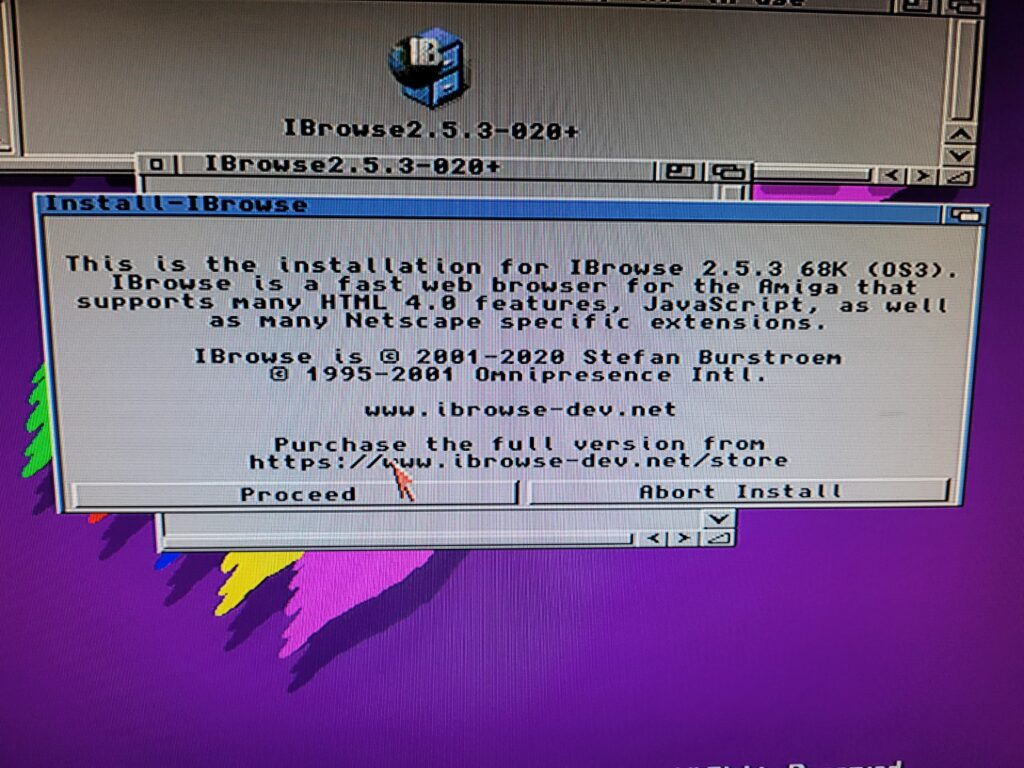
The next window is just a little introduction to the program which can be safely ignored.


Amiga Web Browser

A little introduction to the program.


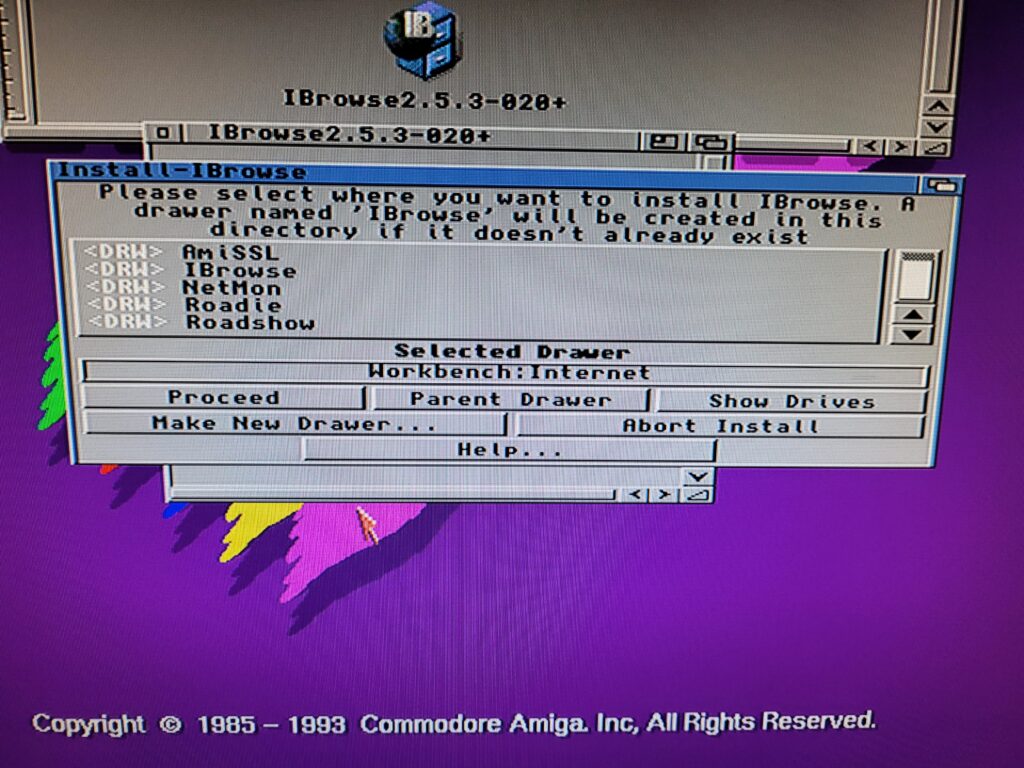
The first choice we need to make is where to install the program. As always mine is going into my Internet folder with all my other Internet related programs.


Amiga Web Browser

Selecting where to install IBrowse.


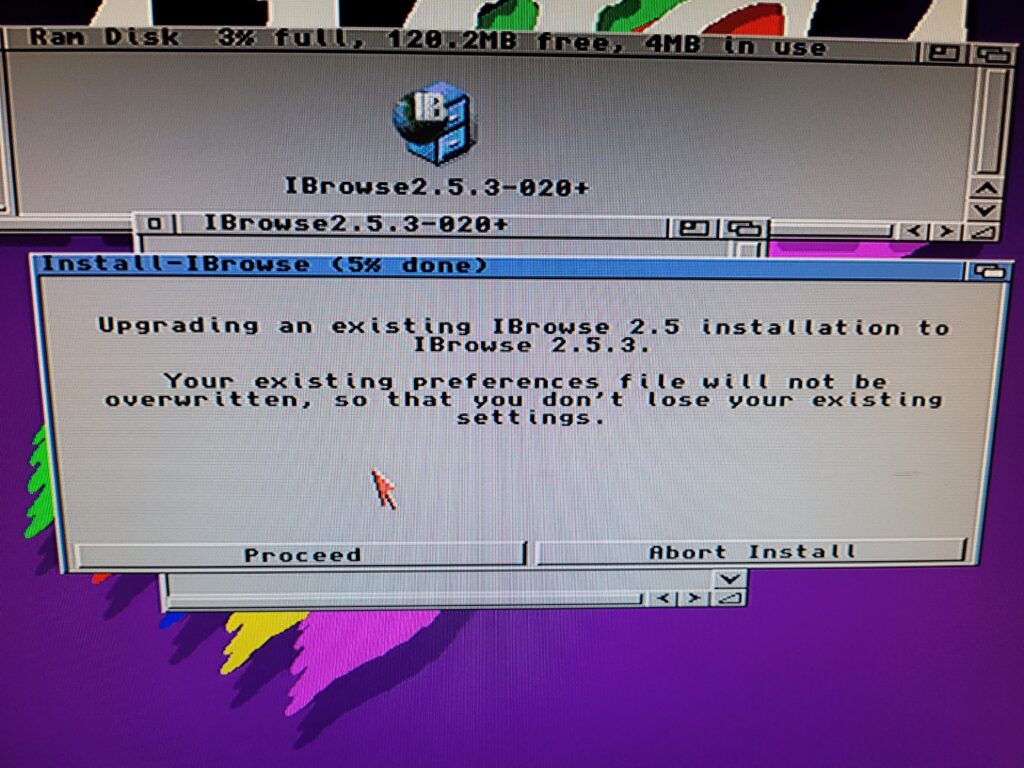
I had already installed IBrowse before so I received confirmation that none of my preferences would be disturbed. Nice.


Amiga Web Browser

As I had already install IBrowse before this screen popped up. If you’re installing it for the first time you shouldn’t see this.


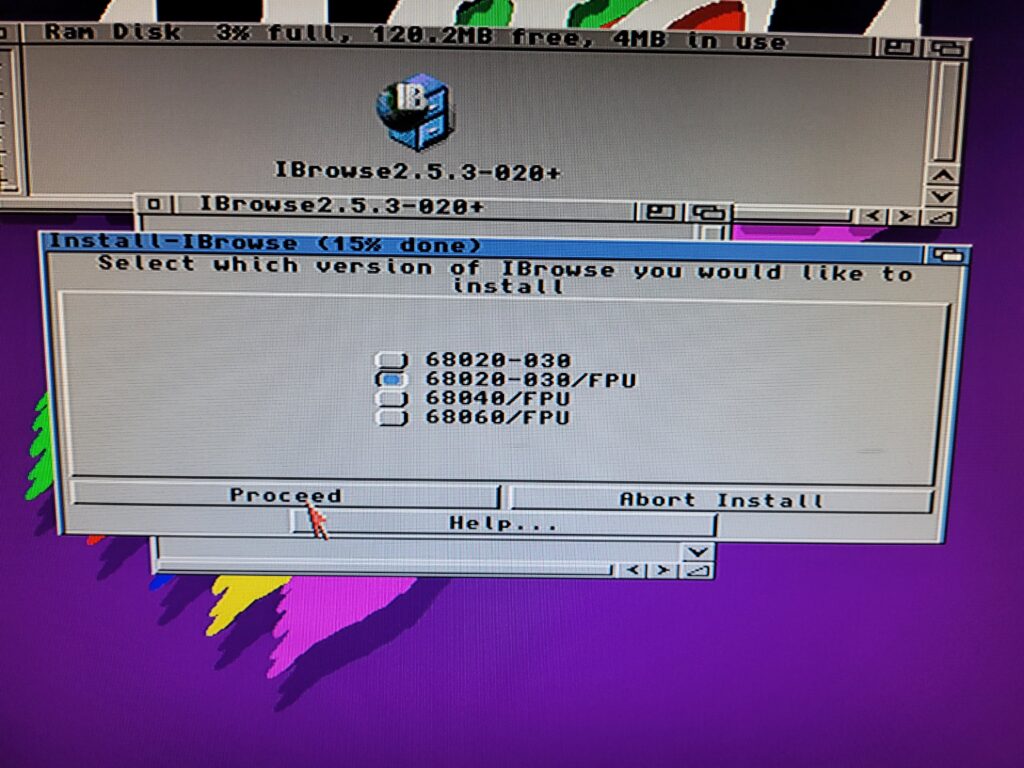
The next dialogue box lets us choose a version optimised for our CPU. I have a 68030 CPU and an FPU in my A1200 so I chose the ‘68020-030/FPU’ option.


Amiga Web Browser

Picking the version that’s optimised for your CPU.


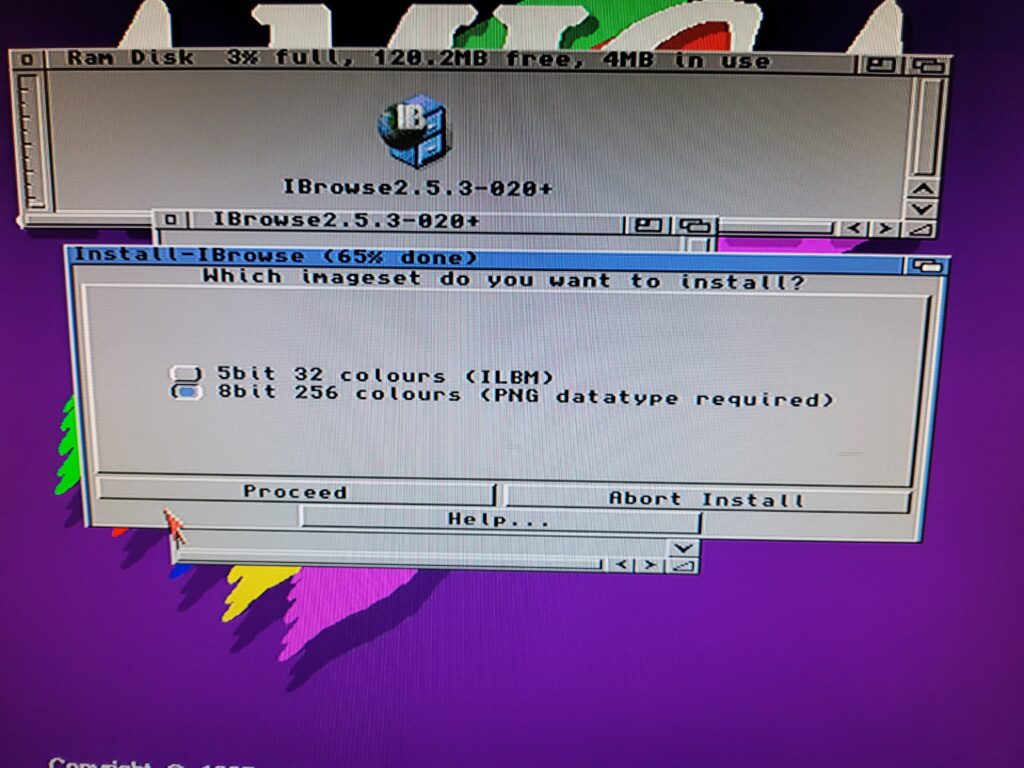
Next we can choose the Imageset to use for the buttons etc. This is down to personal choice and how many colours you choose to run your Workbench in.


Amiga Web Browser

Choosing the imageset.


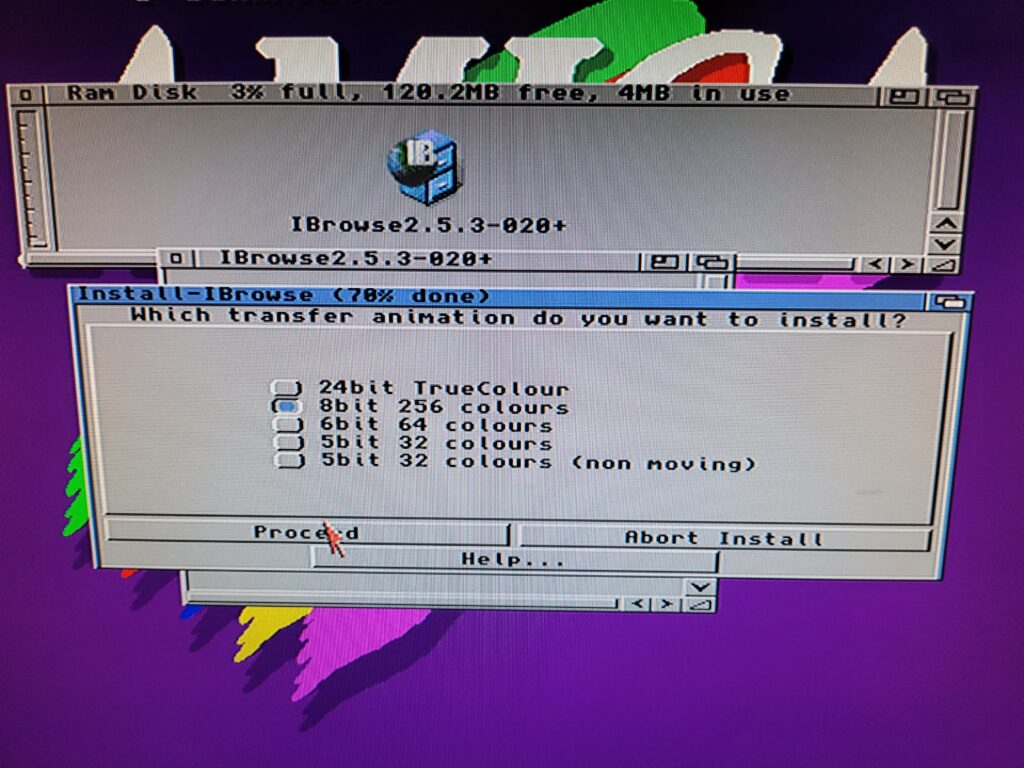
The next choice is similar and affects the little animated globe in the corner of the screen. I chose 256 colours for both options as that’s the max my AGA chipset will allow on Workbench. This is a real throwback to the 90’s when all browsers had a cool animation in the corner whilst we waited for pages to load.


Amiga Web Browser

Choosing the transfer animation – remember those?


The next window informs us that some additional files will be installed if they aren’t already present so just hit proceed to move things along.


Amiga Web Browser

A little notice that some extra MUI stuff will be installed.


Another info window advises about the installation of new MUI classes if you don’t already have them. Just hit ‘proceed’.


Amiga Web Browser

Some more MUI stuff will be installed.


If everything went smoothly that will be the end of the install. You should see a confirmation window along with a reminder of where IBrowse was installed.


Amiga Web Browser

IBrowse is now installed!


Opening the folder should reveal the main IBrowse program, a plugins folder and some documentation.


Amiga Web Browser

The IBrowse program icon.


When you run the IBrowse program it should bring up a screen very similar to the one shown below.


Amiga Web Browser

The IBrowse splash screen.


Taking a look at a few websites.

At last we can finally do some surfing like it’s 1995 again! Although IBrowse can access secure sites that doesn’t mean it will work with every site. The web has evolved a lot in the past 25 years and the Amiga has not. Graphics and Javascript intensive websites are off-limits, as are sites heavily reliant on CSS which IBrowse doesn’t currently support. CSS is promised for IBrowse 3. Having said that, there’s still plenty of sites we can visit that display well and finding out which ones work is an adventure in itself!


Amiga Web Browser

Google as viewed in IBrowse. Fun fact – Google’s search page didn’t even exist back when IBrowse launched!


Thankfully Google works like a dream and the page comes up in a matter of seconds. There’s also a built-in Google search in the Toolbar which elicits search results in seconds too.


Aminet works really well in IBrowse too, displaying pages and search results in 2-3 seconds. Downloading multiple programs is a breeze too thanks to the built-in download manager. With this capability on the Amiga itself it will no longer be necessary to download stuff on a PC and then transfer it across.


Amiga Web Browser

Wikipedia viewed in IBrowse.


Wikipedia also works pretty well as it tend to have lots of text and relatively few images.


Amiga Web Browser

Indie Retro News in IBrowse.


One of my favourite Retro gaming sites works pretty well too, albeit a little slow loading the images.


Amiga Web Browser

Amiga Future in IBrowse.


The Amiga Future site displays pretty well too.


Amiga Web Browser

AmigaWorld in IBrowse.


As does AmigaWorld as you would hope so for an Amiga oriented site.


Amiga Web Browser

CNN Lite in IBrowse.


Most of the main news sites are drowning under the weight of photos and adverts so aren’t really practical for viewing on the Amiga – not if you value your time anyway! However there are still places we can go to, such as CNN lite for example.
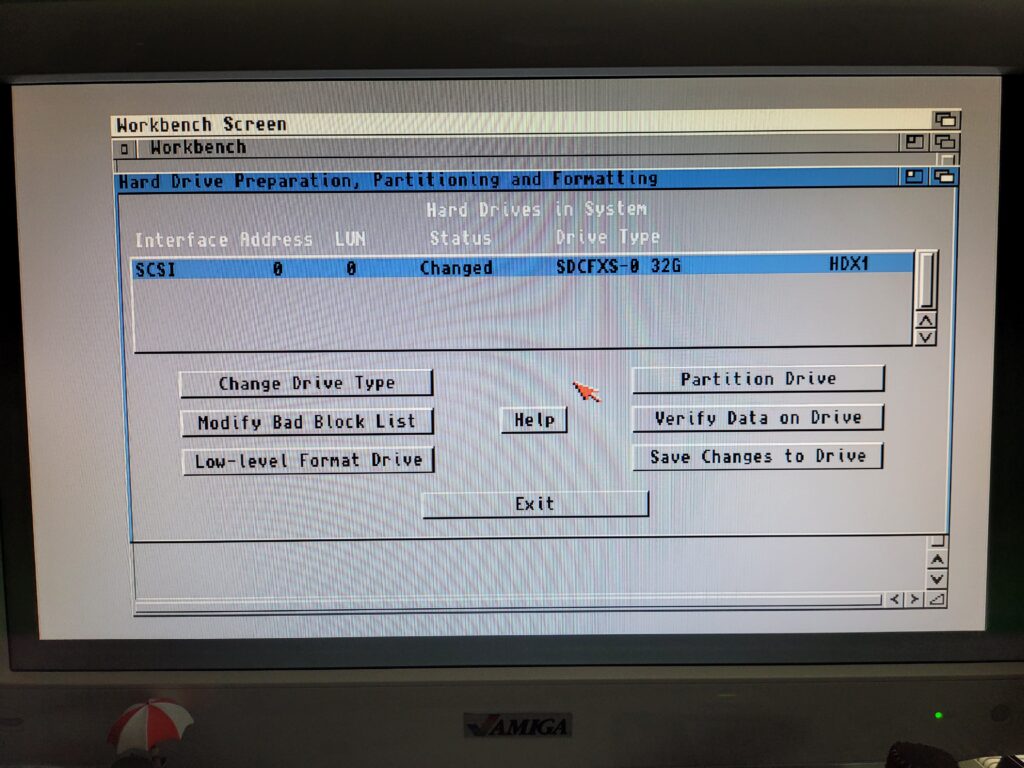
 

Rounding Off

IBrowse is one of the few Classic 68k Amiga web browsers still actively being developed now. It can display https sites and has gained some modern features such as a password manager, integrated search bar and even tabbed browsing. I would really encourage you to pay for the full version if you enjoy using it. We need guys like this supporting the current Amiga scene otherwise we’d be stuck with AWeb now…


Amiga Web Browser

Tabbed browsing in IBrowse.


Just as an aside I also tried the NetSurf Amiga web browser as this claims to be able to work with CSS sites. However after eventually getting it working it wasn’t worth the effort. It looks pretty and may well work great on PPC or Vampire equipped Amiga’s but on my ‘030 A1200 it was diabolical. We’re talking several minutes to load a page (badly) and a horrible laggy mouse pointer that made navigation a nightmare. This browser is clearly aimed at NG Amiga’s so I dismissed it as an option. If I ever get an 060 or PPC card I will revisit it in the future but for now I’ll be waiting for IBrowse 3 to get CSS support.


Amiga NetSurf

NetSurf – not the browser you are looking for.


Anyway have fun surfing the internet with your new Amiga web browser and if you do find some cool Amiga friendly websites then please let me know in the comments below. I hope to compile a list of them in the future to help out my fellow Amigans.

And that concludes part 3 – Installing an Amiga Web Browser. In Part 4 I will look at adding both POP3 and IMAP email access. This is something I did a few years ago on my Vampired A500 running Apollo OS. However I want to revisit it and make sure it still works today and whether it’s actually viable on a slower non-Vampired Amiga.

Getting an A1200 Online Part 2 – Adding an Amiga TCP/IP Stack

Amiga TCP/IP Stack

Installing an Amiga TCP/IP Stack

By the end of Part 1 we’d installed a network card and ancillary software but still couldn’t do anything useful. This is because Amiga OS doesn’t have any sort of networking features built into it. For that we need to add an Amiga TCP/IP Stack. There are a few different options available to Amiga users in this area such as Genesis, Miami(DX), Easynet and maybe a couple of others. I chose to go with Roadshow. It’s probably the fastest TCP/IP stack around and still in active development. Version 1.14 was released in September 2020.


Amiga TCP/IP Stack

Roadshow installation CD.


I bought a physical copy of the software on CD but it can be downloaded too and burned onto a CD (it’s too big to go on a floppy).  A free demo is available if you just want to try it out… it’s fully featured but times out after 30 mins.


Amiga TCP/IP Stack

Roadshow installer.


After running the installer I opted for the ‘Intermediate User’ and clicked ‘Proceed with install’.


Amiga TCP/IP Stack

Roadshow Installer.


I left the next choice as ‘Install for Real’. The ‘Pretend’ option is just there in case you want to perform a dry run.


Amiga TCP/IP Stack

Option to install optimised 68020 version of bdsocket.library.


The next choice is an important one. It asks whether it should install a special version of bdsocket.library and drivers. As I’m running this on an A1200 with a 68030 CPU I answered ‘yes’. The answer would still be yes even on a stock A1200 as that has a 68020. Of course if you were doing this on an unaccelerated A600 then the answer would be ‘no’.


Amiga TCP/IP Stack

Selecting where to put the Roadshow install.


Next the Installer asks where to install everything. This can be anywhere really but I created a directory called ‘Internet’ on my Workbench partition so I could keep everything tidy and logical. To create a directory just use the ‘Make New Drawer’ button.


Amiga TCP/IP Stack

Installer copying files across.


At this point a whole bunch of files were copied over. After a short while the penultimate ‘installation is complete’ message appeared.


Amiga TCP/IP Stack

Installation (almost) complete.


Clicking ‘proceed’ brought up the final ‘100%’ complete window.


Amiga TCP/IP Stack

Installation complete.


Manual Changes

With the automatic installation part now complete we need to finish things by hand. We need to have a configuration file that tells Roadshow which network card it should use to connect to our network and just how it should go about getting an IP.

Helpfully the installer put several template configuration files for many popular network devices in the SYS:Storage/NetInterfaces directory. The file we need for our 3Com card is called 3c589 and it needs to be copied into Devs:NetInterfaces. To do this we enter the following command into a Shell window:

Copy SYS:Storage/NetInterfaces/3c589#? Devs:NetInterfaces

The ‘#?’ is a wildcard which instructs the Amiga to copy all files that start with ‘3c589’ across. We need to specify this to ensure that the corresponding 3c589.INFO file gets copied over as well.


Amiga TCP/IP Stack

Copying the 3c589 files across using the Shell.


Once the file has been copied to its new home we need to edit it. Type in the following to use the Shell’s built in editor to make the necessary amendments:

ed: Devs:NetInterfaces/3c589


Amiga TCP/IP Stack

Launching the editor.


The screenshot below shows the entries that need to be made. The file contains a lot of unnecessary commands and comments designed to explain what everything does. All we actually need though is the following 4 lines of code.

device=3c589.device

unit=0

configure=dhcp

requiresinitdelay=no

To save the file press ESC, then x then press return. Alternatively select ‘Save and exit’ from the Project menu.


Amiga TCP/IP Stack

The 3c589 file should look like this.


This configures Roadshow to connect via the 3Com card and obtain an IP address over DHCP (i.e. automatically).


Testing

With the changes saved to the file it’s possible to check everything is working by typing the following command into the Shell.

addnetinterface 3c589


Amiga TCP/IP Stack

Adding the network interface manually for testing.


All being well this should add the network configuration, connect to your router and acquire an IP address. Happily this worked first time for me when I tried it and brought up the screen below.


Amiga TCP/IP Stack

Success – Roadshow has successfully connected to the network.


With that little test being successful the Amiga Roadshow TCP/IP Stack install is now complete. Every time the Amiga is turned on it will automatically connect to the internet. It does this behind the scenes so you won’t even be aware of it.


A Couple of Additions

Because of the lack of a visual interface for Roadshow I recommend a couple of other small programs (Netmon and Roadie) to provide a bit of feedback and convenience.

These programs are available from Aminet here:

Aminet – comm/net/netmon.lha

Aminet – comm/net/Roadie.lha

Both programs require no installation, just extract the archives to a folder somewhere on your Amiga and run them from there. I opted to put them into the ‘Internet’ folder that I created during the Roadshow install.

Netmon displays a little toolbar on the desktop containing info about download speed, total traffic and time connected.


Amiga TCP/IP Stack

NetMon Floating Info Bar.


Roadie provides a GUI for connecting and disconnecting to and from your network. It also provides information about your current connection such as IP address and DNS servers etc.


Amiga TCP/IP Stack

Roadie – ‘Show Net Status’.


It also offers quick access to the PING command which comes in very useful for troubleshooting. Of course all these commands are available from a command line within the Shell but it’s very convenient to have them accessible via a GUI.


Amiga TCP/IP Stack

Roadie – ‘Ping’.


So now we have our Amiga A1200 with a working network card, configured TCP/IP stack and successfully connected to our network with a few extra tools to make life easier. In Part 3 I will look at installing a modern web browser capable of accessing https websites so we can finally do something on the Internet!
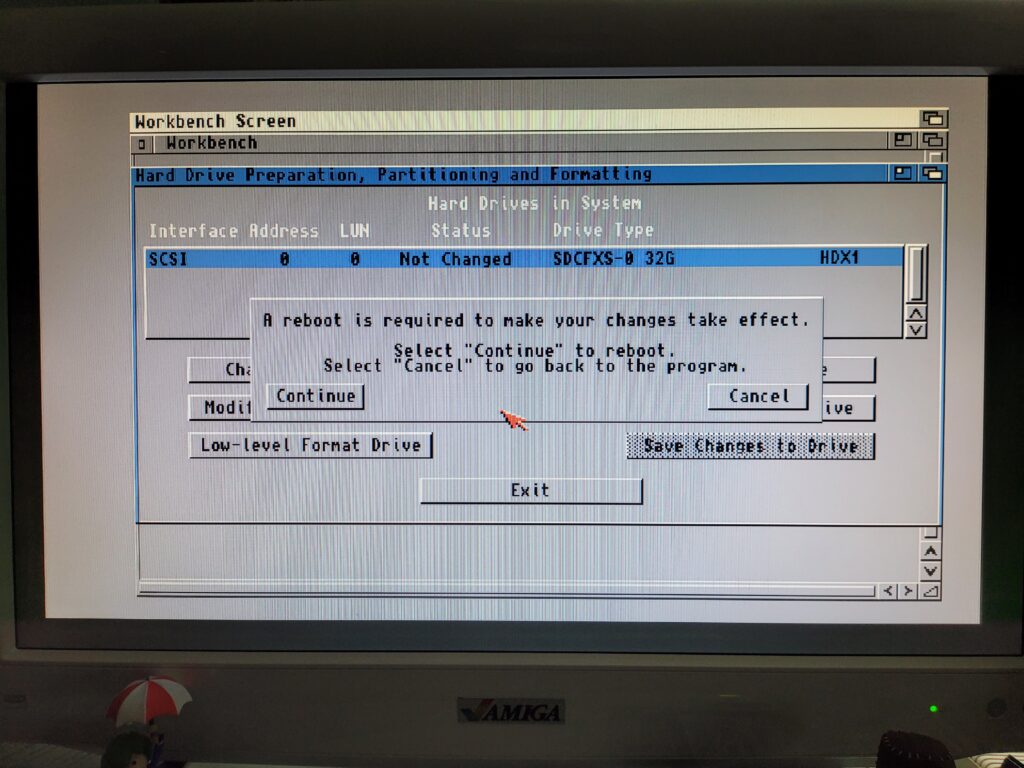
Getting an A1200 Online Part 1 – Adding a Network Card

In this guide I’m going to document how I got my Amiga A1200 online. I’ll cover installing a network card and configuring a TCP/IP Stack. I’ll also cover installing a Web browser and email program and maybe a few other bits and bobs too.

Prerequisites

  • Amiga OS 3.1.4 is already installed on my A1200 so this guide will reflect that.
  • My system includes a SCSI CDROM as part of my setup which I will be using to transfer larger files across in the early stages.
  • I have access to a floppy drive on my PC system that can format, read and write 720k DS/DD floppy disks that my Amiga can also read.

These are not all essential but if you intend to follow the guide you may need to find an alternative means of doing certain things as a result.

The Network Card

There are a few different options when it comes to network devices for non ‘big-box’ Amigas. On my A500 for example I’ve used a Plipbox device which plugs into the parallel port. There’s also the really old school option of using a serial Modem and a dial-up connection (there are still some companies that offer dial-up!)

However since I’ve freed up the PCMCIA port in my A1200 by replacing my Squirrel with a Blizzard SCSI Kit I decided to go for a PCMCIA ethernet card. Although PCMCIA technology is now obsolete there are still plenty of cards knocking around. I found a few in a ‘junk’ box that I used in Windows 98/XP laptops around the turn of the century. They’re usually available quite cheaply on eBay too. As a general rule it would appear 10Base-T cards are most likely to work whilst 100Base-T ones should be avoided.

After a rummage through my box and checking Aminet I settled on the old 3COM 10Base-T card shown below.

Amiga A1200 online

My Ethernet card.

Driver

The part number is 3C562D and there is a SANA-II driver on Aminet that supports this card (and a whole bunch of others).

The driver can be found here: Aminet – driver/net/3c589.lha.

Below I’ve included a list of all the cards supported by this driver. If you are trying to get hold of a card yourself then make sure it is one of the models listed to avoid disappointment.

3C5623, C562B, 3C562C, 3C562D, 3C563B, 3C563C, 3C563D, 3C589B, 3C589C, 3C589D, 3C589E, 3C3FEM556C, 3CCE589EC, 3CCE589ET, 3CCEM556, 3CCEM556B, 3CXE589D, 3CXE589EC, 3CXEM556.

Amiga A1200 online

Back of my Ethernet card with model information.

Installing the Card

Installing the card couldn’t be simpler, it just slots into the PCMCIA slot on the left-hand side of the Amiga. It will only fit one way (usually label side up) so don’t force it. The Ethernet ‘tail’ plugs into an adjacent RJ-45 socket or in my case a cheap and cheerful little 5-port switch under my desk.

Trendnet Gigabit Switch

My cheap and cheerful Gigabit switch.

However I wasn’t terribly happy with how the card and the tail hung over the edge of my desk. With the connecter on the ethernet cable already being quite fragile it just looked like an accident waiting to happen. Sooner or later I was probably going to catch that cable and snap the connecter off!

Amiga A1200 online

Accident waiting to happen.

Obviously I wasn’t alone in thinking this as a search online lead me to an pre-existing solution. This little gizmo I found on eBay takes the PCMCIA slot and twists it through 90 degrees so that cards can be inserted flat against the side of the machine.

This slideshow requires JavaScript.

With the card fitted this way I no longer had to worry about snapping the connector off. Cabling was also streamlined thanks to the ‘tail’ now facing the back of my desk.

Amiga A1200 online

Ethernet card fitted to the PCMCIA adapter. Much better.

Installing the Software

Having downloaded the driver off Aminet on my Windows 10 PC I needed a way of transferring this to my A1200. For this task I used my trusty 720K PC formatted floppy disk to move the file across.

Amiga CrossDOS disk.

Putting files onto a PC formatted ‘CrossDOS’ disk on the PC.

I used a USB floppy drive on the PC side and CrossDOS (which is part of Amiga OS 3.1.4) on the Amiga to read the disk. This method only works for files smaller than 720k (the max capacity of DD disks on PC) but the LHA archive was only 54K so not a problem.

Amiga CrossDOS disk.

Using a PC formatted ‘CrossDOS’ disk on the Amiga.

The LHA archive unpacked to a single ‘3c589’ directory that contained the installer for the driver.

Amiga A1200 online

This is what the unpacked archive should look like.

Running the installer was very straightforward, there were no options that needed to be tweaked.

Amiga A1200 online

Running the 3c589 installer.

I simply clicked on ‘proceed’ a couple of times to complete the installation, whereupon it informed me that the driver could be found in the DEVS:networks directory.

Amiga A1200 online

Installation complete.

That’s all there was to it for the network card driver installation. However there’s one more thing that needs installing which I’ll explain below.

PCMCIA Bug Fix

Unfortunately there’s a bug in the implementation of the PCMCIA slot on the A1200 that was never fixed. It’s nothing major but it can cause a few irritations if not dealt with. Basically it’s supposed to be a hot-pluggable system and cards should be reset automatically when inserted. However the bug prevents this from happening so you can be left in a situation where the card stops working and requires a full power cycle of the A1200 to fix. For me this manifested itself each time I reset my Amiga using ‘CTRL A A’. It happened frequently enough to encourage me to look for a solution.

Fortunately there’s a fix available Aminet which requires the installation of two command line programs called CardPatch & CardReset. They’re available here:

Aminet – util/boot/CardPatch.lha

Aminet – util/boot/CardReset.lha

There’s no dedicated installer for them so they need configuring manually.

Once I had the LHA archives on my Amiga I extracted them to my RAM Disk. The CardPatch and CardReset commands need copying to C: and this can be achieved by opening up a Shell window and entering the following two commands:

COPY RAM:CardPatch C:

COPY RAM:CardReset C:

Amiga PCMCIA Bug

Copying commands to C:

Now we need to get these commands to run during the Amiga’s boot-up so that the card will work after a system reset. To do this we need to edit the Amiga’s ‘startup-sequence’ file. You can either use your editor of choice or the one built into AmigaOS.

To use the built in editor to amend the startup-sequence enter the following command:

Ed S:Startup-Sequence

Amiga PCMCIA Bug

Command to use the built-in editor to amend the startup-sequence.

This will open up the file ‘startup-sequence’ into the editor ready to edit. Now add the following 2 lines near the beginning of the file after the SetPatch command:

CardPatch

CardReset

As shown in the screenshot below. I’ve also added a comment (indicated by the use of a semi-colon) to remind me what these commands do for future reference but this is entirely optional. Don’t worry if your startup-sequence looks different. Every setup will differ depending on what hardware and software you’ve installed on it.

Amiga PCMCIA Bug

Add these lines to the startup-sequence.

To exit and save the changes press Esc, then press x and finally press enter. Alternatively select ‘Save and Exit’ from the Project menu.

And that wraps up Part 1 of this guide for now. In Part 2 I’ll go through setting up a TCP/IP stack which will finally connect our A1200 to the Internet!

Blizzard SCSI Kit MkIV

Blizzard SCSI Kit

Ever since I picked up my Blizzard 1230 MkIV card last year I’ve been hankering after the SCSI expansion for it. The Squirrel SCSI system I’ve been using for the past six months certainly works great but I really wanted to free up the PCMCIA port for other things.

Blizzard SCSI kits are pretty thin on the ground these days but after many months of searching I finally managed to get one. It came complete with the software disk, instruction manual, SCSI breakout port and even a 64MB SIMM!


Blizzard SCSI

Everything you get in the Blizzard SCSI Kit.


It’s in beautiful condition and if it wasn’t for the faded text on a couple of the stickers it could probably pass for being brand new.


Blizzard SCSI

Close-up of the 26-pin SCSI header on the board.


There are three connecters on the board. On the top there’s a 72-pin socket to accept a SIMM of up to 128Mb capacity.


26-pin SCSI header.


There’s also a 26-pin header for connecting the ribbon cable for the 25 pin female D-SUB SCSI port. Finally on the bottom there’s a 100 pin edge connecter which is used to connect the SCSI card to the 1230 MkIV accelerator card.


The business end of the card with a Symbios Logic SCSI Host adapter chip dated 1992.


Underneath the board there’s a single 100 pin edge connecter and a white insulating pad to prevent any short circuits when the card is installed.


Blizzard SCSI

View of the underside of the board. The large white area is insulating material to prevent short-circuits.


Specifications

In the mid 90’s these cards were pretty cutting edge and offered Amiga 1200 owners some impressive features. The manual proudly claims that it will “set new performance standards in its class”.

The headline specifications are listed below:

  • Fast SCSI-II DMA Controller for the Blizzard 1230-IV or Blizzard 1260 Turbo Boards.
  • Transmission rates up to 7Mb/s asynchronous and up to 10 Mb/s synchronous on the SCSI bus.
  • 72-pin standard SIMM socket for memory expansion by up to 128Mb in addition to the memory already installed on the Blizzard Turbo Board. Completely auto-configuring.
  • Ability to connect 6 SCSI devices with ID’s between 0 and 7 (the Blizzard SCSI Card itself is device 0).


Fitting the SCSI Connecter Port


Fitting the card is a little more involved than the accelerator was as installing the rear-mounted SCSI port requires removing the floppy drive to gain access to the expansion port.


Amiga 1200 Expansion Port.

Expansion port blanking plate and the holes where the two floppy drive mounting screws fit.


There’s two screws holding the drive in place from the underside of the case, found next to the expansion port. The other screw is located inside the case along the lower edge of the drive just above the trapdoor. Once these have been removed the drive can be safely lifted to one side revealing the expansion port area.


Amiga 1200 Floppy Drive mount points.

Location of the three screws holding the floppy drive in place.


After removing the plastic blanking plate, the SCSI connecter slides into the vacant slot from the rear. If done correctly the hole in the metal plate should align with the hole in the Amiga case perfectly.


Blizzard SCSI

SCSI port connecter inserted into expansion slot.


The provided screw can then be inserted into the hole from the base of the Amiga and fastened into the threaded hole in the metal plate.


Blizzard SCSI

SCSI port fully fitted – you can see the securing screw on the base of the case next to the rubber foot.


This screw is the only thing that holds the port in place whilst inserting and removing SCSI cables so it needs to be securely fastened.


Blizzard SCSI

Metal plate now secured with the supplied screw.


It’s a pretty neat and surprisingly robust solution and looks almost factory fitted.


Blizzard SCSI

This is how the SCSI port looks once fitted. Also – I hadn’t noticed how corroded my mouse port was until I took this photo!


Fitting the SCSI Card

With the fitment of the SCSI port dealt with it was time for the main event – fitting the SCSI card.


Blizzard SCSI

View of the Blizzard 1230 MkIV and SCSI Kit IV installed in the trapdoor expansion bay.


The SCSI card needs to be married to the Accelerator card before it’s fitted into the slot. There simply isn’t enough room inside the case to attach the SCSI card once the accelerator has been installed. I took my time here as there’s only one way the two cards will successfully slot into place and I didn’t want to damage either by trying to force anything.


Blizzard SCSI

Another view of the Blizzard 1230 MkIV and SCSI Kit IV installed in the trapdoor expansion bay.


Once the two cards are correctly aligned the accelerator card (and only the accelerator card!) can be firmly pressed into its socket. Pushing the edge of the SCSI card might damage the edge connecter.


Blizzard SCSI

Close-up of how the ribbon cable connects to the SCSI card. Pin one is nearest the SIMM socket.


Pin 1 is next to the SIMM socket and the ribbon cable should be attached such that the red edge aligns with it. However in reality the SCSI cable will only fit one way due to how close the pins are to the circuit board.


View of the Blizzard 1230 MkIV Accelerator and SCSI MkIV cards from below.


Testing it all Works!

As always with an old upgrade like this I was quite anxious about whether it would actually work. After double-checking that everything was connected correctly I powered on my A1200 and waited. Thankfully a few moments later Workbench appeared and was reporting approximately 128Mb of Fast Ram available. Definitely a positive sign!


Amiga Workbench

132,065,208 bytes free – a very promising sign.


Next I loaded up the SCSI Config software off the Blizzard Tools disk to see if my devices were being recognised. Sure enough both my Zip drive and CDROM appeared as unit 5 and 2 respectively. Happy days!


Blizzard SCSI

Checking to see if my SCSI devices were recognised using the Blizzard SCSI Config utility.


Although my devices were visible to the system, my discs weren’t showing up on Workbench yet. This was because they were still configured to use my Squirrel SCSI hardware. To get them working I edited the ‘tool types’ for my ZIP and CD mountlists in DEVS:DOSDrivers, setting the ‘DEVICE’ to ‘1230scsi.device’ for them both (the name of the Blizzard SCSI host adapter).


Blizzard SCSI

Editing the ZIP mountlist tool type to use my Blizzard 1230scsi.device.


A quick CTRL-A-A reboot and everything was working – my Zip drives, CDROM’s and Music CD’s were all recognised correctly.


Closing Thoughts

This has been another great addition to my A1200. Not only do I have all my SCSI peripherals working but now I have an extra 64Mb of Fast RAM to play with. Additionally my PCMCIA port is now left vacant so I’m free to explore the addition of a network card or maybe a card reader.

Is this the end for my Amiga 1200’s trapdoor expansions? For the time being, probably yes. I could replace the 64Mb SIMM fitted in both cards with 128Mb SIMM’s to give me a total of 256Mb. However my A1200 already has way more RAM than I ever had back in the day so not sure if that is really necessary. Mind you, if I see some RAM going cheap I’ll probably go for it.

There’s always the possibility of replacing the 1230 for an 040 or 060 accelerator (or even a PPC one). Unfortunately these expansions are obscenely expensive nowadays so that would be hard to justify. Besides, I think the 68030 is the sweet spot for performance versus compatibility for the Amiga. I never say never though…

Amiga Addict – A Brand New Monthly UK Amiga Magazine!

Amiga Addict

Who would have thought that the beginning of 2021 would see the launch a brand new monthly UK Amiga magazine? But that’s exactly what has happened with the publication of ‘Amiga Addict’ magazine.  Of course there are quite a few Amiga-centric mags out there now and I have covered these in the past but I believe this is the first UK Amiga mag and certainly the only one released on a monthly basis. Issue 1 was released in January, issue 2 in February and the March issue has just appeared on their website now too!


This slideshow requires JavaScript.


The cover design looks comfortingly familiar, and certainly wouldn’t have looked out of place on a 1980’s WH Smith shelf. At first glance it could easily be mistaken for a copy of Amiga Format but the magazine makers make no bones about the fact that they were inspired by all those great Amiga mags from the 80’s and 90’s.


Amiga Addict

Someone’s nicked my coverdisk!


I thought the tongue-in-cheek picture of a 3.5″ floppy disk with the message ‘What no coverdisk? was a particularly fun touch. It certainly brought a smile to my face along with fond memories of seeing this message under my coverdisks after peeling them off back in the day. It would have been awesome to have a coverdisk as an option with the first issue but I fully understand why this wasn’t practical.

The magazine itself is A4 sized and has a premium glossy cover with silk finished pages inside. Both issue 1 and 2 run to 55 pages in total and feature a number of adverts from the current Amiga scene too. I always enjoyed browsing the adverts to see what games and gizmos I could get for my Amiga back in the day and I still get that same enjoyment from doing the same thing now with Amiga Addict.


Amiga Addict Contents Page

Contents Page.


A Look Inside Issue 1

Inside issue 1 there’s healthy mixture of gaming, news, letters, reviews, interviews and ‘how to’ articles. It aims to cater to all Amiga users whether they be using classic 68k machines, emulators or FGPA systems. I’ve only read issue one so far but I have to say I was really impressed with it.

The writing style is terrific and very entertaining and I could feel the passion that the authors have for the Amiga throughout their writing. It was refreshing to find a real sense of humour in a lot of the articles that constantly made me smile too. I do appreciate some light hearted banter in my magazines – it helps elevate them to something that I really look forward to, to lift my mood and provide some much needed escapism. This could well just be a British thing but it’s something I don’t find much of in the other current Amiga mags.


Amiga Addict

A review of the PageStream DTP software that is used to create some of the pages of Amiga Addict!


I found the reviews to be excellent; very informative and entertaining in equal measure. I discovered a couple of great new games that I was unaware of and proceeded to order them straight away. At the end of the day this is what it’s all about – helping to keep the Amiga community informed and thriving. Of course much of this info is probably available online… but it is likely spread across various social media and other retro oriented sites which can sometimes feel impossible to keep track of. Personally I think it’s fantastic to have all this info distilled into a single monthly publication. Something that I can read at my leisure without any political posts, irrelevant ads or trolls to annoy and distract me. Spoken like the true grumpy old man that I am.

What I personally find really impressive is that the entire magazine is actually laid out using PageStream on an Amiga X5000. You certainly couldn’t ask for a better demonstration that the Amiga is still relevant today! Suddenly I now how a strong hankering for an X5000 myself!
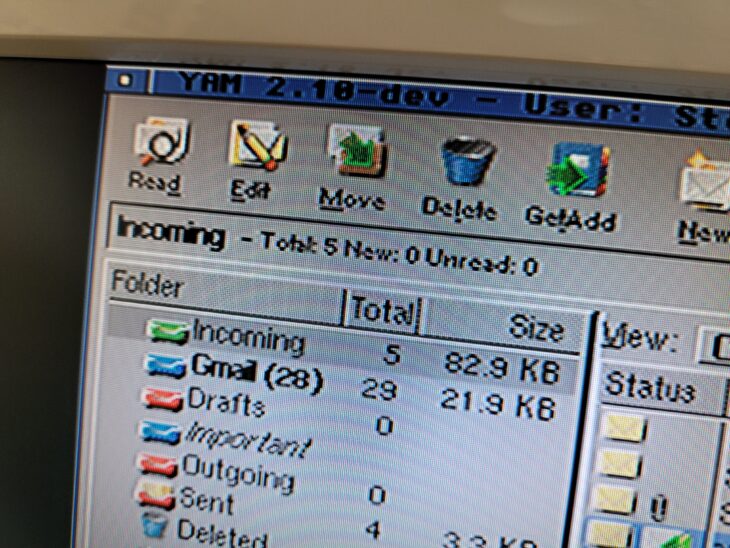
Anyway here’s a look at just few of the articles that can be found in the inaugural issue.


This slideshow requires JavaScript.


I’ve still got issue 2 to read and have just ordered issue 3 so am eagerly awaiting the arrival of that in the post soon!

If the magazine looks interesting to you then head over to the Amiga Addict website straight away and order yourself a copy – it deserves all the support it can get. Copies are available both digitally and physically and discounted subscriptions are available too!

How to use an Iomega Zip Drive with the Amiga A1200

Zip Drive Amiga

In this post I’m going to explain just how you can use an Iomega Zip 100 Drive with an Amiga 1200. The software side of this will be applicable to other Amiga models too but the hardware required is specific to the Amiga 600/1200 series as it utilises the PCMCIA port.

A Little bit of history

Before I delve into the guide a little bit of history. Back in the early 1990’s the most common media format available to Amigan’s was the humble 3.5″ DS/DD Floppy Disk. HD floppy drives were available too but were expensive and only offered double the storage capacity anyway.

This was when Iomega launched their Zip 100 Drive, along with a new disk format that could hold a whopping 100MB. This was a big deal to me back then as standard Amiga floppies could only hold 880K of data and Hard Disk drives cost a fortune! The disks were very similar in size and shape to regular disks and about twice as thick as you can see in the photo below.


Zip 100 Disk size comparison

Zip 100 Disk next to a standard 3.5″ disk.


These drives were aimed at the PC and Apple Mac markets but enthusiasts quickly facilitated the use of them with Amigas too. There were three versions of this drive made that hooked up in one of three different ways; parallel port, SCSI and later a USB version too. However it is important to note that only one version is actually suitable for Amiga use and that is the SCSI version. (The parallel version can be made to work but it requires physically modifying the Amiga’s parallel port which is something I have no intention of doing).

If you have a big box Amiga there’s actually a fourth version – they made an Internal version of the drive with an ATAPI IDE interface but that’s a project for another time… if I ever get my own ‘big box’ Amiga system!


Zip Drive Amiga

This is what the back of a SCSI Zip 100 drive should look like. If it doesn’t look like this then don’t buy it – it won’t work.


Now of course by todays standards 100MB is a trifling amount, my mobile phone has 256GB of storage for example. My Amiga 1200 also has an 8GB CF card so technically I don’t really need any more storage. However all that misses the point. In my eyes, to have an authentic Amiga experience and relive the 90’s you need to use the appropriate hardware. Besides, most of the fun of using retro computers is getting old stuff working again… not because you need to, but because you want to!


Zip Drive Amiga

My ‘new’ Zip 100 Drive still sporting the ‘how to insert a disk’ sticker on the top.


Buying a Zip 100 Drive

Zip drives went out of production a long time ago so your only source is the second hand market now, which for most people will be eBay. There’s always a few on there in various conditions with prices ranging from around £40 to £120. Now of course what you buy is entirely up to you but from my own personal experience I’d say it is worth paying extra for a drive that has been fully tested and confirmed working. I tried the cheap and cheerful approach and ended up with three duds before I decided enough was enough and paid £90 for a fully tested one. Cheaper in the long run and a lot less hassle for sure!


Zip Drive Amiga

New Old Stock (NOS) Zip 100 disks are still readily available.


The disks can be bought very cheaply and there’s plenty out there, even brand new and sealed. Expect to pay between £1.50 and £4 per disk depending on quantity being sold and whether they’re new or used. You can even pick yourself up some rainbow Zip disks and caddy boxes to store them all in!


Zip Drive Amiga

Rainbow Zip 100 Disks.


Adding SCSI to the Amiga 1200

Despite it’s name, the SCSI.device on the A1200 is actually the internal IDE interface. That’s not going to work with our Zip drive so we need to get hold of a SCSI adapter of some kind. If you have a Blizzard trapdoor accelerator card then there was a SCSI expansion made for that. However these are pretty rare nowadays so I would recommend you pick up a Squirrel SCSI interface instead. These devices were made to slot into the Amiga 600/1200’s PCMCIA expansion port and opened up a whole new world of SCSI devices to Amiga enthusiasts.


Zip Drive Amiga

Amiga Squirrel SCSI Device.


The Squirrel SCSI Interface was made by a company called HiSoft but other companies would often bundle it with their own products. I picked up mine as part of a Power Computing CD-ROM drive bundle. Interestingly Power Computing is still going strong, although not surprisingly they don’t sell anything for the Amiga any more.


Amiga Squirrel SCSI Adapter

Squirrel SCSI Adapter plugged into my A1200’s PCMCIA Expansion Port.


The Squirrel is just a small box that plugs into the PCMCIA port and has a short cable with a 50 pin male SCSI connector permanently wired into it. No matter whether you buy the Squirrel on its own or with another device we now have another issue.


Zip Drive Amiga

No way our Squirrel SCSI is connecting to these out of the box…


The Zip drive has two D25 female connectors on the back but our only connector from the Squirrel is a male 50 pin Centronics plug. They don’t fit together so we need to get creative with our cabling. Ideally we would need a cable with a female 50 pin Centronics connector one end and a male D25 connector at the other but I was unable to locate one.


Zip Drive Amiga

All the hardware needed to connect our Zip 100 Drive.


Fortunately there are still a variety of cables and connectors cheaply available. What I ended up having to do was get a male D25 to male 50 pin Centronics cable and a ‘gender changer’ connector. The latter is basically a double sided female 50-pin Centronics connector.


Zip Drive Amiga

A closer look at the SCSI gender changer.


The gender changer allows us to join the two male connectors from the Squirrel and the D25-Centronics cable together as you can see in the next image.


Zip Drive Amiga

Two male 50-pin Centronics cables connected by means of a gender changer.


SCSI Chains

So now we have our Squirrel SCSI Interface fitted with cables that can actually connect to our Zip 100 Drive. However, before actually connecting everything up we just need to check that Termination is enabled on our Zip drive.


Zip Drive Amiga

Zip 100 Drive connected to Squirrel SCSI.


I’m not going to go into great detail here but suffice to say that SCSI (an acronym for Small Computer System Interface) is a system that allowed the daisy-chaining of multiple devices to a computer. To enable the computer to be able to identify each device in the chain they were all allocated an ID number from 0 to 7. In the case of our Zip drive we have the choice of selecting ID 5 or 6 via the little switch at the back. As this is our only device either ID will work but I will be using ID 5 for the rest of this guide.


Zip Drive Amiga

Zip 100 Drive with termination set to ‘on’ and ID set to ‘5’.


The other peculiarity with SCSI chains is that both the first and last devices on the chain have to be ‘terminated’. The Squirrel SCSI adaptor is actually classed as the first device (ID 0) and is already terminated. The Zip drive will be the last device on our chain and so must also be ‘terminated’. Often times on other devices you would have needed to plug a physical Terminator (a bit like a blank plug) into an empty socket to terminate a device. Fortunately the Zip drive has the circuitry built-in and selectable via the switch on the back.

Once the switches are set correctly (as shown in the image above) the Zip drive can be hooked up to the Squirrel and we are ready to proceed onto the next phase.


Zip Drive Amiga

My Zip Drive (sat on top of my MorphOS machine).


Getting the Zip 100 Drive to work with Amiga Workbench


I’m using AmigaOS 3.1.4.1 but I would assume this will work just as well with 3.0 and above.

To get the Amiga to actually read and write to our Zip disks we need to create a ‘Mountlist’ for them. It actually took me a few days of tinkering with different mountlists off Aminet before I found one that would actually work reliably. I’ve successfully formatted several dozen disks with this mountlist so I’m pretty happy with it now.

Now I could have created a mountlist that would allow the reading of PC formatted disks but as Zip drive PC compatibility ceased with with the demise of Windows XP I didn’t feel it would be very useful. Consequently this mountlist is purely for Amiga use.

Now as you will discover, there is no mountlist on your Amiga for Zip disks, even in the storage directory, so we must make our own. To do this we need to copy a spare one from the Storage/DOSDrivers directory and place it into the Devs/DOSDrivers directory. I used the AUX mountlist but any of them will do. This can be achieved by opening up a Shell prompt and typing the following commands:

copy sys:storage/dosdrivers/aux sys:devs/dosdrivers/ZIP0

This copies the AUX mountlist to the correct location and renames it at the same time.

We also need the icon file so press cursor up to bring back your last command and edit it to look like this:

copy sys:storage/dosdrivers/aux.info sys:devs/dosdrivers/ZIP0.info

Now open up that newly created ZIP0 file in the editor of your choice. If you don’t have one then simply enter this command into the Shell to use the built in text editor:

ED sys:devs/dosdrivers/zip0

Delete all the existing text in the file and then enter the following exactly as shown below:

FileSystem = L:FastFileSystem
Flags = 0
Surfaces = 2
BlocksPerTrack = 64
SectorSize = 512
Mask = 0x7ffffffe
MaxTransfer = 0x0ffffffe
Reserved = 2
Interleave = 0
LowCyl = 0
HighCyl = 1535
Buffers = 50
BufMemType = 0
StackSize = 600
Priority = 10
GlobVec = -1
DosType = 0x444f5301


It should look like this on the Amiga:


Zip Drive Amiga Mountlist

ZIP0 Mountlist entries


Once you’ve entered everything above, triple check it. Once you are certain it is correct make sure you save the edited file!

We’re not quite done yet. We need to add a few Tooltypes to provide the Amiga with a bit more info to go on. Click on the ZIP0 icon and select ‘Information…’ from the Icon Window and edit the Tooltypes.

Delete any existing entries that may be in the Tooltypes window and replace them with these:


DEVICE=squirrelscsi.device

ACTIVATE=1

UNIT=5

DONOTWAIT


It should look like this when you’re finished:


Zip Drive Amiga

ZIP0 Icon Tooltype entries


Check what you’ve entered is correct and then click save and reboot your Amiga. Pop a Zip disk in the Zip drive and it should pop up on the desktop looking like the image below. If it doesn’t then you will need to go back through the above and check you’ve got everything right.


Zip Drive Amiga

An uninitialized Zip disk.


Zip disks come formatted for Macs/PC’s so they will need formatting before they are useable on the Amiga. Just format them as you would any regular floppy disk. Click on it and select ‘Format Disk’ from the Icon menu. Give the disk a name if you like or leave it as ’empty’ (you can always change it later). The rest of the settings can be left as they are. I strongly recommend you do a full format as these disks are old now – better to discover any issues with them before you start to use them rather than later on when it may be too late! Better yet use IOTools – more about this later.


The Workbench Format Disk window for a Zip disk.


It takes around 5 minutes to do a full format of a Zip disk so go and have a cup of tea while it finishes.


Formatting progress indicator.


Providing there are no errors you should be presented with a nice formatted disk icon.


Formatted Zip disk icon.


It may look like an ordinary floppy disk, but on closer inspection you can see that this disk has nearly 100MB of space available.


Zip disk with 96M free space.


Iomega Tools

Now by all means we could leave things here, I mean everything works as it should after all. However I’d recommend installing Iomega Tools as well. This software provides a lot of extra functionality that would otherwise be lacking from the Amiga experience. Things like a software eject, password protecting disks and access to hidden drive settings.

One of the main reasons I like this software is that it offers the ability to override the default sleep time of the Zip drive. By default your disk is kept spinning with the heads in constant motion for 15 minutes before spinning down after any disk activity. This will generate a lot of unnecessary wear and tear on both the disk and drive which is something we should be avoiding. Zip drives aren’t getting any younger after all!


Amiga IoTools

IoTools Main Window.


You can download this free software off Aminet. There is no installer – just copy the main IoTools program to either your WBStartup (recommended) or your Workbench Tools directory.

WBStartup is recommended so that the software is always running. Things like the sleep timer settings are stored in the software itself so it needs to be running to have any effect. You can still install it elsewhere if you don’t intend to use the Zip drive all the time and are happy to run it manually whenever you do use it. Alternatively you can select ‘Park Drive’ and ‘Start Disk’ to manually stop and start the drive respectively.


Amiga IoTools

Amiga IoTools Settings Screen.


You need to configure the settings of your SCSI device and drive for the software to work fully. The settings that worked for me are shown in the image above. Most boxes are set to their default. The ‘Device’ setting which is truncated in the image is ‘squirrelscsi.device’. If you do have the software running every time you boot your Amiga then you might want to tick the ‘Open Iconified’ box which will help keep your Workbech screen tidy.

Drive Settings is where the sleep countdown is located. I recommend a time of 5 minutes as a good compromise between convenience and preservation.


Amiga IoTools

Zip Drive Sleep Settings.


The Lock or Unlock Media screen is where you can password protect your disks or remove the protection completely.


Amiga IoTools

Password protect your Zip disks here.


The Format Disk window is incredibly useful and is what I used to format all of my disks. Choose the Format and Verify option and it will do a full format whilst also performing a thorough check of the Zip disk, mapping out any bad sectors as it goes. This takes approximately 9 minutes per disk which is a lot longer than even the full format I mentioned earlier. However I feel it is worth the investment of time for the peace of mind it offers.


Amiga IoTools

Format and Verify option will make sure your disks are in good shape.


The Disk Status screen offers some interesting stats about the currently inserted Zip disk…


Amiga IoTools

Amiga IoTools – Disk Status Screen.


As does the Drive Status screen.


Amiga IoTools

IoTools Drive Status Window.


If you have a disk in the drive the ‘Run Diagnosis’ option will do a thorough check of the drive to make sure it is operating correctly (it doesn’t delete any info on the disk).


Amiga IoTools

IoTools Drive Diagnosis complete.


Amazingly the software is still supported too – it was last updated in May 2020. I even contacted the author, Thomas Richter, with a query and he got back to me within minutes. How’s that for Amiga support!


Zip Drive Amiga

Zip Drive is now part of my A1200 setup.


Anyway I really enjoyed my little Zip drive adventure and am making good use of it to organise my collection of Amiga ADF’s, Music and more.

I do hope you found the guide useful… it has taken me many an evening and weekend to pull all the info together and get it into a cohesive post. If you found it interesting/helpful then please let me know in the comments below!