Introduction
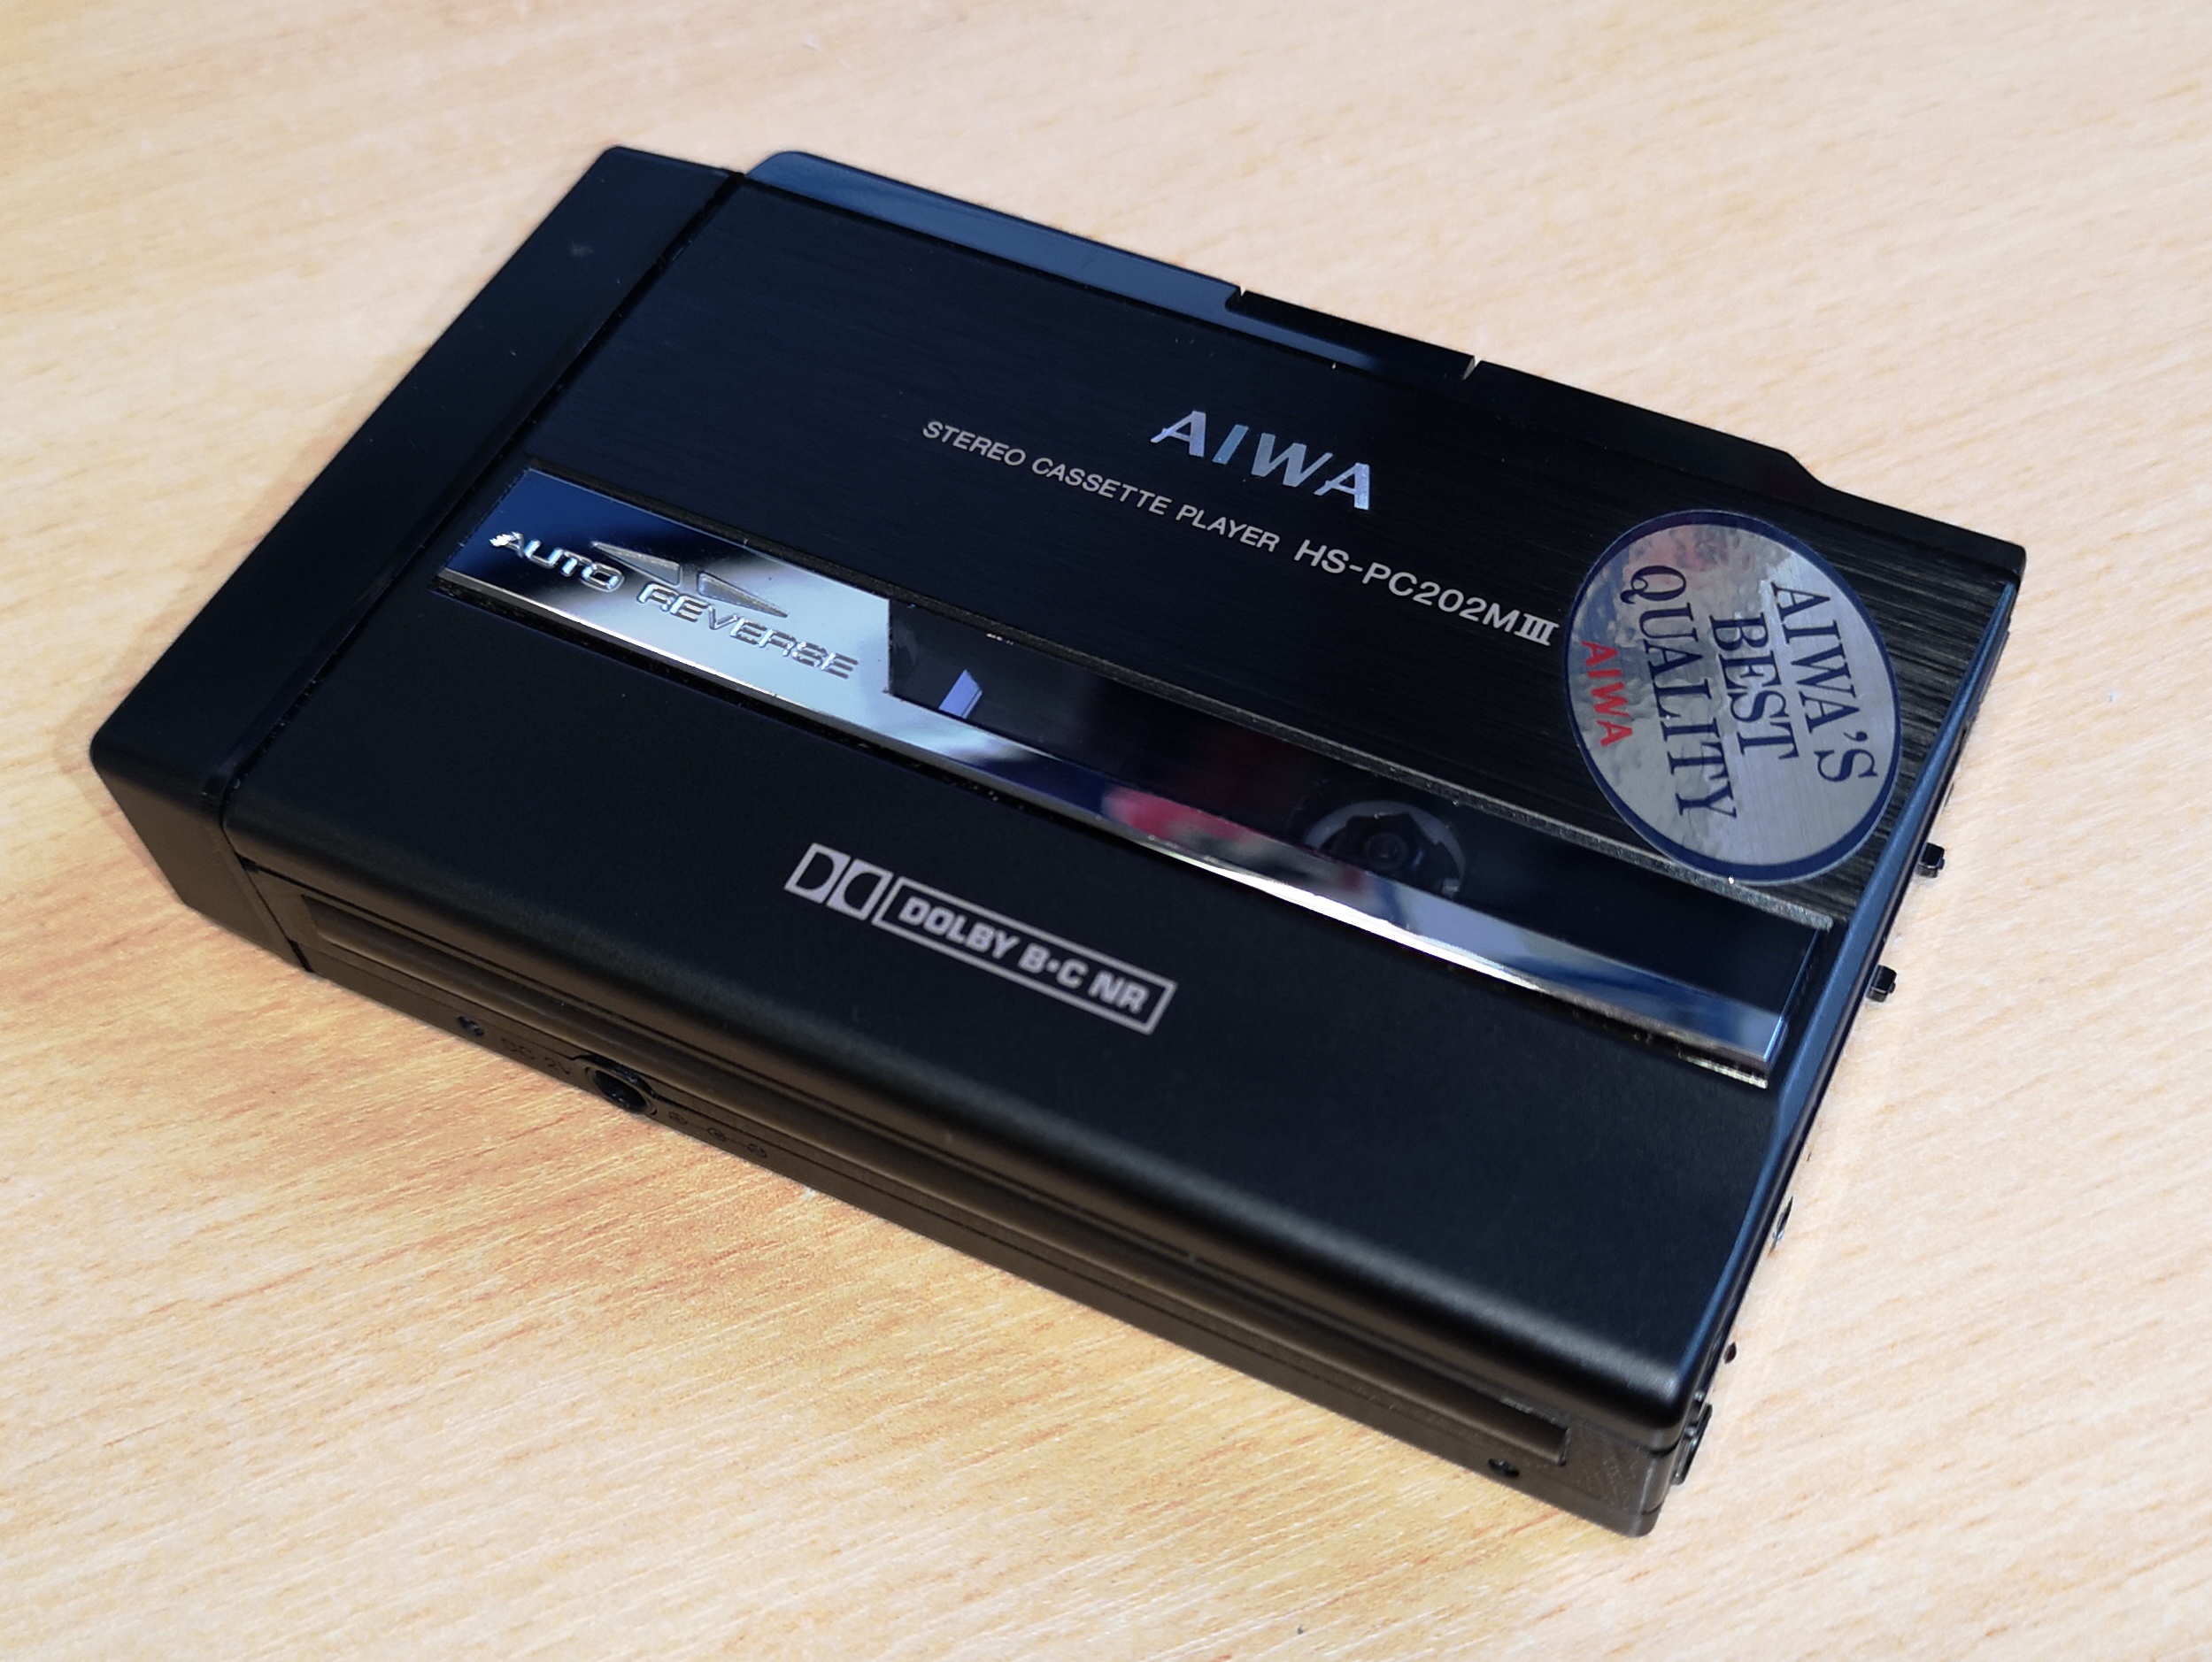
I recently bought a ‘New Old Stock’ AIWA HS-PC202 Mk 3 Personal Stereo off eBay as I just couldn’t resist the idea of unboxing a ‘new’ walkman in 2018. Now I’m fully aware that you can buy brand new ones off Amazon but these are pretty cheap and nasty affairs designed to cash in on nostalgia rather than offer a quality audio experience. This Aiwa model is a quality bit of kit with the ability to play Chrome tapes, Dolby B & C noise reduction, auto-reverse and a super slim, attractive design.
However it had been sat in storage for about 25 years so when I popped in some batteries and tried to play a tape – nothing happened! I could see the power LED light and hear a hiss from the headphones but the spindles didn’t turn. Thankfully I could hear the motor run momentarily if I held the unit to my ear whilst pressing ‘play’. This was a sure sign that the belt had failed in some way which is very common on vintage cassette decks.
This post will provide instructions on how to open up the AIWA HS-PC202 Mk 3 cassette player, and replace the belt. The only tools you need are some small watch-makers screwdrivers and a pair of tweezers. It’s quite a straightforward job as the player has been designed with the foresight that one day someone would need to change that belt!
Getting Started with your AIWA HS-PC202
The first thing you need to do with your AIWA HS-PC202 is unclip the battery compartment as one of the screws you need to remove is hiding behind this. Now you need to remove the backplate from the player to expose the belt. It is held in place by 3 tiny screws and a clip that fits inside the case near the play button.
Take your philips screwdriver and remove the first screw shown in the picture below. Place it in safe place, preferably in a small container as the screw is incredibly small and easy to lose. This is a slightly different size to the next two so it should be easy to identify when you are putting things back together.
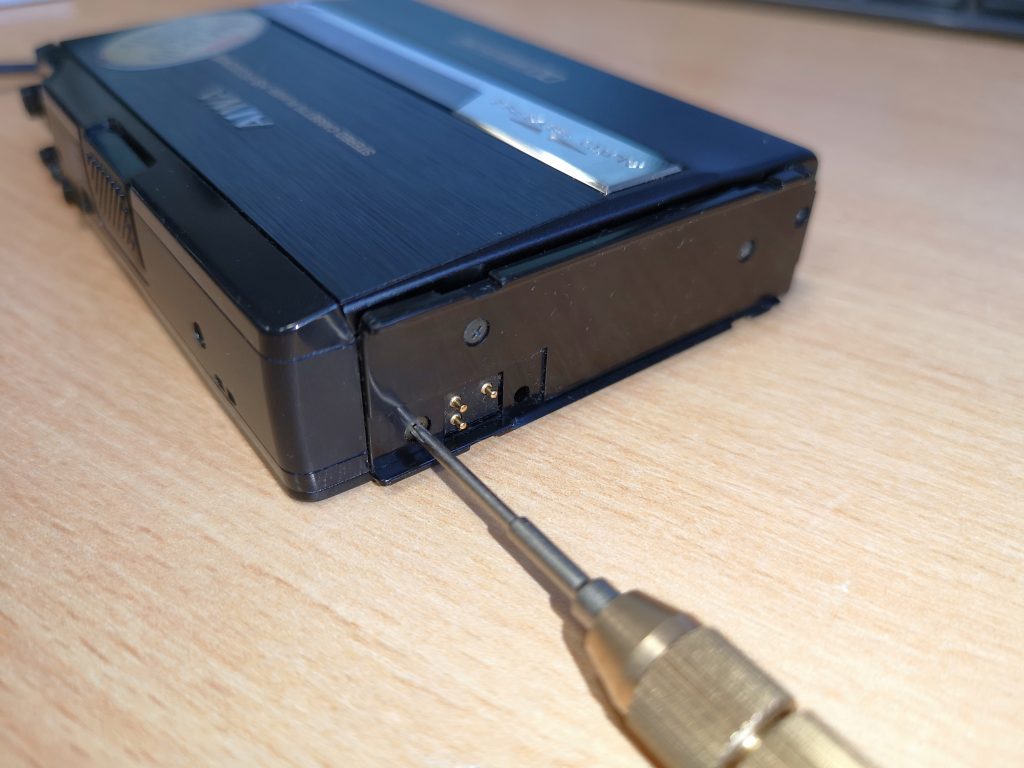
Remove this screw first
Now spin the player around so you are looking at the side where the lid hinges and remove the two screws indicated in the photos below.
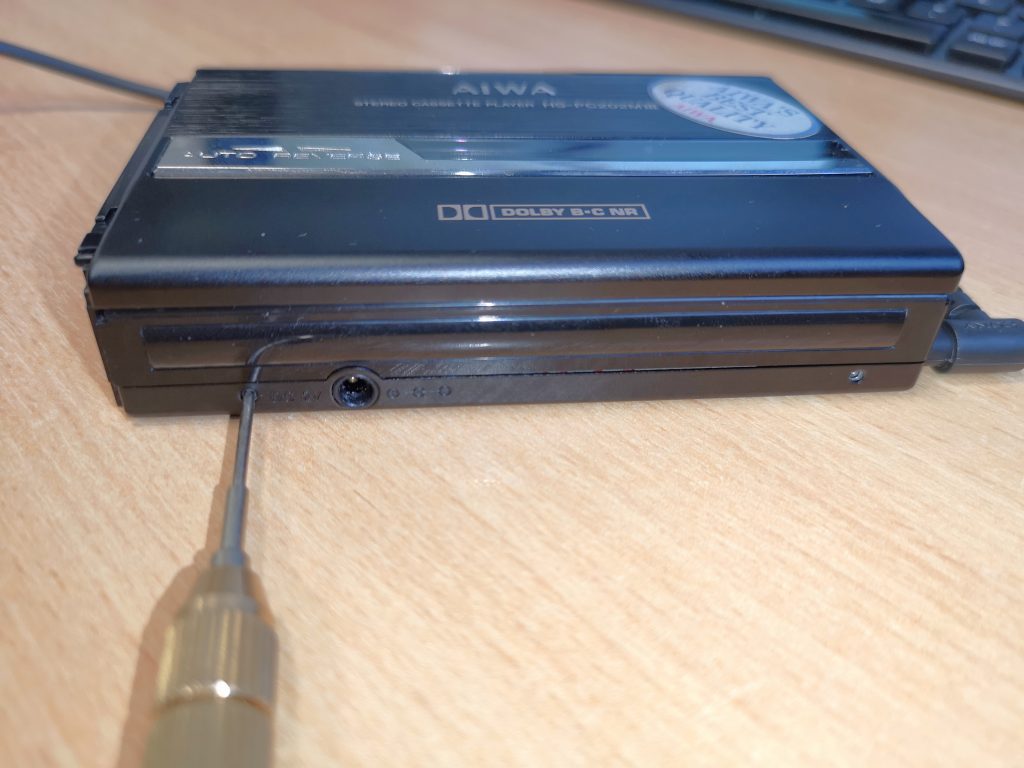
Remove the left screw
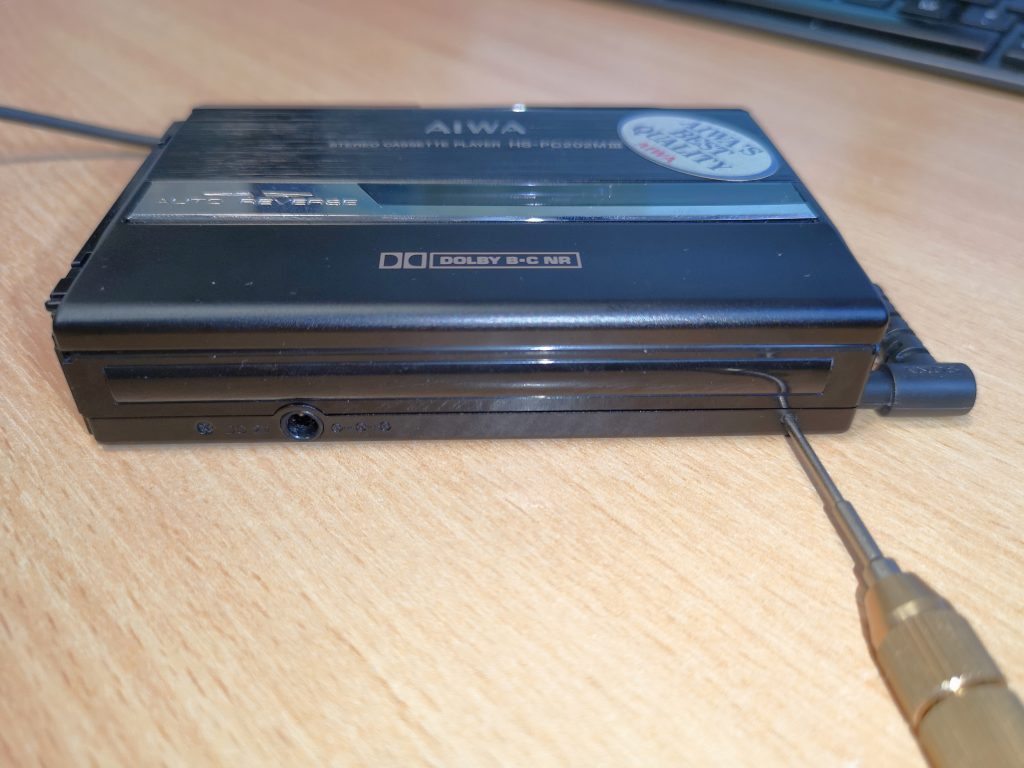
Remove the right screw
Removing the Backplate
Store these two screws safely with the other and put aside as you are ready to begin removing the backplate now. You need to be careful and not rush this next part as there are a few things that are held in place by the backplate and they will fall out and get lost if you’re not careful. The one thing seems to fall out no matter what you do is a small, circular, black plastic spacer that fits between the backplate and the DC power socket. Now you know about it, be prepared for this and catch it. Store it safely with the other screws.
The other things held in place by the backplate are the Dolby NR and Tape Bias selector slide switches. It’s simple to put them back if they fall out – but if you’re not expecting them to drop out they could easily fall on the floor un-noticed and get lost.
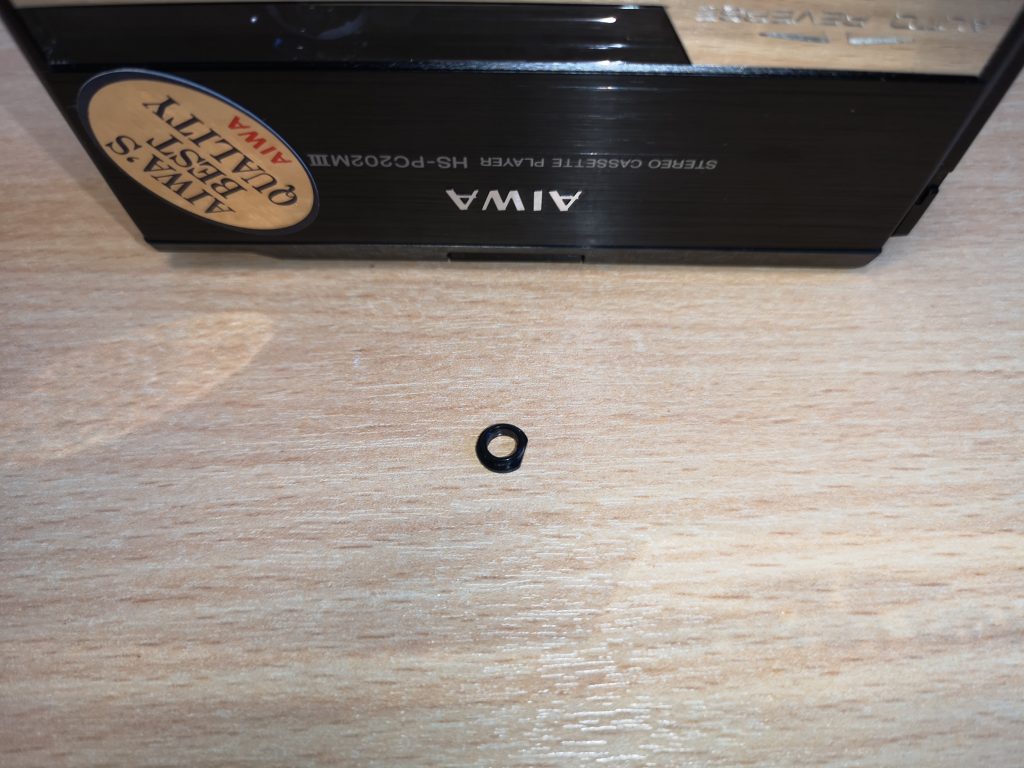
This is the small plastic part that will fall out from around the DC power socket.
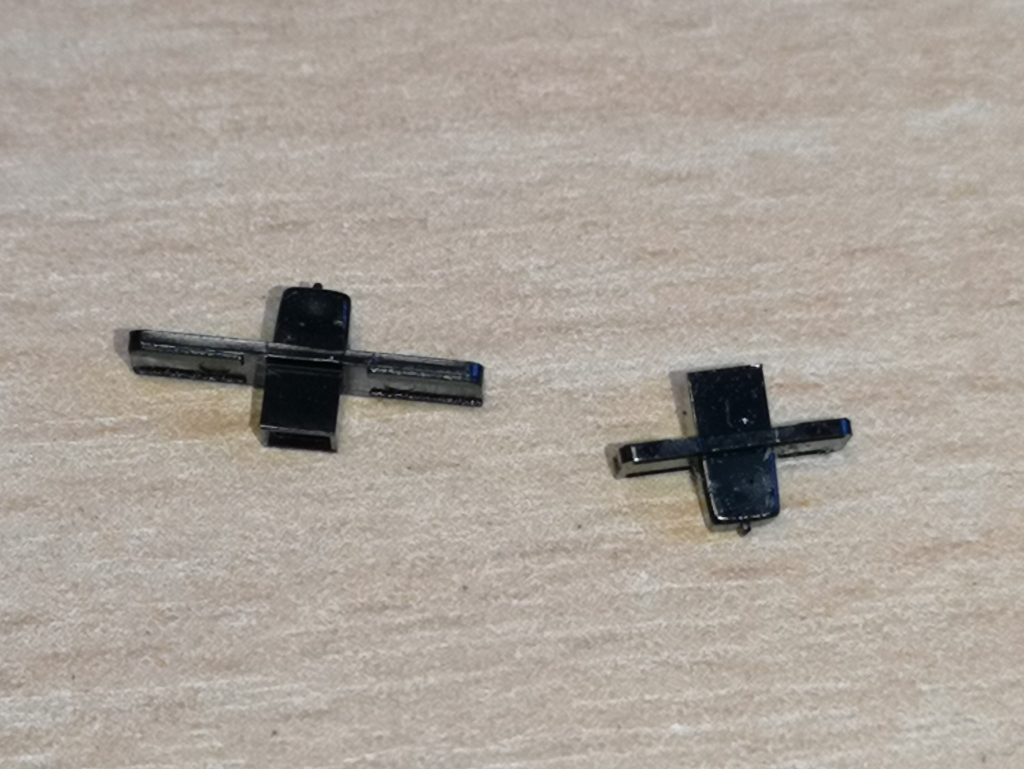
These are the Bias and Dolby selector switches that may drop out when you remove the backplate.
The backplate needs to pivot away from the case from the battery end first. There is a lip at the opposite end by the volume wheel and switches so you need to picture it hinging from that position and focus your efforts on making it open that way. If you place your AIWA HS-PC202 vertically it’s easier to do this and it will prevent the switches from falling out.
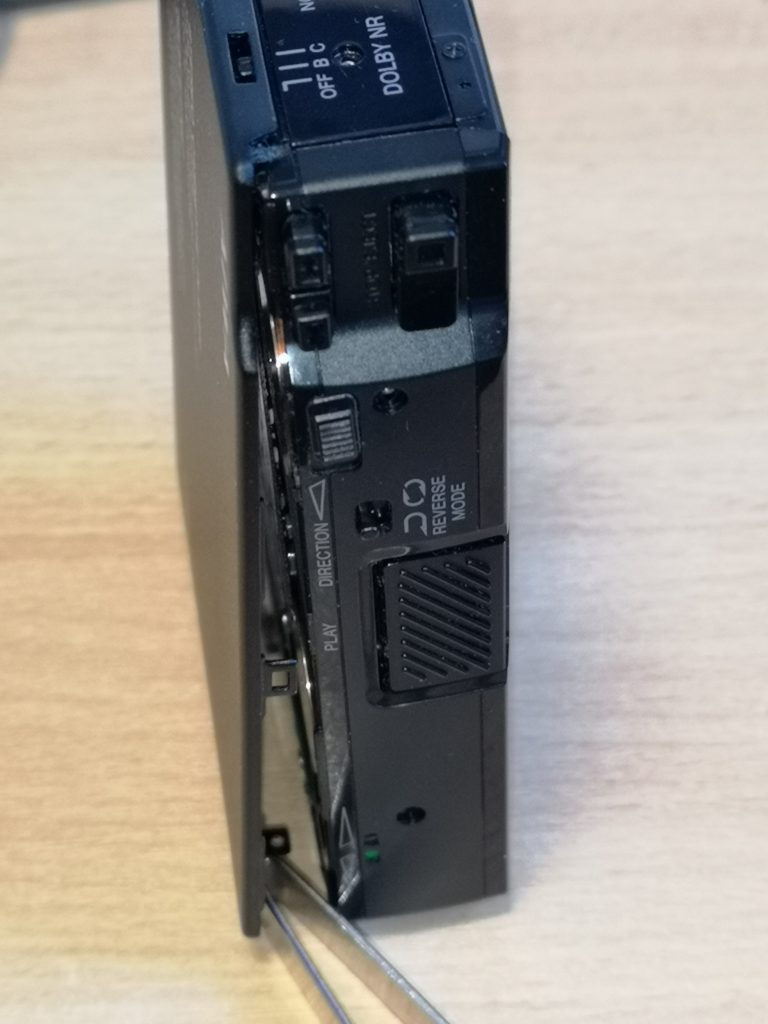
Gently prise the backplate off, starting at the battery end (the bottom in this photo)
As you can see in the above photo there is a small metal tab on the front edge of the backplate that fits into a plastic lug inside the case, above the play button. You will need to carefully slide a small flat bladed screwdriver in and gently lever the plastic around the play button outward, away from the backplate to release the tab. The backplate should now be free and you can pull it away from the body and slide it upward to remove it, leaving the switches on the top in place.
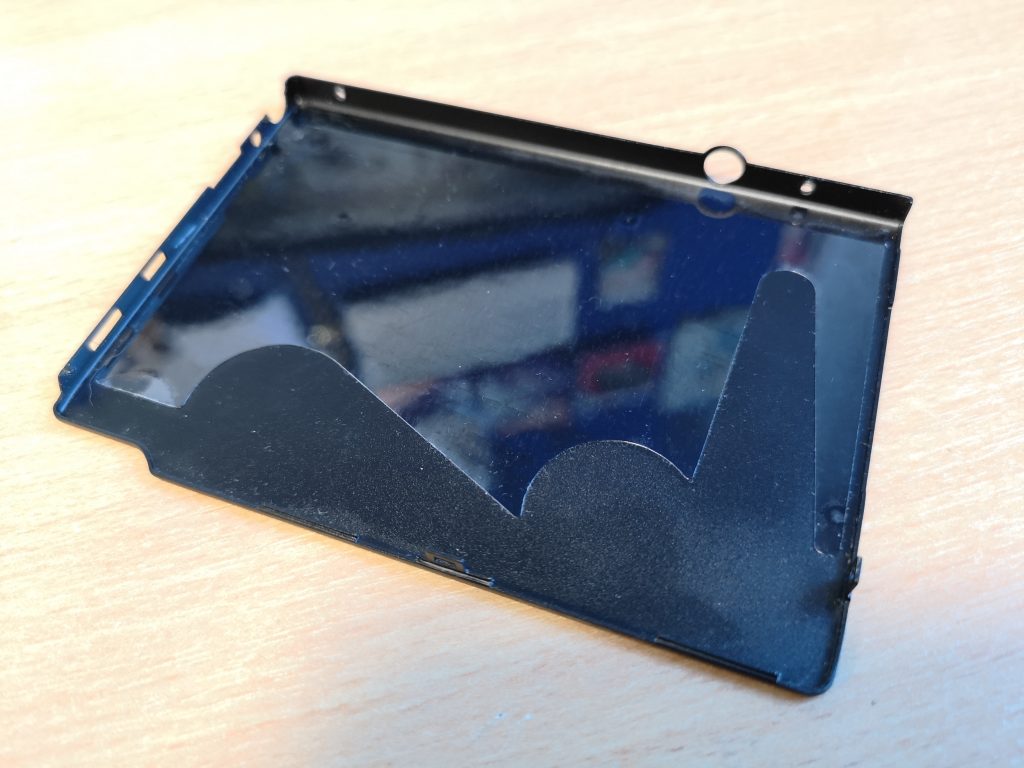
The backplate – note screw holes and cut-outs for controls and DC input.
Inside the AIWA HS-PC202 Mk3
Now that the backplate if off you should see be able to see the circuit board with a cut-out for the belt and pulley wheels just like in the photo below. A belt in good condition should be taught and fit around all the pulleys tightly, something that mine was definitely not doing!
The smallest wheel is the motor pulley, the two large brass wheels drive the capstans and I think the smaller black wheel is there just to guide the belt around the others.
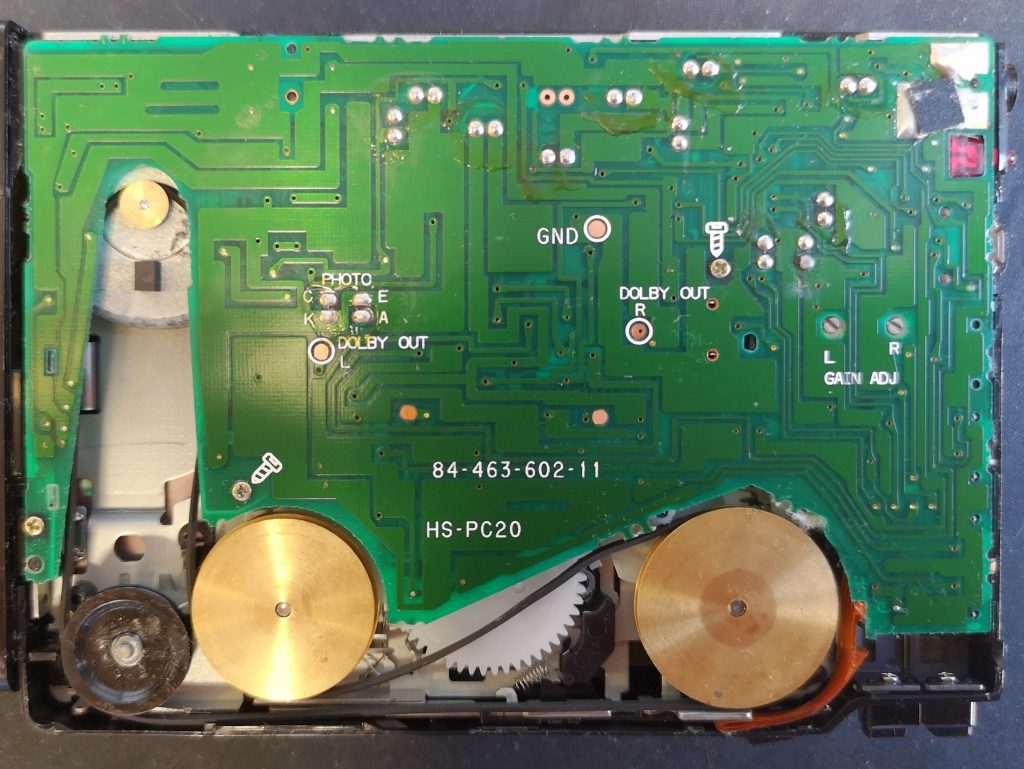
Inside the player. See how the rubber belt is no longer taught and is just lying there looking lumpy and uneven
Replacing the Belt (Take 1)
It took quite a lot of investigative work to locate a new belt that was an exact match for the original. Avoid those cheap multi-packs you can pick up off Amazon and eBay from China – the quality of them is variable at best and the chances of getting one that actually fits correctly is next to zero.
The belt fitted to this walkman has a square cross-section, not round or flat like many other belts. It is also very thin – about 0.6mm thick. The length is 76mm. For belts most suppliers use the measurement of the diameter of the belt when laid out flat in a circle. So basically you need to find a 0.6mm x 76mm belt. I couldn’t find one this thin at first so I bought a 1mm x 76mm belt. It did fit and work but was quite a tight fit around the black wheel where it nearly touches the side of the case. It was also only a fraction of a mm away from touching itself (ooerr) where it passes beneath the nearby brass pulley (see the photo below to see how tight it was).
The company I bought the belt from (SignalsUK) was super helpful and based in the UK too. The belt arrived a couple of days after ordering. Although it was thicker than the original it did appear to work OK. (Edit: Sadly this company no longer appear to exist (at least online) so I’ve removed the out of date link to their site).
The belt is very easy to fit. Use your tweezers to place it around the motor spindle and around the other pulleys following the path in the photo below. There is a small plastic tab that protrudes out of the case towards the black plastic wheel. The gap it leaves is very small (you will find it at around the 8 o’clock position) so be careful not to snag or damage the belt here. There will be a a degree of tension in the belt and this is normal so you will need to stretch it a little over the final wheel.
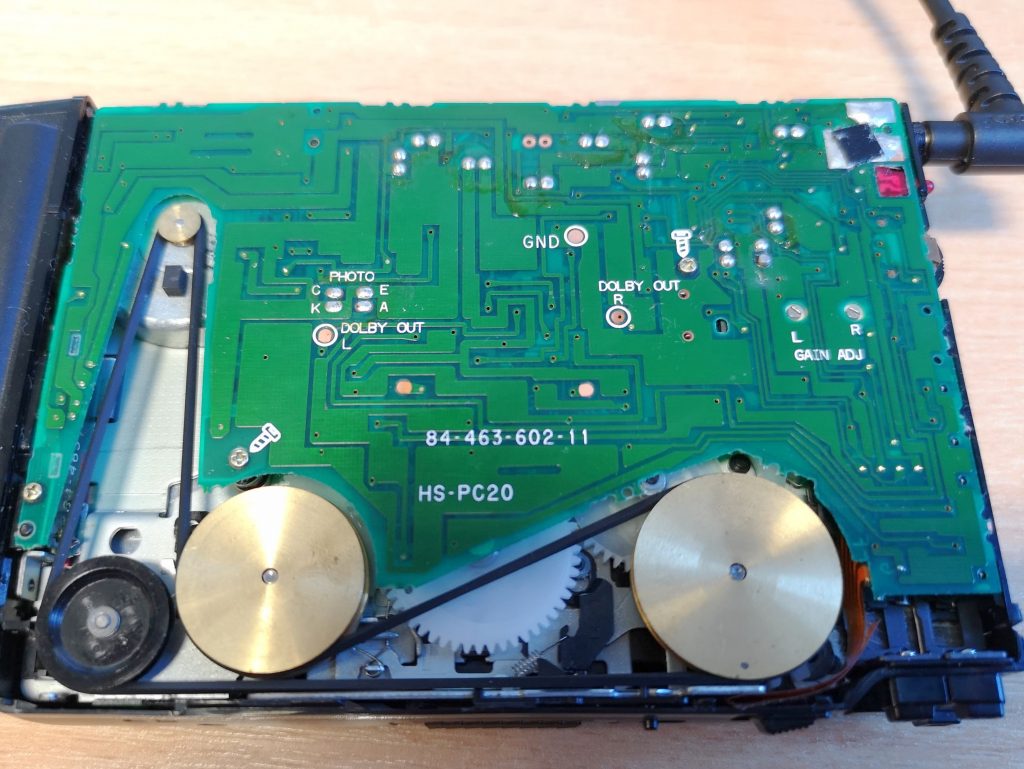
The 1mm thick belt – notice how it is practically rubbing against itself where it passes back beneath the left-hand brass pulley wheel.
Replacing the Belt (Take 2)
If a jobs worth doing, it’s worth doing properly – so I continued my search for a better fitting belt. Eventually I stumbled upon a place that custom manufactures belts for a variety of machines, including the AIWA HS-PC202 Mk3. The Mk3 is apparently mechanically identical inside to the Mk2 and so the belt they supply for the Mk2 also fits the Mk3. Here’s a link straight to the correct belt – here. The company, FixYourAudio, is based in Slovakia and is run by a very helpful guy who makes the spare parts purely as a hobby to help enthusiasts keep these old machines alive. A week or so after ordering my belt arrived in the UK so I have no qualms in recommending them. It is ever-so-slightly thinner than the original but is definitely a better fit than the 1mm thick one.
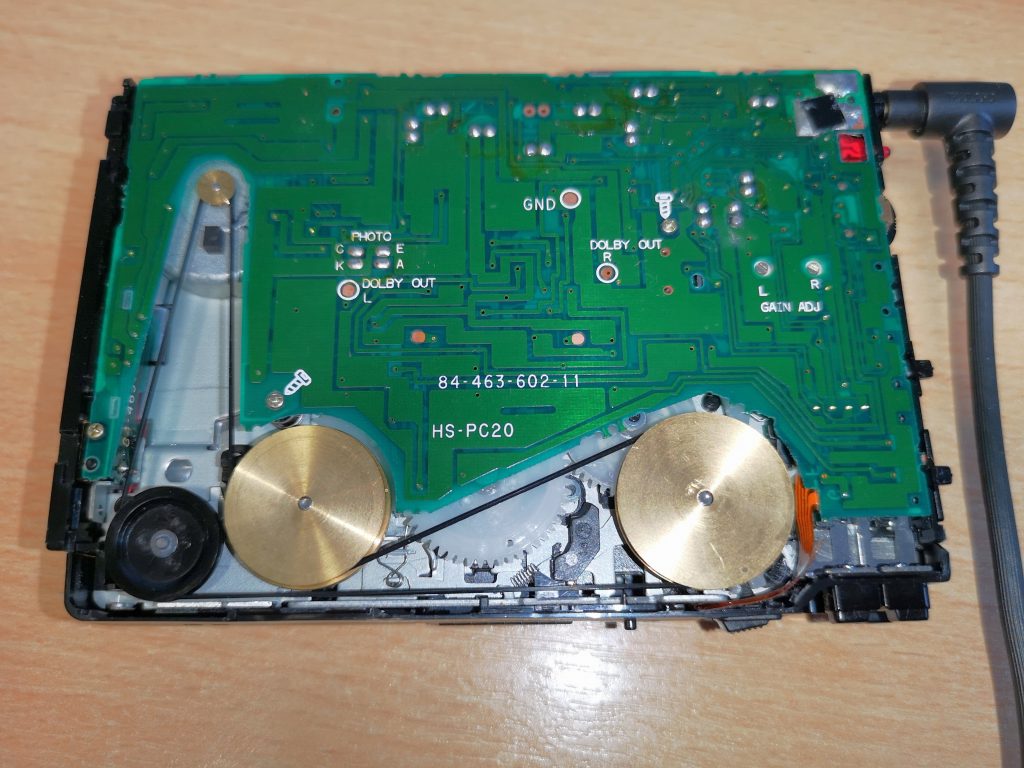
New 0.5mm belt fitted
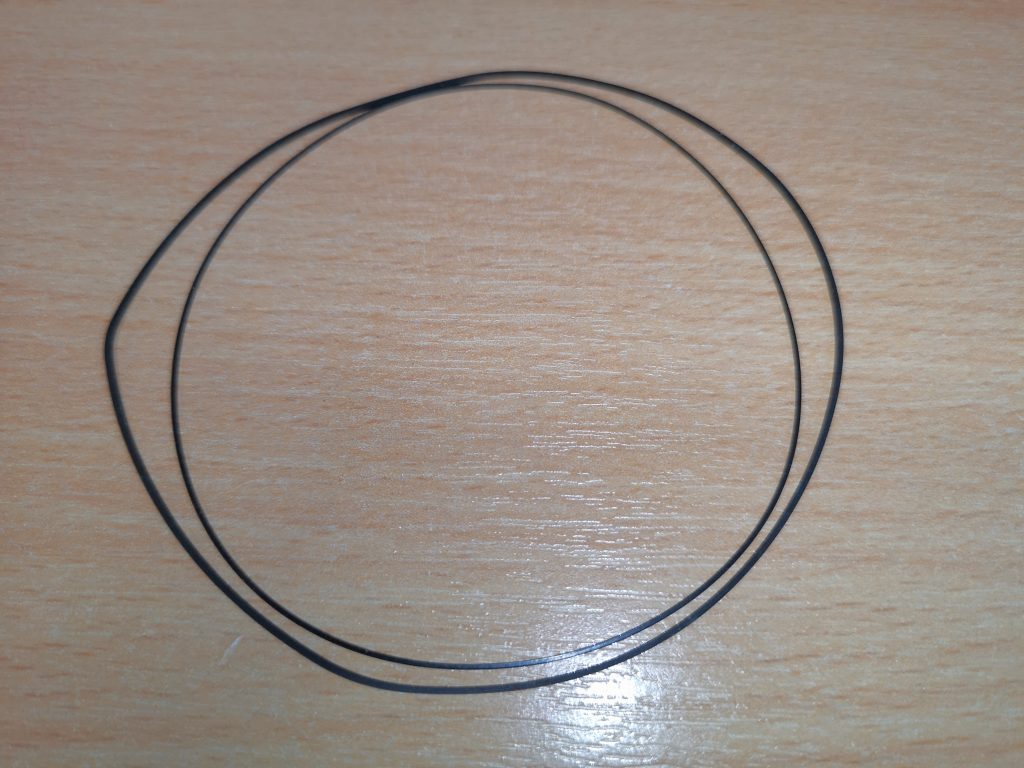
Comparison between the old stretched and worn belt on the outside and the new one on the inside!
Putting it back together
Before you finish off – if you have any additional problems with your player such as unwanted ‘scratchy’ noises when turning the volume wheel or when the headphone jack is twisted in the socket then take advantage of the opportunity and squirt some DeoxIT on them whilst you’ve got the player open. Don’t forget to operate the volume wheel fully a dozen or so times to work the fluid into the pot and clean it up. Likewise for the headphone socket, squirt some in and then insert the plug and twist it around in circles a bunch of times to clean off the contacts.
Now you just need to put it all back together. If you knocked off the slider switches then pop them back on now. You will notice that one side of them is hollow and this will sit on top of the appropriate switch sticking out from the circuit board. The larger of the two fits on the Dolby NR slider whilst the other belongs on the Tape Bias switch. Don’t forget to place the little round spacer back over the DC input port. There is a little flat spot on one side of the circle and this should be positioned facing the outside of the case so that it fits flush against the flat edge of the backplate.
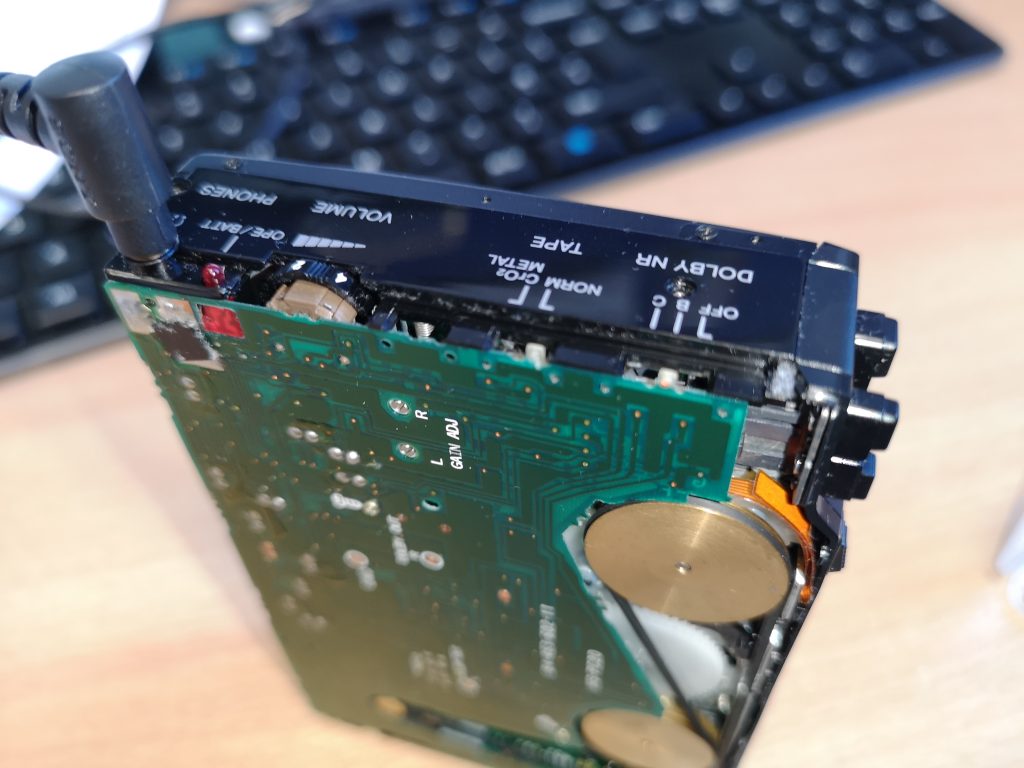
View of the controls – note the small white Bias and Dolby switches. It is on these that the black ‘cross’ pieces will sit on if they have fallen off
You may need to press and squeeze gently in a few places, particularly around the play button to get the tab to engage in the lug correctly. However you should not have to force anything. If you feel any resistance stop and check, reposition the backplate, check the spacer and/or the position of the slide switches and try again. Once it has popped back into place and you are happy with the fit all around, replace the 3 screws and you should be good to go! Enjoy the new lease of life your personal stereo has been given!
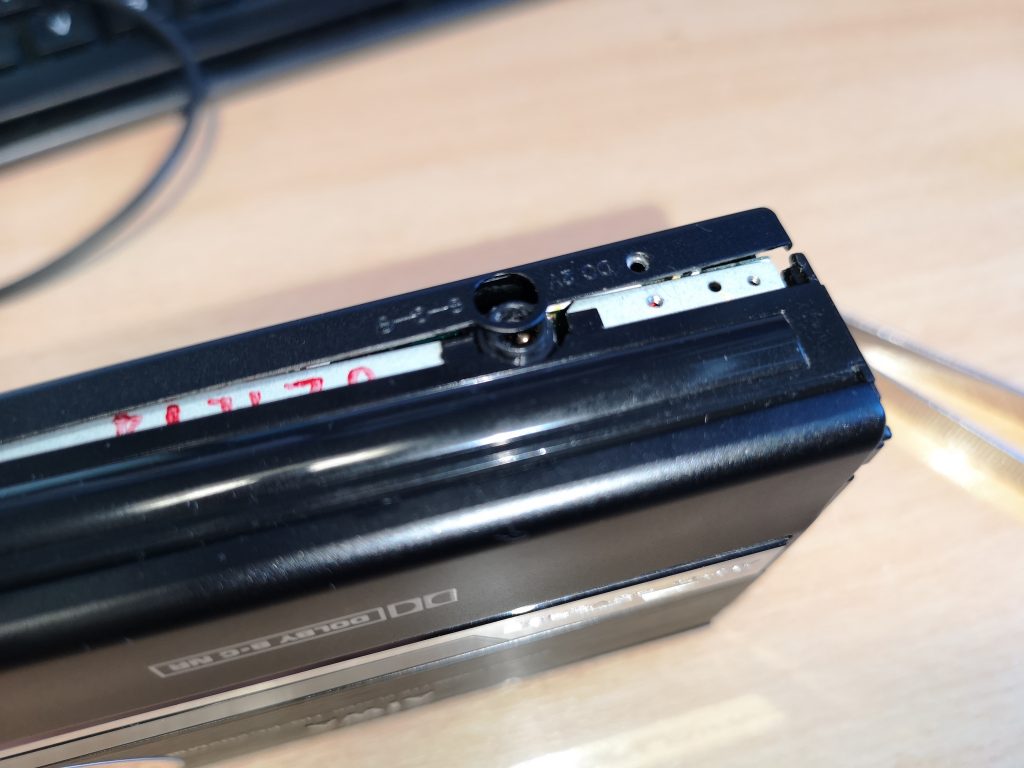
The small plastic spacer fits here. Flat edge towards the backplate.
If you found this guide to replacing the belt in an AIWA HS-PC202 useful then please leave a comment below, it would mean a lot to me. Likewise if you have any questions I’ll do my best to help.
If you’d like to know how to go about de-magnetising the play head in your AIWA HS-PC202 then take a look at this post.


