Lyonsden Blog

Tag - 1541 Ultimate

Adventures with JiffyDOS

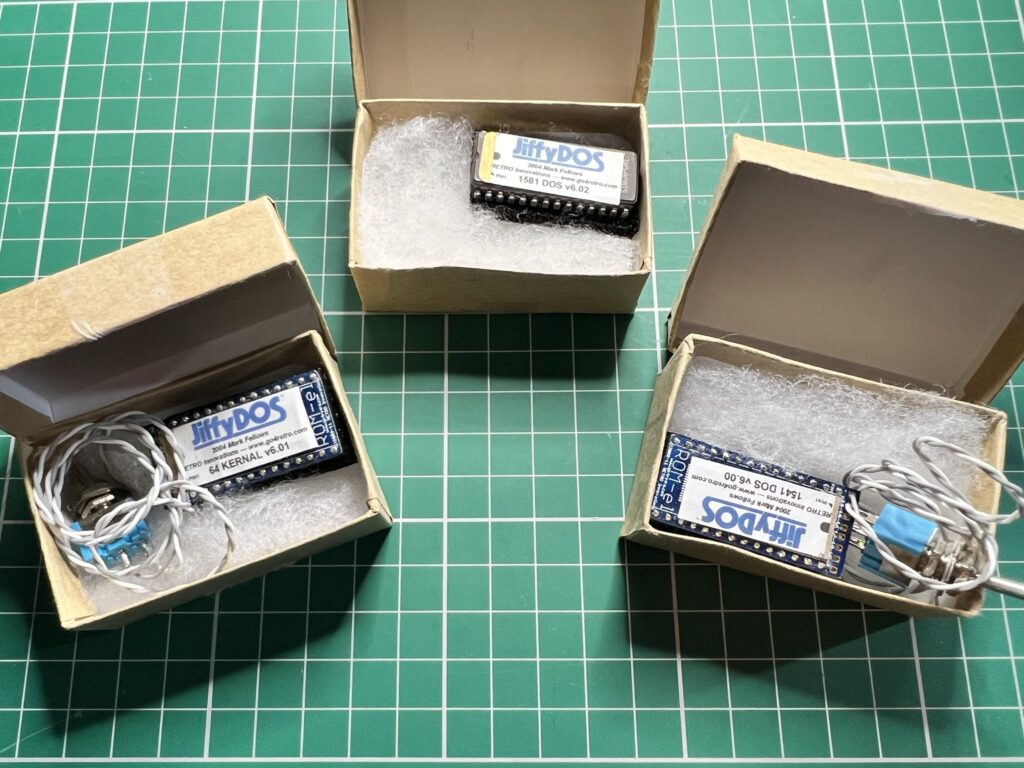
I recently bought some official JiffyDOS ROM’s from Retro Innovations in the USA and they arrived a couple of weeks ago. They came individually cossetted in small little cardboard boxes packed with fluff like tiny little eggs in nest. The boxes themselves were packaged inside a jiffy bag. Interestingly no instructions were supplied but these are readily available on their website so not too much of an issue.
 

JiffyDOS

The three different types of JiffyDOS ROM’s I received.


I excitedly opened up the case on my 64C so I could set about installing the replacement Kernal ROM chip… and immediately encountered my first major problem. My ROM wasn’t socketed, meaning I would have to de-solder the existing chip before I could even think about replacing it.
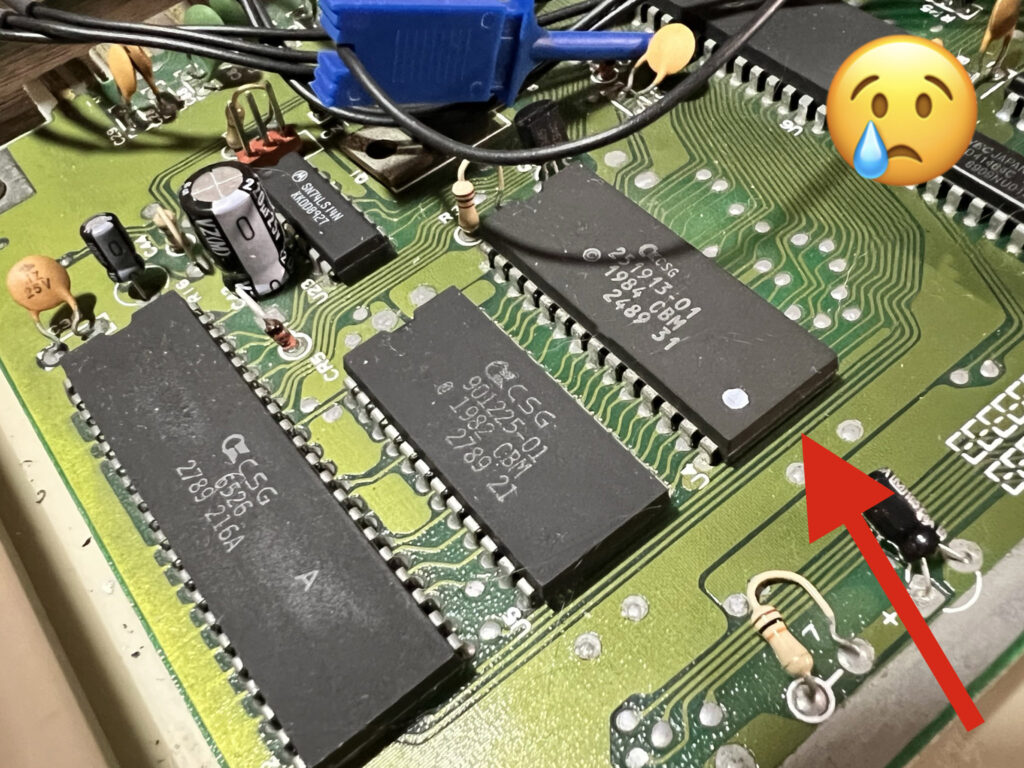
 

C64C kernal ROM soldered directly to motherboard.


I don’t have any fancy de-soldering tools, just a cheap solder sucker and some braid. I’ve never had much luck with a solder sucker as the solder always seems to solidify by the time I get the sucker into position. I knew it would all end in tears unless I bought a new tool to make life easier. I’ve seen people on YouTube using electric de-soldering guns that use a vacuum pump to suck out the solder which would be perfect but I didn’t want to spend that much money on something I wouldn’t be using very often. I settled for the tool you see below (Preciva Electric Desoldering Pump) which was a nice compromise coming in at under £40. Instead of a vacuum pump it uses a spring loaded mechanism just like a normal solder sucker – but with the added benefit of a heated nozzle to melt the solder.
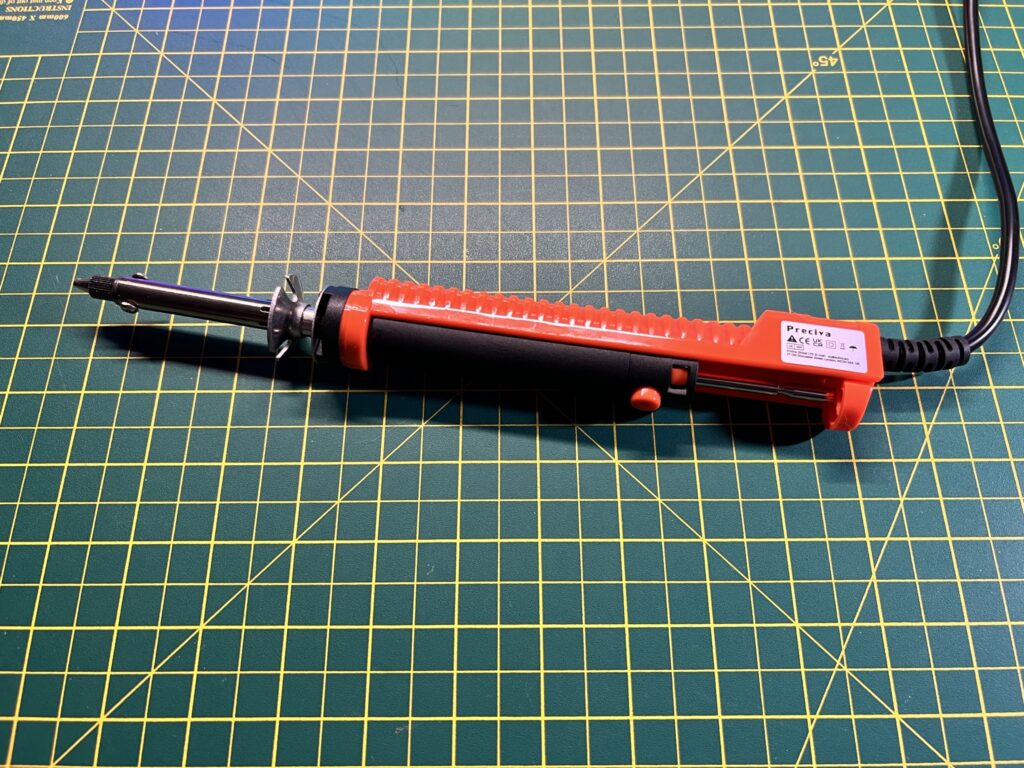
 

Preciva Electric Desoldering Pump

Preciva Electric Desoldering Pump


Thankfully the device turned out to be a good investment and worked well. I just placed the nozzle over each of the pins in turn and left it there for about 6 seconds or so and then triggered the suction pump. I repeated the process a couple of times for each pin to make sure I’d got all the solder out. Obviously not as convenient as having continuous suction but no big hardship to re-prime the pump each time.
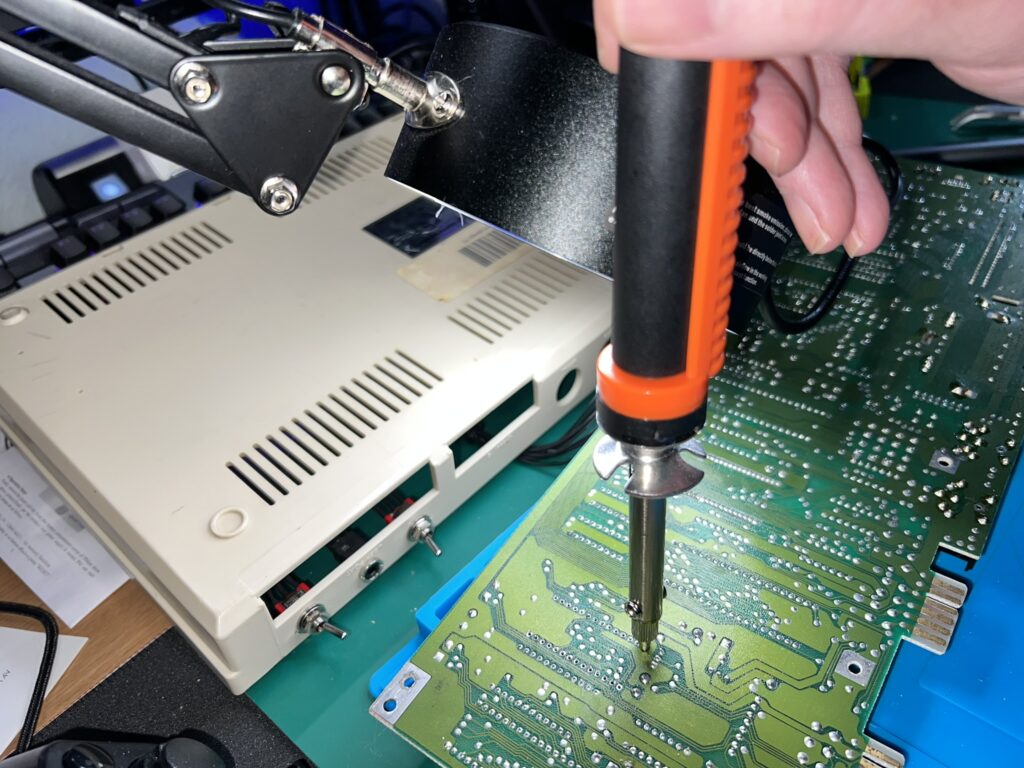
 

De-soldering the Kernal ROM with my new tool.


Of course things are never quite so simple and when I tried to remove the chip a few pins were still being held in place by a few bits of solder so I revisited those a couple of times before it finally came free.
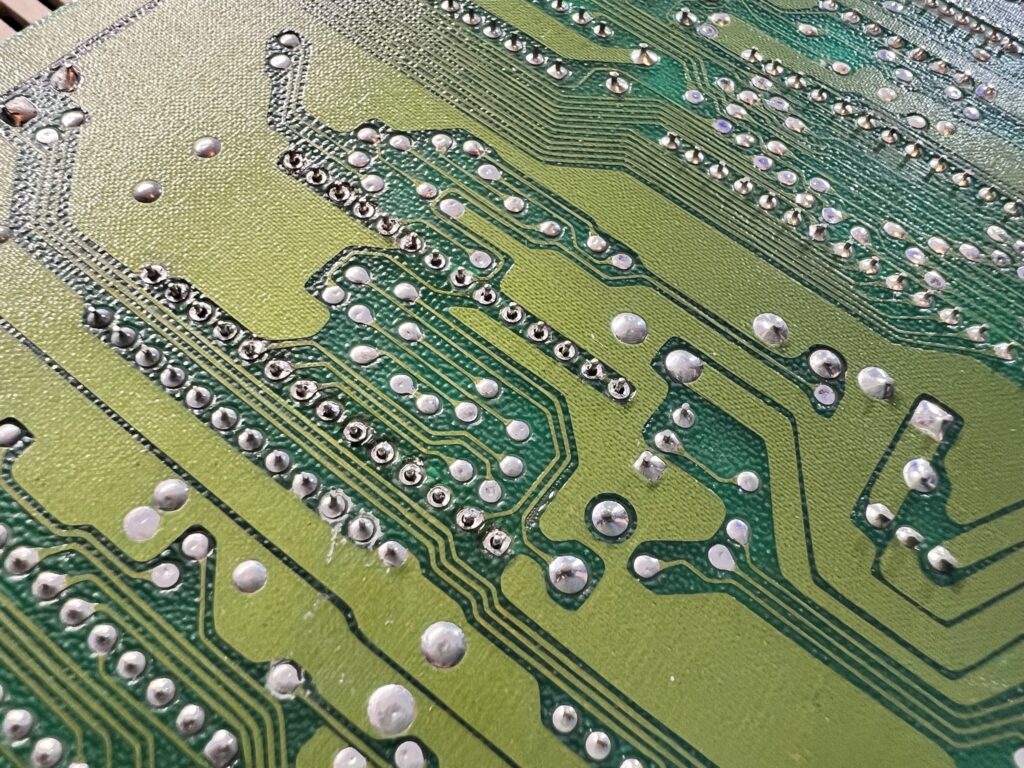
 

De-soldered and ready to remove.


Once I had removed the original kernal ROM I stored it away in a safe place and popped in the new socket, making sure the notch was in the correct place (facing the back of the C64).
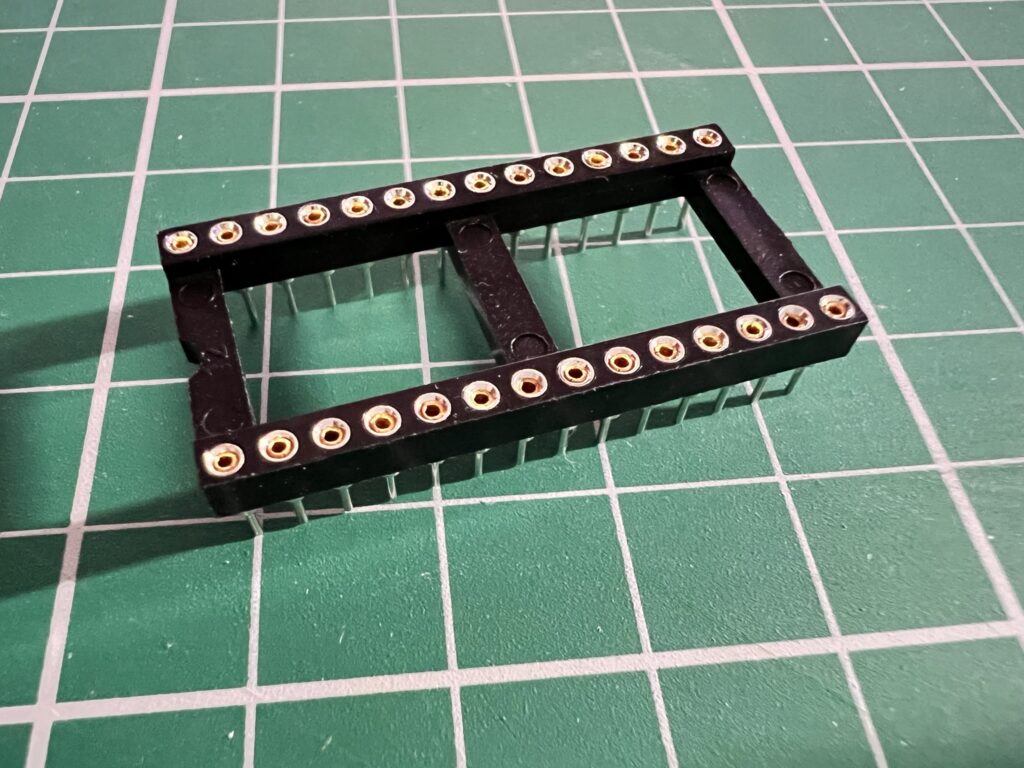
 

This is the 28pin socket I needed to install to take the JiffyDOS ROM.


I then soldered each corner of the socket in place whilst holding it in position with a few lumps of Blu Tack.
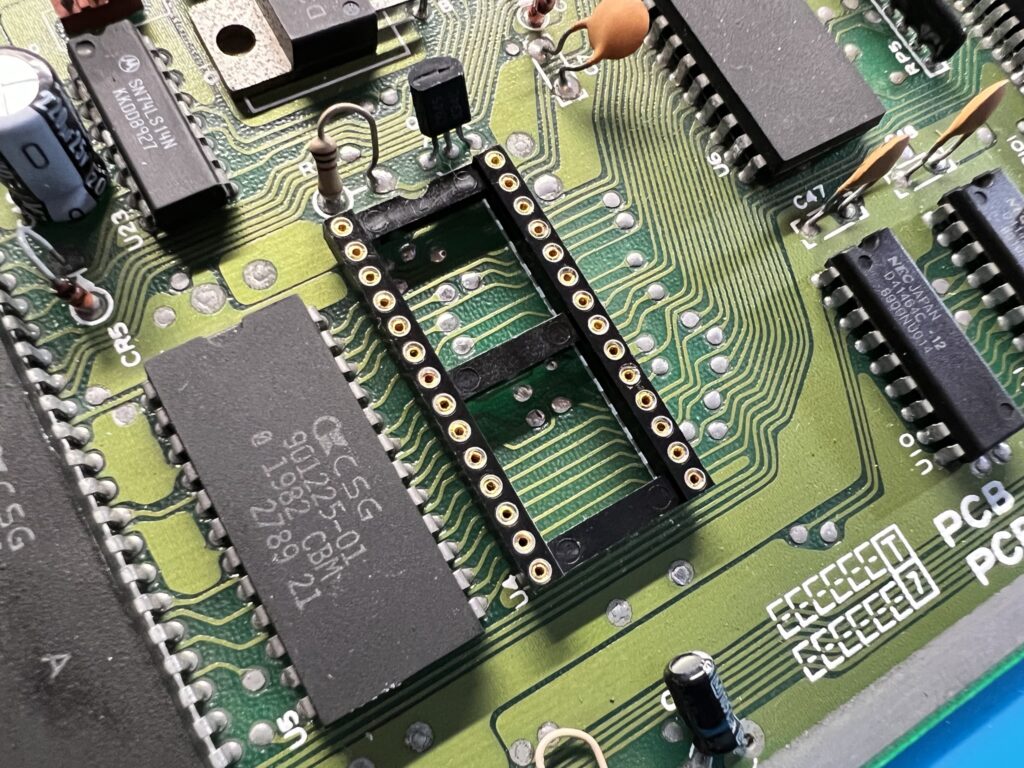
 

Socket soldered into place.


With the socket now held secure I soldered the rest of the pins. I always use a lead based solder as I just find it so much easier to work with than the lead-free stuff. I used flux to ensure the solder flowed nicely too which did leave a sticky mess to clean up afterwards but it came off easily with some isopropyl alcohol.
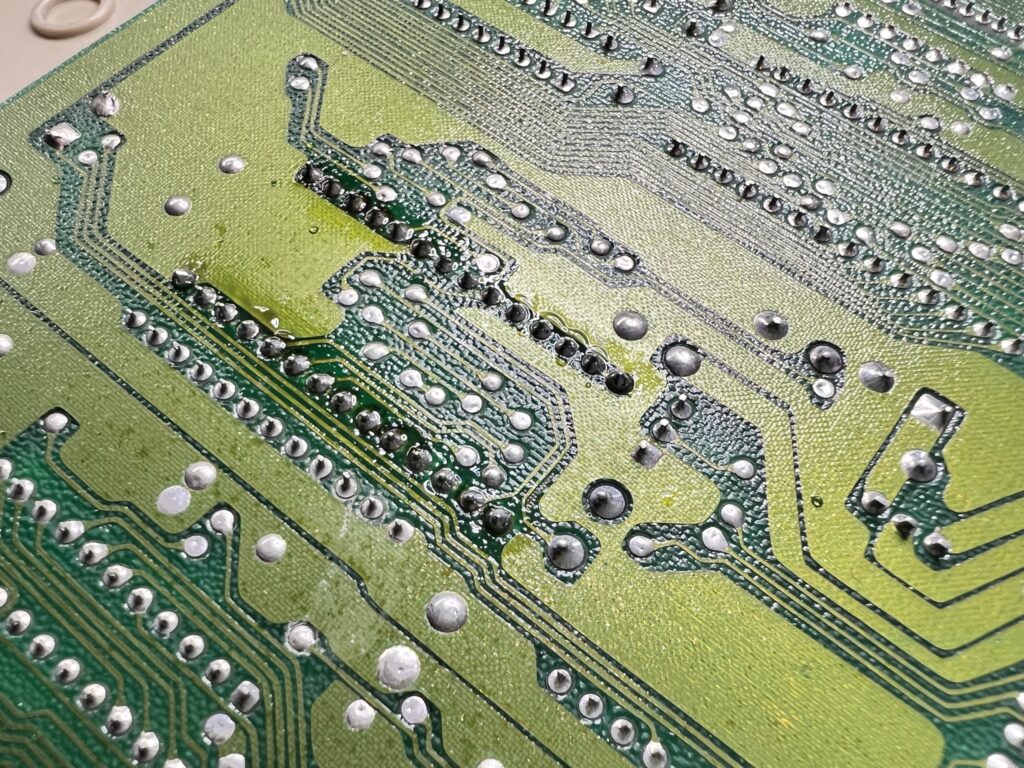
 

Socket now soldered into place. Flux still needs cleaning off.


After satisfying myself that all my solder joints were ok (by using a magnifying glass) I reinstalled the mainboard into my C64 and popped in the JiffyDOS kernal ROM.
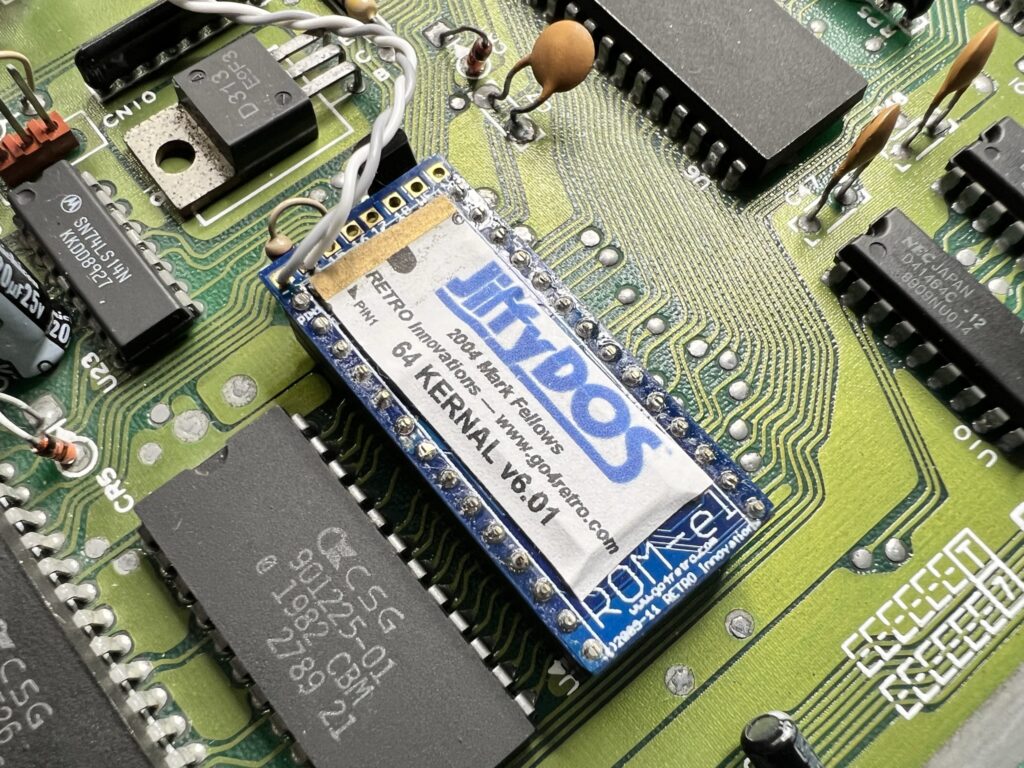
 

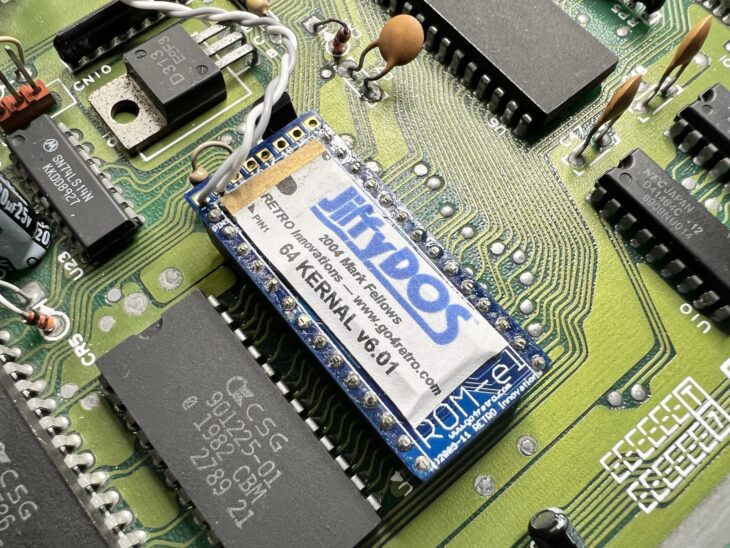
JiffyDOS

JiffyDOS ROM installed in the socket.


Now I just needed to find a home for the switch. I chose the area above the datasette port to mount the switch but it could have gone anywhere really.
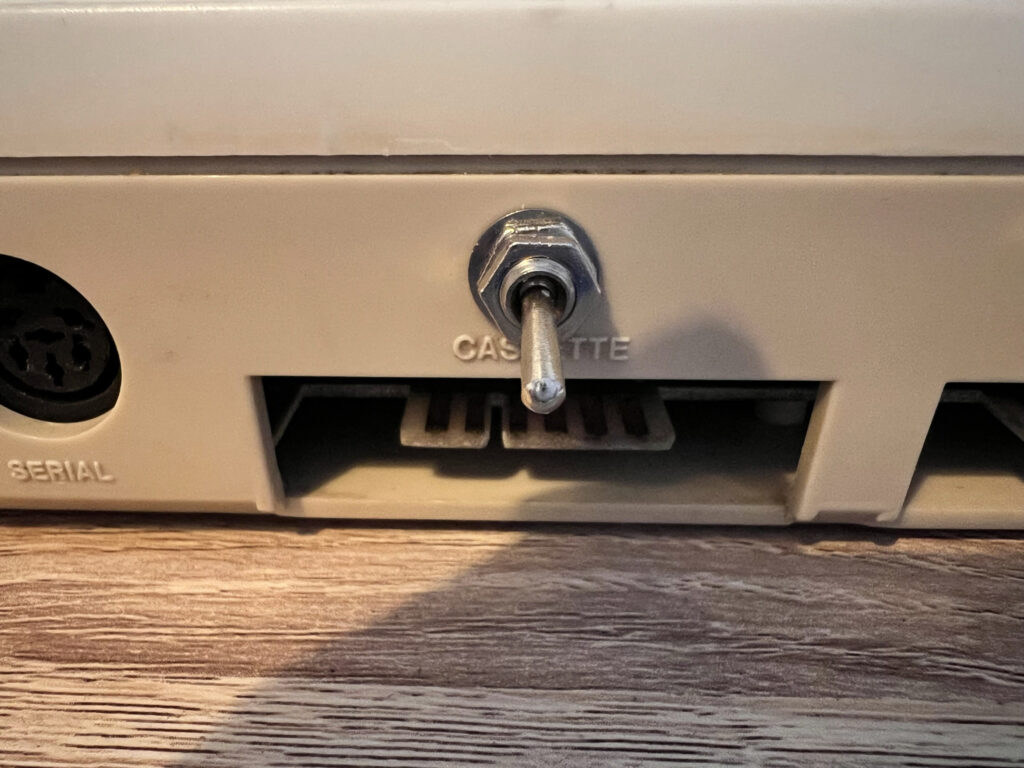
 

JiffyDOS

JiffyDOS toggle switch installed on the back of my C64C.


If I was bothered about drilling my case I could even have routed it through to the outside via the openings for the user/datasette ports.
 

JiffyDOS

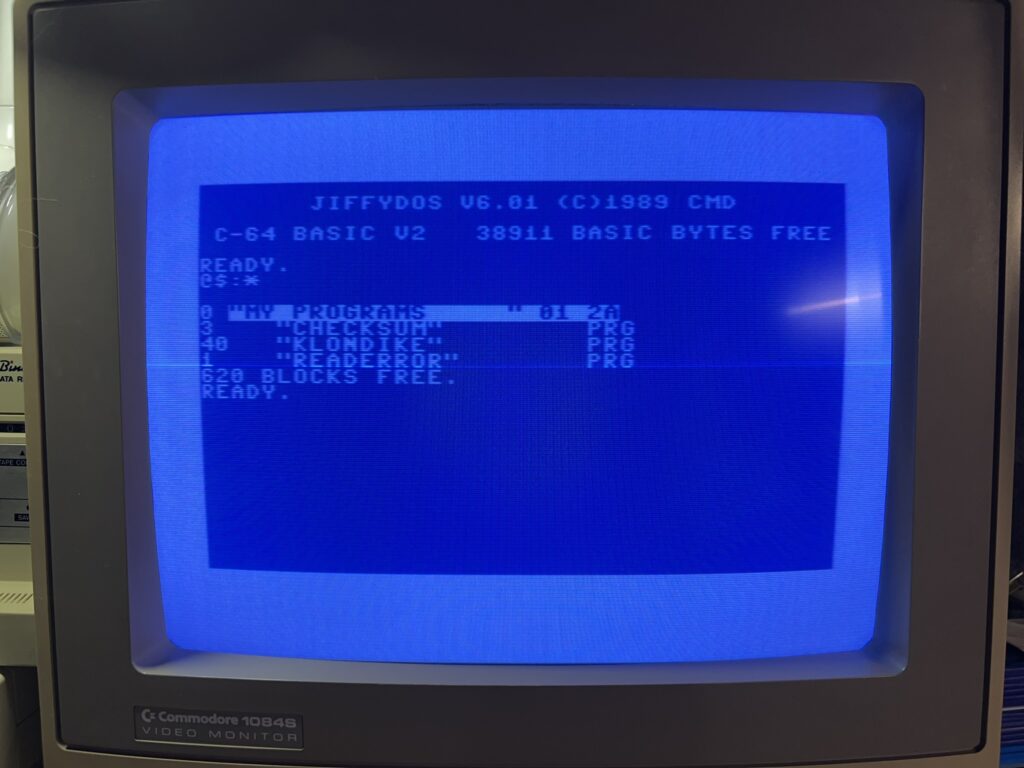
JiffyDOS Startup message.


With the install finished I put my C64 back together and booted her back up to make sure everything was working. I was greeted with a brand new message on startup; ‘JIFFYDOS V6.01 (C)1989 CMD’ which meant that the new Kernal was working. I turned my C64 off, flipped the switch and turned it back on to check I could still get the usual ‘BASIC V2’ message which I did. Happy days!

Phase one was complete. Next up was phase two – installing all the JiffyDOS ROM’s into my disk drives!


Installing JiffyDOS in my 1581 Drive

I started with the easiest drive to upgrade – my 1581. The version of the kernal for this drive doesn’t require a switch as it’s able to detect whether the C64 itself is running JiffyDOS and can switch modes on the fly automatically.

There were only 2 screws holding the two halves of the case together and once the top section was lifted off I could see the familiar steel casing of a 3.5″ drive inside.
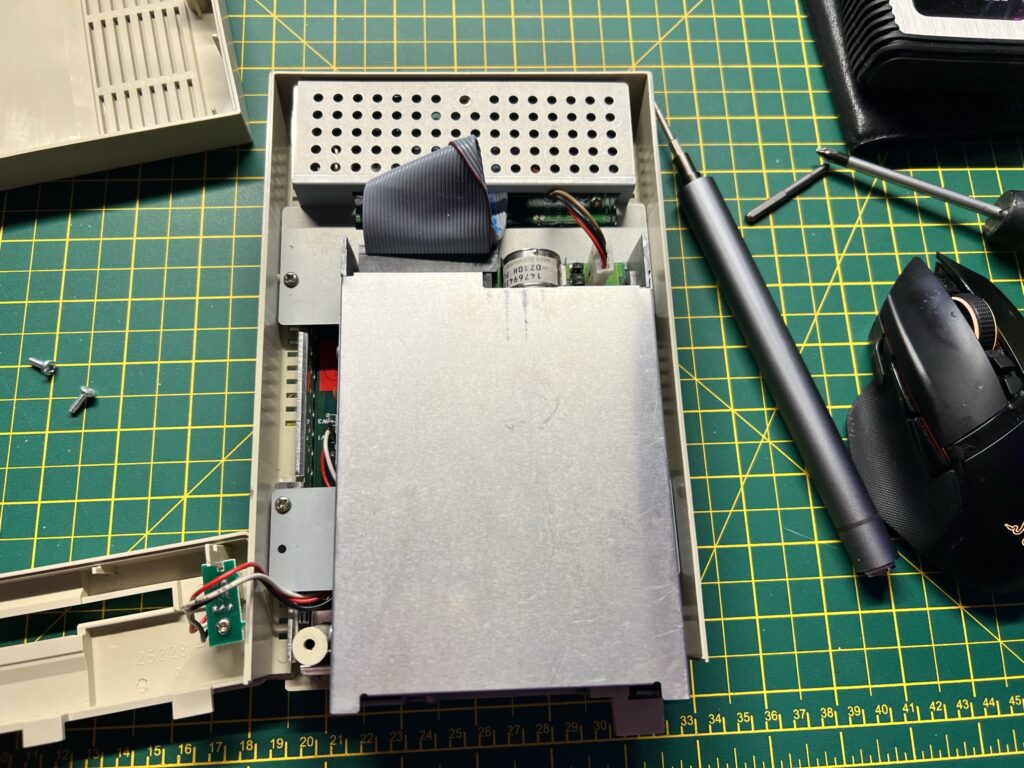
 

1581 drive with top cover removed.


This was held in place by four more screws and could be lifted out of the way entirely once they had been removed.
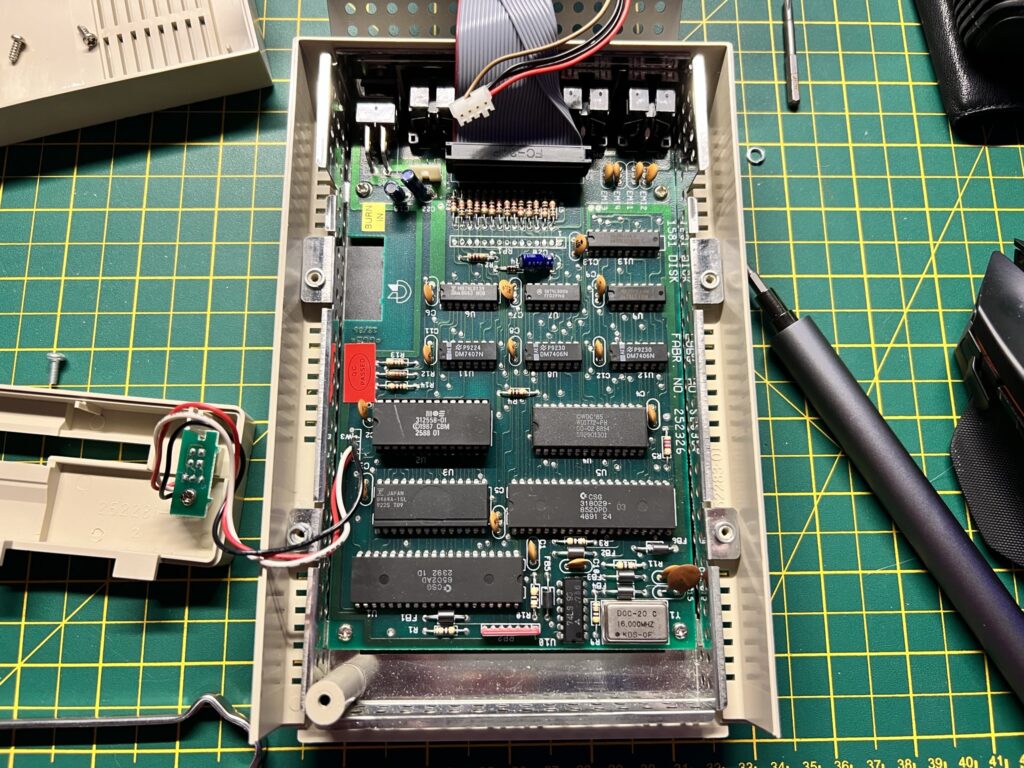
 

1581 drive mainboard.


Thankfully the kernal ROM was socketed which was a real stroke of luck as every other chip on the board was soldered directly in place.
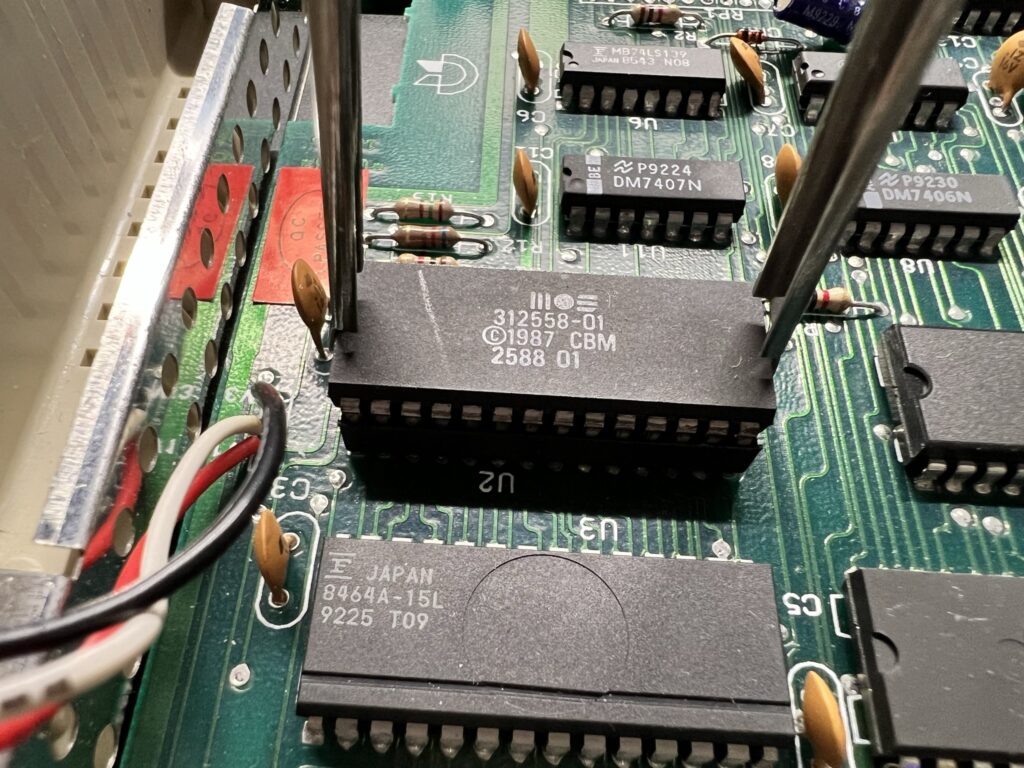
 

Removing the 1581 kernal ROM.


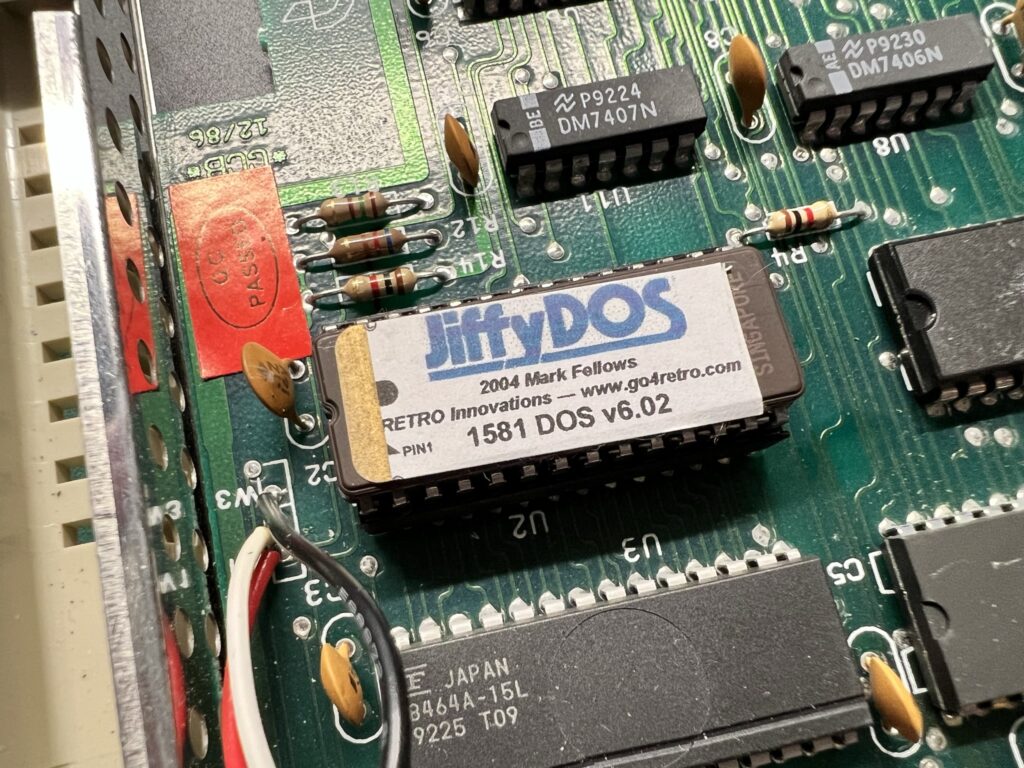
It needed a good old tug with the chip removal tool to get it budge but it parted ways with the socket eventually allowing me to drop in the replacement, taking care to make sure it was aligned correctly.
 

JiffyDOS

1581 JiffyDOS Kernal ROM installed.


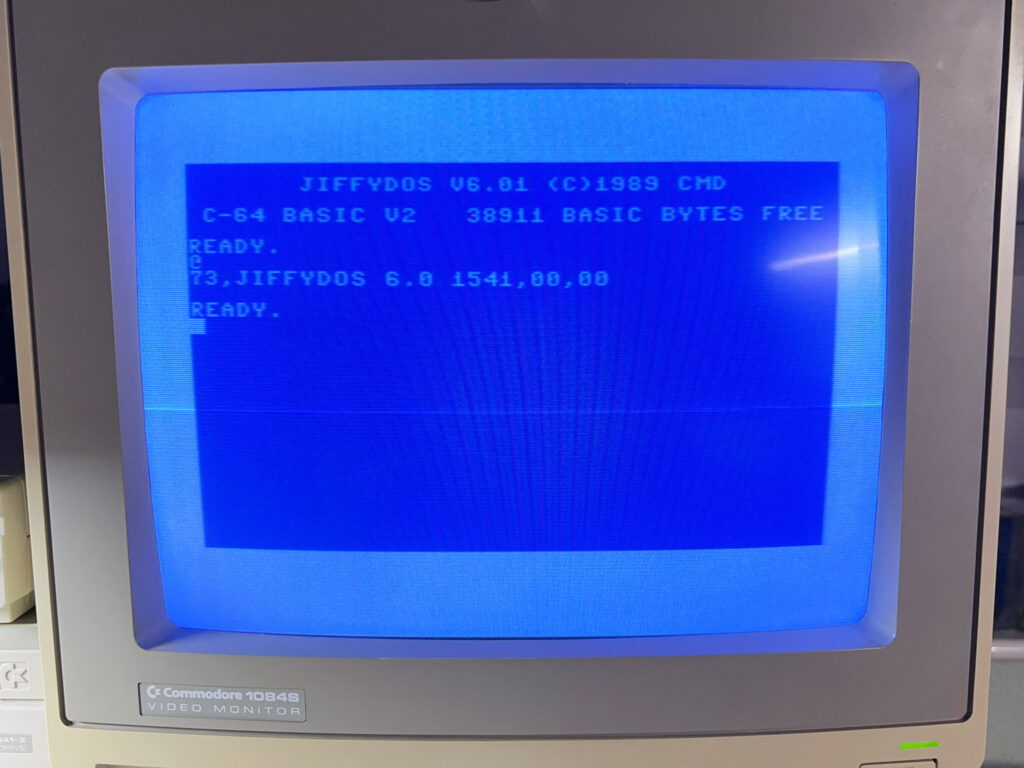
With the new JiffyDOS kernal installed I put the drive back together again, hooked it back up to my C64 and powered everything back on. Using the ‘@’ command I was able to read the error channel of the drive which confirmed the V6 JiffyDOS ROM was working. Two installs down, two remaining!
 

JiffyDOS

Reading the drive error channel (by pressing just one key!) to make sure the new ROM was working.


Installing JiffyDOS in my 1541-II Drives

Next up were my two 1541-II drives which I knew would be a little more involved as they would both need a small toggle switch installing to change between the standard kernal and JiffyDOS,
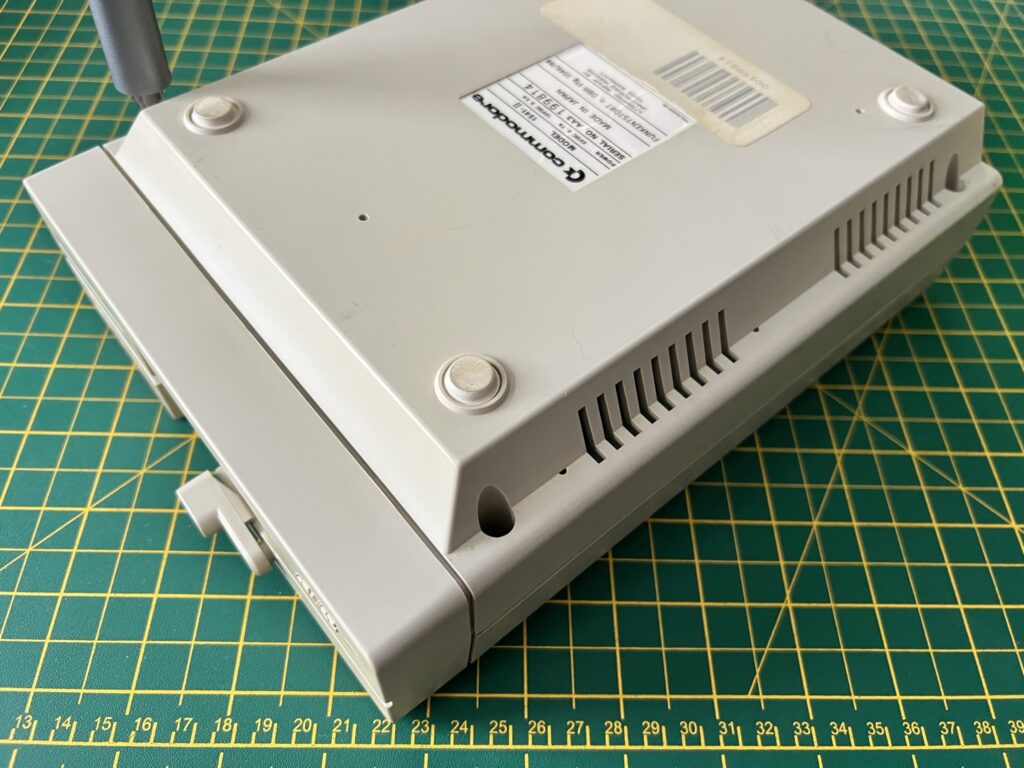
 

Removing the four screws holding the 1541-II case together.


There were four screws holding the two halves of the case together which I removed from the bottom of the drive. Flipping the whole case over then allowed the top half to be lifted off and placed out of the way.
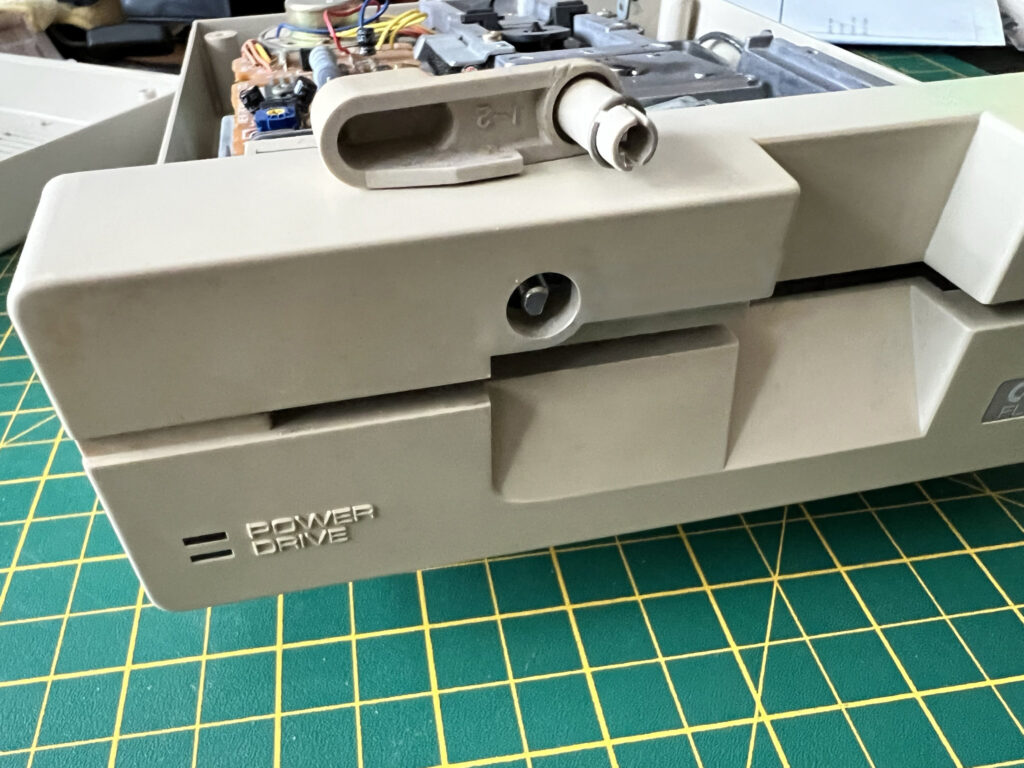
 

1541-II Drive latch lever removed.


The drive latch lever needed removing in order to get the front panel off. It just pulls off with the application of a bit of force, but shouldn’t require any tools.
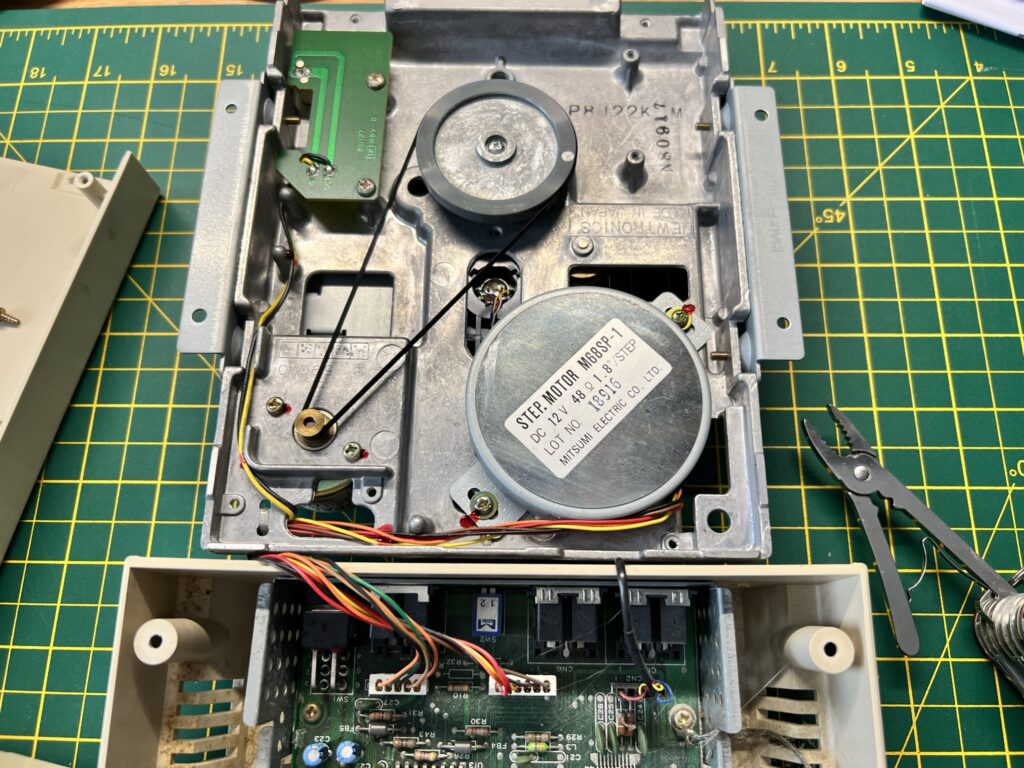
 

Drive mechanism flipped over out of the way allowing a clear view of the drive belt and stepper motor.


With the front bezel removed there were an additional four screws holding the actual disk drive mechanism to the base of the case. After these were removed I was able to flip the mechanism over and place it at the back of the case leaving all the cables still attached.
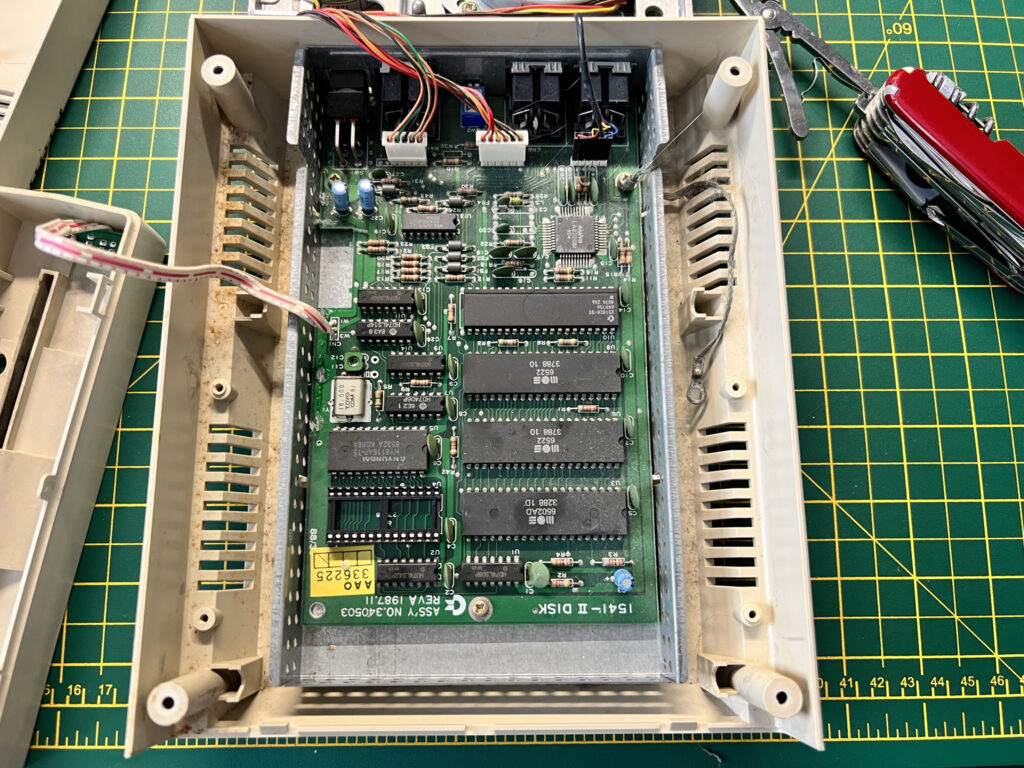
 

1541-II mainboard with kernal ROM removed (bottom left). Not yet had it’s spring clean in this photo!


The kernal ROM was also socketed on the drive so it was an easy job to remove it (bottom left in the photo above). At this point I realised the inside of the case was pretty dirty so I actually removed the whole board and gave it a good clean before continuing!
 

JiffyDOS

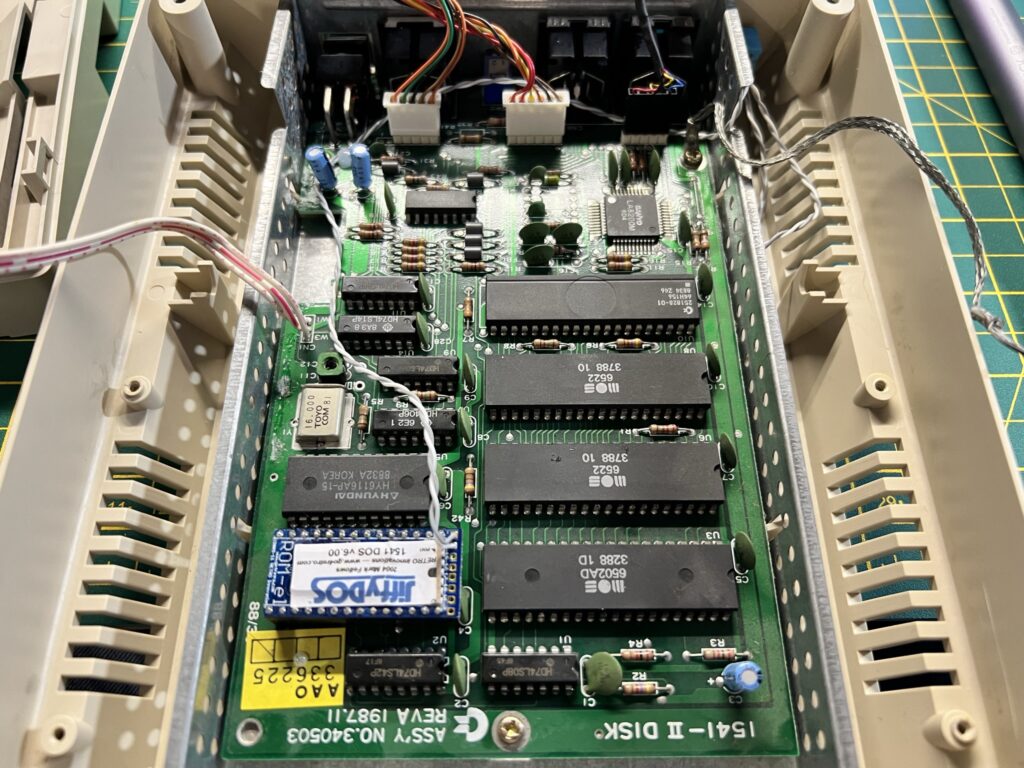
1541-II JiffyDOS ROM fitted – after the drive had received a spring clean!


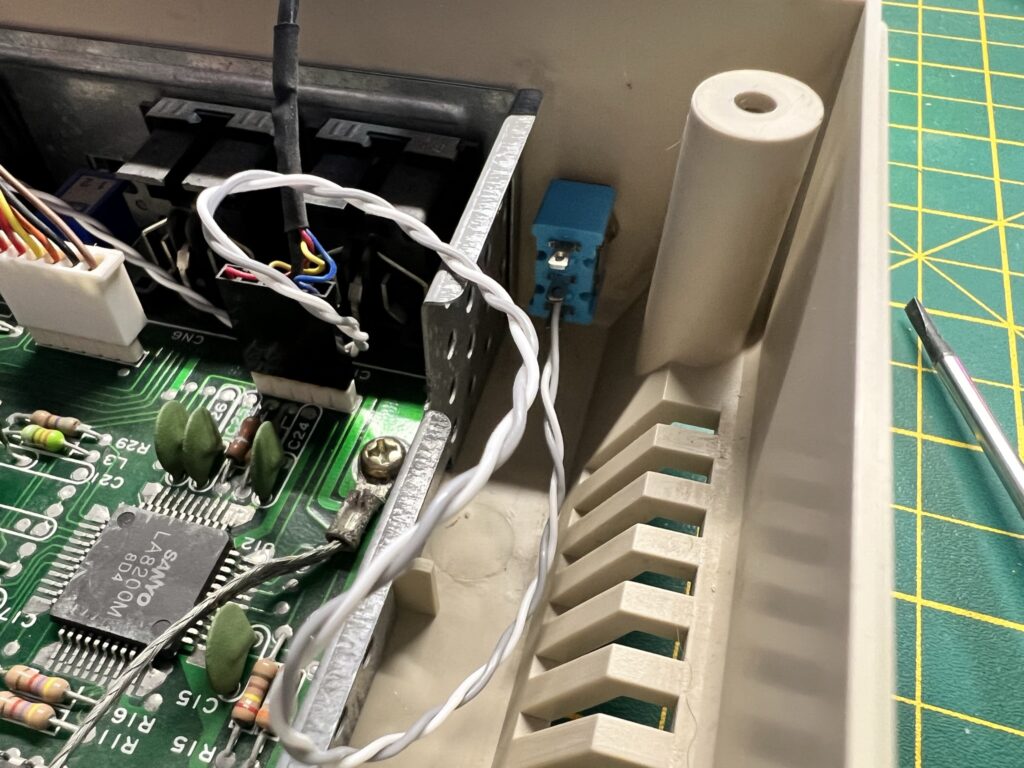
I fitted the JiffyDOS ROM and then routed the wire through to the back of the case where I found a nice spot to mount the switch.
 

JiffyDOS

1541-II JiffyDOS switch location.


I replaced the disk mechanism, making sure that I didn’t trap any of the wires underneath and that they wouldn’t foul the drive belt either.
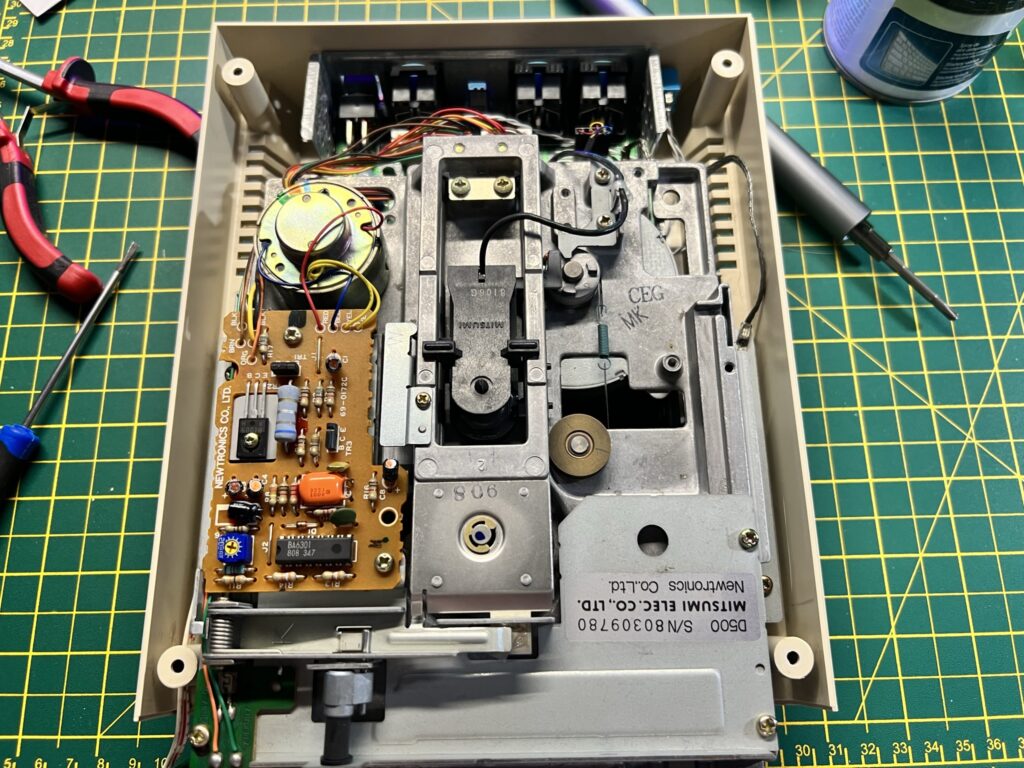
 

Re-fitting the drive mechanism.


Whilst I had the lid off I thought I may as well give the drive head a quick clean. Normally I just use a 5.25″ cleaning floppy every few months but theres no substitute for a proper clean.
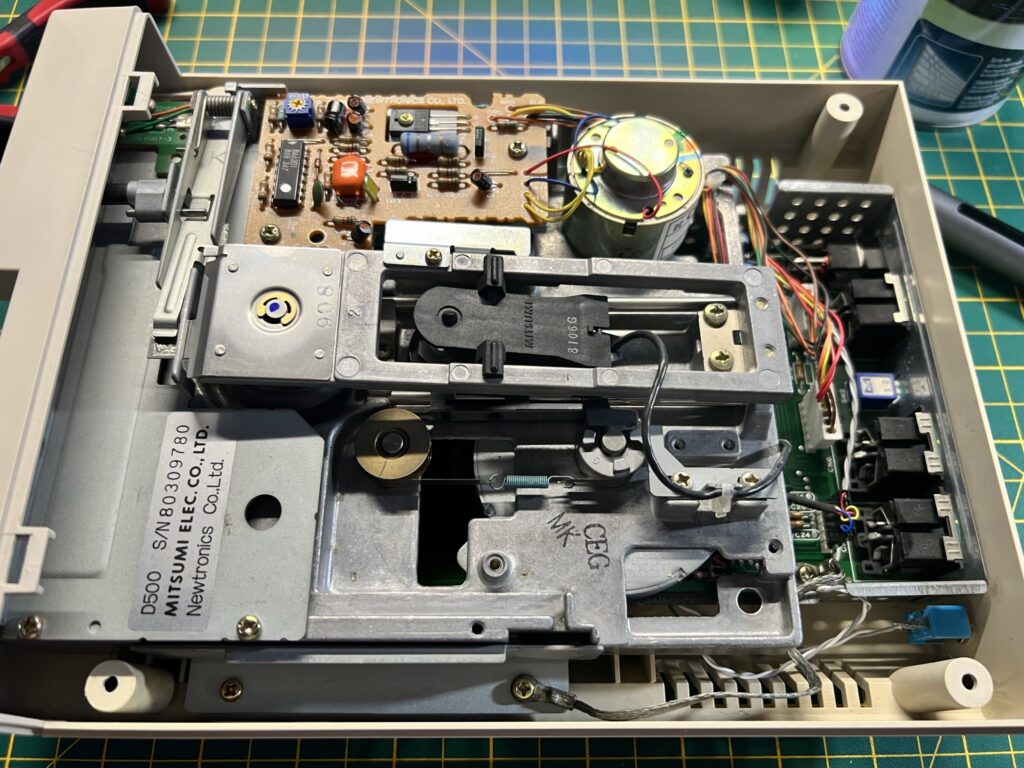
 

JiffyDOS

Another view of 1541-II with JiffyDOS ROM and switch installed.


I used a few drops of isopropyl alcohol on a cotton bud and gently wiped across the head a few times to ensure it was in tip top condition.
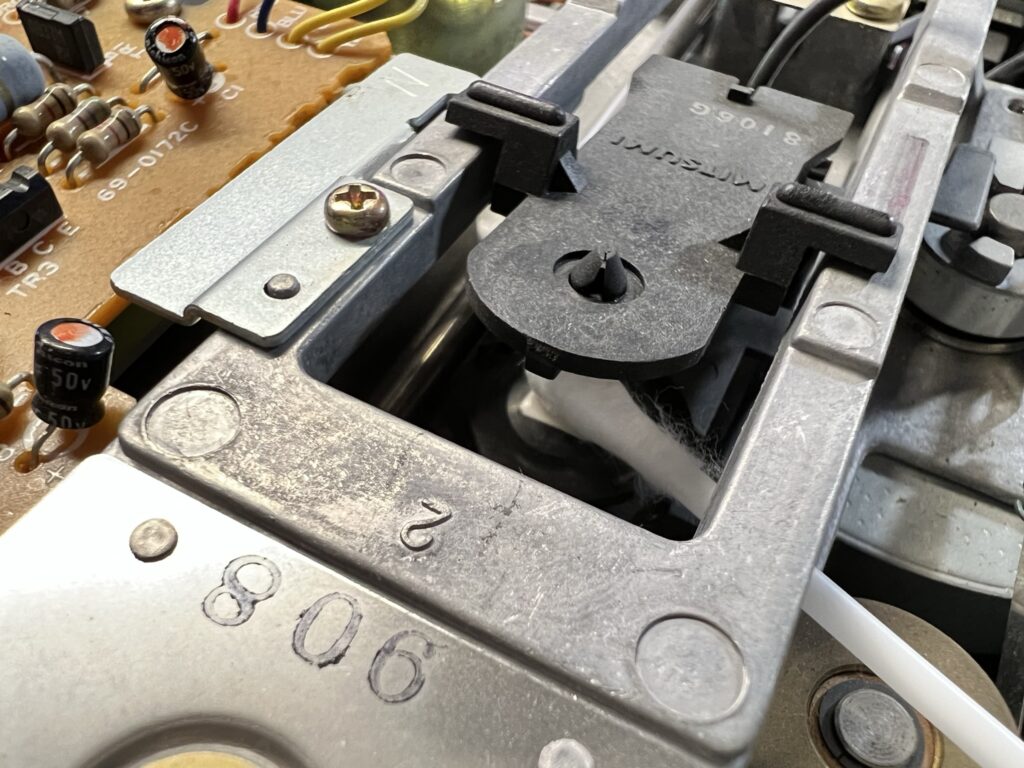
 

Giving the read/write head a quick clean with a cotton bud and some isopropyl alcohol.


With the new JiffyDOS ROM installed, the case sparkling and head shiny clean I reassembled everything and gave it quick test before repeating the entire process on my other 1541-II drive.
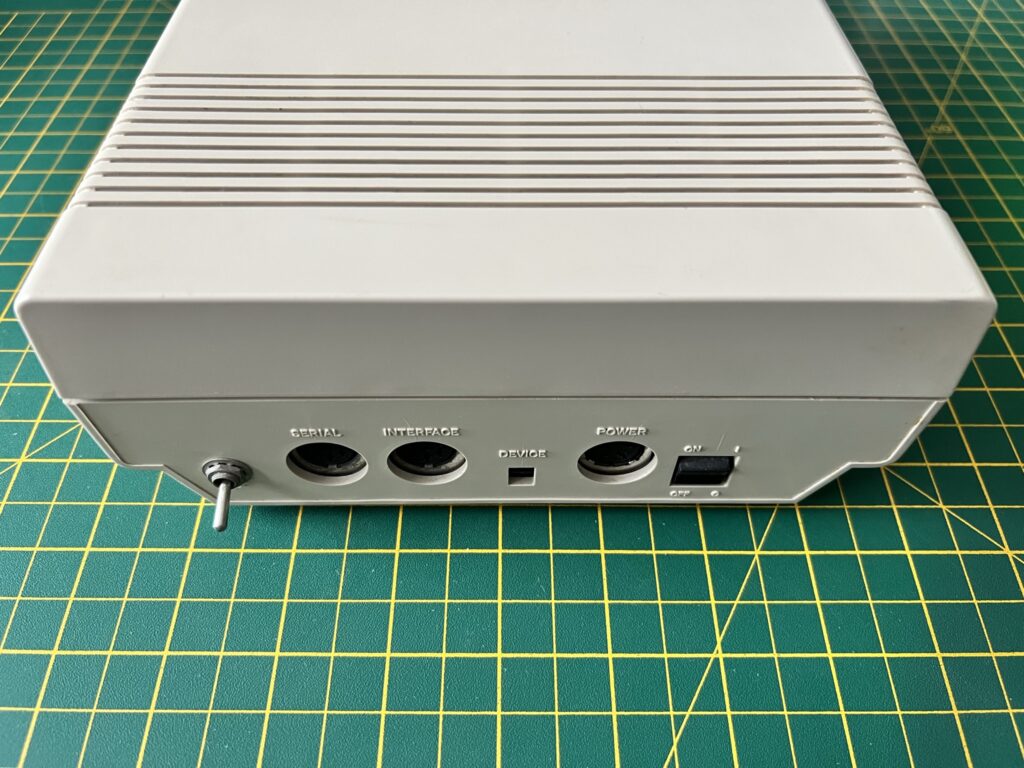
 

JiffyDOS

Back of the 1541-II drive showing the location of the JiffyDOS selector switch.


Speed Tests

Although the process took a little while longer than I expected (thanks mostly to carrying out an impromptu spring clean) the actual installs went smoothly. It was finally time to see what sort of benefits the JiffyDOS system would bring!

To test the speed increase I used a 40 block program, Klondike, that I had typed in from a listing a while back. I copied the same file onto both a 3.5″ floppy and a 5.25″ floppy. I then timed how long the program took to load on each drive with the standard kernal and then with JiffyDOS enabled. Here’s the results:


JiffyDOS Speed Test

DriveStandard Load TimeJiffyDOS Load Time
1541-II
27 seconds5 seconds
158121 seconds5 seconds
1541 Ultimate-II+22 seconds5.5 seconds
Time taken to load a 40 block BASIC program off a 5.25" disk in a 1541-II, a 3,5" disk in a 1581 drive, and a 1541 Ultimate-II+ cartridge with and without the use of JiffyDOS..


The speed improvement was pretty dramatic, going from 27 seconds to load the game on the 1541 drive to just 5 seconds – a reduction in the loading time of over 80%. The speed increase was also very impressive on the 1581, reducing the loading time by 76%. It’s interesting to note that the standard loading time on the 1581 was already 6 seconds quicker than on the 1541-II drive thanks to an improved read/write speed.
 

JiffyDOS

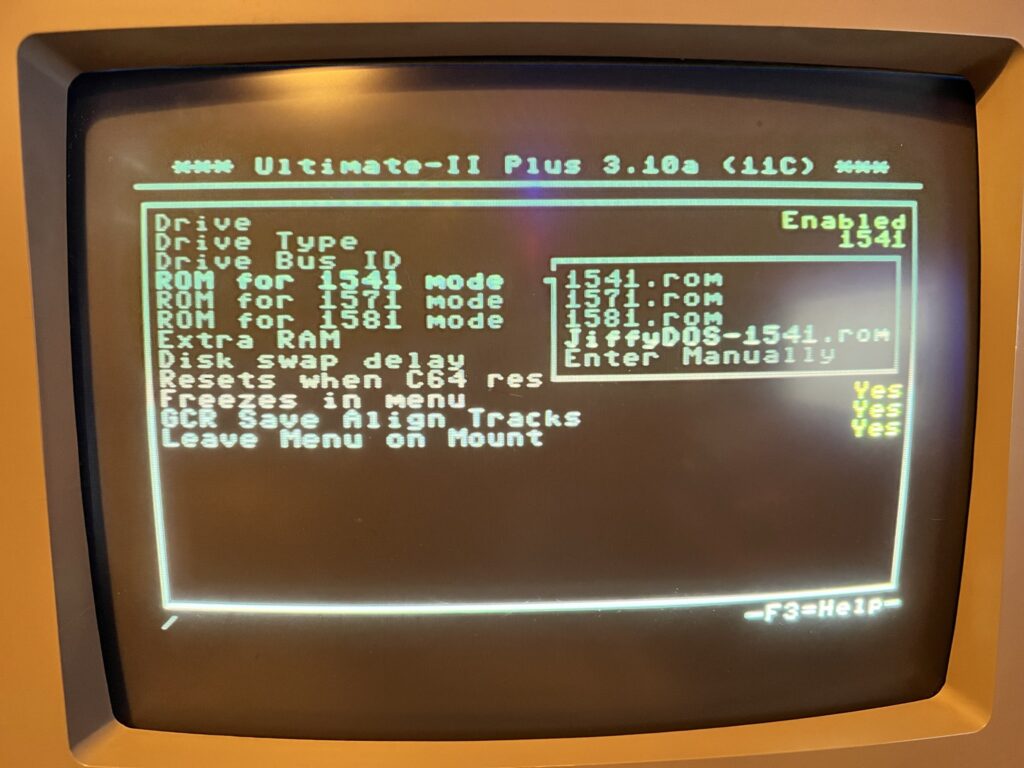
Assigning a digital JiffyDOS ROM to use in my 1541 Ultimate-II .


I also tested JiffyDOS out on my 1541 Ultimate-II+ device after installing a digital copy of the 1541-II ROM into the Flash memory of the cart. I got almost identical results to my real 1581 drive with my stopwatch recording times just a whisker slower for the virtual drive.


Quality of Life Improvements

JiffyDOS offers a lot more than just data transfer speed increases, it actually incorporates a complete implementation of the Commodore DOS 5.1 wedge command set in ROM. What this means in practise is an end to the ridiculously complex strings of commands needed to perform simple tasks like formatting a disk and the introduction of a new easy to use command set. Being in ROM means these benefits are available all the time, from the moment you power on your computer.

Here’s a few examples:

Reading a disk directory: Normally this would require entering the command ‘LOAD”$”,8’ which would load the directory of a disk into the C64’s memory so you can list it. It works and it’s not particularly difficult to remember but it wipes the C64’s memory in the process so is not ideal. With JiffyDOS you can simply enter ‘@$’ and it will LIST the directory of the default drive WITHOUT destroying whatever program is resident in RAM. In fact you don’t even need to type it in, simply press ‘F1’ and then hit RETURN. A whole bunch of common commands are pre-programmed into the function keys to make your life easier.

Formatting a disk: This would normally require the following command ‘OPEN 1,8,15,”N:NEWDISK,01″:CLOSE 1’. However using JiffyDOS you simply enter ‘@N:NEWDISK,01’ which is much easier to remember.

Reading the error channel: This is a much more striking example. Remember trying to find out why the error light of your drive was flashing? You would normally have to type in a small BASIC program like this:

10 OPEN 15,8,15
20 INPUT#15,F,E$,T,S
30 PRINT F;E$;T;S
40 CLOSE 15

However with JiffyDOS all you do is enter ‘@’ (or ‘@””,9’ for a non default drive number) to achieve the same thing! Incidentally this feature is also really useful for checking that JiffyDOS is enabled and working on a specific drive when first powering up.
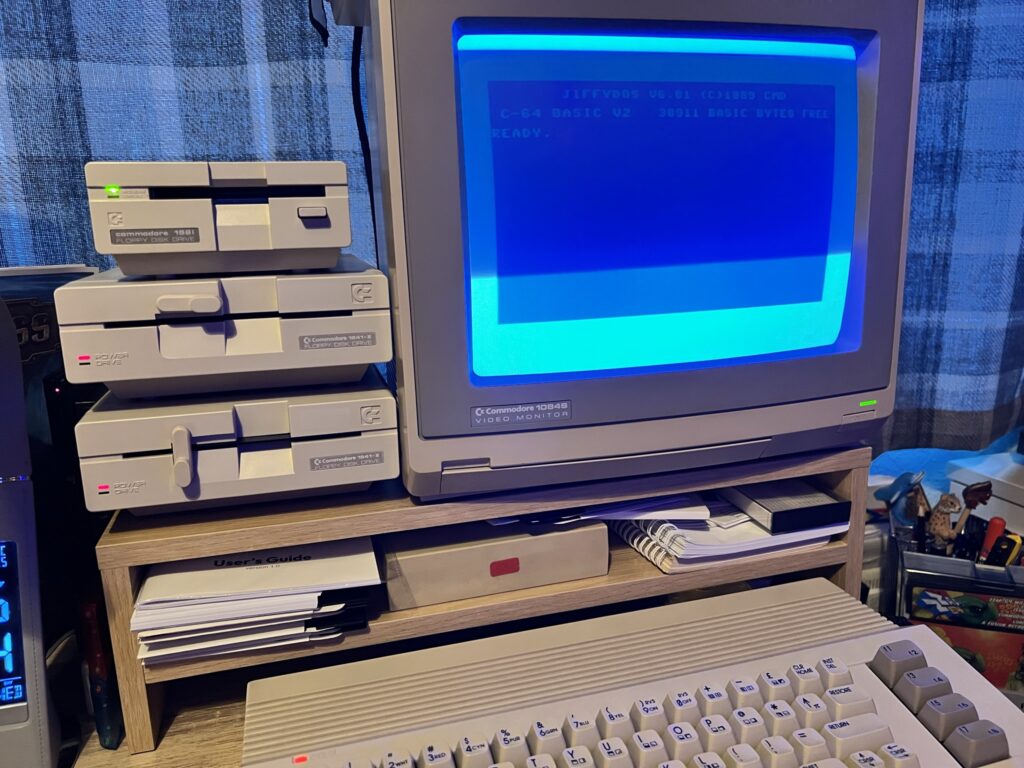
 

My Commodore 64 hooked up to my 1541-II and 1581 drives.


In addition to dozens of new easy to use disk commands there are other amazing new features like a built-in file copier. Copying files from one disk to another is now a doddle – simply set the source and target drive, tag files you want to copy from a directory listing using ‘CTRL+W’ and then ‘RUN’ the copy.

Now you might be wondering, as I did, how all these extra commands and functions have been added to the kernal without squeezing out other functionality. Well in truth they haven’t – the datasette routines have been removed to make space for them. This means that whilst JiffyDOS is enabled you are unable to load or save data from cassette. In reality this is no great hardship though as a quick power cycle and flick of the switch will revert back to the regular kernal and enable tape operations.

JiffyDOS is an amazing upgrade and something I wish I had installed years ago. The speed improvement it brings is pretty amazing but it’s probably all the new DOS features and commands that I appreciate the most. They turn what was, in all honesty, a pretty horrible and unintuitive user experience, into a pleasure.

Pi1541 Disk Drive

Pi1541 Disk Drive

Little bit of background

I’ve been aware of the Pi1541 disk drive or Pi1541 ‘hats’ for several months now. This project was undertaken to create a ‘cycle exact’ emulation of a Commodore 1541 floppy drive using a cheap Raspberry Pi computer. The idea behind it is that by fully emulating the 6502 CPU and 6522 VIA chips you would have a 100% 1541 compatible ‘disk drive’ capable of reading any disk image, even ones with custom fast loaders and exotic copy protection schemes. By contrast the ubiquitous SD2IEC devices don’t emulate either chips but rather simulate some disk protocols and use some clever code to try to blag some fast loaders into working. This is why special versions of some games need to be created to work on SD2IEC devices.

In a nutshell a Pi1541 Disk Drive utilises a Raspberry Pi B computer running custom software along with a daughter board or ‘hat’ which sits on top and connects to the GPIPO pins of the Pi. This ‘hat’ adds the standard IEC connectors and handles the stuff that is required for the Pi to successfully communicate with the attached Commodore computer. The project was created by a guy called Steve White and if you want to know the technical ins and outs then check out his website here.

Pi1541 Disk Drives can be picked up very cheaply on eBay. In fact the whole point of the project was to create something better than an SD2IEC but much cheaper than FPGA based offerings like the 1541 Ultimate II+. Of course another option is to build your own but I have neither the time nor the inclination to attempt that. The other big turn off with both of these options is that quite frankly, the devices are just plain ugly. Which brings me neatly on to my latest acquisition…

Pi1541 Disk Drive

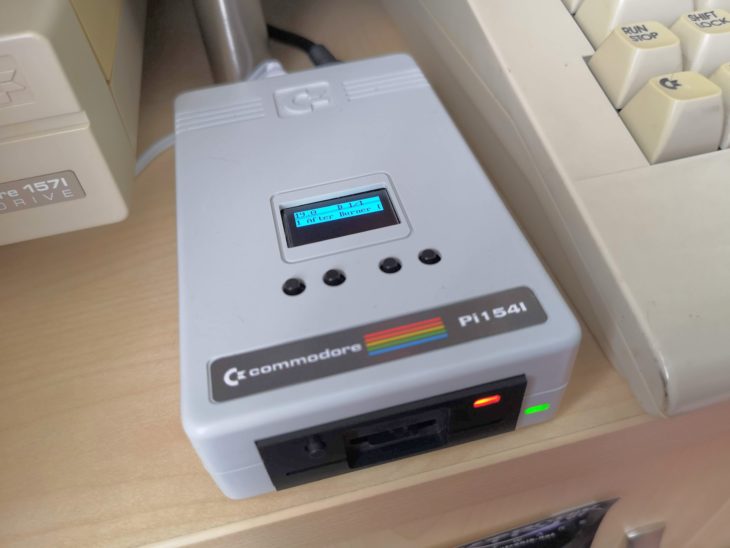
As I mentioned earlier I’ve been aware of this project for some time, but for the reasons I mentioned above it just didn’t appeal to me. Until that is, I saw that Tim Harris who runs sharewareplus was offering a super slick, plug and play, cased Pi1541 Disk Drive complete with OLED screen. I just had to have one and after several months of waiting it has finally arrived!


Pi1541 Disk Drive

Pi1541 Disk Drive


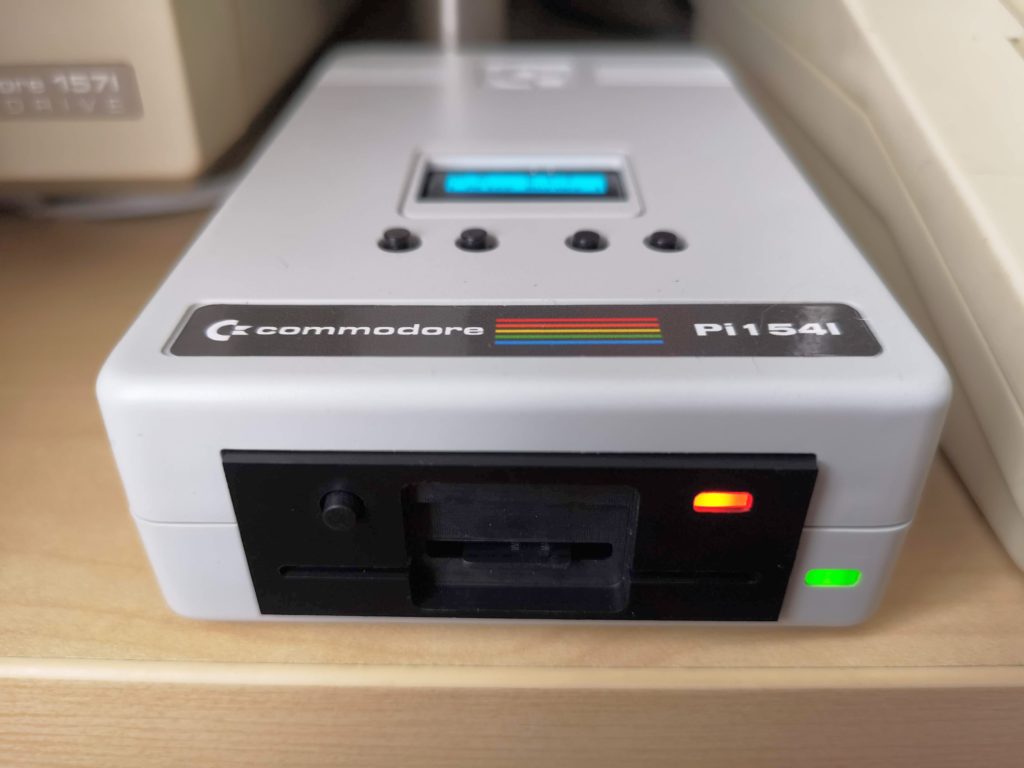
This really is a thing of beauty, modelled closely on the first generation Commodore 1541 floppy drive. There’s so many little design cues taken from the original case. The Micro SD card slot encased in black plastic housing complete with scaled disk ‘slot’.  The red drive activity LED and green power LED. A chicken logo moulded into the casing top. The Commodore label complete with rainbow colours and a 1541 logo where the trailing 1 is actually a letter I. It even has a built in speaker to emulate the drive sounds of the original drive!

It came supplied with a Micro USB cable (to power it) and a single instruction sheet explaining what the ports are for and what the buttons do. Disappointingly it did not include a Micro SD card, IEC cable or even further instructions.


This slideshow requires JavaScript.


The casing is approximately 5″ (13cm) deep, 3″ (7.5cm) wide and 1.25″ (3cm) tall. On the front there is a MicroSD card slot, a green power LED, a red drive activity LED and a ‘Select/Start’ switch. On the rear there is a power on/off switch, Micro USB power socket and a standard CBM IEC drive connector socket.


This slideshow requires JavaScript.


On the top of the device is a lovely 1″ x 0.5″ (128×64 resolution) blue OLED screen along with four navigation buttons. When the device is first turned on it operates in SD2IEC mode which allows you to browse through the contents of your Micro SD card and select an image (or multiple images) to use. In this mode all 4 top buttons have a function: ‘move up’, ‘move down’, ‘exit folder’ and ‘add disk’ (for multi-disk games). In this mode the button on the front acts as a ‘select’ button.

Once an image has been selected on the device and a ‘load “*”,8,1’ (or similar drive command) is issued from the computer, it switches to full 1541 emulation mode. In this mode only the first 2 buttons on the top have a function: ‘previous disk’ and ‘next disk’. In this mode the front button acts as ‘start’.


Setting it up

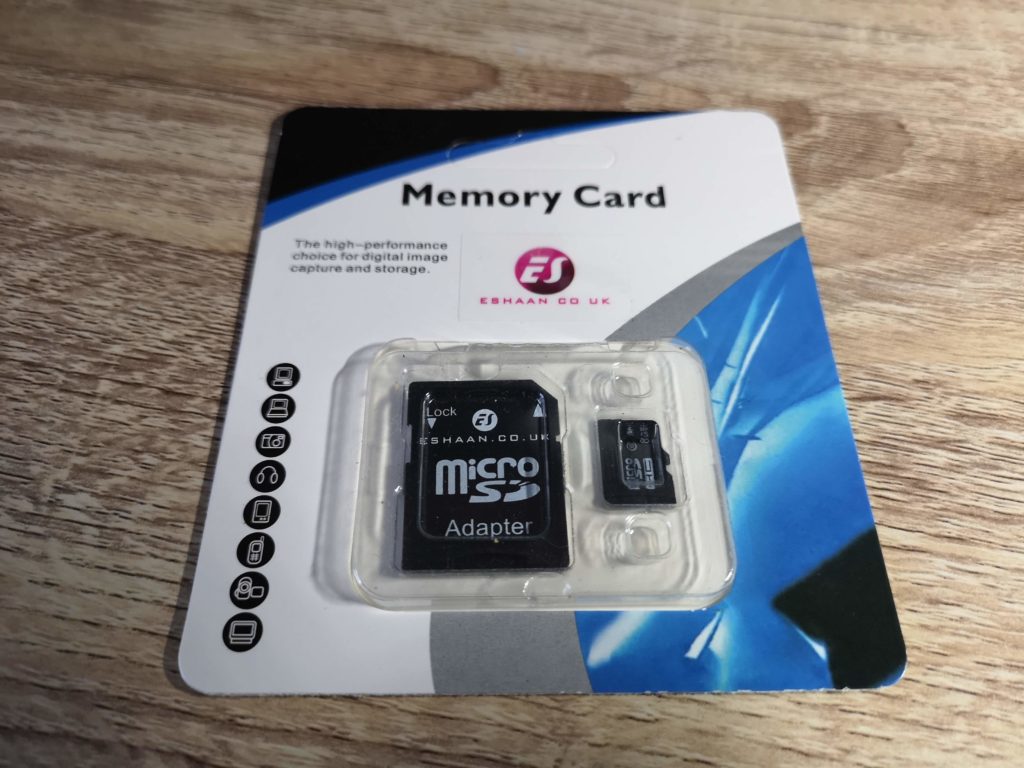
I was advised that this Pi1541 Disk Drive worked best if you use an 8GB Micro SD card so I just picked up this [amazon_textlink asin=’B00OO1489A’ text=’generic card’ template=’ProductLink’ store=’lyonsden-21′ marketplace=’UK’ link_id=’2cfd7b41-fa87-463d-8193-fa88db2fcc6e’] off Amazon and it has worked perfectly.


Pi1541 Disk Drive

8GB Micro SD Card


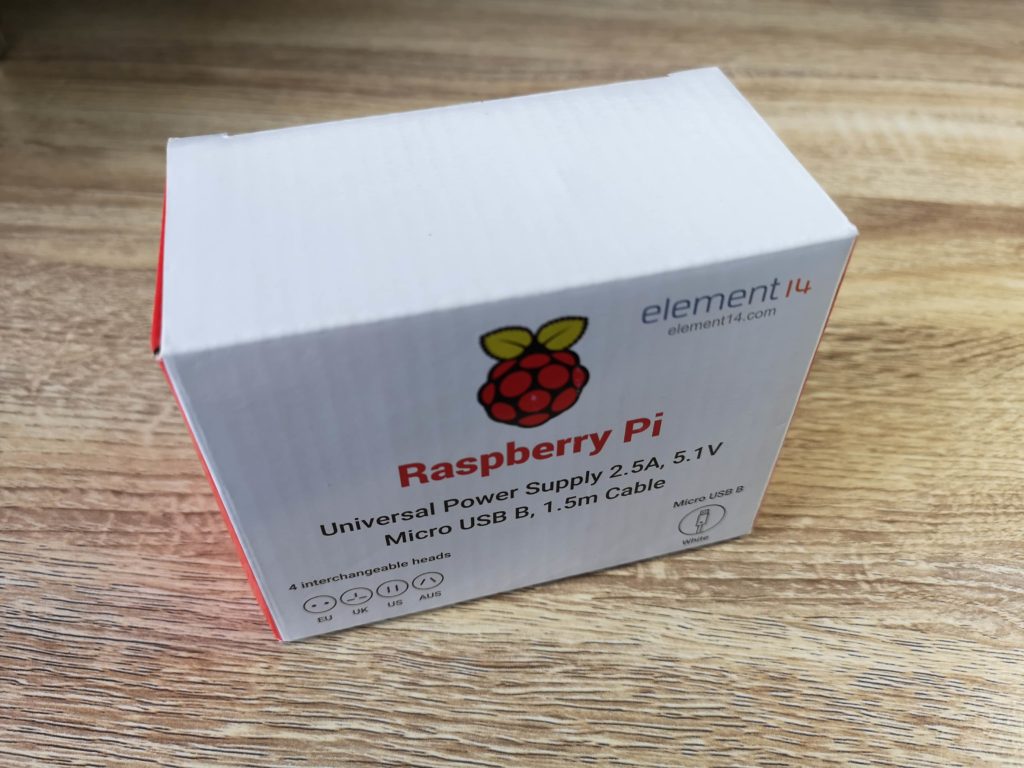
Unfortunately I did not fare so well with the Micro USB power supply. The device came with a Micro USB A-B cable so I plugged it into a free port on my power strip extension lead. The drive powered up and appeared to work fine until I tried to actually load a directory listing or a program and then it would just lock up and my C64 would freeze. Thinking the device was faulty, I got in touch with the guy selling it and was advised this was likely a power issue. The Pi needs a beefy PSU, especially when it’s also powering an additional board plus OLED screen. Long story short I tried several USB chargers from phones and such like but none of them fixed the problem. In the end I ordered an official [amazon_textlink asin=’B01CO1ELT8′ text=’Raspberry Pi PSU’ template=’ProductLink’ store=’lyonsden-21′ marketplace=’UK’ link_id=’5f2082ed-bb79-4d0e-a527-0c957f374c26′] off Amazon and the problem just went away. Moral of the story? Don’t be a cheapskate and buy a decent power supply for it!


Pi1541 Disk Drive

Official Raspberry Pi PSU


In use

Once I’d properly sorted out the Micro SD card and PSU the Pi1541 Disk Drive worked perfectly. It loaded everything I threw at it including .G64 disk images that that won’t work on my SD2IEC device (but do work on my 1541 Ultimate II+). I also tried it with turbo load cartridges such as the Epyx Fastload and Action Replay VI’s Fastload. It worked perfectly and as you would expect loading times were significantly reduced using either cart. It is claimed to be 100% compatible with Jiffy DOS too but at the moment I don’t have the hardware to put that to the test.

There are a few other benefits that the Pi1541 Disk Drive has over it’s rivals. It doesn’t hijack the cassette port or user port for power like an SD2IEC device would as it’s powered independently from the host computer. Nor does it occupy the cartridge slot like a 1541 Ultimate does. It also works with my VIC20, something even the mighty 1541 Ultimate cannot do. I believe it will also work with both the Commodore 16 and plus 4 but I own neither of these machines so cannot confirm this.

There are a few niggles, the first being that the Micro SD card doesn’t have the ‘push to eject’ feature. When you want to remove it there is only 2mm of card protruding to grip onto and I found it difficult to pull out without using some needle-nose pliers.

My other gripe is that it didn’t come with an IEC cable, memory card or PSU. For a device costing £150 I would have expected these to be included and it would have saved me messing around trying to get a working power supply.

The sound produced is a little disappointing too. More a series of beep’s than a true emulation of drive noises (sounds a bit like what you get with a Gotek that’s had a sound mod fitted). My 1541 Ultimate II+ does a much better job of reproducing drive sounds.

Verdict

This is a terrific product and probably the best and most accurate emulation of the Commodore 1541 drive there has been to date. It also looks the part and will work across almost the entire range of 8-bit Commodore machines.


Pi1541 Disk Drive

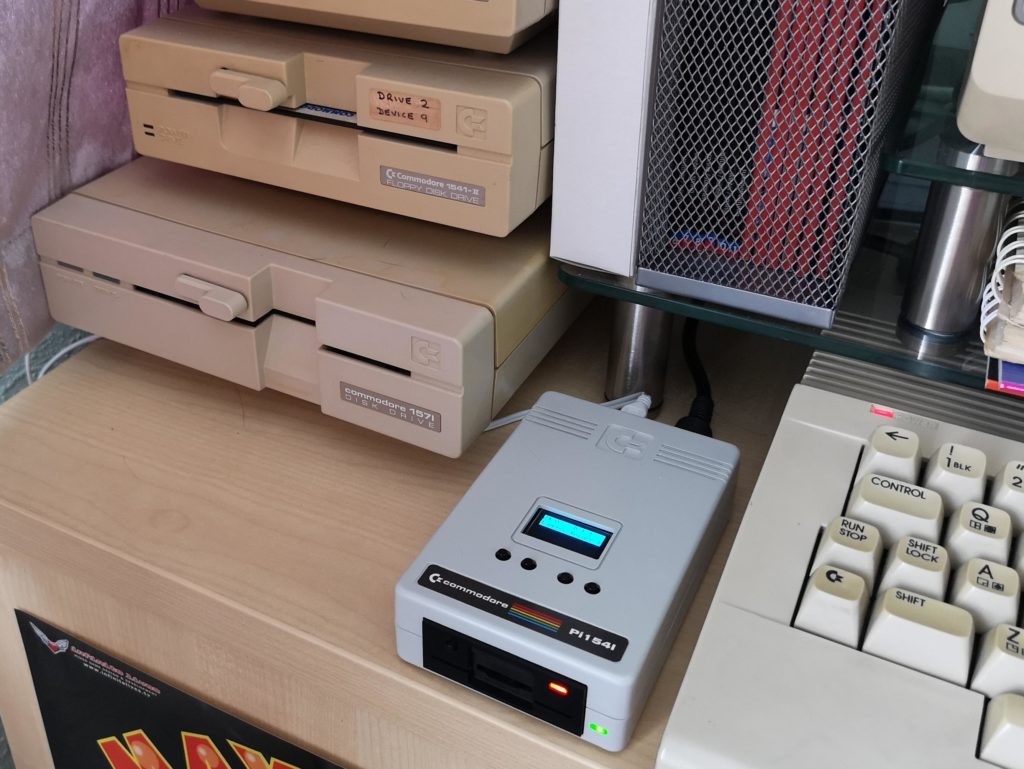
Pi1541 Disk Drive next to 1541-II’s and a 1571


It’s definitely a luxury peripheral in my eyes though rather than an essential purchase. In this particular form it cannot compete on price with either the SD2IEC or the 1541 Ultimate II+ cartridge (which has many more features). However if you were to choose one of the more modest Pi1541’s you can find on eBay then it trounces the Ultimate on price and beats the SD2IEC on compatibility for a similar cost.

Another thing to bear in mind is that although, strictly speaking, SD2IEC devices are nowhere near as compatible as the Pi1541, they ARE ubiquitous. Because of this most games have been tweaked to make them work within the confines of the system out of necessity, so in most cases compatibility is often a moot point.

Bottom line is this; if you want the most compatible and by far the best looking modern 1541 Drive implementation there is and you don’t mind paying a premium for it, then you won’t find a better product than this. You can pick these up from from Tim over at SharewarePlus.

Network your Commodore 64

I’ve had my 1541 Ultimate II+ cart for around a year now. It’s a fantastic modern addition to my Commodore 64 and one that I certainly wouldn’t ever want to be without. However in all that time I’ve never bothered to explore using its built-in Ethernet port. Well the other day I finally got around to setting it up and am really glad I did too. I thought I’d share my experience in case it can help someone else get more out of their device. Basically this post will explain how to network your Commodore 64   (with a 1541 Ultimate II) to copy your games, music, demos, documents or anything else straight to your 1541 Ultimate II without ever needing to swap USB drives around.


Connecting to your network

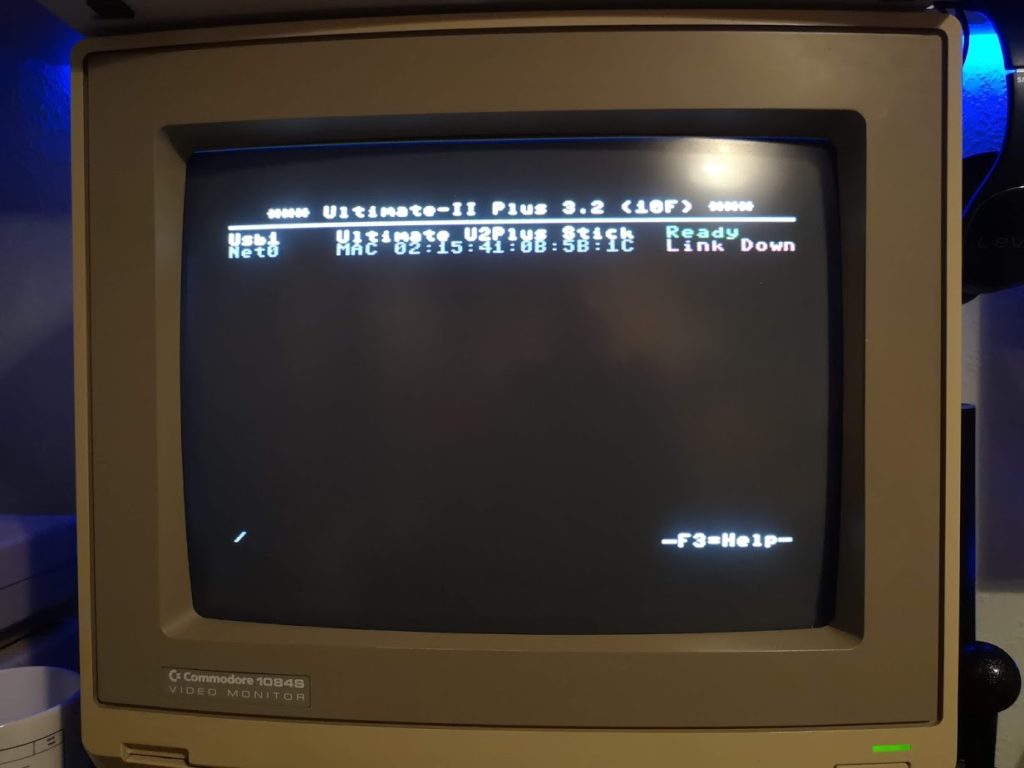
You may have noticed the red ‘Link Down’ status that appears on screen when you press the menu button on your Ultimate cart. The is basically the built-in network card of the device telling you that it’s not connected to anything. The ‘MAC’ with the 12 Hexadecimal codes along side is the ‘MAC Address’ of your cart in case you need to find it on your network router.


Network your Commodore 64

‘Link Down’ Status shown in red


All you need to do to network your Commodore 64 is connect it to your router with an [amazon_textlink asin=’B00J3UYNII’ text=’Ethernet cable’ template=’ProductLink’ store=’lyonsden-21′ marketplace=’UK’ link_id=’885964d9-fae3-11e8-9619-05a5a6b29c97′]. Providing your router is configured to use DHCP (and by default, pretty much all of them are) your cart should pick up an IP address on your network straight away.


Network your Commodore 64

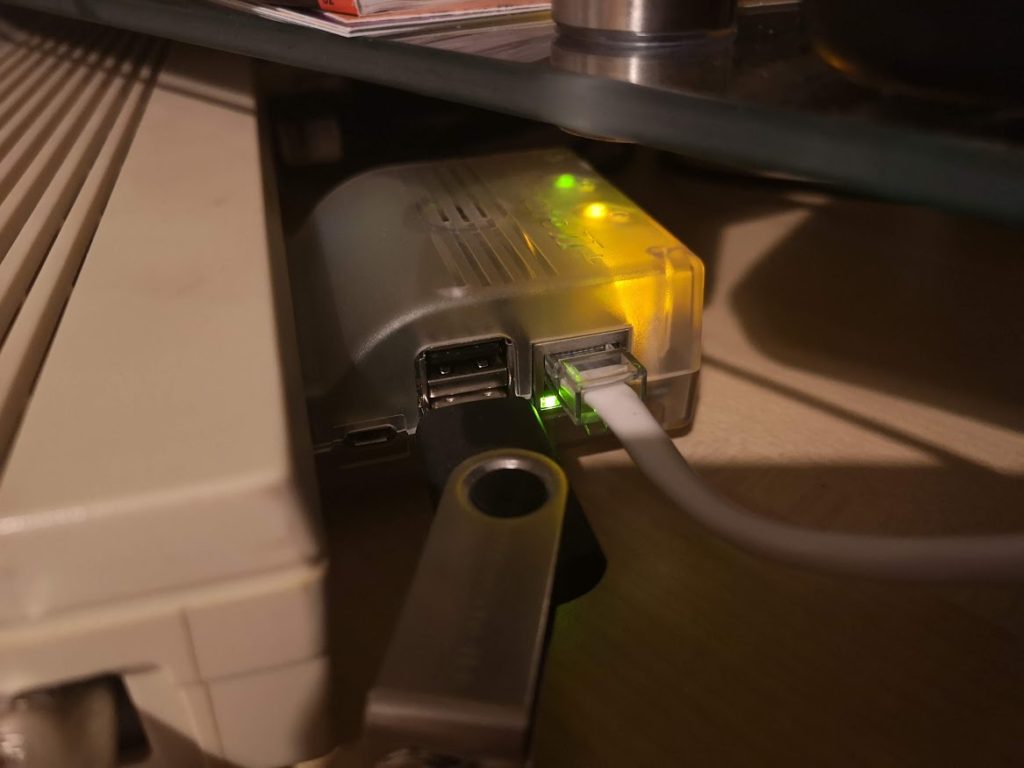
Ethernet cable plugged in. Note the Green link/activity light. This should blink on and off.


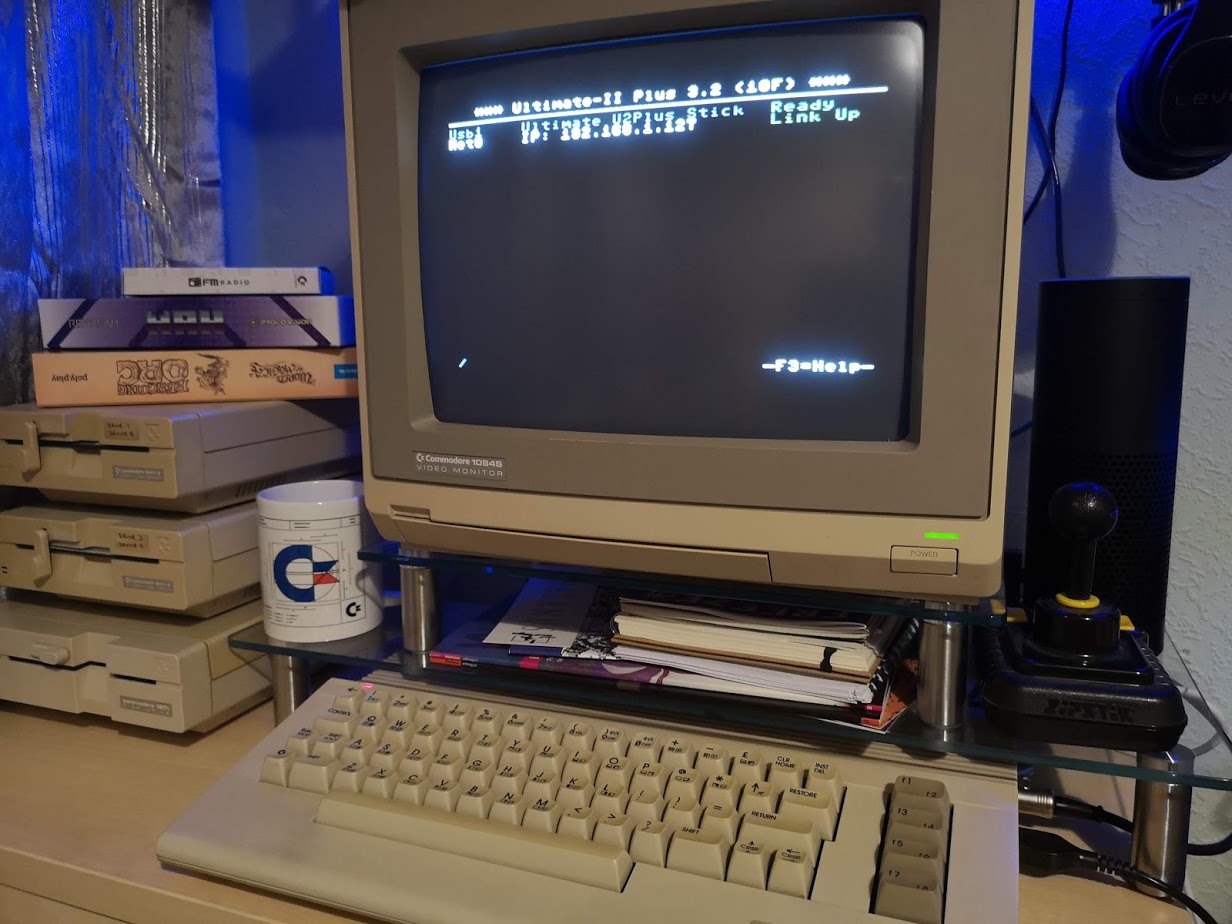
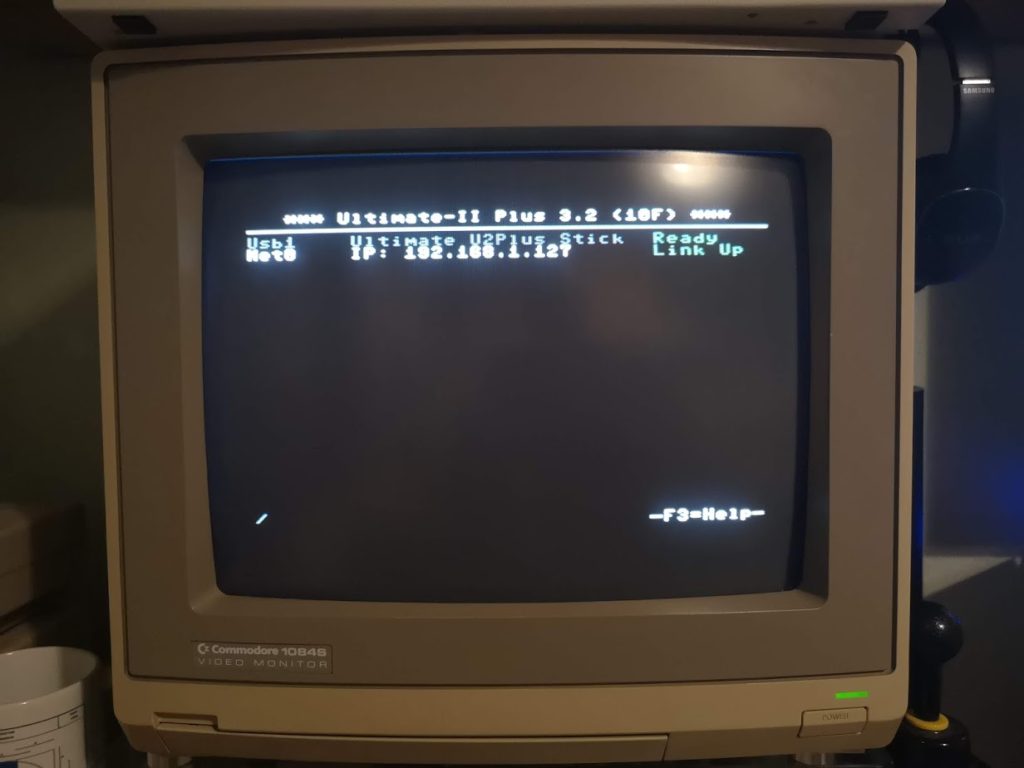
After you have plugged the cable in you should see a green activity light appear on the device itself. You should also see an IP address appear on the menu screen and the red ‘Link Down’ status should change to a green ‘Link Up’.


Network your Commodore 64

‘Link Up’ Confirmation Status and IP address shown


FTP Software

So far so good, but it’s still not much use at the moment. To be useful you’re going to need some FTP software on your PC. I’ll use Filezilla as an example as it’s free and easy to use. The principal will be the same regardless of what software you choose to use. (As a side note I normally use Directory Opus which is still going strong – only just for PC’s these days rather than the Amiga). Note, if you are going to download and install Filezilla it’s just the client you want, not the server version. Also make sure you un-tick any boxes during the install to avoid any unwanted ‘bundled extras’ being installed (one of my pet peeves these days). The FTP software is going to allow you to connect to the USB storage device that is plugged in to the 1541 Ultimate II and transfer files across.


Network your Commodore 64

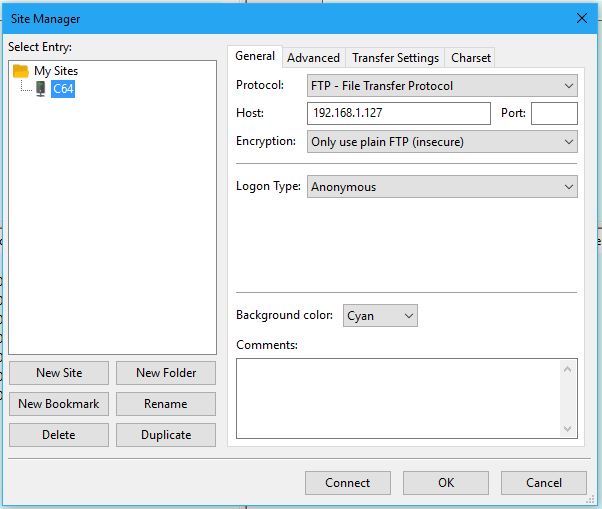
Configuring the FTP software to connect to your C64


Adding your C64 as a ‘site’

Once you’ve got your FTP software up and running you need to add a new ‘site’ to it (basically your 1541 Ultimate II). Simply got to the ‘File’ menu and select ‘Site Manager’ and then click on ‘New Site’. Give the site a suitable name so you’ll be able to recognise it easily in future. I simply called mine ‘C64’. Now make sure all the various settings below are entered. These have already been entered in the screenshot above.


  • Protocol: FTP
  • Host: (this will be the IP address displayed on YOUR C64 screen)
  • Port: (you can leave this blank)
  • Encryption: Only use plain FTP (insecure). (You are only transferring stuff within your own home network so this is not an issue)
  • Logon Type: Anonymous


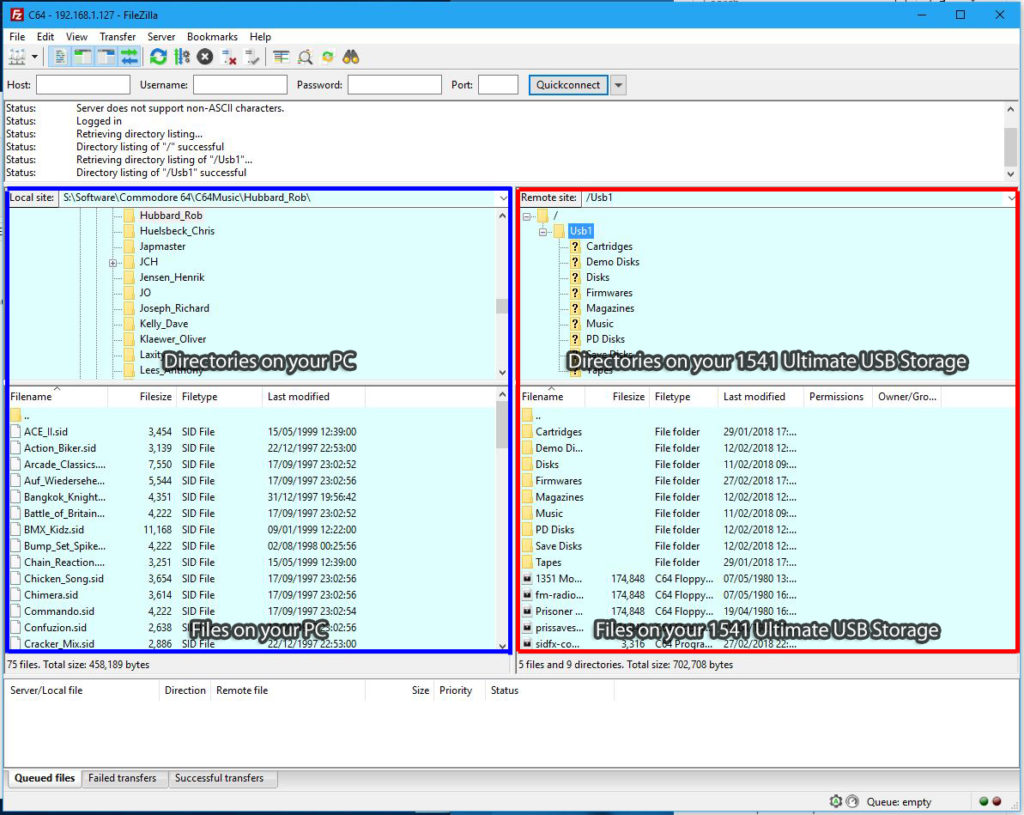
Once you’ve checked that all the above settings are correct, click on ‘connect’. The new site you’ve just created will be saved and it should connect to your Ultimate cart and display something similar to the screenshot below.


Network your Commodore 64

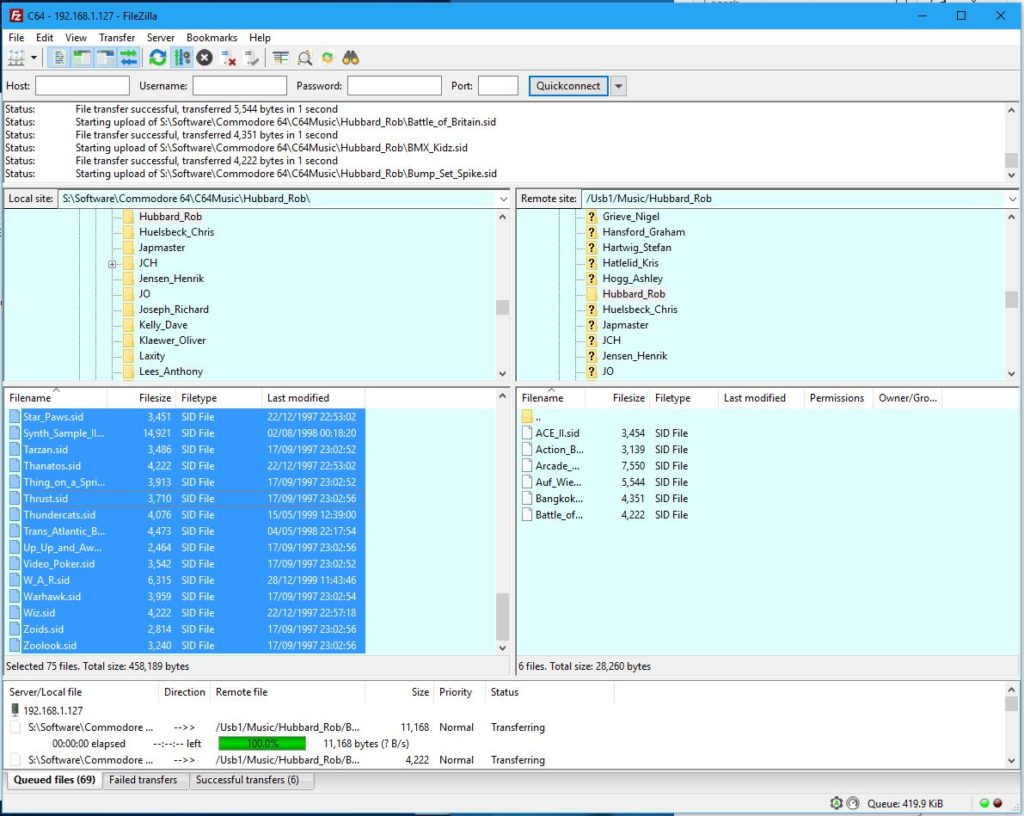
FTP software – PC on the left, C64 on the right


The top window is basically a scrolling log of the actions performed by the FTP software and is just for info purposes. The two areas highlighted in blue and red above are where you can get stuff done. The left hand side is your PC and the right hand side your C64, or rather the USB drive plugged into your 1541 Ultimate II. The upper window on each side is where you can browse through the directories / folders whilst the lower section shows you the contents of them.


How to actually transfer games onto your C64!

To transfer games across to your C64 all you need to do is click through to where they are stored on your PC in the left window, where you want them to go in the right window, and then simply drag and drop them over, it’s that simple.


Network your Commodore 64

Files being transfer over FTP


In the above screenshot I’ve dragged a bunch of Rob Hubbard SID tunes across from my PC to my 1541 Ultimate II’s USB drive. You can see a log of what is happening in the top window and view the individual files’ transfer progress in the bottom window.


Network your Commodore 64

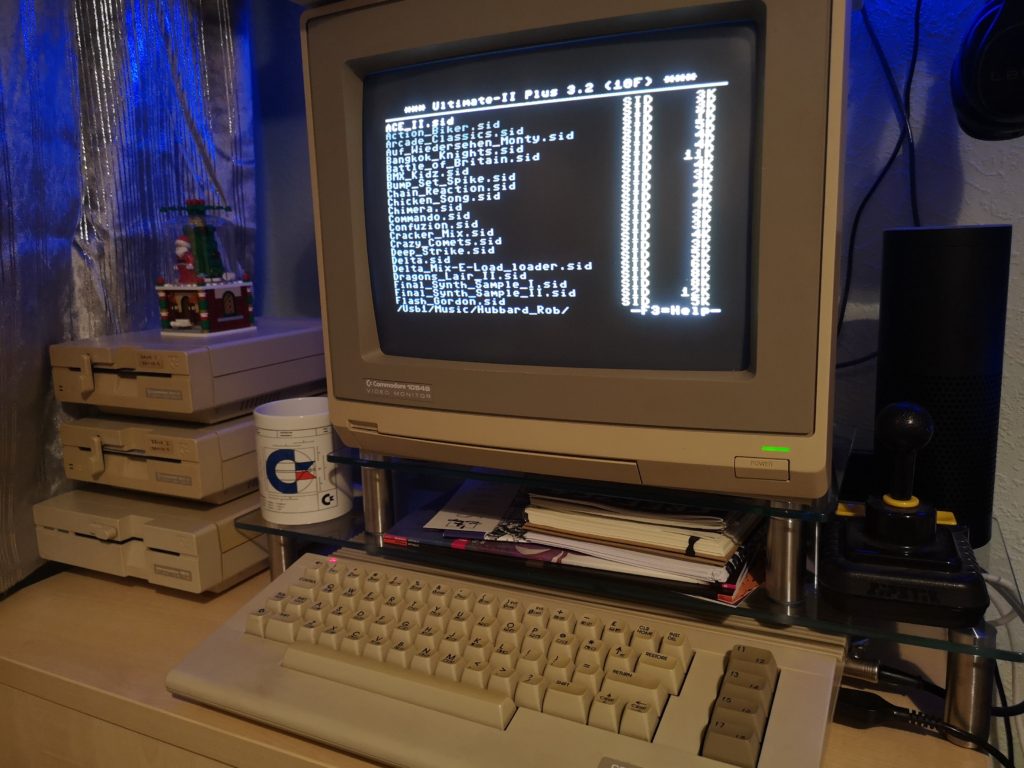
The files on my C64 after being transferred across


The file transfers are really fast, taking just a few seconds so I find this a really quick and convenient way of getting new software onto my C64 without constantly faffing about with a flash drive. I definitely won’t be unplugging that USB drive from my 1541 Ultimate anytime soon now!


Reservations

One other thing you should probably do is to ‘reserve’ your C64’s IP address on your router. Most routers offer the facility to do this. This will ensure that every time you turn your C64 on it will pick up the same IP. If you don’t, it will likely get a different one each time and you will need to change the connection info in the FTP software.


Apparently you can also connect to the 1541 Ultimate using Telnet and use it for stuff life swapping disk images on the fly for multi-disk games. I might explore this in the future but I doubt it would be something I’d use much, unlike transferring files across which I do on a regular basis. Anyway I hope this has helped you to network your Commodore 64. If you have any questions or comments please do get in touch.