Lyonsden Blog

Category - Reviews

The C64 Collectors Guide to Mastertronic Kickstarter Bundle

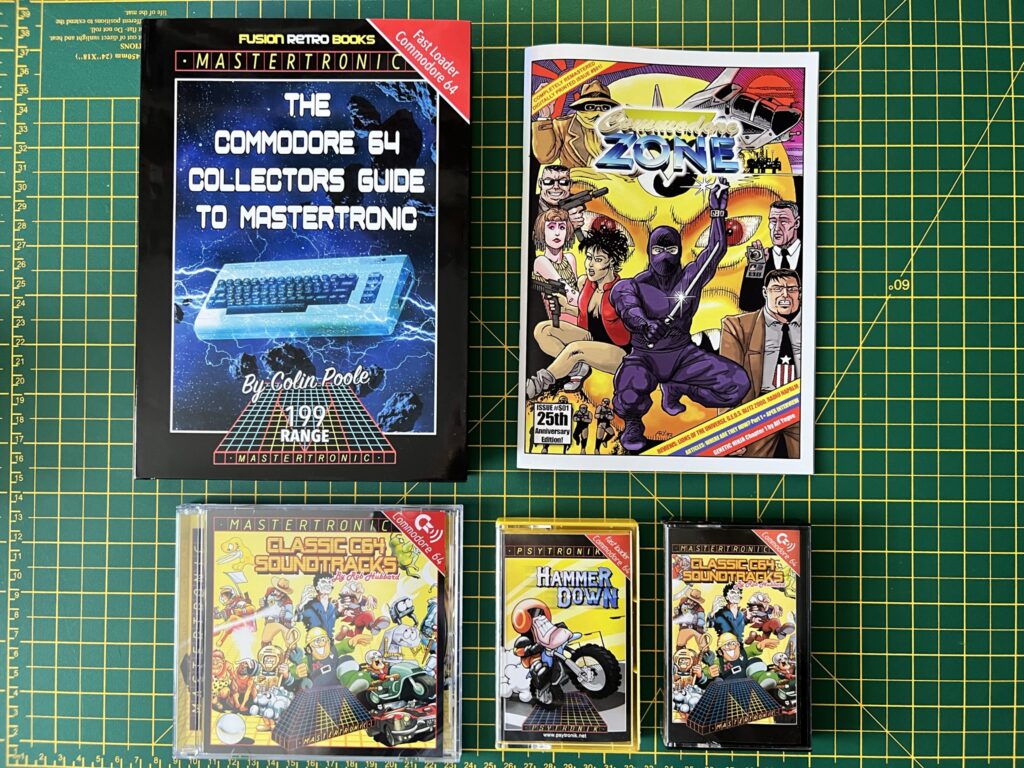
This is a compilation of mini reviews of stuff I got with ‘The Commodore 64 Collectors Guide to Mastertronic’ on Kickstarter a couple of months ago. It includes the book itself, ‘Hammer Down’ C64 game, ‘Classic C64 Soundtracks’ Tape/CD and a 25th Anniversary remaster of the first edition of Commodore Zone magazine.


Collectors Guide to Mastertronic

What I received in my bundle.


As you can see in the photo above I received quite a few items in the bundle. The book, a reproduction Commodore Zone magazine, Classic C64 Soundtrack CD and Cassette tape and a C64 game on cassette; Hammer Down. ‘Didn’t he do well!’ as Brucie used to say.


Collectors Guide to Mastertronic

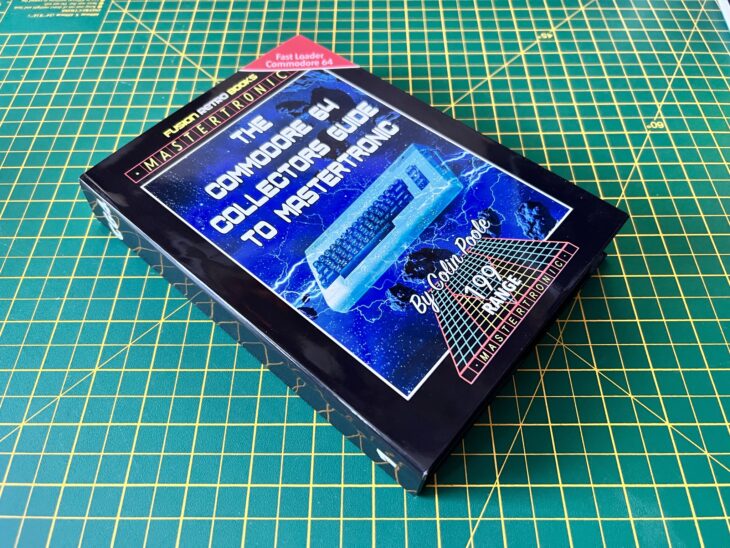
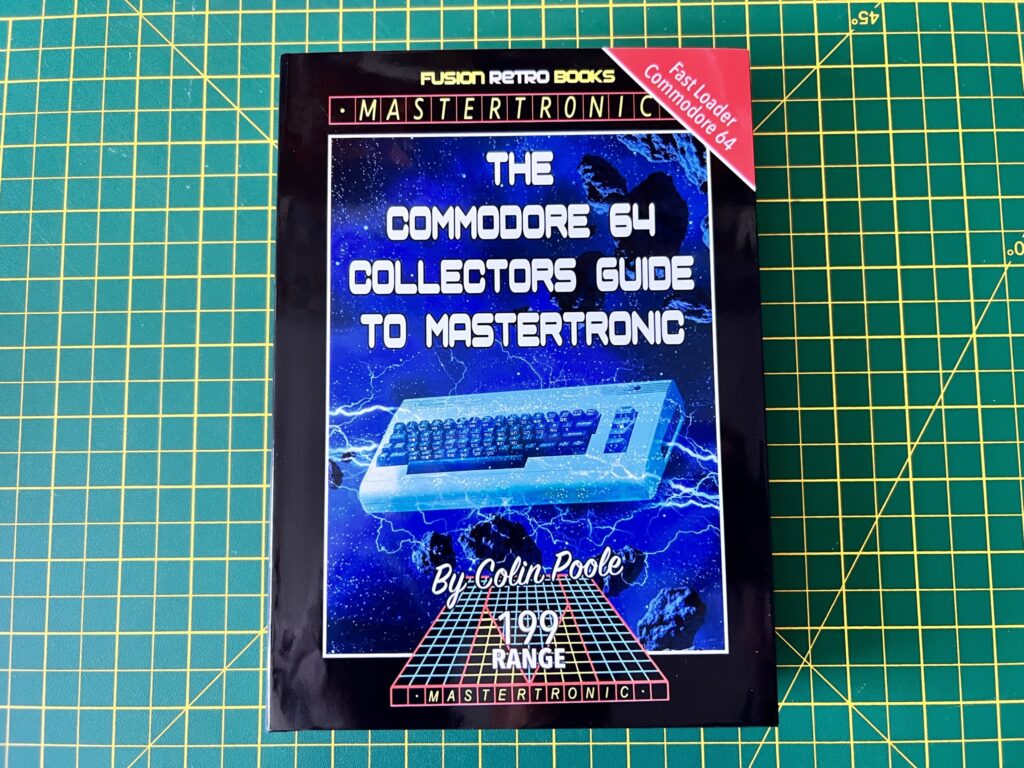
The Commodore 64 Collectors Guide to Mastertronic.


The hardback book itself is a weighty tome, coming in at over 500 pages complete with glossy protective jacket. The cover takes its styling cues from the Mastertronic £1.99 range of its subject matter and is visually very appealing.


Collectors Guide to Mastertronic

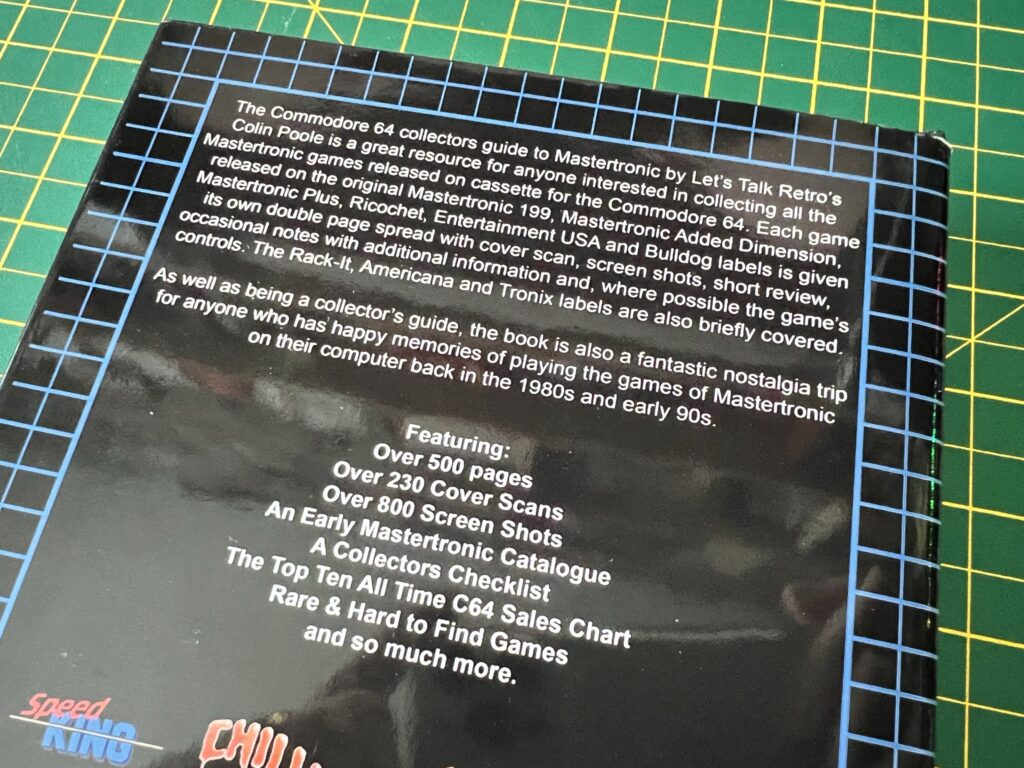
The back cover.


Inside the Collectors Guide to Mastertronic Book

Inside there is coverage of every Mastertronic game ever released for the Commodore 64 alongside screenshots, game descriptions and mini reviews. It’s basically an encyclopaedia of everything Mastertronic for the C64. The presentation of the book is lovely with full colour box art and screenshots on glossy paper with a real premium feel to everything. The original Zzap! 64 scores for the games are also included where they exist (they may be present for every game but I certainly haven’t read every page in the book to check).


This slideshow requires JavaScript.


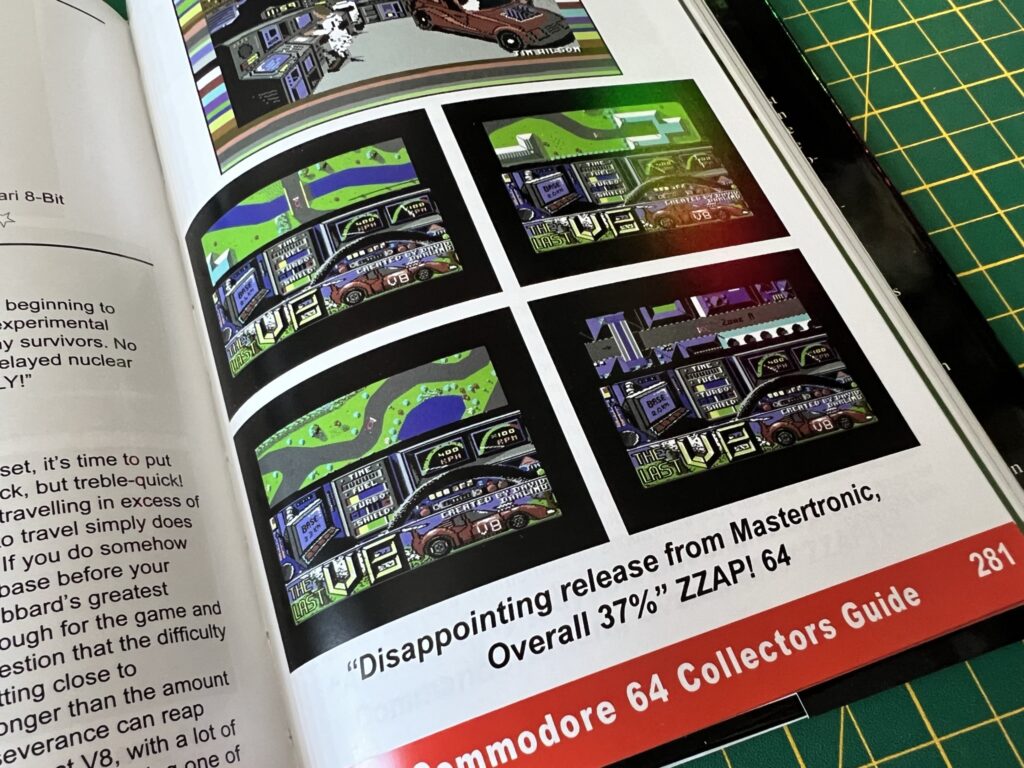
I’ve had a lot of fun just randomly browsing through the book, stopping when a particular game catches my eye. I was quite shocked to discover that one of my favourite Mastertronic titles scored a measly 37% in Zzap! 64. I’d have given it at least double that score as it entertained me for many a rainy Sunday afternoon as a kid until I finally completed it.


Collectors Guide to Mastertronic

Shockingly low score for The Last V8!


Although I got the Collectors Guide to Mastertronic book as part of a Kickstarter campaign, it is available to be purchased separately from the Fusion Retro Books website. If you want to pick yourself up a copy don’t forget to use my code ‘LYONSDENBLOG’ to get yourself a whopping 15% off the price.


Collectors Guide to Mastertronic – C64 Soundtracks

Also included in the bundle was a collection of excellent C64 SID soundtracks on both CD and Cassette. Each contains exactly the same tracks but I wanted both just so I could play them on both my Hi-Fi and Walkman. There are 13 tracks in total and most are native SID tracks but there are also a couple of orchestral versions at the end taken from the 8-bit Symphony album.


This slideshow requires JavaScript.


Just like the book, the design of the albums is based on typical Mastertronic releases from the past. This is especially true for the cassette version which would look right at home amongst my collection of classic games.


This slideshow requires JavaScript.


The cassette features full colour labels and a J-card complete with track listings. The recording, whilst on a standard ferric cassette, sounded terrific and has been completed to a high standard.


This slideshow requires JavaScript.


The CD is a thing of beauty too. The music has been recorded onto one of those vinyl record style black CD’s which makes it look like a diminutive 7″ single. It features an expanded version of the cassette artwork on the front and needless to say it also sounds fantastic.

Sadly I don’t think the soundtracks are available to buy anywhere now as they were limited edition runs.


Hammer Down Game

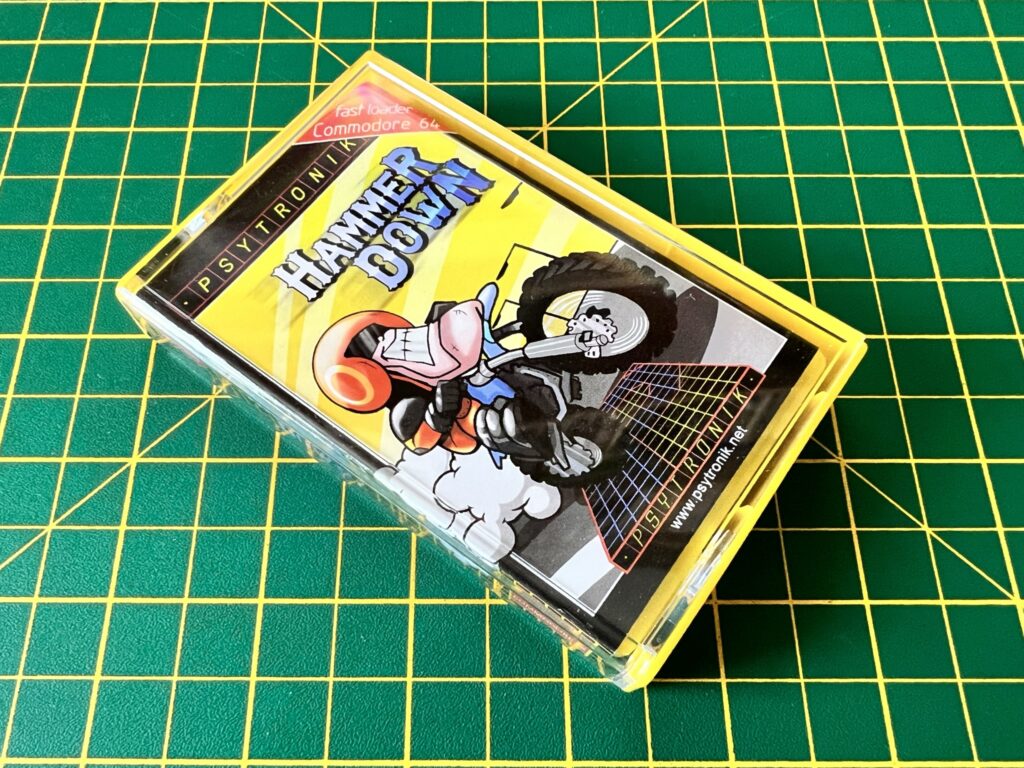
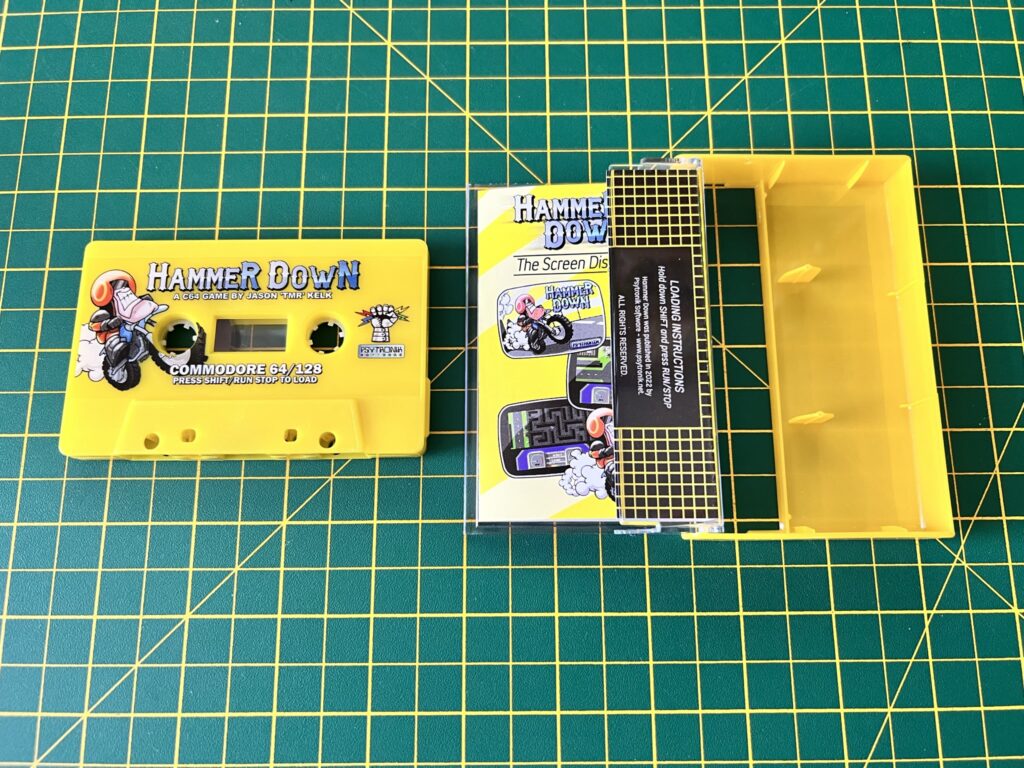
Also included in my Collectors Guide to Mastertronic bundle was a new original game for the C64 called ‘Hammer Down’. The game comes on cassette with a suitably Mastertronic style cover. Look carefully though and you will see that it’s actually made by Psytronik, the prolific modern day C64 game publisher.


Hammer Down C64.

Hammer Down cassette case.


The yellow cassette is very eye-catching and has colour artwork screen-printed directly onto it and looks fantastic.


Hammer Down C64.

Hammer Down tape and cassette case.


Likewise the yellow case and full colour J card complete with screenshots looks equally great.


Hammer Down C64.

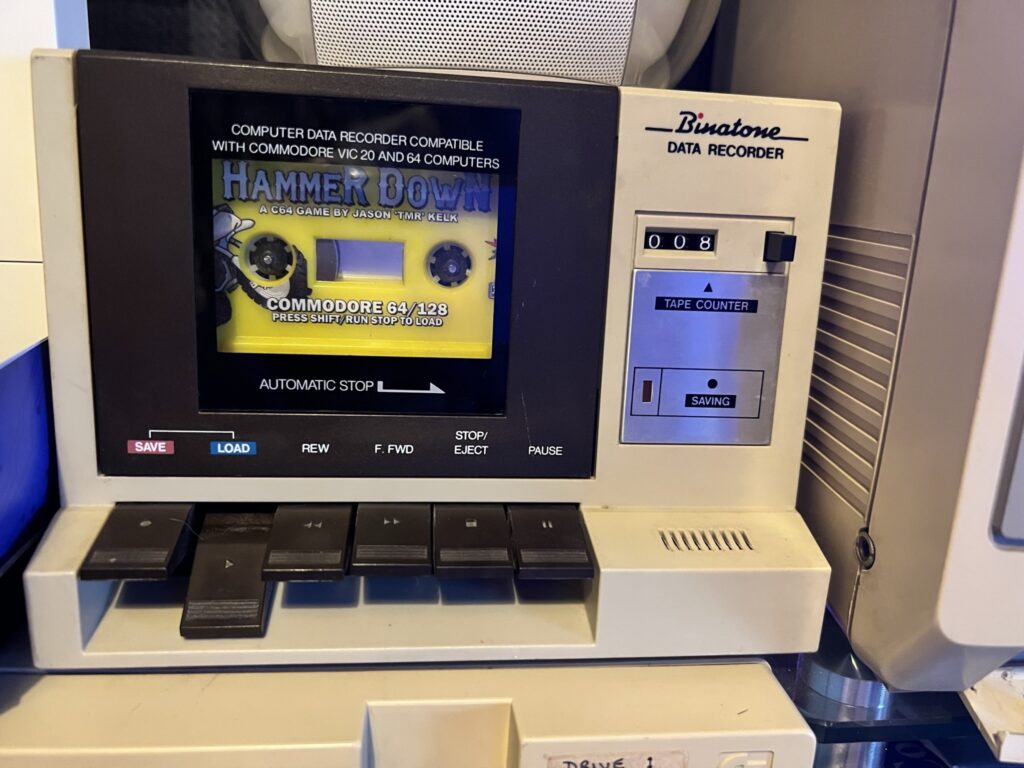
Binatone Data Recorder – Loading…


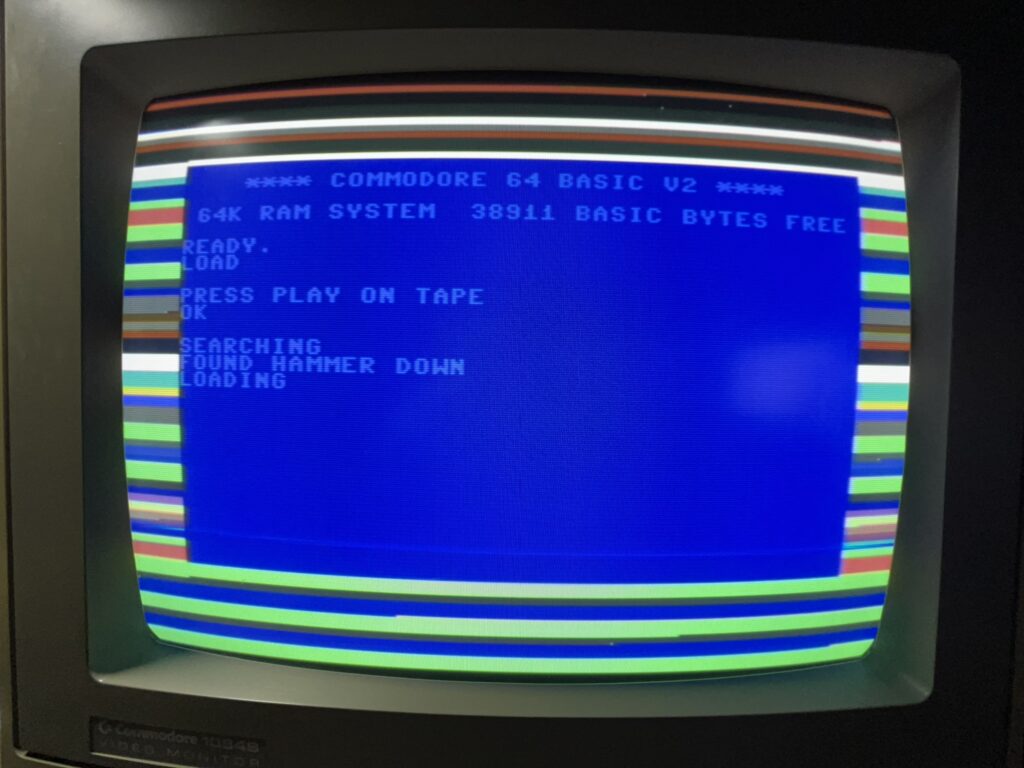
The game takes a few minutes to load but during that time you are entertained by a very catchy SID tune and some great game artwork.


Hammer Down C64.

Press Play on Tape.


Hammer Down C64.

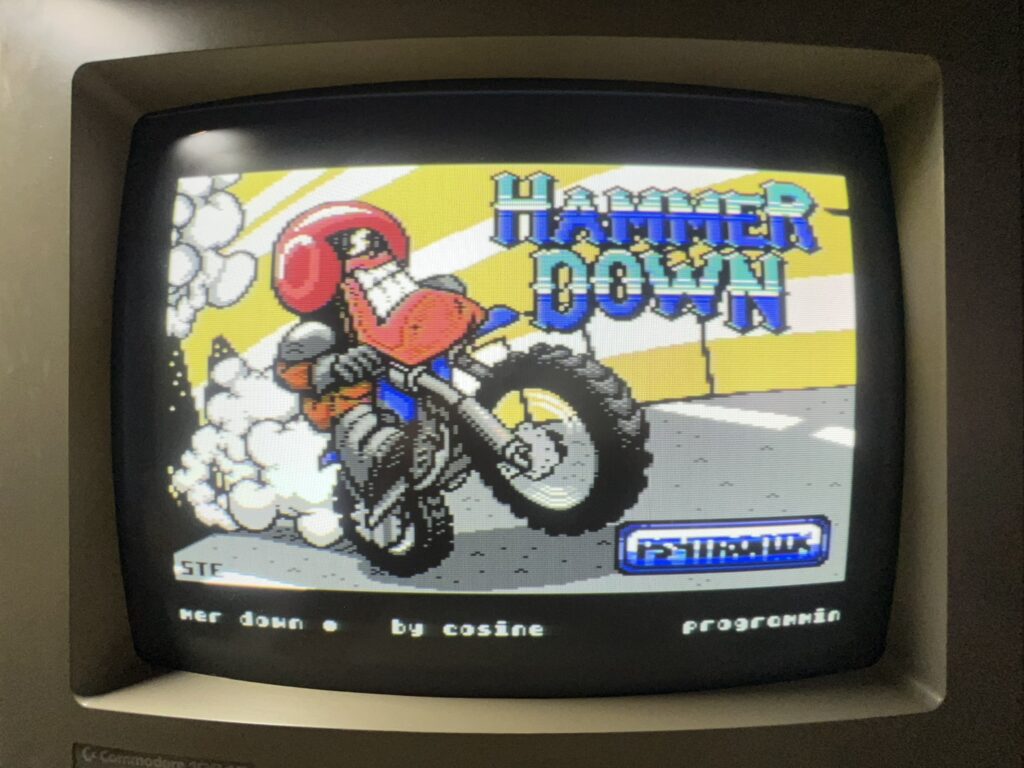
Hammer Down Loading Screen.


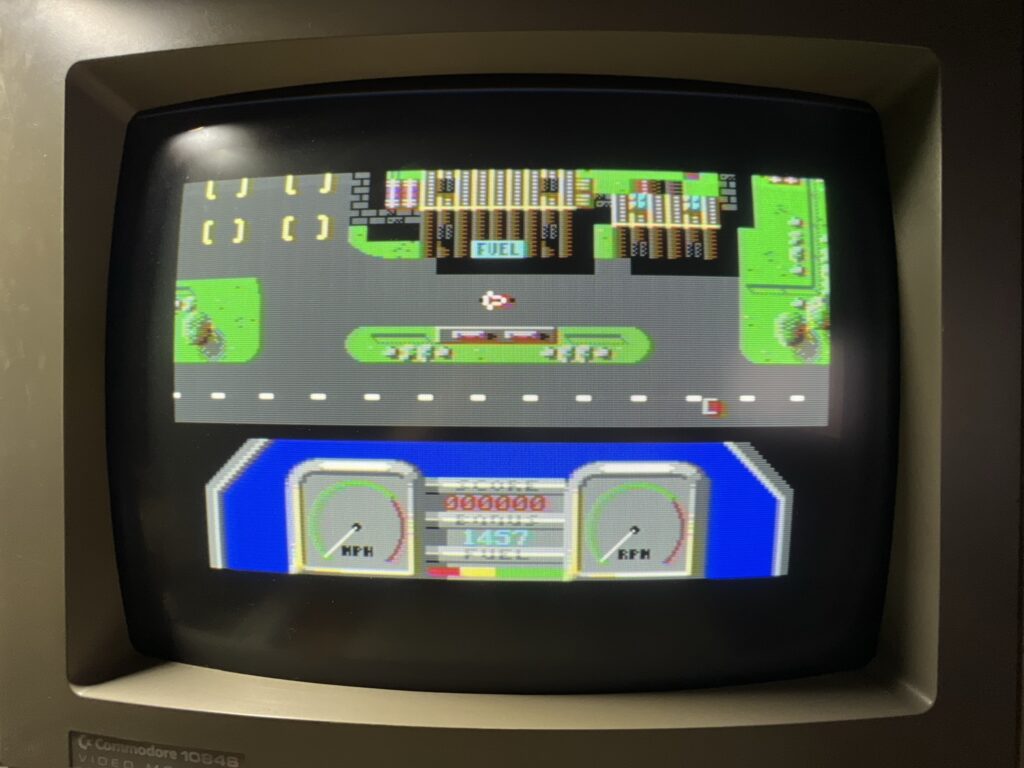
The game itself is like a cross between ‘The Last V8’ and ‘Action Biker’ which is no bad thing. The gameplay side of things comes from ‘Action Biker’ whilst the top-down view (rather than isometric) comes from ‘The Last V8’.


Hammer Down C64.

Hammer Down Title Screen.


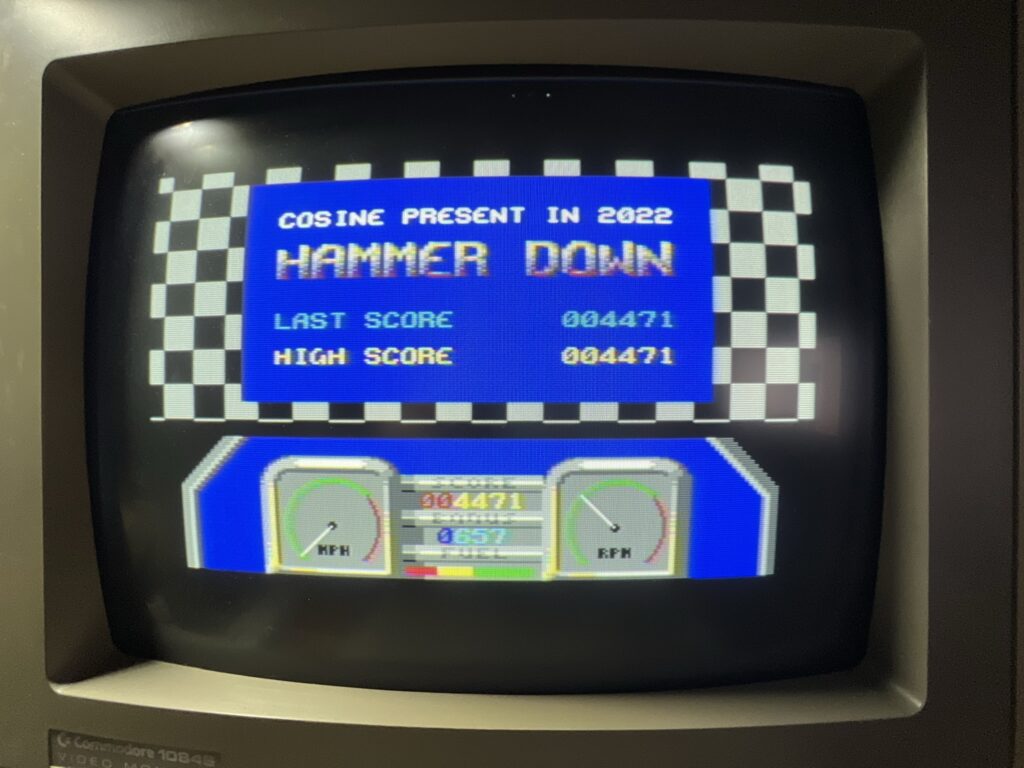
Once the gamer finishes loading you are greeted with a neat ‘chequered flag’ title screen along with another great piece of SID music. This screen also displays your high score and the games credits. A really nice touch here is that the MPH and RPM dials become VU meters with needles that bounce away in sync to the music.


Hammer Down C64.

Never forget where the petrol station is!


You play as a motorcycle courier who must ride around and collect all the packages dotted around a small town. Of course it’s never quite that simple so in time honoured tradition you have 3 lives and will lose one if you hit an object or run out of fuel. Your fuel level drops at quite an alarming rate so you need to keep a close eye on it. Thankfully a warning will sound when the level gets critically low. Fill-ups are free so it really pays to keep your tank topped up.


Hammer Down C64.

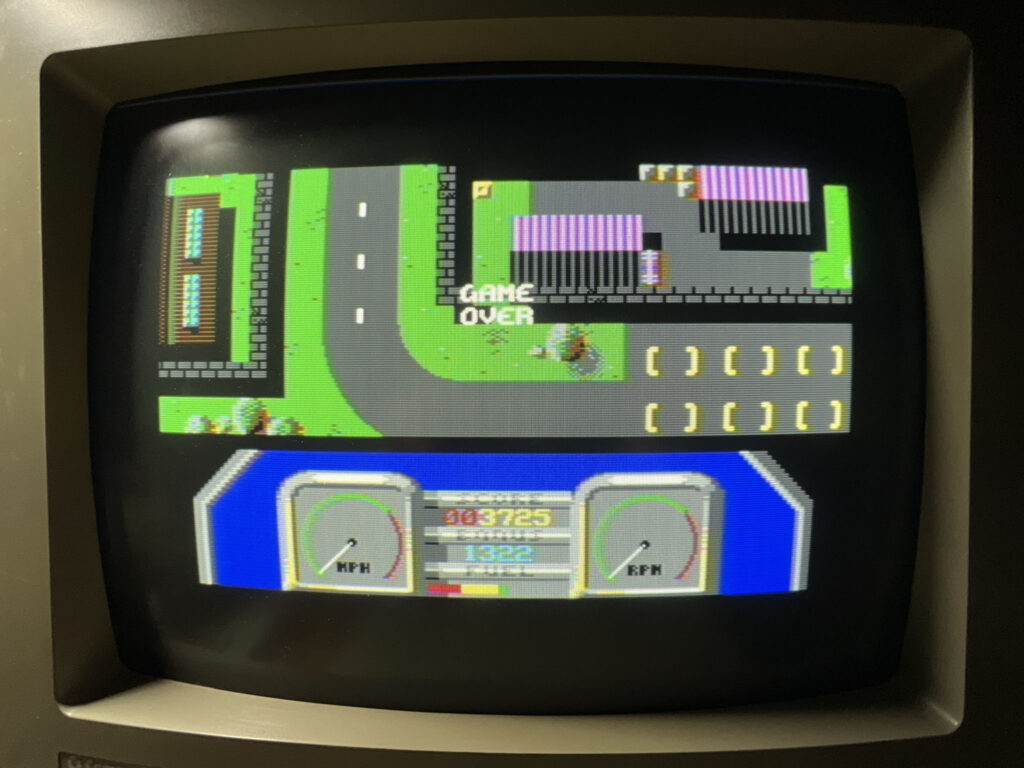
GAME OVER – Expect to be seeing this screen a lot!


Like the games upon which it is based, controlling the bike in Hammer Down is quite tricky and takes some getting used to and navigating the scenery can be tough. The main problem is discerning what elements of the environment are fatal if touched and those you can get away with. For example there are thick black areas around walls and buildings which I thought would kill me. After a few minutes I realised they were shadows and I could safely drive through them. Conversely sometimes elements I thought were road markings turned out not to be resulting in a life lost. Basically a lot of trial and error is required but that’s all part of the fun.

Another skill that needs to be mastered is the U-turn! Your bike has no reverse so if you head down a dead end (which you must do to collect many of the packages) a U-turn is your only option! The bike has a pretty small turning circle but it can still be extremely tricky to turn around without hitting something!

There’s limited sound effects in the game, being mainly limited to explosions, a low-fuel warning/refuelling ‘glug’ and a parcel pickup chime. However the SID music that plays during the game more than makes up for this. It’s a terrific rendition of ‘The Return of the Los Palmas 7’ by Madness. They were one of my favourite bands back in the 80’s so this added greatly to my enjoyment of the game. Obviously your mileage may vary here!
All in all this is a terrific little game and I’m really glad I chose to add it to my Kickstarter bundle. I highly recommend it, especially if you are a fan of either ‘The Last V8’ or ‘Action Biker’. It definitely has that ‘one more go’ appeal as you strive to collect a few extra parcels on your next round and beat your high score.

If you would like to get yourself a copy Psytronik will be selling it on their website soon.

Commodore Zone 25th Anniversary Edition

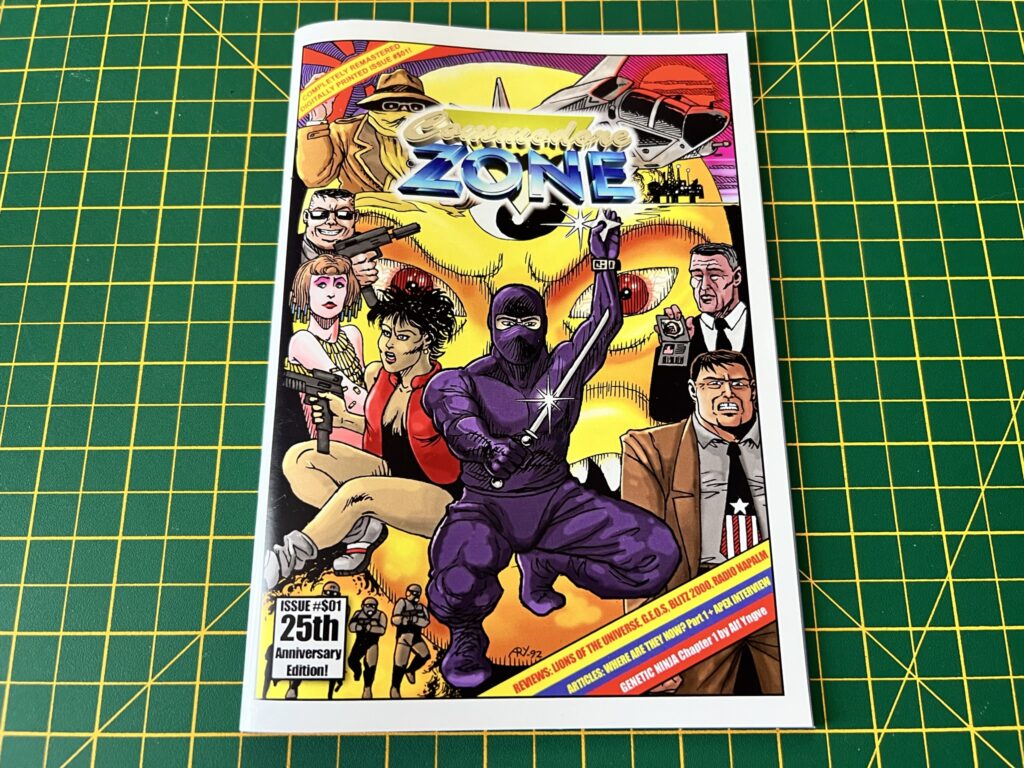
Last but by no means least I picked up a ‘remastered’ 25th Anniversary Edition of the first issue of Commodore Zone magazine. For those unfamiliar with Commodore Zone it was a fan made A5 magazine produced in the UK in the mid 1990’s and ran for 16 issues.


Commodore Zone

Commodore Zone Remastered edition.


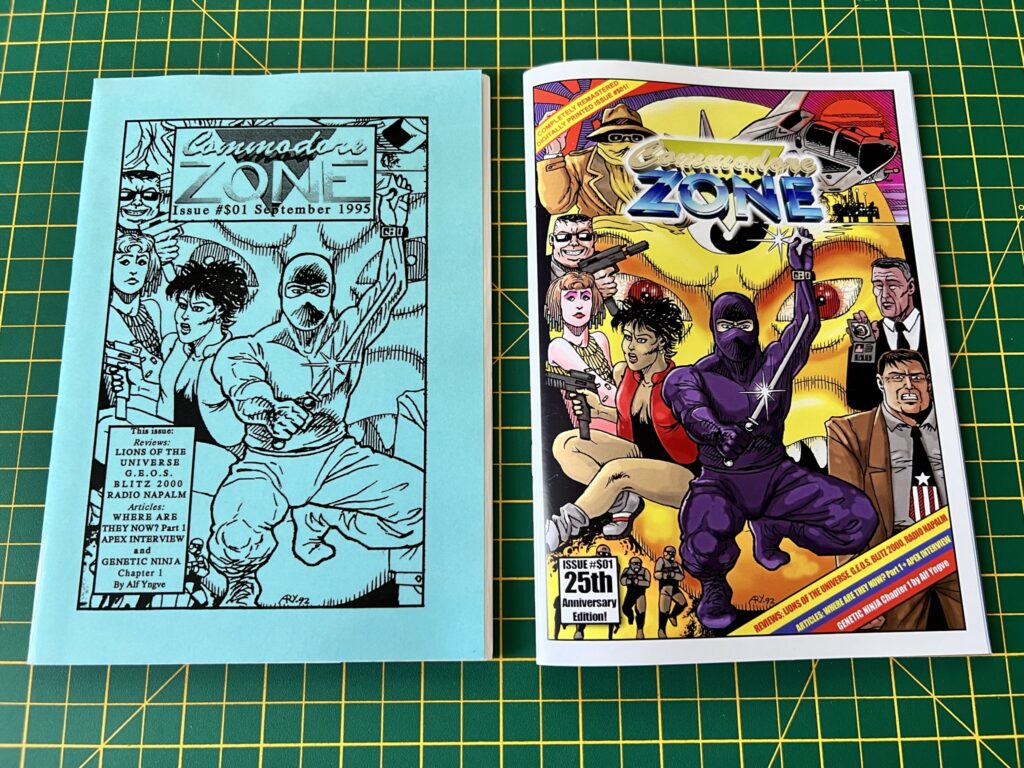
The original magazine was completely black and white, even down to the cover. Access to a colour printer was a luxury most of us couldn’t afford back then!  The photo below shows the original magazine from September 1995 on the left for a direct comparison.
 

Commodore Zone

Original and remastered edition side-by-side.


Clearly a lot of work has gone into this as you can see from the comparison photos below. It’s not just the addition of colour but also many of the pages have been completely redesigned to incorporate a more modern look and feel. The guys that did this have done a tremendous job and I really hope that they give the same treatment to the rest of the back-catalogue in the near future.


This slideshow requires JavaScript.


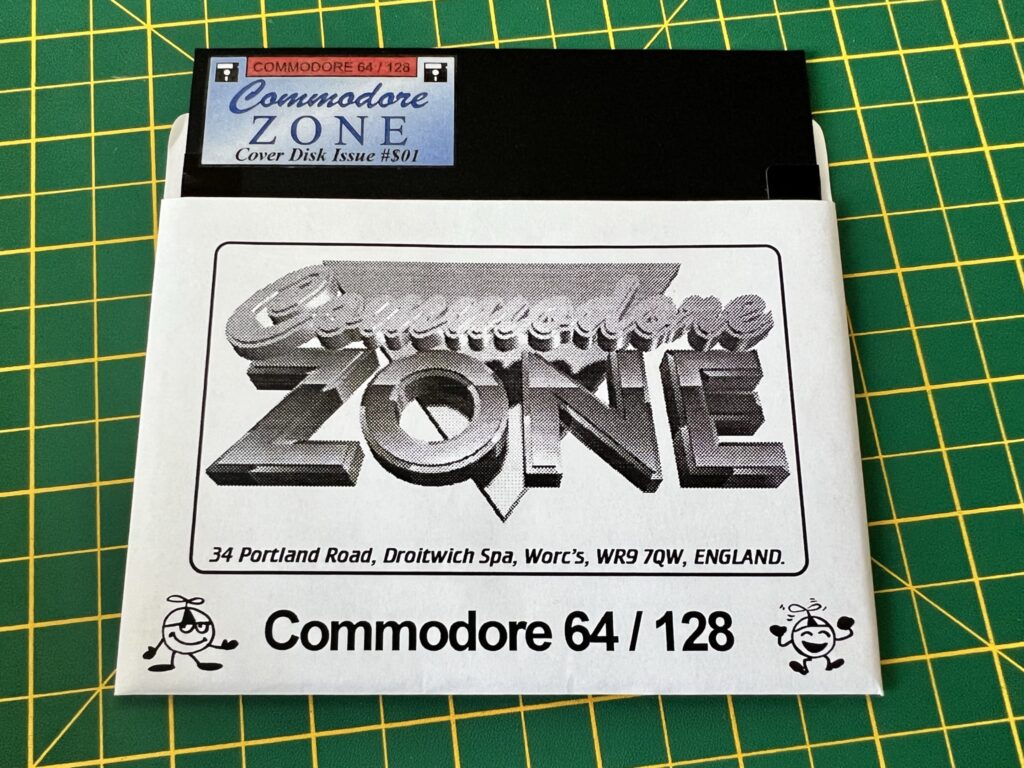
The only thing missing is the coverdisk but as I have all the original discs already that’s no great loss. Here’s a photo of the (double-sided) disk I received with issue one 27 years ago!


Commodore Zone

The original coverdisk from issue 1.


Sadly printed versions of Commodore Zone aren’t available to purchase anywhere today (unless you get lucky on eBay). However you can buy a CD containing scanned copies of all 16 magazines along with .d64 versions of all the coverdisks here.

The A500 Mini Review

Despite the fact that I already own a real A500 an A1200 and a CD32 I still pre-ordered ‘The A500 Mini’ as soon as they were announced, such is my love for these old Commodore machines. I also picked up both ‘The C64 Mini’ and Maxi despite owning a VIC20 and C64 which they both emulate. I suppose even if I never use them much they’re still really cool devices to own and display but the truth is I just can’t resist these (or any) sort of gadgets.

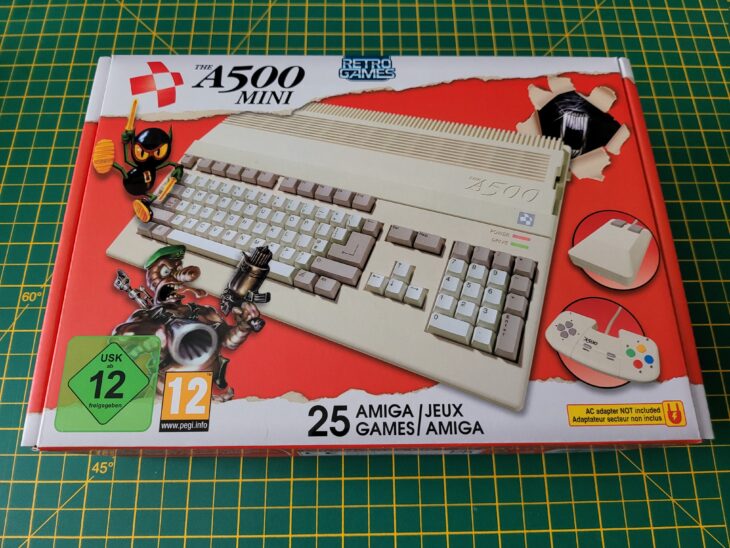
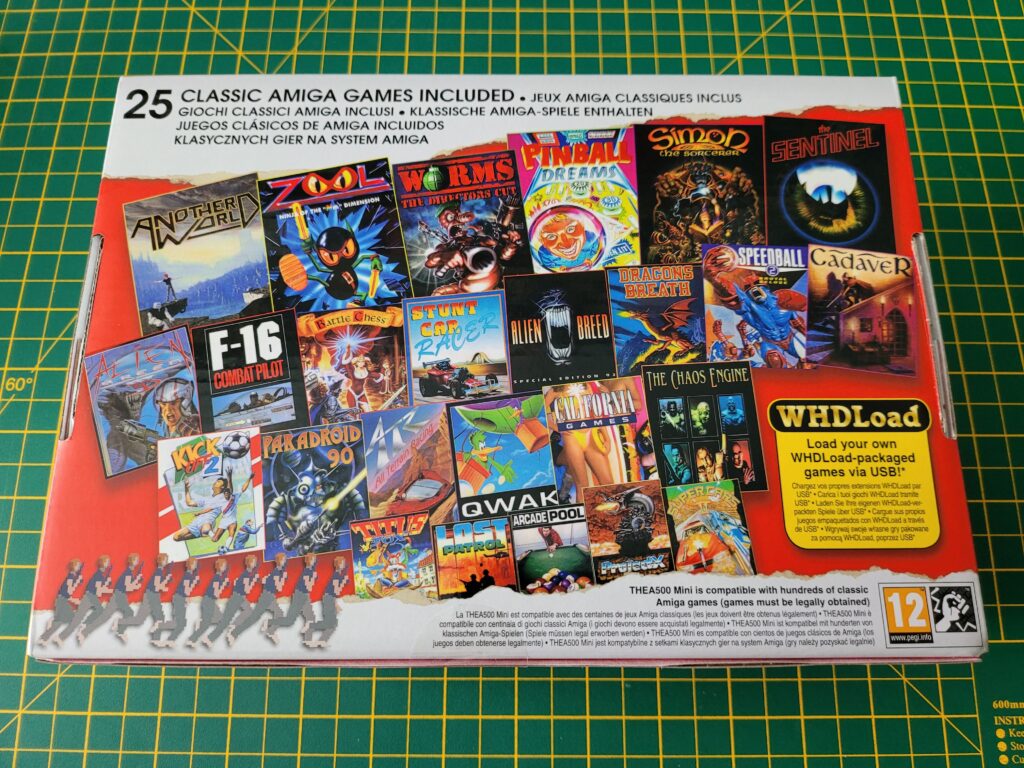
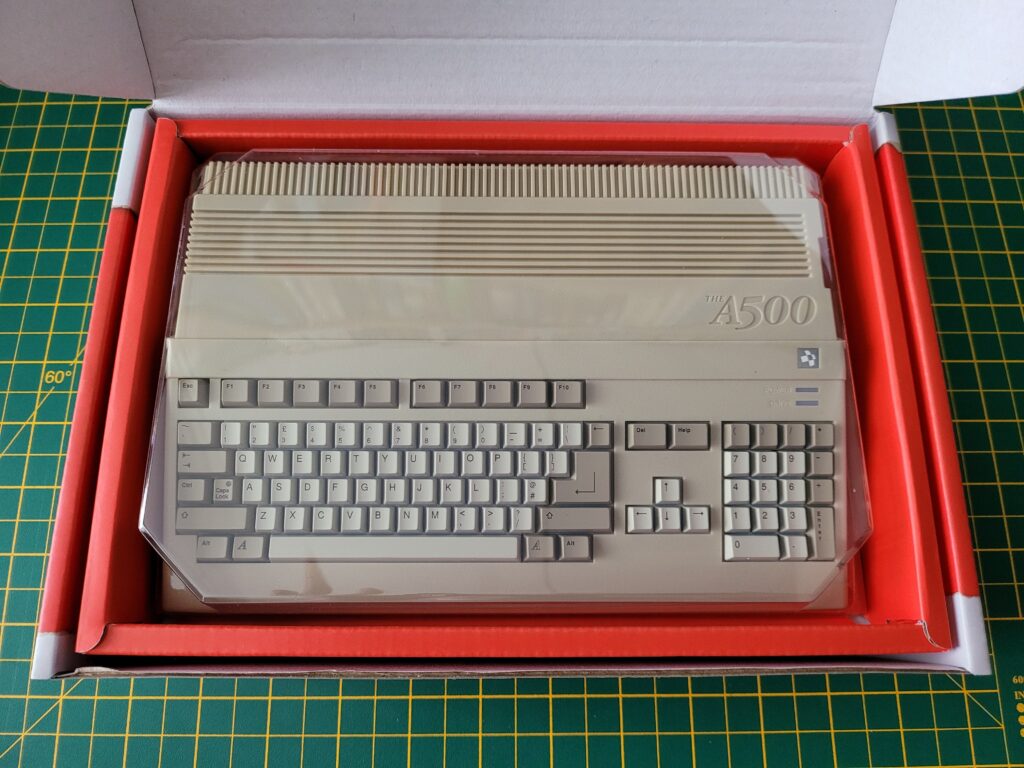
First impressions were terrific. The A500 Mini came in a very attractive and colourful box adorned with pictures of the computer and peripherals on the front and a gallery of the included games on the back. The box was surprisingly heavy too, something I definitely wasn’t expecting.


The A500 Mini

Back of The A500 Mini Box.


The A500 Mini comes with the following 25 games pre-loaded:

Alien Breed 3D
Alien Breed: Special Edition’92
Another World
Arcade Pool
ATR: All Terrain Racing
Battle Chess
Cadaver
California Games
The Chaos Engine
Dragons Breath
F-16 Combat Pilot
Kick Off 2
The Lost Patrol
Paradroid 90
Pinball Dreams
Project-X: Special Edition 93
Qwak
The Sentinel
Simon the Sorcerer
Speedball 2: Brutal Deluxe
Stunt Car Racer
Super Cars II
Titus The Fox: To Marrakech And Back
Worms: The Director’s Cut
Zool: Ninja Of The “Nth” Dimension


What’s in the Box?

Opening up the box revealed the A500 mini itself, an optical USB Tank mouse, CD32-esque USB controller, quick start guide, HDMI cable and a USB C power cable.


The A500 Mini

The A500 Mini (with plastic cover).


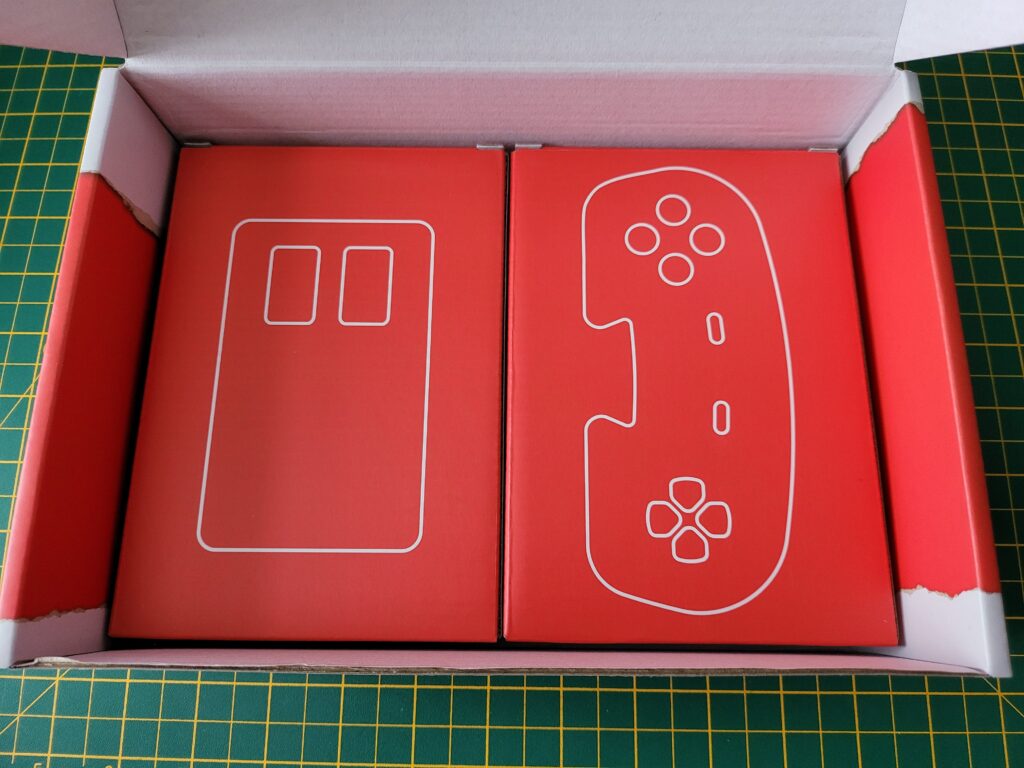
The mouse and controller were tucked away under the A500 Mini inside their own little boxes.


The A500 Mini

Controller and Mouse Boxes.


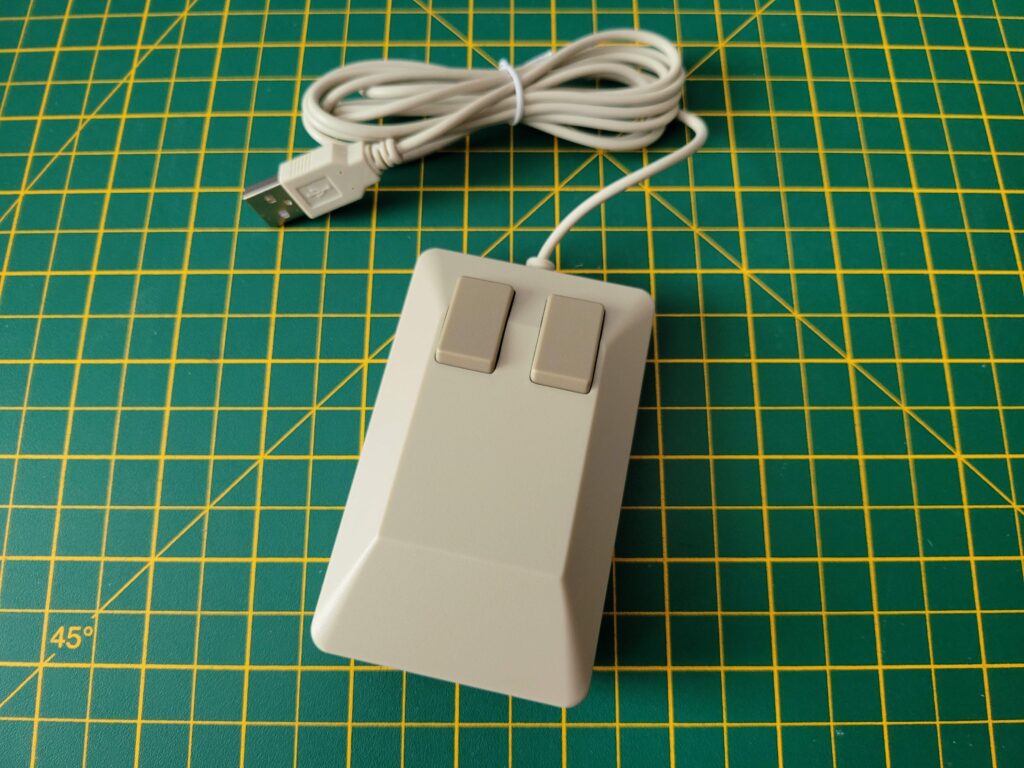
The tank mouse is a perfect, slightly smaller replica of a real Amiga tank mouse.


Tank Mouse

The A500 Mini Tank Mouse.


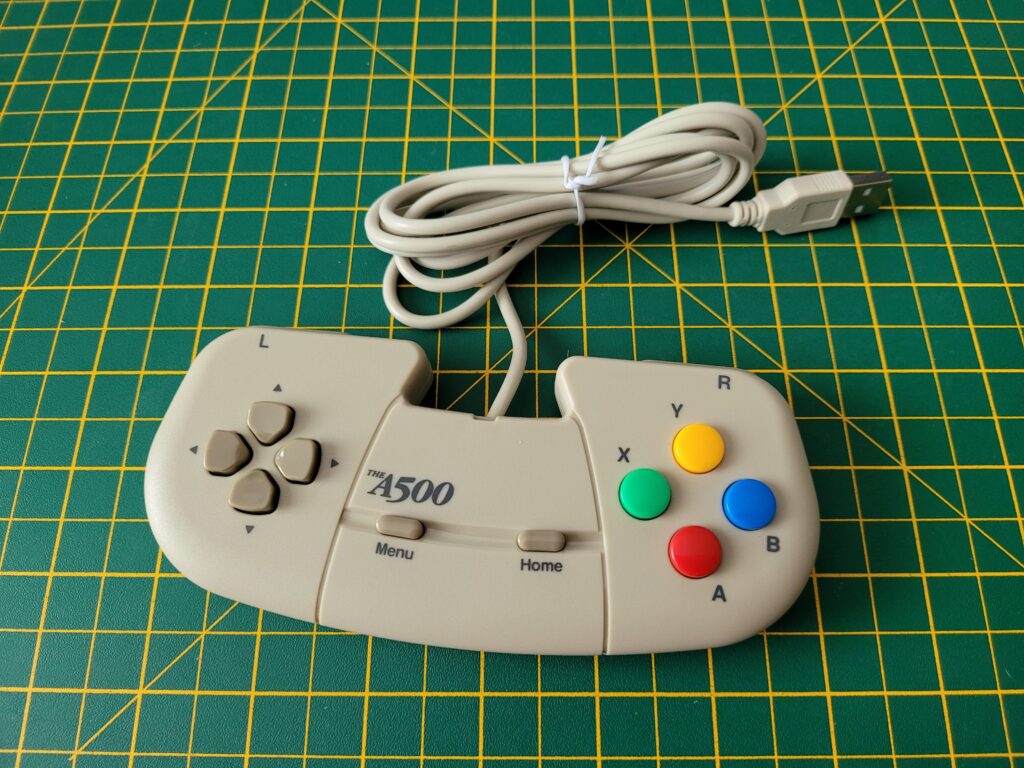
The design of the gamepad was clearly inspired by the CD32’s controllers.


The A500 Mini

The A500 Mini Controller.


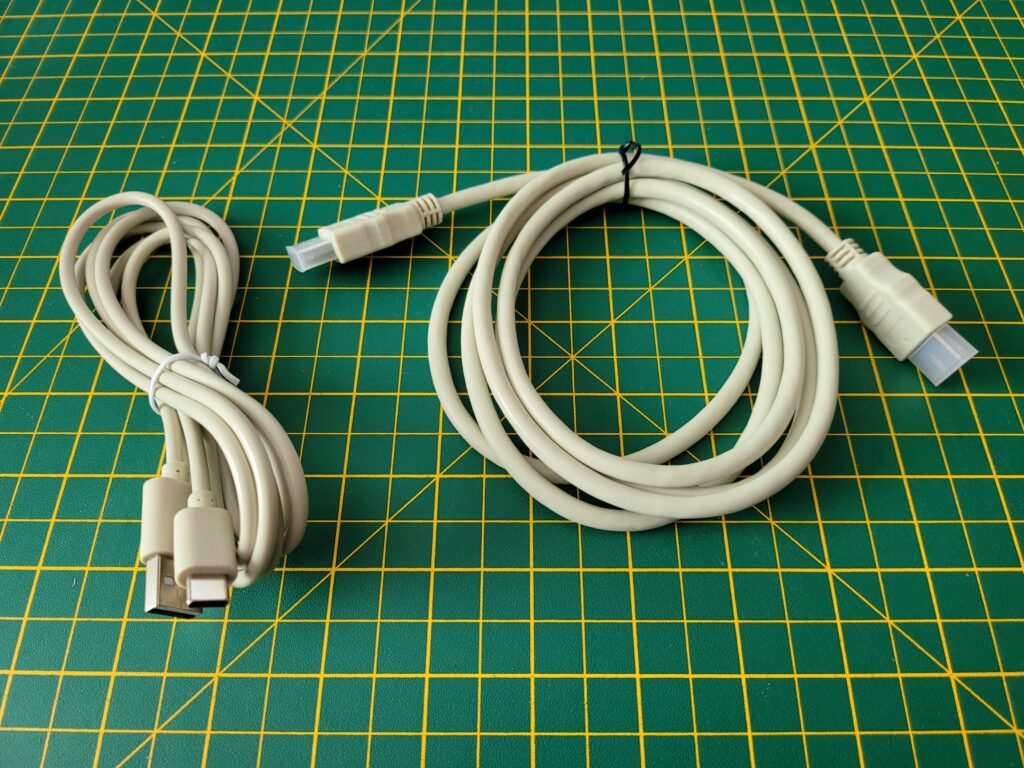
A suitably beige USB C power cable and HDMI cable are also included. I have to admit it was nice to see the adoption of USB C for the power as most of my modern day kit uses this standard now. You have to provide your own USB power socket but that was to be expected – most of us have plenty of these lying around.


Cables

USB C Power and HDMI Cables.


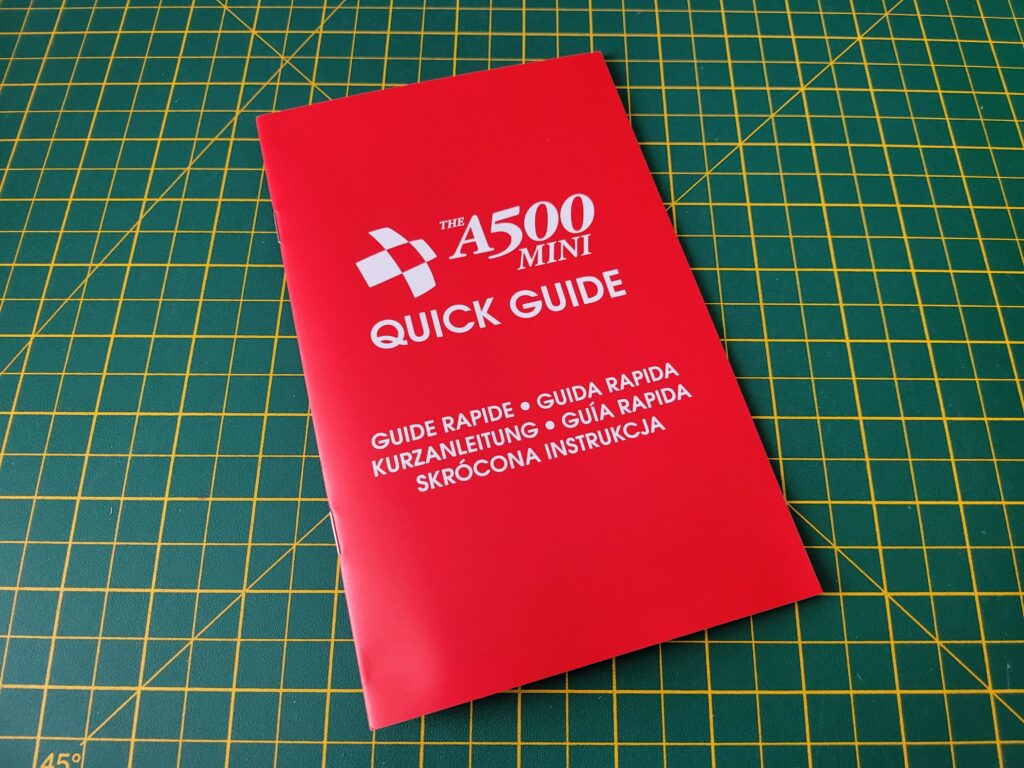
The Quick guide is literally just that. Strip away all the pages devoted to other languages, health and safety gubbins and a list of the package contents and you are left with a meagre 2 pages of instructions. The full 48 page English instruction manual is provided online – here’s the URL given in the quick guide. For a retro product I did find this disappointing and would much rather have had all of this info in a nice spiral bound or hardback manual. Hopefully they release this as an optional extra shortly like they did with the ‘The C64 User Manual‘.


The A500 Mini Guide

The A500 Mini Quick Guide.


A Closer Look at the A500 Mini

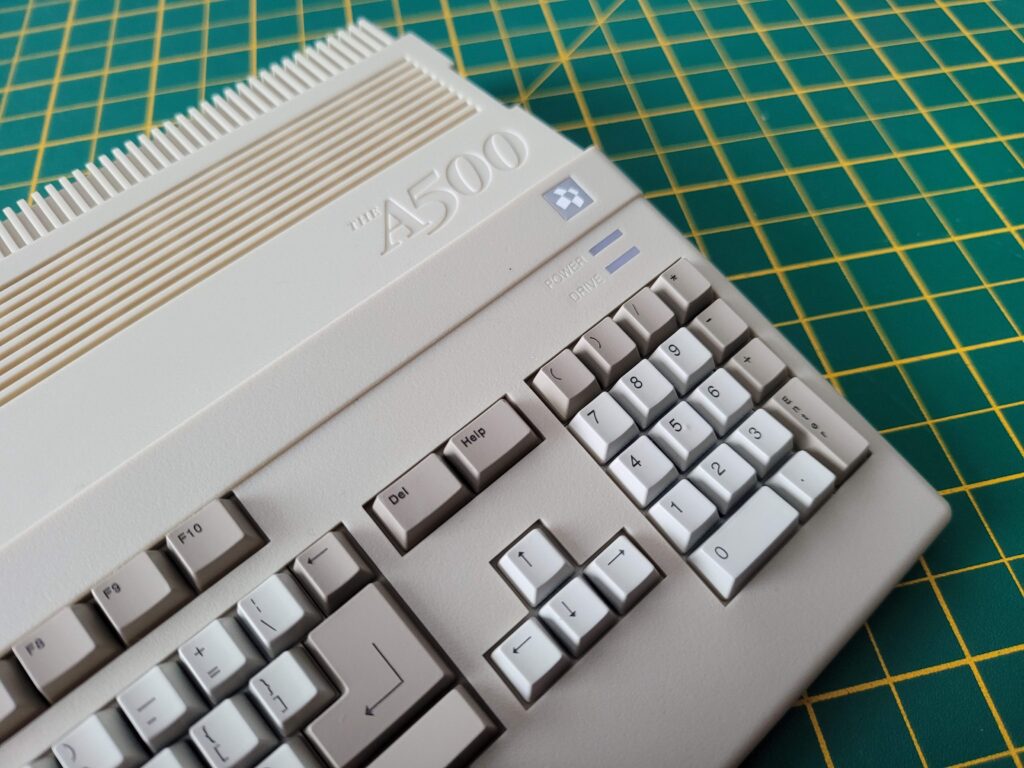
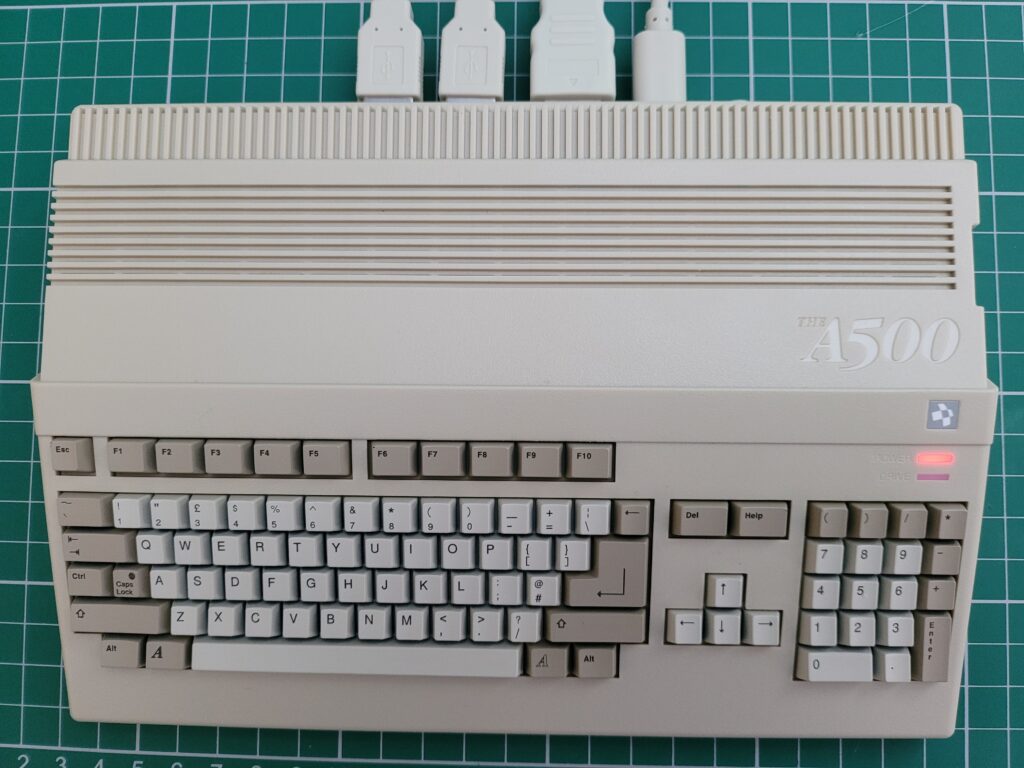
From the photos you could certainly be forgiven for mistaking the A500 Mini for a real A500 especially if you last used one in the 80’s or 90’s. Obviously it doesn’t have the Commodore logo on display but it’s only really when you see the USB ports on the back that you realise something isn’t quite right.

If you try to press any of the keys you will quickly realise something else isn’t right too. Just like with The C64 Mini the keyboard is completely non-functional and just for show. It’s certainly very convincing visually though with each key perfectly formed!


This slideshow requires JavaScript.


The attention to detail on the case is amazing and really makes me wonder why I’ve been waiting for four years now for my ‘Compatible A500 case’ to be made!
 

The A500 Mini

Spot the subtle differences from a real A500.


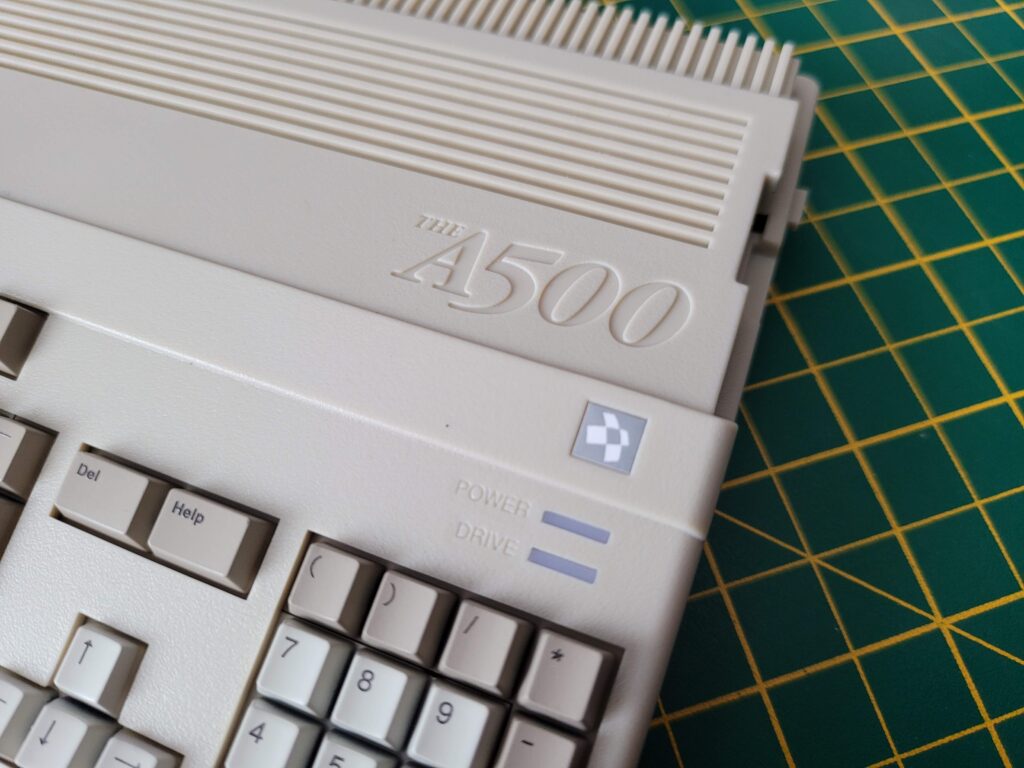
The case displays the wording ‘The A500’ rather than Amiga and their own logo rather than the familiar Commodore ‘Chicken head’ which is obviously for copyright reasons.


The A500 Mini

Those keys look so real!
 

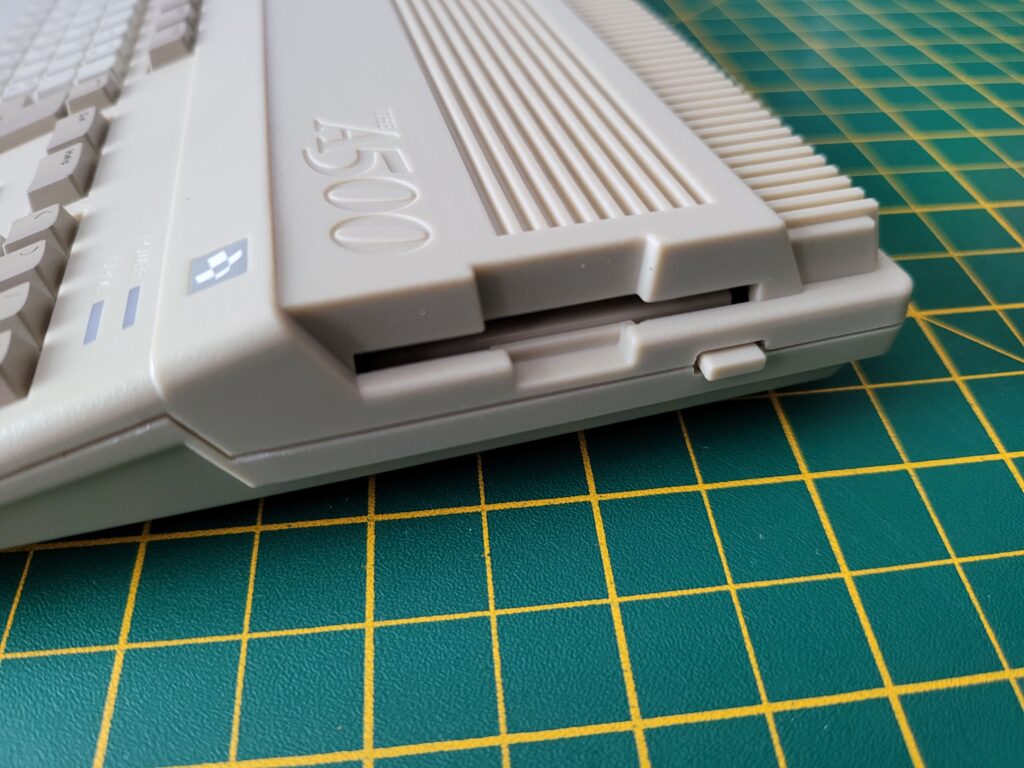
The floppy drive and eject button are very convincing but totally non-functional. Its a real shame they didn’t incorporate an SD card slot for expanding your game library here. At the very least they should have put an extra USB port here so we could insert our USB stick like it was a floppy disk…


The A500 Mini

Close-up of the non-functioning ‘floppy disk drive’.


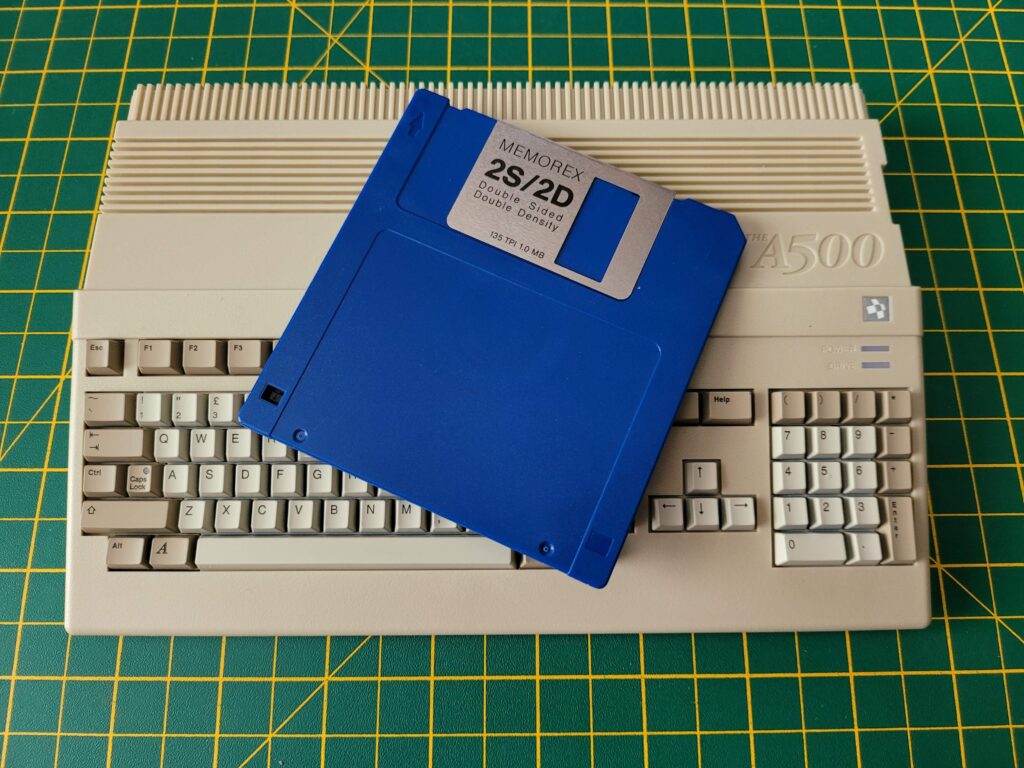
The diminutive scale of The A500 Mini becomes instantly apparent when compared to a 3.5″ floppy disk!


The A500 Mini

A500 Mini Compared to 3.5″ Floppy Disk.


Ports

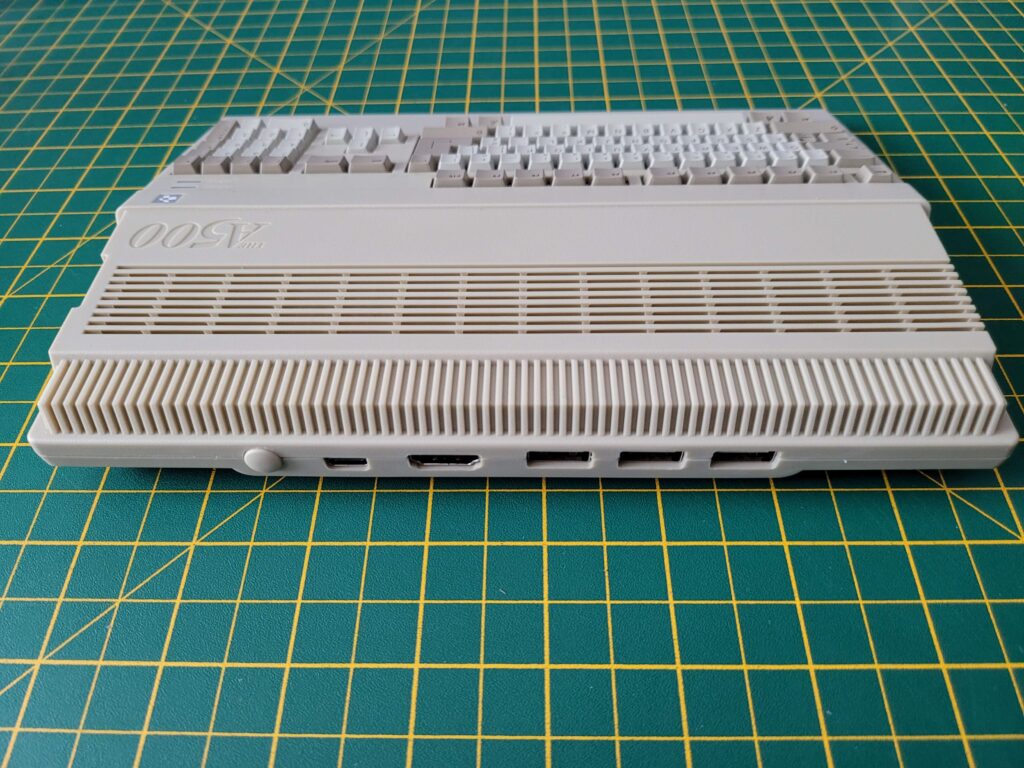
Unlike the original A500 the The A500 Mini come with a very modest selection of ports comprising USB-C for power, a full-size HDMI for video and 3 USB ports for the mouse, controller and memory stick with extra games on. There’s also a power switch included on the back.

I really think there should have been an extra USB port included here for attaching a USB keyboard. If all you are interested in is arcade style games then you’ll be fine. However if simulation games are more your thing (like the Microprose games that needed keyboard overlays) then you are going to need a USB hub to add a keyboard which is going to make for a very messy setup indeed.


The A500 Mini

Connectivity: From left to right, Power button, USB-C power socket, HDMI Video, 3x USB ports.


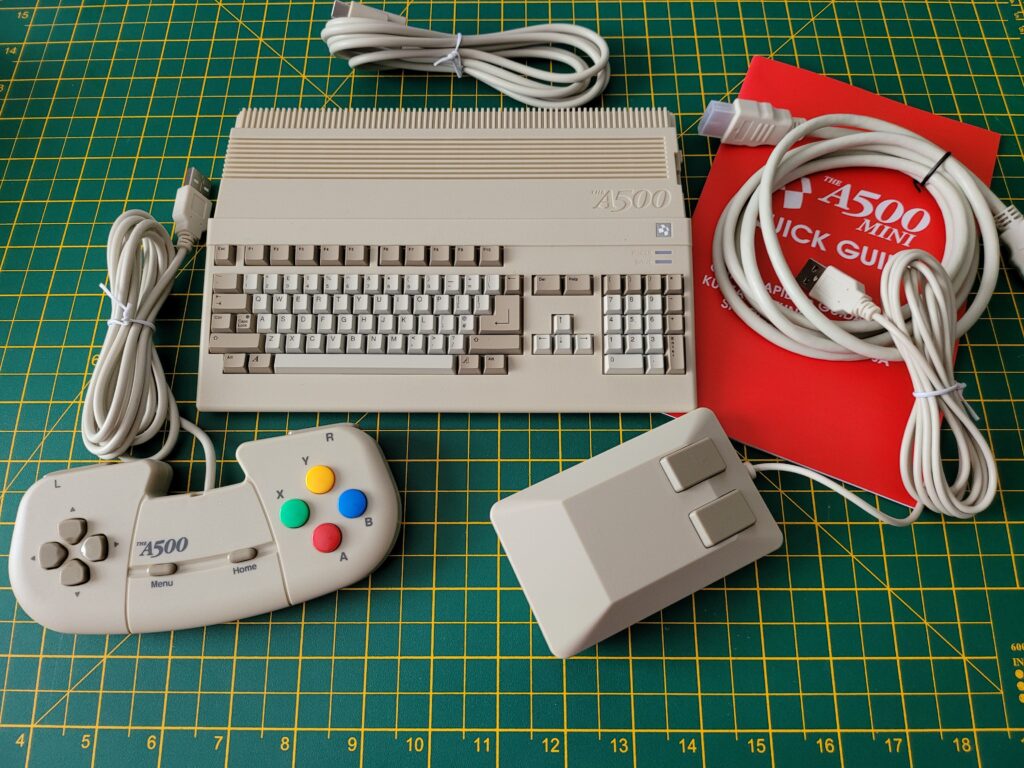
Here’s a photo of everything you get inside the box. The relative size of the A500 Mini becomes apparent when it is sat next to the mouse and gamepad.


The A500 Mini

Contents of the box.


What’s it like to use?

After plugging all the cables in and pressing the on/off switch the power LED came to life. Surprisingly the drive activity light doesn’t actually operate when loading the UI or any of the included games.


The A500 Mini

All plugged in and ready to go!


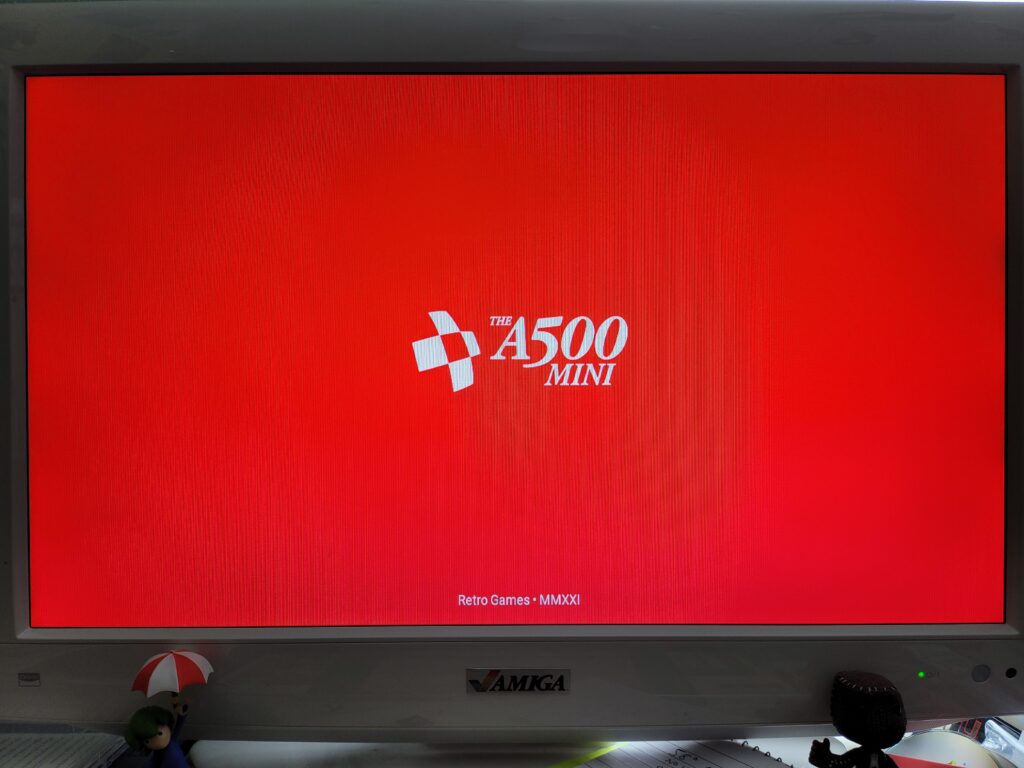
After approximately 8 seconds of staring at a blank TV whilst it booted up a very snazzy red and white A500 Mini splash screen appeared.


The A500 Mini

The A500 Mini Boot Screen.


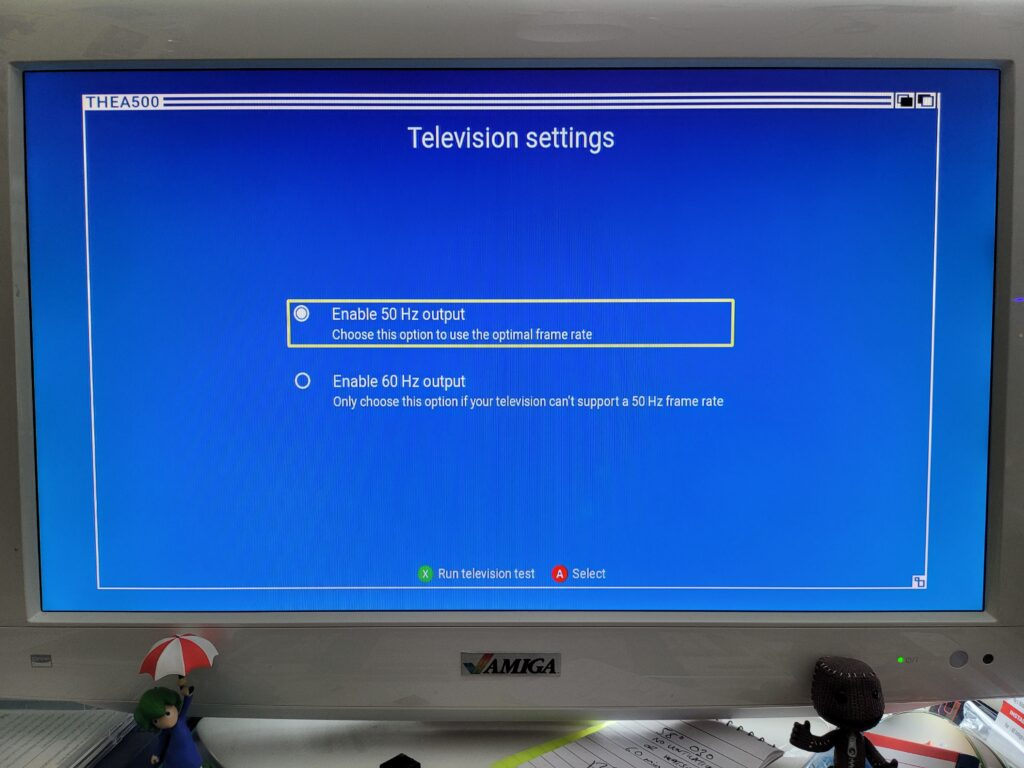
As this was the first time the device had been used a couple of configuration screens popped up allowing me to choose my language and also whether I wanted to use 50Hz or 60Hz.


The A500 Mini

TV Settings Screen.


Naturally being in the UK I chose the superior 50Hz option for the optimal frame rate. 🙂


The A500 Mini

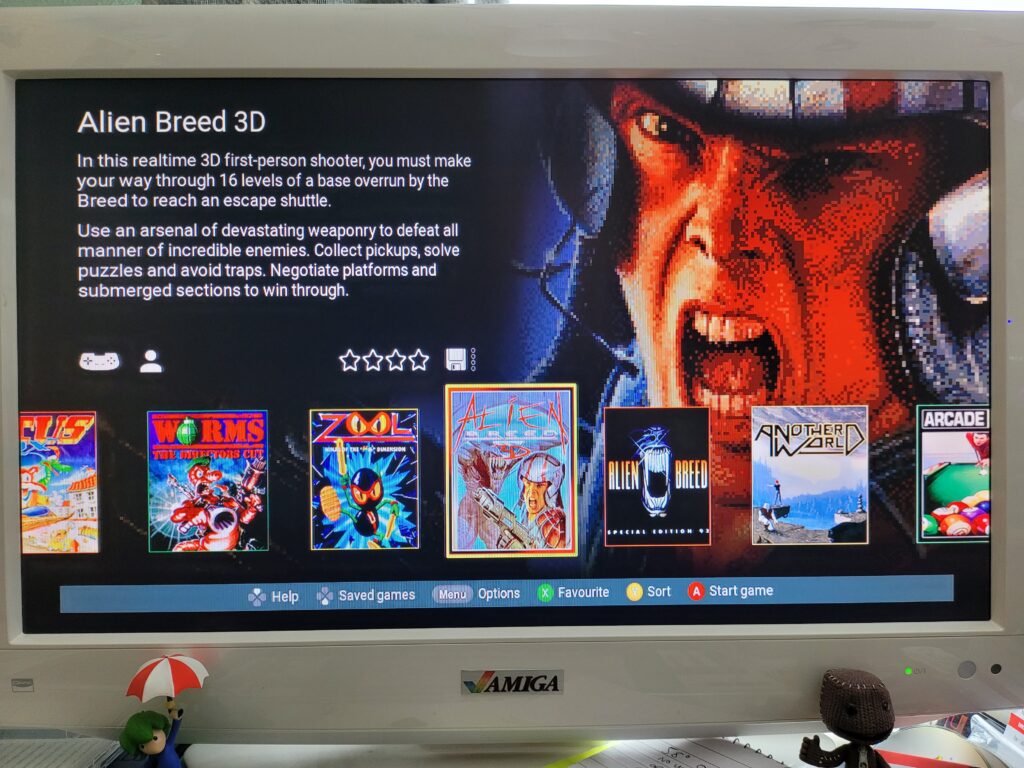
The A500 Mini User Interface.


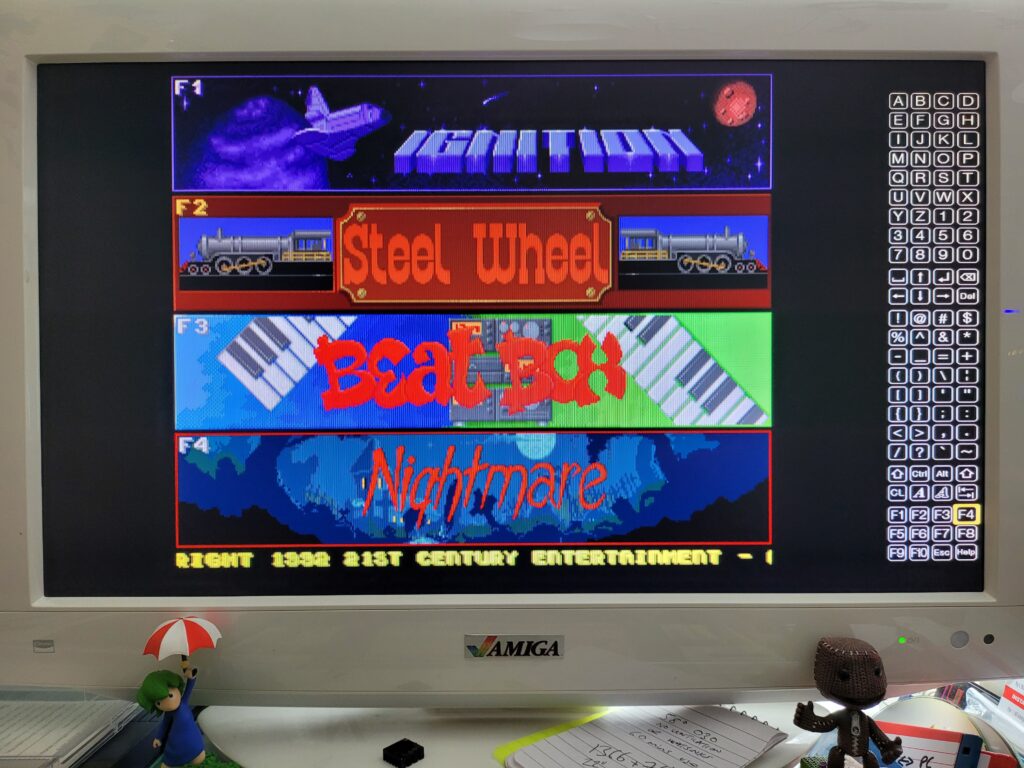
After a quick test to make sure the mode was compatible I was presented with a gorgeous user-interface (UI). The UI features a scrolling carousel of Amiga game box art along with changing graphic montages from each game in the background. Some very relaxing ambient synth music plays softly whilst you navigate the UI too.

There are icons showing whether each game utilises the controller and/or mouse and how many players it supports. Each game can have a user star rating too, from 1 to four stars. As the carousel allows you to change the sort order between Author, Genre, Year, Publisher and Favourite this affords you the option of having the games displayed by order of preference should you want it.


The A500 Mini

The Chaos Engine playing as good as ever.


Over the course of an afternoon I had a lot of fun trying out all of the pre-installed games on The A500 Mini and they all ran perfectly. I didn’t do any side by side comparisons but nothing gave me pause for concern and I was very impressed with just how slick everything was. Games loaded in seconds – there’s no simulated loading times here.

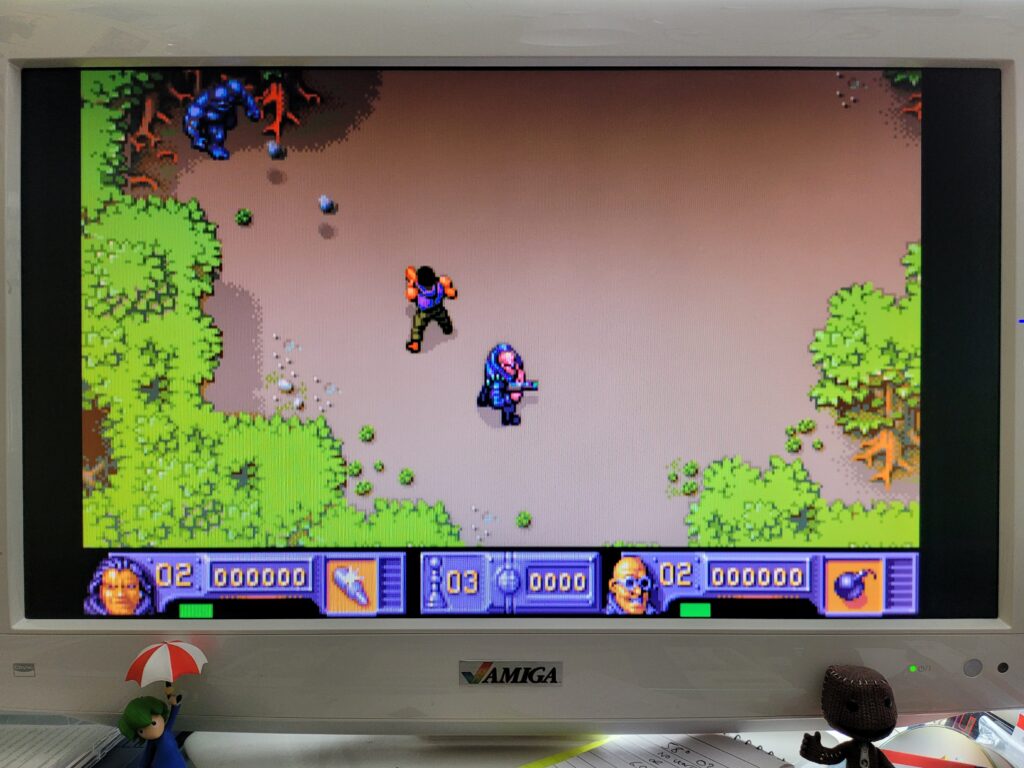
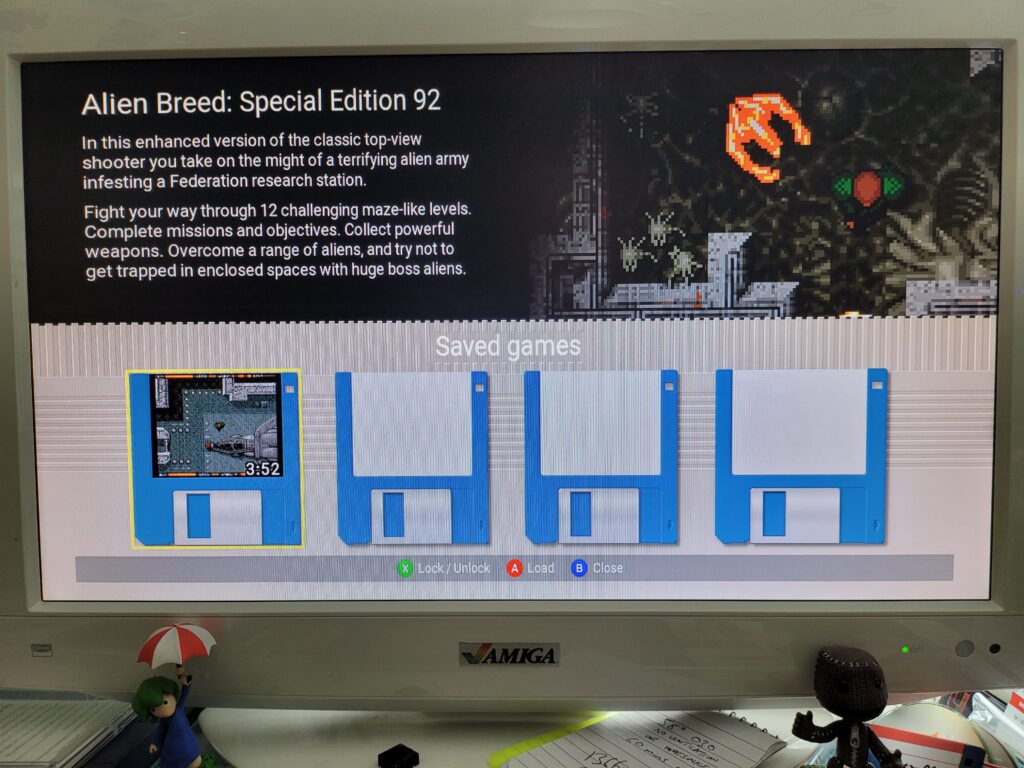
There are plenty of quality of life features too. For example each game supports up to 4 ‘save states’ allowing you to instantly save your progress at any point in any game. It even includes a ‘disk label’ incorporating a screen capture of exactly what you were doing at the moment you created the save state to help you recognise it in future! I think these are a great feature and who knows – in 30 years time someone might be using using a PS5 mini console and using save-states to brute force through a boss encounter in Elden Ring…


The A500 Mini

Alien Breed Save State with thumbnail ‘disk label’.


Some of the included games need rudimentary keyboard support in order to work. Pinball Dreams is a good example, requiring the use of the function keys to select which level you want to play. The handy virtual keyboard (invoked by tapping the menu button) worked like a charm here. However for games that require frequent keyboard inputs or text adventures like The Pawn you would definitely need to use a USB keyboard.


The A500 Mini

Selecting a level in Pinball Dreams using the virtual keyboard.


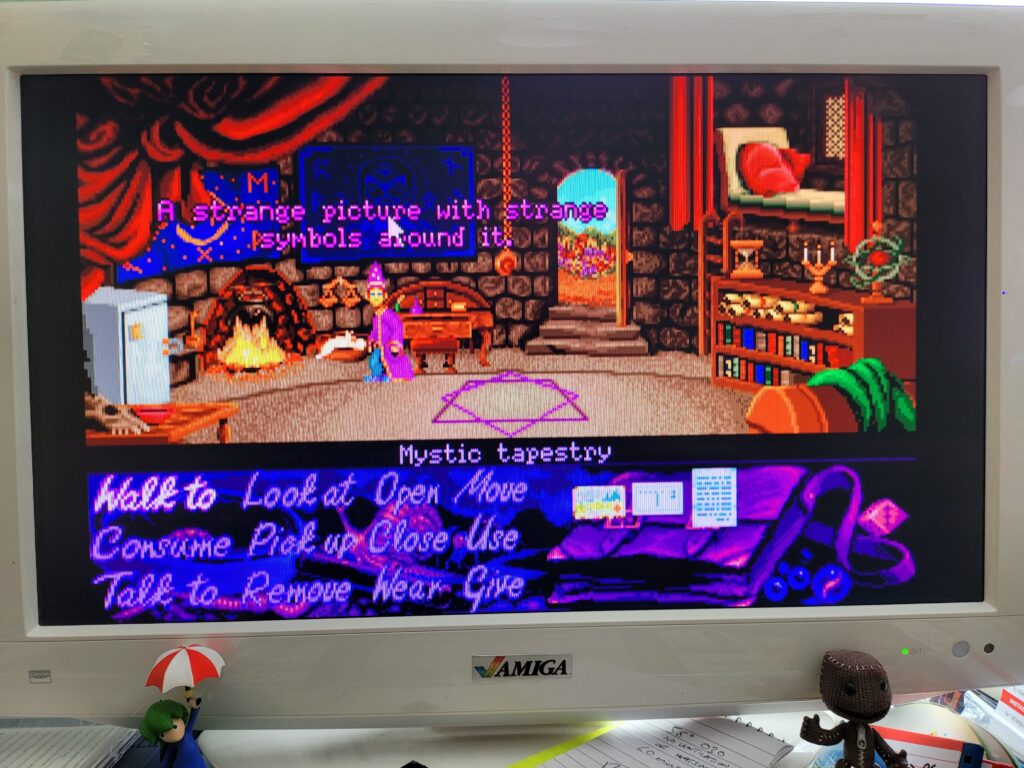
Happily the tank mouse is a pleasure to use in the games that support it, in Simon the Sorcerer for example. I should point out that the main UI doesn’t support it at all though – you must use the controller to navigate around that.

Unlike the original A500 mouse this new one incorporates a modern optical sensor under the hood and is all the better for it. I’m not really nostalgic about the old ball mice – they were a pain and required constant cleaning. Even when new they were not as accurate in use as a cheap optical mouse is now. I’ve been using optical mice with all my Amiga machines for years which should speak volumes.


Simon the Sorcerer

Using the mouse in Simon the Sorcerer.


Tweaking the settings

So the included games all work like a charm – but there’s still room for improvement. There’s a bunch of options you can mess around with to alter each game to your personal preference. The settings screens all feature a Workbench 1.3 Window effect which is a nice nod to the past and another example of the thought that has gone into this product.


The A500 Mini

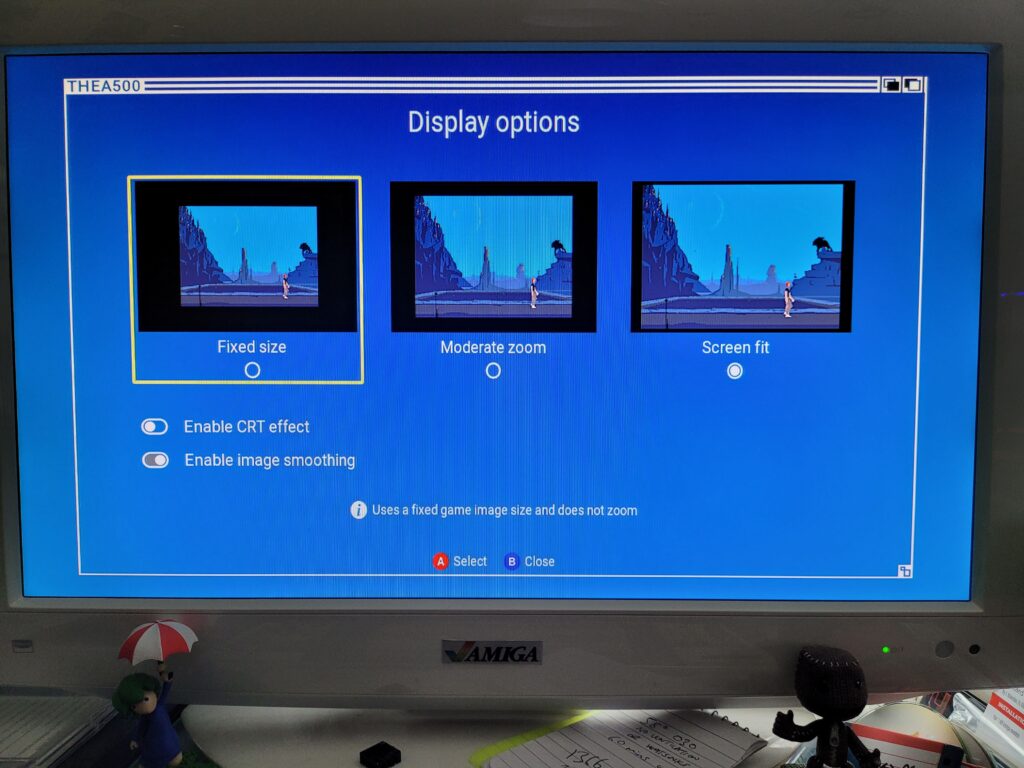
Display Options.


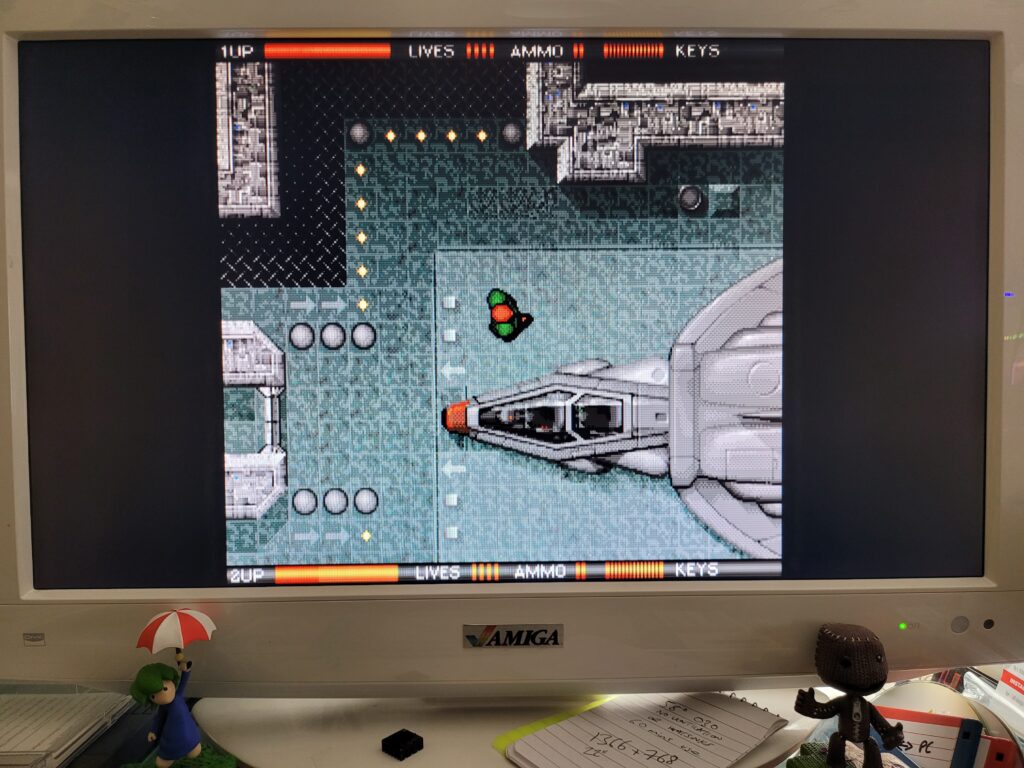
The Display Options screen allows you to select the zoom size of the screen. Some games are displayed as small 4:3 windows so you can use these settings to make the screen fit your display better. There’s also a CRT effect filter that adds scanlines to the image to make it appear as if its displayed on an old CRT monitor.


Alien Breed

WITHOUT CRT Effect.


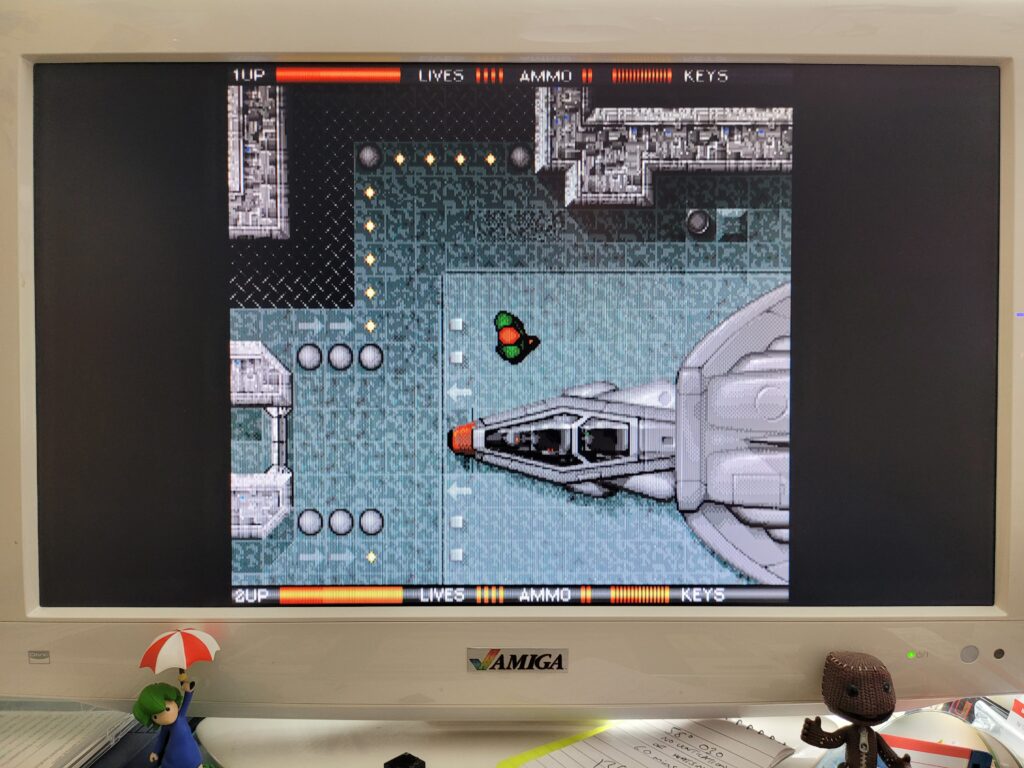
The effect is subtle but quite effective which you can hopefully see on the two screenshots. Above is a screenshot taken without the CRT filter and below with it turned on.


Alien Breed

WITH CRT Effect.


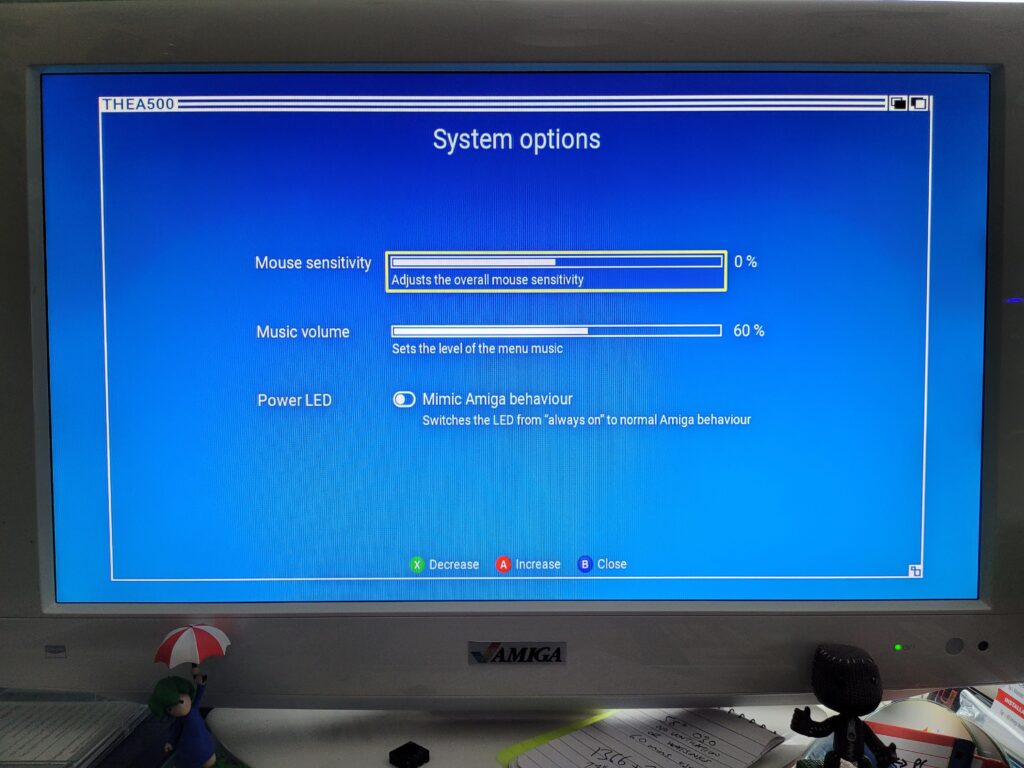
The System Options screen allows you to adjust the mouse sensitivity, music volume and Power LED behaviour. The ‘mimic Amiga behaviour’ option just made the LED act weird when loading WHDLoad games (it would keep turning off) so I left this option disabled.


The A500 Mini

System Options Screen.


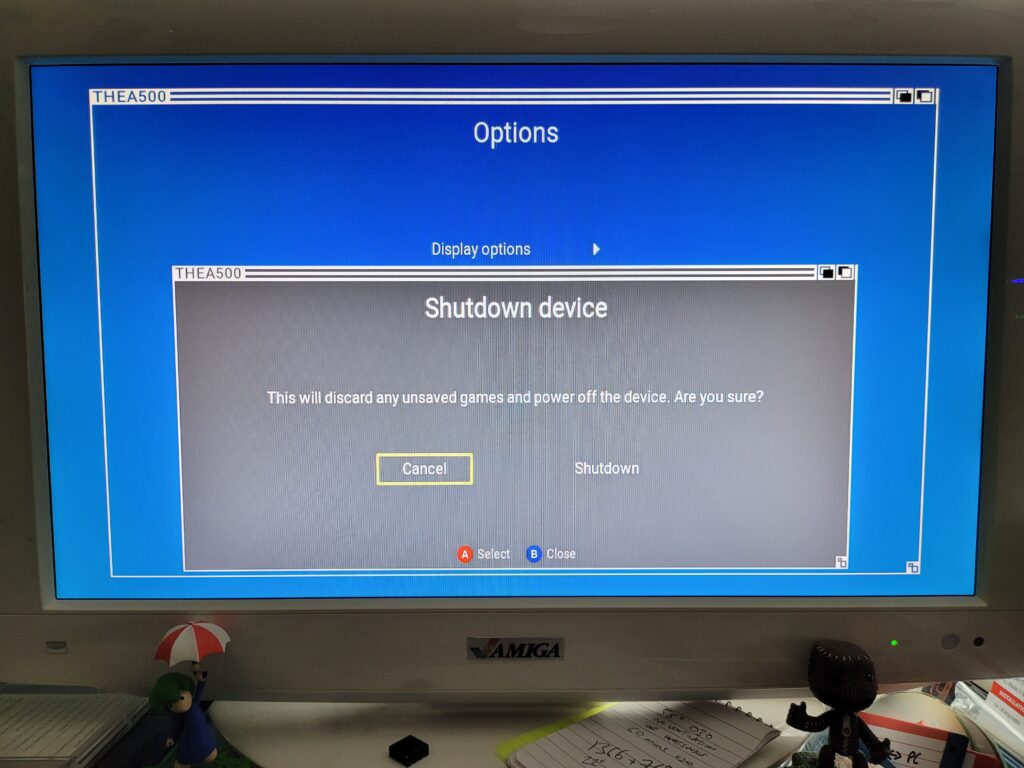
The Shutdown Device option allows a safe way to shutdown the A500 Mini and will probably be my go-to method for powering it off. If I invest a lot of time into a game and save my progress I don’t want to come back and find it’s been corrupted due to me pulling out the plug!


The A500 Mini

Safe Shutdown.


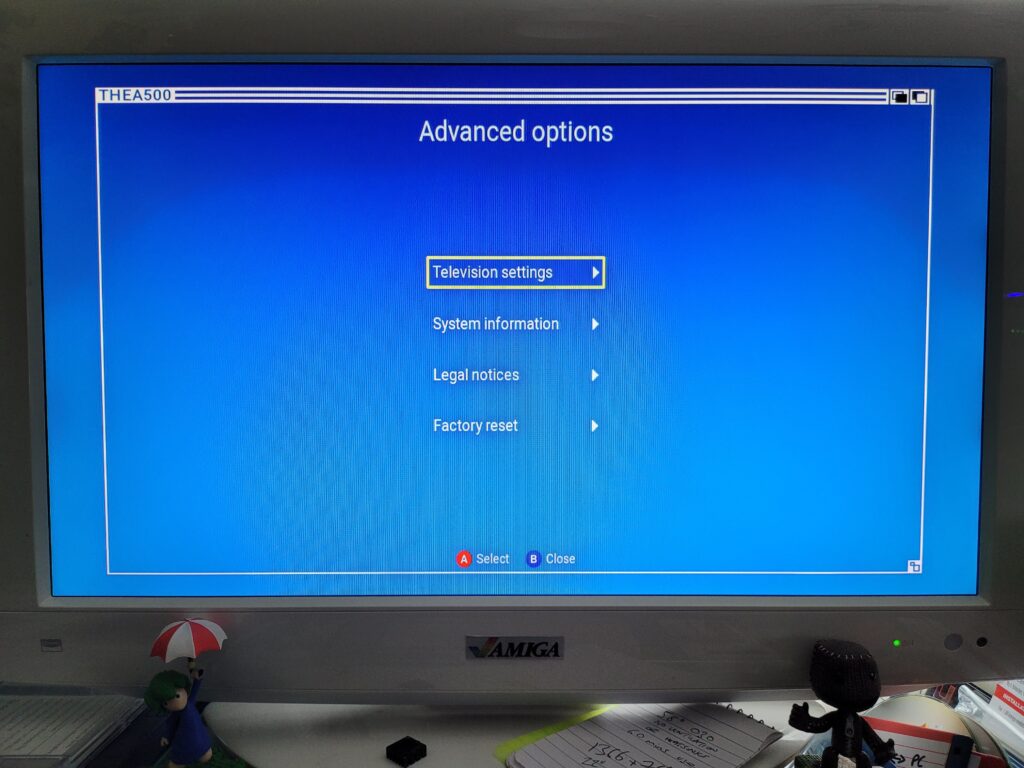
There’s also an ‘Advanced Options’ screen which is home to some less frequently needed settings. Here you can re-visit the 50/60Hz mode options, tweak whether a game should utilise the ‘border’ section of the screen, access System info, creator credits and also perform a factory reset.


The A500 Mini

Advanced Options Screen.


Loading Your Own Games

One of the advertised features of the console is being able to play your own selection of games on the device. However this isn’t explained at all in the Quick Guide, for this info you need to head online to their website: THEA500 Mini support (retrogames.biz)

In a nutshell these are the requirements for getting your own games onto The A500 Mini.

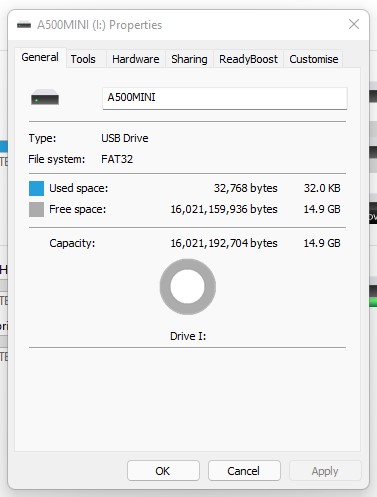
  • A USB stick formatted using FAT32.
  • The USB stick must have ‘THEA500 WHDLoad Package’ installed on it.
  • The WHDLoad programs all have to be LHA files.
  • The WHDLoad programs must be a complete archive of the program and
    not just the program’s WHDLoad installer.


My FAT32 Formatted 16GB USB Stick.


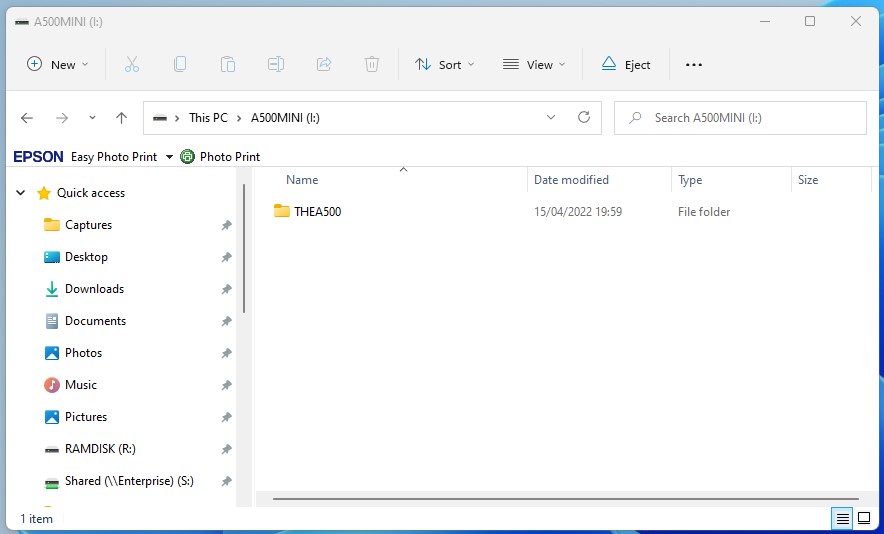
Once you’ve downloaded the ‘THEA500 WHDLoad Package v1.0.1 ‘ you simply unzip it to the ROOT of your USB stick. It should look like the screenshot below if you’ve done it correctly.


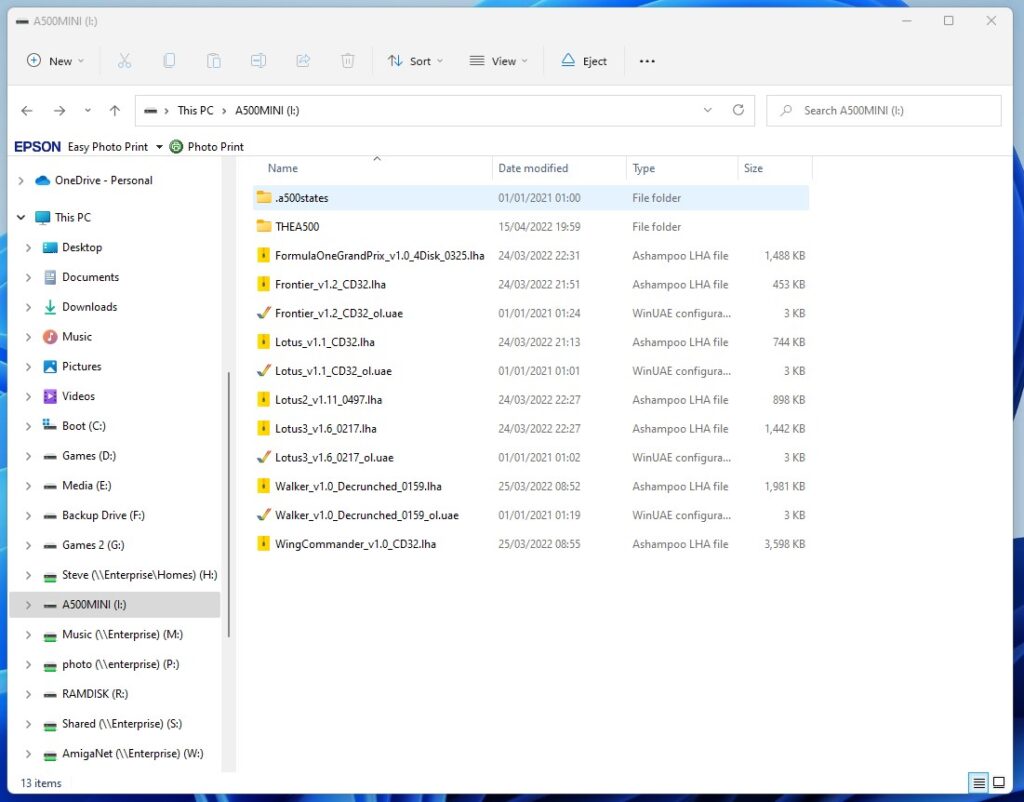
Games are simply copied into the root of the USB stick as well, or if you have a lot then you can also organise them into directories too. All the games must be in LHA format. I put a handful of games on my stick and it looked like the screenshot below. Note the ‘states’ directory and the various .uae files. These were all created by the A500 Mini itself and contain the save states and configuration options for my custom games. Don’t delete these files!


My USB Stick with a bunch of games ‘installed’.


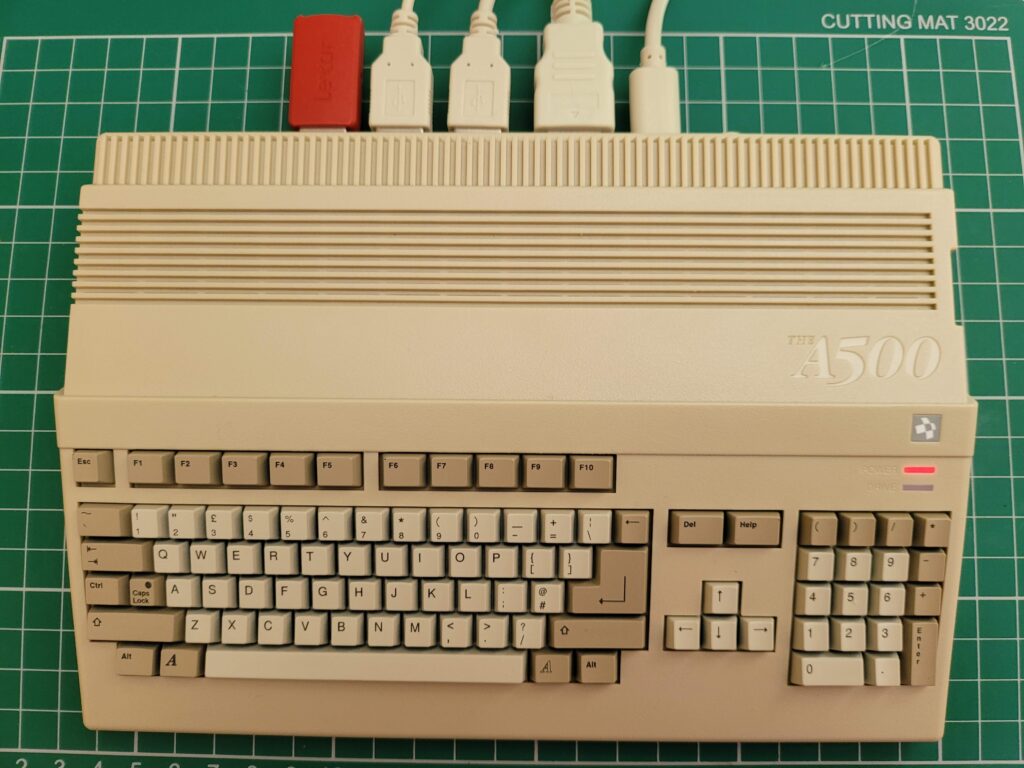
The USB stick plugs into the spare USB port at the rear of the A500 Mini – assuming you aren’t using a USB keyboard of course.


The A500 Mini

A500 Mini with USB Stick plugged in.


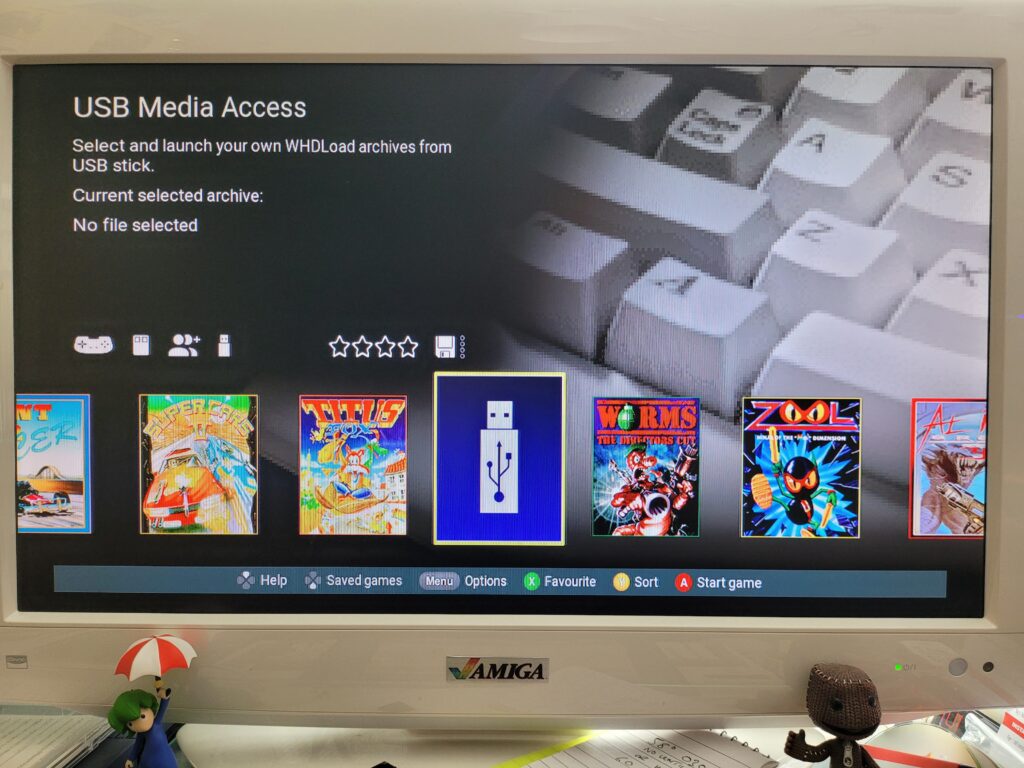
If it has been setup correctly then a USB Stick icon should appear on the carousel as shown in the photo below.


The A500 Mini

USB Stick icon on the carousel.


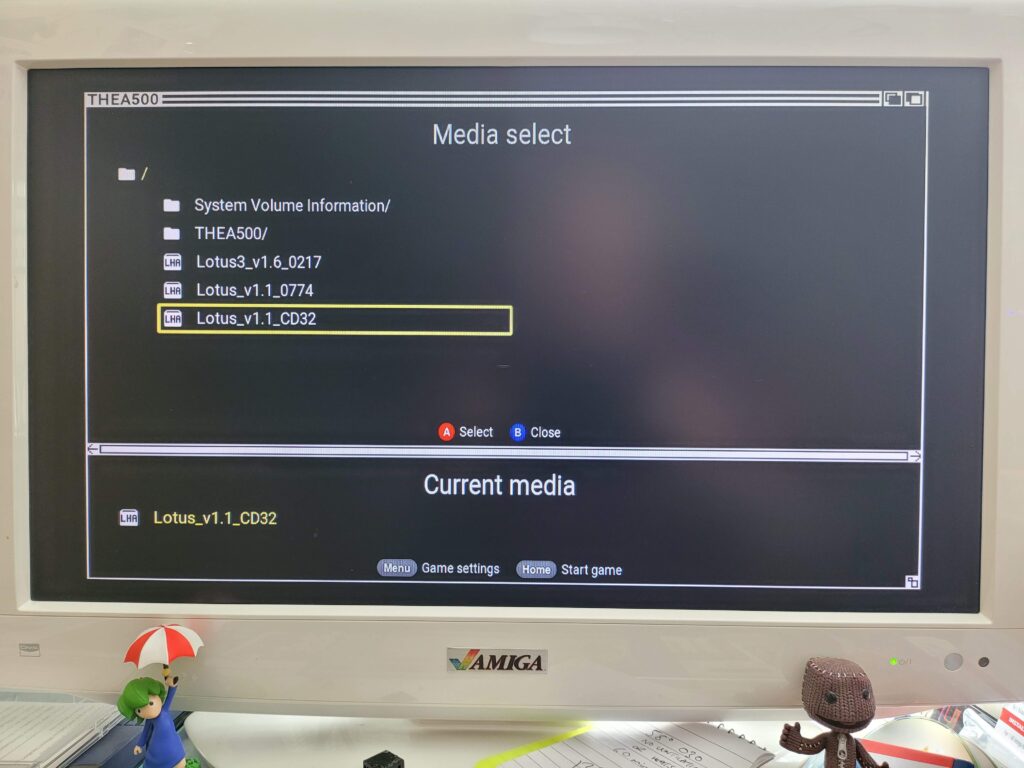
Clicking ‘Start Game’ will then bring up the contents of the stick. In my example below I had put a few Lotus games on my USB stick to experiment with.


The A500 Mini

Selecting a custom game.


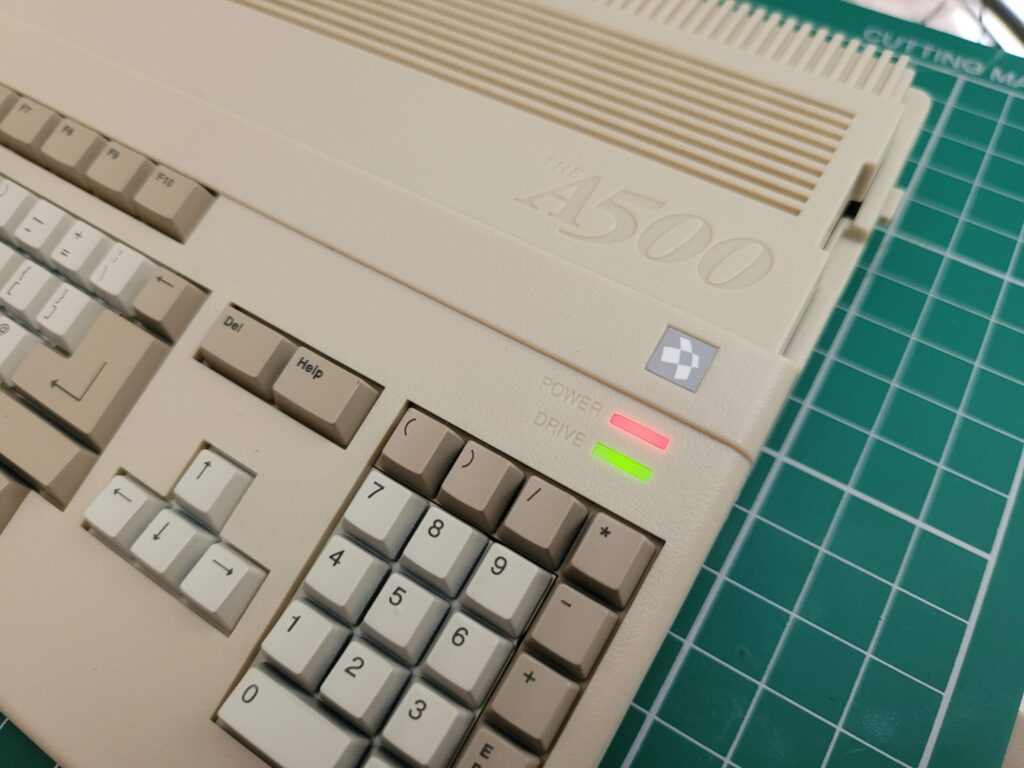
When loading the games the drive activity LED finally sprang into life!


The A500 Mini

The A500 Mini Drive activity light.


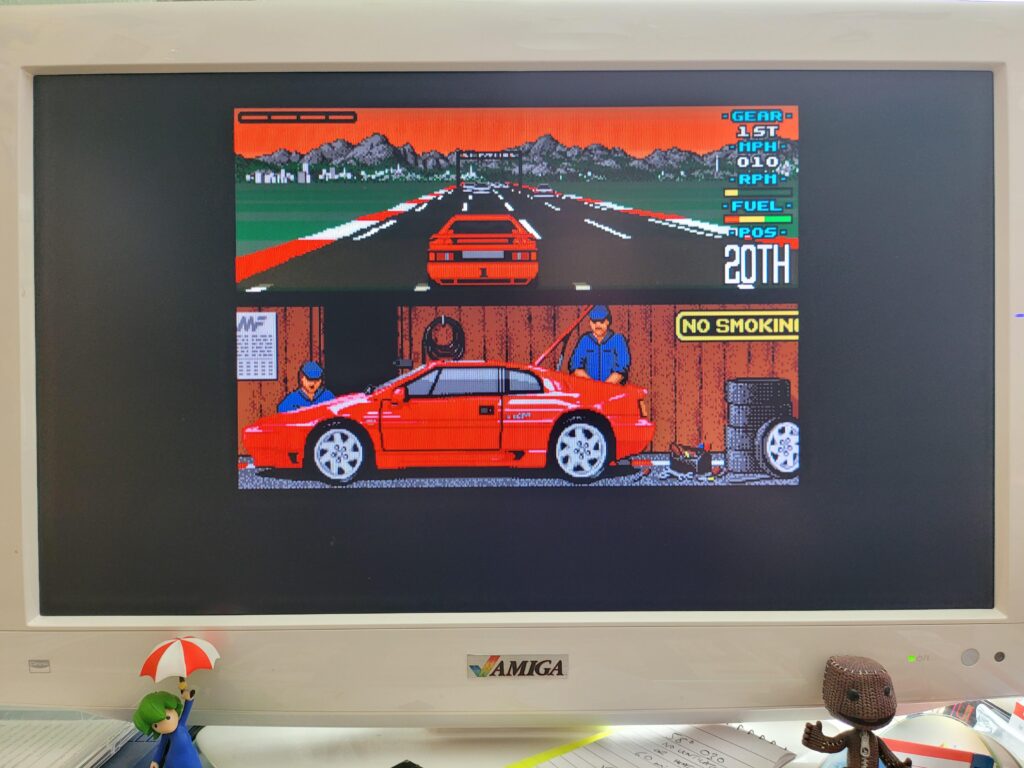
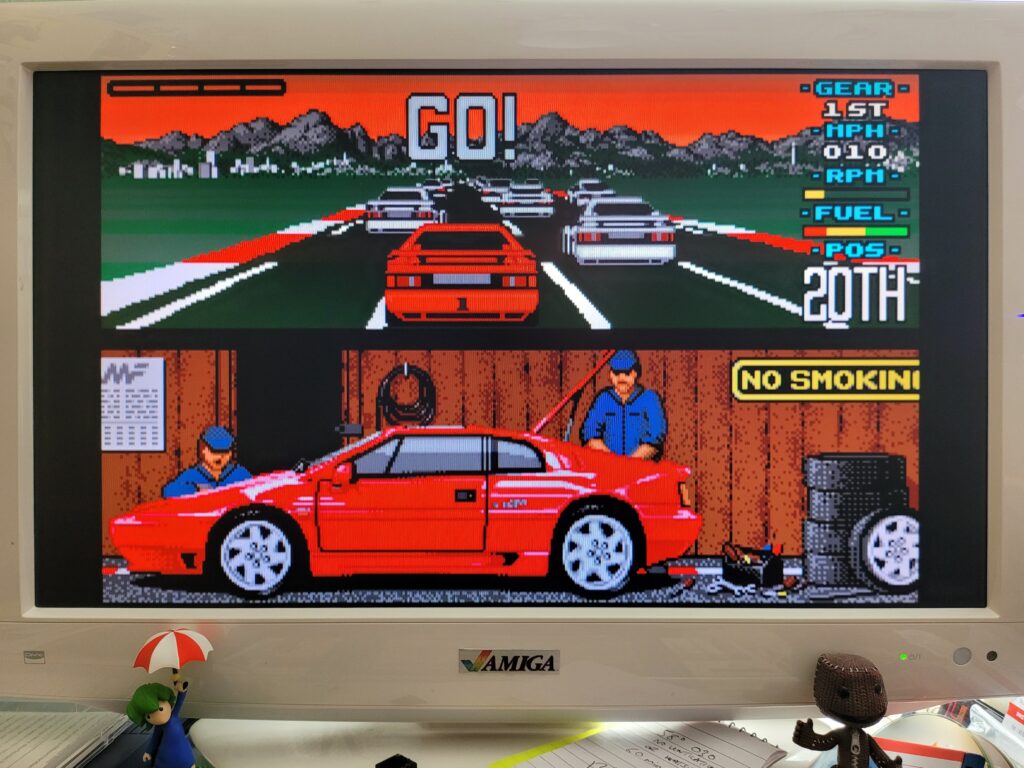
Lotus 1 loaded up and played just fine, but it was only using a fraction of the available screen space…


Lotus Turbo Esprit Challenge.


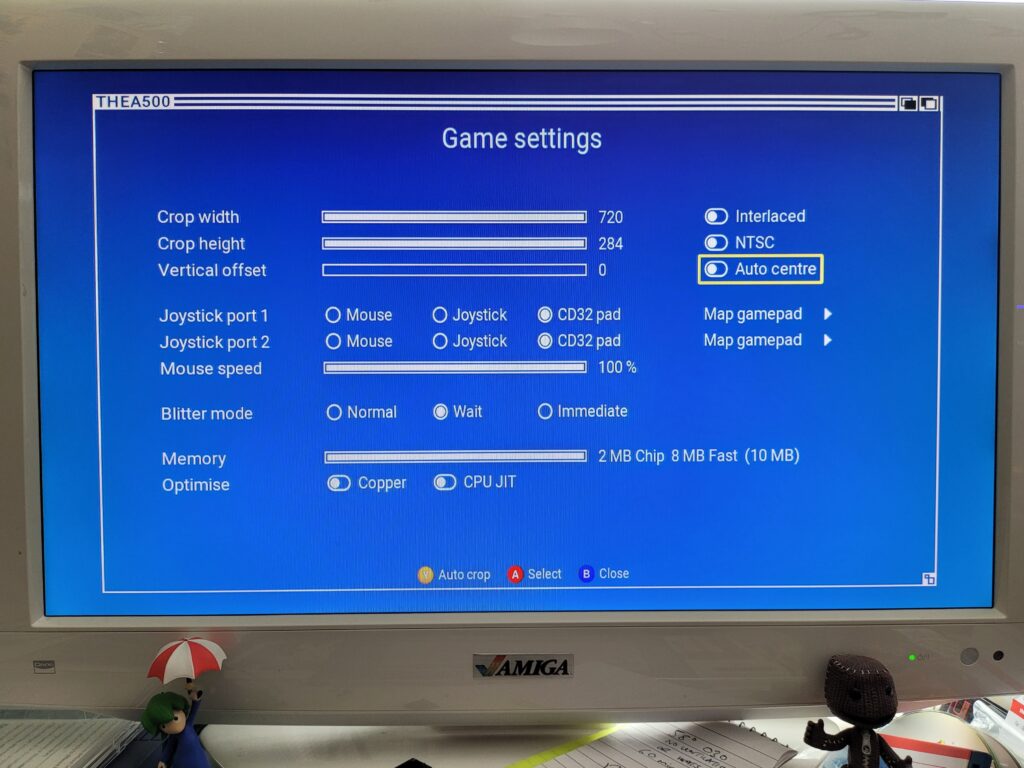
The Game Settings screen offers numerous tools to tweak how the game runs, including how it appears on screen.


The A500 Mini

Game settings screen.


By using a combination of auto-centre and auto-crop I was able to achieve the result in the next photo which was infinitely better. These settings are remembered for each custom game too which means once you’ve only got to configure things the way you like then the one time.


Lotus Esprit Turbo Challenge looking much better now that it’s using most of the available screen.


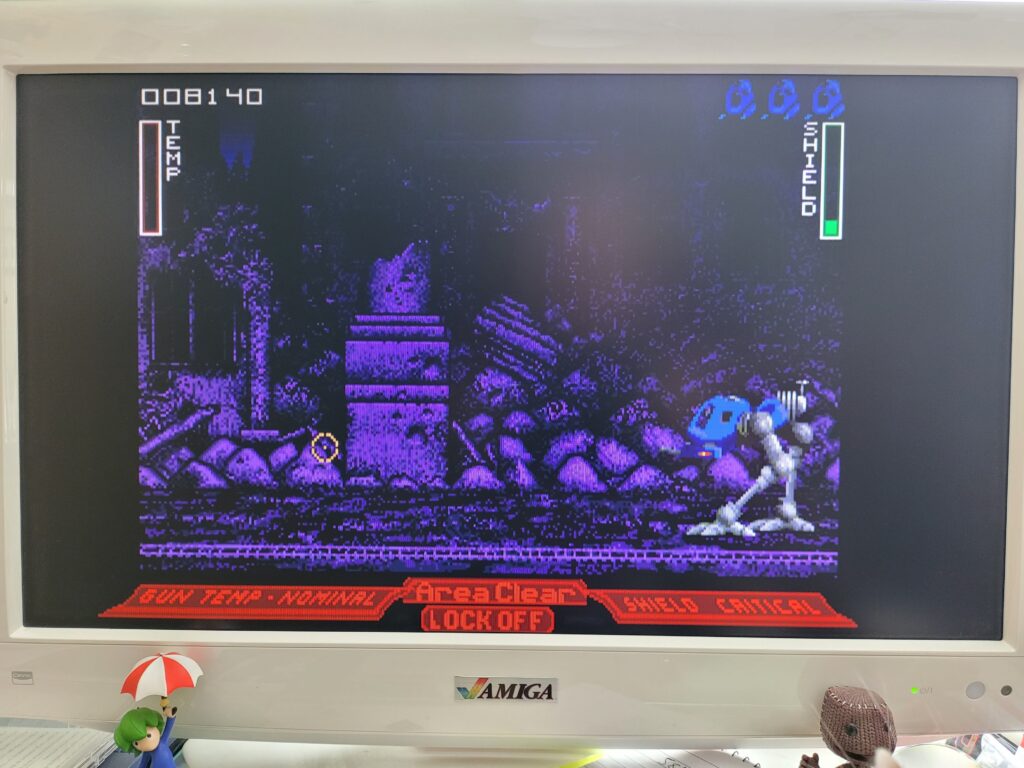
Mouse support is disabled by default which I discovered when I loaded up Walker for a quick blast. This was easily solved by going into the Game Settings screen and enabling the Mouse on Joystick Port 1. I also had to adjust the sensitivity as it seemed way over-sensitive to me. Once I’d sorted those two things it played perfectly.


Walker.


I’m not sure exactly how powerful the A500 mini is but it’s definitely much faster than a stock Amiga 500 that’s for sure. Here’s a video of it running the intro from Frontier Elite 2. Anyone who has seen this running on a stock A500 will know that it really struggles to keep up the framerate during most of this 3D animated sequence. The A500 Mini on the other hand makes it seem effortless.


Wing Commander also ran super smooth too which I remember being another game that really needed a decent CPU to shine. It actually runs better on the A500 Mini than it does on my TerribleFire 330 equipped CD32 which has a 50Mhz 68030 CPU.


ADF Support

You may have noticed that I’ve made no mention of loading ADF disk images so far and that’s because they are simply not supported. I have to say that this is a huge disappointment for me personally as I’ve purchased a lot of modern day Amiga games and many of them only came in ADF format. I’ve also converted many of my old original physical game disks into ADF images and I’m unable to use any of them. Furthermore I have no idea how to create WHDLoad versions of any of my games so I am faced with either not being able to play these games on the A500 Mini or having to search around to see if anyone else has created WHDLoad versions of them. I really hope Retro Games Ltd. add this feature in a firmware update soon as it really limits the devices appeal at the moment for me personally.

Verdict

The A500 Mini is a beautifully designed and executed piece of kit and it seems evident to me that the guys who created it are passionate Amiga fans. The UI is beautiful and I love the slick implementation of save-states and simple to configure options to tweak my gameplay experience. The mouse and controller both look the part and work really well. Most importantly of all, the games appear to run great on the device and at an improved frame-rate too, for games that support it. The lack of a decent printed manual is a bit disappointing but hardly a deal-breaker. The lack of ADF support on the other hand is a bit more troubling and quite a let-down for me personally. If using ADF images is important to you too then maybe hold off until Retro Games Ltd. announce they’re going to add support for them. For anyone else thinking of taking the plunge though, just get one – you won’t regret it.

SDBox Review

SDBox

If there was one take-away from my recent clean install of AmigaOS3.2 it was that transferring files across to a stock Amiga system is a real pain in the arse. Sure you can use CrossDOS, but that is limited to 720K files. If you have a CD drive then you can burn stuff to a CD which raises the limit considerably to 650mb. However this is pretty time consuming and my drive refuses to read CDRW discs so means I have to use CDR’s which is downright wasteful.

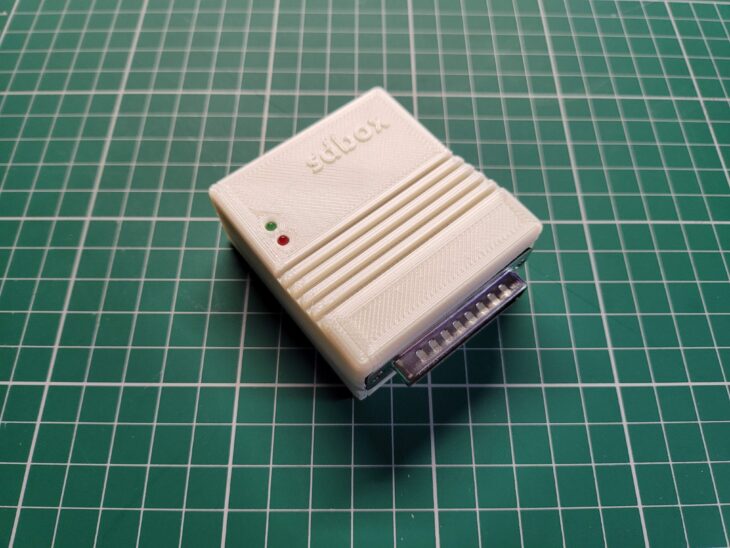
Enter the SDBox – a little expansion for any Amiga system that enables it to read and write data to MicroSD Cards. A few years ago I wrote a post about adding an SD Card to an A500, however that relied on having a Vampire accelerator card. This device just requires a parallel port to operate, something which all Amiga’s have.

What’s Included

The SDBox is actually a public domain Amiga community project that you can construct yourself (see here). However due to the inclusion of some surface mount components I chose to buy one ready made from Amigastore.eu. I can normally solder stuff OK but dealing with tiny surface mount components is beyond my skill level.


SDBox

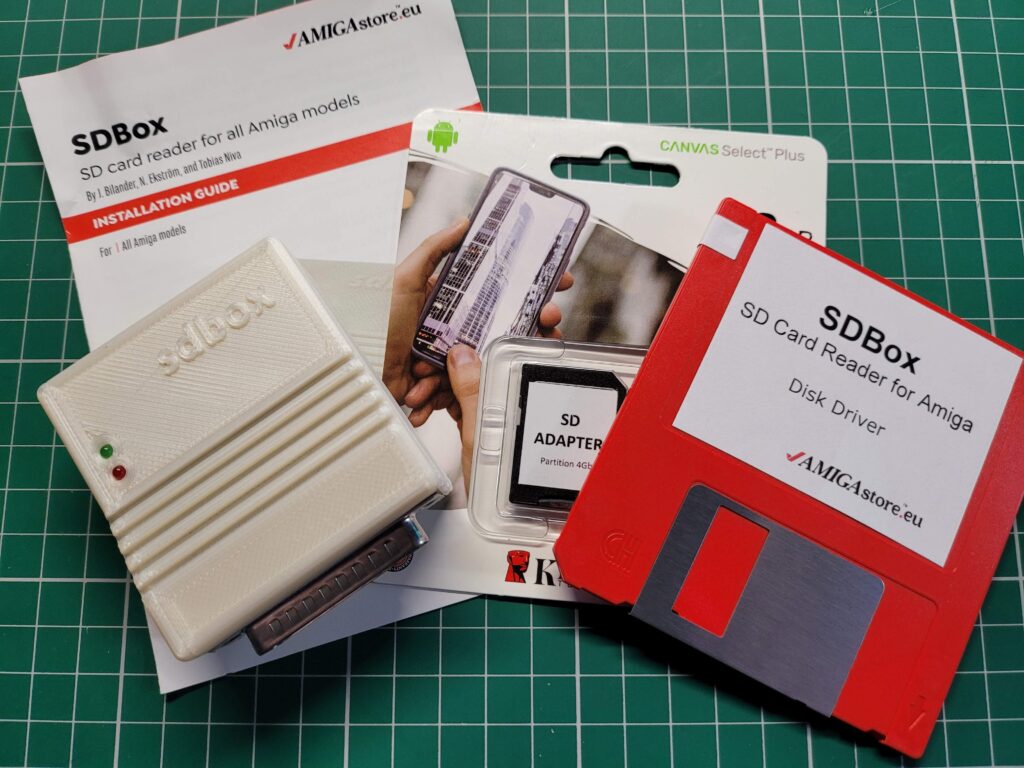
SDBox – package contents.


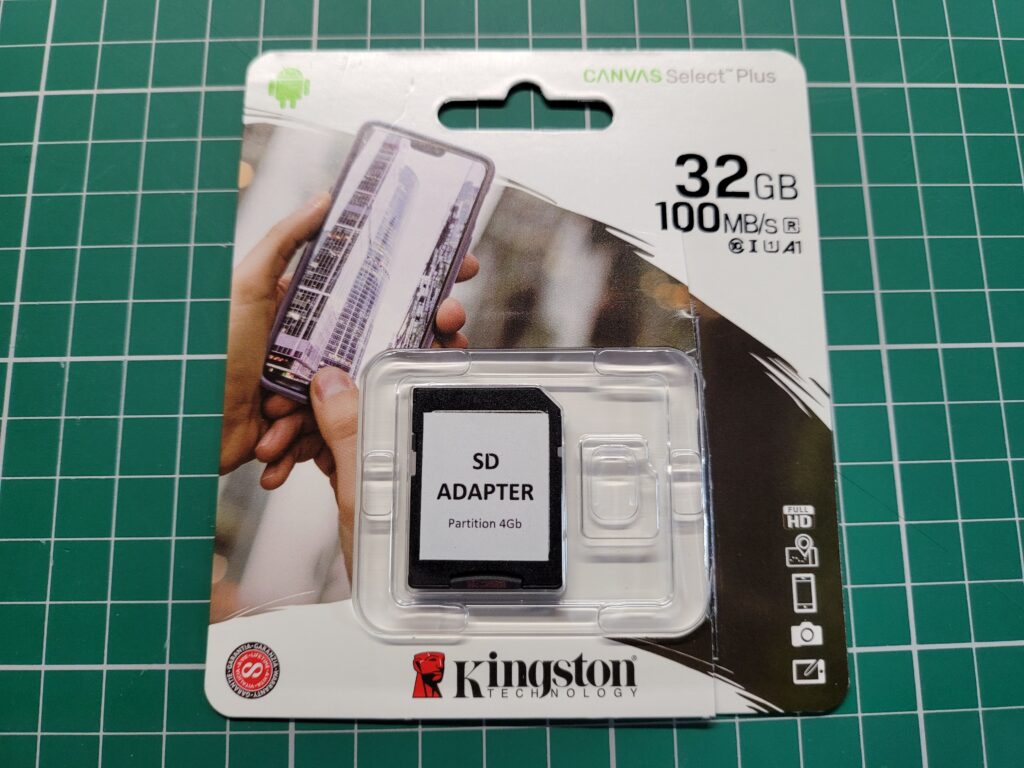
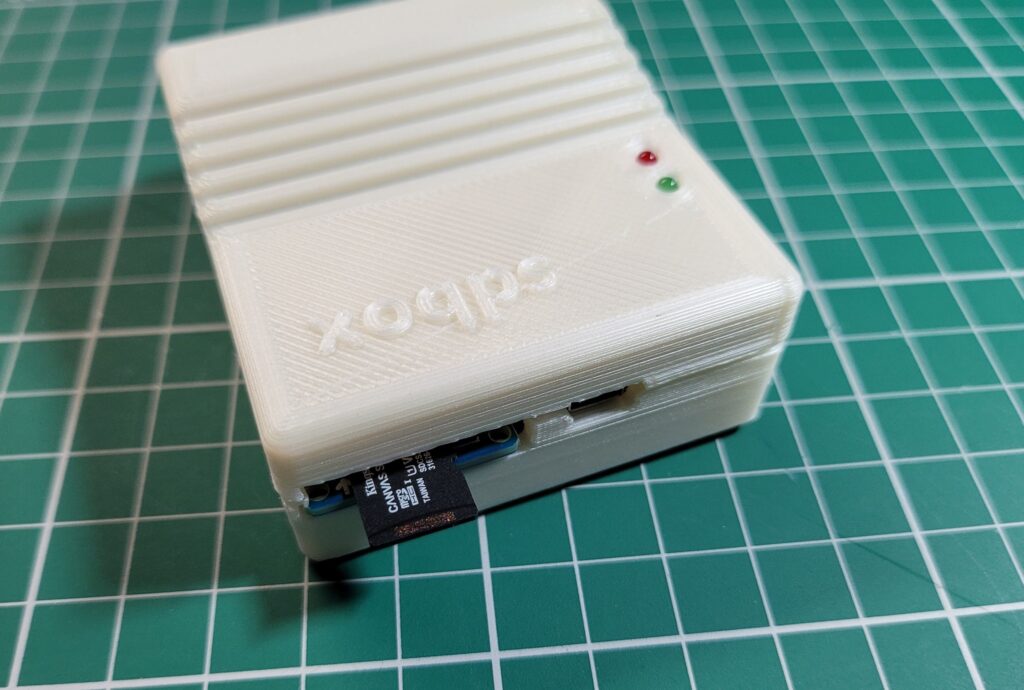
Included in the package was the SDBox device in a nice 3D Printed case, a 4GB MicroSD Card with adapter*, instruction booklet and a 3.5″ floppy containing the software to make it all work. A mini USB cable was an option too but I’ve accumulated dozens of them over the years so didn’t see the point in getting another one.


Connecting the SDBox

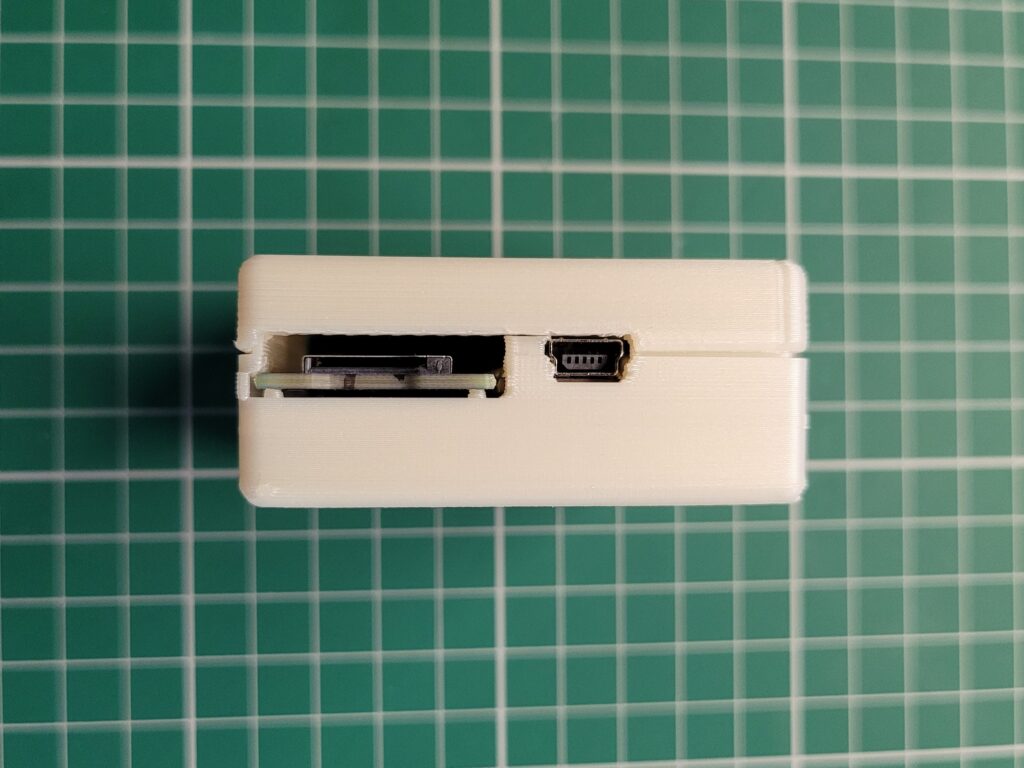
With the Amiga turned off the SDBox simply plugs into the parallel port socket round the back. It also requires 5V of power to function which can be provided via a mini USB cable.


SDBox

The Micro SD card slot and Mini USB power socket on the back of the SDBox.


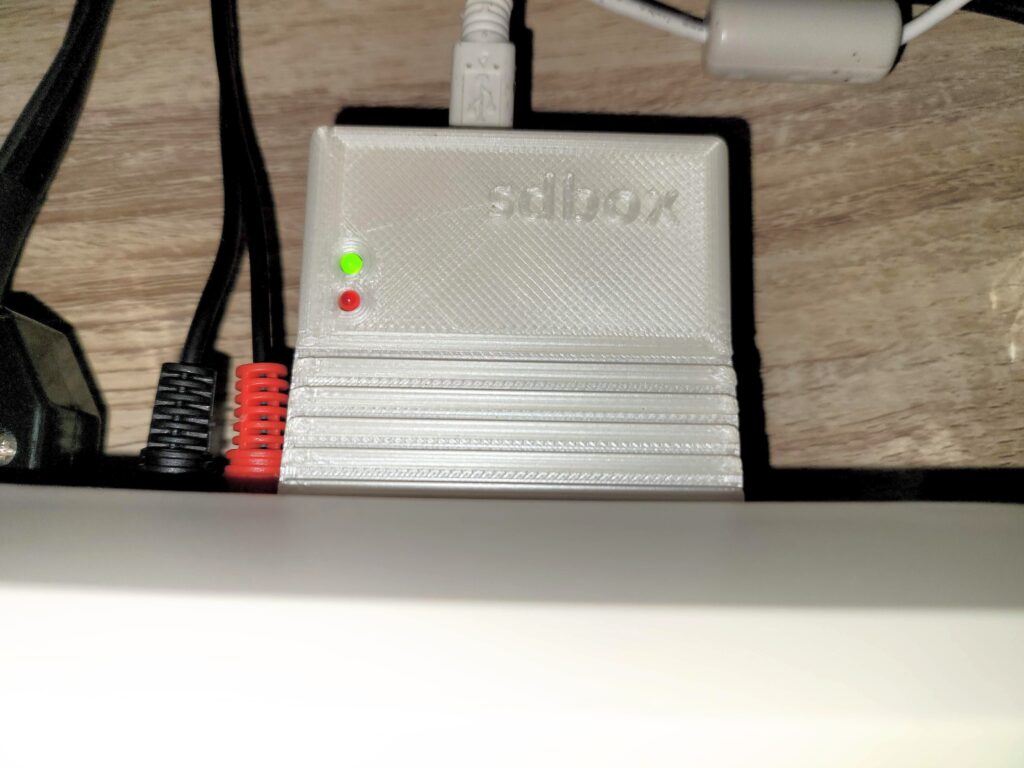
I found there was just enough clearance at the side for it to not interfere with my RCA audio plugs but this might not be the case if you have thicker plugs.


SDBox

The SDBox plugged into the parallel port.


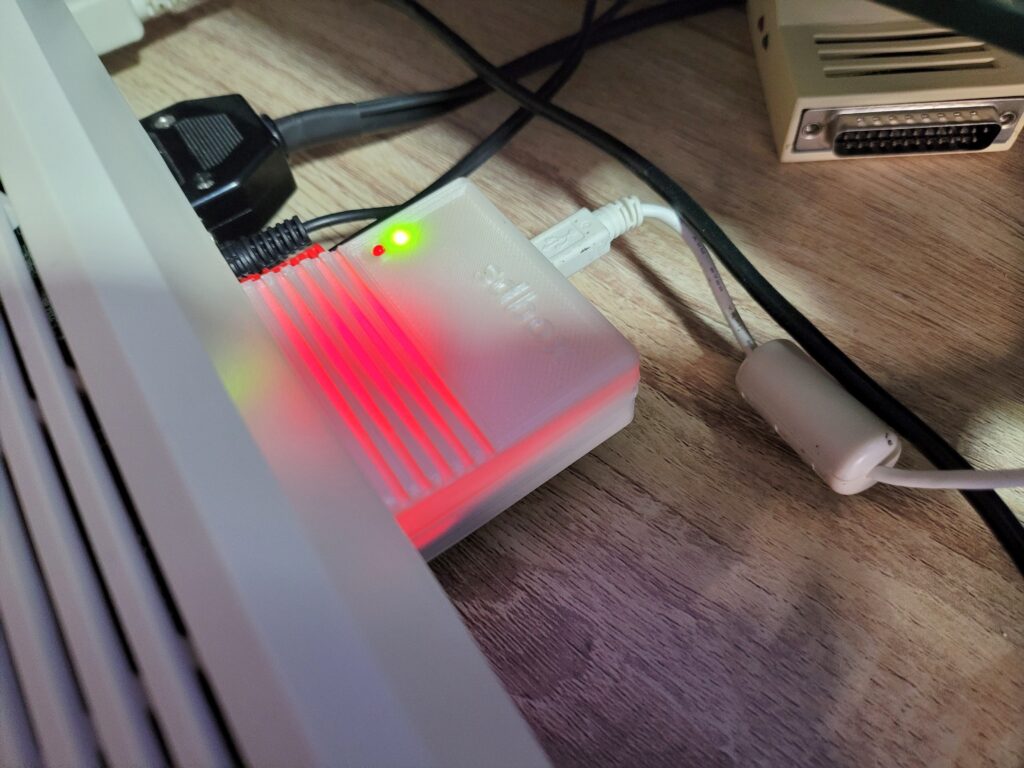
When powered on the box glows red from inside – presumably this illumination comes from an LED on the Arduino Nano. It’s not quite as noticeable as the photo below would have you believe and it’s not a big deal.


SDBox

Red glow from the Arduino Nano inside.


Installing the Drivers

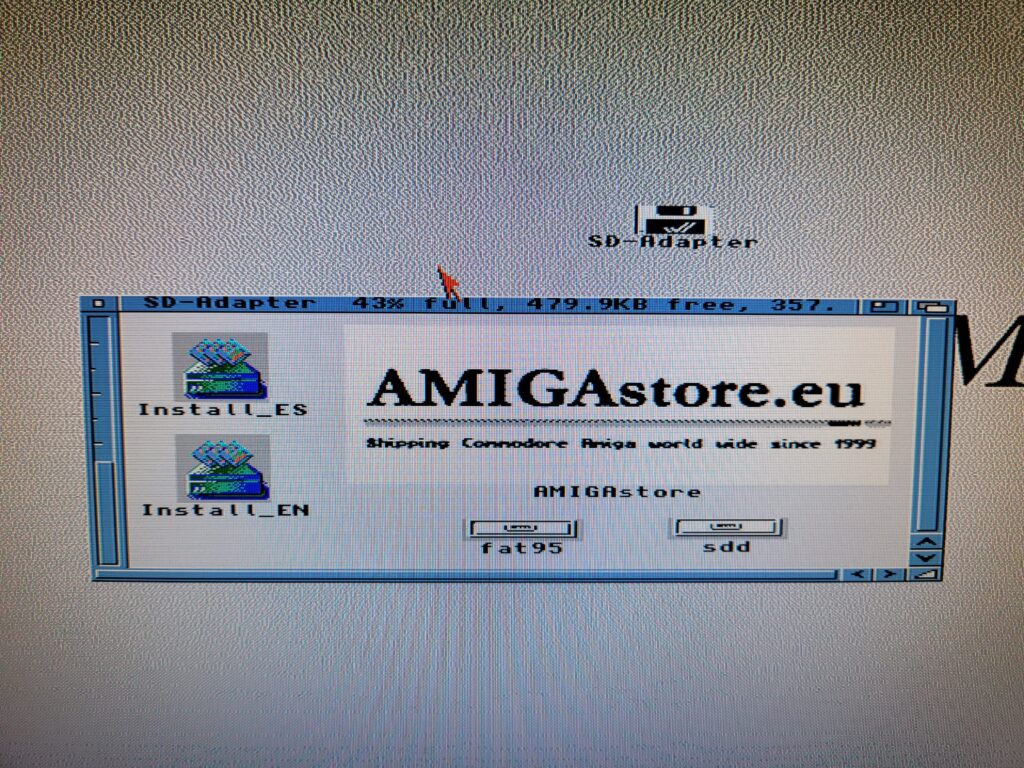
With the hardware powered on and connected the next task is to pop in the floppy and run the installer to install the driver software.


SDBox

Contents of the floppy disk.


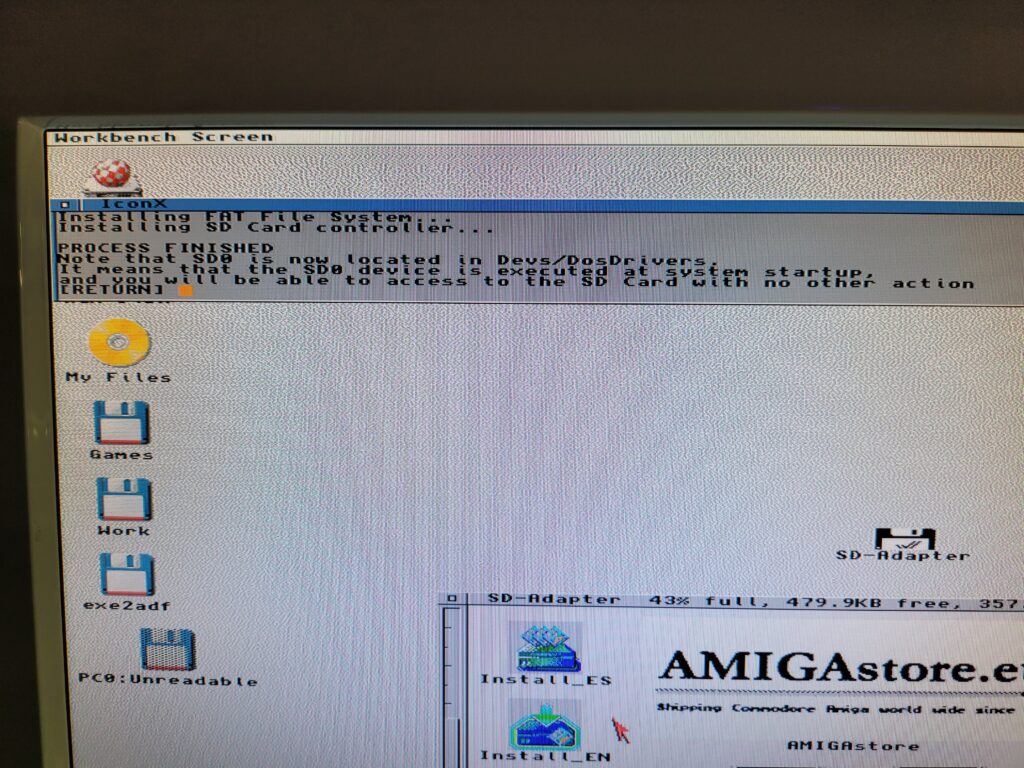
The floppy comes with a handy installer (in both English and Spanish) to copy over and configure everything necessary to use the SDBox.


SDBox

SDBox Installer now finished.


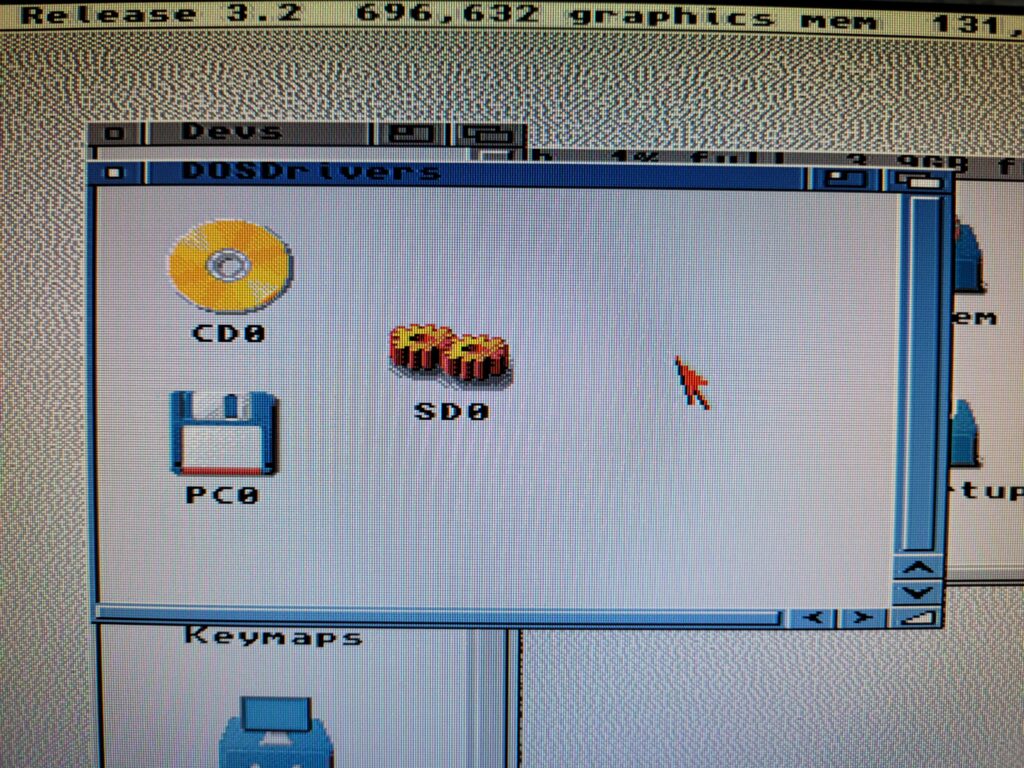
A few moments later a message appears on the screen to inform you that the install is complete and where it has put the SD0 device.


SD0 DOSDriver

This is the SD Device it installs in DEVS/DOSDrivers.


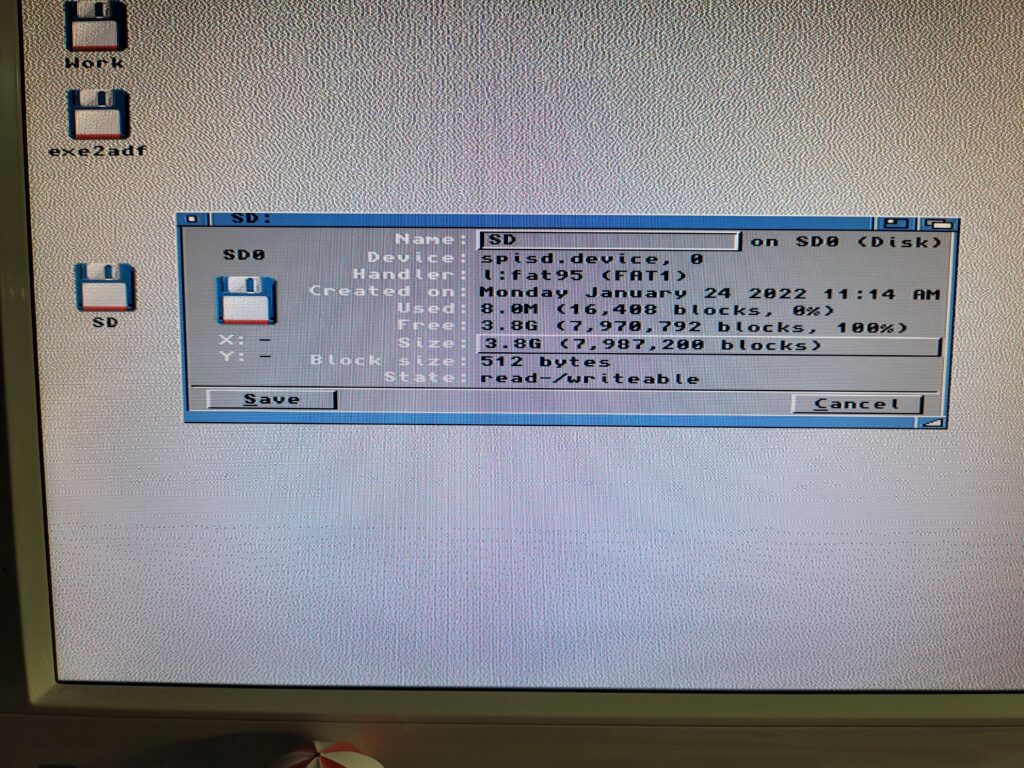
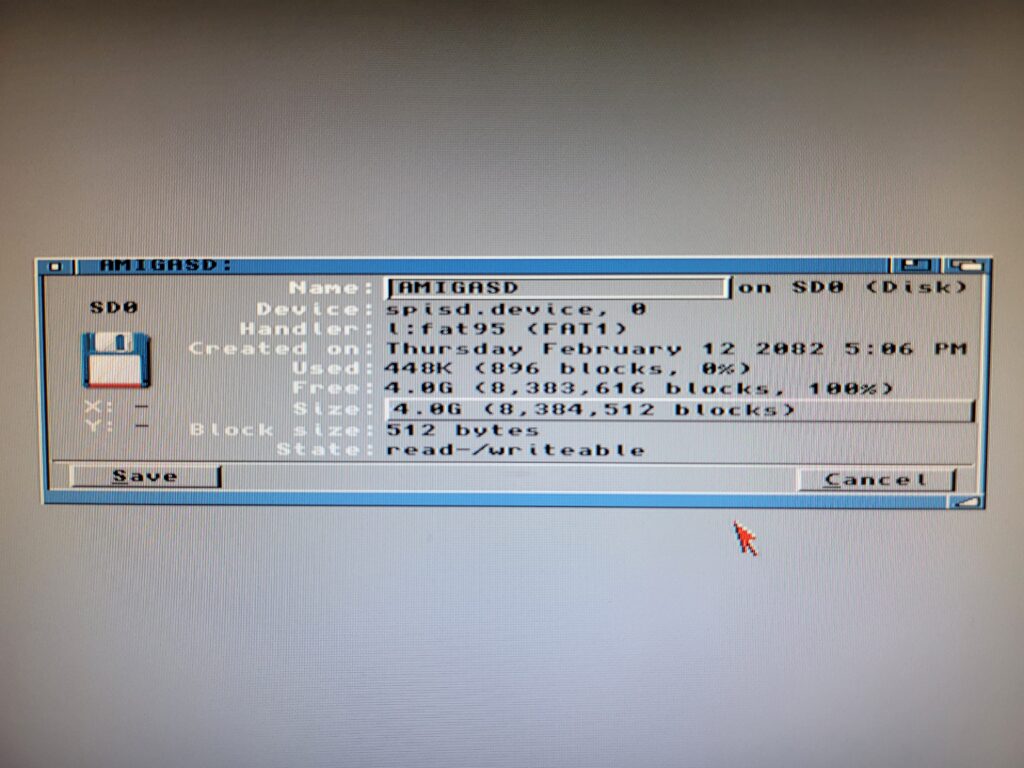
A quick reboot and my SD card was showing up on my Workbench screen, just like any other drive would. I brought up the drive info window for SD0 to confirm it was reading the card properly.


SD0 Information

Icon Information for the SD card.


SD Cards

I chose to get an SD Card with my SDBox but you can use any MicroSD card you may have lying around. The one caveat is the device is only capable of accessing 4GB partitions so if you have a bigger card you must create a 4GB (or smaller)  partition on it for it to work. There’s some info at the end of this post describing how to partition a MicroSD card in Windows if you need it.


SDBox

If you look carefully you can see the packaging has been opened already…


*Clearly AmigaStore.eu were unable to source a 4GB card for me as they actually sent me a 32GB MicroSD card that had been manually partitioned to 4GB.


Using the SDBox

In use the SDBox performed well and exactly as described. It’s not going to set any speed records but given it’s hooked up to a parallel port that’s to be expected. To give an idea of transfer times I copied an 880K ADF file from my RAM Disk to both my internal CompactFlash card and the SDBox. It took about 1 second to transfer to the CF card and 6 seconds to the SDBox. Next I tried a bigger file;  AmiSSL 4.12 which was 5.7MB. It took 6.5 seconds to transfer to my CF card and 39 seconds to complete the transfer via the SDBox. Approximately six times slower but still perfectly acceptable.


SDBox

MicroSD card being inserted in the card slot.


The SDbox doesn’t support swapping thecard whilst the Amiga is running so don’t expect it to update the contents if you do – it’ll just result in an error. It requires a full reboot to refresh the contents of the card but again this is not a great inconvenience.


Fly in the Ointment – Conflict with Indivision AGA Mk3 Flicker Fixer

On a slightly more sour note I did encounter one issue with my unit. Whenever the SDBox was accessed, whether that be reading or writing data, my screen flickered/wobbled around. You can see exactly what I’m on about in the little video clip I recorded below. After testing all sorts of things I narrowed it down to an issue with using interlaced HIGHGFX screenmodes on my Indivision AGA Mk3 flicker-fixer. Normal Amiga screenmodes, including interlaced ones, worked just fine as did non-interlaced HIGHGFX modes (all of these still going through my flicker-fixer).

Naturally Sod’s law meant that my screen was utilising ‘HIGHGFX Super-High Res Laced’ which is why I witnessed the issue from the start. It’s certainly not a deal-breaker – it’s more of an irritation than anything else (especially if you are a bit of a perfectionist). It doesn’t affect the operation of the SDBox and I can certainly live with it – just something to bear in mind for anyone with a similar setup.


I tried many things to get rid of the issue and also contacted the manufacturer of the Indivision card but so far I do not have a solution. If I ever get to the bottom of the issue I’ll update this post.


How to make a 4Gb partition on a larger SD Card.

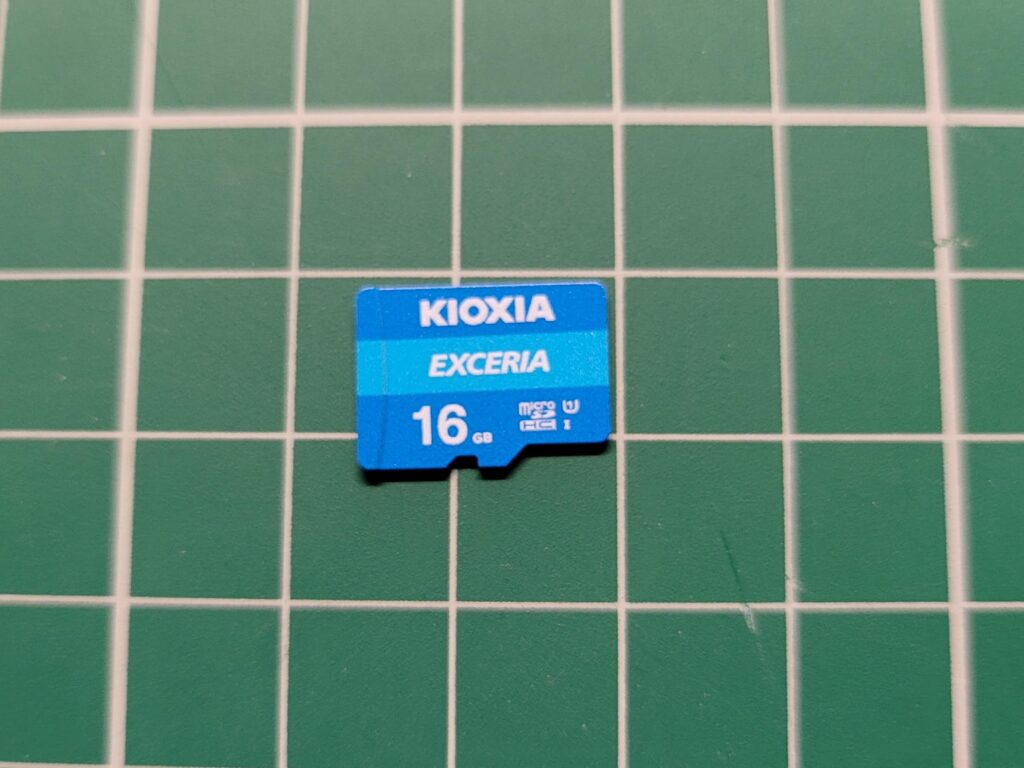
This is a pretty straightforward task to accomplish in Windows. I used a nice bit of free software called ‘MiniTool Partition Wizard‘ to do the job along with a spare 16GB MicroSD card that I had lying around.


MicroSD Card

A generic 16GB MicroSD card I used for testing.


Basically what you need to do is load up the software and then find your card in the list of drives. They normally show up slightly smaller than the stated capacity. For instance I popped in a 16GB card and it showed as 14.43GB under the list of available drives.

Once you’ve located it simply right-click it and select ‘Delete Volume’ then do the same again but select ‘Create’ to make a new, smaller partition. On the ‘Create New Partition’ screen select ‘FAT’ as the file system (see screenshot below) and it will shrink the size of the partition down to 4GB automatically. Give it a name (this will appear on your Amiga workbench) and then click ‘OK’ and then ‘Apply’ to make all these changes happen.


Partition Wizard

Partition Wizard – New Partition Settings


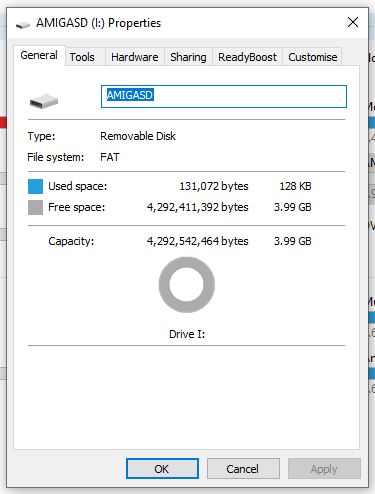
Now if you right-click the SD card and select ‘Properties’ in Windows you should get the screen below showing that the card is now recognised as being 4GB and formatted with the FAT file system.


Windows 10 Drive properties

Checking the size/format of the card in Windows.


Back over to the Amiga – pop the card into the SDBox and boot up your Amiga. You should now see the card appear on Workbench with the name you gave it in Windows. You can go to ‘Icon’ > ‘Information’ to bring up a similar properties screen to check it’s all setup correctly.


SDBox

SD Card properties displayed on Workbench


And that’s all there is to re-partitioning an SD card to work with the SDBox. Enjoy!


Rogue64 Review

Rogue64

It’s been a good while since I reviewed a game but after recently picking up Rogue64, a new game that has just launched for the Commodore 64, I suddenly felt the urge to write one.

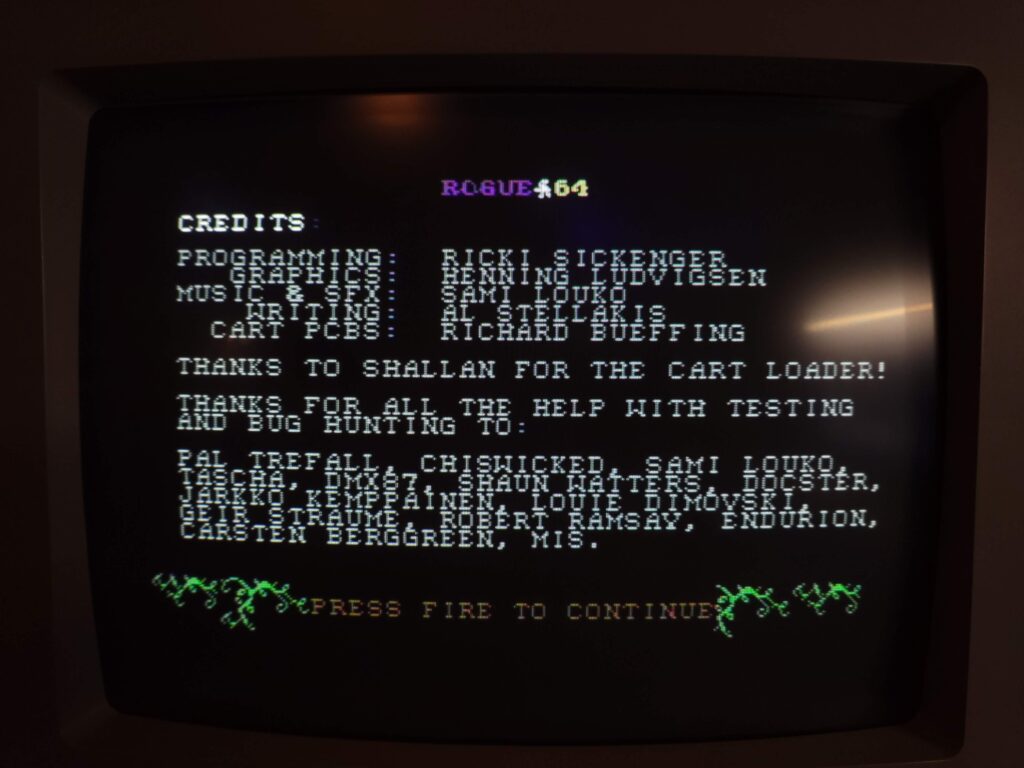
The game, created by Badgerpunch Games (credits in the image below), is available both physically (from Bitmap Soft) and digitally from Itch.io. priced at £35 and £4.60 respectively. I picked up my copy of the game digitally.


Rogue64 Credits

Rogue64 Credits


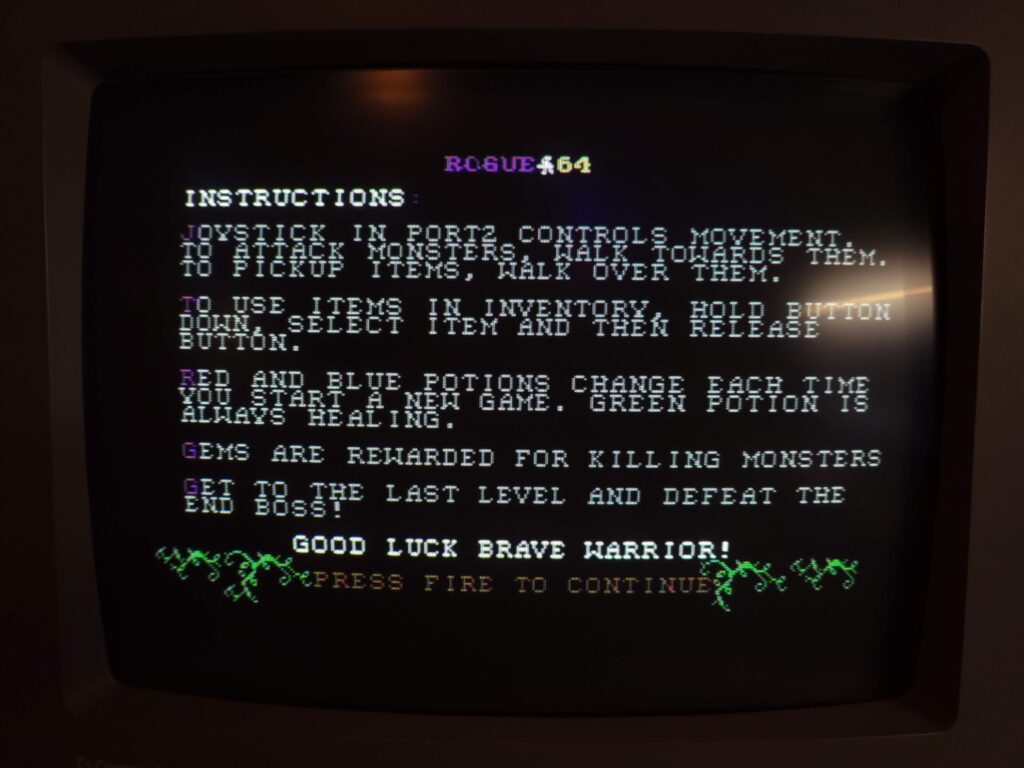
The download included a CRT cartridge image along with a very attractive PDF instruction booklet. An Easyflash cartridge version is also available to download. At the time of writing the game is only available in cartridge form (whether that be physically or digitally).


Rogue64 Instructions

Rogue64 Instructions


I ran the game via my 1541 Ultimate II+ cart (and via emulation) and it worked without a hitch.


Story

The story, according to the games Itch.io page, goes like this: “You are Zendar the explorer, looking for treasure and fame in the dungeons of Mordecoom! Rumour has it that there is a magic item at the bottom of the dungeon, and you want it! The only problem is that there are evil cave dwellers lurking in the dark, waiting to attack as you travel deeper and deeper into this cube-like tentacle terror maze. The dungeons of Mordecoom are waiting!”


First Impressions

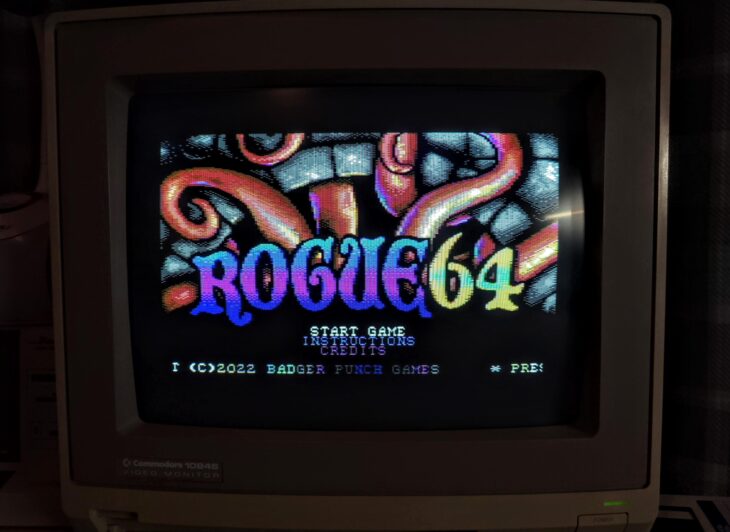
On first running the game there’s a ‘Bitmap Soft Presents’ screen complete with digitised speech before reaching the main title screen. From here you can choose to see the game credits, some instructions or begin your descent into the dungeons of Mordecoom…


Rogue64

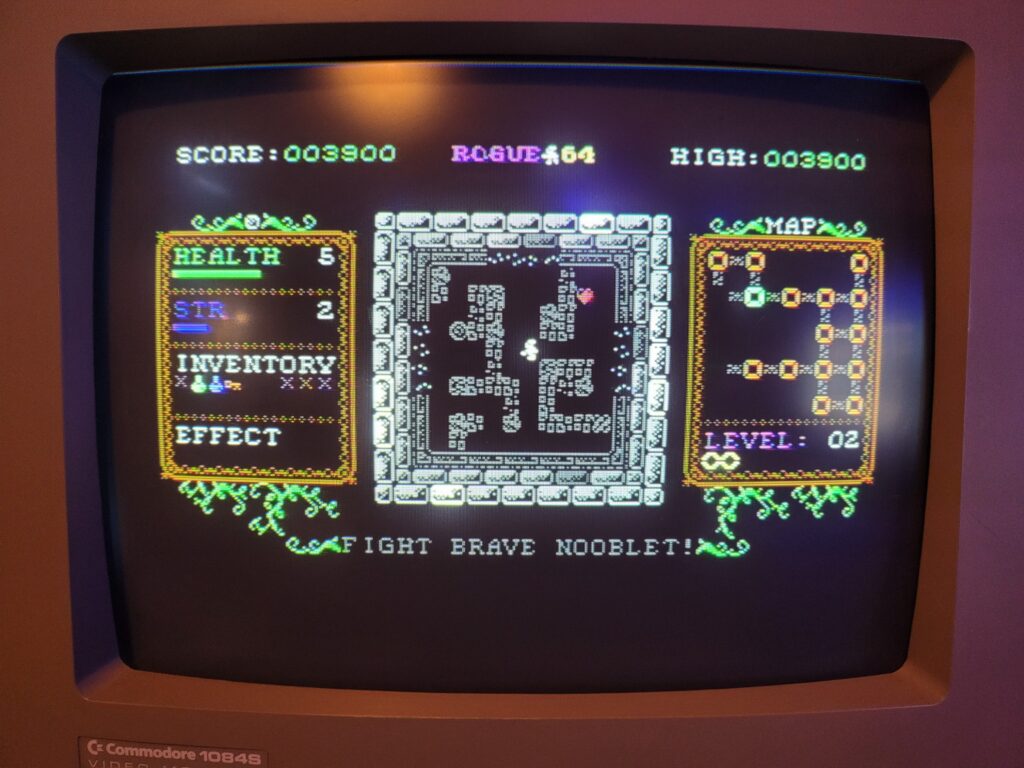
Rogue64 game screen


The game screen is attractively presented, which considering this is all you will ever see, is just as well. The game utilises the C64’s hi-res graphics mode to achieve a detailed and crisp display. A good use of colour ensures that the screen is still attractive to the eye and everything is presented clearly.

In time honoured tradition your score and high score are displayed across the top of the screen along with the name of the game.


Rogue64

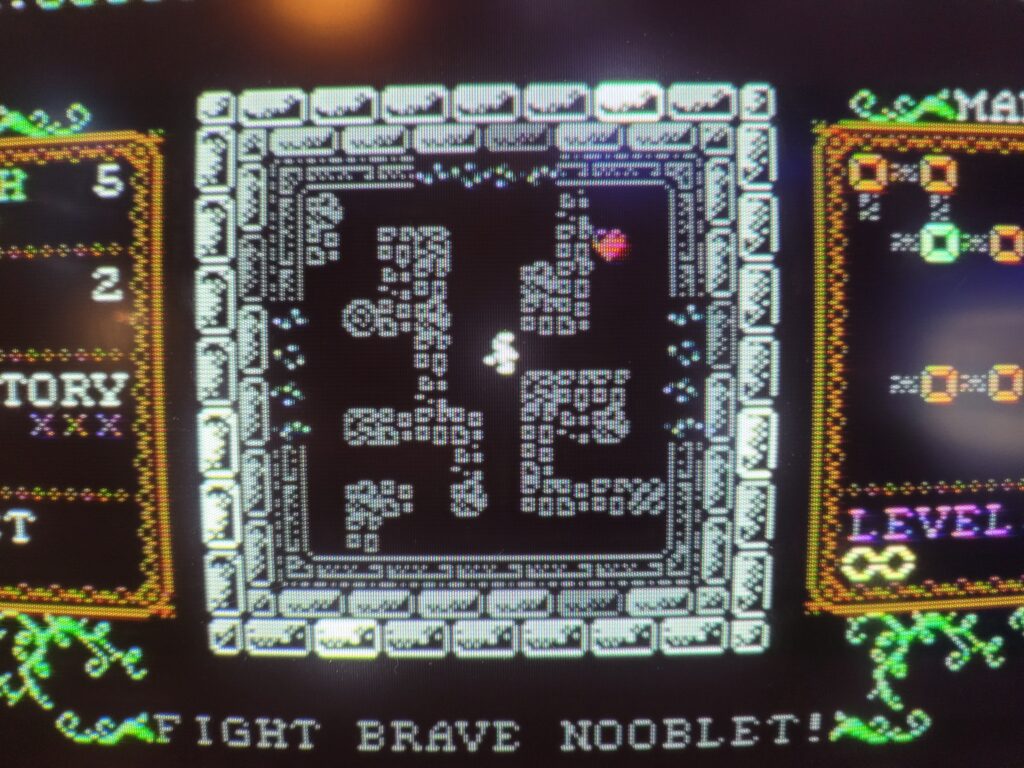
Gameplay window showing current room


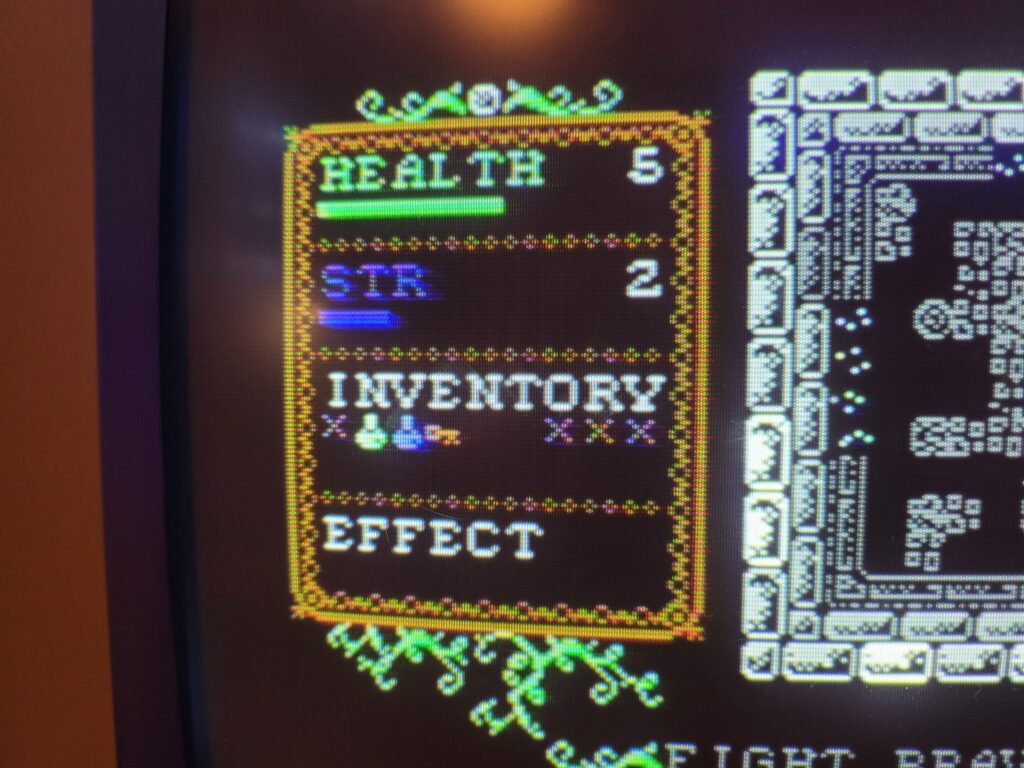
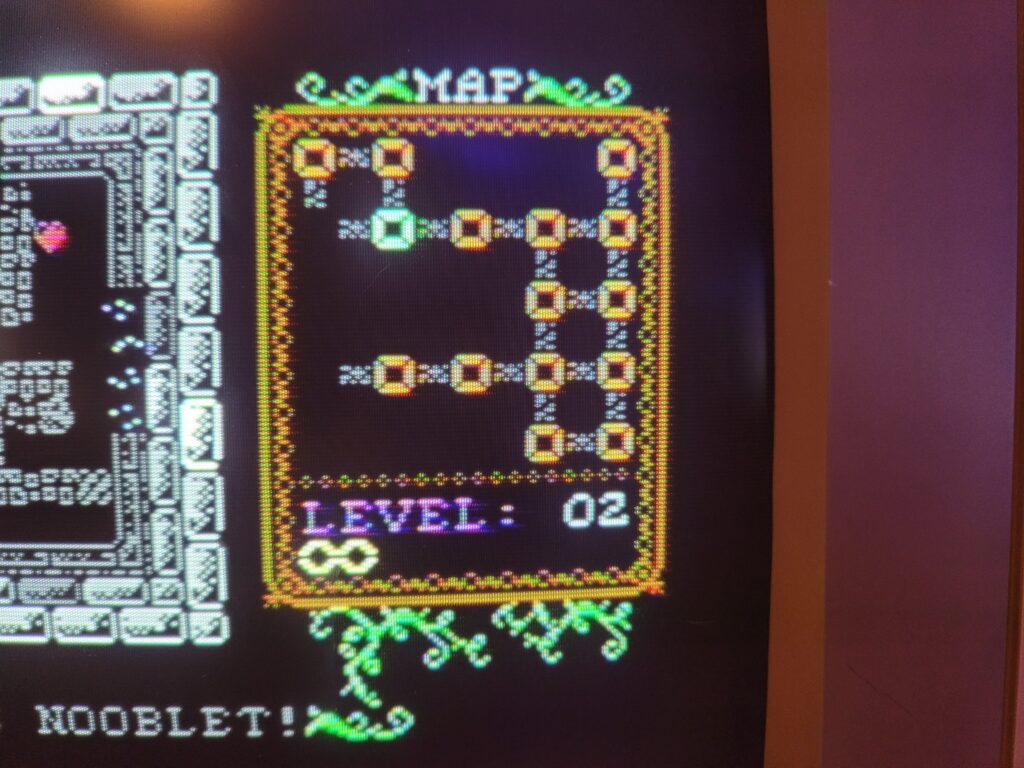
The main screen is split into 3 main sections. On the left is the information panel where you can see your health, strength, inventory and status effects. The central window is where we can find our hero and where all the action takes place. The right hand side displays a map of the current dungeon and is updated automatically as you explore. Each dungeon level has a name which is displayed across the bottom of the screen.


Gameplay

The aim of the game is to battle your way through multiple dungeon levels and ultimately face off against the final boss. Levels get progressively more difficult as you journey deeper down and new monsters are introduced. Thankfully our hero gets stronger too thanks to magical gems that can be found as you explore. These can grant him extra strength or increase his health bar.

Grabbing gold bars adds a nice chunk of points to your score whilst various potions scattered around each level can help or hinder your progress. Green potions always recover health but the red and blue ones could do anything at all. This is because their contents are randomised at the beginning of each game to add a bit of variety to each play through. Some of their effects include freezing time for a number of moves, killing all monsters in a room, making you drunk so you move erratically and so on. This definitely adds an interesting element to the game as you drink one for the first time to discover what it does!

Hearts can also be found on each level and will recover our hero’s health on contact. However unlike the green potions they cannot be carried so you have to decide on the most opportune moment to use them.


Rogue64

Character stats and inventory


Each dungeon is split up into several small rooms and each of these is displayed in full within the central window. There’s no scrolling – your character stays within the confines of that window – it flips as you move from one room to another. Rooms tend to be a little maze-like in appearance and will incorporate one or more exits that allow you to move around the level.

Speaking of movement, our hero is controlled with a joystick in port 2. You simply push in the direction you want him to go. Objects can be picked up by simply walking over them and go straight into your inventory. I think the clever ‘use item’ system is worthy of a mention too. To select a potion within your inventory you hold down the fire button and move the stick left and right until it is highlighted and then simply release the fire button to use it. Very simple and slick, much like the rest of the game.


Combat

Enemies can be attacked by standing next to them and pushing our hero in their direction. Combat is automatic and uses RNG along with your strength, active potions and health to determine the outcome. As RNG is employed both your attacks and those of the monsters can and will miss their target occasionally so it pays to be careful. If a fight looks like it’s going the wrong way, running away is a viable option. You can come back to finish them off after you’ve healed up. It’s important to note that the game is turn based so enemies only react or move when you do which which makes it quite a relaxing experience overall.

Occasionally monsters can inflict a status effect on you that will last for a number of turns. I managed to get poisoned by a snake and kept taking damage after every move. If I hadn’t had a healing potion on me I would have been dead for sure. Likewise some of the potions you take have status affects such as making you stronger or intoxicated for a few turns and so on. This adds a certain level of unpredictability to the game and keeps you on your toes.

To progress onto the next dungeon you must find the exit to the current one (a yellow door) and also the key required to open it. Both of these are randomly somewhere with each level. You could choose to rush to the exit in each dungeon as it is quite possible to avoid contact with a lot of the monsters. However you’ll miss many vital upgrades doing this and end up being ill-prepared for the final boss fight. Far better to take your time and explore each room fully, defeating every monster along the way. Besides, this is what I’d call a ‘high score chaser’ game and the only way to get a decent score is to kill and collect everything in sight!


Design

I really appreciate the way the game screen has been designed – it’s very aesthetically pleasing and everything you need is always visible. No need to toggle map screens or inventories – it’s all there, all the time. The game employs an auto-map feature which is pretty neat. When you enter a room it is added to the map straight away and all available exits indicated too. This makes it easy to see at a glance if there are any rooms you haven’t discovered yet. Occasionally you can pick up a potion that will highlight all the rooms in a level immediately but I didn’t find these terribly useful.

It’s all thoughtfully laid out, intuitive and everything fits in the space allotted for it. Each room fits within the confines of the central window and each dungeon map fits within the map window. Inventory space is very limited so it pays to use the stuff you find rather than try to hoard it for later.


Rogue64 Map Screen

Rogue64 Auto-Map


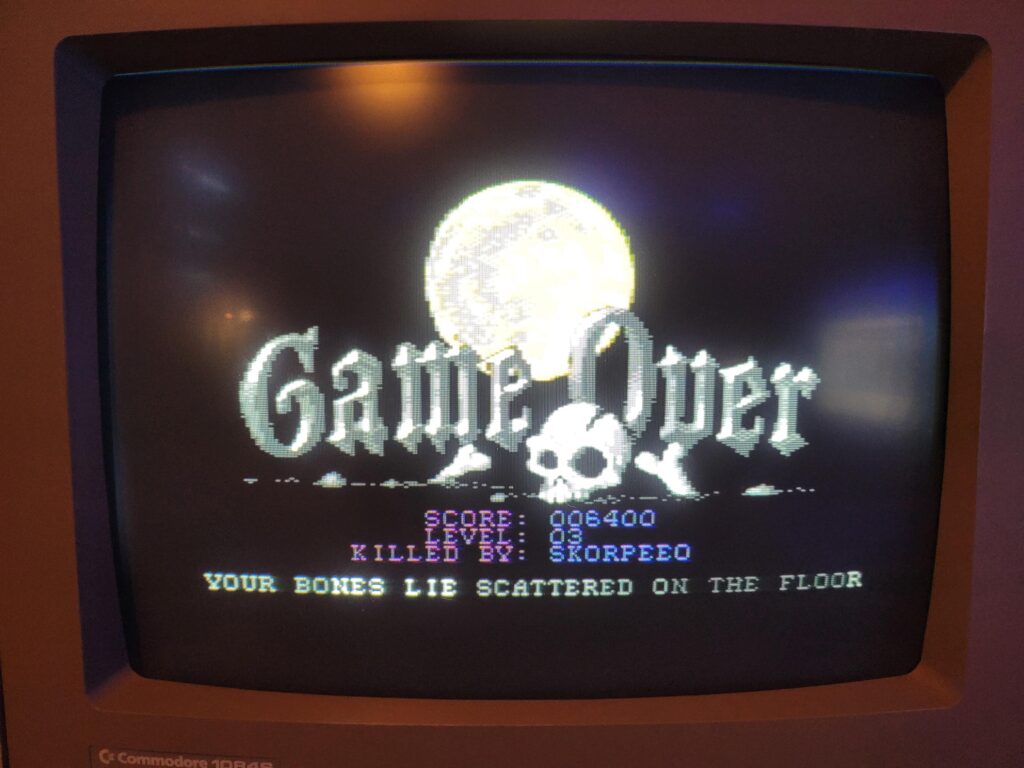
Sooner or later you will meet a grisly death and be greeted with the Game Over screen. This gives you a handy summary of your progress including level reached, score attained and what monster offed you. I should point out that there’s no option to save your progress with this being a ‘roguelike’ game so bear that in mind before you start your dungeon crawl. None of your progress or hero upgrades carry over to your next play through – you are back to square one every time.


Rogue64 Game Over

Rogue64 Game Over screen


Music and Sound

Playing throughout is a terrific SID tune that really suits the game and certainly never gets tiring. Sound effects are minimal but are there when required. Battling, picking up items, exiting a room and so on all have their own little effects that add to the immersion of the game. There’s also a screen shake effect that occurs when you take a hit in battle which is a really nice touch.


Nit-picking

There are a few little things I wish had been incorporated into the game. For example, as great as the automap system is – it would be even better if it was able indicate the exit (after you have discovered it of course) to make it easier to find once you’ve located the key. Likewise if it could identify rooms with discovered but uncollected items I’d find that a real boon too.

Another feature I would love to see is an option to save your game, although I can understand why it’s not there. If you are 10-15 minutes into a game and something comes up it would be nice to have an option to save your progress. Whilst I don’t mind leaving my PC on for extended periods of time, leaving my 40 year old C64 on with a game paused is a definite no-no for me. Finally the big draw of replaying the game is to beat your high score – it would be awesome if the game actually saved this for posterity too.


Mobile Gaming

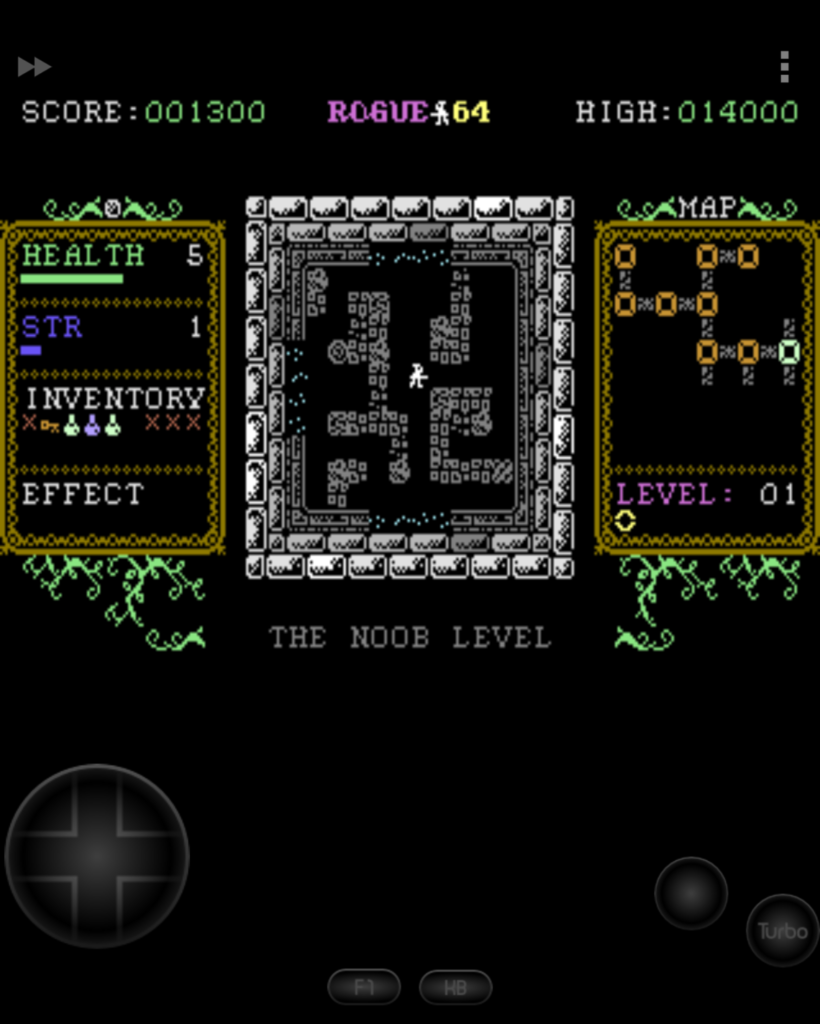
I’m not a massive mobile gamer but occasionally I’ll stumble across a game that I like to while away my lunch hour playing. This is one of those games. The turn based combat, addictive gameplay and simple control system make this a perfect game to play on a C64 emulator on my phone. There are quite a few C64 emulators out there for Android users; I use C64.emu and this game runs absolutely flawlessly on it. An added benefit of playing on my phone is that I can just flip it shut and the game is paused indefinitely until I come back to it. Nice! If smartphones had existed in the 80’s I would have failed all my ‘O’ Levels for sure…


Rogue64

Rogue64 running on my phone via the C64.emu emulator


Verdict

Normally roguelike games infuriate me. I hate losing my progress and having to slog through a game just to get back to the where I was up to. That’s definitely not the case with Rogue64 though. Through a combination of slick game design, simplified controls, easy to master turn based combat not to mention a great SID tune and a fair but addictive gameplay loop, Rogue64 keeps me going back for ‘one more go’. Sure I could kick myself when I die stupidly after failing to reach the next dungeon, but there there’s also a real sense of satisfaction when I finally do and beat my high score in the process. I’ve not yet reached the last level of the dungeon or seen the boss monster but I’m determined to keep trying until I do!

Zzap! Amiga Micro Action – Brand new UK Amiga magazine!

2021 was a great year for Amiga magazines. Back in January there was the launch of Amiga Addict, then towards the end of the year, another brand new magazine appeared; Zzap! Amiga – Micro Action from the same guys who resurrected Zzap! 64 – Fusion Retro Books.

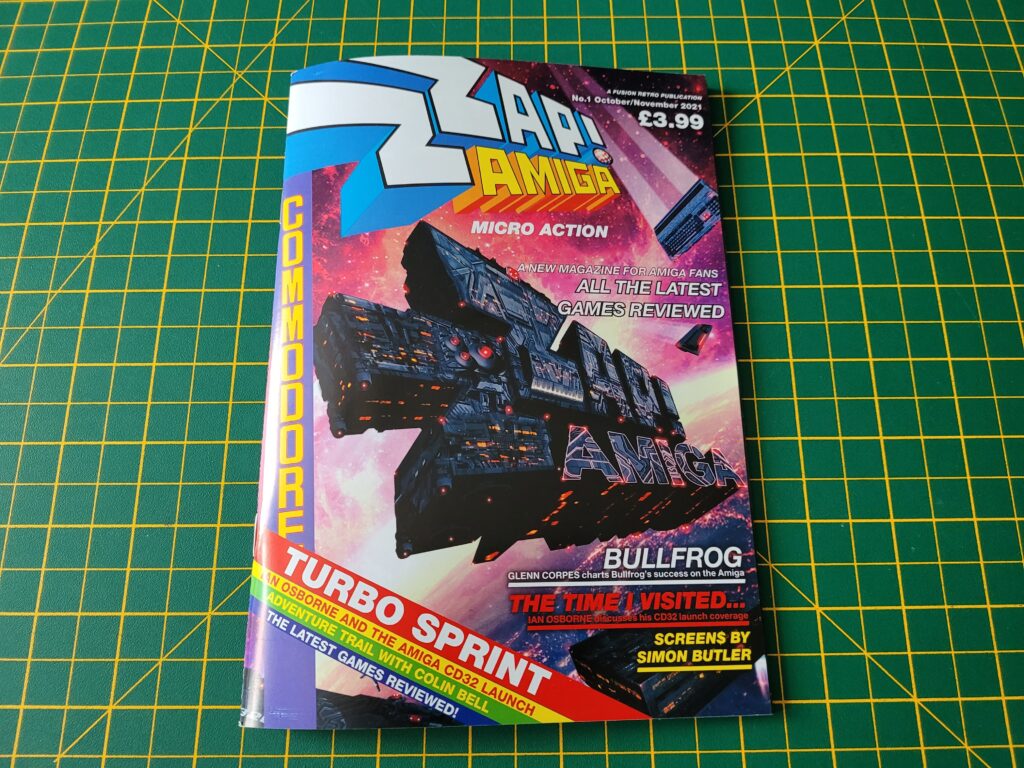
Zzap! Amiga

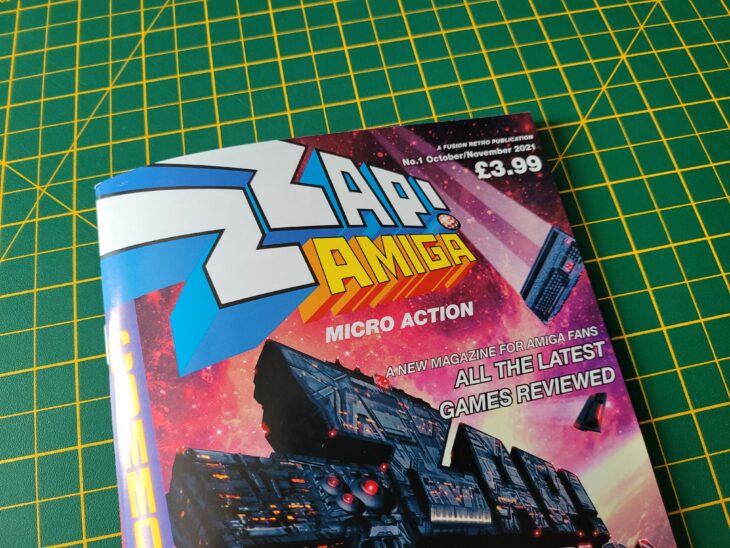
Zzap! Amiga Front Cover

The cover design adopts the familiar Zzap appearance and represents, perhaps, what we might have seen back in the late 80’s had Zzap fully transitioned over to the Amiga.

The magazine itself is A5 sized and is printed in full colour on thick glossy glossy paper, stapled at the centre. There’s a grand total of 58 pages sandwiched between the covers comprising mostly articles with a small smattering of adverts. From what I can gather Zzap! Amiga will be published 4 times a year (quarterly).

A Look Inside Issue 1

Zzap! Amiga

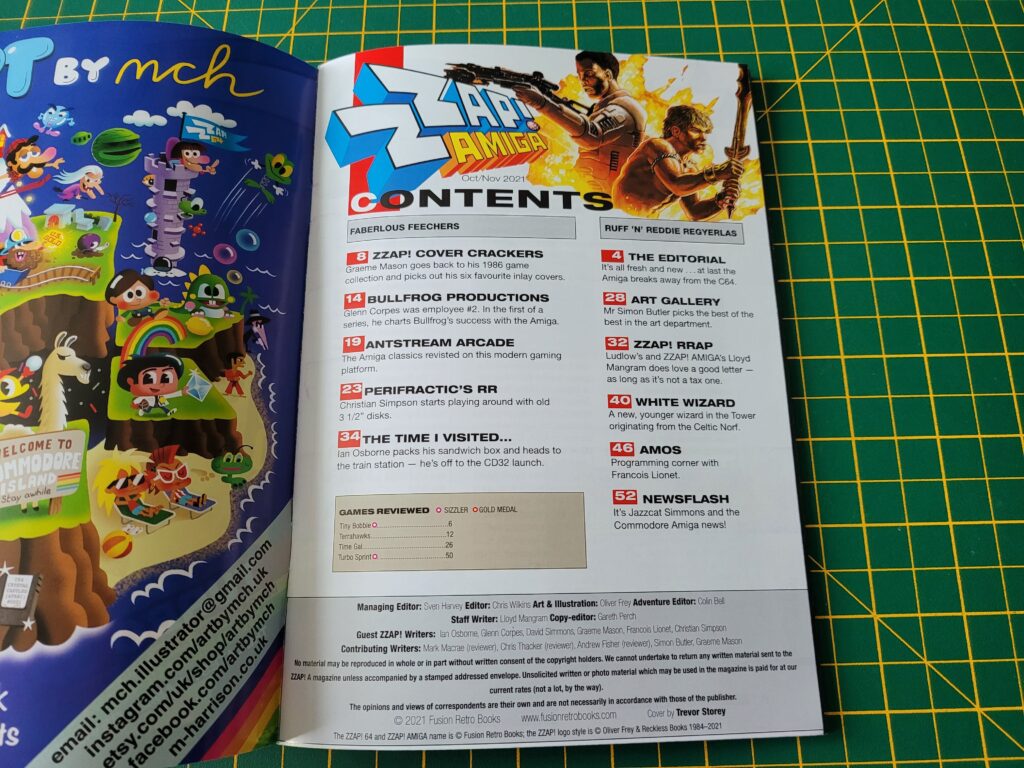
Zzap! Amiga Contents Page

There’s a clear emphasis on gaming here, which is to be expected considering Zzap’s heritage. This is probably why it’s only coming out quarterly too, allowing time for enough new games and news to surface. Some Zzap! regulars make an appearance including Zzap! Rrap (letters page) and The White Wizard (adventure gaming). RetroRecipes’ Chris Simpson (Perifractic) has his own section of the mag too whilst elsewhere there’s a 6 page article reminiscing about the CD32 console launch. There’s some cool featured Amiga art and a look at the success Bullfrog had with the Amiga. Of course there’s plenty of news from the Amiga gaming scene included too.

Zzap! Amiga

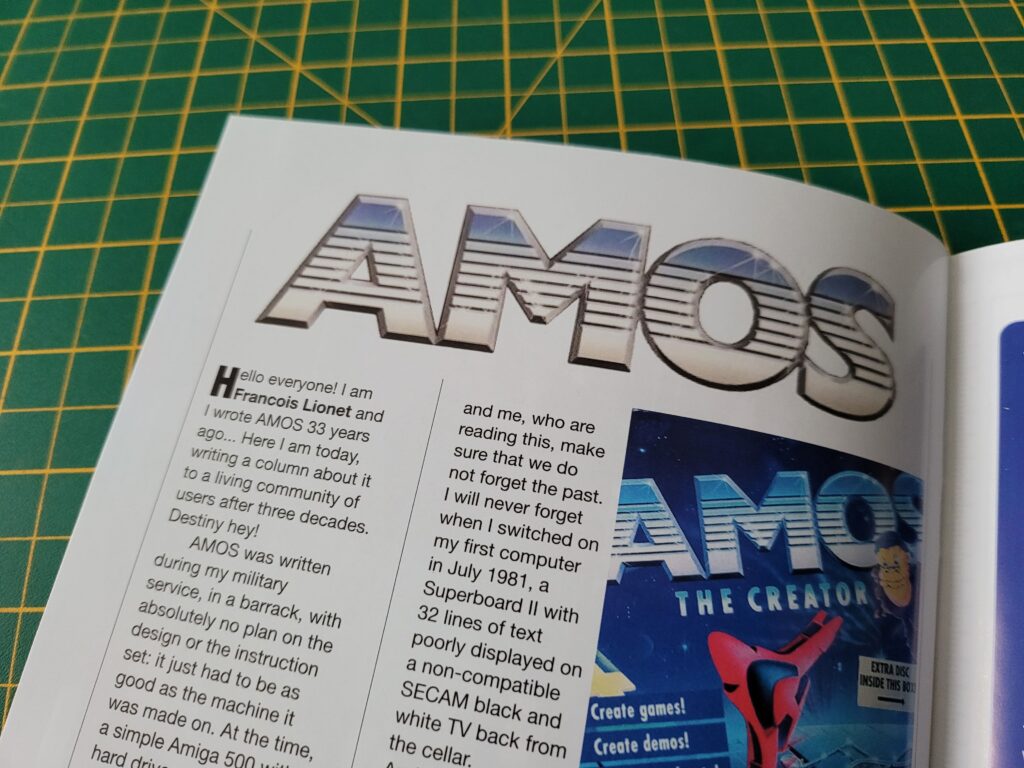
AMOS

AMOS Coding

Finally I have to mention I was really pleasantly surprised to see that there was an AMOS coding section near the back of the magazine. It even included a type-in listing to enter! The article also contained information on how you can legally get a free copy of AMOS to experiment with. As a big Amiga tinkerer this was definitely right up my street. I have a boxed original copy of AMOS so this is just the excuse I need to dust it off and put it to good use! I sincerely hope to see more of this sort of stuff in the future.

This slideshow requires JavaScript.

All in all this was a great read, especially if you are an Amiga gamer. It was entertaining and informative without being dry and serious. I personally would have liked to see more game reviews – hopefully issue 2 will improve things in this respect.

At £3.99 plus postage it’s a no-brainer for me and a worthy addition to my retro magazine collection. Don’t forget you can get 15% off with code ‘LYONSDENBLOG’ at the checkout!

Head on over to Fusion Retro Books to pick up your own copy. At the time of writing issue 2 is about to be published too which I’ll definitely be getting.

CD64 Interface – First Edition Review

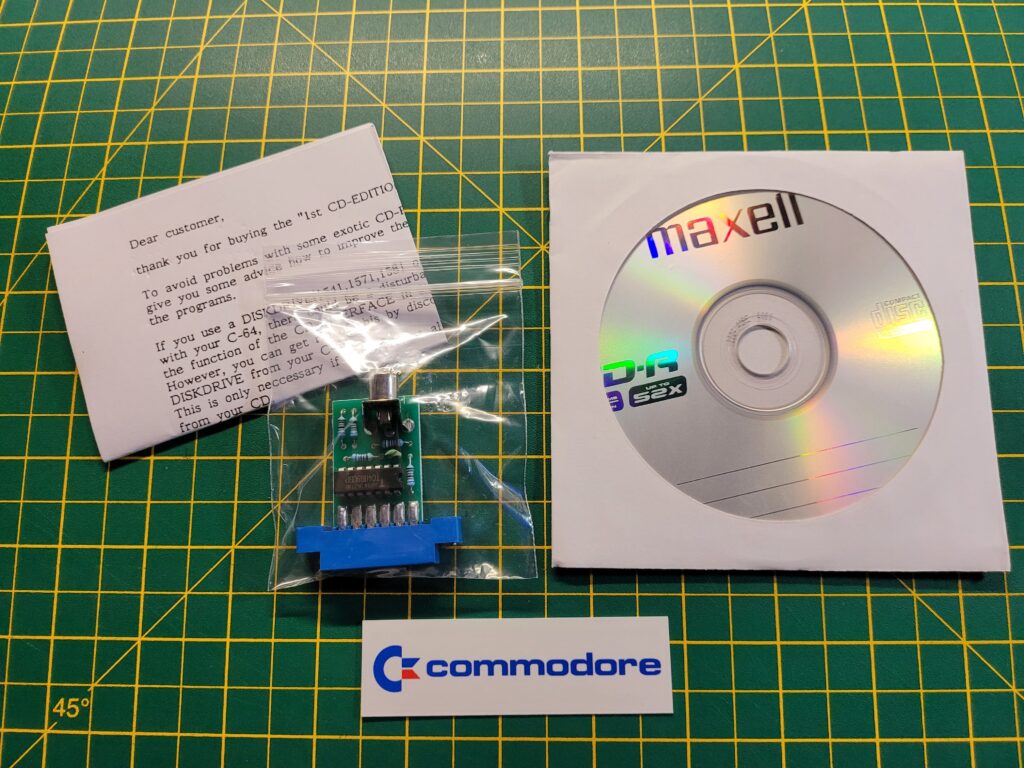
If you’ve ever wanted to use CD’s with your C64 then this could be the gadget for you. I spotted this little gizmo on the SharwarePlus website and wanted it immediately. It arrived quickly and well packaged. Inside the box there was a CDR containing a bunch of games, the CD64 interface itself, an instruction sheet and a small Commodore bookmark type thingy.


CD64 Interface Package contents.

CD64 Interface Package contents.


A Closer look at what’s included

The CD64 Interface comprises a small circuit board with a cassette port socket one end and a single RCA socket the other. The RCA socket actually gives the first clue as to how this device works.


This slideshow requires JavaScript.


The second big clue can be found when you insert the CD into a computer…


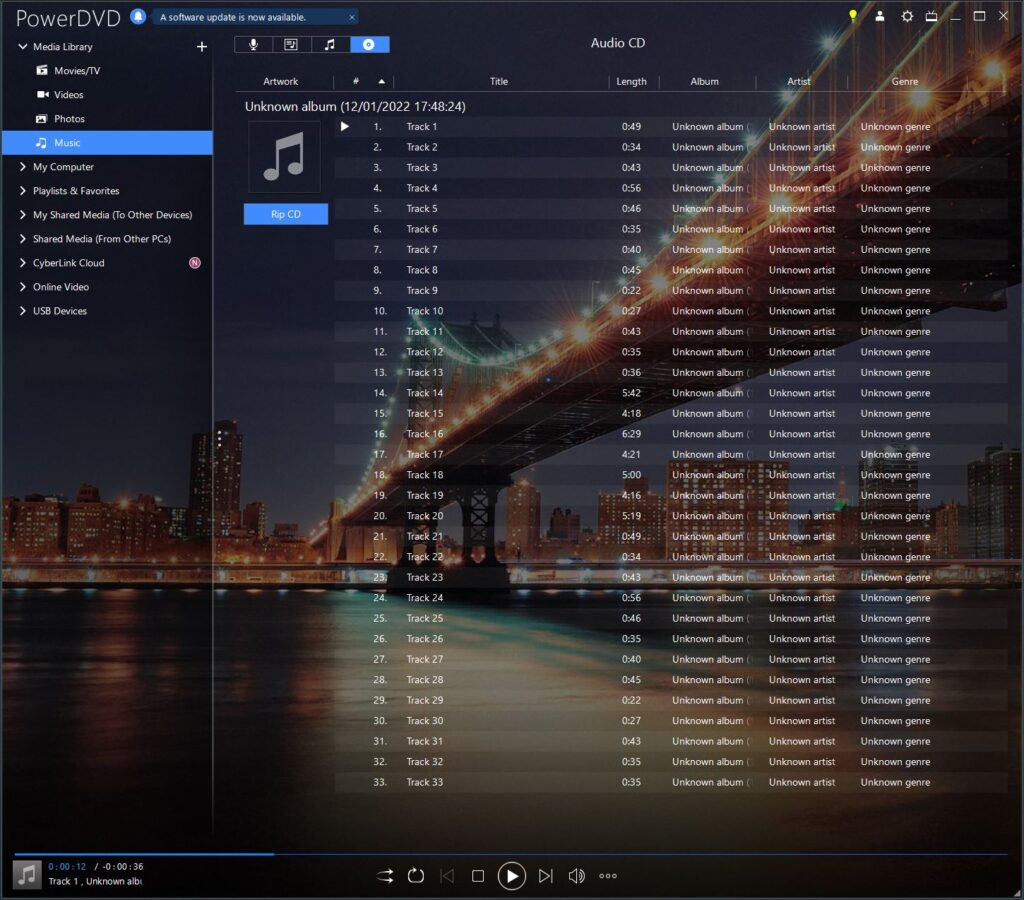
CD Tracklist showing all 33 tracks included on the CD.


If you haven’t already worked it out, the device lets you hook up the audio output of a CD player to the C64’s cassette port. The connected player then becomes a datasette of sorts albeit one with direct access to each program. The disc included is an audio CD and contains 33 audio tracks. Playing a track back through a stereo fills the room with that familiar screeching sound that most of us remember from the 80’s when copying games on cassette.


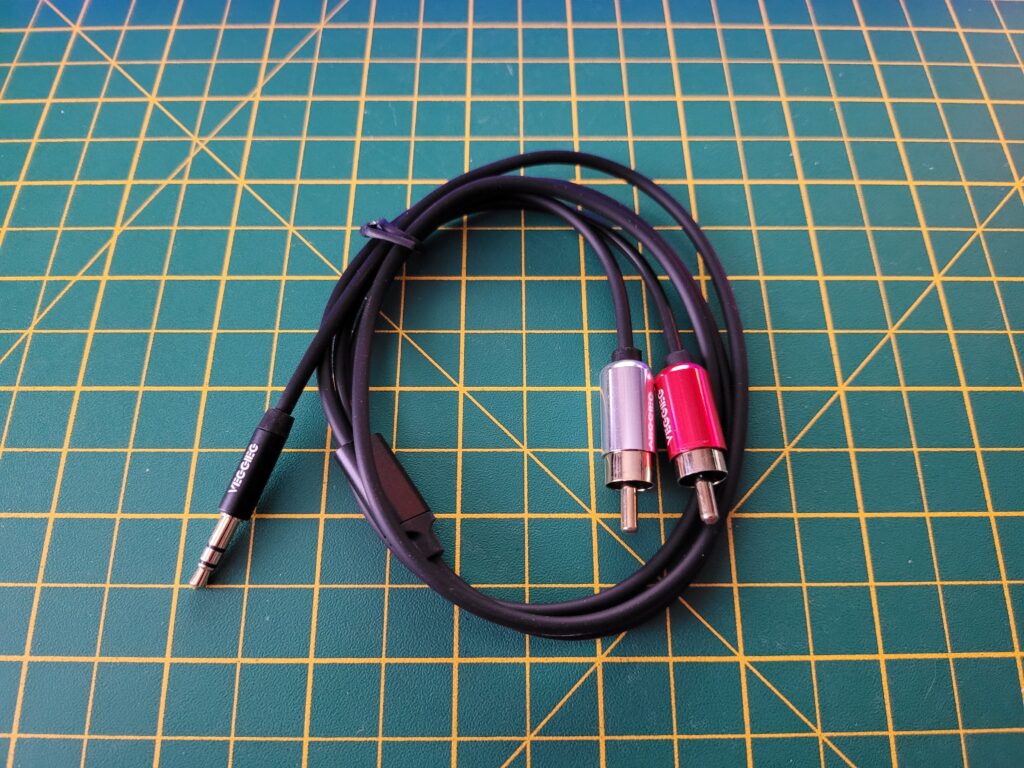
3.5mm headphone jack to Stereo RCA cable (not included).


In addition to the C64 game files there’s also seven Chris Hülsbeck music tracks on the CD which can be listened to on your CD player. Don’t try and do what I did and load them on the C64 thinking they were some sort of demo scene tracks – doh!


CD64 interface

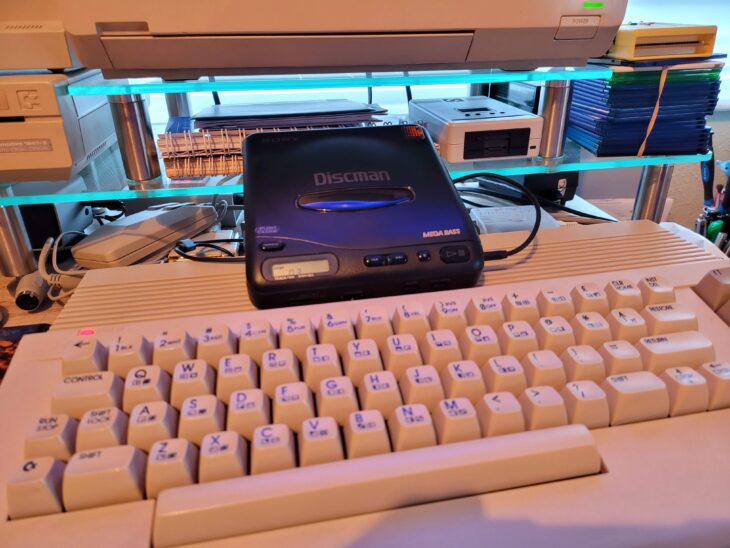
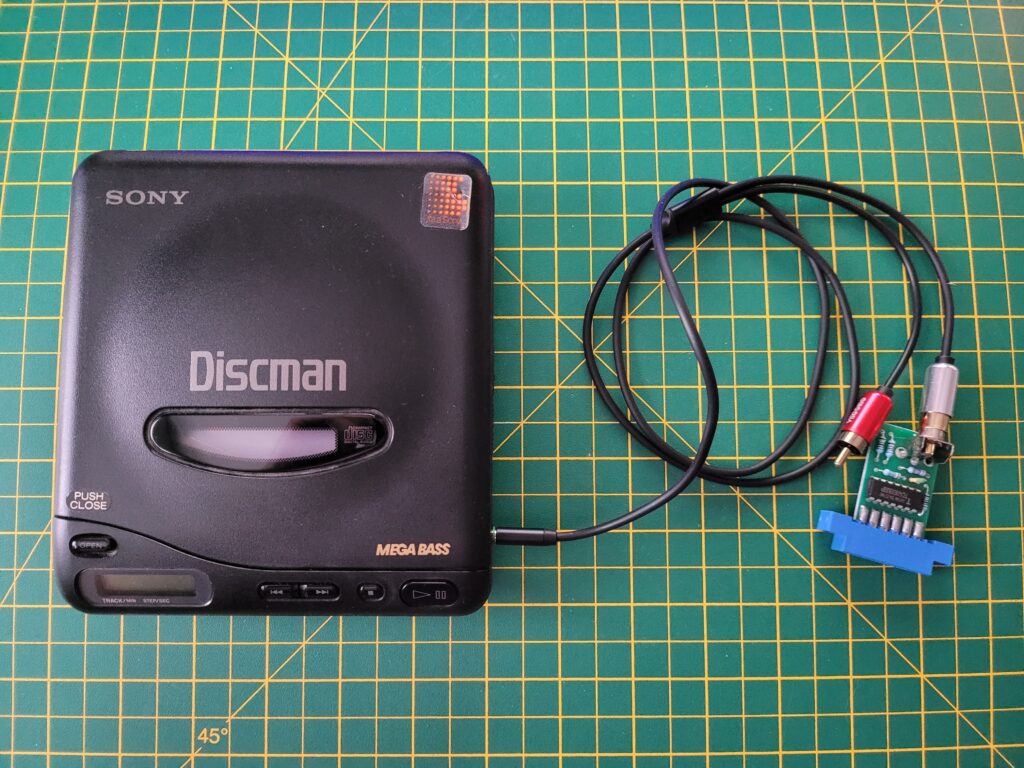
My Sony Discman D-11 attached to the CD64 interface with a 3.5mm headphone jack to stereo RCA cable.


To access the CD I used my old Sony Discman D-11 and a 3.5mm headphone jack to RCA cable to try it out. I listened to the CD with a pair of headphones first just to make sure that the sound was coming out of both left and right channels (it did). Consequently it doesn’t matter which RCA plug you use to hook up the CD64 Interface, both will work.


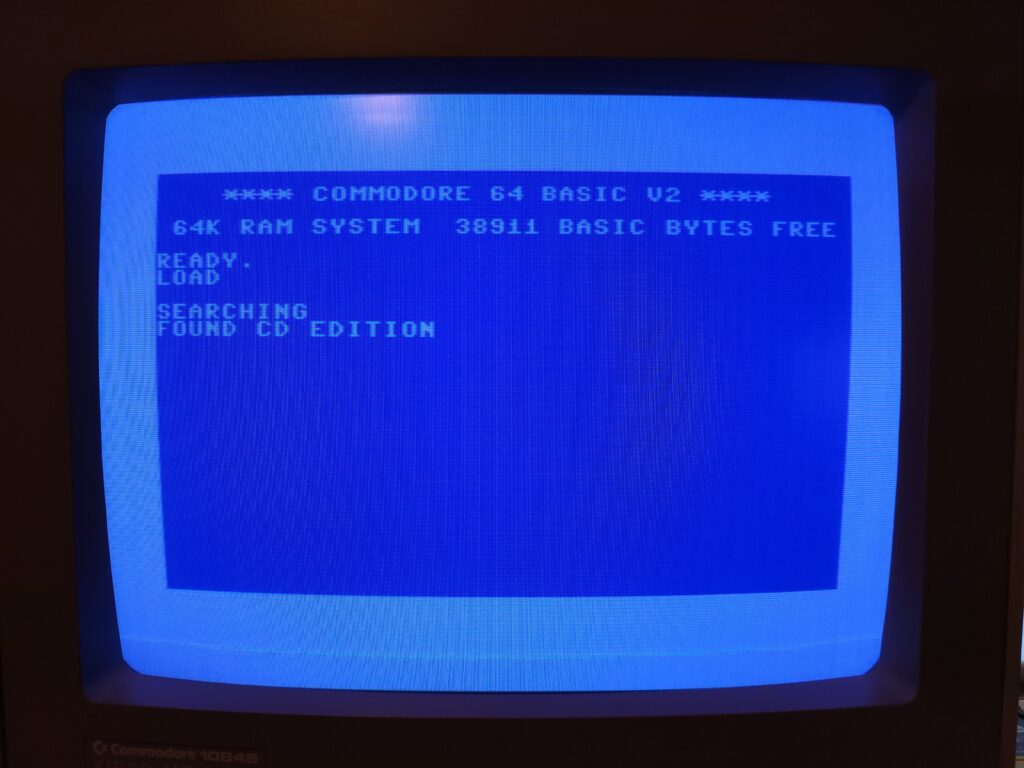
C64 LOAD Screen

First attempt at loading the Menu off CD.


Loading Programs off the CD

To load stuff off the CD you press the familiar SHIFT & RUN/STOP keys and then press PLAY on the CD player. I was very quickly presented with a ‘Found CD Edition’ message which means it had at least found the first data track on the CD. However for a while I couldn’t get any further than this. After reading the guide it suggested unplugging connected devices to remove any unwanted interference. Once I had removed my 1541 Ultimate-II+ cart and 1541-II floppy drive I began to make some progress.

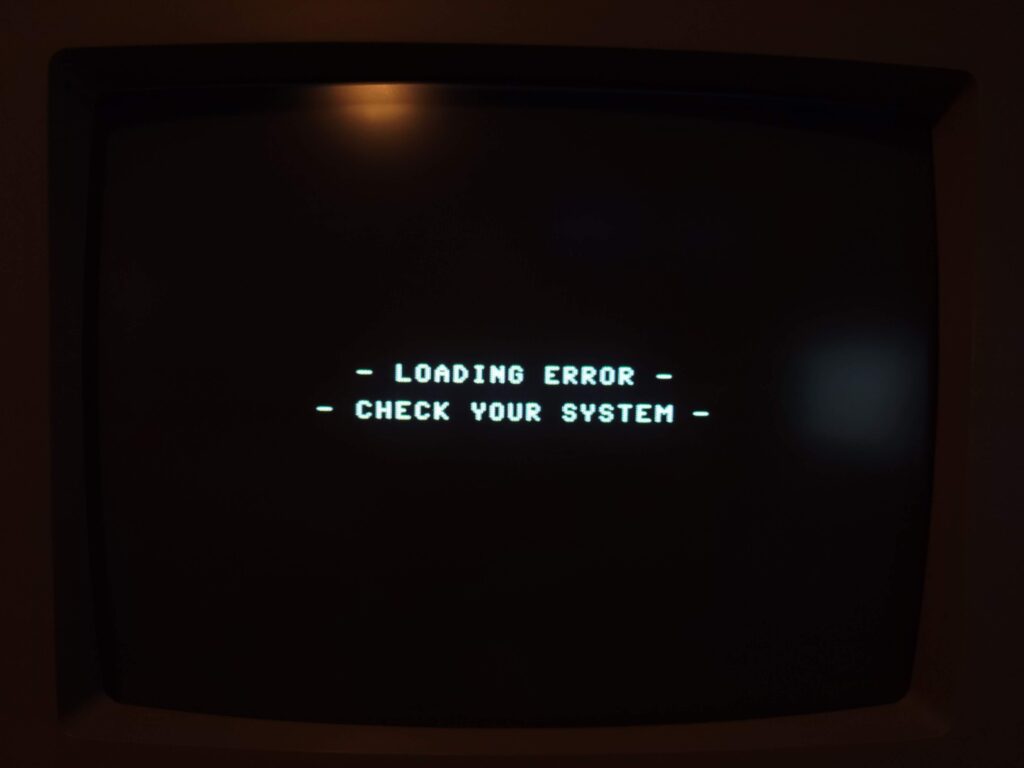
There was still a fair bit of trial and error to get the volume level right though. Too quiet or too loud and the programs failed to load – or loaded with an error.


Load error

Load Error.


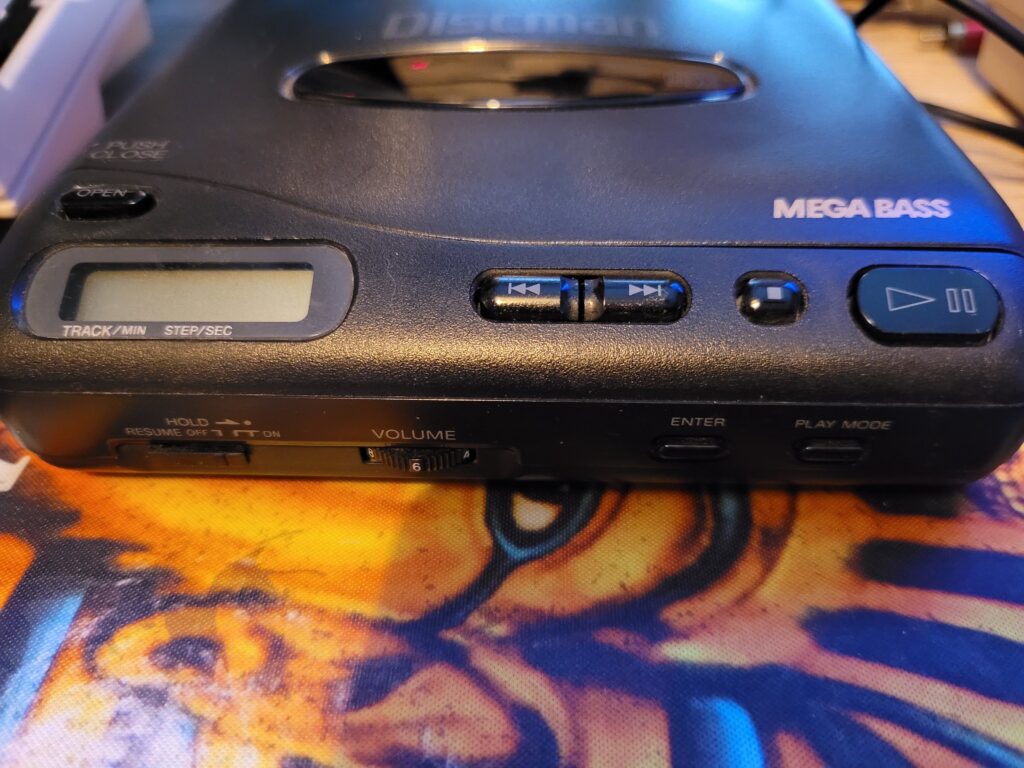
After about 20 minutes of trying different levels I finally found the sweet spot, which for me was a volume level of 6 (my player goes up to 10). I also saw an improvement by setting the Megabass feature to the medium setting (as opposed to being turned off). Of course every player is going to be different in this respect – the key thing is to experiment.


Sony Discman D-11

Setting my volume level to 6 seemed to give the best results.


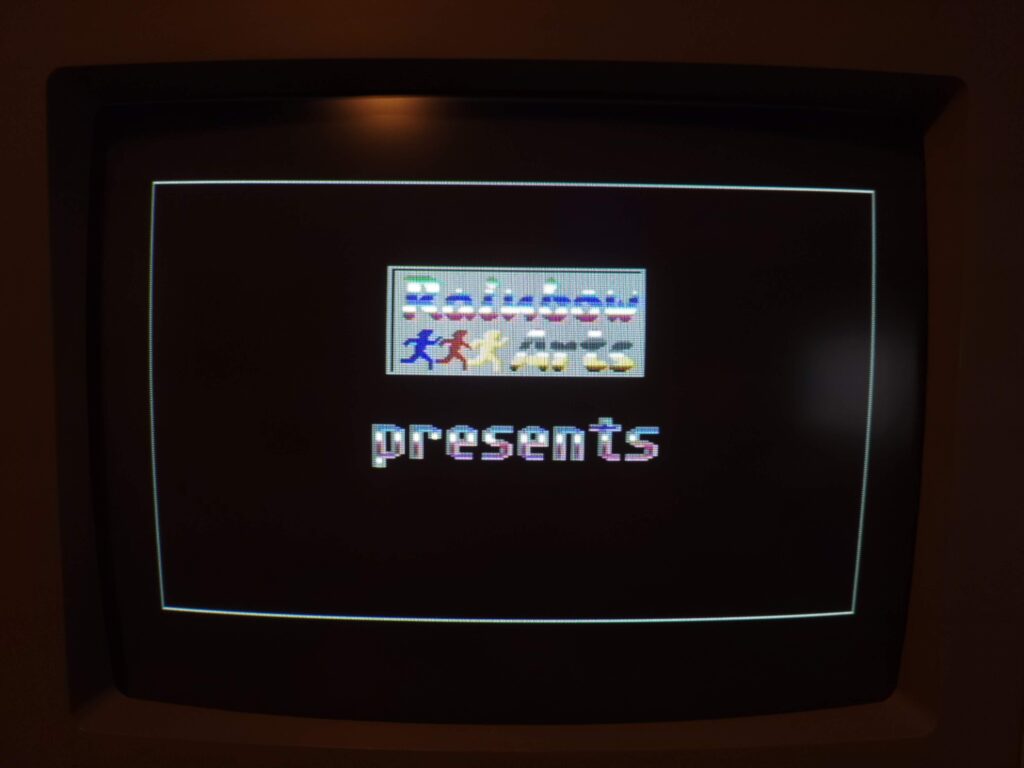
Now that I had the volume level set correctly I was finally able to get to the animated ‘Rainbow Arts’ Title Screen.


Rainbow Arts Title Screen.

Rainbow Arts Title Screen.


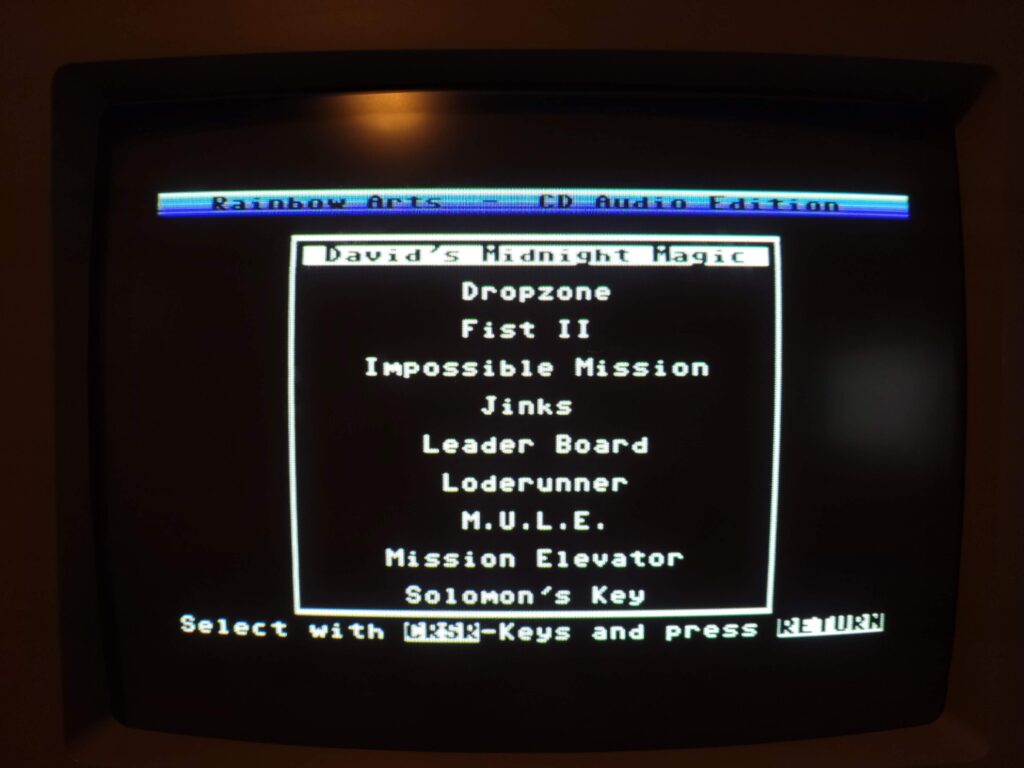
From here I could access each of the included 10 games via a simple menu screen.


Rainbow Arts Menu Screen.

Rainbow Arts Menu Screen.


To operate the menu it was simply a matter of selecting a game from the list with the cursor keys and then hitting RETURN.


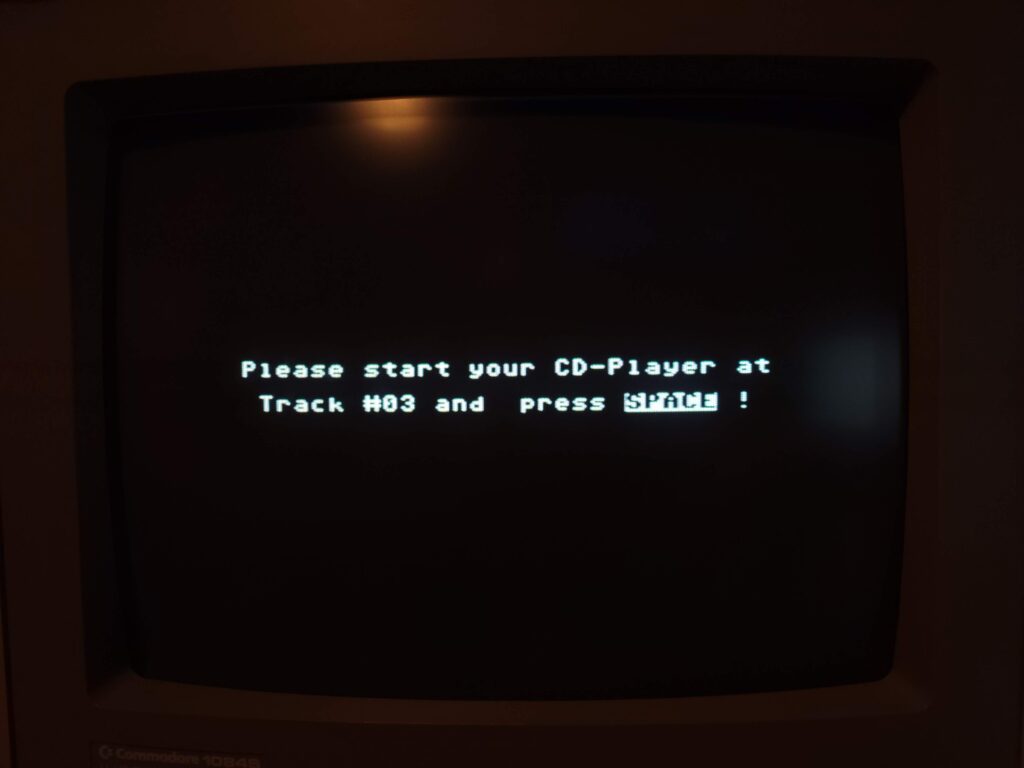
Instructions for selecting the correct track on the CD.

Instructions for selecting the correct track on the CD.


The program then tells you which track to select on your CD player before pressing SPACE to begin loading it.


C64 high speed loader

All programs utilise high speed loaders.


All the games utilise very efficient high-speed loaders so load in no time at all. Impossible Mission took about 35 seconds to load, Dropzone just 15 which is pretty impressive.


A Few of the Included Games

This slideshow requires JavaScript.


CD Contents

Here’s a complete rundown of the CD contents:

1. Start menu,

2. David’s Midnight Magic (Broderbund, flipper),

3. Dropzone (U.S.Gold, action),

4. Fist II – The Legend Continues (Melbourne House),

5. Impossible Mission (Epyx, action),

6-7. Jinks (Rainbow Arts),

8. Leaderboard Golf (Access, golf simulation),

9. Loderunner (Broderbund, jump&run),

10 & 11. M.U.L.E. (Electronic Arts),

12. Mission Elevator (Softgold, action),

13. Solomon’s Key (U.S. Gold),

14 to 20. Music pieces by Chris Hülsbeck,

21 to 33. Repetition of tracks 1 to 13.


Conclusion

This is a great little device once you’ve spent some time tweaking the sound levels. Being able to select which program to load by using the <</>> buttons on the CD player is far more convenient than using FF/RW on a Datasette so it’s shame there aren’t more compilation CD’s like this.

Although there’s only ten games on the CD there’s no reason why you can’t create your own CD compilations. I would think using something like TapWav to convert C64 .TAP files into digital WAVE files and then burning those to an audio CD would work. This is definitely something I’ll have a play around with when I have a spare moment in the future.

I had a lot of fun playing around with this little accessory and the included 10 games too. If you’d like to get hold of one for yourself then head on over to The Shareware PLUS Commodore 64 & 128 Blog and and grab one.

Great Giana Sisters (Reproduction)

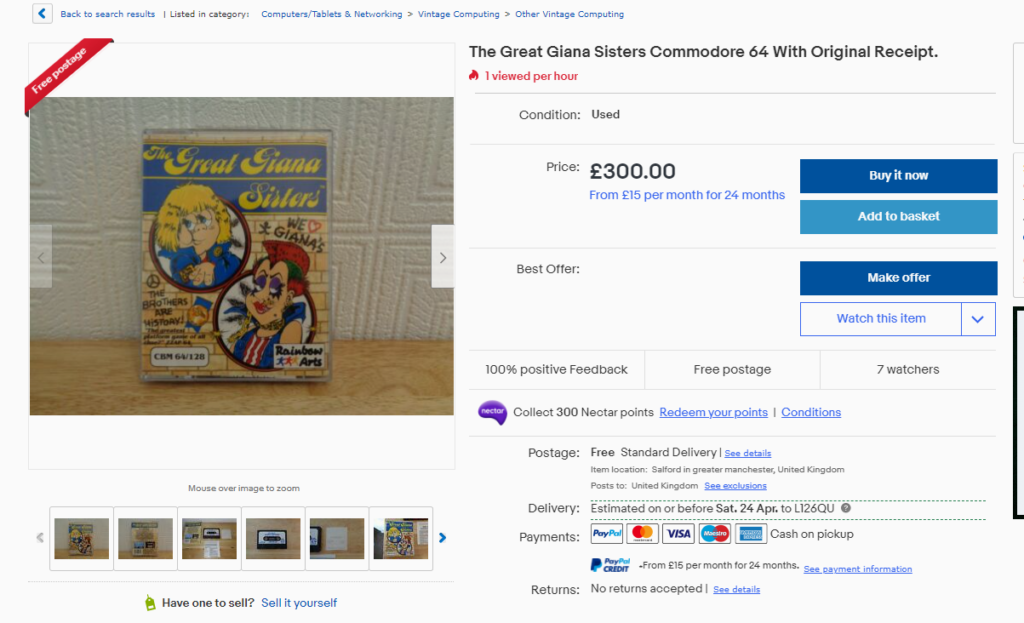
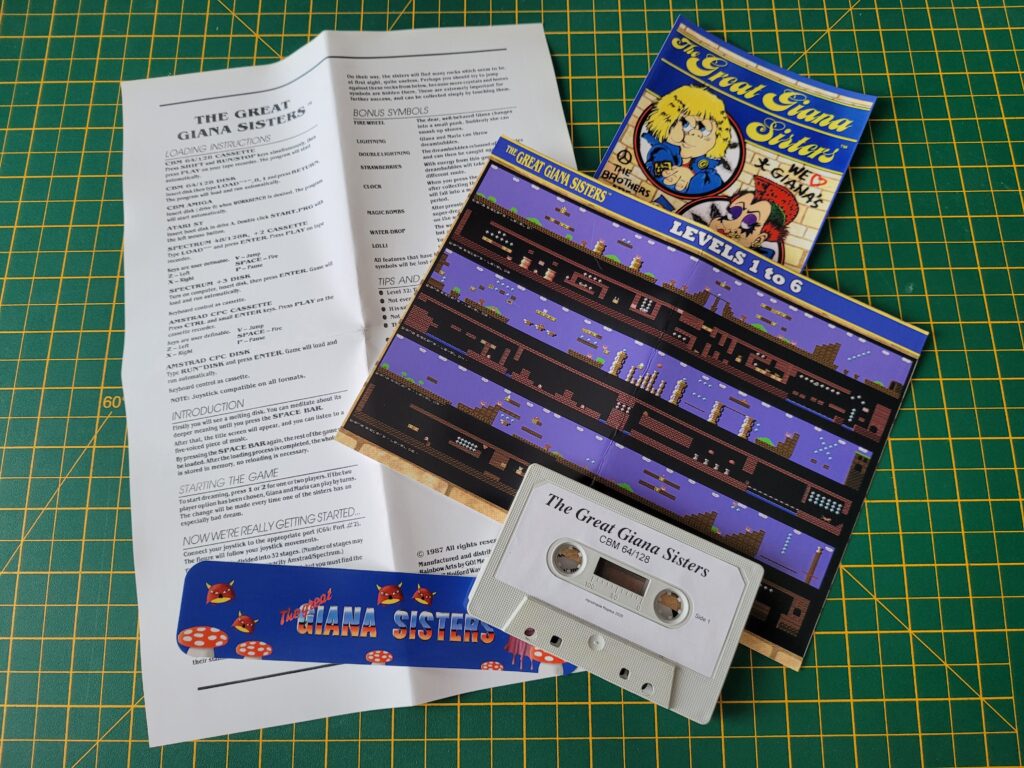
One of the less desirable side-effects of the booming C64 retro scene is the extra demand. The supply of old games and hardware is limited as obviously no more copies are being made. Consequently as more and more people try to get hold of stuff the more scarce and thus expensive it becomes. This is basic supply and demand unfortunately and Great Giana Sisters is a perfect example. It was already a scarce product owing to the small number of copies sold originally but add the extra demand and it becomes classic unobtanium.


eBay

One of the more reasonable asking prices for the game on eBay!


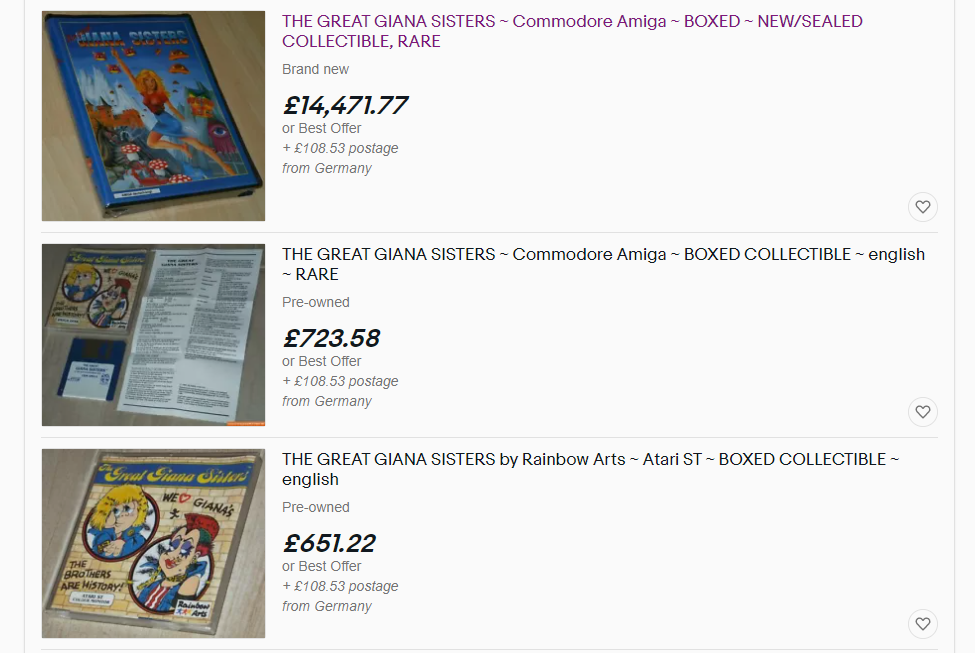
There are a few copies floating around but when they do appear on eBay they sell for hundreds of pounds. At the time of writing this there is one on there now with a ‘Buy it now’ price of £300 and several others for much more…


eBay

Taking the pi**?


Unless you have very deep pockets then that puts it out of reach of most hobbyist collectors such as myself.


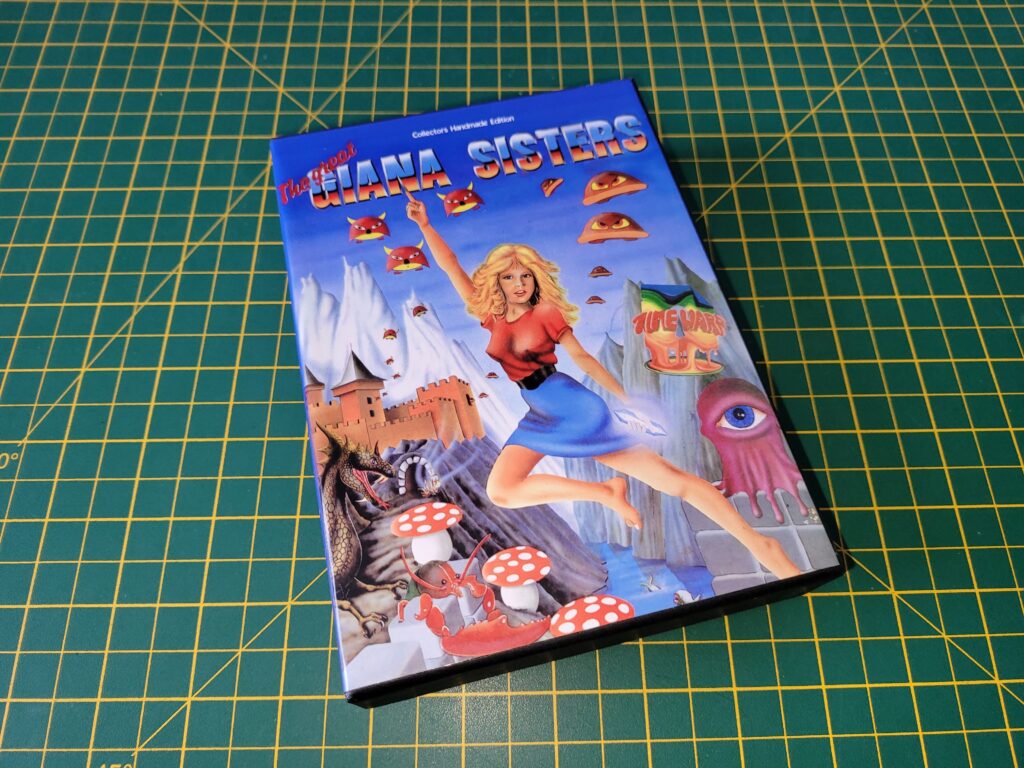
Great Giana Sisters

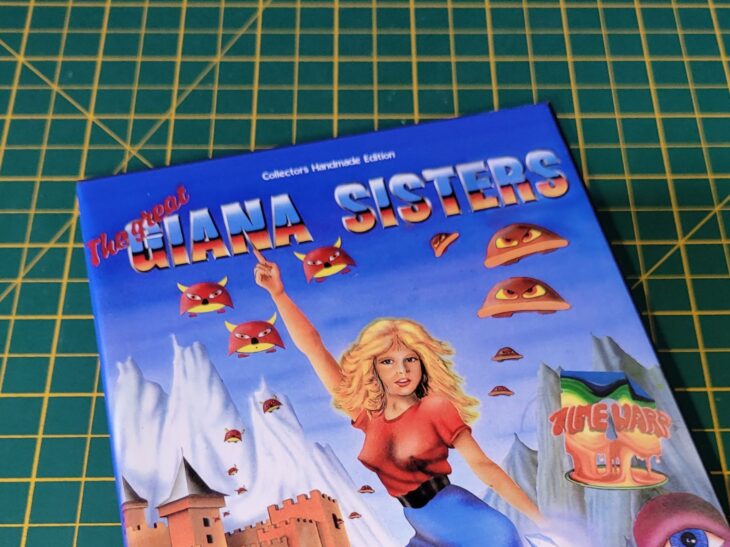
Front Cover Artwork.


Imagine my surprise then, when I stumbled across this version on eBay selling for less than £40. I jumped at the opportunity, even though I was a little apprehensive about the quality of the item I would receive. I made the seller an offer which he accepted and then patiently waited for it to arrive.


Great Giana Sisters

Back of the box.


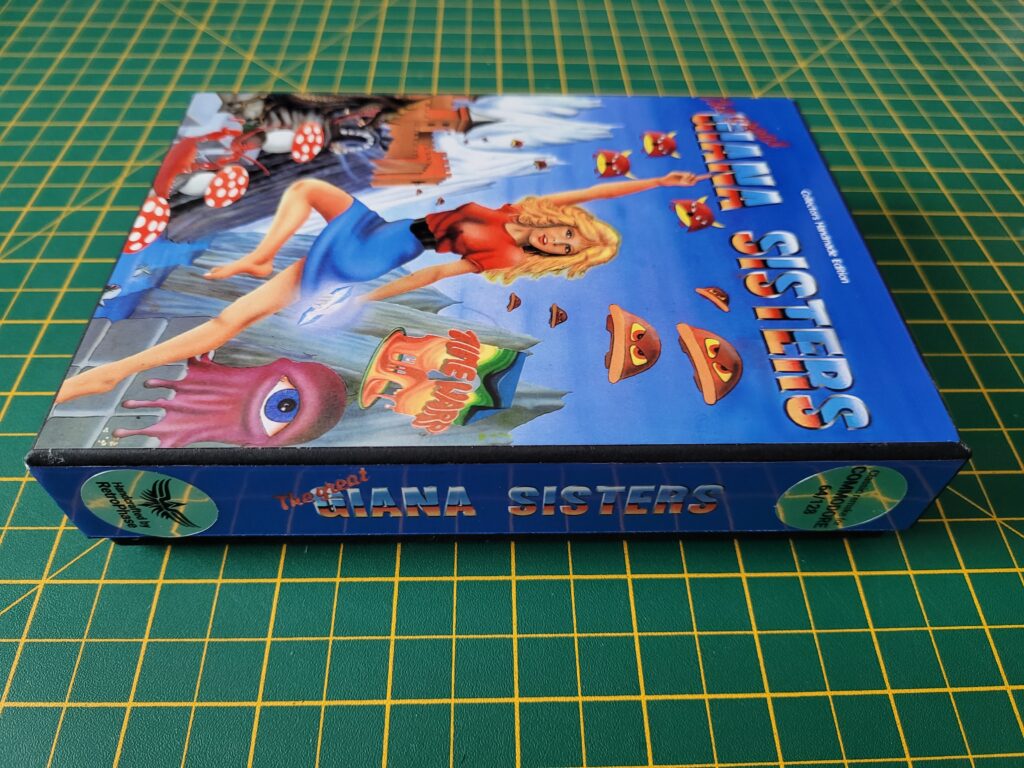
A few days later the game arrived, packaged securely to prevent any damage . The sturdy cardboard box the game came in was around the size of a VCR tape but about 50% thicker.


Great Giana Sisters

Another view of the box side-on.


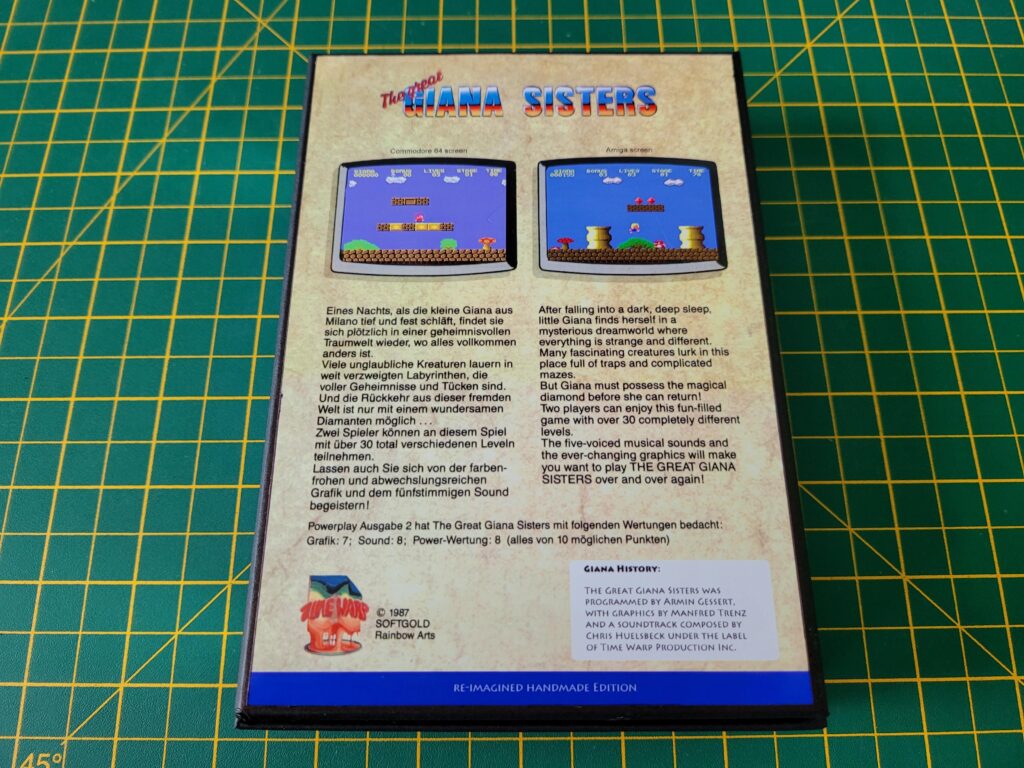
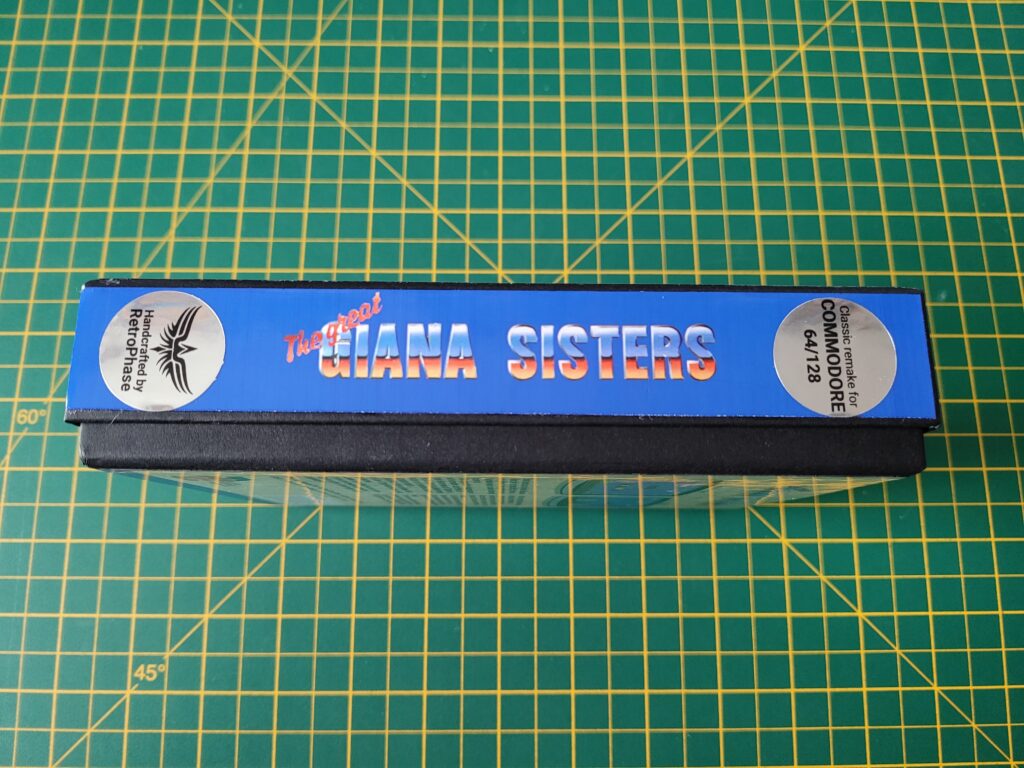
Glossy artwork from the original game adorned the front cover whilst the back of the box had some screenshots and details of the game. Both sides of the box had matching title artwork down the spines, capped off with a couple of very attractive silver foil stickers.


Great Giana Sisters

Box spine.


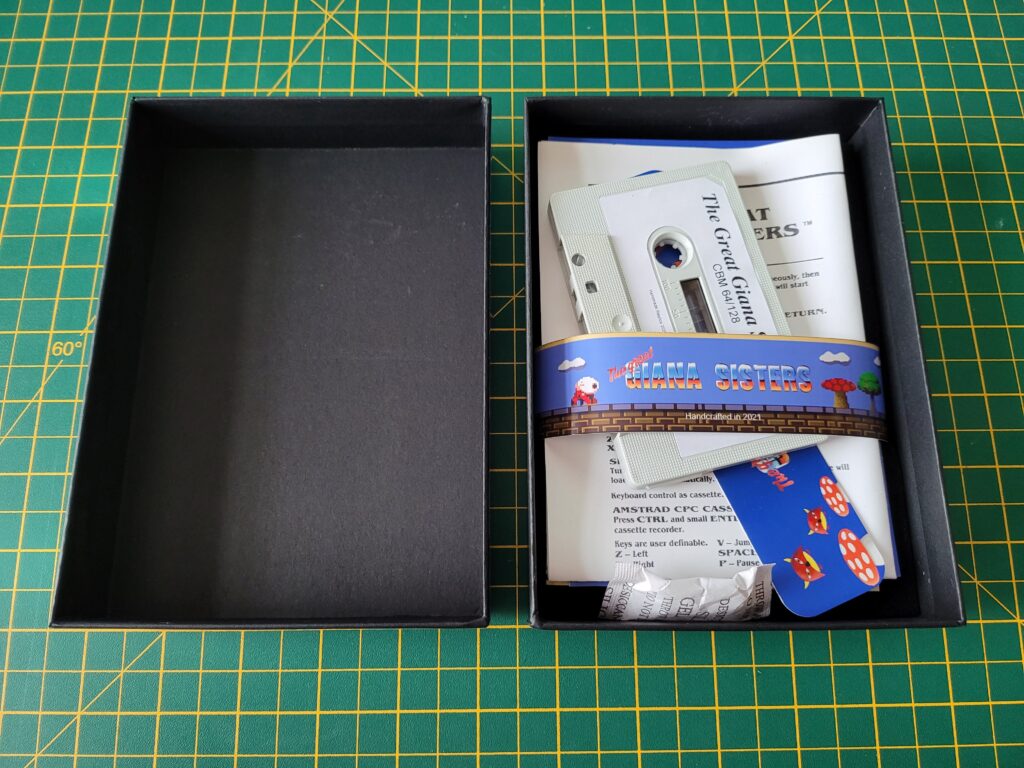
Inside the box was equally well presented with a thick black foam pad sitting at the bottom and all the ‘feelies’ placed on top.


Great Giana Sisters

A look inside the box.


Besides a copy of the game on cassette tape there was also an instruction sheet, glossy colour level map, a bookmark and a postcard featuring the alternative cover artwork. Oh and a little sachet of silica gel crystals to keep moisture at bay. Keeping everything neat and tidy inside the box was a matching Giana Sisters strap around the contents.


Great Giana Sisters

All the ‘feelies’ included in the game.


Is it original? Of course not. Is it going to be worth a fortune in the future? Almost certainly not. Is it a great looking physical copy of the game that didn’t cost me an arm and a leg? It sure is and one I’m more than happy to display on my shelf.


Great Giana Sisters

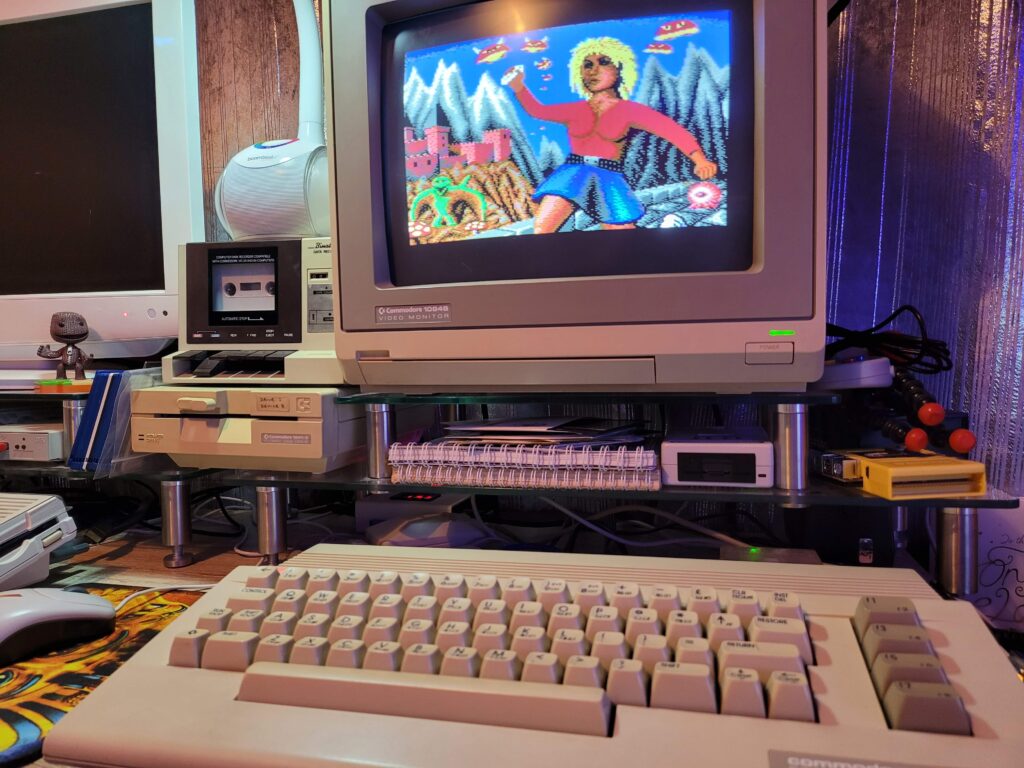
Great Giana Sisters loading screen.


That tape is no mere dummy either, it actually contains a copy of the game on both sides!  🙂


Great Giana Sisters

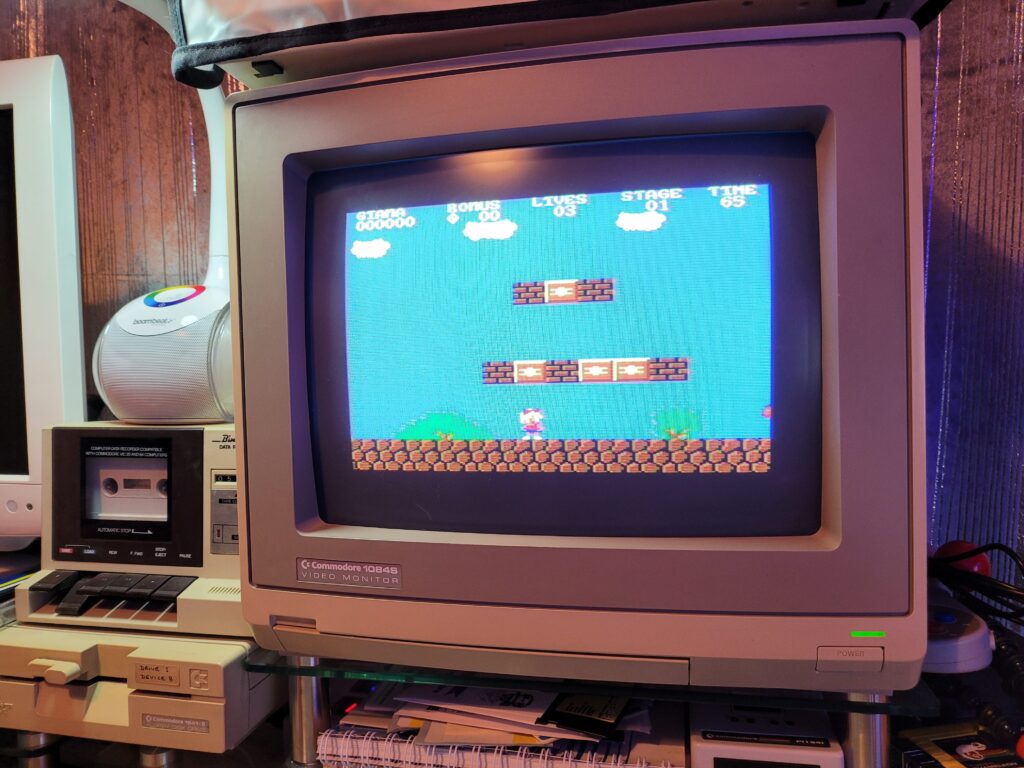
Playing Great Giana Sisters on my C64C.


Here’s a link to the sellers items for sale on eBay if you want to take a look for yourself. He produces a few other reproduction games too although he doesn’t always have them listed for sale. If there’s none there when you look then keep checking back or fire him a message. He says he’s open to requests to produce other games too…

Retro Format – A Brand new Retro Computer Magazine

Retro Format

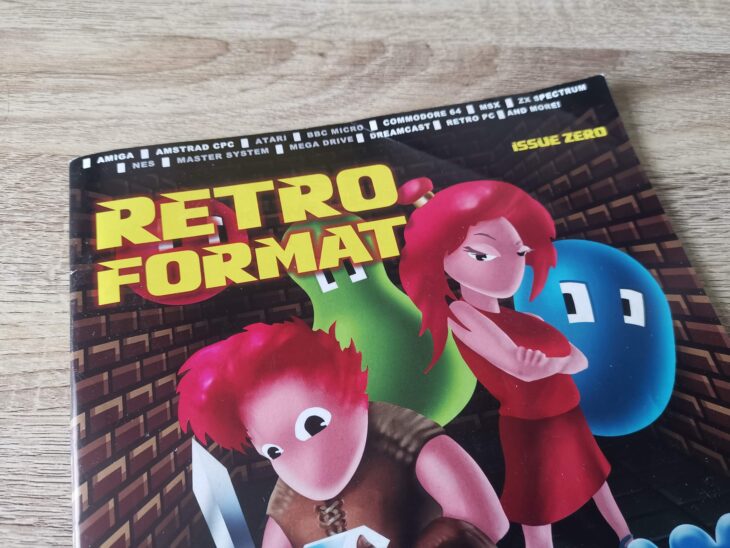
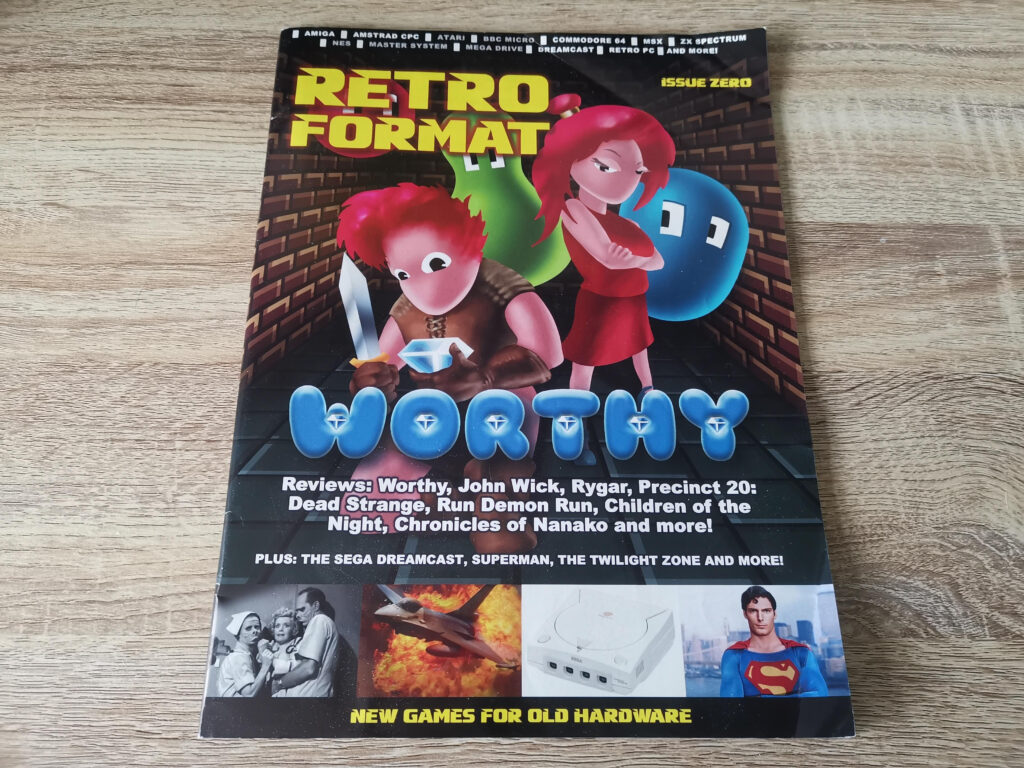
Believe it or not there is now another Retro Computing magazine on the block! It’s called Retro Format and it’s a multi-format magazine that caters for all retro 8/16/32-bit systems. Born from a successful Kickstarter campaign, this magazine is mostly focussed on games, specifically reviewing them, much like you’d imagine an all format ZZap!64 might look.


Retro Format

Retro Format Cover.


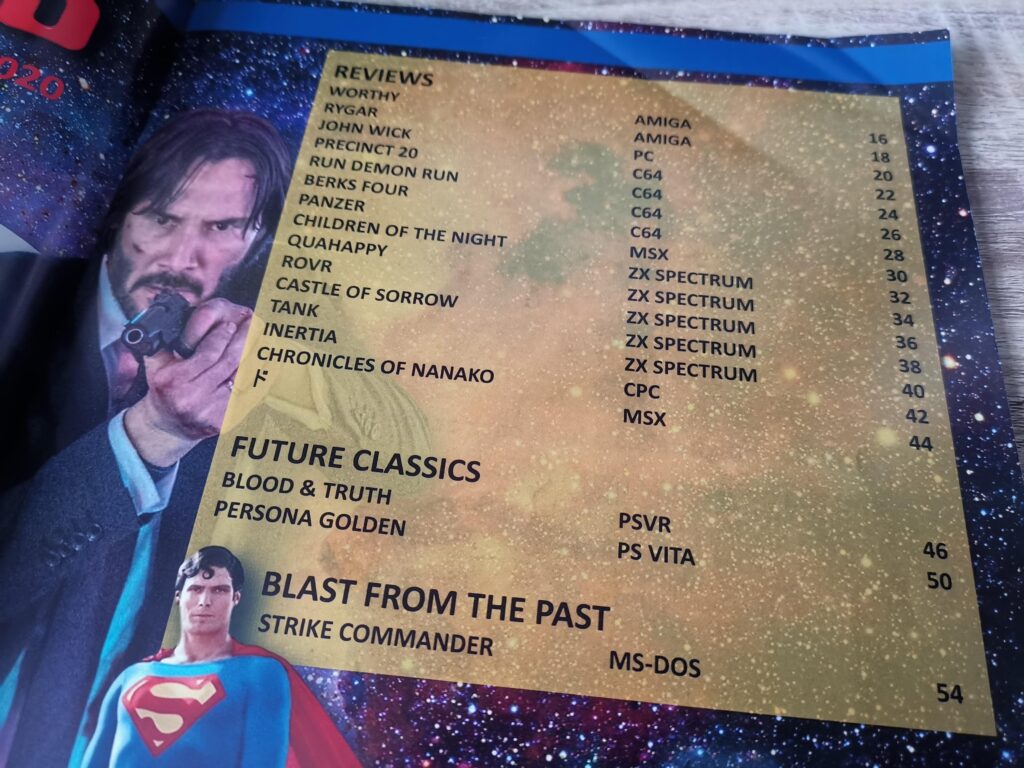
Initial impressions are very good indeed. It’s a full-size magazine, 64 pages in length (cover to cover) and all printed in full colour. There are over a dozen full reviews of games for retro systems inside. The games themselves are almost exclusively new ones created recently for retro systems. The two main exceptions to this are John Wick (a new NES styled game for modern PC’s) and Strike Commander – an old DOS game.


Retro Format

Retro Format Contents Page.


The Reviews

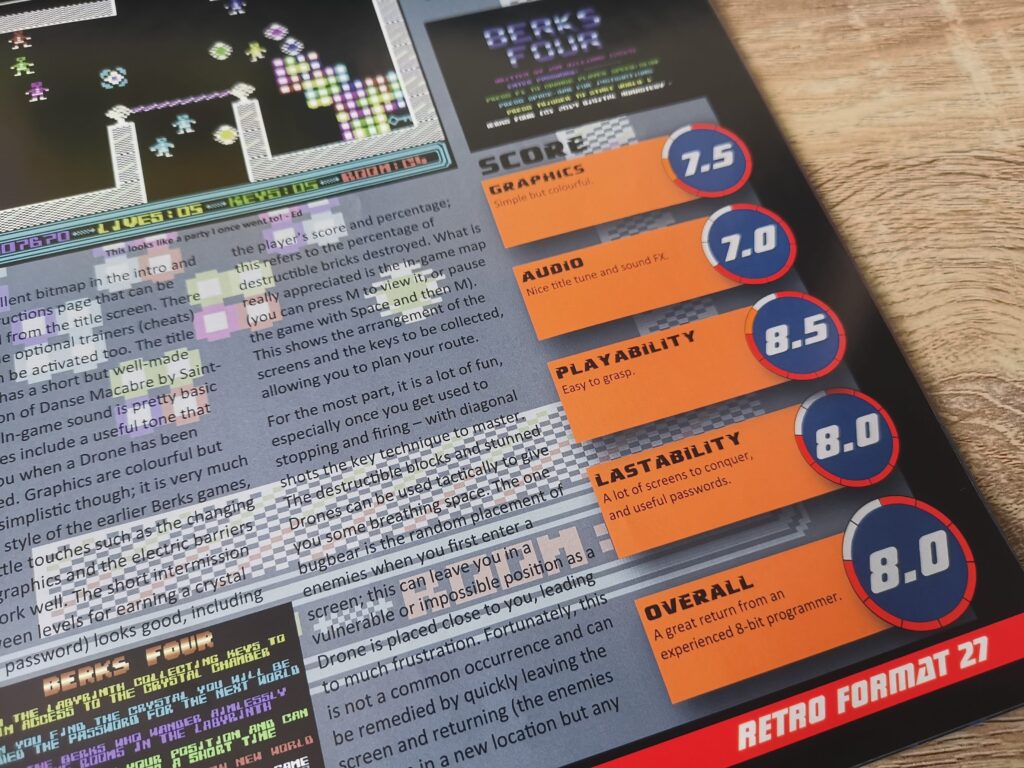
I really like the review style. It breaks game scores down by Graphics, Audio, Playability, Lastability and then gives an Overall score. This is how games used to be reviewed back in the day and I welcome seeing this format again.


Retro Format

Retro Format Game Scoring System.


As for the reviews, the bulk of the magazine is split almost 50/50 between Commodore and Spectrum games with the remainder made up of a handful of MSX, CPC and PC titles.

There’s also a future classics section which looks at a couple of modern games for the Vita and Playstation VR systems. I’d say the jury is out on this section though as I’m not sure I felt it was relevant.

Besides the games there was a really interesting 8-page feature on the SEGA Dreamcast system along with some of the best games available for it. I ended my SEGA experience with the Mega Drive but this definitely piqued my interest and made me think about getting one…


More than just games…


Retro Format

A look at the Christopher Reeve Superman Movies.


The magazine is rounded off by a classic Movie and TV section which I enjoyed a lot. It features the Christopher Reeve Superman movies and also delves into some past episodes of The Twilight Zone. As a big  Sci-Fi fan I found these articles to be right up my street.


The original Twilight Zone – NOT the recently re-hashed abomination.


Here’s a peek at some of the reviews featured in the magazine.


This slideshow requires JavaScript.


How to get your own copy…

If you are interested in purchasing your own copy of the magazine then head on over to the Retro Format website.

The Valley – C64 Cartridge Review

The Valley Cartridge

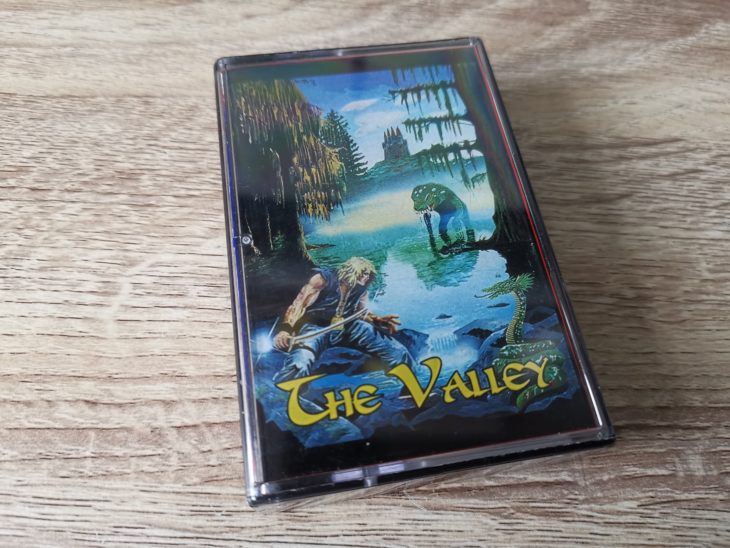
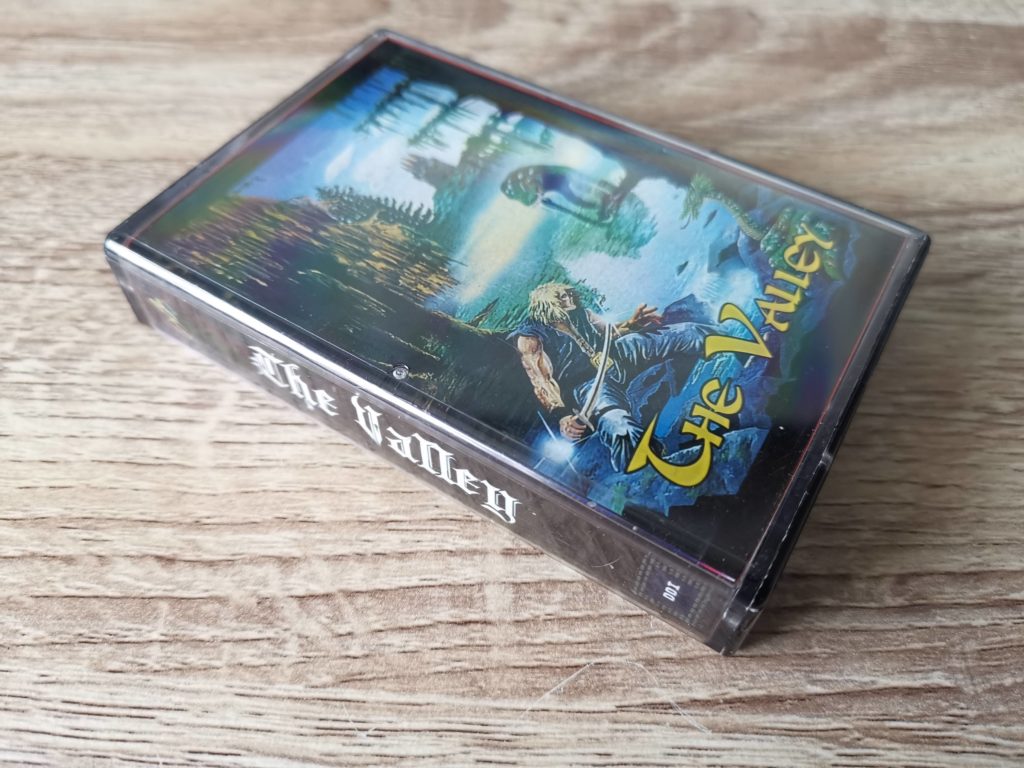
Recently Tim Harris was kind enough to lend me a new cartridge based game called ‘The Valley’ for the Commodore 64 to try out. The cartridge arrived housed inside a sleek oversized cassette case complete with a very attractive inlay card.


The Valley

The Valley Game Case.


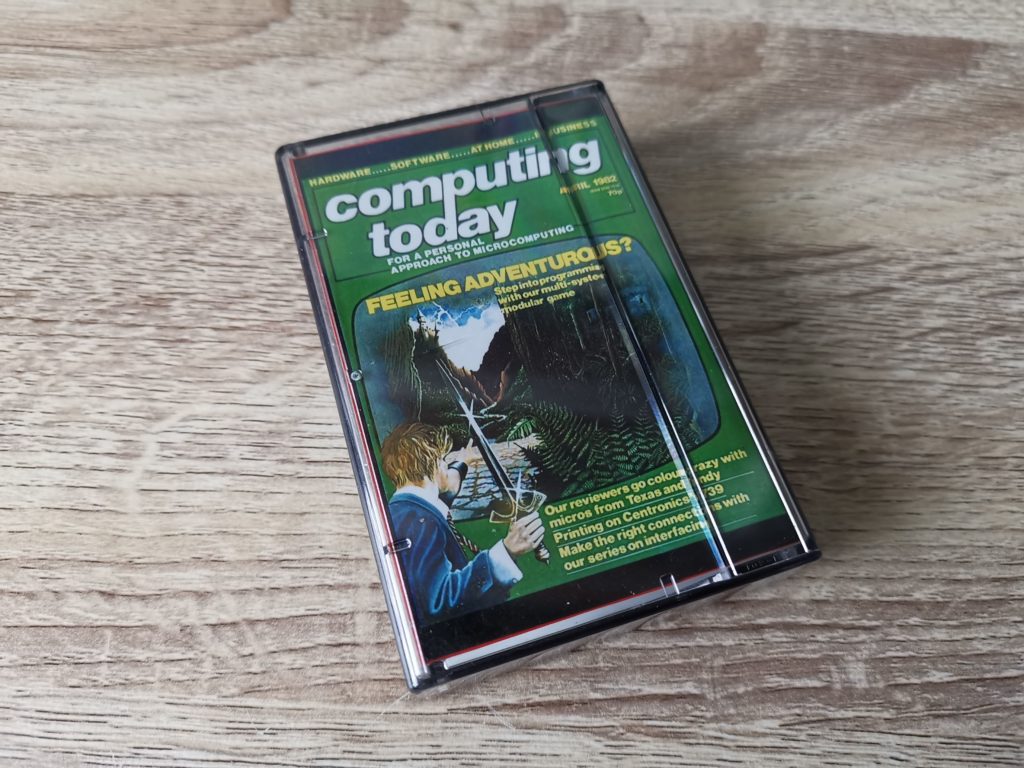
The rear inlay depicts the April 1982 cover of the British ‘Computing Today’ magazine (costing just 70p!) which is where ‘The Valley’ game actually originates from.


The Valley

Back of case.


Upon opening the case it becomes immediately apparent that these are no ordinary cartridges. They are little electronic works of art.


The Valley Cartridge

Cartridge Design 1


The Valley Cartridge

Cartridge Design 2


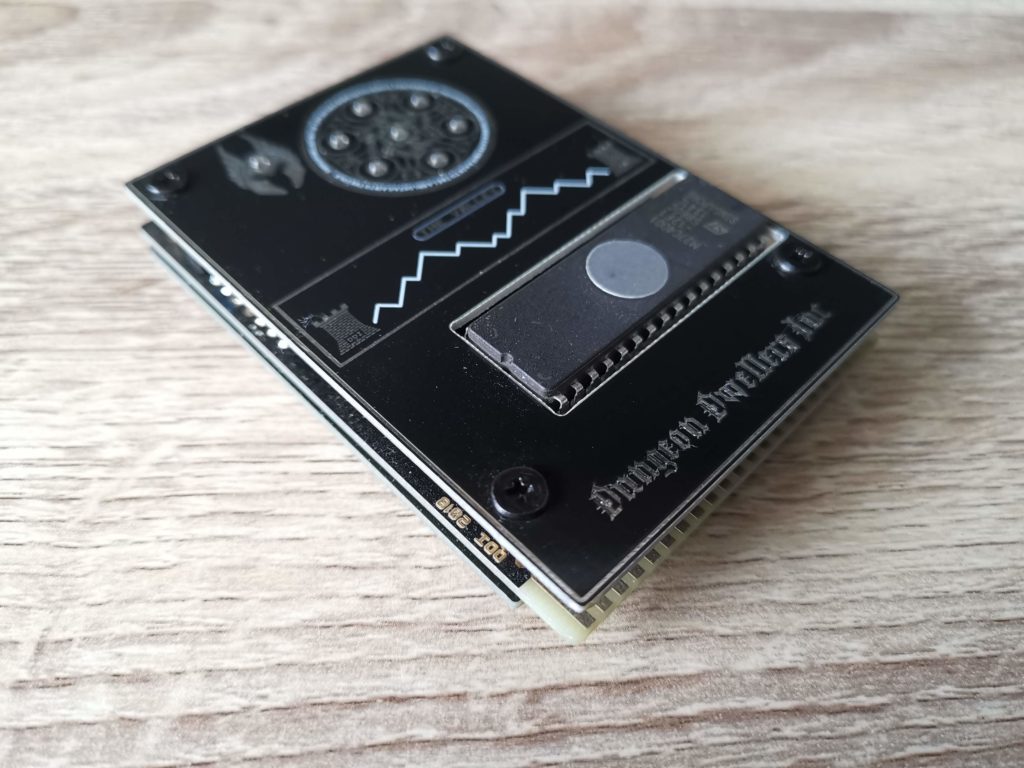
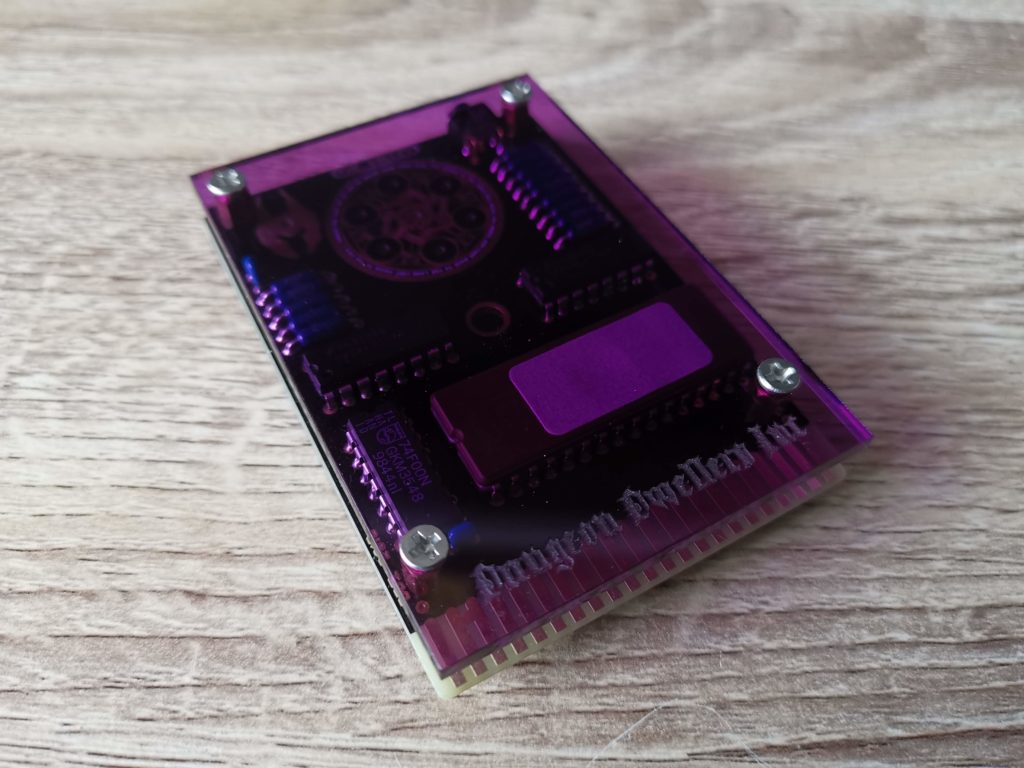
As you can see from the above two photos there are actually two completely different cartridges. However the difference is purely cosmetic as they both run the same game.


This slideshow requires JavaScript.


Rather than have a traditional plastic case these cartridges have been constructed in such a way that lets your see their inner workings. One consists of a PCB sandwiched between two purple perspex layers whilst the other is a triple decker PCB stack.


A Closer Look at the Two Cartridges


The black one… this is constructed from 3 PCB’s bolted together and is my personal favourite.

This slideshow requires JavaScript.


The purple one… this is made from a single PCB sandwiched between two sections of purple perspex.

This slideshow requires JavaScript.


Plugging the Carts In

Here’s what they look like plugged in…

This slideshow requires JavaScript.


So why exactly have the cartridges been created like this? Well part of the reason for this strange construction becomes obvious when you first plug the cartridges in and switch on the power. They light up like Christmas trees, the reason for which I will reveal shortly.


This slideshow requires JavaScript.


The Game

This game actually has quite some history to it and it all relates to that Computing Today magazine featured on the inlay card.

Back in the early 1980’s the magazine published The Valley in the form of a listing for the 32K Commodore PET.  The listing was hundreds of lines long so it was broken down into more manageable chunks for budding adventurers to type in (and then spend hours on end bug checking).


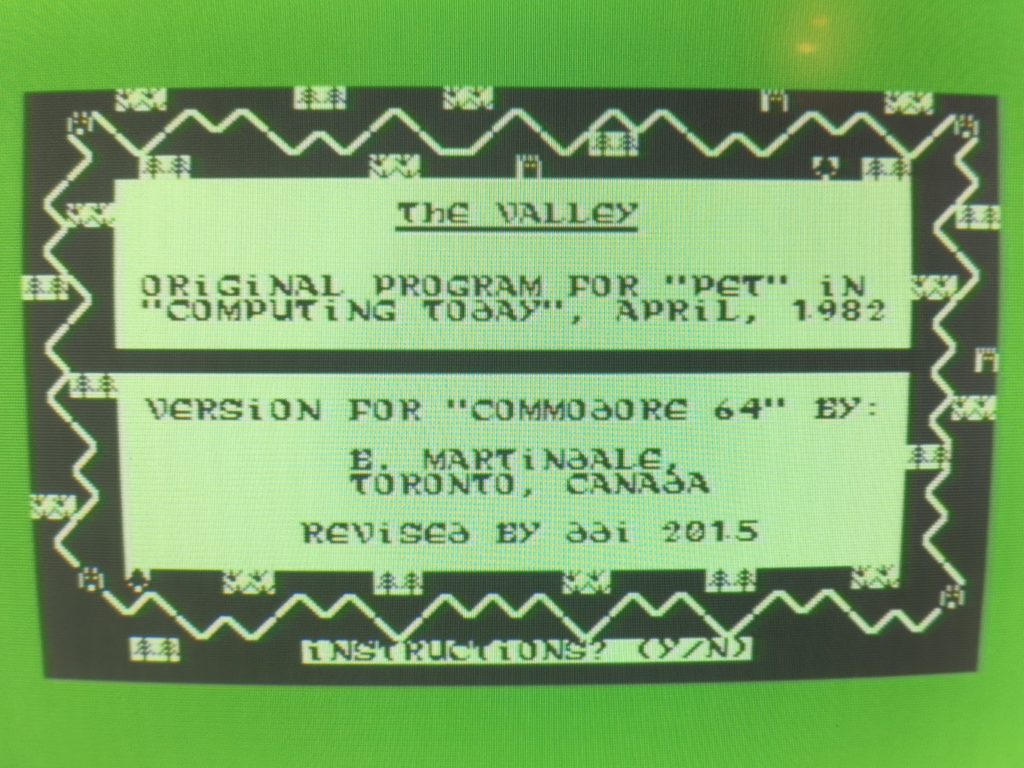
The Valley Title Screen

Title Screen.


This also made it relatively straightforward to convert the game to run on other machines as each chunk of code was accompanied by comprehensive documentation that described exactly how everything worked. A nice bonus of typing in games like this was having the option of tweaking the game to your liking. Nasty Troll kicking your arse? Just nerf it’s physical damage stats in the code!


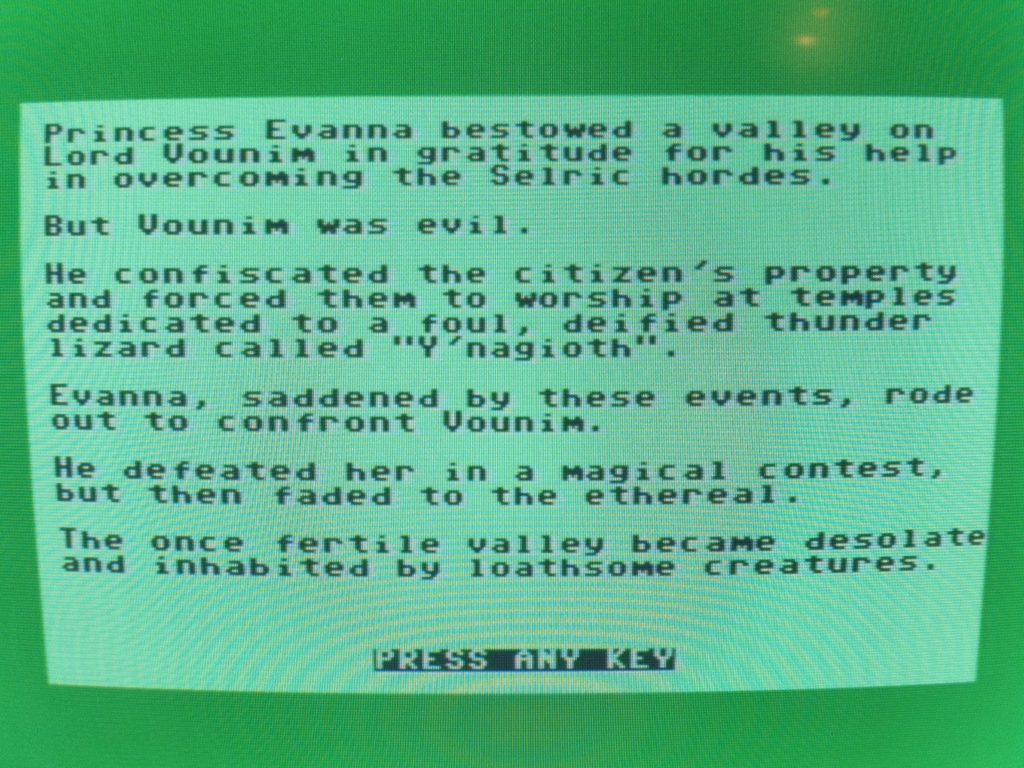
The games backstory.


The object of the game is to find the Amulet of Alarian from one of the temples and also locate the 6 gem stones that slot into it. You must also reach the rank of ‘Demon Killer’ so that you can find the Helm of Evanna and return it to the castle. Only by doing this will you save The Valley from the darkness that has engulfed it. To achieve all this, you, the hero, must travel across the valley battling many monsters and raiding temples to find treasures and stones for the amulet.

In this original form the game lacked a proper ending and ‘suffered from very poor gameplay’ according to Dungeon Dwellers Inc (DDI), the makers of this new incarnation of ‘The Valley’. DDI have taken the original game and enhanced it to make it more fun to play. The enhancements don’t just concern the coding of the game either… but link directly into the design of the cartridges.


The Valley Cartridge

A thing of beauty!


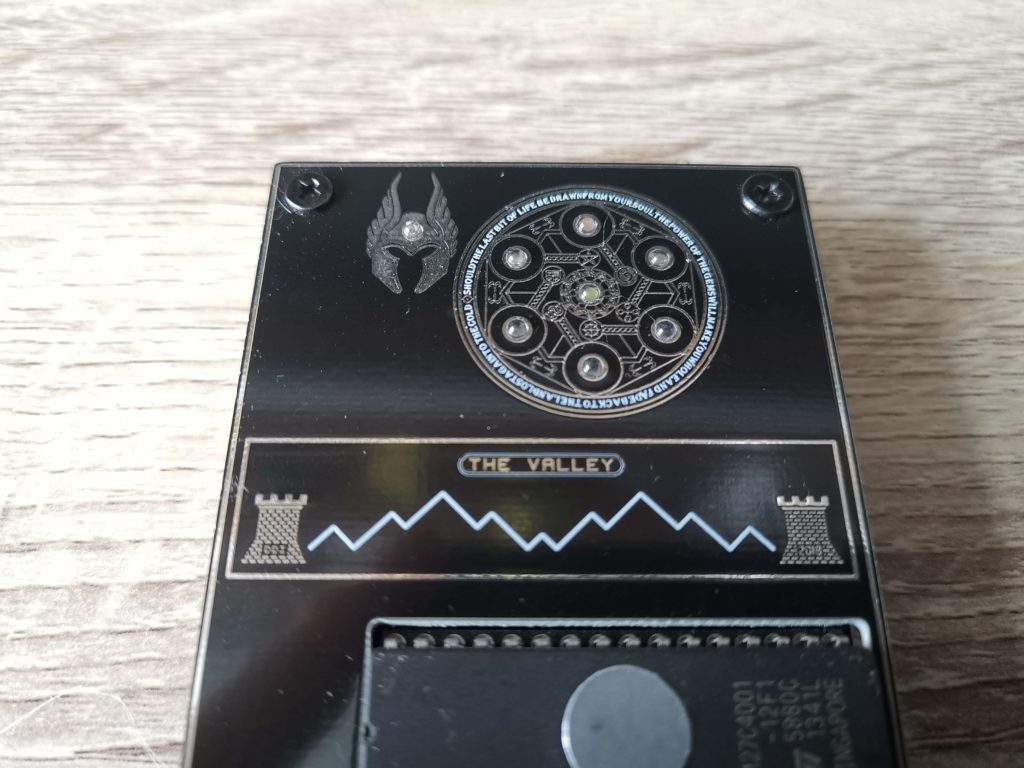
The cartridges feature graphics for both the Helm of Evanna and the Amulet of Alarian etched onto the PCB. The really cool thing though is that within the graphics are a series of LED’s which depict the presence of each item within your actual in-game inventory.

There are 8 LED’s to represent the helm, amulet and each of the 6 mystic stones. When you find one of these items in the game the corresponding LED will light up! If you are lucky enough to find all the items there are LED’s on the back of the cart that will start to pulse signifying that you a nearing the games end.

A handy little extra feature is the addition of a reset button at the back of the cartridge which is itself illuminated by a red LED.


The Game

DDI have added a very atmospheric title screen complete with music to the start of the game that really sets the mood. However this is the only sound that you will hear from the game (unless you manage to beat it) as the game is played in complete silence. There is supposed to be an animated ending complete with sound but I’ve not come anywhere close to seeing that yet.


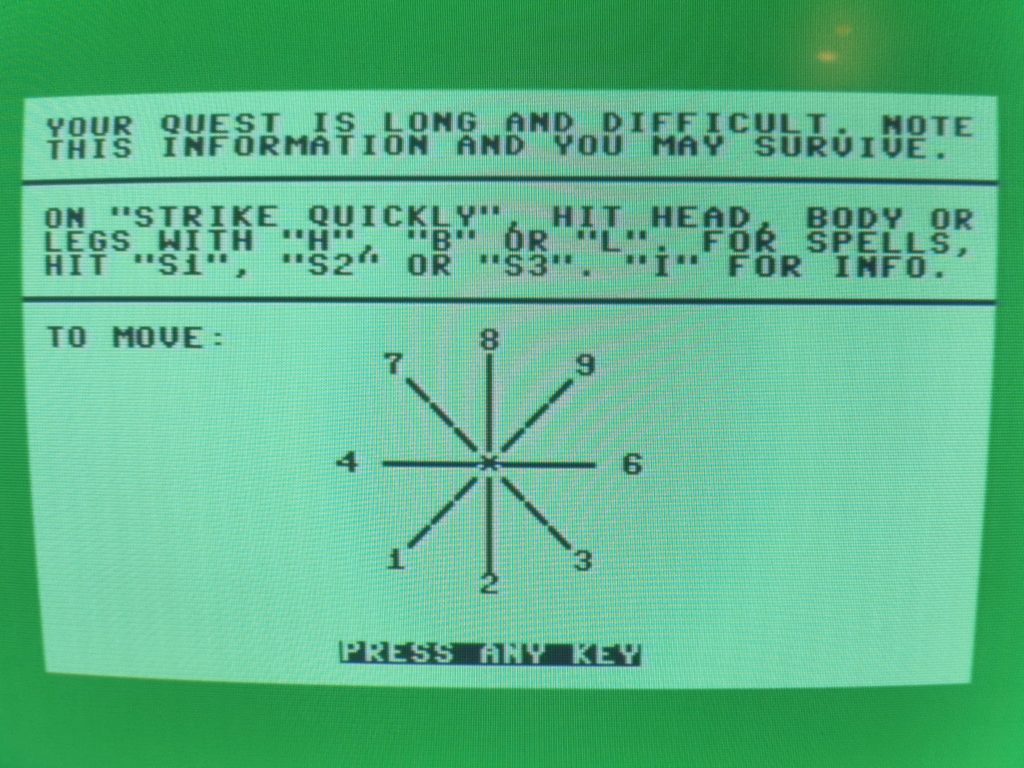
The Valley Instructions

You control the game using the numeric keys. Very strange layout at first but you get do get used to it. Shame there appears to be no joystick support though…


You begin the game by naming your character and choosing your class. The 5 options available are; Wizard, Ranger, Barbarian, Warrior and Cleric. The choice you make affects the in-game stats of your character, namely your Combat Strength, PSI (magic) Power and Stamina. If you ignore the choices on offer and select a different number then you are randomly assigned a class from one of 7 alternatives including: Villager, Thief, Bandit, Archer, Druid, Knight and Warlock.


The Valley Game Screen

The main game screen.


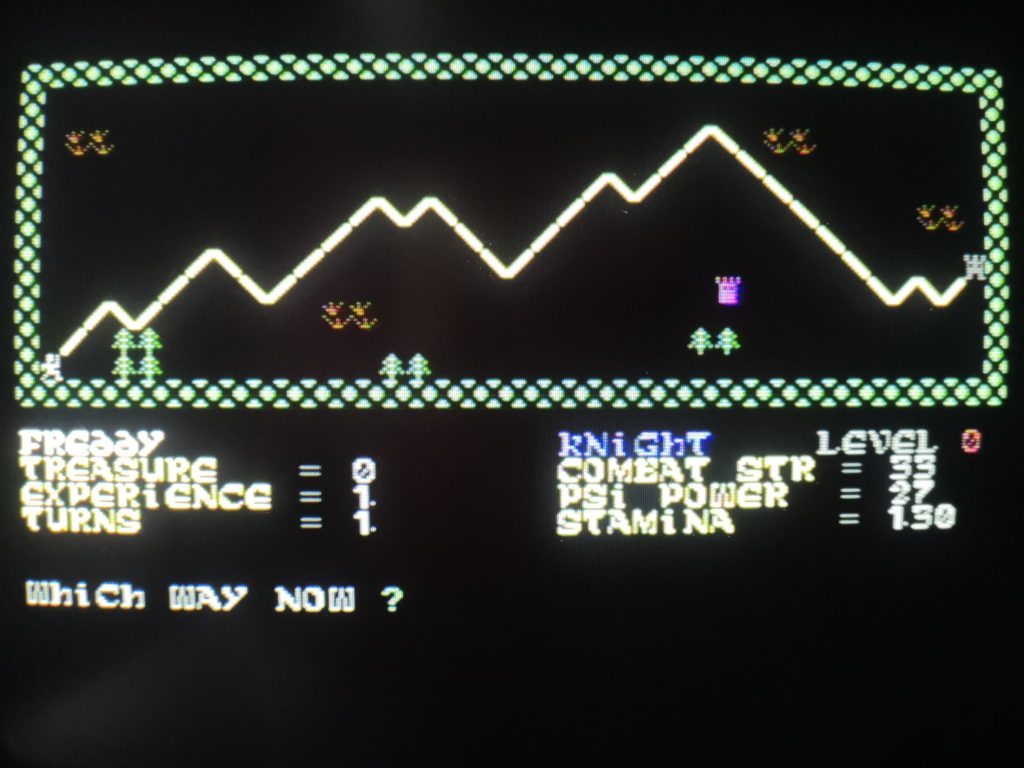
The main game screen then appears and the map of the kingdom is drawn up. The map and everything within it is generated randomly each time you start the game so no two play-throughs will ever be the same.

You will start in south west corner of the map on the safe path. So long as you stay on this path you will never be attacked. However once you stray off it it’s game on. Away from the safety of the path you can be attacked even if you are standing still so don’t wander off for a cuppa or you will likely find your hero dead when you return!


Combat

The Valley is a proper old school RPG that requires a healthy dose of imagination to be properly enjoyed. Other than the visual representation of where you are (Valley, Forest, Swamp, Tower etc.) there are no graphics to depict enemies or battles. All encounters are text based and the battles performed by rolls of the dice. When you encounter a foe you will be informed of their presence via text and a (semi) turn-based battle will commence. Whatever moves they make and the damage they do will be displayed on screen.

I previously described the combat as ‘semi turn-based’ and that’s because it uses a mixture of turn-based moves and real-time inputs from you during battles. When it is your turn to move a ‘Strike Quickly’ message will flash up on the screen and you literally have about half a second to press a key and select your attack. If you are too slow you miss your chance to retaliate and the monster gets another swipe at you. This is especially frustrating when you have to cast spells as you have to press ‘S’ to signify that you want to cast a spell and then press ‘1’, ‘2’ or ‘3’ to select which one. All of these key presses are subject to the same strict time restraints which can lead to frustration when you get flummoxed mid-battle.


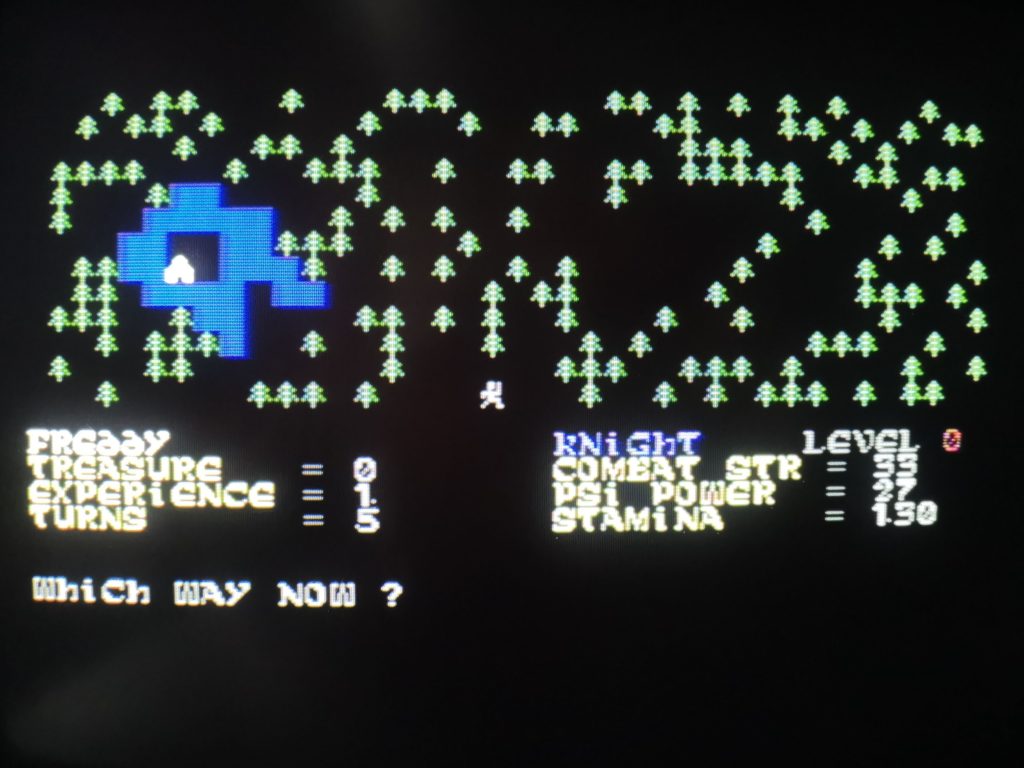
Exploring a forest in The Valley

Exploring a forest in The Valley.


As I said combat is all a roll of the dice so both you and the enemy can and will miss and attacks will do a random amount of damage, sometimes none at all. Consequently you need to be prepared for anything. Occasionally you will surprise an enemy and get a chance at striking first or evading them – but only if you spot the opening message and press the correct key in time to take advantage of the situation.

I must admit I would have preferred a true turn based approach where you can take time to select your move and play at a relaxed pace. However this does make battles more tense, albeit at the expense of risking cramp in your hands from hovering over the keyboard like a praying mantis all the time!

Speaking of moves you have 6 at your disposal, 3 physical attacks and 3 magic. Physical attacks consist of Head, Body or Leg strikes with head strikes being less likely to succeed but rewarding success with more damage, whilst leg strikes are most likely to hit home but do the least amount of damage. The magic spells you can cast are Sleep, PSI Lance and Lightning however the latter two can only be cast once you reach level 8 and 16 respectively.

Damage reduces your stamina and combat strength and if either of these falls to zero your hero dies. To recover from damage you just need to move around. After every turn your stats slowly increase so it pays to keep moving although you can’t move far before you encounter another enemy to fight.


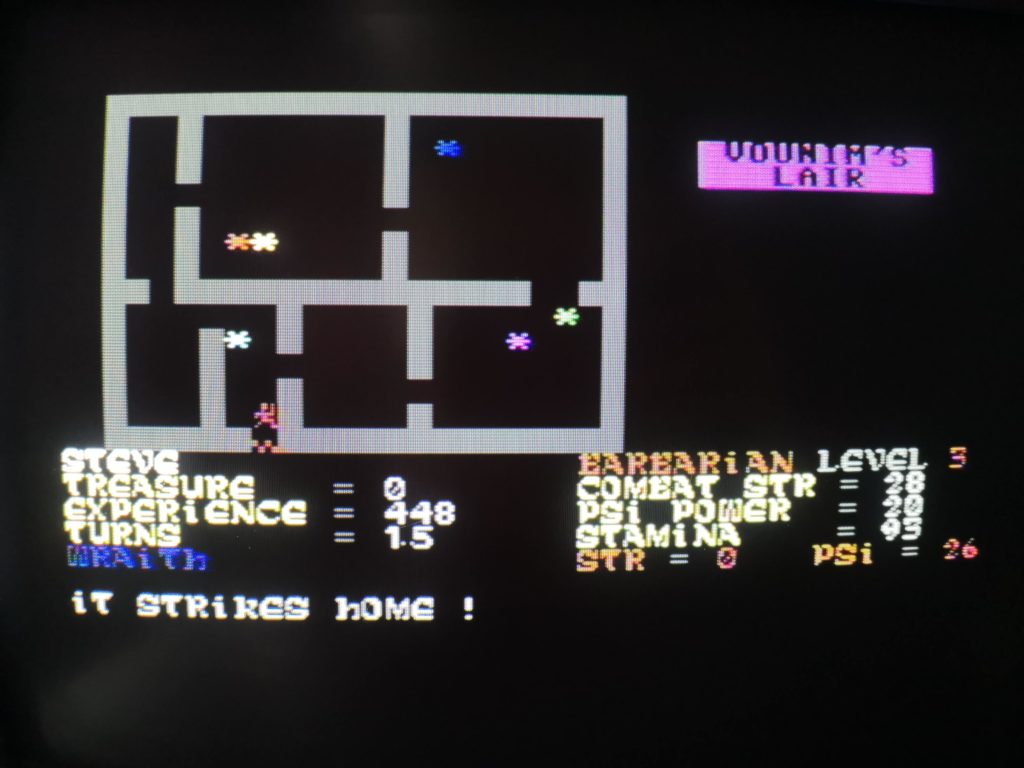
The Valley Lair

Inside a lair… each of those asterisks could potentially, if you are really lucky, be the amulet…


Occasionally you will encounter some treasure or a ‘place of ancient power’ rather than enemies with the latter granting welcome stat bonuses to aid you in your adventure.

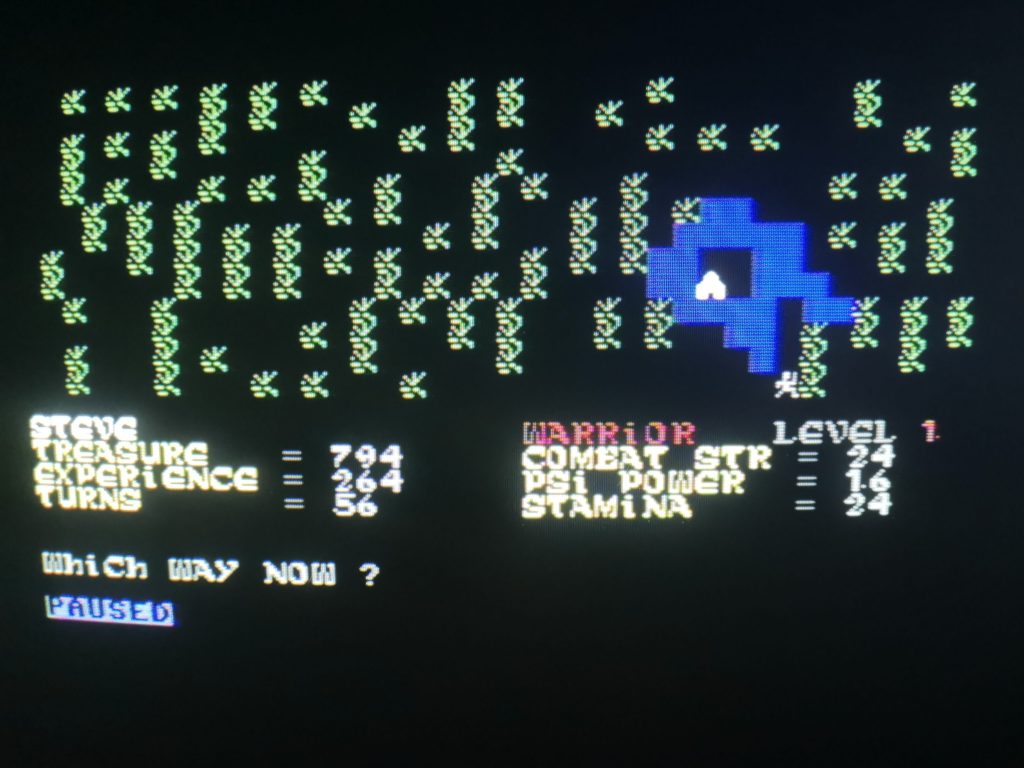
When you venture into a swamp, forest or the Tower the upper half of the screen changes to show the map for that area. Forests have temples to explore whilst the swamps have lairs, each comprising of a single floor. The Tower is split into many floors and is the only place you are able to find the 6 stones, but only once you have located the Amulet of Alarian. If you try to enter the tower before you have located this your entry will be barred.


Exploring a swamp in The Valley

Exploring a swamp in The Valley


Progress can be saved by making your way to one of the two castles that are found at either end of the road – assuming you manage to get there in one piece! Additionally if you manage to place all six gem stones in the amulet it will grant you the power of resurrection… but only once. If you are slain and resurrected the stones disappear and you will need to find another set in the tower again!

Verdict


The Valley is a pretty unforgiving and difficult game I have to admit and I’m not very good at it. I was constantly either too slow pressing the keys or pressing the wrong ones in the heat of battle. Consequently I wasn’t able to get very far during the time I had the game for. However the allure of lighting up those LED’s on the cartridge was very strong indeed and it definitely had that ‘one more go’ quality about it. It’s not cheap but it’s definitely something I’d consider to be a collectors item and something I would treasure for years to come.

At the time of writing The Valley cartridges are only available from DDI. You can find their website here: sys64738. I believe the game will cost $80 plus postage to your location.

If you would like to try the game first to see if you like it before parting with a not insignificant amount of money it is also available to download from CSDB.

Vegetables Deluxe Review

Vegetables Deluxe

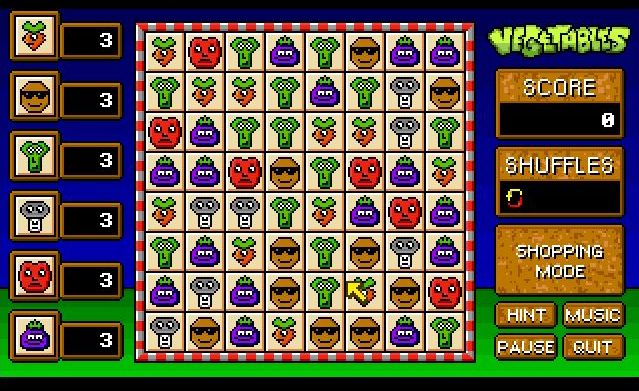
Vegetables Deluxe is a sequel of sorts to the Vegetables game that was released on itch.io early last year by Mike Richmond. It’s a ‘match 3’ type of game similar to Bejewelled or Candy Crush, a genre I don’t think even existed back in the 80’s. Thanks to this game that’s no longer the case and you can now enjoy this genre on both a C64 and Amiga (see end of post).


Physical Presentation

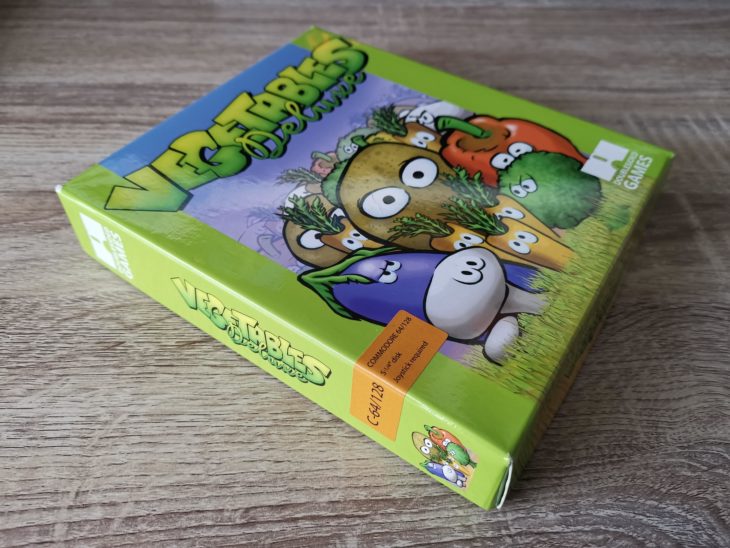
The game is presented in a vibrantly coloured glossy green box with some great artwork on the front. The back of the box includes some nice clear screenshots of the game in action along with a description of what it’s all about.

This slideshow requires JavaScript.


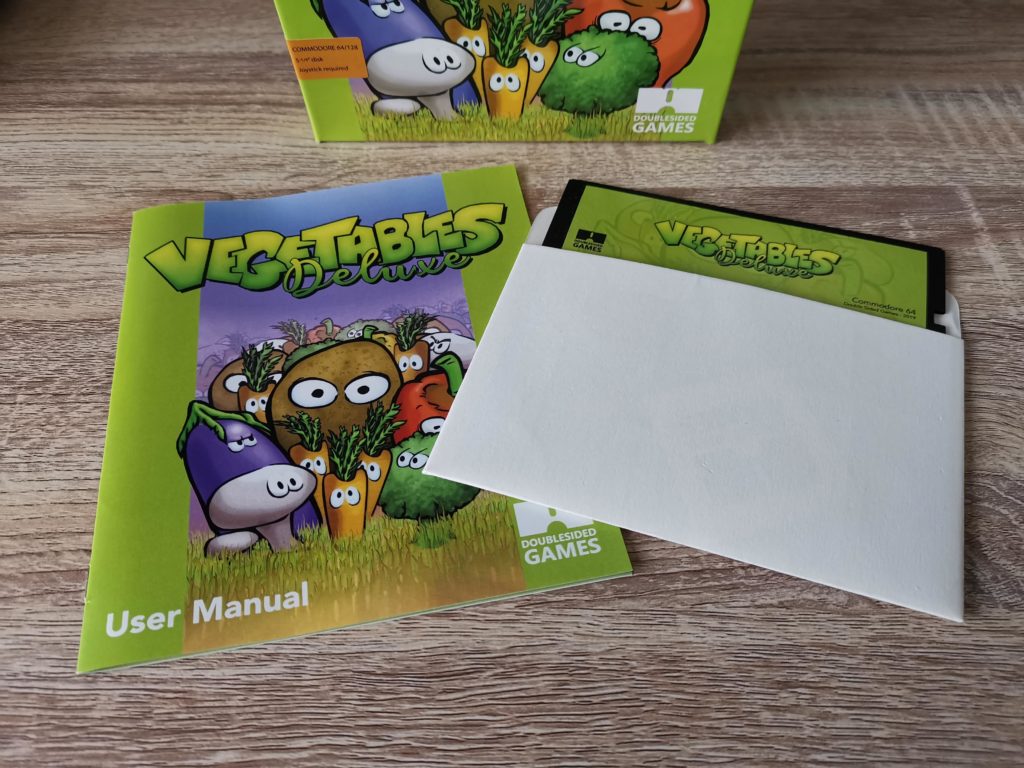
Opening up the box reveals an instruction manual and the game on a 5.25″ floppy disk with a snazzy matching label.


Vegetables Deluxe

Vegetables Deluxe manual and Game on a 5,25″ disk


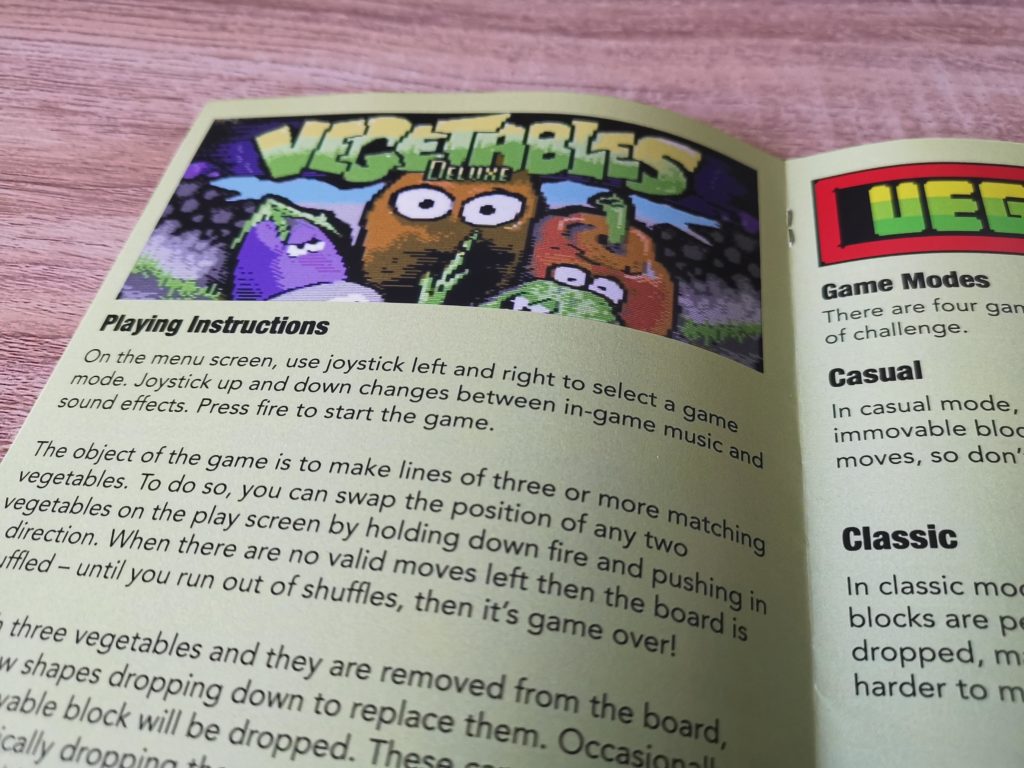
The instruction manual is nicely illustrated and in full colour throughout. It clearly explains how to play the game and describes the four different game modes on offer.


Vegetables Deluxe manual

Vegetables Deluxe manual


Loading up the Game


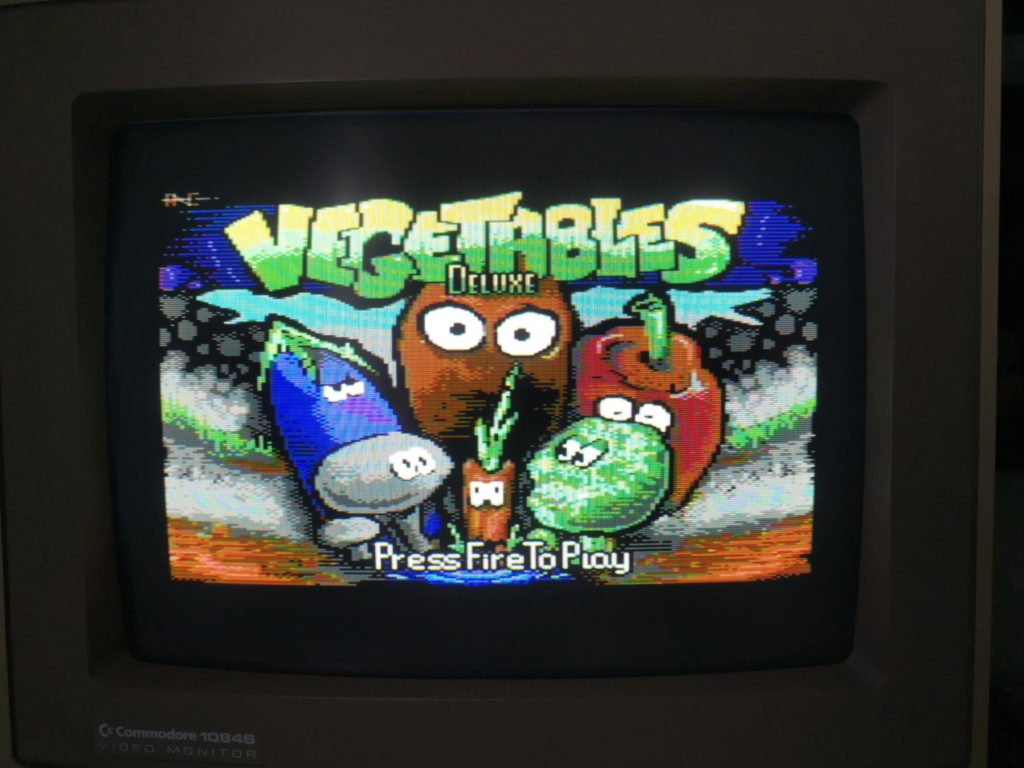
Upon loading the game  you are presented with a lovely title screen complete with music.  Pressing the fire button on your joystick starts a game straight away. I did find this a little odd as you’d normally expect to choose the game mode first.


Vegetables Deluxe title screen

Vegetables Deluxe title screen


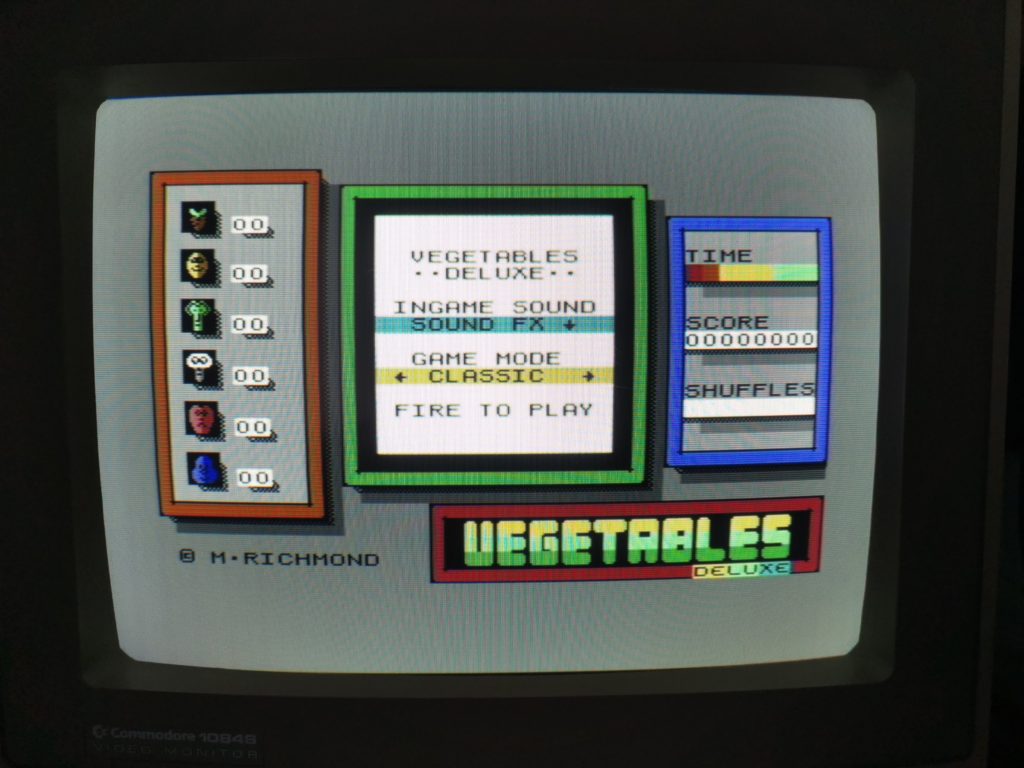
To actually get to the menu screen you need to pause the game by pressing ‘P’ on the keyboard and then press ‘Q’.


menu screen

Vegetables Deluxe menu screen


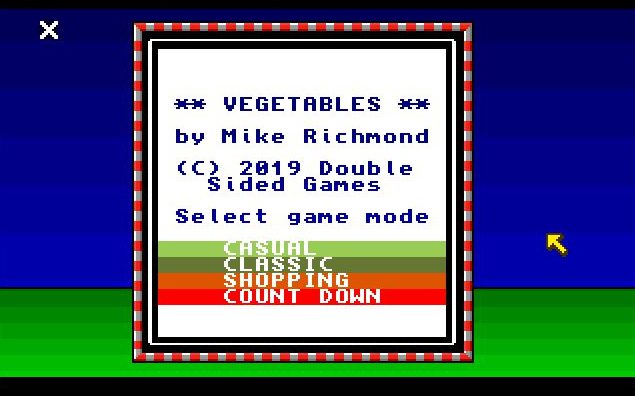
From the menu screen you can choose whether to have music or just sound effects whilst playing. You can also select from one of four different gameplay modes (more about these later).


The Game

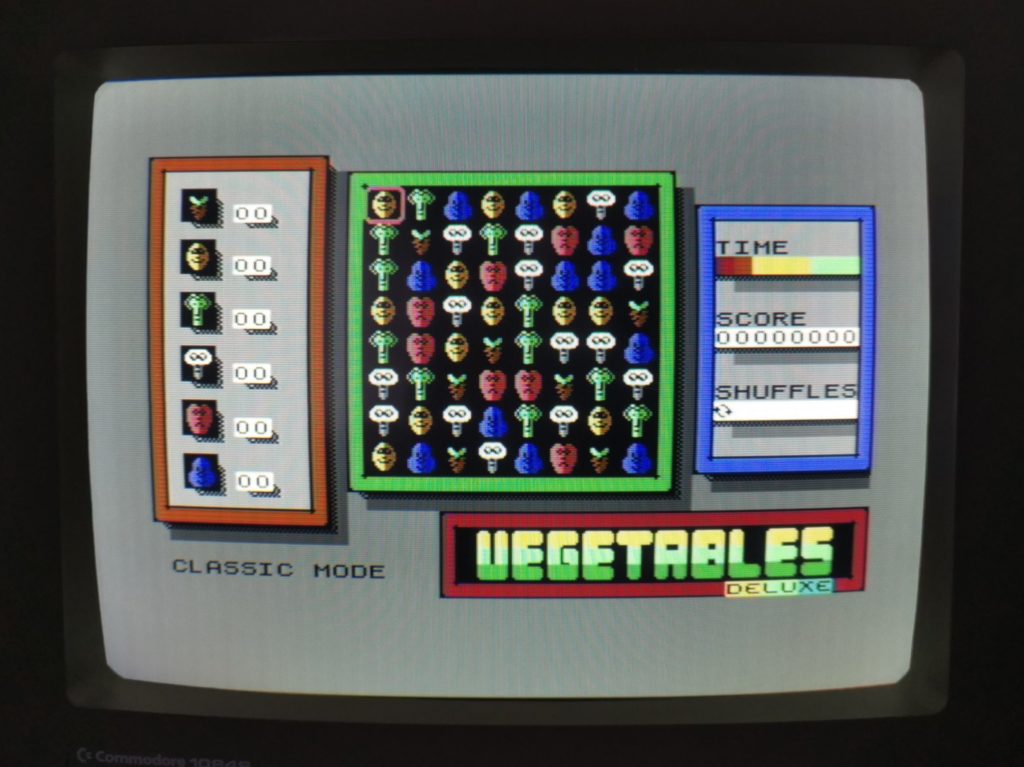
I’m sure most people are aware of what a ‘match 3’ game is but just in case… Basically you have a grid full of randomly coloured objects, or in this case vegetables. You must match 3 or more of the same coloured vegetables either vertically or horizontally to remove them from the screen and earn points. You do this by moving the little selection box around with a joystick, holding the fire button and then moving the stick in a direction. When a group of vegetables disappear, the ones above fall down and new ones randomly appear from the top to take their place. If you run out of matches the game will use one of your available ‘shuffles’ to randomly rearrange the vegetables on the screen so you can carry on. However, if you no longer have any shuffles remaining then the game will end.


Vegetables Deluxe ‘Classic’ mode


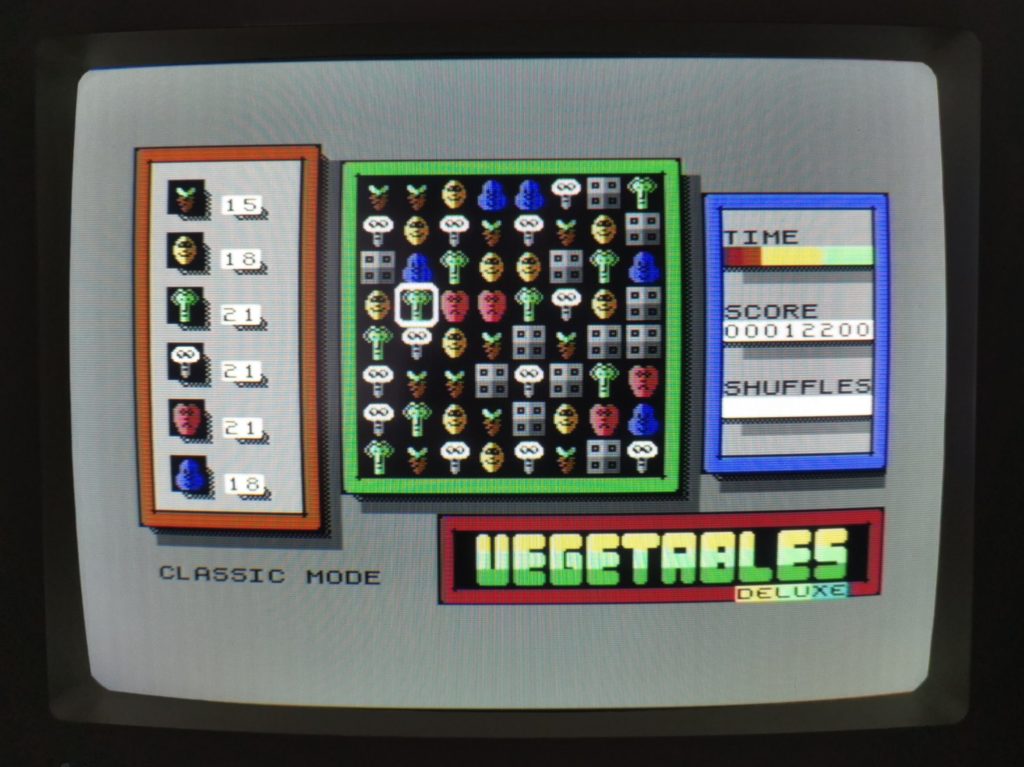
To mix things up occasionally an immovable block will appear that impedes your progress. You can also match more than three vegetables for extra bonuses. Matching 4 in a row will cause an entire row to be removed and this is a great way to clear those immovable blocks. Matching 5 in a row will cause every matching vegetable on the screen to removed and will earn you an extra shuffle.


Vegetable Delxue

Watch out for the grey immovable blocks, let too many accumulate and you’ll run out of moves!


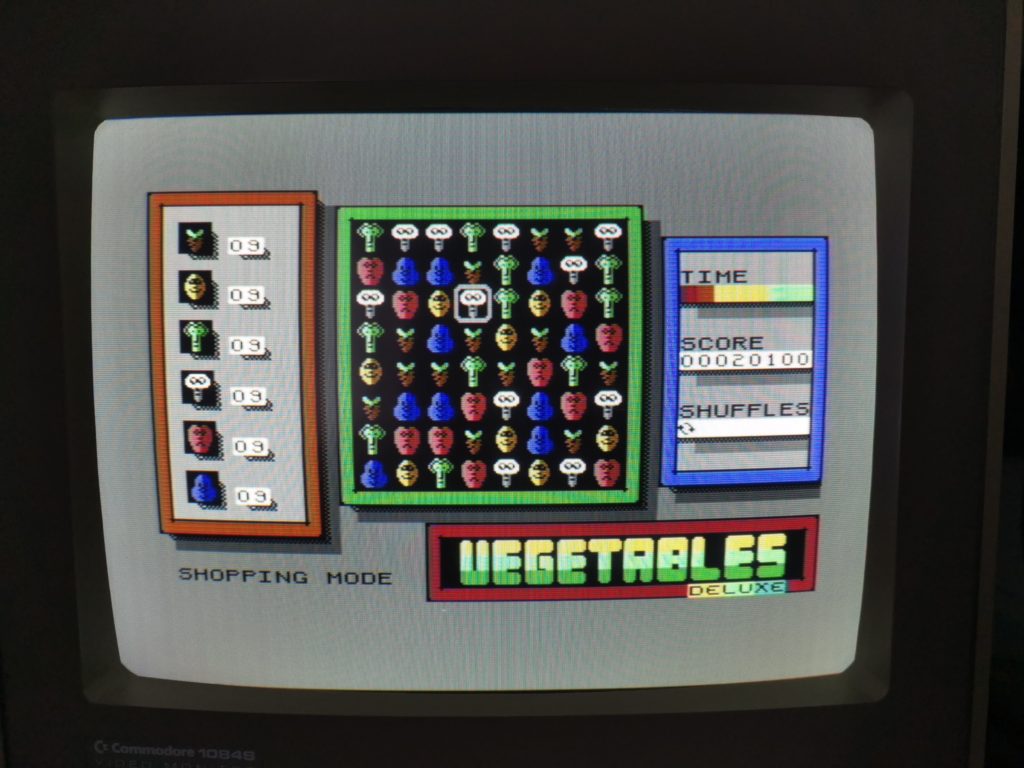
The screen is broken up into 3 main sections. On the left there is a kind of shopping list which either tells you how many of each vegetable you need to collect, or how many you have collected so far. (More on this later). The centre of the screen is where all the action takes place whilst on the right is where the timer, score and number of shuffles are located.


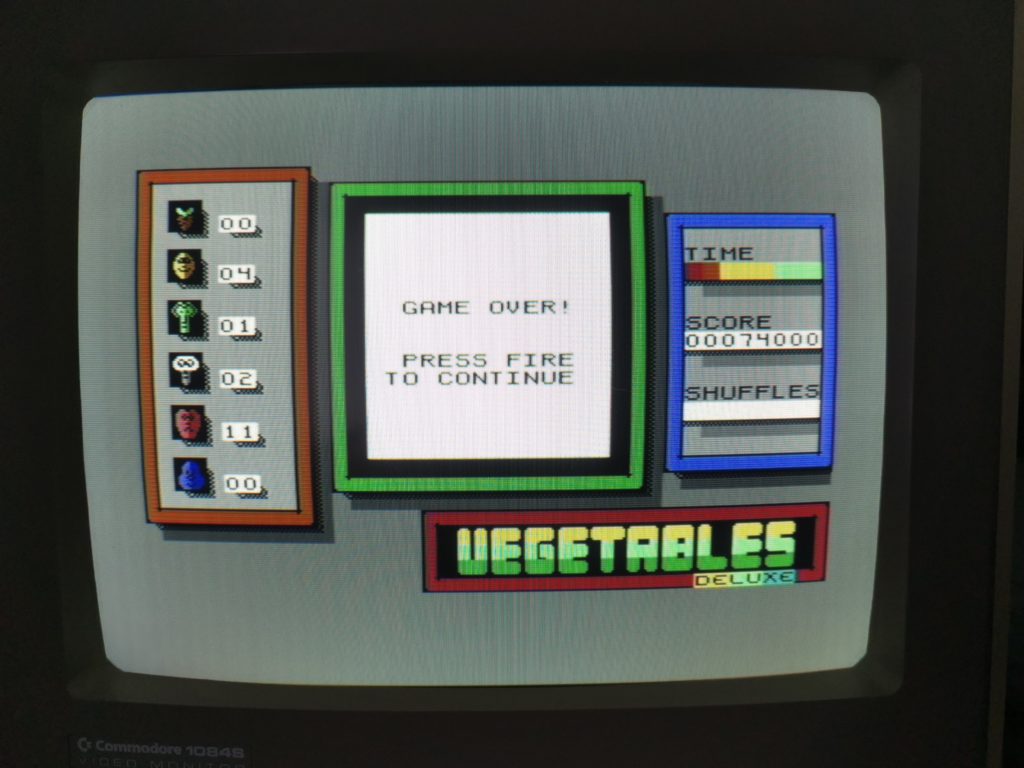
Vegetables Deluxe

Game Over! (This was my ‘shopping’ High Score)


Game Modes


There are 4 different modes, each catering towards a different play style.

Casual is for those that want a relaxing experience that keeps the ‘unmovable blocks’ to a minimum. The instructions reckon it’s still possible to reach a game over state in this mode. However during my time playing the game I found this to be more like an endless mode as I kept racking up extra shuffles.

Classic is the default play mode and has you battling to reach a high score whilst dealing with plenty of immovable blocks.

Shopping has you collecting the vegetables shown on the shopping list. If you manage to collect them all then you complete that level and move onto the next with a bigger shopping list.


Vegetables Deluxe

Shopping mode has you collecting items off the list on the left


Countdown is the hardest mode and has a sliding countdown timer (the coloured bar on the right). This gives you just a few seconds to make a match or you lose a shuffle.

During play if you are struggling to find a match the game will briefly highlight a potential (though not necessarily the best) move you can make. This is a great feature and is one commonly found on modern variants of the game. It’s no use in Countdown mode though, for that you really need to be on the ball!

When you are not playing in shopping mode, the list on the left works the other way round. It actually keeps a tally of what you’ve collected, up to a point anyway. You see the counters only go up to 99 and then reset back to 0. It’s not a big deal and in Casual mode where you could potentially be collecting a mountain of vegetables, entirely understandable.


My thoughts on the game

I tried all the game modes but found the ‘shopping’ mode the most fun. It gives you something extra to work on besides just matching vegetables. I didn’t really enjoy ‘countdown’ mode as the timer destroyed the relaxation side of things. Games started in casual mode simply lasted too long. Without a save option I was never able to actually finish one. I guess people playing it on an emulator or C64 Mini would have the option of using save states but that doesn’t fly on the real thing. Leaving my ageing C64 on until I can come back to finish a game certainly isn’t an option either!

For a game that is all about reaching and beating a high score I was disappointed that there was no way to save a high score to disk. Many C64 games offer this facility now and it’s a shame that Vegetables Deluxe hasn’t followed suit. Of course it’s not the end of the world by any means. You can write your score down (proper old-school style) or snap a pic of the screen with a smartphone. Hopefully one day this feature might be included in an updated version of the game.

The game looks terrific though and all the better for utilising high resolution mode. The vegetables are clearly defined and very colourful and the overall aesthetic is very pleasing to the eye. If you choose to play with sound effects then you won’t hear much at all, just the odd ‘plink’ when you make a match. The music however is brilliant and if you enjoy SID tunes then this is definitely the way to play. I’ve played this game for hours and never  tired of listening to the soundtrack so top marks for that.

This is a terrific little puzzle game for the Commodore 64. It looks great, sounds fantastic and is a lot of fun to play. I have no reservations at all in recommending it to anyone looking for a casual gaming experience. It’s published by Double-Sided Games in Canada on cartridge, floppy disk or digital download. There is now also a cassette tape version available from Psytronik in the UK.


Standard vs Deluxe Comparison

I mentioned at the start that this is an updated version of the game. Below you can see a few comparison pics between this and the earlier version. There’s a number of marked improvements over the original game. These include the addition of in-game music and three extra gameplay modes. The Deluxe version also takes advantage of the Commodore 64’s high-res capability to deliver much crisper graphics than you get with the chunkier colour mode used in the original. It actually reminds me a little of a Spectrum game in terms of presentation, especially the font used.

This slideshow requires JavaScript.


This slideshow requires JavaScript.


Amiga Version

Included as a bonus at no extra charge is a complete Amiga port of the game as well! This takes the form of a digital ADF disk image that you can either use in an emulator or on a real Amiga via a GOTEK drive. (I think this bonus is exclusive to the Double-Sided Games release).


Amiga Vegetables Deluxe

Amiga Title Screen


It’s the exact same game with the same choice of game modes, optional music and so on. The music is terrific but I personally prefer the C64 tune. The title screen is also infinitely better on the C64 version with the Amiga’s being text only.

Amiga Vegetables Deluxe

Amiga Vegetables Deluxe game screen

A big benefit of the Amiga version is mouse support which feels like the natural way to play a game like this. It also benefits from the higher resolution and larger colour palette to create a more striking display. Both games are brilliant but I think the C64 version is better in the music department whilst the mouse support gives the Amiga version the edge in gameplay. If the C64 version supported the NEOS or 1351 mouse then that would make it a clear winner for me!

Even though the Amiga version is classed as a bonus addition to the C64 game I would still recommend this to Amiga only gamers as it’s a great game on either system.

Fusion 2020 Annual Review

Fusion 2020 Annual

I’ve been buying Fusion magazine since its inception over a year ago. It’s a great little magazine that covers everything from retro gaming and culture to modern day classics. A couple of months ago they launched a ‘Fusion 2020 Annual’ Kickstarter campaign which I backed without hesitation. The annual arrived fresh off the printing press a couple of days ago so here’s a quick look at what’s inside.


Fusion 2020 Annual

Fusion 2020 Annual Back Cover


The Extras

The first thing you will notice is that the annual is A5 in size rather than the more common A4 format. This is in keeping with the magazine itself which is published in this format. There were a whole bunch of stretch goals added towards the end of the campaign which means that it came packaged with a host extra goodies.


Fusion 2020 Annual

Fusion 2020 Annual & Extras


Included is an A5 calendar that unfolds to A4 and features some fantastic artwork from the magazine. There’s also a special ZX Spectrum themed edition of Fusion magazine that runs to 50 pages covering everything ‘speccy’. Finally there’s a couple of collectable art cards and two badges featuring artwork from previous magazine covers.


Fusion 2020 Calendar

The Fusion 2020 Calendar featuring some fantastic artwork


Below is a little peek at the contents pages so you can get an idea of exactly what you will find inside the annual. As you can see there’s a broad range of topics and time periods covered.


Fusion 2020 Annual

Fusion 2020 Annual Contents Pages


Taking a peek inside


As a huge Amiga fan I thought this interview with RJ Mical was especially interesting to read.


Fusion 2020 Annual

An interview with RJ Mical who was part of the team that created the Amiga 1000


There’s plenty of nostalgic trips down memory lane to be found in the annual. Here’s one that struck a chord with me, I’ve still got this up in the attic somewhere!


Fusion 2020 Annual

Frustration!


Another nostalgia hit, this time looking back at a particularly memorable Zzap!64 magazine cover.


Fusion 2020 Annual

Zzap!64 Feature


There’s also a feature I found particularly interesting as a retro game collector – ‘Cheaper in Japan’. This looks into sourcing games from the far east and demonstrates how much cheaper they can be than their western counterparts. Sadly this won’t help with the escalating prices of Commodore gear but something to bear in mind for Sega, Nintendo and PlayStation classics.


Fusion 2020 Calendar

Buying retro games cheaper from Japan


There’s some great modern day features too such as this look at the fantastic Logitech G920 wheel and pedal set. (I’m a big racing simulation fan when I’m not playing retro games and this is the wheel I use).


Fusion 2020 Annual

Logitech G920 Wheel review


Verdict

All in all this is a cracking addition to anyone’s book collection and I have no qualms about recommending it to people who are passionate about gaming. There’s literally something for everyone in here, especially if they’re interested in older games and systems.

If you’d like to get hold of your own copy you can buy the annual directly from the Fusion Retro Books website for the bargain price of £9.99. Please bear in mind that you won’t get all the extras described above as these were only for those who backed the Kickstarter campaign.

A look back at Pinball Spectacular and Raid on Fort Knox for the VIC20

Pinball Spectacular

Picked up another duo of classic VIC20 game cartridges off eBay to add to my collection this week. Pinball Spectacular and Raid on Fort Knox, both of which are in pretty good condition complete with their original boxes and instruction sheets.

As usual I spent some time scanning the boxes in and adding them to my ‘3D VIC20 Game Museum‘. It’s so much easier to do this as and when I get new games. If I leave it too long they pile up and I develop a kind of mental block that prevents me doing them!

I’ve never seen or played either of these two before so had no idea what to expect from either of them beforehand. Thought I would share my thoughts on each title in the form of some mini reviews…


Pinball Spectacular

I’d never even seen Pinball Spectacular for the VIC20 before so this was a particularly interesting purchase for me. The game requires the use of paddles which was another reason I was keen to pick it up. There weren’t many paddle games made for the VIC so I grab any I can find!

Once I loaded this up I quickly realised that this is not a pinball game at all. It might take a few cues from it but this is basically a version of breakout.


Pinball Spectacular

Pinball Spectacular Title/Player select screen


You control two horizontal bats that you can move left and right with the paddle. Once you launch the pinball with the fire button you need to keep batting it back up the screen to destroy the coloured blocks. This can quickly get tricky as the ball ricochets, often at high speed, at all sorts of angles due to the design of the ‘table’. The goal here is to clear all the blocks and release an alien which you then destroy by hitting it with the pinball.

So far, this has far more in common with breakout than anything else. Here’s where the the pinball elements come in to play. You can hit the ghost at the top of the screen for extra points. Likewise if you can direct the ball to hit all the little faces (turning the frowns into smiles) you can gain another bonus. Light up the letters E X T R A and unsurprisingly you earn an extra ball.


Pinball Spectacular

Pinball Spectacular


It’s a very simple game but it’s presented attractively with a great use of colour and some decent sound effects. Best of all it’s actually really good fun to play, helped in no small part by the use of paddles to control the bats. I can see myself coming back to play this often, trying to rack up higher and higher scores.


Raid on Fort Knox

This game has a lot in common with other games such as Pacman or Radar Rat race. The aim of the game is to steal gold bars from the vaults in Fort Knox and escape back to your hideout with them. Fort Knox is represented as a maze of corridors and for some reason there are black panthers patrolling that you must avoid. Not sure why there’s panthers around instead of guards but no matter. If one touches you,  you lose one of your three lives, lose all three and it’s game over.


Raid on Fort Knox

Raid on Fort Knox Title Screen


Whilst you are navigating through the corridors to retrieve the gold, one bar at a time, there’s no time limit. However as soon as you grab a gold bar a countdown timer bar appears at the bottom of the screen. You must get back to your hideout, whilst avoiding the panthers, before the time limit runs out. The faster you get back to your hideout, the bigger the payout. If time runs out you get nothing for your troubles. If you steal all the bars you move on to a bonus vault before moving up to the next level.


Raid on Fort Knox

First level of Raid on Fort Knox – on the left are the gold bars. You’re the little blue guy top right.


The graphics can best be described as rudimentary, as are the sound effects. If it was a budget game on cassette I’d forgive these shortcomings but for a cartridge game it’s disappointing. I reckon it was probably written in BASIC. I’m glad I was able to add it to my collection but in all honesty it’s not a title I see myself coming back to in the future.


Raid on Fort Knox

Raid on Fort Knox Bonus Level – avoid those black panthers.