Lyonsden Blog

Category - VIC 20

Cooling my VIC20

Cooling VIC20

Although my VIC20 is working perfectly I thought it would be prudent to take some precautions to help it continue to lead a long life. I’ve read about chips failing in the VIC, often due to excessive heat build-up. To this end I set about checking just how hot the various chips were getting and see if I could find a way of cooling my VIC20.

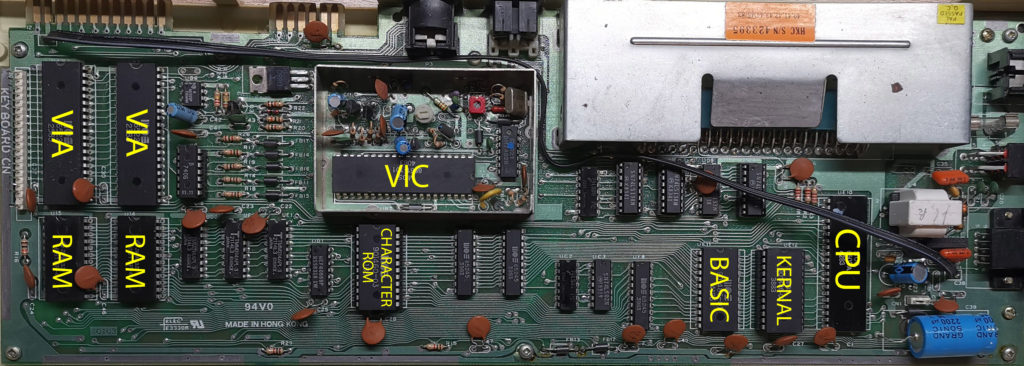
Here’s a diagram I knocked up identifying the main chips on my VIC20 motherboard. I made it for my own future reference but it may be helpful to others too.


VIC20 Motherboard chip identification

Commodore VIC20 Motherboard with main chips labelled. (Click for larger version).


The first thing I did was leave my VIC20 running a game for a couple of hours. I chose GORF as it continually runs in ‘attract mode’ which I hoped would give everything a good workout. I let this run for 2 hours before lifting the lid and checking the chip temperatures.

To perform the testing I used a cheap infrared thermometer that I picked up off Amazon. With this gadget I could simply point the laser at a chip to instantly read its temperature. I found that different areas on the same chip could give significantly different temperatures. The difference was often as much as 5C so I noted down the highest temperature measured for each chip.


Chip Temperatures

Perhaps not surprisingly the hottest chip on the board was the VIC running at 46C . The next hottest were the 2 VIA chips at operating at 40C. Running in joint third place was the Character ROM, BASIC, Kernal and CPU chips at 35C each. Last place and probably of little concern were the two large RAM chips in the bottom left which reached 30C. The rest of the chips were all below 30C so I felt these didn’t warrant any further attention.


Copper Heatsinks

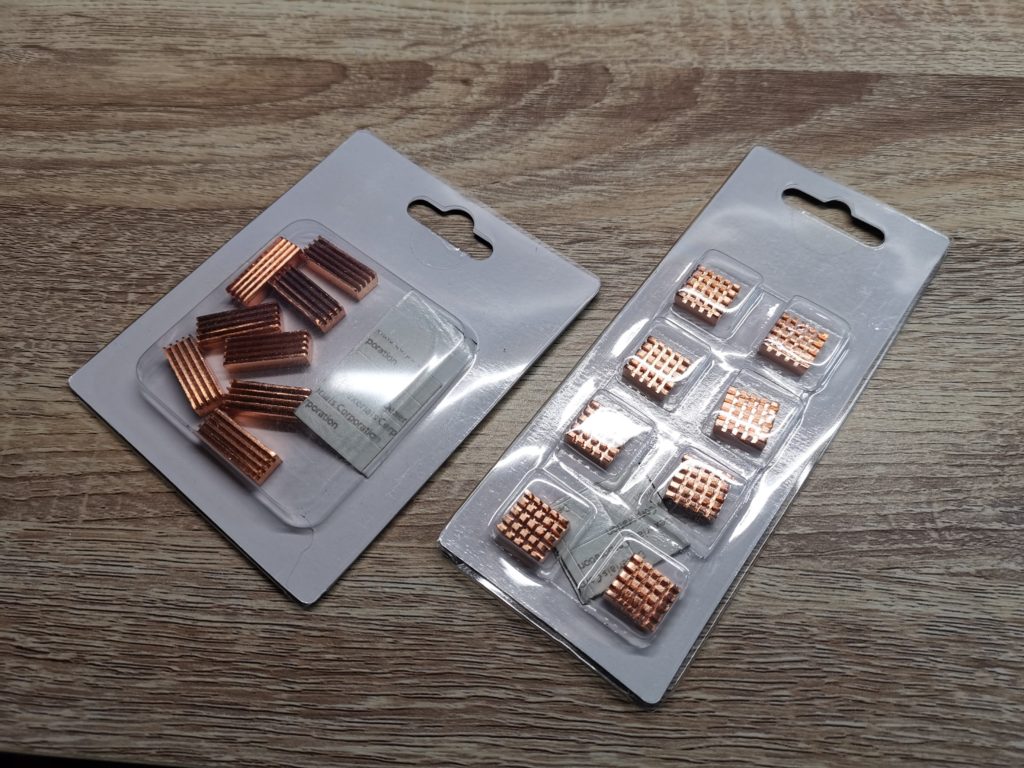
Packs of Copper Heatsinks


I didn’t want to install a fan in my VIC20 so I decided on heatsinks to help cool things down. Because all the chips are different sizes a ‘one size fits all’ approach wasn’t going to work. To this end I took a few measurements and went looking for something suitable. In the end I settled on these copper heatsinks from Amazon and picked up 3 packs in total. I had already bought a pack of these in case any of the smaller chips needed cooling too.


Copper Heatsinks

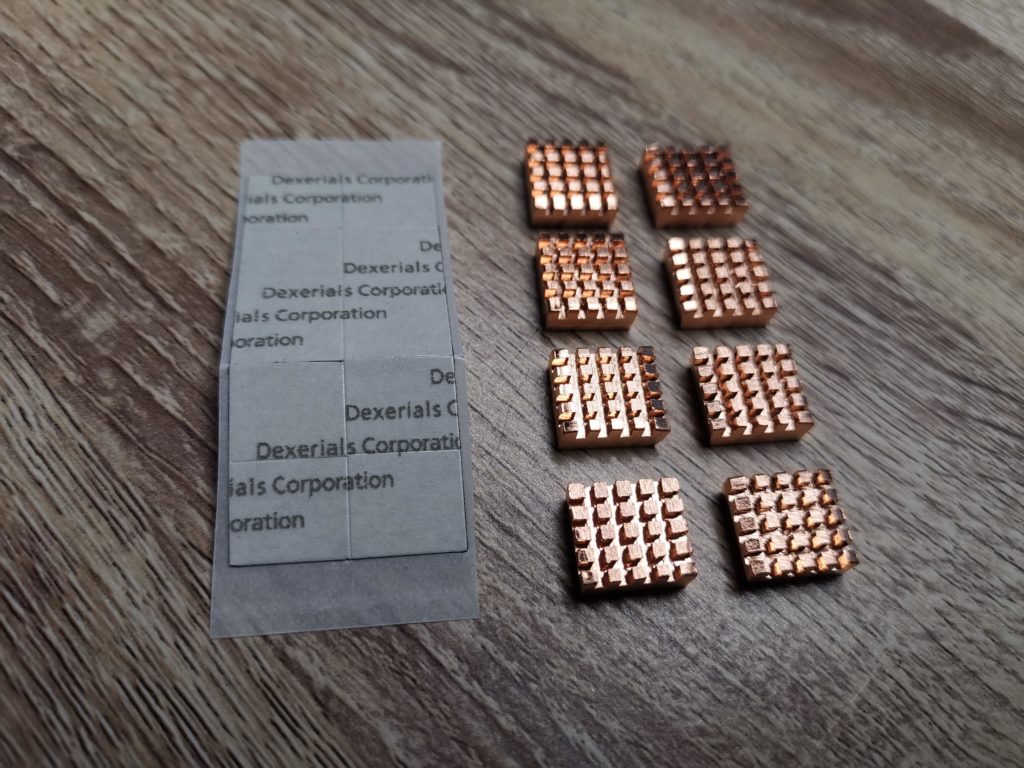
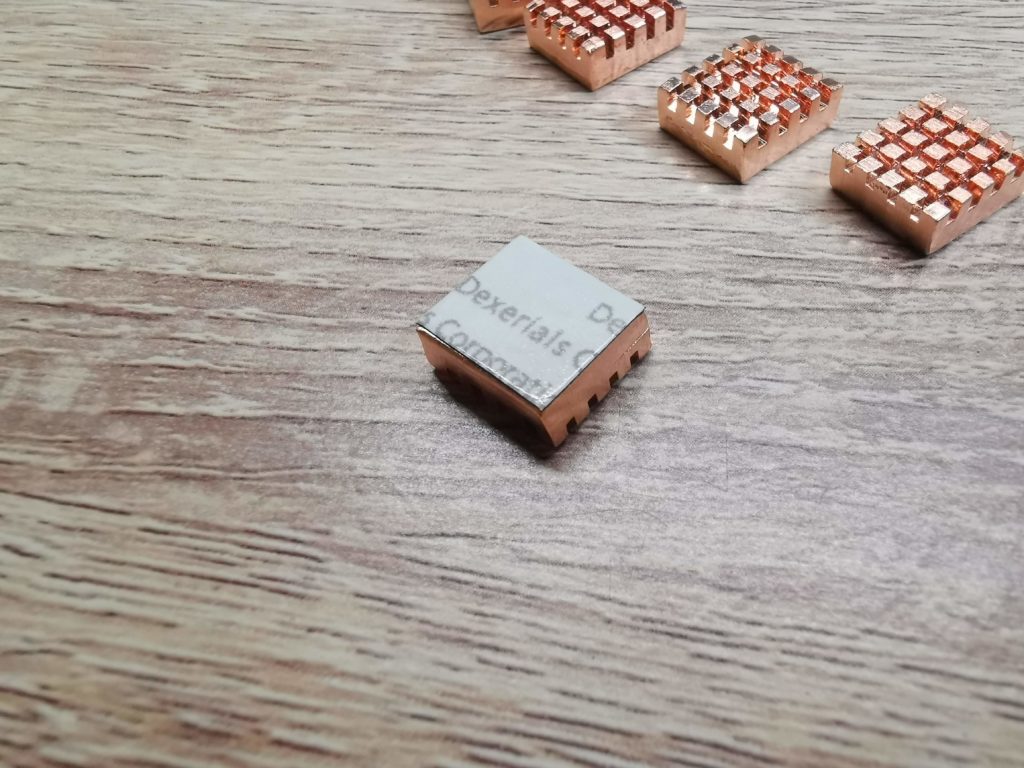
Copper Heatsinks alongside the thermal tape fixing pads


Although they look square, they’re aren’t quite as they measure 10mm x 11mm. However they are the perfect size to both fit the width of each of the main chips and to be used in multiples to maximise surface coverage on the various chip lengths. They also came supplied with self-adhesive thermal tape which allowed easy installation.


Preparation

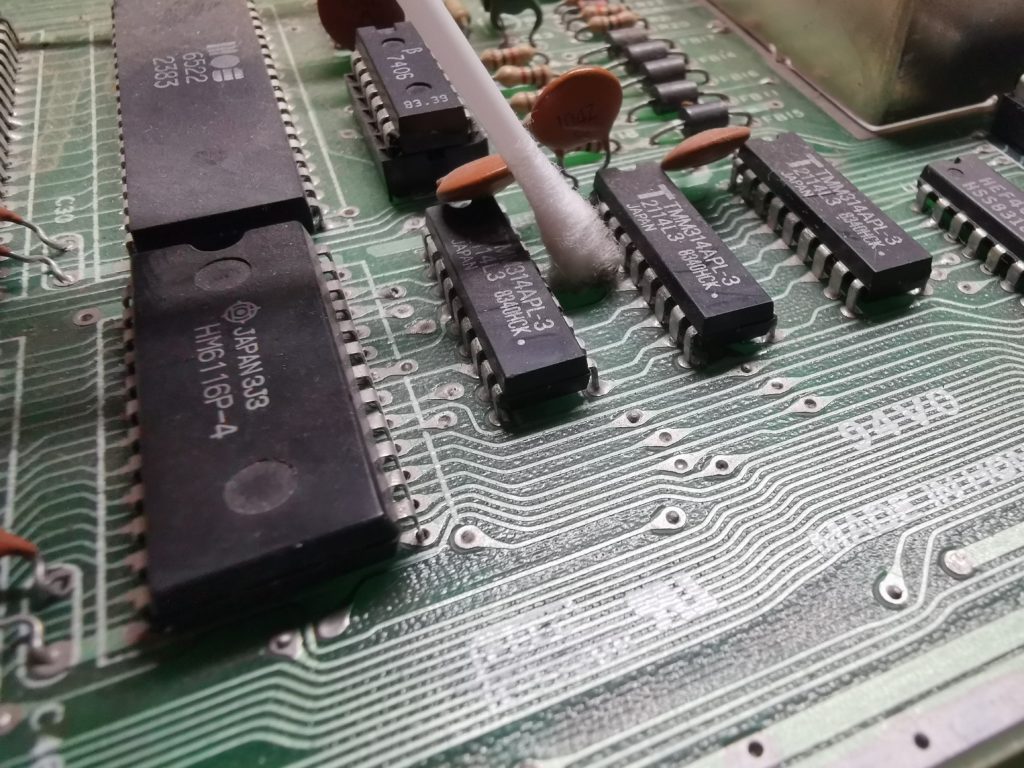
Before even thinking of installing the heatsinks I needed to do some cleaning. The chip surfaces needed to be squeaky clean to ensure good adhesion of the thermal tape. Also, besides a few blasts of compressed air I hadn’t got around to cleaning the motherboard since I rescued my VIC20 from the attic. A bottle of Isopropyl alchohol and a box of Lidl’s finest (i.e. cheap) cotton buds was the order of the day here.


Dirty cotton buds after the chips and motherboard had been cleaned with isopropyl alcohol.


All I did was gently wipe the surface of every chip, component, contact and the surface of the board itself until the cotton buds came up clean. Of course if the board was already clean I would have simply cleaned the surface of the main chips and stopped there. The whole cleaning process probably took about half an hour, maybe a bit more but i found it quite therapeutic. I also cleaned the base of the heatsinks just to be sure they were squeaky clean.


Cleaning motherboard with cotton bud

Cleaning up with an alcohol soaked cotton bud.


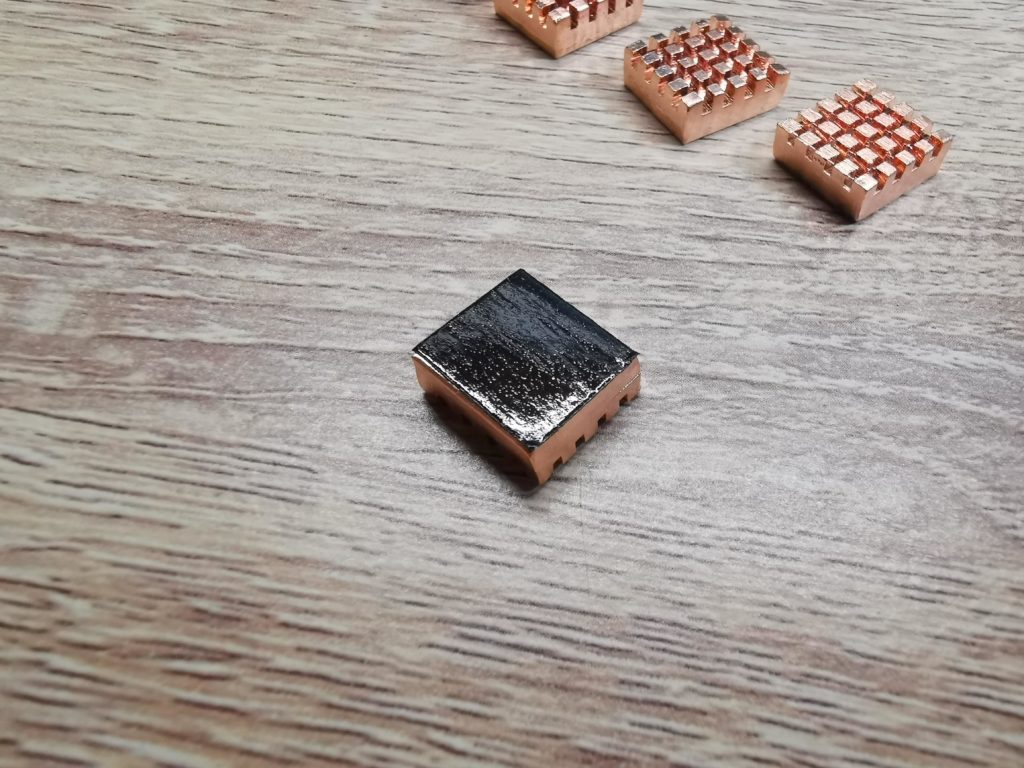
The next task was to carefully attach the thermal tape to the heatsinks. I simply peeled one square off the sheet and carefully aligned it with the edge of a heatink before pressing it firmly into place. It was important to get these aligned correctly otherwise it would have made placing them next to each other very difficult.


Heatsink with thermal tape applied

Heatsink with thermal tape applied


Once I was ready to attach a heatsink (I’d already loose-fitted them to check the best way to arrange them) I just needed to peel the protective film off the thermal tape. I found a sharp blade was very useful here if I couldn’t catch the edge of the plastic film with my fingernail.


Heatsink with thermal tape applied

Heatsink with thermal tape applied, protective film removed and ready to be stuck into place


Installation

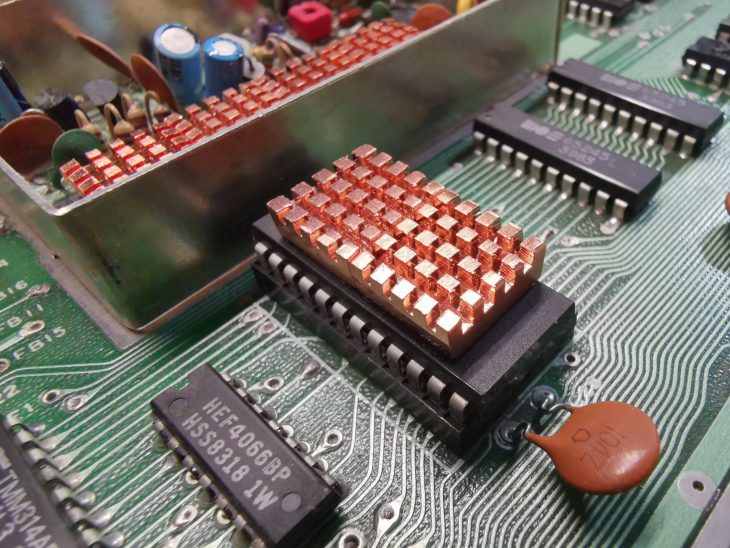
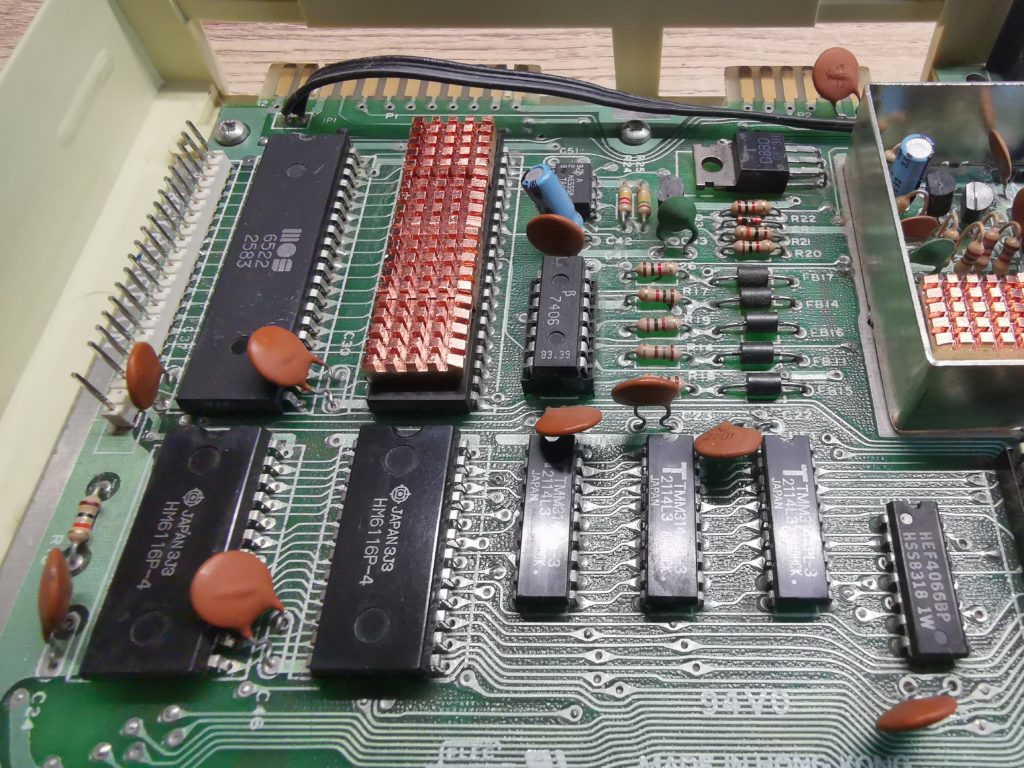
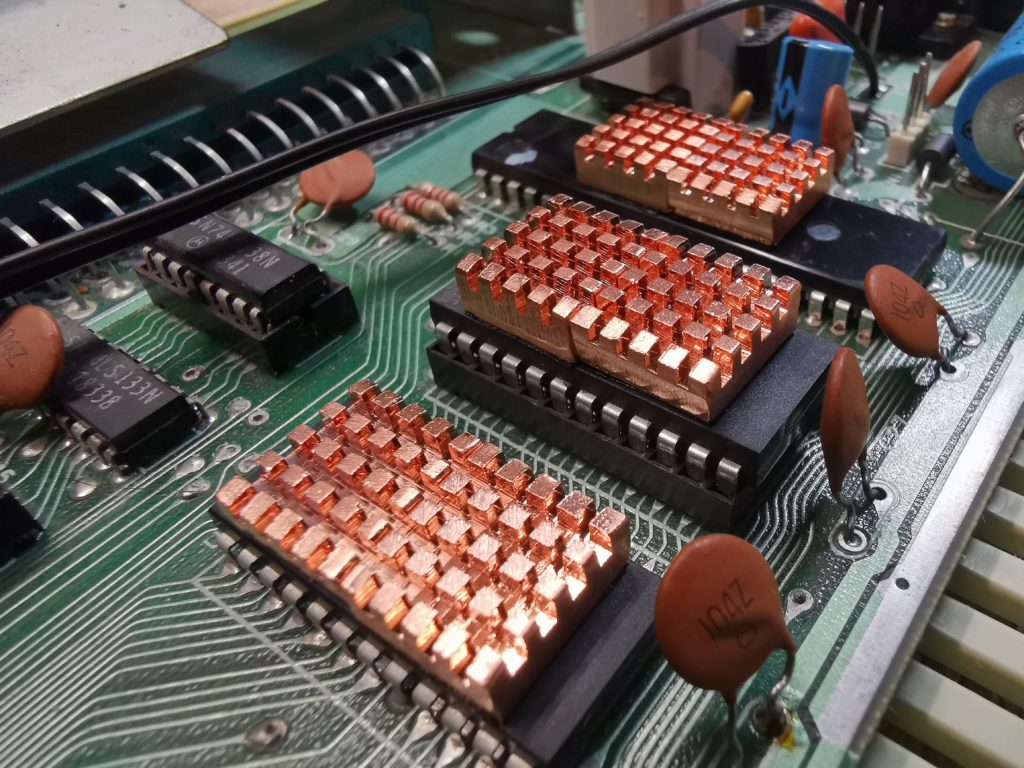
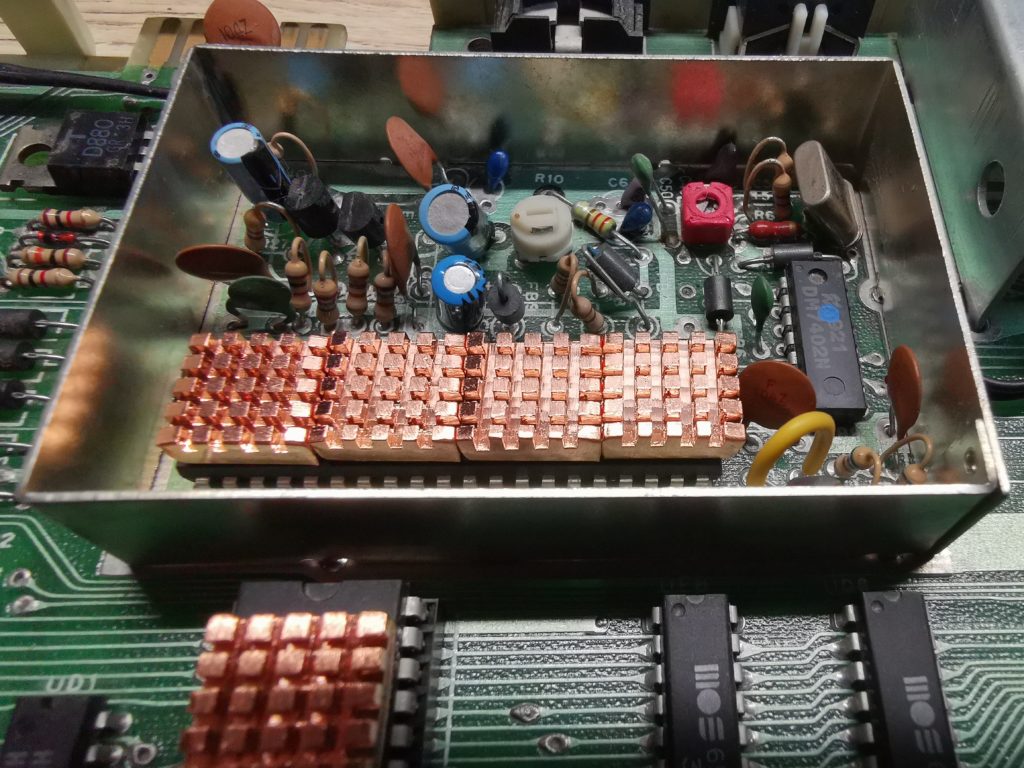
This was the best part, sticking the heatsinks onto the chips. For the bigger chips like the VIA, VIC and CPU I used 4 heatsinks butted up close to each other. For most of the other chips like the RAM, BASIC and Kernal I just used 2. By this stage I ran out of the ‘not quite square’ heatsinks. Because of this I used 2 of the tall slim heatsinks to top off both of the RAM chips. These were only reaching 30C anyway so didn’t need serious cooling.


Cooling VIC20

Here’s the VIC fully covered by heatsinks.


I found the thermal tape stuck the heatsinks down really well which made it all the more important to position them correctly first time. Moving them around after they’d been stuck down was almost impossible.


Cooling VIC20

First VIA chip done… that ceramic capacitor bent over the lower part of the left VIA chip needed to be carefully bent away before heatsinks could be fitted


Cooling VIC20

From left to right, the BASIC, Kernal and CPU chip (not finished)


Did it actually do anything?

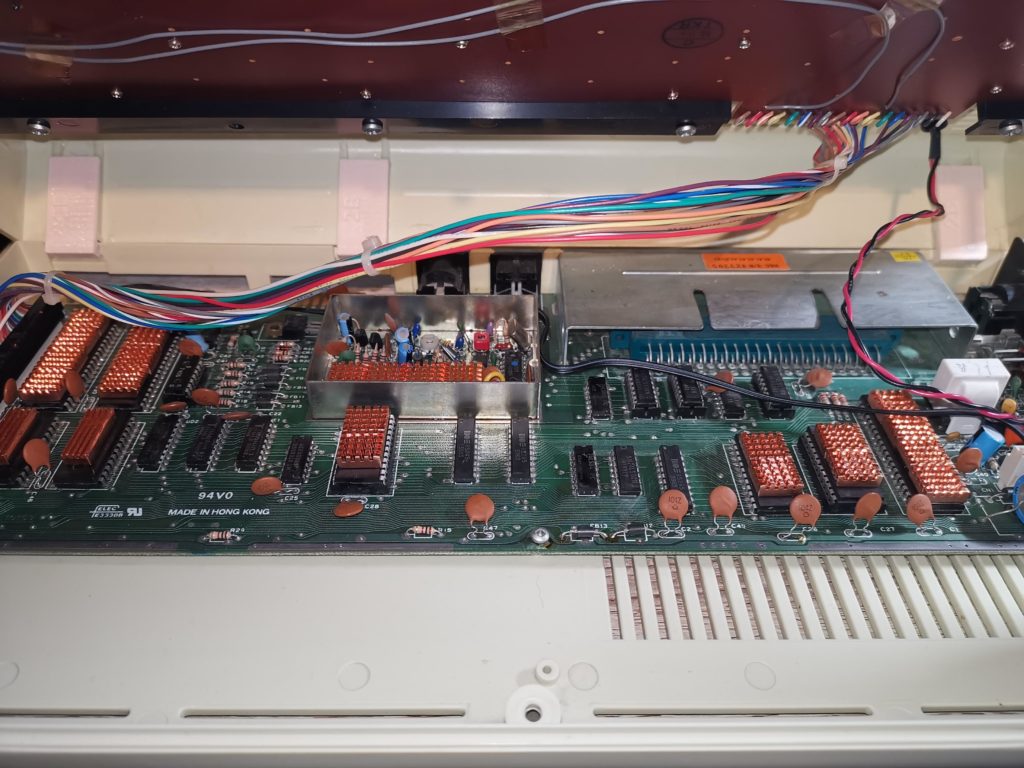
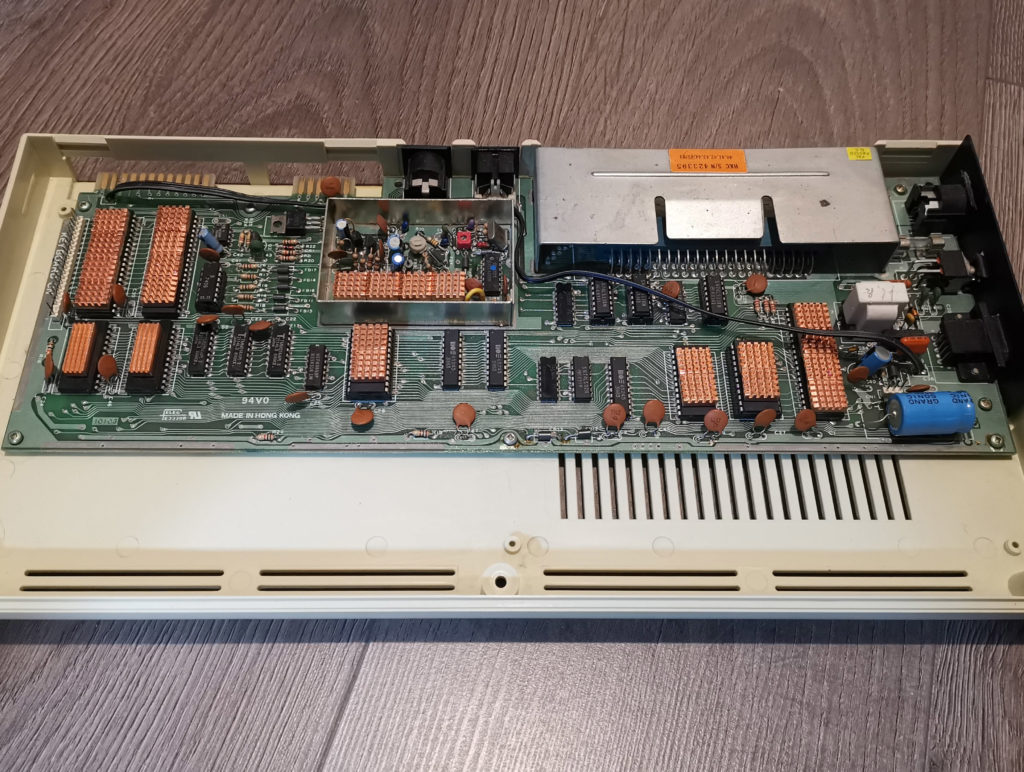
Here’s a photo of the completed project with all the main chips covered by heatsinks. It certainly looks the part now but did the addition of the heatsinks actually have any appreciable impact on cooling my VIC20?


Cooling VIC20

Finished project with all the ‘hottest’ running chips fitted with heatsinks


In order to see if the project actually made any sort of meaningful impact I repeated the same test as before. I popped the lid back on, slid GORF into the cartridge slot and let my VIC simmer for 2 hours. I measured temperatures in the same way as before, noting the highest recorded reading for each one.

I’m happy to say I found that the heatsinks did actually result in a decent improvement in temperatures across the board. The biggest improvement came from the VIC chip which went from hovering around 46C down to 38C, a drop of 8C which is fantastic. The VIA chips fell from 40C to 35C and the VIC Character ROM from 35C to 31C. The remaining chips showed drops of between 2-3C which whilst not as impressive is still an improvement.

I’m not really sure why the different chips exhibited different levels of improvement but nevertheless I’m very happy with the results. My VIC20 is almost 40 years old now and I’m hoping this little project helps it last a good few more!

Audio Tape Cassette Storage – Solution/Review

audio tape cassette storage

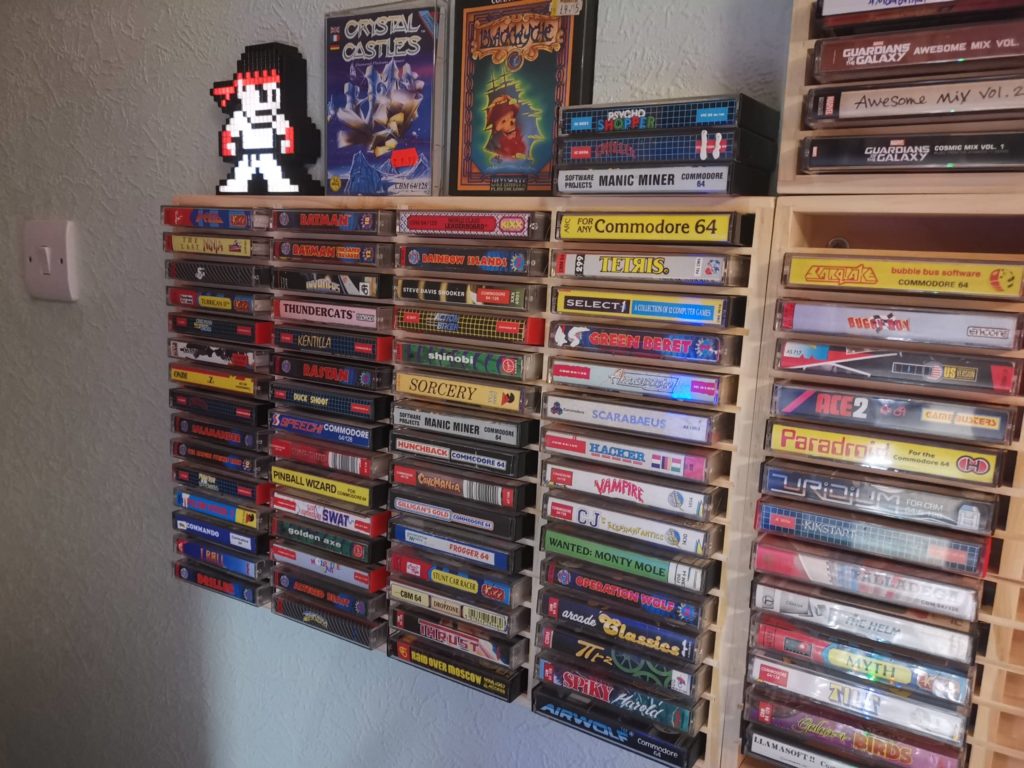
My audio tape cassette storage problem has been bugging me for quite some time now. Over the years I’ve accumulated a lot of cassette tapes (both music and games) and that number is constantly increasing. I’ve been storing a lot of them in those old drawer units (the ones usually covered in tacky looking wood effect vinyl). Whilst this is an effective storage method I’ve always found them a bit of a pain to use and also my tapes are hidden away out of sight. I’ve also got loads of tapes stacked on top of each other on a shelf and this is far from ideal too. Forty year old tapes are not something I want to risk playing Jenga with!

All this leads me to the reason for posting this article. After searching around for a while for a better solution I finally found one I’m happy with so I thought I’d share it.


This is a link to the racks featured in this post.


The Solution

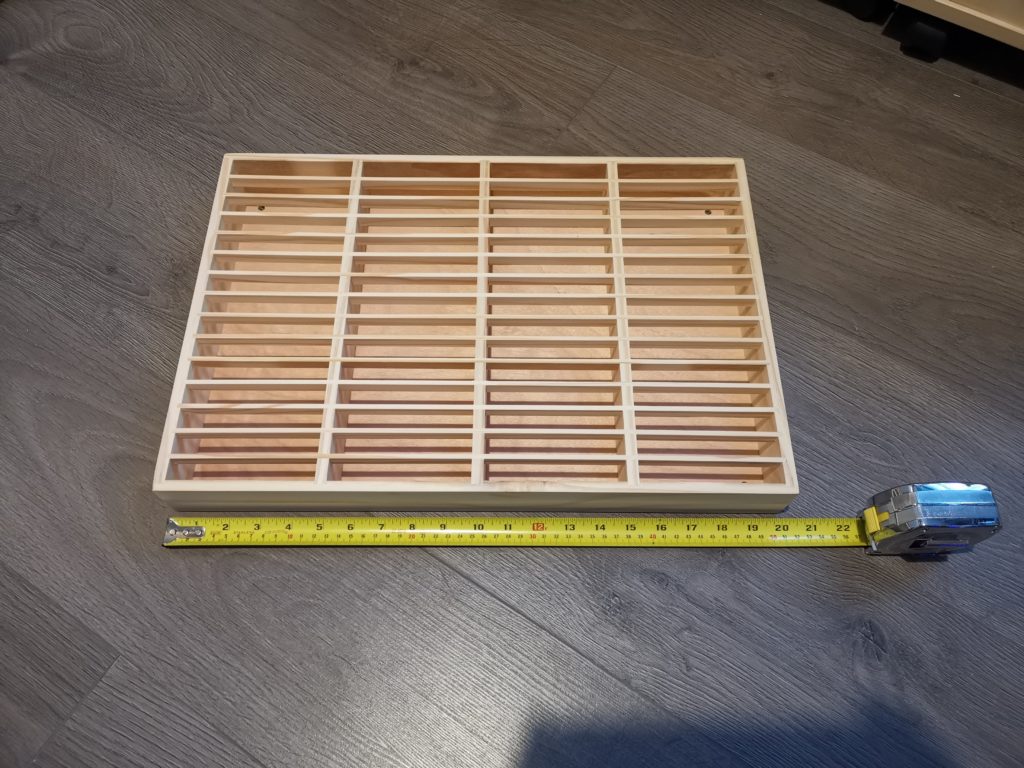
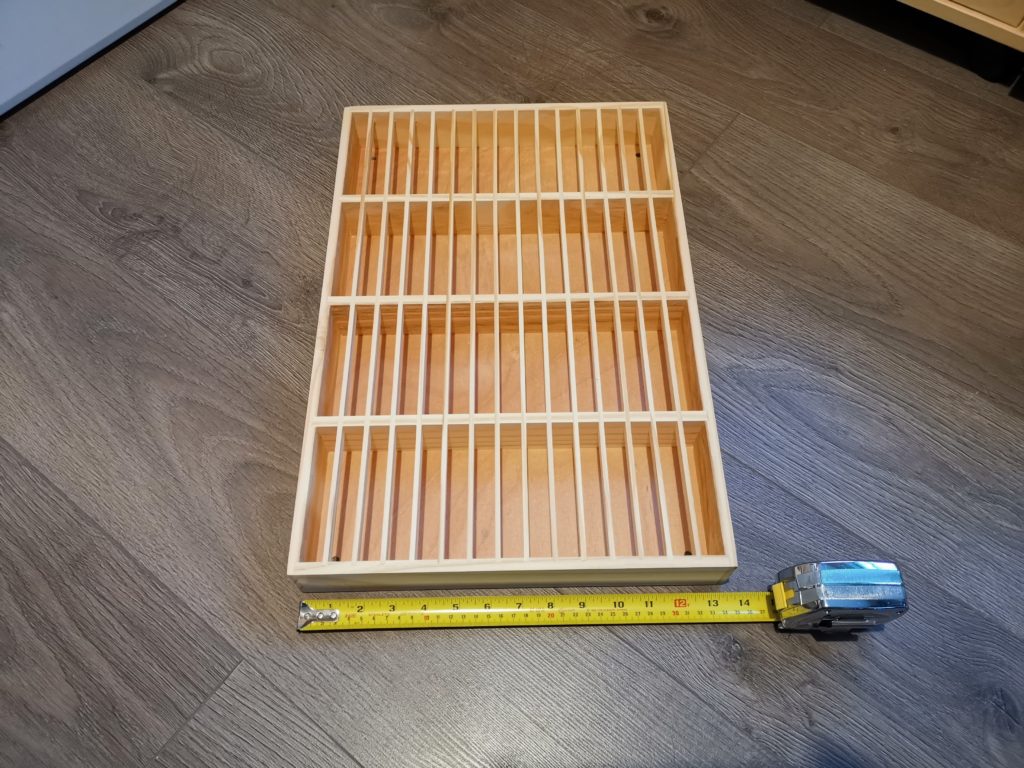
The audio tape cassette storage solution I found is a purpose made wooden rack that can hold 60 cassettes in their boxes. It’s manufactured by a company in Germany called ‘Protected’ and are available for sale on . Delivery took less than a week by DHL.


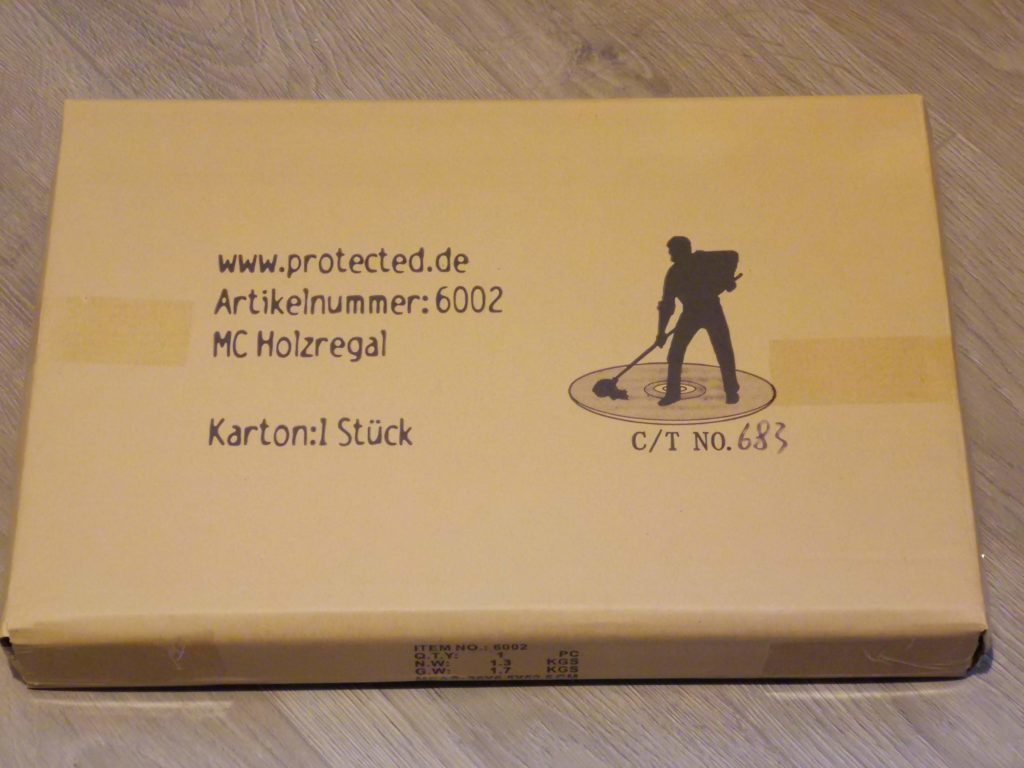
The packaging the racks arrived in.


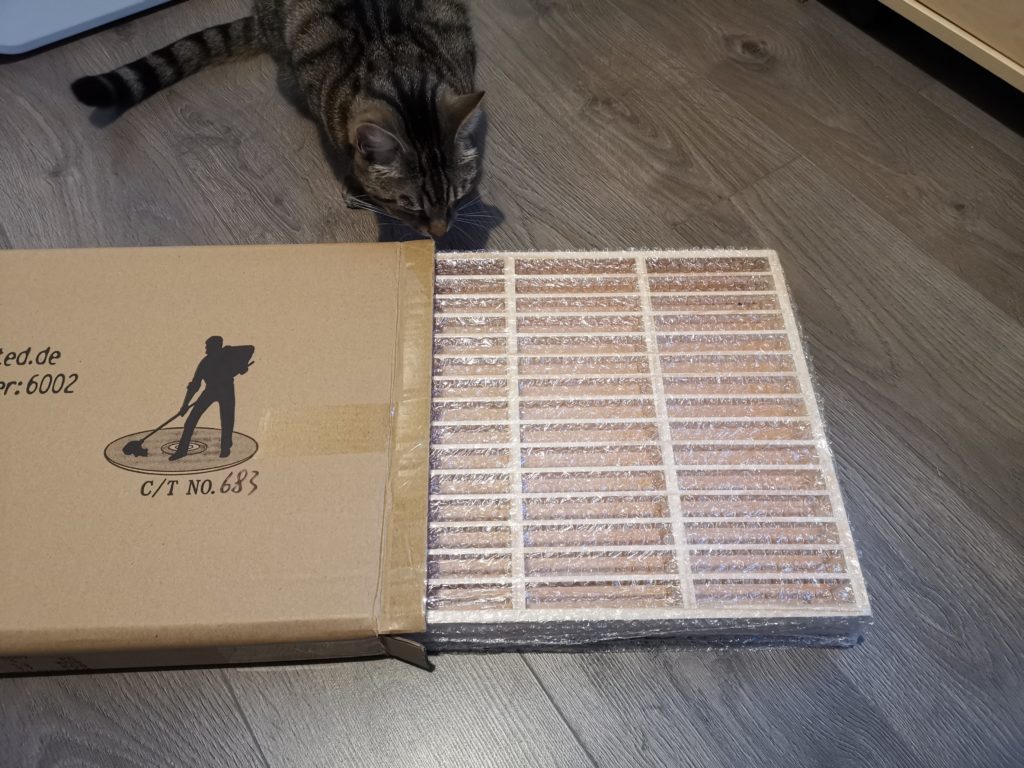
The racks came individually packaged. Opening the cardboard box (carefully to avoid cutting into it) revealed the nicely bubble-wrapped rack inside.


audio tape cassette storage

My cat loves it when I open new parcels!


All three of mine arrived in great shape. I must admit I was a little wary about ordering at first as I wasn’t sure if these were getting knocked together in someone’s garden shed. There is only one (poor) photo on the Amazon website and precious little info provided. However I was very pleased to discover a high standard of both manufacture and finish.


audio tape cassette storage

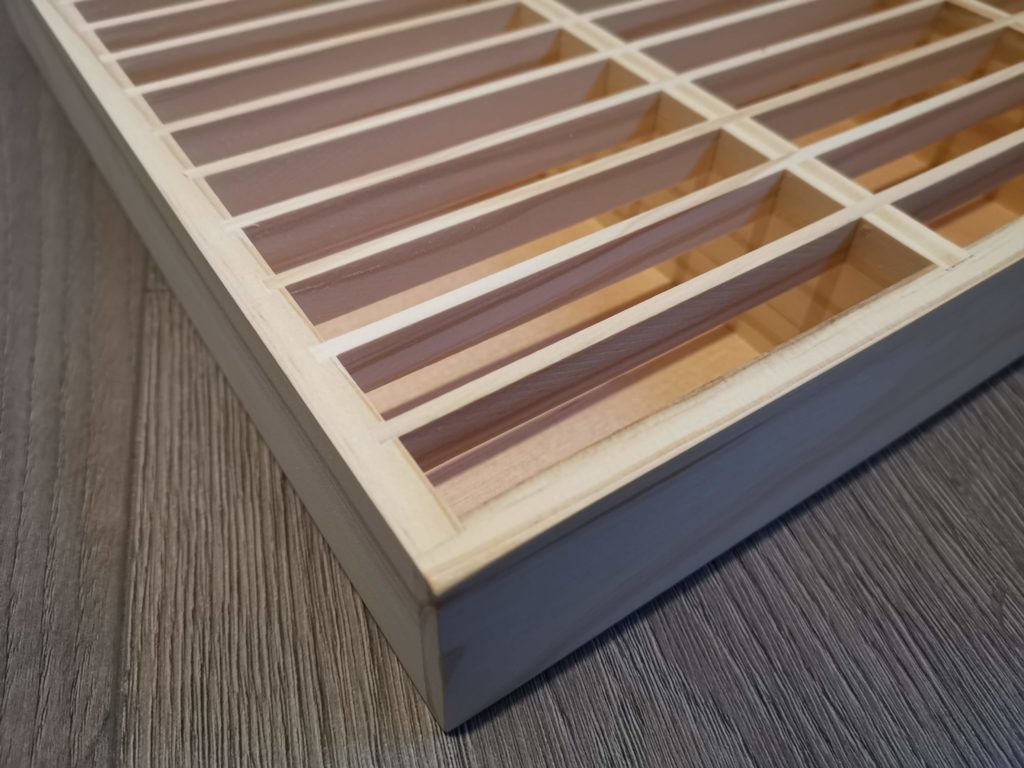
Nicely finished woodwork


A Closer Look

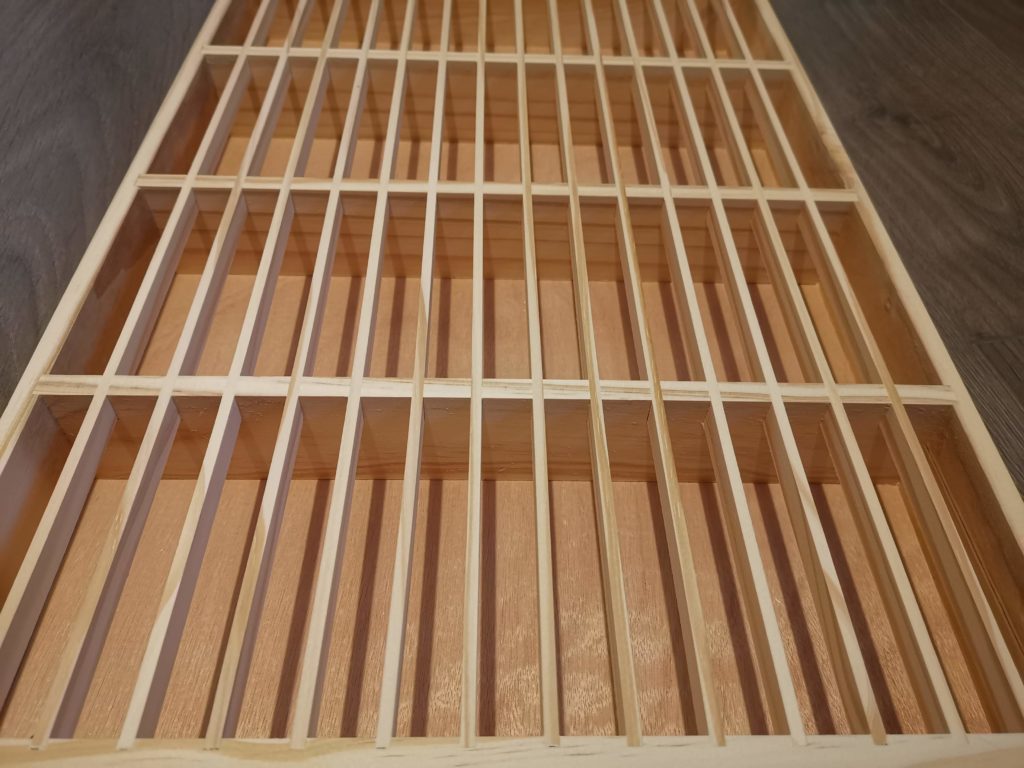
The racks are constructed from solid strips of pine wood and the back panel is made of plywood. All the strips of wood forming the slots are perfectly aligned and fit perfectly flush. There are no sharp edges or splinters to worry about as everything has been sanded smooth and edges rounded off. The back is a little rough but once in use you’re never going to see or touch it again.

There are 4 pre-drilled holes in each corner so you can wall mount the racks. Somewhat disappointingly plugs and screws are not provided. However this is not that big a deal and most people my age have probably got loads in a jam jar somewhere in their shed or garage. I would also recommend the use of a washer as the holes are quite big. Using a washer will also prevent you from driving a screw right through the thin plywood back panel.


width…


Size wise the racks are approximately 20″ (51cm) long and 13.5″ (34cm) tall.


height…


I opted for the natural pine finish but they also offer a white one too. I’ve not seen that in the flesh so can’t comment on the finish of it. I guess you could also either varnish or paint them to suite your colour scheme too. I’m quite happy to keep the bare wood finish for my setup though.


Closer look at the slot construction


The slots are perfectly sized and I’ve not found any cassettes that wouldn’t fit into the them.


audio tape cassette storage

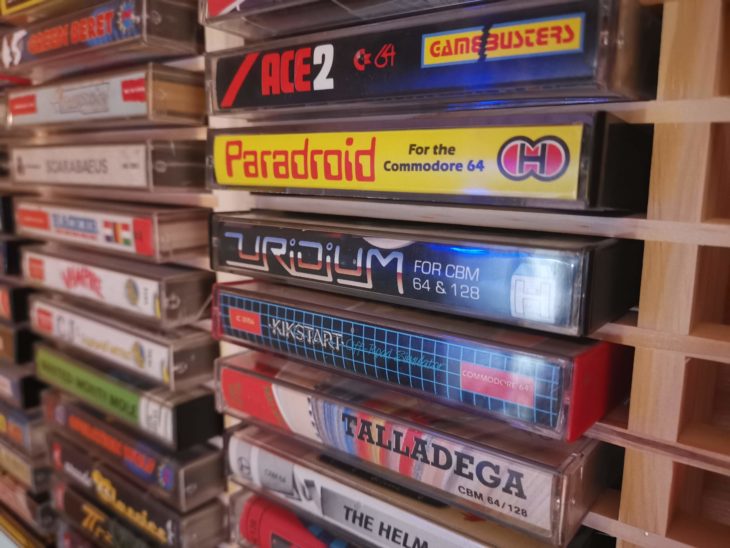
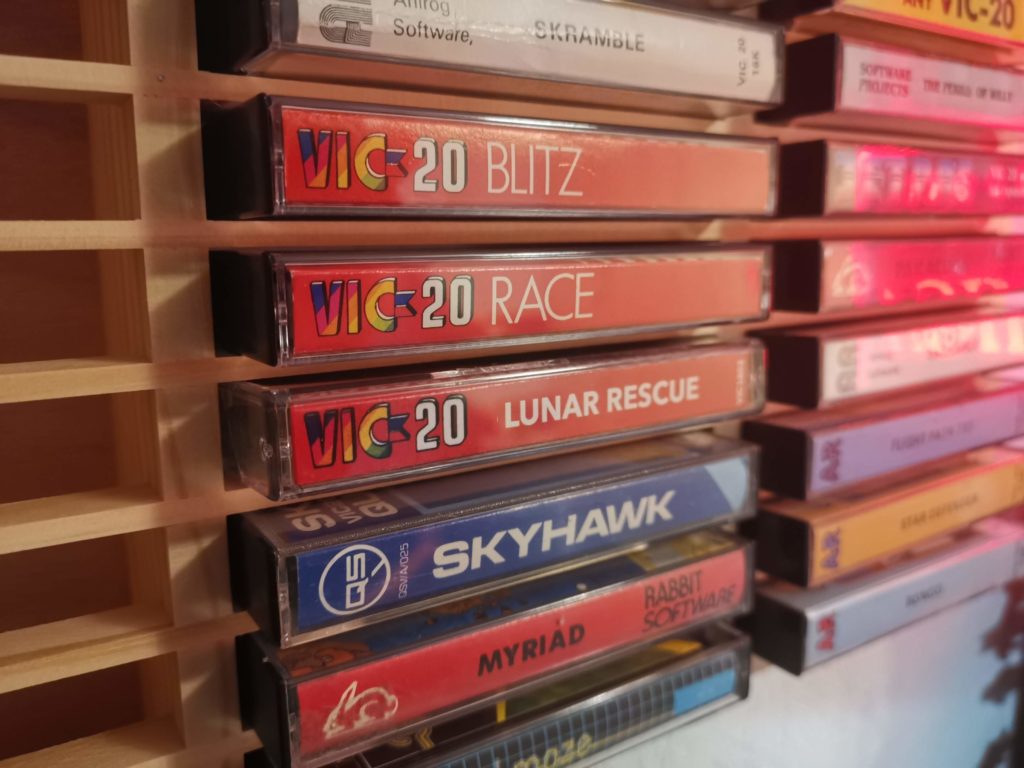
A selection of VIC20 games slotted in nicely


The rack is slightly shallower than a cassette is deep (2″ or 50mm) which means tapes stick out about 1/2″ (12mm). This allows you to easily get your fingers around them when you need to get them out.


audio tape cassette storage

Top of rack makes for a useful display area.


You can even use the top of the rack as a small shelf for extra storage or display purposes. I’m still experimenting with what looks best but will probably settle for displaying double-cassette boxes or the odd big box game.


audio tape cassette storage

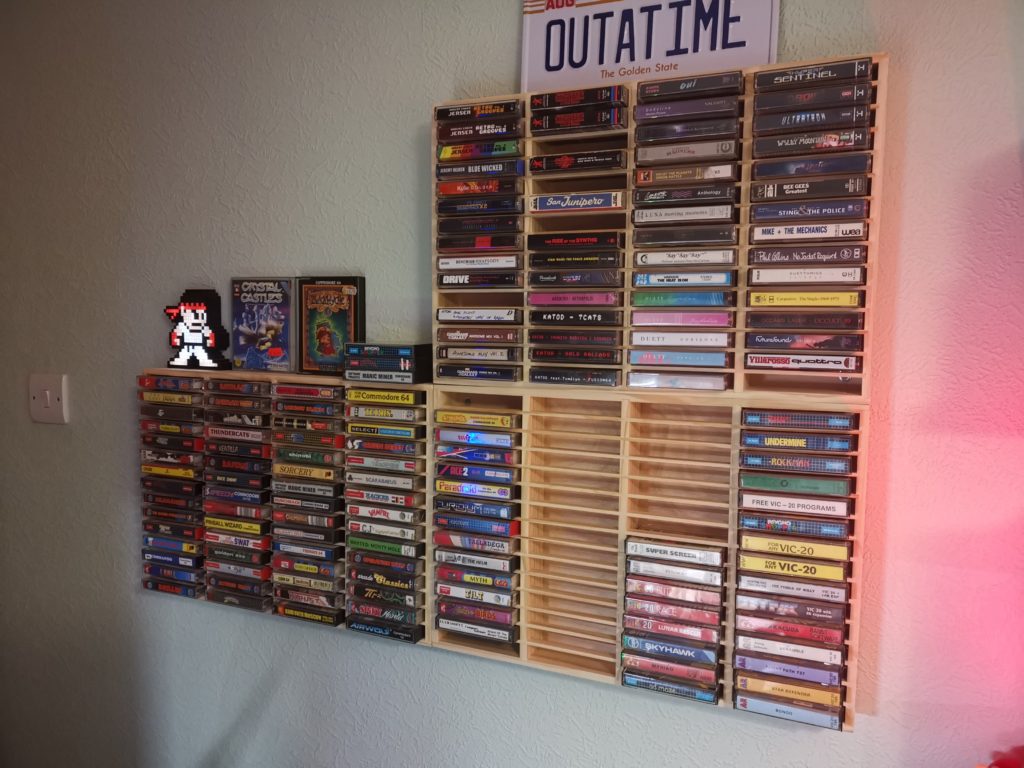
Racks filling up nicely…

Finishing Words

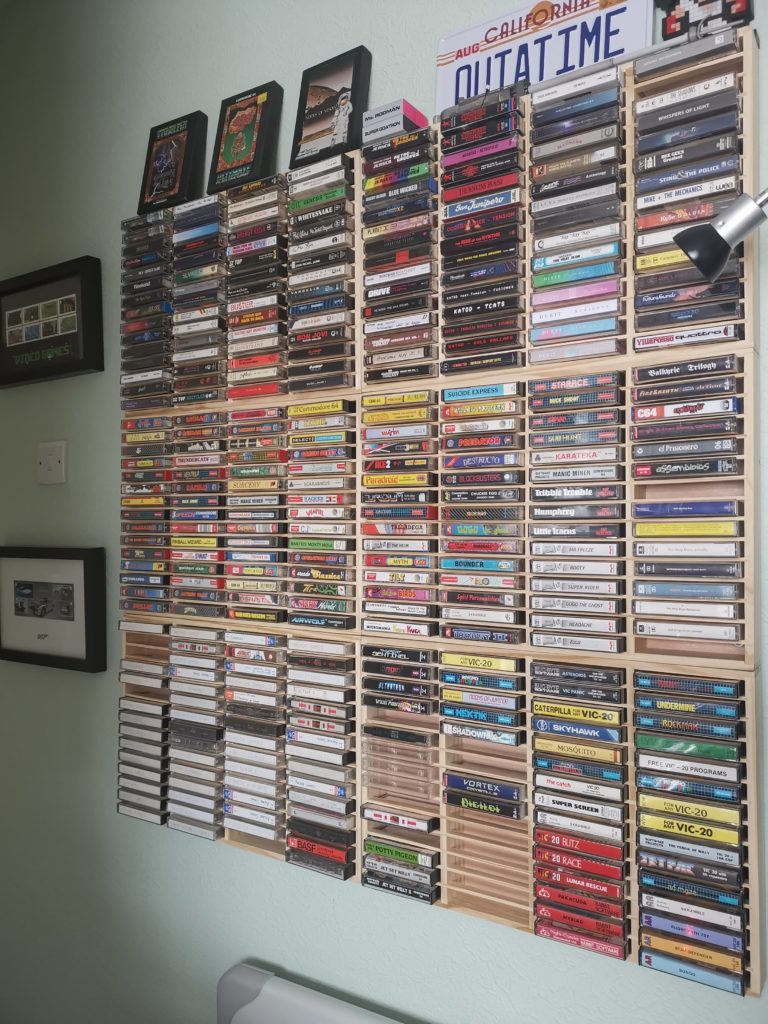
I have to say I really love these racks and I’m glad I’ve finally found a storage solution that fulfils my desire to display my stuff too. I filled my three racks straight away so have just ordered another three. With six racks I’ll have the capacity to store 360 tapes in total. That’ll allow me to store all the tapes I currently own and hopefully leave me with enough empty slots to accommodate future purchases, fingers crossed.

The racks are available from Amazon here:


Update: 1st April 2020

Fitted the extra three racks so as promised here’s a photo of the finished project. I still have a few empty slots left thankfully but how long for is anyone’s guess!


audio tape cassette storage

Finished project with enough space for 360 cassette tapes.


Hope you found this article useful!

Cassette Deck Maintenance: Demagnetising a Tape Head

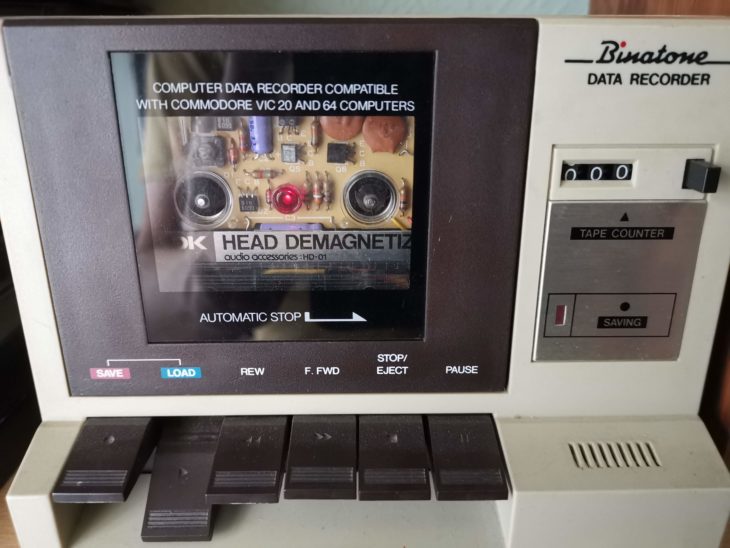
Binatone Data Recorder - Demagnetising Tape head

In addition to regular cleaning another vital part of keeping your cassette deck running smoothly is demagnetising the tape head. This applies to both computer cassette decks and Hi-Fi ones. Over time a residual magnetic field can build up on the head. Not only can this adversely affect playback (more noise and loss of high end response) but it can also degrade the quality of any tape passing over it.

A cassette tape is basically a strip of thin plastic coated with a ferrous material. Music (or data in the case of a computer tape) is recorded onto it by using an electro-magnet to magnetise the tape surface to varying degrees. A tape can be erased by placing a strong magnet near it so even a weakly magnetised head will, over time, slowly erase any recordings passing over it. The more you play a tape on a deck with a magnetised head, the greater the cumulative effect will be.

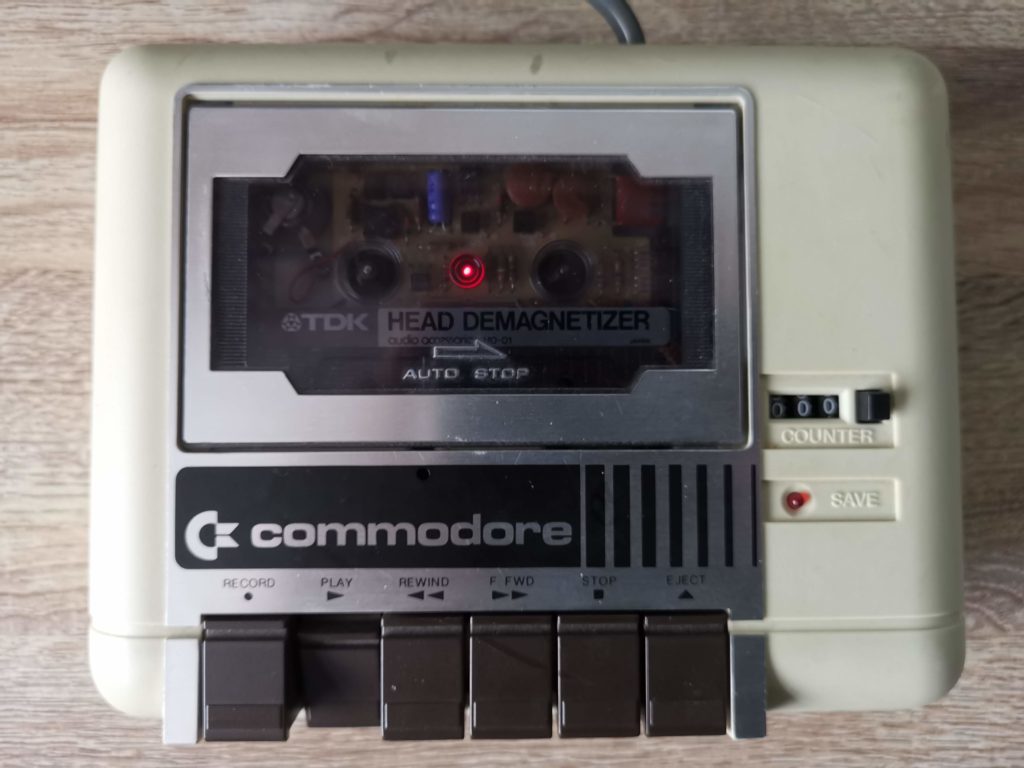
TDK HD-01 Tape Head Demagnetiser

This slideshow requires JavaScript.


So what can you do about it? Well thankfully there are a number of different ways you can demagnetise tape heads. Popular methods include a mains powered electro-magnetic wand and those cheap cleaning cassettes that contain a rotating magnet on a little disc. In the past I relied on an the latter; an old Maxell cleaner/demagnetising cassette. However just recently I stumbled across this TDK one advertised as ‘New Old Stock’. I’ve always trusted TDK as a brand, they make good quality products and know their stuff. It was a little on the expensive side due to me needing to pay shipping and import taxes from the US but I felt it was worth it.


This slideshow requires JavaScript.


Although the box it came in was very tatty, the contents were like new. Inside there was a small instruction manual and the demagnetiser itself. The device is powered by a small 1.5V lithium battery which should be good for 500 uses according to the instructions.

Naturally I had to install a new battery before I could get it to work. The rear of the instruction manual is stamped with the year 1978 so this little gadget is now over 40 years old! Thankfully it takes a standard size A76/LR44 button cell battery that is still readily available.


How does it work? – Demagnetising the tape heads

So how do you use it? Well it really couldn’t be any simpler. You basically pop it into your cassette player and press play! There’s a small plastic micro-switch above the play head that is activated by the motion of play head moving upwards when you press the play button. A red LED illuminates at the centre of the cassette to demonstrate that it’s working and that’s it, job done! When activated the circuitry inside the demagnetiser generates a pulse signal which demagnetises the play head in a matter of seconds.

This slideshow requires JavaScript.


There’s a little more to the process than that if you are using the device in a cassette deck that doesn’t have a mechanical play button. The device won’t work until the play button is pressed so if you have a deck that won’t allow you to press play whilst powered off then you need to take a few precautions. This is because of the strong signal it outputs which can damage amplifiers and headphones if you don’t make sure to fully turn down any volume controls first. My Hi-Fi has a fully electronic transport mechanism so I have to be careful when using it on that device for example.


Commodore C2N - Demagnetising Tape head

Commodore C2N – Demagnetising the tape head in progress!


Thankfully most older devices have fully manual play buttons and need no such precautions. With devices like the Commodore C2N Datasette I can simply pop the cassette in, press play and the get the job done in seconds. I would imagine virtually all Walkmans would be equally simple to work with.

The manual recommends demagnetising your tape head every 30 hours of playing time. Therefore, how often you need to do this will depend on what sort of tapes you are playing and how often you play them. For my Hi-Fi deck regularly playing C60 and C90 tapes this could be as often as once a fortnight. For my computer decks playing relatively short C15 tapes much less frequently, once every 6 months would be more appropriate.

Despite the cost I think the device is totally worth my time and money. Given how precious some of my old cassette tapes and games are to me, anything I can do to help prolong their lifespan is worth doing in my book.

Retrokomp Issue 2 (1) Out Now!

Issue two of the multi-format retro magazine has finally been released and I received my copy a few days ago. Just to confuse things slightly this magazine is actually named Retrokomp Issue 1. That’s because the first issue was in fact numbered ‘0’. This is a slightly odd numbering convention that can be found on their other magazines such as Amiga User too.


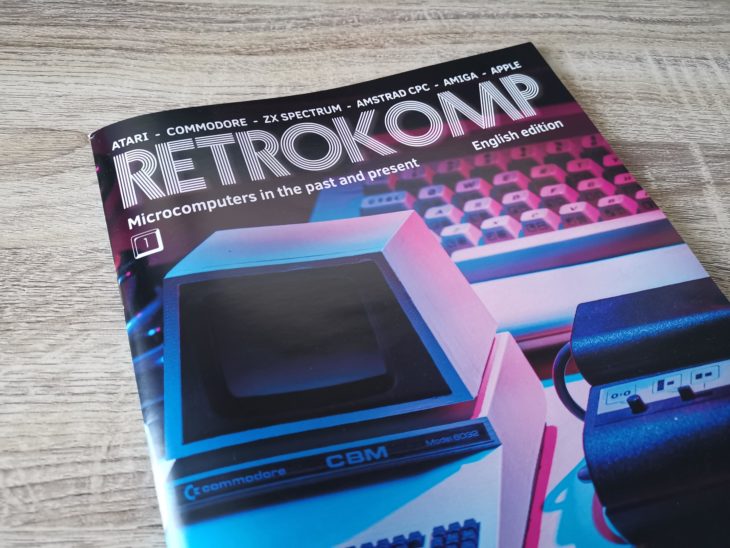
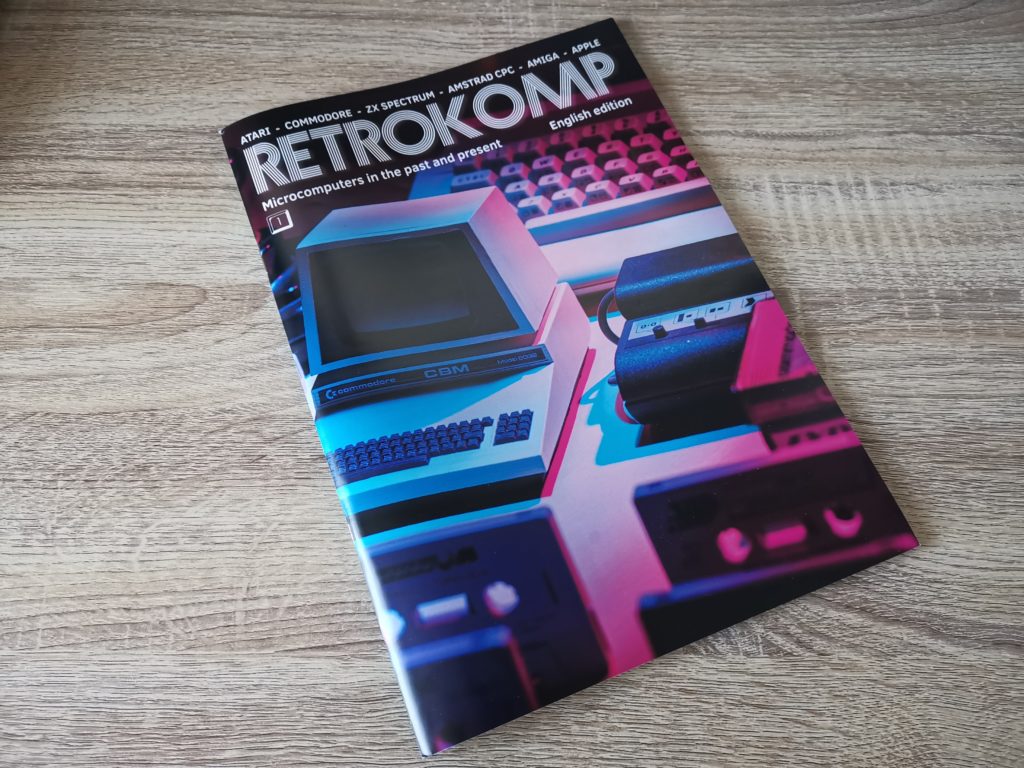
Retrokomp Issue 1

Retrokomp Issue 1 Cover


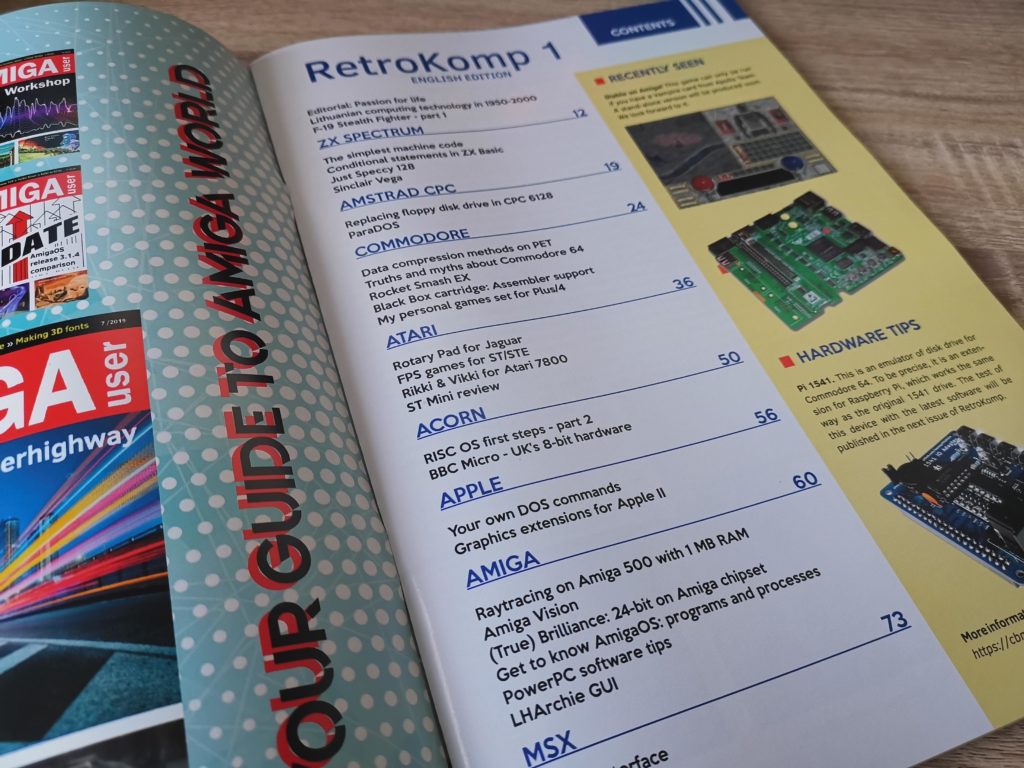
This issue is packed with even more Commodore content that the previous one and arrives with a hefty count of 76 thick glossy pages.


A welcome bias towards Commodore in this issues contents


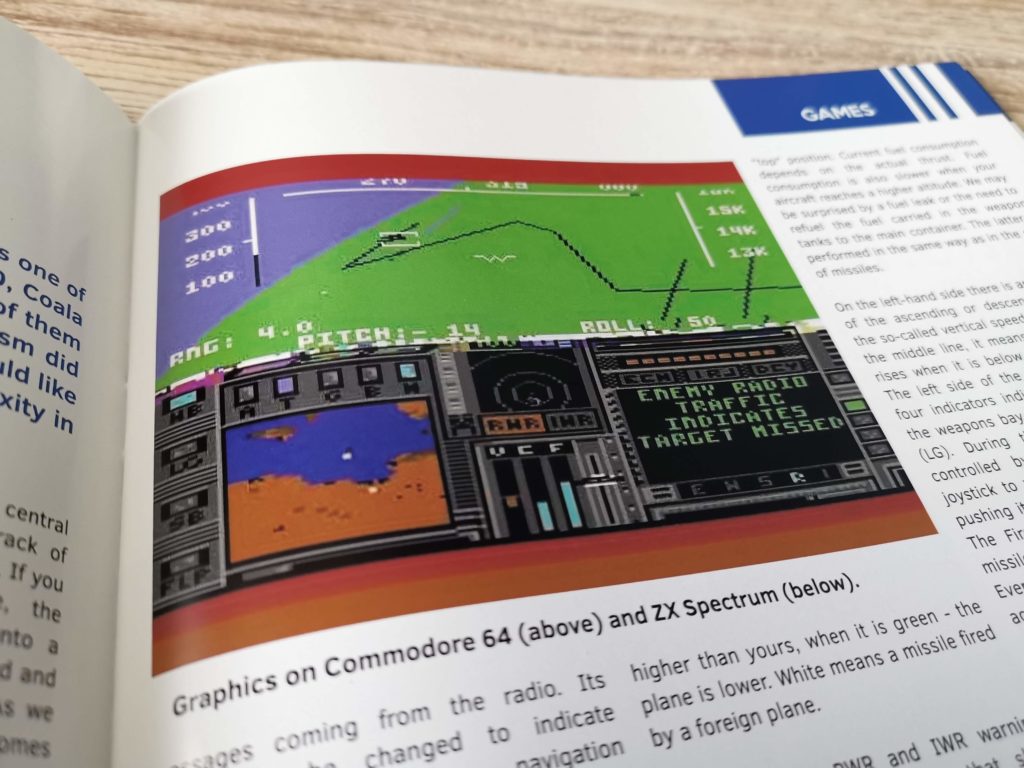
As I mentioned in my look at the very first issue, this is definitely a magazine aimed at the more serious user. There’s a big emphasis on productivity and creative software rather than gaming. This is no bad thing though as there are plenty of magazines offering gaming news and reviews now. That’s not to say the Retrokomp doesn’t dabble with games though. This issue has the first part of really interesting series of articles delving into MicroProse F-19 Stealth Fighter, possibly their finest flight simulation ever in my opinion.


F-19 Stealth Fightrer

F-19 Stealth Fighter on the C64


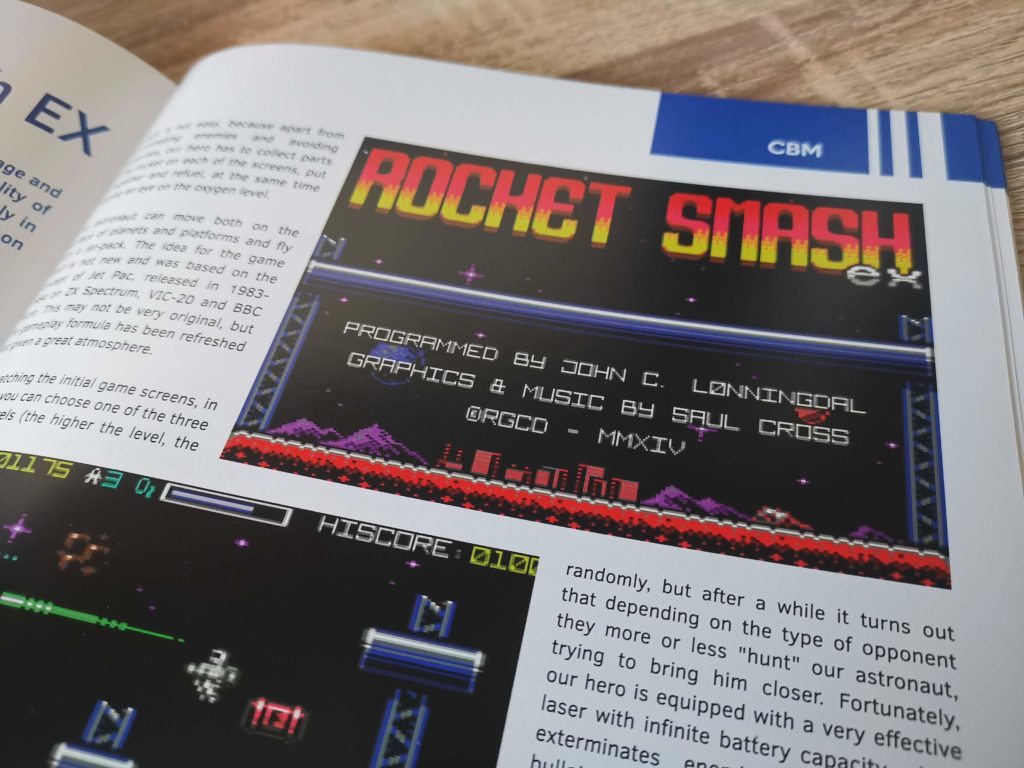
Rocket Smash EX Review

Rocket Smash EX Review


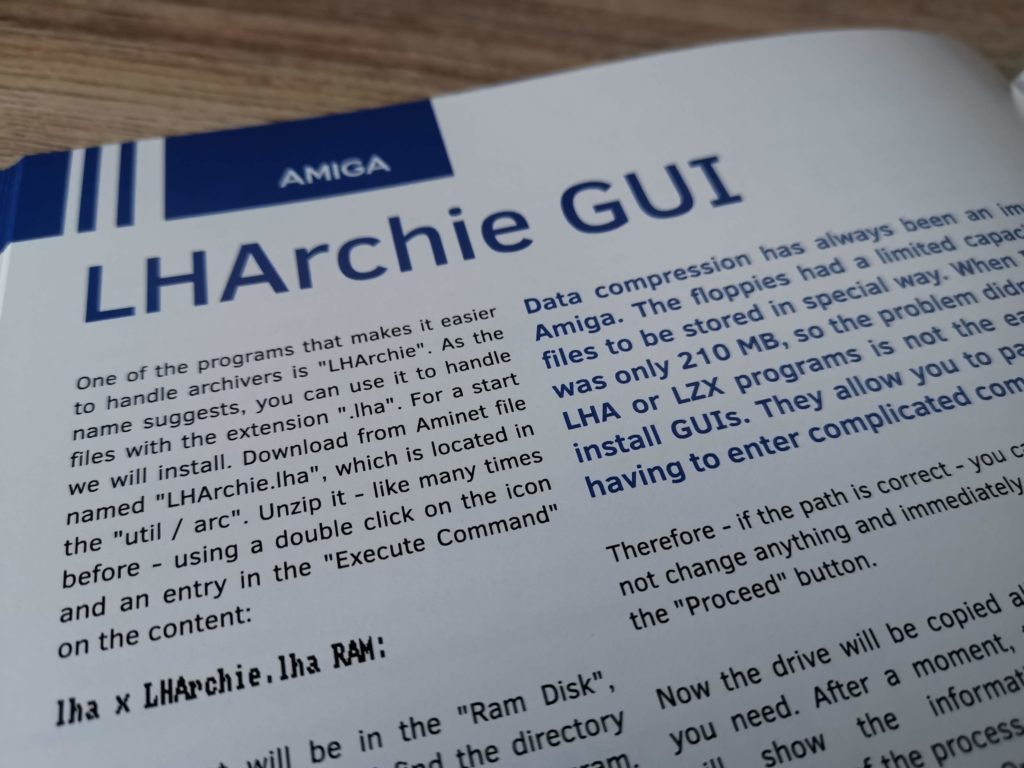
Of course there’s no shortage of interesting articles to expand your retro computing knowledge either. I particularly enjoyed the LHArchie GUI guide that shows how to install a GUI for the previously shell only LHA archive utility.


LHArchie GUI

LHArchie GUI


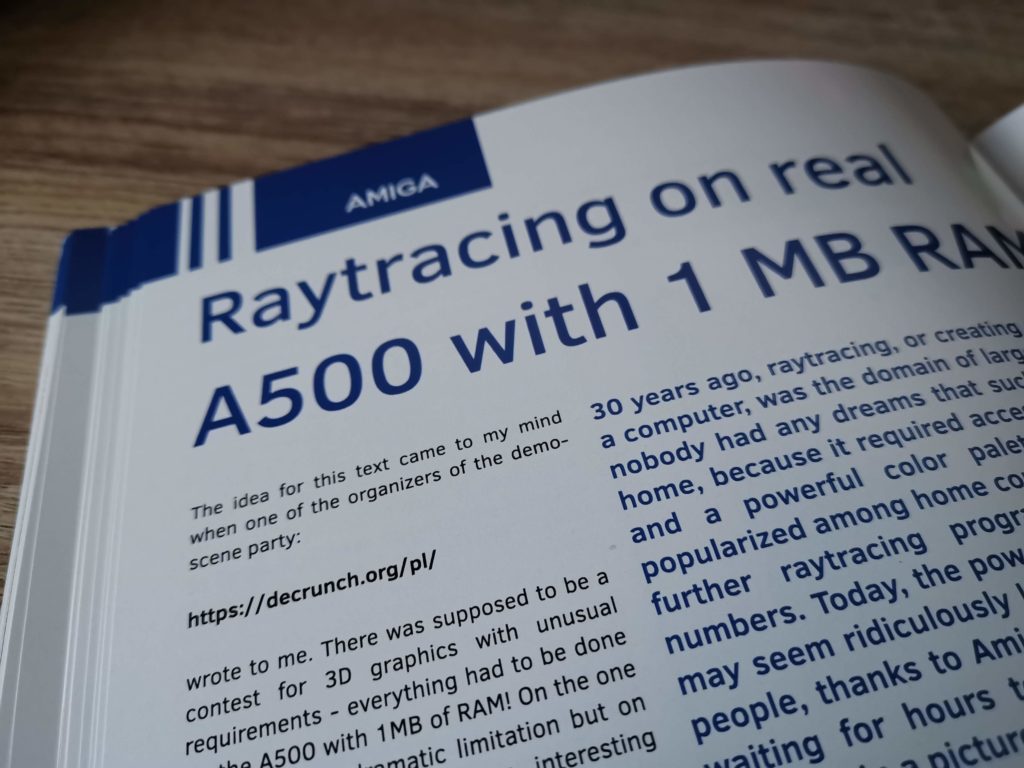
Other stand-out articles for me were the Ray-tracing and Brilliance articles for the Amiga.


Amiga Ray-tracing

Amiga Ray-tracing


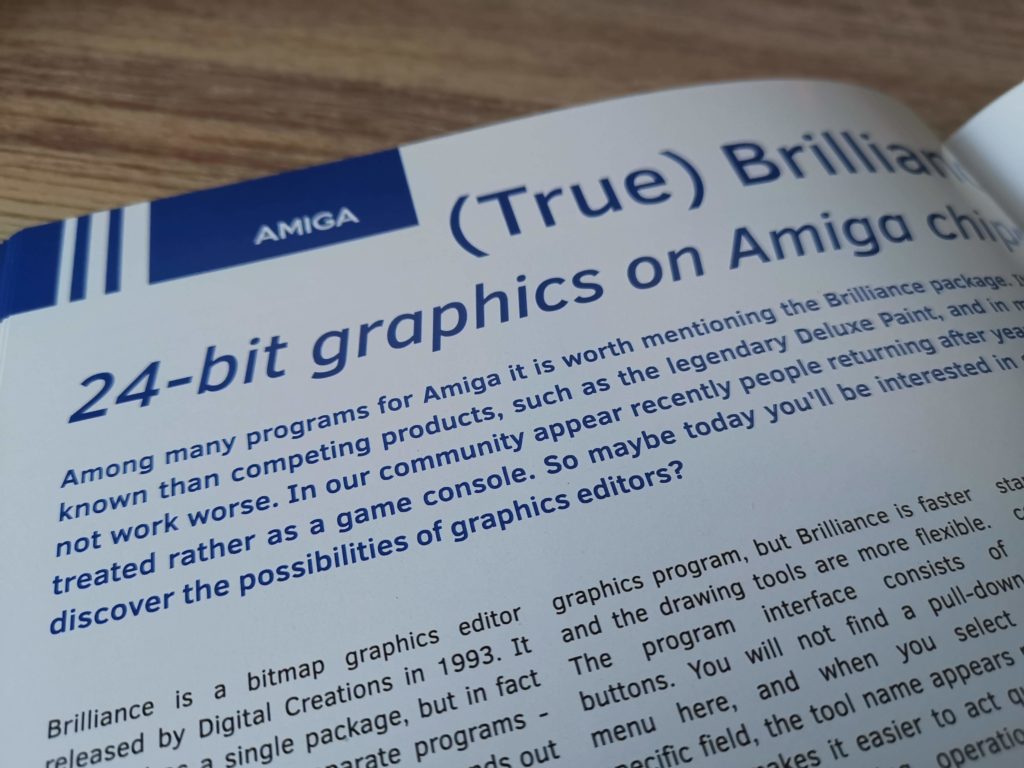
Brilliance

Everyone remembers Deluxe Paint on the Amiga but who remembers Brilliance?


A quick run-down of the Commodore-centric articles in Retrokomp Issue 1:

  • F-19 Stealth Fighter
  • Data compression methods on the PET
  • Truths and myths about the Commodore 64
  • Rocket Smash EX Review
  • Black Box cartridge: Assembler support
  • My personal games set for Plus/4
  • Raytracing on the Amia 500 with 1MB RAM
  • Amiga Vision
  • (True) Brilliance: 24-bit on Amiga chipset
  • Get to know AmigaOS: programs and processes
  • PowerPC software tips
  • LHArchie GUI


Plus/4 Gaming

Plus/4 Gaming


If you’ve never come across Retrokomp magazine before you might like to read through my preview of the first issue here.

Alternatively if you’d like to purchase a copy of Retrokomp Issue 1 for yourself then visit the publishers website here and show your support.

A look back at Pinball Spectacular and Raid on Fort Knox for the VIC20

Pinball Spectacular

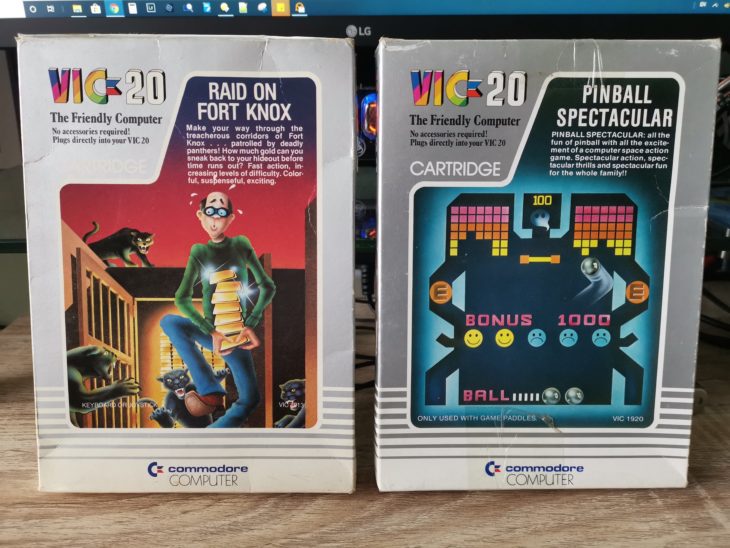
Picked up another duo of classic VIC20 game cartridges off eBay to add to my collection this week. Pinball Spectacular and Raid on Fort Knox, both of which are in pretty good condition complete with their original boxes and instruction sheets.

As usual I spent some time scanning the boxes in and adding them to my ‘3D VIC20 Game Museum‘. It’s so much easier to do this as and when I get new games. If I leave it too long they pile up and I develop a kind of mental block that prevents me doing them!

I’ve never seen or played either of these two before so had no idea what to expect from either of them beforehand. Thought I would share my thoughts on each title in the form of some mini reviews…


Pinball Spectacular

I’d never even seen Pinball Spectacular for the VIC20 before so this was a particularly interesting purchase for me. The game requires the use of paddles which was another reason I was keen to pick it up. There weren’t many paddle games made for the VIC so I grab any I can find!

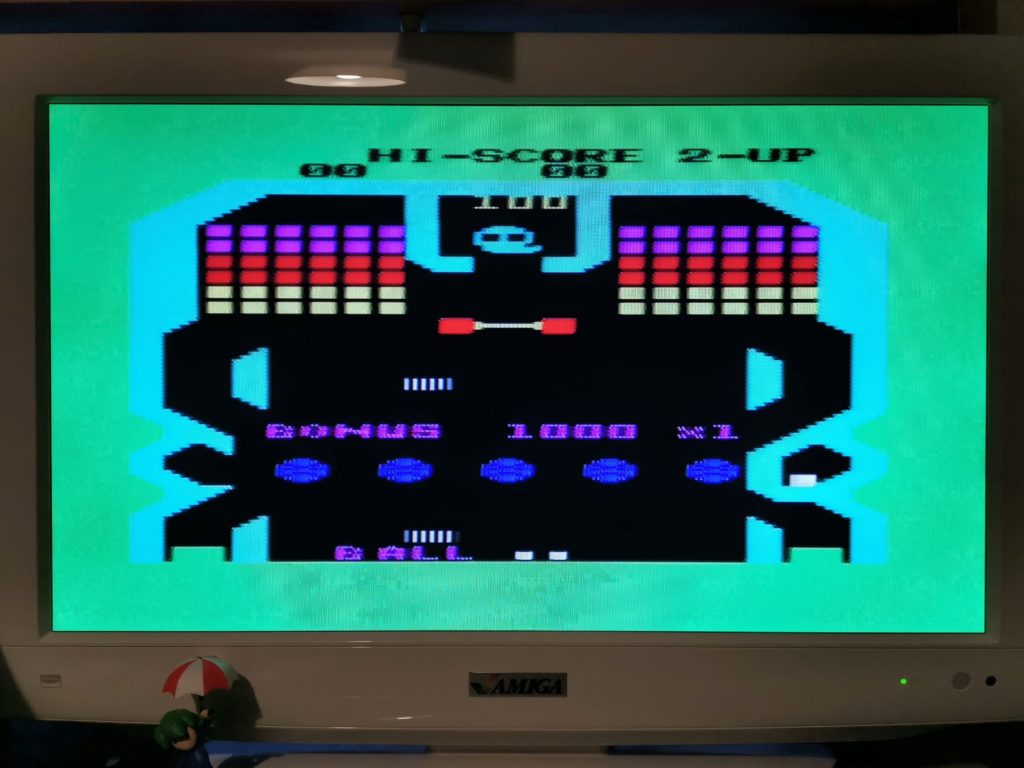
Once I loaded this up I quickly realised that this is not a pinball game at all. It might take a few cues from it but this is basically a version of breakout.


Pinball Spectacular

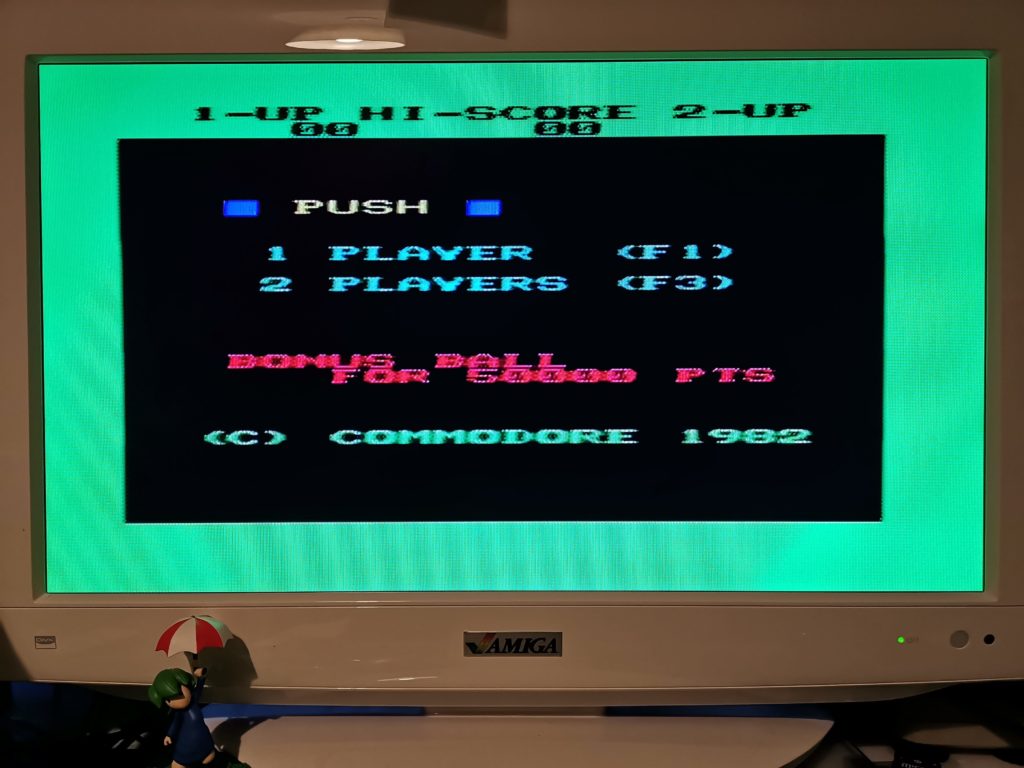
Pinball Spectacular Title/Player select screen


You control two horizontal bats that you can move left and right with the paddle. Once you launch the pinball with the fire button you need to keep batting it back up the screen to destroy the coloured blocks. This can quickly get tricky as the ball ricochets, often at high speed, at all sorts of angles due to the design of the ‘table’. The goal here is to clear all the blocks and release an alien which you then destroy by hitting it with the pinball.

So far, this has far more in common with breakout than anything else. Here’s where the the pinball elements come in to play. You can hit the ghost at the top of the screen for extra points. Likewise if you can direct the ball to hit all the little faces (turning the frowns into smiles) you can gain another bonus. Light up the letters E X T R A and unsurprisingly you earn an extra ball.


Pinball Spectacular

Pinball Spectacular


It’s a very simple game but it’s presented attractively with a great use of colour and some decent sound effects. Best of all it’s actually really good fun to play, helped in no small part by the use of paddles to control the bats. I can see myself coming back to play this often, trying to rack up higher and higher scores.


Raid on Fort Knox

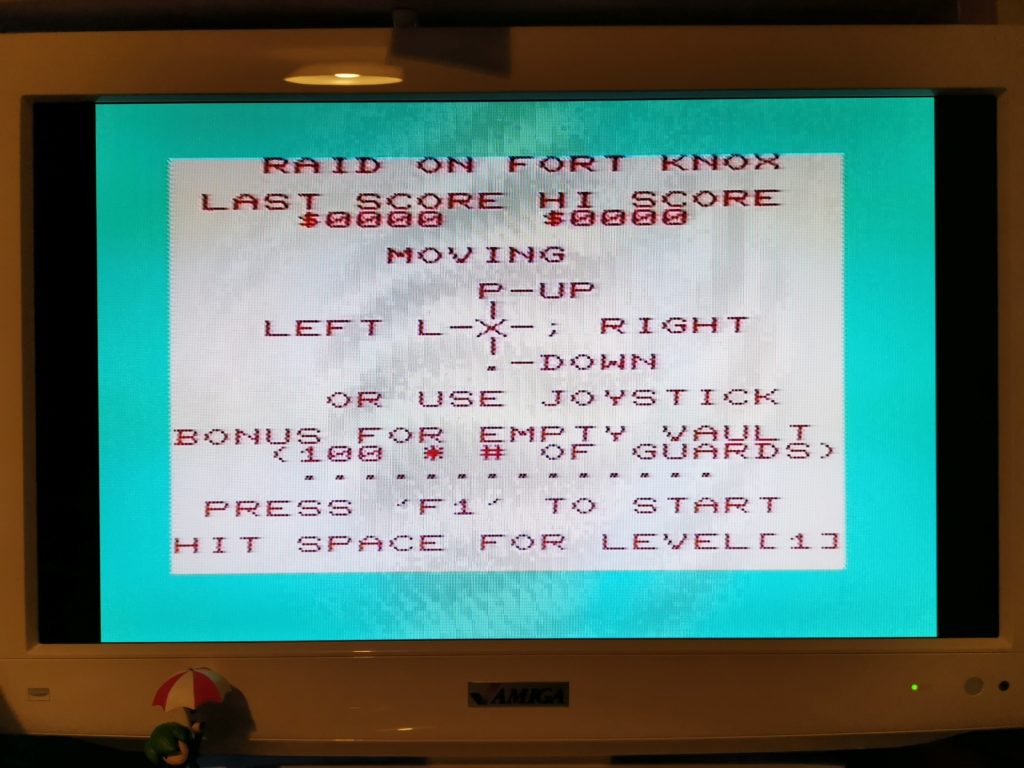
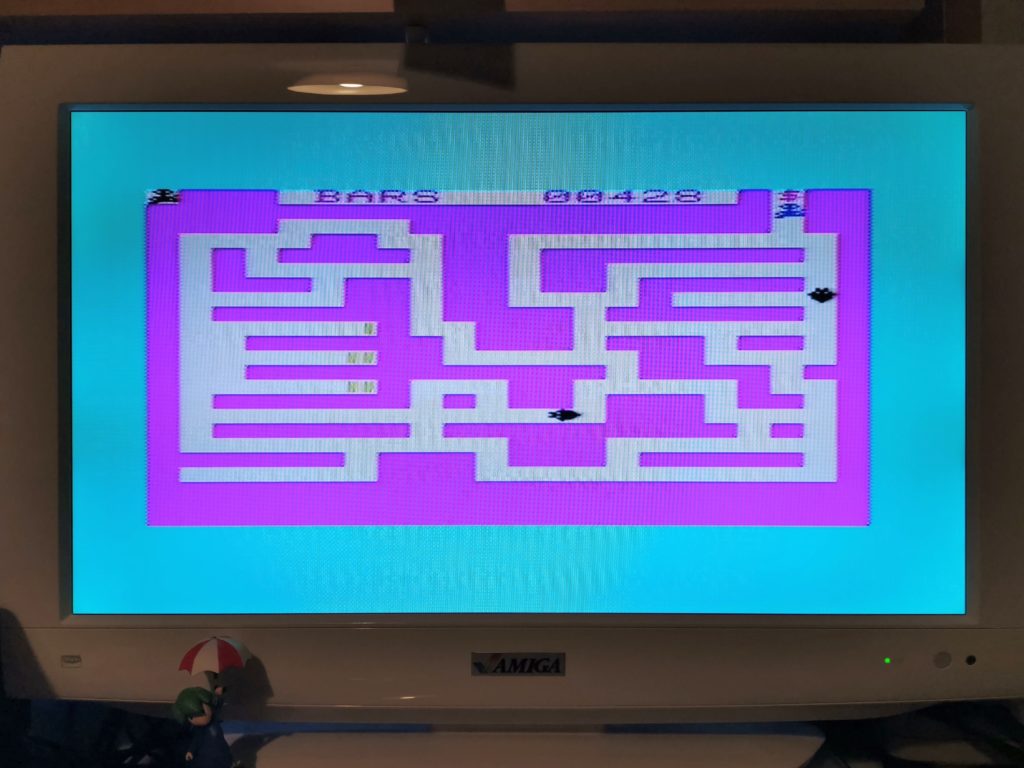
This game has a lot in common with other games such as Pacman or Radar Rat race. The aim of the game is to steal gold bars from the vaults in Fort Knox and escape back to your hideout with them. Fort Knox is represented as a maze of corridors and for some reason there are black panthers patrolling that you must avoid. Not sure why there’s panthers around instead of guards but no matter. If one touches you,  you lose one of your three lives, lose all three and it’s game over.


Raid on Fort Knox

Raid on Fort Knox Title Screen


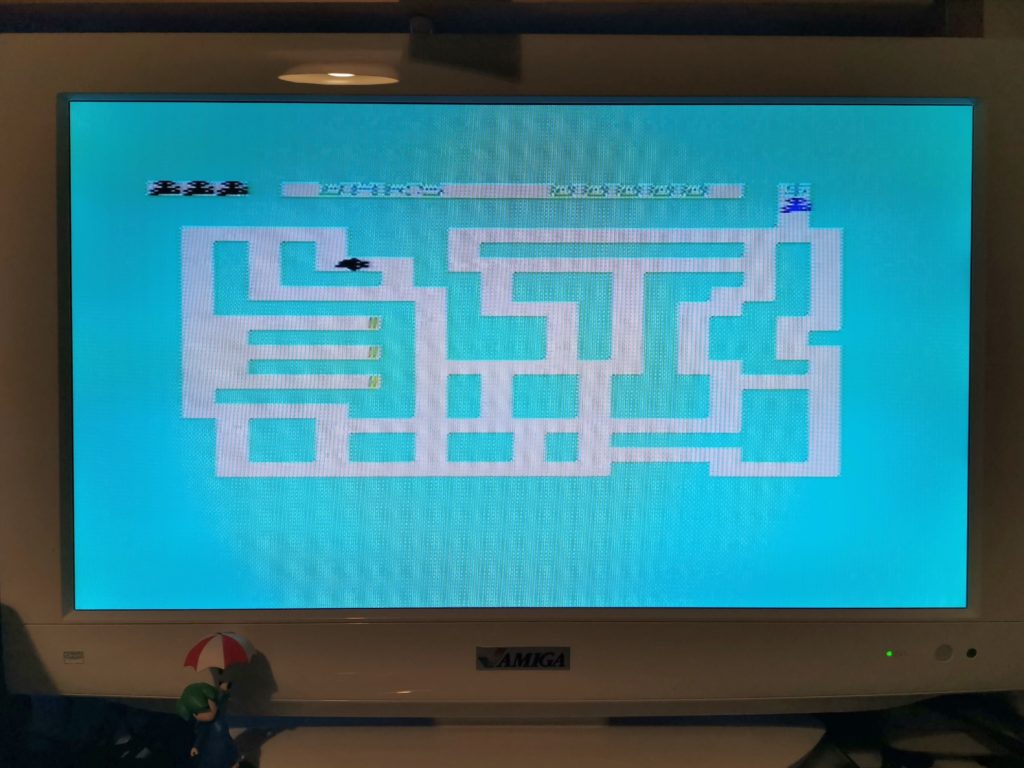
Whilst you are navigating through the corridors to retrieve the gold, one bar at a time, there’s no time limit. However as soon as you grab a gold bar a countdown timer bar appears at the bottom of the screen. You must get back to your hideout, whilst avoiding the panthers, before the time limit runs out. The faster you get back to your hideout, the bigger the payout. If time runs out you get nothing for your troubles. If you steal all the bars you move on to a bonus vault before moving up to the next level.


Raid on Fort Knox

First level of Raid on Fort Knox – on the left are the gold bars. You’re the little blue guy top right.


The graphics can best be described as rudimentary, as are the sound effects. If it was a budget game on cassette I’d forgive these shortcomings but for a cartridge game it’s disappointing. I reckon it was probably written in BASIC. I’m glad I was able to add it to my collection but in all honesty it’s not a title I see myself coming back to in the future.


Raid on Fort Knox

Raid on Fort Knox Bonus Level – avoid those black panthers.


Retrobrighting with Just the Sun!

Retrobrighting with Just the Sun

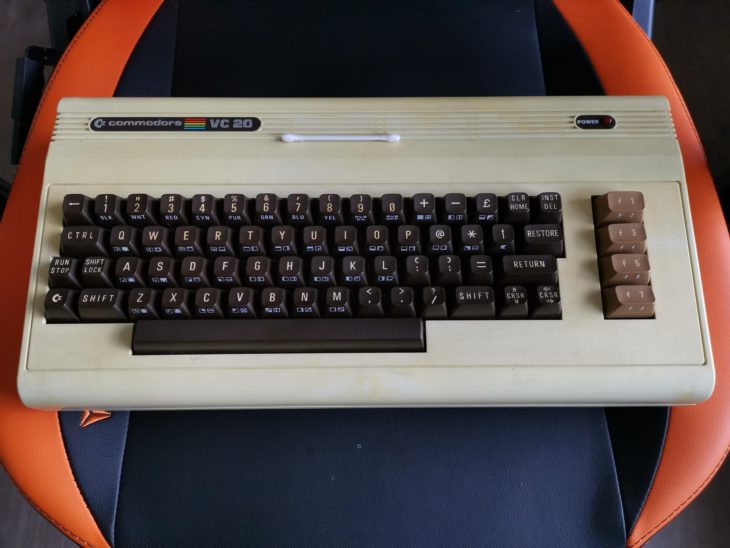
Came across this idea of retrobrighting with just the sun on YouTube. I was highly sceptical so thought I’d give it a go myself! It’s a pretty simple idea. Instead of slathering your yellowed computer in peroxide, or immersing it in bath of bleach, simply stick it out in the sun for a few days! Sounds too good to be true right?

Enter the VIC

My VIC20 had some pretty unpleasant yellowing to it so I used that as my test subject. For 4 days straight I put it outside on a south-facing bench in the garden. I’d place it there before I left for work in the morning and bring it in once I got home in the evening. Today was the 4th and final day.

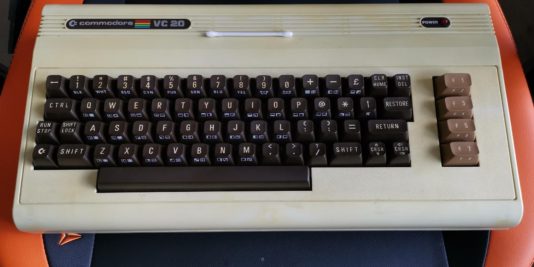
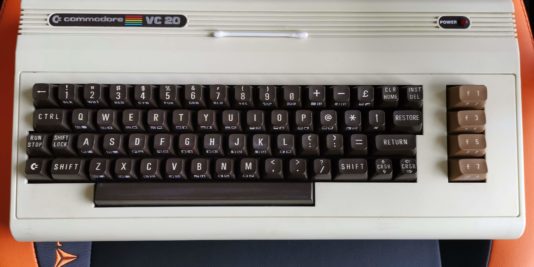
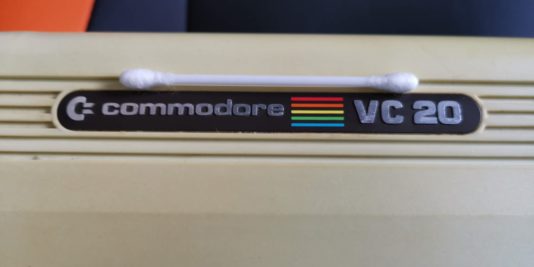
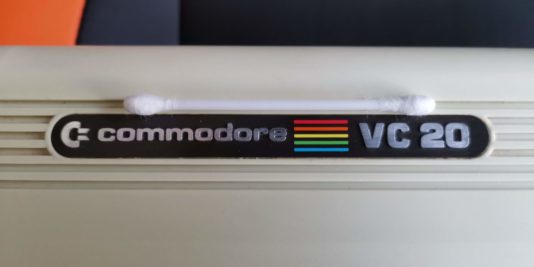
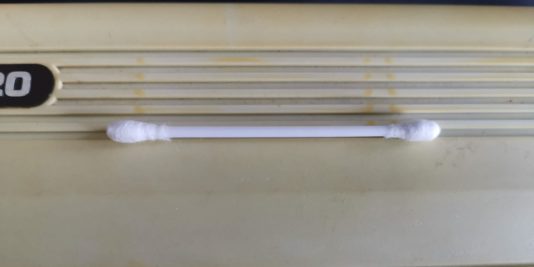
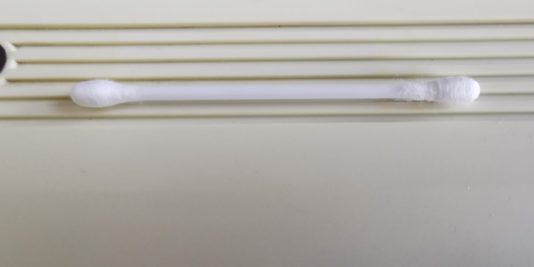
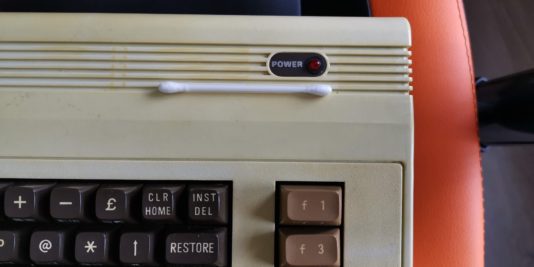
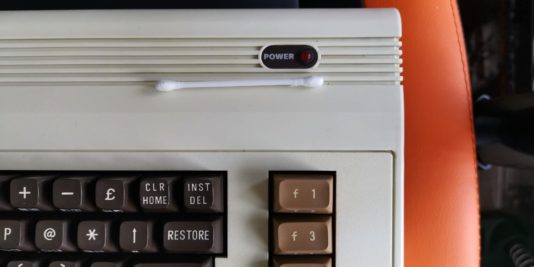
I’ll let the results below do the talking. I used the same white cotton bud in each photo as a frame of reference to judge the level of yellowing. I also took the photos in the exact same location at the same time of day to keep the lighting as similar as possible. No flash was used in any of the photos.

Before & After Results

I’m extremely pleased with the results. The overall yellowing has vanished, even the quite pronounced yellowing around the grill area has gone too. The beauty of this method is that I literally did nothing – the sun did all the work for me. I didn’t even need to dismantle the computer!

Conclusion

I’ve had some disastrous results using peroxide gel in the past. On one occasion I ended up with an appalling marbling effect on a rare C128D keyboard. After that incident I had vowed never to try my hand at retrobrighting again, however this test has changed my mind. It looks like it’s the safest and easiest way imaginable to brighten up yellowed plastic. It’ll be interesting to see if the brightening effect lasts. If the yellowing comes back in future I’ll update this article.

Three Classic VIC20 Games Remembered

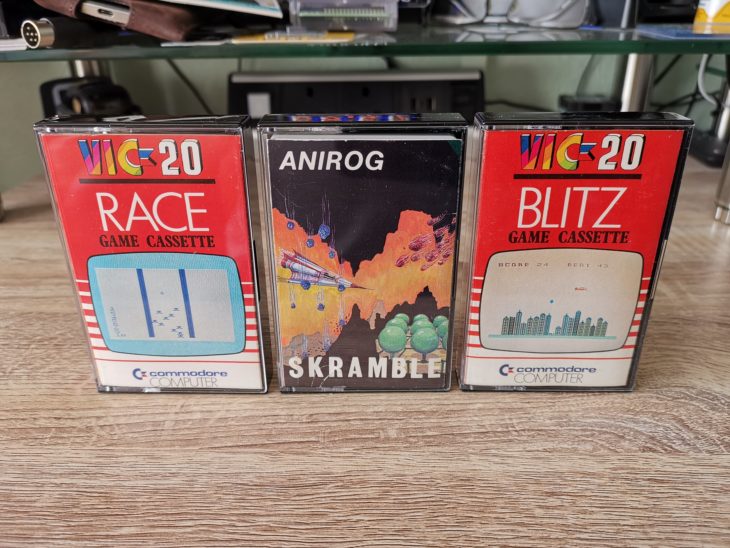
Race, Skramble & Blitz

Picked up a few nice games off eBay recently for my VIC20. Although I’ve had all of them in past, this is the first time I’ve actually owned the retail releases for each game. The copies of Blitz and Race I had as a child were part of a compilation tape I got with my VIC20. I only ever had a pirated copy of Skramble so now at long last I have the original game in my collection.

Although the cassette tapes and ‘J’ card inlays were in terrific shape, the boxes on all three were extremely tatty and well worn. The very first thing I did was replace them with new ones and as you can see the games all look as good as new now.


This slideshow requires JavaScript.


Like many people I got my copy of ‘Blitz’ and ‘Race’ on a compilation tape that came with my VIC20 computer.  I still have this tape (pictured below) of course but thought it would be cool to own the original, stand alone copies of the games too.  It’s holding up pretty well considering it’s now 37 years old!


This slideshow requires JavaScript.


A brief look at each game


As I’ve done on previous occasions,  I’ve taken some screenshots of each game and written little mini reviews of each. Part of the fun of getting hold of these old games is to relive the whole experience of loading them and seeing if I even remember what they used to look like correctly after all this time.


Race


Despite some horrendous squeaking noises this loaded after a few tries. It’s a pretty spartan game with a brief text introduction and then on to the game. Despite the name and screenshot on the front of the cassette case this is not a racing game. No, this is a dodging game. Move your bike left and right to avoid the other bikes scrolling up the screen. The are four difficultly levels and it gets faster as you progress until you either reach the end or crash. Needless to say it’s not a very entertaining game, and probably never really was. The whole thing is very rudimentary, but then again it looks like it was written in BASIC so you can’t expect too much. Still, it’s a nice little bit of VIC20 history.

This slideshow requires JavaScript.


Blitz

This is also a 3.5K game written in BASIC for an expanded VIC20. However this one manages to have a lot of charm and character and is quite fun to play.

The idea is simple, fly your little bi-plane across a randomly generated city as you bomb it into oblivion so you can land. Every time you reach the edge of the screen your plane drops down a row, getting ever closer to the skyscrapers below. You can only drop a single bomb at a time so there is an element of strategy (and luck) to it if you want to succeed. If you time it well you can often drop two or more bombs in one pass which is crucial to clearing the city. Fail to bomb even the smallest bit of rubble away and you’ll crash into it and it’s game over.

I played this quite a lot as a child, the graphics are really pretty good for what it is and the sound effects  work really well too. It’s still actually fun now and a worthy addition to my collection.


This slideshow requires JavaScript.


Skramble


I thought this tape was faulty at first as every time I tried to load it I was getting an ‘out of memory’ error. After a spot of RTFM I tried just typing ‘LOAD’ instead of the customary ‘SHIFT & RUN/STOP’ as it suggested. Hey presto – it worked! The screen turned white and the text red and several minutes later the game greeted me with a very colourful  title screen.

I have to say this is by far the best game of the bunch, the extra 16K of RAM really allows the VIC20 to show what it is capable of. Fantastic, colourful graphics, slick side scrolling and punchy sound effects made this one of the best Skramble clones you could play at the time and it still looks great even now. It’s definitely the best version of Skramble you could play on the VIC. Just a shame so few games actually took advantage of the 16K RAM expansion back in the day as the VIC20 was capable of running some great games if given the chance.

It’s was very difficult trying to play this whilst reaching for the phone camera, games back then didn’t have a ‘pause’ feature! I’m looking forward to playing this a lot more now and reaching the end. If my memory is correct there were 6 levels in all with the final one being pretty torturous. I completed it many times over as a child and won’t rest until I do the same now as an older and wiser, albeit probably slower adult!


This slideshow requires JavaScript.


Pi1541 Disk Drive

Pi1541 Disk Drive

Little bit of background

I’ve been aware of the Pi1541 disk drive or Pi1541 ‘hats’ for several months now. This project was undertaken to create a ‘cycle exact’ emulation of a Commodore 1541 floppy drive using a cheap Raspberry Pi computer. The idea behind it is that by fully emulating the 6502 CPU and 6522 VIA chips you would have a 100% 1541 compatible ‘disk drive’ capable of reading any disk image, even ones with custom fast loaders and exotic copy protection schemes. By contrast the ubiquitous SD2IEC devices don’t emulate either chips but rather simulate some disk protocols and use some clever code to try to blag some fast loaders into working. This is why special versions of some games need to be created to work on SD2IEC devices.

In a nutshell a Pi1541 Disk Drive utilises a Raspberry Pi B computer running custom software along with a daughter board or ‘hat’ which sits on top and connects to the GPIPO pins of the Pi. This ‘hat’ adds the standard IEC connectors and handles the stuff that is required for the Pi to successfully communicate with the attached Commodore computer. The project was created by a guy called Steve White and if you want to know the technical ins and outs then check out his website here.

Pi1541 Disk Drives can be picked up very cheaply on eBay. In fact the whole point of the project was to create something better than an SD2IEC but much cheaper than FPGA based offerings like the 1541 Ultimate II+. Of course another option is to build your own but I have neither the time nor the inclination to attempt that. The other big turn off with both of these options is that quite frankly, the devices are just plain ugly. Which brings me neatly on to my latest acquisition…

Pi1541 Disk Drive

As I mentioned earlier I’ve been aware of this project for some time, but for the reasons I mentioned above it just didn’t appeal to me. Until that is, I saw that Tim Harris who runs sharewareplus was offering a super slick, plug and play, cased Pi1541 Disk Drive complete with OLED screen. I just had to have one and after several months of waiting it has finally arrived!


Pi1541 Disk Drive

Pi1541 Disk Drive


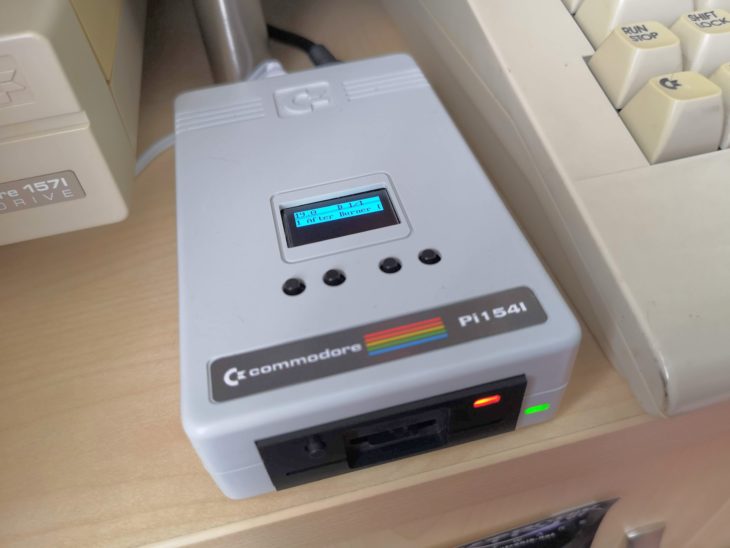
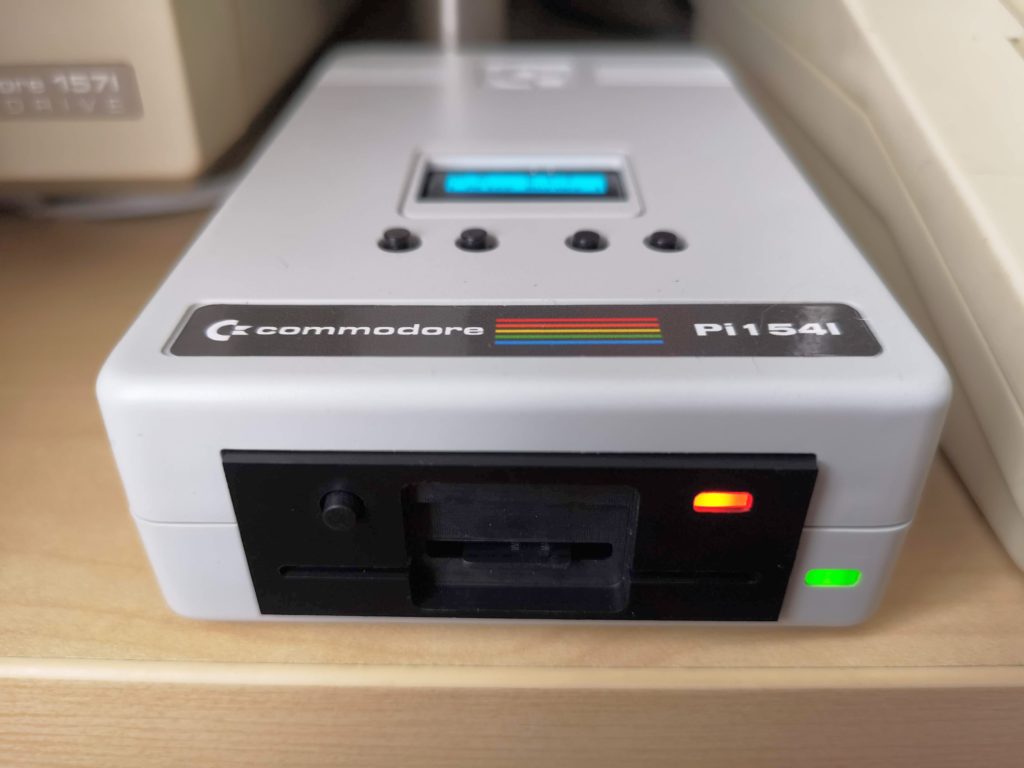
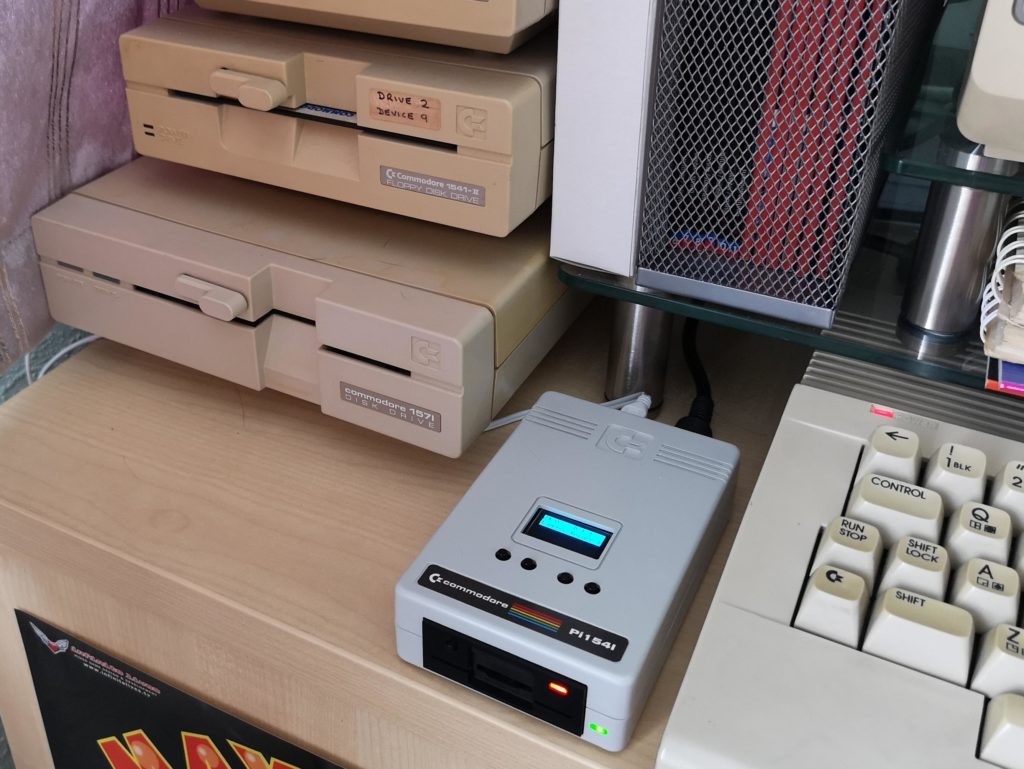
This really is a thing of beauty, modelled closely on the first generation Commodore 1541 floppy drive. There’s so many little design cues taken from the original case. The Micro SD card slot encased in black plastic housing complete with scaled disk ‘slot’.  The red drive activity LED and green power LED. A chicken logo moulded into the casing top. The Commodore label complete with rainbow colours and a 1541 logo where the trailing 1 is actually a letter I. It even has a built in speaker to emulate the drive sounds of the original drive!

It came supplied with a Micro USB cable (to power it) and a single instruction sheet explaining what the ports are for and what the buttons do. Disappointingly it did not include a Micro SD card, IEC cable or even further instructions.


This slideshow requires JavaScript.


The casing is approximately 5″ (13cm) deep, 3″ (7.5cm) wide and 1.25″ (3cm) tall. On the front there is a MicroSD card slot, a green power LED, a red drive activity LED and a ‘Select/Start’ switch. On the rear there is a power on/off switch, Micro USB power socket and a standard CBM IEC drive connector socket.


This slideshow requires JavaScript.


On the top of the device is a lovely 1″ x 0.5″ (128×64 resolution) blue OLED screen along with four navigation buttons. When the device is first turned on it operates in SD2IEC mode which allows you to browse through the contents of your Micro SD card and select an image (or multiple images) to use. In this mode all 4 top buttons have a function: ‘move up’, ‘move down’, ‘exit folder’ and ‘add disk’ (for multi-disk games). In this mode the button on the front acts as a ‘select’ button.

Once an image has been selected on the device and a ‘load “*”,8,1’ (or similar drive command) is issued from the computer, it switches to full 1541 emulation mode. In this mode only the first 2 buttons on the top have a function: ‘previous disk’ and ‘next disk’. In this mode the front button acts as ‘start’.


Setting it up

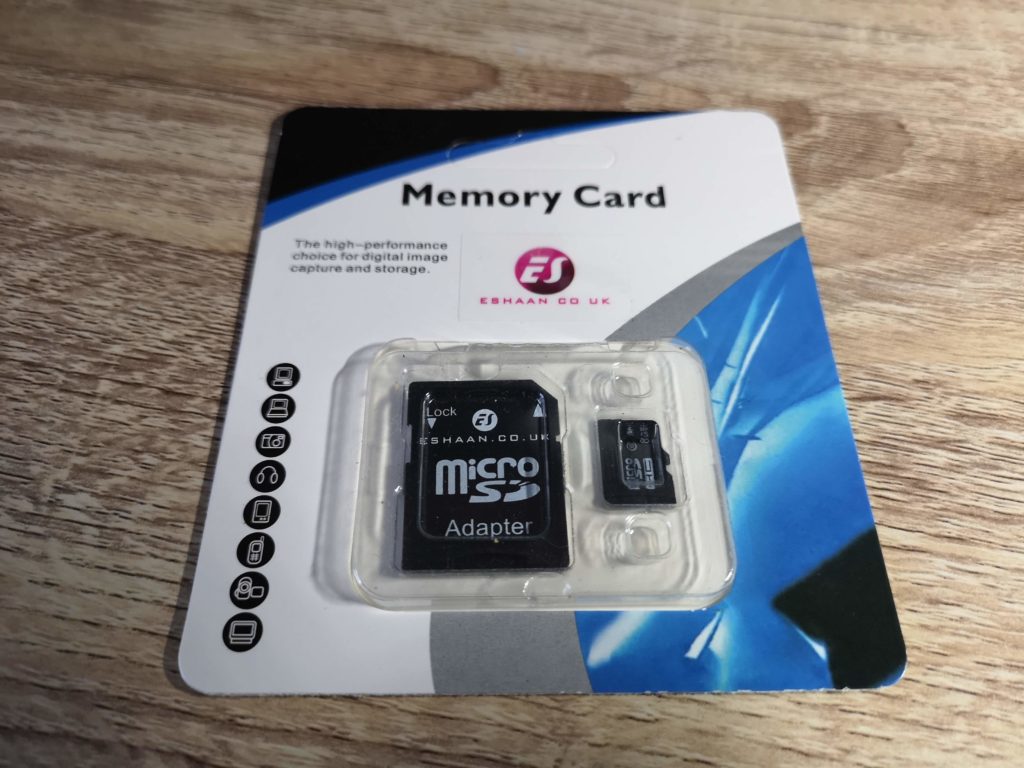
I was advised that this Pi1541 Disk Drive worked best if you use an 8GB Micro SD card so I just picked up this [amazon_textlink asin=’B00OO1489A’ text=’generic card’ template=’ProductLink’ store=’lyonsden-21′ marketplace=’UK’ link_id=’2cfd7b41-fa87-463d-8193-fa88db2fcc6e’] off Amazon and it has worked perfectly.


Pi1541 Disk Drive

8GB Micro SD Card


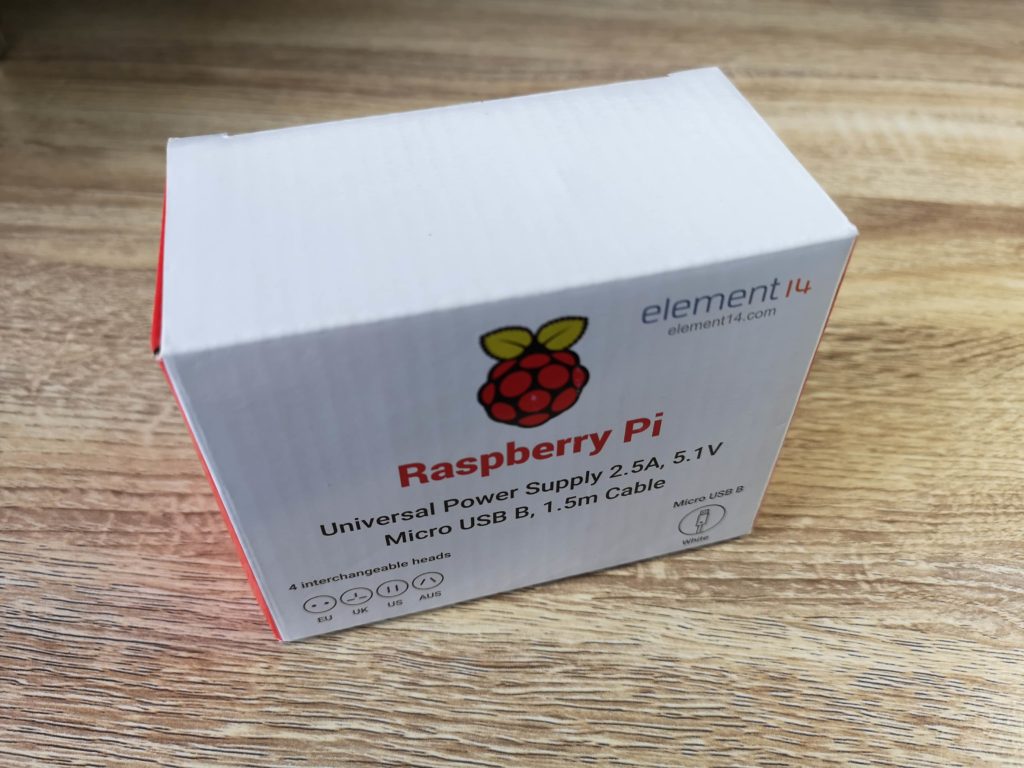
Unfortunately I did not fare so well with the Micro USB power supply. The device came with a Micro USB A-B cable so I plugged it into a free port on my power strip extension lead. The drive powered up and appeared to work fine until I tried to actually load a directory listing or a program and then it would just lock up and my C64 would freeze. Thinking the device was faulty, I got in touch with the guy selling it and was advised this was likely a power issue. The Pi needs a beefy PSU, especially when it’s also powering an additional board plus OLED screen. Long story short I tried several USB chargers from phones and such like but none of them fixed the problem. In the end I ordered an official [amazon_textlink asin=’B01CO1ELT8′ text=’Raspberry Pi PSU’ template=’ProductLink’ store=’lyonsden-21′ marketplace=’UK’ link_id=’5f2082ed-bb79-4d0e-a527-0c957f374c26′] off Amazon and the problem just went away. Moral of the story? Don’t be a cheapskate and buy a decent power supply for it!


Pi1541 Disk Drive

Official Raspberry Pi PSU


In use

Once I’d properly sorted out the Micro SD card and PSU the Pi1541 Disk Drive worked perfectly. It loaded everything I threw at it including .G64 disk images that that won’t work on my SD2IEC device (but do work on my 1541 Ultimate II+). I also tried it with turbo load cartridges such as the Epyx Fastload and Action Replay VI’s Fastload. It worked perfectly and as you would expect loading times were significantly reduced using either cart. It is claimed to be 100% compatible with Jiffy DOS too but at the moment I don’t have the hardware to put that to the test.

There are a few other benefits that the Pi1541 Disk Drive has over it’s rivals. It doesn’t hijack the cassette port or user port for power like an SD2IEC device would as it’s powered independently from the host computer. Nor does it occupy the cartridge slot like a 1541 Ultimate does. It also works with my VIC20, something even the mighty 1541 Ultimate cannot do. I believe it will also work with both the Commodore 16 and plus 4 but I own neither of these machines so cannot confirm this.

There are a few niggles, the first being that the Micro SD card doesn’t have the ‘push to eject’ feature. When you want to remove it there is only 2mm of card protruding to grip onto and I found it difficult to pull out without using some needle-nose pliers.

My other gripe is that it didn’t come with an IEC cable, memory card or PSU. For a device costing £150 I would have expected these to be included and it would have saved me messing around trying to get a working power supply.

The sound produced is a little disappointing too. More a series of beep’s than a true emulation of drive noises (sounds a bit like what you get with a Gotek that’s had a sound mod fitted). My 1541 Ultimate II+ does a much better job of reproducing drive sounds.

Verdict

This is a terrific product and probably the best and most accurate emulation of the Commodore 1541 drive there has been to date. It also looks the part and will work across almost the entire range of 8-bit Commodore machines.


Pi1541 Disk Drive

Pi1541 Disk Drive next to 1541-II’s and a 1571


It’s definitely a luxury peripheral in my eyes though rather than an essential purchase. In this particular form it cannot compete on price with either the SD2IEC or the 1541 Ultimate II+ cartridge (which has many more features). However if you were to choose one of the more modest Pi1541’s you can find on eBay then it trounces the Ultimate on price and beats the SD2IEC on compatibility for a similar cost.

Another thing to bear in mind is that although, strictly speaking, SD2IEC devices are nowhere near as compatible as the Pi1541, they ARE ubiquitous. Because of this most games have been tweaked to make them work within the confines of the system out of necessity, so in most cases compatibility is often a moot point.

Bottom line is this; if you want the most compatible and by far the best looking modern 1541 Drive implementation there is and you don’t mind paying a premium for it, then you won’t find a better product than this. You can pick these up from from Tim over at SharewarePlus.

2 New VIC20 Game Cartridges

VIC20 Pirate Cove & Star Battle

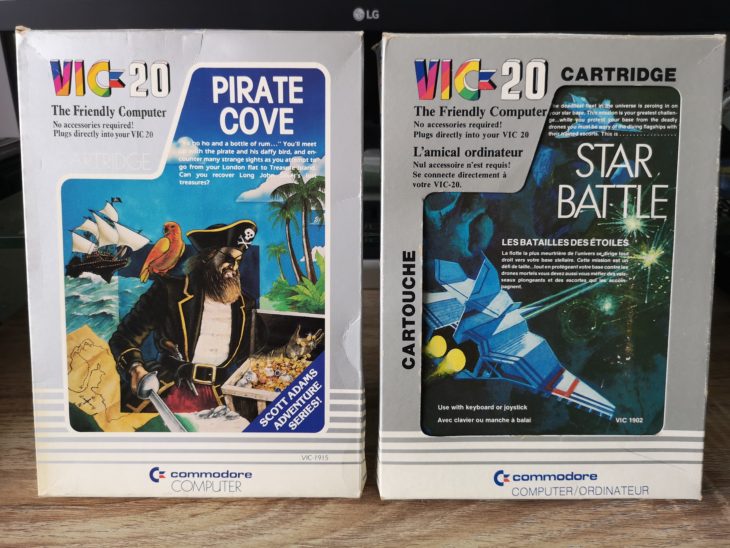
Picked up a couple of terrific classic VIC20 game cartridges off eBay to add to my collection this week. Pirate Cove and Star Battle, both of which are in fantastic condition. I’ve also spent some time scanning the boxes in and have added them to my ‘3D VIC20 Game Museum‘ too!

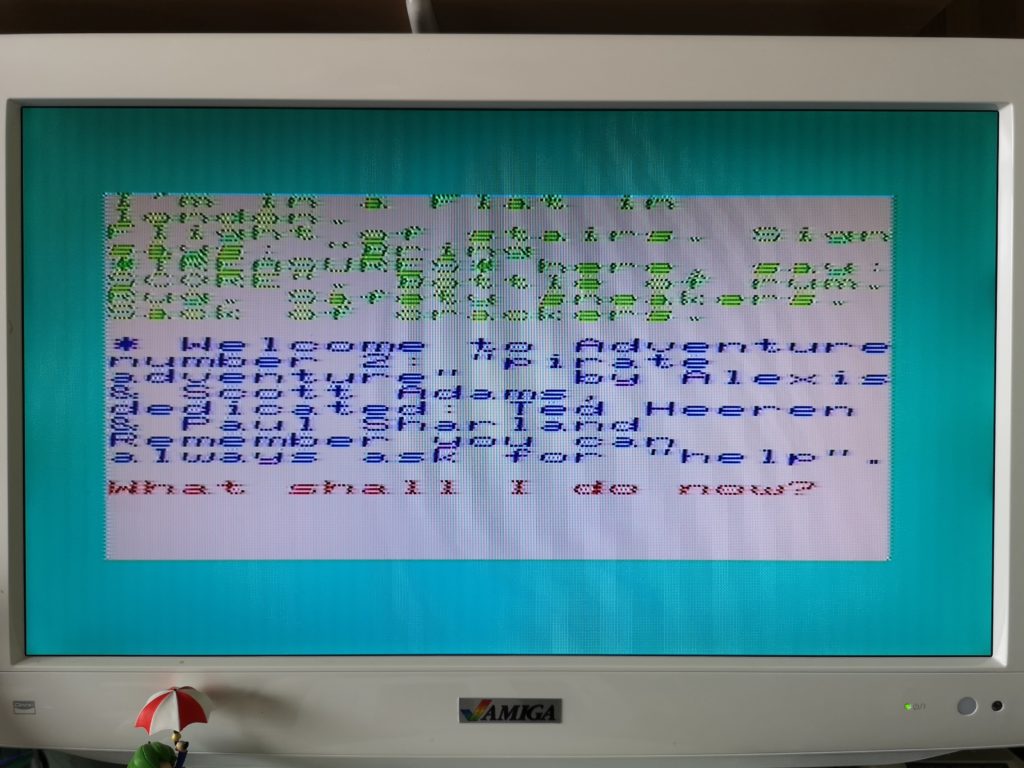
Pirate Cove is another excellent Scott Adams text adventure and along with ‘The Count‘, ‘Voodoo Castle‘, ‘Adventureland‘ and ‘Mission Impossible‘ completes my collection of his games on the VIC20.


VIC20 Pirate Cove

VIC20 Pirate Cove


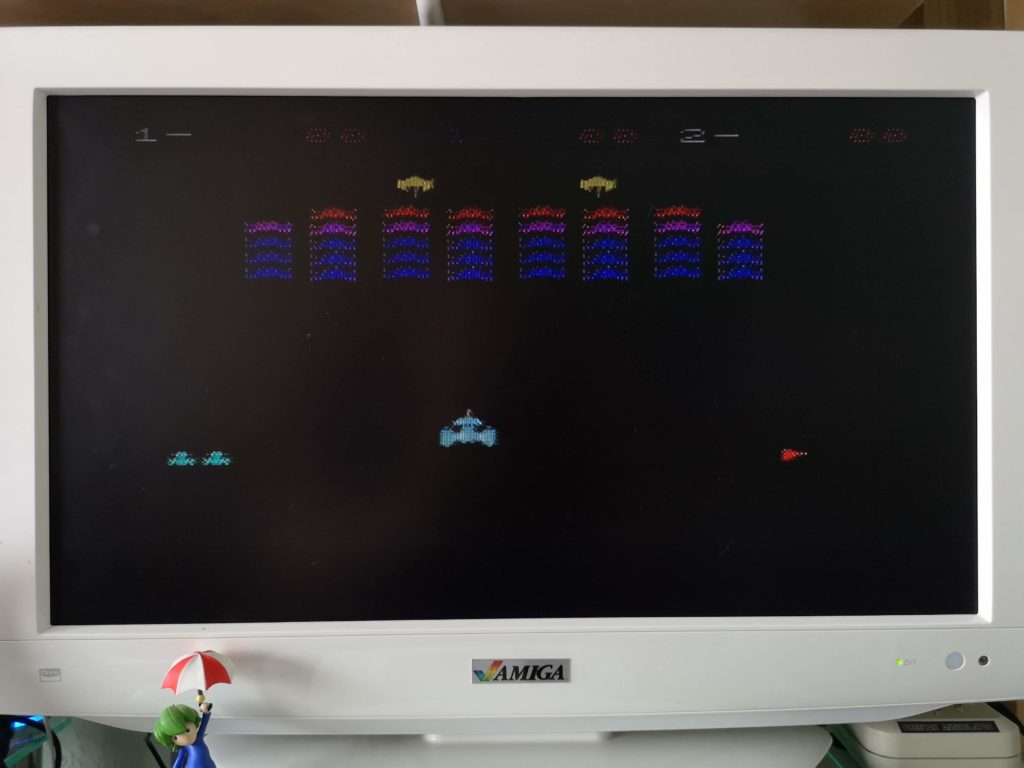
Star Battle is a rather good Galaxians clone for the VIC20. I never had this as a child so really pleased to be able to add it to my collection now.


VIC20 Space Battle

VIC20 Space Battle


VIC20 Penultimate+ Cartridge

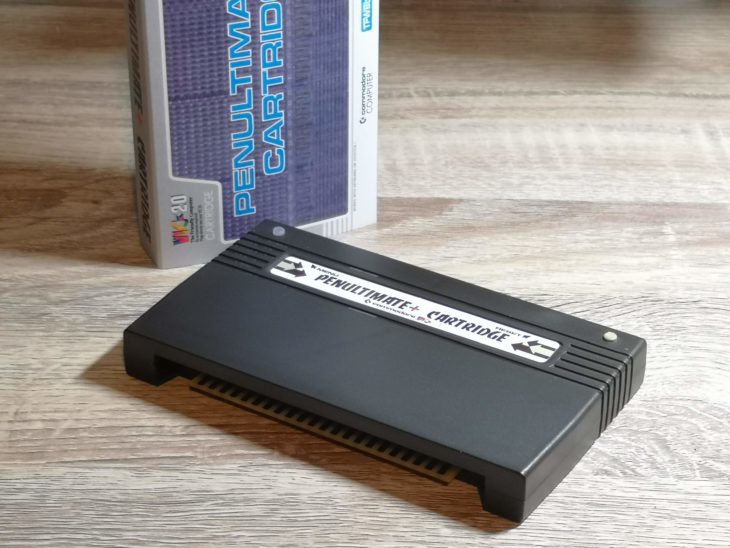
Penultimate+ Cartridge

Thought I’d share a little review of a new gizmo I picked up for my VIC20 recently. It’s called the ‘Penultimate+’ cartridge and it’s sold by The Future Was 8-bit.

It aims to be the only cartridge you will ever need to put in your VIC20’s expansion slot. It combines a RAM pack, various expansion carts, reset button, system diagnostics and over 70 game ROM’s into a single cartridge and all accessible through a simple and intuitive menu system.


What you get

The artwork on the packaging is fantastic, riffing off the original cartridge boxes to produce a product dripping with nostalgia. It’s a slip-case rather than a box though which disappointed me a little bit. Although I realise my cartridge is likely going to stay plugged in most of its life, it would have been great to have a proper box to store it in for those times when it’s not. Even if I never unplug the cartridge again, as a collector I would have appreciated a proper box to display on my shelf. With no cartridge inside the slip-case is very flimsy and could be easily squashed flat.


This slideshow requires JavaScript.


The cartridge itself is sturdily built from brown plastic to a very high standard. It fits snugly into the VIC20’s expansion port without any issues at all. Most of Commodore’s original expansion carts were produced in a similar colour so again this is a nice nostalgic nod to the past.

On the top are two buttons. The first button on the left is an illuminated ‘menu’ button that launches the Penultimate+ Cartridge’s menu screen. The second ‘reset’ button on the right resets your VIC20 vastly reducing the need to power cycle your machine.

Given that much of the time this cart is going to be used for playing games, having joystick navigation through menus is a godsend. Simply move up and down with the stick and press fire to select a menu item or launch a game. Some frequently used options also have handy keyboard shortcuts too.


This slideshow requires JavaScript.

The RAM Pack Function

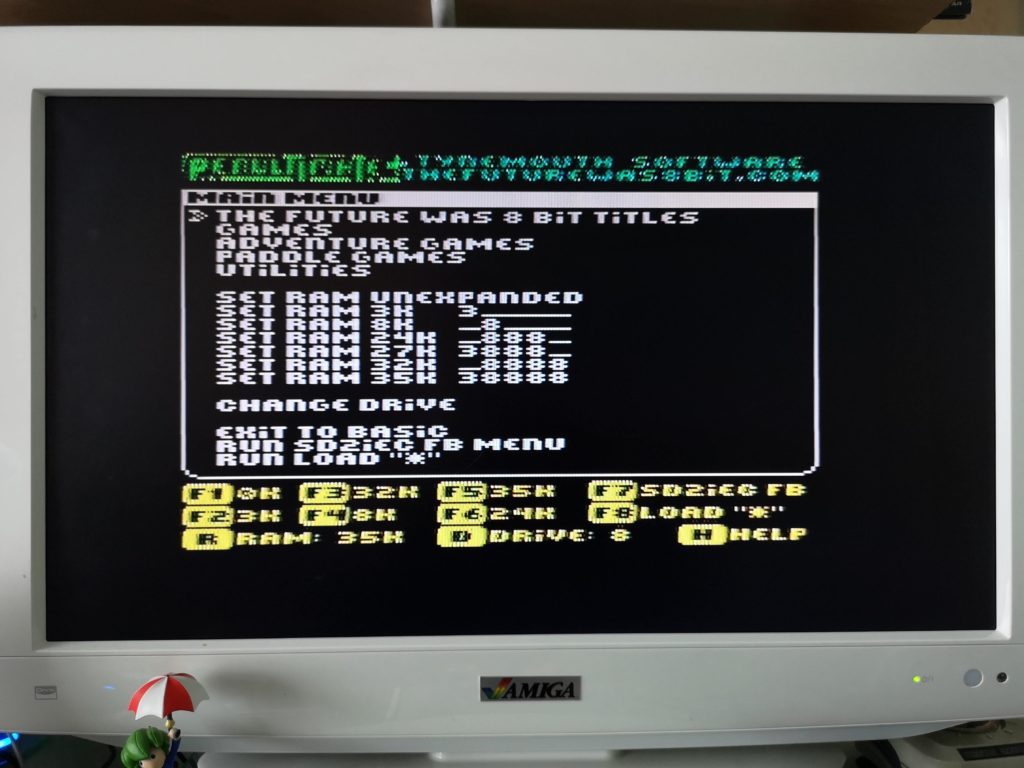
The RAM pack behaves in much the same way as other switchable RAM packs like the Vixen one I already have. The one big difference with this one is that you can change the amount of RAM available using the on-screen menu instead of messing with DIP switches. You are able to chose from Unexpanded (no extra RAM), 3K, 8K, 24K, 32K and 35K. Strangely there’s no option to select 16K but playing 16K games with the 24K option seems to work just fine.

There’s a couple of ways to access the extra RAM depending on what you need it for:

  1. Select one of the ‘Set RAM…’ options from the menu to have that amount of RAM allocated whilst remaining in the menu system so you can load a game ROM.
  2. Press one of the function key shortcuts at the bottom of the screen to reset your VIC20 and drop you at the BASIC screen with the extra memory allocated. This is the option you would choose if you wanted to write a program or load one off a cassette tape and needed the extra RAM to do so.


Penultimate+ Cartridge

Main menu with RAM options.


The Games

The games are neatly arranged into 4 categories:

  • The Future Was 8-Bit Titles (exclusive new games released by TFW8b)
  • Games (this is where the vast majority of the game ROMs can be found)
  • Adventure Games (all the Scott Adams cartridge adventure games)
  • Paddle Games (all the paddle compatible games)


This slideshow requires JavaScript.


Penultimate+ Included Games List

Adventureland AdventureMission Impossible Adventure
AEMosquito Infestation
AggressorMotocross Racer
Alien BlitzMs. Pac-Man
Alien SidestepOmega Race
AmokPac-Man
Attack of the Mutant CamelsPentagorat
AvengerPharaoh's Curse
Basic-v4Pirate's Cove Adventure
BattlezonePole Position
Bertie the BallPrincess and Frog
Black HoleQ-Bert
BolderDanRadar Rat Race
Buck RogersRaid on Fort Knox
CentipedeRiver Rescue
Cheese and OnionRoad Race
ChoplifterRobotron
CloudburstRodMan
ClownsSatellite Patrol
Cosmic JailbreakSerpentine
Crater RaiderShamus
Creepy CorridorsSkibbereen
CyclonSpaceship-1
Deadly SkiesSquishem
DefenderStar Battle
Demon AttackSub Chase
Dig DugSuper Expander
Donkey KongSuper Slot
DragonfireSuper Starship Space Attack
Fast BoyTerraguard
FroggerTetris
Future FighterThe Count Adventure
GalaxianThe Sky is Falling
Gold FeverThreshold
GorfTopper
GridrunnerTornado
Jelly MonstersTutankham
Jungle HuntTypo
KeyQuestViccyBird
K-Razy AntiksVICKIT4&5
LazerzoneVicterm 40
Lode RunnerVoodoo Castle Adventure
Mine Madness

SD2IEC Functionality

Unlike, for example, the 1541 Ultimate cartridge that you can get for the Commodore 64, the Penultimate+ Cartridge does not allow you to add any content of your own. You are stuck with the cartridges and game ROM’s that it ships with.


Penultimate+ Cartridge

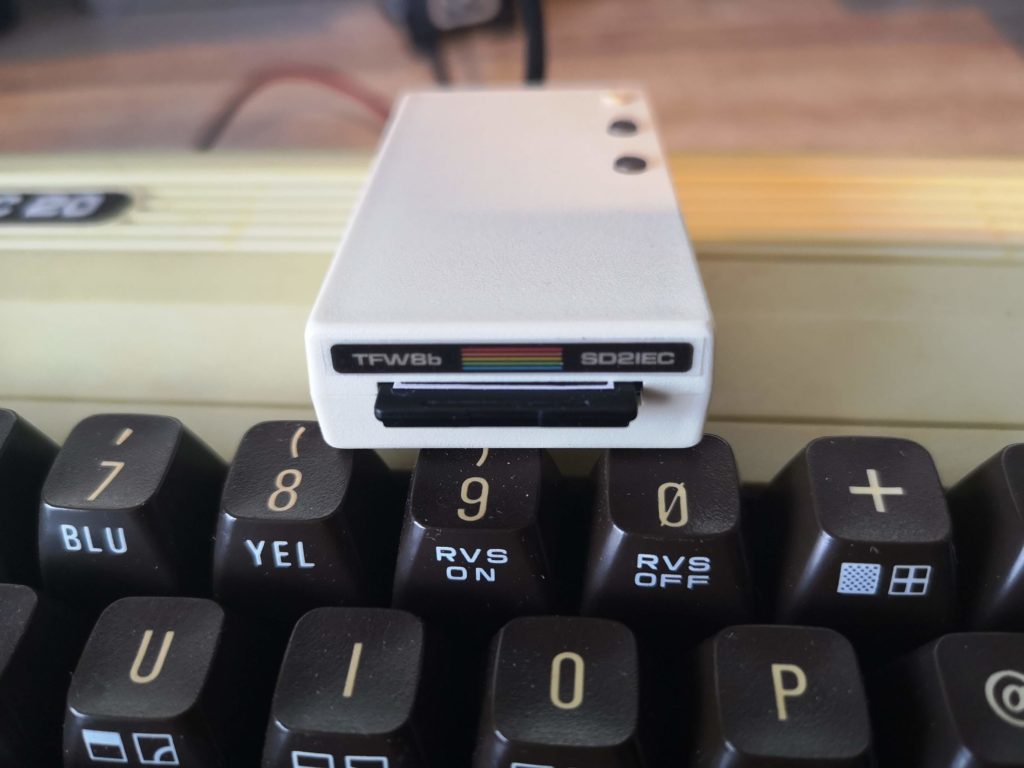
SD2IEC Device


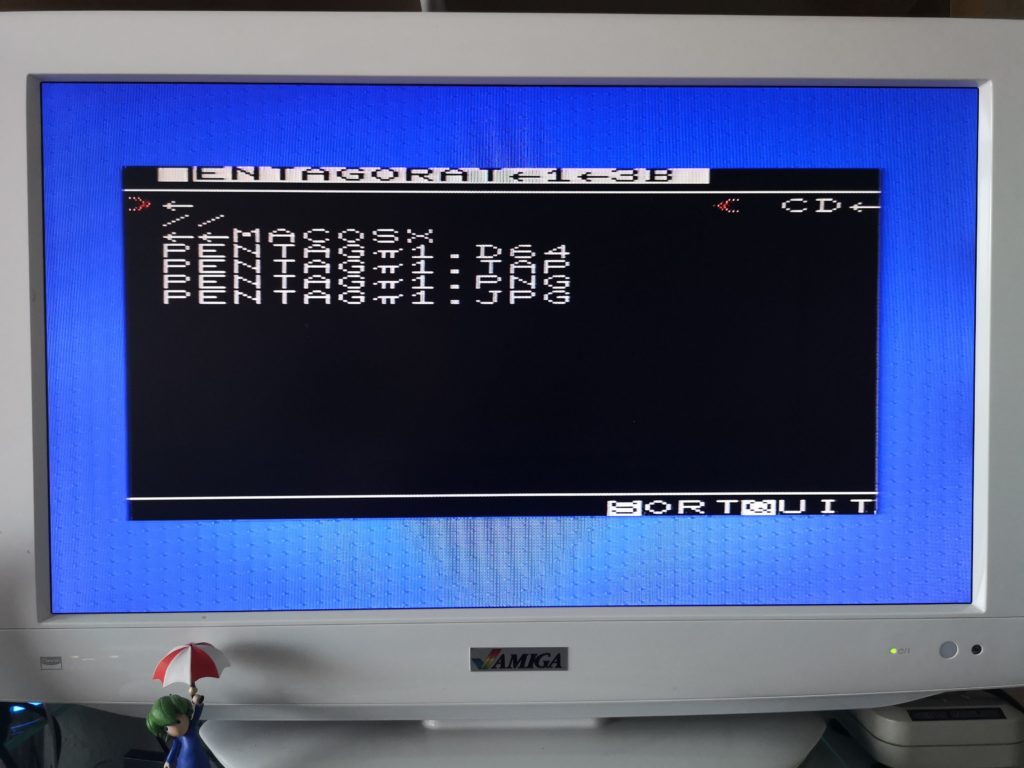
Thankfully however, it does provide a quick way to access any content you may have via an SD2IEC device. Selecting this option from the menu will allow you to easily browse through the content of an SD card using a joystick. For games that won’t run on an unexpanded VIC20 you can allocate the correct amount of additional RAM needed before launching a game. I found this to work really well but I do need to spend a little time organising my game collection by how much RAM each needs.
 

Penultimate+ Cartridge

Navigating the SD2IEC menus


Utilities

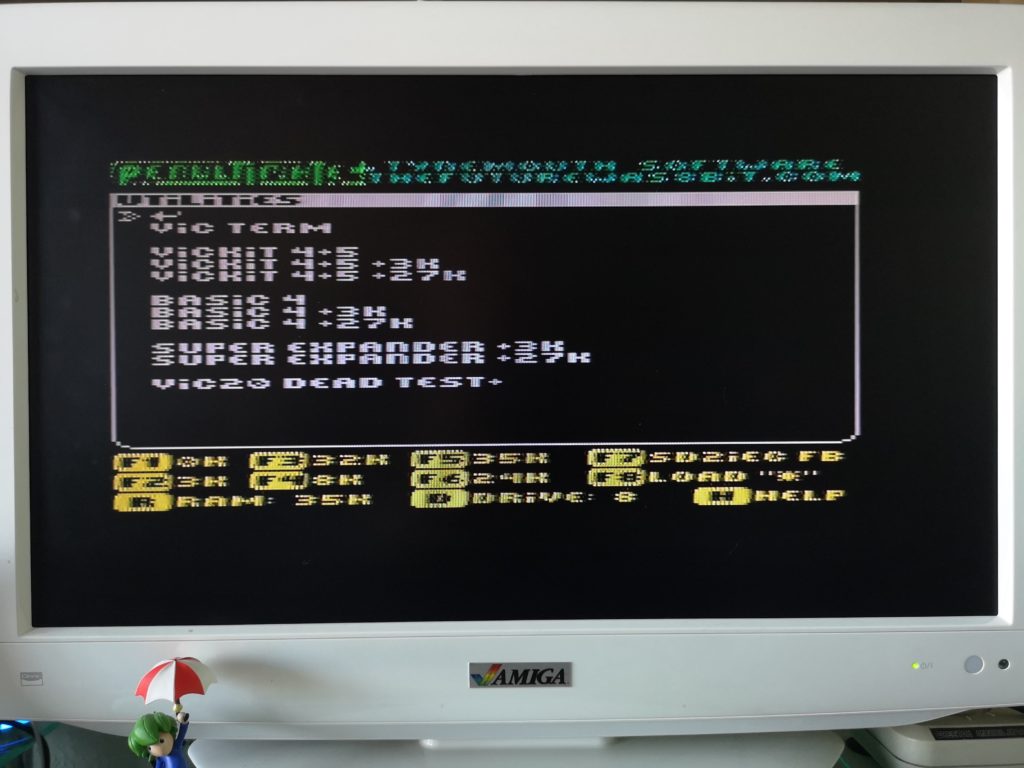
Under this section you will find a bunch of utilities that may be of interest to the more dedicated user.


Penultimate+ Cartridge

Utilities


Vic Term

This is a terminal program but as I don’t have a suitable modem for my VIC20 I’ve been unable to try this.

Vickit

This is a high speed cassette loading system. If you load this up and re-save a program to cassette it will load back in a fraction of the time.

BASIC4

This adds a number of sorely lacking disk handling commands to the VIC20’s BASIC arsenal such as ‘DIRECTORY’ and ‘DLOAD’.

Super Expander

This is probably the most useful of the bunch and greatly increases the BASIC commands available for writing programs. It provides dedicated graphics and sound commands along with some extra RAM to create them. It also provides commands that enable you to easily read paddle and joystick inputs. If you were thinking of writing a VIC20 game then this would be a great cart to load up. The only downside to this is however is that anyone else that wanted to run your program would also need the Super Expander for it to work!

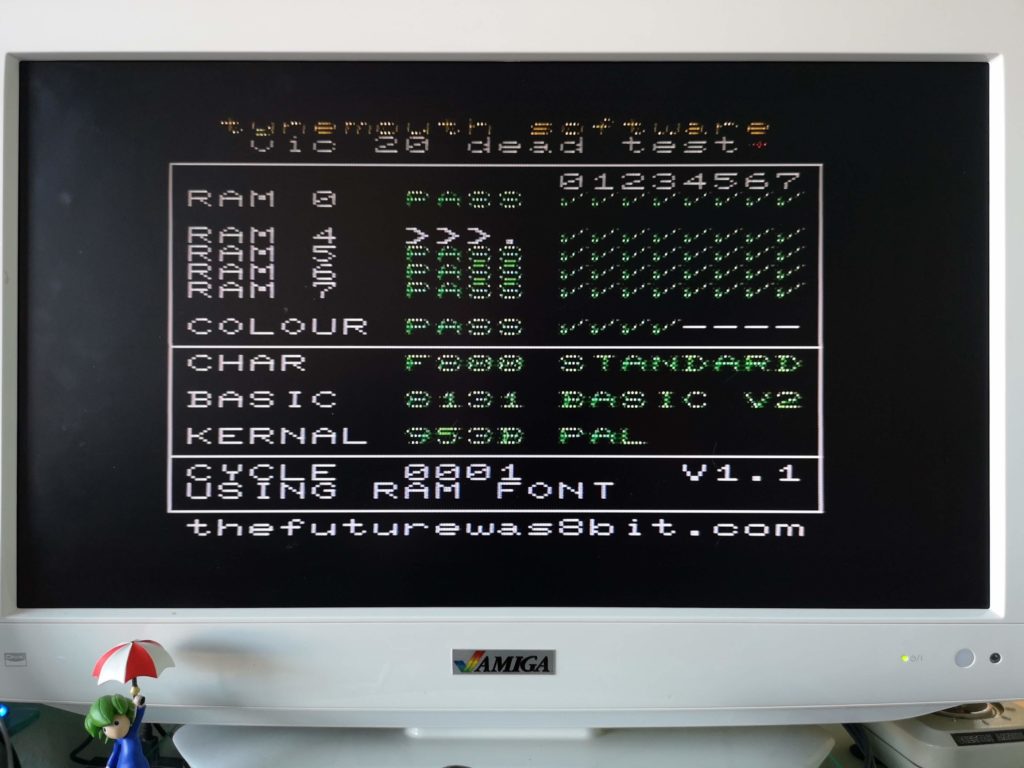
VIC20 Dead Test+

This could prove to be another really useful feature to have on board. When you load this up it will test various aspects of your VIC20’s RAM and ROM in an endless cycle. If your VIC20 ever starts behaving strangely then this would be a great tool to load up to get an idea what’s going wrong.

If your VIC20 won’t even boot up then you can hold down the reset button for 10 seconds after switching it on to go straight to the dead test function. This is where ‘Dead Test’ cart actually earns its name.

I would have liked an option to buy dongles to plug into the various ports enabling a more comprehensive test but it’s still a great tool to have at your disposal. Maybe a future version will offer this feature.


Penultimate+ Cartridge

‘Dead Test’

Verdict

If you have a VIC20 then you should seriously consider getting one of these cartridges. It successfully combines a huge number of cartridges, games and functions into a single plug and play cartridge driven by a simple and intuitive menu system.

Even if you’re like me and have an extensive collection of cartridges already I would still recommend getting this. Not only is it hugely convenient to have an entire library of titles and functions always at the ready but it saves the wear and tear of both your VIC20’s cartridge port and the individual edge connectors of your cartridges. If you add an SD2IEC reader then you can literally have everything a few stick waggles and a button press away.

Does it fulfil it’s mission to be the one and only cartridge you need? Almost, but I still have an Adman speech synthesiser cartridge that I enjoy messing about with from time to time. Maybe a future ‘Ultimate’ version will incorporate this too and then it really can remain plugged in forever!

Retrokomp – A brand new Retro Computer Magazine

Retrokomp Magazine

I originally spotted Retrokomp Magazine a few months ago. I thought it looked interesting but sadly it was only available in Polish at the time. That’s changed now though so I ordered myself a copy for €10 plus postage last week and it arrived today.


Retrokomp Magazine

A technical article looking at diagnosing issues with the Commodore 64


So what exactly is it?

Retrokomp Magazine is a brand new retro computer magazine that focuses on 8-Bit and 16-Bit machines and is published by Bitronic.pl in Poland. Although it covers other makes and models of machine there is a lot of Commodore content covering everything from the VIC20 though to the Amiga. The other machines covered include Atari, ZX Spectrum, Amstrad CPC and the old Apple computers. It’s produced in full colour to a high standard on A4 glossy paper and there are 74 pages in total.


Retrokomp Magazine

Detailed look at the long lost methods of interacting with 5.25″ floppies and how you can convert them to .D64’s


The first thing that struck me as I flicked through it is that it’s not like most of the other magazines in circulation right now. This is not a game-centric magazine, it’s very text heavy and it contains a lot of articles and information. This is a good thing in my opinion as there are plenty of other magazines that cover games already.

I’ve read a few of the articles in full and they’re well written, interesting and informative. They’re the sort of articles that I will either refer back to in the future or prompt me to start experimenting with a particular piece of kit or write a program. They remind me a little bit of the sort of articles you used to get in Amiga Shopper magazine (RIP).


Retrokomp Magazine

Making a VIC20 sound generator, complete with type-in listing


A quick run-down of the Commodore-centric articles in this issue:

  • Transferring data to the C64 (looks at converting real floppies into .D64 files)
  • Controlling the floppy disk drive (in depth look at floppy disks usage on the 64)
  • Expansion cards for the C16 – Plus/4 family (everything from adding more RAM to sound cards)
  • Diagnostic info for repairing Commodore 64’s
  • Better sound for the VIC20 (how to write your own sound generator – complete with listing to type in!!!)
  • Hardware expansions for the CD32 (looks at several devices you can get to expand the capabilities of the machine)
  • Devices supported by handlers (a look at Amiga DOS handlers and what you can do with them)
  • Tandem IDE controller (a look at the Tandem IDE CD-ROM drive controller for the Amiga)


Retrokomp Magazine

CD32 Expansions


Verdict

Although I’ve not read all of the magazine yet, what I have read so far impressed me. Even the non Commodore articles look interesting, so if I ever pick up one of those other machines there’s plenty to come back for.

Basically if you are interested in using your old computers for anything other than simply playing games on then I’d definitely recommend giving this magazine a try. It’s clearly targeted at hobbyists and tinkerers like myself and has plenty to offer.  If, however, you are only interested in games then this probably isn’t the magazine for you.


Retrokomp Magazine

Happy days – a program listing to type in! This alone made the purchase worthwhile. (yes it’s deliberately blurred)


VIC20 Keyboard Repair

VIC-20

This is just a quick post about how I was able to repair the damaged keyboard on my recently unearthed Commodore VIC20.

As I mentioned previously in my VIC20 Attic Find post, the decades of storage in my attic had taken its toll on the keyboard. The insides of the keys had become brittle and four of them had broken apart. As you can see from the following photo they were in a pretty bad shape. In this condition they just wobbled around on top of the plungers and fell straight off if the keyboard was turned upside down.


VIC20 Keyboard Repair

Broken and crumbling keys


The quick and easy solution would have been to stick some blue-tack in there but I doubt that would have been an effective bodge for long. Alternatively I could have glued them in place but then they would be permanently attached to the keyboard with no way of removing them for future cleaning or repairs. As my dad always used to say, if a job’s worth doing then it’s worth doing properly!

I did toy with the idea of replacing the whole keyboard with one from a donor machine off eBay. However that wasn’t cost effective and I really wanted to keep my VIC as original as possible.

I asked and searched around and eventually stumbled across retroleum.co.uk. They sell (amongst other spares) individual replacement Commodore 64 keys for £1 each. Luckily for me, the keyboard on my VIC20 is identical to the ones found on the original breadbin style C64’s. Not all revisions are so do check carefully before buying C64 keys if you want to fit them on a VIC20.


VIC20 Keyboard Repair

My new VIC20 keys!


Particularly useful was the fact that they sell a wide variety of keys, not just from different models of C64’s, but with different levels of yellowing too! This meant I was able to choose some that would blend in perfectly with the rest of my keyboard. In the end the keys I ordered were described as ‘Breadbin C64 – Keyboard Type 2, Grade 1.5’. A couple of days after ordering them they arrived in a neat little cardboard box.


VIC20 Keyboard Repair

New keys fitted – perfect match!


Fitting the new keys only took a few seconds and I was really pleased to see that they turned out to be a perfect match for my keyboard. My VIC20 is certainly looking a lot happier and I can actually use the keyboard now too.

Now that the keyboard is sorted I still need to look into sorting a few other things out. Next job will be to pop a few heat-sinks onto some of the more critical chips and maybe retrobrite it, if I’m feeling brave that is, (my last attempt was a disaster).