Lyonsden Blog

Category - Commodore 64

Andy’s Utility Cart Review

In this post I’ll be taking a look at ‘Andy’s Utility Cart’, a collection of 12 utilities (and one music demo) from SharewarePlus, all combined onto a single C64 cartridge..


Andy's Utility Cart

The Cartridge and Instruction Manual

The cartridge comes packaged in an attractive cardboard box along with an ‘instruction’ booklet. However this is just a small folded sheet containing a list of what programs are on the cart. No instructions for any of the included programs are actually provided.


Inside the Cartridge

Removing the solitary Philips screw and opening the cartridge shell reveals a smart looking white circuit board hosting a 1Mb Atmel AT27C010-70PU EPROM along with a couple of ancillary chips. The Atmel chip is a ‘one time programmable’ affair that contains all the C64 programs.


This slideshow requires JavaScript.


What’s on the Cartridge?

So now that we’ve seen the hardware inside the shell it’s time to see what programs are on it. See below for a full list of what’s included.


  1. 64 DOCTOR
  2. 64 TESTER
  3. FAST LOADER
  4. TURBO NIB COPY
  5. DISK TOOL b.S
  6. CASS.AZIMUTH
  7. HEAD ALIGN
  8. 1541 ALIGNMENT
  9. 15 SEC FORMAT
  10. THRUST CONCERT
  11. 1541 ALPS CHECK
  12. TURBO 250 [Bonus Program]
  13. DIAGNOSTIC [Bonus Program]


All of the utilities on the cart are selectable from a handy menu screen as can be seen in the photo below. There’s no way to exit most of the programs or get back to this menu screen so you will need to power cycle your C64 to achieve this.


Andy's Utility Cart

Andy’s Utility Cart Menu Screen


Strangely for a compilation that is described as ‘twelve utilities for the Commodore 64’ there’s actually 13 in total. Not sure why there’s a discrepancy. Maybe they considered 13 to be unlucky?   Perhaps it’s because one of the programs, Thrust Concert, isn’t actually a utility at all but more of a scene demo? Alternatively it’s conceivable that they felt some of the programs were a bit samey? Who knows… but I’m certainly not going to complain about having an extra program included!


Andy's Utility Cart

Back of the box (and a list of what’s on the cart)


Here’s quick look at each of the 12 13 Utilities


64 DOCTOR (Diagnostic sequence by Computer Software Associates)


This is a comprehensive diagnostic program that can help with troubleshooting issues with your C64. It can test the keyboard, video, audio, joysticks, disk drive, datasette, RAM and even an attached printer.  You are able to launch a complete systematic scan or you can select a specific test and just run that.


Menu Screen for 64 Doctor


In the photo below I ran the keyboard test which marks each character on the screen as you press the corresponding physical key on the keyboard. Great for seeing at a glance which keys might be faulty on an old keyboard.


Running through the keyboard test


64 TESTER (Comprehensive screen, keyboard & joystick port tester by Tim Cannell)


This is another diagnostic program that focuses on testing the screen, keyboard and joystick ports. The tests are displayed on-screen immediately on launch and includes character maps, colour palette (including overscan borders), along with sprites, and the current status of both joystick port axes.


C64 Tester Screen


Additionally a counter ticks upwards at the bottom, presumably so you know the program is still running/not crashed and a rather annoying ‘Close Encounters’ style 5 note beep jingle is stuck on repeat too which had me reaching for the volume knob after about 30 seconds!


FAST LOADER (Commodore 64 fast disk loader with shortcuts by MR. BYTE)


This one is a floppy disk fast loader utility, presumably similar to Epyx Fastload and the like. Unfortunately in my testing I didn’t have much luck with it and nothing would load with it enabled.  At first I had both my 1541 drives on and I was getting an error in German saying ‘Bitte nur floppy anschalten’ which translated to ‘floppy only please’. Not very helpful but I took it to mean ‘one floppy drive only’. Thinking it didn’t like having both drives on I turned one off and tried again. This time I didn’t get that error but instead the screen would just go blank when attempting to load stuff, unsuccessfully. I tried a variety of disks and programs but nothing made any difference. Some instructions for this one might have been helpful – maybe I was missing a vital step. I also made sure my JiffyDOS ROM was disabled, but that too made no difference. Maybe it just doesn’t like my C64? The brief description did mention ‘with shortcuts’ but I have no idea what they are and whether they were optional or a necessity to get it working. In the end I had to throw in the towel and admit defeat with this one.


I may never know how speedy Mr Bytes fastloader is…


TURBO NIB COPY – (Copy Q turbo nibbler disk copier with error scanner by Cracker & CSS)


This is a very handy and easy to use ‘nibbler’ disk copy utility that can copy the contents of one disk to another using either one or two 1541 drives.


Turbo NIB Copy Initial Screen


An option screen allows you to select drive unit numbers for both the source and destination drives letting you configure disk to disk copies if you have more than one drive.


Options Menu


Obviously copying disks is quicker and more convenient using two 1541 drives but it’s still perfectly possible if you only have a single drive at your disposal.


Reading phase


In the case of single drive copying, disks are copied in sections with you swapping the source and destination disks in and out of the drive. It takes four passes (8 disk insertions in total) to completely copy a single disk although the fourth and final pass is much faster than the previous three.


Writing phase


A visual representation of the tracks and sectors being copied is displayed on screen in real-time providing reassurance that progress is being made.


DISK TOOL b.S (Disk Tool V6.5 with comprehensive floppy & disk monitors by Klaus Raczel)


This program includes a whole raft of disk related tools ranging from the mundane like formatting and verifying to advanced sector editing.


Disk Tool Title Screen


Unfortunately the menu’s are all in German which I cannot understand (it’s been nearly 40 years since I studied it at school and I was never particularly good at it anyway). Some of the German words were close enough to their English counterparts that I could understand them, but others, not so much.


Some of the German is easy to understand… some is not


Basically I struggled to use this utility. I did try the translation feature of my iPhone which did a pretty good job of translating the photos I took of the menus to be fair but it made using what is already quite a complex program a chore. One rainy day maybe I’ll go through all the menus and translate them into English…


CASS.AZIMUTH (Cassette Azimuth for aligning & adjusting your datasette by H Diebek)


This is a really useful tool when you are having issues loading software off tapes from your datasette unit. Apart from having a dirty read/write head, azimuth (head alignment) is probably the main reason for having games and programs fail to load. On Commodore’s datasette units you can adjust azimuth using a small Philips screwdriver but you need real-time feedback to let you know whether your are making things better or worse. This program provides that feedback.


Menu/Instruction Screen


I do already have software to do this that I purchased back in the 80’s from Interceptor Micro’s. It came with a little Philips screwdriver and a pointer to attach to it so you could see how much you had rotated it. However it’s one glaring flaw was that the software came on cassette. Not ideal if your read/write head is totally out of whack!


Alignment screen – clearly my drive needs some adjustment…


The program displays the data being read off a C64 tape in real time as little black dots falling down the screen. This allows you to fine-tune the azimuth on the fly by adjusting the screw until the dots appear as orderly and distinct thin vertical lines (rather than be splattered across the screen). In the photo above there is certainly room for improvement on my deck.

However it’s important to remember that azimuth can vary on a tape by tape basis as much depends on the azimuth of the machine that recorded the program onto the tape in the first place!


HEAD ALIGN (Minimal head alignment v1.1 for your datasette by Enthusi)

This is basically another Datasette azimuth alignment program only this time a more streamlined, bare bones version that doesn’t require you to press any keys to start the process. It also didn’t like having my JiffyDOS ROM enabled and refused to supply power to my cassette port until I disabled it. Not a big deal, just something to be aware of.


Head alignment screen


1541 ALIGNMENT (Commodore 1541 disk drive track & sector alignment by Antiram)


This is a comprehensive track/sector alignment tool for tuning 1541 drives. Happily my drives are in perfect shape so I didn’t mess around with this program at all but it’s a very useful tool to have in ones toolbox for when the need arises for sure!


1541 Alignment Menu Screen


15 SEC FORMAT (Fast 15 second formatter by Mike J. Henry & Alf Maier)

This literally does what it says on the tin – load it and it prompts you for a disk name and ID number. Enter these and press RETURN and away it goes!


The name’s Bond…


In fact calling it ’15 Sec Format’ actually does it an injustice as I found it was consistently formatting disks in 12 seconds. Using JiffyDOS made no difference to the speed in this case. The program ends once the format is complete but you can simply RUN it again to format another. If you have a whole bunch of disks to format then this would be a great solution.


THRUST CONCERT (Music concert featuring Rob Hubbard & Jeremy Smith by Stoat & Tim)


This isn’t a utility but still a welcome addition to the cart. I suppose it could be considered a ‘sound test’ but that’s a bit of a stretch.


Stoat and Tim Present…


This is basically a music demo and I do actually remember listening to this quite a lot back in the day. The demo features the music Rob Hubbard created for the budget Firebird game callerd ‘Thrust’ and is ‘played’ by a band of animated computer characters.


Rob Hubbard on keyboard (bottom right)


If, like me, you love Rob Hubbard’s music then this demo is an essential listen.


1541 ALPS CHECK (Alps 1541 drive alignment with LED & stepper motor tests by Commodore)


This is another terrific 1541 diagnosing program that allows you to test/adjust everything including the LED’s, head alignment, stepper motor speed and even the write protect tab. A very useful program to have, especially on cartridge in case your drive is in no state to load up your utility floppy.


1541 ALPS Check Menu


Bonus Programs


F1. TURBO 250 (Turbo cassette load & save by Mr Z)

This is a pretty simple but effective program that allows you to save (and then subsequently load) programs onto cassette tape in turbo format. It cannot load non-turbo programs from cassette at faster speeds as the speed itself isn’t altered. What this program actually does is increase the density of data saved onto a tape. With more tightly packed data, any given length of tape will contain a larger section of the saved program and thus when read at the same speed, loads more of that program into your C64’s RAM. Ultimately the result is that the program loads in a fraction of the time.


Turbo 250 Menu Screen


Of course densely packed data is more susceptible to read errors but with this cart you have the tools required to sort that problem out too!


F3. DIAGNOSTICS (Diagnostic Program 324528, by Commodore)

This is another C64 diagnostic program that tests things like RAM, Timers, Memory and Colour output.


Diagnostics Test


It runs all the tests automatically on launch and loops through them continually. A counter is updated at the end of each test cycle allowing you to keep track of how many times it has run, useful for bench testing a machine after a repair for example.


Colour Test


Final Thoughts

Andy’s Utility Cart is a really useful collection of utilities to have in your arsenal. Sure, there are a few duplicated programs but this allows you to pick the one that suits your needs best.

It’s a shame I couldn’t get the Fast Loader to work and that the Disk Tool utility is presented in German but there are loads of other programs available so it’s far from a dealbreaker. There are no instructions provided (nor links to online documentation) so you either need to know what you are doing or be prepared to do a bit of research and hunt around online for information in order to get the most out of some of the packages.

Priced at just £18 it’s easy to forgive these minor shortcomings anyway. I certainly had a lot of fun playing around with all the programs on the cart and have no doubt I will be using several of the utilities to maintain my disk drives and datasette.

The cart is available from Tim Harris over at Shareware Plus priced at £18 at time of posting.

Zzap! 64 Issue 16 out now

Zzap! 64 Issue 16

Here’s a quick look at my copy of Zzap! 64, Issue 16, that arrived in the post today.


Zzap! 64 Issue 16

Zzap! 64 Issue 16 Cover Image


The magazine is packed with content spanning 60 pages, including news, game reviews and insightful articles about the past, present and future Commodore 64 scene.


A Peek Inside

Here’s a quick look at the contents page giving an overview of what’s inside this issue.


Zzap! 64 Issue 16 Contents Page

Contents Page


Sadly the coverdisk for Zzap! 64 is digital only these days as the supply of ‘new old stock’ 5.25″ disks has run dry (nobody manufactures new ones any more). There’s still a page dedicated to letting you know what you can enjoy when you ‘insert’ the .D64 file into your 1541 Ultimate II+ though (or whatever your 1541 emulator of choice happens to be).


Zzap! 64 Issue 16 Coverdisc Page

Digital ‘covermount’ content page.

.


Getting hold of a copy of Zzap! 64 Issue 16

This is another great edition of Zzap! 64 and well worth a buy. The magazine is available from Fusion Retro Books priced at £4.99. Make sure you use the code ‘LYONSDENBLOG’ to grab yourself a nifty 15% off the price! This code works for everything you place in your basket too!

I’ll leave you with a small gallery of images from the magazine.


This slideshow requires JavaScript.


You can find other Zzap! 64 related posts here .

Freeze 64 Issue #63 Fanzine

Issue 63 of Freeze 64 has just arrived.


Freeze 64 Issue #62

This edition comes with cheat cared #39 to add to your collection.


Here’s a shot of the contents page so you can get an idea of what’s in this issue.


Freeze 64 Issue #62

Freeze64 Issue 63 Contents Page.


I’ve been getting Freeze 64 for many years now and Vinny continues to make a fantastic magazine that deserves our support. If you would like find out how you can get hold of your own copy then head over to the Freeze64 website and take a look.

Finally, here’s a link to some of my previews of earlier editions of Freeze64.

Zzap! 64 Issue 15 out now

Zzap! 64 Issue 15

Wouldn’t you just know it, like buses, you wait months for the next editions of your favourite retro gaming magazines to arrive and then they all come at once! Yep today my postie delivered Zzap! 64 to join yesterdays Zzap! Amiga and Freeze 64 from the day before! This is issue 15 of Zzap! 64 and features possibly one of the most iconic and memorable bits of cover artwork the original run of the magazine ever used.


Zzap! 64 Issue 15

Yummy.


The magazine is packed with content spanning its 60 pages, with news and game reviews, including more than one title that gets the coveted ‘sizzler’ award!


A Peek Inside

Here’s a quick look at the contents page giving an overview of what’s inside this issue.


Zzap! 64 Issue 15

Zzap! 64 issue 15 Contents page.


Sadly the coverdisk for Zzap! 64 is digital only these days as the supply of ‘new old stock’ 5.25″ disks has run dry (nobody manufactures new ones any more) . There’s still a page dedicated to letting you know what you can enjoy when you ‘insert’ the .D64 file into your 1541 Ultimate II+ though (or whatever your 1541 emulator of choice happens to be).


Zzap! 64 Issue 15

Digital ‘covermount’ content page.

.


Getting hold of a copy of Zzap! 64 Issue 15

This is another great edition of Zzap! 64 and well worth a buy. The magazine is available from Fusion Retro Books priced at £4.99. Make sure you use the code ‘LYONSDENBLOG’ to grab yourself a nifty 15% off the price! This code works for everything you place in your basket too!

I’ll leave you with a small gallery of images from the magazine.


This slideshow requires JavaScript.

Freeze 64 Issue #62 Fanzine is out now

It’s been a long time since I made a post about a new edition of Freeze 64 arriving. It’s certainly not because I’ve stopped reading it, but a few years ago I made the decision to make these sort of quick news type posts on Twitter instead of on here. However since cutting all ties with that platform I still want to continue to give it a bit of publicity by mentioning it on my blog.

Issue 62 literally landed on my doormat this morning so other than a cursory flick through it I’ve not had time to actually read anything yet. I can however report that it did come with another cheat card for the collection! 🙂


Freeze 64 Issue #62

This edition comes with cheat cared #38 to add to your collection.


Here’s a shot of the contents page so you can get an idea of what’s in this issue.


Freeze 64 Issue #62

Freeze64 Issue 62 Contents Page.


I’ve been getting Freeze 64 for many years now and Vinny continues to make a fantastic magazine that deserves our support. If you would like find out how you can get hold of your own copy then head over to the Freeze64 website and take a look.

Finally, here’s a link to some of my previews of earlier editions of Freeze64.

Hollywood Hijinx by Infocom – Classic C64 Purchase

Infocom Hollywood Hijinx

Not too long ago I was fortunate enough to acquire a whole bunch of Infocom adventure games from a generous donor over in the USA. Even though the cost for me to get them all shipped over to the UK was significant it was all worth it when the package finally arrived and I got to open it up. So here’s a look at one of the games I received in that delivery… Hollywood Hijinx from 1987.

Considering this game is 36 years it’s in superb condition with just a little creasing to the spine towards one edge in the middle. The previous owner clearly looked after it really well.


Infocom Hollywood Hijinx

Infocom Hollywood Hijinx – Back Cover.


This particular adventure takes place in the mansion and surrounding grounds of your rich Aunt and Uncle who have recently passed away. Your Uncle was a famous actor and amassed a lot of wealth over the years and you stand to inherit the lot – but only if you can find the ten treasures your Aunt cunningly hid away (before she died obviously) around the estate. Oh and you have to collect every single one of them in just one night!


Infocom Hollywood Hijinx

The Hollywood Hijinx opening screen on my Commodore 64 and 1084 monitor.


Hollywood Hijinx’s difficulty level is rated by Infocom themselves as ‘Standard’ which means it is supposed to be playable by normal mortals. I’ve never played this particular adventure before so that remains to be seen. However they do have two higher difficulty levels of Advanced and Expert so that does encourage me somewhat. The easiest difficulty for reference is ‘Introductory’ which they say is suitable for children aged 9 and above.


Tinsel World

This is a fictional Hollywood tabloid that sets the scene for the game and is integrated into the box lid as is usually the case with Infocom’s ‘grey box’ releases. There are numerous stories about your Uncles exploits that gives some background info for the story. There’s also some other completely unrelated, ludicrous but often humorous tales that you might expect to see in such a ‘trashy’ magazine. The publication then transitions into the instruction manual, describing how to play the game and providing tips on drawing a map and so on.


This slideshow requires JavaScript.


Inside the Infocom Hollywood Hijinx box

As with all Infocom games there’s far more than just a disk included here.


Infocom Hollywood Hijinx

Back of the box.


Removing the plastic ‘lid’ from the recessed ‘hole’ inside the box reveals a small treasure trove of trinkets and extras (or feelies as Infocom used to call them).


Infocom Hollywood Hijinx

Storage compartment inside the box.


When picking up these games second hand I often find the lid has been lost (along with some of the contents too if you are unlucky). Happily it was included here, probably explaining why everything was present and correct within.


Infocom Hollywood Hijinx

Hollywood Hijinx Floppy Disk.


The game runs off a single floppy disk which was in great condition with the original label that, although a little yellowed with age, had not succumbed to mould or graffiti. Amazingly the game still loads perfectly from that disk too.


Infocom Hollywood Hijinx

All the stuff included inside the box.


The United Products of Infocom ‘passport’ was included with this game. This is basically a little catalogue showing you all the other adventure games they had available at the time. The registration card (unused) and Quick Reference card is also present and correct.


Infocom Hollywood Hijinx

At least the claim about the size of the swizzle stick was true!


One of the most prominent of the ‘feelies’ included is the amazing ‘Lucky palm tree swizzle stick!’ which really is the same size as in the fictional advert. Luckily it was included with the game otherwise I would have had to pay $12.95 plus $3.00 P&P to get hold of one! Sadly no matter how many times I twizzled my stick (oo’er missus) I’ve not uncovered a chest of gold coins whilst digging in my garden!


Buddy Burbank Photo

Signed photo of your Uncle.


Also included is a suitably cheesy signed photo of your Uncle Buddy which looks like it was taken after he’d doused his hair with an entire bottle of Grecian 2000…


Uncle Buddy Letter

Reverse side of the photo reveals a letter from your Uncle.


Flipping the photo over reveals a note off your uncle with some clues to help point you in right direction to find the treasures.


Aunties Will

Your Aunts Last Will and Testament


Last but by no means least there is a letter written by your Aunt explaining why they have left everything to you and also why they hid the treasures away instead of just giving them to you.

However your nieces and nephews have also received a similar letter, so, in a nutshell; you get first dibs on the treasure hunt as your Uncle’s favourite nephew… but if you can’t find all the treasures in a single night then tough luck – your other nieces and nephews will get a shot instead and you’ll end up with nothing!

This sounds like a fairly straightforward treasure hunt game, albeit with a timer. I haven’t played it yet but am really looking forward to having a go at this one and seeing how many treasures I can find!

If you enjoyed reading about this game then here’s a look at some of the other Infocom games in my collection that I’ve posted about.

Adventures with JiffyDOS

I recently bought some official JiffyDOS ROM’s from Retro Innovations in the USA and they arrived a couple of weeks ago. They came individually cossetted in small little cardboard boxes packed with fluff like tiny little eggs in nest. The boxes themselves were packaged inside a jiffy bag. Interestingly no instructions were supplied but these are readily available on their website so not too much of an issue.


JiffyDOS

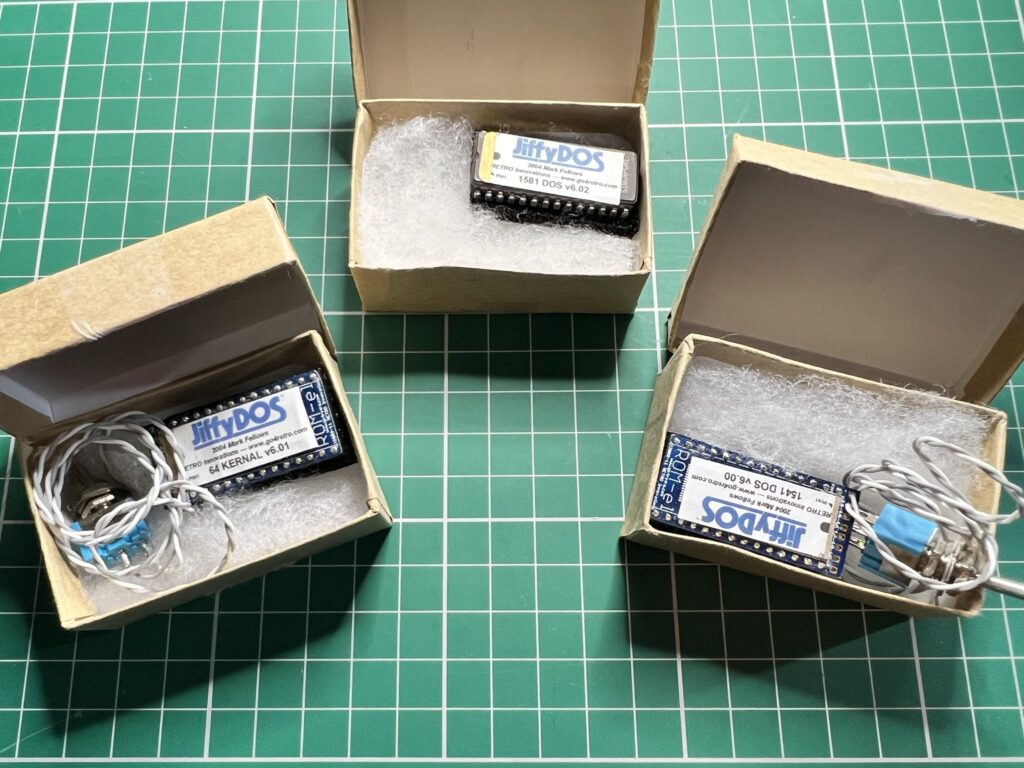
The three different types of JiffyDOS ROM’s I received.


I excitedly opened up the case on my 64C so I could set about installing the replacement Kernal ROM chip… and immediately encountered my first major problem. My ROM wasn’t socketed, meaning I would have to de-solder the existing chip before I could even think about replacing it.


C64C kernal ROM soldered directly to motherboard.


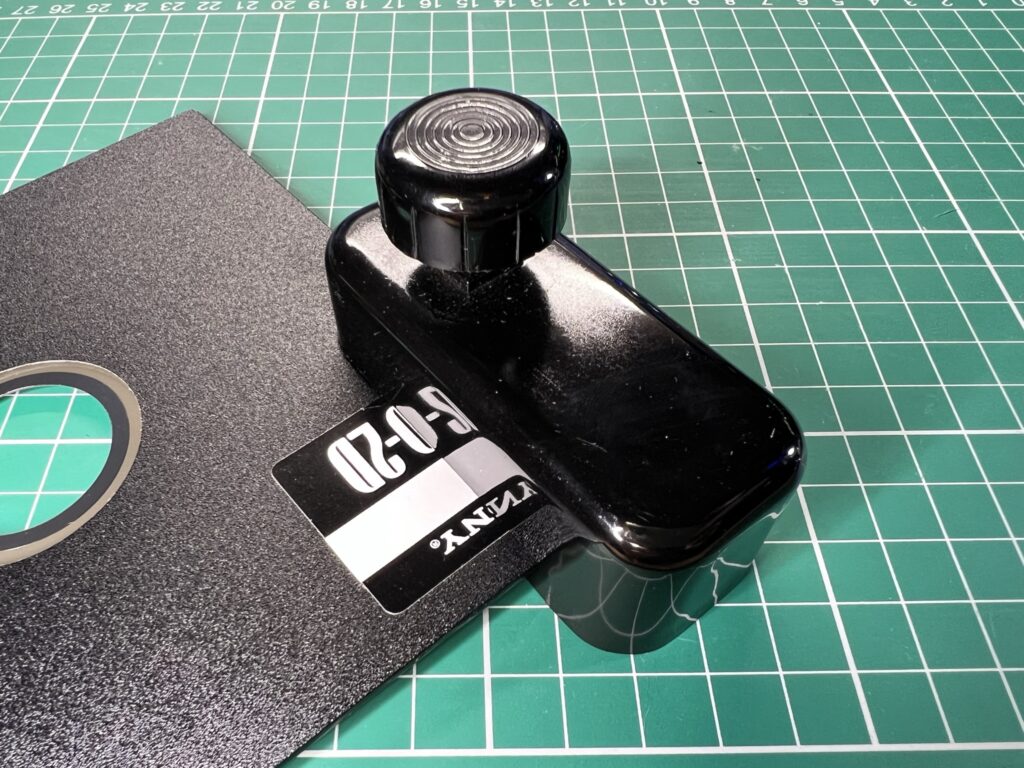
I don’t have any fancy de-soldering tools, just a cheap solder sucker and some braid. I’ve never had much luck with a solder sucker as the solder always seems to solidify by the time I get the sucker into position. I knew it would all end in tears unless I bought a new tool to make life easier. I’ve seen people on YouTube using electric de-soldering guns that use a vacuum pump to suck out the solder which would be perfect but I didn’t want to spend that much money on something I wouldn’t be using very often. I settled for the tool you see below (Preciva Electric Desoldering Pump) which was a nice compromise coming in at under £40. Instead of a vacuum pump it uses a spring loaded mechanism just like a normal solder sucker – but with the added benefit of a heated nozzle to melt the solder.


Preciva Electric Desoldering Pump

Preciva Electric Desoldering Pump


Thankfully the device turned out to be a good investment and worked well. I just placed the nozzle over each of the pins in turn and left it there for about 6 seconds or so and then triggered the suction pump. I repeated the process a couple of times for each pin to make sure I’d got all the solder out. Obviously not as convenient as having continuous suction but no big hardship to re-prime the pump each time.


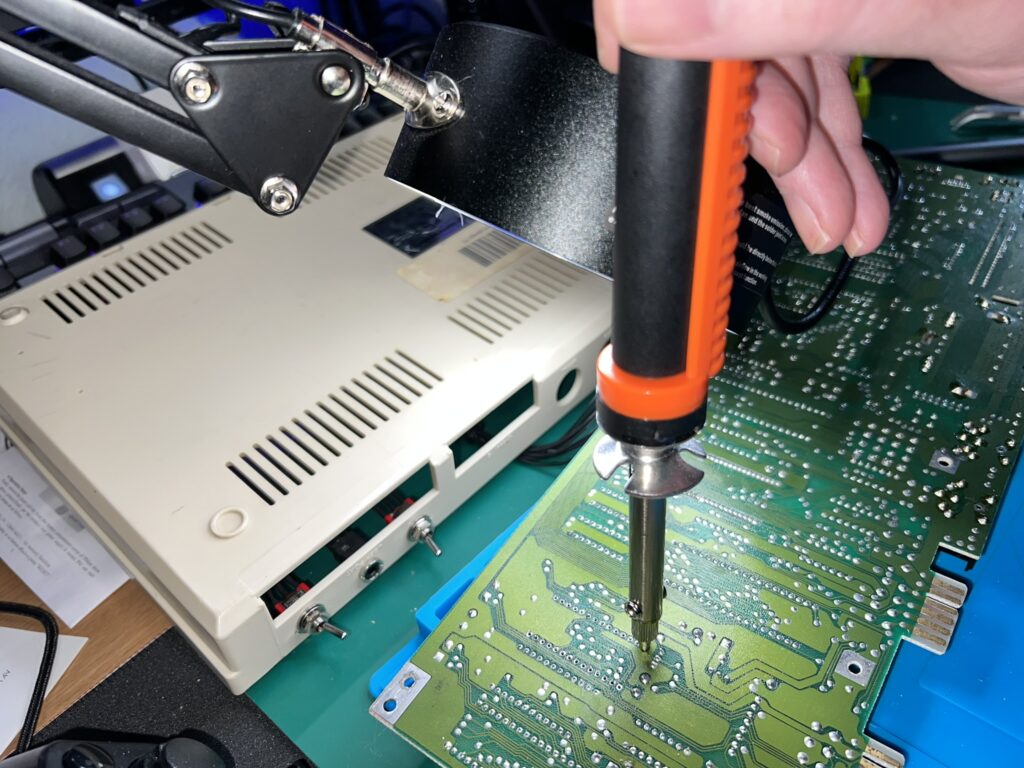
De-soldering the Kernal ROM with my new tool.


Of course things are never quite so simple and when I tried to remove the chip a few pins were still being held in place by a few bits of solder so I revisited those a couple of times before it finally came free.


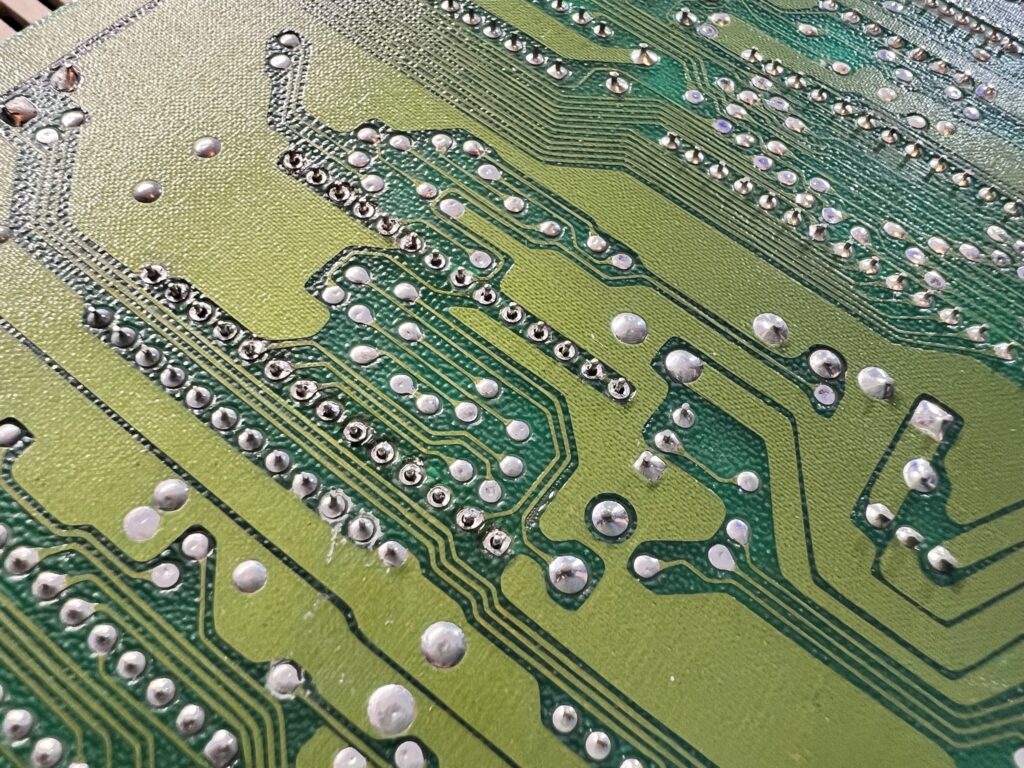
De-soldered and ready to remove.


Once I had removed the original kernal ROM I stored it away in a safe place and popped in the new socket, making sure the notch was in the correct place (facing the back of the C64).


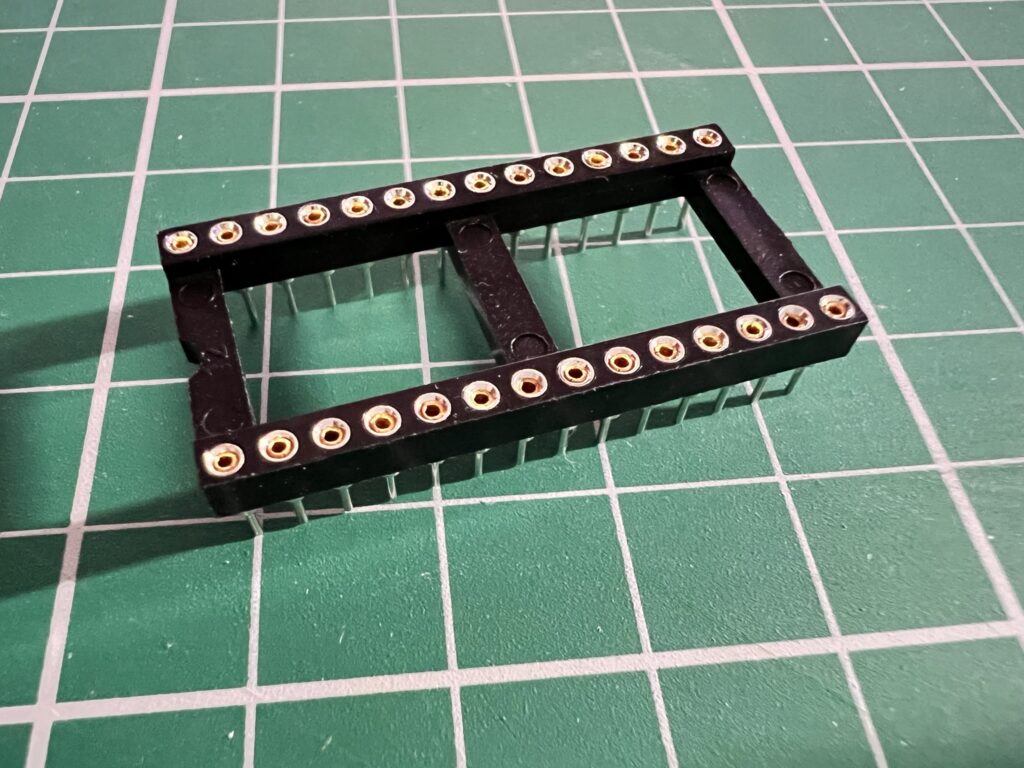
This is the 28pin socket I needed to install to take the JiffyDOS ROM.


I then soldered each corner of the socket in place whilst holding it in position with a few lumps of Blu Tack.


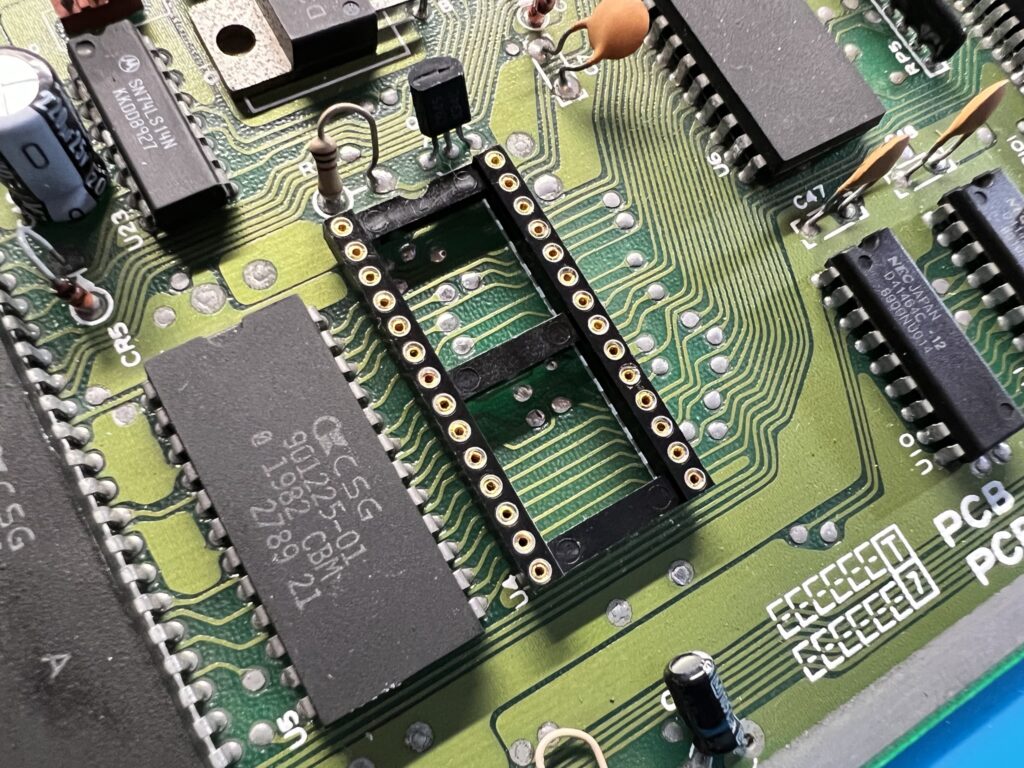
Socket soldered into place.


With the socket now held secure I soldered the rest of the pins. I always use a lead based solder as I just find it so much easier to work with than the lead-free stuff. I used flux to ensure the solder flowed nicely too which did leave a sticky mess to clean up afterwards but it came off easily with some isopropyl alcohol.


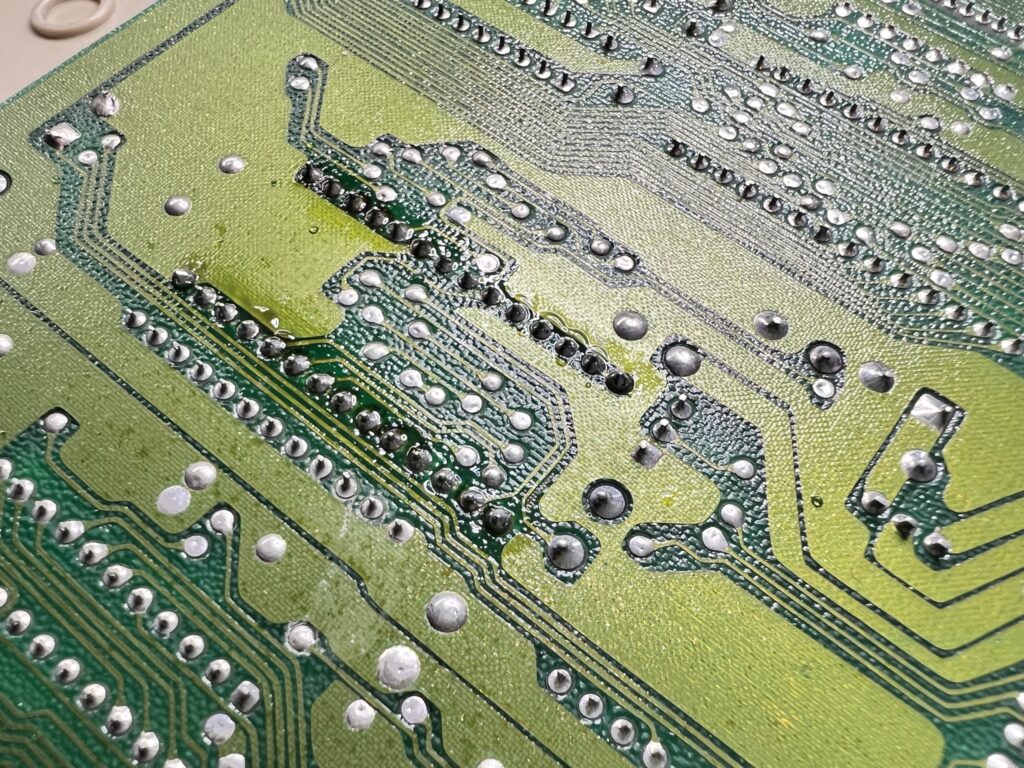
Socket now soldered into place. Flux still needs cleaning off.


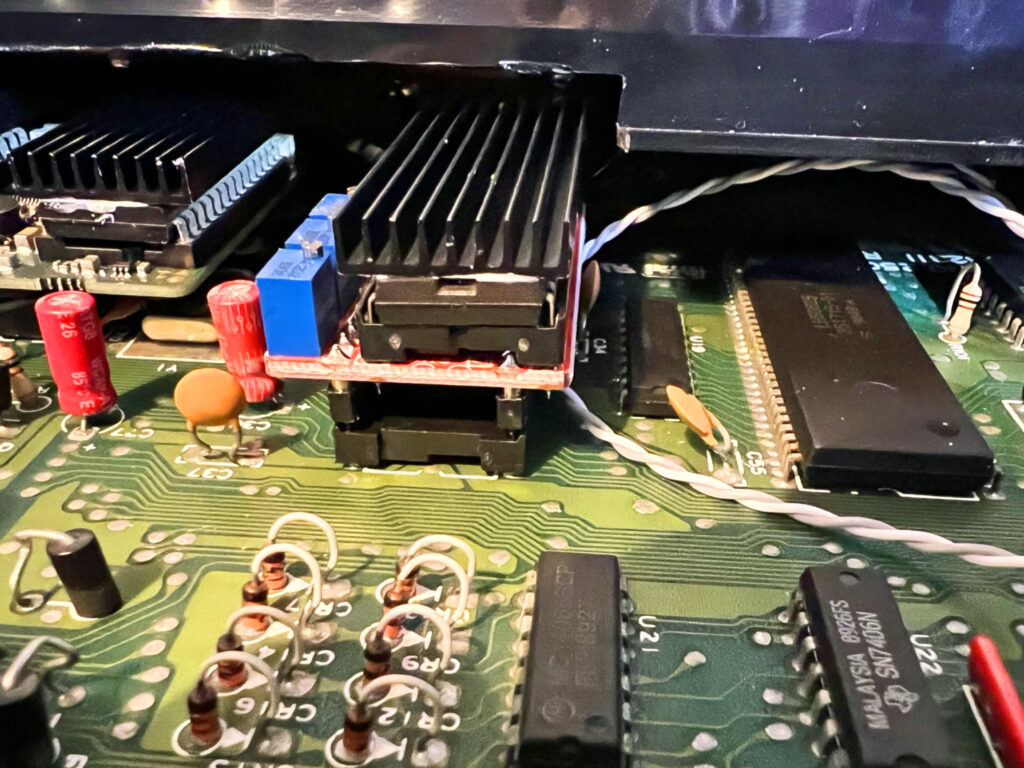
After satisfying myself that all my solder joints were ok (by using a magnifying glass) I reinstalled the mainboard into my C64 and popped in the JiffyDOS kernal ROM.


JiffyDOS

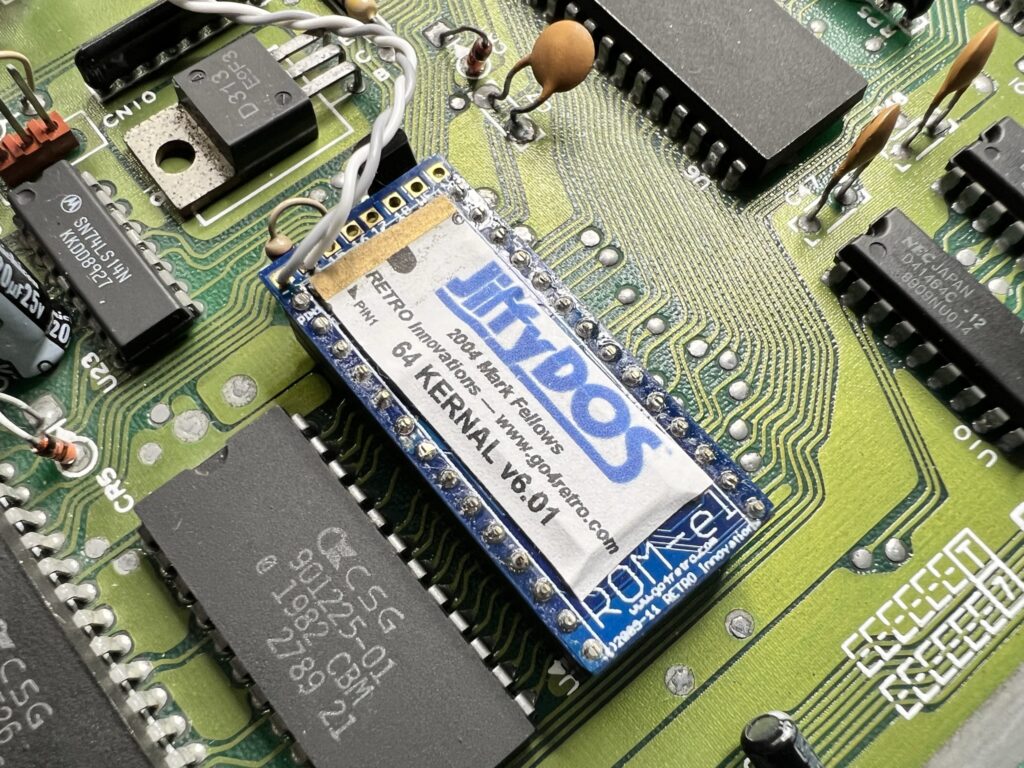
JiffyDOS ROM installed in the socket.


Now I just needed to find a home for the switch. I chose the area above the datasette port to mount the switch but it could have gone anywhere really.


JiffyDOS

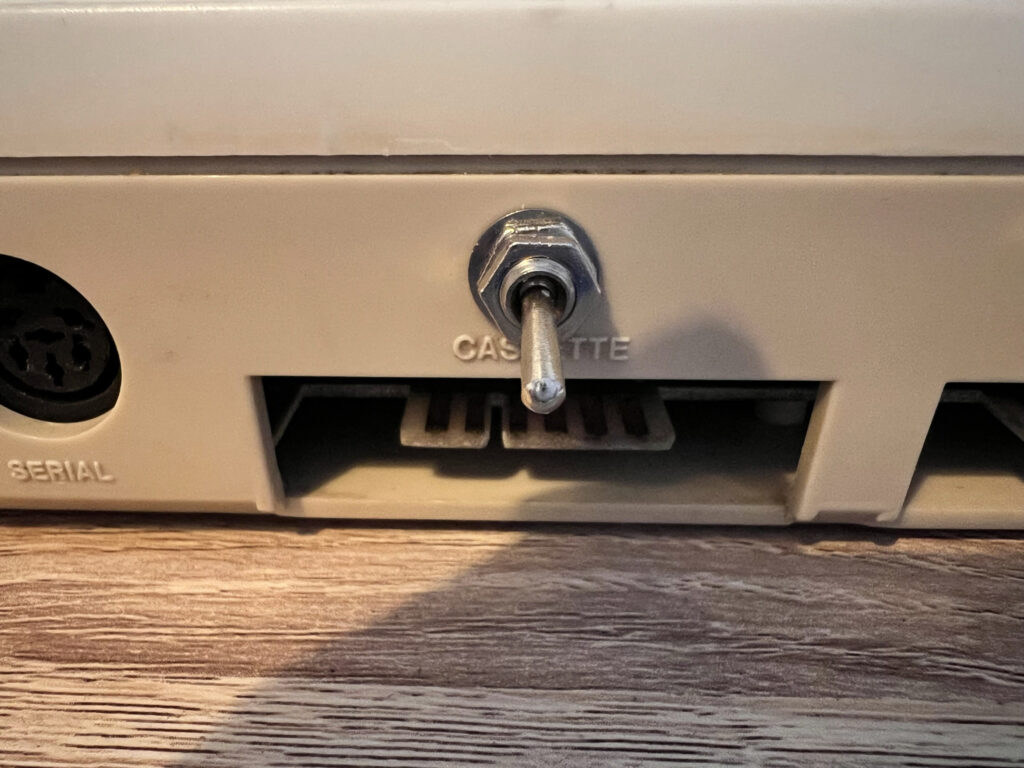
JiffyDOS toggle switch installed on the back of my C64C.


If I was bothered about drilling my case I could even have routed it through to the outside via the openings for the user/datasette ports.


JiffyDOS

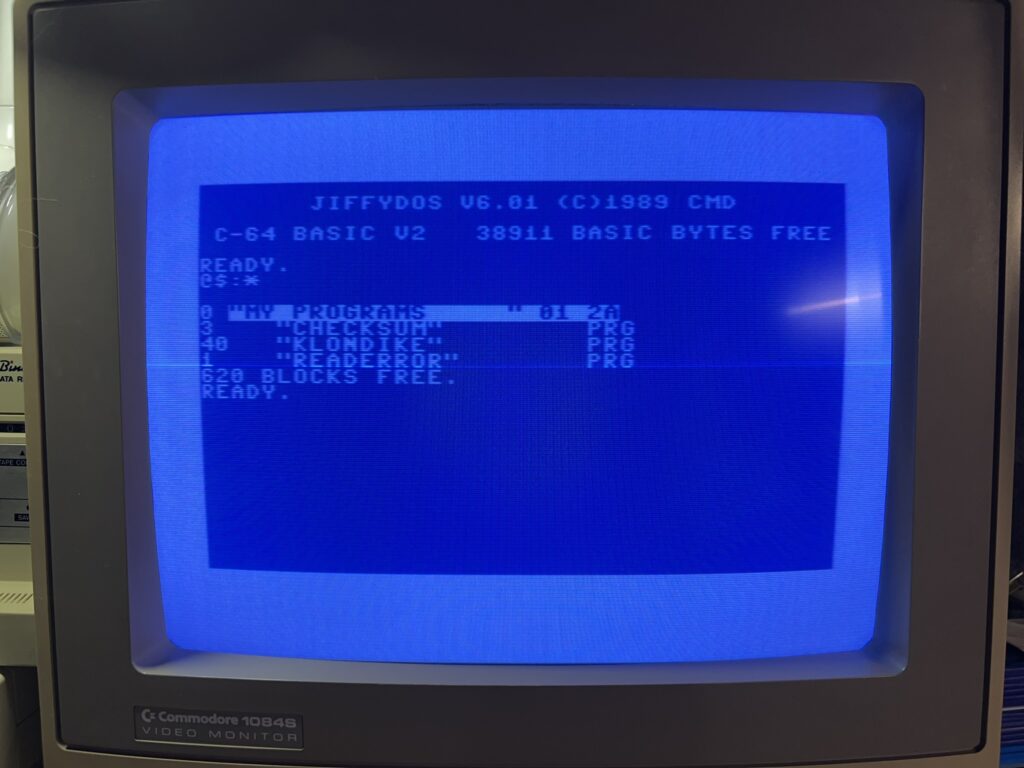
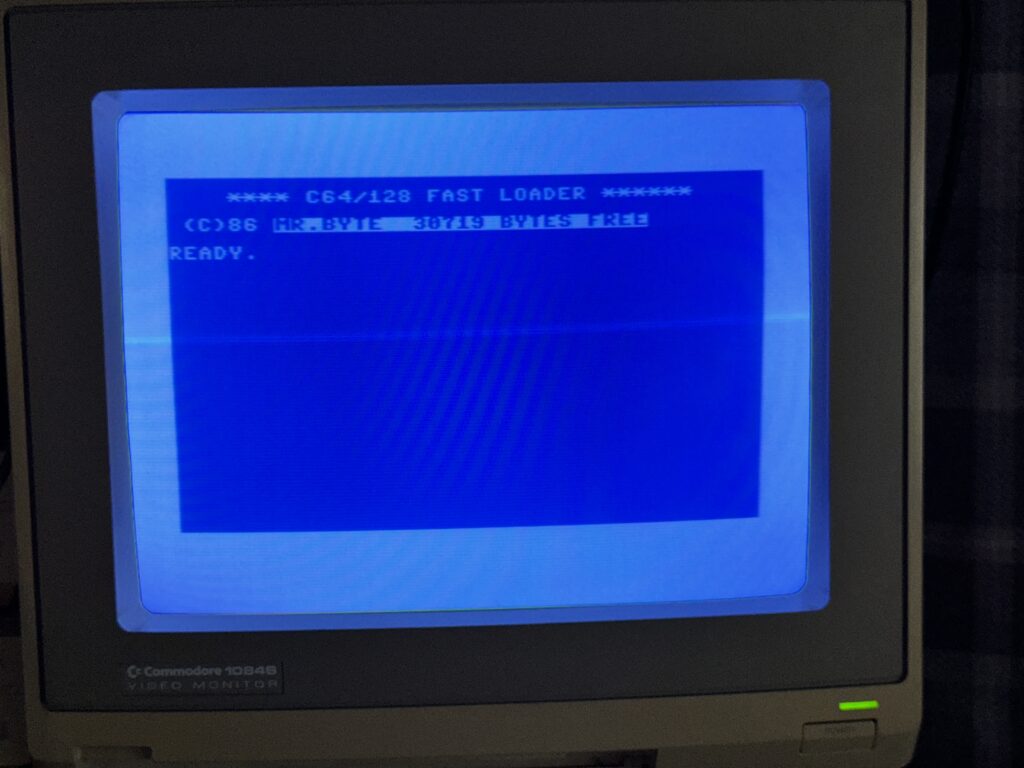
JiffyDOS Startup message.


With the install finished I put my C64 back together and booted her back up to make sure everything was working. I was greeted with a brand new message on startup; ‘JIFFYDOS V6.01 (C)1989 CMD’ which meant that the new Kernal was working. I turned my C64 off, flipped the switch and turned it back on to check I could still get the usual ‘BASIC V2’ message which I did. Happy days!

Phase one was complete. Next up was phase two – installing all the JiffyDOS ROM’s into my disk drives!


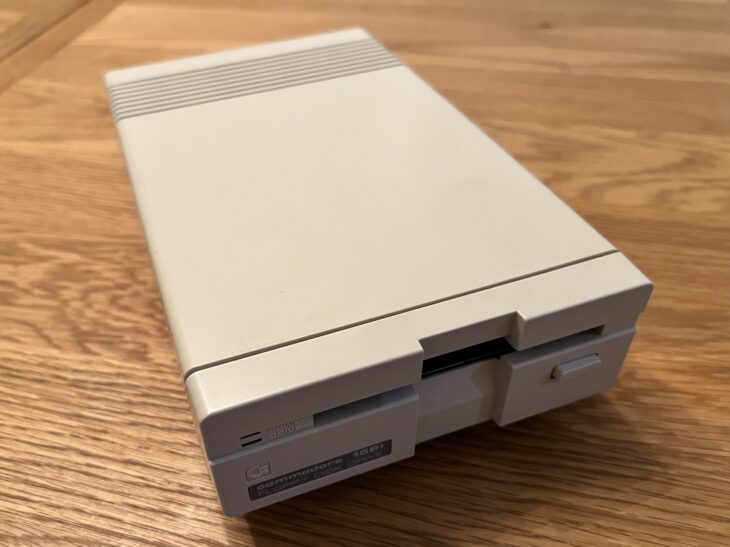
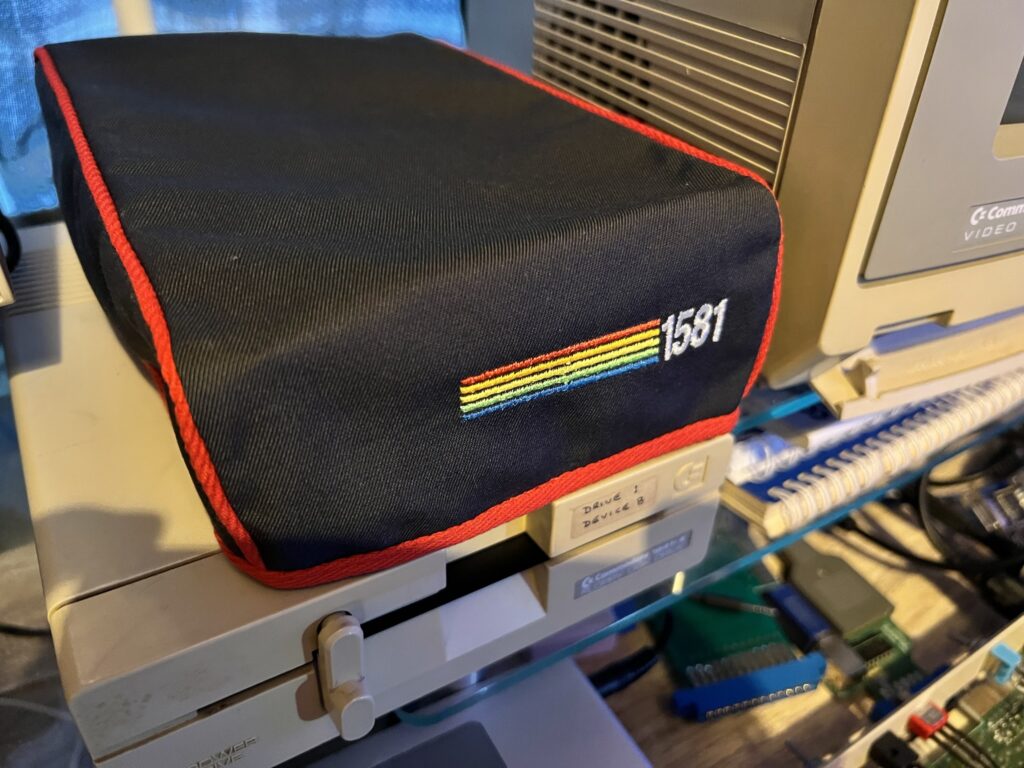
Installing JiffyDOS in my 1581 Drive

I started with the easiest drive to upgrade – my 1581. The version of the kernal for this drive doesn’t require a switch as it’s able to detect whether the C64 itself is running JiffyDOS and can switch modes on the fly automatically.

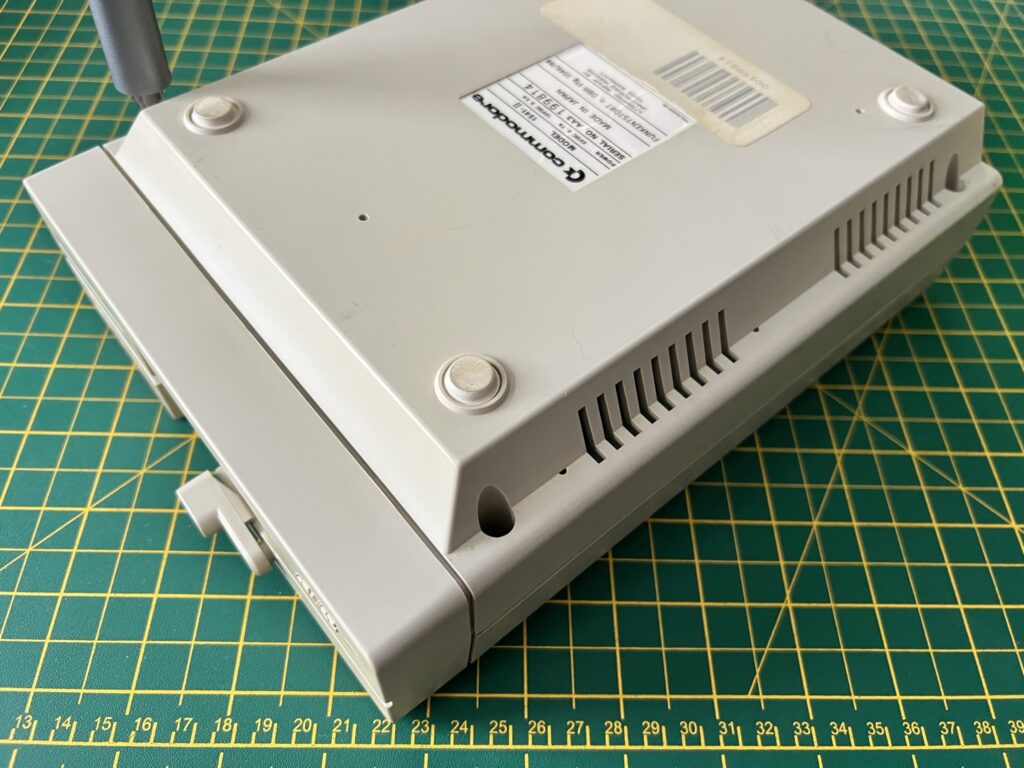
There were only 2 screws holding the two halves of the case together and once the top section was lifted off I could see the familiar steel casing of a 3.5″ drive inside.


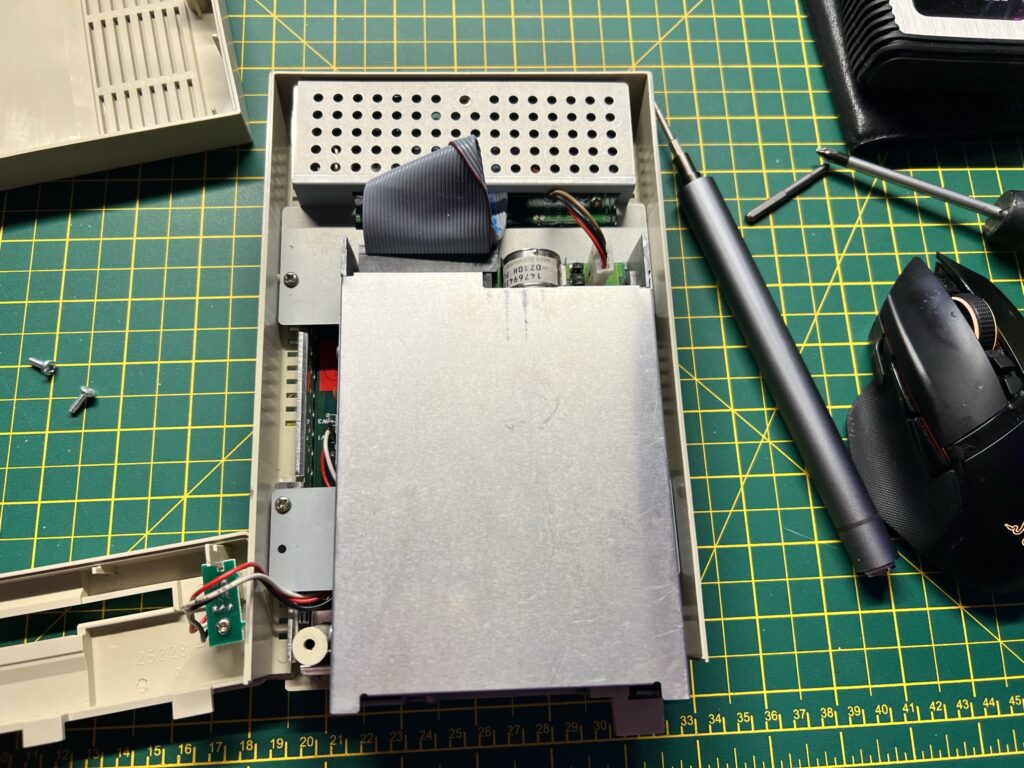
1581 drive with top cover removed.


This was held in place by four more screws and could be lifted out of the way entirely once they had been removed.


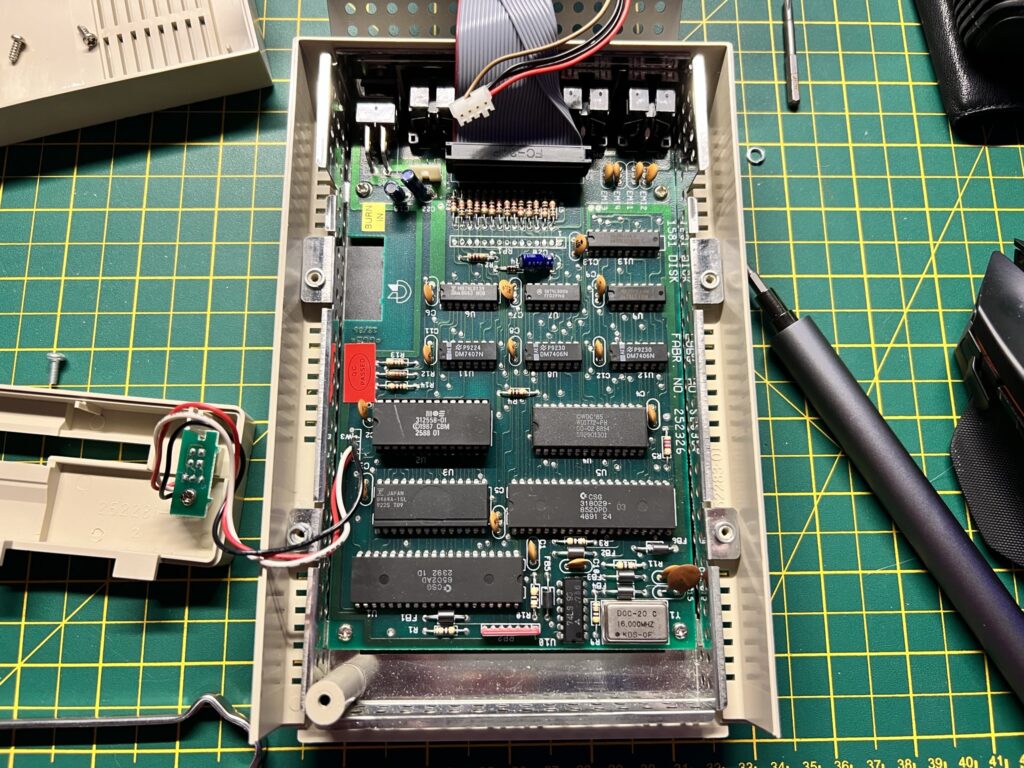
1581 drive mainboard.


Thankfully the kernal ROM was socketed which was a real stroke of luck as every other chip on the board was soldered directly in place.


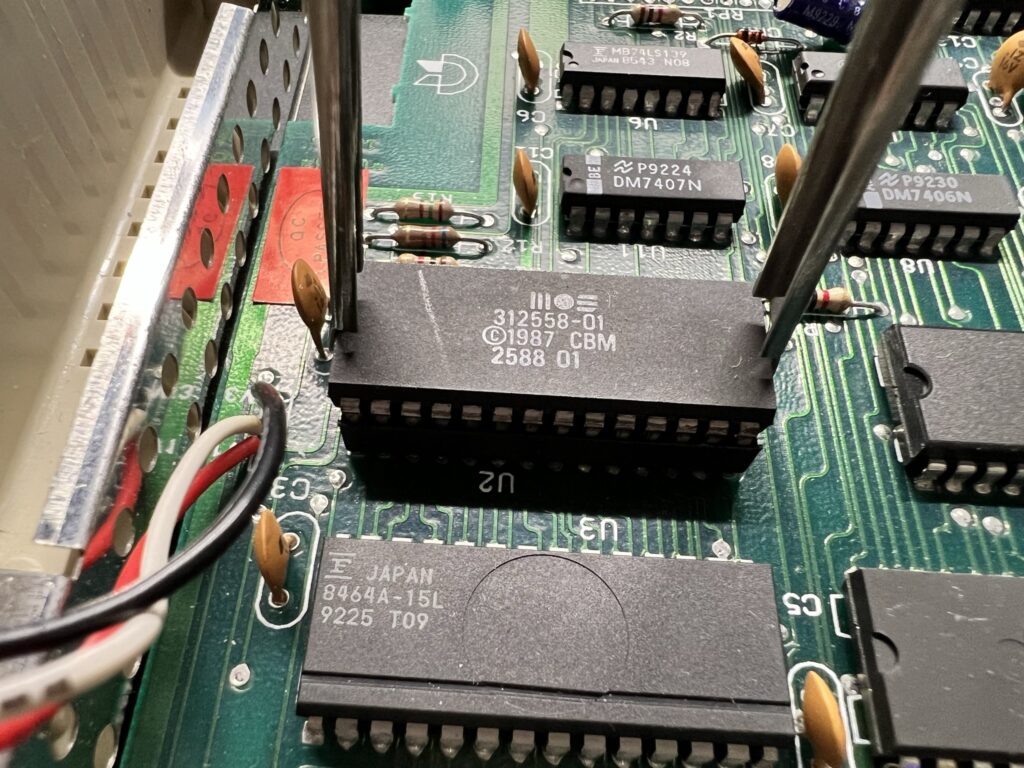
Removing the 1581 kernal ROM.


It needed a good old tug with the chip removal tool to get it budge but it parted ways with the socket eventually allowing me to drop in the replacement, taking care to make sure it was aligned correctly.


JiffyDOS

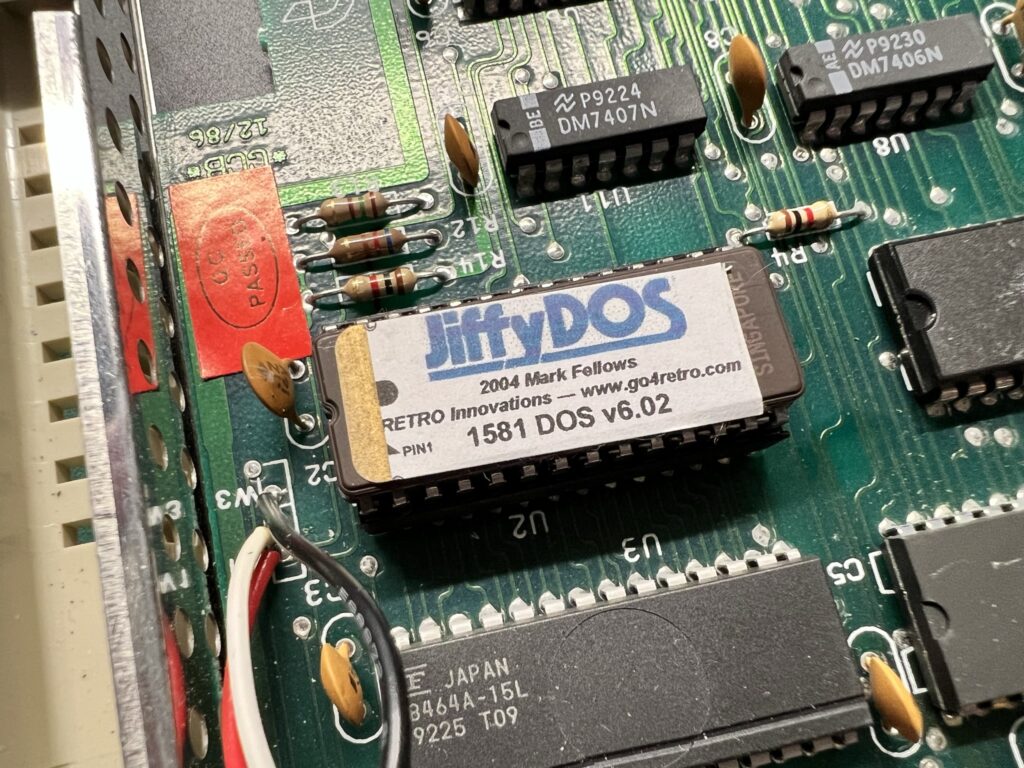
1581 JiffyDOS Kernal ROM installed.


With the new JiffyDOS kernal installed I put the drive back together again, hooked it back up to my C64 and powered everything back on. Using the ‘@’ command I was able to read the error channel of the drive which confirmed the V6 JiffyDOS ROM was working. Two installs down, two remaining!


JiffyDOS

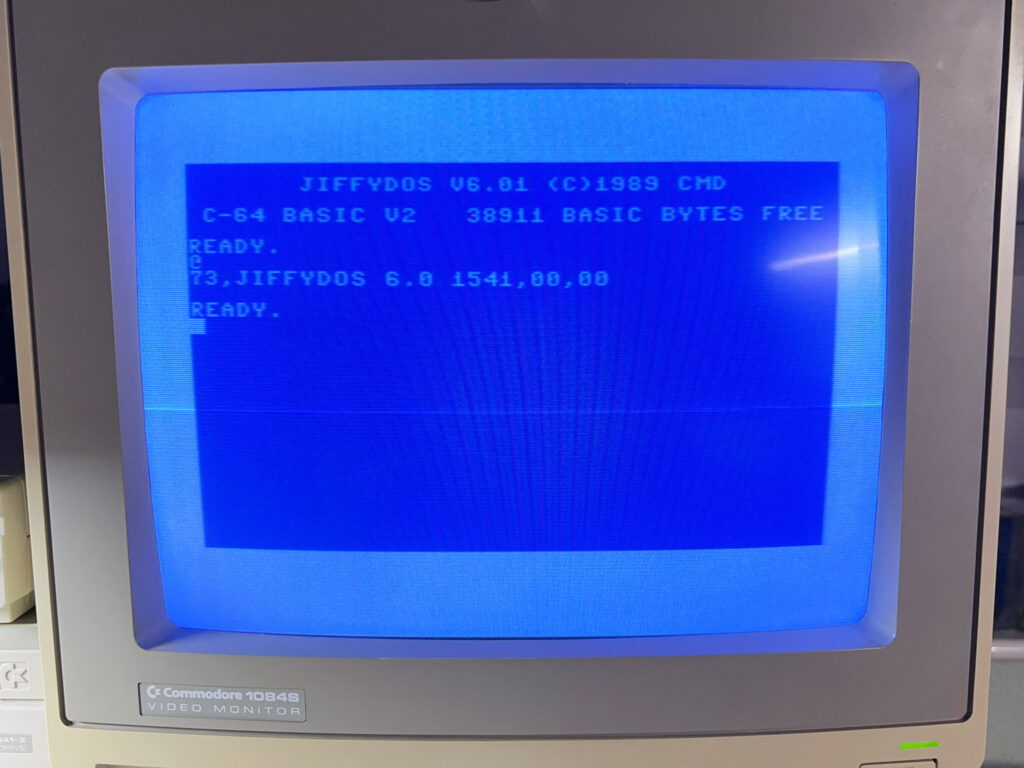
Reading the drive error channel (by pressing just one key!) to make sure the new ROM was working.


Installing JiffyDOS in my 1541-II Drives

Next up were my two 1541-II drives which I knew would be a little more involved as they would both need a small toggle switch installing to change between the standard kernal and JiffyDOS,


Removing the four screws holding the 1541-II case together.


There were four screws holding the two halves of the case together which I removed from the bottom of the drive. Flipping the whole case over then allowed the top half to be lifted off and placed out of the way.


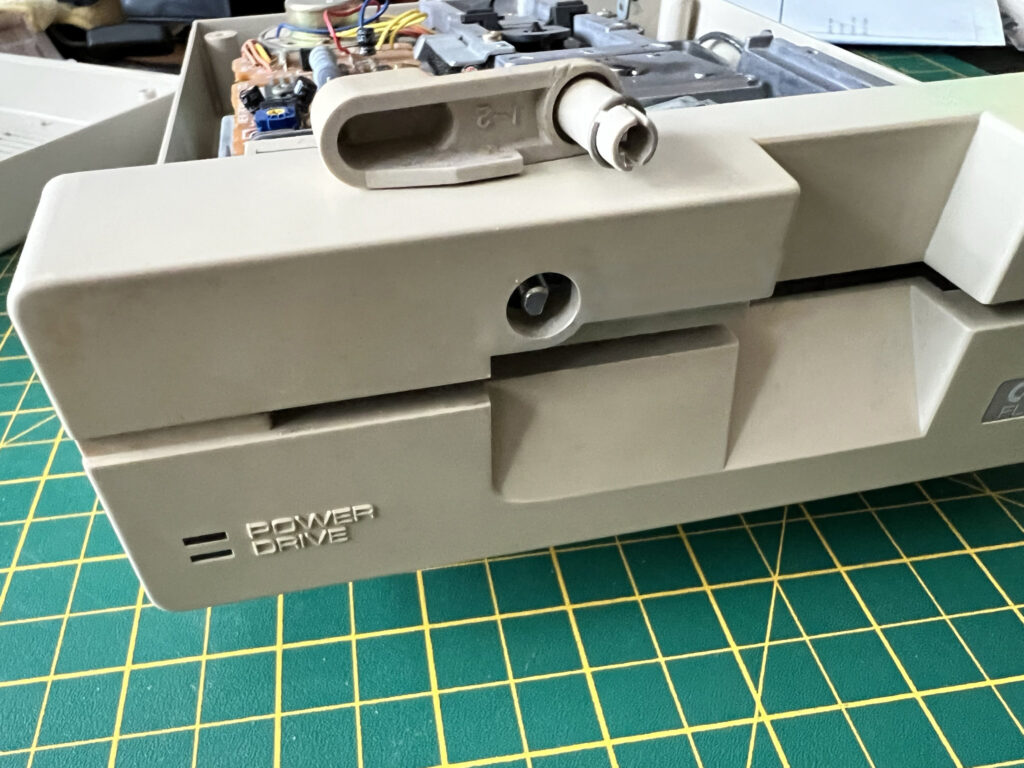
1541-II Drive latch lever removed.


The drive latch lever needed removing in order to get the front panel off. It just pulls off with the application of a bit of force, but shouldn’t require any tools.


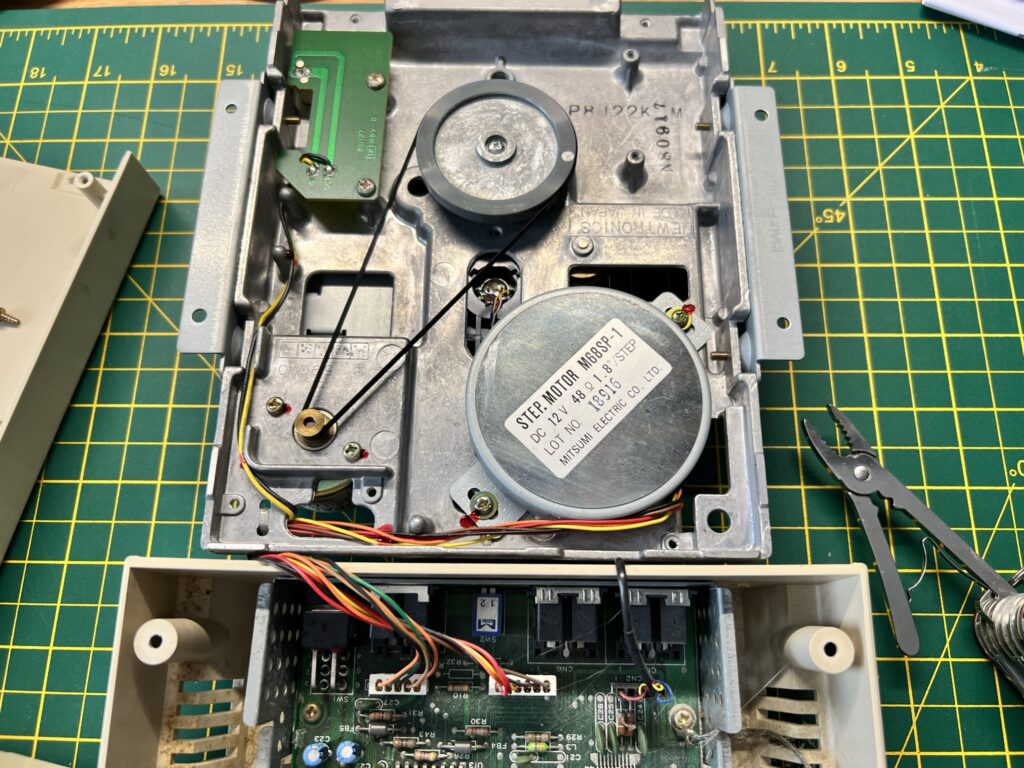
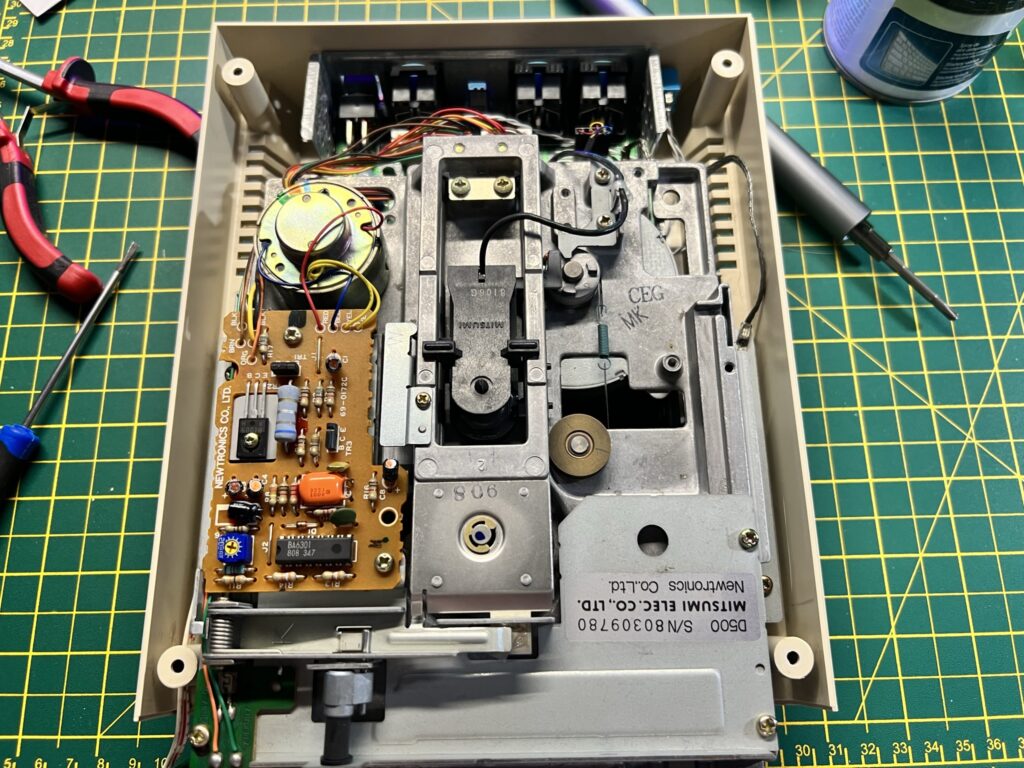
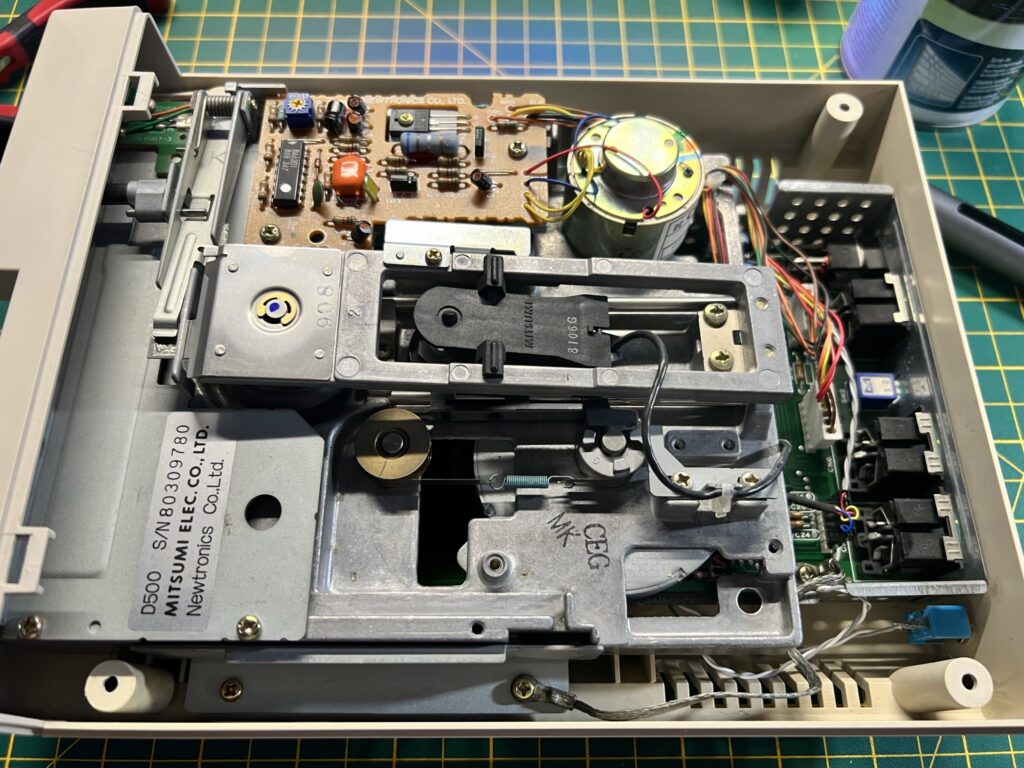
Drive mechanism flipped over out of the way allowing a clear view of the drive belt and stepper motor.


With the front bezel removed there were an additional four screws holding the actual disk drive mechanism to the base of the case. After these were removed I was able to flip the mechanism over and place it at the back of the case leaving all the cables still attached.


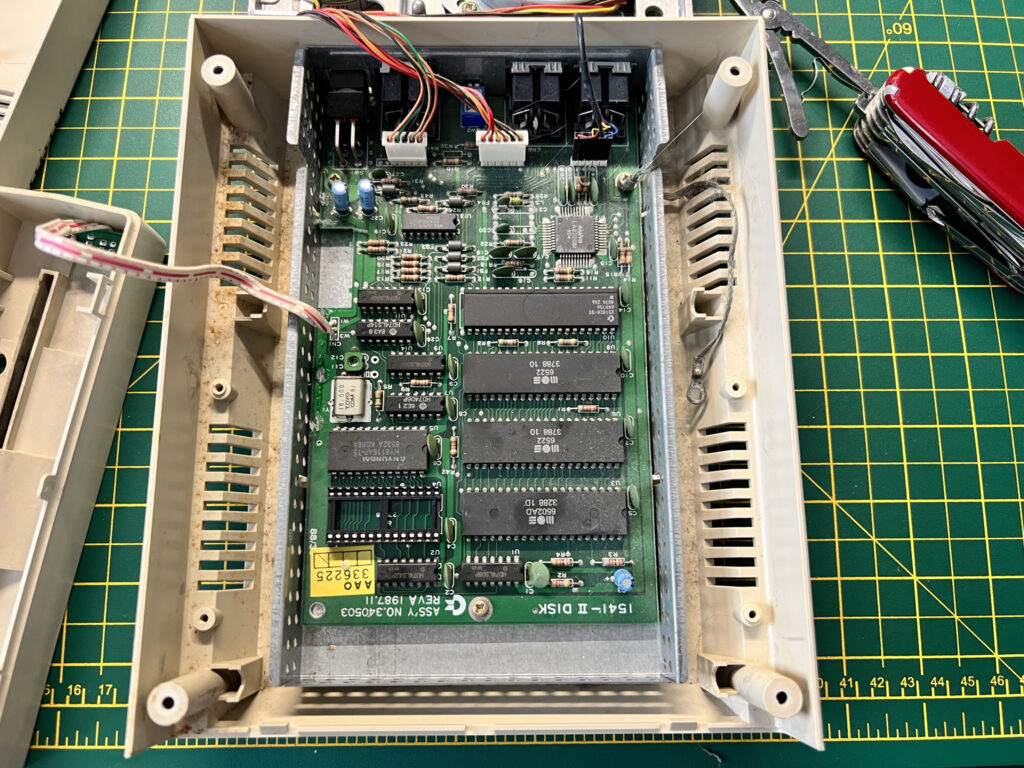
1541-II mainboard with kernal ROM removed (bottom left). Not yet had it’s spring clean in this photo!


The kernal ROM was also socketed on the drive so it was an easy job to remove it (bottom left in the photo above). At this point I realised the inside of the case was pretty dirty so I actually removed the whole board and gave it a good clean before continuing!


JiffyDOS

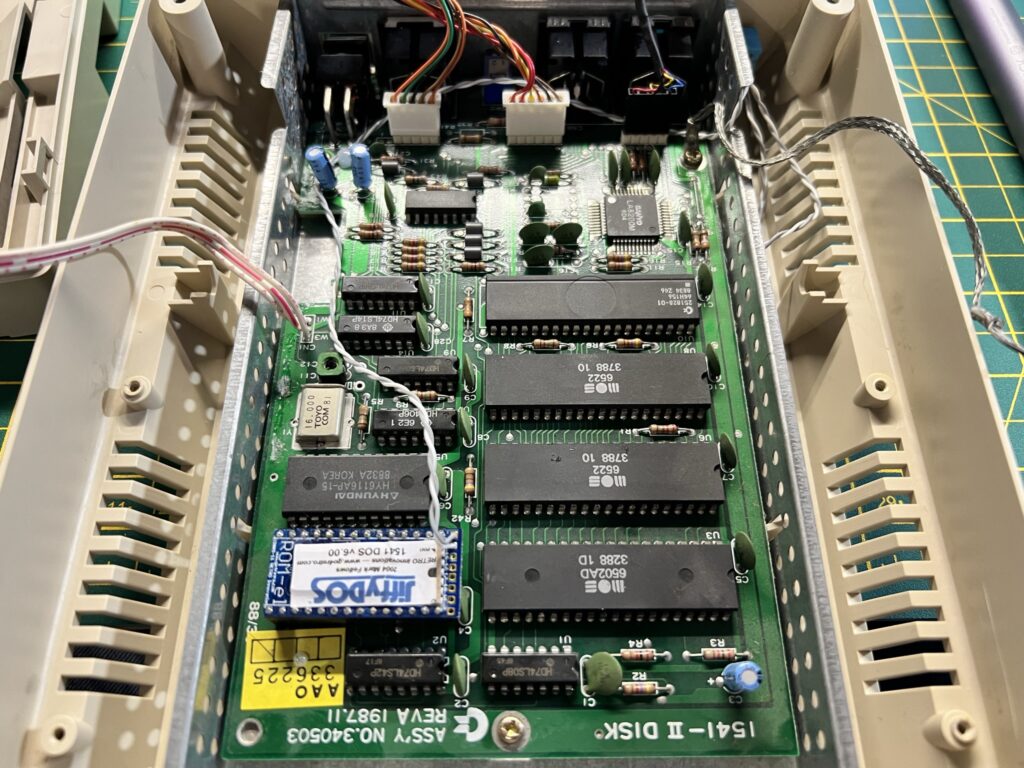
1541-II JiffyDOS ROM fitted – after the drive had received a spring clean!


I fitted the JiffyDOS ROM and then routed the wire through to the back of the case where I found a nice spot to mount the switch.


JiffyDOS

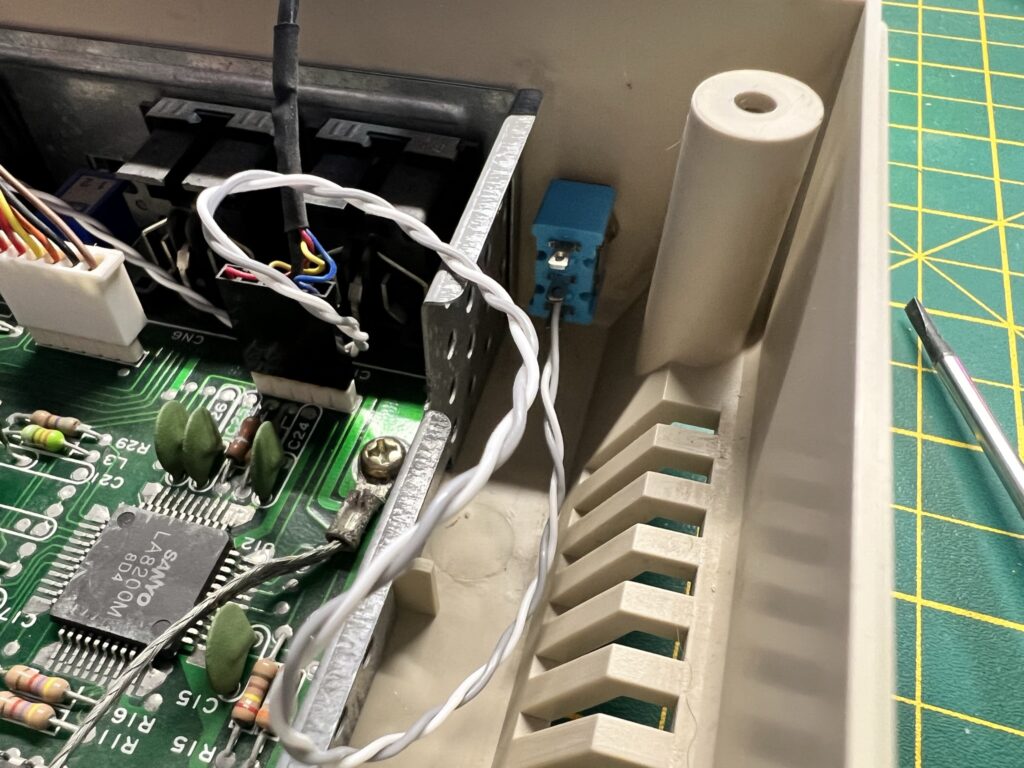
1541-II JiffyDOS switch location.


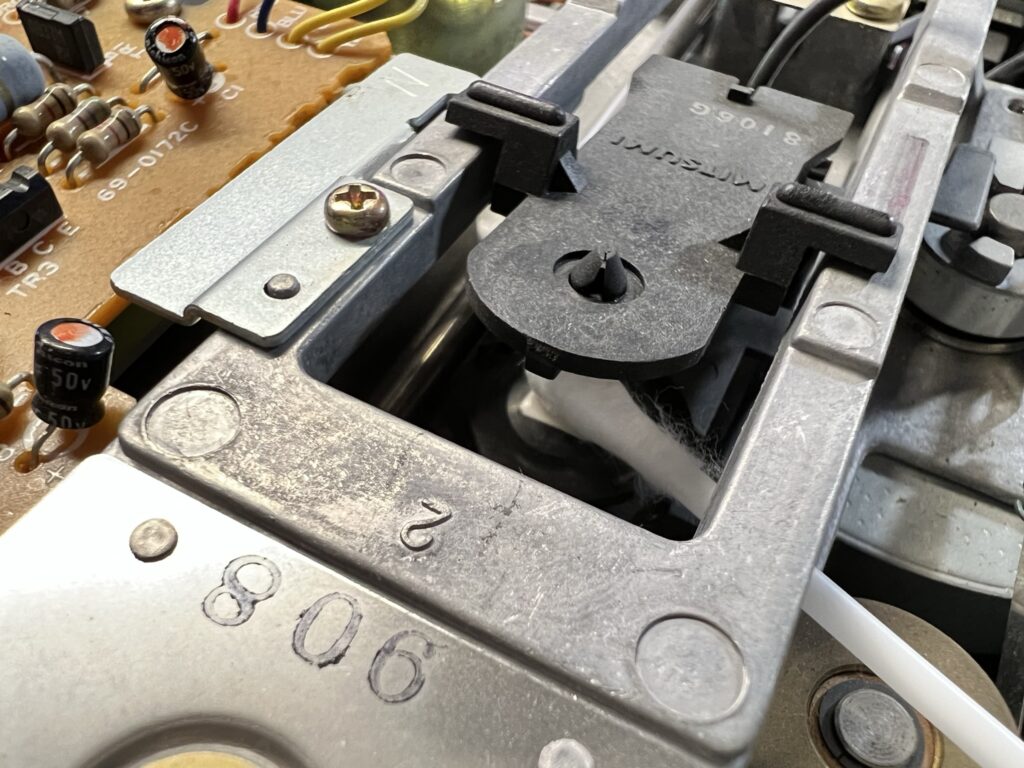
I replaced the disk mechanism, making sure that I didn’t trap any of the wires underneath and that they wouldn’t foul the drive belt either.


Re-fitting the drive mechanism.


Whilst I had the lid off I thought I may as well give the drive head a quick clean. Normally I just use a 5.25″ cleaning floppy every few months but theres no substitute for a proper clean.


JiffyDOS

Another view of 1541-II with JiffyDOS ROM and switch installed.


I used a few drops of isopropyl alcohol on a cotton bud and gently wiped across the head a few times to ensure it was in tip top condition.


Giving the read/write head a quick clean with a cotton bud and some isopropyl alcohol.


With the new JiffyDOS ROM installed, the case sparkling and head shiny clean I reassembled everything and gave it quick test before repeating the entire process on my other 1541-II drive.


JiffyDOS

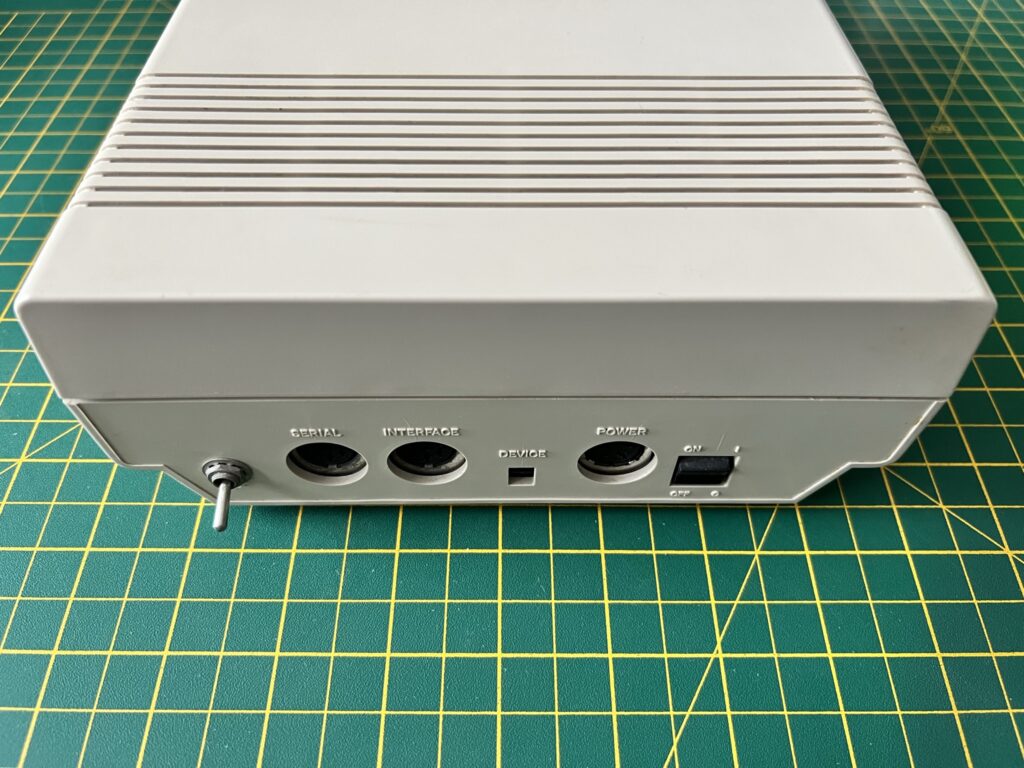
Back of the 1541-II drive showing the location of the JiffyDOS selector switch.


Speed Tests

Although the process took a little while longer than I expected (thanks mostly to carrying out an impromptu spring clean) the actual installs went smoothly. It was finally time to see what sort of benefits the JiffyDOS system would bring!

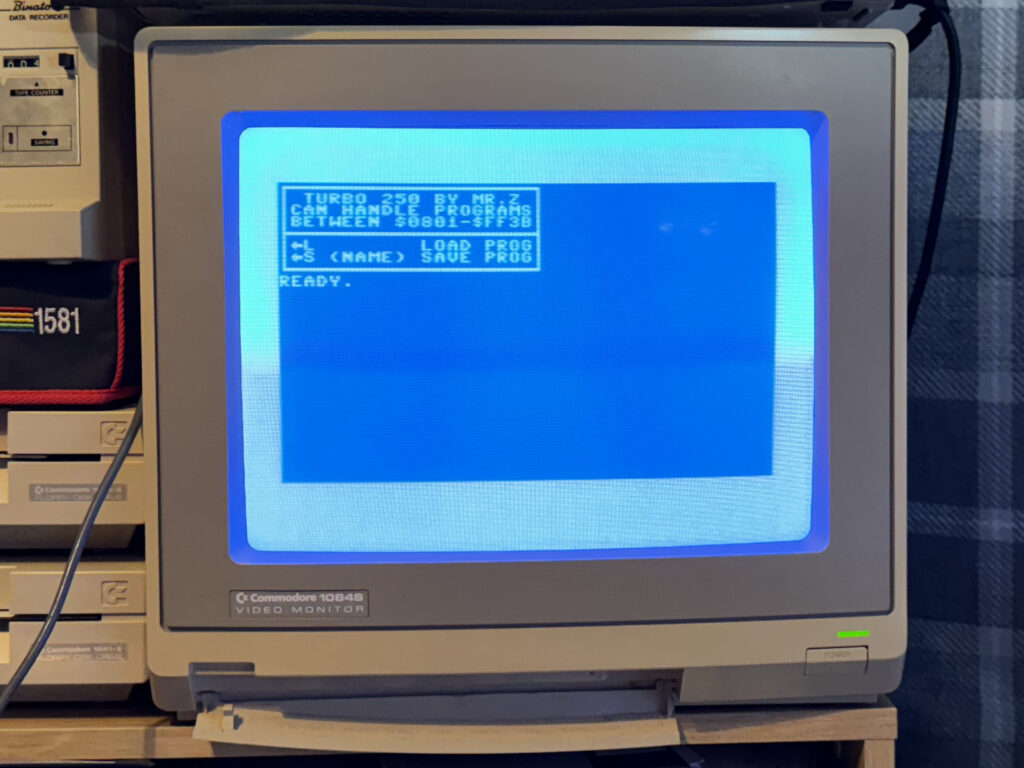
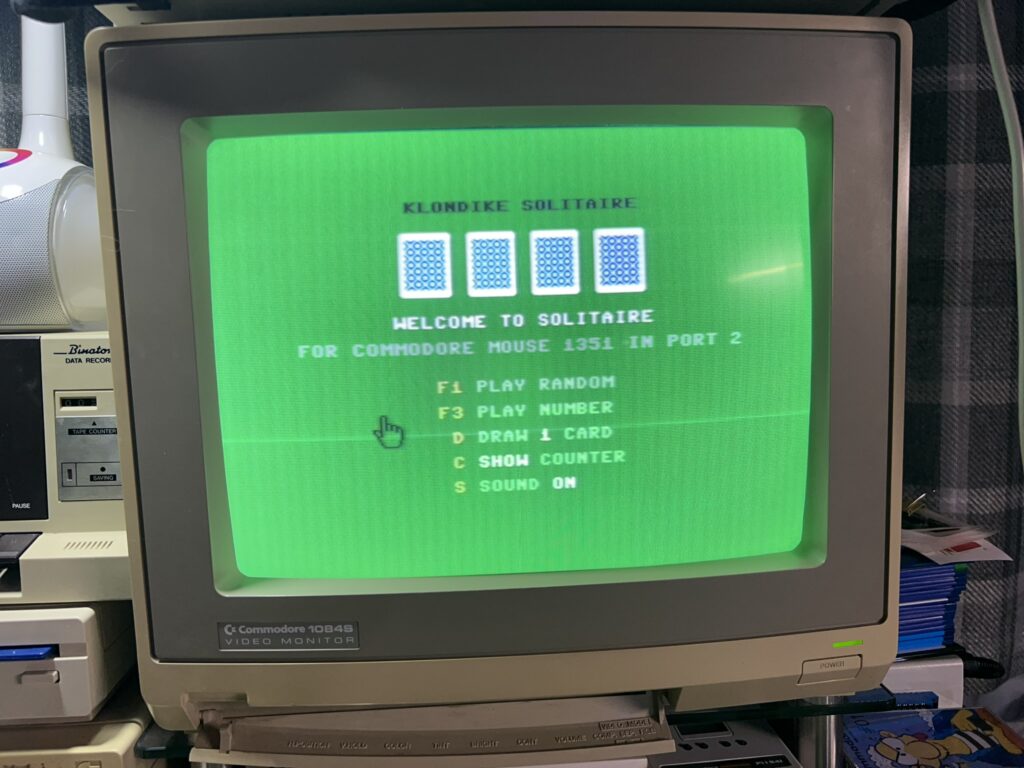
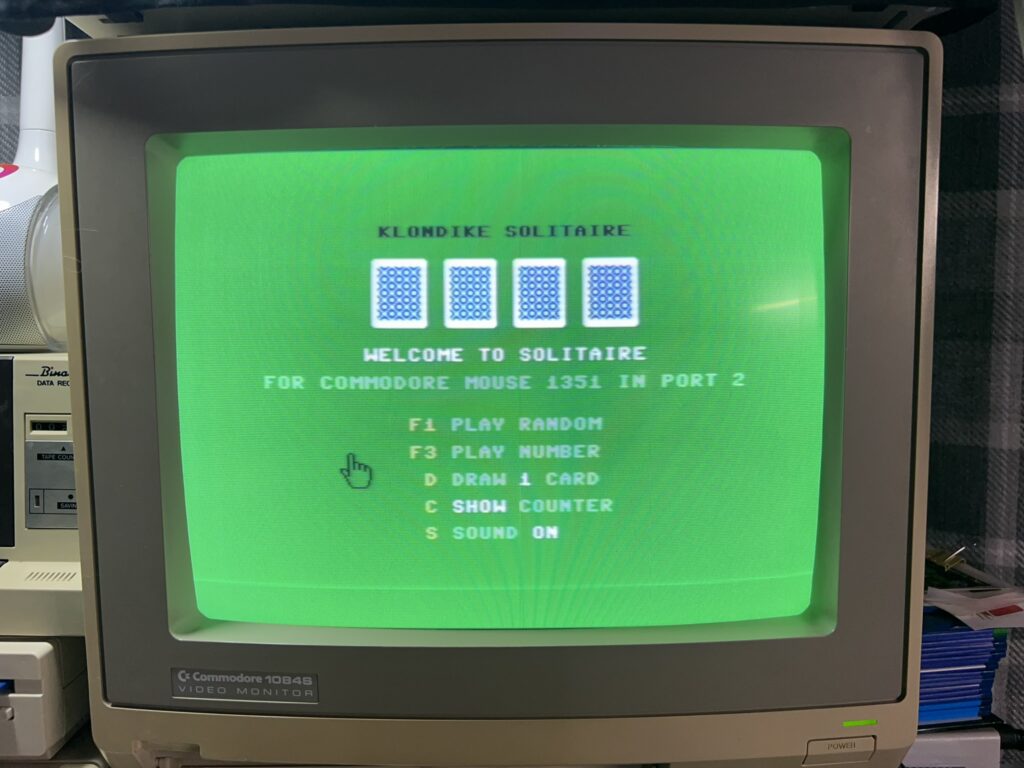
To test the speed increase I used a 40 block program, Klondike, that I had typed in from a listing a while back. I copied the same file onto both a 3.5″ floppy and a 5.25″ floppy. I then timed how long the program took to load on each drive with the standard kernal and then with JiffyDOS enabled. Here’s the results:


JiffyDOS Speed Test

DriveStandard Load TimeJiffyDOS Load Time
1541-II
27 seconds5 seconds
158121 seconds5 seconds
1541 Ultimate-II+22 seconds5.5 seconds
Time taken to load a 40 block BASIC program off a 5.25" disk in a 1541-II, a 3,5" disk in a 1581 drive, and a 1541 Ultimate-II+ cartridge with and without the use of JiffyDOS..


The speed improvement was pretty dramatic, going from 27 seconds to load the game on the 1541 drive to just 5 seconds – a reduction in the loading time of over 80%. The speed increase was also very impressive on the 1581, reducing the loading time by 76%. It’s interesting to note that the standard loading time on the 1581 was already 6 seconds quicker than on the 1541-II drive thanks to an improved read/write speed.


JiffyDOS

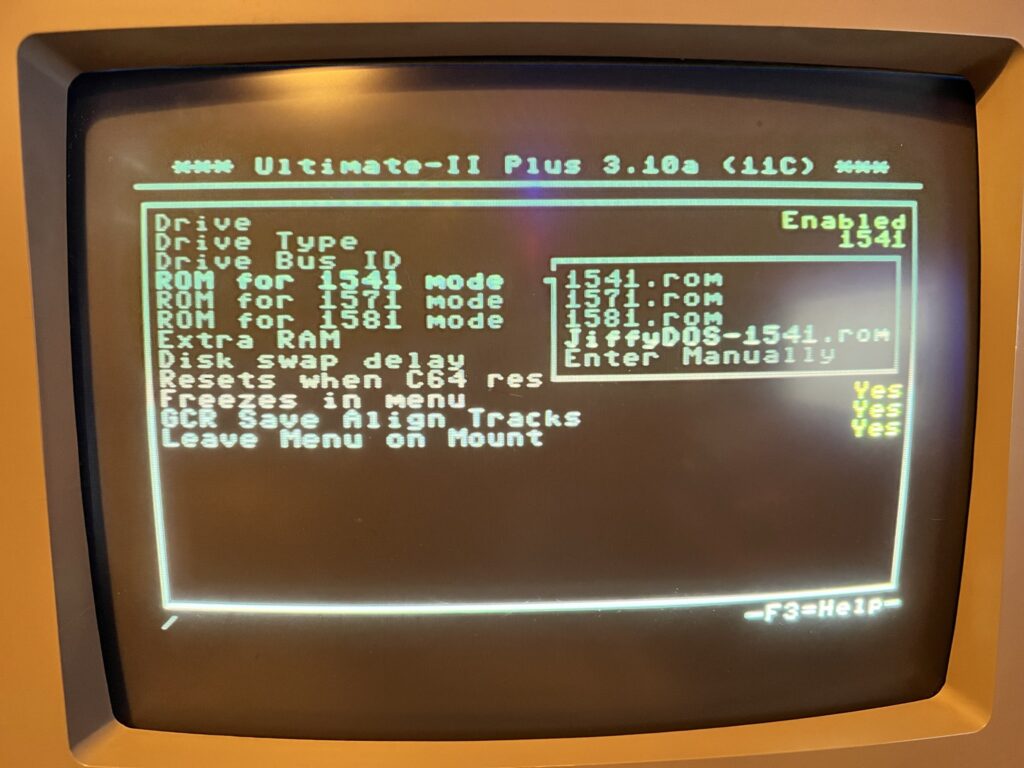
Assigning a digital JiffyDOS ROM to use in my 1541 Ultimate-II .


I also tested JiffyDOS out on my 1541 Ultimate-II+ device after installing a digital copy of the 1541-II ROM into the Flash memory of the cart. I got almost identical results to my real 1581 drive with my stopwatch recording times just a whisker slower for the virtual drive.


Quality of Life Improvements

JiffyDOS offers a lot more than just data transfer speed increases, it actually incorporates a complete implementation of the Commodore DOS 5.1 wedge command set in ROM. What this means in practise is an end to the ridiculously complex strings of commands needed to perform simple tasks like formatting a disk and the introduction of a new easy to use command set. Being in ROM means these benefits are available all the time, from the moment you power on your computer.

Here’s a few examples:

Reading a disk directory: Normally this would require entering the command ‘LOAD”$”,8’ which would load the directory of a disk into the C64’s memory so you can list it. It works and it’s not particularly difficult to remember but it wipes the C64’s memory in the process so is not ideal. With JiffyDOS you can simply enter ‘@$’ and it will LIST the directory of the default drive WITHOUT destroying whatever program is resident in RAM. In fact you don’t even need to type it in, simply press ‘F1’ and then hit RETURN. A whole bunch of common commands are pre-programmed into the function keys to make your life easier.

Formatting a disk: This would normally require the following command ‘OPEN 1,8,15,”N:NEWDISK,01″:CLOSE 1’. However using JiffyDOS you simply enter ‘@N:NEWDISK,01’ which is much easier to remember.

Reading the error channel: This is a much more striking example. Remember trying to find out why the error light of your drive was flashing? You would normally have to type in a small BASIC program like this:

10 OPEN 15,8,15
20 INPUT#15,F,E$,T,S
30 PRINT F;E$;T;S
40 CLOSE 15

However with JiffyDOS all you do is enter ‘@’ (or ‘@””,9’ for a non default drive number) to achieve the same thing! Incidentally this feature is also really useful for checking that JiffyDOS is enabled and working on a specific drive when first powering up.


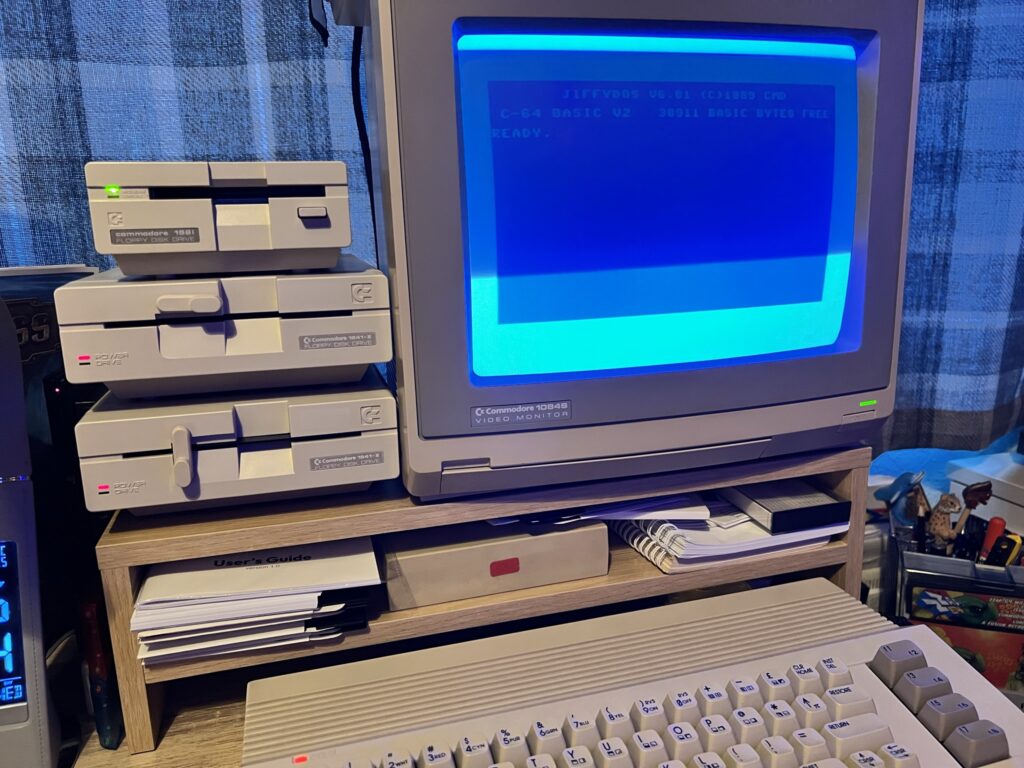
My Commodore 64 hooked up to my 1541-II and 1581 drives.


In addition to dozens of new easy to use disk commands there are other amazing new features like a built-in file copier. Copying files from one disk to another is now a doddle – simply set the source and target drive, tag files you want to copy from a directory listing using ‘CTRL+W’ and then ‘RUN’ the copy.

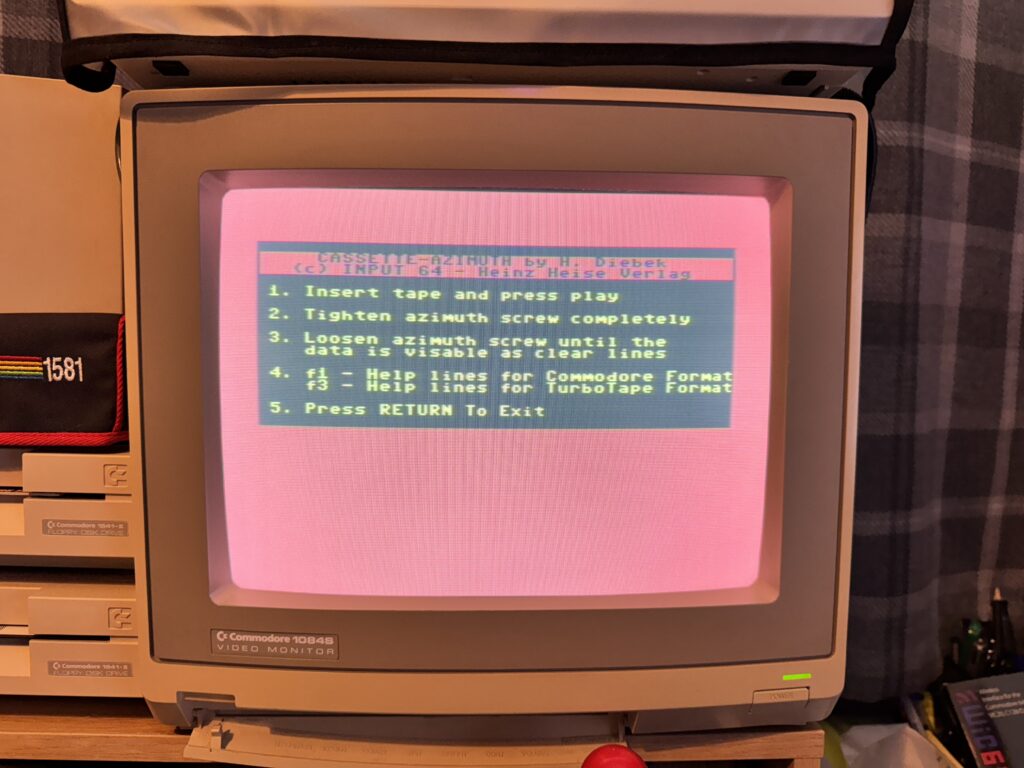
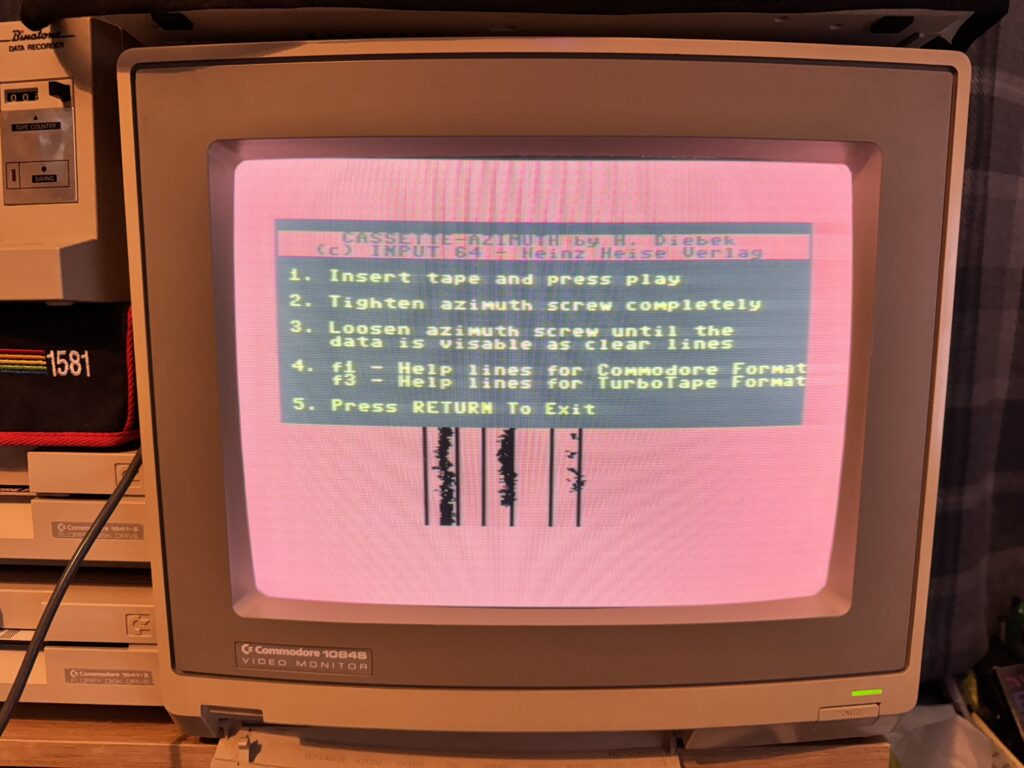
Now you might be wondering, as I did, how all these extra commands and functions have been added to the kernal without squeezing out other functionality. Well in truth they haven’t – the datasette routines have been removed to make space for them. This means that whilst JiffyDOS is enabled you are unable to load or save data from cassette. In reality this is no great hardship though as a quick power cycle and flick of the switch will revert back to the regular kernal and enable tape operations.

JiffyDOS is an amazing upgrade and something I wish I had installed years ago. The speed improvement it brings is pretty amazing but it’s probably all the new DOS features and commands that I appreciate the most. They turn what was, in all honesty, a pretty horrible and unintuitive user experience, into a pleasure.

Installing a LumaFix64

LumaFix64

I’ve actually had this LumaFix64 kit (from SharewarePlus) lurking around the back of my ‘future projects’ box for quite a while now. I was waiting for a good opportunity to fit it so whilst I had my C64 in bits recently to work on a JiffyDOS install I thought the time was definitely right to install it.

In a nutshell the LumaFix64 is designed to help remove, or at least reduce the vertical lines and chequerboarding that you often experience with the Commodore 64’s video output, particularly when hooked up to a modern flat screen TV/Monitor. These issues are caused by noise generated within the VIC-II video chip. TheLumaFix64 allows you to adjust AEC, PHIO and CHR using tiny little potentiometers (pots) on the device itself.  According to the manual it is able to improve the displayed image by inverting these errant signals and feeding them back into the Luma signal.


This slideshow requires JavaScript.


The device itself came supplied in a small Ziplock bag along with a small manual and a warning card that says you might have to do a lot of adjusting. With hindsight I now know exactly why they included this card!


LumaFix64

Close-up of the LumaFix64 device.


Thankfully my VIC-II chip is socketed so installing the LumaFix64 was pretty straightforward. All I had to do was remove the VIC-II, install the LumaFix64 into the now empty socket and then put the VIC-II chip into the socket on the LumaFix64.


LumaFix64

LumaFix64 installed and ready to go!


With the LumaFix64 installed I turned on my C64 to check everything was still working OK and was immediately horrified at the sight before me. Rather than improve the image, it had completely ruined it, so much so that I actually thought I’d damaged the VIC-II somehow during the installation.


C64 vertical bars

Noooooooooo! This is how the display looked immediately after installing the LumaFix64.


Fearing the worst but hoping for the best I started turning the topmost Pot (AEC). I turned and turned and turned it and nothing seemed to happen at all. Was it broken? Had I turned it too far? Turns out I still hadn’t turned it enough! After a few more twists of my screwdriver the image started to improve until eventually I heard a faint ‘click’ which signified I had turned it as far as it would allow. I then turned it back the other way and did some further fine tuning until I got the best image I could before moving on to the next pot .

Next I moved onto the centre pot (PHIO) and adjusted that back and forth until I got the best looking image from this pot. Same deal with the third and final part of the puzzle (CHR) which didn’t need too much tuning to reach a sweet spot. I went back and forth like this a few times, cycling through the 3 pots until I was finally happy with the image. I didn’t time it but the whole process of tweaking the pots probably took around twenty minutes. There was no real methodology to it, just trial and error. With the benefit of hindsight I should have marked the screwdriver in some way before starting so I knew how many full rotations I’d made. It was pretty much impossible to keep track after the first few twists but I got there in the end which is all that really matters.


C64 Vertical Bars

This is what the vertical bars looked like before installing the LumaFix64. Not terrible but room for improvement.


When I used to have my C64 connected to an LCD TV the image was significantly worse than the one I now enjoy on my 1084S and they (LCD’s) are really the main use case scenario for the LumaFix. The C64 was designed to display images on CRT’s so you would expect a decent picture when using one. The picture I had beforehand (on the 1084) was pretty good already and the vertical bars were only really noticeable on light coloured screens like the green one above. However I was able to almost completely eradicate them with patience using the LumaFix as you can see in the photo below. I do think they are still very faintly visible and maybe I could improve the image even more if I persevered but I’m happy with the quality now so will leave well alone.


Improved image after tinkering with the LumaFix64.


The only other problem I ran into was the result of me previously attaching a heat-sink to my VIC-II chip. With the added height of the LumaFix64 it was simply too tall to fit under the keyboard. As a result I had to elongate the cutaway section I had previously made in the black plastic frame (to fit over my SIDFX) to accommodate the VIC-II as well. There would have been just enough clearance without the heartsink..


LumaFix64

Keyboard modification to clear the LumaFix64 + VIC-II Chip + Heatsink combo!


All in this was a pretty simple, cheap (less than £20) upgrade that produced a small but noticeable improvement in image quality. All it requires is a little bit of patience to dial in the correct settings for the three pots. Of course if your VIC-II isn’t socketed then it’s a much bigger job and depending on your skills and/or available equipment you might want to reconsider. Similarly, if you have a heatsink fitted to your VIC-II like me then factor that in to your buying/installation decision too.

Commodore 1581 Disk Drive

The 1581 was the last disk drive Commodore produced for their 8-bit range of machines way back in 1987. It should look instantly familiar to Amiga users as it looks very similar to the A1010 drive and uses the same double-sided, double-density (DSDD) disks to provide 800K of storage. This was 80K more than PC’s could manage (720K) with the same disks at the time, but 80K less than the Amiga (880K).

In terms of program storage this equated to a whopping 3160 blocks free on a single formatted disk. This represented a huge jump from the 170K of storage (664 blocks) available on a standard 5.25” 1541 floppy and even the 340k (1328 blocks) achievable with a 1571. The 1571 was able to read/write both sides of a disk simultaneously without it’s owner having to resort to the use of a Disk Notcher and flipping the disk like a record as we swapped from Side A to Side B!


Floppy Disk Notcher

Who remembers using one of these back in the 80’s?


Despite its impressive specifications the 1581 didn’t sell well at all, for a couple of reasons. Firstly because it arrived late in the life of the C64, so late in fact that the Amiga 1000 had already been around for two years and the A500 had just launched. It also didn’t help that it was more expensive than both the ubiquitous 1541 and also the 1571 drives. Consequently there’s not many of them floating around today and decent working examples are hard to find.

Fast forward to today and there are many modern alternatives to using original Commodore hardware. For instance I already have an SD2IEC reader, a Pi1541, a Turbo Chameleon Mk2 and a 1541 Ultimate-II+, not to mention an Easy Flash 3 cartridge. All these devices offer a quick and easy way to access digital disk images on my 8-bit machines. Yet despite all logic I’ve been hankering after a 1581 for years now. Presumably like quite a few others judging by the price they can go for on eBay.

Well anyway, the point of all this is that a short while ago I finally succumbed to that desire and picked up the stunning little beauty that you can see below. In my defence I was feeling pretty miserable at the time as I was convalescing after surgery and this was a much needed bit of retail therapy!


This slideshow requires JavaScript.


It’s in superb, practically mint condition and came complete with the original Commodore power supply and comprehensive User’s Guide. It’s working perfectly too and shows no sign of the dreaded yellowing that my 1541-II’s have suffered.


This slideshow requires JavaScript.


It’s not just going to be sat on a shelf like a trophy gathering dust though, as I fully intend to put it to good use. In that regard I plan to fit it with a JiffyDOS ROM in the near future to give it a significant speed boost. I also want to incorporate it into my GEOS eco-system as it should really help improve my overall experience there by enabling me to combine multiple disks onto just one. Expect posts about both of those projects in the coming months.


Commodore 1581 Dust Cover

1581 Dust Cover


Having said that, for those occasions when it isn’t being used I picked up this rather natty embroidered dust cover for it off eBay to protect it from dust and sunlight. The seller does a whole range of covers for Commodore machines and I have to confess I’m tempted to kit everything out in matching covers!

C64 User Port Expander

Over the years I’ve amassed quite a number of C64 peripherals that attach via the User Port. Off the top of my head I have a Wi-Fi modem, FM Radio, MP3 Player, sound sampler, Parallel printer device, Power Monitor, webcam interface not to mention DIY contraptions from various electronics projects. I’ve probably got other stuff that I’ve forgotten about too. Constantly swapping all these device over is a bit of a pain and not only that it must exact a toll on the user port which has already seen decades of wear and tear. Suffice to say that this all lead me to the idea of getting hold of some sort of user port ‘expander’ device.


C64 User Port Expander

Don’t press that big red button… unless you want to reset your C64!


I reached out to Tim Harris over at SharewarePlus who stocks a plethora of Commodore 64 peripherals and as luck would have it he had such a device in stock and sent one over. Once attached it provides three user port edge connectors instead of just one. As an added bonus it also incorporates a handy (impossible to miss) reset button on the board too.


C64 User Port Expander

Underside of the user port expander.


I immediately set about attaching everything I could to the expander to see what would work and what wouldn’t. There’s certainly one glaring issue right away in that anything you hook up to the right hand connector is going to interfere with the datasette port.


C64 User Port Expander

Nothing is connecting to the right-hand side unless I remove that tape adapter!


I had to disconnect my 1541 Ultimate II+ tape adapter to be able to attach anything I owned on that side.


C64 User Port Expander

A losing combination of user port gizmo’s.


The other issue is that not everything plays nicely with other devices as they are sharing the same connections. My FM Radio was particularly anti-social in this respect and refused to work at all when anything else was attached to the expander. However my MP3 player, Wi-Fi modem and Power Monitor were all much better behaved in this regard. I had a great time listening to some tunes from my MP3 player whilst browsing BBS’s via the Wi-Fi modem. Awesome stuff!


C64 User Port Expander

Winner winner, chicken dinner!


I haven’t tested every combination of devices together but it definitely requires a level of experimentation to see what will work. Don’t get one expecting to be able to just attach three random devices and for them to just work. I will be leaving the expander connected most the time, even if it means only having a single device attached to it. Why? Because it will stop the wear and tear on my user port – the poor thing has been getting used and abused for forty years now, it deserves a rest!


C64 User Port Expander

Happy compromise so that I don’t lose access to my datasette port.


The reset button worked well although I usually just use the one on my 1541 Ultimate II+,  it’s nice to have another option. My only other criticism would be that the expander isn’t supported in any way so the weight any devices attached causes it to droop down at an angle. This isn’t really that much of an issue since the user port is quite low and the length of the board means the angle it comes to rest at is pretty shallow.


C64 User Port Expander

Added a couple of silicone feet to the board.


However my OCD just couldn’t let it slide so I had a rummage around my junk drawer and found a few silicone feet that were the correct height and attached them to the bottom of the board.


C64 User Port Expander

Board is well supported now.


With the little feet attached I was much happier as I knew the weight of the board and attachments wasn’t going to put any strain on the solder joints.


Pros & Cons

This is a great little device to have in your arsenal of C64 peripherals and can potentially offer a lot of convenience and functionality, provided the devices you choose to hook up are mutually compatible. It will also help to protect your C64’s user port and if you don’t already have one, the reset button comes in really handy and saves wearing out the power button on your C64.

It’s by no means perfect though, especially if you want to keep using your datasette port. Doing so effectively means you lose the use of a connector. I suppose a version with vertical slots would help here, but in my case that would create a new problem as my monitor stand only offers 8cm of headroom. Some extra circuitry to allow you to disable a slot if an attached device won’t play nice would be a boon too. Regardless I’m really happy with it as it lets me use two devices at the same time and when I do need to swap over to a difference device I know that it isn’t wearing out that edge connector on my 64.

If you would like to get a user port expander for your own C64, head over to SharewarePlus and drop Tim Harris a message to let him know what you are after and he’ll sort you out.

A C64 MP3 Player!

Given that the much more powerful 16-bit Amiga 500 is unable to play MP3’s you could be forgiven for thinking that the lowly 8-bit C64 has no chance. Well it’s time for a re-think because equipped with this nifty little C64 MP3 Player device your humble C64 can now play MP3 files without breaking a sweat!


C64 MP3

The C64 MP3 Player Top View.


This slick little device was designed and hand built by a chap called Pietro in Italy. It consists of a larger PCB, approximately 7cm x 7cm  in size with a smaller 4cm x 4cm Mp3 ‘daughterboard’ attached to it in one corner. It didn’t start out looking like this though. Pietro’s first prototype consisted of a bunch of wires and components soldered directly to a user port connector. Only once he knew it all worked did he set about designing the PCB to do the job in style.

The larger PCB links the power and control lines of the MP3 module to the corresponding connections of the C64’s user port. He also added a few extra components into the mix to enable an LED illuminate when the device is playing music.


C64 MP3

You can clearly see the tracks snaking around the board on the back of the device here.


Pietro tells me that it started out in life as an MP3 ‘voice playback’ module he picked up off AliExpress. Although the module was designed to be used with an Arduino device, after some tinkering he figured out which pins controlled things such as next/previous track, volume up/down etc. He then set about writing the software to control it in C using the CC64 compiler along with a bit of Assembly where speed was a factor.


C64 MP3

From left to right; MicroSD card slot, 3.5mm headphone jack and line out.


There’s a lot of connectivity packed onto that small daughterboard including a MicroSD card slot, 3.5mm headphone jack, line-out connection and also a Micro USB socket. You can control the output level of the line-out using a small potentiometer on the daughterboard.


C64 MP3

The blue cube in the centre is a potentiometer to control the line out level. Note also the Micro USB socket that allows connection to a PC.


The last thing of note to point out is the bright red DIP switch array. There are three little switches here that can be configured in different positions here according to which piece of software you want to use it with.


Lets Play Some MP3’s


The first thing to do is get some music onto a Micro SD card. It doesn’t seem to be fussy about what cards it will read so I just used a cheap one off Amazon and have had no issues with it.


C64 MP3

Micro SD card inserted.


To actually get music onto the device you can either pop the MicroSD card into a reader on your PC and copy it across, or alternatively, you can connect it via a Micro USB cable and it will appear on your PC as a mass storage device allowing you to copy music across that way. The device is able to play MP3’s at up to 320Kbps without issue and also lossless WAV files. However FLAC files appear to be unsupported so if you have a bunch of these you want to listen to then you’ll need to convert them over to MP3’s.


C64 MP3

A blue LED will light up once the board is connected to a PC via USB cable.


Obviously the board must be plugged into the user port and connected to either an external powered speaker (my personal preference) via the 3.5mm headphone jack or a suitable amp via the line out but I didn’t have one available to test this side of things.


C64 MP3

MP3 Player hooked up to the C64’s user port.


There’s a few different programs that Petro has written for the player. The “basic” program toggles the 8 pins to select a track number from 1 to 255 whereas the “one” version as he calls it uses the One-Line interface from which you can also change the volume, EQ setting and more. Naturally as the second one offers the most features it’s the version I opted to use.

Once the software has loaded (only takes a couple of seconds) you are presented with a screen reminding you about which mode the program is using and how to set the DIP switches. Assuming they’re in the correct position simply hit ‘return’ to continue. If the switches are set wrongly then you must do as it suggests and turn off the computer and move them into the correct positions before trying again.


C64 MP3 Player

Checking the DIP switches are correctly set.


Sadly file/track names are not supported here so you must know the number of the track you want to play. If there was one feature I’d like to see in a future version, track names would be it!


C64 MP3 Player

The MP3 Player Interface.


The main program screen provides pretty much all of the features you would expect from an MP3 player. You can start, pause and stop a track, skip back and forth and navigate through directories too as these are also supported. There’s a full repertoire of extra functions, such as repeating a single track, repeating all tracks or repeating everything within a directory.  Random track play is also supported in a similar way. If you know which track number you wish to play you can skip straight to it using the ‘select file’ option.

The player software also includes an Equalizer that really has a dramatic effect on the sound playback. The choices provided are; ‘Normal’, ‘Pop’, ‘Rock’, ‘Jazz’ and ‘Classic’. Finally you can control the volume in 30 increments using the +/- keys.


Final Thoughts and Availability

This really is an amazing and fun little device that adds yet another string to the C64’s already impressive entertainment bow. The quality of music playback is terrific and provided you keep a little printout of what files are on the card handy, navigating around your collection is fairly straightforward. The one caveat I must point out though is that you do need a powered speaker or headphones with a suitable pre-amp to listen to it. This is because the device itself lacks an amplifier of it’s own so although you can plug headphones directly into it, the sound you’ll experience is quiet and tinny.


The Original eBay auction advert for the MP3 Player.


Unfortunately Pietro informed me he only made a handful of these devices for fun so doesn’t have any more of them available for sale right now. However he says he’s totally open to the idea of making more if the demand is there so if you fancy one of these for yourself get in touch with him over at his eBay store and let him know!

Commodore 64 FM Radio Module

If you’ve ever wanted to have an FM radio built into your C64 then your dreams have just come true. I spotted this cool little device whilst browsing around the SharewarePlus website a few weeks ago and have been putting it through its paces since…


What’s in the box?

Included in the box is the radio module, a real time clock (RTC) module, small telescopic aerial, program disk, battery (for the RTC), some fittings and finally some instruction sheets.


C64 FM Radio

Kit Contents.


The board is nicely made and incorporates sockets for stereo audio output, aerial input and a 6-pin female socket header to accommodate the RTC.


C64 FM Radio

Close-up of the Radio board.


C64 FM Radio

Audio port (left) and Aerial port (right).


The RTC features mostly surface mounted components on one side along with 6 header pins that will allow it to be plugged into the Radio PCB.


C64 RTC

The RTC module.


The reverse side is dominated by a battery holder for a 3V Lithium CR2032 battery which is required to power it.


C64 RTC

3V CR2032 button cell goes here.


The RTC attaches neatly to the main Radio PCB as shown in the photo below.


C64 FM Radio

Here the RTC ‘daughterboard’ has been securely attached to the radio PCB.


A couple of small screws top and bottom with a stand-off sandwiched in-between ensures the RTC stays in place as you can see in the photo below.


C64 FM Radio

Close-up showing how the board attaches with the stand-off spacer.


Getting it Working

The FM Radio module plugs into the User Port at the back of your Commodore 64. Sound is output via a standard 3.5mm jack so you can attach a pair of headphones, or, as I did, hook it up to a powered speaker. In order to actually pick up any stations you also need to plug in the included telescopic aerial.


C64 FM Radio

FM Radio plugged in a ready to go.


With the radio board plugged into the C64’s user port, speakers and aerial attached it’s time to power on the C64 and load up the supplied software to get it working.


C64 Directory Listing

Contents of the supplied floppy disk.


The supplied floppy disk contains a number of different programs for both the  C64 and C128 but the one I was interested in to get the radio working was the first one in the list above; “fmradio-64.prg”.


C64 FM Radio

Initial screen.


Loading it up will initially present the screen above where it will confirm the presence of the RTC, show the current date and time and give you the option to set it too. Pressing ‘space’ loads up the actual FM Radio program.


Using the Radio

With the program running you can control the radio via a basic but functional user interface (UI) that displays all the information you need.


C64 FM Radio

FM Radio Software UI.


The top-left portion of the screen is dedicated to showing the following 6 things:

  • CPOWER – Power status (Green=ON / RED=OFF)
  • Mute – on/off
  • Bass Boost – on/off
  • Scan – Indicates if the radio is currently scanning for a channel
  • Stereo – Shows whether channel is playing in Mono or Stereo
  • 50us de-em – ‘de-emphasis’ 50us or 70us setting that can help remove unwanted noise/interference

Moving across to the larger section on the right we can see details about the currently tuned channel along with the volume level and signal strength. If you have stored a channel in a ‘preset’ and named it then that will be displayed too under ‘Station name’.

In the strip below (providing you have set it already) the current date and time will be displayed.

Finally below all this and occupying the majority of the screen is the channel preset/listing area. This is basically a list of all the channels you have stored and the names you have assigned them.


How well does it work?

As the C64 FM Radio is digital rather than analogue, tuning in to stations is really simple. You can initiate an automatic channel scan up or down the FM frequency by tapping ‘;’ and ‘:’ respectively. Alternatively you can nudge the tuner up or down 100Khz at a time to fine tune a station yourself by using the ‘U’ and ‘D’ keys. The radio will not automatically retrieve channel names but once you have tuned in a channel you like you can press ‘C’ to store it and assign it any name you like  (up to 12 characters) and save it into one of the 16 available slots. These presets are saved to disk when you quit the program. The first 10 presets can be quickly accessed by simply pressing the corresponding number on the keyboard. Alternatively, you can use the cursor keys to move up and down the list and press ‘return’ to select one.

Here’s a short video of me using the radio, switching channels and so on, all from my C64.


Once you have tuned into a particular station you have the option of changing between mono and stereo reception and toggling a ‘de-emphasis’ setting to improve the audio. I found tuning to be mostly ‘all or nothing’ meaning that most of the stations either tuned in perfectly or barely at all so I had no use for these tools but it’s nice to have them available. Of course you can also alter the volume level, add Bass Boost or mute the audio all from your C64. The bass boost works quite well too, at least with my Bose speaker anyway.

I was only able to pull in a couple of local radio stations initially with the supplied telescopic aerial but I do have a lot of electronic equipment in my man cave that could well be affecting reception. However I replaced the supplied aerial with a 2m long aux cable I had lying around and was then able to pull in a few more channels. Who knows what I could pull in if I had an even longer one! If it’s been a while since you used an FM radio then you might have forgotten how finicky they can sometimes be depending on where they are placed and what direction the aerial is pointing in etc. Luckily for me, my favourite radio station (Greatest Hits Radio) was one of the two I could receive with the supplied telescopic aerial. The quality of the reception was spot on too so I was quite happy to continue using the stock aerial.

I should point out that the FM Radio hardware is doing all the work here. The C64 just interfaces with the board to provide power and interact with it via software. This becomes pretty obvious once you quit the program or reset your C64 because the radio continues to work. However this allows you to play a game on your C64 whilst listening to the radio so is actually a positive for me!


GEOS

The included RTC works with GEOS (after you install a small driver to read the time from it) which is amazingly useful and really cool. Sadly this latest radio design (there have been at least 3 different ones used that I’m aware of) doesn’t yet work with GEOS but the guys behind this project are working on a revised PCB that should fix this in the future.

I was able to get hold of an older version of the Radio hardware that still works with the GEOS Radio program and it’s a really slick experience. It provides a modern, mouse driven UI for the radio with a nice chunky digital channel display. You can see how attractive the radio app is in the photo below.


Radio program running within GEOS.


Where to get one?

I picked up my C64 FM Radio kit from Shareware Plus in the UK. If you fancy getting one yourself you can find them here. It’s not only a fun piece of hardware to tinker around with but its really useful too. The clock feature for GEOS alone made it worthwhile for me. Just be aware that if you have your heart set on using the radio with GEOS then hang fire until they revise the board to work correctly with it.