Lyonsden Blog

Category - Gaming

Roguecraft Amiga Review

I’ve had my eye on Roguecraft ever since I heard Badgerpunch Games were making an Amiga version of their previous game, Rogue64. This game was released way back in 2022 and remains one of my favourite games for the Commodore 64 to this day.

When I heard they were releasing a physical boxed edition of Roguecraft for the Amiga I pre-ordered immediately. With the ‘Standard Edition’ costing a very reasonable £19.99 plus P&P it was just too tempting to pass up on.

Finally, after many months, the waiting is over and my copy of the game has arrived!


Roguecraft

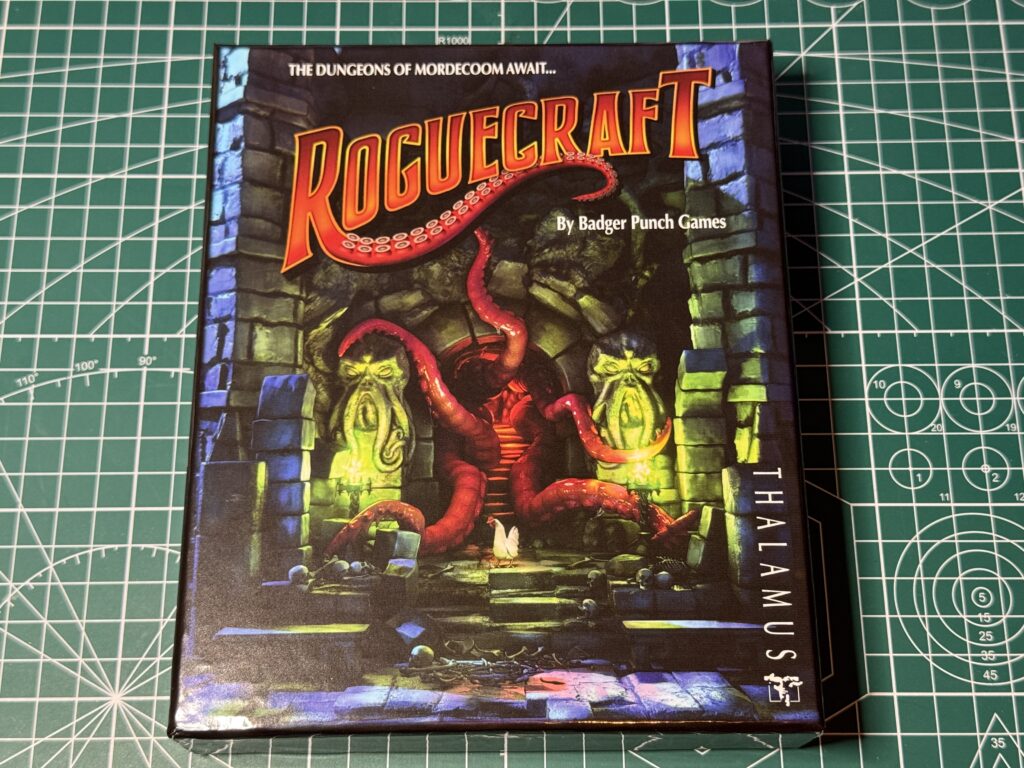
Roguecraft box artwork


The box itself is a thing of beauty featuring one of the tentacled monsters on the front in glorious, vibrant, glossy colour.


Roguecraft

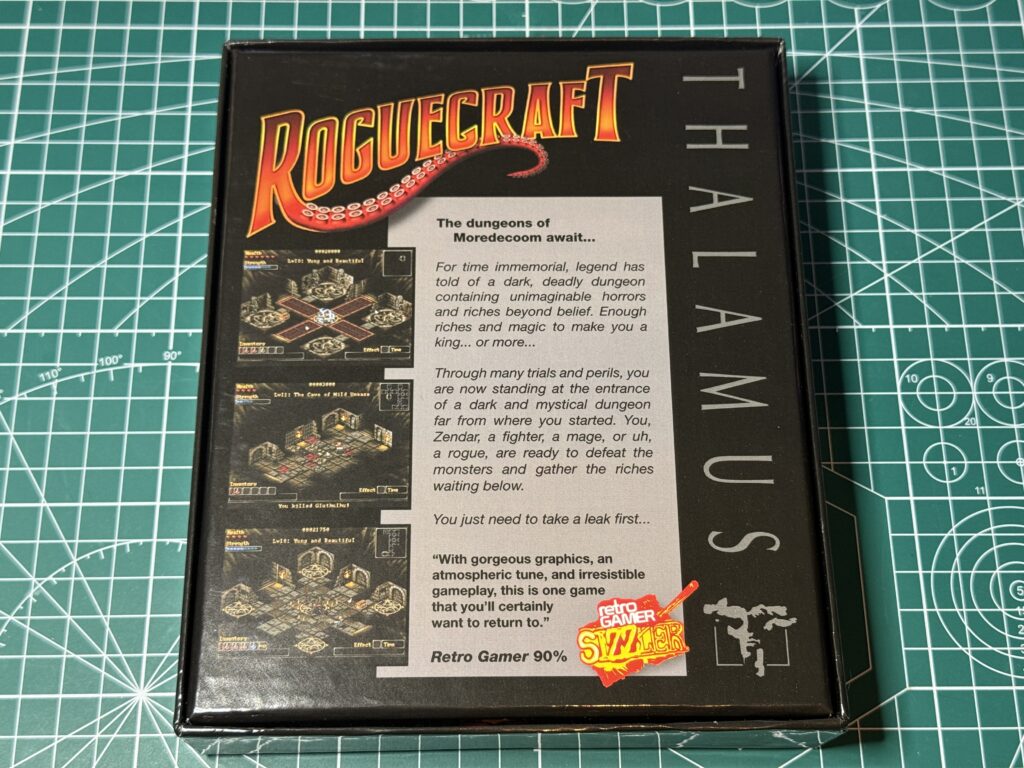
Back of the box


The back of the box features screenshots from the game to whet your appetite along with some scene-setting words and a Retro Gamer Sizzler seal of approval.


Roguecraft

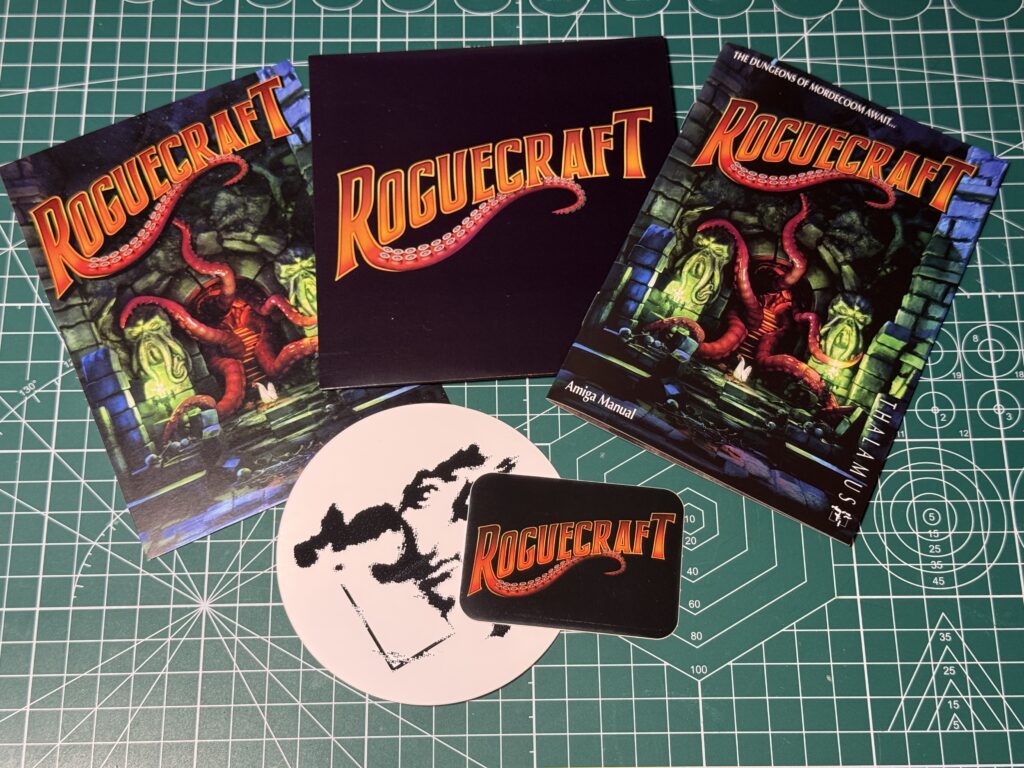
Lots of Roguecraft goodies!


Opening up the box reveals a variety of goodies inside, including the games instruction manual, a copy of the game for the CD32, A Roguecraft postcard, a Roguecraft floppy disk label and a Thalamus sticker.

I should point out that I was also emailed a digital copy of the game so I also have a bootable ADF and a WHDLoad version of the game and this is what you would get if you bought the game from their itch.io store.


Roguecraft

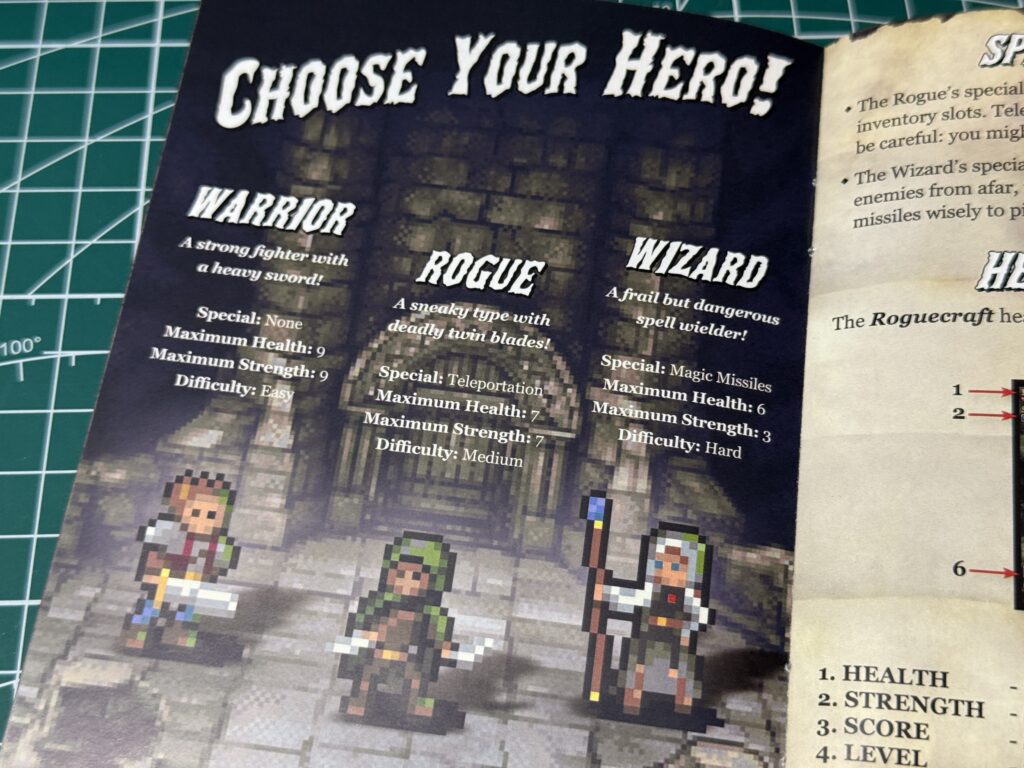
Choose your hero!


The excellent manual has been printed in full colour on glossy paper and takes you through the characters you can play…


Roguecraft

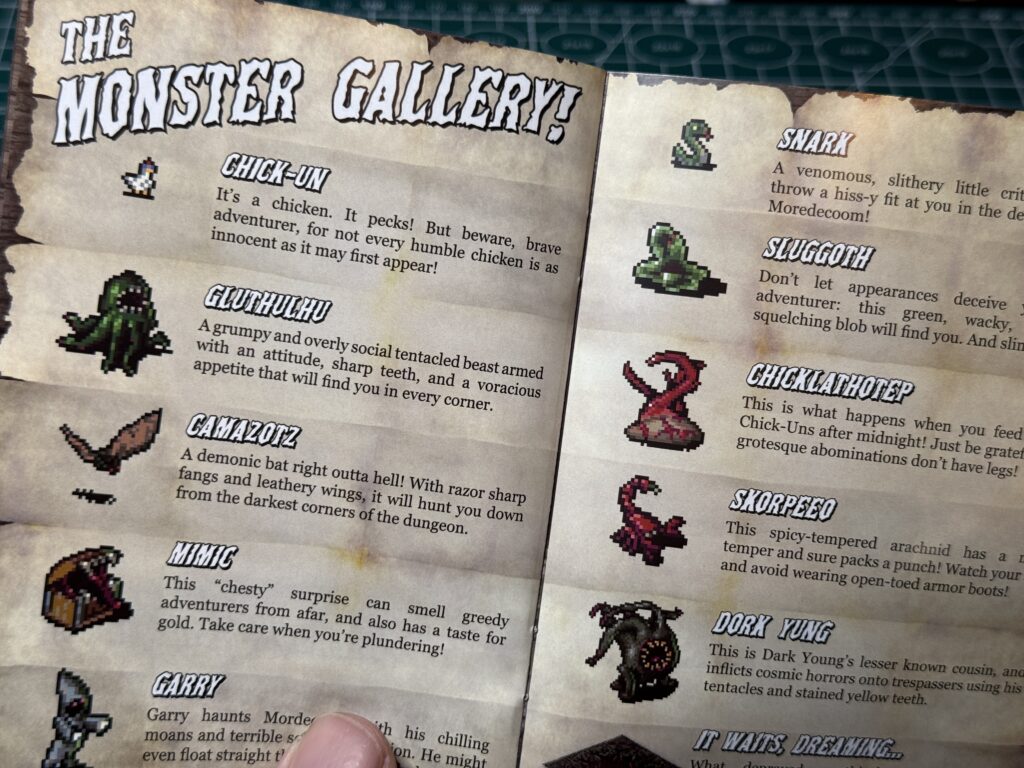
Some of the monsters you can expect to confront


Along with the monsters you’ll be battling as you venture further into the game world. There’s plenty of other information provided to enhance your Roguecraft experience too.
 

Roguecraft

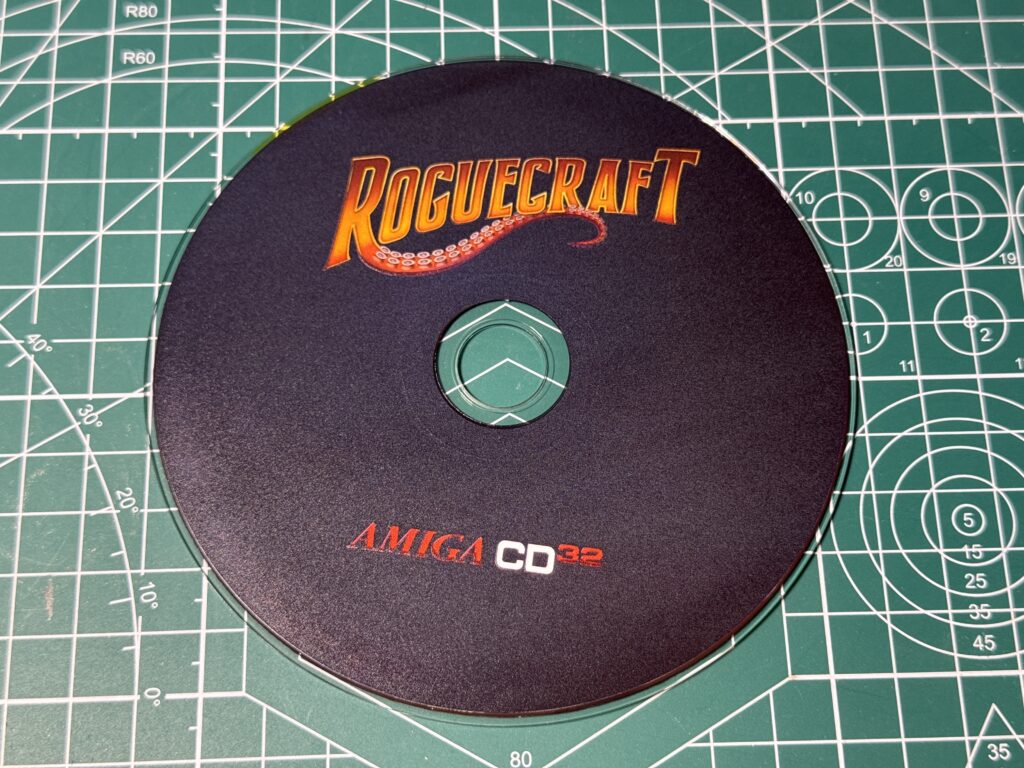
Roguecraft CD32 disc


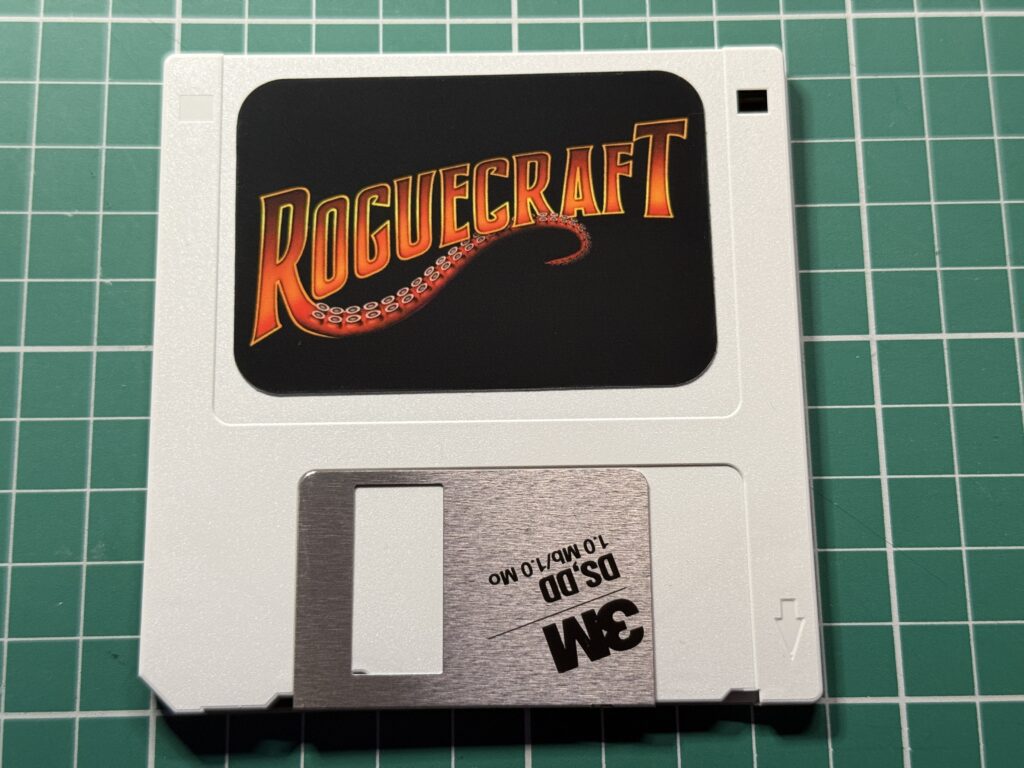
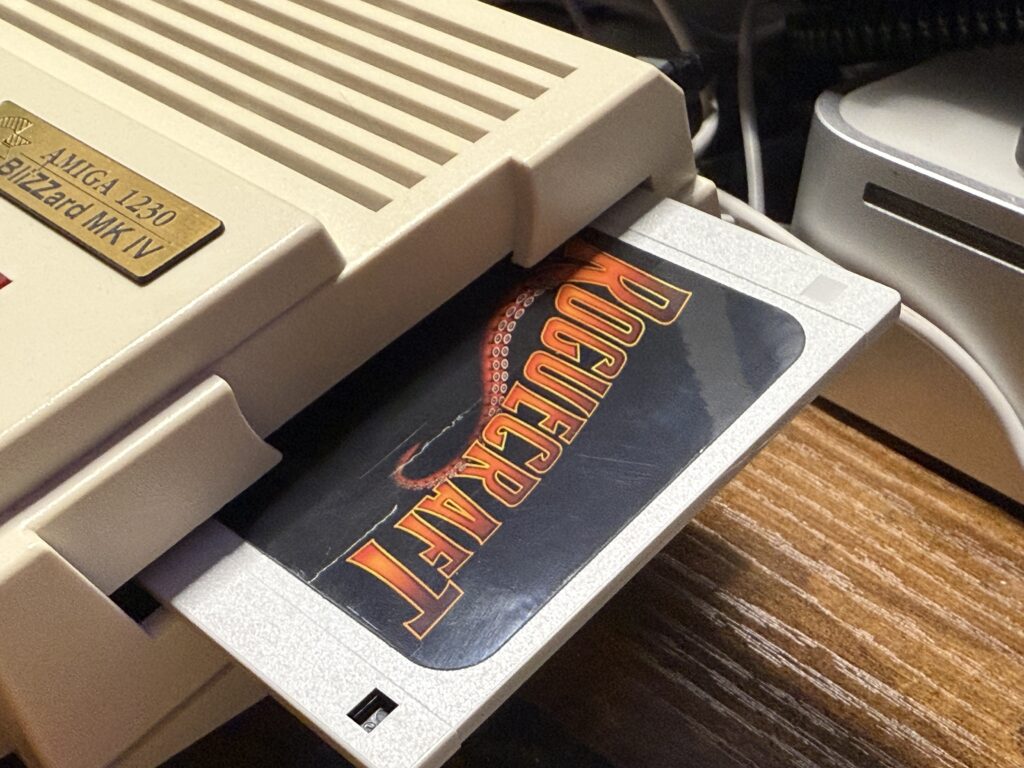
As there was a disk label included in the box and I have the ADF image of the game it would be remiss of me not to create my own ‘game disk’ so I can load it up off a proper disk on my A1200.
 

Floppy Disk

DIY Roguecraft Disk


I used the brilliant GoADF 2020 to write the image to a spare floppy disk…


Writing a 3.5" floppy dfisk

Writing the ADF image to a real floppy disk.


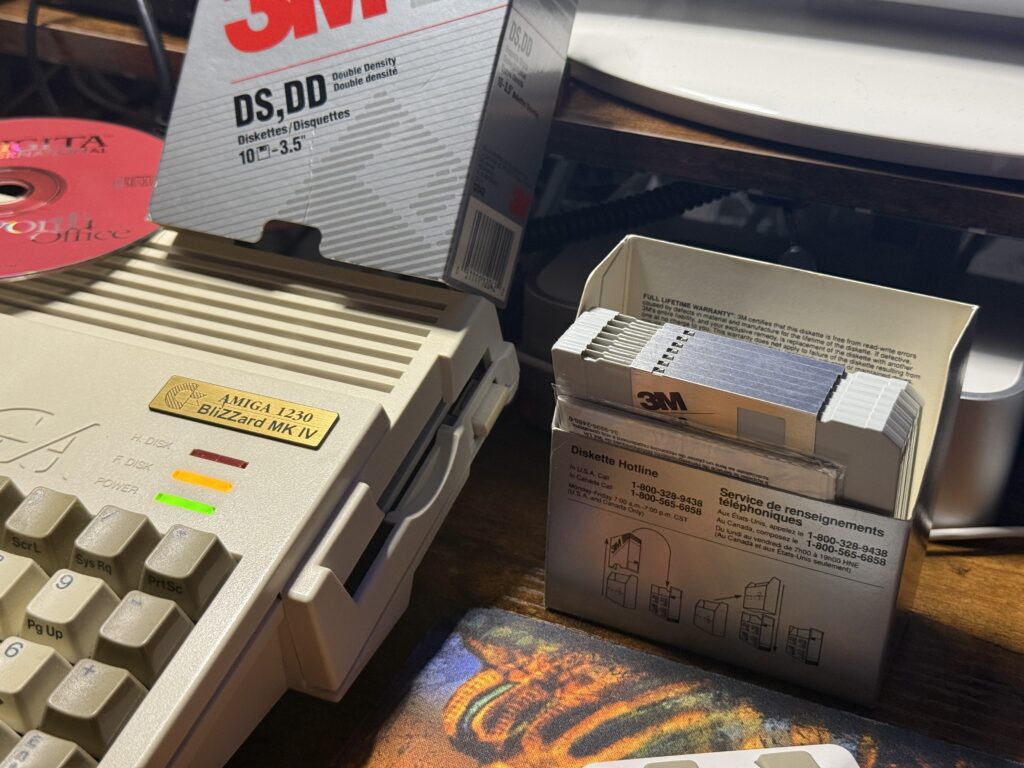
,,,and then popped it into my A1200’s internal floppy drive so I could load up the game the way nature Commodore intended.


Ready to load


Loading the game

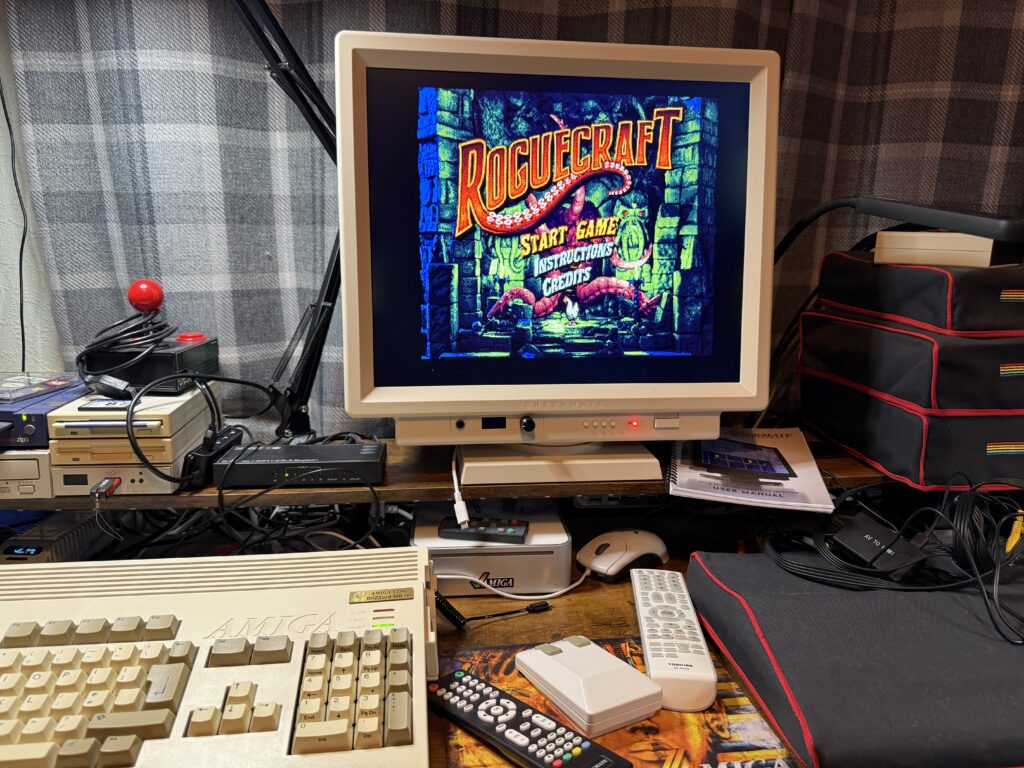
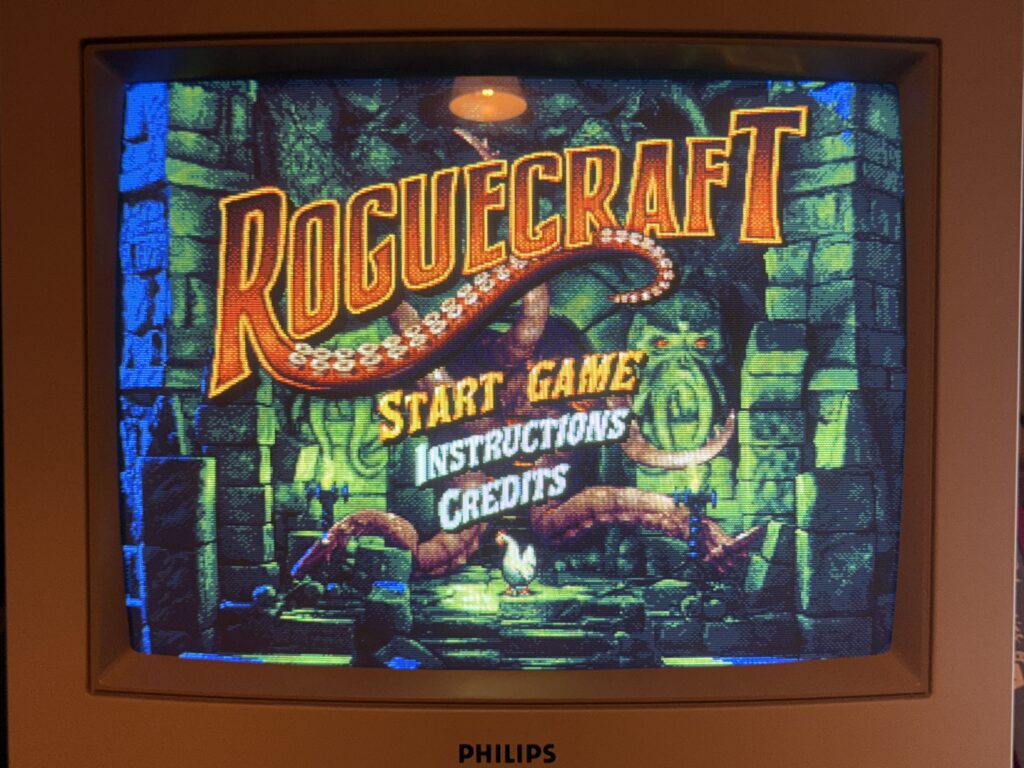
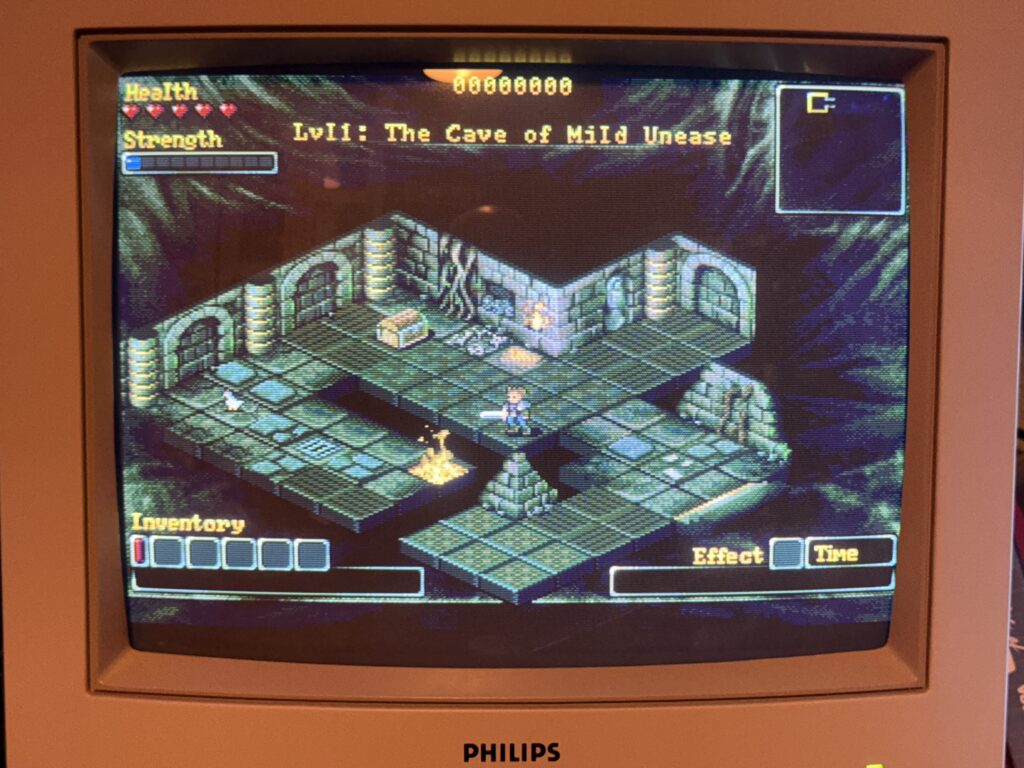
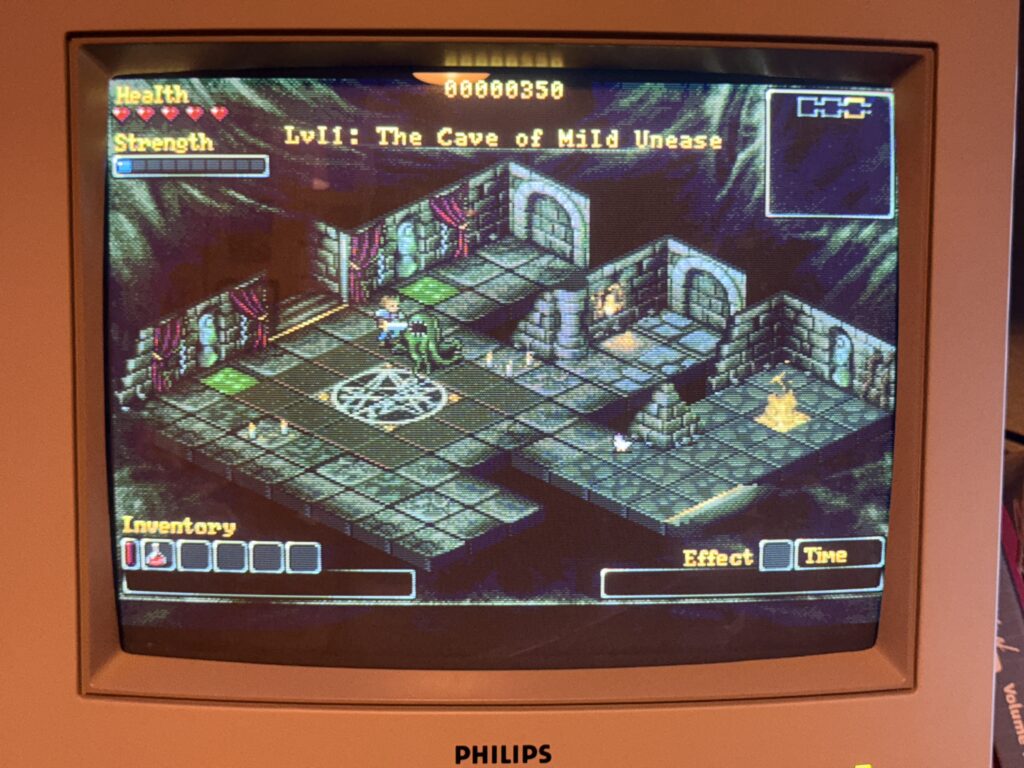
I loaded the game up on my CD32 and have to say it looks simply stunning displayed on my Philips CM8833-II monitor with vibrant colours that ‘pop’ right off the screen. The photo I took below doesn’t do it justice. It’s accompanied by a superb music track that sets the tone for the game proper.


Roguecraft

Roguecraft Title Screen


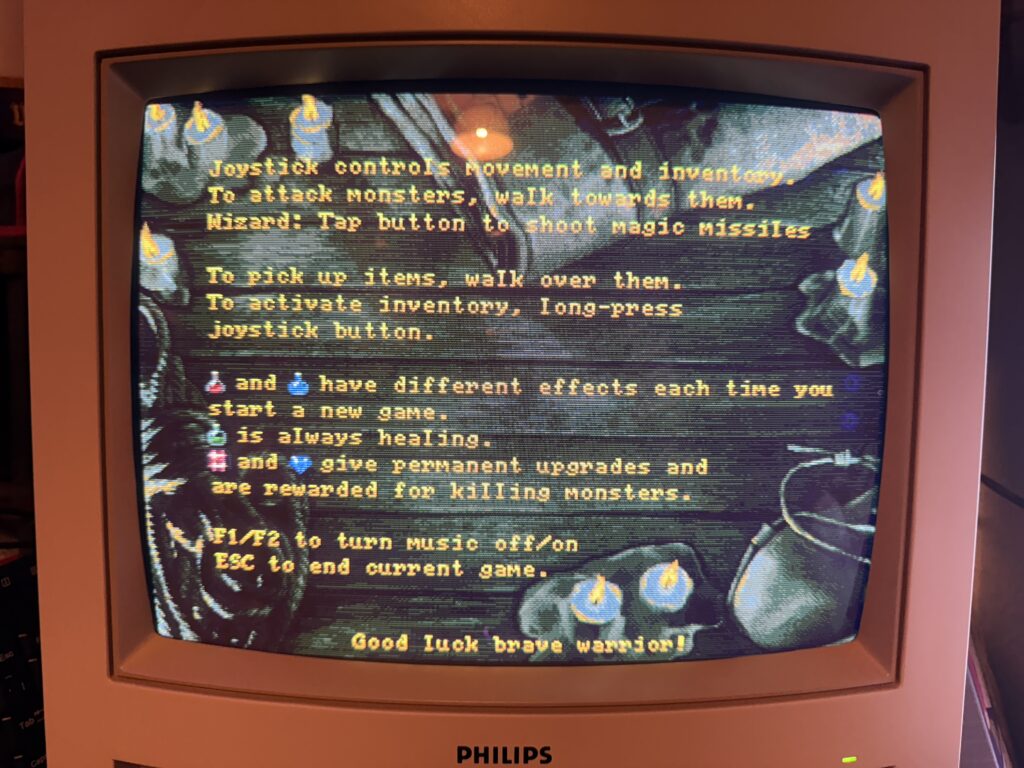
Before starting the game you can choose to view the credits or read the instructions. Very handy if you got the digital version of the game without the printed manual.


Roguecraft

Roguecraft instructions


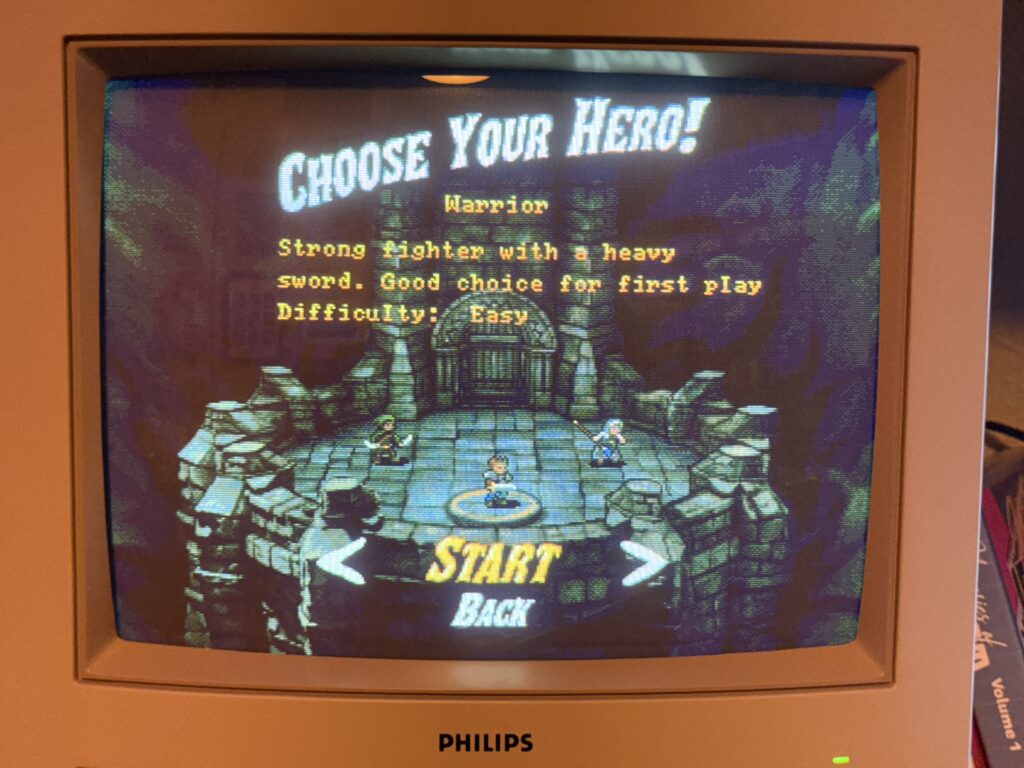
I chose the ‘Warrior’ for my initial playthrough as it’s the default choice. Turns out this is also the ‘easy’ option too. The other choices on offer were the ‘Rogue’ and ‘Wizard’ which represent the ‘medium’ and ‘difficult’ options as they have progressively lower health and strength. The wizard is the only character to have a ranged weapon which should make for an interesting gameplay change. The Rogue has a unique ability too – he can teleport which can get him out of some tight spots.
 

Roguecraft

Choosing the ‘easy’ option


The graphics look simply gorgeous on my CRT monitor. If this game had come out 35 years ago it would have been a stonking success for sure.


There be treasure ahead!


CRT vs LCD

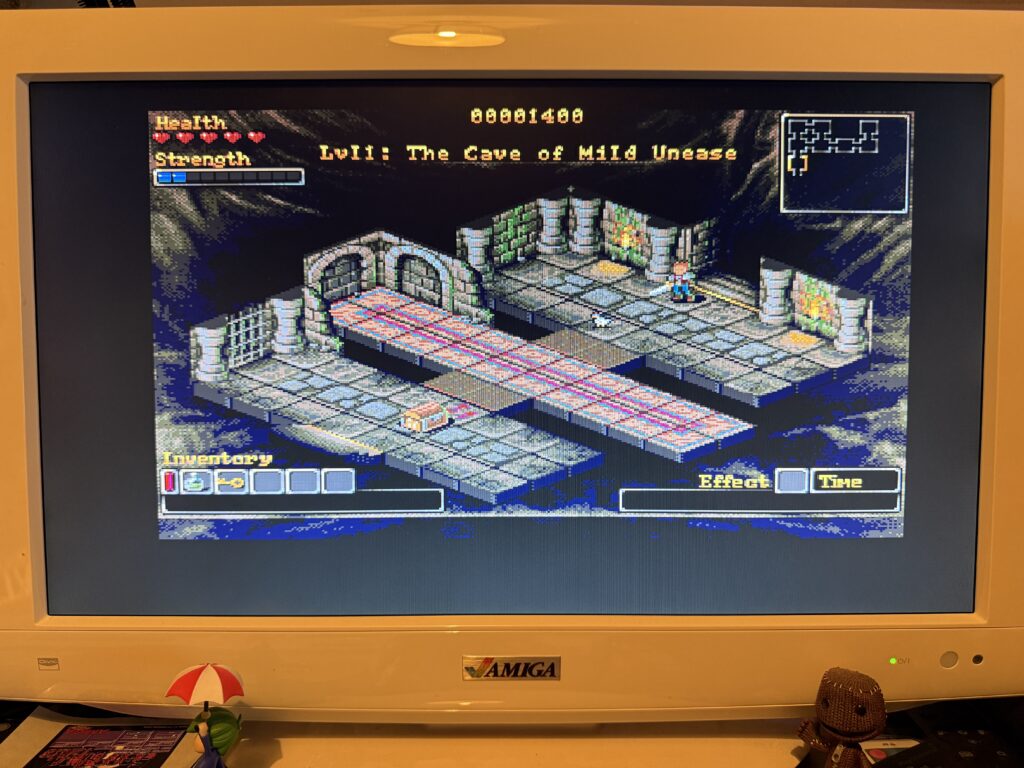
I tried the game on my accelerated A1200 too and whilst it still looked great I think it lost some of its charm when displayed on my LCD screen with black borders and crisp pixels. The picture just wasn’t as warm or vibrant and the dithered pixels were clearly visible.


Running on an LCD screen

It definitely loses something when played on an LCD screen


You can clearly see the difference in the two photos of the title screen taken from each screen type below.


This slideshow requires JavaScript.


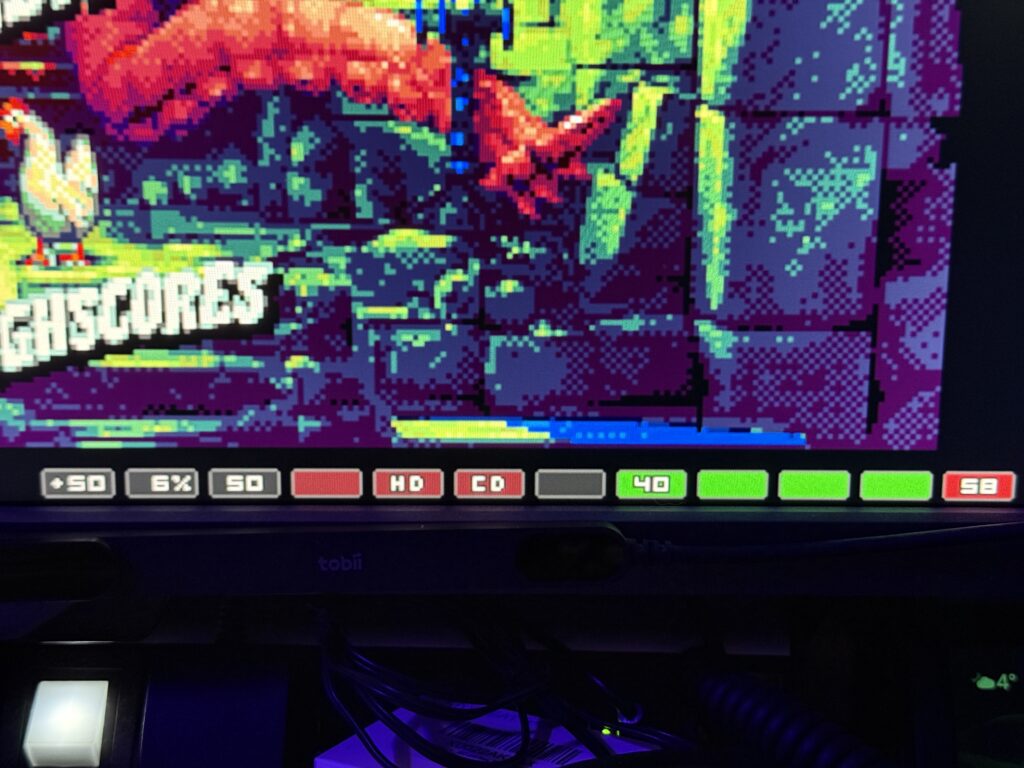
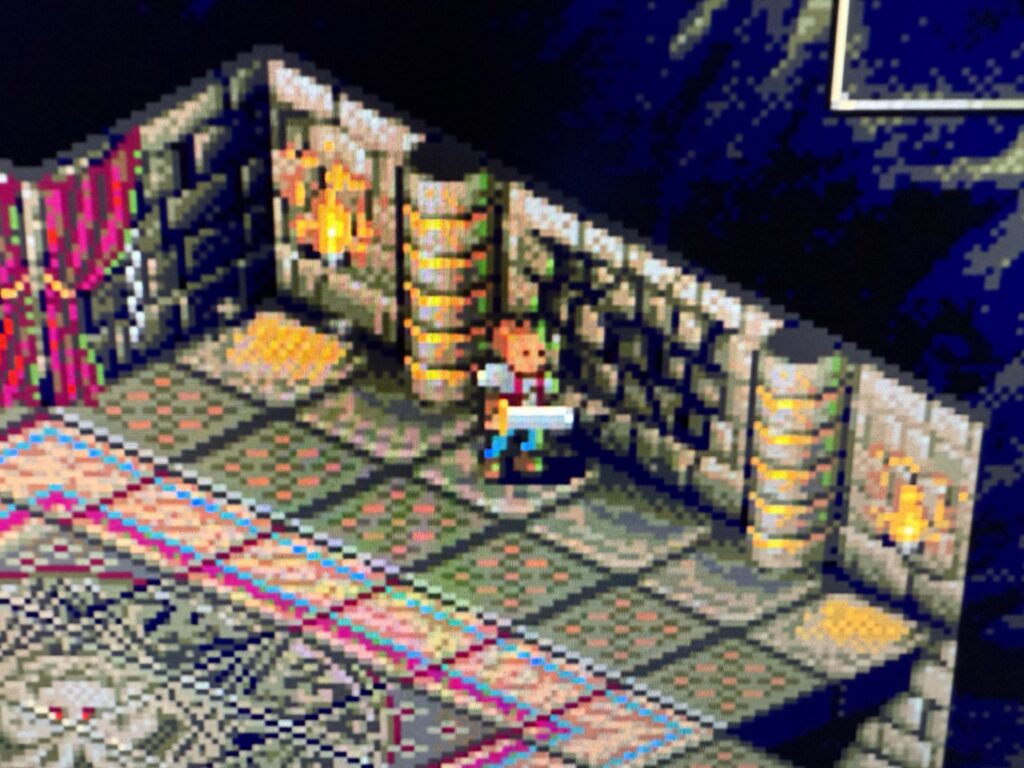
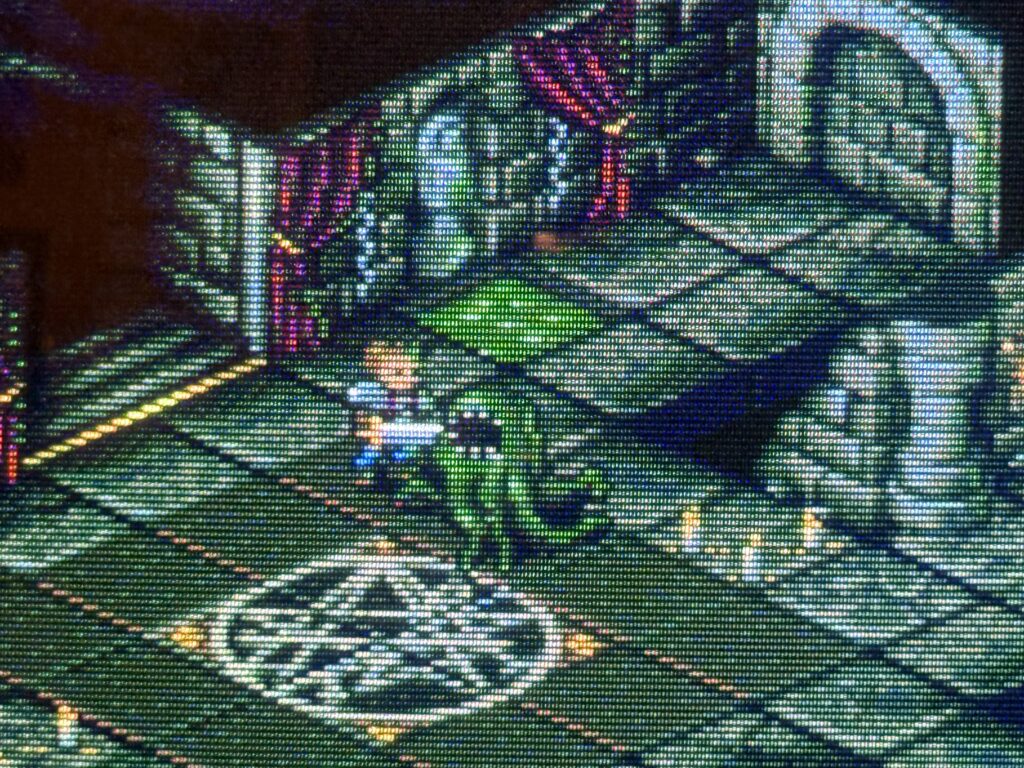
I think the CD32 version will be the way I play this going forward as this is the Amiga I have hooked up to my CRT. I mean just look at this close-up of the graphics on my CRT below – this is how it was meant to be played for sure. The dithered colours blend into each other and those natural scan lines look fantastic. It’s very clear that someone has spent a massive amount of time labouring over these graphics to get them ‘just right’. Your character and the monsters are fully animated too and look great as you navigate around the isometric levels.


Close-up of the game graphics on CRT

Look at the pixels on that….


Further enhancing the game is an amazing soundtrack composed by Jogeir Liljedalh. I’m a huge fan of the SID soundtrack from the original Rogue64 game and I can hear elements of it in this new Amiga version but Jogeir has knocked it out of the park with this one, It’s so good I went ahead and bought the soundtrack so I could listen to it whenever I wanted.


Gameplay

The aim of the game is the same as its predecessor – to progress down through the ten levels of the Mordecoom dungeons by locating the key hidden in one of the rooms on each. These levels are procedurally generated so no two playthroughs should ever be exactly the same. This is pretty essential really as being a rogue-like means you will be dying and replaying the levels a lot, hopefully progressing a bit further each time.

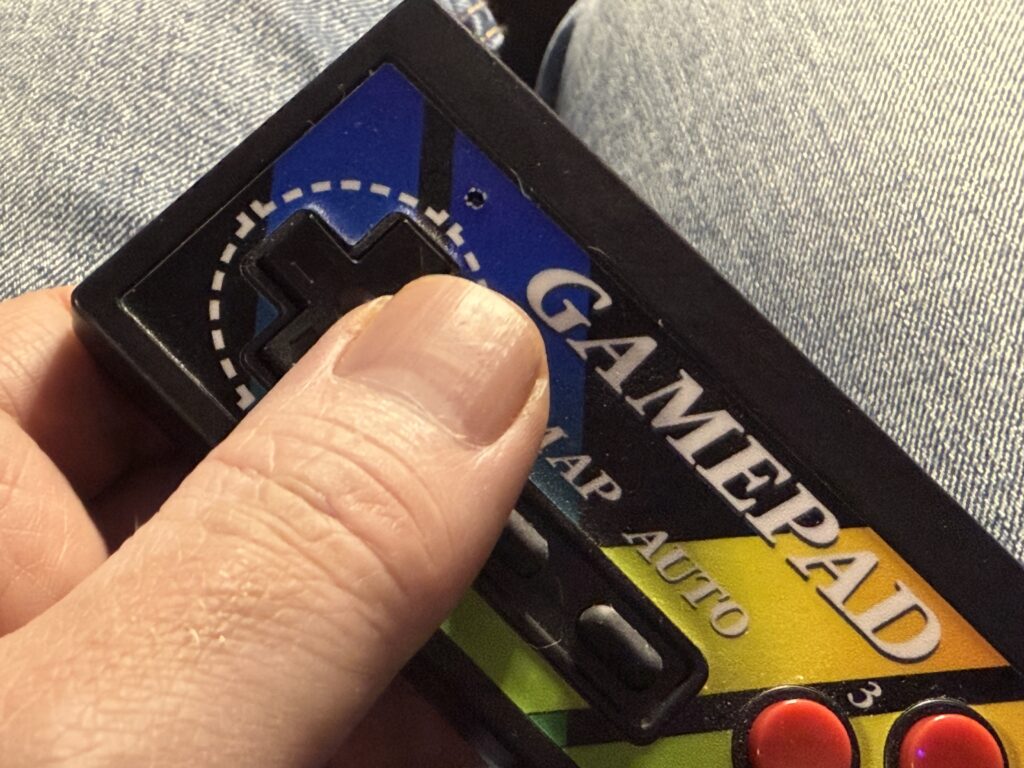
Controlling your character couldn’t be simpler – you simply push in the direction you want to go to both move and attack. Having said that, I did struggle with working out which direction on the D-pad corresponded to the direction I wanted to move on the screen. I’m sure it will become muscle memory in time but for now I found it infinitely easier to play with my controller held at a 45′ angle as you can see below. Steve Jobs was right all along – I was holding it wrong! Jokes aside I really did find directional control to be completely logical and intuitive when I held it this way.


Orienting my controller to match the screen!


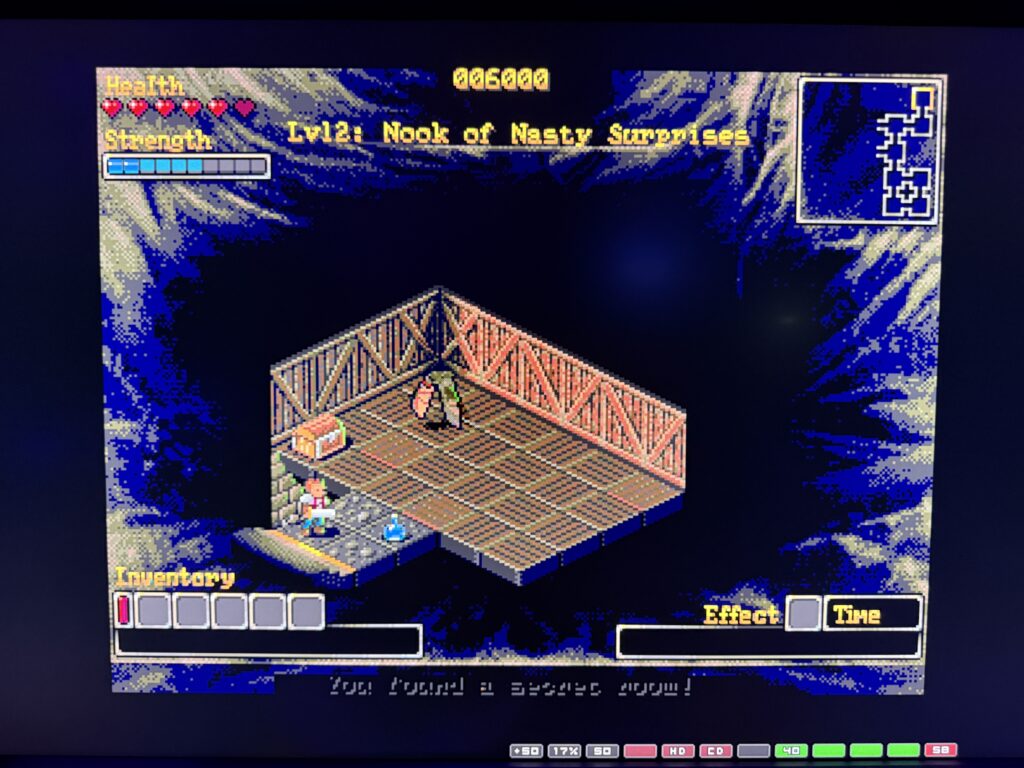
Roguecraft is a turn-based game so you and the enemies take it in turns to move and attack. In true RPG fashion combat takes into account your relative strength against the enemy, active potions and also an element of RNG. Sometimes your attacks will miss their mark, same goes for the enemy attacks on you. However if they land a successful hit it reduces your health which is displayed in the top left corner. Underneath this is your strength which determines how much damage you do when attacking. Both your health and strength can be upgraded by finding red and blue gems respectively which are dropped by downed enemies after you’ve killed enough of them. You can replenish your health with hearts which can be found dotted around here and there. These are used immediately unlike the potions which you can carry so sometimes it’s better to save them until you are ready to progress to the next level rather than waste them.


Roguecraft

Battling a Gluthulhu


Speaking of potions there are numerous different types you will find peppered around the dungeons of Moredecoom. The green potions heal you but the red and blue ones effects are randomised at the beginning of each game. There’s a couple of new status effects in this version that I won’t spoil. Will they help or hinder your progress? There’s only one way to find out! In addition to the potions and gems there are also treasure chests in some rooms and opening these will boost your score.

Another new feature in this game are hazards which litter the floor, lave pits, acid pools, spikes, fires… you really need to watch where you tread now!

Just like it’s predecessor Roguecraft features an auto-mapping feature, but improves on it by clearly marking the ‘exit’ room on the map after you find it so it’s easier to back-track when you are ready to proceed down to the next level. In doing so it has addressed one of my criticisms of the first game and is all the better for it.

I love this game, it looks and sounds terrific and is a hell of a lot of fun to play. It feels more challenging now and I died a lot at the hands tentacles of the level one Gluthulhu monster as he’s quite tough to kill until you can boost your strength. Nevertheless it has that ‘just one more go’ factor in spades and is the perfect ‘pick up and play’ game when you have some spare time.

Cassette Tape Storage Solution for 2024

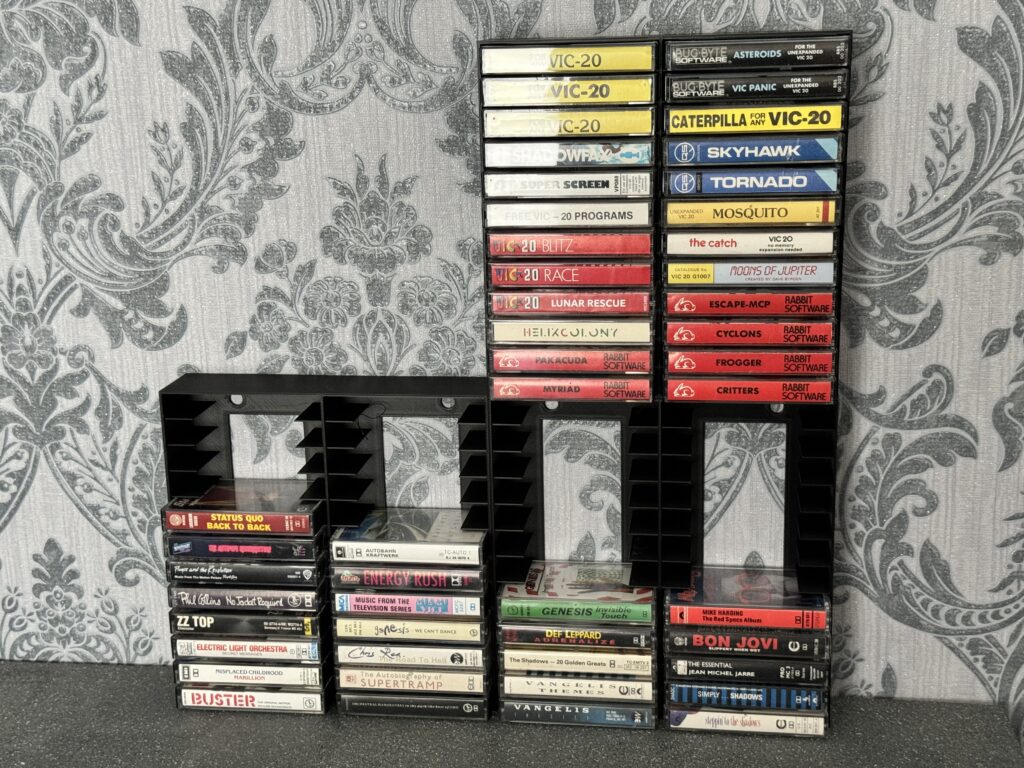
I’ve covered some storage solutions for Cassette tapes in the past but sadly they are no being made. With my own collection of tapes continuing to grow (both music and computer games) I needed a smart, attractive storage solution, and preferably one that would continue to be made for a long time to come.

There was really only one way to guarantee the latter so I’ve ended up designing and 3D printing my own rack and have made it available to purchase on my Etsy Store in case anyone else would like to get one.


Cassette Tape Storage

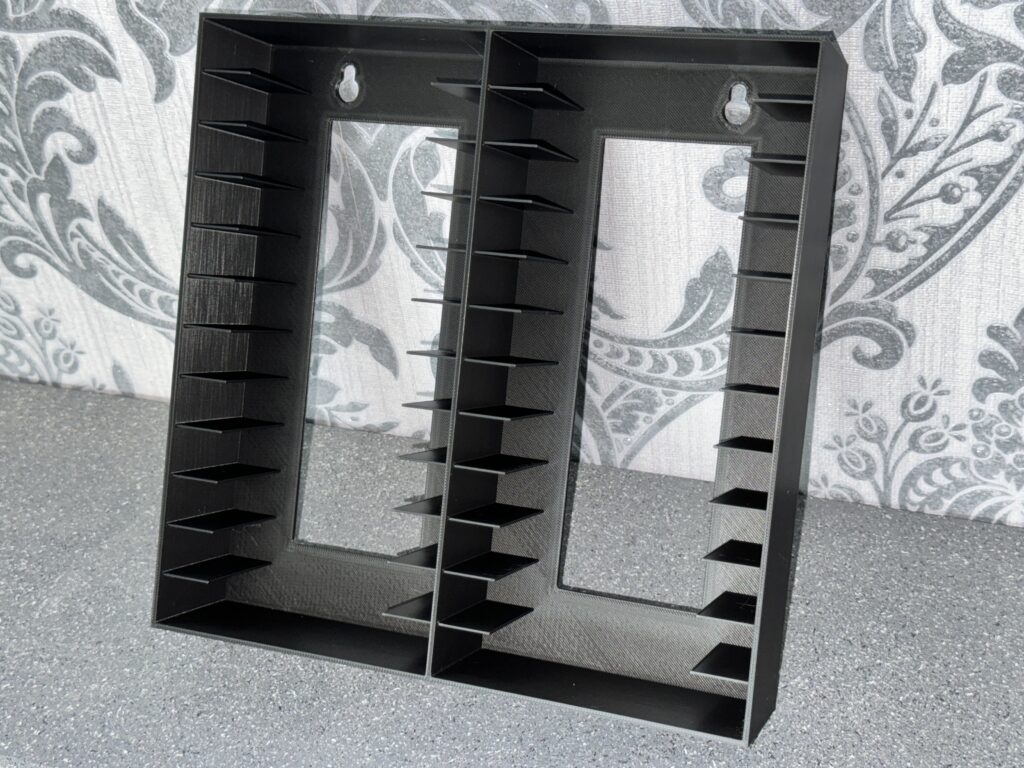
Empty storage rack. Mounting holes at the top.


The finished storage rack measures 23cm x 23cm and is a shade over 5cm deep. I literally cannot make a larger capacity rack as that’s pretty much the maximum size of my printers’ build plates.


This slideshow requires JavaScript.


It has a couple of screw mounting holes at the top so it can be hung on a wall. Alternatively it can be placed free-standing on a shelf, or even on its back inside a drawer.


Cassette Tape Storage

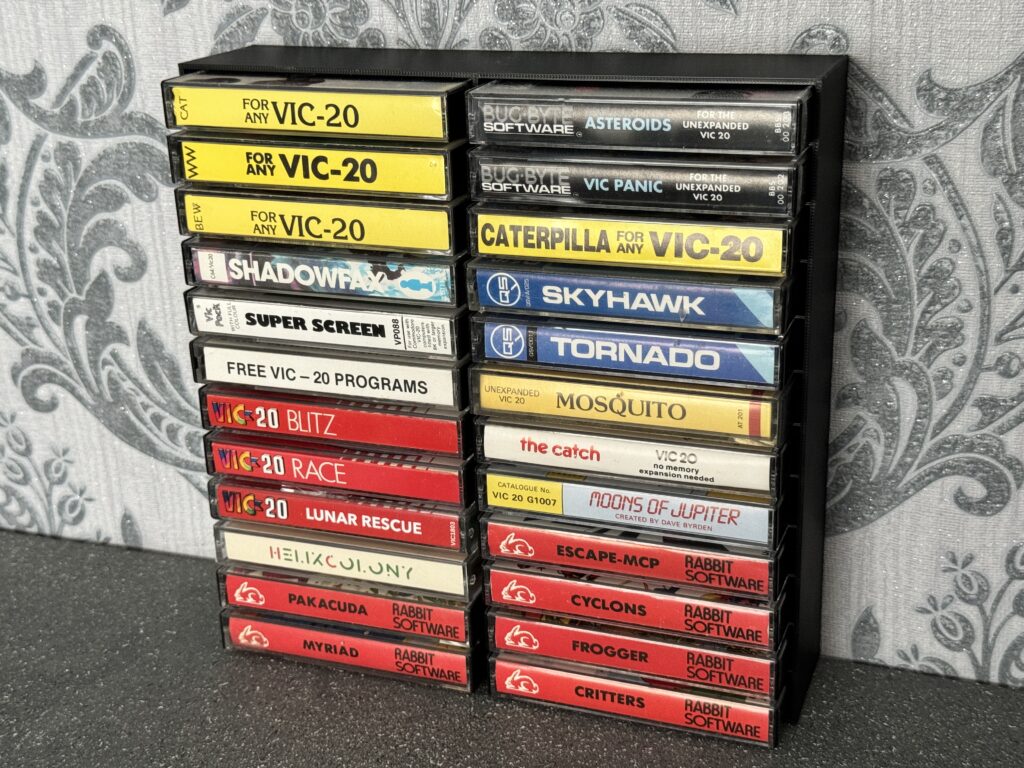
Lots of VIC20 games


The idea is that you can just keep adding more racks as your collection grows.


Cassette Tape Storage

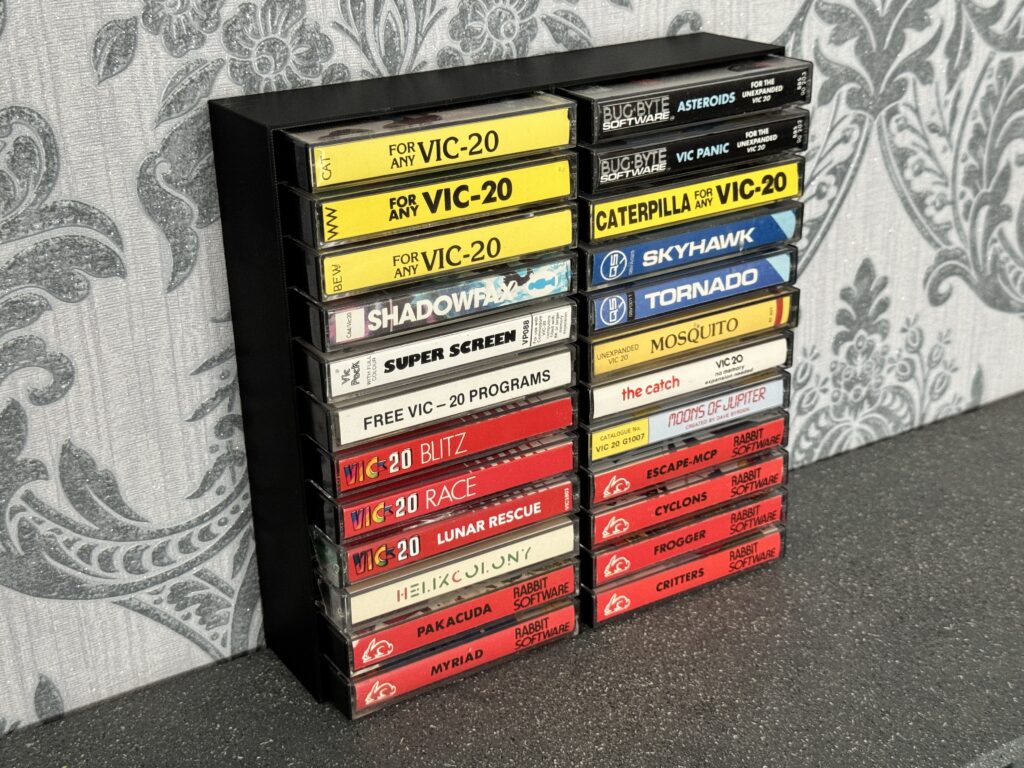
A rack full of VIC20 games.


Although you can just place them side by side or on top of each other when expanding I’d recommend fixing them to the wall if going vertically for stability. Nobody wants their collection of tapes falling on the floor if your cat decides to go mountaineering!


Cassette Tape Storage

Expanding your collection – 3 racks together


These are produced on Bambu Labs printers using premium PLA and each one takes nine hours to complete. They’re really nice quality even if I do so so myself but you can judge for yourself by looking at the photos.

As I said if you want one you can get one from my Etsy store. If you’d like to order more than one then drop me a message and I can sort out a discount.

Wireless Tank Mouse

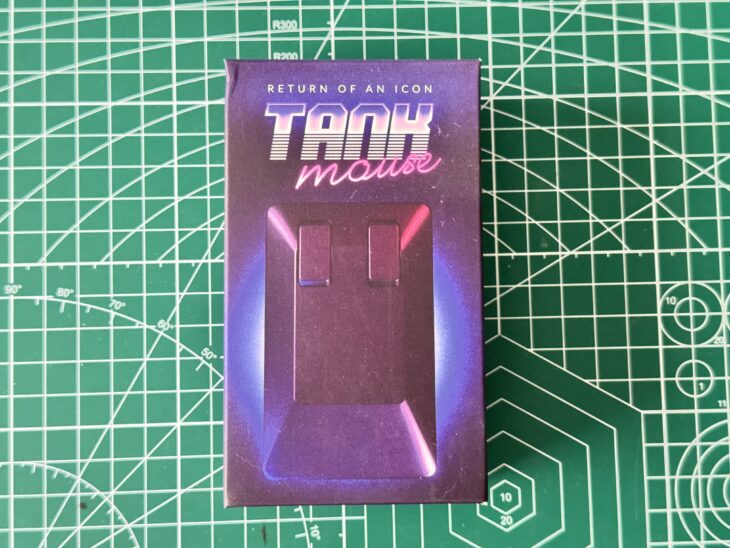
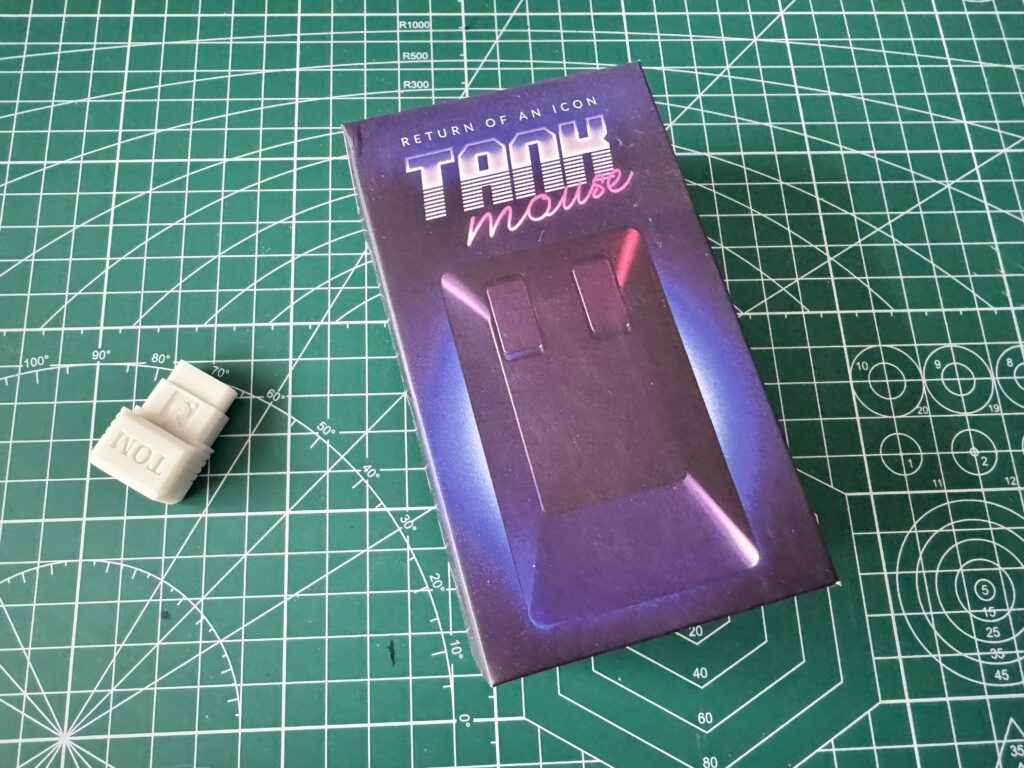
Wireless Tank Mouse Box

I missed the initial Kickstarter for this ‘Wireless Tank Mouse’ back in 2022 but now that they are on general sale I decided to pick one up from Sordan.ie to see if it was any good and hopefully use it with my Commodore and MEGA65 machines.


This slideshow requires JavaScript.


The packaging is certainly very attractive featuring a very 80’s neon VHS style design on the front and a multitude of specs and features plastered over the sides and back of the box.


Wireless Tank Mouse

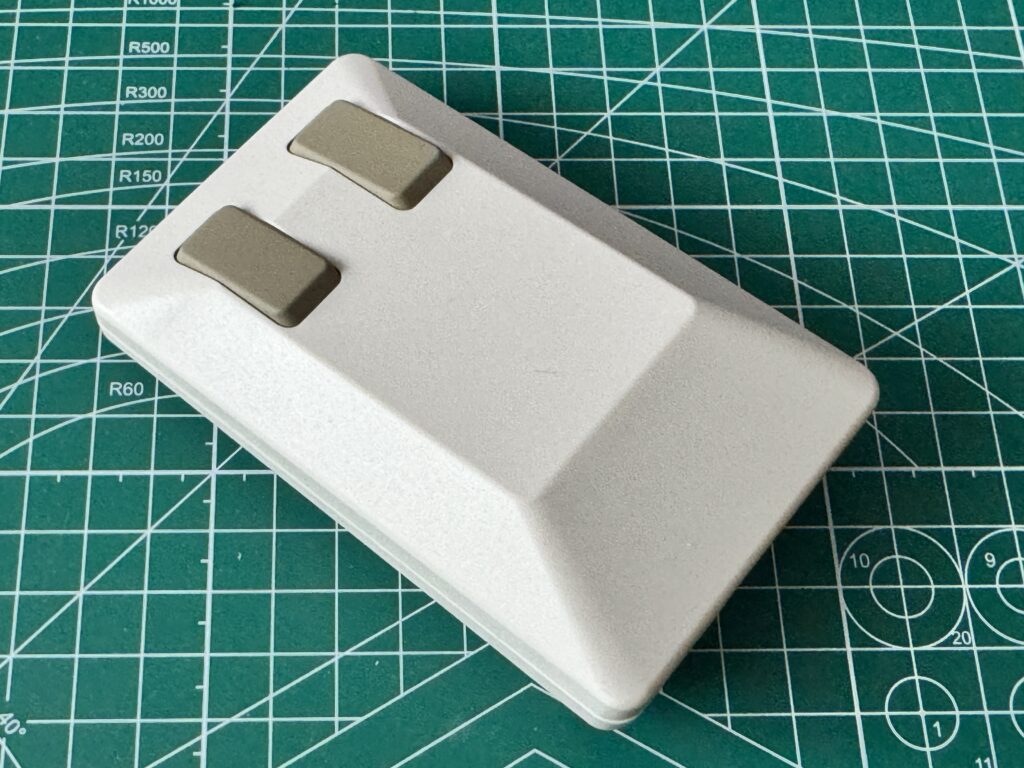
Wireless Tank Mouse


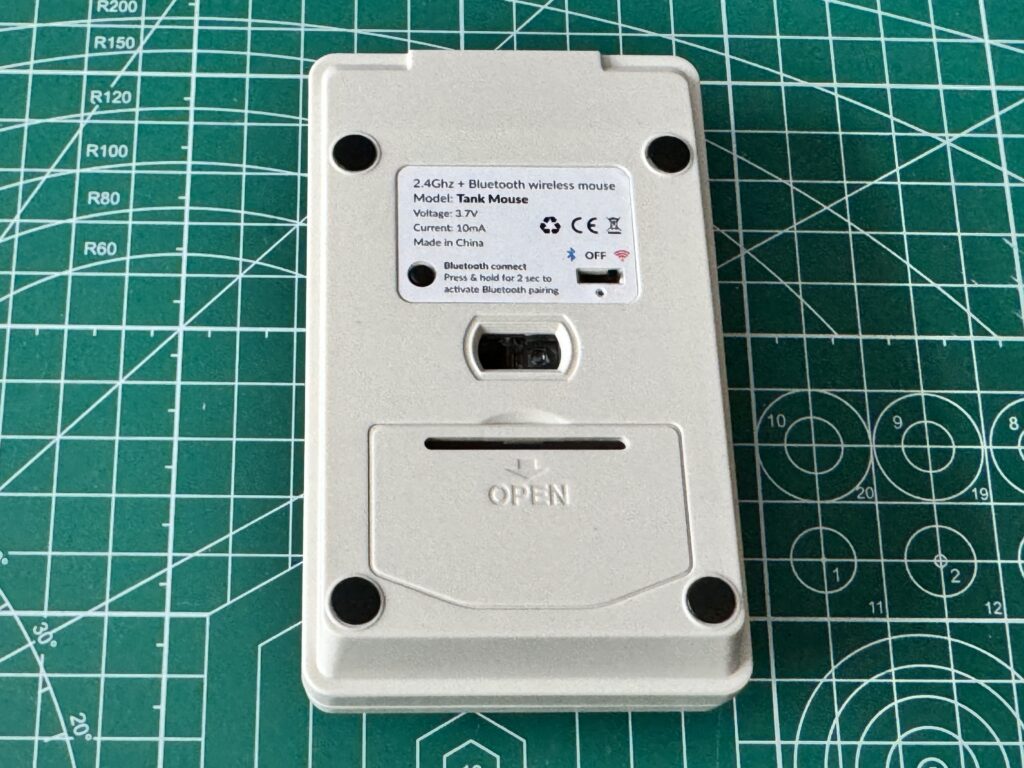
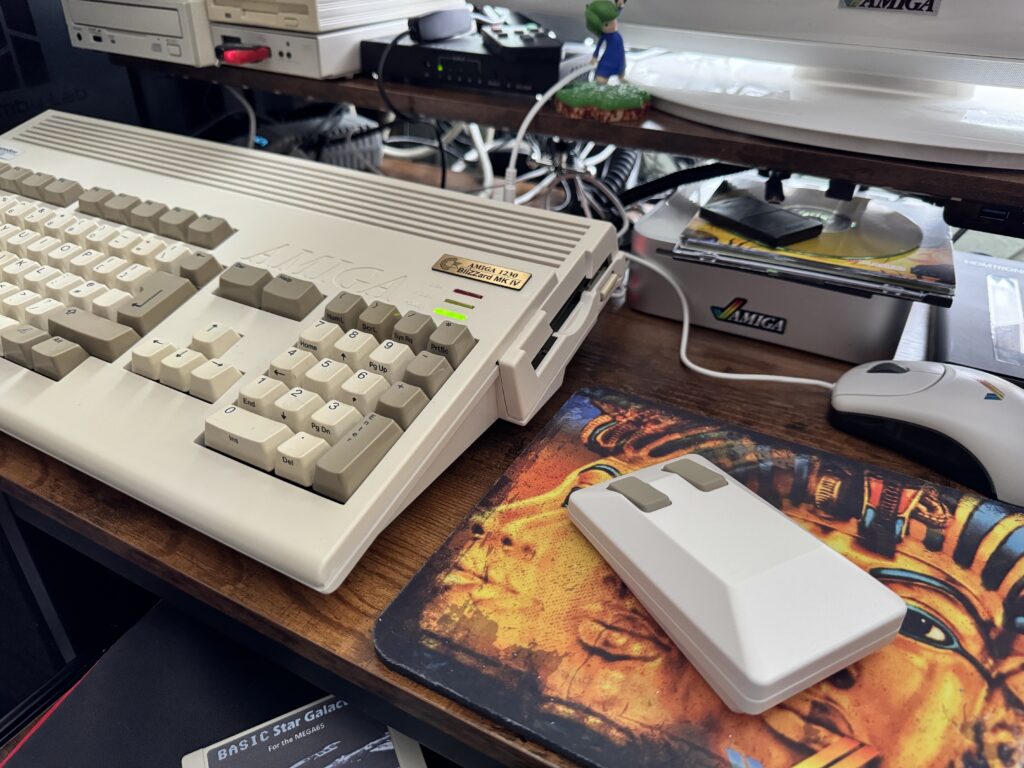
In the flesh it certainly looks the part and is very similar to the Amiga tank mouse we all know and love. Of course there’s two striking differences, the first of which is that this is now an optical mouse with the ball having been relegated to the history books. The second is the lack of a wire as this is now fully wireless, utilising either Bluetooth or 2.4Ghz to transmit the necessary signals back to your computer. You can switch between these options using a little 3-way switch underneath. This same switch is also used to power the mouse off when it’s placed in the middle position.


Wireless Tank Mouse

Wireless Tank Mouse underside


An optional extra that I purchased was the Tom adapter which came packaged separately in a little plastic bag. I have to confess to wondering why it was called Tom for a little while until I remembered the Tom and Jerry cartoons and then it all made perfect sense! Without this little gizmo the mouse will only work with modern computers which would defeat the purpose of it for me.


Wireless Tank Mouse with Tom adapter


The Tom device is basically just a USB to DB9 adapter with some clever electronics to convert the USB signals into something old Commodore computers can understand. Compared to most of the Tom adapters available on eBay this one seems to be extremely compact and is actually referred to as a ‘Micro Tom’. It’s housed in a really nice 3D printed case that holds everything together securely.


This slideshow requires JavaScript.


When placed next to my original Amiga Tank mouse you can see just how close the design is. The main visible difference, besides the obvious lack of a wire, is that the buttons are a little narrower and spaced further apart on the new mouse. There’s a good reason for this that I will get to later on.


This slideshow requires JavaScript.


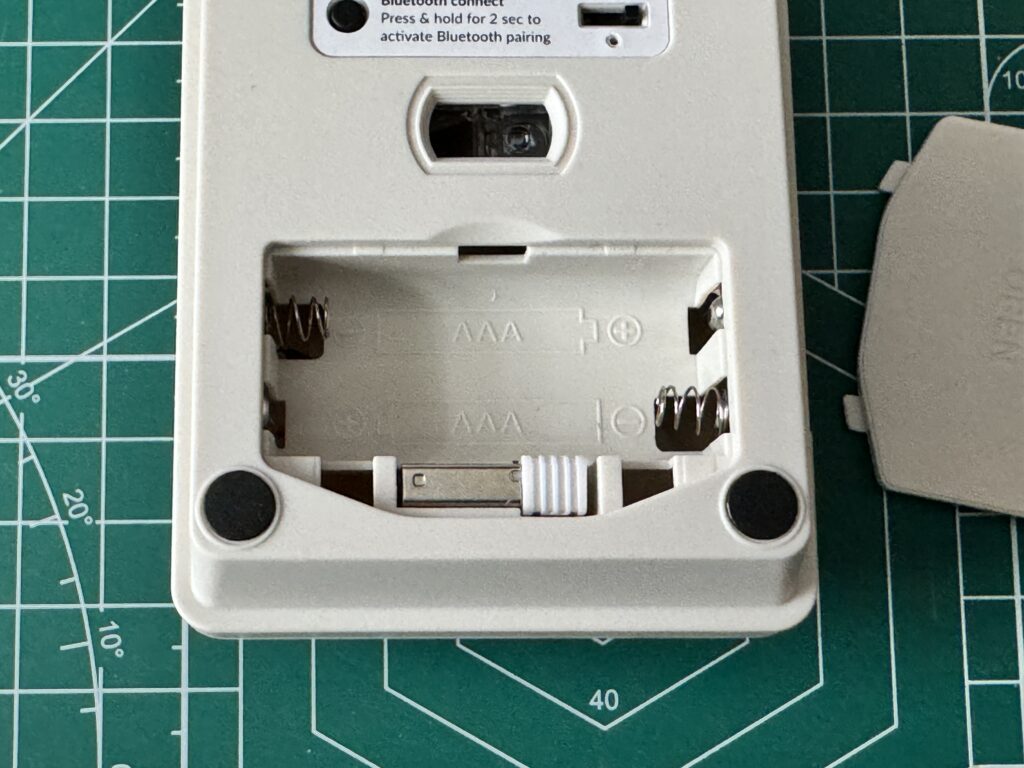
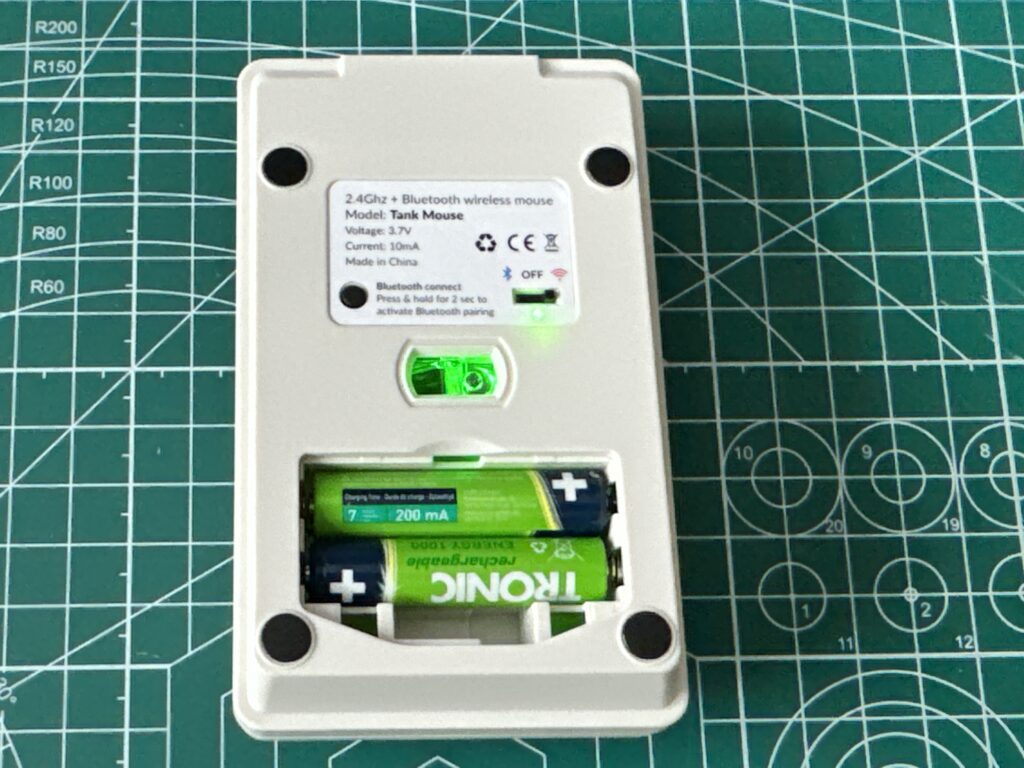
Opening up the battery compartment reveals a small USB receiver tucked away at the bottom.


Wireless tank mouse

Wireless tank mouse battery compartment and USB receiver storage


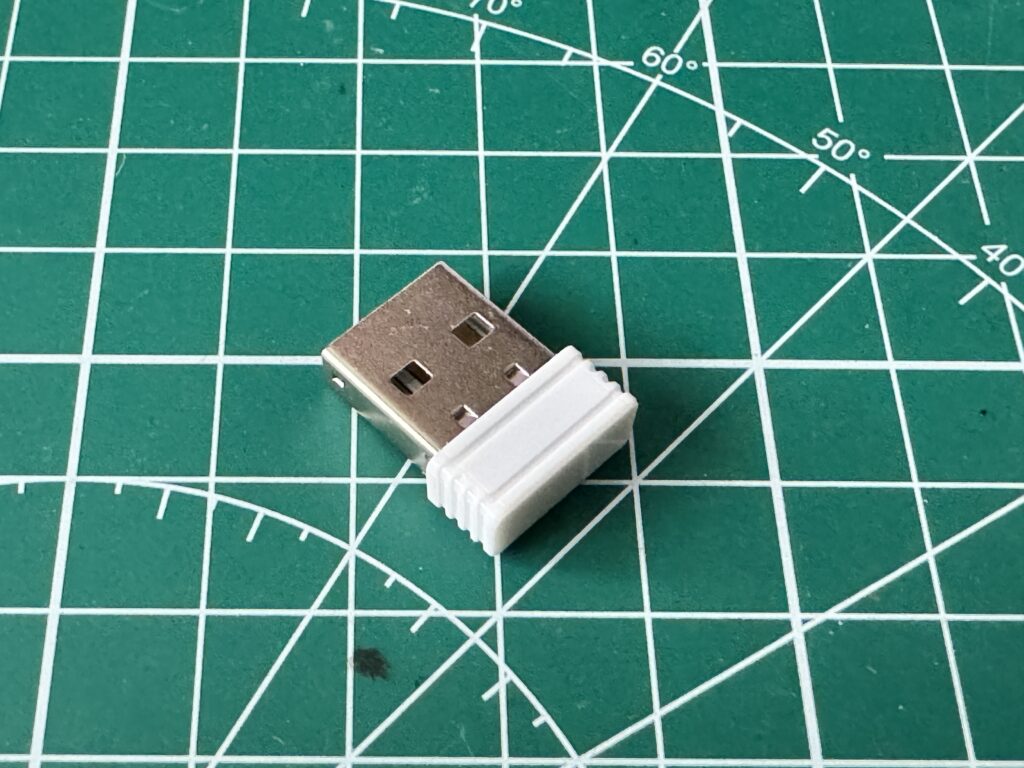
This USB receiver can be plugged directly into a modern computer should you wish (Mac, Linux or PC) so you can use the mouse with those systems (or emulators running on them). If your computer has Bluetooth then you can leave the receiver in its cubby hole and simply pair it with your PC using that instead.


USB Receiver

USB Receiver


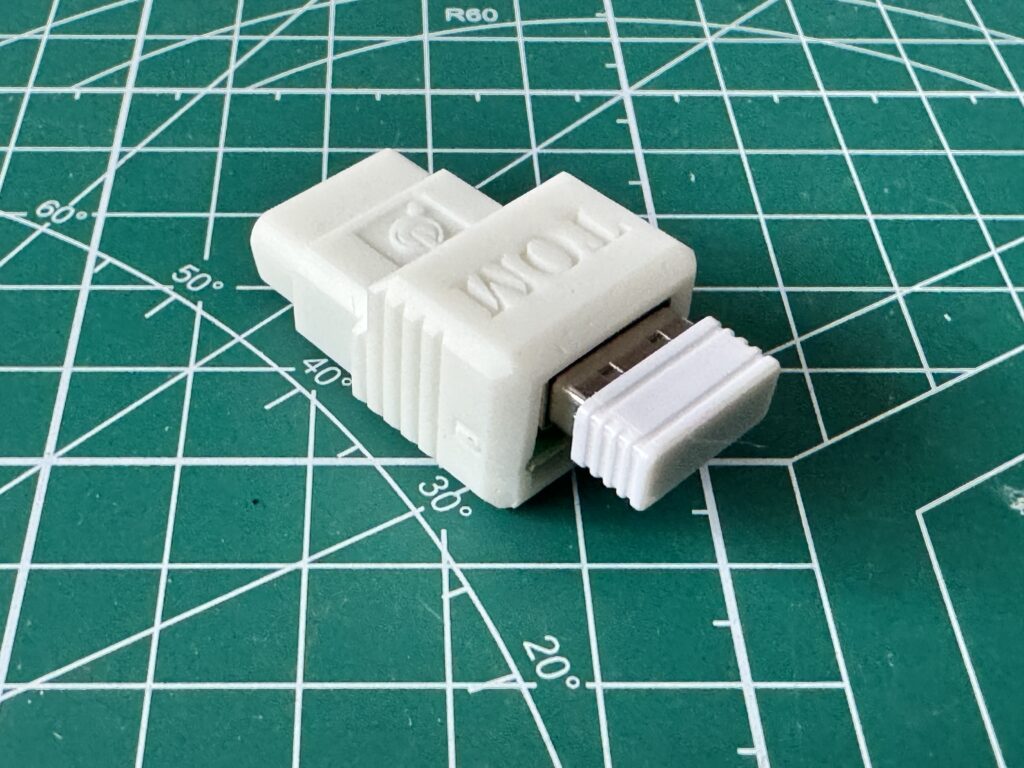
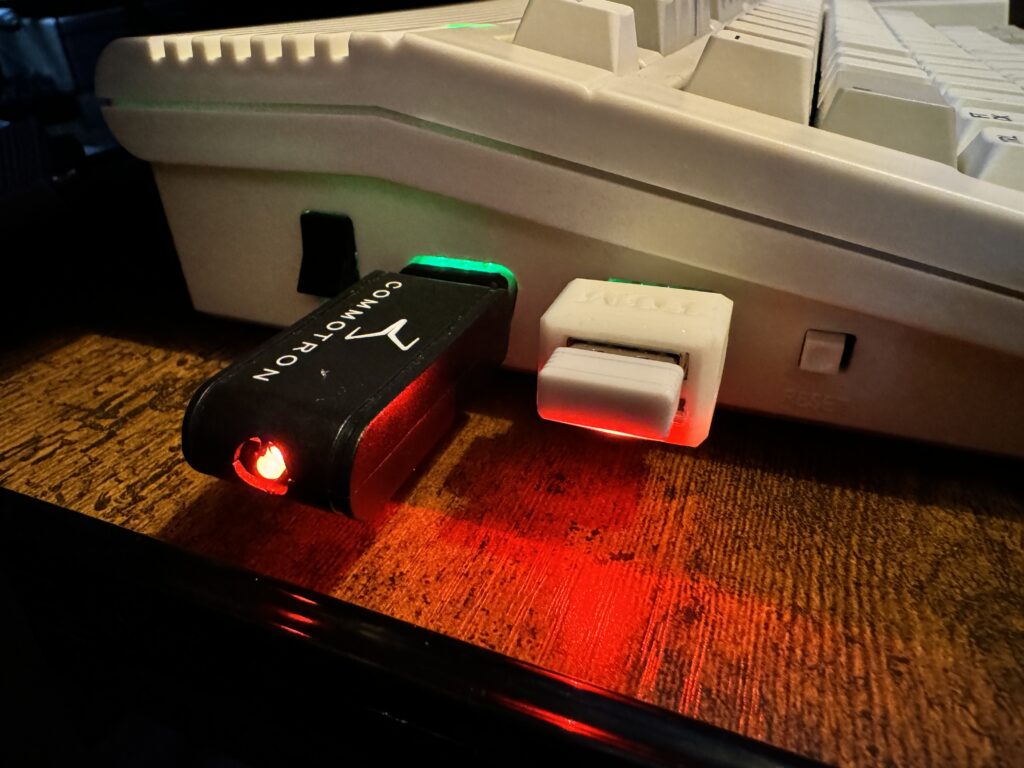
To use the mouse with Commodore machines you need to insert the USB receiver into the Tom adapter.


Tom adapter with USB receiver plugged in

Tom adapter with USB receiver plugged in


It was a really tight fit, so much so that I felt the need to double check I was putting it in correctly before risking applying more force to get the job done!


Wireless tank mouse batteries

Let there be (green) light!


It’s powered by a couple of AAA batteries (rechargeable ones appear to work fine) which helps to add a bit of weight to it. I know some people like their mice light but I’m not one of them so the batteries went some way towards compensating for the lack of the ball.


Mousing Around


Before trying the wireless tank mouse with my retro machines I gave it a quick go in my Windows 11 PC and it worked immediately and completely flawlessly. I also tried it with my MorphOS Apple Mac Mini G4 with similar success. When used with modern machines you can use it with your favourite emulator for a more immersive experience or even as your daily driver should you wish.

In addition to the obligatory left and right mouse buttons the wireless tank mouse actually fully supports mouse scrolling too. Now you may well be thinking how’s that possible – it has no scroll wheel? Well remember earlier on when I mentioned about the buttons being spaced further apart? That’s because the designer has ingeniously incorporated a touch sensitive strip between the two buttons. You can simply swipe up and down with your finger to scroll in those directions. It works really well too. Obviously it lacks the tactile feedback of an actual wheel but having one of those would ruin the whole aesthetic.


wireless tank mouse with my A1200

Using the wireless tank mouse with my A1200


I have plenty of mice for my modern computers though, I got this to use with my Amiga mainly so I plugged the Tom adapter into port 1 of my A1200 and powered it on, and it just worked. No messing around, no pairing, no software to install, just plug and play. The scrolling support worked seamlessly too, (I installed scroll wheel support for my existing wired Amga mouse years ago). Tracking was super accurate and smooth and the mouse was just as comfortable to hold as ever – in fact more so now as I’m not constantly fighting against the cable in the limited space I have available to use it!


Wireless tank mouse ‘Tom’ adapter (on the right)


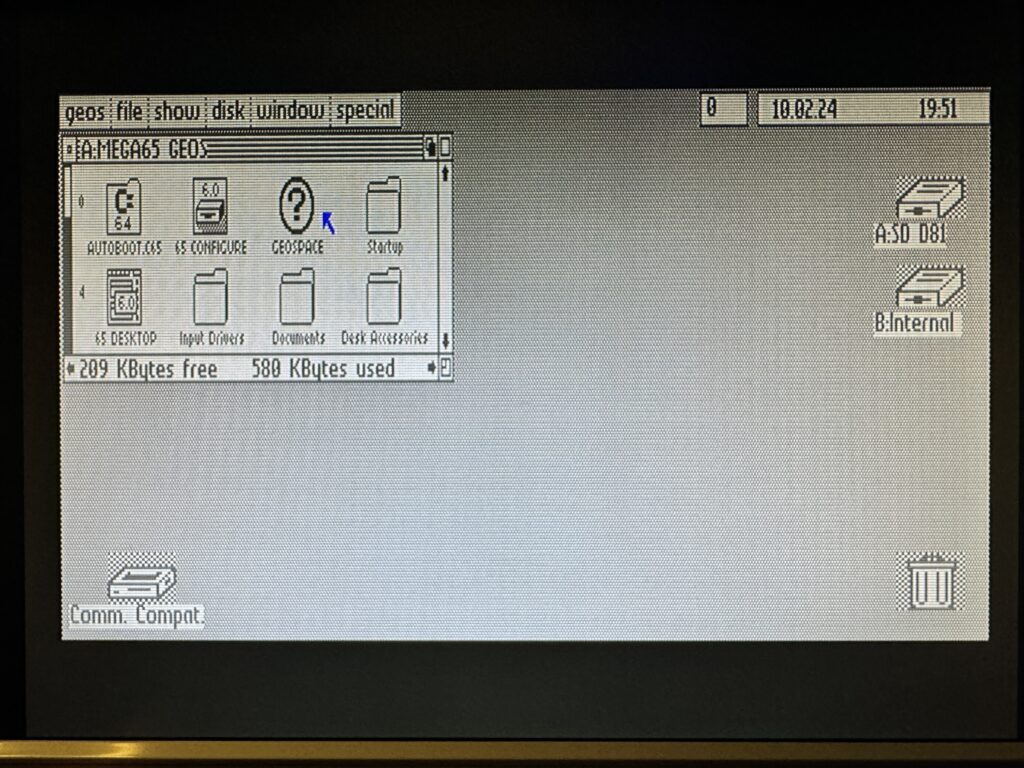
Satisfied that it worked with my Amiga I fired up my MEGA65 and loaded up GEOS65 and sure enough it worked really well with that too.


GEOS 65 running on my MEGA65 controlled by my wireless tank mouse


Next I invoked ‘GO64’ and switched my MEGA65 into C64 mode to load up a BASIC Solitaire game that I typed in a few years ago. This was designed to work the the Commodore 1351 mouse and sure enough this also worked like a charm with just occasional jittering. Incidentally this is also a game that really benefits from switching the CPU to 40Mhz mode – no more lag when shuffling the cards!

I tried it with my real C64C computer and ran into my first problem. It simply refused to work. After a bit of RTFM (or RTFW in this case) I discovered the following…


Switching between C64 and Amiga Mode


Out of the box the Tom adapter is configured to run in Amiga mode. Consequently when plugging it into a C64 it just doesn’t work. (Same for the alternative C64 CORE in the MEGA65). Thankfully it can be switched into C64 1351 mode quite easily by plugging in a USB mouse, holding down the middle button (usually the scroll wheel) at bootup and whilst still holding it down press the left mouse button a few times until the red LED flashes 3 times and then you can let go. The adapter will now behave like a 1351 mouse forever until you change it back.

I did come a little unstuck trying to change it back to Amiga mode though. Either I have a slightly different model of Tom adapter or whoever wrote the instructions on the Sordan site got a bit confused. Thankfully after about 30 minutes of swapping different mice, power cycling, cursing and failing I figured it out. To switch to Amiga mode I had to hold down the right mouse button at bootup and then rapidly press the left button until the red LED flashed just the one time and then let go. (The instructions tell you to do the complete opposite which makes it flash twice which appears to be Atari ST mode).


What do I think of it?


All in this is a fantastic product that works with a huge range of machines, both old and new. It oozes nostalgia thanks to its design but at the same time embraces modernity by swapping the ball for an optical sensor, the wire for wireless connectivity and adds ‘invisible’ scrolling support beneath the plastic case. It works with pretty much every machine I own; all my Amigas, CD32, MEGA65, Commodore 64, Mac Mini running MorphOS and even my PC’s and emulators. My only criticism is the method of switching modes on the Tom adapter is a bit of a faff. I would much prefer a little 3-way toggle switch than trying to pull off some kind of weird secret handshake with the mouse. Other than that though the wireless tank mouse seems to be a jack of all trades and a master of them all and I’m really glad I picked one up.


Amiga Future #168 – May/June edition out now

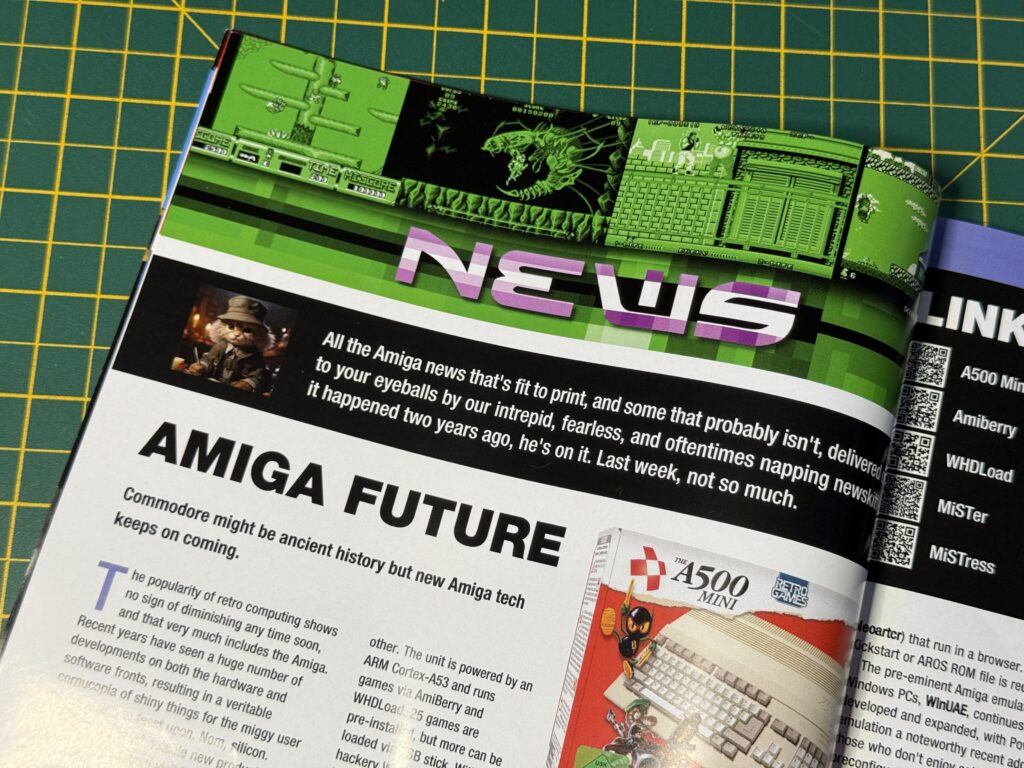
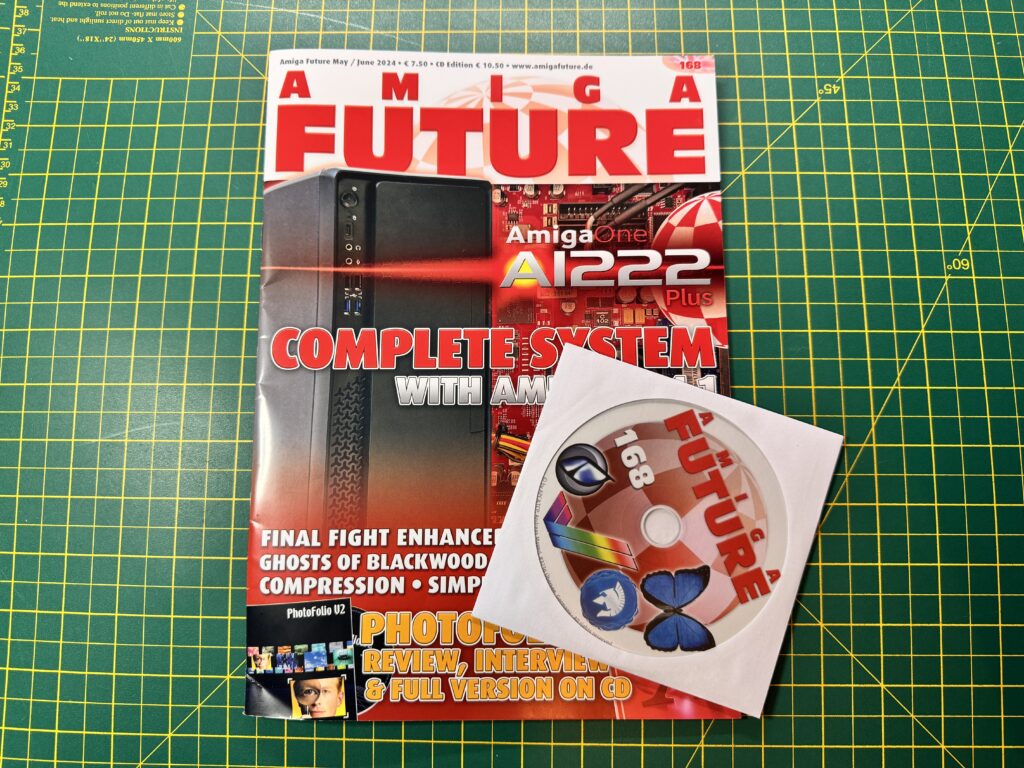
The latest issue of Amiga Future (Amiga Future #168) for subscribers arrived a few days ago. Excitingly the cover features a brand new Amiga computer – the AmigaOne A1222 Plus which I can’t wait to read about. No doubt it will be outlandishly expensive but one can dream!


Amiga Future #168

Front Cover.


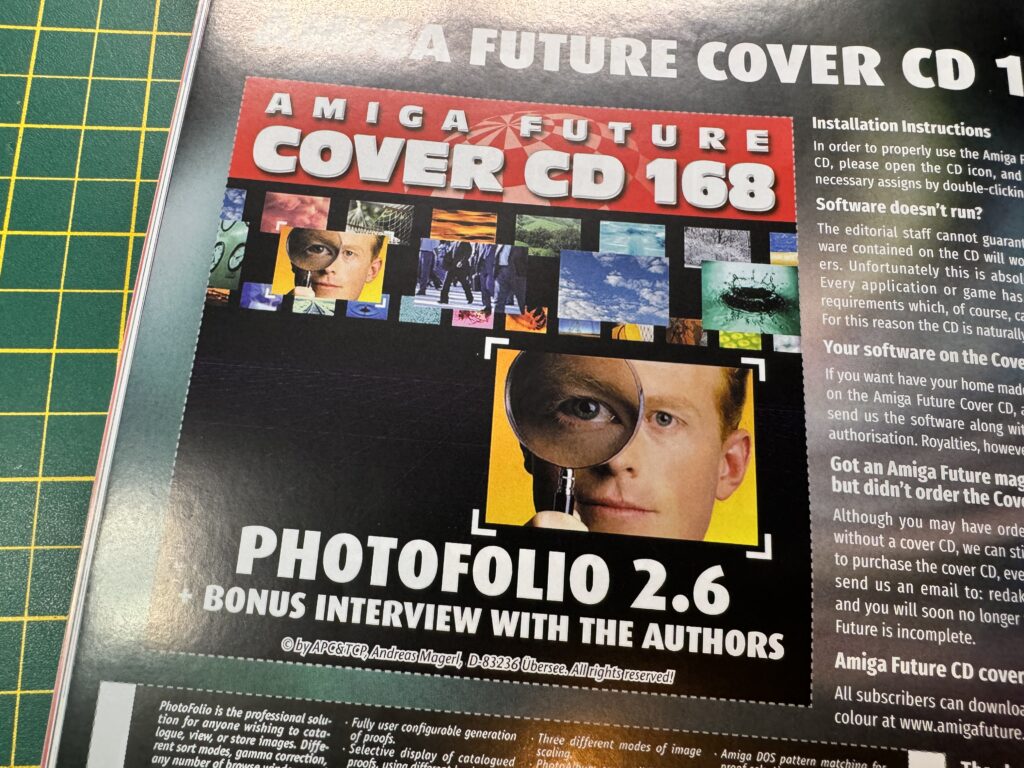
The Coverdisk

The main event on this months cover CD is ‘Photofolio 2.6’ which appears to be some sort of Amiga ‘Lightroom’. Regardless, I’m looking forward to investigating it!


Amiga Future #168

Cover CD.


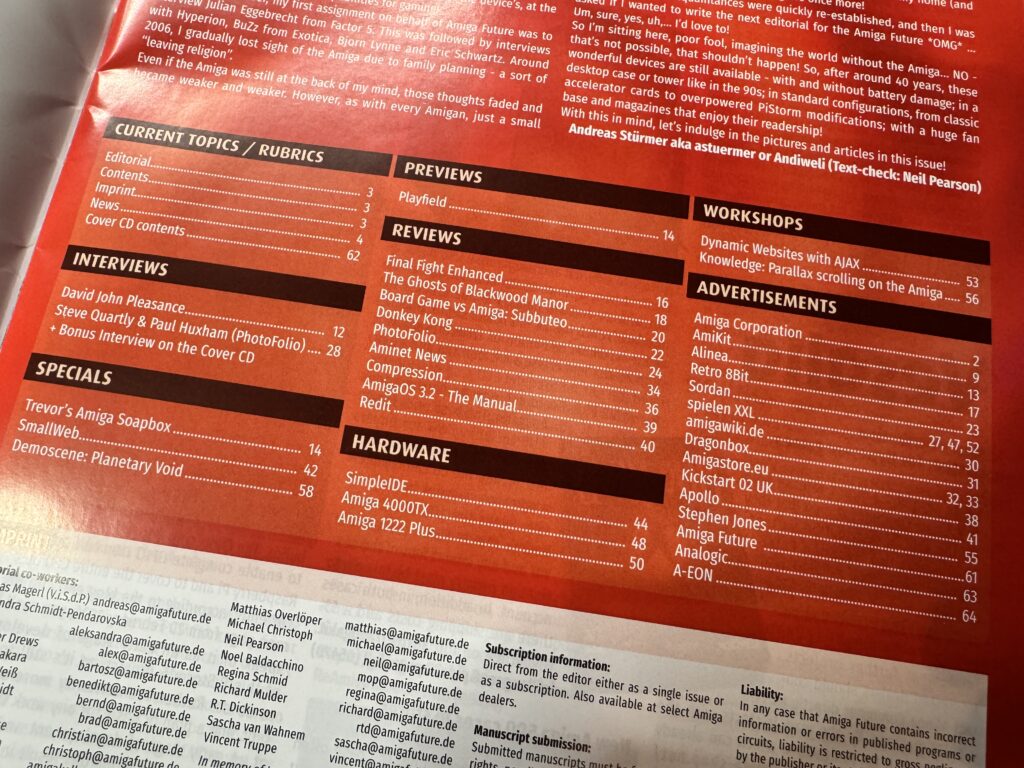
What’s in Amiga Future #168

Here’s a quick snap of the contents page to give you an idea of what is in this issue. There’s plenty of both game and software reviews this issue and some interesting hardware gets covered too.


Amiga Future #168

Contents Page


Below is a little peek at some of the stuff inside Amiga Future #168. If you’d like to purchase a copy then do please take a look here. – Incidentally I don’t get any commission or anything if you buy a copy, I’m merely trying to spread the word and ensure our little community continues to thrive. 🙂


This slideshow requires JavaScript.


Never come across Amiga Future magazine before? Perhaps you’d care to take a look at some of my other Amiga Future magazine previews here.

Freeze 64 Issue #67 Fanzine

Freeze 64 Issue #67

I’m not sure if the passage of time is accelerating or Vinny has cranked up production of Freeze 64 but either way I was happy to receive the latest edition of Freeze 64 in the post yesterday. It’s  now up to issue #67 and this edition features artwork from the brand new game ‘Good Kniight’ on the front cover.


Freeze 64 Issue #67

Issue #67 Cover featuring artwork from ‘Good Kniight’


Here’s a shot of the contents page so you can get an idea of what’s in this issue.


Freeze 64 Issue #67

Freeze64 Issue 67 Contents Page.


If you would like to find out how you can get hold of your own copy then head over to the Freeze64 website and take a look.

Finally, here’s a link to some of my previews of earlier editions of Freeze64.

Zzap! 64 Issue 19 out now

Here’s a slightly more in depth (than usual) look at my copy of Zzap! 64, Issue 19, that arrived in the post a few days ago. As well as the usual quick preview of what’s in the mag I run through what’s on this months digital coverdisk too.


Zzap! 64 Issue 19 Cover Image


As always the magazine is packed with content spanning 60 pages, including news, game reviews and insightful articles about the past, present and future Commodore 64 scene.


A Peek Inside

Here’s a quick look at the contents page giving an overview of what’s inside this issue.


Contents Page


The now familiar digital covermount page gives a preview of what’s on this editions disk.


Digital ‘covermount’ content page.


There’s plenty of goodies waiting to be loaded up on this months coverdisk, accessible via a slick menu screen accompanied by some great SID music as always.


Issue 19’s Covermount Menu screen


First up on the menu we have Alpacalypse – a side scrolling infinite runner style game where you have to dodge falling enemies, jump across gaps and collect fruit to increase your score. Vibrant, smooth-scrolling graphics and an excellent music track help to make this a fun game that is great for a quick blast of Alpaca action. High scores are saved to disk too which is a great feature all games should have and really fuels that ‘just one more go’ impulse.


This slideshow requires JavaScript.


Next up is Metal Mayhem which is a tank battle game for two players or a single player vs the computer. The AI enemy tanks are brutally efficient at destroying you so I guess it was more intended to be played with a friend.


This slideshow requires JavaScript.


Next we have ‘Spinning Image’ – probably my favourite game on this months disk. You are presented with two pictures – the one on the right is the ‘target’ picture whilst the one on the left has some bits missing. The game has you moving your avatar (Milly and Molly) left and right in order to line up and ‘fire’ a limited number of squares up onto the players picture to make it match the one on the right. The kicker is that the squares will only ‘stick’ if they bump up against an existing square.

You will quickly encounter areas where you seemingly have to get a quare to be suspended in mid air which is where the puzzle element comes into play. Some squares can be pulled back down allowing you to reposition them elsewhere to build a temporary framework to build on. A very challenging game on later levels yet still very relaxing to play as there’s no time limit in effect. The menu music is a bit annoying and shrill but the game music is thankfully understated and complements it quite nicely. You can save your progress too – essential for a game like this.


This slideshow requires JavaScript.


The fourth game this month is a demo of ‘Phantomas 3 – The Return of Brok’ which is a neat little platform game that utilises the C64’s hires graphics mode to produce some very nice, detailed graphics.


This slideshow requires JavaScript.


Finally there’s another demo, this time of a game called ‘Spy Agent’ which sees you trying to kill an enemy spy before he does the same to you. The game takes place within a single screen platform scenario with lifts and stairs to get around. You need a friend for this one as it’s two player only. It’s not much fun on your own as the enemy spy just stands there waiting for you to kill him before respawning elsewhere and then doing the same. Hopefully, as this is just a demo, they are working on an AI spy for all the solo players out there.


C64 Spy Agent

Spy Agent


Side 2 of the disk features a scene demo dating back to 1987, ‘Think Twice’ by The Judges featuring some funky scrolling effects and a decent SID music track.


Getting hold of a copy of Zzap! 64 Issue 19

This is another great edition of Zzap! 64 and well worth a buy. The magazine is available from Fusion Retro Books priced at £4.99. Make sure you use the code ‘LYONSDENBLOG’ to grab yourself a sweet 15% off the price! This code works for everything you place in your basket too!

Below you can peruse a small gallery of images from the magazine.


This slideshow requires JavaScript.

You can find other Zzap! 64 related posts here .

Converting a Simulant ‘Classic USB mechanical PC Keyboard’ to work natively with the Amiga

Amiga USB keyboard

Back when I purchased my Amiga USB keyboard in 2022 from Simulant it carried a disclaimer that it wouldn’t work with ‘real’ Amigas but that they were working on an adapter. That was about 18 months ago now and I had almost forgotten about it. However a few weeks ago I received an email saying they were taking pre-orders for the adapter so I jumped on board. It arrived a few days ago so I’ll go through the installation and how well it works in this post.


Amiga Conversion Kit Contents


The kit included the adapter, an A4000/CD32 keyboard cable, an A2000/A3000 adapter and a small strip of doubled-over plastic.


Raspberry Pi Pico


The adapter itself consists of a small Raspberry Pi Pico board affixed to a custom PCB that has some extra chips, sockets and circuitry to interface with the keyboard itself.


Back of the custom PCB


There were no instructions supplied with the kit at all, not even a bit of paper with a URL to visit for more info. Unsure if that was an oversight or not. Thankfully I received an email from them shortly before the delivery was due and it contained a link to download some new firmware for it. Within the zip file there was a small text file with basic instructions and a few photos. It was enough to set me on the path anyway.


Updating the Firmware

The very first task was to install the latest firmware on the Pico board. This was really straightforward and just required me to hook it up to my PC with a Micro USB cable whilst holding down the ‘BOOTSEL’ button on the Pico board. After a few moments it then appeared on my PC as a regular storage device; ‘RPI-RP2’ and I was able to copy the firmware across.


The RPI-RP2 mass storage device


The drive disappeared automatically once the firmware had successfully installed which was my cue to unplug it and move on to the next stage.


Dismantling the keyboard

The next job was to get the keyboard opened up. The top half of the keyboard overlaps the bottom half and is held in place by a series of plastic clips. There are four along the front edge and another four along the back – there are none on the sides.


Spudger time!


The two halves fit together extremely snugly so to avoid any cosmetic damage I used a plastic spudger tool to gently prise the them apart and then slid it along, disengaging the clips as I progressed.


Amiga USB keyboard

Top half of case removed.


With all the clips dealt with the two halves separated easily and I was able to lift the top off and place it to one side.


Amiga USB keyboard

Keycap puller


The next job was to remove some of the keycaps to gain access to the screws holding the keyboard and bottom of the case together.


Amiga USB keyboard

Keys removed revealing screw beneath.


First I removed the Caps Lock, Tab, Q and A keys on the left…


Amiga USB keyboard

Keys removed revealing screw beneath.


Then the 7 and 4 keys from the numeric keypad on the right.


Removing the left-hand side screw.


Then I removed the small phillips screw from each side of the keyboard…


It’s a screw!


and placed them, along with the keycaps, somewhere safe so I wouldn’t lose them in the black-hole that is my desk!


Don’t want to lose these!


With the screws removed I was then able to separate the keyboard from the bottom of the case.


Amiga USB keyboard

Bottom of the keyboard released


I then set about removing the cable clamp from the bottom of the case.


Removing the cable clamp screws.


The clamp was held in place by two phillips screws, smaller than the ones I had encountered earlier.


The cable clamp.


The cable was then free to be moved around to give me more slack to work with for the next stage.


The path of the cable is a curvy one…


In order to fit the adapter I needed to remove the old cable from the keyboard circuit board.


Silcone…


Unfortunately for me, whomever made it decided it would be a good idea to squirt lashings of silicone all over it.


Slcing the silicone off


I spent the next 20 minutes very carefully removing chunks of silicone…


Another chunk of silicone removed…


using a combination of craft knife and tweezers, doing my best not to slice through anything I shouldn’t!


A lovely mess.


It was a pretty tedious task but eventually I had a small pile of silicone bits and I was able to remove the old plug from the socket and feed it back out through the small slot in the case.


Finally – all gone.


This eventually left me with a nice, silicone-free, keyboard cable socket!


Installing the adapter

Now it was finally time to install the adapter. I began by gently feeding it through the small slot in the base of the keyboard case until I had enough cable to work with,


Pushing the new cable through the slot.


Next I connected the plug into the empty socket on the adapter board.


Cable now hooked up to the Pico board.


Simulant recommend the adapter be placed out of the way with the two sockets straddling the plastic ridge in the case so I placed it between the left foot and the cable entry point as shown below.


Placing the adapter board out of the way.


Once I’d placed the cables where I wanted them to go I re-attached the cable clamp to hold it in place.


Attaching to the keyboard.


The final connection task was to plug in the short fly-lead running from the adapter into the socket on the keyboard (the one that was previously covered in silicone).


Plastic shielding.


Before closing everything up I wrapped the adapter in the plastic sheathing provided and secured it with a little sticky tape. This was there just to prevent any kind of electrical short occurring between the adapter and the bottom of the keyboard circuit board.


Making sure nothing gets trapped as the case is reassembled.


I then carefully mounted the keyboard back into the bottom of the case making sure that nothing got trapped in the process and then re-seated the top of the case over everything to hold it all together once more.


Ta-da!


Testing

The conversion was now complete so it was time to hook it up to my Amiga and put it through its paces!


A4000 PS/2 connector.


The standard cable it comes with ends in a PS/2 connector, like the one you would find on an A4000.


The 5-pin DIN adapter.


It also comes with an adaptor to convert it into a 5-pin DIN style connector more commonly found on A1500/2000/3000 machines.


The adapter cable.


Sadly I do not own any kind of big box Amiga to test it out with… the price of these machines has skyrocketed in recent years and it’s difficult to justify the expense when they appear on eBay, However I do have a CD32 console and this is blessed with an A4000 style PS/2 socket so I used that for my testing.


CD32 PS/2 ‘AUX’ socket.


My CD32 is equipped with a ‘TerribleFire 330‘ which means I am able to run a fully loaded Workbench environment off a compact flash ‘hard drive’. I have it hooked up to my Philips CM8833-Mk2 monitor via RGB. Not as good as an A3000 with RTG but it’s still a nice setup.


New keyboard connected.


I loaded up a copy of Final Writer and began bashing away on the keyboard. It’s a lovely typing experience with plenty of tactile feedback without being too clicky and annoying. All the characters and punctuation marks appeared correctly including the likes of £, @ and $ (I’m in England so use a British keyboard layout). The caps lock key also functioned correctly as did the number lock key.


Final Writer.


One little quirk I did notice was that the hash key next to the Return key was basically redundant and had no function at all. Interestingly this is a blank key on my A1200 and doesn’t exist at all on my A500 so it makes more sense in light of this. It was not an issue anyway as the hash character was accessed using the key to its immediate left whilst the tilde character was accessible from the key to the left of the numeric 1 key (which is where it is located on a real Amiga keyboard).


Proper Amiga keycap layout.


The other important thing I realised was that the Amiga keys didn’t work when trying to access Amiga shortcuts, however I found that the two ‘Alt’ keys did. I solved this by simply swapping the keycaps over so that the Amiga keys were placed directly either side of the space bar and the Alt keys adjacent to those. After that everything behaved correctly with shortcuts like ‘Amiga+ S’ to save and of course the ‘three finger salute’, CTRL, A + A to reset it proving to be no problem at all.


Rounding Off

At a shade over £50 this is not a cheap kit, especially when you’ve already shelled out over £100 for the Amiga USB keyboard. However it’s been well designed and does exactly what they said it would. Considering the price that original A4000 keyboards can go for on eBay it begins to look a lot more economical! It’s also been made in very small numbers so there’s no economies of scale at play either.

My only criticism would be levelled at the lack of any instructions included with the kit but maybe someone just forgot to throw them in the jiffy bag when they were packing mine? Additionally, and this is not a criticism – more of a request really, it would be great if they could give us the option to quickly switch from the original USB configuration to the Amiga one without having to take it all apart again. I’d like to continue using it with my MorphOS machine as well as with my emulated Amigas and not be forced into choosing one or the other. A first world problem for sure!

Anyway if you already have one of these Amiga USB keyboards and want to use it with a big box Amiga then I can heartily recommend this as it does exactly what it says on the tin!

Zzap! Amiga Issue #15 is out now

Today I received the latest edition of Zzap! Amiga Issue #15 ‘Micro Action’ in the post. Here’s a little glimpse inside so you can get an idea of what to expect in this issue.


Zzap! Amiga Issue #15

Zzap! Amiga Front Cover


A Look Inside


Here’s the contents page and below it, a handful of the 60 pages within this edition.


Zzap! Amiga Issue #15

Zzap! Amiga Issue #15 Contents Page


This slideshow requires JavaScript.


At £4.99 plus postage for 60 A5 pages of Amiga goodness this is, as always, another worthy addition to my retro magazine collection. Don’t forget you can get 15% off a copy of your own with code ‘LYONSDENBLOG’ at the checkout!

Head on over to Fusion Retro Books to pick up your own copy of Issue #15.

Some more Zzap! Amiga magazine previews here.

Freeze 64 Issue #66 Fanzine

Issue 66 of Freeze 64 arrived in the post earlier today and features artwork (created by AI Vinny says) for the game ‘Strangeloop’ on the front cover. Why? Because this game is the main feature of this edition. Sadly no cheat card this month though.


Freeze 64 Issue #66

AI Generated ‘Strangeloop’ cover


Here’s a shot of the contents page so you can get an idea of what’s in this issue.


Freeze 64 Issue #66

Freeze64 Issue 66 Contents Page.


I’ve been getting Freeze 64 for many years now and have just extended my subscription for another year as Vinny continues to make a fantastic magazine that deserves our support. If you would like to find out how you can get hold of your own copy then head over to the Freeze64 website and take a look.

Finally, here’s a link to some of my previews of earlier editions of Freeze64.

Amiga Addict 28 out now

Behold, the latest issue of Amiga Addict magazine, issue 28, arrived today. This month the cover is devoted to the awesome Scala multimedia software to complement the in-depth six page feature within the magazine itself.


Amiga Addict 28

Issue 28 cover


Below is a peek at the contents page giving an overview of what’s inside this months issue.


Amiga Addict 28

Contents page


Here’s the coverdisc page providing details about what you can expect to find on this months disk (whether that be real or virtual). This month brings a collection of 3 PD games; Baldy: The Search For Missing Disks, Mad Bomber and Zerberk.


Amiga Addict 28

Coverdisk Capers


If you are not familiar with Amiga Addict cover disks, they only provide the labels – you have to supply the floppy disk. The self-adhesive labels are always of a super-high quality in glossy full colour with a peel-off backing. When applied to a suitable floppy they really look the part and provide a good excuse to blow the cobwebs out of your Amiga’s floppy drive.


Amiga Addict 28

My Maxell CoverDIsk 🙂


The magazine consists of 60 A4 full colour pages and features loads of news, reviews, articles, tutorials and more. This issue costs £6.50 (plus P&P) and is available from the Amiga Addict website. Amazingly it is also available in some bricks and mortar newsagents such as WHSmith so you may be able to pick it up there if you’re lucky and save yourself the postage!


A Look Inside Amiga Addict Issue 28


I’ll leave you with a quick look at just few of the articles that can be found in issue 28.

This slideshow requires JavaScript.


Finally, here’s a link to some of my previews of other, earlier editions of Amiga Addict magazine.

Amiga Future #167 – March/April edition out now

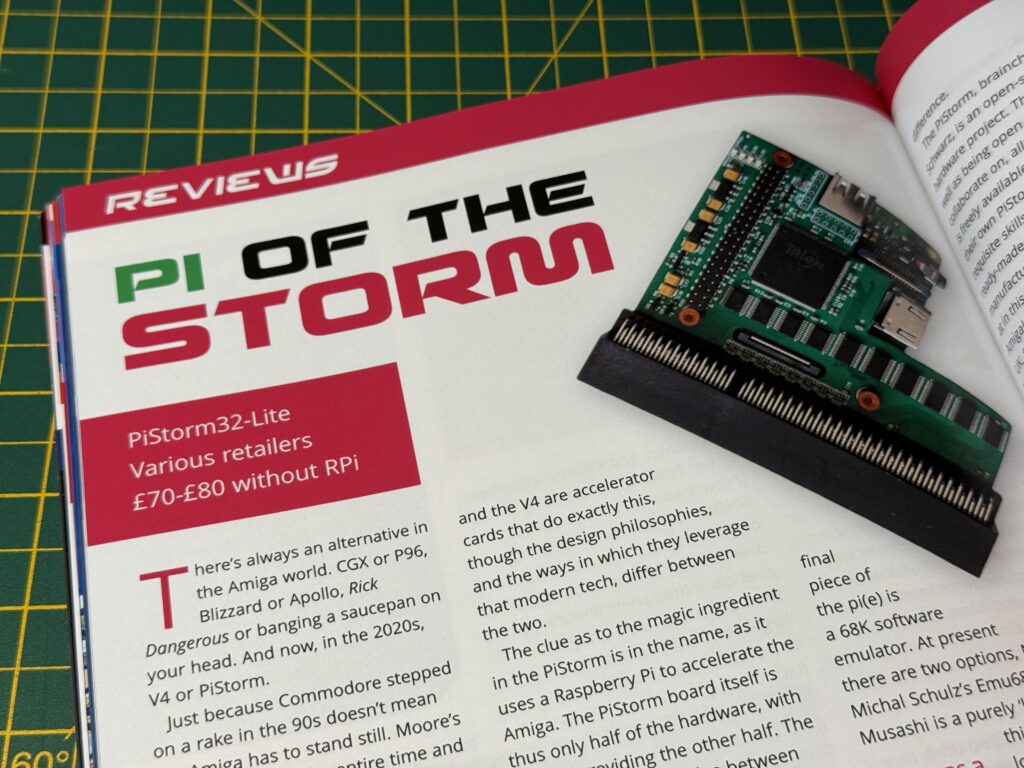
The latest issue of Amiga Future (Amiga Future #167) for subscribers arrived a few days ago. This time around the front cover features the A1200 PiStorm Lite Adapter along with some nice artwork from the ‘Stuntman Seymour’ and ‘Super Delivery Boy’ games that are reviewed in this issue.


Amiga Future #167

Issue #167 Front Cover.


The Coverdisk

The main event on this months cover CD is ‘Fatman’ and ‘Wheelspin’ for the gamers and ‘Font Machine 3’ and ‘X-DVE 3.5’ for the tinkerers. Pretty decent disc this issue with something for everyone really.


Amiga Future #167

Issue #167’s cover CD.


What’s in Amiga Future #167

Here’s a photo of the contents page to give you an idea of what is in this issue. There’s plenty of both game and software reviews this issue and some interesting hardware gets covered too.


Amiga Future #167

Contents of Issue #167


Below is a little peek at some of the stuff inside Amiga Future #167. If you’d like to purchase a copy then do please take a look here. – Incidentally I don’t get any commission or anything if you buy a copy, I’m merely trying to spread the word and ensure our little community continues to thrive. 🙂


This slideshow requires JavaScript.


Never come across Amiga Future magazine before? Perhaps you’d care to take a look at some of my other Amiga Future magazine previews here.

Zzap! 64 Issue 18 out now

Here’s a quick look at my copy of Zzap! 64, Issue 18, that arrived in today’s post.


Zzap! 64 Issue 18

Zzap! 64 Issue 18 Cover Image


As always the magazine is packed with content spanning 60 pages, including news, game reviews and insightful articles about the past, present and future Commodore 64 scene.


A Peek Inside

Here’s a quick look at the contents page giving an overview of what’s inside this issue.


Zzap! 64 Issue 18

Contents Page


The now familiar digital covermount page gives a preview of what’s on this editions ‘disk’. If only someone would start producing 5.25″ floppies again…


Zzap! 64 Issue 18

Digital ‘covermount’ content page.


There’s half a dozen goodies waiting to be selected on this months covermount, plus an additional full game hidden away in the Zip file – ‘Elasto Mania 64’ which is a very cool (and tricky) physics based  scrambler bike game. Imagine something along the lines of an 8-bit ‘Trials’ game. Impressive stuff for the C64.


Zzap! 64 Issue 18

Issue 18’s Covermount Menu screen


Getting hold of a copy of Zzap! 64 Issue 18

This is another great edition of Zzap! 64 and well worth a buy. The magazine is available from Fusion Retro Books priced at £4.99. Make sure you use the code ‘LYONSDENBLOG’ to grab yourself a sweet 15% off the price! This code works for everything you place in your basket too!

Below you can peruse a small gallery of images from the magazine.


This slideshow requires JavaScript.

You can find other Zzap! 64 related posts here .