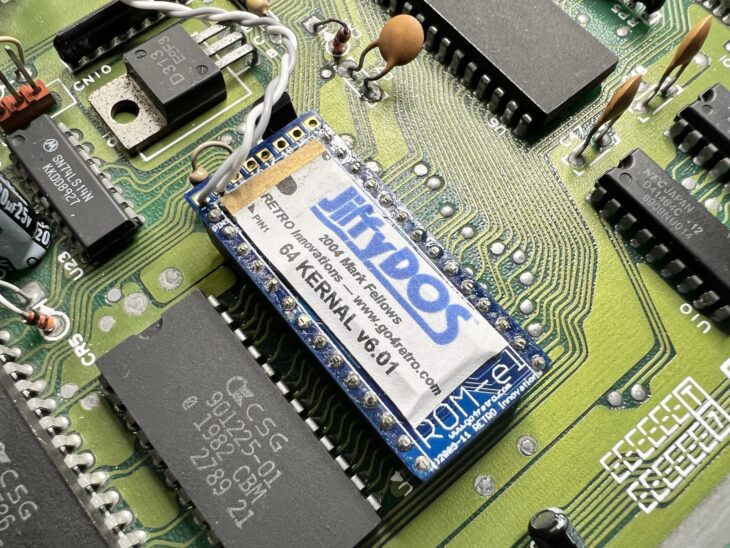
I recently bought some official JiffyDOS ROM’s from Retro Innovations in the USA and they arrived a couple of weeks ago. They came individually cossetted in small little cardboard boxes packed with fluff like tiny little eggs in nest. The boxes themselves were packaged inside a jiffy bag. Interestingly no instructions were supplied but these are readily available on their website so not too much of an issue.
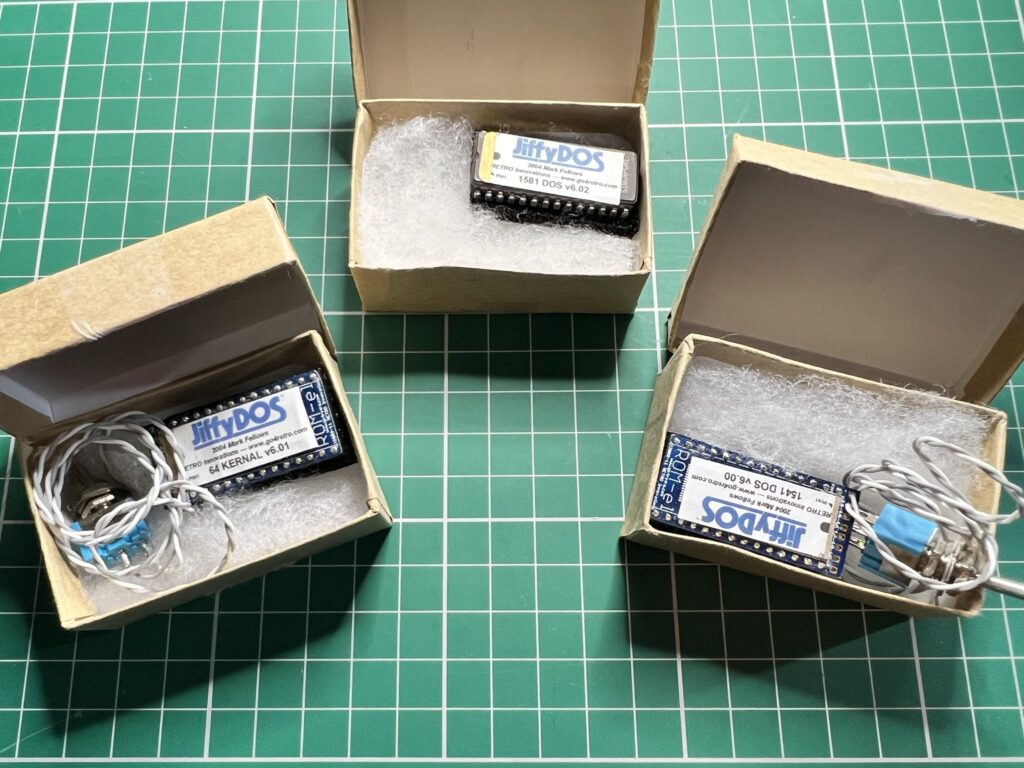
The three different types of JiffyDOS ROM’s I received.
I excitedly opened up the case on my 64C so I could set about installing the replacement Kernal ROM chip… and immediately encountered my first major problem. My ROM wasn’t socketed, meaning I would have to de-solder the existing chip before I could even think about replacing it.
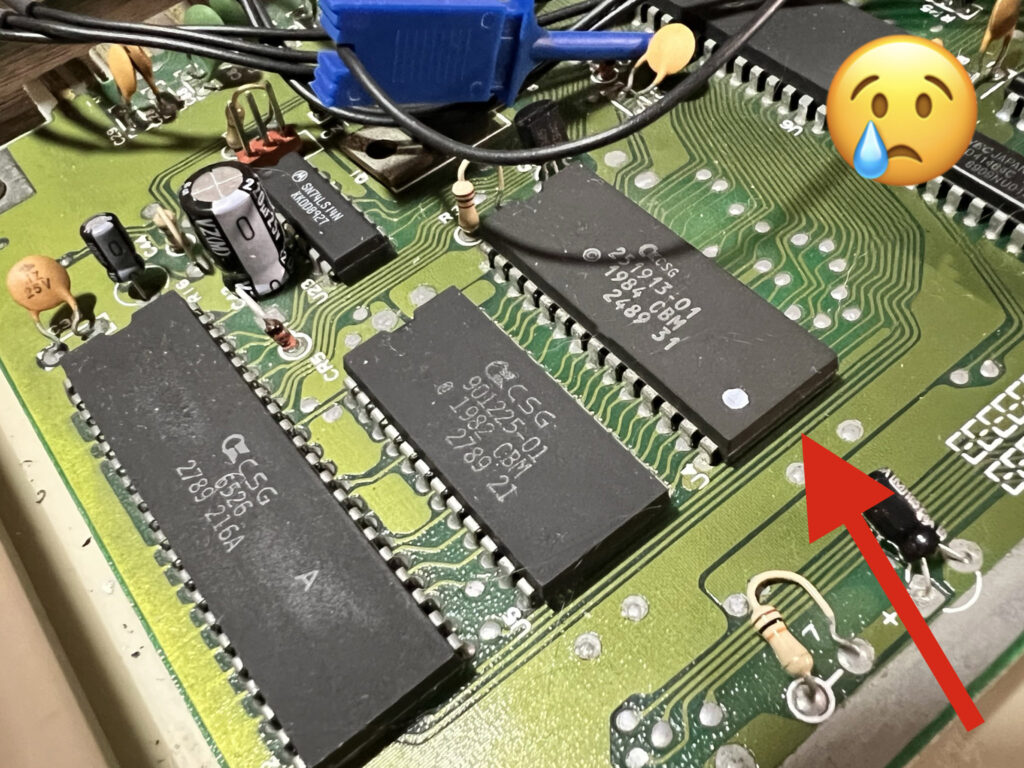
C64C kernal ROM soldered directly to motherboard.
I don’t have any fancy de-soldering tools, just a cheap solder sucker and some braid. I’ve never had much luck with a solder sucker as the solder always seems to solidify by the time I get the sucker into position. I knew it would all end in tears unless I bought a new tool to make life easier. I’ve seen people on YouTube using electric de-soldering guns that use a vacuum pump to suck out the solder which would be perfect but I didn’t want to spend that much money on something I wouldn’t be using very often. I settled for the tool you see below (Preciva Electric Desoldering Pump) which was a nice compromise coming in at under £40. Instead of a vacuum pump it uses a spring loaded mechanism just like a normal solder sucker – but with the added benefit of a heated nozzle to melt the solder.
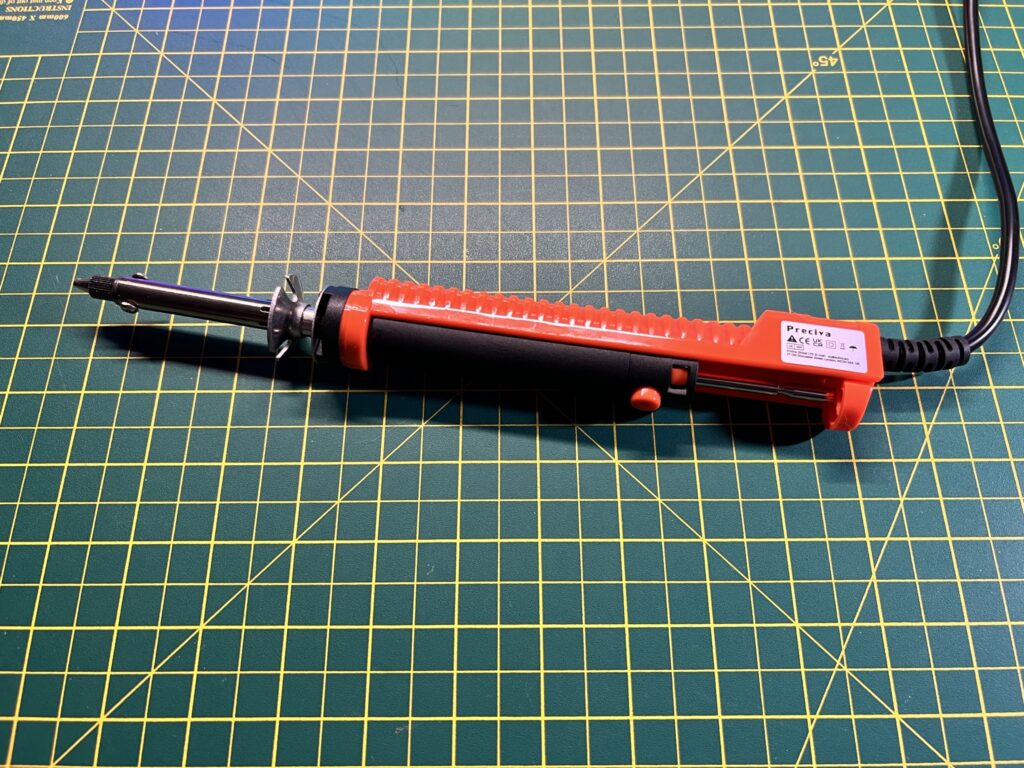
Preciva Electric Desoldering Pump
Thankfully the device turned out to be a good investment and worked well. I just placed the nozzle over each of the pins in turn and left it there for about 6 seconds or so and then triggered the suction pump. I repeated the process a couple of times for each pin to make sure I’d got all the solder out. Obviously not as convenient as having continuous suction but no big hardship to re-prime the pump each time.
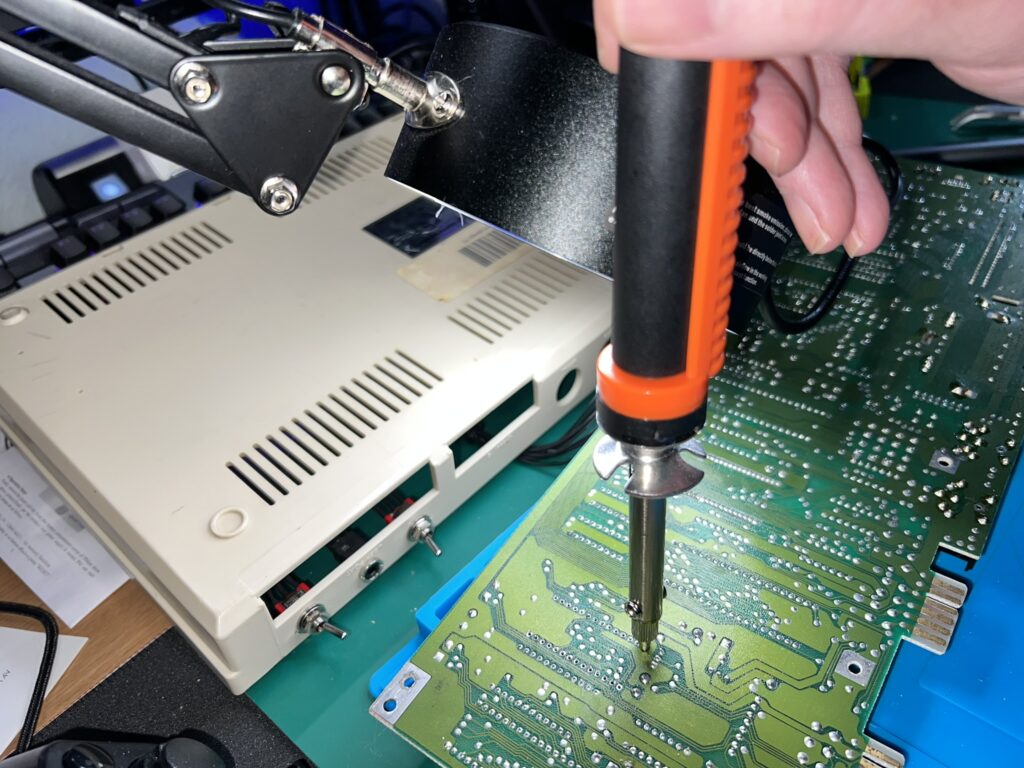
De-soldering the Kernal ROM with my new tool.
Of course things are never quite so simple and when I tried to remove the chip a few pins were still being held in place by a few bits of solder so I revisited those a couple of times before it finally came free.
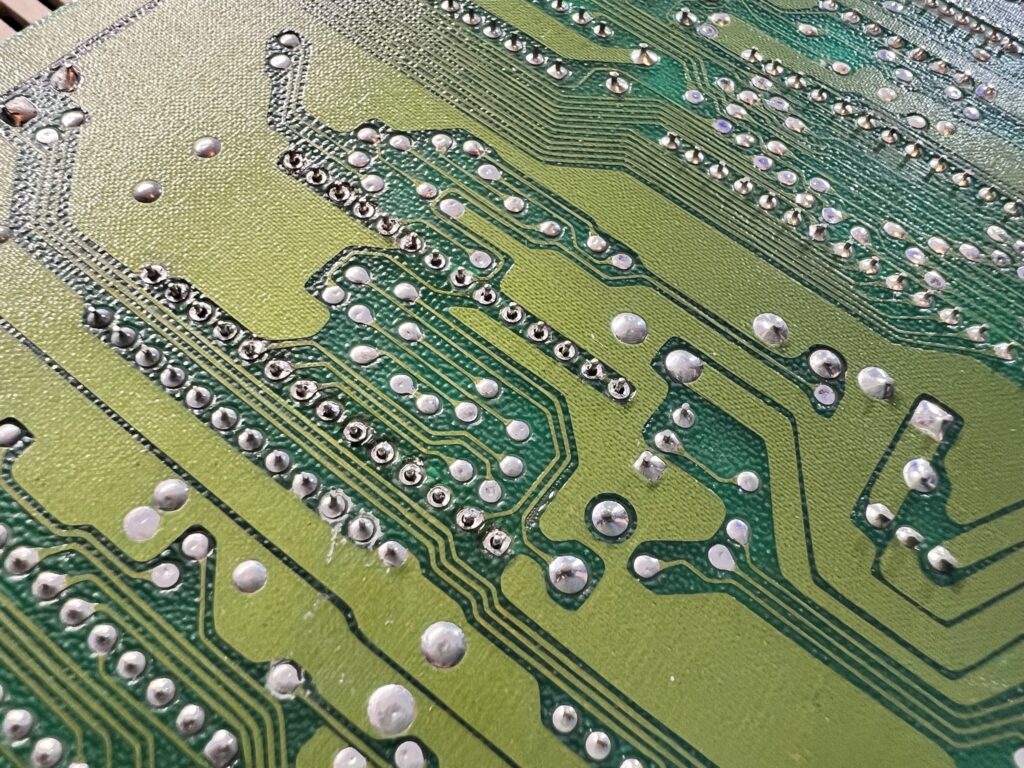
De-soldered and ready to remove.
Once I had removed the original kernal ROM I stored it away in a safe place and popped in the new socket, making sure the notch was in the correct place (facing the back of the C64).
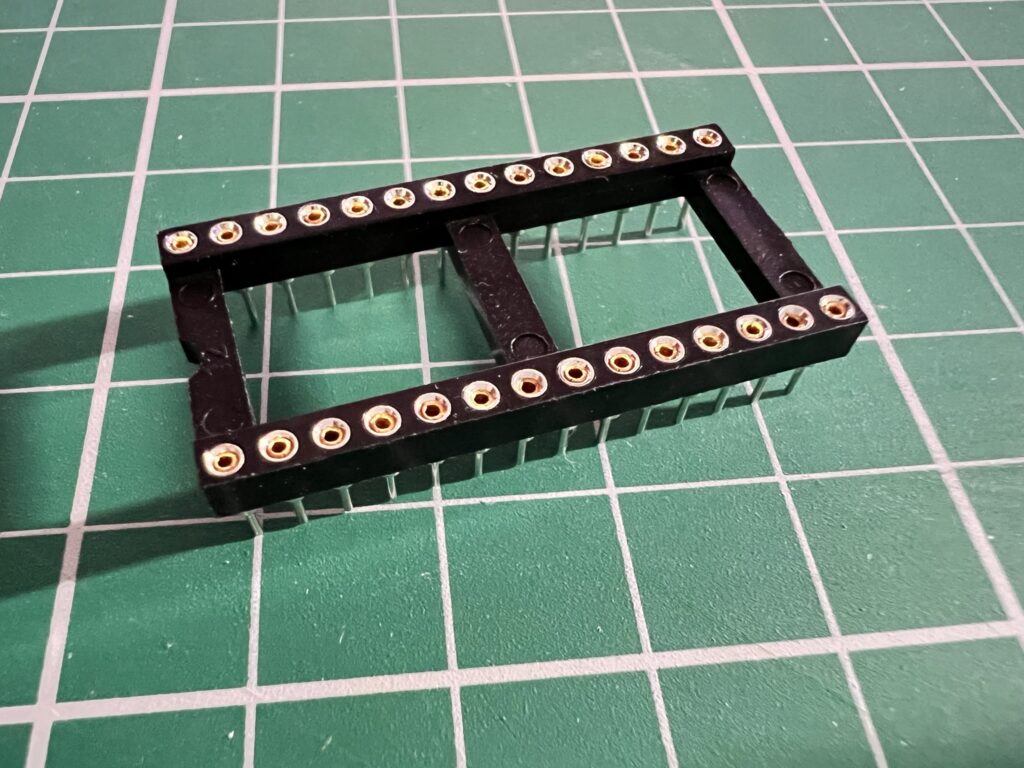
This is the 28pin socket I needed to install to take the JiffyDOS ROM.
I then soldered each corner of the socket in place whilst holding it in position with a few lumps of Blu Tack.
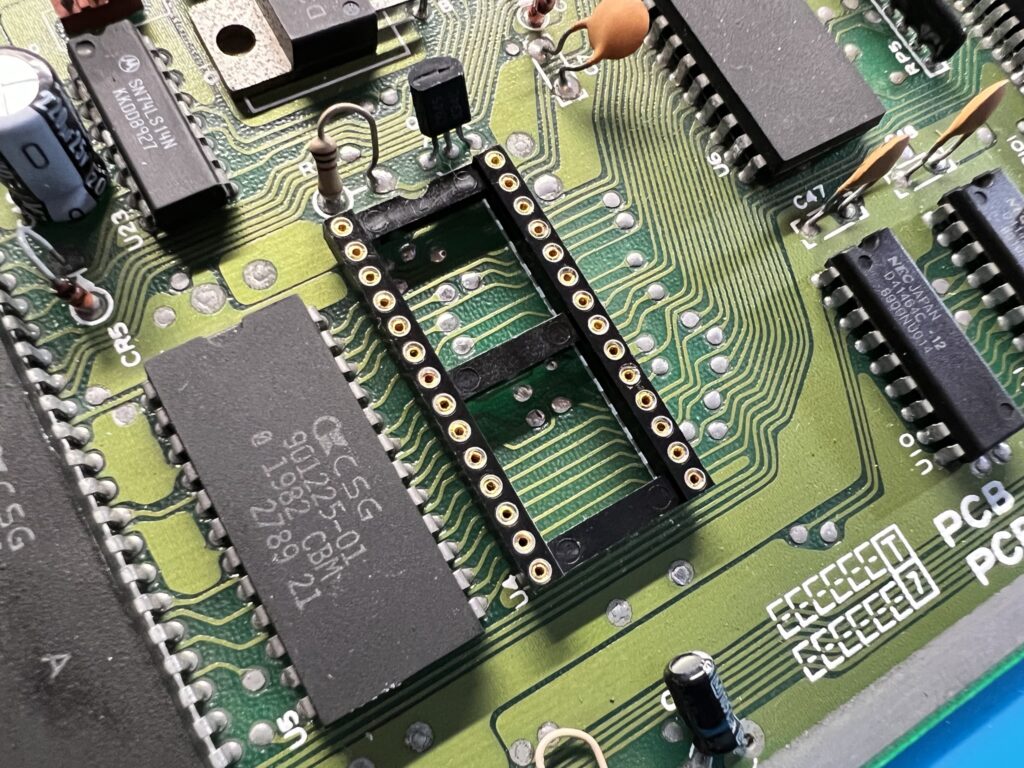
Socket soldered into place.
With the socket now held secure I soldered the rest of the pins. I always use a lead based solder as I just find it so much easier to work with than the lead-free stuff. I used flux to ensure the solder flowed nicely too which did leave a sticky mess to clean up afterwards but it came off easily with some isopropyl alcohol.
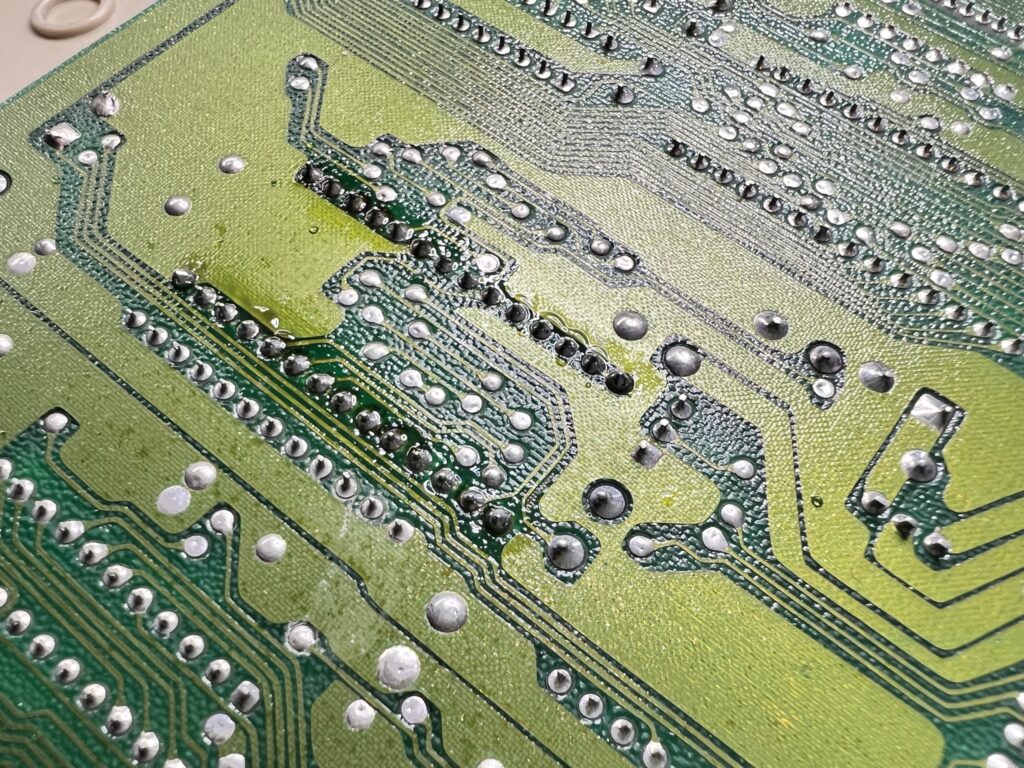
Socket now soldered into place. Flux still needs cleaning off.
After satisfying myself that all my solder joints were ok (by using a magnifying glass) I reinstalled the mainboard into my C64 and popped in the JiffyDOS kernal ROM.
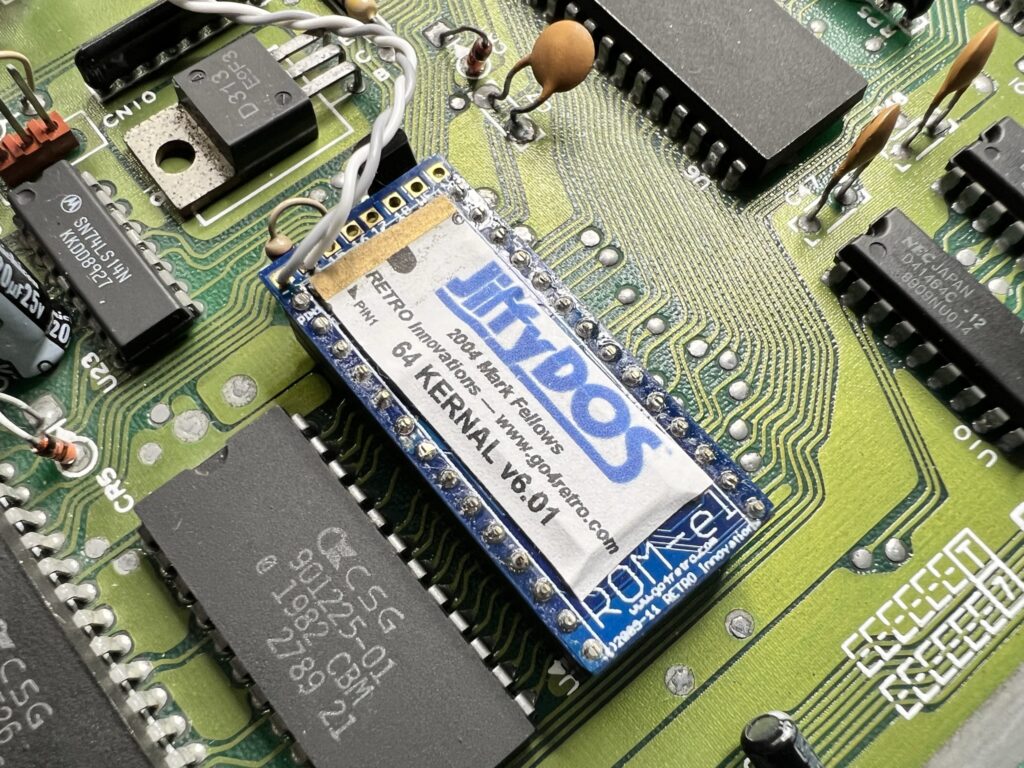
JiffyDOS ROM installed in the socket.
Now I just needed to find a home for the switch. I chose the area above the datasette port to mount the switch but it could have gone anywhere really.
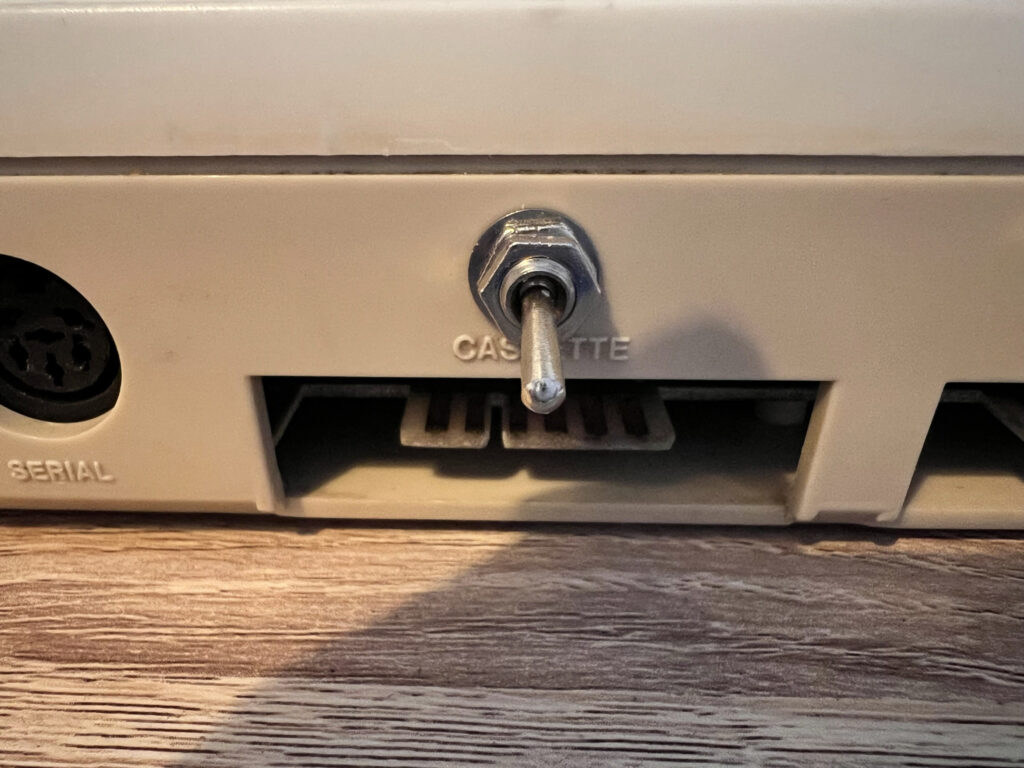
JiffyDOS toggle switch installed on the back of my C64C.
If I was bothered about drilling my case I could even have routed it through to the outside via the openings for the user/datasette ports.
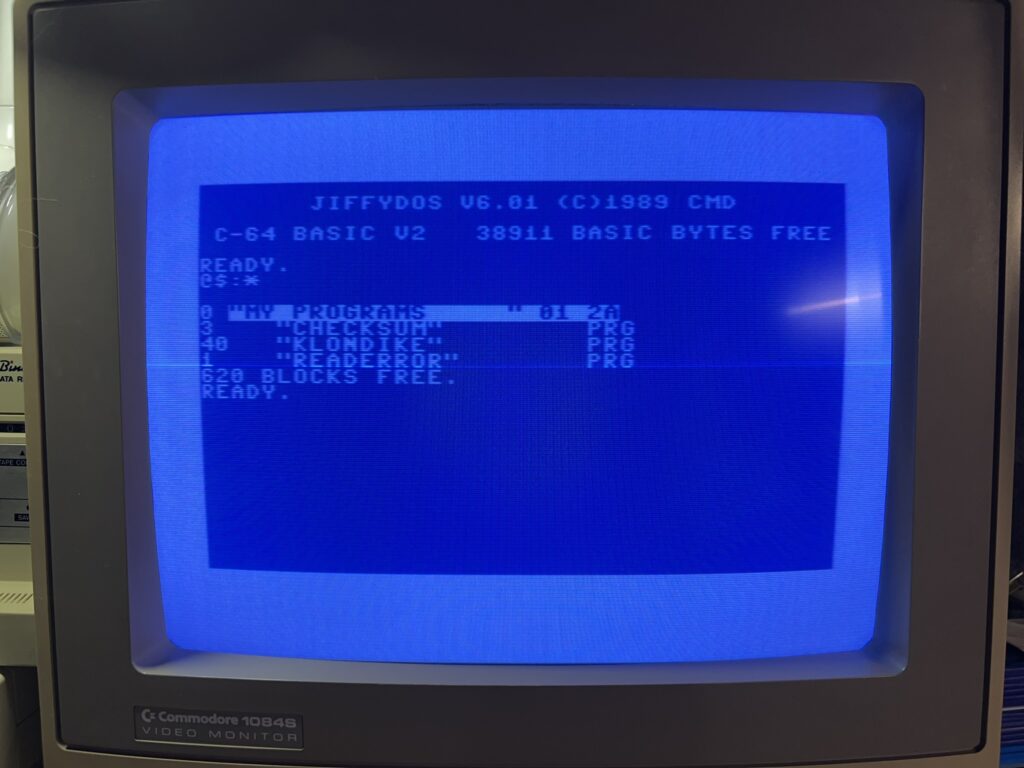
JiffyDOS Startup message.
With the install finished I put my C64 back together and booted her back up to make sure everything was working. I was greeted with a brand new message on startup; ‘JIFFYDOS V6.01 (C)1989 CMD’ which meant that the new Kernal was working. I turned my C64 off, flipped the switch and turned it back on to check I could still get the usual ‘BASIC V2’ message which I did. Happy days!
Phase one was complete. Next up was phase two – installing all the JiffyDOS ROM’s into my disk drives!
Installing JiffyDOS in my 1581 Drive
I started with the easiest drive to upgrade – my 1581. The version of the kernal for this drive doesn’t require a switch as it’s able to detect whether the C64 itself is running JiffyDOS and can switch modes on the fly automatically.
There were only 2 screws holding the two halves of the case together and once the top section was lifted off I could see the familiar steel casing of a 3.5″ drive inside.
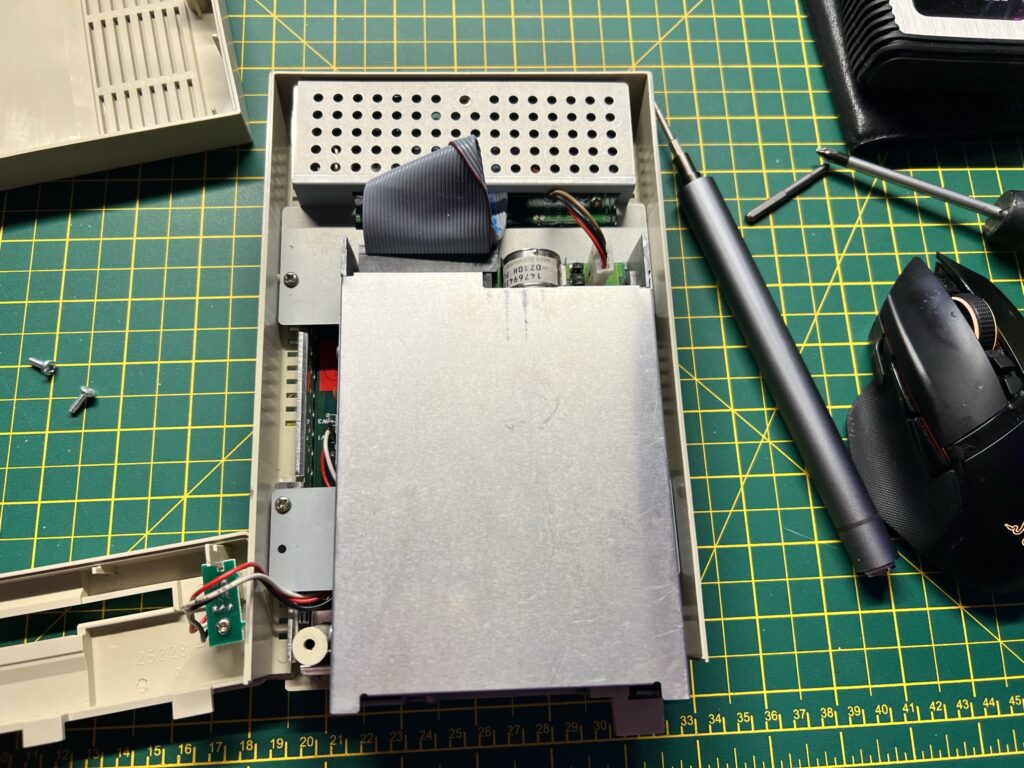
1581 drive with top cover removed.
This was held in place by four more screws and could be lifted out of the way entirely once they had been removed.
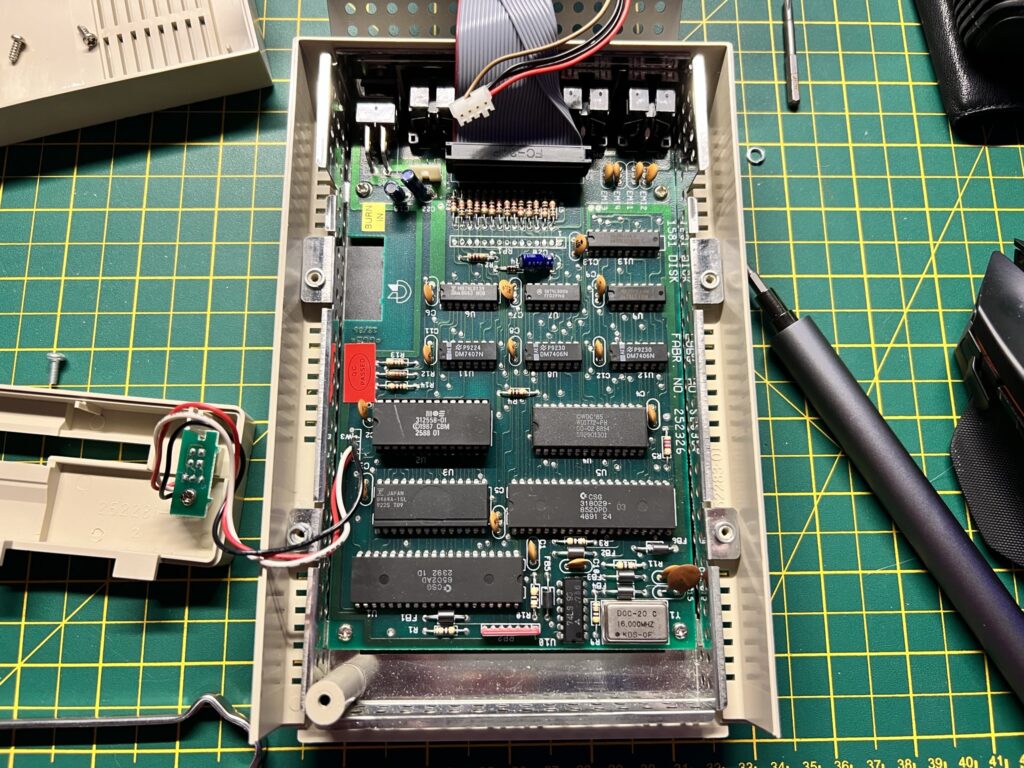
1581 drive mainboard.
Thankfully the kernal ROM was socketed which was a real stroke of luck as every other chip on the board was soldered directly in place.
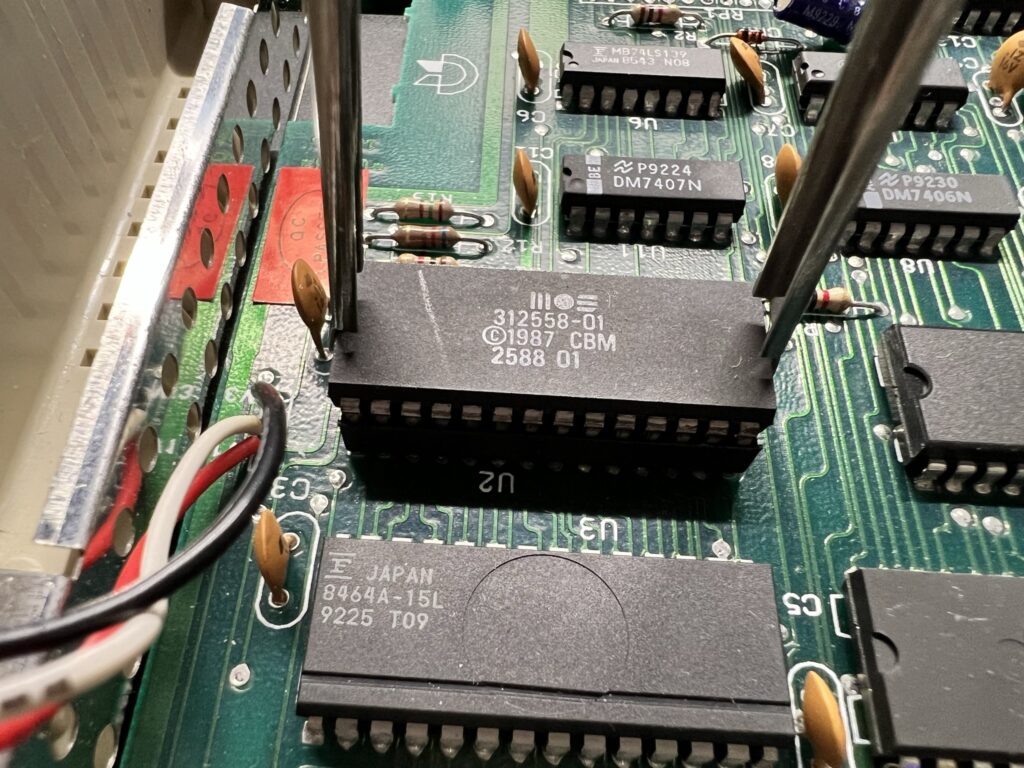
Removing the 1581 kernal ROM.
It needed a good old tug with the chip removal tool to get it budge but it parted ways with the socket eventually allowing me to drop in the replacement, taking care to make sure it was aligned correctly.
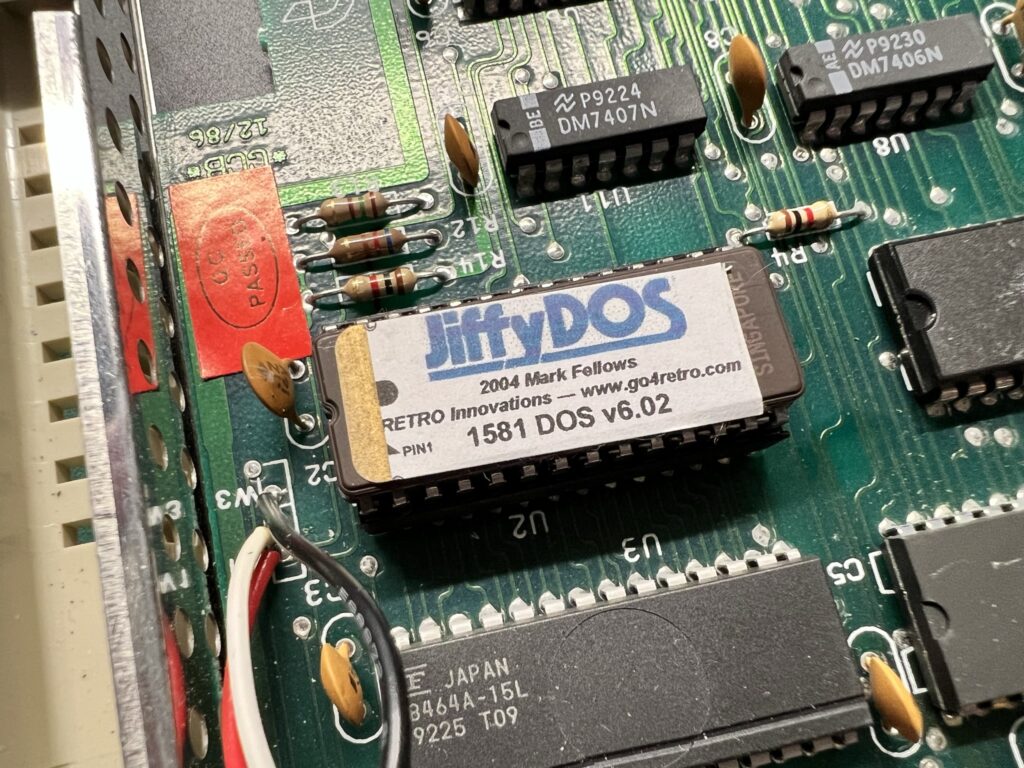
1581 JiffyDOS Kernal ROM installed.
With the new JiffyDOS kernal installed I put the drive back together again, hooked it back up to my C64 and powered everything back on. Using the ‘@’ command I was able to read the error channel of the drive which confirmed the V6 JiffyDOS ROM was working. Two installs down, two remaining!
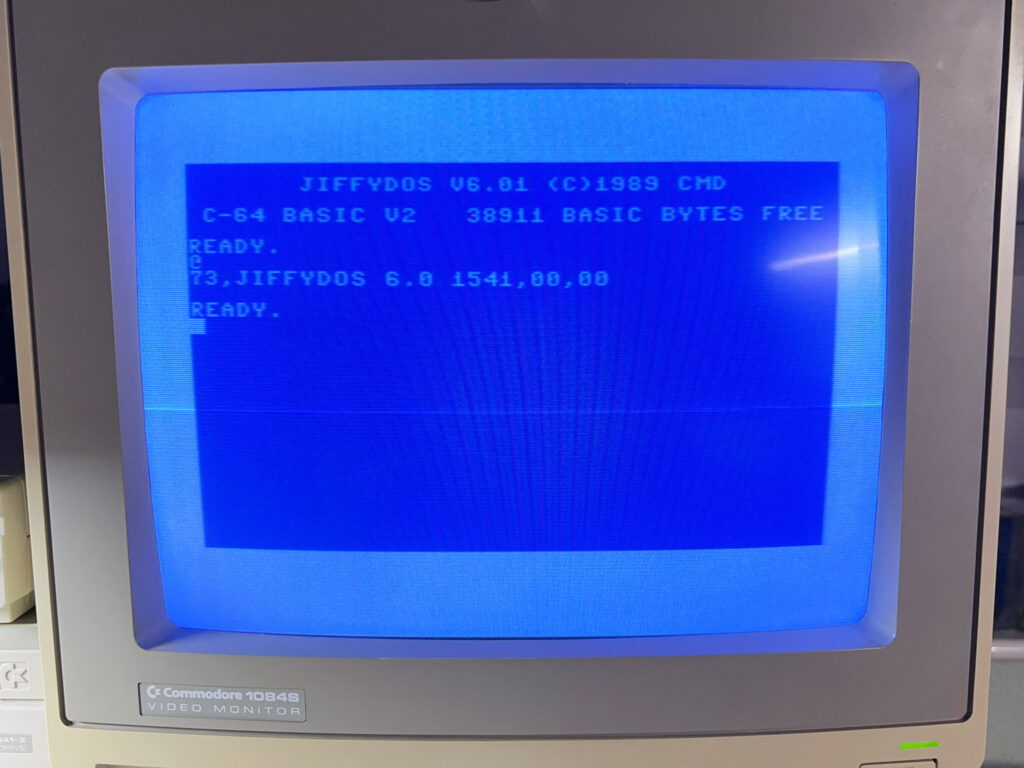
Reading the drive error channel (by pressing just one key!) to make sure the new ROM was working.
Installing JiffyDOS in my 1541-II Drives
Next up were my two 1541-II drives which I knew would be a little more involved as they would both need a small toggle switch installing to change between the standard kernal and JiffyDOS,
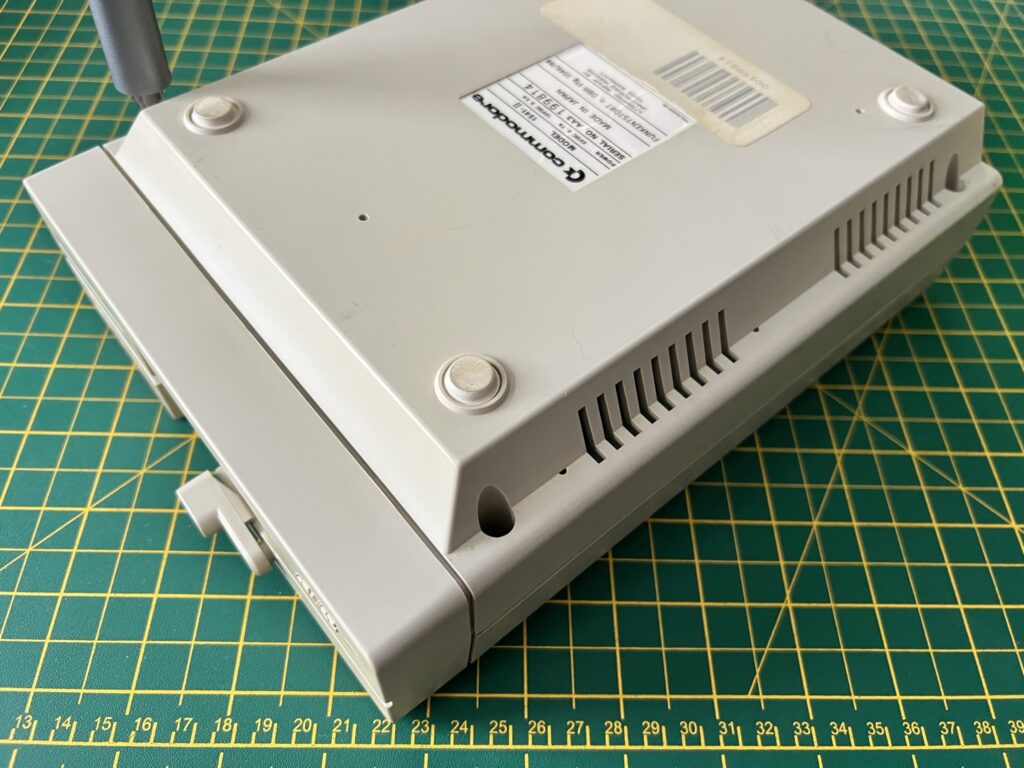
Removing the four screws holding the 1541-II case together.
There were four screws holding the two halves of the case together which I removed from the bottom of the drive. Flipping the whole case over then allowed the top half to be lifted off and placed out of the way.
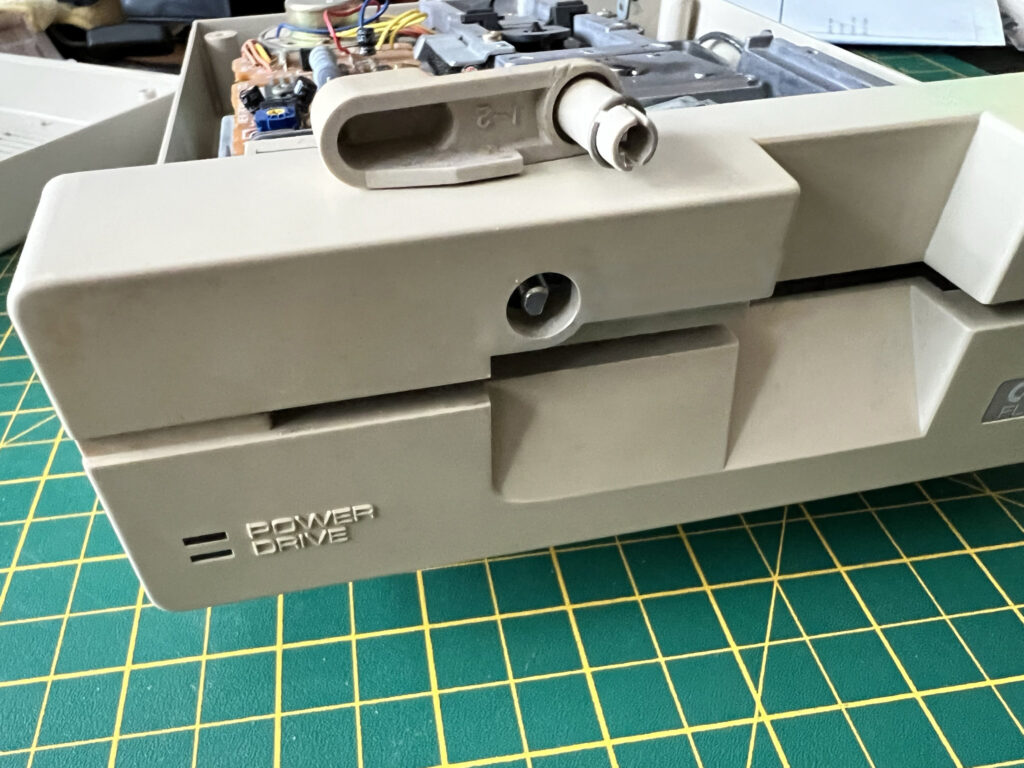
1541-II Drive latch lever removed.
The drive latch lever needed removing in order to get the front panel off. It just pulls off with the application of a bit of force, but shouldn’t require any tools.
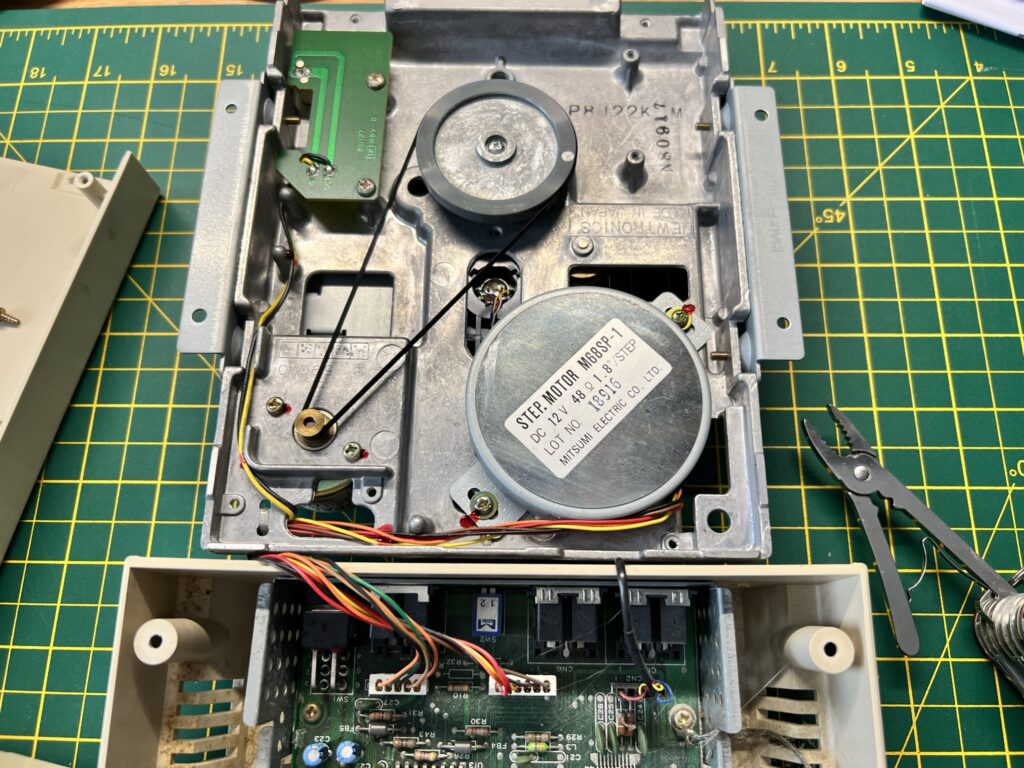
Drive mechanism flipped over out of the way allowing a clear view of the drive belt and stepper motor.
With the front bezel removed there were an additional four screws holding the actual disk drive mechanism to the base of the case. After these were removed I was able to flip the mechanism over and place it at the back of the case leaving all the cables still attached.
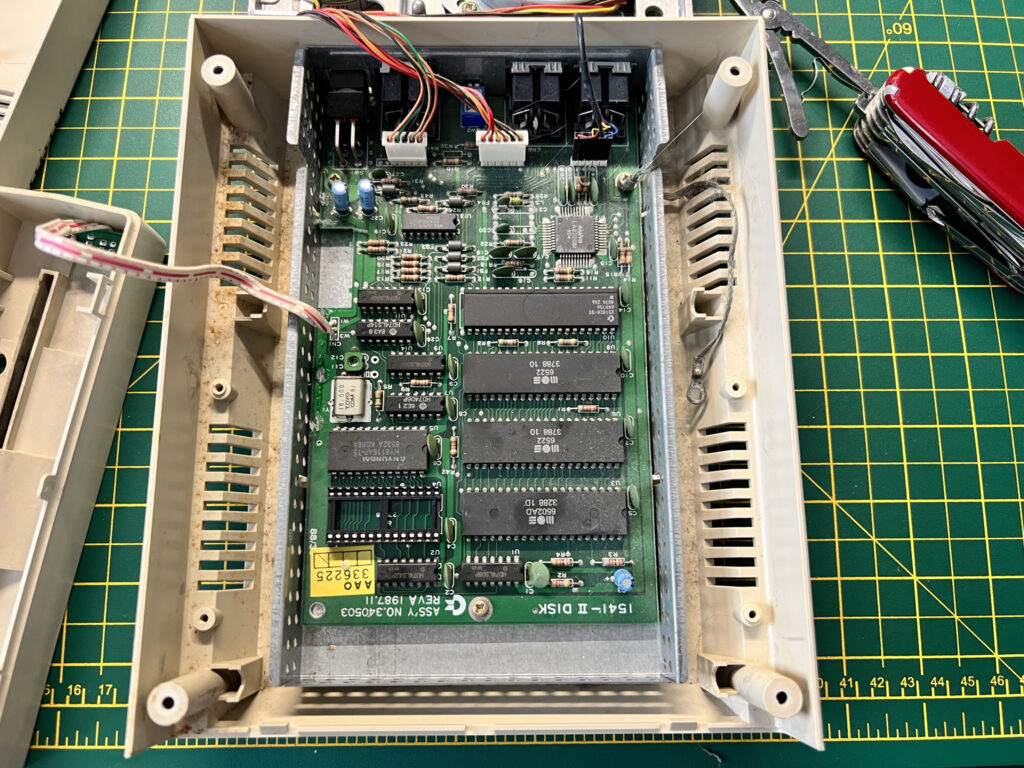
1541-II mainboard with kernal ROM removed (bottom left). Not yet had it’s spring clean in this photo!
The kernal ROM was also socketed on the drive so it was an easy job to remove it (bottom left in the photo above). At this point I realised the inside of the case was pretty dirty so I actually removed the whole board and gave it a good clean before continuing!
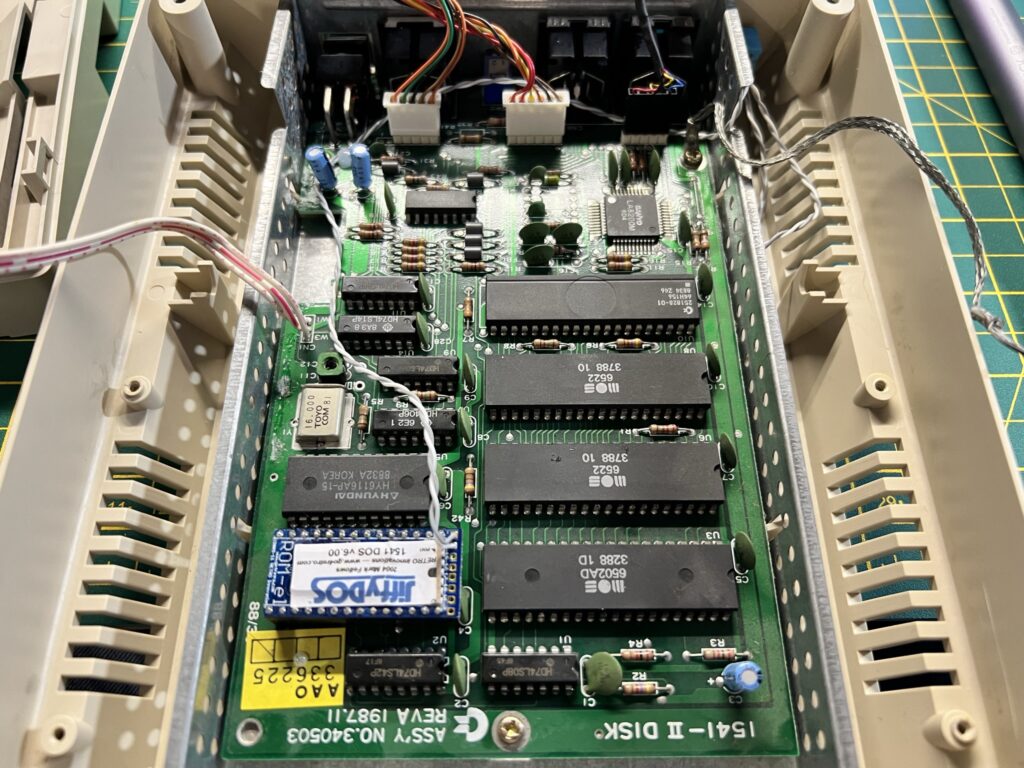
1541-II JiffyDOS ROM fitted – after the drive had received a spring clean!
I fitted the JiffyDOS ROM and then routed the wire through to the back of the case where I found a nice spot to mount the switch.
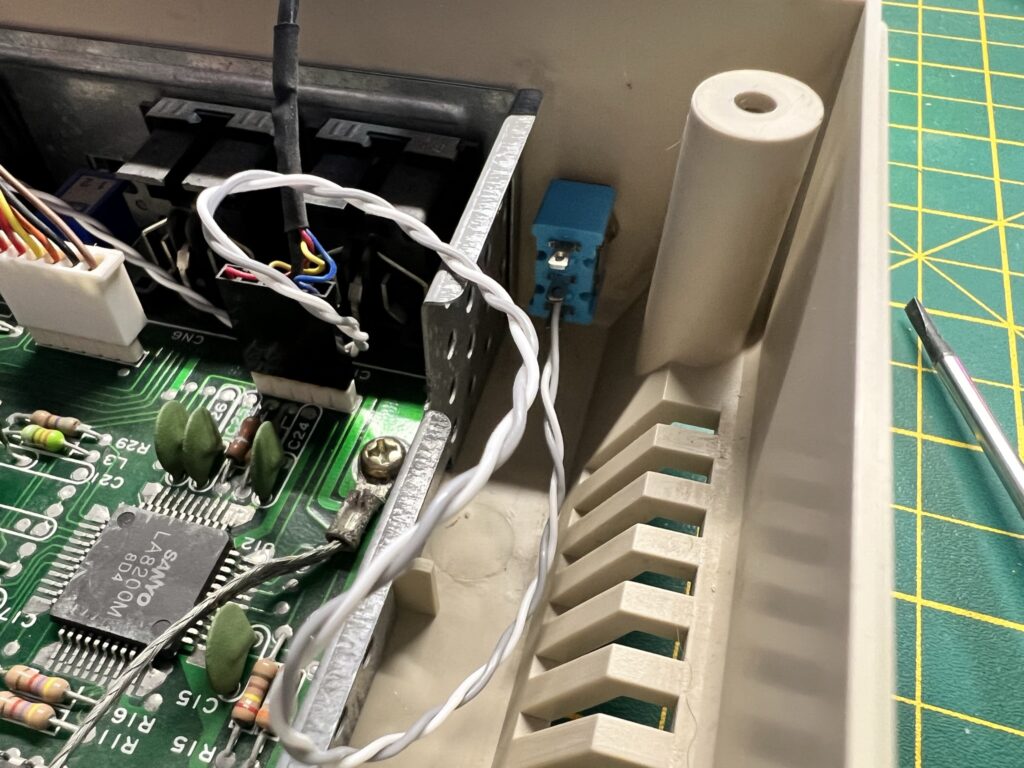
1541-II JiffyDOS switch location.
I replaced the disk mechanism, making sure that I didn’t trap any of the wires underneath and that they wouldn’t foul the drive belt either.
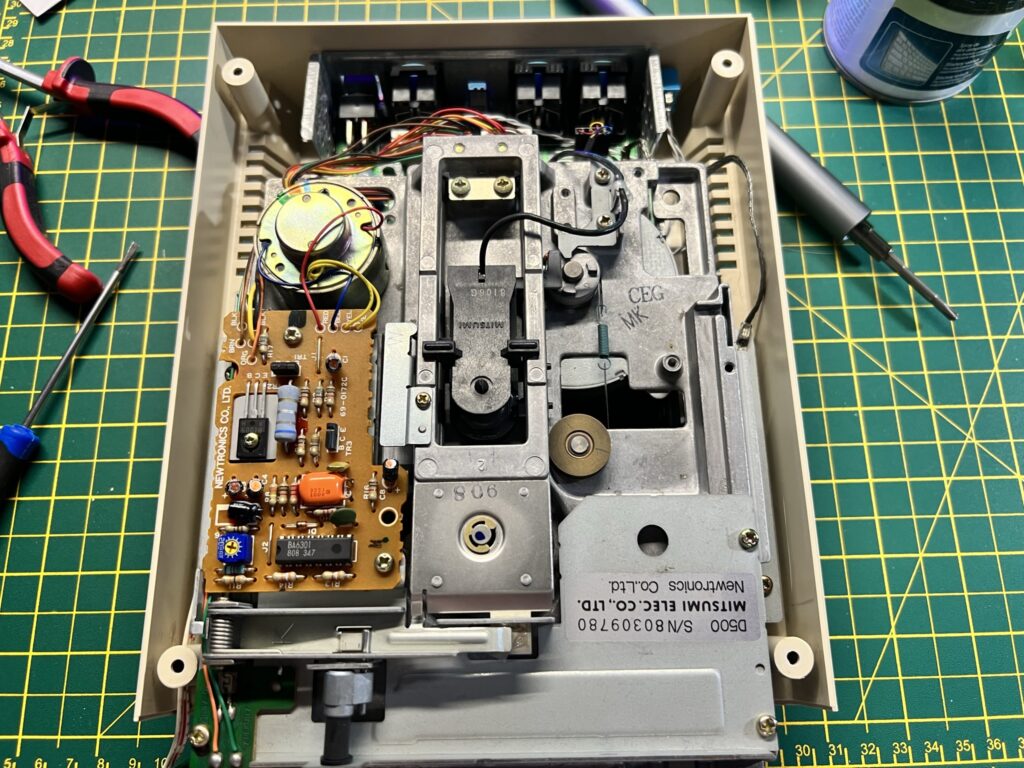
Re-fitting the drive mechanism.
Whilst I had the lid off I thought I may as well give the drive head a quick clean. Normally I just use a 5.25″ cleaning floppy every few months but theres no substitute for a proper clean.
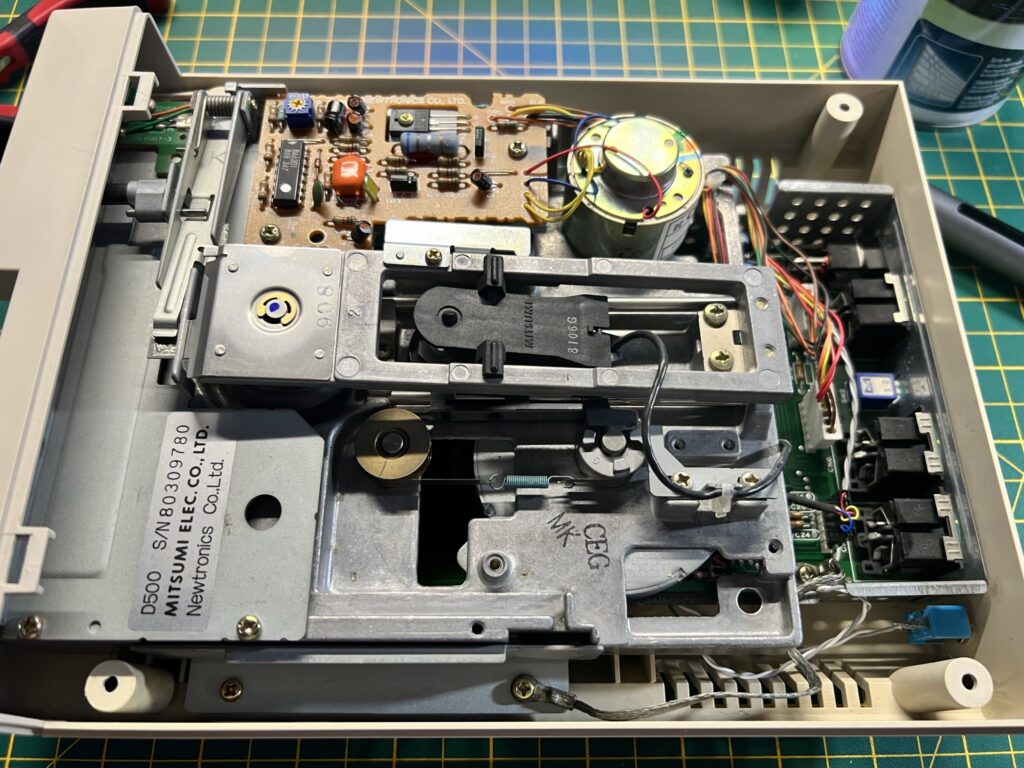
Another view of 1541-II with JiffyDOS ROM and switch installed.
I used a few drops of isopropyl alcohol on a cotton bud and gently wiped across the head a few times to ensure it was in tip top condition.
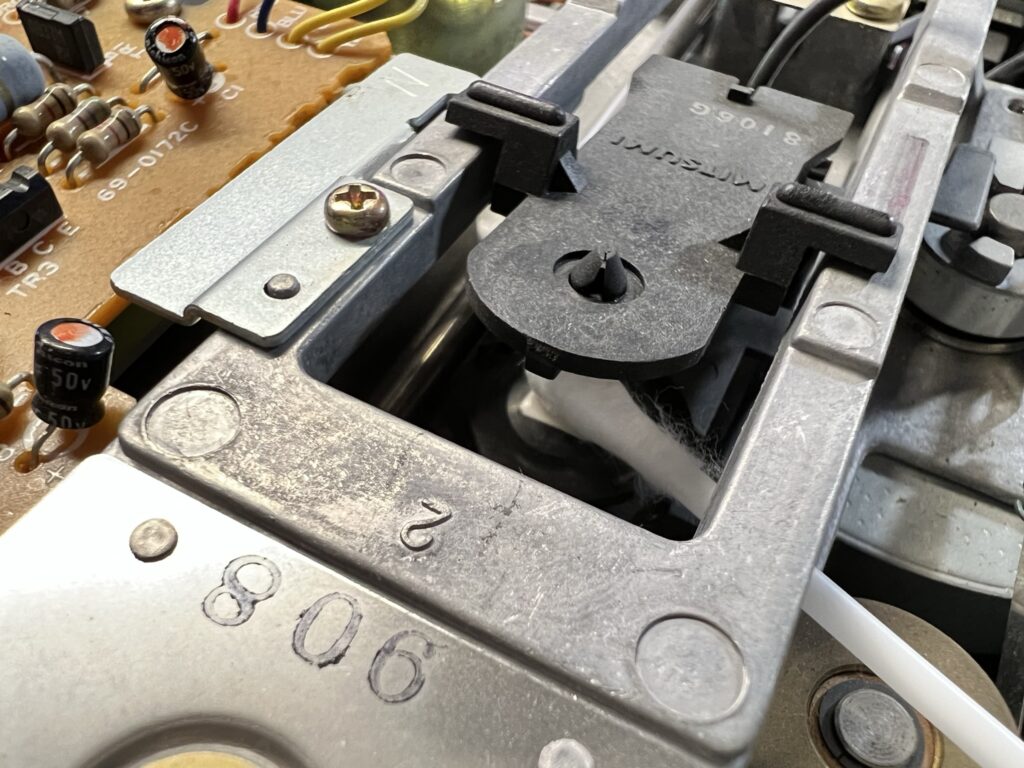
Giving the read/write head a quick clean with a cotton bud and some isopropyl alcohol.
With the new JiffyDOS ROM installed, the case sparkling and head shiny clean I reassembled everything and gave it quick test before repeating the entire process on my other 1541-II drive.
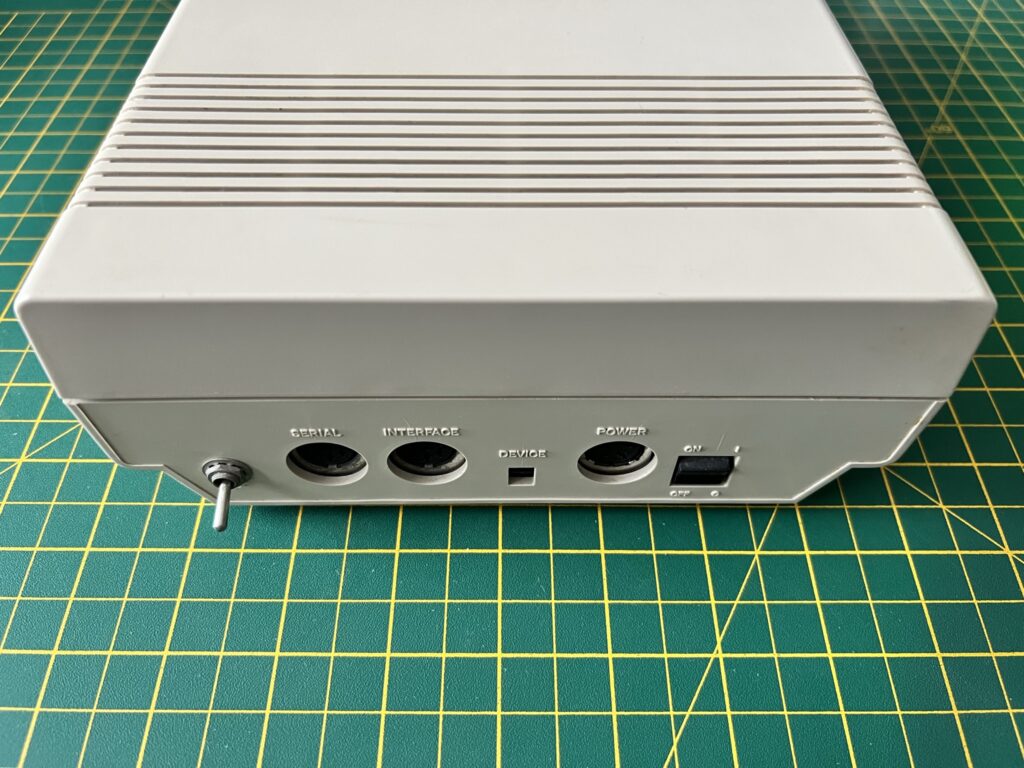
Back of the 1541-II drive showing the location of the JiffyDOS selector switch.
Speed Tests
Although the process took a little while longer than I expected (thanks mostly to carrying out an impromptu spring clean) the actual installs went smoothly. It was finally time to see what sort of benefits the JiffyDOS system would bring!
To test the speed increase I used a 40 block program, Klondike, that I had typed in from a listing a while back. I copied the same file onto both a 3.5″ floppy and a 5.25″ floppy. I then timed how long the program took to load on each drive with the standard kernal and then with JiffyDOS enabled. Here’s the results:
JiffyDOS Speed Test
| Drive | Standard Load Time | JiffyDOS Load Time |
|---|---|---|
| 1541-II | 27 seconds | 5 seconds |
| 1581 | 21 seconds | 5 seconds |
| 1541 Ultimate-II+ | 22 seconds | 5.5 seconds |
The speed improvement was pretty dramatic, going from 27 seconds to load the game on the 1541 drive to just 5 seconds – a reduction in the loading time of over 80%. The speed increase was also very impressive on the 1581, reducing the loading time by 76%. It’s interesting to note that the standard loading time on the 1581 was already 6 seconds quicker than on the 1541-II drive thanks to an improved read/write speed.
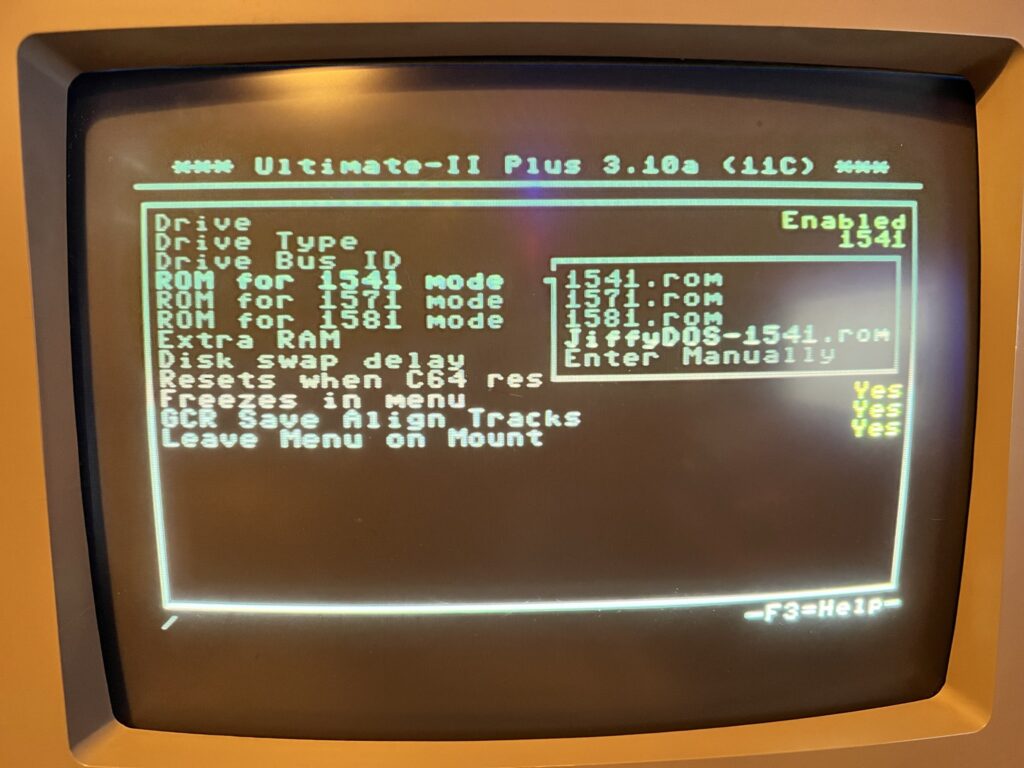
Assigning a digital JiffyDOS ROM to use in my 1541 Ultimate-II .
I also tested JiffyDOS out on my 1541 Ultimate-II+ device after installing a digital copy of the 1541-II ROM into the Flash memory of the cart. I got almost identical results to my real 1581 drive with my stopwatch recording times just a whisker slower for the virtual drive.
Quality of Life Improvements
JiffyDOS offers a lot more than just data transfer speed increases, it actually incorporates a complete implementation of the Commodore DOS 5.1 wedge command set in ROM. What this means in practise is an end to the ridiculously complex strings of commands needed to perform simple tasks like formatting a disk and the introduction of a new easy to use command set. Being in ROM means these benefits are available all the time, from the moment you power on your computer.
Here’s a few examples:
Reading a disk directory: Normally this would require entering the command ‘LOAD”$”,8’ which would load the directory of a disk into the C64’s memory so you can list it. It works and it’s not particularly difficult to remember but it wipes the C64’s memory in the process so is not ideal. With JiffyDOS you can simply enter ‘@$’ and it will LIST the directory of the default drive WITHOUT destroying whatever program is resident in RAM. In fact you don’t even need to type it in, simply press ‘F1’ and then hit RETURN. A whole bunch of common commands are pre-programmed into the function keys to make your life easier.
Formatting a disk: This would normally require the following command ‘OPEN 1,8,15,”N:NEWDISK,01″:CLOSE 1’. However using JiffyDOS you simply enter ‘@N:NEWDISK,01’ which is much easier to remember.
Reading the error channel: This is a much more striking example. Remember trying to find out why the error light of your drive was flashing? You would normally have to type in a small BASIC program like this:
10 OPEN 15,8,15
20 INPUT#15,F,E$,T,S
30 PRINT F;E$;T;S
40 CLOSE 15
However with JiffyDOS all you do is enter ‘@’ (or ‘@””,9’ for a non default drive number) to achieve the same thing! Incidentally this feature is also really useful for checking that JiffyDOS is enabled and working on a specific drive when first powering up.
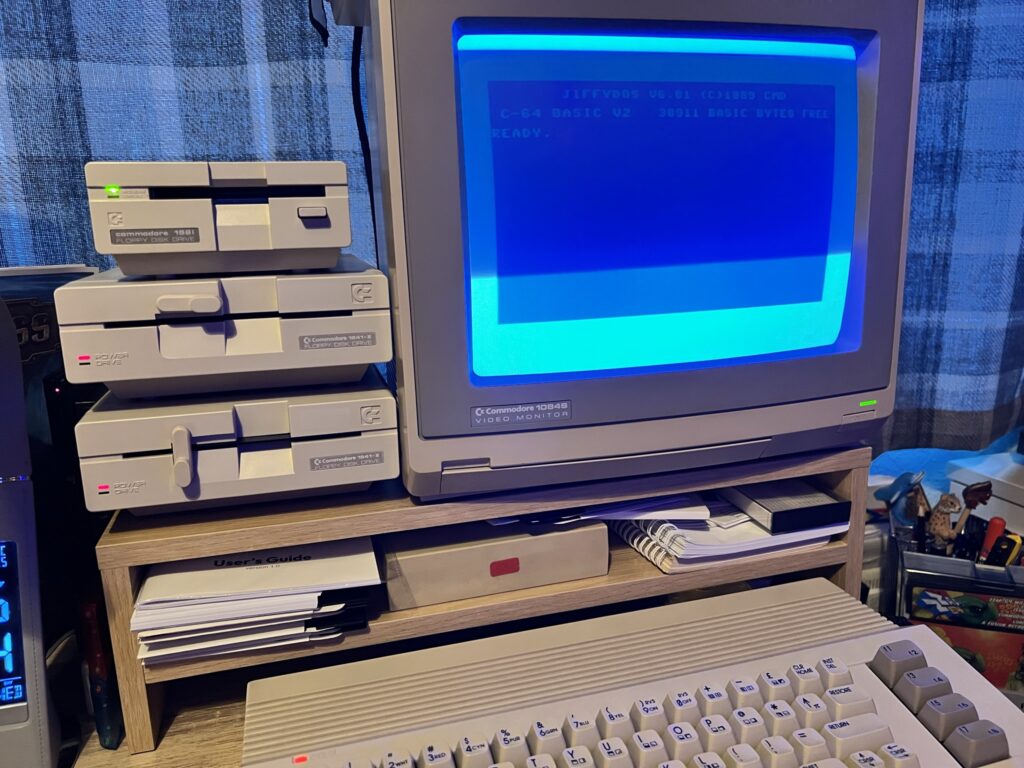
My Commodore 64 hooked up to my 1541-II and 1581 drives.
In addition to dozens of new easy to use disk commands there are other amazing new features like a built-in file copier. Copying files from one disk to another is now a doddle – simply set the source and target drive, tag files you want to copy from a directory listing using ‘CTRL+W’ and then ‘RUN’ the copy.
Now you might be wondering, as I did, how all these extra commands and functions have been added to the kernal without squeezing out other functionality. Well in truth they haven’t – the datasette routines have been removed to make space for them. This means that whilst JiffyDOS is enabled you are unable to load or save data from cassette. In reality this is no great hardship though as a quick power cycle and flick of the switch will revert back to the regular kernal and enable tape operations.
JiffyDOS is an amazing upgrade and something I wish I had installed years ago. The speed improvement it brings is pretty amazing but it’s probably all the new DOS features and commands that I appreciate the most. They turn what was, in all honesty, a pretty horrible and unintuitive user experience, into a pleasure.


