Lyonsden Blog

Category - Amiga

Amiga Addict Issue 23 out now

Amiga Addict 23

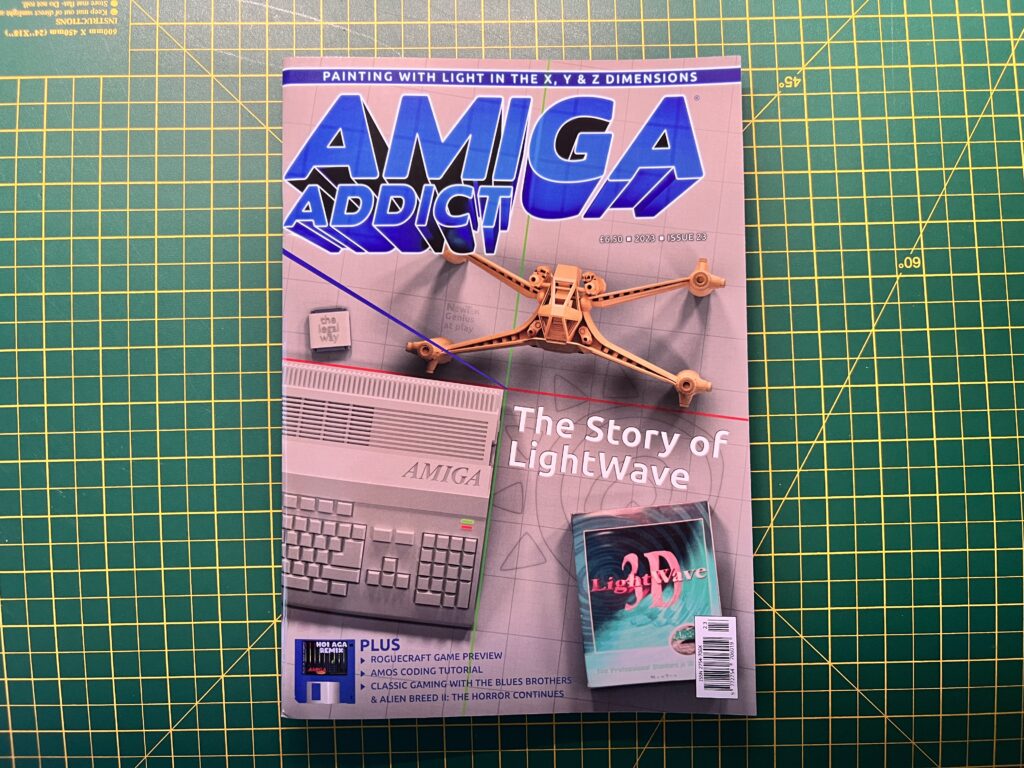
Unbelievably I had yet another retro mag, Amiga Addict, delivered this morning. Don’t think I’ve ever had a four magazines arrive in the same week before, never mind on 4 consecutive days! Amiga Addict has been running for over 2 years now and I covered the first few issues way back in 2021. It’s now up to issue 23 and this one features Lightwave (of Baylon 5 fame) on the front cover.


Amiga Addict 23

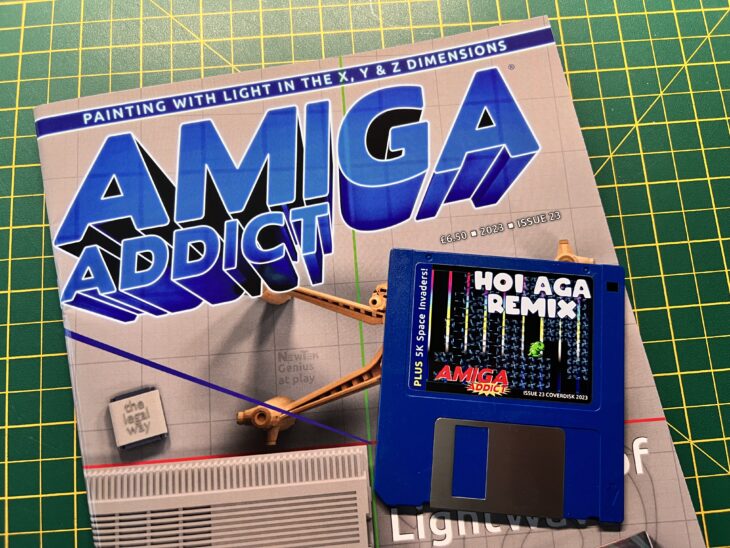
Amiga Addict 23 Cover


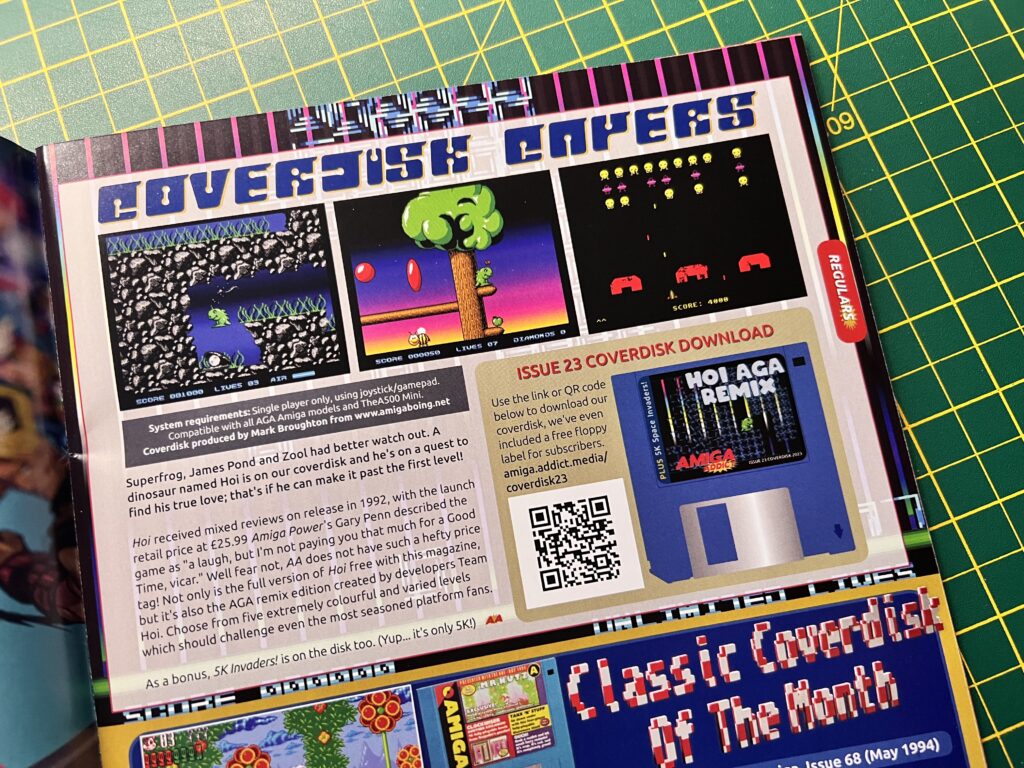
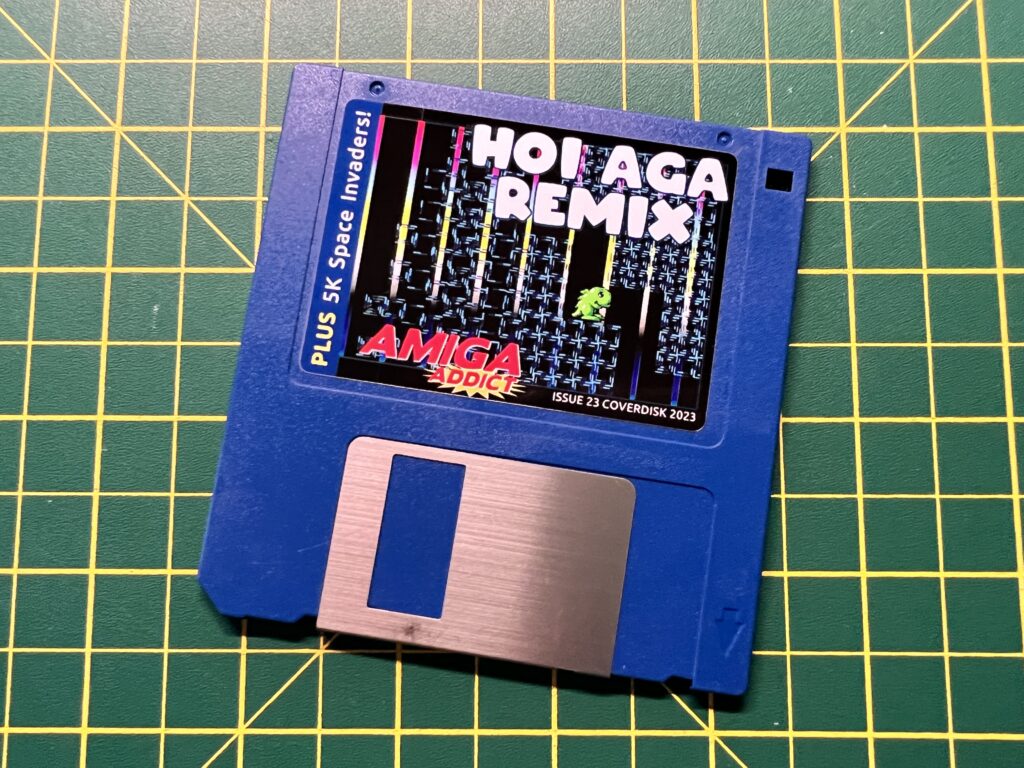
This months coverdisk features the full game Hoi (AGA remix), 5K Invaders and also 6K Pacman (which isn’t mentioned) but is on the there too!


Issue 23’s coverdisk.


If you are not familiar with Amiga Addict cover disks, they only provide the labels – you have to supply the floppy disk. The self-adhesive labels are always of a super-high quality in glossy full colour with a peel-off backing. When applied to a suitable floppy (preferably a blue one) they really look the part and provide a good excuse to blow the cobwebs out of your Amiga’s floppy drive.


Amiga Addict 23

What’s on this editions coverdisk?


The magazine consists of 60 A4 full colour pages and features loads of news, reviews, articles, tutorials and more. This issue costs £6.50 (plus P&P) and is available from the Amiga Addict website. Amazingly it is also available in some bricks and mortar newsagents such as WHSmith so you may be able to pick it up there if you’re lucky and save yourself the postage!


Amiga Addict 23

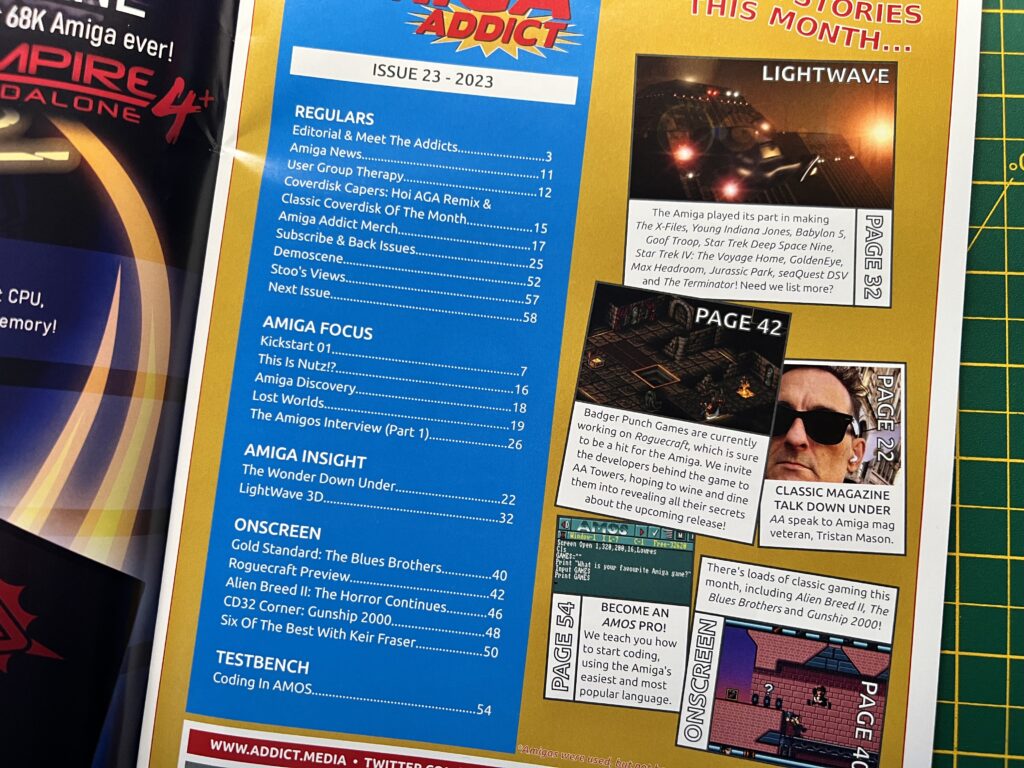
Issue 23’s Contents Page


A Look Inside Issue 23


I’ll leave you with a quick look at just few of the articles that can be found in issue 23.


This slideshow requires JavaScript.

Zzap! Amiga Issue #11 is out now

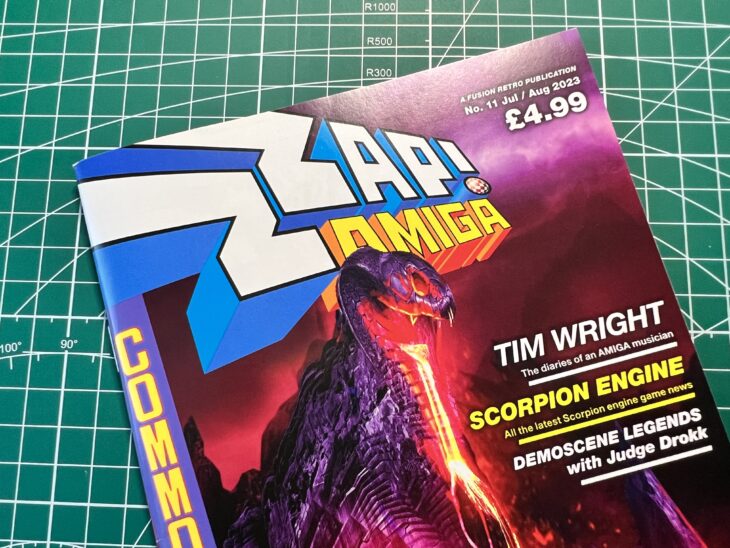
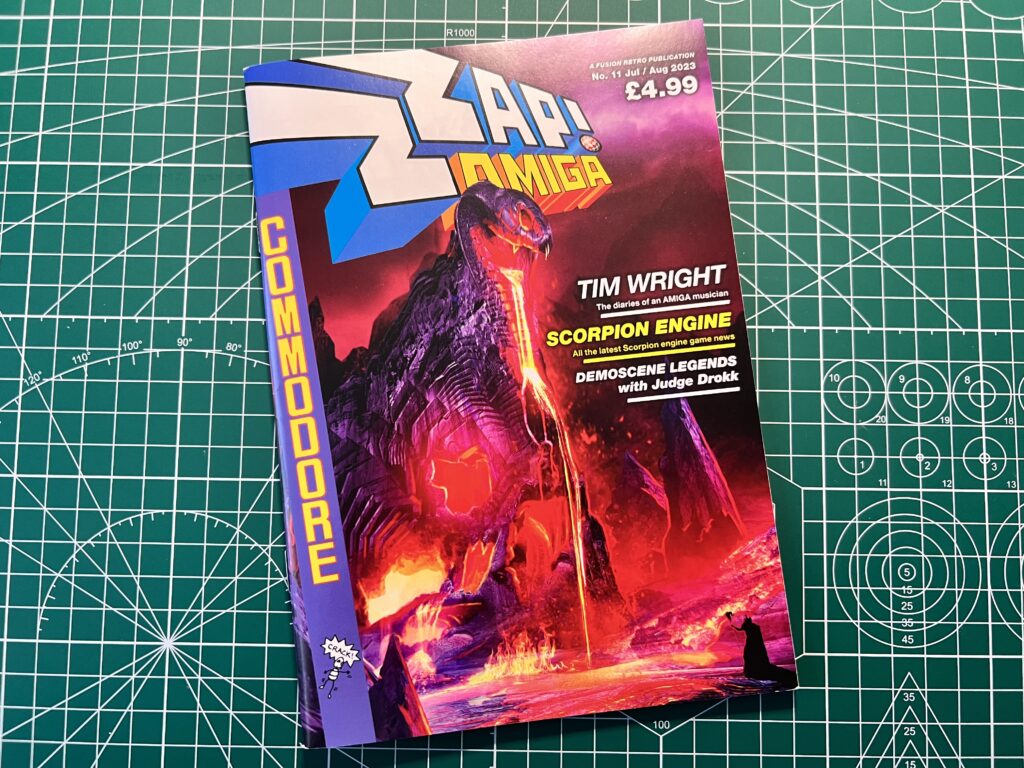
Zzap! Amiga Issue #11

My weekend reading material is looking pretty good this week, what with with Freeze 64 arriving yesterday and now Zzap! Amiga Issue #11 dropping through my letterbox too.

This magazine, published by Fusion Retro Books, has been running for a good 18 months or more now and this is the 11th issue.


Zzap! Amiga Issue #11

Zzap! Amiga Front Cover


A Look Inside


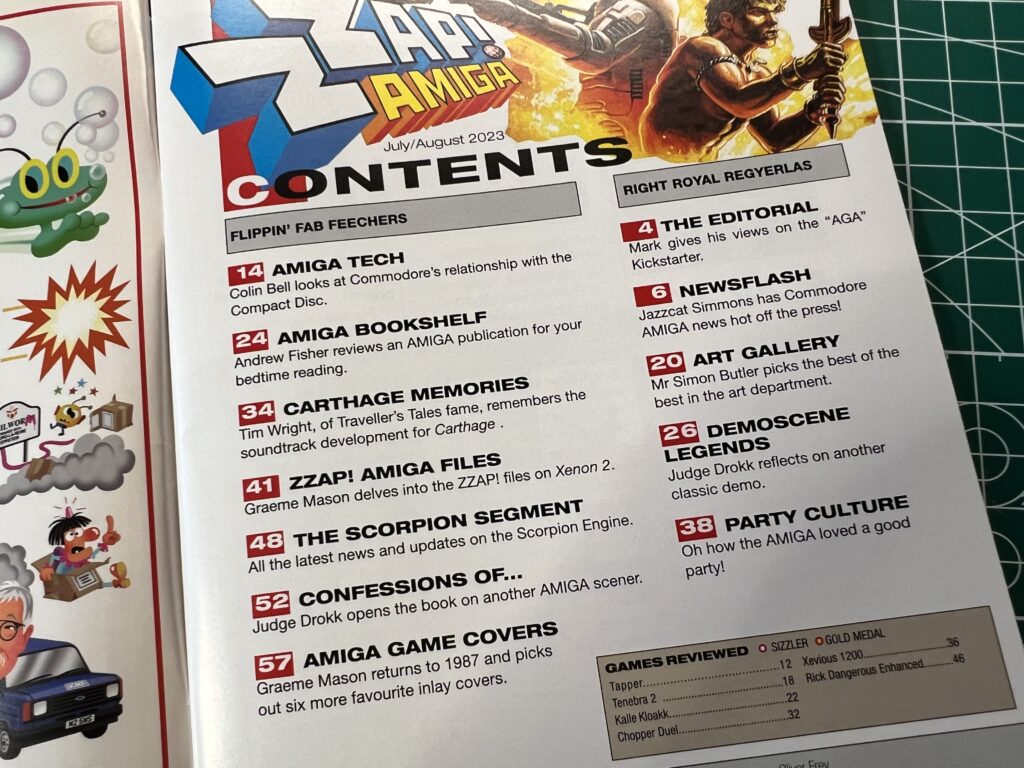
Here’s a quick peek at the contents page and a handful of the 60 pages within this edition.


Zzap! Amiga Issue #11

Zzap! Amiga Issue #11 Contents Page


This slideshow requires JavaScript.


At £4.99 plus postage for 60 pages of Amiga goodness it’s a no-brainer for me and a worthy addition to my retro magazine collection. Don’t forget you can get 15% off a copy of your own with code ‘LYONSDENBLOG’ at the checkout!

Head on over to Fusion Retro Books to pick up your own copy of Issue #11.

Getting ‘SAY’ Speech Synthesizer to Work on Workbench 3

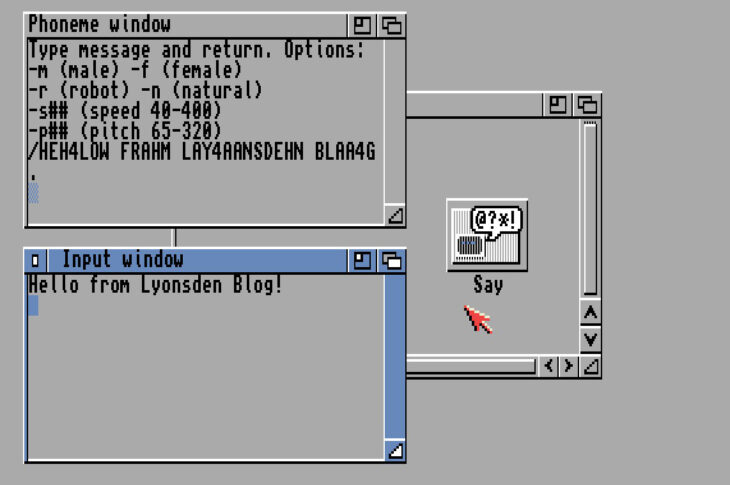
I remember having an awful lot of fun with the speech synthesiser (called ‘Say’) on my Amiga 500 back in the day. As a teenager I would spend far too much time getting it to utter all sorts of obscenities and disparaging remarks to anyone within earshot. So imagine my disappointment a few days ago when I tried to revisit that memory on my Amiga 1200 and discovered the Say program was nowhere to be found!

Turns out that Commodore, in their infinite wisdom, killed off Say back in 1992 with the release of Workbench 3. As my A1200 is running the very latest Workbench 3.2.1. it simply wasn’t included and hasn’t been for a great many years.

I couldn’t leave it there though, I really wanted Say on my Amiga and wasn’t going to settle until I made it happen. Thankfully the fix turned out to be pretty simple, provided you can lay your hands on an old Workbench floppy disk that is! Luckily I have loads of old workbench disks going back to version 1.2 so finding the files wasn’t too difficult..

The first and most obvious thing to grab is the Say program itself. This can be found in the Utilities drawer on a Workbench 2 disk. Once you’ve found it copy it to the Utilities drawer on your Workbench 3 machine. Now you may be tempted to run it at this point and have it say something infantile like ‘I like boobies’ but you will be disappointed. There are some missing pieces of the puzzle we need to find before it will work.


Amiga Say

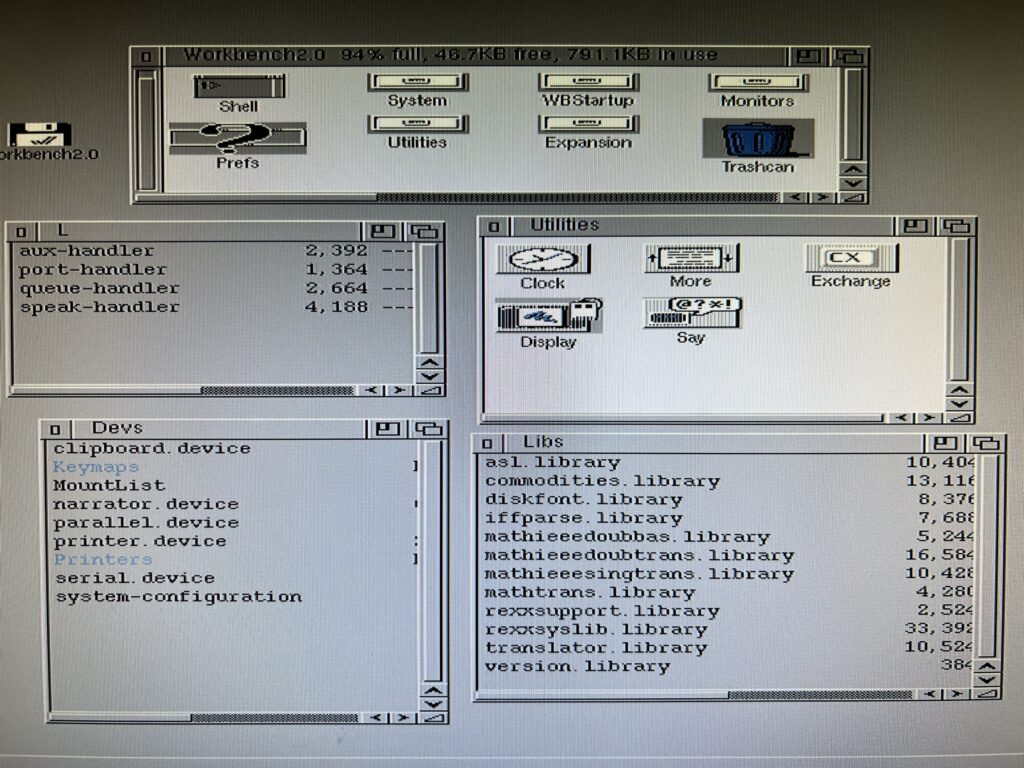
Everything you need to get Say working on a Workbench 2.0 disk.


There are three additional files that are required to restore the Amiga’s voice (which I found through trial and error with the help of good old SnoopDOS). The files we need are:- ‘narrator.device’, ‘translator.library’ and ‘speak-handler’ and thankfully all of these files can be found on that very same Workbench 2.0 floppy disk.

Now I realise not everyone has a bunch of Workbench disks to hand so I have gathered the files together and made them available for you below. This LHA archive contains all the necessary files you need so just download it and unpack it on your Amiga.

SayStuff.lha


Where to put the files?

The main ‘Say’ program itself can technically go anywhere but traditionally it was found in the Utilities drawer so I recommend copying it there. The other three files must go in the correct drawers otherwise the program won’t work. You can use any method you like to copy the files into place. I prefer using Directory Opus but you can use the Shell or Workbench too, whatever is easiest for you.

Here’s a quick rundown of where to put the files (and by extension, where to find them too, if you are using your own floppy to source them):

narrator.device -> Devs:

translator.library -> Libs:

speak-handler -> L:

Once all four files have been copied across you can finally run Say and have some fun. Enjoy!


Amiga Speech Sample

Below is a sample of speech from my Amiga 1200 just for fun. I think the quality of the speech is pretty good but in case your ears aren’t tuned to 80’s speech technology here’s a transcript of what it is saying:

“Hello there and a warm welcome from the Lyonsden Blog Amiga 1200 computer. I really hope you enjoyed this article about getting my voice back!”


Trade and Play Wirral

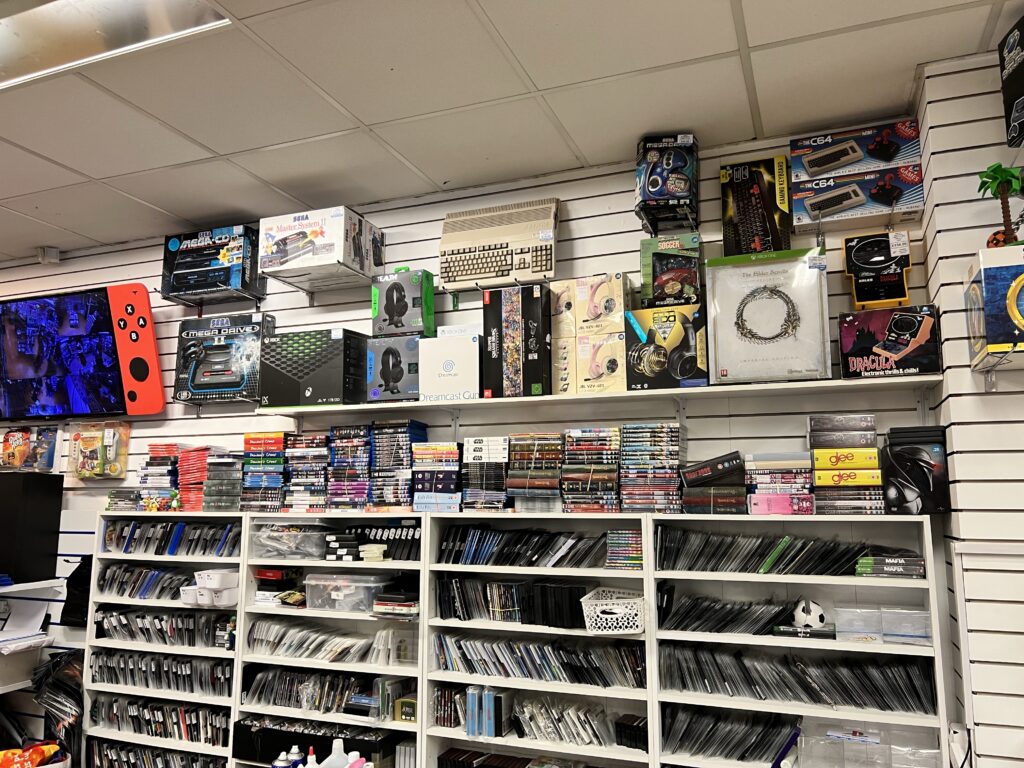
This is just a quick post I’m putting up after a recent visit I had to a Retro gaming shop called ‘Trade and Play’ in the Pyramids shopping centre in Birkenhead. Thought it might be of interest to anyone who lives in North West England as I was completely unaware of its existence until a friend tipped me off about it and I think it is well worth a visit. Spoiler alert – they stock Amiga games!

What sort of stuff does it sell?

Though the shop does stock (and accept trade-ins for) current generation games and consoles, what really sets it apart from the likes of Game and CEX is the amazing amount of retro games and hardware they stock. Not just a few old PlayStation or Xbox games but masses of games for every system including the likes of the NES, SNES N64, MasterSystem, MegaDrive, Saturn, Dreamcast, PS1, PS2 plus all the handheld systems like the Gameboy, Game Gear, PSP and Vita. We’re talking original boxed hardware, peripherals, games and more. They even had an original boxed Atari 2600 for sale along with a stack of cartridges for it.

However what really excited me the most was that they actually stocked Commodore Amiga hardware and big box games for both the regular Amiga computers and the CD32. On one wall nestled amongst a boxed Sega MegaCD and Master System 2 there was a beautiful Amiga 500 for a not entirely unreasonable £150 supplied with mouse, PSU and cables. Imagine being able to buy that and walk back to the car with an actual Amiga 500 you just bought from a shop in 2023! I was sorely tempted I can tell you, but as I already have one, explaining getting another one to my wife (who was with me!) would have been challenging to say the least!

Incidentally the store also stocks a massive range of pre-owned DVD’s, Blu-Rays, books, comics and Sci-Fi memorabilia. It’s the kind of place you can browse around for hours and spend a fortune in should you let yourself.


Nostalgia Time

My visit to Trade and Play really brought back fond memories from when I used to buy Amiga games ‘off the shelf’ in the high street. One of my favourite places to go was Electronics Boutique in Lord Street, Liverpool. This was way back in the 1990’s before it got taken over by Game. I would often visit during my lunch hour and spend half an hour or more simply browsing the shelves. I don’t think there’s anything quite like being able to browse a selection of physical games in a shop. Looking at the cover art, flipping the boxes over to read about the the game itself and then studying the screenshots to get an idea of what the game would be like. When you finally made your choice you’d take it over to the till to buy it. The experience didn’t end there though, because now you entered the next phase; the fervent anticipation of actually playing the game and imagining just how great it was going to be. This phase could last for hours depending on when you bought the game and how long it would be before you got home. During this period you could open the box up and pour over the manual to get a taste of what it would be like. Occasionally you could also take a look at the included game map or the keyboard overlays to see what keys worked which weapons and so on. Very occasionally you could even read a Novella that would set the scene for a game and really get you hyped to start playing.

This all happened in a golden age before the Internet existed and the only prior knowledge you would have about a game was word of mouth, or a review in a magazine. Oftentimes I would buy a game blind though and rely totally on the screenshots to guide me. Sometimes I would end up with a real hidden gem of a game, sometimes not but it was always a pleasurable experience. Simpler, happier times in my book.


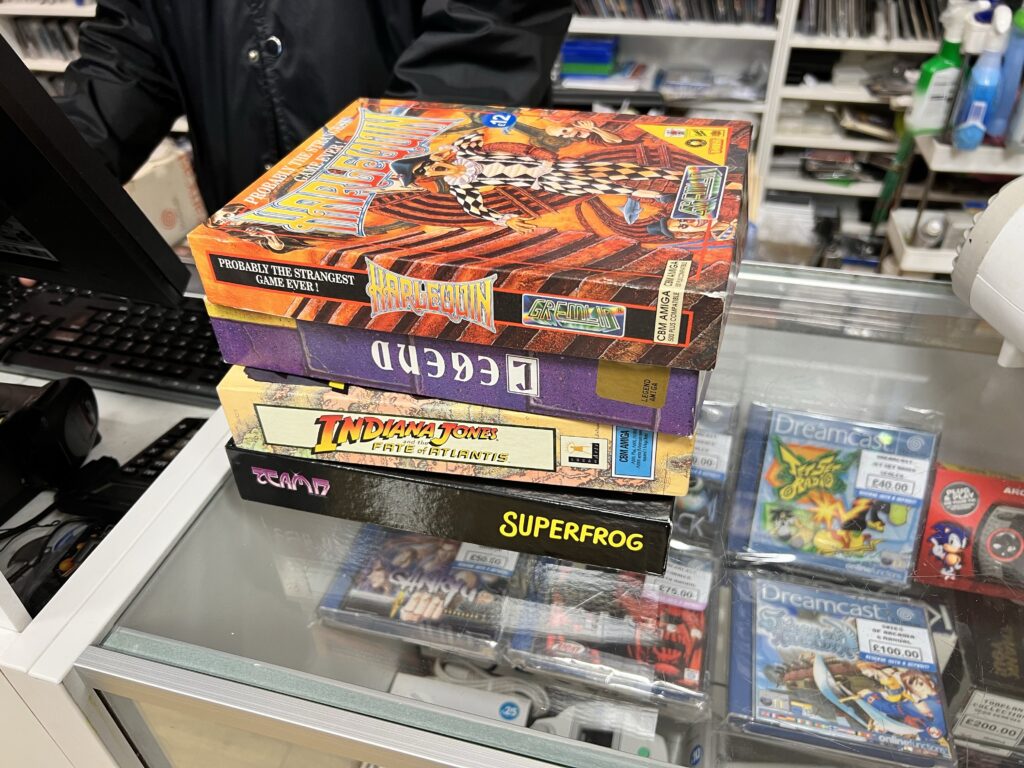
Trade and Play

A look behind the counter at Trade and Play Wirral.


My Haul

Unlike Sega MegaDrive or SNES games (of which they stocked hundreds of titles) the selection of Amiga games was a lot more modest, we’re talking about maybe twenty titles in total here. However this is 2023 and I couldn’t name any other store that stocks even a single Amiga title so this is shopping nirvana as far as I’m concerned. The quality and condition of the Amiga games they did stock was outstanding and I would have been proud to add any of them to my collection.


Trade and Play

My haul from Trade and Play Wirral.


All the Amiga games I saw in Trade and Play were in superb condition and were offered in their original big cardboard boxes and included the manuals and disks. They guy in the store was really helpful too and dug out some Amiga games that weren’t even on display so I could have a look through them. He had no problem with me opening up the boxes to inspect the contents either. In the end I purchased four games in total, Harlequin, Legend, Superfrog and Indiana Jones and the Fate of Atlantis. I would say the prices I paid for them were reasonable too, certainly no more than you might (sensibly) expect to pay for them on eBay but often quite a bit less. They even had an Infocom adventure in stock – Leather Goddesses of Phobos! The only reason I didn’t pick this up was because I decided long ago to base my Infocom collection on their C64 releases, I simply don’t have the space to start an Amiga collection too!

Anyway here’s a closer look at each of the games I bought from Trade and Play Wirral so you can see the quality for yourself.


This slideshow requires JavaScript.


This slideshow requires JavaScript.


This slideshow requires JavaScript.


This slideshow requires JavaScript.

Amiga “Classic” USB mechanical keyboard

Amiga USB Keyboard

Back in 2020 I backed a Kickstarter campaign run by Simulant Systems Ltd. to create a range of new retro USB keyboards for the Amiga (and other systems). Sadly it never reached its funding goal but they didn’t give up on the idea and continued to find a way to make it work. Well nearly two years later they finally achieved their goal and have produced a batch of what they are calling  Amiga ‘Classic’ USB mechanical PC keyboards.  They’ve been furiously packing and dispatching them since early December and mine arrived last week!


Amiga USB Keyboard

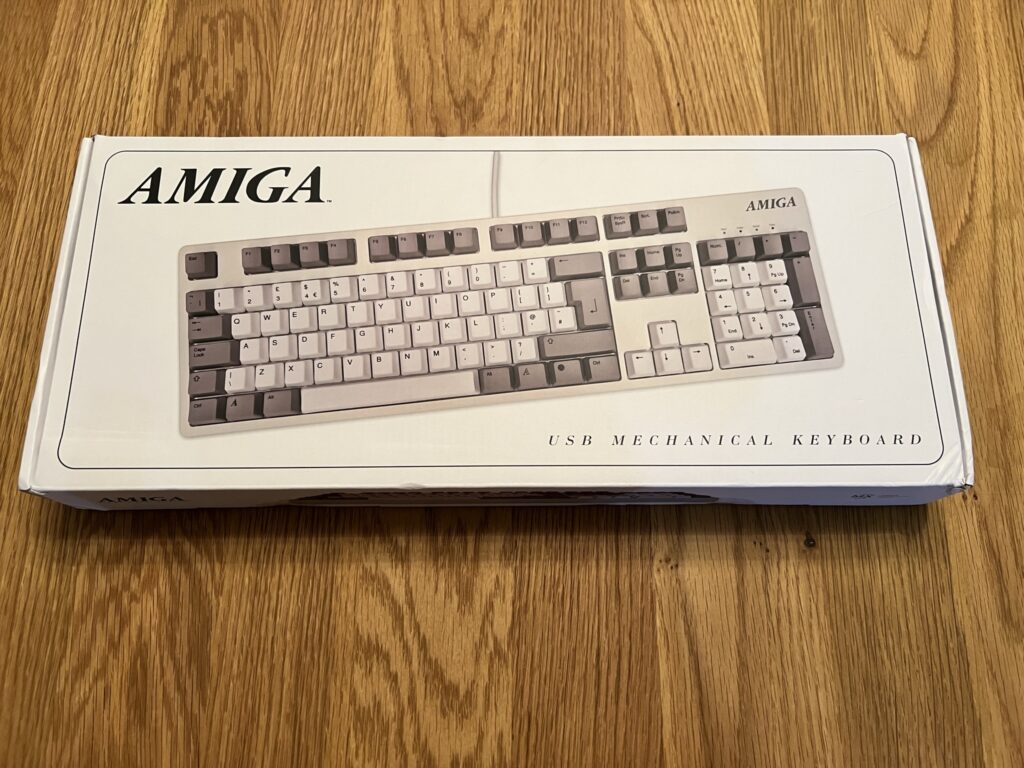
Front of the box.


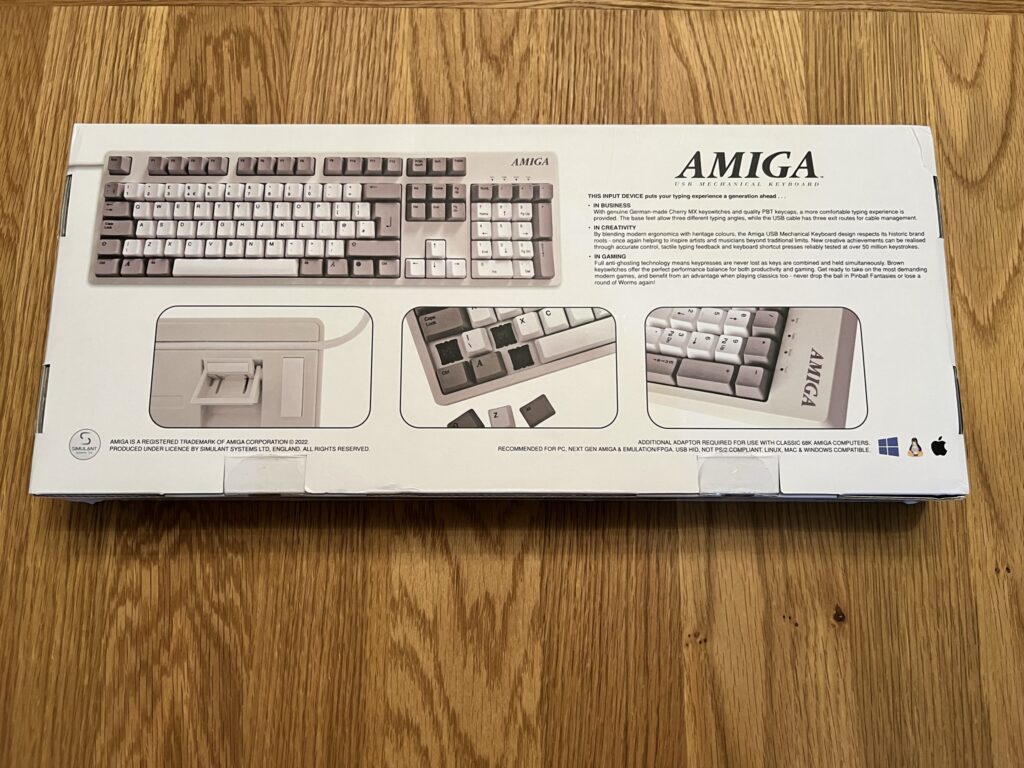
What makes this extra special is that it has the official registered Amiga logo both on the box and the keyboard itself thus making it an official piece of new Amiga hardware being sold in 2023! Sadly it is actually a USB PC keyboard which is why there are Windows, Linux and Mac logos on the box but no Amiga Tick or boing ball! However they are working on an adapter that will allow it to connect to real Amiga. This gizmo will actually fit inside the keyboard case which is very intriguing. Definitely looking forward to finding out more about that when it’s released!


Amiga USB Keyboard

Back of the box.


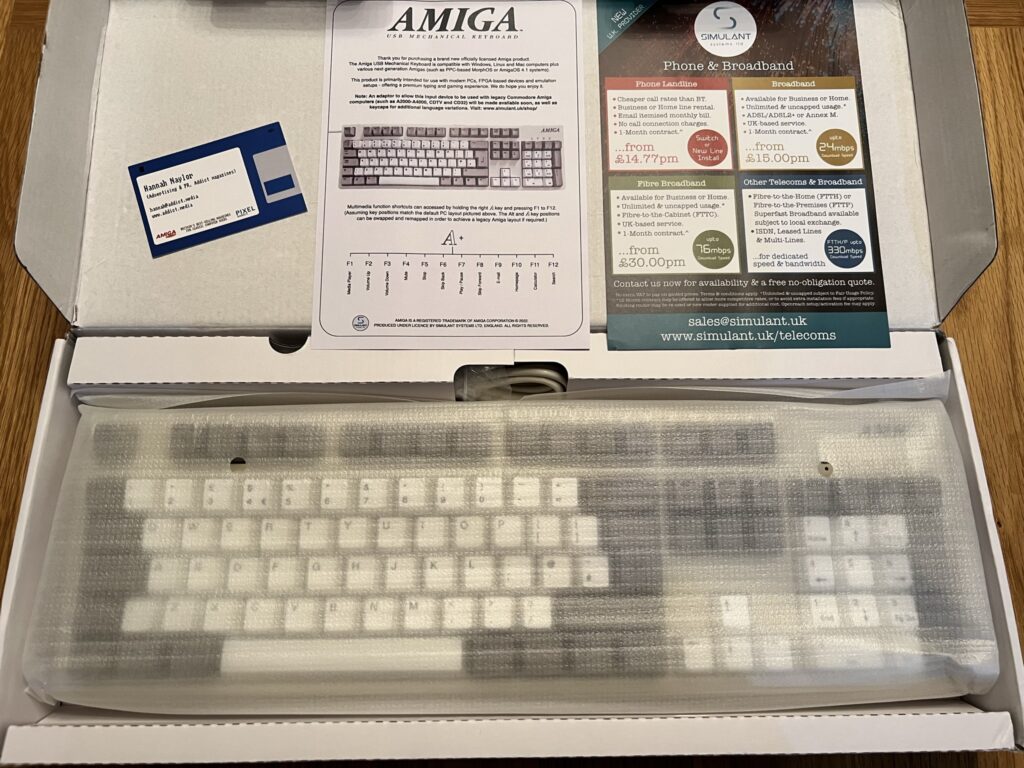
The keyboard packaging is really attractive and worth keeping hold of. It would certainly not look out of place on a shelf in you local Currys (PC World). Opening it up reveals the keyboard safely cocooned inside a foam bag along with a guide sheet and some promo flyers.


Amiga USB Keyboard

Who doesn’t love the smell of freshly opened tech?


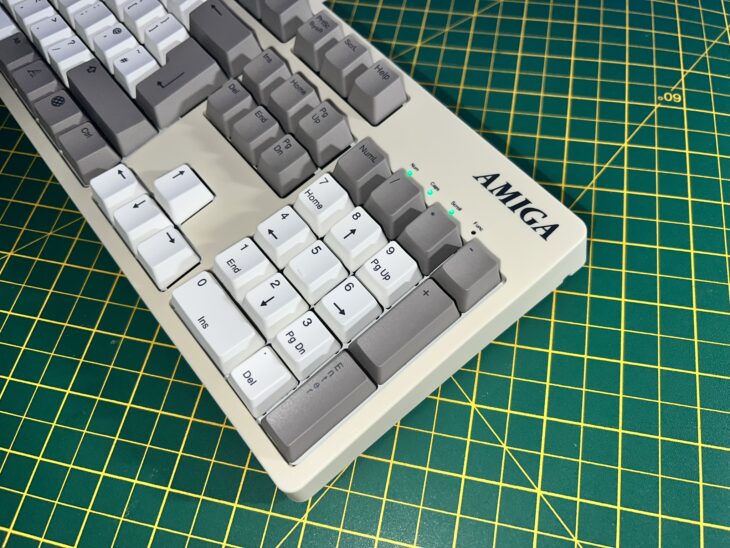
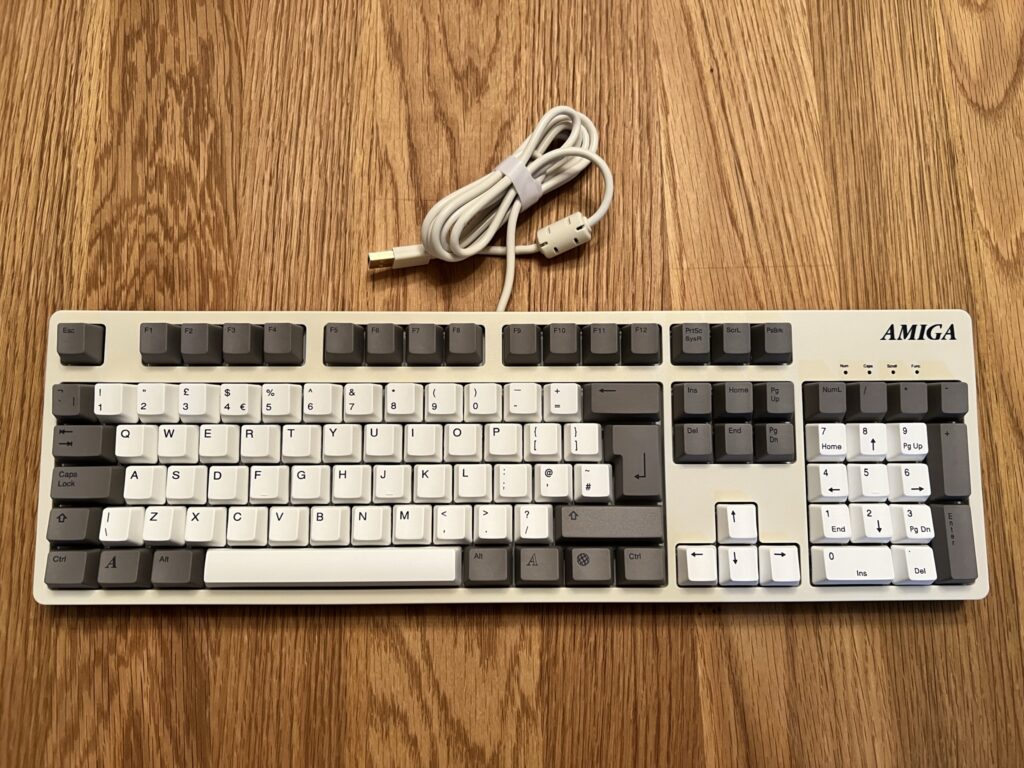
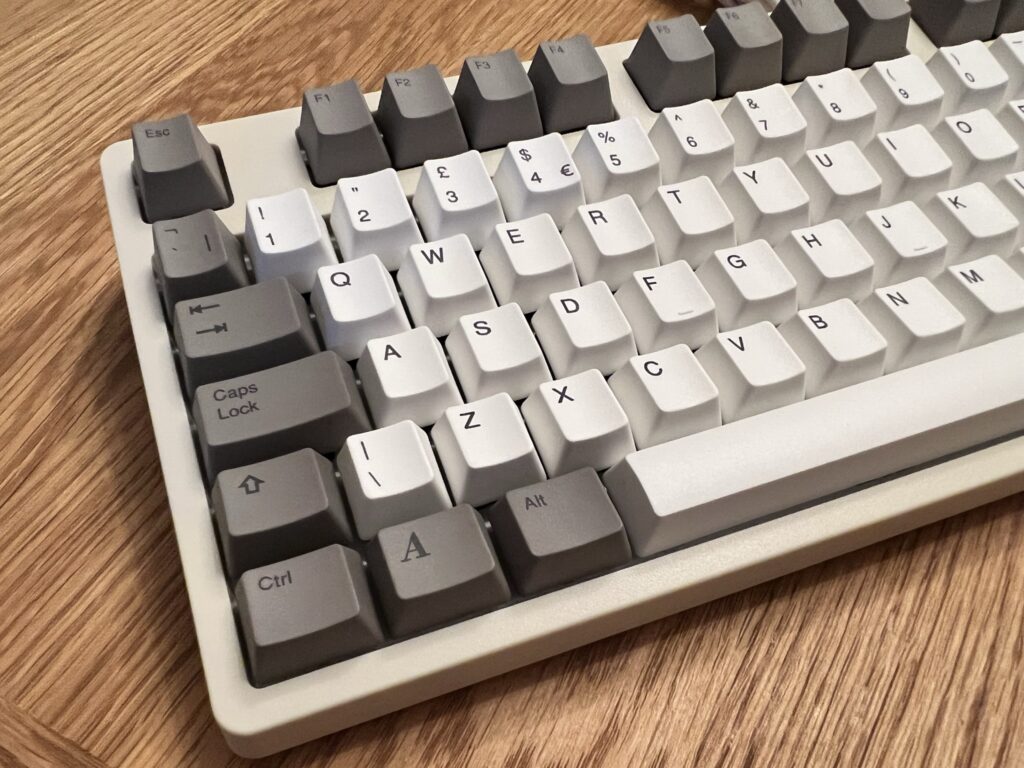
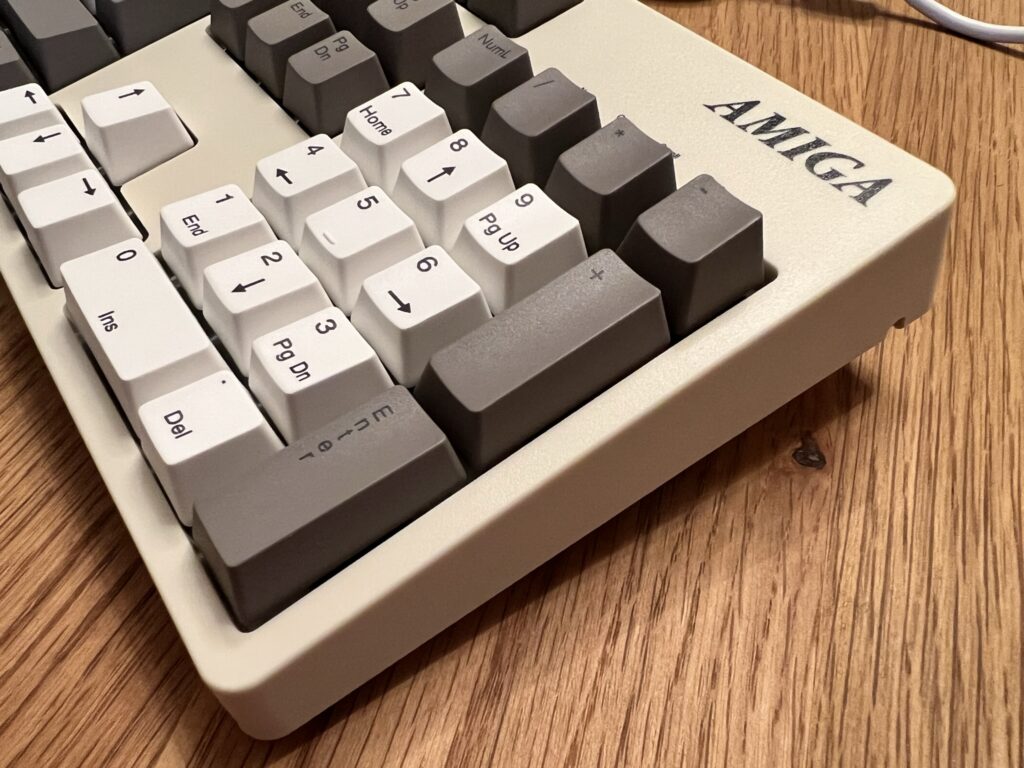
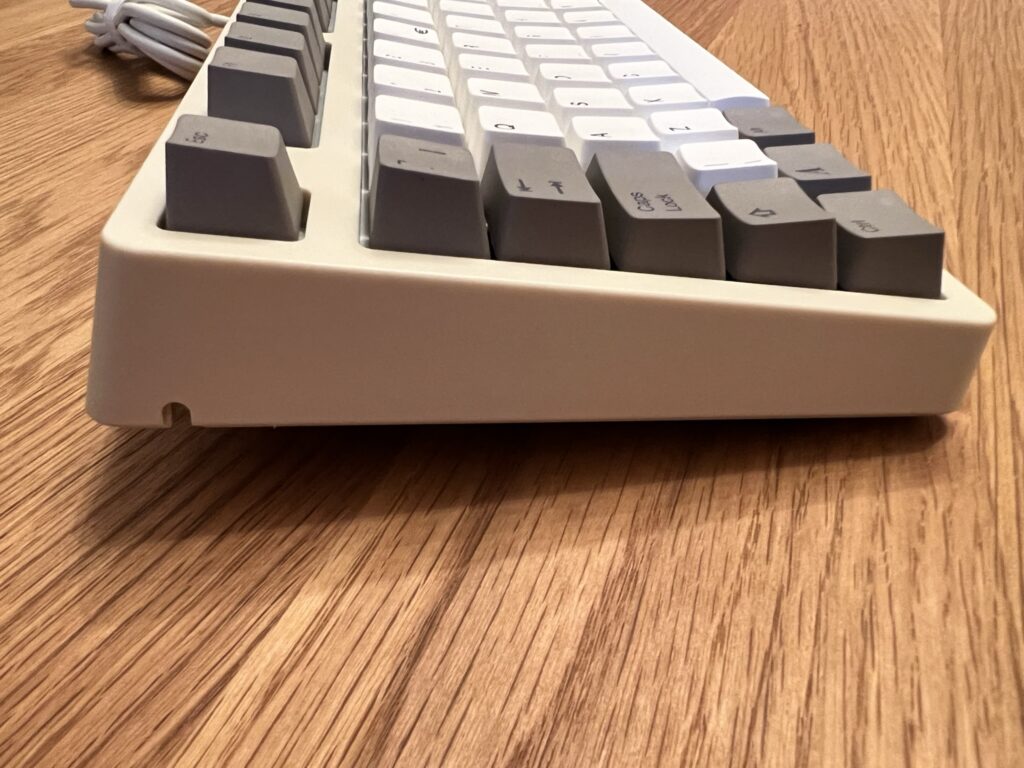
The keyboard itself is beige with a mixture of white and grey keycaps that follow the Amiga aesthetic well.


Amiga USB Keyboard

Noice!


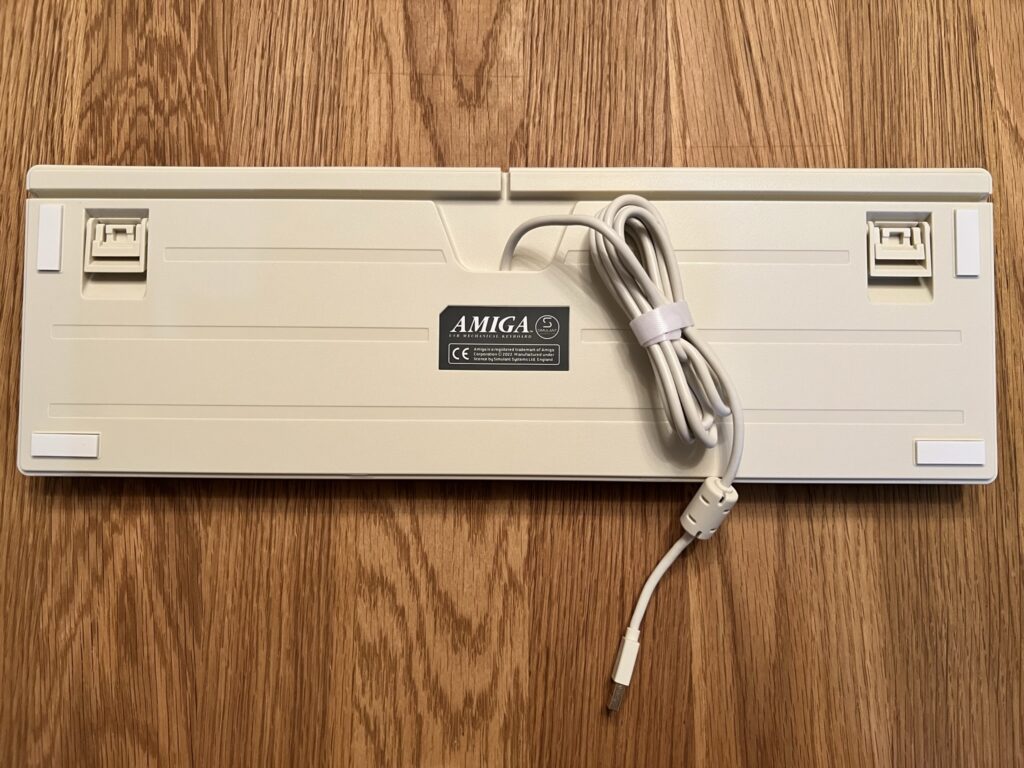
It has a decently long 2m USB cable and there’s little channels in the base that allow you to have it exiting out of the left, right or rear side of the keyboard which is a really thoughtful addition. I appreciated the provision of a detachable Velcro cable tie to keep things neat and tidy too.


Amiga USB Keyboard

Note the non-slip pads, pop out feet and cable management channels.


It’s also quite heavy, coming in at just under 1.4Kg when I popped it on the kitchen scales. A fair bit more than most keyboards these days, unless you count the RGB gaming ones with aluminium bases.


Amiga USB Keyboard

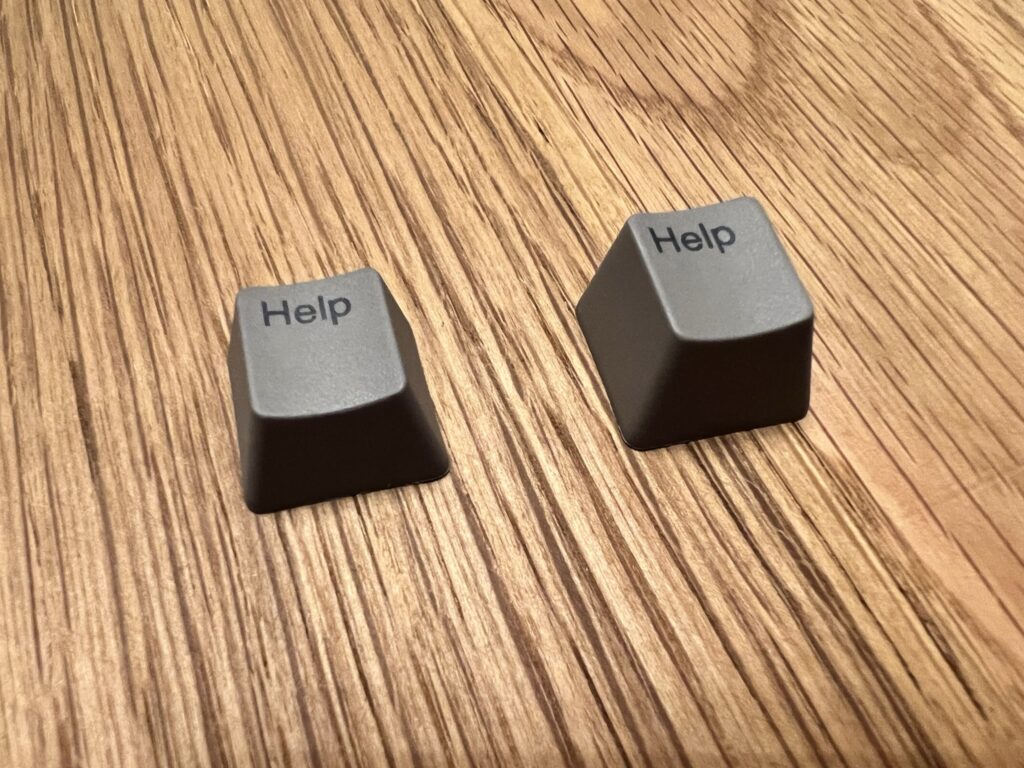
Help!


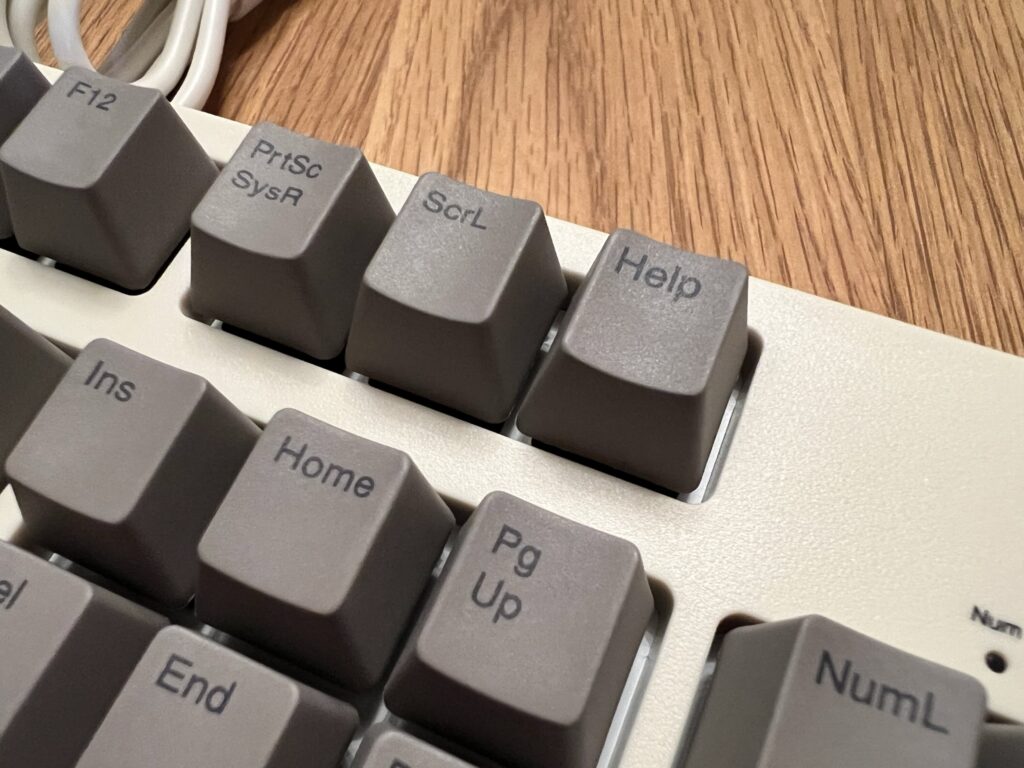
The keyboard doesn’t actually come with a ‘Help’ key fitted as standard which is a bit of a strange oversight. However they have made limited quantities of Help keycaps and were good enough to include a couple of different sized ones for me when I requested them.


Amiga USB Keyboard

Help keycap installed.


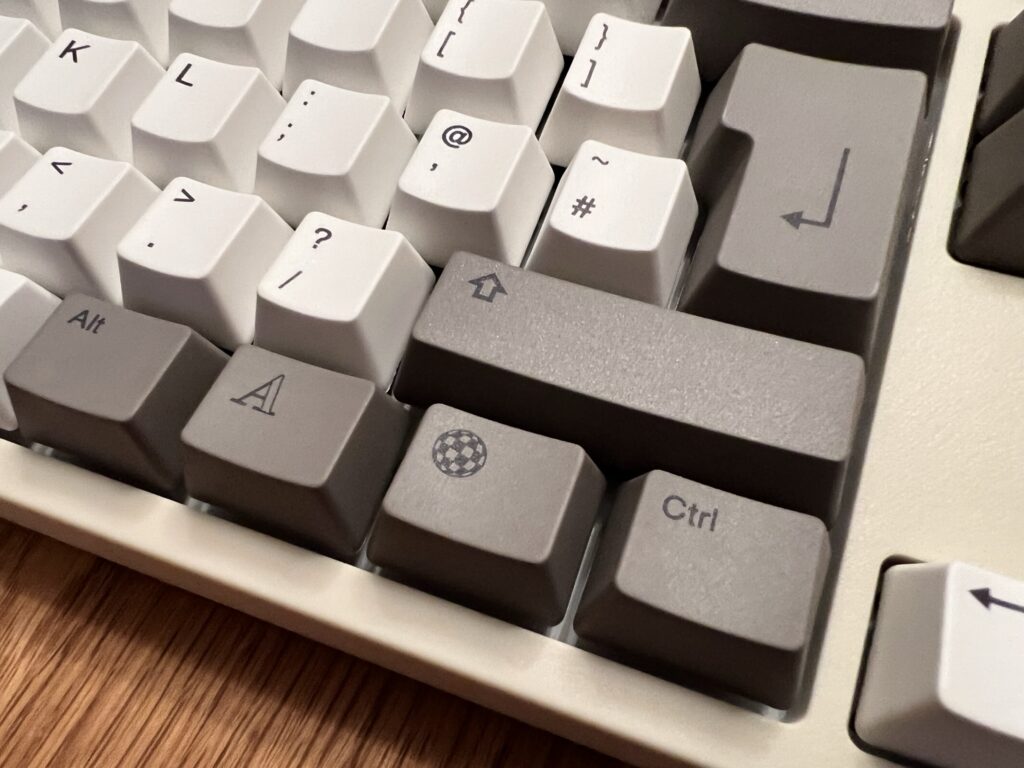
The ‘Amiga’ keys on both sides of the keyboard are present and correct (replacing the Windows and Menu keys).


Amiga USB Keyboard

Left Amiga key.


There’s even an Amiga ‘Boing Ball’ key – because, well why not!


Amiga USB Keyboard

Right Amiga Key & Boing Ball!


The keyboard has little pop-out feet underneath that can be located at two different heights giving a grand total of 3 possible angles it can be positioned at.


Amiga USB Keyboard

Feet position 1.


Obviously as this is a PC USB keyboard it is currently only suitable for use with the various Amiga emulators, FPGA machines and the A500 Mini.


Amiga USB Keyboard

Feet position 2


I tried the keyboard out with AmiKit and Amiga Forever on my PC and it was a pleasure to use. The keys have that pleasing mechanical click that provides much needed feedback – but not so loud as to annoy like many gaming keyboards can. Interestingly the keyboard was actually recognised as a ‘Gaming Keyboard’ when plugged into my Windows 11 PC.


Amiga USB Keyboard

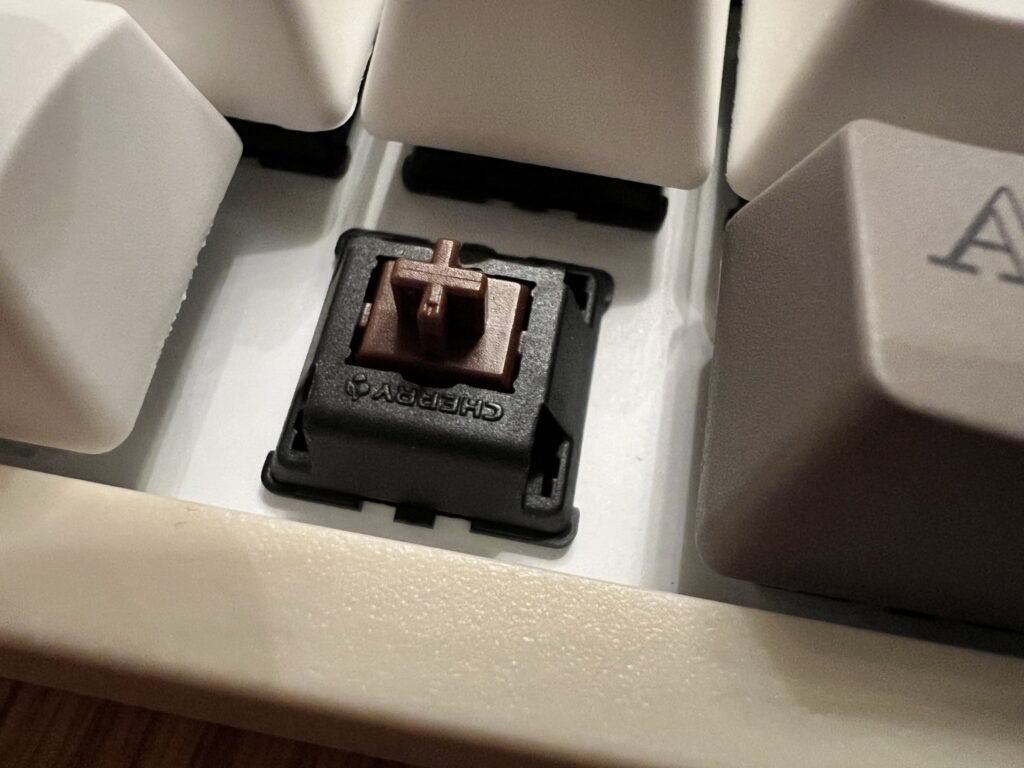
Cherry MX Brown switches throughout.


It’s nice to see that the keyboard is using genuine (as far as I can tell anyway) Cherry MX Brown switches which probably goes a long way toward explaining the high price too.

It’s far from an essential purchase, especially when it costs over £140 but given it was being made in limited quantities I felt compelled to grab one while I could. FOMO is a real thing! The plan is, one day, to pair it up with a MiSTer or possibly a Raspberry Pi in the upcoming Checkmate monitor that I’ve backed on Kickstarter.

If you are in the market for an Amiga themed USB keyboard and have £140 burning a hole in your pocket then (at the time of writing) they still have some left here

Wireless Amiga and C64 Gamepad Review

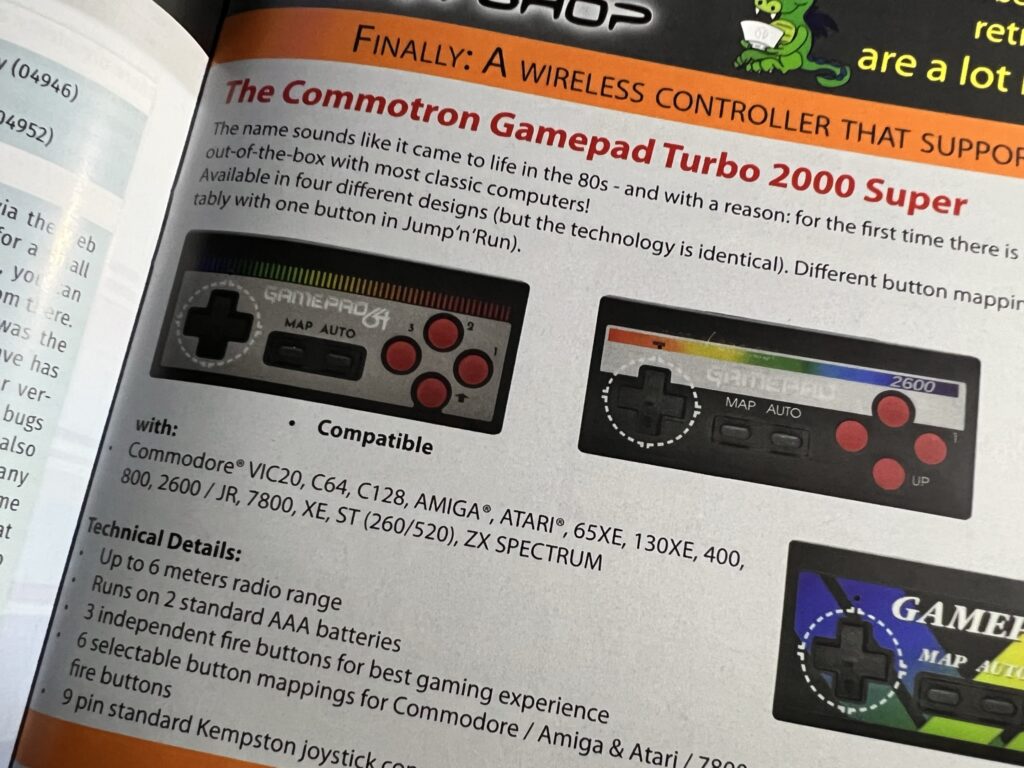
I spotted this wireless Amiga gamepad in an advert in the latest issue of Amiga Future magazine and ordered myself one immediately. Reading a physical Amiga magazine in 2023, seeing an advert in it and actually being able to order the item in that advert is a pretty special experience for me as a retro gamer. Normally when browsing through old Amiga magazines I see adverts for products and from suppliers that are long gone, but this was like being back in the early 1990’s all over again!


wireless Amiga gamepad

Advert in Amiga Future Magazine.


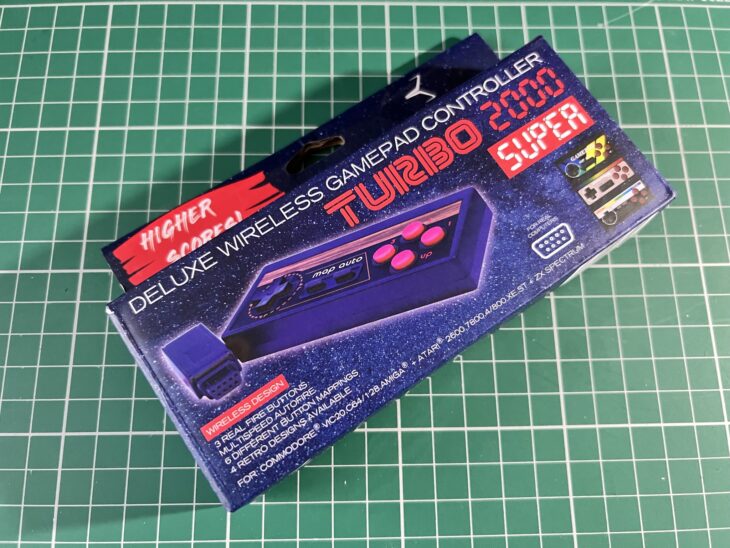
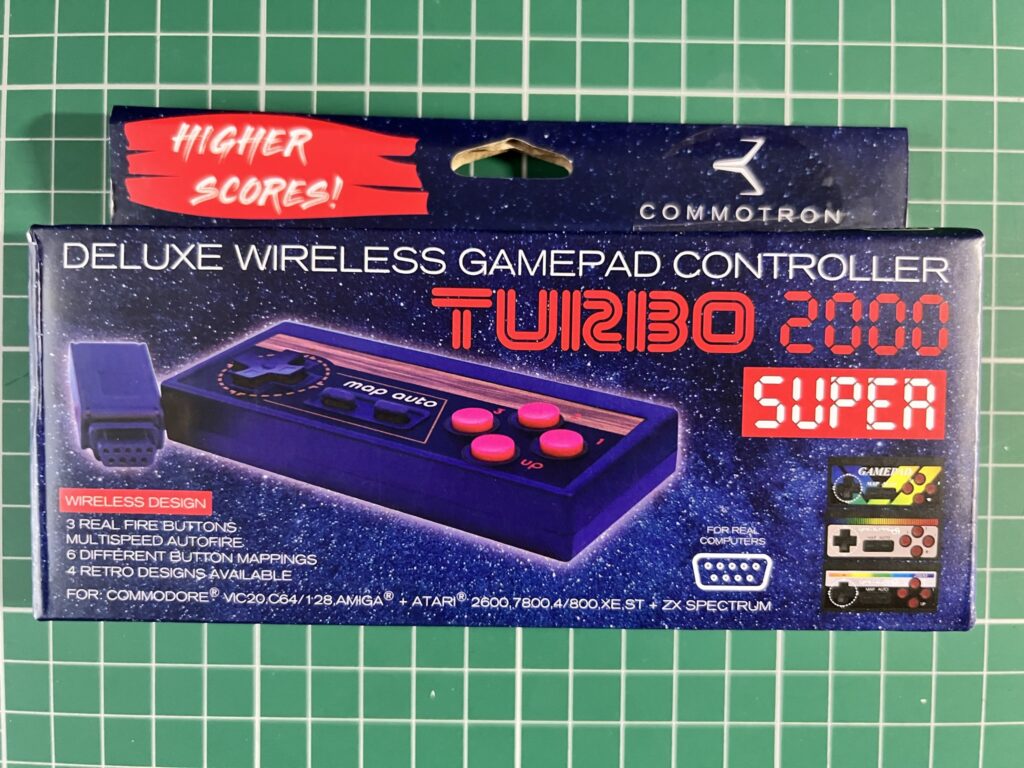
It’s full name is the “TURBO 2000 Super – Deluxe Wireless GamePad Controller” which is ridiculously OTT in a loveable 80’s kind of way. I picked mine up from their eBay web store but they’re available elsewhere online from other retro retailers too.


wireless Amiga gamepad

The box front.


Despite coming from Germany delivery took less than a week and I had no import fees to pay. Yippee! 🙂


wireless Amiga gamepad

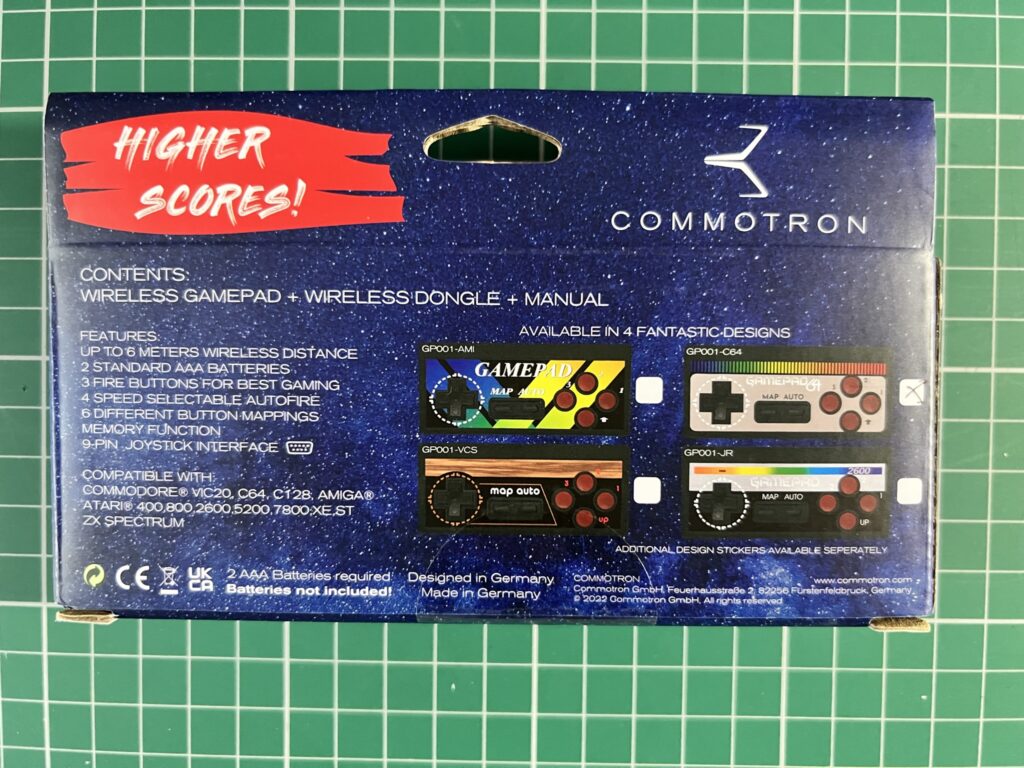
Back of the Box.


It came packaged in a pretty slick and colourful box that definitely wouldn’t look out of place on the shelf in your local game store.


Batteries Not Included

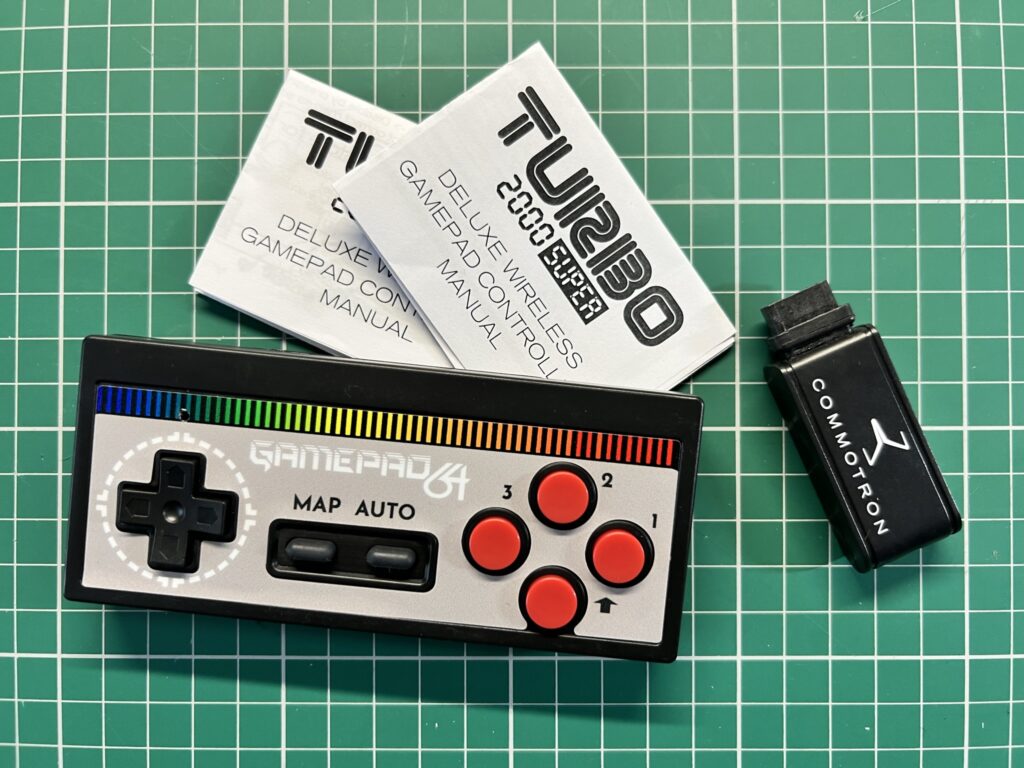
Opening up the box reveals a couple of instruction sheets, a dongle with a standard 9-pin DSub plug and of course the gamepad itself.


wireless Amiga gamepad

Everything you get inside the box.


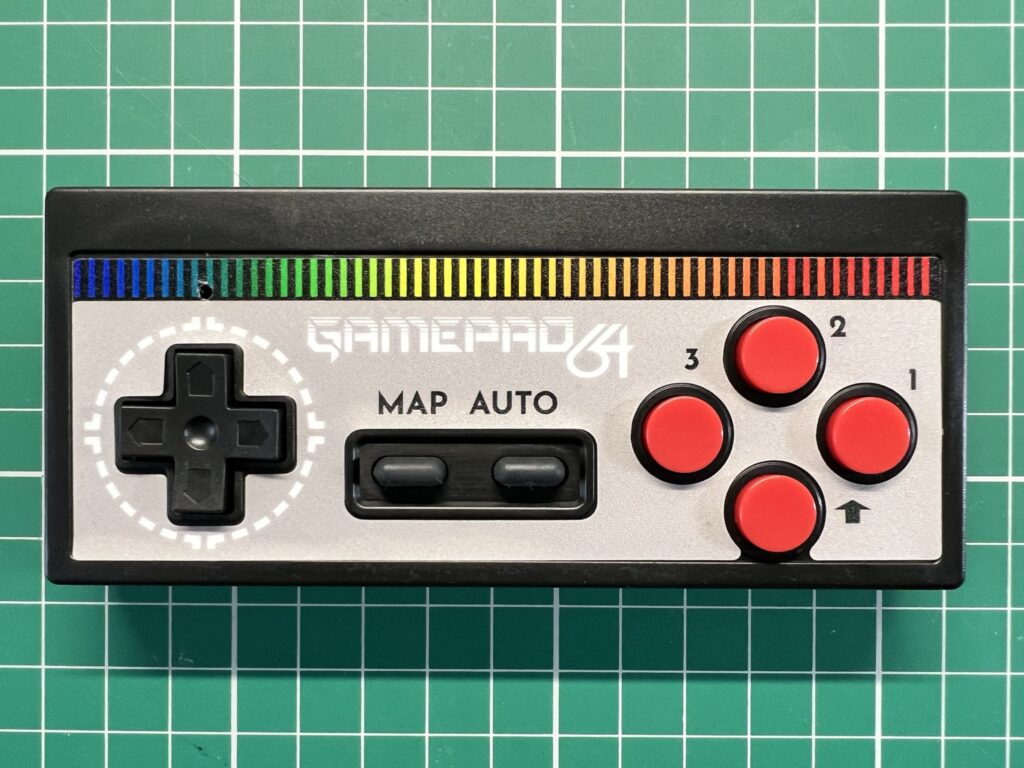
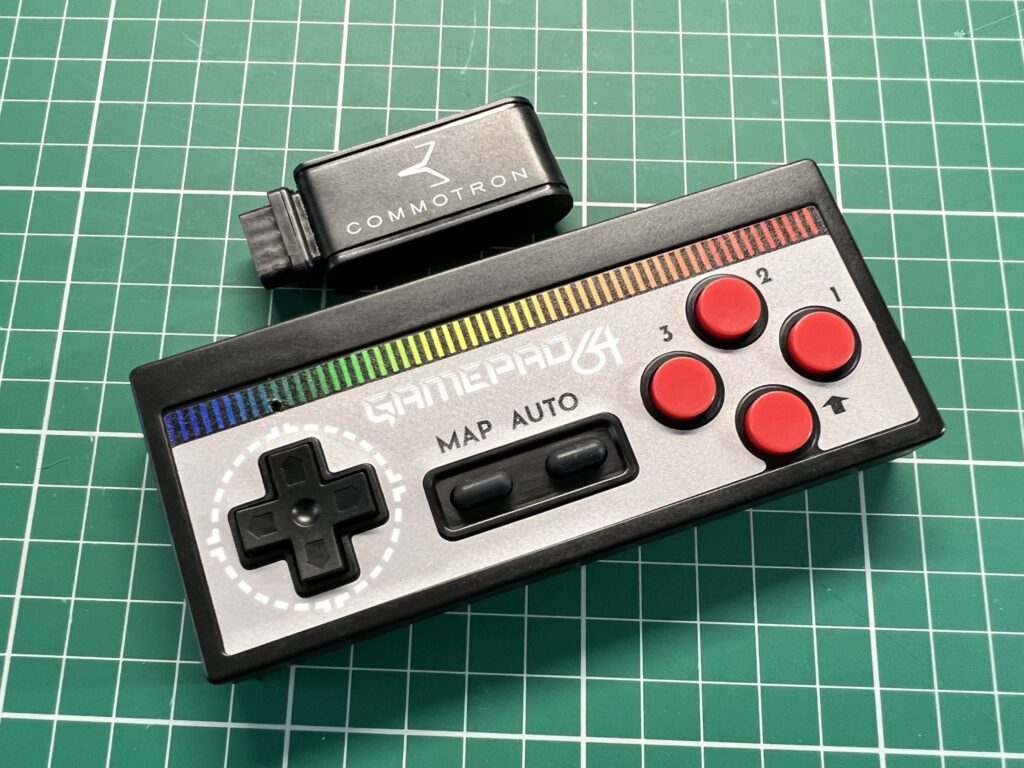
They actually make four different versions of the gamepad for the Amiga, C64, Atari VCS and Atari 2600. They’re all the same physical device though, it’s just the vinyl sticker on the controller that differs for each version.


wireless Amiga gamepad

The wireless dongle and gamepad.


I chose the C64 themed controller as the colours just appealed to me the most.


wireless Amiga gamepad

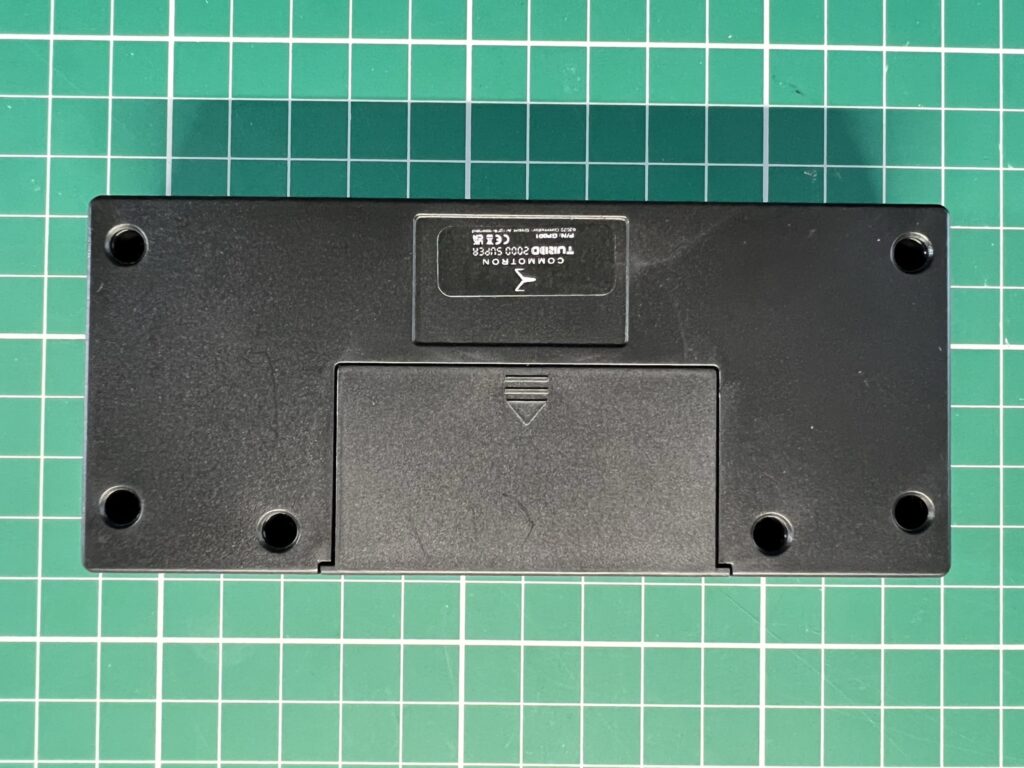
Bottom of the Gamepad.


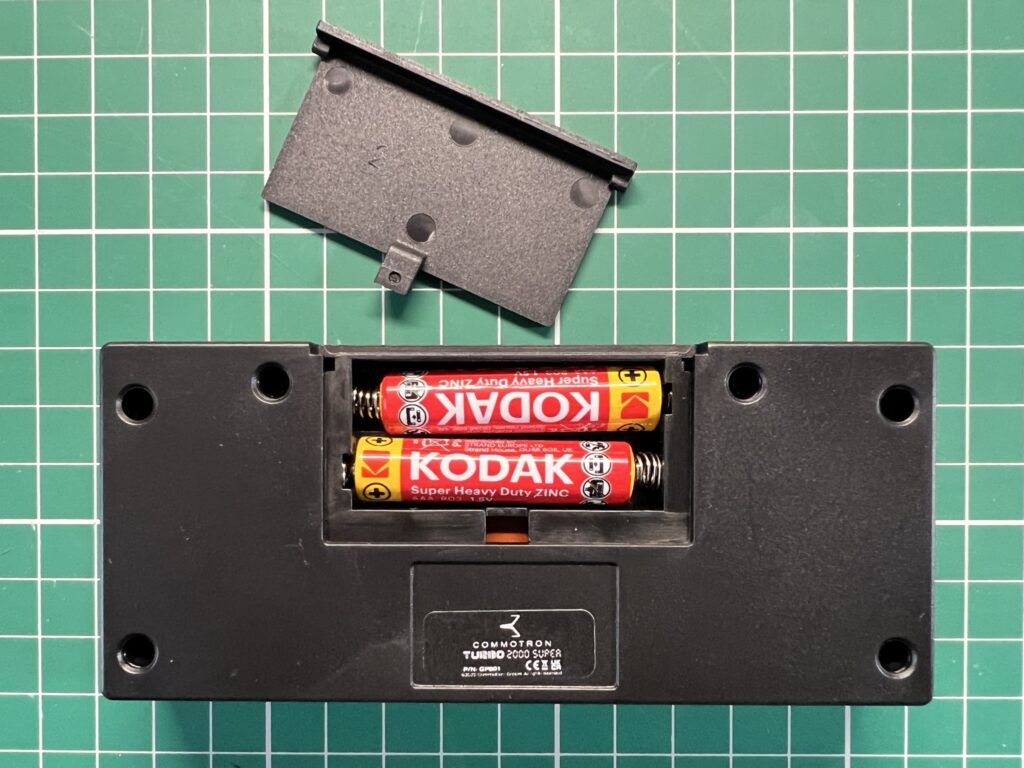
The controller takes 2 AAA batteries (not supplied) that fit into a little compartment on the underside.


wireless Amiga gamepad

AAA Battery Compartment.


Connecting the Gamepad to the Amiga

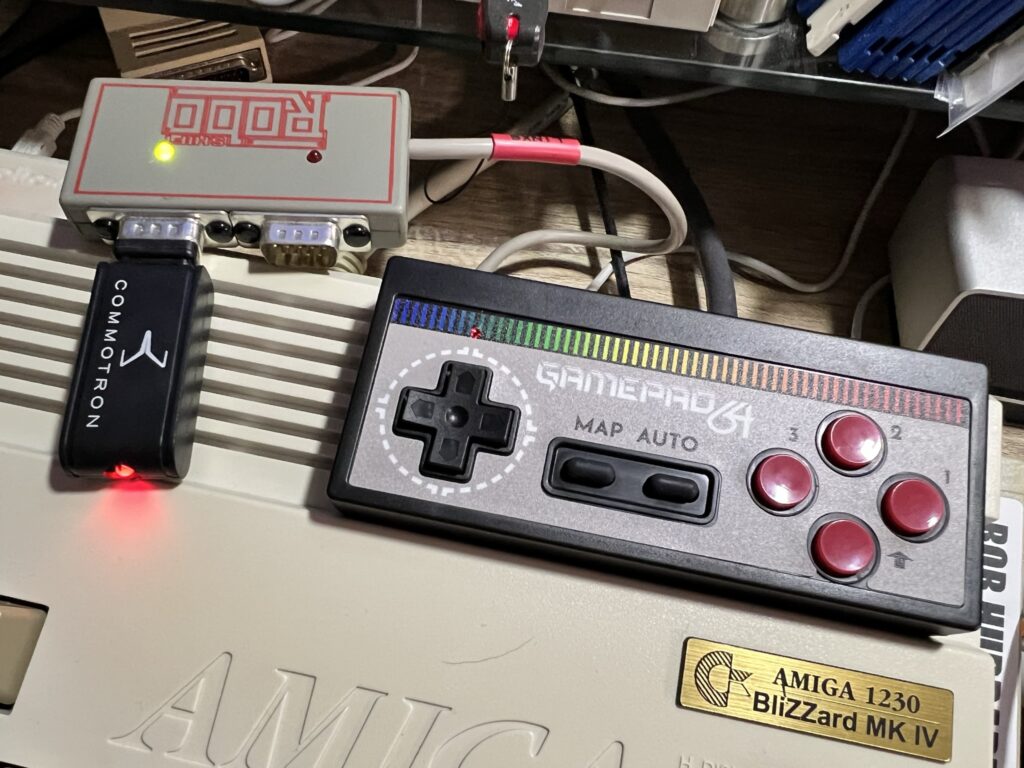
Connecting the dongle and gamepad to the Amiga could not have been any simpler. You just plug the dongle into the joystick port as normal (or in my case my Roboshift), power on the Amiga and then power on the gamepad.


wireless Amiga gamepad

Hooking the Wireless Dongle up to my Roboshift device.


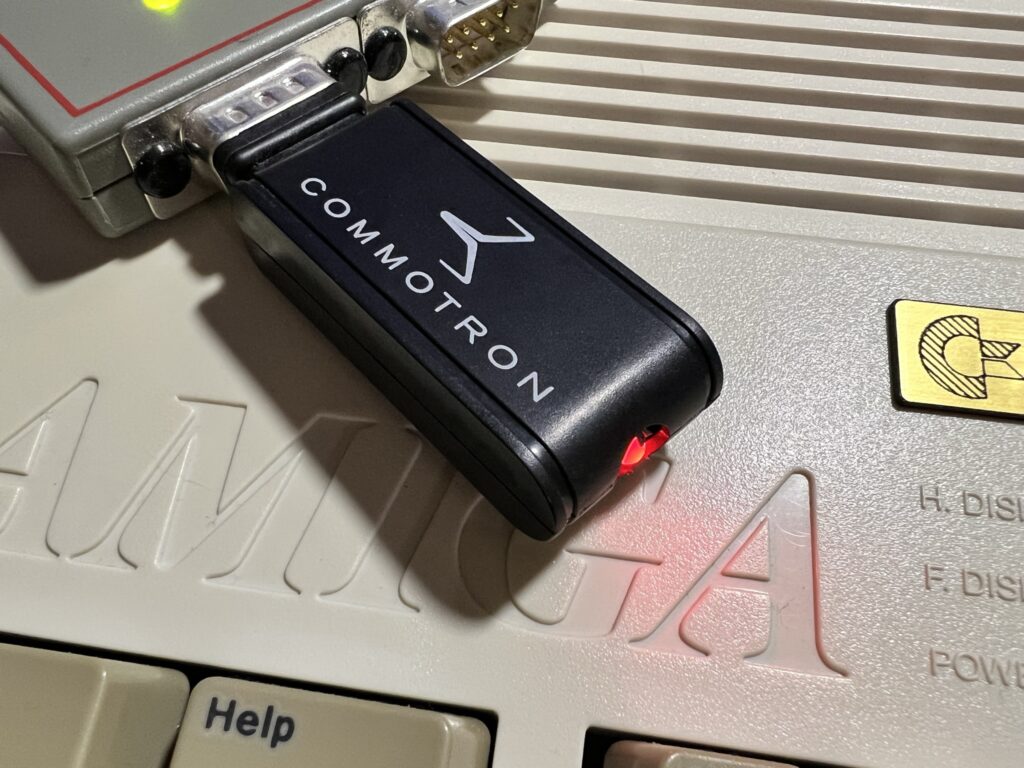
When you first plug the dongle in and power on your Amiga, a red LED on the device flashes signifying that it is trying to pair with the controller.


wireless Amiga gamepad

The Wireless Dongle.


As soon as I powered on the gamepad (which also had a small red LED above the D-Pad) both LED’s became solid red right away.


wireless Amiga gamepad

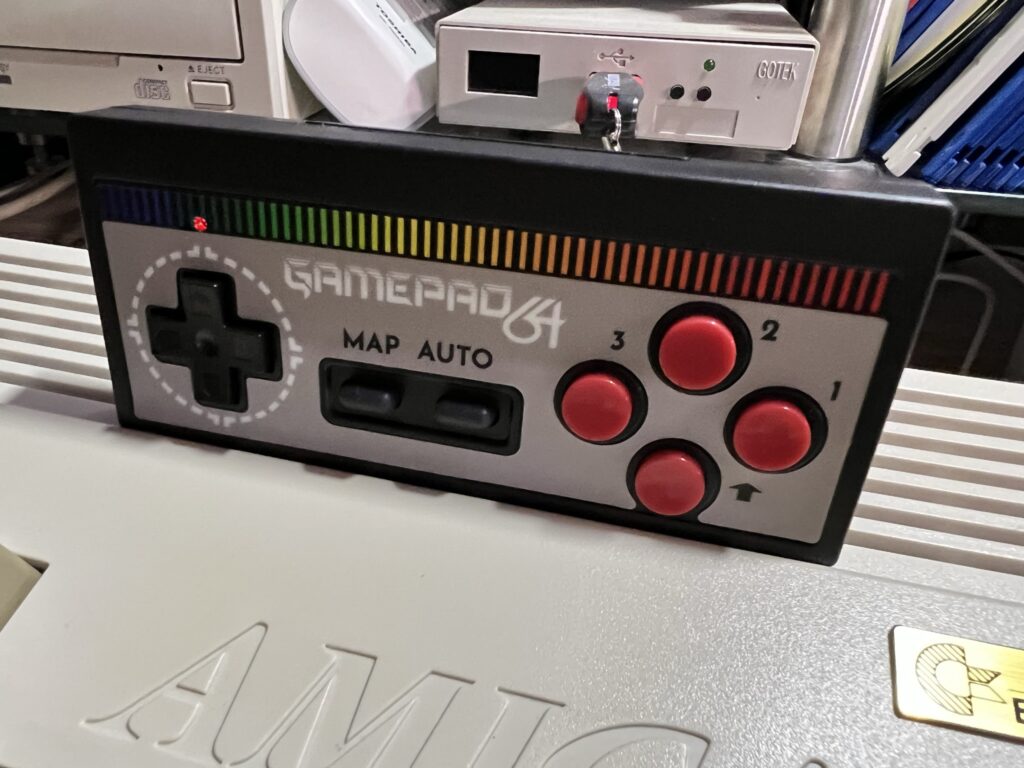
Notice the little Power/Connectivity LED above the D-Pad.


What’s it like to use?

The gamepad is well constructed and nicely finished in a textured matte black plastic. The vinyl sticker on the front is really well made and looks professional. The textured finish makes it easy to grip and having a set of batteries inside it means it has a nice bit of weight to it.


wireless Amiga gamepad

Close-up of the buttons.


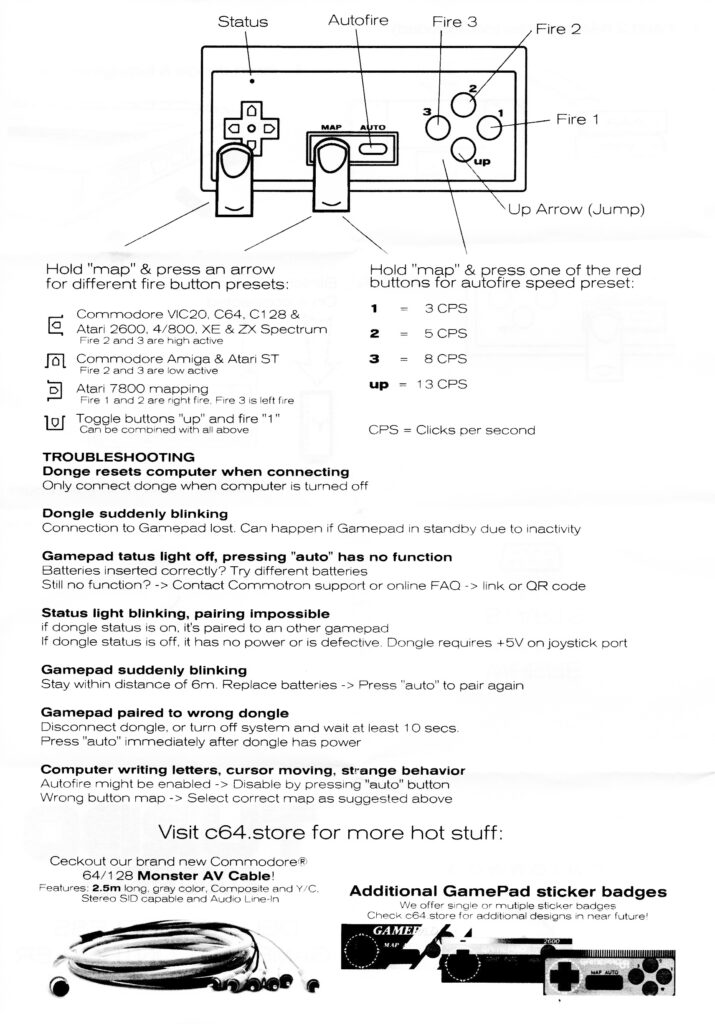
The gamepad features 3 fire buttons (labelled 1, 2 & 3) and a dedicated ‘UP’ button which is a real boon in platform games. The ‘MAP’ button is used to switch around the fire buttons depending on your preference or system being used. It can also be used to switch the ‘UP’ button with fire button 1 should you wish. The ‘AUTO’ button toggles the auto-fire feature on and off. 4 different auto-fire speeds are configurable on the pad; 1, 5, 8 and 13 ‘clicks per second’.

The D-Pad is very responsive and easy to operate without accidentally triggering a diagonal direction unless you actually want to. The fire buttons are quite stiffly sprung and require a firm push to depress which gives plenty of tactile feedback. It did take me a little while to get used to though. Compared to say an Xbox or PlayStation controller they require much more pressure to operate.


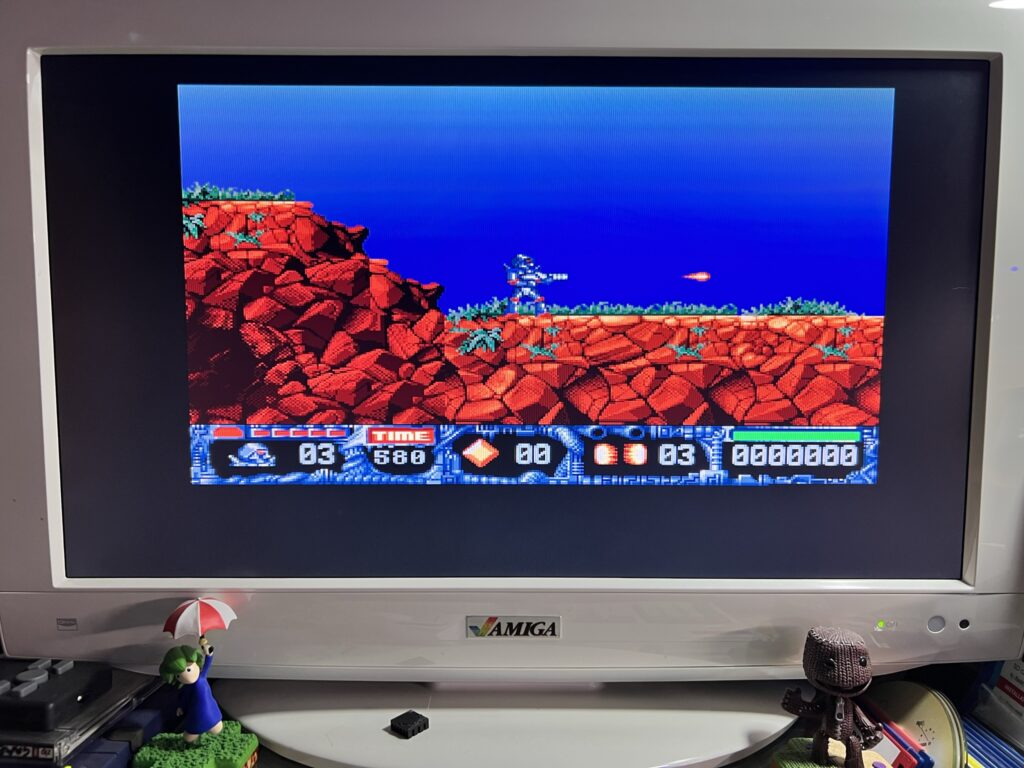
Turrican 2 AGA

Turrican 2 AGA


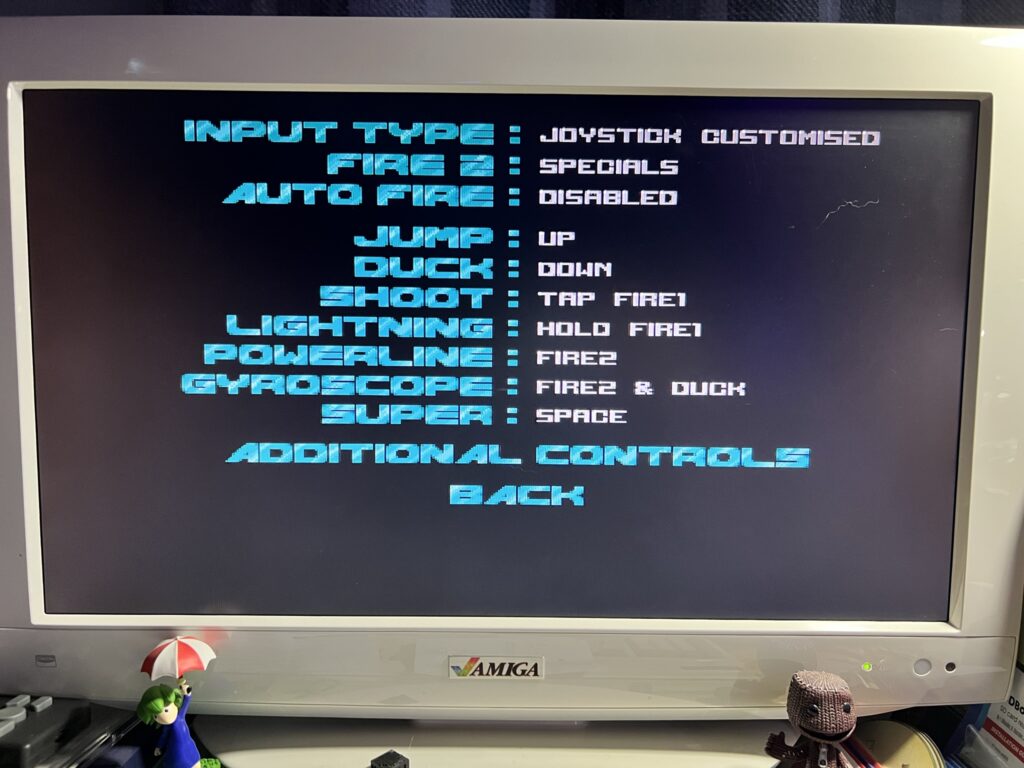
Having 2 fire buttons that work on the Amiga is terrific. Playing the new Turrican 2 AGA for example (awesome game by the way) is so much better when you have the 2nd fire button to help trigger extra weapons/abilities instead of having to reach for the keyboard all the time!


Turrican 2 AGA

Turrican 2 AGA – 2nd Fire Button Configuration.,


This gamepad would be equally awesome for games that support 2 fire buttons on the C64 too. Games like Super Mario Bros 64 and Chase HQ 2 for example.

Another useful feature is that the gamepad turns itself off after a period of inactivity to conserve battery life. Turning it back on just requires a quick press of the ‘AUTO’ button for near instantaneous reconnection.


Final Thoughts

This is an awesome controller and I’m so glad I bought it. I have a ton of retro joysticks and gamepads now but this one has quickly become my favourite. The combination of auto-fire, configurable extra fire buttons and of course the wireless capability means it’s a no-brainer for me. It’s reasonably priced too, coming in at around the same level you would expect to pay for an Xbox or PlayStation controller. Considering this is a low volume product I think the price is very fair indeed.

Needless to say I’m going to order some more so I can leave one permanently attached to each of my Commodore machines! Highly recommended.


FYI

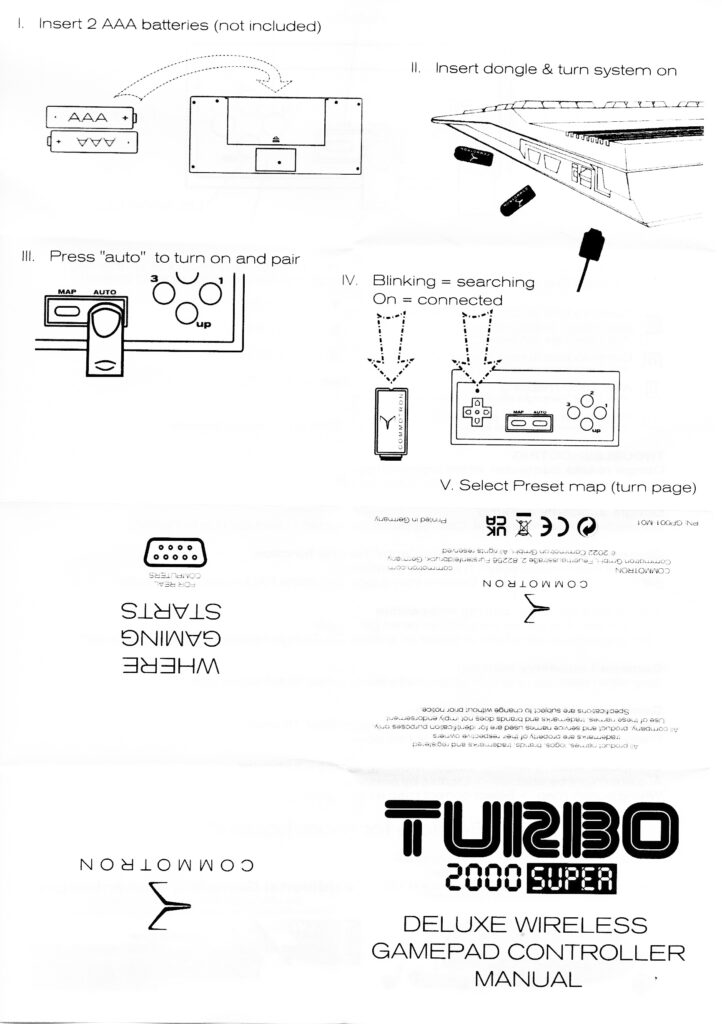
I’ve included scans of the instructions below in case anyone is curious about exactly how the button mapping or pairing works.


How to access a network share on the Amiga

After getting it online this has to be the next best thing your can do with your Amiga. Being able to access a network share on the Amiga is really a liberating experience. It affords you not just the freedom to quickly access files you may have downloaded on your PC but also near unlimited extra storage for your Amiga. It’s quite a straightforward process and I’ll go through the whole thing from start to finish in this post.

Before going any further it’s assumed that you already have your Amiga networked and have configured a TCP/IP Stack as these are essential. You will also need a Windows based PC to create a shared folder on (or a suitable NAS that supports the SMB1).


Installing the Amiga Software

I’ll deal with the Amiga installation side of things first as that’s much more straightforward. To begin with you need to download two packages off Aminet, smbfs-68k.lha and SMBMounter.lha.

We only need a single file from the SMBFS package so simply extract the LHA archive to your RAM disk and then copy the ‘SMBFS’ file to your C: drive. (Strictly speaking if you are comfortable with the command line then this is all you need but we’re going to install a GUI for it, hence the need for SMBMounter).

Next extract the SMBMounter archive, run the installer and select ‘Intermediate User’ as shown below.
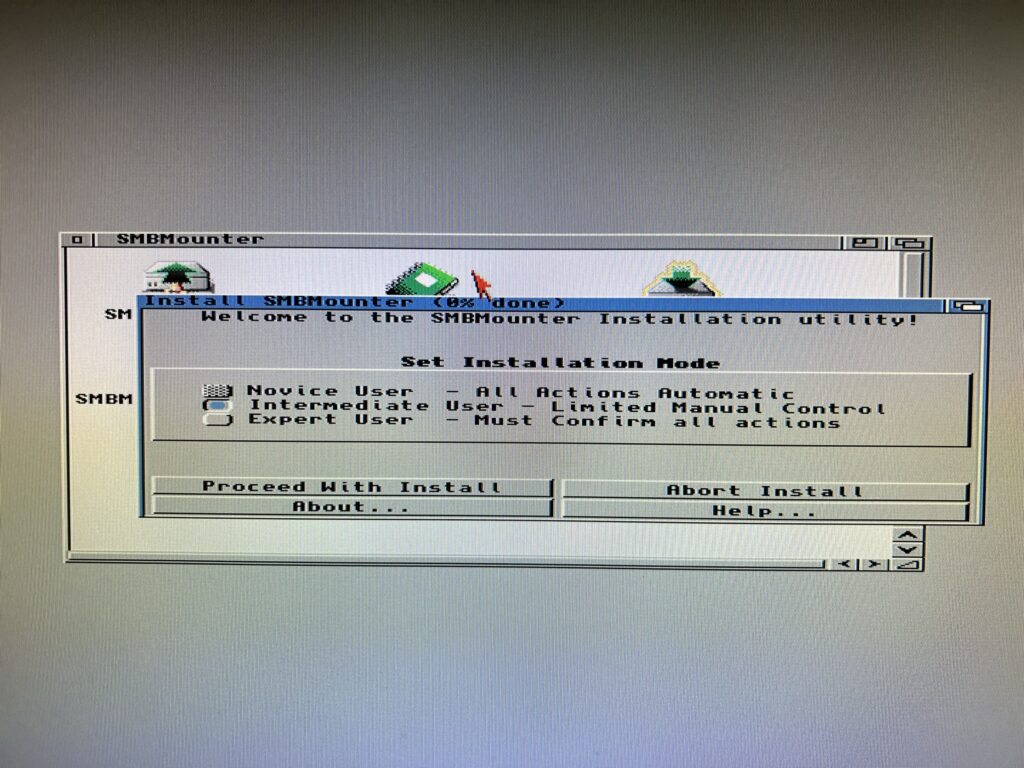
 

Installing SMBMounter

Installing SMBMounter


Select ‘Install for real’.
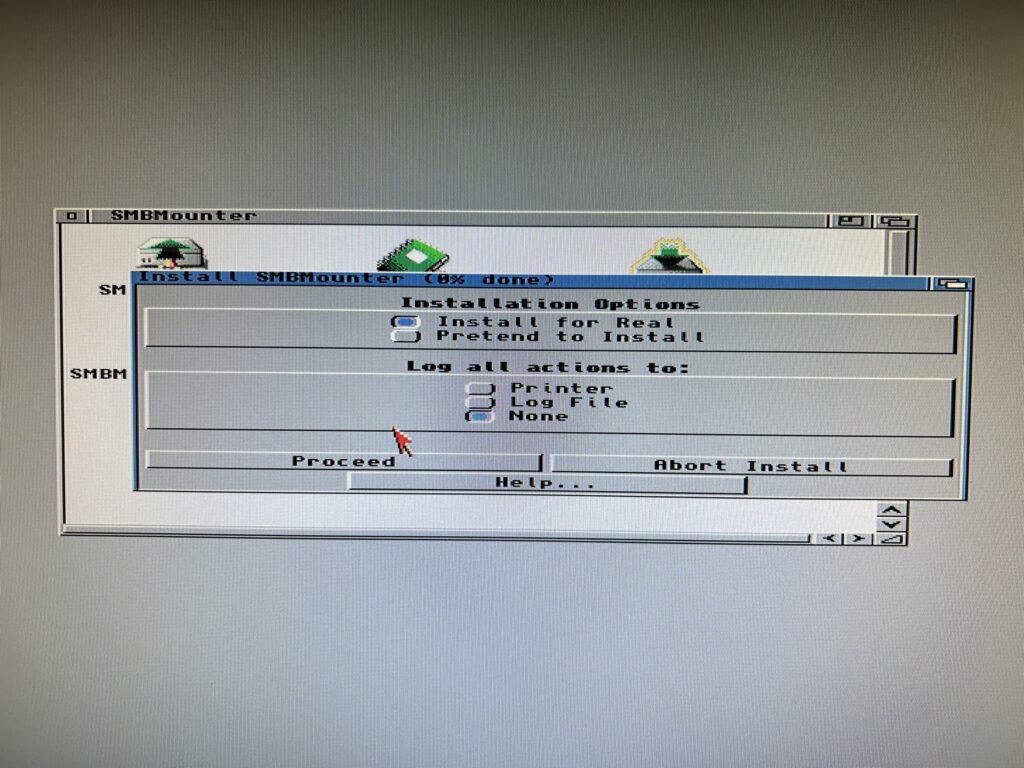
 

Installing SMBMounter

Installing SMBMounter


Choose where to install the software. It doesn’t really matter but in my case I selected my ‘Internet’ drawer as I like to keep all my internet/network related stuff in one place. Note that you do not need to create an SMBMounter drawer – one will be created automatically in the location you choose.
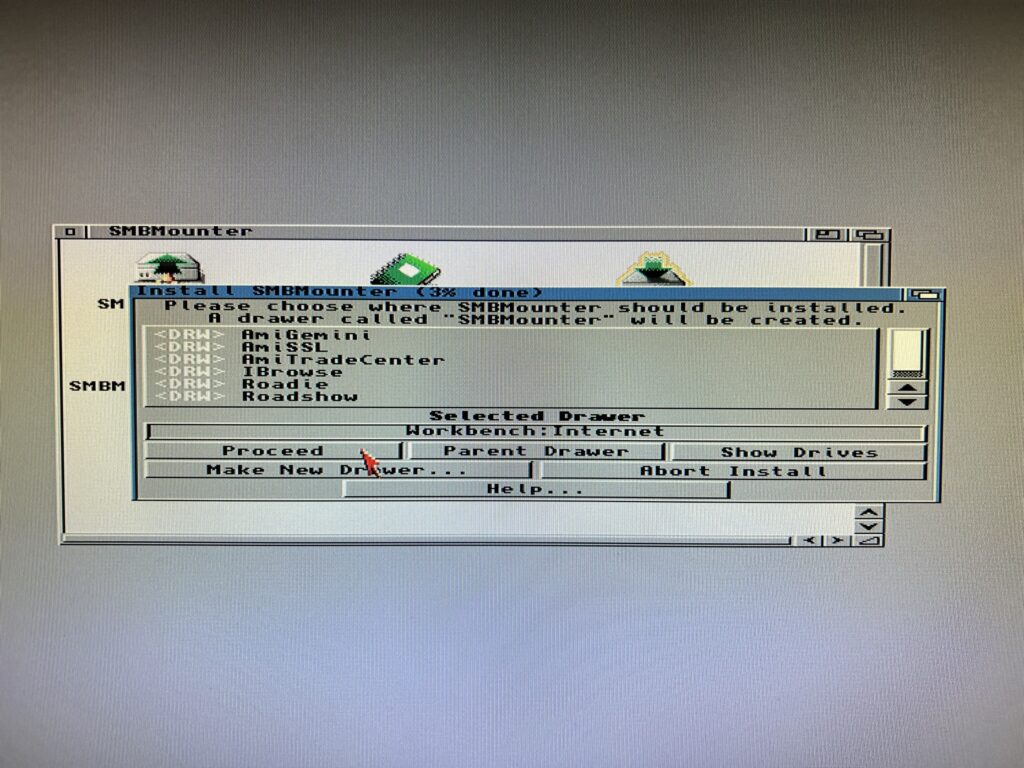
 

Installing SMBMounter

Installing SMBMounter


Next choose a language if English is not your native tongue.
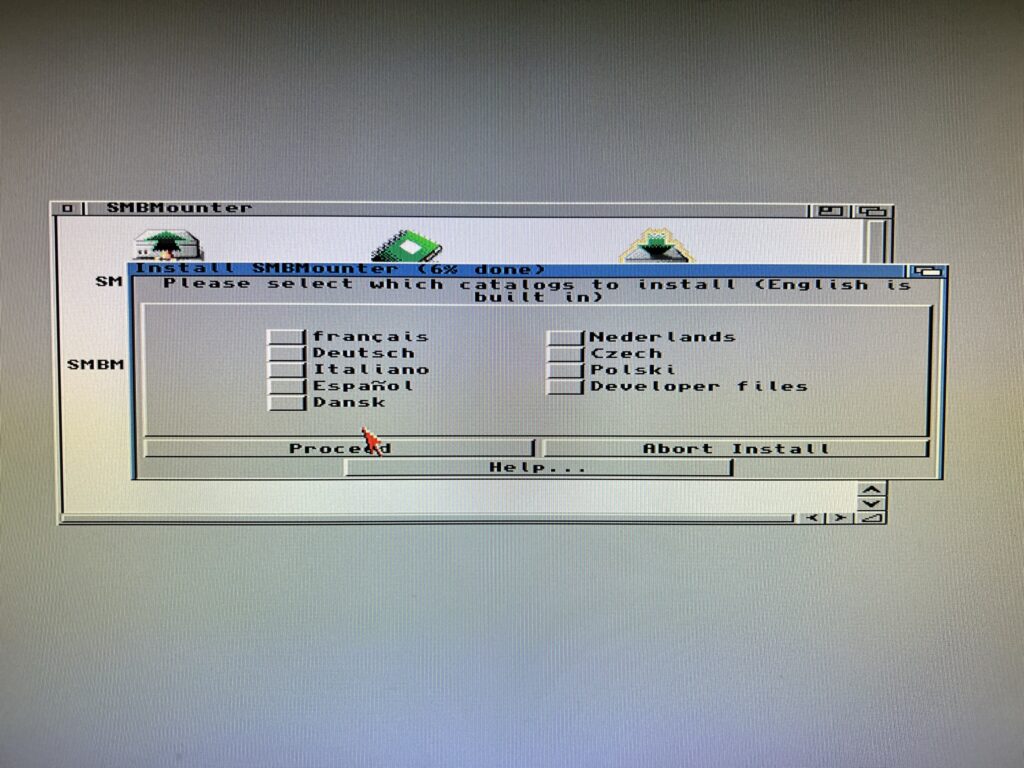
 

Installing SMBMounter

Installing SMBMounter


The final thing to choose is the icon set that will be used for the program files. I’m using OS3.2 and like GlowIcons so chose that option.
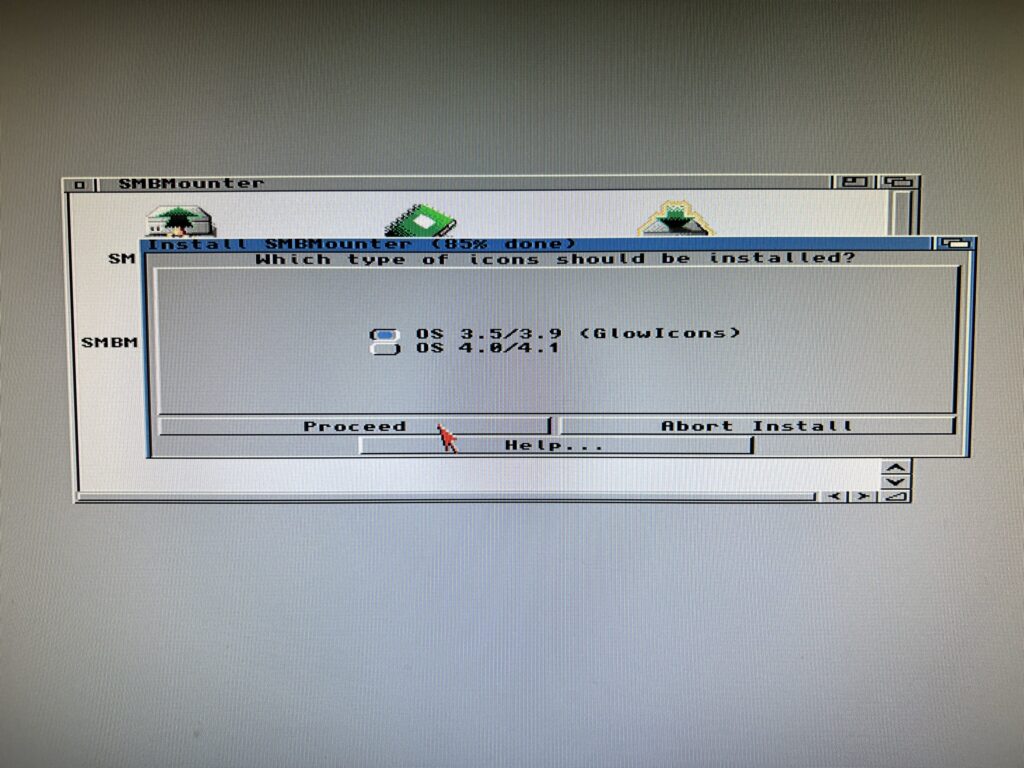
 

Installing SMBMounter

Installing SMBMounter


The program will now be installed. After a few seconds you should get an ‘Installation Complete’ message along with a reminder of the install location.
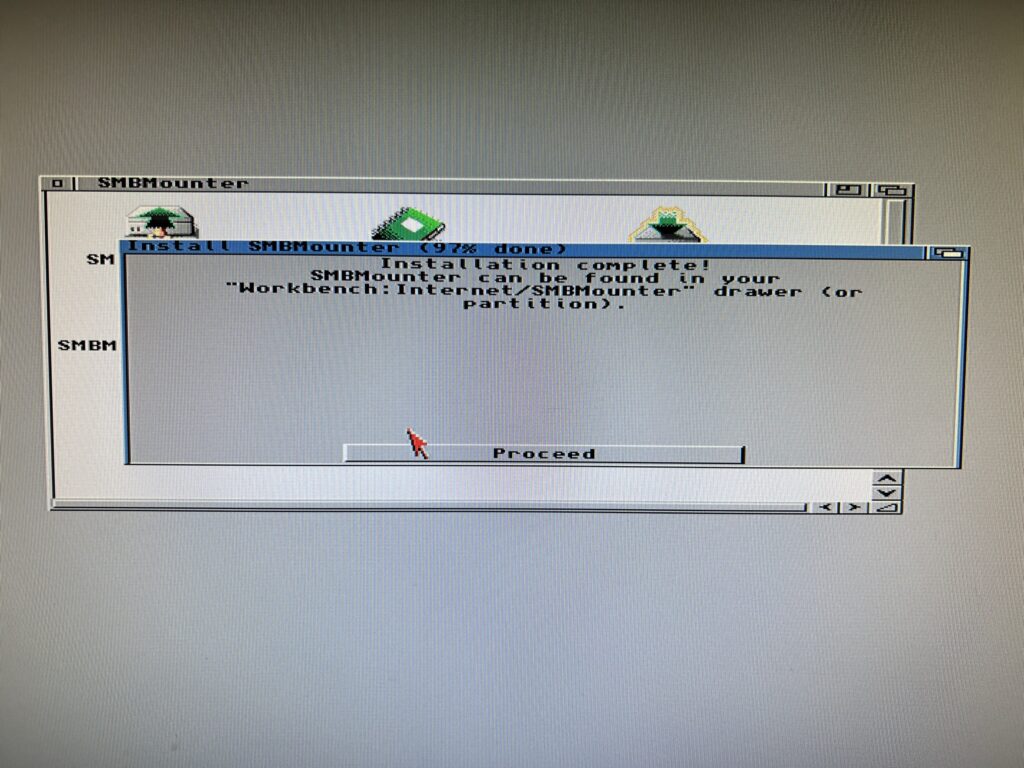
 

Installing SMBMounter

Installing SMBMounter


If everything went well you should have a drawer looking just like the one in the photo below.
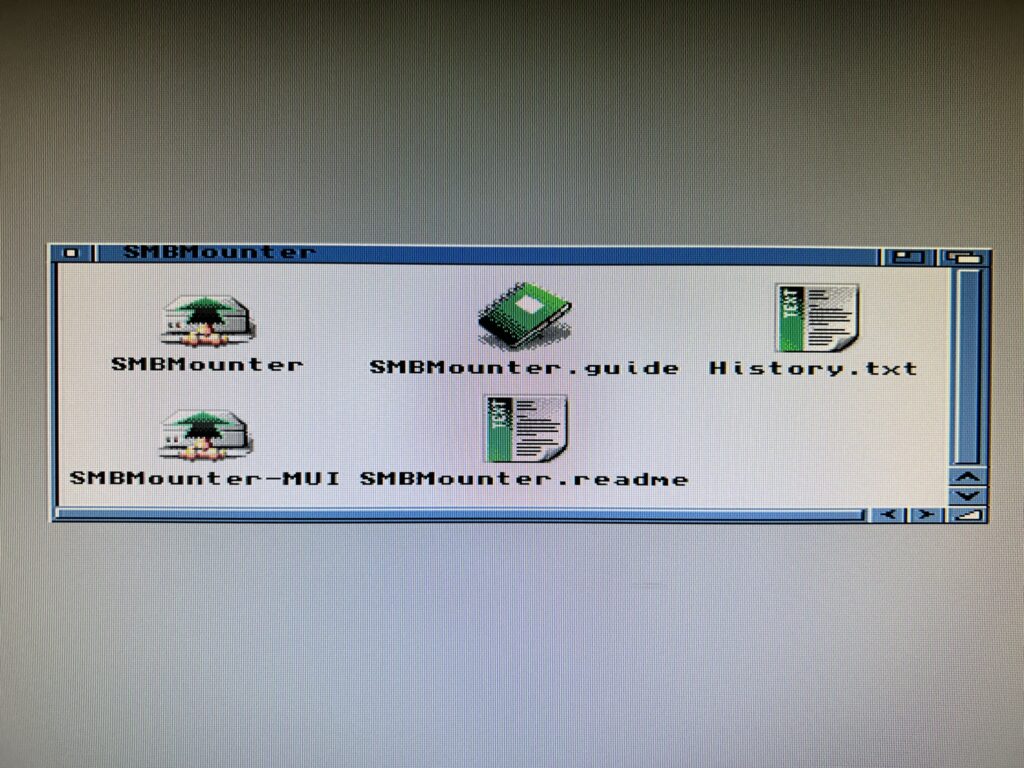
 

access a network share on the Amiga

Installing SMBMounter


That’s it for the Amiga side of things, at least for now anyway. Time to boot up your Windows PC and configure something for the Amiga to connect to!


Configuring an SMB1 Share on a PC


Enabling SMB1

I just want to preface this section by saying that I created this guide on a Windows 11 PC (which was upgraded from a Windows 10 install). It should work with older versions of Windows too. However Microsoft is actively trying to kill off SMB1 (see here) so if you are reading this in the future you may have a few extra hoops you need to jump through to get this working. (Alternatively just use an old PC running Windows 10!)

Right, with that out of the way the first thing you must do is determine whether your PC has SMB1 file sharing enabled, and if not, enable it. The easiest way to achieve this is to open the ‘Turn Windows features on or off’ control panel.


Turn Windows Features on or off

Turn Windows Features on or off


To do this use the start menu search facility and type ‘features’. Windows will have a rummage around the C: drive and then present you with the program so you can just click on it as shown above.


Turn Windows Features on or off

Checking that SMB1 client/server is enabled.


Scroll down the list until you get to the SMB section. You want to see little check boxes next to ‘SMB 1.0/CIFS Client’ and ‘SMB 1.0/CIFS Server’. If they aren’t ticked, click in the little boxes to enable them and then click on OK. You will have to restart Windows for it to complete the installation of the new features.

Please note you do NOT want to have a check mark next to ‘SMB 1.0/CIFS Automatic Removal’. If you do have it ticked this will cause Windows to remove SMB after a few weeks of the protocol not being utilised.


Creating a Local User Account

This part isn’t strictly necessary but I recommend it as it helps keep things neat and tidy and also prevents issues in the future should you change your PC account password. I’m doing this in Windows 11 Home. There are multiple ways to achieve this but I’m just going to describe one method which is very straightforward. If you already know how to do this then skip to the next section.

Firstly using the start menu search enter ”netplwiz’ and then run the program that Windows finds.
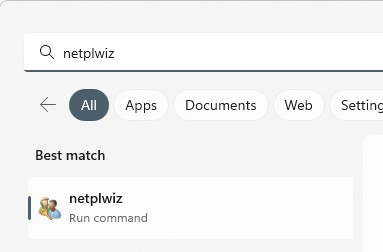
 

NETPLWIZ

Running NETPLWIZ to access user accounts.


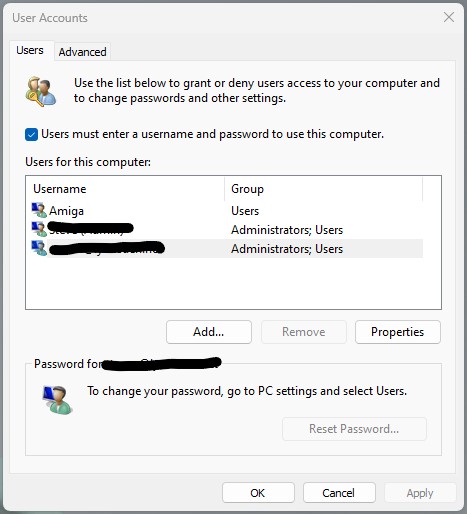
This will bring up the ‘User Accounts’ window. You should see at least one account here which will be your main Windows account. There may be others too, depending on how many people use the PC.
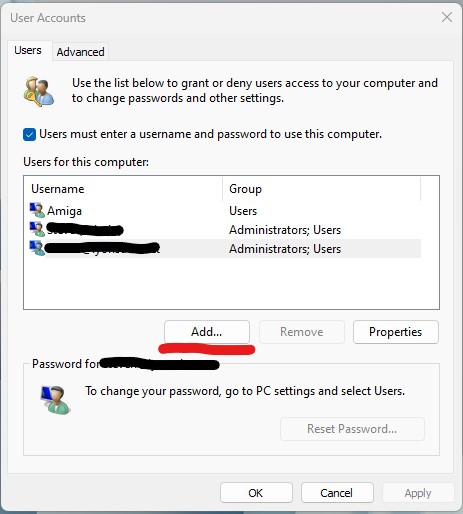
 

Windows 11 User Accounts

Windows 11 Local User Accounts window.


I had already created an Amiga account when I took the above screengrab but will pretend I didn’t for the rest of this section so click on ‘Add…’ to continue.
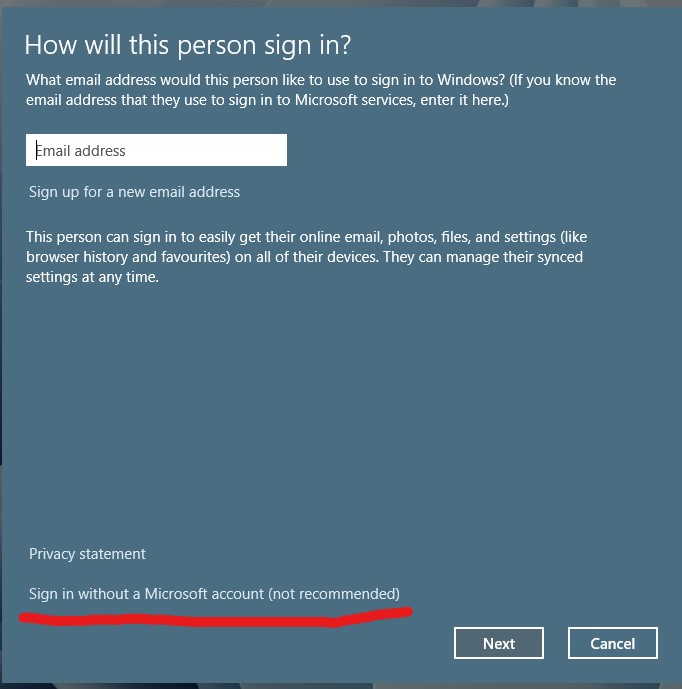
 

No I don’t want to create another Microsoft account…


Ignore Microsoft’s recommendation and click on the bit at the bottom which says ‘Sign in without a Microsoft account (not recommended) and then click ‘Next’.
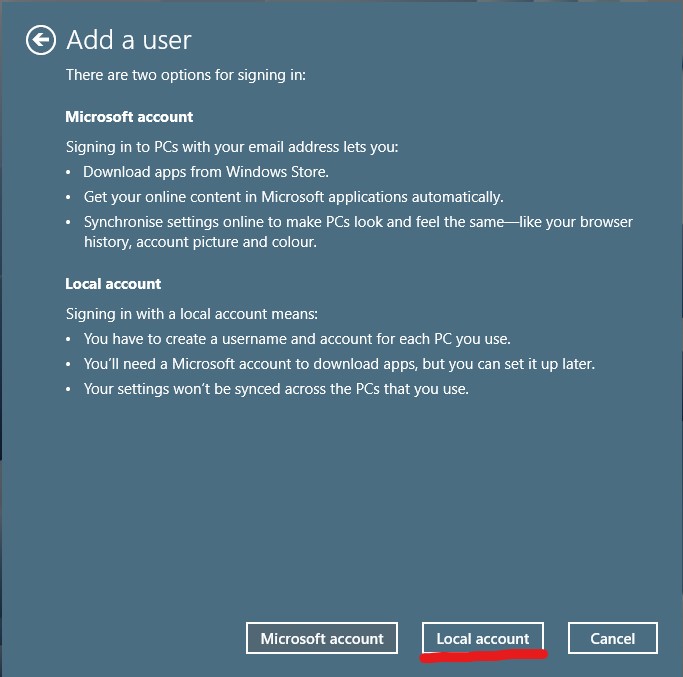
 

I just told you I don’t want one, take the hint!


Select the ‘Local account’ option from the bottom of the next window that appears…
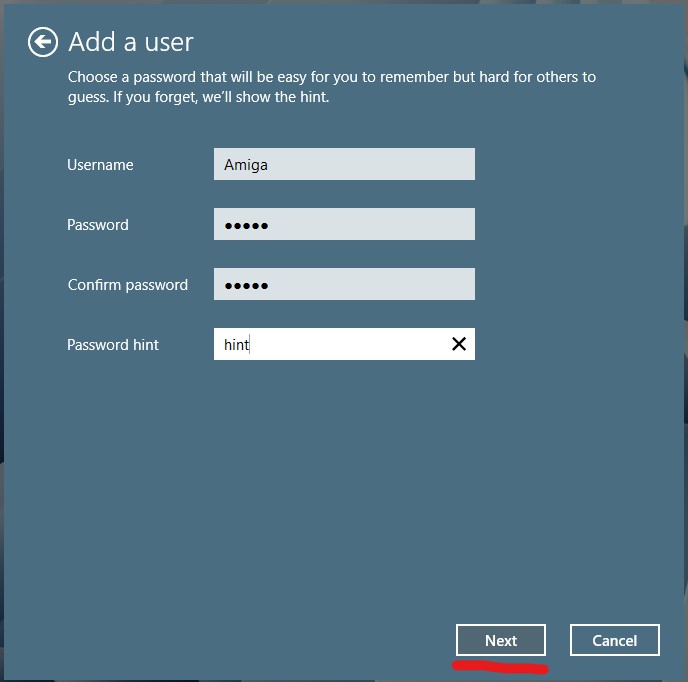
 

Microsoft finally took the hint and let me set up a local account.


Enter the name for your local account, ‘Amiga’ in my case, a password (twice) and a Password hint in case you forget it (this can’t be skipped unfortunately). Click on ‘Next’ when ready.
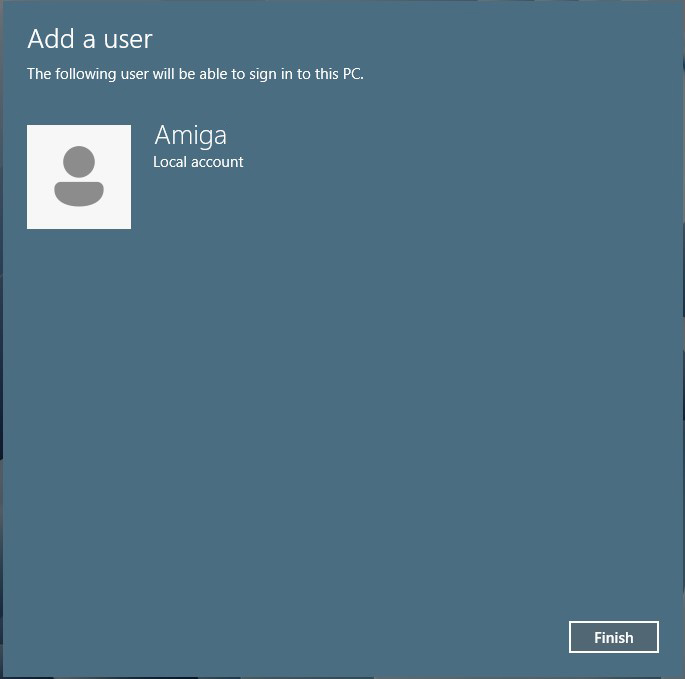
 

One local Amiga account all ready to go.


This will bring up a confirmation screen with the name of your account. Click ‘Finish’.
 

Mission accomplished.


This will bring you back to the User Account window (above) which you can now safely close by clicking on ‘OK’. Your local account is now created and ready to be used in the next section.


Creating a Shared Folder

With SMB1 enabled it’s now time to setup a shared folder that your Amiga can actually connect to. Choose a location with enough free space on your PC and create a new folder there. I chose my E: drive as it has plenty of free space but you can choose any location you want. Give it a suitable name.
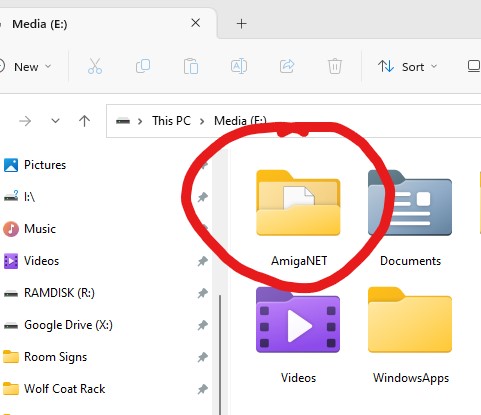
 

Creating a folder for our share.


Now we need to SHARE this folder so right-click on it and select ‘Properties’ and then ‘Advanced Sharing…’


Selecting Advanced Sharing


Once the Advanced Sharing windows pops up you need to tick the box next to where it says ‘Share this folder’ and then give the share a name in the box below. Try to keep the name short and without spaces or punctuation to avoid any problems connecting to it down the line.
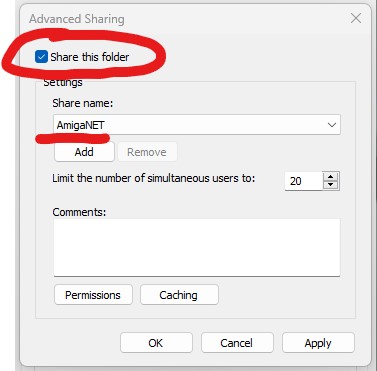
 

Enabling sharing and giving the share a name.


Before closing the Advanced Sharing window, click on the ‘Permissions’ button near the bottom.
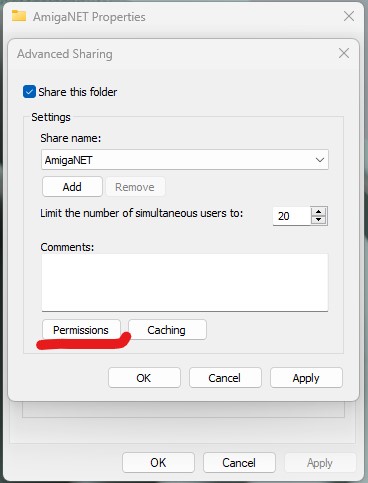
 

Click permissions.


A new window will pop up allowing you add a new user to access the shared folder. To do this click on ‘Add’.


Click Add.


The will bring up yet another window where you can enter the account name of the user you want to access the share.

Enter the username into the box. My local user account was called ‘Amiga’ so I entered ‘Amiga’ in this box. You can click the ‘Check Names’ button on the right to make sure you have done this correctly. If you’ve made a mistake Windows will say ‘name not found’ which means it cannot find an account with that name. Time to check your spelling! Click on OK when done.
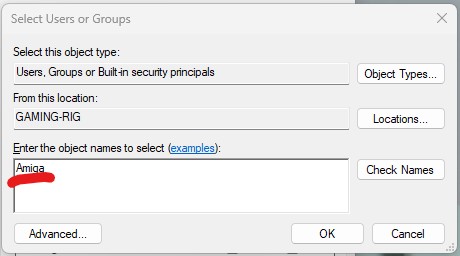
 

Add YOUR local user account name.


You will be back looking at the Share Permission window again now and you should see the username of the account you just added at the top of the list (see below). Make sure it is selected and then click the empty box next to ‘Full Control’ to grant your Amiga this permission, then click ‘Apply’ then ‘OK’..

By the way, if you are not aware of the name of your computer, you will see it here. It’s the name in the brackets before the backslash (GAMING-RIG in my case) – jot it down as you will need it later!
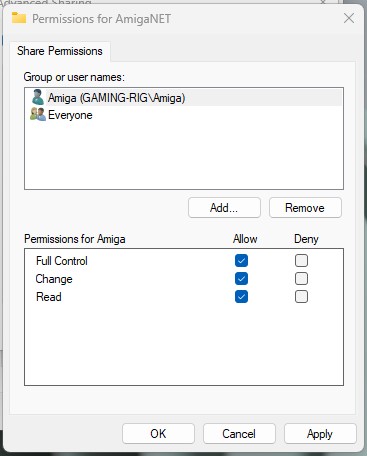
 

Giving your local account full control of the share.


You should end up with a window looking like the one above. Click OK when you are happy everything looks correct and then on OK once more to get back to the main properties window as shown below. Were are nearly there now – just one last thing to do.

Click on the ‘Security’ tab (highlighted below).


Select the Security tab.


Next click on the ‘Edit’ button…
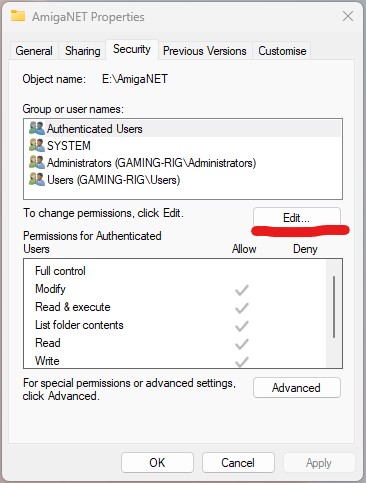
 

Click Edit.


Then click on the ‘Add’ button…
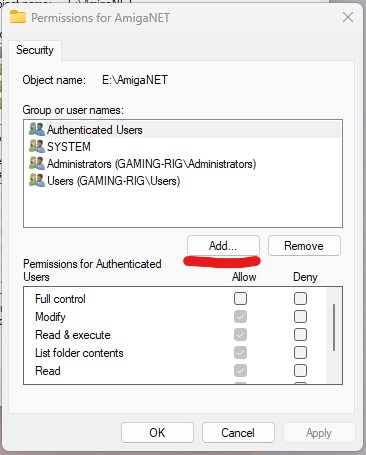
 

Click Add.


Then just as you did before, enter the same local account username into the box so we can define the permissions this user should have. Once done, click on OK.
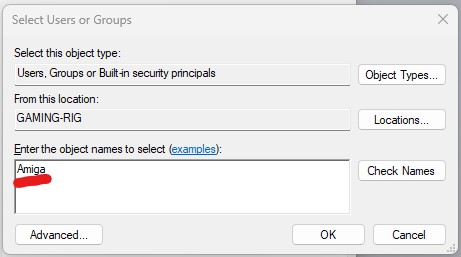
 

Enter YOUR local account name once more.


Back in the Permissions window make sure that the user is highlighted in the top section and then click on the box next to ‘Full Control’ to grant them full access to the share.
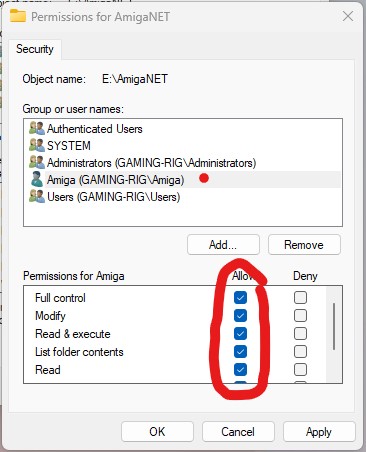
 

Ensure all the boxes are ticked.


Click on OK and then OK again. Congratulations, you have just created a shared folder on your PC and granted access to it from the local user account you created earlier. Time to get back to the Amiga!


Connecting to the Shared Folder from your Amiga


With the share created, a local account setup, SMBFS installed to C: and SMBMounter installed on your Amiga we are ready for the final piece of the puzzle; configuring SMBMounter.
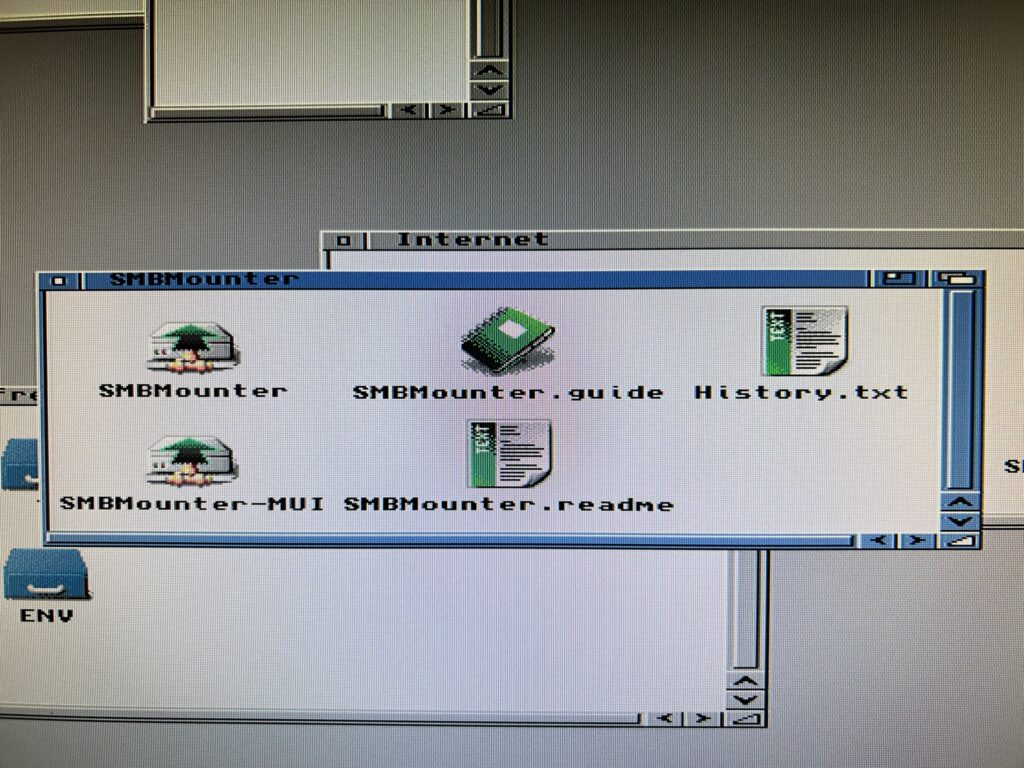
 

access a network share on the Amiga

Note the two different versions of SMBMounter (with and without MUI).


There are actually two versions of SMBMounter included, a regular one and one that utilises MUI. They both perform exactly the same functions but I prefer the layout of the MUI version so that’s what I’ll be using here.
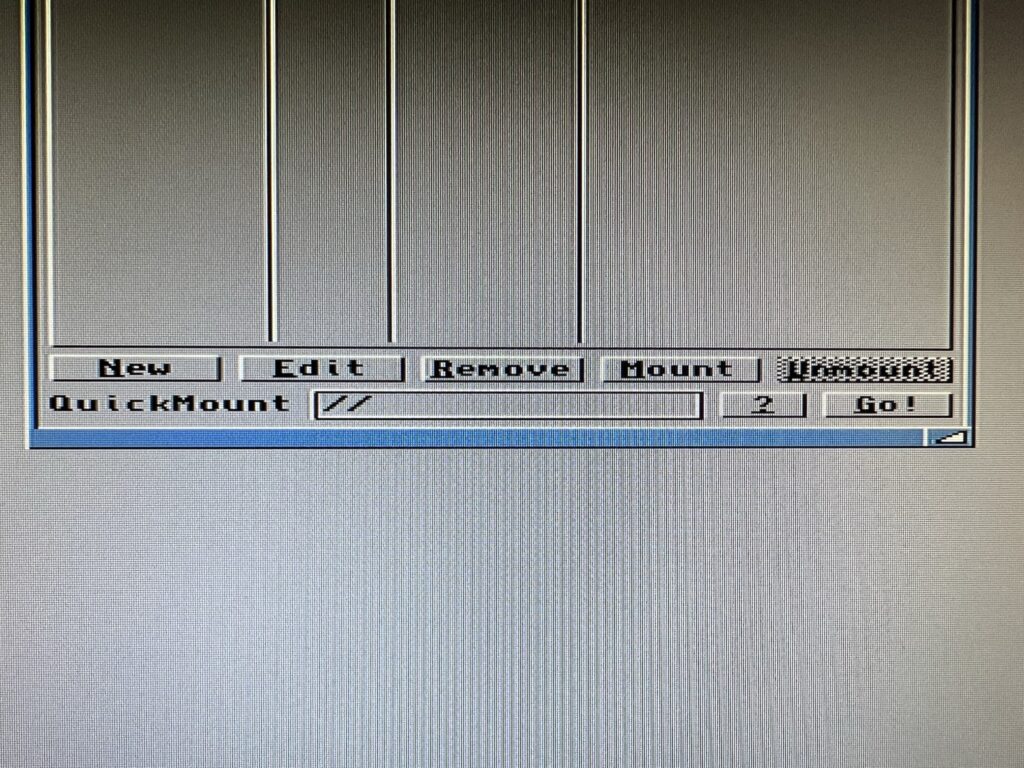
 

Use the ‘Remove’ button shown above to get rid of the supplied mount entries.


The program comes with a few mounts already configured but they are years out of date and no longer work so delete all of them before going any further to keep things neat and tidy. To delete them simply highlight each one in turn and click on the ‘Remove’ button (see photo above).
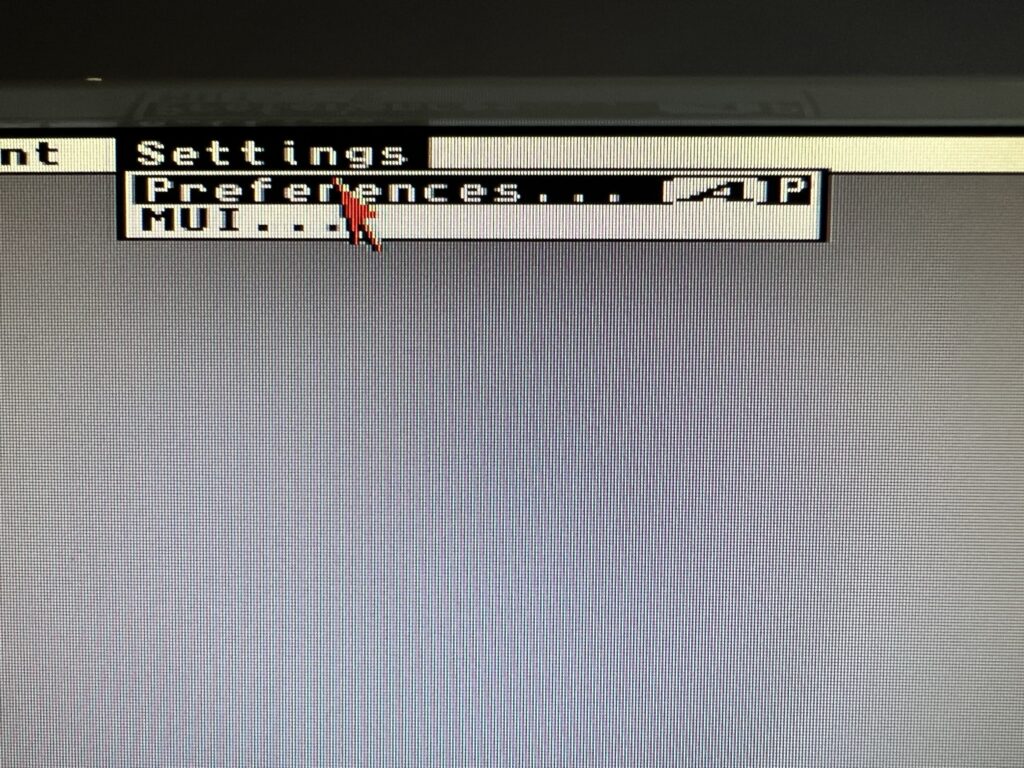
 

Preferences menu.


Next, open up the Preferences window (accessible from the menu – shown above) to configure a few parameters.

We haven’t bothered installing Samba but to prevent it from complaining I set the path here for it to ‘C:’. The path to SMBFS should be set to ‘C:smbfs’. Note you can browse to the location using the file browser icon on the right of each box if you prefer.
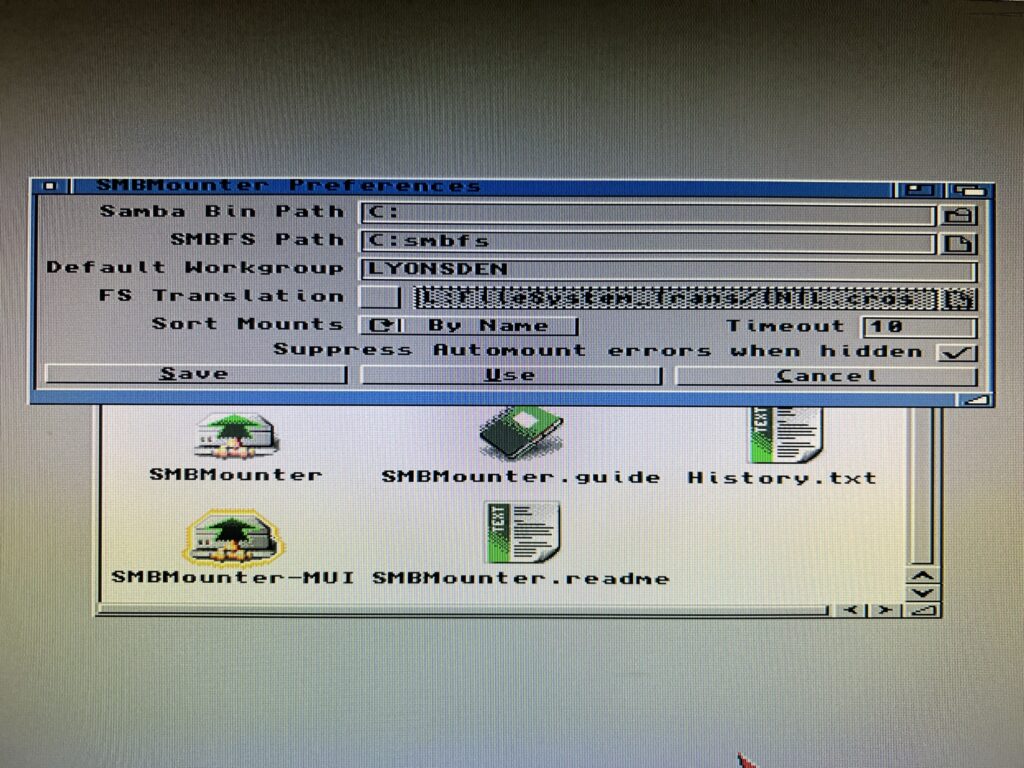
 

access a network share on the Amiga

Editing the preferences.


The default workgroup is actually set to ‘WORKGROUP’ and you can probably leave it as is. However I do actually have a workgroup configured on my network so I entered the name of it here; ‘LYONSDEN’. The rest of the settings can be left alone. Double check you have entered everything correctly and then click on ‘Save’ to have it remember your settings and move on.
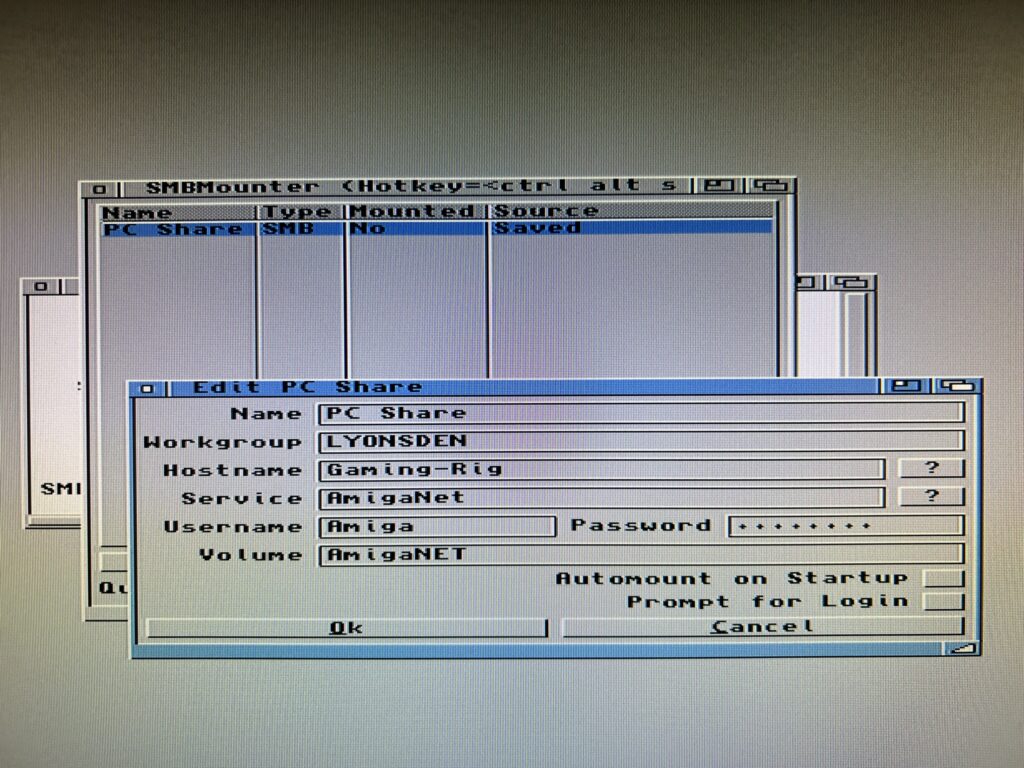
 

access a network share on the Amiga

Entering the settings for our share.


The final hurdle is to configure the connection to our shared folder. Click on ‘New’ and then enter the details of your share using the guidance below to help you.


SMBMounter Configuration
  • Name – this is an arbitrary label for the connection as it will appear in the SMBMounter list. (Like the connections it came with when you first installed it for example). I called mine ‘PC Share’ but you can call yours anything you want..
  • Workgroup – this will default to WORKGROUP and you can leave it like this but I entered the name of my own workgroup; ‘LYONSDEN’.
  • Hostname – this is the name of your PC, in my case ‘Gaming-Rig’. If you are unsure what it is refer back to the section in red where I told you to make a note of it during the ‘Creating a Shared Folder’ section.
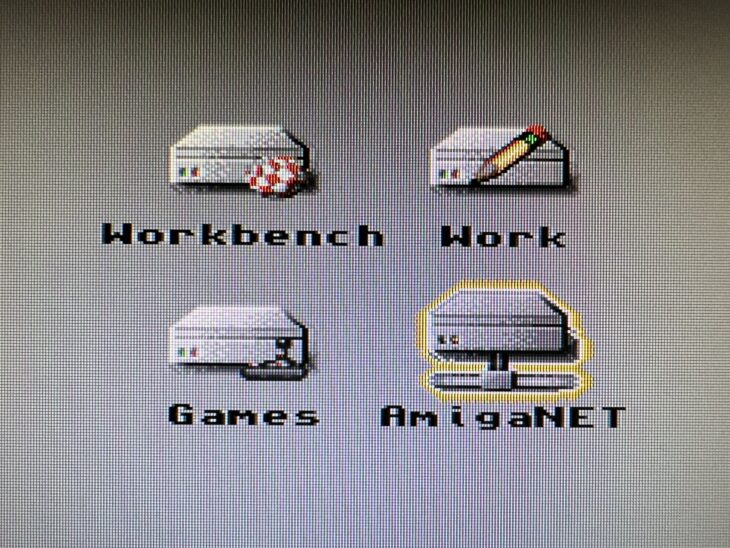
  • Service – this is the name of the shared folder we created earlier, in my case ‘AmigaNet’.
  • Username – this is the name of the local user account we created earlier, in my case ‘Amiga’.
  • Password – the password we set for the local user account earlier.
  • Volume – this is the name you want the share to have on your Amiga. This is like naming your hard drives when you use HDToolbox. Whatever name you enter here is the name that will appear on workbench when the drive is mounted.
  • Automount at Start-up – self explanatory really. I leave this off as I don’t always want the share connected, especially if I just want to play some WHDLoad games for example.
  • Prompt for Login – this is an alternative to having the username and password stored and entered automatically. If ticked it will ask you to login with a username and password every time you want to connect. I leave this feature off as it’s would be a pain for me to do this all the time.


Once you’ve entered all the above details and checked they are all correct click on OK. Be sure to ‘Save all mounts’ from the Project menu before proceeding so you don’t lose all those settings when rebooting your Amiga.
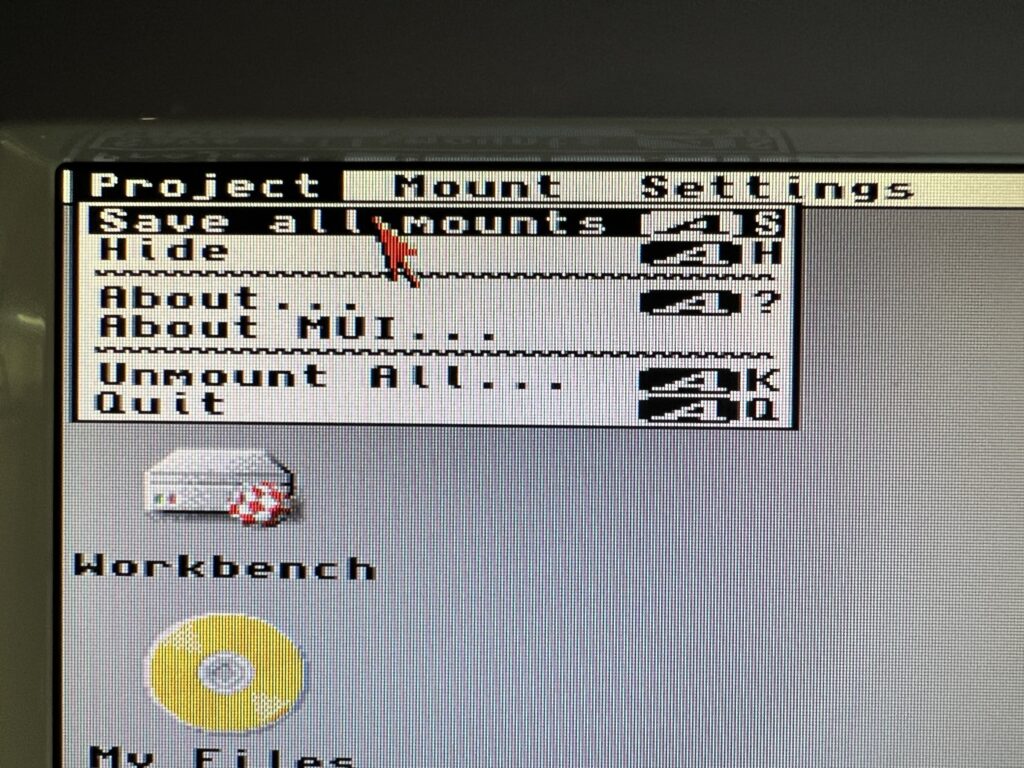
 

Saving your mount settings.


Now for the moment of truth! Click on the ‘Mount’ button in SMBMounter and if you’ve done everything correctly the share should appear on your Workbench after a couple of seconds. (Note – the icon that appears for you will differ depending on what icon packs and settings you are using).
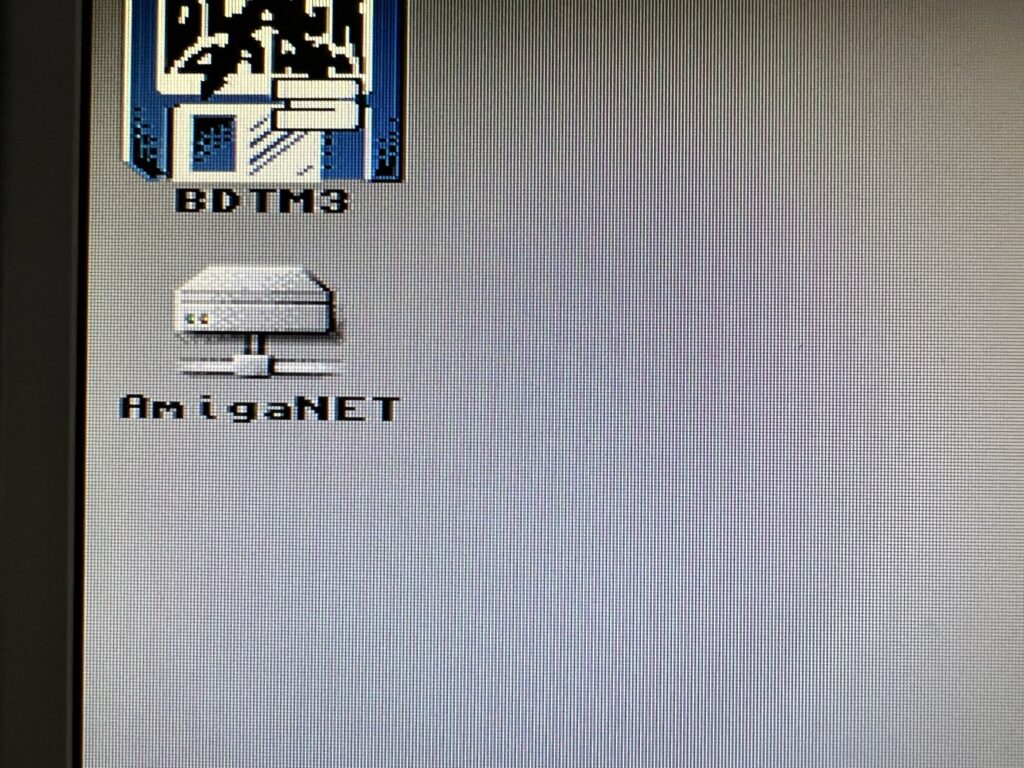
 

access a network share on the Amiga

Success – an icon like this on your Workbench means your share is connected!


You can use this drive just like you would any other. Drag and drop files into it, off it, delete them, save stuff there, even change the drive icon. It’s accessible from other programs just like a regular Amiga partition too so you can use it in Directory Opus, Wordworth or whatever other stuff you use.
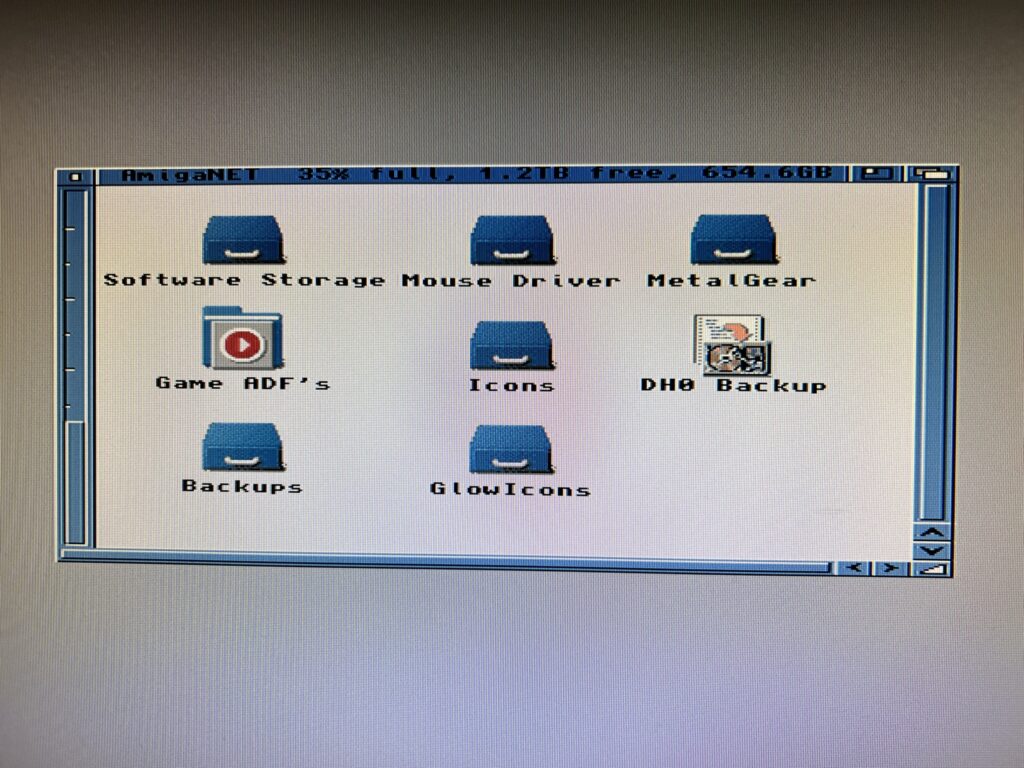
 

My SMB Share – 1.2Tb free!


As can be seen in the image above the Amiga is able to recognise the full capacity of the shared folder, that’s 1.2 Terabytes in my case – an insane amount of storage for any Amiga.

Quick Troubleshooting Tips

If you get any errors, such as ‘access denied’ or ‘incorrect username/password’ you will need to double check that you have entered the correct and IDENTICAL username and password in both SMBMounter and Windows. Likewise you might need to double check the name of the share in each and so on.

If you’ve done all that find that you cannot connect at all, or if one day in the future it all stops working then your firewall may well be to blame…


Firewalls

A real quick way to prove whether your firewall is at fault is to just disable it and try to connect again. If it works then you have found the problem – if not then at least you’ve ruled something out. Make sure you turn it back on after testing though!

Assuming your firewall is to blame, to fix the problem you are going to need to find a way to allow traffic to flow between your Amiga and PC. I’m afraid there’s no single magic bullet for this – there’s too many variables at play. All I can do is explain how I got around this problem myself. Networking is a pretty complex topic and well beyond the scope of this post to explain everything.

Anyway I use Norton 360 which has it’s own firewall (by default Windows 10/11 use Windows Defender) and it decided to block my Amiga from accessing my share after my Internet went down and my router rebooted. I couldn’t even ping my PC from my Amiga so I knew something wasn’t right.


Adding a trusted device in Norton 360’s Firewall settings.


Norton 360’s firewall allows you to add trusted devices that are allowed to connect to your PC irrespective of any other rules that may exist. To do this you must enter either the IP address of your Amiga or the MAC address of the network card you are using in it. This is probably the best method for most users as the MAC address of the card will never change and it is easy to find. Most cards will have their MAC address displayed on a label affixed to them somewhere. Finding out your Amiga’s IP address is not always so straightforward and unless you possess the knowledge of how to make it static you are going to keep having this issue over and over. Why? Because the IP will change frequently and your firewall will no longer know it should be trusted.
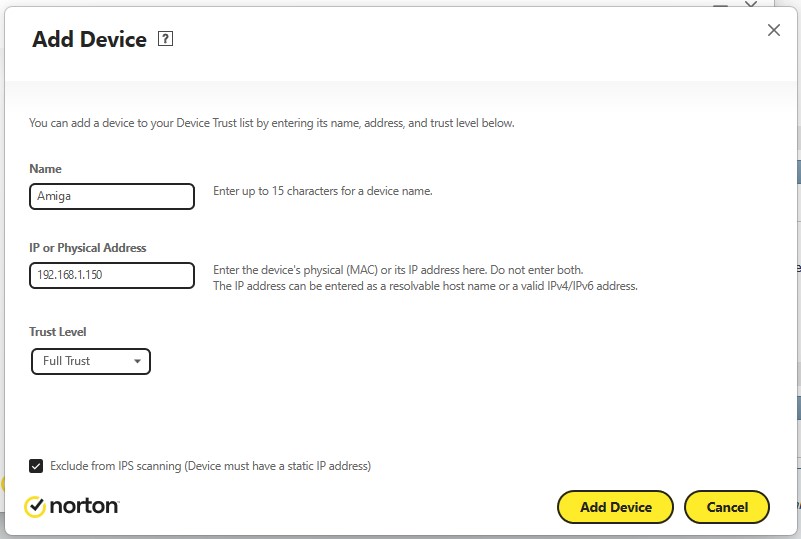
 

Adding a trusted device in Norton 360’s Firewall settings.


As I knew what my Amiga’s IP was (using the Roadie GUI for Roadshow) and I knew how to make IP reservations on my router (so my Amiga always gets the same IP) I used the IP address to configure my firewall as shown above.
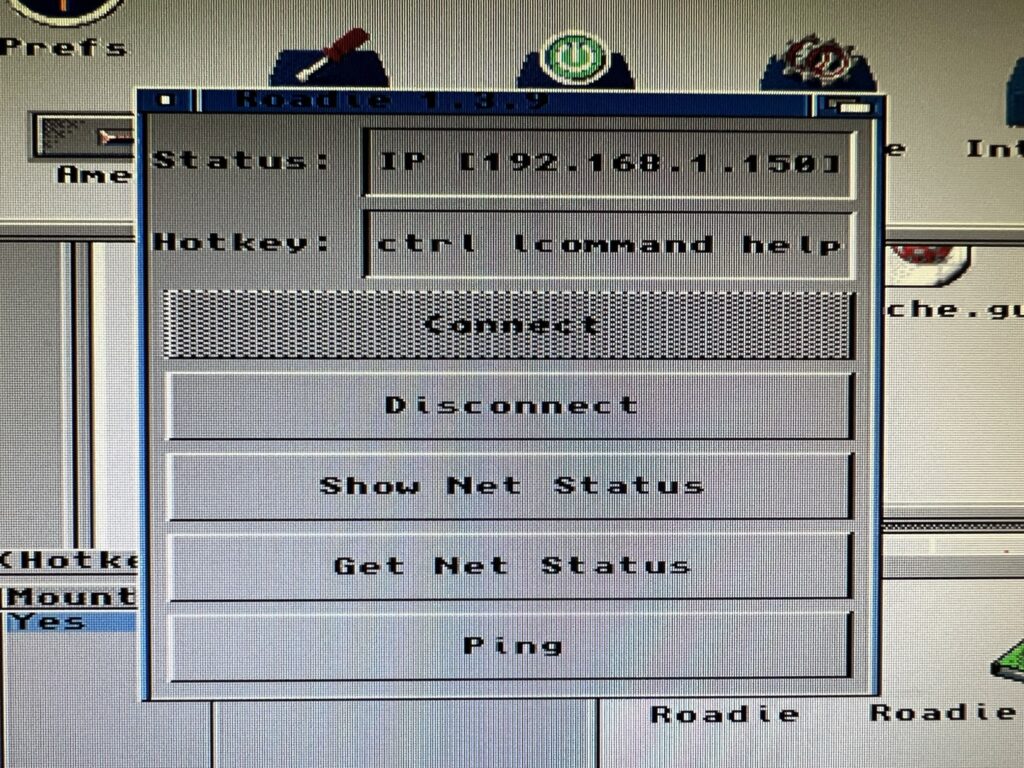
 

Using Roadie to find out my Amiga’s IP address.


After adding my Amiga as a trusted device I was able to ping my PC and connect to the share immediately.

If you too are experiencing firewall issues then hopefully my experience has given you enough pointers to sort them out for yourself. You might have to do some Googling but at least you should have an idea of what to search for!


Transfer Speeds & Conclusion

Transfer speeds are not as fast as the internal Compact Flash HD using the SCSI.device interface. I timed a few different file transfer operations to give some practical examples. A 3.5Mb LHA archive file copied from DH0: to DH1: took 6 seconds to transfer. It took the same time to transfer to my RAM Disk. That exact same file took 49 seconds to transfer to the SMB shared folder across the network. This is to be expected though – my A1200 is using a really old 10Base-T network card.
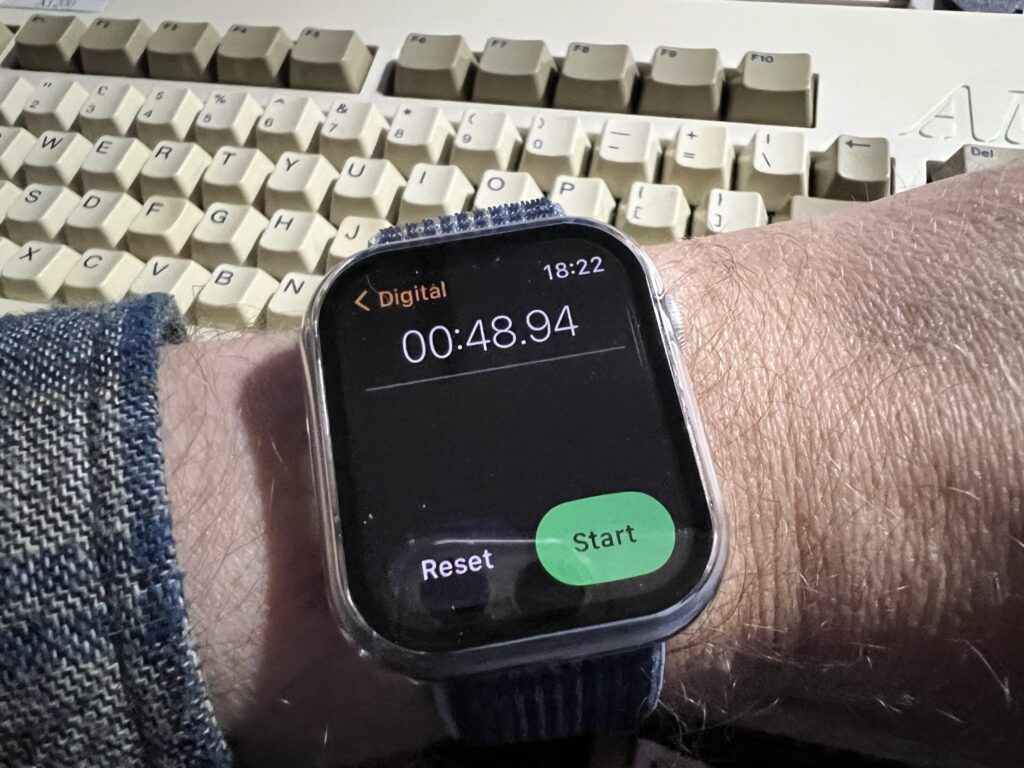
 

Guess who got an Apple Watch for Christmas and wanted an excuse to use it?


For the sake of completeness I timed transferring the same file to an SD card using my SDBox device. That took 26 seconds, so basically twice as fast as the SMB share. However that isn’t accessible to the PC when it’s in the Amiga and vice versa, plus there’s the faffing around swapping the card from one reader to another so probably slower all things considered.

In reality for most regular sized Amiga files you probably won’t notice much of a lag in moving them around at all. An ADF image takes 13 seconds to transfer which is perfectly acceptable in my view. Besides, these timings are missing the point really. The sheer convenience of having a drive that you can use to share files ‘on the fly’ between your PC(s) and Amiga(s) trumps any small time penalties experienced whilst doing so.

I have access to floppy disks, Zip disks, CDR’s, SD cards, PCMCIA CF cards but I choose to use the SMB Shared Folder most of the time when transferring stuff to and from my Amiga. It just works and its really convenient. That should speak volumes about the usefulness of such a setup so if you have the resources available, go for it!

Anyway I hope this article helps a few at least a few people access a network share on the Amiga. Let me know of your successes (or fails!) by leaving a reply below.
Amiga Tank Mouse Gets Laser Upgrade & Refurbishment

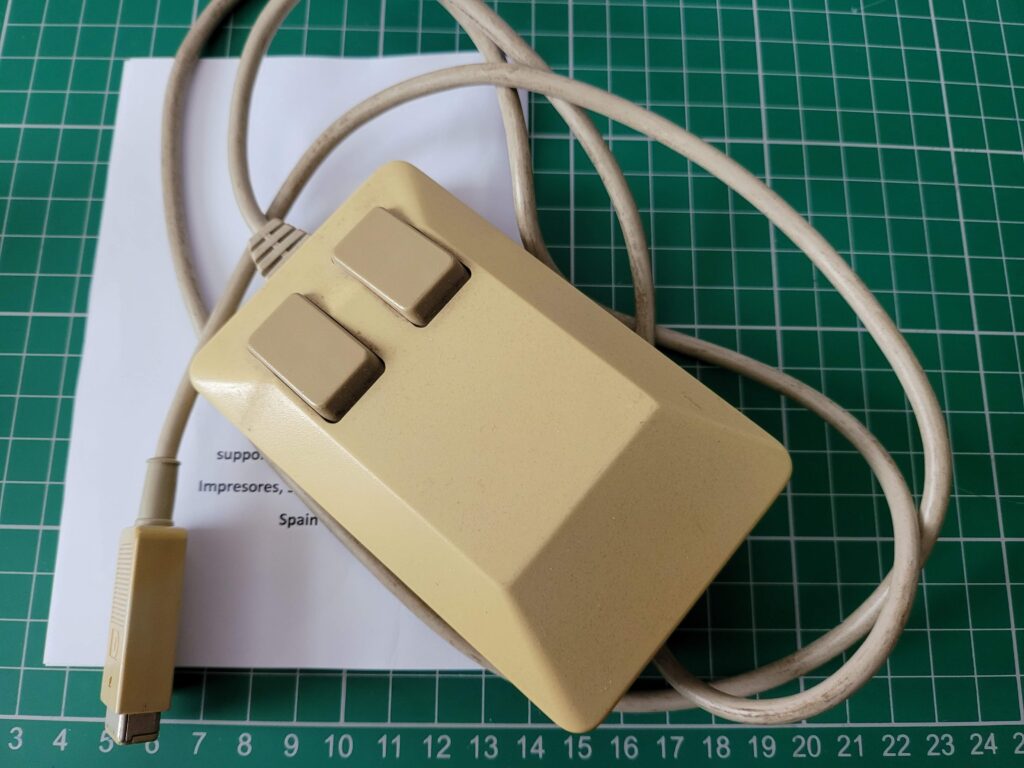
Love it or loathe it the Tank mouse is synonymous with the early Amiga computers and even though they’re very angular in design I actually find the ergonomics of them quite comfortable to use. However what I no longer appreciate is the imprecise and clunky ball mechanism and the constant need to remove the fluff and detritus that always collects on the rollers.

Now I know that some may consider this part of the nostalgia, and if it was only used occasionally then I might possibly agree, but as someone who uses my old machines on a regular basis I say balls to that – give me an optical mouse any day! With this Amiga Laser Mouse Upgrade kit I picked up from AmigaStore.eu I can finally have the best of both worlds!


Amiga Laser Mouse Upgrade

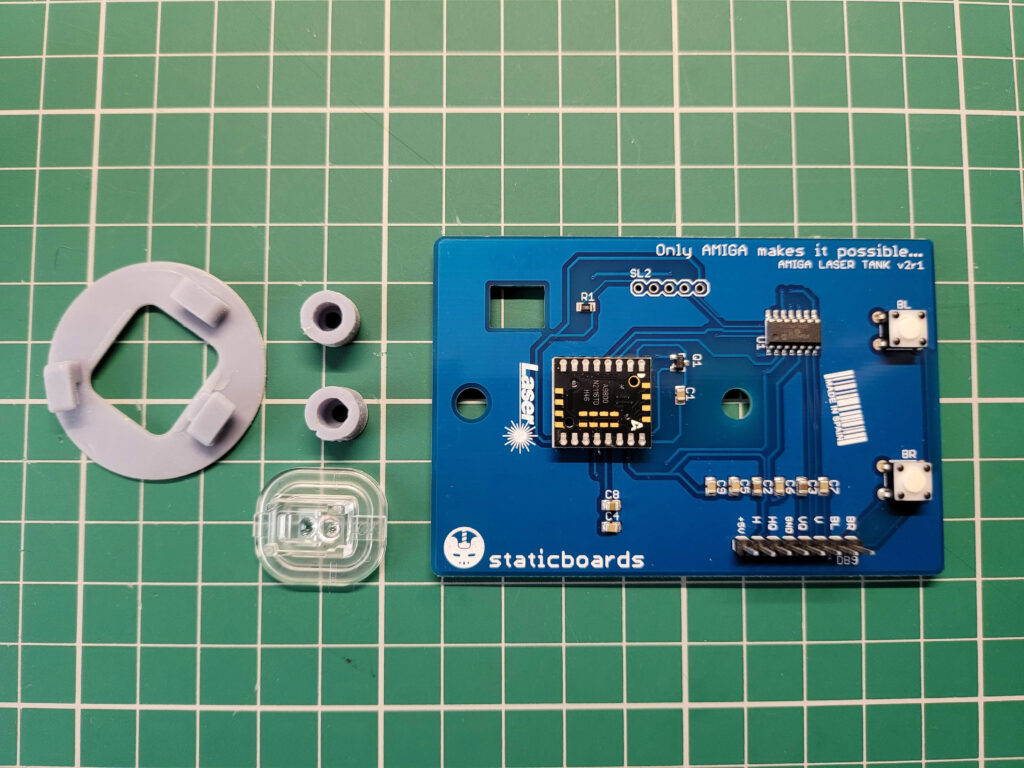
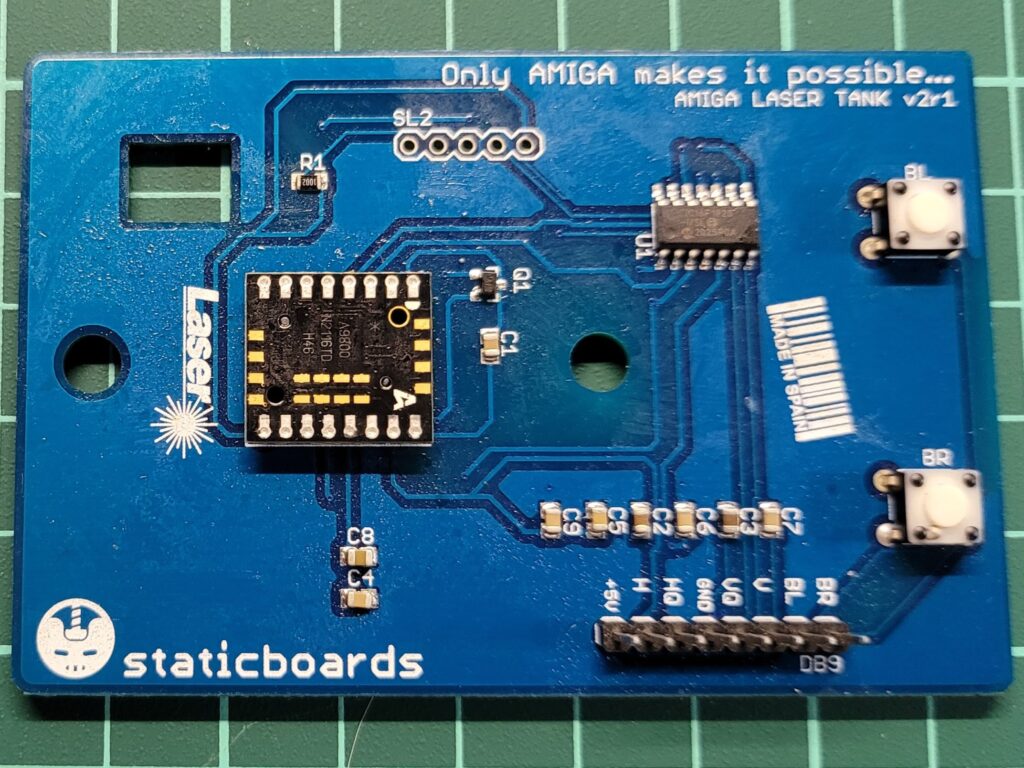
The laser upgrade kit contents.


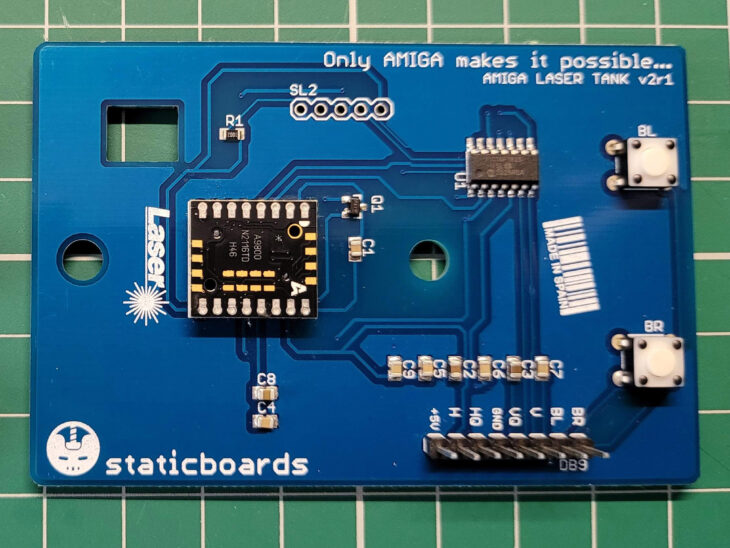
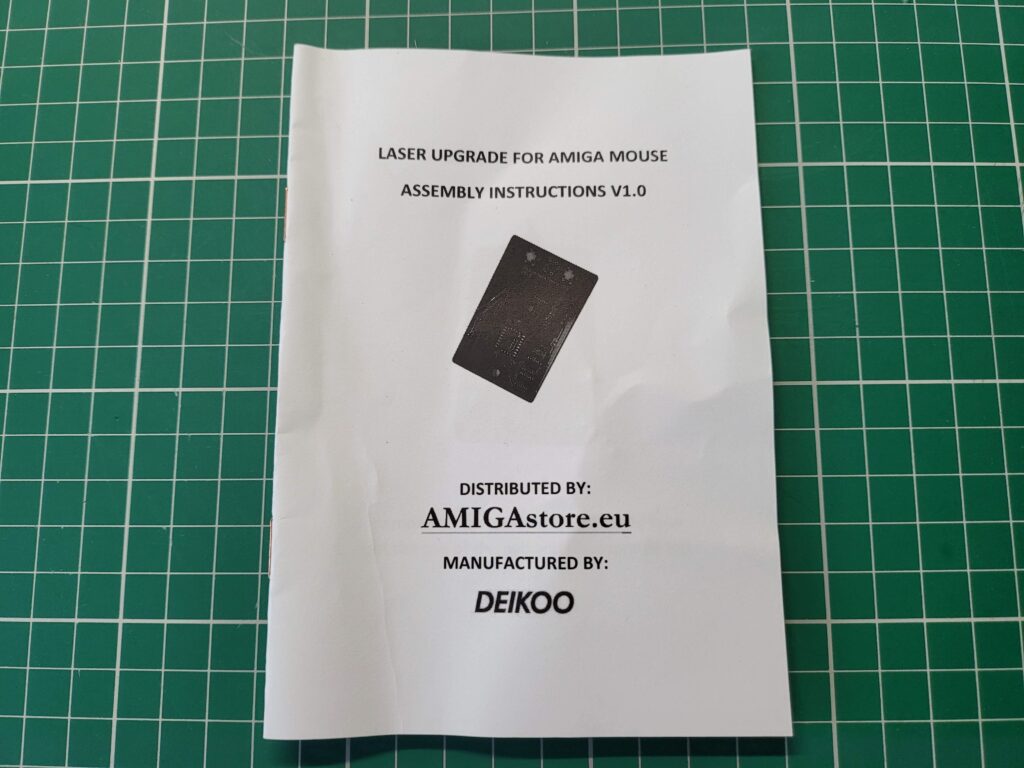
The upgrade kit took around a week to arrive and included a single PCB with optical sensor, a little lens to fit over it, a replacement cover and a couple of little plastic spacers. There was also a small instruction booklet.


Amiga Laser Mouse Upgrade

Instruction manual.


Annoyingly everything (even all the plastic parts) was covered in sticky soldering flux. All the components came supplied in a small Ziplock bag so the flux must have smeared itself onto everything in transit. I had to spend a good fifteen minutes giving everything a thorough cleaning with Isopropyl alcohol to get rid of the residue.


Amiga Laser Mouse Upgrade

What the board looked like before the excess flux was cleaned off it.


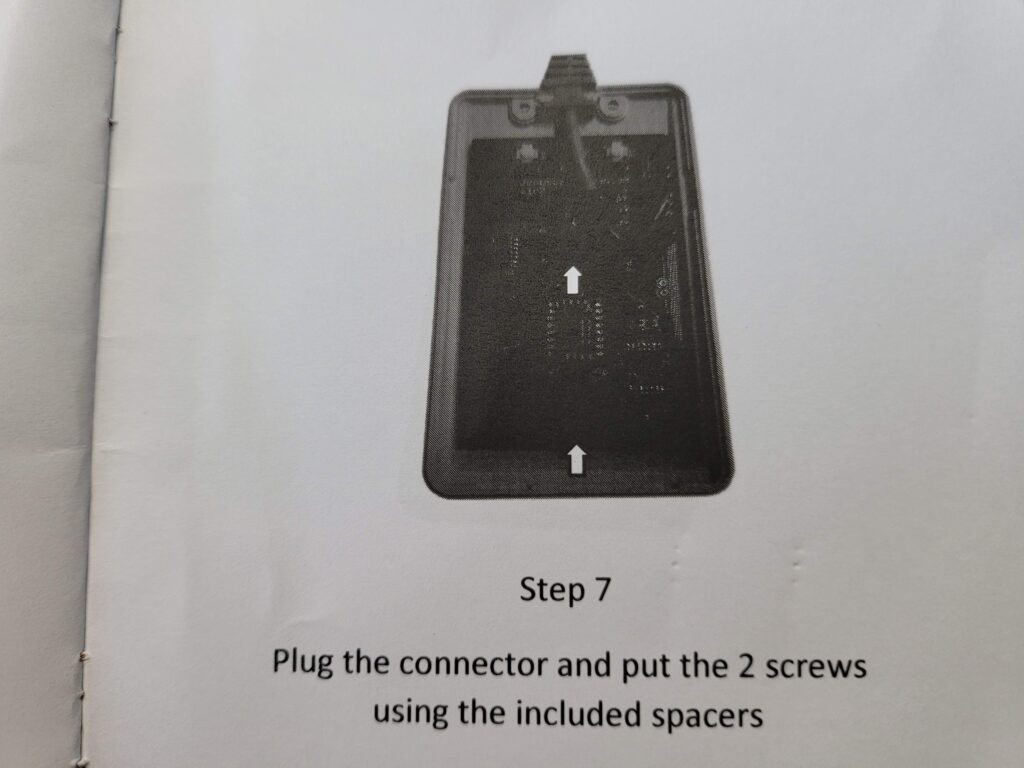
The manual was also a little disappointing – all the photos were dark and murky so details were near impossible to see. It was like a photocopy of a photocopy of a… well you get the idea. Thankfully it’s a pretty straightforward install and you don’t really need much guidance but it’s definitely something that could do with addressing in the future.


Amiga Laser Mouse Upgrade

Quality of the photos in the manual leave a bit to be desired.


Preparations

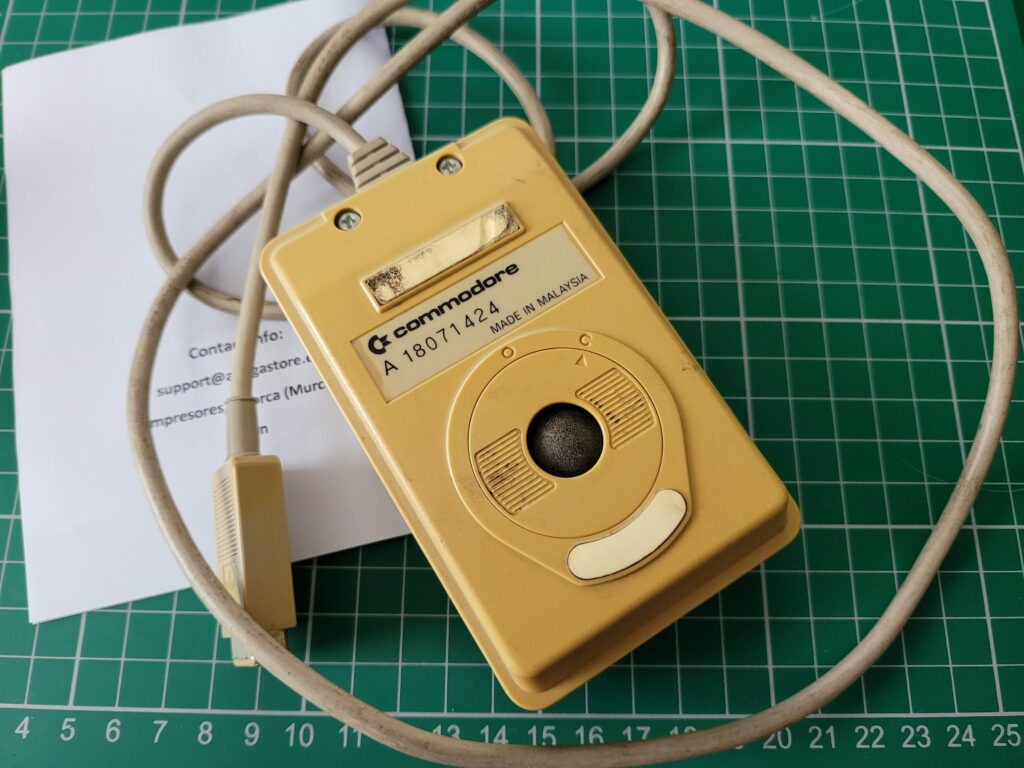
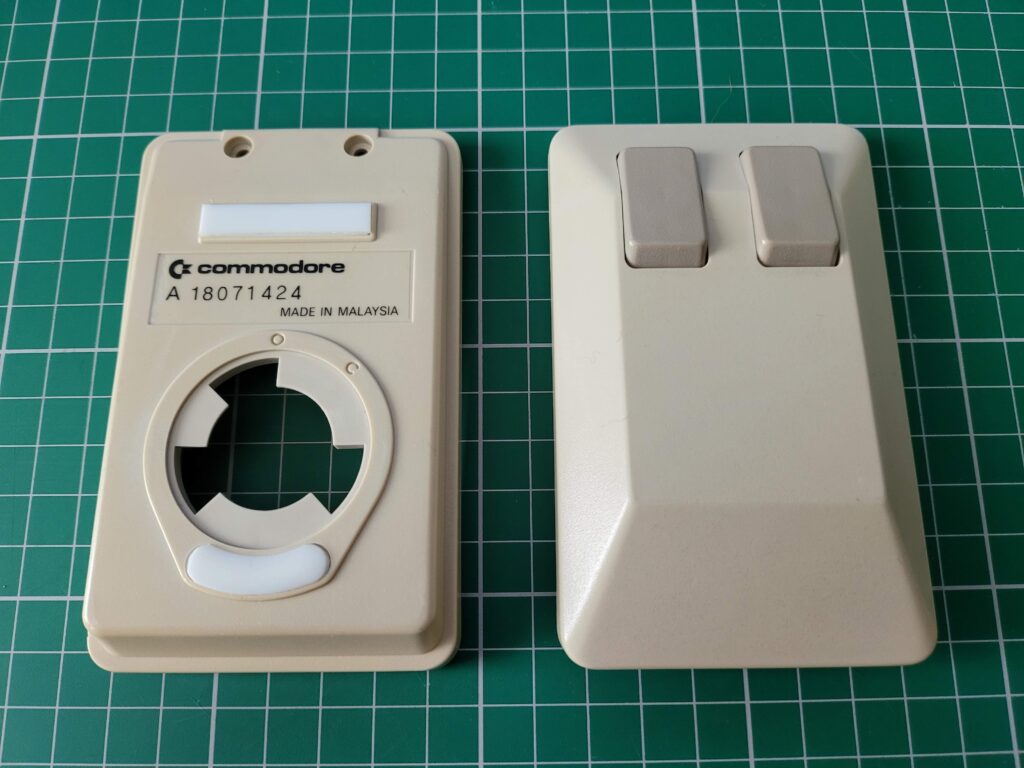
My tank mouse had been sat in a cupboard, unloved, for many years so when I dug it out for this project it was looking a little sorry for itself and was quite yellowed, especially underneath.


Amiga Tank Mouse

Top of the mouse doesn’t look too bad, a little dirty perhaps but nothing major.


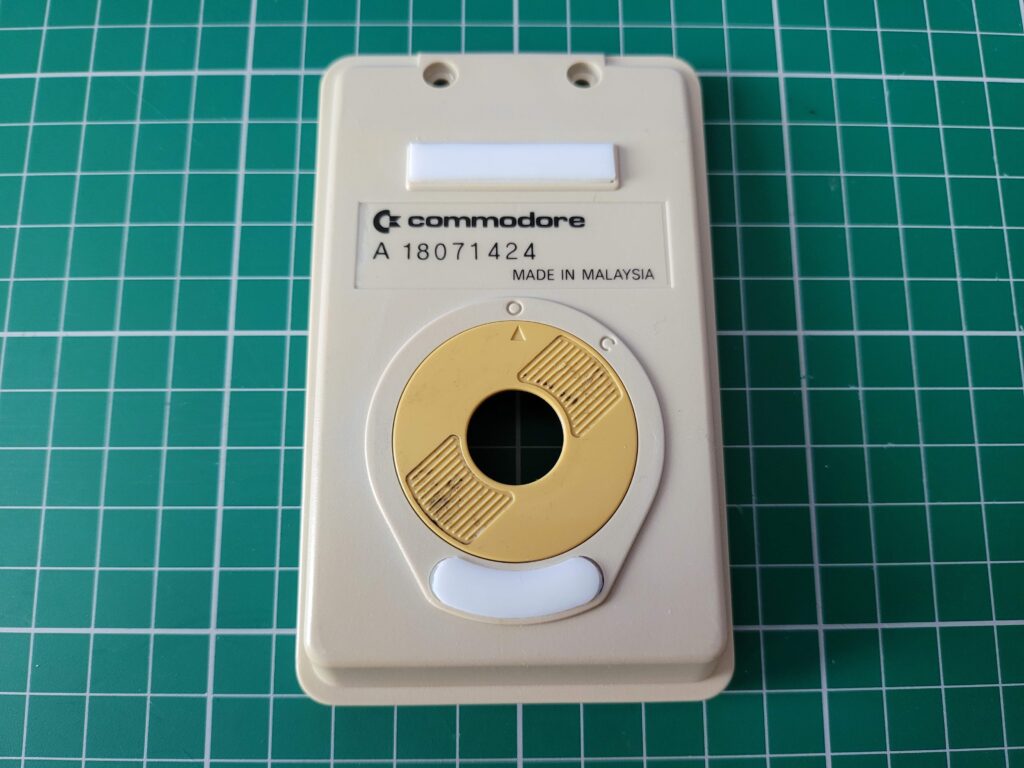
One of the glide pads on the base of the mouse was also looking quite tatty so I wanted to sort this out too.


Amiga Tank Mouse

The underside of the mouse is a completely different story. It’s turned a very unpleasant looking shade of ‘nicotine’ yellow.


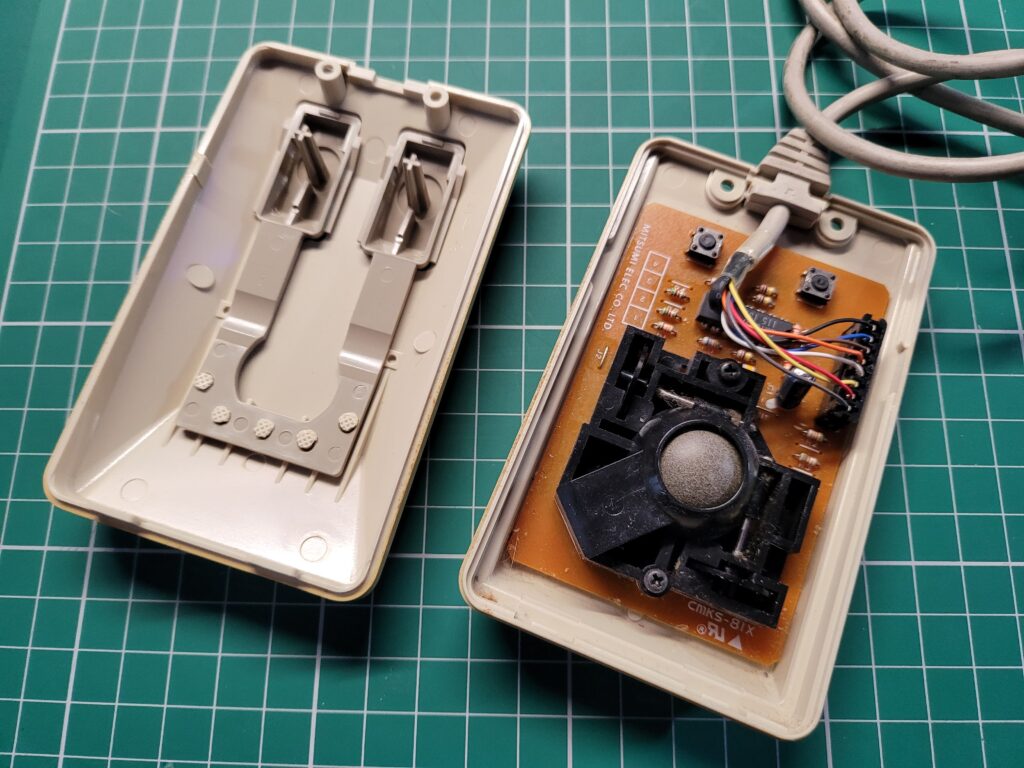
Dismantling the mouse was pretty straightforward. Two small silver screws either side of the cable entry point needed removing to free one end of the case, whilst a couple of plastic clips secured the opposite end and just needing to be gently teased apart.


Amiga Tank Mouse Internals

With the case opened you can see the ball mechanism in all its fluffy glory.


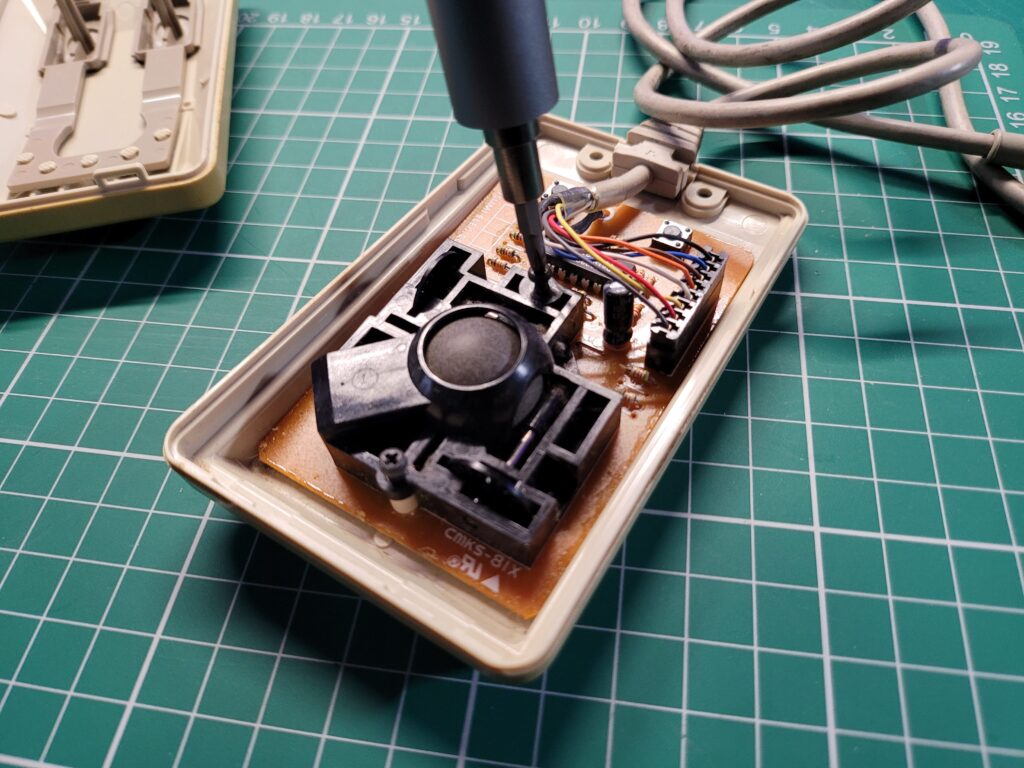
There were a further two black screws above and below the ball mechanism, holding the circuit board in place that also needed removing. I set both sets of screws aside somewhere safe as they would be needed later on when putting it all back together.


Amiga Tank Mouse Ball

The two black screws at the top and bottom of the black plastic ball housing need to be removed and put to one side safely for later.


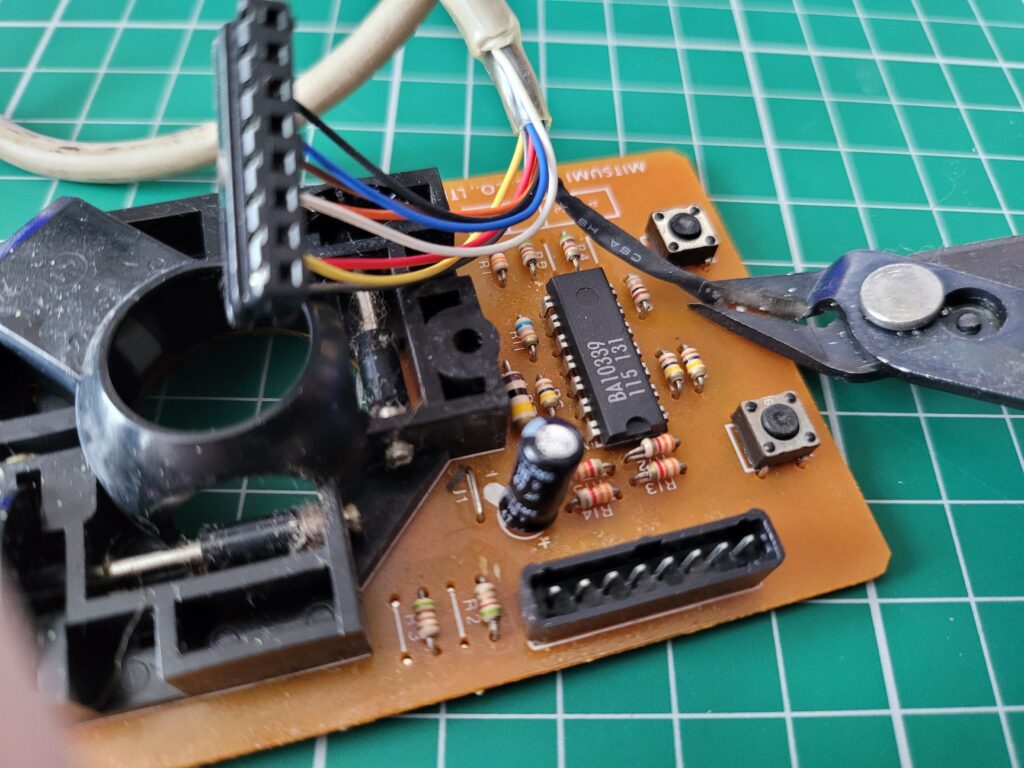
Once the board was out, the cable connector was removed and the ground wire soldered to the circuit board cut. It isn’t required for the the new laser board to work.


Amiga Tank Mouse Circuit Board

The black ground wire that is soldered directly to the board needs to be cut here.


The old board is surplus to requirement now but I’ll be keeping hold of it as it may come in handy to repair another tank mouse in the future.


Amiga Tank Mouse Bottom

The extent of the yellowing was clear to see once the cover and sticky pads had been removed.


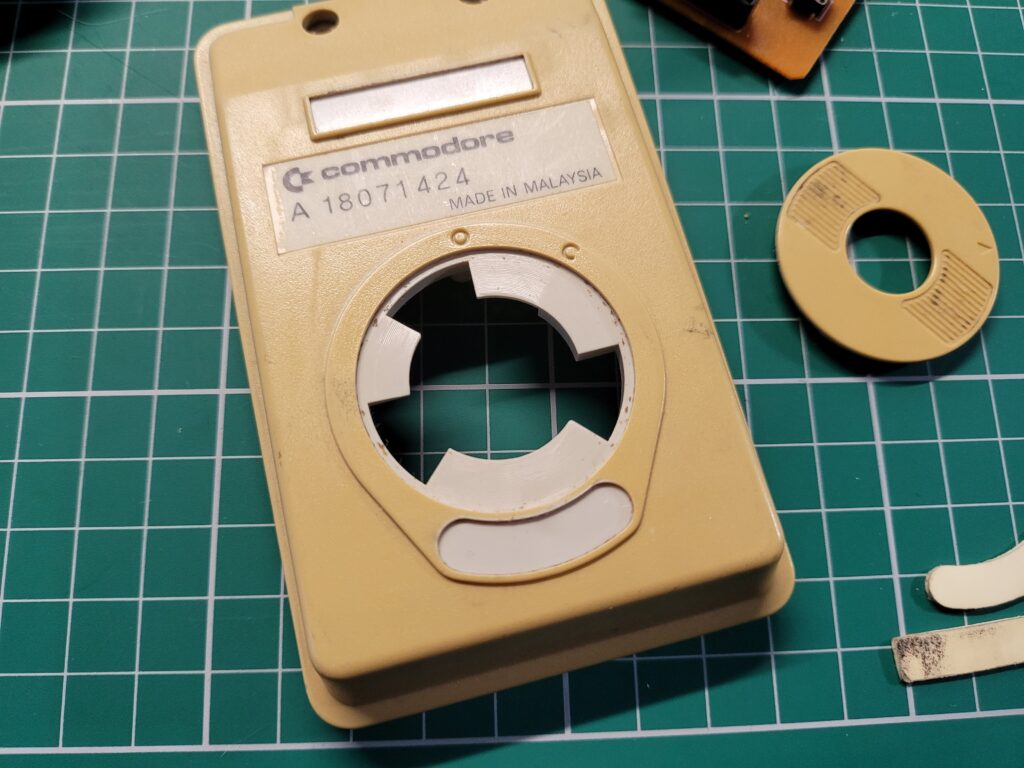
After removing the old glide pads and the cover off the ball compartment the extent of the yellowing was pretty evident. The original beige colour could clearly be seen underneath. Hopefully this is the colour the whole mouse will be by the end of this project after a spot of Retrobrighting.


Retrobriting

I live in North West England so hot sunny weather is something of a rarity here so I had no chance of just using the suns UV to do the job as I have in the past. Just as an example, at the time of writing it’s raining and about 12’C outside.

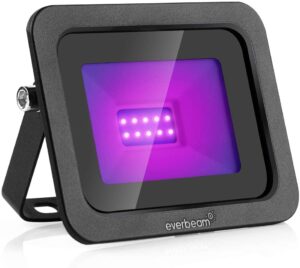
To this end I decided to buy the necessary kit off Amazon so I could do this sort of thing indoors whenever I wanted in future and not be beholden to the weather. I picked up a small 10W UV lamp that came with a built-in bracket and power cable with inline on/off switch and moulded UK plug.


The UV lamp.


I also got a 500ml bottle of 6% Hydrogen Peroxide to make a nice bath for the mouse to soak in. I only had to use half of it too so could have got away with buying a smaller bottle.


Hydrogen Peroxide.


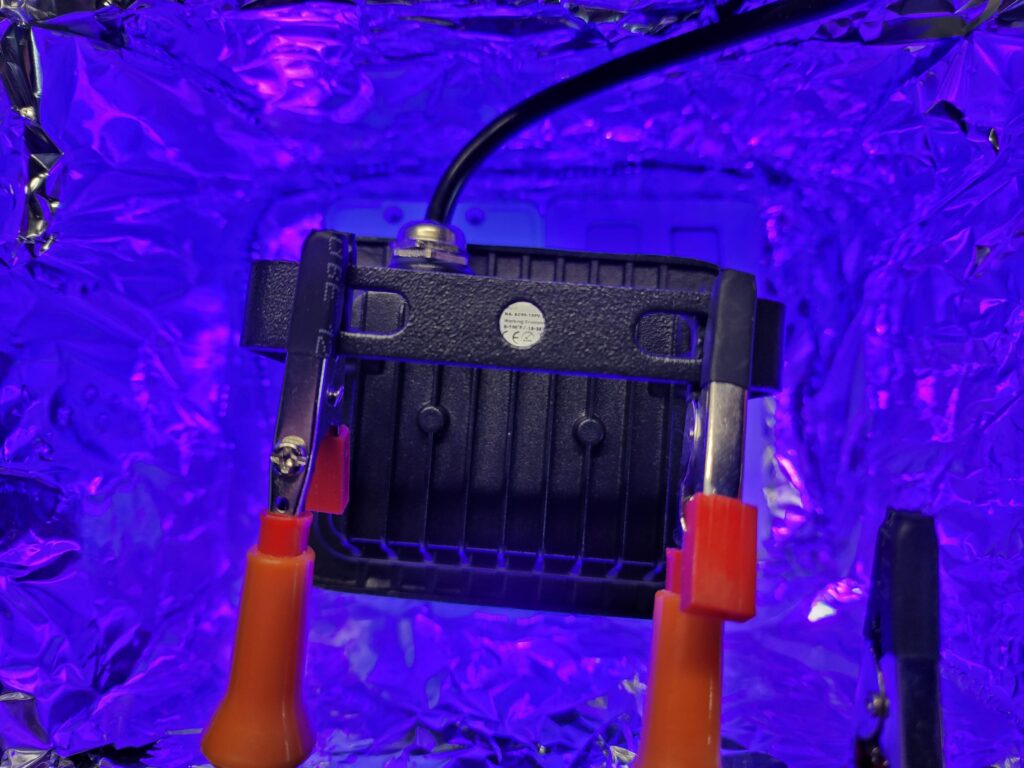
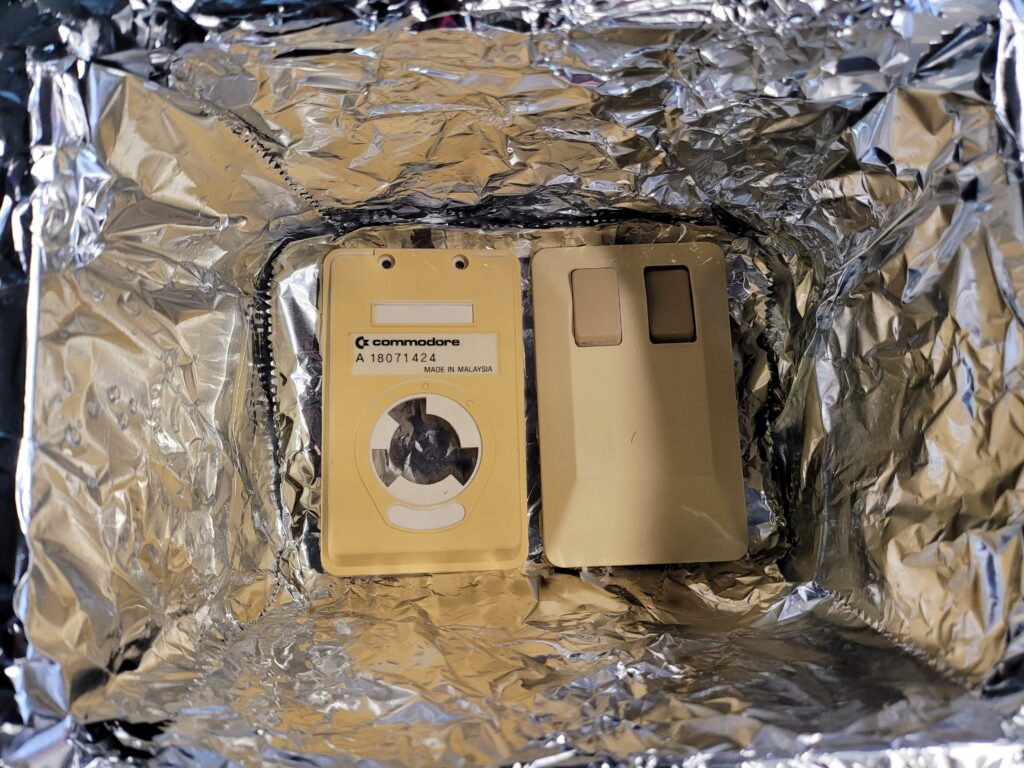
To begin the process I first gave the mouse case a clean in some soapy water before putting both sides into a tin foil lined plastic box.  The idea behind the tin foil was two-fold. Firstly it would reflect the UV light around the box helping ensure even coverage and secondly it would prevent the UV light from making the plastic box brittle and possibly even bleaching the colour out of my desk.


Retrobrighting

Plastic mouse case sitting in the bottom of a tin-foil lined box.


I then covered them with a 50/50 mix of warm water and Hydrogen Peroxide solution. I chose a box that wasn’t much bigger than the mouse case which kept the amount of fluid needed to a minimum.


Retrobrighting

UV light suspended over the box.


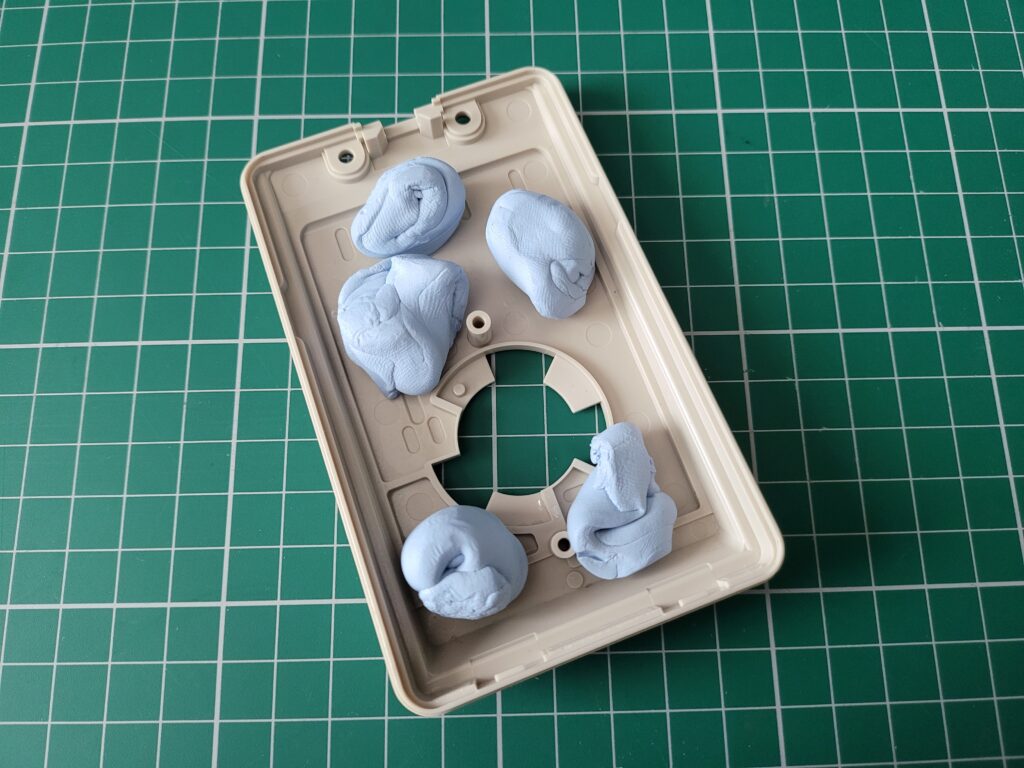
Once the case halves were immersed in fluid I positioned the UV light over the top of the box and held it in place with some helping hands and switched it on. Everything looked good so I left it for about an hour and then came back to check on it. The plastic parts were covered in hundreds of tiny air bubbles which meant the process was obviously working. The bad news was that those same bubbles were causing the case to float up and no longer be covered in the hydrogen peroxide solution. Over a period of a few hours I had to keep adding blobs of blu-tack to the underside of each part before they would finally stay submerged.


Retrobrighting

Blu-tack weights to keep the case submerged.


Once I was happy that the case wouldn’t float up any more and that the UV light wasn’t going to overheat or nose-dive into the liquid I shut the door to the man cave and left it all overnight to marinate.


Results

The following evening after work I fished the case out of the water and had a look at the results which you can see in the photo below. Needless to say I was pretty chuffed with how it turned out as everything was now a nice uniform beige colour top and bottom.
 

Retrobrighting Results

Freshly retrobrighted cases.


Compared to the mouse ball cover (which I deliberately didn’t treat – see photo below) the difference was night and day. All in I’d say the case probably spent about 24 hours under the UV lamp in the hydrogen peroxide solution. Perhaps they might have been ready a bit sooner but I wasn’t able to keep checking in on them. Either way I’m quite happy to wait a day for such a good result. Incidentally, the liquid solution was at room temperature (about 22′-24’C) the whole time, I didn’t use any kind of water heater.


Retrobrighting Comparison

Spot the difference.


Replacing the Glide Pads

Unfortunately in my excitement to finish my mouse refurb I forgot to take pictures of the case before fitting the new glide pads so you’ve already seen pictures of them fitted.

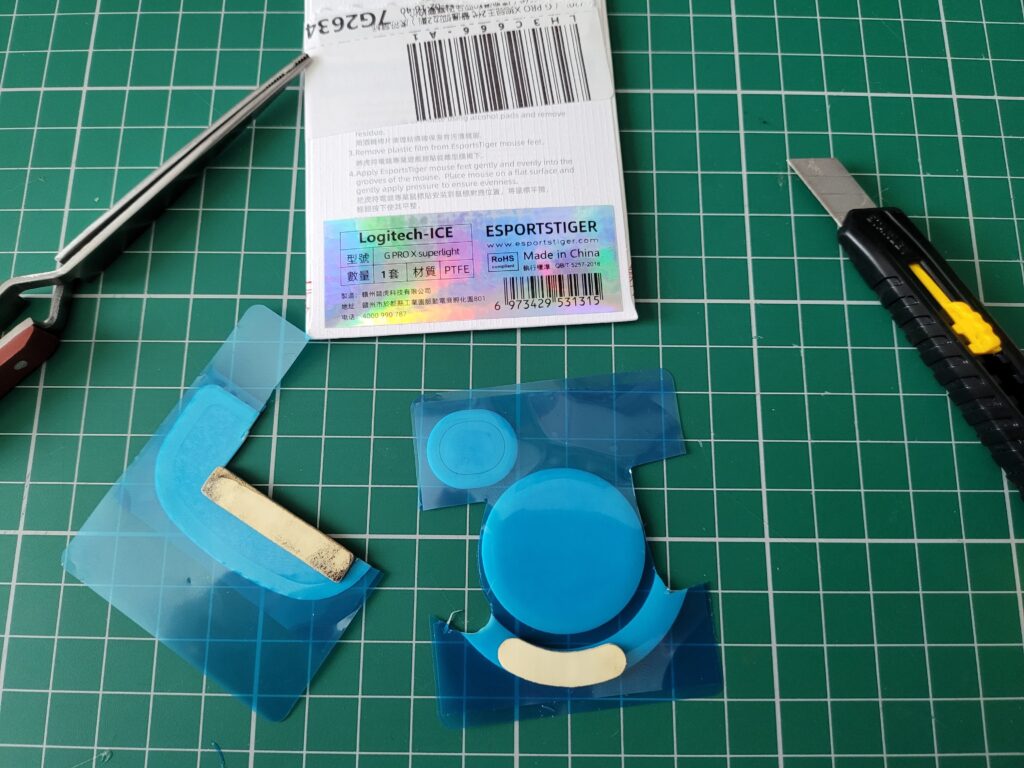
To get the correct sizing for the glide pads I simply placed the old pads on top of the new ones (photo below) and cut around the outline with a sharp craft knife. I struck it lucky with the curved pad at the bottom as it matched the curvature of the new one exactly so I only had to cut the rounded ends. The only slight issue I had was that the new pads were half the thickness of the old ones so I needed to cut out two of each and stick them on top of each other. If I hadn’t done this then they would not have cleared the recesses in the case and they’d have been a waste of time.

Anyway, I’m really happy with the end result as the mouse glides around like a dream now. I also still have enough material left to kit out another mouse should the need ever arise.


Mouse glide pads

Cutting out the glide pads.


Incidentally the mouse glide pads I bought were designed to fit a “Logitech G Pro X Superlight”. There are plenty available on eBay at the time of writing.


Installing the Amiga Laser Mouse Upgrade Board

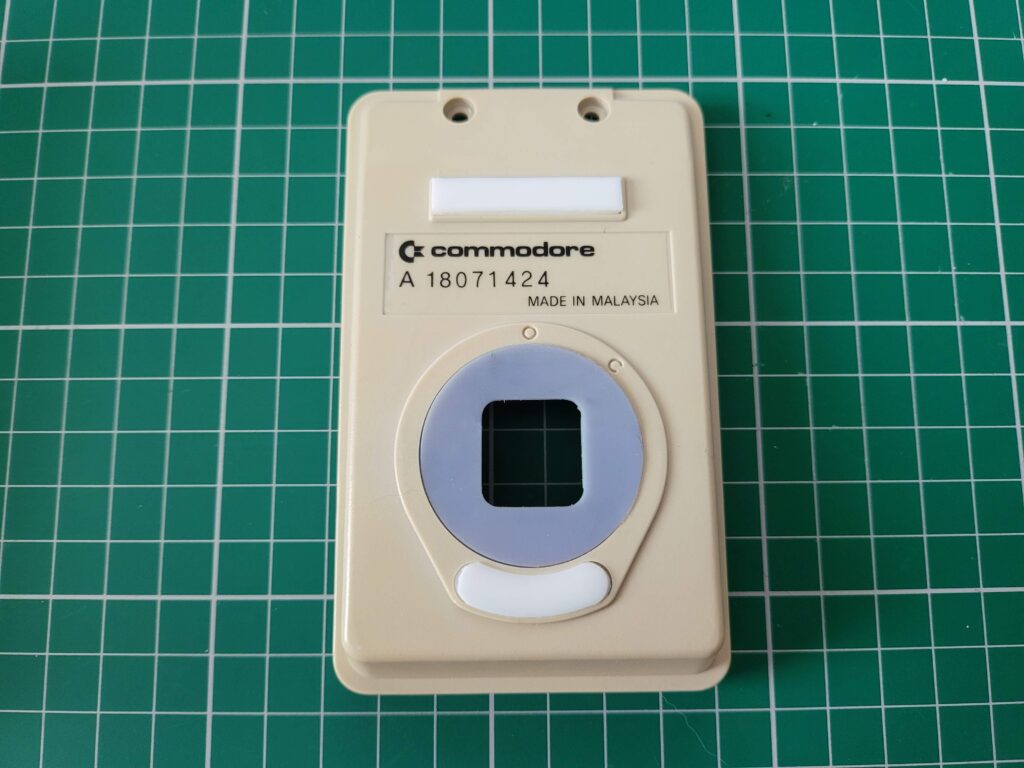
With the case now looking fine and dandy it was time to fit the laser upgrade itself. The first task was to fit the new plastic cover in place of the original. This is made out of some sort of flexible plastic material (TPU?) and I found it didn’t want to sit completely flat. Luckily it doesn’t hinder the use of the mouse but I might add a few tiny blobs of glue around the edge to hold it securely if it proves to be an issue in the future. Not sure why they made it grey either – definitely loses some style points for not being beige! At some point in the future I might have a go at 3D printing a better looking cover for it.


Amiga Laser Mouse Upgrade

New mouse cover fitted – it now has a square hole to better fit the new laser mechanism.


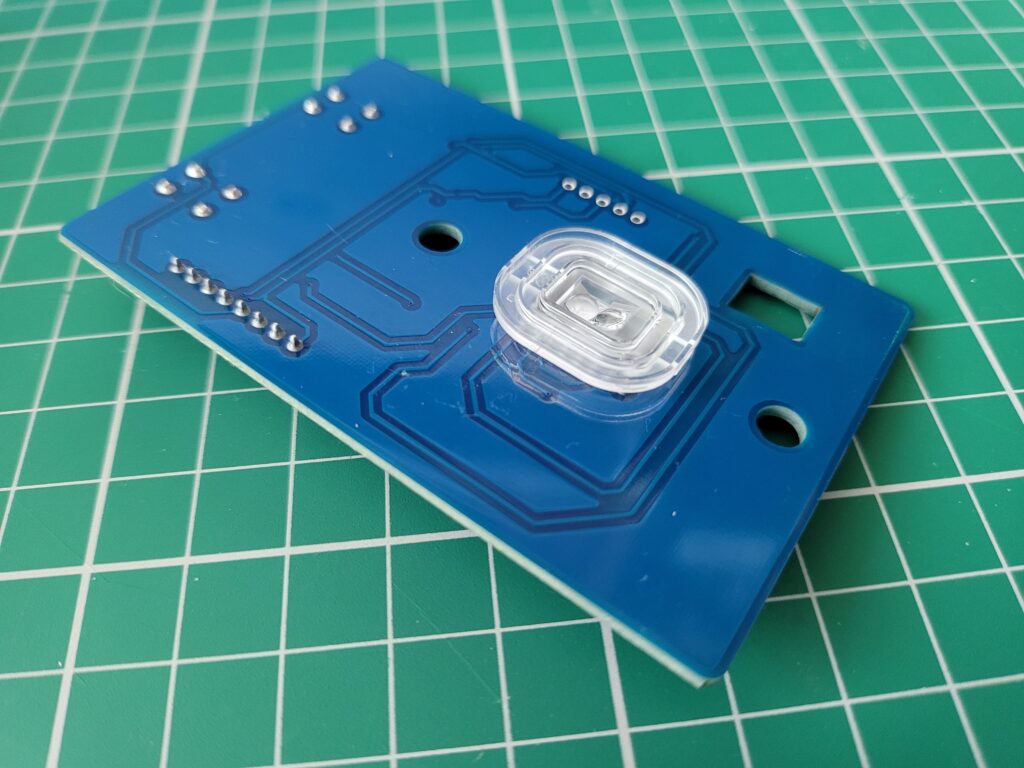
The next task was to fit the transparent plastic ‘lens’ to the circuit board. This slots into the bottom of the board and thanks to the different sized plastic pins it has on the corners it would only fit one way.


Amiga Laser Mouse Upgrade

Plastic lens fitted to the underside of the circuit board.


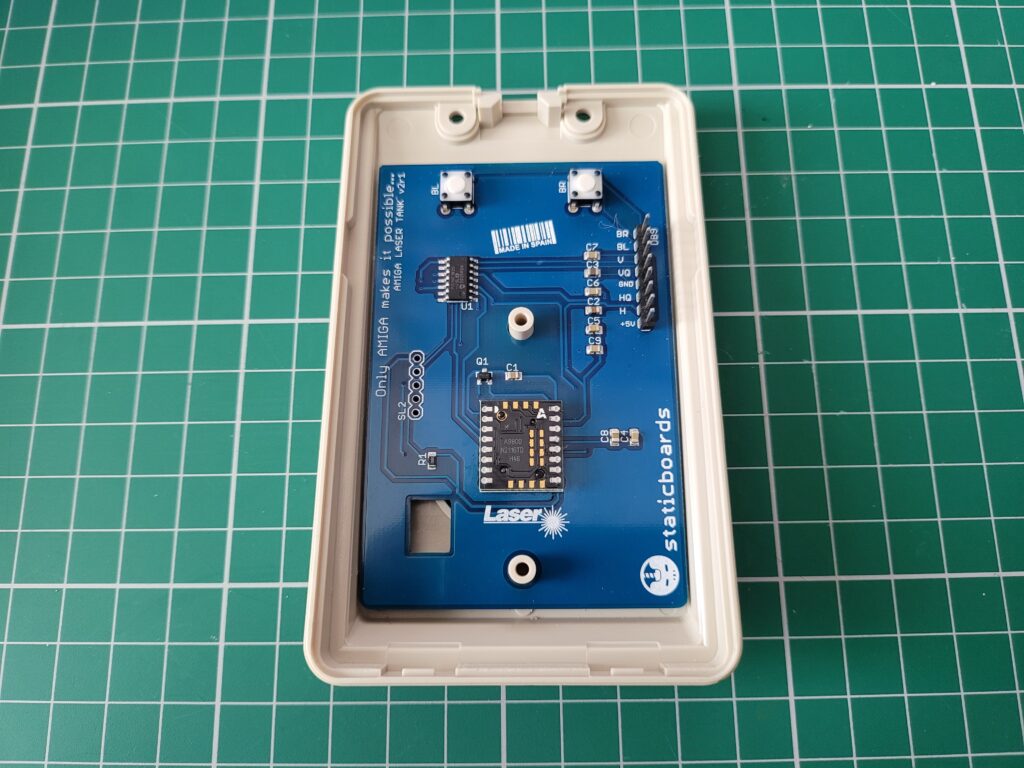
With the lens fitted I carefully lowered the board into the bottom of the mouse case. The plastic lens needed to be held in place during this operation otherwise it kept falling out. Once the board was is in place, the flexible plastic cover fitted earlier prevented it from falling out through the bottom.

.

Amiga Laser Mouse Upgrade

New board fitted into mouse base.


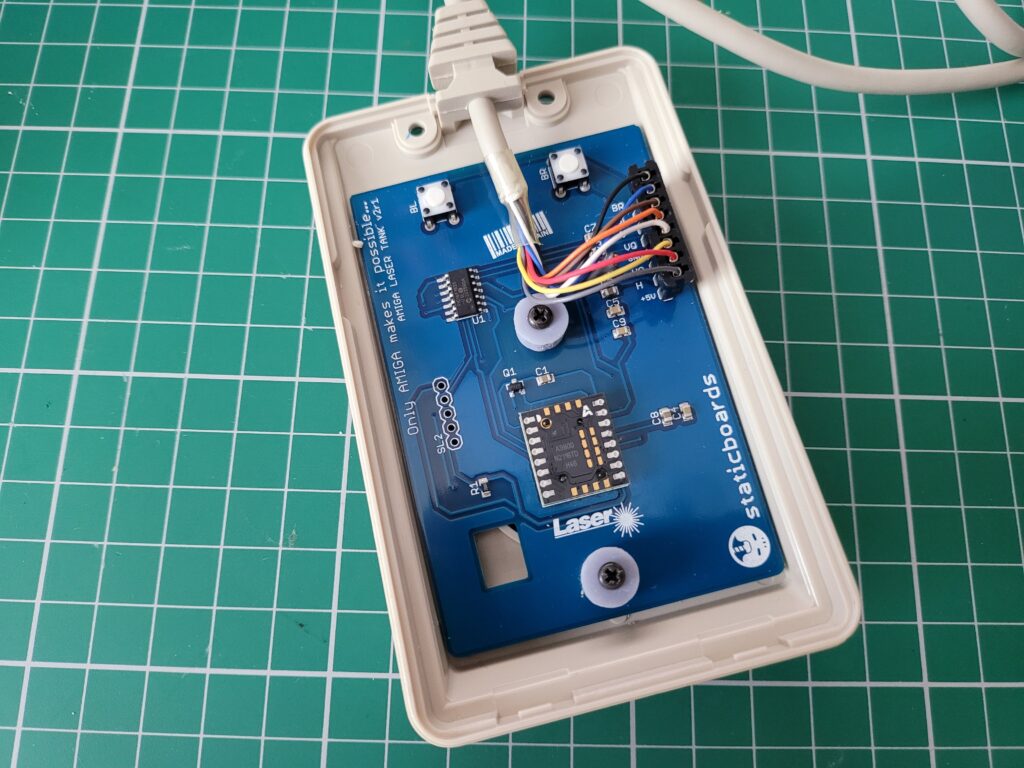
Next the two little plastic spacers were fitted over the existing screw posts allowing the board to be secured in place using the original black screws removed earlier. I then reattached the cable connector to the pin header on the new board.


Amiga Laser Mouse Upgrade

Board secured in place and cable reconnected.


Now I just needed to replace the top half of the case by carefully relocating the clips at one end and securing the other with the two silver screws.


Amiga Laser Mouse Upgrade

Job done.


Test Drive

The only thing left to do now was plug it into my Amiga and take it for spin. Happily it performed very well indeed,  it was just like using a brand new mouse – which is effectively what it is now. I did find the mouse buttons to be quite stiff compared to modern mice but it’s something I could get used to. The stiffness will be down to the type of switches they’ve used in the construction of the new board and they may possibly soften up a bit in the fullness of time too.


Amiga Tank Mouse

Mouse back in action!


All in all I can heartily recommend this laser upgrade kit. Sure, the photos in the instruction manual are a bit ropy and the grey mouse cover isn’t perfect but the stuff that really matters, the laser mechanism itself, is spot on. This upgrade has totally transformed my crusty old tank mouse into a device worthy of being used in the 21st century.

Unfortunately at the time of publishing this if you want one you will need to register your interest on their website as they are currently out of stock. Still, good things come to those that wait!


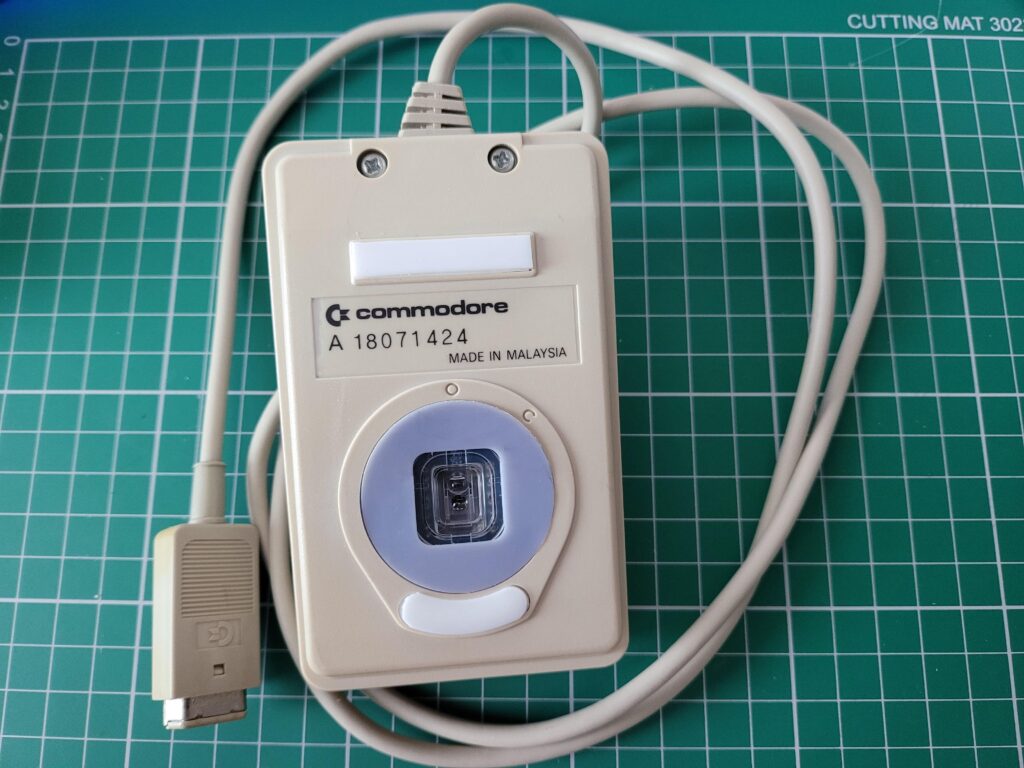
Amiga Laser Mouse Upgrade

Close-up of the underside of the mouse.


The A500 Mini Review

Despite the fact that I already own a real A500 an A1200 and a CD32 I still pre-ordered ‘The A500 Mini’ as soon as they were announced, such is my love for these old Commodore machines. I also picked up both ‘The C64 Mini’ and Maxi despite owning a VIC20 and C64 which they both emulate. I suppose even if I never use them much they’re still really cool devices to own and display but the truth is I just can’t resist these (or any) sort of gadgets.

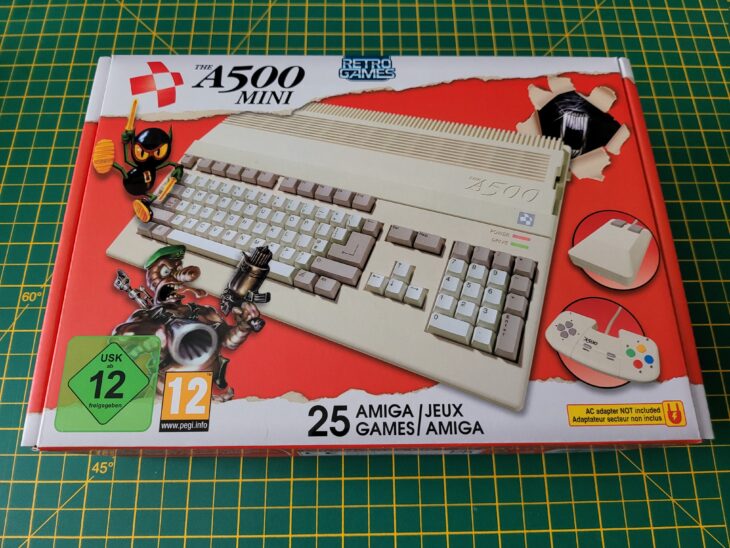
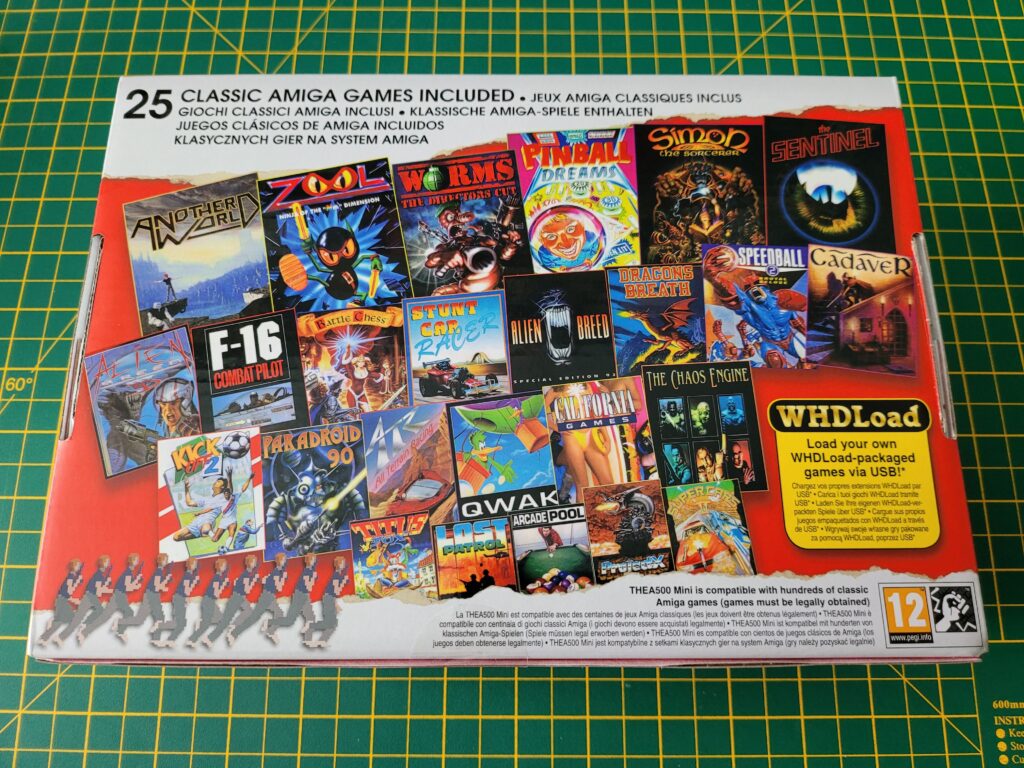
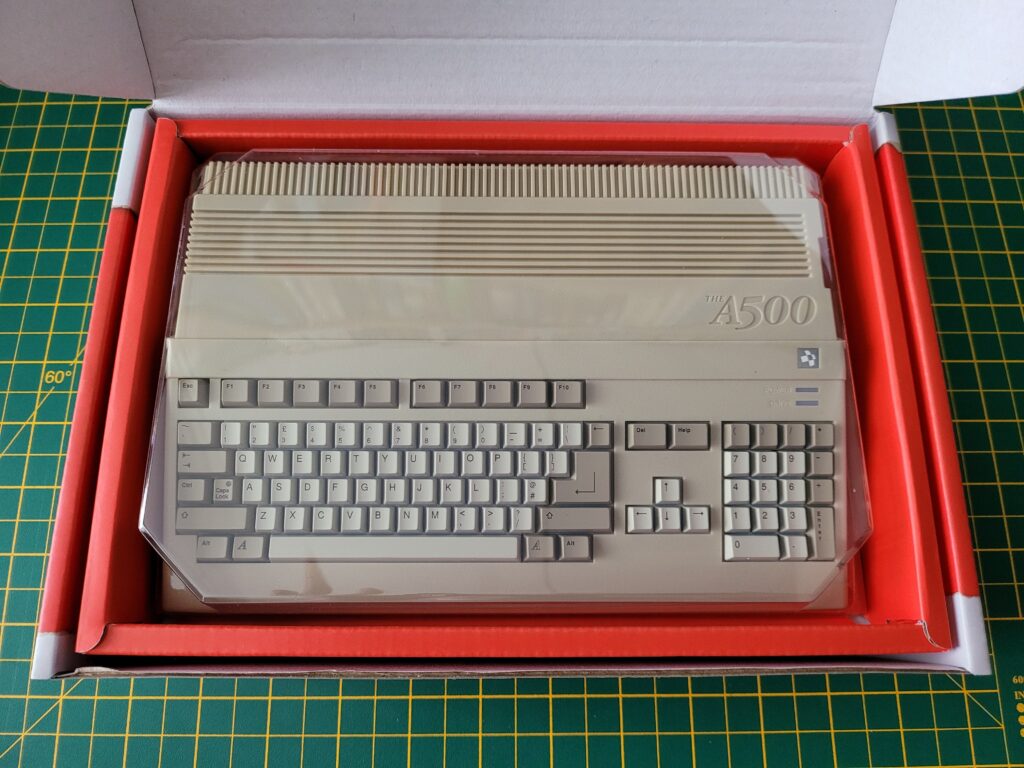
First impressions were terrific. The A500 Mini came in a very attractive and colourful box adorned with pictures of the computer and peripherals on the front and a gallery of the included games on the back. The box was surprisingly heavy too, something I definitely wasn’t expecting.


The A500 Mini

Back of The A500 Mini Box.


The A500 Mini comes with the following 25 games pre-loaded:

Alien Breed 3D
Alien Breed: Special Edition’92
Another World
Arcade Pool
ATR: All Terrain Racing
Battle Chess
Cadaver
California Games
The Chaos Engine
Dragons Breath
F-16 Combat Pilot
Kick Off 2
The Lost Patrol
Paradroid 90
Pinball Dreams
Project-X: Special Edition 93
Qwak
The Sentinel
Simon the Sorcerer
Speedball 2: Brutal Deluxe
Stunt Car Racer
Super Cars II
Titus The Fox: To Marrakech And Back
Worms: The Director’s Cut
Zool: Ninja Of The “Nth” Dimension


What’s in the Box?

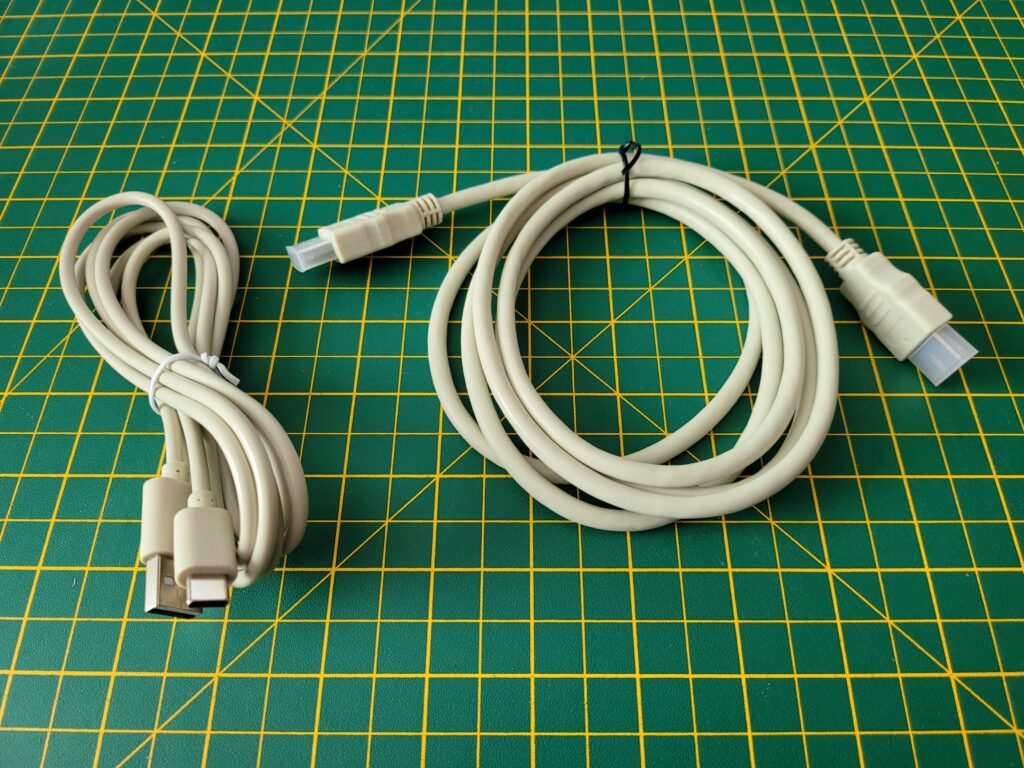
Opening up the box revealed the A500 mini itself, an optical USB Tank mouse, CD32-esque USB controller, quick start guide, HDMI cable and a USB C power cable.


The A500 Mini

The A500 Mini (with plastic cover).


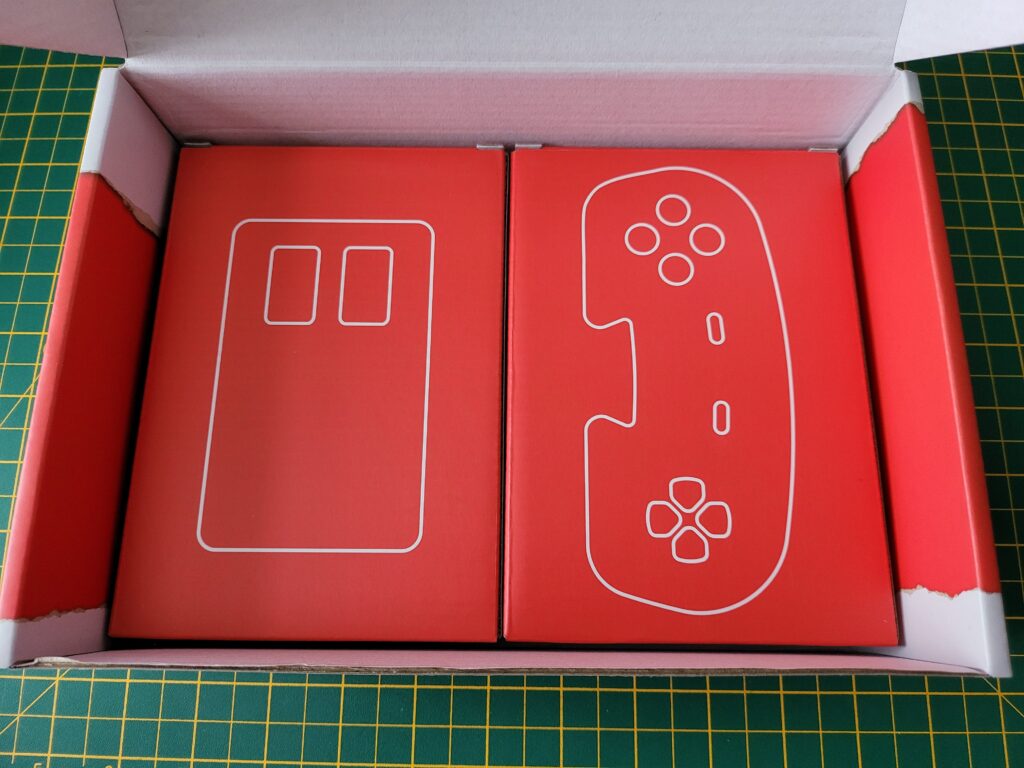
The mouse and controller were tucked away under the A500 Mini inside their own little boxes.


The A500 Mini

Controller and Mouse Boxes.


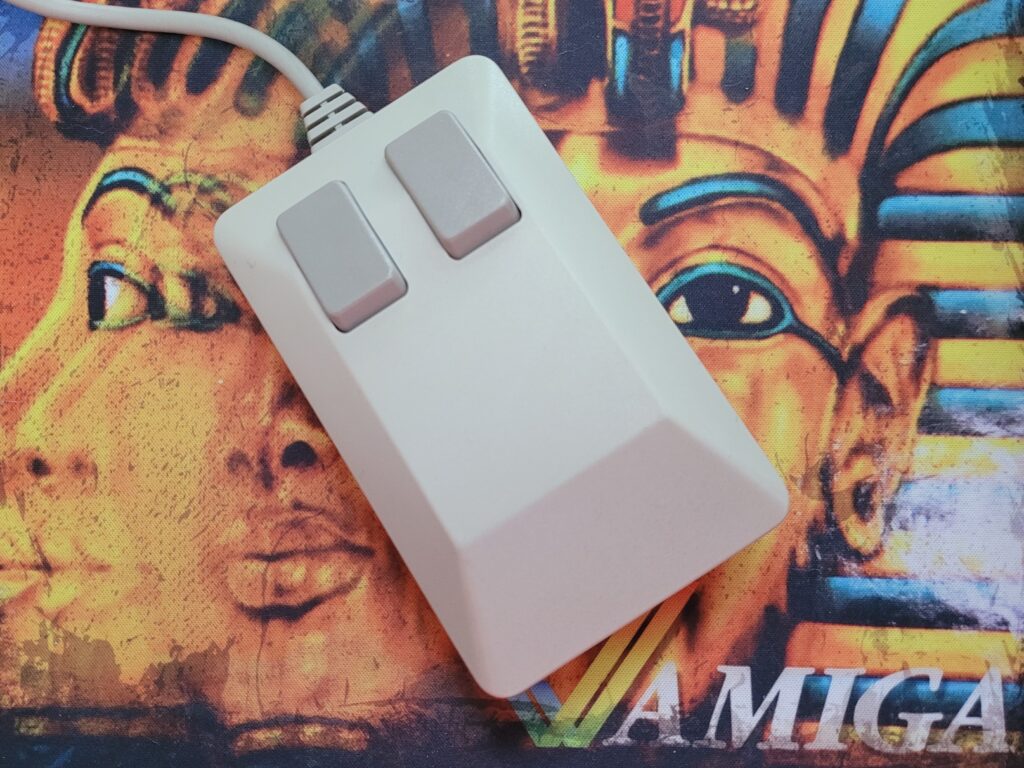
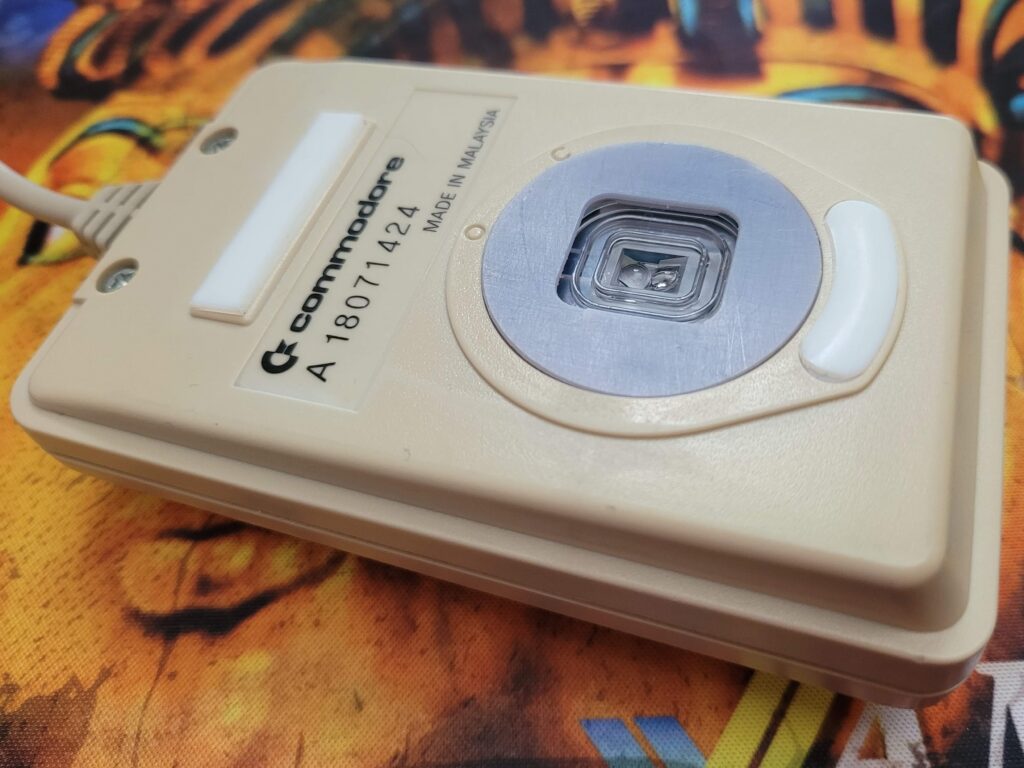
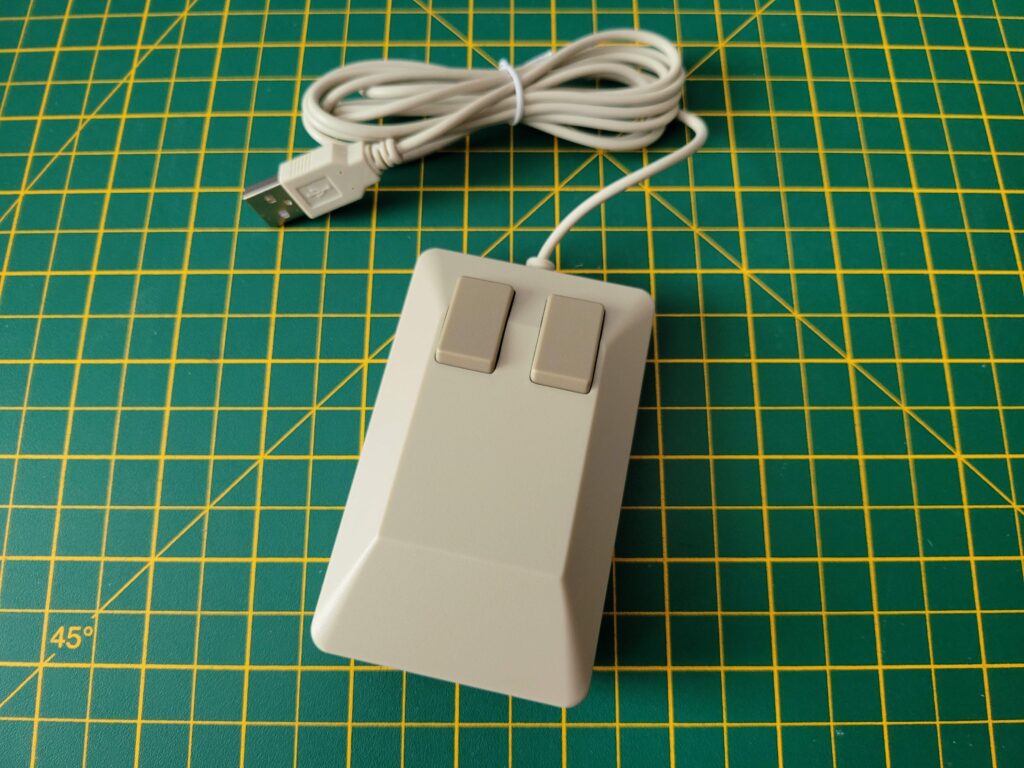
The tank mouse is a perfect, slightly smaller replica of a real Amiga tank mouse.


Tank Mouse

The A500 Mini Tank Mouse.


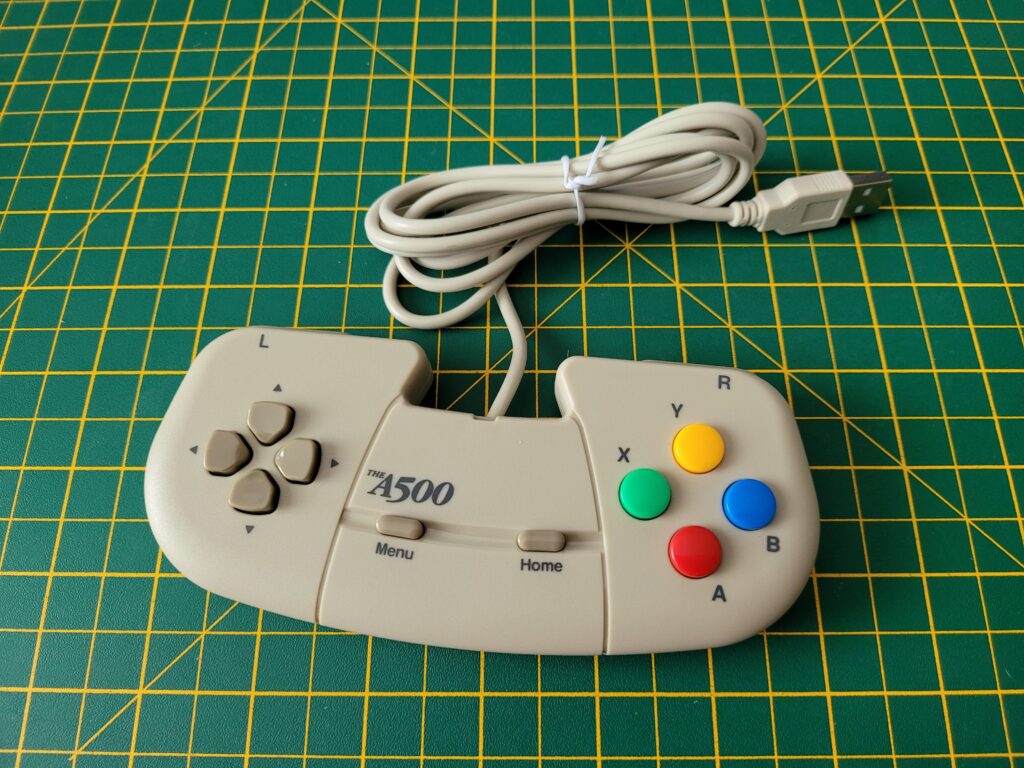
The design of the gamepad was clearly inspired by the CD32’s controllers.


The A500 Mini

The A500 Mini Controller.


A suitably beige USB C power cable and HDMI cable are also included. I have to admit it was nice to see the adoption of USB C for the power as most of my modern day kit uses this standard now. You have to provide your own USB power socket but that was to be expected – most of us have plenty of these lying around.


Cables

USB C Power and HDMI Cables.


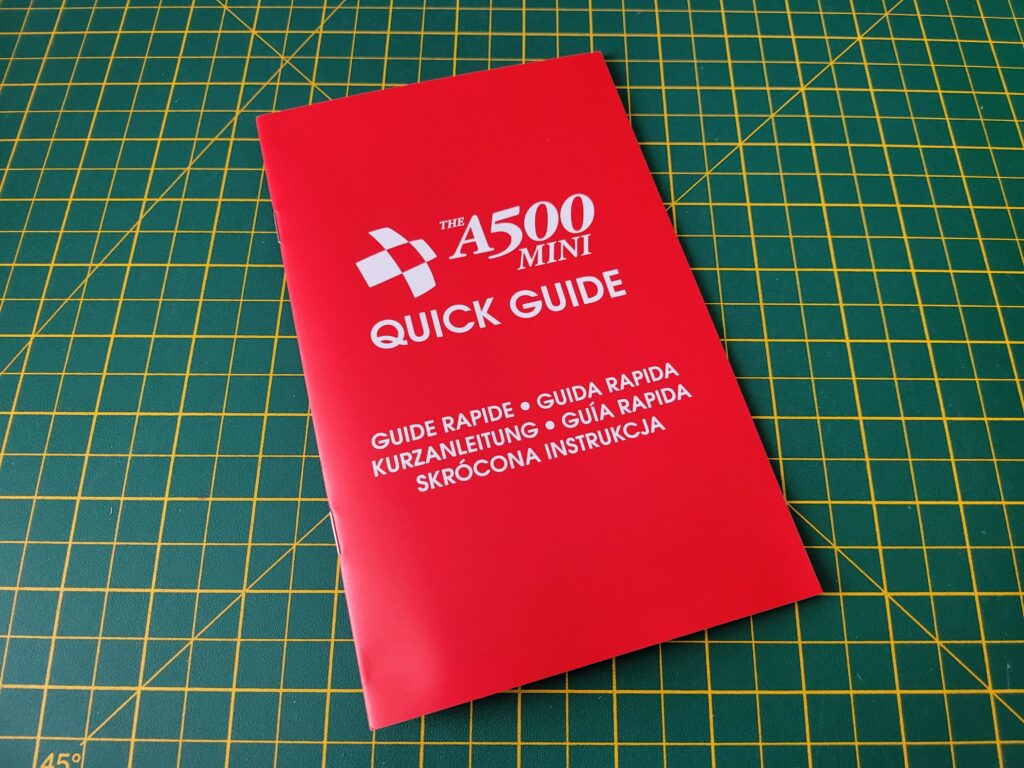
The Quick guide is literally just that. Strip away all the pages devoted to other languages, health and safety gubbins and a list of the package contents and you are left with a meagre 2 pages of instructions. The full 48 page English instruction manual is provided online – here’s the URL given in the quick guide. For a retro product I did find this disappointing and would much rather have had all of this info in a nice spiral bound or hardback manual. Hopefully they release this as an optional extra shortly like they did with the ‘The C64 User Manual‘.


The A500 Mini Guide

The A500 Mini Quick Guide.


A Closer Look at the A500 Mini

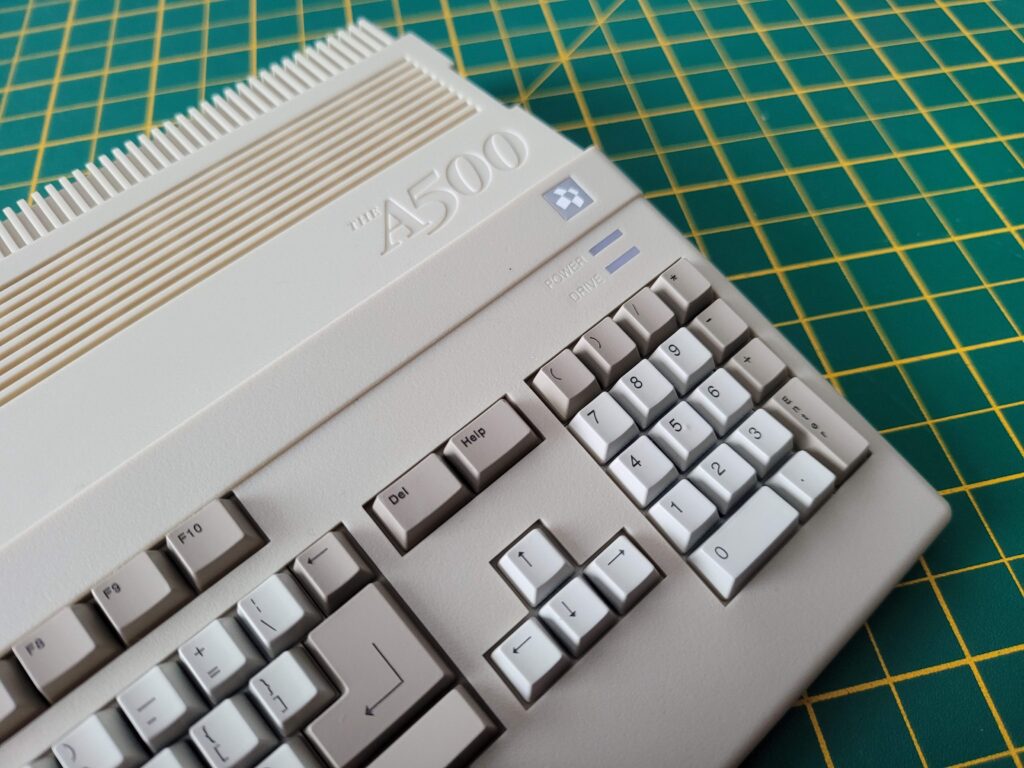
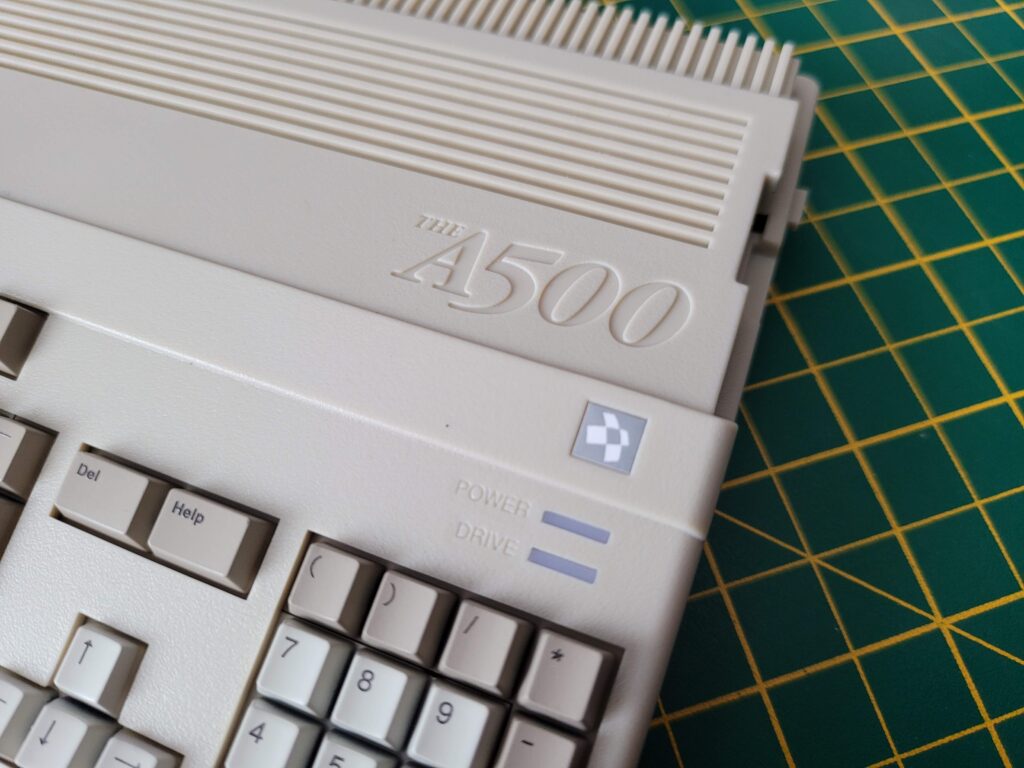
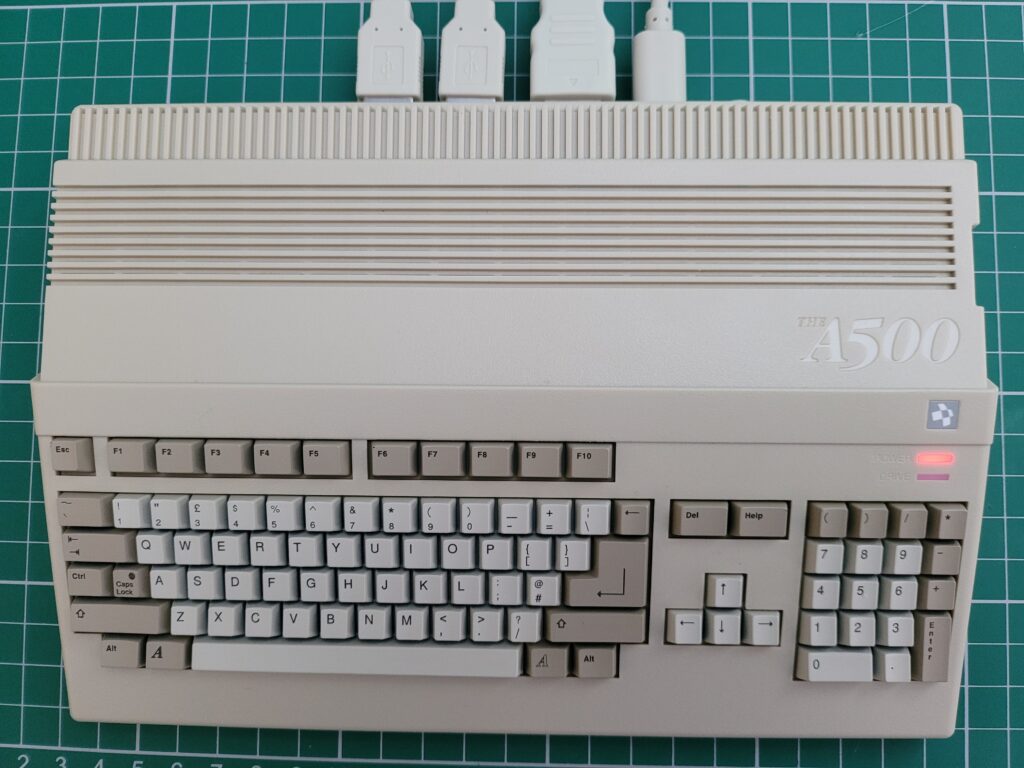
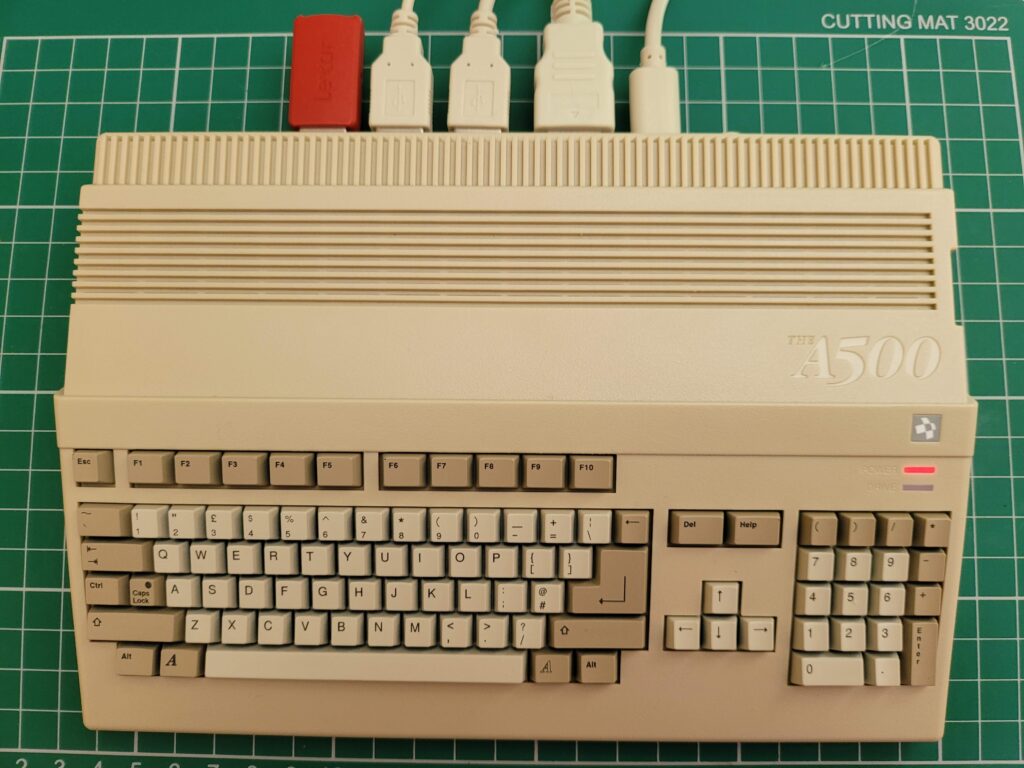
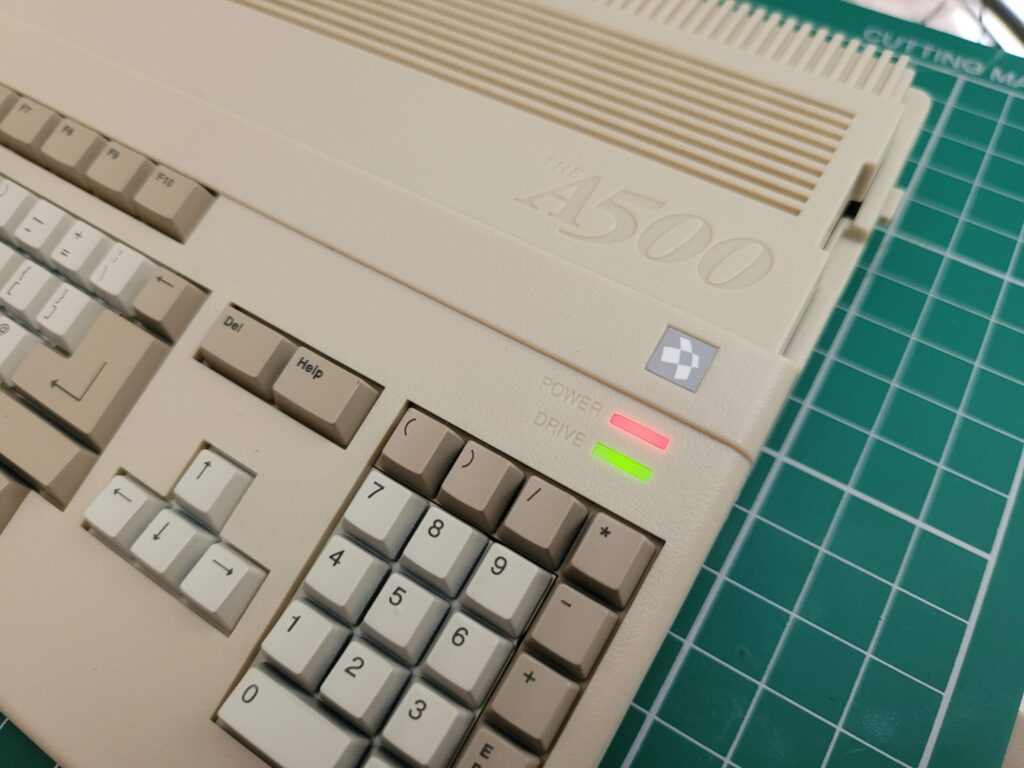
From the photos you could certainly be forgiven for mistaking the A500 Mini for a real A500 especially if you last used one in the 80’s or 90’s. Obviously it doesn’t have the Commodore logo on display but it’s only really when you see the USB ports on the back that you realise something isn’t quite right.

If you try to press any of the keys you will quickly realise something else isn’t right too. Just like with The C64 Mini the keyboard is completely non-functional and just for show. It’s certainly very convincing visually though with each key perfectly formed!


This slideshow requires JavaScript.


The attention to detail on the case is amazing and really makes me wonder why I’ve been waiting for four years now for my ‘Compatible A500 case’ to be made!


The A500 Mini

Spot the subtle differences from a real A500.


The case displays the wording ‘The A500’ rather than Amiga and their own logo rather than the familiar Commodore ‘Chicken head’ which is obviously for copyright reasons.


The A500 Mini

Those keys look so real!


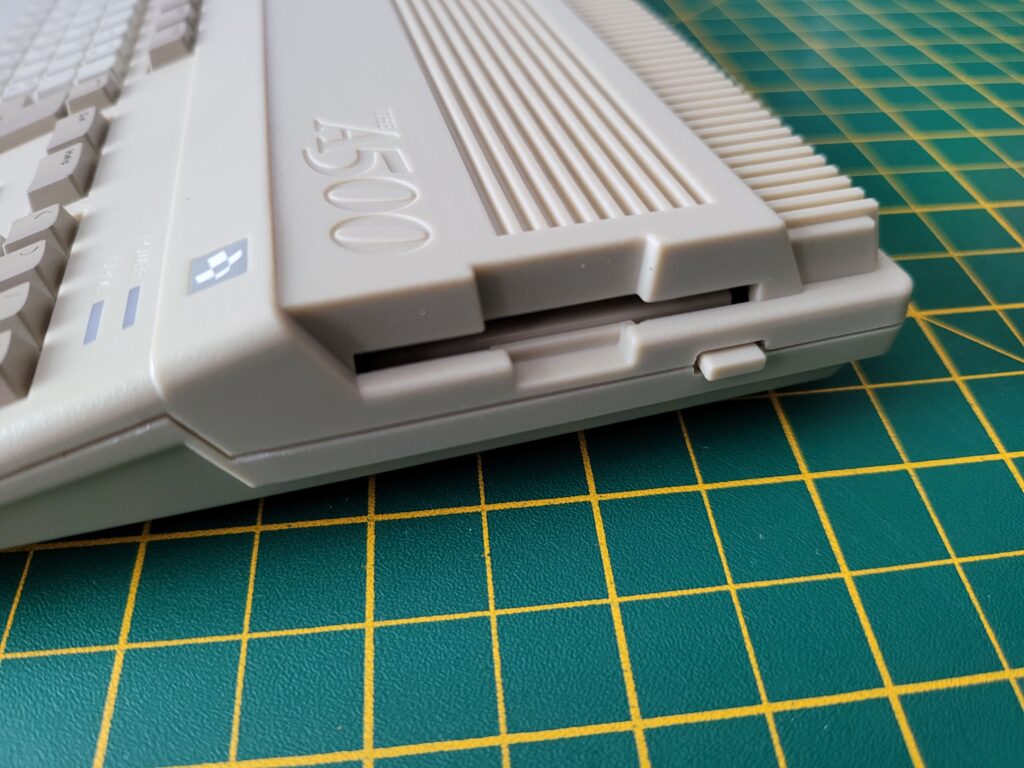
The floppy drive and eject button are very convincing but totally non-functional. Its a real shame they didn’t incorporate an SD card slot for expanding your game library here. At the very least they should have put an extra USB port here so we could insert our USB stick like it was a floppy disk…


The A500 Mini

Close-up of the non-functioning ‘floppy disk drive’.


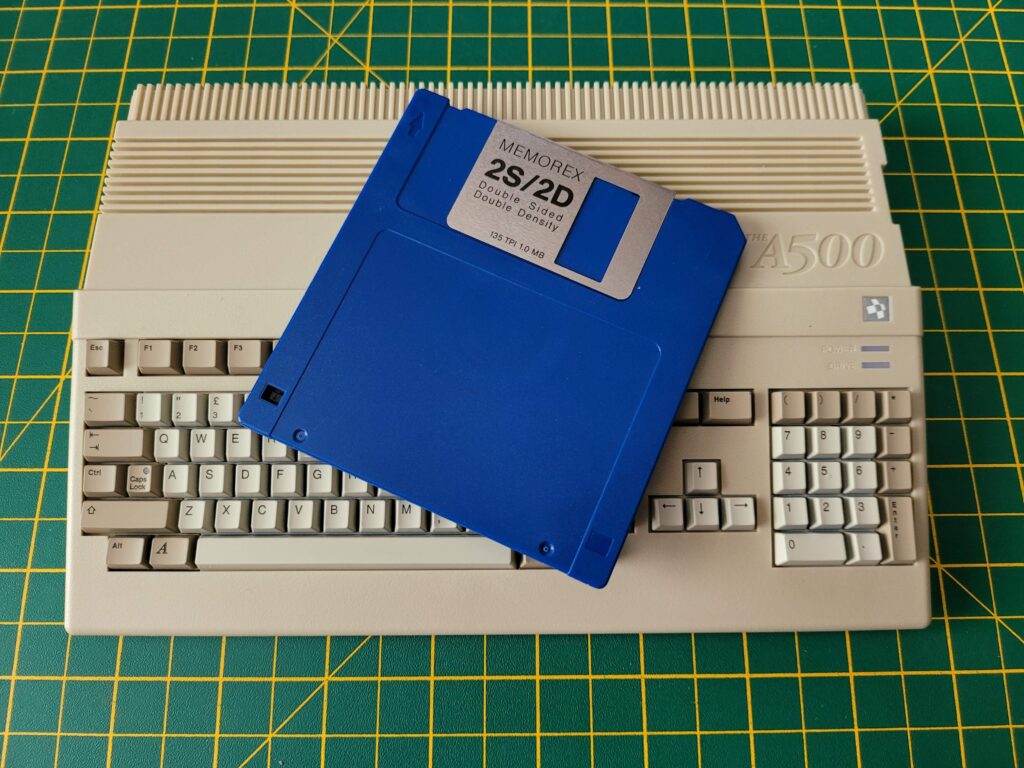
The diminutive scale of The A500 Mini becomes instantly apparent when compared to a 3.5″ floppy disk!


The A500 Mini

A500 Mini Compared to 3.5″ Floppy Disk.


Ports

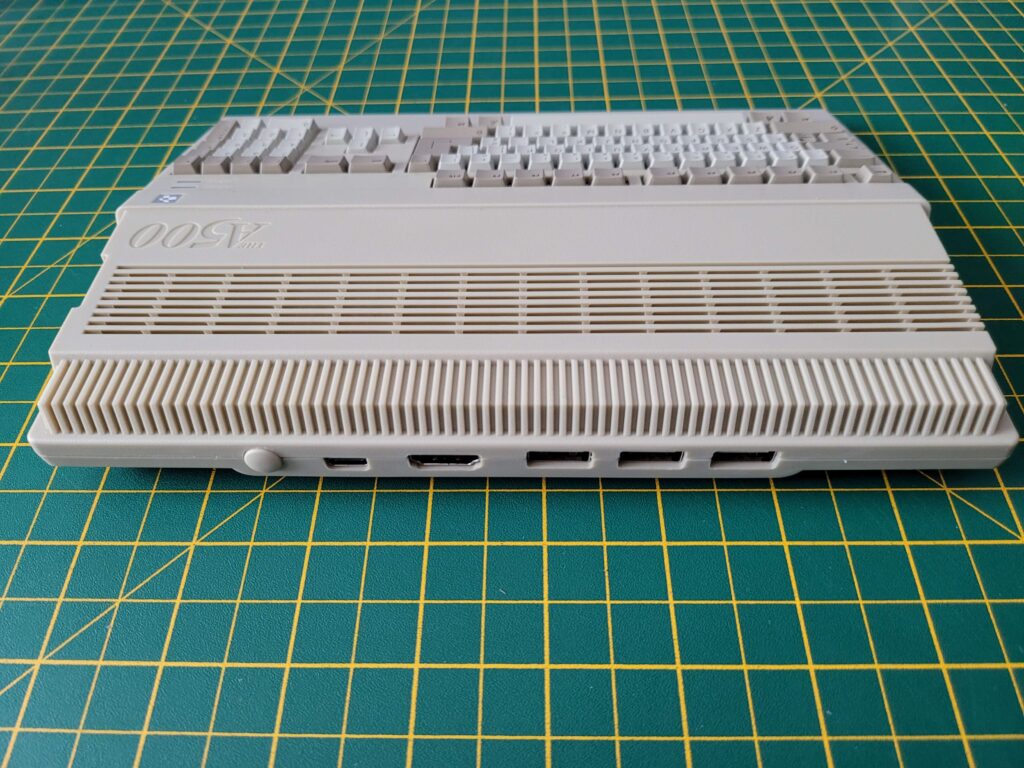
Unlike the original A500 the The A500 Mini come with a very modest selection of ports comprising USB-C for power, a full-size HDMI for video and 3 USB ports for the mouse, controller and memory stick with extra games on. There’s also a power switch included on the back.

I really think there should have been an extra USB port included here for attaching a USB keyboard. If all you are interested in is arcade style games then you’ll be fine. However if simulation games are more your thing (like the Microprose games that needed keyboard overlays) then you are going to need a USB hub to add a keyboard which is going to make for a very messy setup indeed.


The A500 Mini

Connectivity: From left to right, Power button, USB-C power socket, HDMI Video, 3x USB ports.


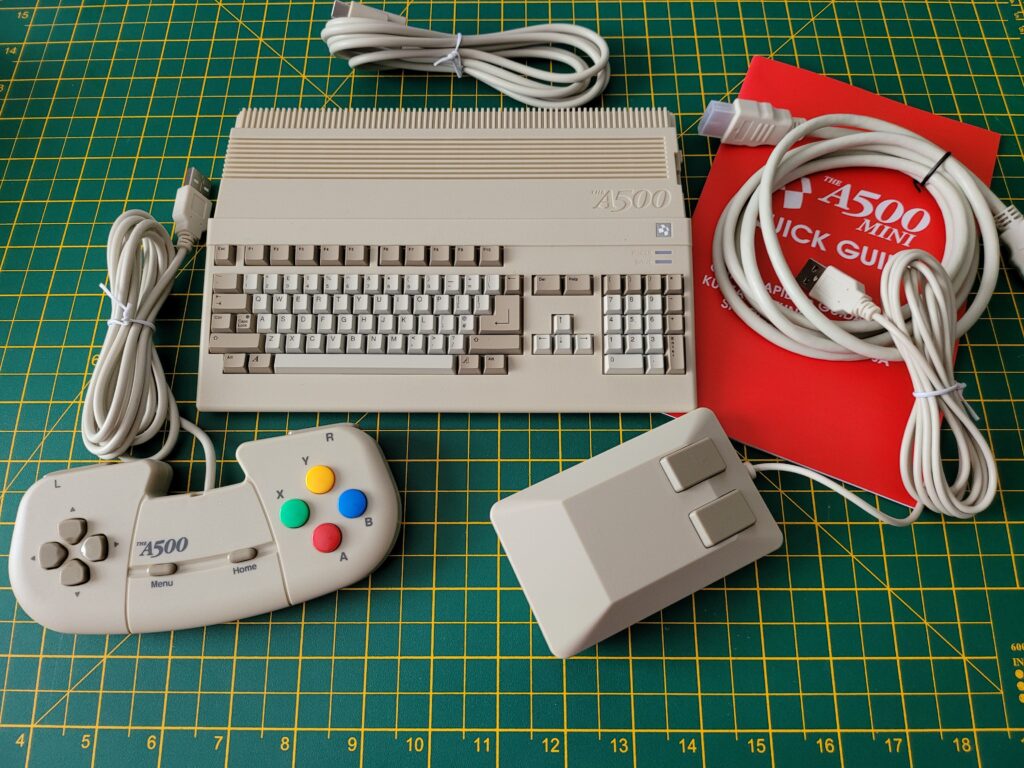
Here’s a photo of everything you get inside the box. The relative size of the A500 Mini becomes apparent when it is sat next to the mouse and gamepad.


The A500 Mini

Contents of the box.


What’s it like to use?

After plugging all the cables in and pressing the on/off switch the power LED came to life. Surprisingly the drive activity light doesn’t actually operate when loading the UI or any of the included games.


The A500 Mini

All plugged in and ready to go!


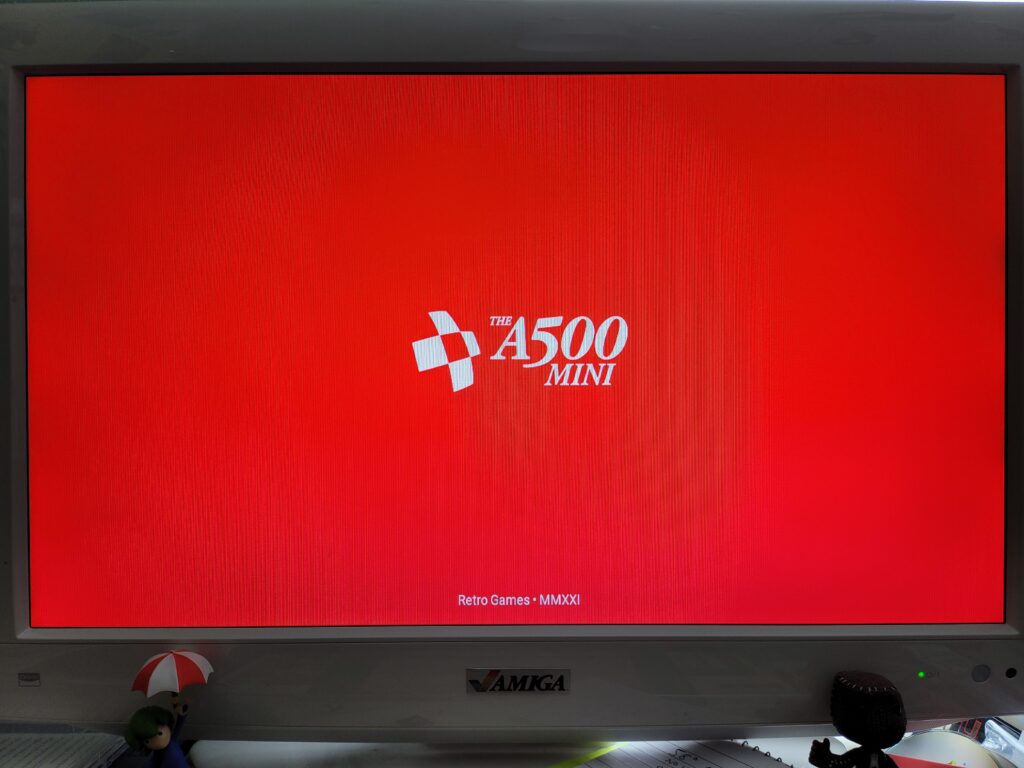
After approximately 8 seconds of staring at a blank TV whilst it booted up a very snazzy red and white A500 Mini splash screen appeared.


The A500 Mini

The A500 Mini Boot Screen.


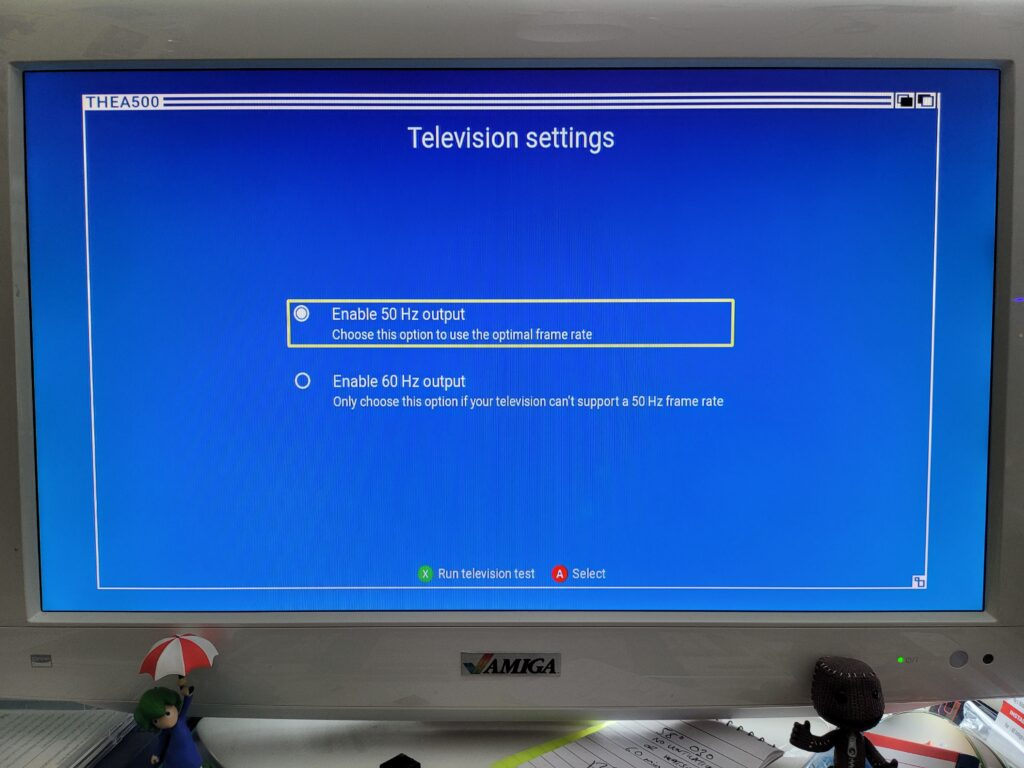
As this was the first time the device had been used a couple of configuration screens popped up allowing me to choose my language and also whether I wanted to use 50Hz or 60Hz.


The A500 Mini

TV Settings Screen.


Naturally being in the UK I chose the superior 50Hz option for the optimal frame rate. 🙂


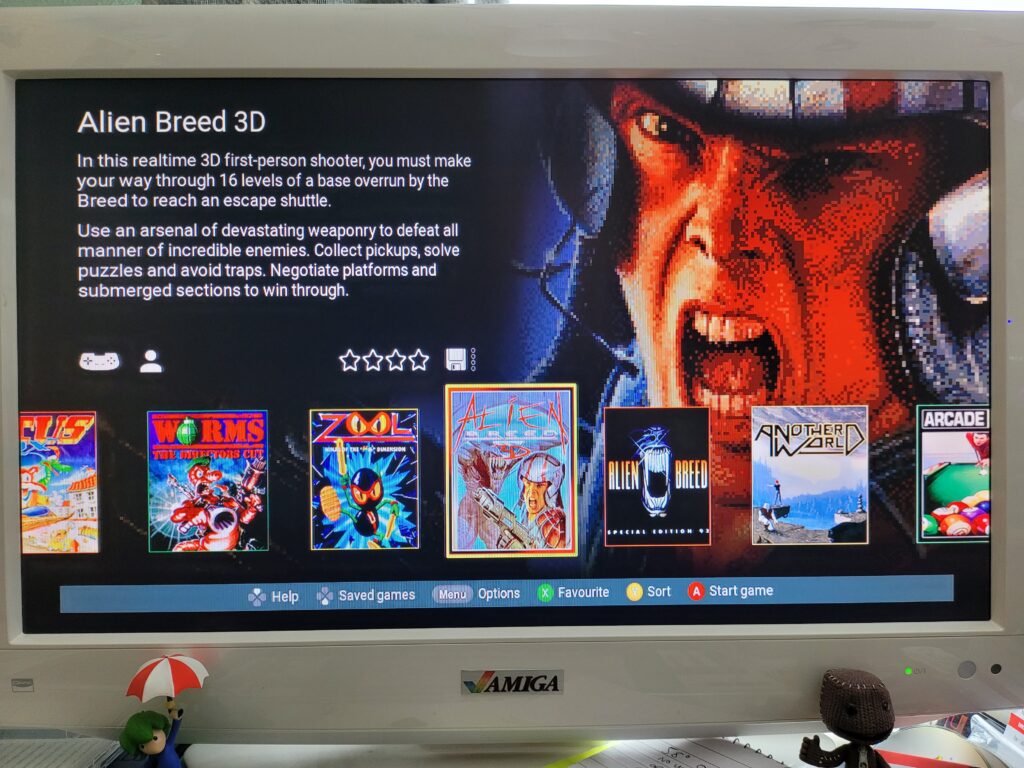
The A500 Mini

The A500 Mini User Interface.


After a quick test to make sure the mode was compatible I was presented with a gorgeous user-interface (UI). The UI features a scrolling carousel of Amiga game box art along with changing graphic montages from each game in the background. Some very relaxing ambient synth music plays softly whilst you navigate the UI too.

There are icons showing whether each game utilises the controller and/or mouse and how many players it supports. Each game can have a user star rating too, from 1 to four stars. As the carousel allows you to change the sort order between Author, Genre, Year, Publisher and Favourite this affords you the option of having the games displayed by order of preference should you want it.


The A500 Mini

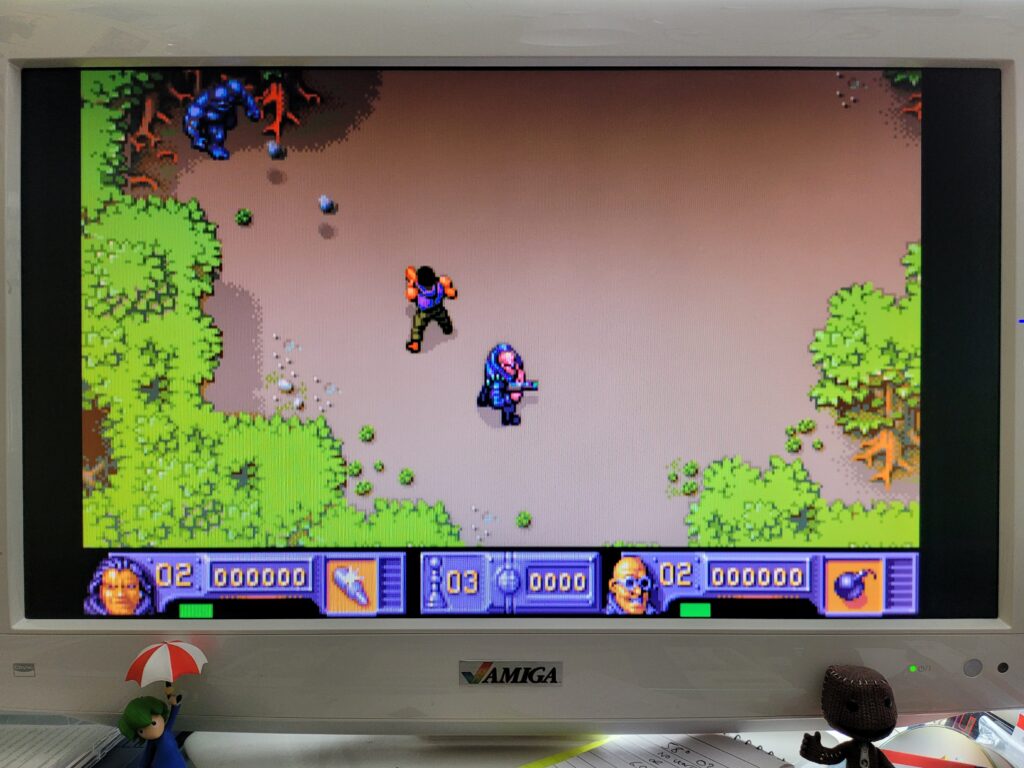
The Chaos Engine playing as good as ever.


Over the course of an afternoon I had a lot of fun trying out all of the pre-installed games on The A500 Mini and they all ran perfectly. I didn’t do any side by side comparisons but nothing gave me pause for concern and I was very impressed with just how slick everything was. Games loaded in seconds – there’s no simulated loading times here.

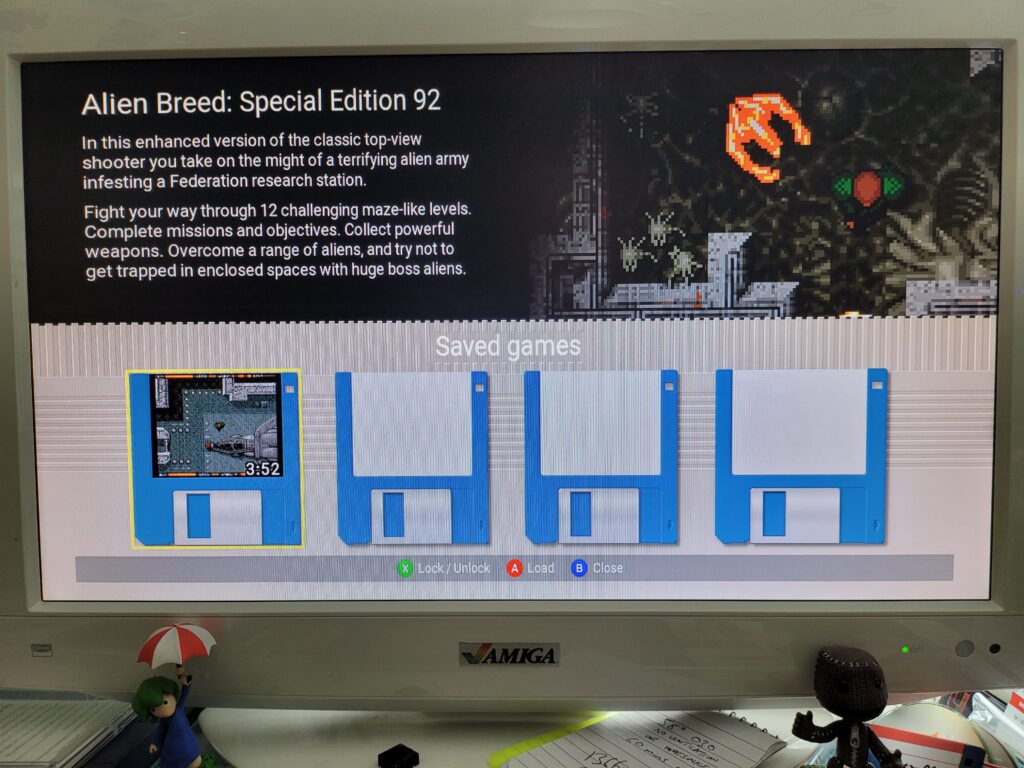
There are plenty of quality of life features too. For example each game supports up to 4 ‘save states’ allowing you to instantly save your progress at any point in any game. It even includes a ‘disk label’ incorporating a screen capture of exactly what you were doing at the moment you created the save state to help you recognise it in future! I think these are a great feature and who knows – in 30 years time someone might be using using a PS5 mini console and using save-states to brute force through a boss encounter in Elden Ring…


The A500 Mini

Alien Breed Save State with thumbnail ‘disk label’.


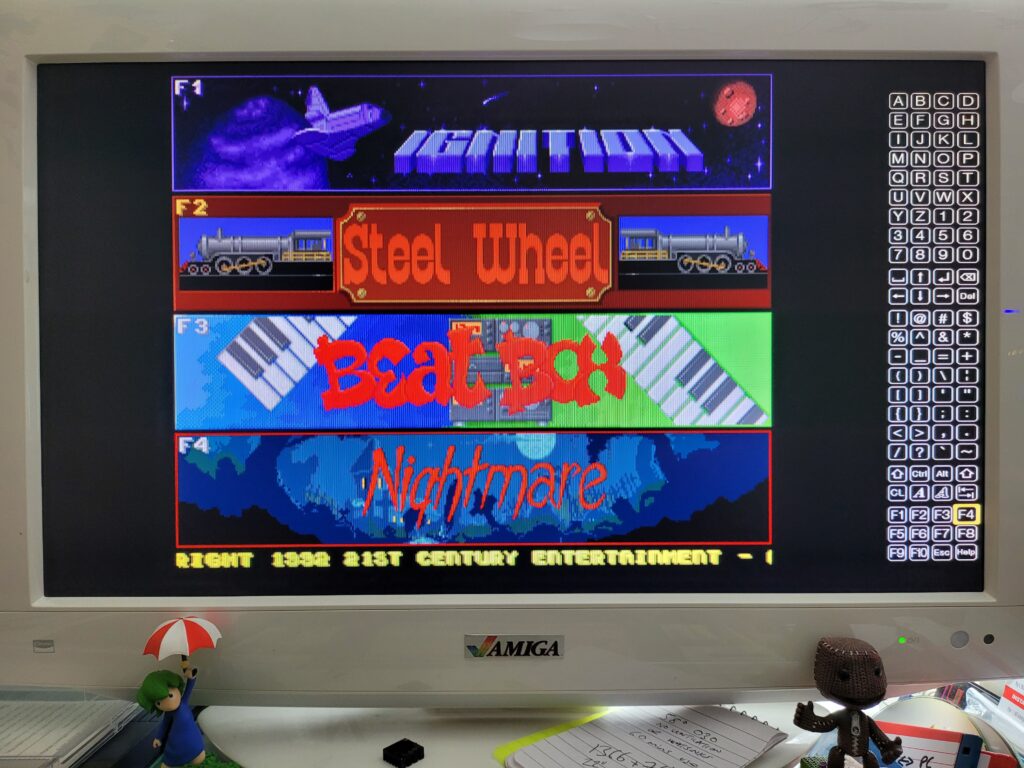
Some of the included games need rudimentary keyboard support in order to work. Pinball Dreams is a good example, requiring the use of the function keys to select which level you want to play. The handy virtual keyboard (invoked by tapping the menu button) worked like a charm here. However for games that require frequent keyboard inputs or text adventures like The Pawn you would definitely need to use a USB keyboard.


The A500 Mini

Selecting a level in Pinball Dreams using the virtual keyboard.


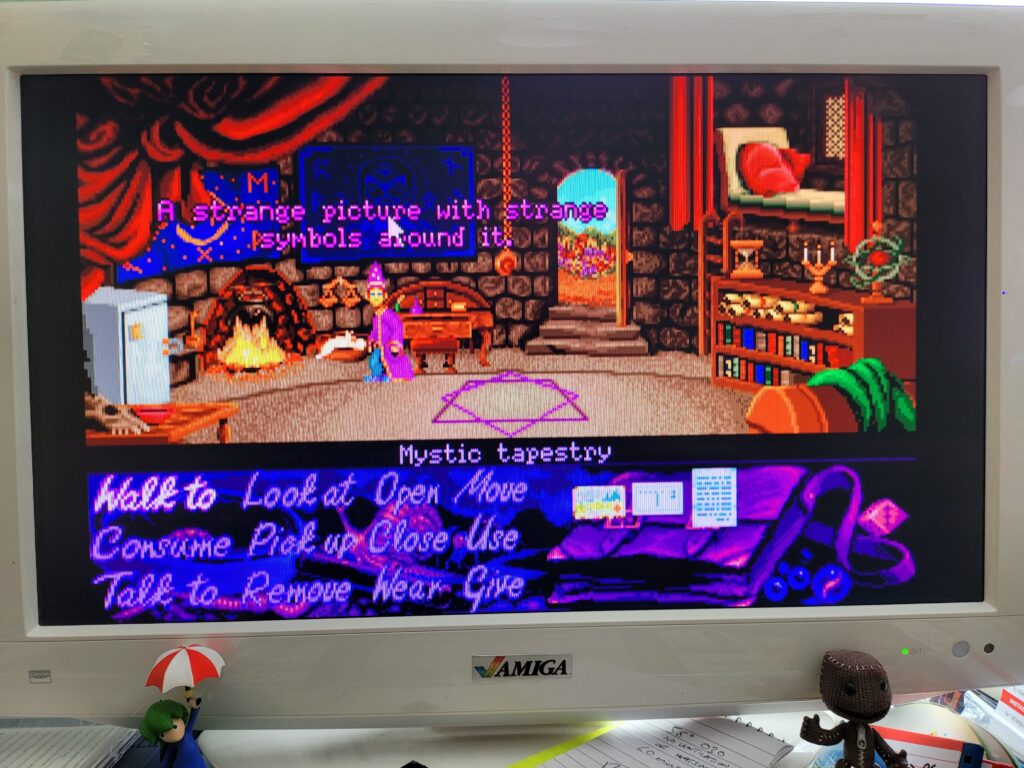
Happily the tank mouse is a pleasure to use in the games that support it, in Simon the Sorcerer for example. I should point out that the main UI doesn’t support it at all though – you must use the controller to navigate around that.

Unlike the original A500 mouse this new one incorporates a modern optical sensor under the hood and is all the better for it. I’m not really nostalgic about the old ball mice – they were a pain and required constant cleaning. Even when new they were not as accurate in use as a cheap optical mouse is now. I’ve been using optical mice with all my Amiga machines for years which should speak volumes.


Simon the Sorcerer

Using the mouse in Simon the Sorcerer.


Tweaking the settings

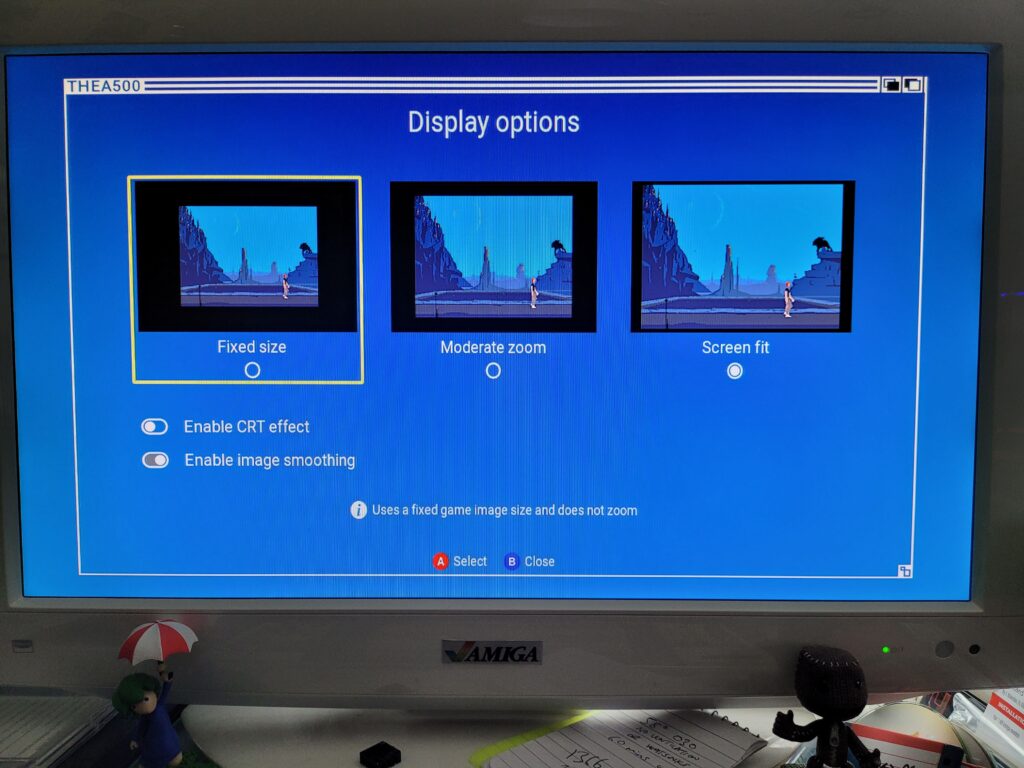
So the included games all work like a charm – but there’s still room for improvement. There’s a bunch of options you can mess around with to alter each game to your personal preference. The settings screens all feature a Workbench 1.3 Window effect which is a nice nod to the past and another example of the thought that has gone into this product.


The A500 Mini

Display Options.


The Display Options screen allows you to select the zoom size of the screen. Some games are displayed as small 4:3 windows so you can use these settings to make the screen fit your display better. There’s also a CRT effect filter that adds scanlines to the image to make it appear as if its displayed on an old CRT monitor.


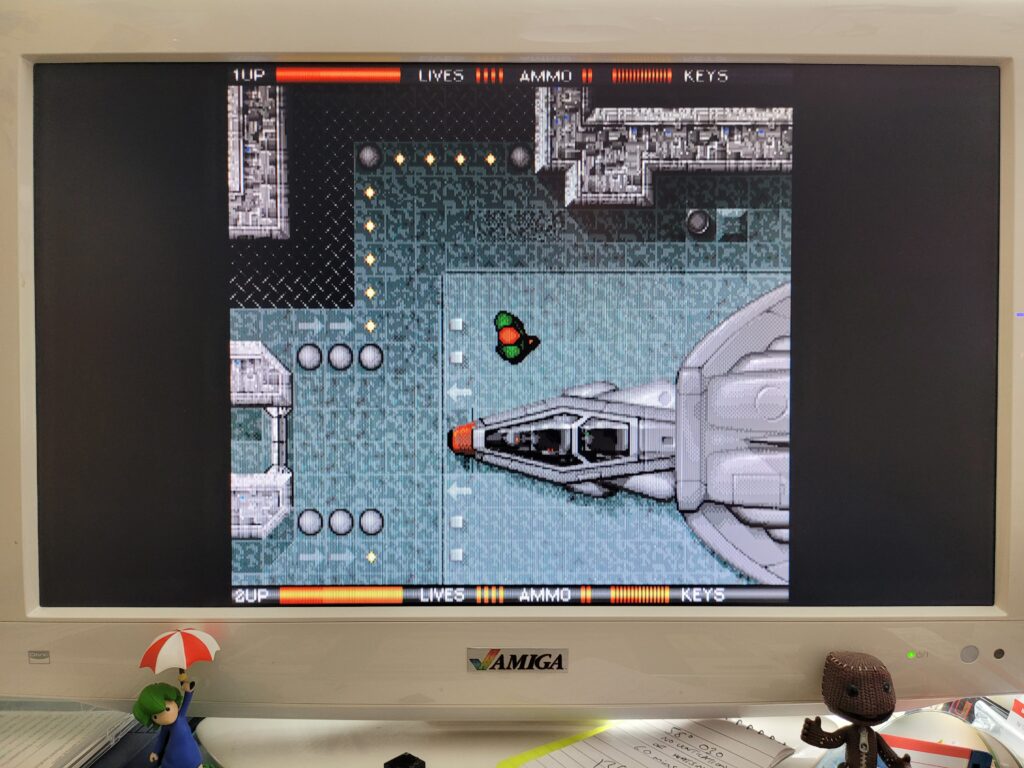
Alien Breed

WITHOUT CRT Effect.


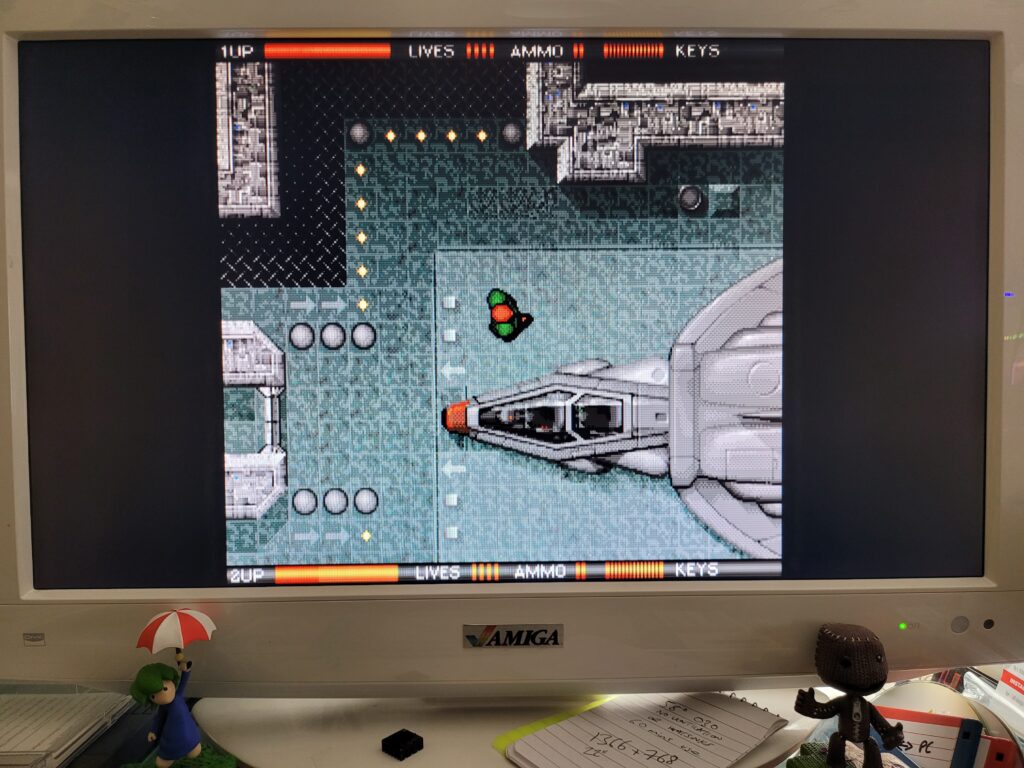
The effect is subtle but quite effective which you can hopefully see on the two screenshots. Above is a screenshot taken without the CRT filter and below with it turned on.


Alien Breed

WITH CRT Effect.


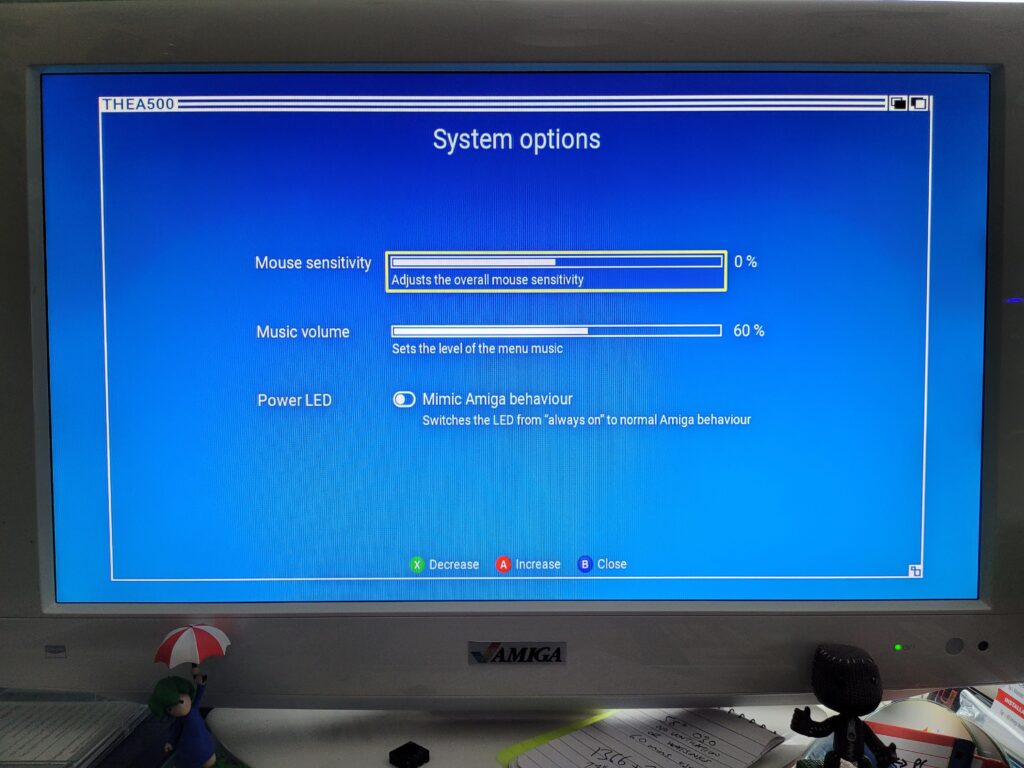
The System Options screen allows you to adjust the mouse sensitivity, music volume and Power LED behaviour. The ‘mimic Amiga behaviour’ option just made the LED act weird when loading WHDLoad games (it would keep turning off) so I left this option disabled.


The A500 Mini

System Options Screen.


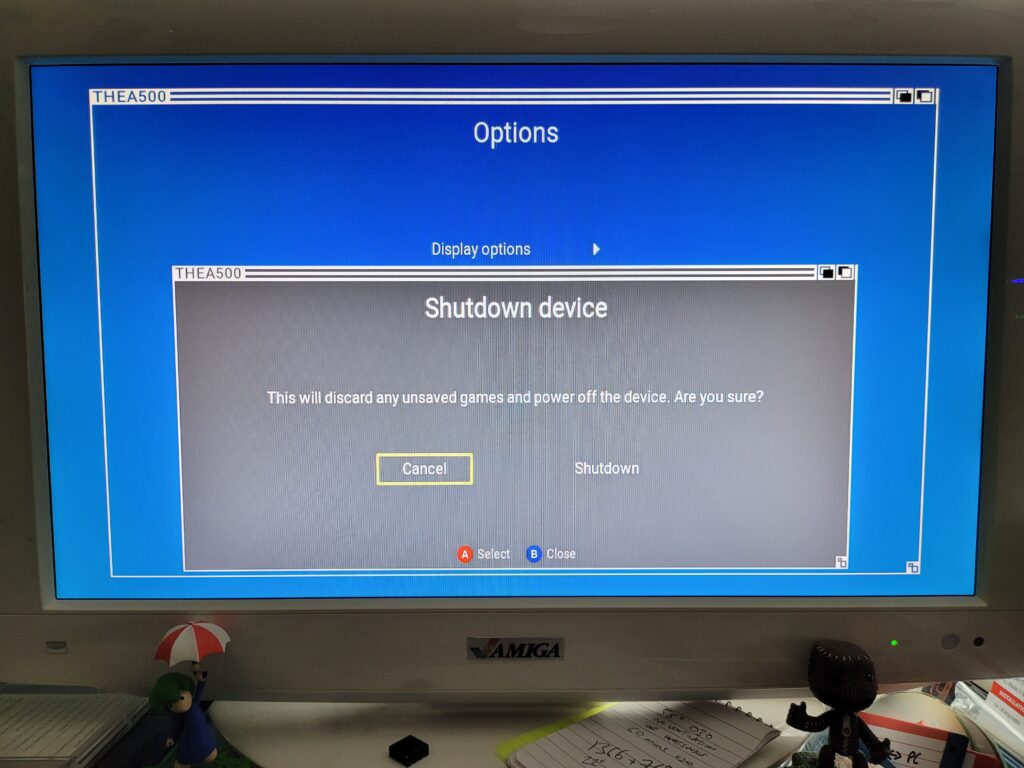
The Shutdown Device option allows a safe way to shutdown the A500 Mini and will probably be my go-to method for powering it off. If I invest a lot of time into a game and save my progress I don’t want to come back and find it’s been corrupted due to me pulling out the plug!


The A500 Mini

Safe Shutdown.


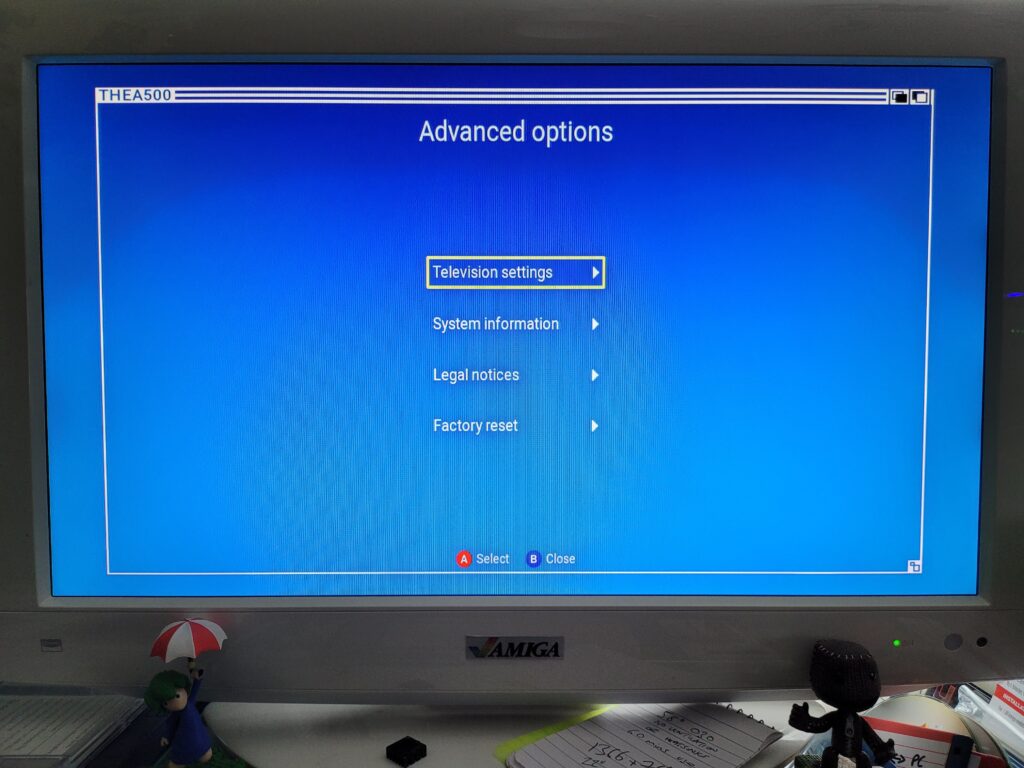
There’s also an ‘Advanced Options’ screen which is home to some less frequently needed settings. Here you can re-visit the 50/60Hz mode options, tweak whether a game should utilise the ‘border’ section of the screen, access System info, creator credits and also perform a factory reset.


The A500 Mini

Advanced Options Screen.


Loading Your Own Games

One of the advertised features of the console is being able to play your own selection of games on the device. However this isn’t explained at all in the Quick Guide, for this info you need to head online to their website: THEA500 Mini support (retrogames.biz)

In a nutshell these are the requirements for getting your own games onto The A500 Mini.

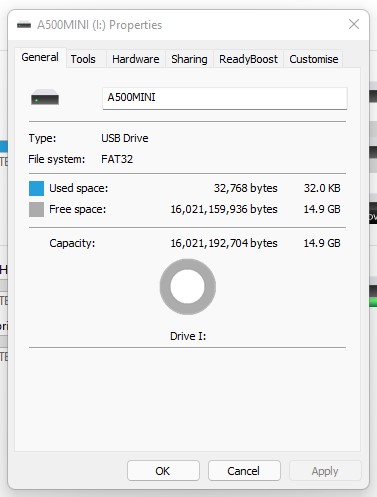
  • A USB stick formatted using FAT32.
  • The USB stick must have ‘THEA500 WHDLoad Package’ installed on it.
  • The WHDLoad programs all have to be LHA files.
  • The WHDLoad programs must be a complete archive of the program and
    not just the program’s WHDLoad installer.


My FAT32 Formatted 16GB USB Stick.


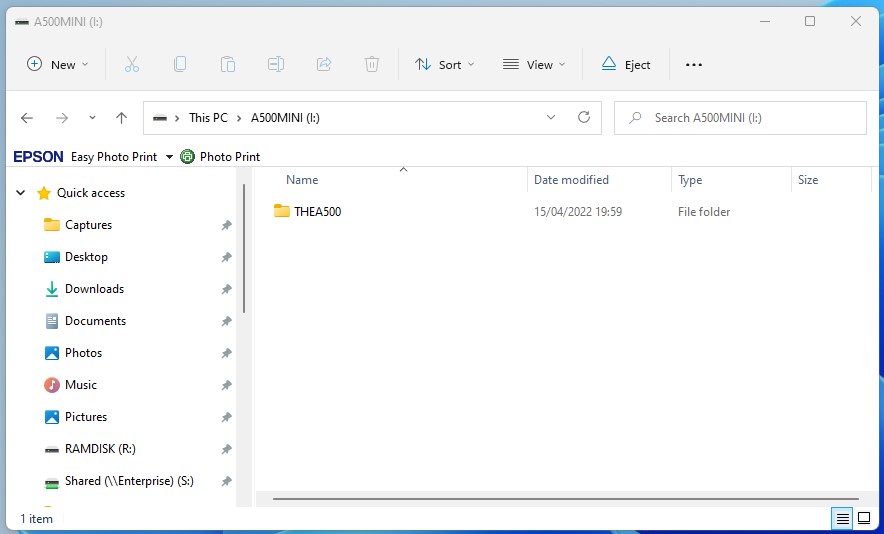
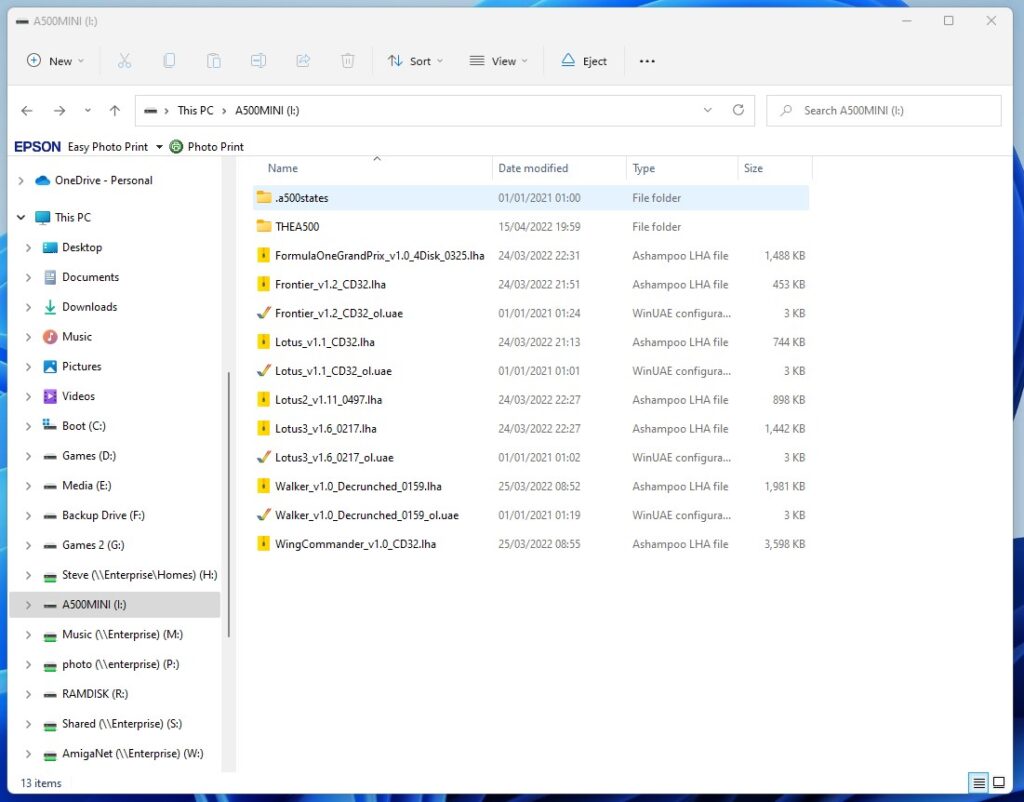
Once you’ve downloaded the ‘THEA500 WHDLoad Package v1.0.1 ‘ you simply unzip it to the ROOT of your USB stick. It should look like the screenshot below if you’ve done it correctly.


Games are simply copied into the root of the USB stick as well, or if you have a lot then you can also organise them into directories too. All the games must be in LHA format. I put a handful of games on my stick and it looked like the screenshot below. Note the ‘states’ directory and the various .uae files. These were all created by the A500 Mini itself and contain the save states and configuration options for my custom games. Don’t delete these files!
 

My USB Stick with a bunch of games ‘installed’.


The USB stick plugs into the spare USB port at the rear of the A500 Mini – assuming you aren’t using a USB keyboard of course.


The A500 Mini

A500 Mini with USB Stick plugged in.


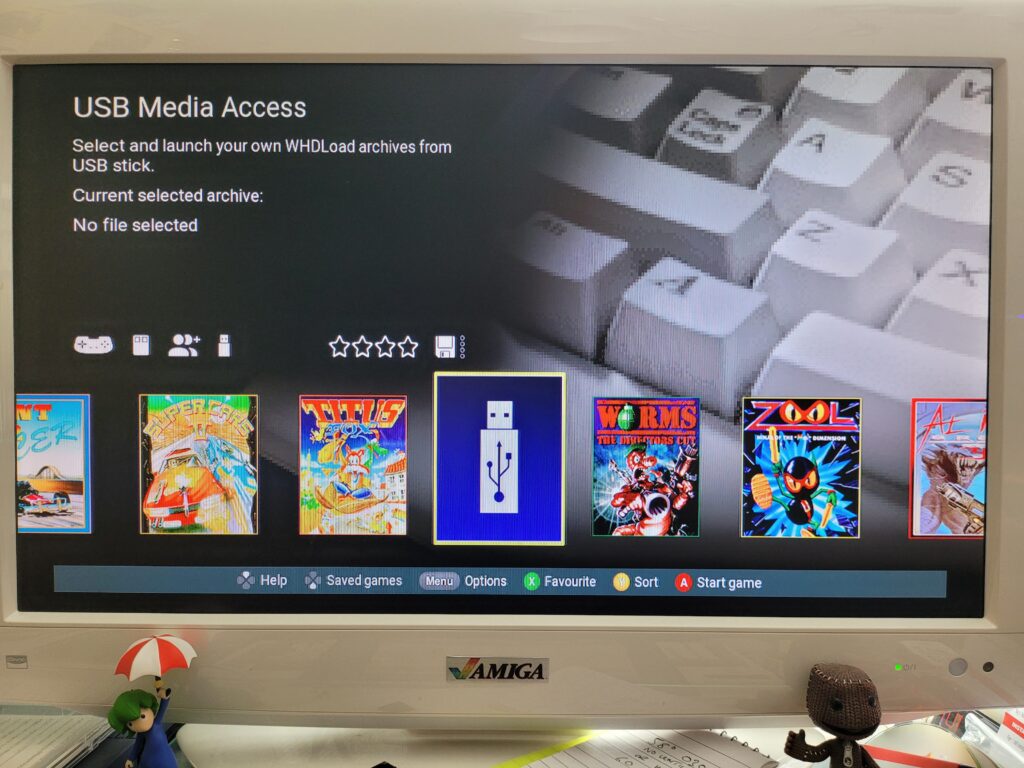
If it has been setup correctly then a USB Stick icon should appear on the carousel as shown in the photo below.
 

The A500 Mini

USB Stick icon on the carousel.


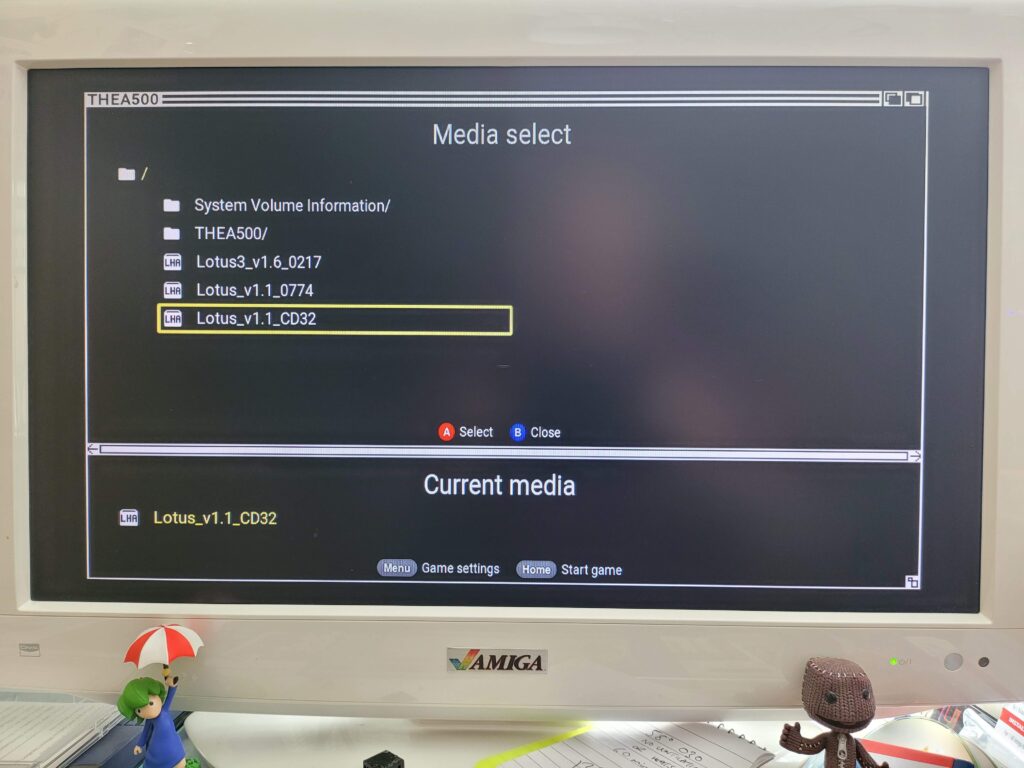
Clicking ‘Start Game’ will then bring up the contents of the stick. In my example below I had put a few Lotus games on my USB stick to experiment with.


The A500 Mini

Selecting a custom game.


When loading the games the drive activity LED finally sprang into life!


The A500 Mini

The A500 Mini Drive activity light.


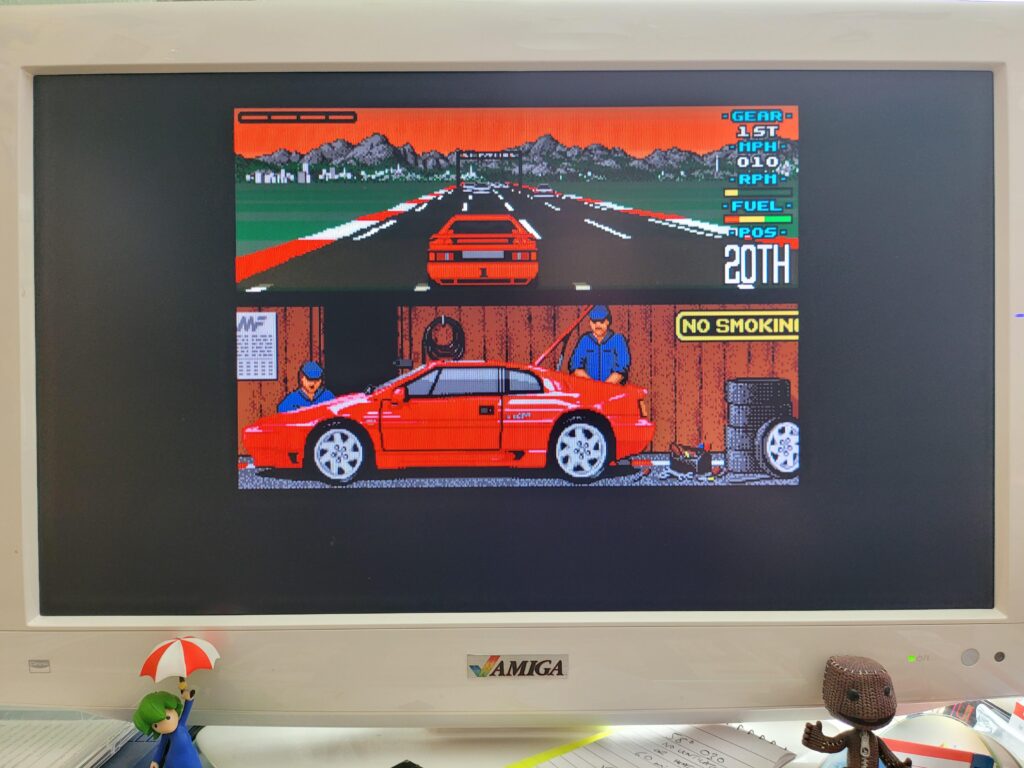
Lotus 1 loaded up and played just fine, but it was only using a fraction of the available screen space…


Lotus Turbo Esprit Challenge.


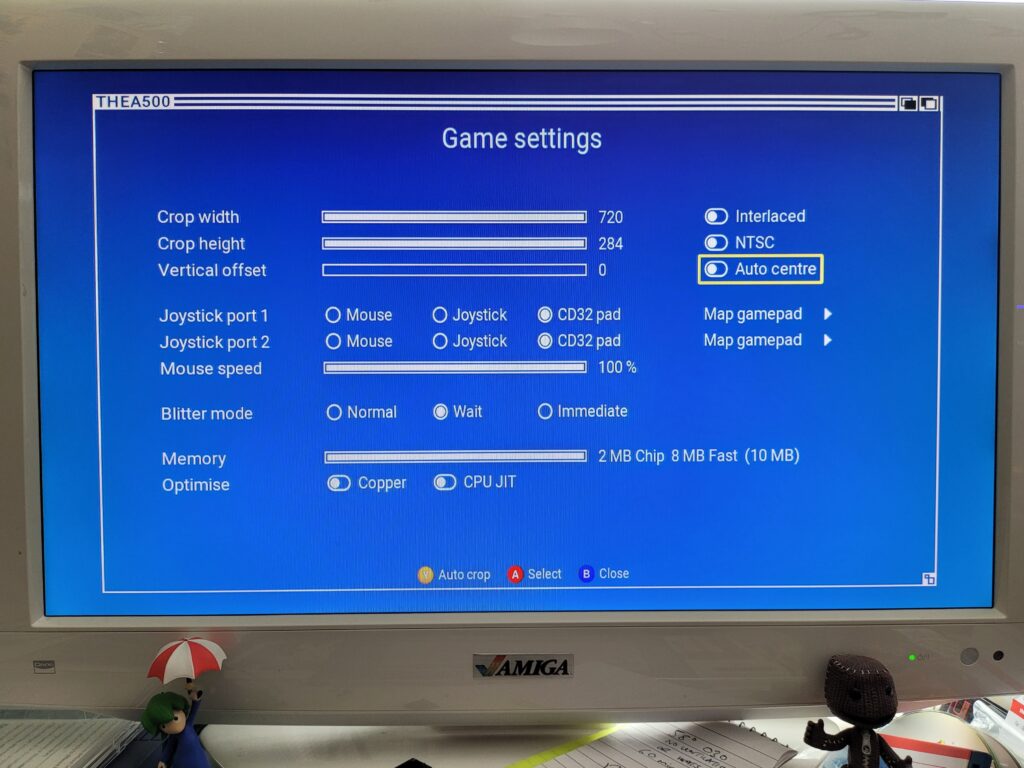
The Game Settings screen offers numerous tools to tweak how the game runs, including how it appears on screen.


The A500 Mini

Game settings screen.


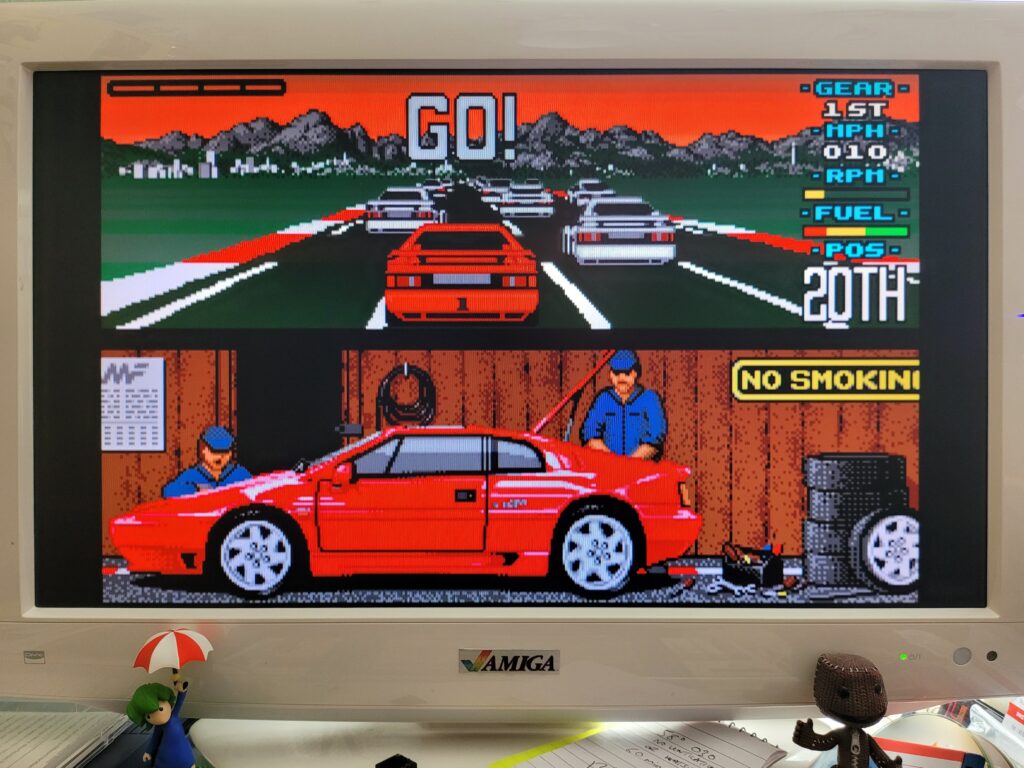
By using a combination of auto-centre and auto-crop I was able to achieve the result in the next photo which was infinitely better. These settings are remembered for each custom game too which means once you’ve only got to configure things the way you like then the one time.


Lotus Esprit Turbo Challenge looking much better now that it’s using most of the available screen.


Mouse support is disabled by default which I discovered when I loaded up Walker for a quick blast. This was easily solved by going into the Game Settings screen and enabling the Mouse on Joystick Port 1. I also had to adjust the sensitivity as it seemed way over-sensitive to me. Once I’d sorted those two things it played perfectly.


Walker.


I’m not sure exactly how powerful the A500 mini is but it’s definitely much faster than a stock Amiga 500 that’s for sure. Here’s a video of it running the intro from Frontier Elite 2. Anyone who has seen this running on a stock A500 will know that it really struggles to keep up the framerate during most of this 3D animated sequence. The A500 Mini on the other hand makes it seem effortless.


Wing Commander also ran super smooth too which I remember being another game that really needed a decent CPU to shine. It actually runs better on the A500 Mini than it does on my TerribleFire 330 equipped CD32 which has a 50Mhz 68030 CPU.


ADF Support

You may have noticed that I’ve made no mention of loading ADF disk images so far and that’s because they are simply not supported. I have to say that this is a huge disappointment for me personally as I’ve purchased a lot of modern day Amiga games and many of them only came in ADF format. I’ve also converted many of my old original physical game disks into ADF images and I’m unable to use any of them. Furthermore I have no idea how to create WHDLoad versions of any of my games so I am faced with either not being able to play these games on the A500 Mini or having to search around to see if anyone else has created WHDLoad versions of them. I really hope Retro Games Ltd. add this feature in a firmware update soon as it really limits the devices appeal at the moment for me personally.

Verdict

The A500 Mini is a beautifully designed and executed piece of kit and it seems evident to me that the guys who created it are passionate Amiga fans. The UI is beautiful and I love the slick implementation of save-states and simple to configure options to tweak my gameplay experience. The mouse and controller both look the part and work really well. Most importantly of all, the games appear to run great on the device and at an improved frame-rate too, for games that support it. The lack of a decent printed manual is a bit disappointing but hardly a deal-breaker. The lack of ADF support on the other hand is a bit more troubling and quite a let-down for me personally. If using ADF images is important to you too then maybe hold off until Retro Games Ltd. announce they’re going to add support for them. For anyone else thinking of taking the plunge though, just get one – you won’t regret it.

Amiga 1200 ‘Triple LED’ Adapter Kit

Amiga 1200 Triple LED Kit

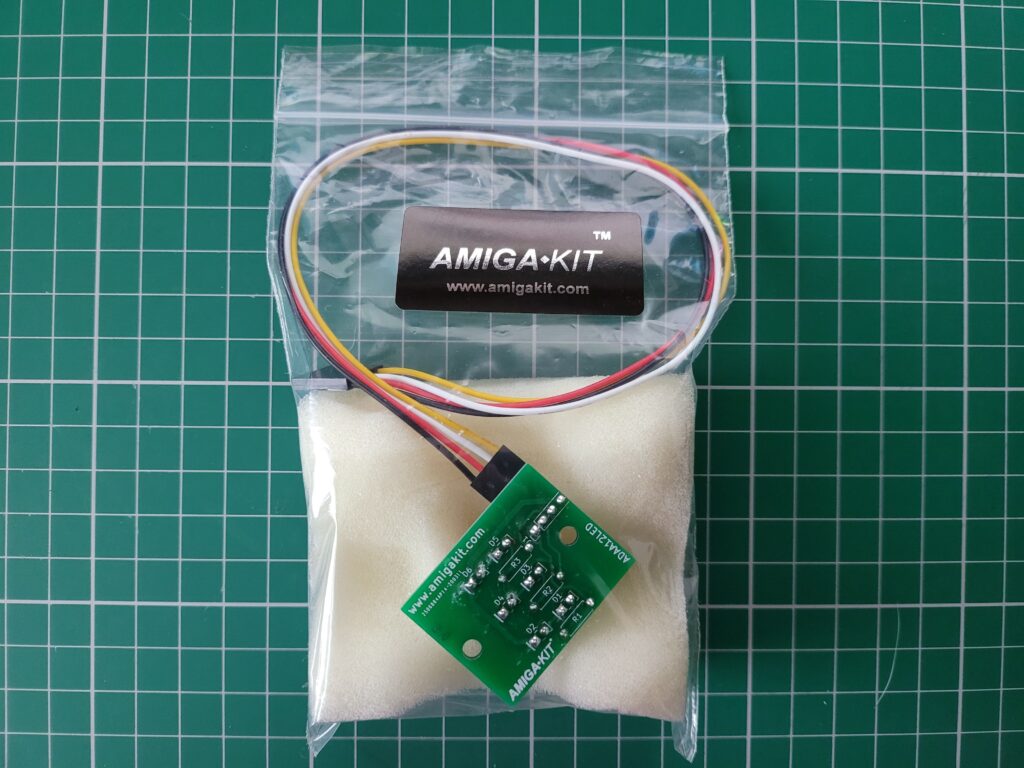
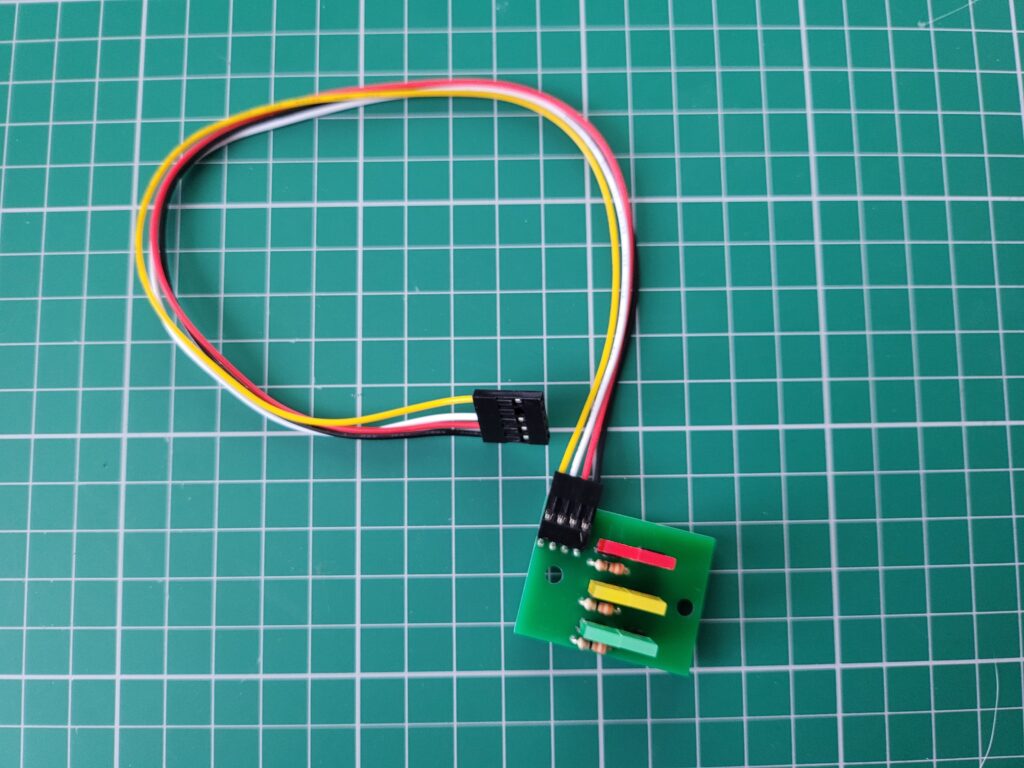
I recently spotted a neat little bit of hardware over on the AmigaKit website (they call it an ‘A1200 Triple LED Adapter’) that allows the user to change the colours of the Amiga 1200’s activity LED’s. A quick impulse purchase and a few weeks later the kit arrived, well packaged and protected in a zip-lock bag with a wad of foam to stop the LED’s from being damaged.


A1200 Triple LED Adapter

A1200 Triple LED Kit Packaging.


A Closer Look at the A1200 Triple LED Adapter

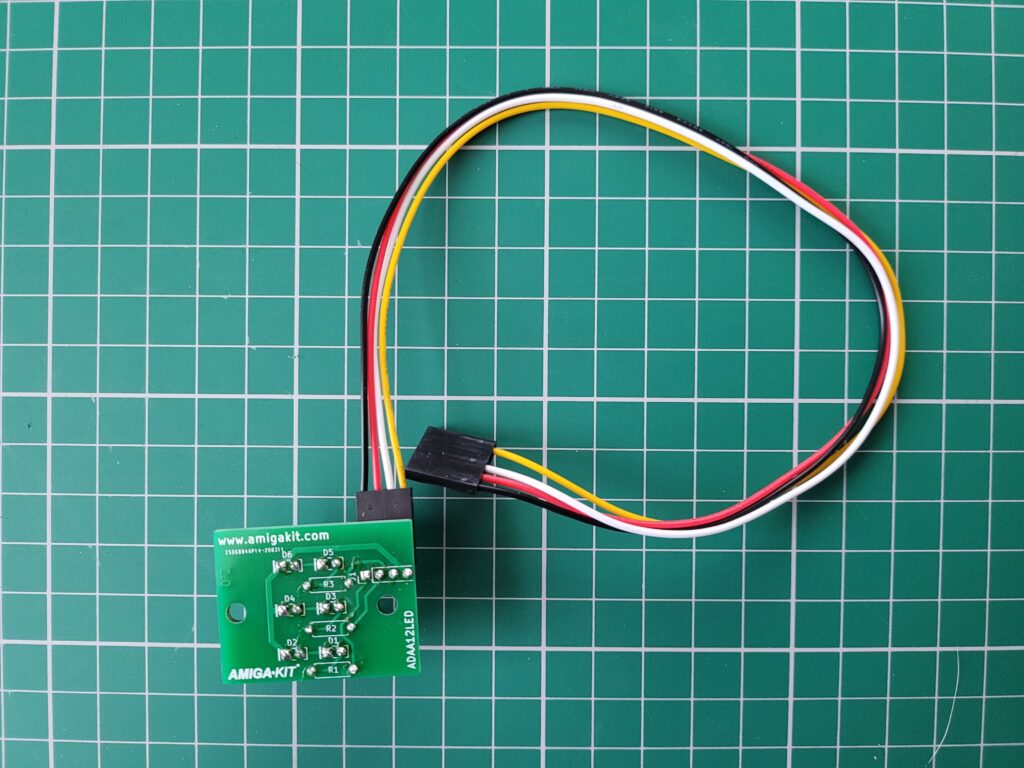
The adapter actually offers a number of small improvements over the Amiga 1200’s stock LED’s.  For a start the connector cable now incorporates a 4-pin plug that can easily be removed from the LED circuit board. This will be a real boon when opening up my A1200 in the future allowing the case lid to be removed easily without straining the soldered wire connections.


A1200 Triple LED Adapter

Back view of the A1200 Triple LED Kit.


The biggest benefit though is that the LED’s are now removable and completely interchangeable. When selecting the kit on AmigaKit’s website you can pick what colour you want each LED to be. I chose Red, Amber and Green to represent HDD, FDD and Power activity respectively. They sell spare LED’s too in case you should need them in future which is good to know.


A1200 Triple LED Adapter

Here you can clearly see the 3 coloured LED’s.


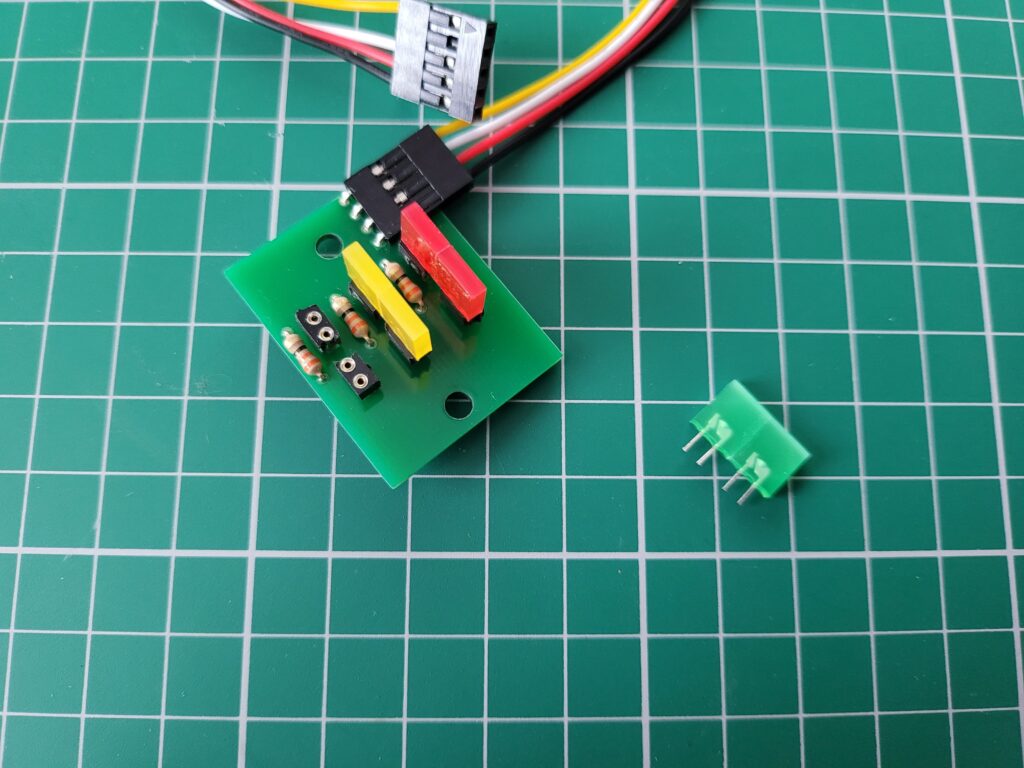
The LED’s are all socketed and they can be removed by simply pulling on them gently so if you change your mind and want a yellow power LED – no problem!


A1200 Triple LED Adapter

A1200 Triple LED Kit with one of the LED’s removed revealing empty socket.


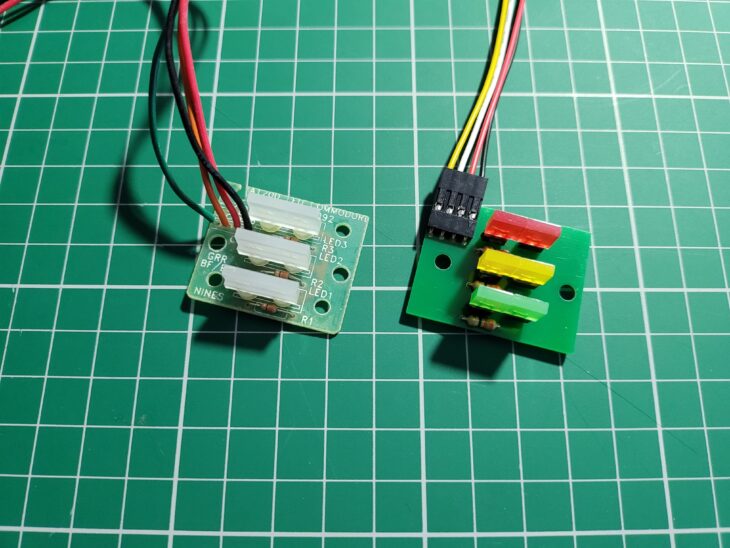
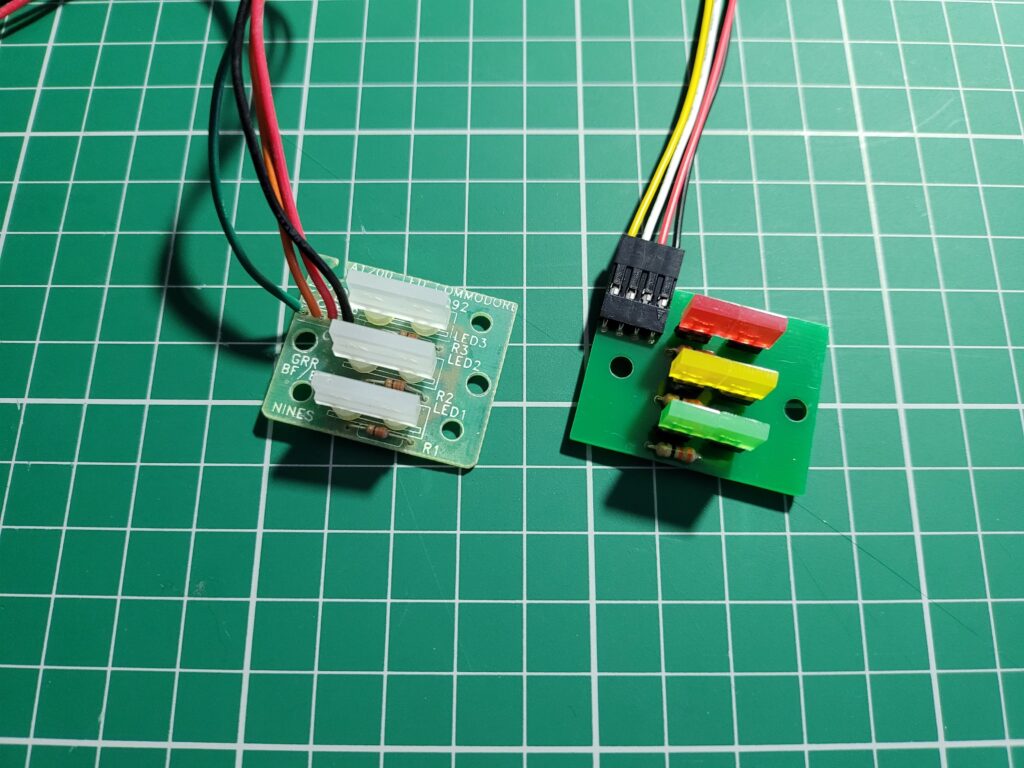
In the photo below you can clearly see the difference in the LED’s. The original A1200 board features transparent LED’s that light up pale yellow/orange/green colours when powered. By contrast the new board has coloured LED’s that I think provide deeper and more pleasing colours when illuminated.


A1200 Triple LED Adapter

Original LED board on the left, new one on the right.


Fitting the Kit

Fitting the new LED’s couldn’t be any simpler really. Start by removing the two phillips screws holding the old board to the case. Keep them safe as they will be needed to fix the new board in place shortly.


A1200 LED board

Original LED board attached to case with two Philips screws.


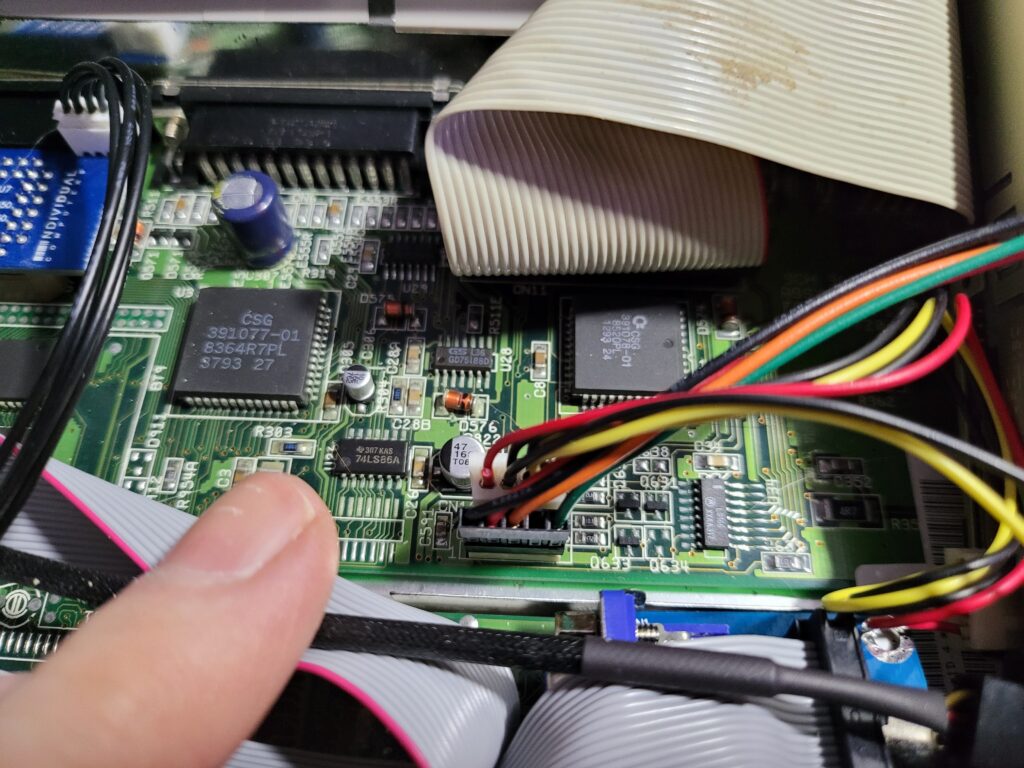
Unplug the power LED from the A1200’s mainboard. In the photo below it’s the lower (black) connector. The white connector is for the floppy drive. The old board can now be completely removed and stored away safely in case you ever want to put it back.


Amiga 1200 mainboard

Amiga 1200 original LED power connector on mainboard (the lower of the two).


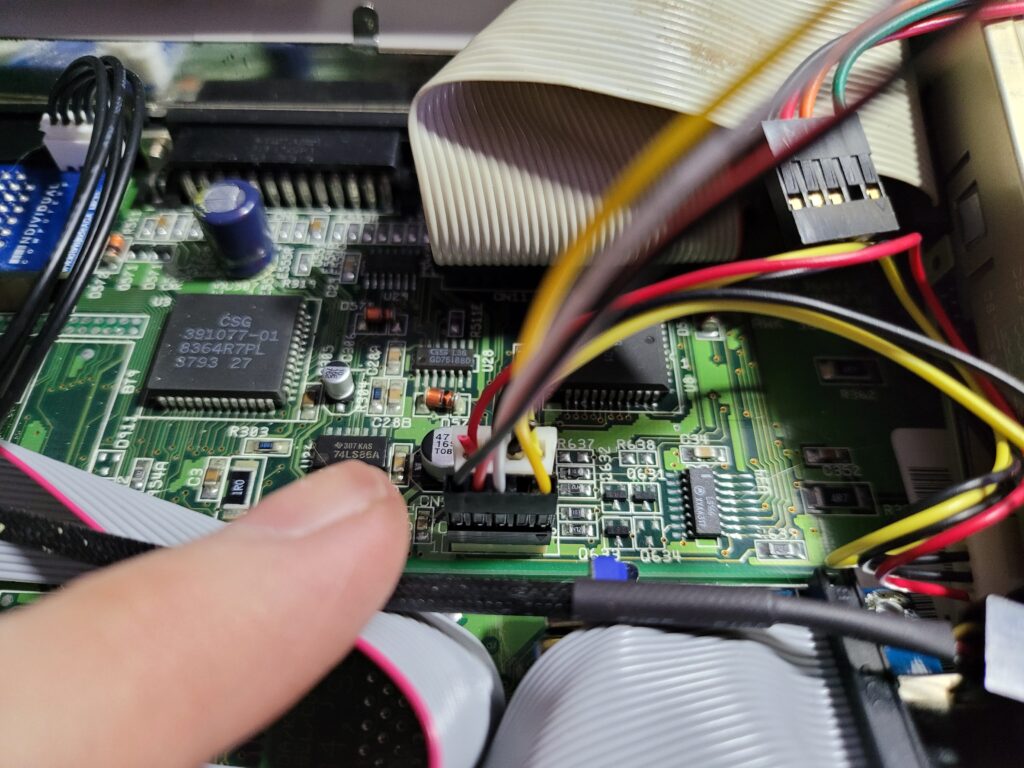
Fitting the new board is basically the same procedure in reverse. Start by connecting the power cable to the board. The colouring is slightly different with the new wiring but just make sure the black cable goes on the left (below photo).


Amiga 1200 mainboard

Amiga 1200 new LED power connector on mainboard (the lower of the two).


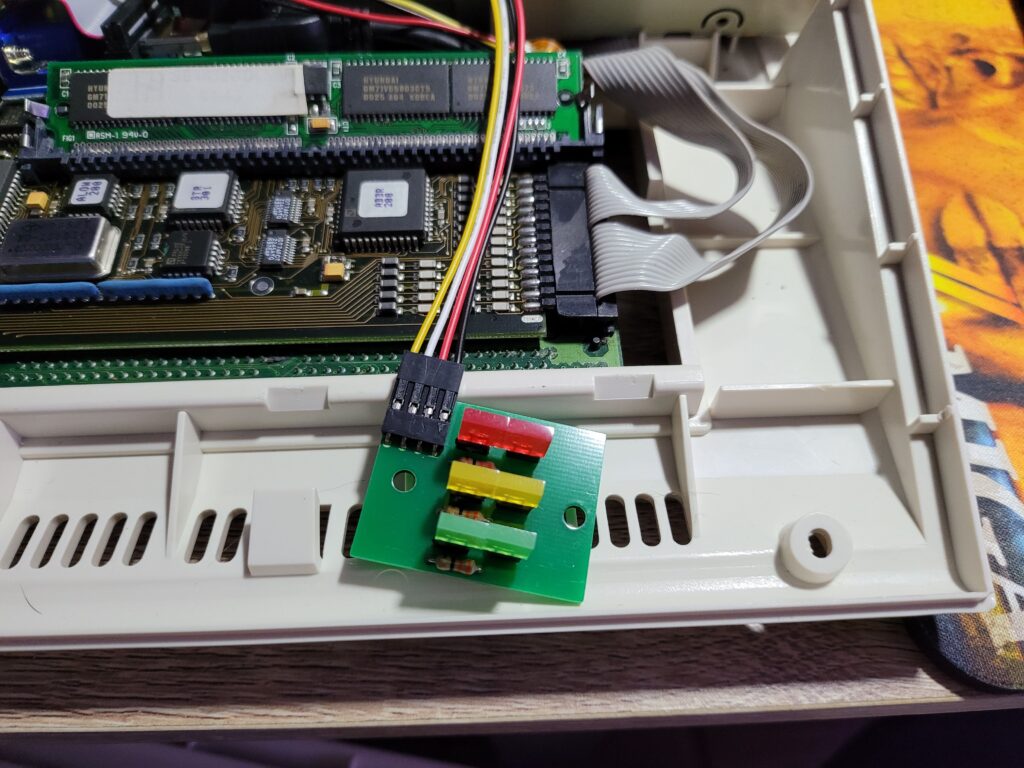
Before fitting the board to the case make sure you orient it correctly; the power cable connects to the top of the board. Don’t forget to thread the cable through the square hole in the metal keyboard frame too!


A1200 Triple LED Adapter

New triple LED adapter connected and ready to be attached.


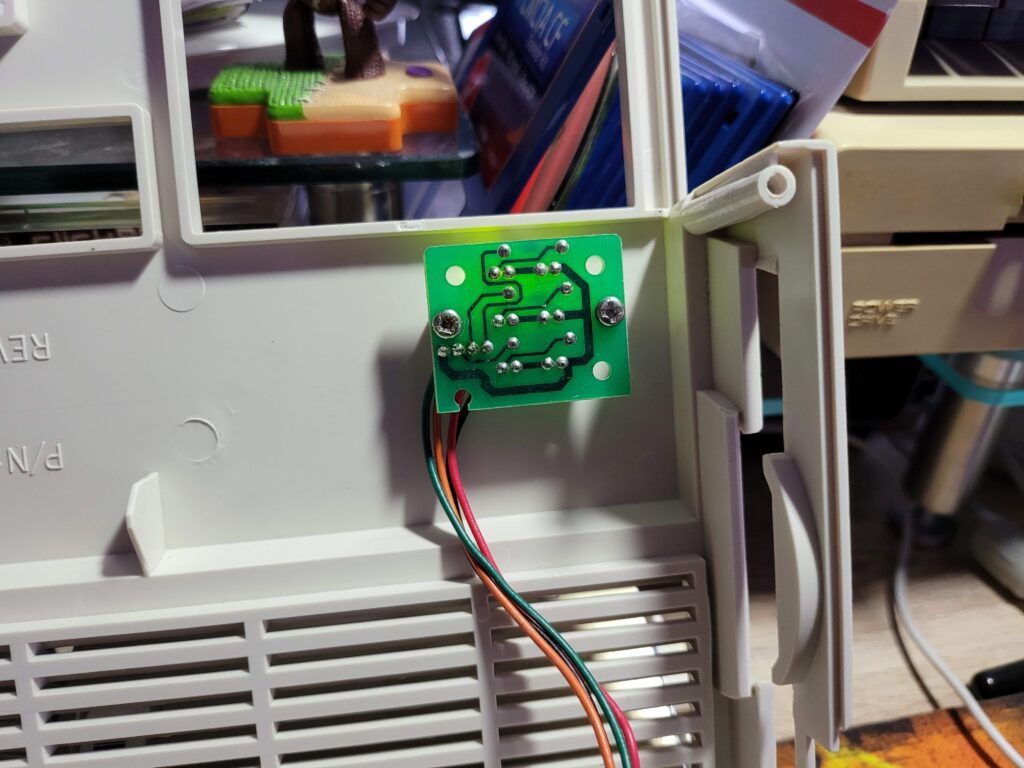
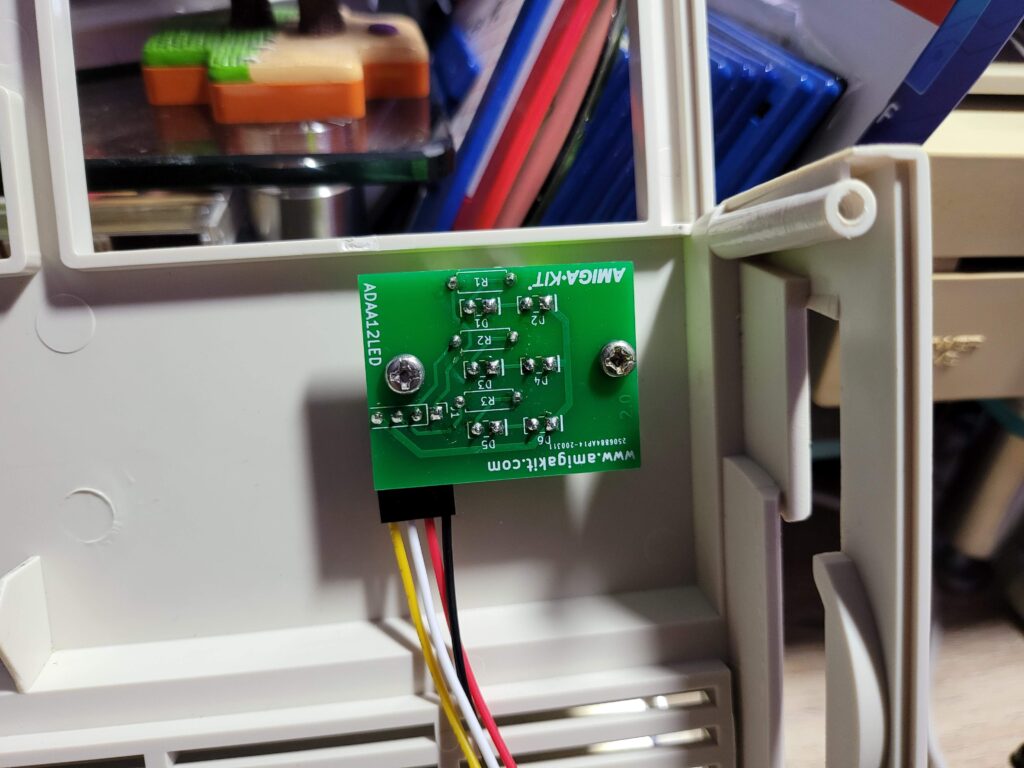
Attach the board using the two phillips screws that you removed earlier. The correct board orientation can be seen in the photo below.
 

A1200 Triple LED Adapter

New A1200 Triple LED adapter attached to A1200 case lid.


At this stage it might be worth a quick power up to check that the LED’s are working. Assuming all is good, carefully reassemble the case and the upgrade is complete. If not, check the connector is pushed all the way down onto the pins and that it’s oriented correctly.


Finished Result

I found the new LED’s to be ever so slightly narrower than the original ones so there’s a tiny gap left on either side of them. However it’s hardly noticeable, especially once they’re actually illuminated.


A1200 Triple LED Adapter

LED kit fully fitted.


I recorded a quick video to demonstrate what the drive activity LED’s look like in use. I’m very happy with the results and would definitely recommend this kit to anyone that wants to spruce up their A1200 a bit.


A1200 PCMCIA Reset Bug – Hardware Fix

PCMCIA Reset Fix

The A1200 PCMCIA reset bug is an annoying glitch in the implementation of the card slot on the A1200 that was never fixed by Commodore. In a nutshell the Amiga 1200’s Gayle chip fails to reset PCMCIA cards during system resets such as when you press ‘CTRL A A’. Whether this is an issue for the user largely depends on the card being used but my network card is definitely one of those that is affected by the bug. Without either a software or hardware fix it requires a full power cycle to restore card functionality every time the bug manifests.

I’ve written about this issue before where I described fixing it using two command line programs called CardPatch & CardReset on Aminet. That software solution served me pretty well up until recently when I ran into the issue again after doing a clean AmigaOS3.2 install. After scratching my head wondering why Roadshow wasn’t working I decided it was time for a permanent hardware fix so that I would never encounter the issue again.

My Hardware Fix

A quick browse around my favourite Amiga suppliers revealed that AmigaKit made one such device and they had it in stock. Fast forward a couple of weeks and I had one sitting on my desk.

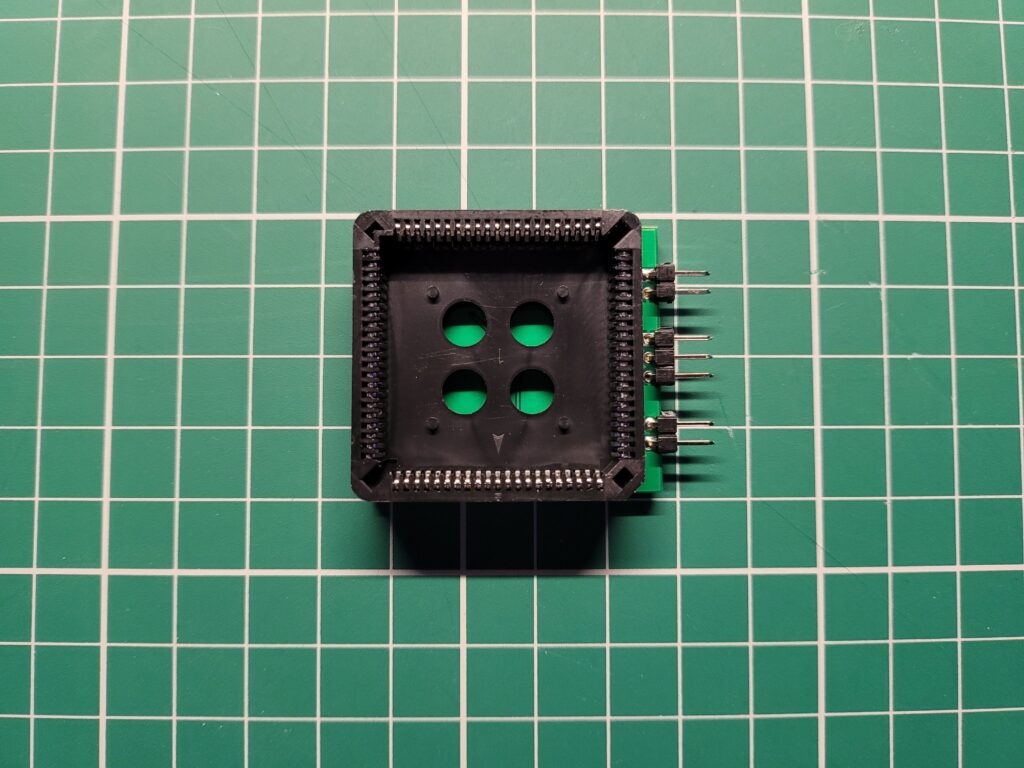
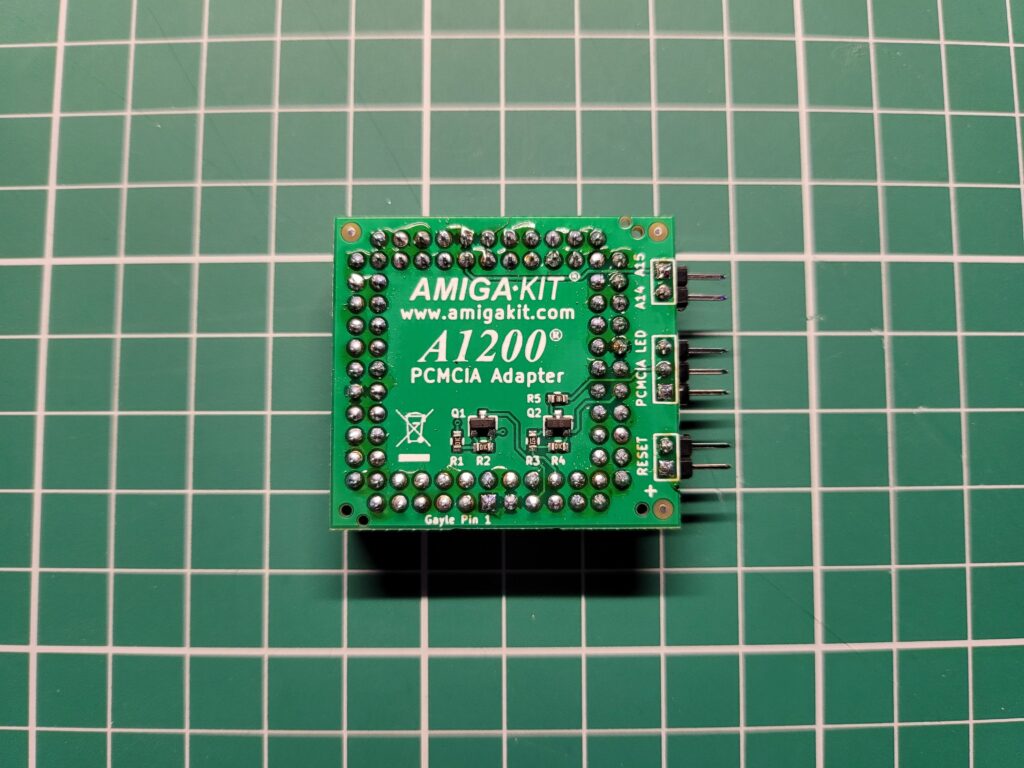
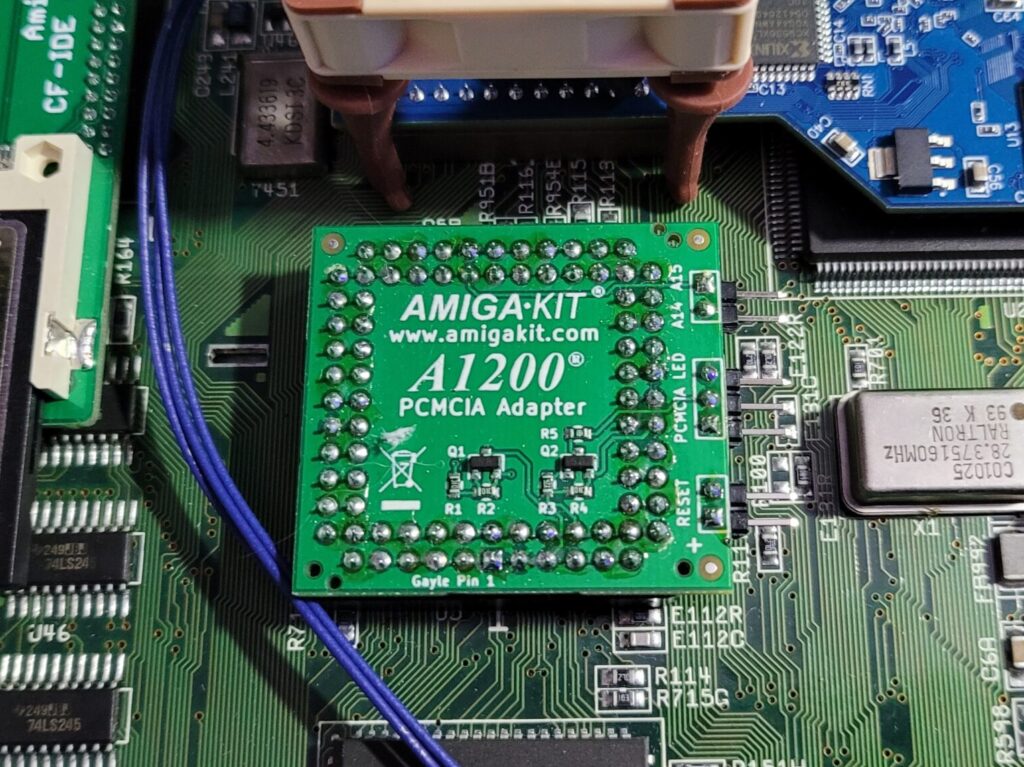
The adapter consists of a PLCC socket attached to a small circuit board that contains the electronics for the fix.


A1200 PCMCIA Reset Bug

AMIGAKIT A1200 PCMCIA Reset Bug-fix Adapter (PLCC socket side).


Besides the reset bug fix the device also includes pin headers for attaching a reset switch, a PCMCIA activity LED and also A14 and A15 signals for other devices such as clockport expanders. It’s a well made, neat little device.


A1200 PCMCIA Reset Bug

AMIGAKIT A1200 PCMCIA Reset Bug-fix Adapter (circuit board side).


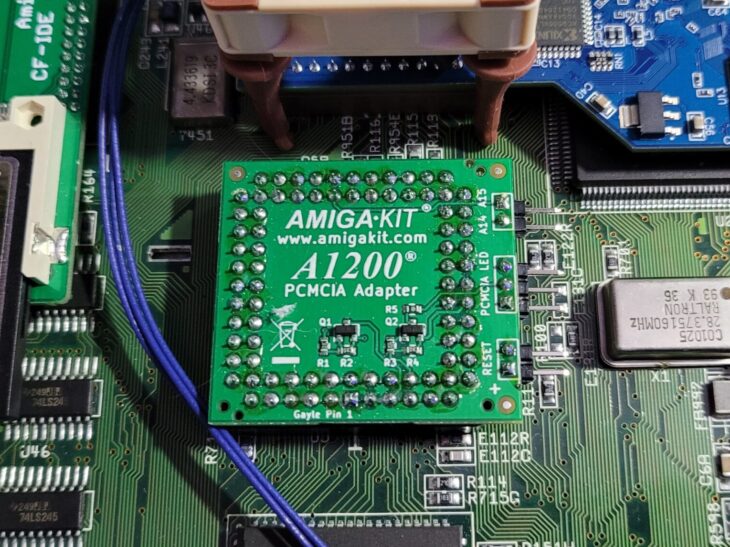
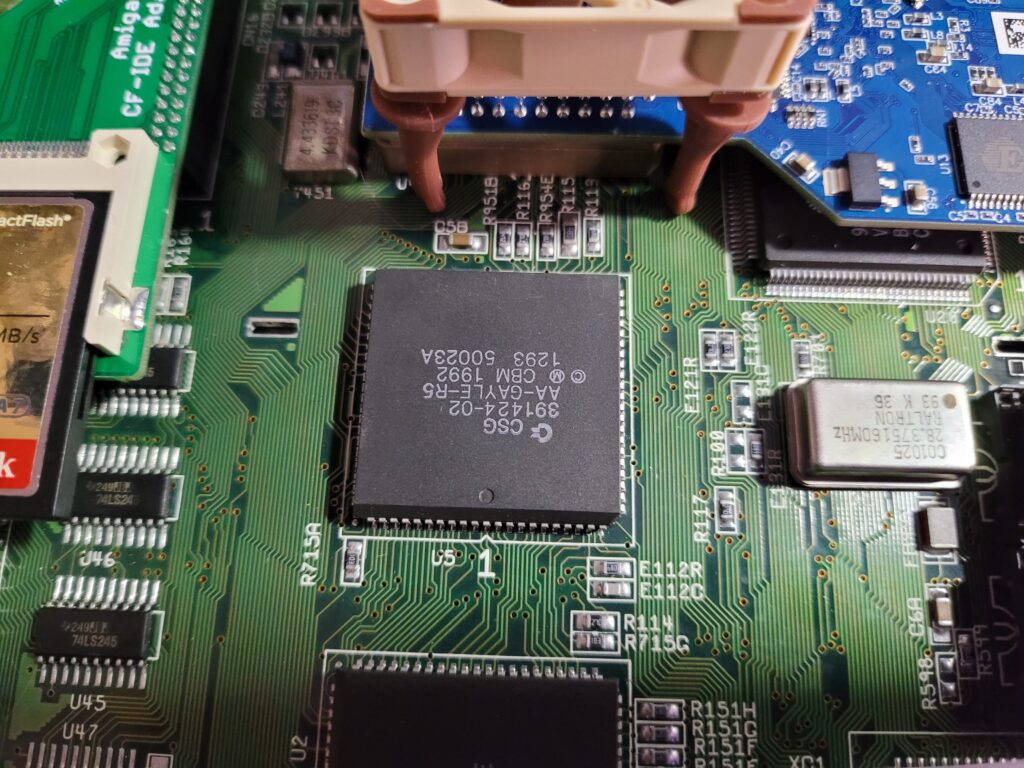
The device is designed to sit on top of the A1200’s ‘GAYLE’ chip which is where the fault stems from.


Amiga 1200 GAYLE chip (centre of the photo).


Installing the Adapter

To install the hardware fix you simply place the PLCC socket over the top of the GAYLE chip. However before doing this you must make sure that the device is oriented correctly otherwise it won’t work and may even damage your Amiga.

The adapter circuit board has ‘Gayle Pin 1’ written along the bottom edge and if you look closely on the A1200 mainboard below the Gayle chip you will see a ‘1’ marked beneath it (when viewing from the front). Make sure that these two are on the same side. Another, probably easier, way to tell is that the writing on the board should be the right way up once installed (viewing from the front). The pin headers should point towards the right hand side of the machine where the floppy drive is and away from the PCMCIA port too.

It takes a some force to get it to seat properly and the top of the board is not particularly finger friendly so be careful. It should click into place securely and not wobble around at all.


PCMCIA Reset Fix

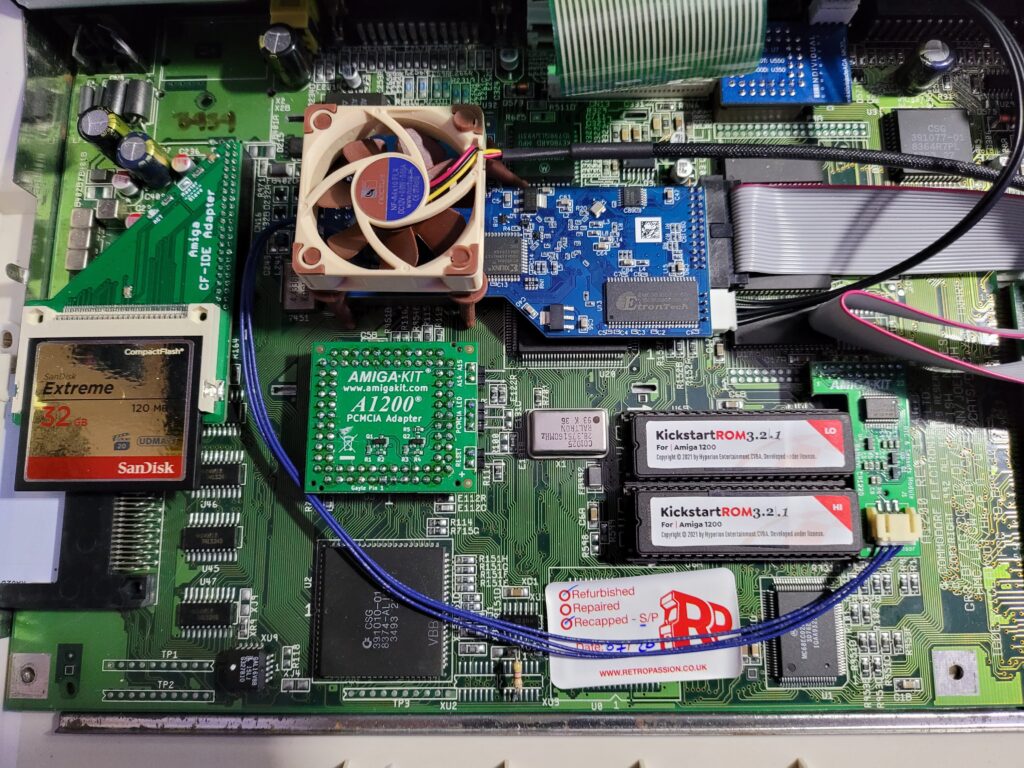
AmigaKit PCMCIA Reset Fix installed on the Gayle chip. Note how ‘Gayle Pin 1’ on the adapter lines up with the ‘1’ on the mainboard.


There’s nothing else to connect and no software to install. Once the device has been installed you can close up the A1200’s case and switch it on.


A1200 PCMCIA Reset Bug

My Amiga 1200 mainboard sporting a number of extra expansions.


If everything has gone to plan the Amiga will boot up normally with no visible signs that anything has changed… except that PCMCIA cards will just work as intended now. No more unresponsive network cards after a reset from now on then!
I’ve had the device fitted for a week now and experienced no issues with my cards since. It does exactly what it says on the tin.
The expansion pin headers on the board are an interesting addition. I’ll probably add a reset switch to it in the near future as that would definitely come in handy. Not sure about the PCMCIA LED as I don’t use my CF adapter that often.

Anyway, if  you are coming up against the A1200 PCMCIA reset bug and want a ‘fit and forget’ solution I highly recommend this; it’s cheap, easy to fit and does the job.

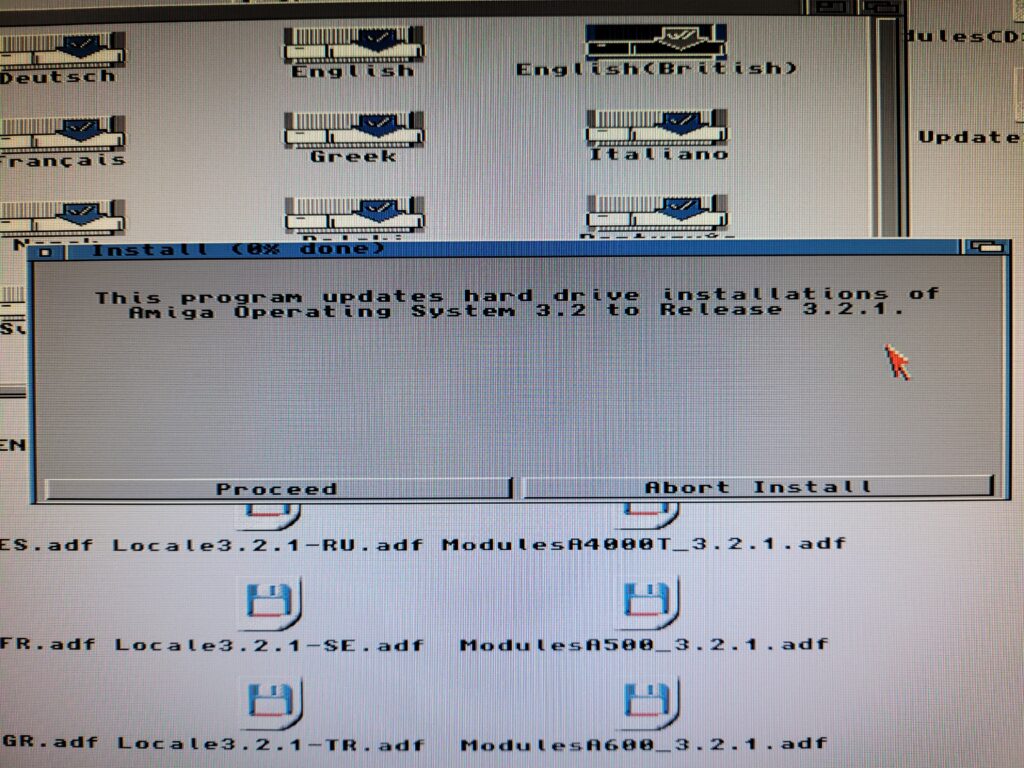
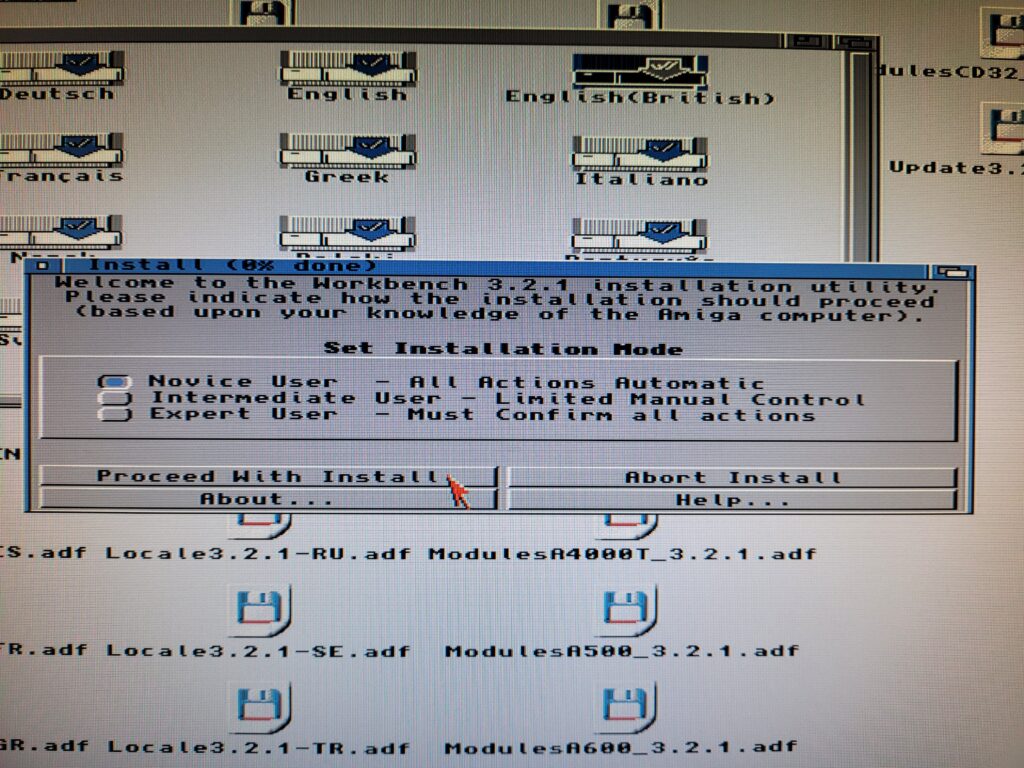
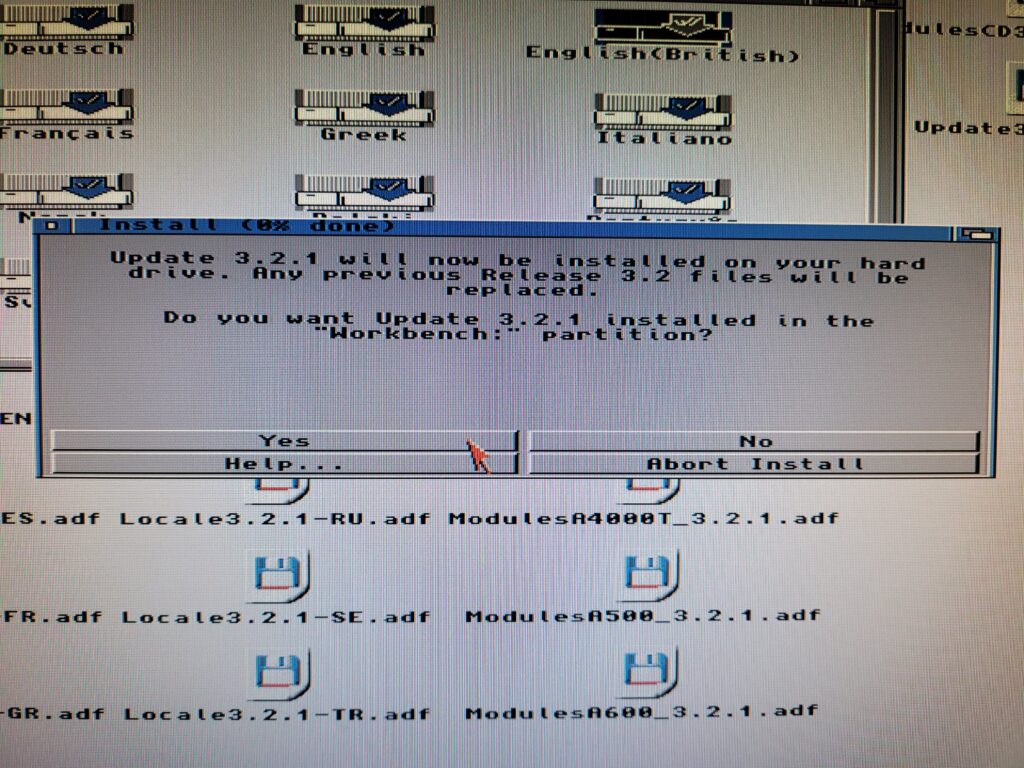
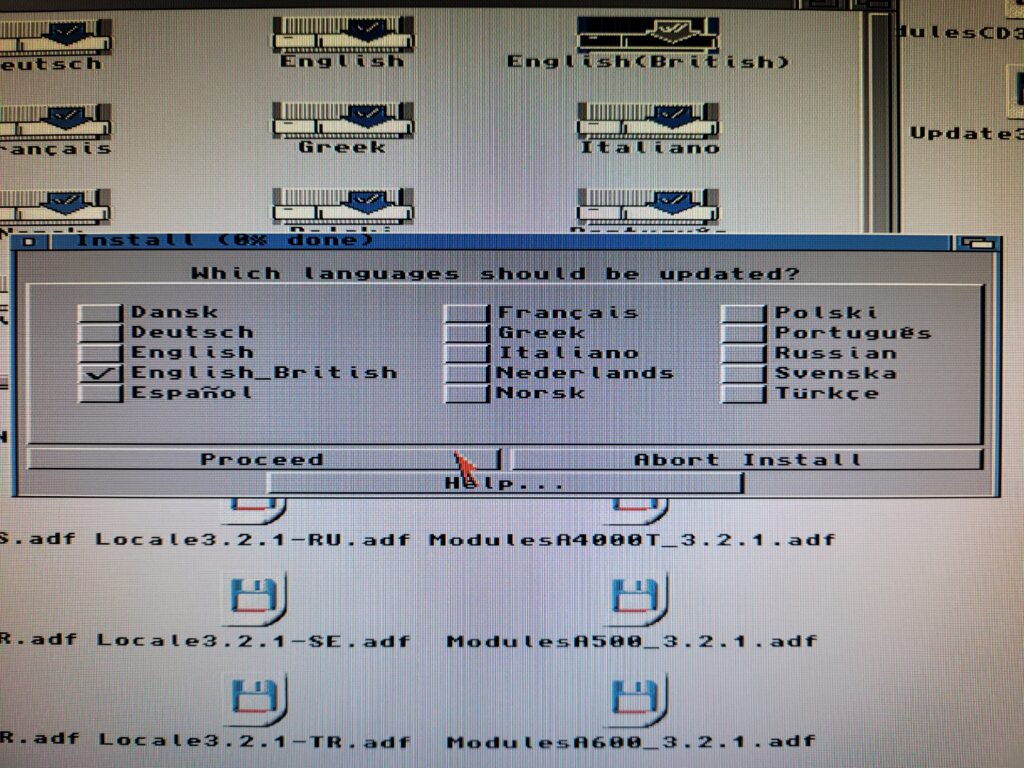
Upgrading to AmigaOS 3.2.1

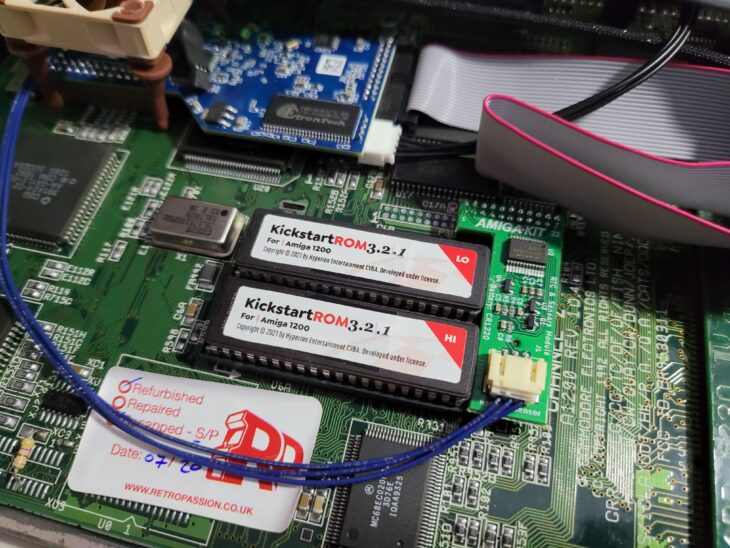
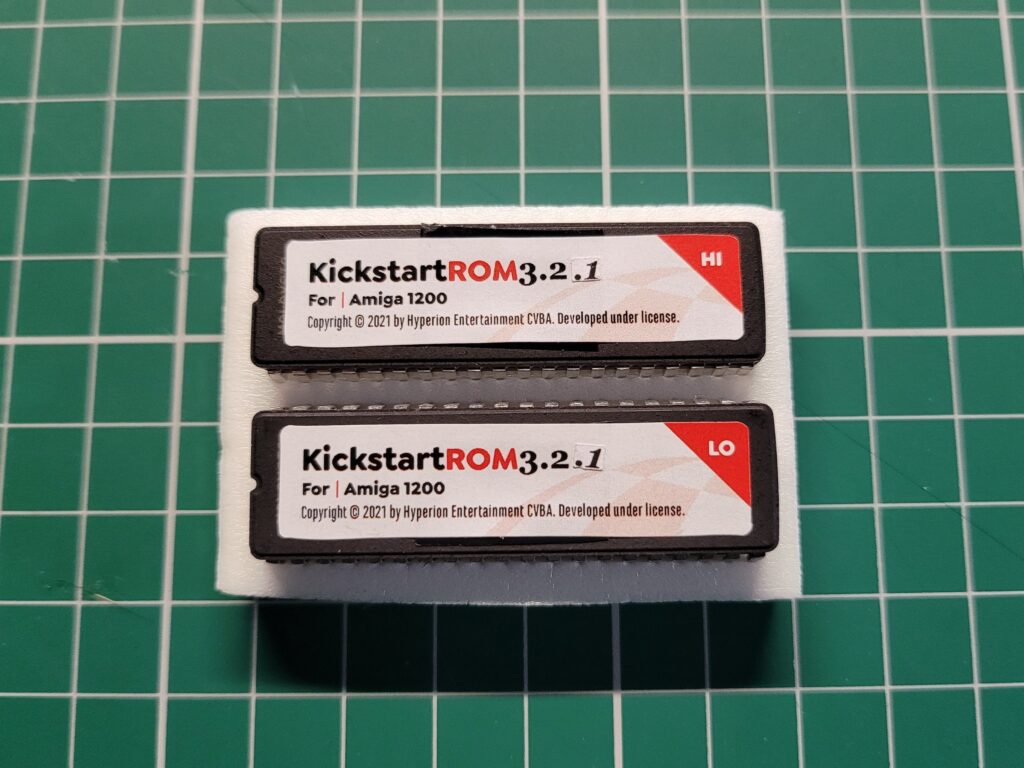
Kickstart 3.2.1 ROMS

I’ve not even had my Kickstart 3.2 ROMS installed in my Amiga 1200 for a month and I’m already replacing them! Why? Because AmigaOS 3.2.1 was released by Hyperion in December 2021. This incremental update fixes a number of issues and also adds a few new features so naturally I wanted to get my hands on it. Strictly speaking the physical ROMS are not required as you can map copies of them into RAM. However I wanted the real deal so ordered a set from AmigaStore.eu as this was were I bought AmigaOS 3.2 from. They arrived quickly and well packaged (along with an SDBox I ordered at the same time).


AmigaOS 3.2.1

AmigaOS 3.2.1 Kickstart ROMS for the A1200


Installing the ROMS

Naturally the first thing I did was to open up my A1200 and fit the two new ROM chips. If you are looking for more comprehensive instructions on how to do this you can follow my guide here. The important things are to get the ‘HI’ and ‘LO’ chips in the correct sockets, that you orient them correctly (notched end of chip goes next to notched socket) and finally that you leave the last pair of pins in each socket empty as the sockets have 42 pins whereas the ROMS only have 40.


Removing the ROMS with a chip puller.


Before going any further I booted up my Amiga to make sure everything was working and that the new Kickstart ROMS were the correct version. Sure enough Workbench reported a Kickstart Version of 47.102 which is the 3.2.1 edition. Happy days.


Kickstart 3.2.1 version

Kickstart 3.2.1 (version 47.102).


Next I needed to obtain the 3.2.1 Workbench update. This is a free download from Hyperion but does require you to register your copy of AmigaOS 3.2 before it will allow you access. This requires the little code that was stuck onto the cellophane wrapper of the AmigaOS 3.2 box. The update comes in the form of a 15MB LHA archive that includes Kickstart ROMS should you need them.


Installing AmigaOS 3.2.1

AmigaOS 3.2 introduced native support for ADF image files so I thought I’d make use of this feature to update Workbench.


Contents of the Update3.2.1 LHA Archive

Contents of the Update3.2.1 LHA Archive


The LHA archive unpacks into a single Update3.2.1 folder that includes everything necessary to get things up and running. Opening up the ADF folder reveals 26 ADF’s and it’s these we need to do the upgrade.


Contents of the ADF Folder.


The ADF we need to get the ball rolling is called ‘Update3.2.1’. Simply double-clicking it opend that ‘disk’.


The Update3.2.1 ADF Image


It will then appear on the desktop just as if you’d inserted it into a physical drive yourself.


It all Starts with the Update3.2.1 disk.


Opening that disk, and then the Install folder within it, reveals a bunch of different country-specific installers. I went for the English(British) option as I’m in the UK.


Contents of the Install Folder,


Go!

The install process is now underway and we just need to click ‘Proceed’ to begin.


AmigaOS 3.2.1 Upgrade

AmigaOS 3.2.1 Update Begins


The first choice to make was picking an installation mode. I left it on the default ‘Novice User’ option as I’ve not done much customisation to my A1200 since doing a clean install of 3.2 a few weeks ago.


Installation Mode

Selecting the Installation Mode.


A warning pops just to confirm you are happy to proceed with the update which will obviously replace a bunch of your 3.2 files in the process. I clicked ‘Yes’ to proceed.


Installer

Confirming the start of the upgrade.


Next up you get to choose which language(s) you want. Check the boxes next to the one(s) you would like and then click ‘Proceed’.


Installer

Language selection.


It’s at this point that the installation really starts and files get copied across.


Amiga Installer

Files copying across.


Now I thought I was going to need to select each ADF as and when the installer requested a new disk. However that wasn’t the case at all. Something pretty cool happens during the install – it mounts and unmounts each ADF image as it needs them – automatically. During the install you see a bunch of disks appear and then disappear on the Workbench like magic. Impressive stuff indeed.


Mounted ADF image file

ADF images are switched on the fly.


Thanks to the auto-switching virtual disks the update only takes about a minute to complete. Once finished it asks you to click ‘Proceed’ to reboot your Amiga. It was at this point that I got my second pleasant surprise – my Amiga automatically rebooted itself! Many installers have the same message at the end but I don’t recall any that actually rebooted the machine before.


Installer complete

Upgrade complete.


Once Workbench had loaded back up I did another quick check of the version numbers. Reassuringly Workbench was reporting being 47.3. Combined with Kickstart being 47.102 this confirmed that my upgrade to AmigaOS 3.2.1 was complete.


AmigaOS 3.2.1

Both Workbench and Kickstart displaying correct versions.


New Feature – Eject

This release includes a lot of bug fixes and a number of new features too. Out of all of them though, the one I was most excited to see was also probably the most trivial. The Amiga now has an ‘Eject disk’ option under the Icon menu! Not unsurprisingly this lets you eject any disks that supports this feature. It was probably mainly intended for un-mounting ADF images but it also works with physical drives. I tried it out on my SCSI CD drive and it worked like a charm it also worked well with my Iomega Zip drive. Sure this was possible before via 3rd party programs but to have this feature natively available in Workbench is a first and worth upgrading for alone in my book.