Lyonsden Blog

Tag - Cassette Tape

C64 Tape Pulse Visualizer

C64 Tape Pulse Visualizer

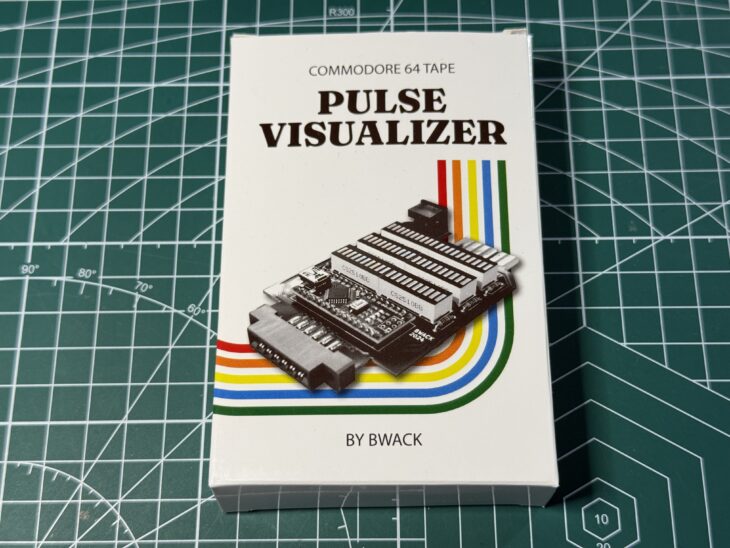
This cool looking Gizmo is the ‘C64 Tape Pulse Visualizer’ and is the creation of a guy who goes by the handle of @BWACK on the internet and has been manufactured and supplied by the good folks over at Shareware Plus.
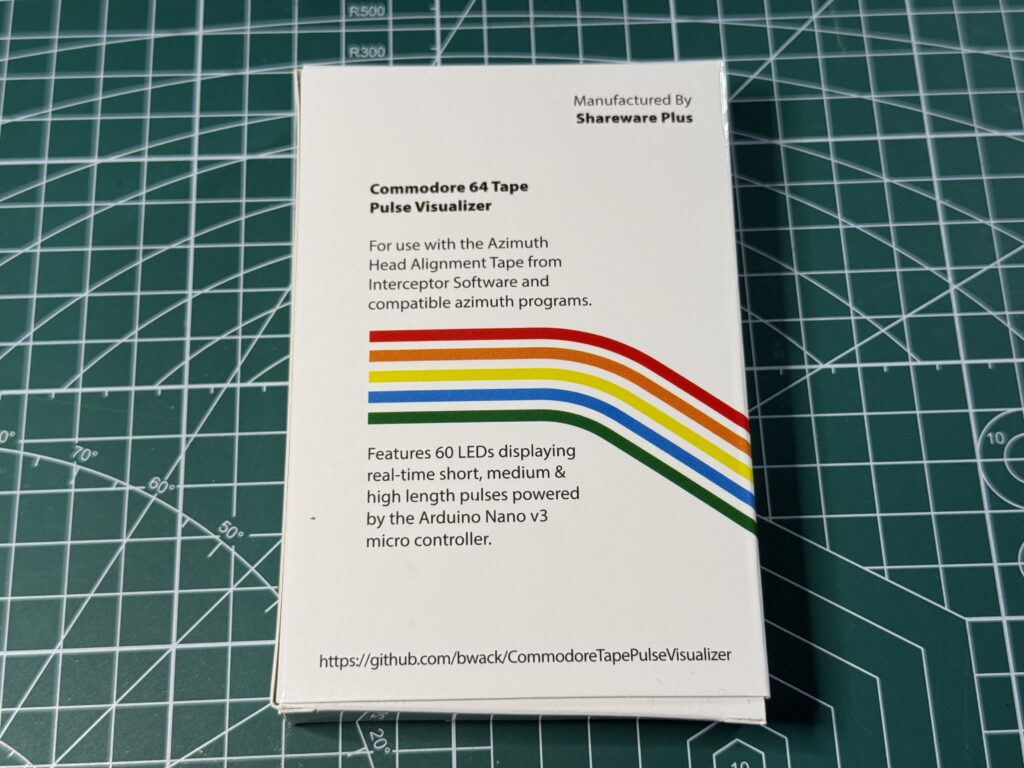
 

Back of the box.

Back of the box.


Inside the cartridge sized box you get the visualizer itself along with a card that gives a little info about the device along with a link to @BWACK’s github page.
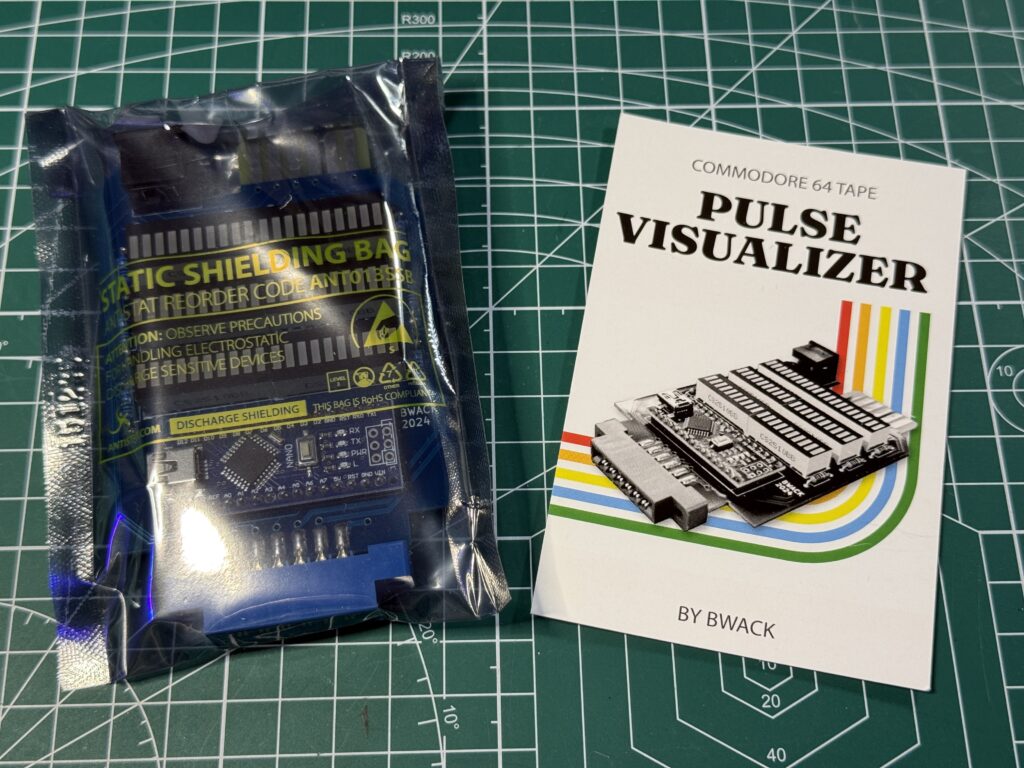
 

C64 Tape Pulse Visualizer

C64 Tape Pulse Visualizer – What’s included.


The device comprises six 10 segment ‘light bar graph’ LED display modules, each with an accompanying resistor, an Arduino Nano v3 and finally the pass through connectors for your datasette.
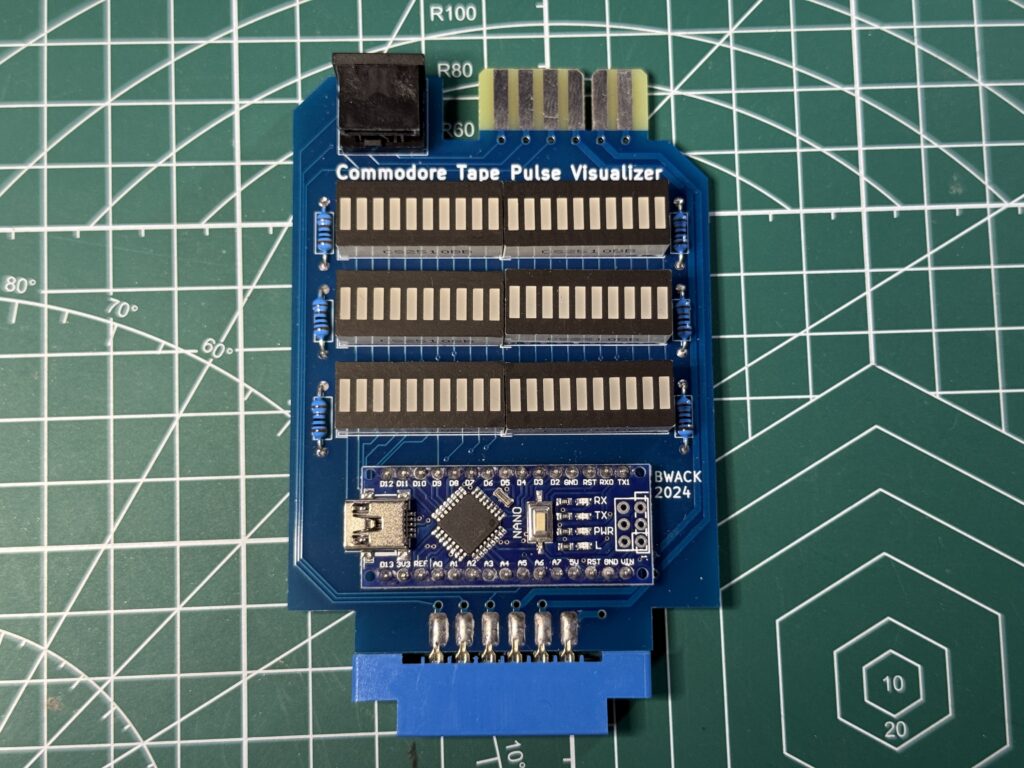
 

C64 Tape Pulse Visualizer

C64 Tape Pulse Visualizer Device.


The odd looking 7 pin mini DIN socket on the top left corner is so you can use it with the tape decks that came with the Commodore 16 and/or Plus 4. This is a thoughtful addition if you have one of those systems (sadly I don’t).
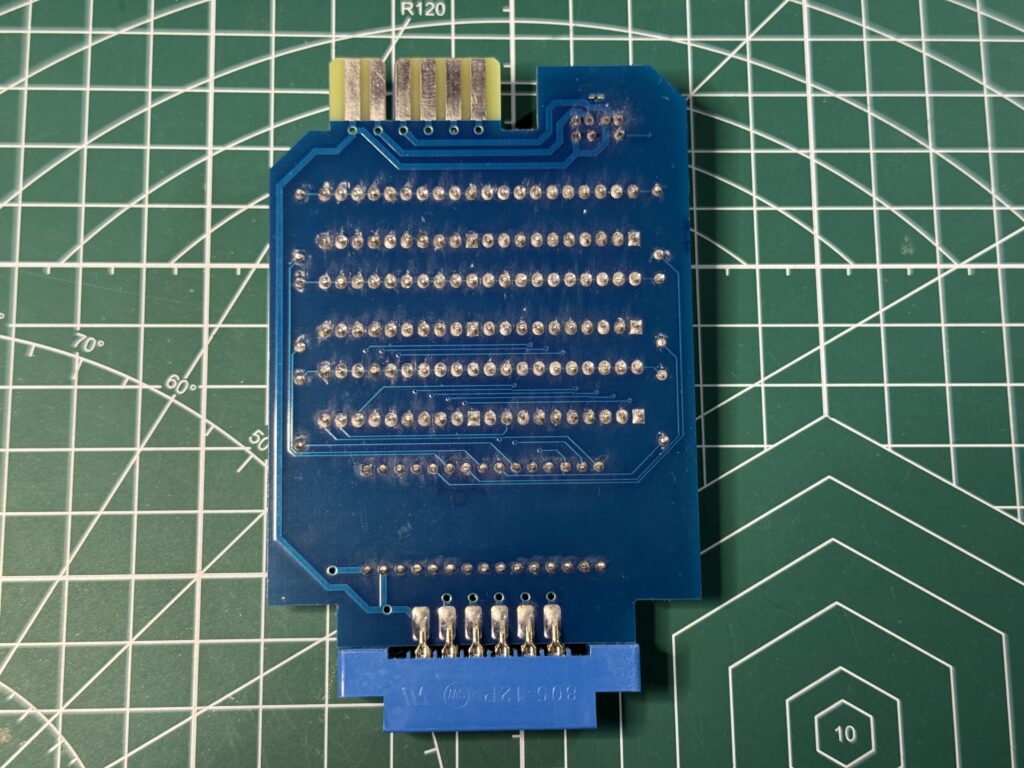
 

C64 Tape Pulse Visualizer

Reverse side.


The back of the PCB isn’t very interesting at all with no components on show, just a bunch of solder joints.
 

C64 Tape Pulse Visualizer

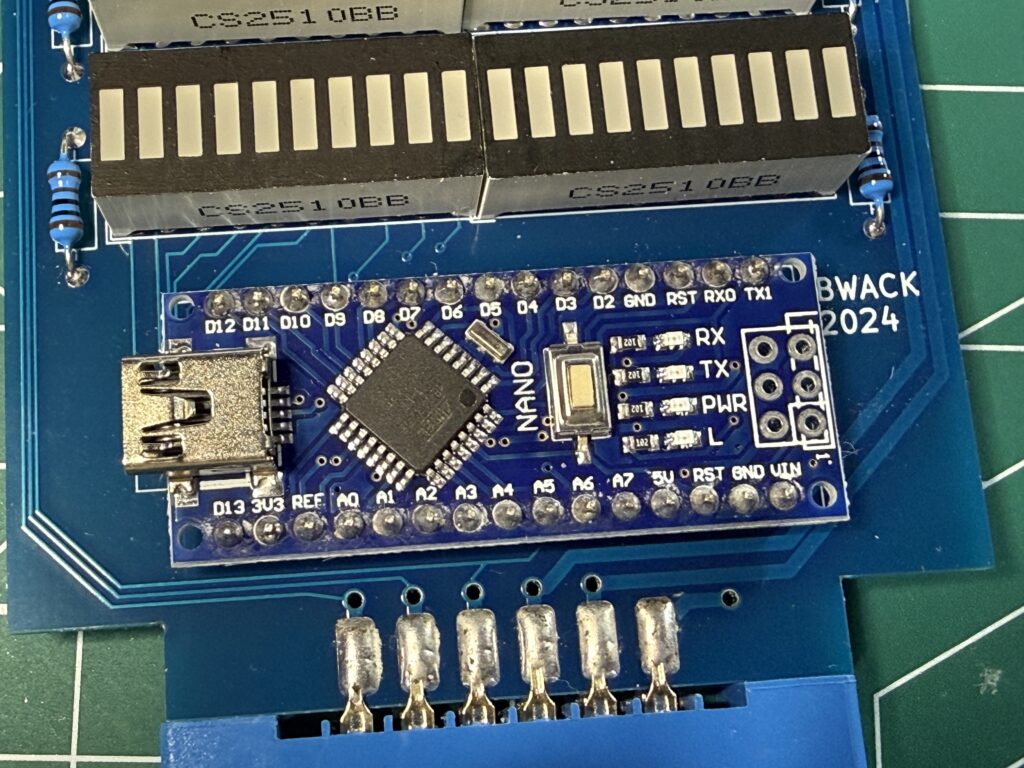
Closeup of the Arduino Nano board.


The Arduino nano, pictured above, does all the work here, processing the signals being read off the tape and converting them into a cohesive display on the LED’s.


What does it do?


If you’ve ever had problems loading a game or program off a cassette on your trusty Commodore C2N Datasette then this gizmo could be just what you’ve been waiting for, but before I get into that I need to explain a little bit about *Azimuth adjustment…

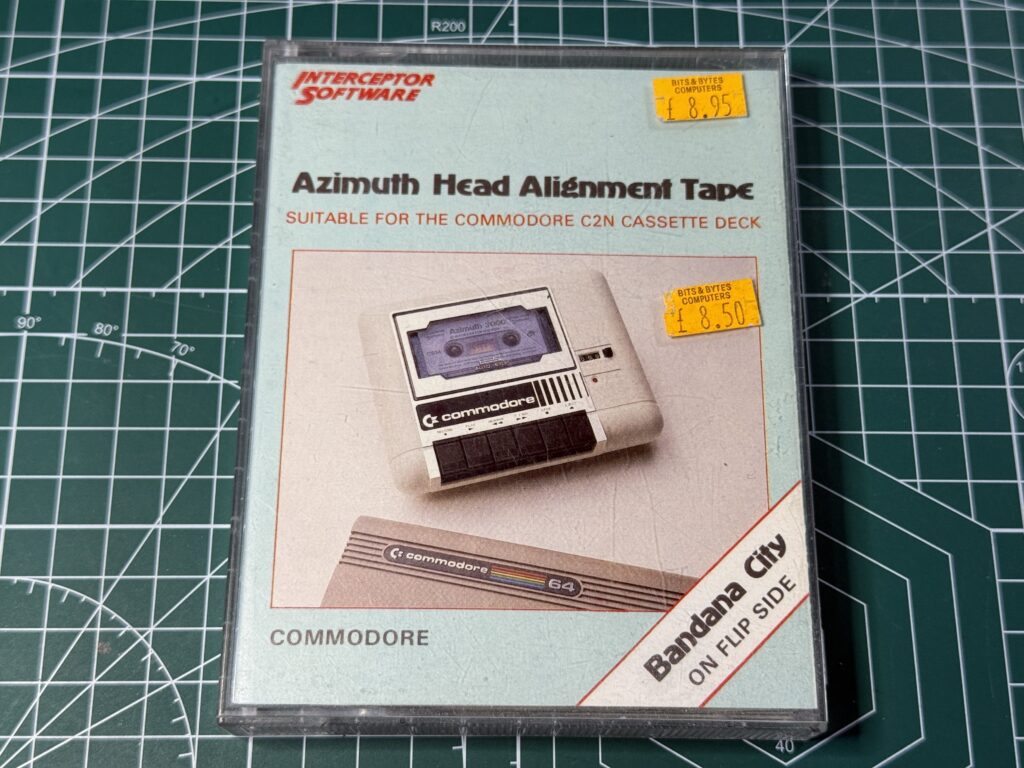
Normally my first port of call when I have an issue loading a game is a bottle of Isopropyl Alcohol and some cotton buds to clean the heads, capstans and pinch roller. If that doesn’t work then I will reach for my trusty Azimuth alignment kit from Interceptor Software – a bit of kit I’ve owned since the dawn of time itself**.

*    Azimuth is basically the angle of the tape head relative to the tape being run past it.

**  Actually about 1984.
 

Interceptor Software

My Azimuth Alignment Kit


This essential bit of hardware comprises a small Philips screwdriver, a cardboard arrow with a hole in it and a tape containing a special calibration program. The cardboard arrow is arguably the most important thing in the box – you certainly can’t complete the process without it!


This slideshow requires JavaScript.


To use this you first load up and run the program and leave the tape playing. Next you twist the screwdriver in one direction until the program makes a ‘bong’ sound and the counter stops. You then repeat the process in the opposite direction. This will give you two angles, denoted by the cardboard arrow, the centre of which is the correct Azimuth and should give you the strongest signal when loading stuff. I have simplified this somewhat to keep it brief as there are a few more steps involved but that’s the gist of it.

The test tape contains a constant 3000 baud signal and is supposed to have been recorded on a professionally calibrated machine to guarantee the integrity of the signal. This is what makes adjusting the azimuth possible with it.
 

C64 Tape Pulse Visualizer

C64 Tape Pulse Visualizer


However what happens if your tape head is so far out of alignment that you can’t even load the program? You could try blindly tweaking the azimuth a bit and trying to load it again but that’s a very hit and miss approach and a sure-fire recipe for frustration and headaches. This is where the ‘Tape Pulse Visualiser’ can come to the rescue.


How to use it


You don’t really even need to run the program when you have access to the Visualiser as it literally does what it says on the box and lets you see (visualise) the signals being read by the tape head as illuminated segments on the displays.

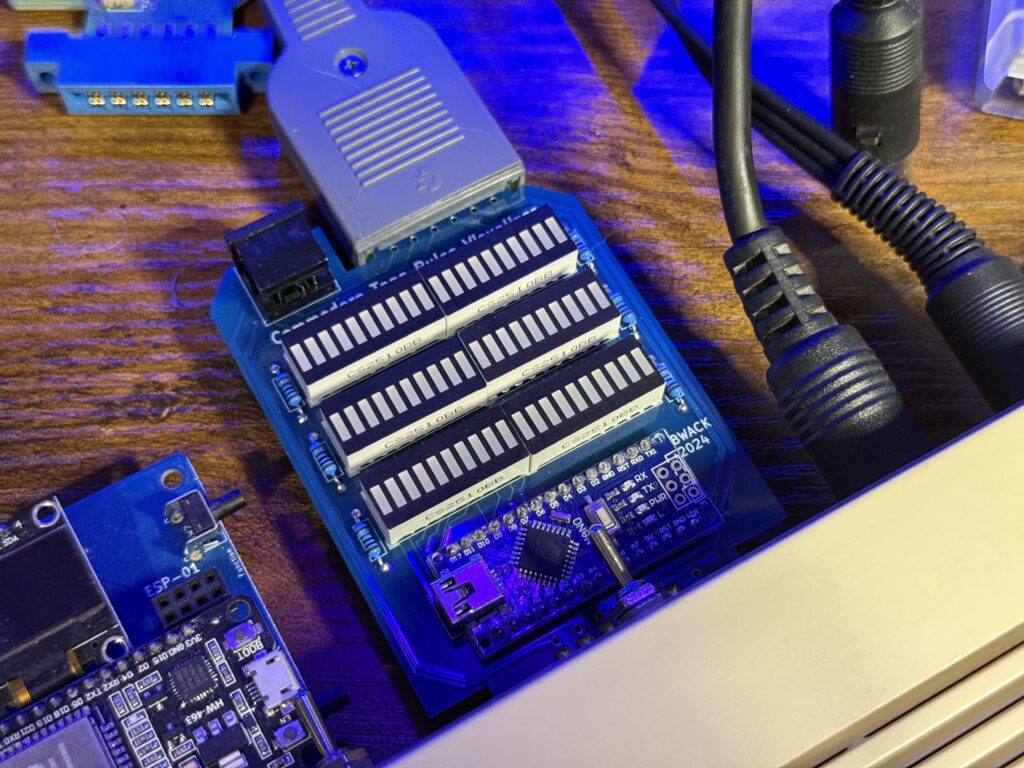
A well adjusted Azimuth using our test tape is represented by two groups of illuminated segments on the display that are tightly packed together. The more ‘scattered’ they appear, are the weaker the signal, and thus more badly aligned the head is. There are 3 strips of LED’s that represent short, medium and high length pulses. Not all the strips will illuminate – it will depend on the nature of the recording such as whether it uses a turbo-loader etc.


The idea is to adjust the screw and ‘focus’ the LED segments as much as you can as in doing so you are aligning the head. It’s far easier to understand by just watching it in action.

If you watch the video above you can see me adjust the azimuth screw from a correctly set position to an incorrect position in both the clockwise and anti-clockwise directions. Note how the LED’s start flickering across the display as the head is moved further and further out of alignment.  It changes from just having 2 or 3 LED’s constantly illuminated to having a bunch of around 10 of them flickering away like mad. The ‘bonging’ noise is coming from the Azimuth alignment program as I still had it running whilst recording the video clip.

In a nutshell, you just need to twist your screwdriver slowly , first in one direction and then the other until you find the sweet spot where just a couple of LED’s are steadily lit up and you should be good to go!


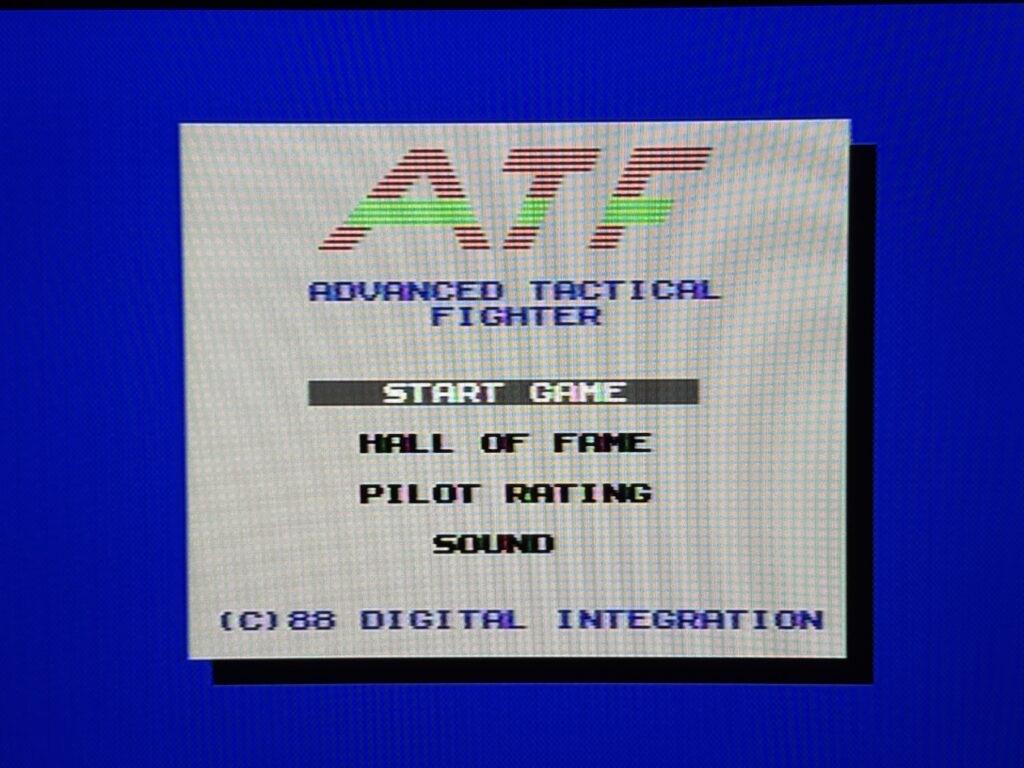
There’s no reason to unplug this when you are done adjusting your azimuth either as it just looks super cool to have the LED’s flickering away whilst you are loading a game. You can see it working whilst I’m loading up my copy of ATF which employs the use of a turbo loader and it loads up just fine.
 

ATF Title Screen


I’m a sucker for VU meters and flashing lights on old Hi-Fi decks and my C64 is no different – this will be staying plugged in for the foreseeable future! I’m delighted to be able to confirm that it still works if you have Gideon’s Ultimate II+ cartridge and cassette adapter installed too,  although it is a bit tight when attaching the USB cable!

If you’d like to get hold of your own Tape Pulse Visualizer for your C64 head on over to sharewareplus.blogspot.com where you can pick one up for £28 pus P&P.


Addendum / Pro Tip

If you think your Commodore 64’s cassette port might be damaged and you also happen to have a JiffyDOS ROM installed – turn it off! I had totally forgotten about JiffyDOS utilising the space used by the tape routines so it could have more for itself to beef up disk commands! I was getting a ‘Device not present’ error every time I tried to load something off a tape. After wasting an embarrassingly long time faffing around I disabled the JiffyDOS ROM and BOOM it started working again. In my defence it has been over 2 years since I installed JiffyDOS and I haven’t used a tape since…

Cassette Tape Storage Solution for 2024

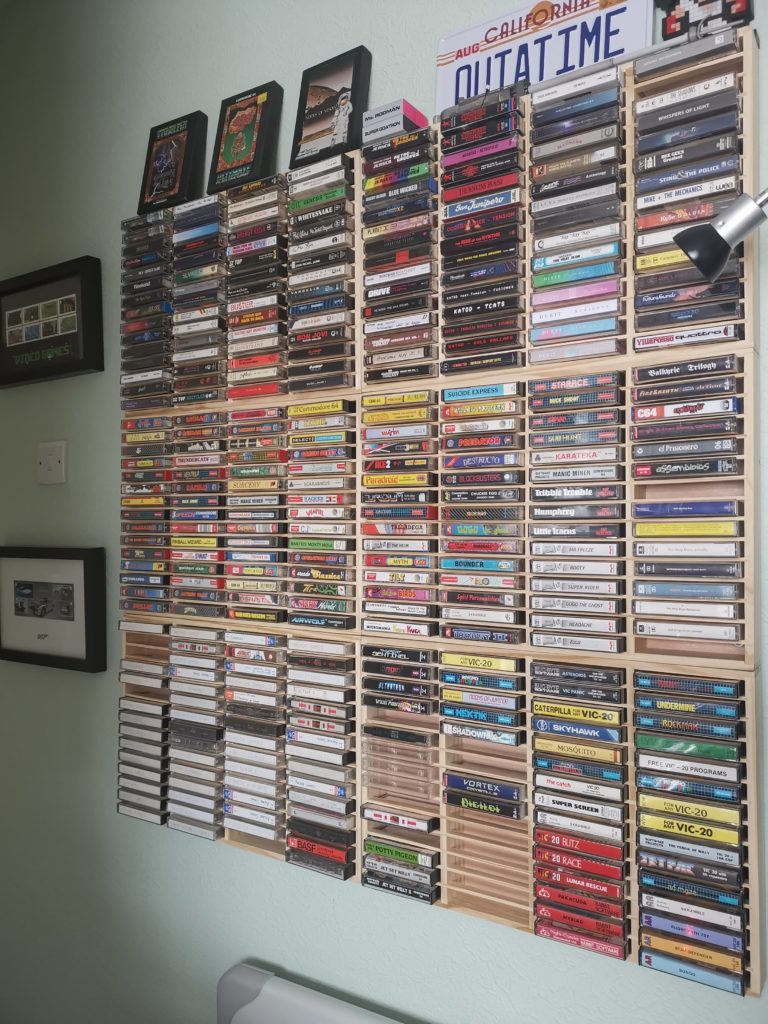
I’ve covered some storage solutions for Cassette tapes in the past but sadly they are no being made. With my own collection of tapes continuing to grow (both music and computer games) I needed a smart, attractive storage solution, and preferably one that would continue to be made for a long time to come.

There was really only one way to guarantee the latter so I’ve ended up designing and 3D printing my own rack and have made it available to purchase on my Etsy Store in case anyone else would like to get one.


Cassette Tape Storage

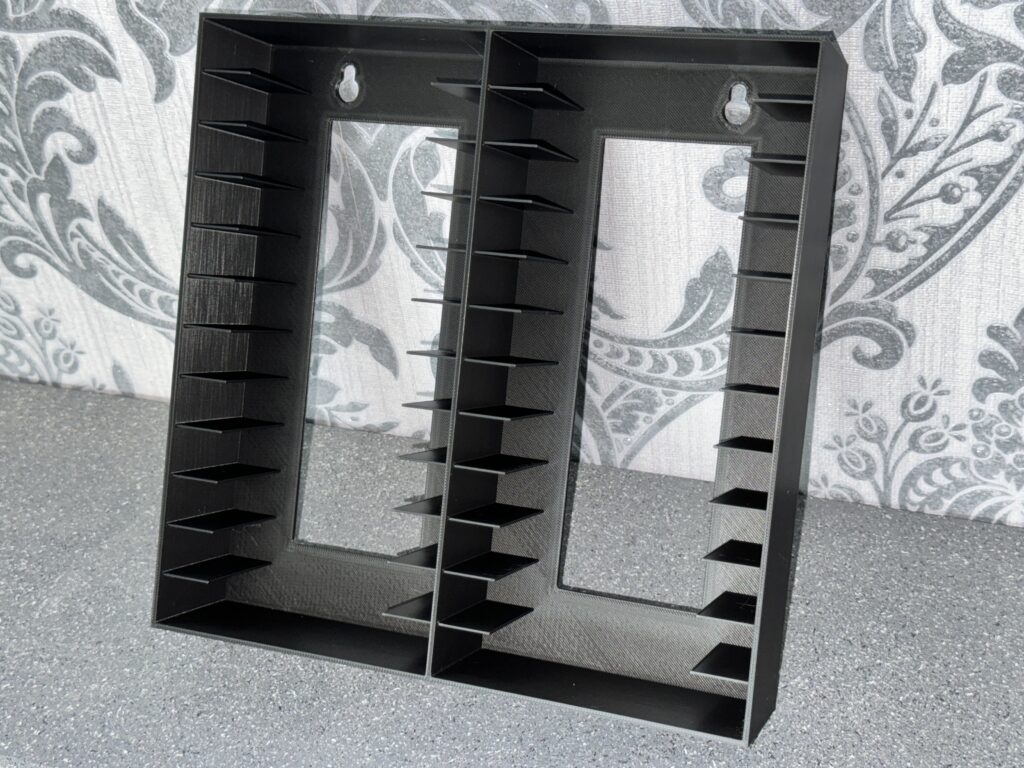
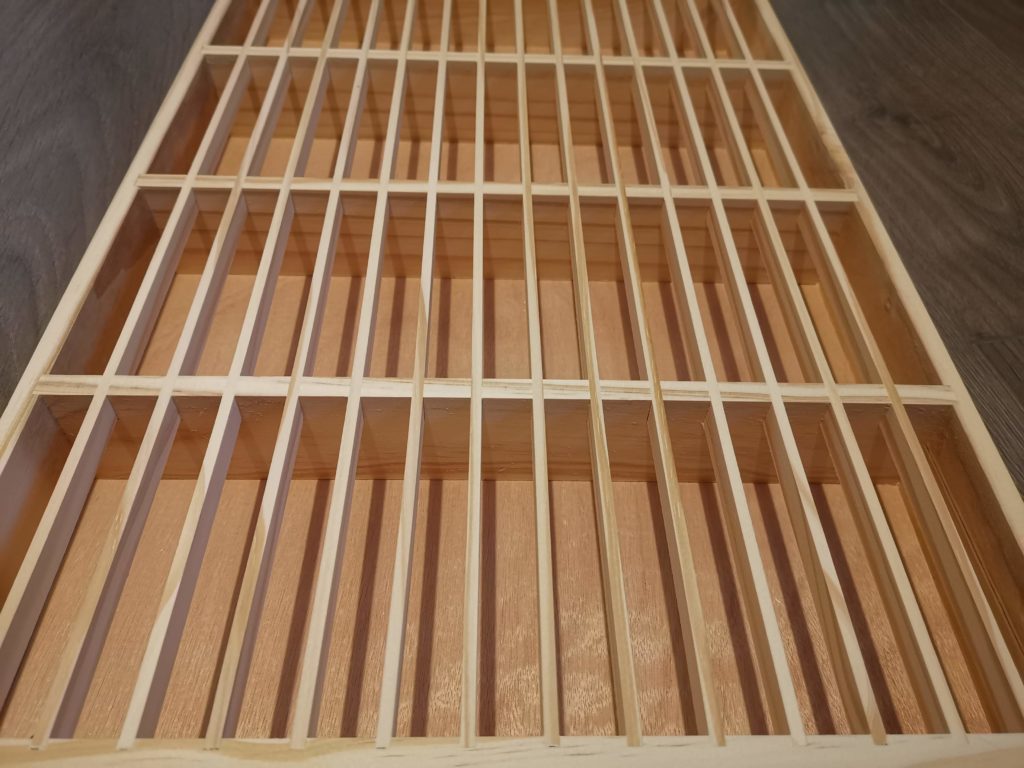
Empty storage rack. Mounting holes at the top.


The finished storage rack measures 23cm x 23cm and is a shade over 5cm deep. I literally cannot make a larger capacity rack as that’s pretty much the maximum size of my printers’ build plates.


This slideshow requires JavaScript.


It has a couple of screw mounting holes at the top so it can be hung on a wall. Alternatively it can be placed free-standing on a shelf, or even on its back inside a drawer.


Cassette Tape Storage

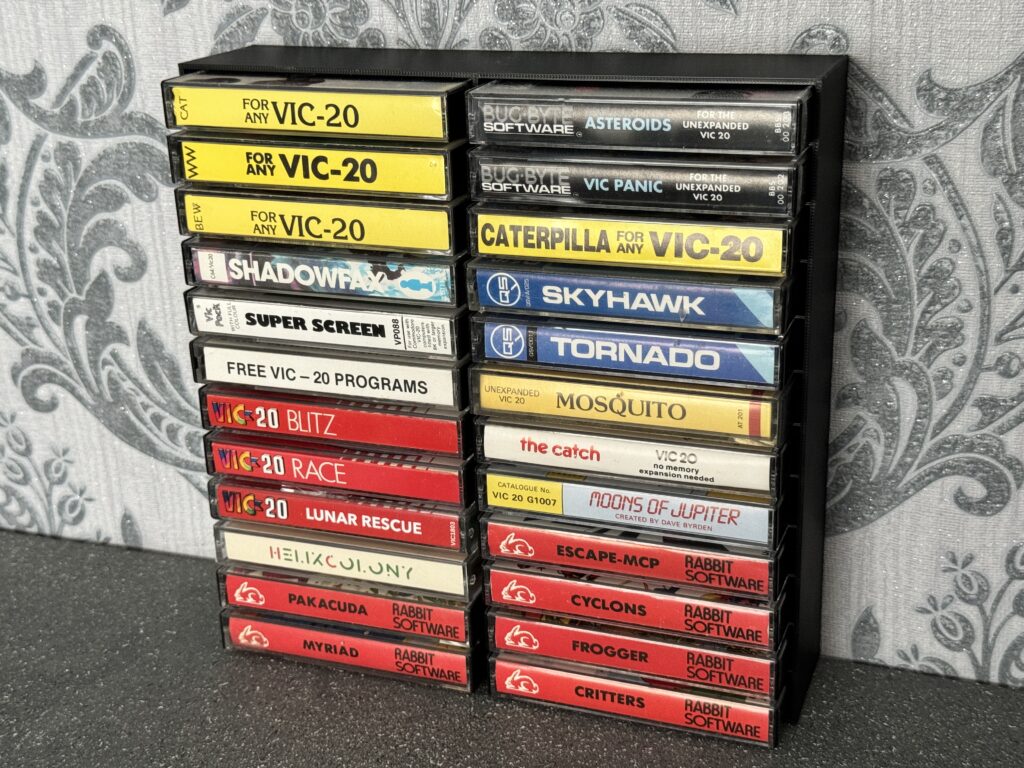
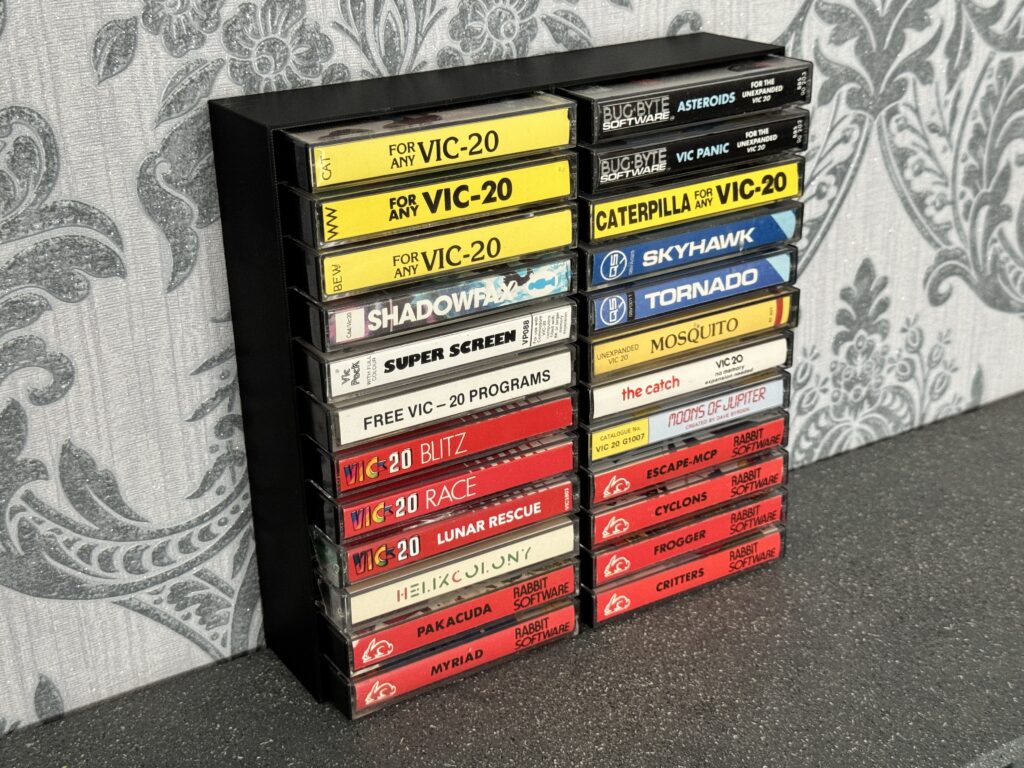
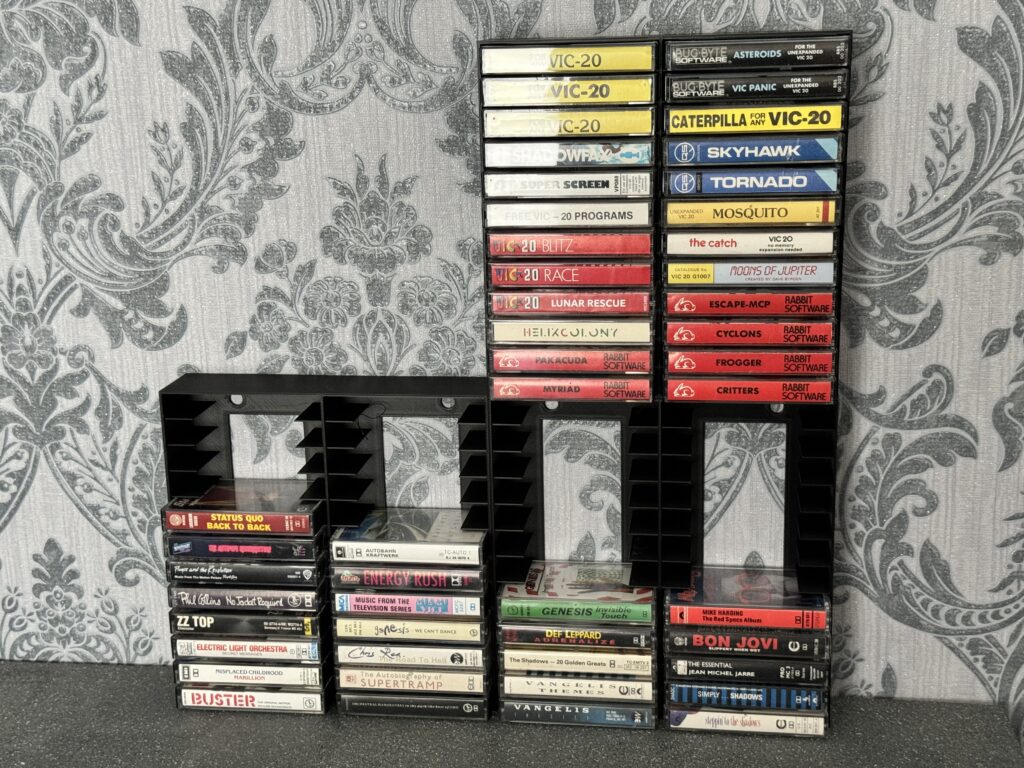
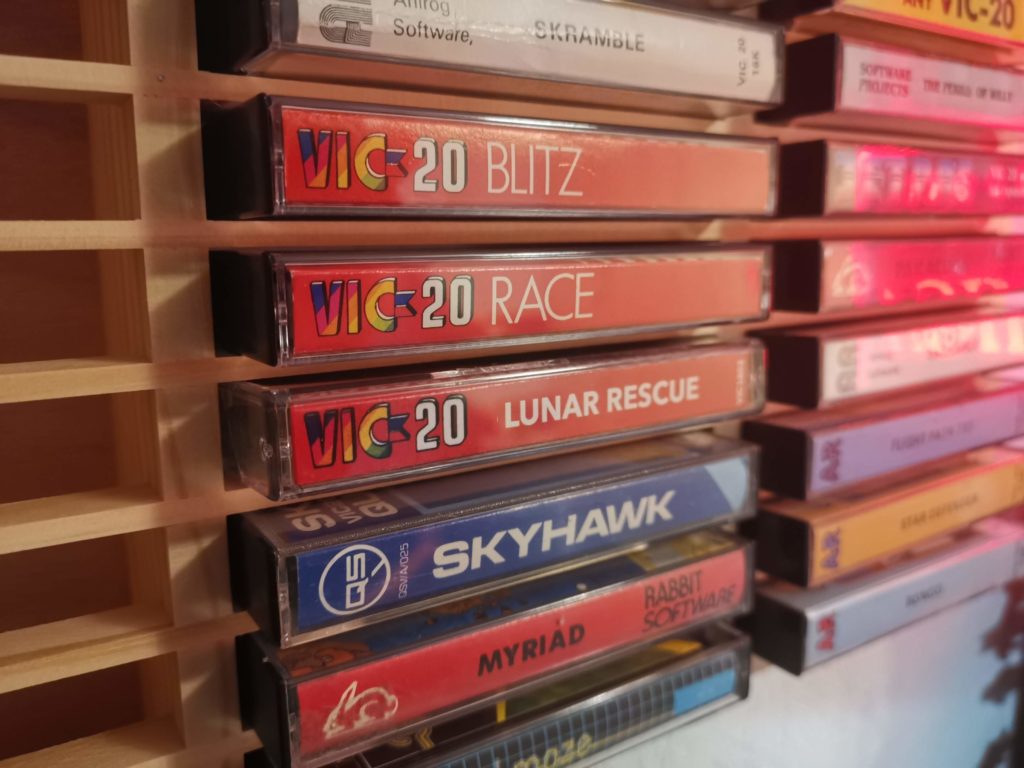
Lots of VIC20 games


The idea is that you can just keep adding more racks as your collection grows.


Cassette Tape Storage

A rack full of VIC20 games.


Although you can just place them side by side or on top of each other when expanding I’d recommend fixing them to the wall if going vertically for stability. Nobody wants their collection of tapes falling on the floor if your cat decides to go mountaineering!


Cassette Tape Storage

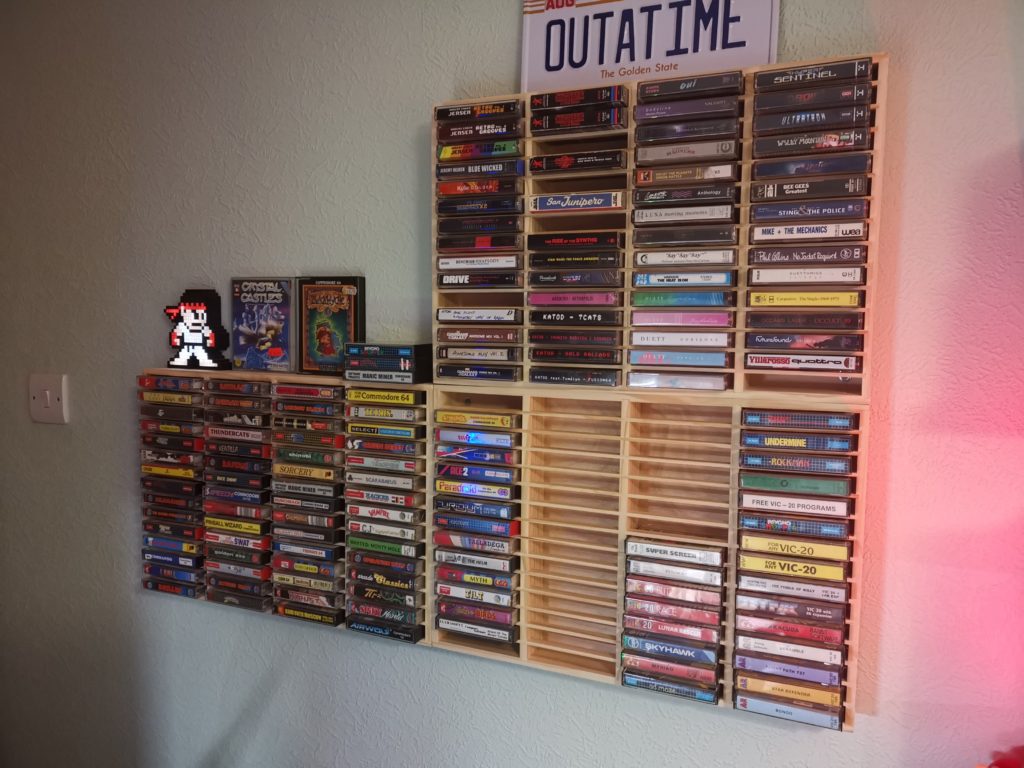
Expanding your collection – 3 racks together


These are produced on Bambu Labs printers using premium PLA and each one takes nine hours to complete. They’re really nice quality even if I do so so myself but you can judge for yourself by looking at the photos.

As I said if you want one you can get one from my Etsy store. If you’d like to order more than one then drop me a message and I can sort out a discount.

Retro Cassette HDD Enclosure

Retro Cassette HDD Enclosure

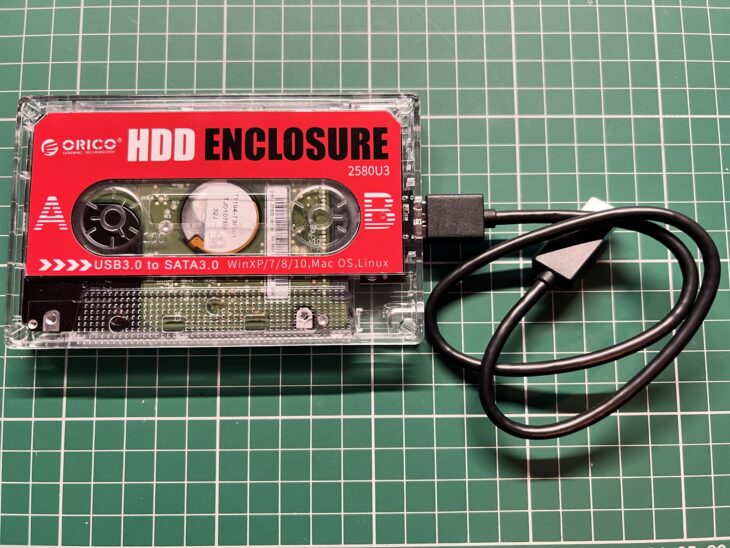
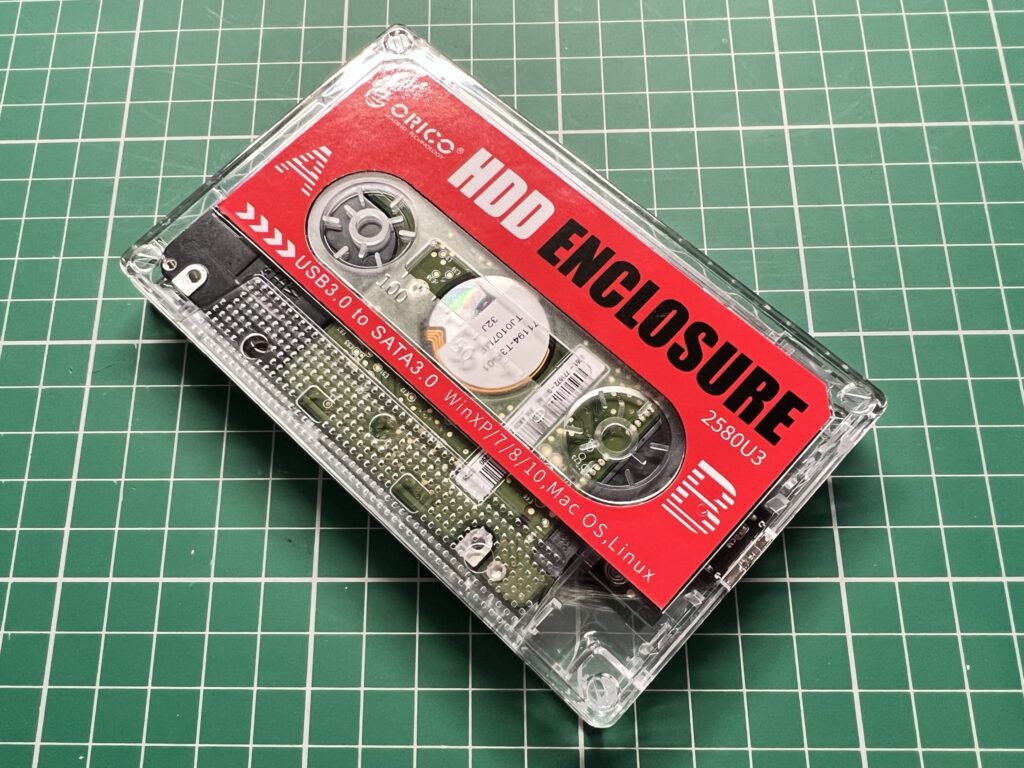
Picked this funky little retro cassette HDD enclosure up off Amazon a few days ago as I just couldn’t resist the look of it. It’s nothing special, just a cheap enclosure that you can pop a 2.5″ HDD/SSD in for some portable storage. However it’s been designed to look like a cassette tape which is what attracted me to it.


Retro Cassette HDD Enclosure

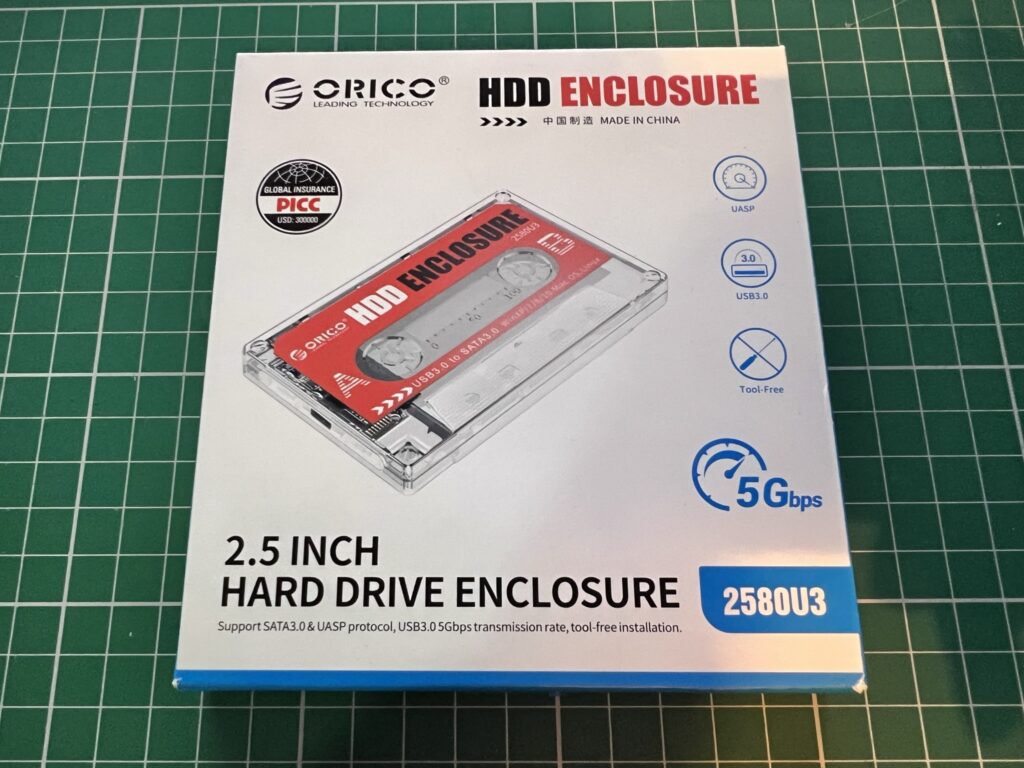
Front of the box.


It supports USB 3.0 as you would expect and claims a 5Gbps transfer speed which I’m not going to bother testing. I’m here for the looks!


Retro Cassette HDD Enclosure

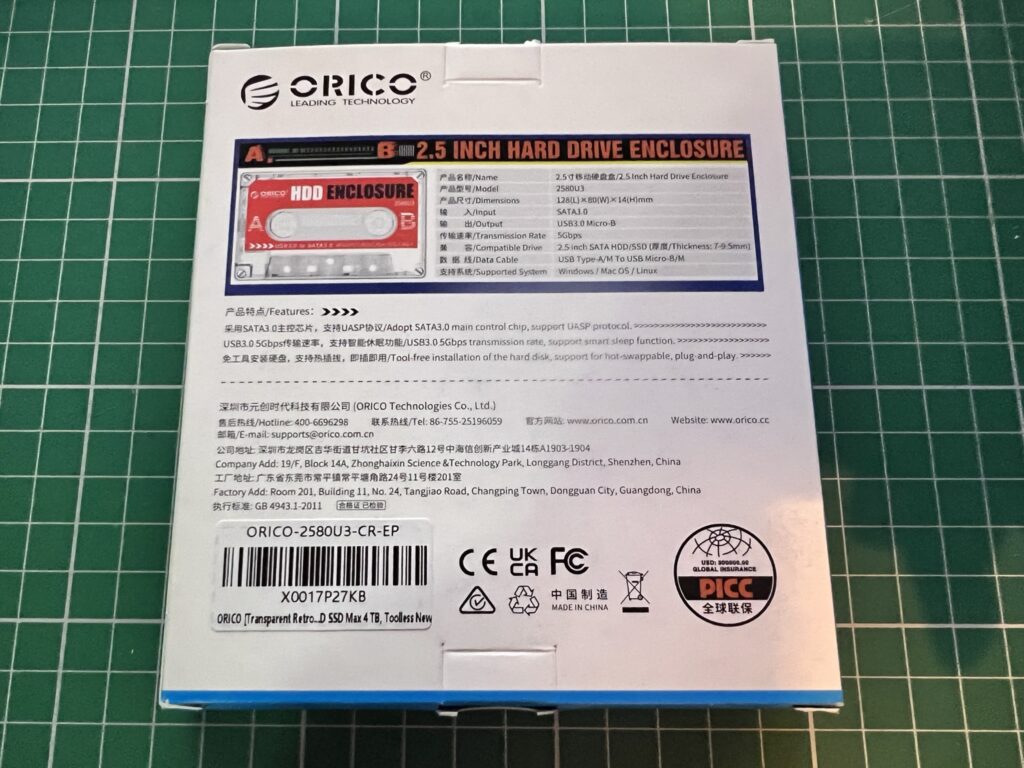
Back of the box.


What’s in the box?

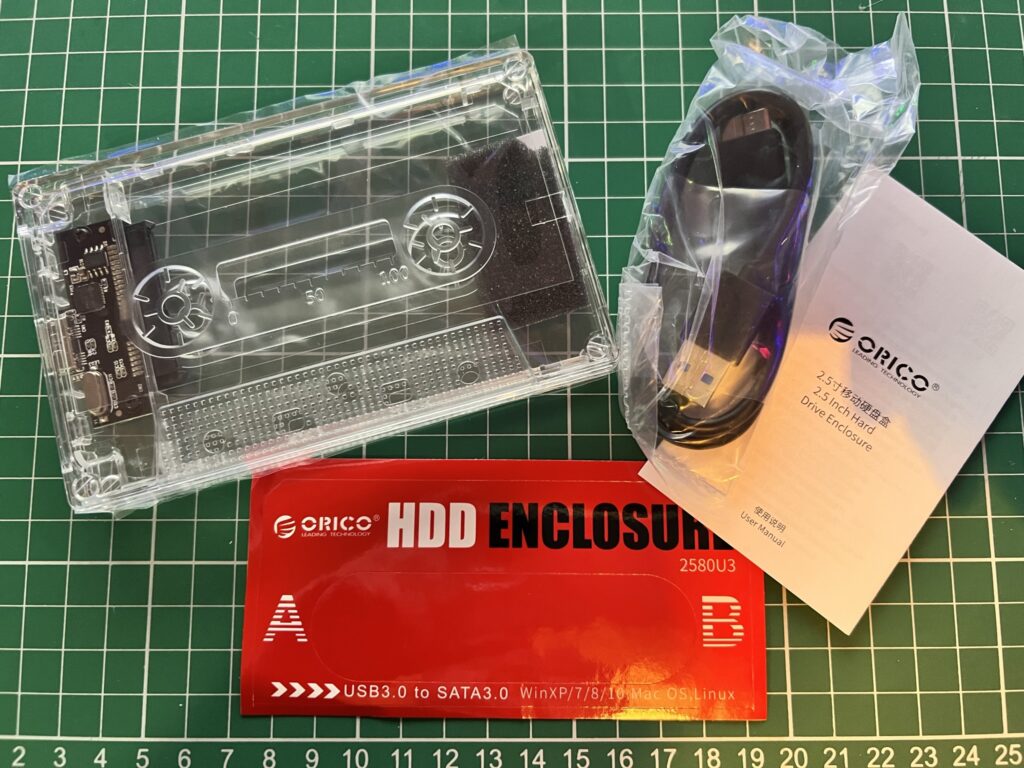
Inside the box you get the ‘cassette’ enclosure, a short USB 3.0 cable, some stickers and some rudimentary instructions in Chinese and ‘Chinglish’ as is expected with cheap electronics these days.


Retro Cassette HDD Enclosure

A look at what came inside the box.


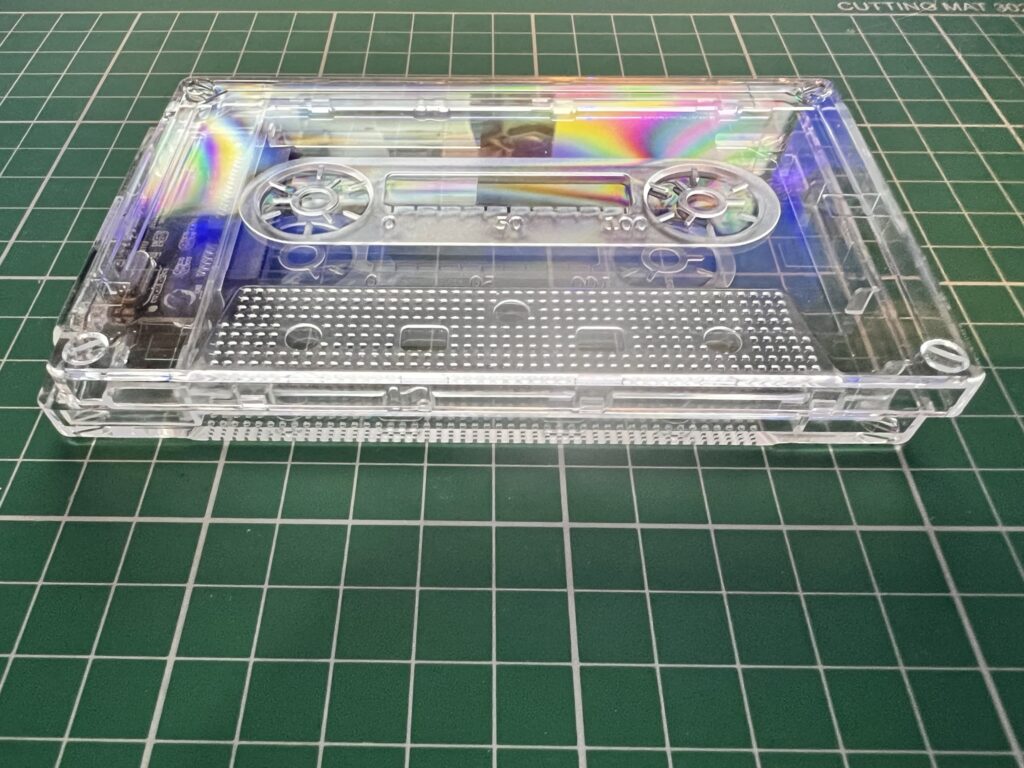
The enclosure is made from transparent plastic and it came with a protective wrap to prevent scratches which peeled off easily.


Retro Cassette HDD Enclosure

Sliding the enclosure open.


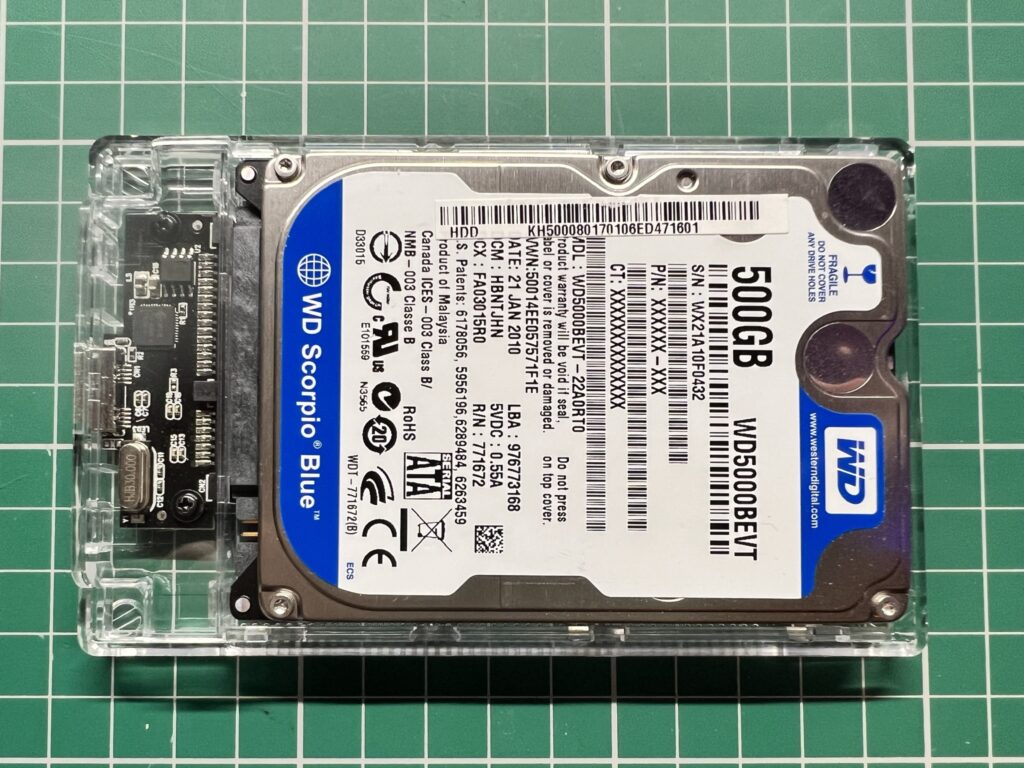
Opening the case seemed like some sort of fiendish Rubik’s puzzle at first… until it finally dawned on me that the two halves slid apart instead of unclipping! To be fair the instructions did mention the word ‘slide’ but it was by no means obvious!


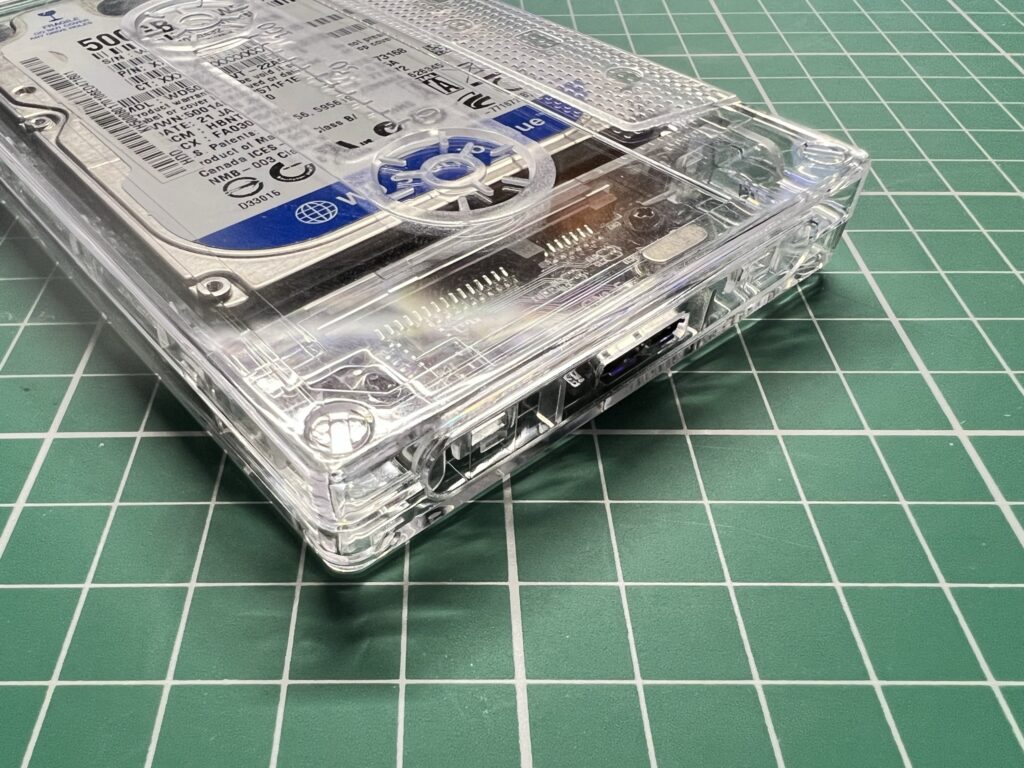
500GB Drive fitted snugly inside.


I had a bunch of old 2.5″ laptop drives rattling around in the bottom of my desk drawer so installed one of those inside the enclosure, a process which took all of about five seconds.


Retro Cassette HDD Enclosure

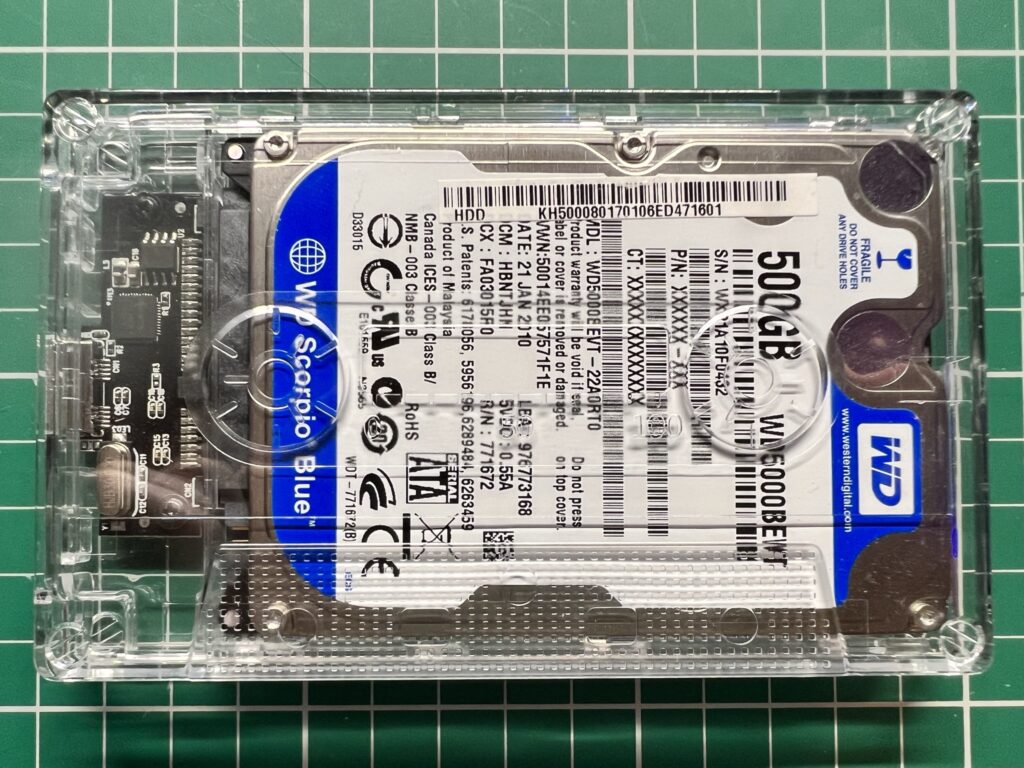
Lid back on the enclosure.


Putting the lid back on proved to be far easier than taking it off!


Retro Cassette HDD Enclosure

Close-up of the business end of the enclosure.


My HDD was pretty chunky so it fit snugly with no room to spare which means it didn’t rattle around. A piece of self-adhesive foam was supplied in the enclosure which could be used as padding for thinner drives such as SSD’s to prevent them from moving around inside the enclosure.


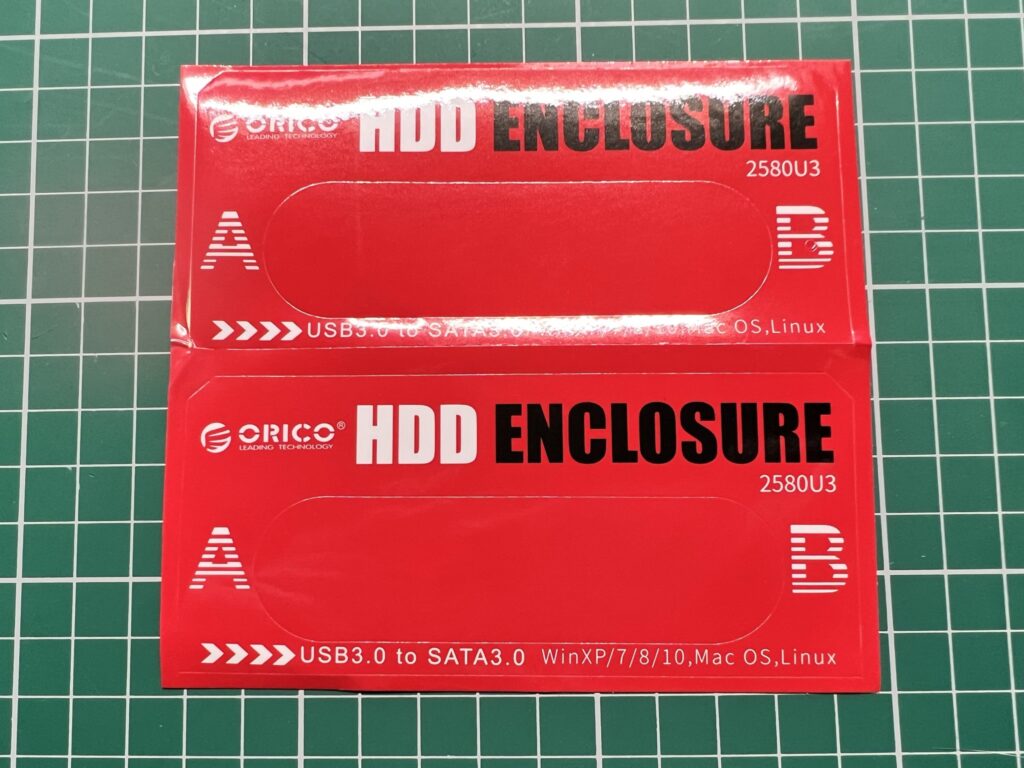
‘Cassette’ stickers.


Of course at this point it still looked like a transparent case with a hard drive inside it. Time to affix the stickers!


Retro Cassette HDD Enclosure

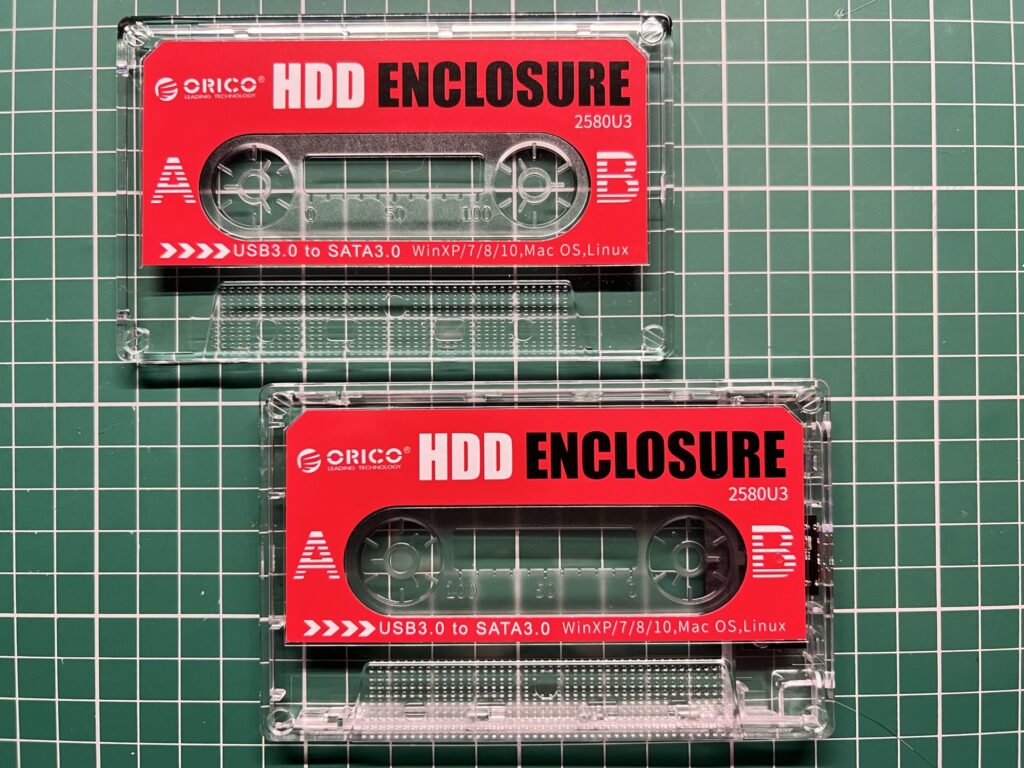
Looking a lot more like a cassette now!


Two stickers are supplied in the box, one for each side. I found it much easier to see what I was doing without the drive installed so I took the enclosure apart and removed the drive. Once I’d done that I found them very easy to align and stick on.


Retro Cassette HDD Enclosure

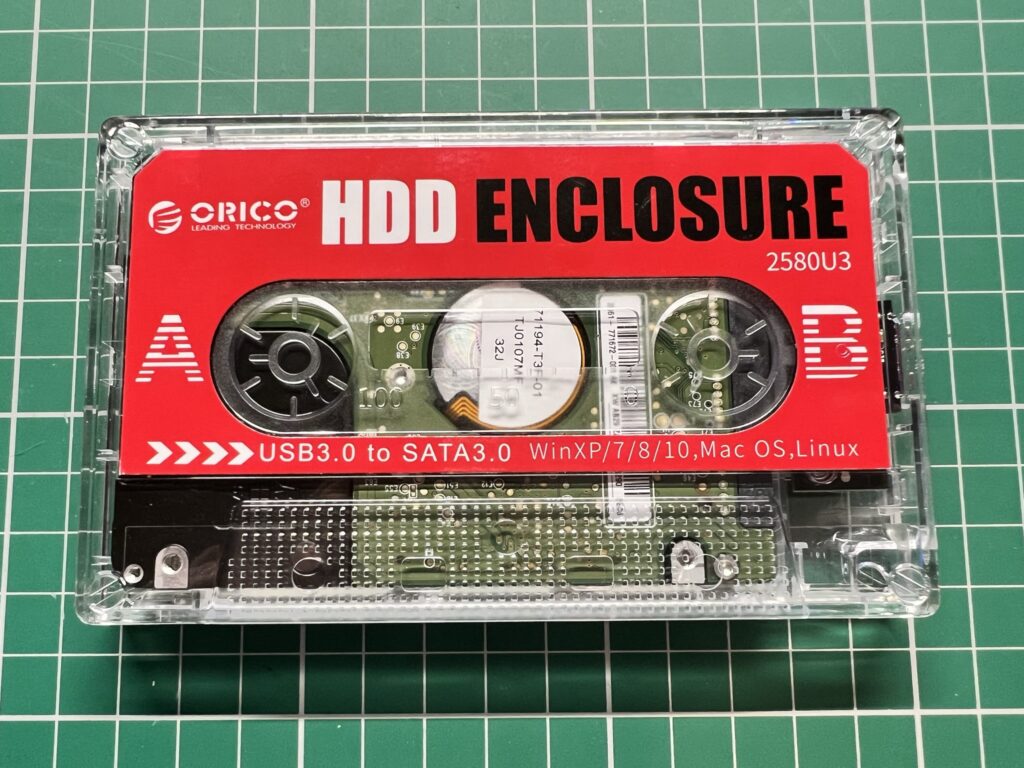
Transformation complete.


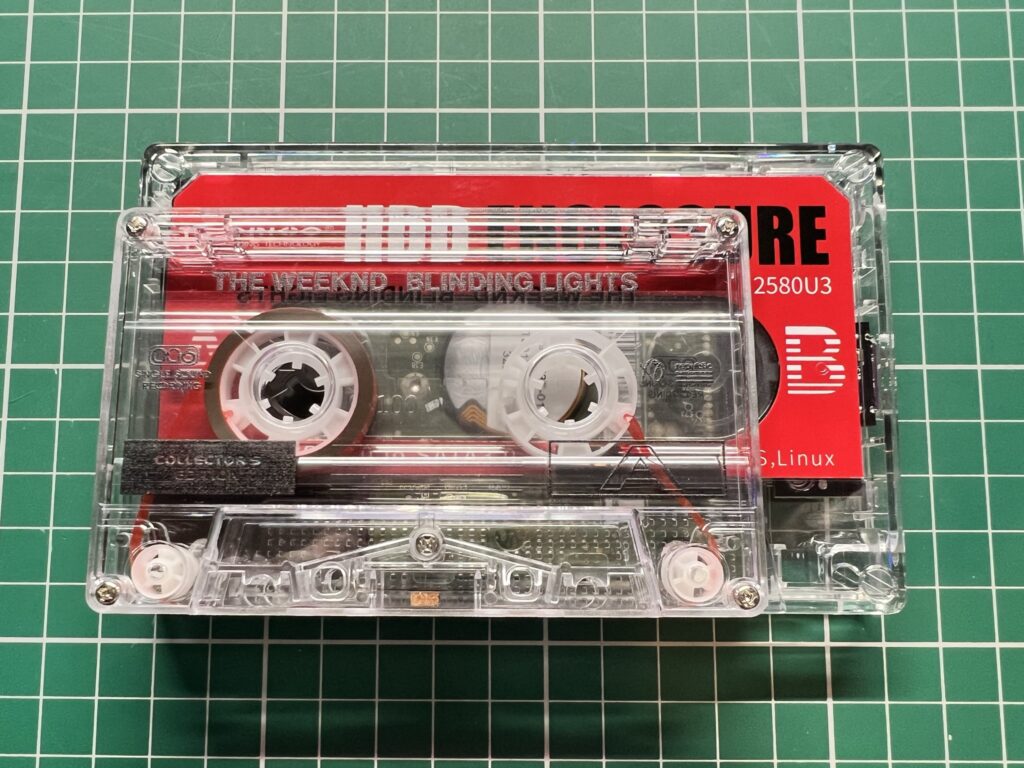
With the the stickers applied the transformation was complete and I had a cassette tape with a 500GB storage capacity! It definitely looks the part and is a lot more interesting to have than a plain old boring black plastic case.


Retro Cassette HDD Enclosure

If you don’t look too closely it certainly looks like a tape…
 

Below is a photo alongside a regular cassette tape for comparison. Clearly it’s quite a bit bigger but it needs to be so that a regular 2.5″ drive can fit inside.


Retro Cassette HDD Enclosure

Comparison with an actual audio cassette tape. Absolutely awesome song too!


Final Thoughts

It worked without any fuss when I plugged it into my PC, just as you would expect really. However it did so whilst looking cool, which is something you can’t say about the majority of storage solutions available these days! It brings a smile to my face every time I get it out of the drawer and everyone who sees it on my desk comments on it which makes it totally worth the few quid it cost in my book.

If I wanted to be really flash I’d probably install an SSD, however I bought it as a fun (and cheap!) way to make use of an old drive so I’m quite happy with it the way it is.

On the off chance anyone wants to pick one up I’ve included an affiliate link below 🙂

CD64 Interface – First Edition Review

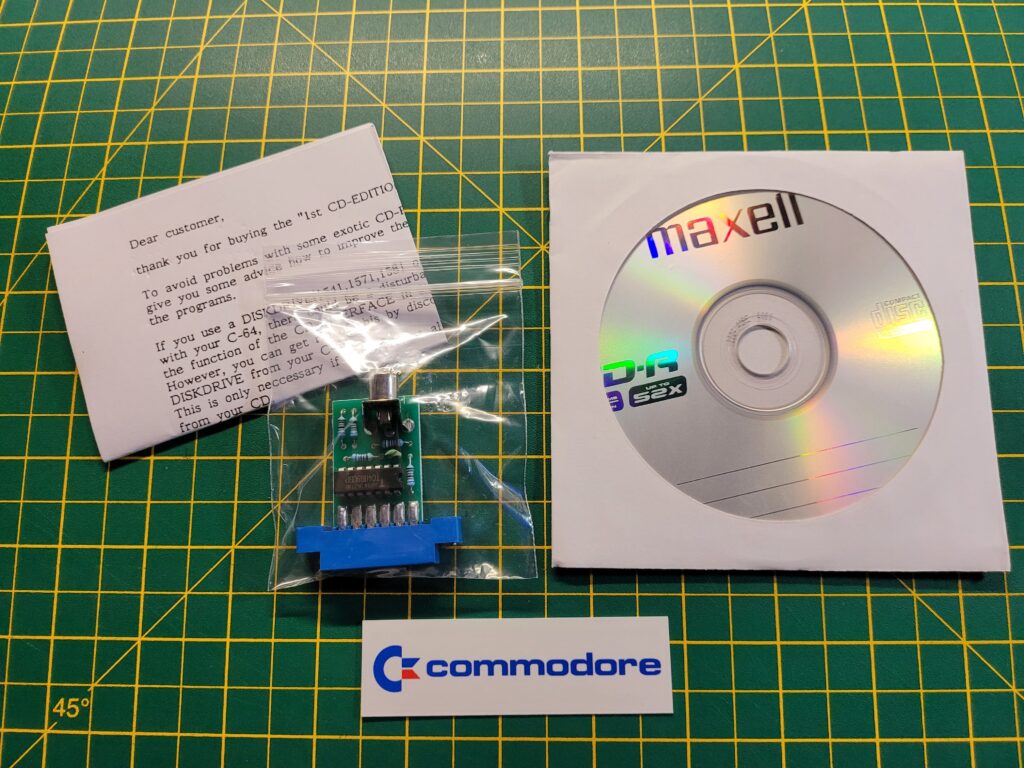
If you’ve ever wanted to use CD’s with your C64 then this could be the gadget for you. I spotted this little gizmo on the SharwarePlus website and wanted it immediately. It arrived quickly and well packaged. Inside the box there was a CDR containing a bunch of games, the CD64 interface itself, an instruction sheet and a small Commodore bookmark type thingy.


CD64 Interface Package contents.

CD64 Interface Package contents.


A Closer look at what’s included

The CD64 Interface comprises a small circuit board with a cassette port socket one end and a single RCA socket the other. The RCA socket actually gives the first clue as to how this device works.


This slideshow requires JavaScript.


The second big clue can be found when you insert the CD into a computer…
 

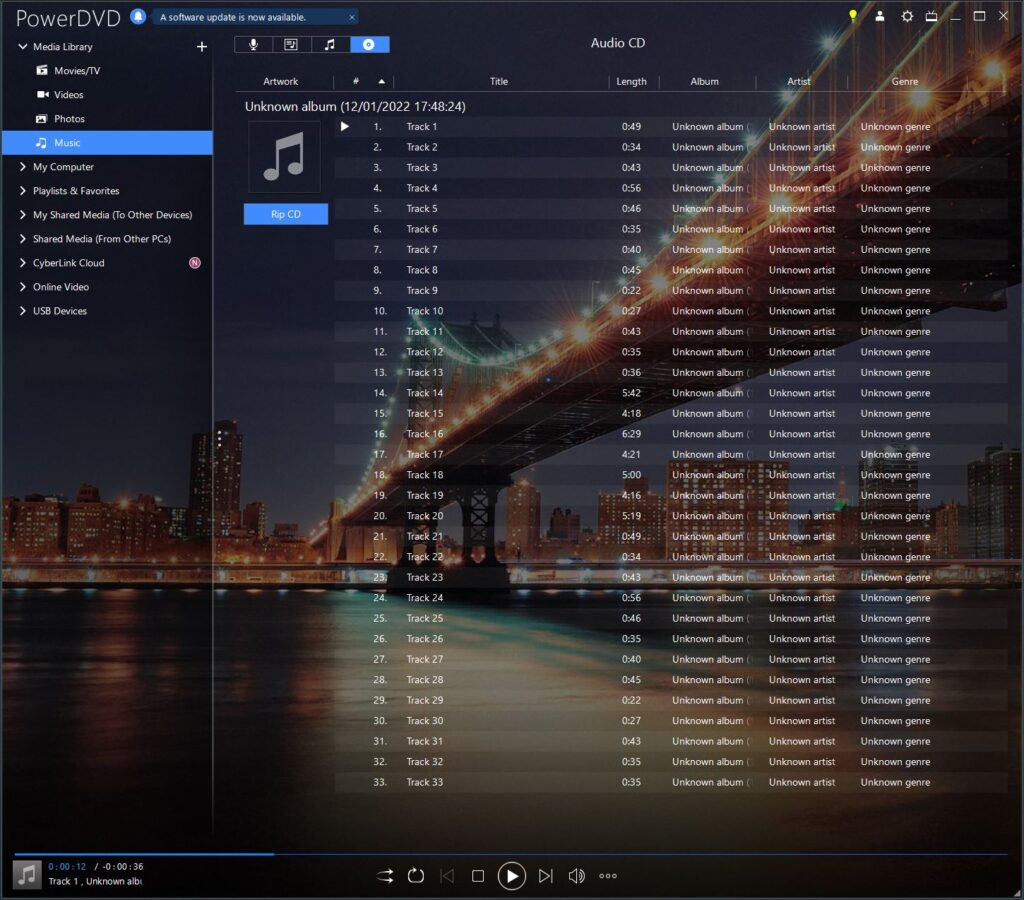
CD Tracklist showing all 33 tracks included on the CD.


If you haven’t already worked it out, the device lets you hook up the audio output of a CD player to the C64’s cassette port. The connected player then becomes a datasette of sorts albeit one with direct access to each program. The disc included is an audio CD and contains 33 audio tracks. Playing a track back through a stereo fills the room with that familiar screeching sound that most of us remember from the 80’s when copying games on cassette.


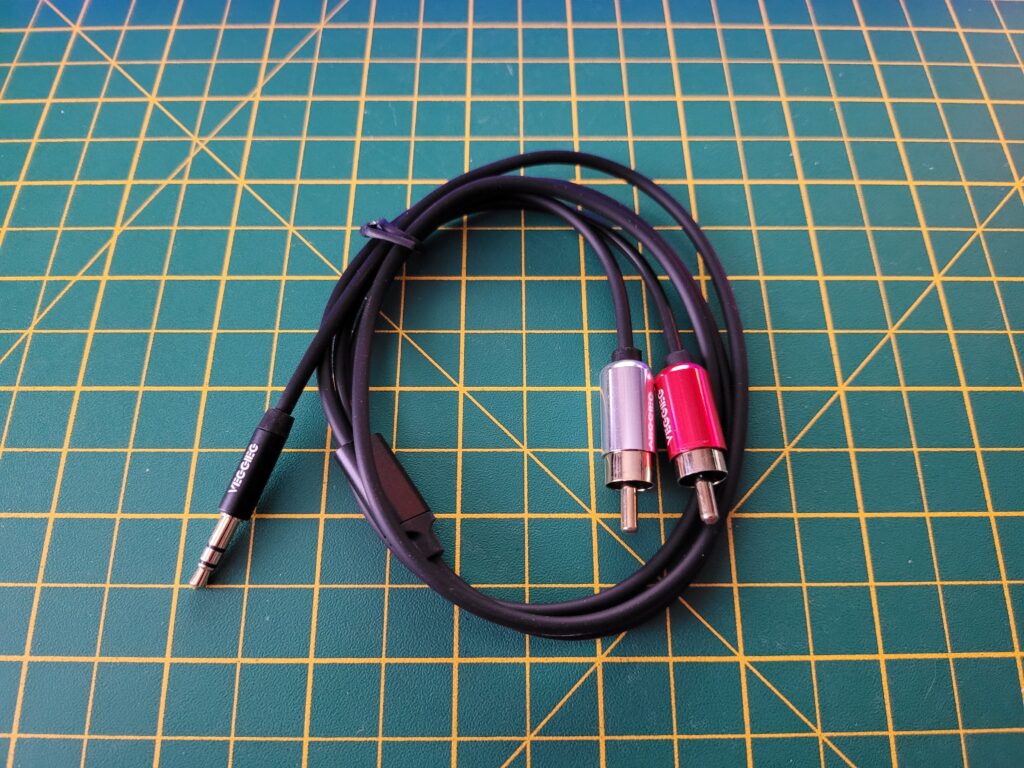
3.5mm headphone jack to Stereo RCA cable (not included).


In addition to the C64 game files there’s also seven Chris Hülsbeck music tracks on the CD which can be listened to on your CD player. Don’t try and do what I did and load them on the C64 thinking they were some sort of demo scene tracks – doh!


CD64 interface

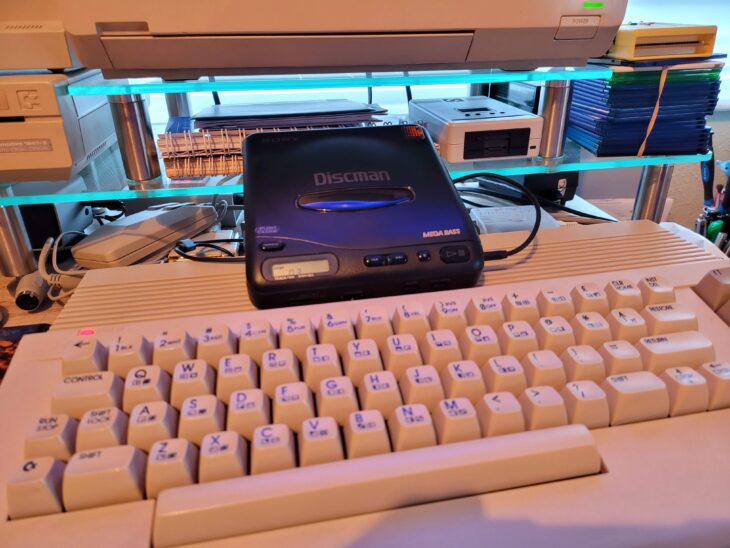
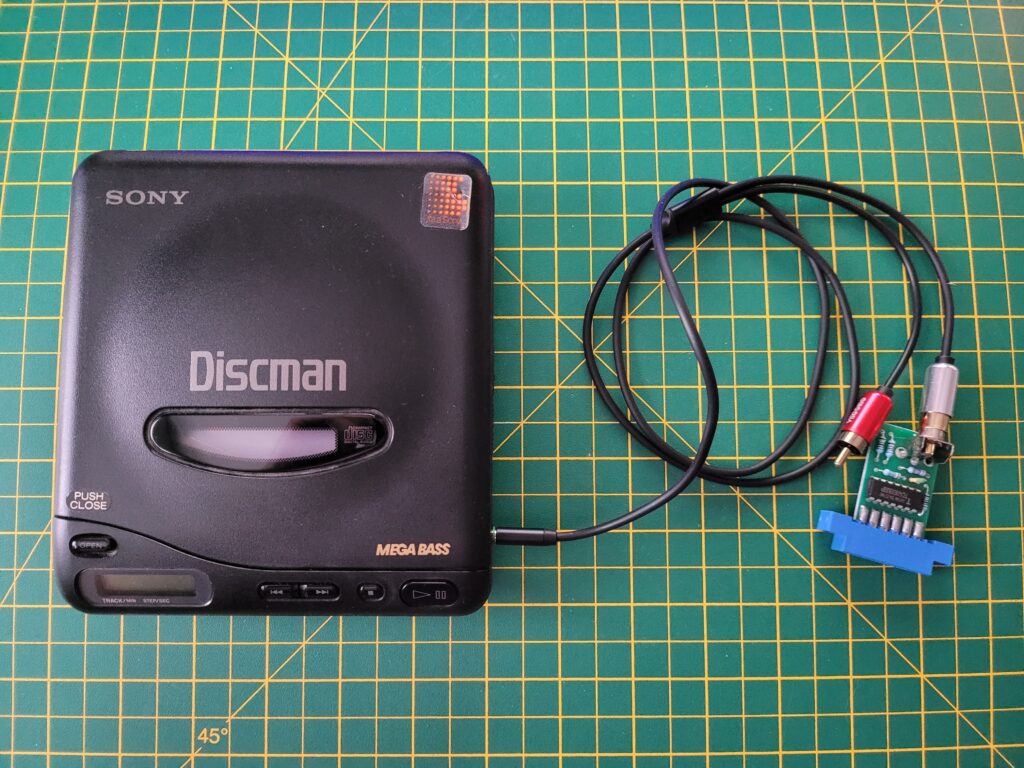
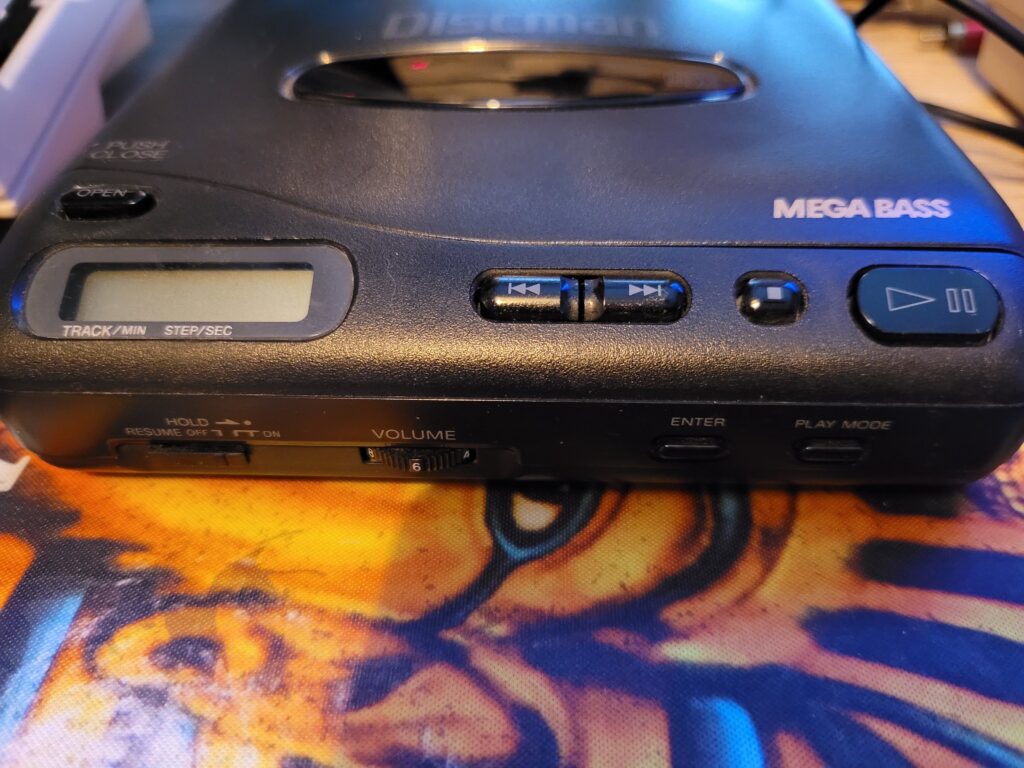
My Sony Discman D-11 attached to the CD64 interface with a 3.5mm headphone jack to stereo RCA cable.


To access the CD I used my old Sony Discman D-11 and a 3.5mm headphone jack to RCA cable to try it out. I listened to the CD with a pair of headphones first just to make sure that the sound was coming out of both left and right channels (it did). Consequently it doesn’t matter which RCA plug you use to hook up the CD64 Interface, both will work.


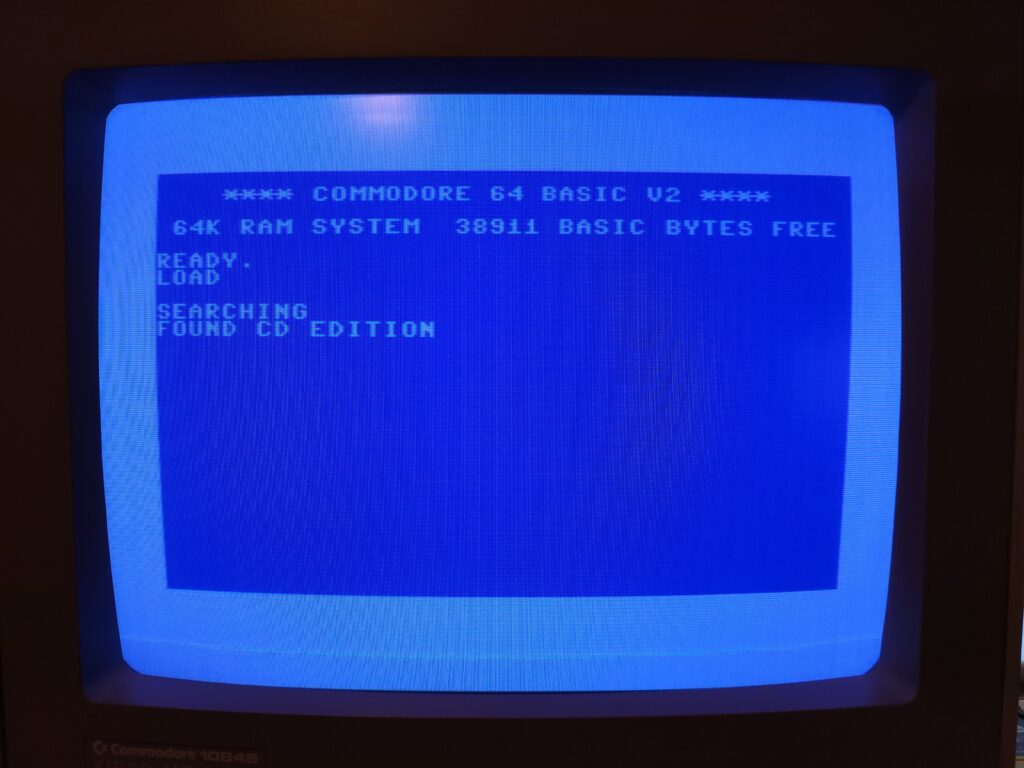
C64 LOAD Screen

First attempt at loading the Menu off CD.


Loading Programs off the CD

To load stuff off the CD you press the familiar SHIFT & RUN/STOP keys and then press PLAY on the CD player. I was very quickly presented with a ‘Found CD Edition’ message which means it had at least found the first data track on the CD. However for a while I couldn’t get any further than this. After reading the guide it suggested unplugging connected devices to remove any unwanted interference. Once I had removed my 1541 Ultimate-II+ cart and 1541-II floppy drive I began to make some progress.

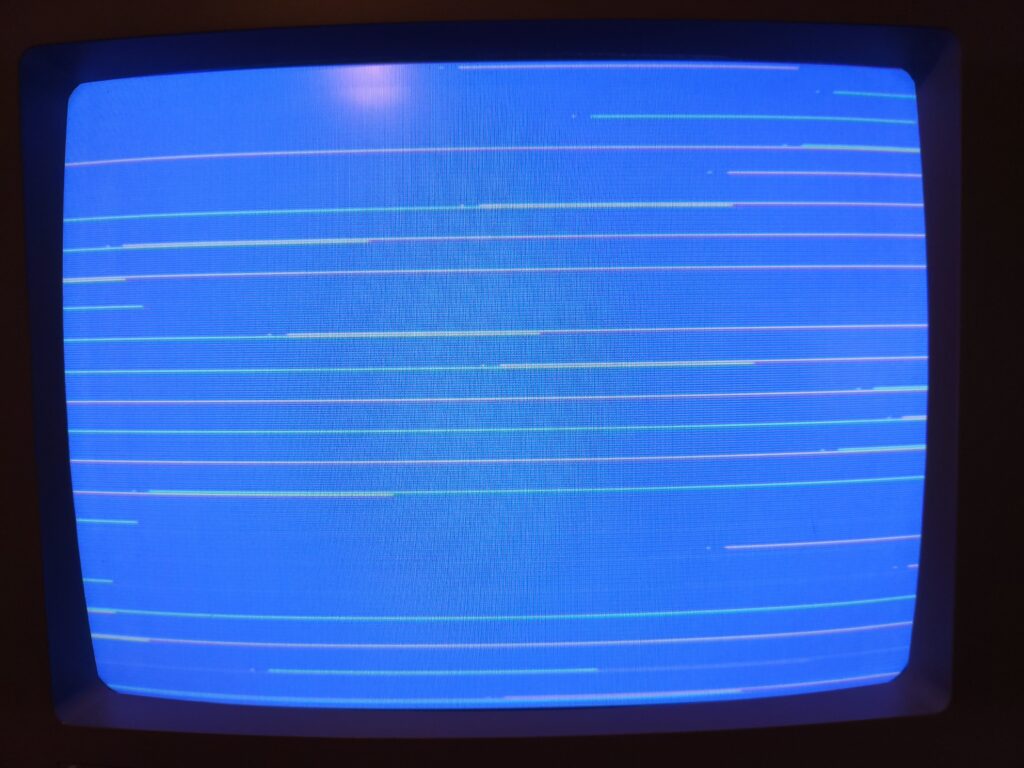
There was still a fair bit of trial and error to get the volume level right though. Too quiet or too loud and the programs failed to load – or loaded with an error.


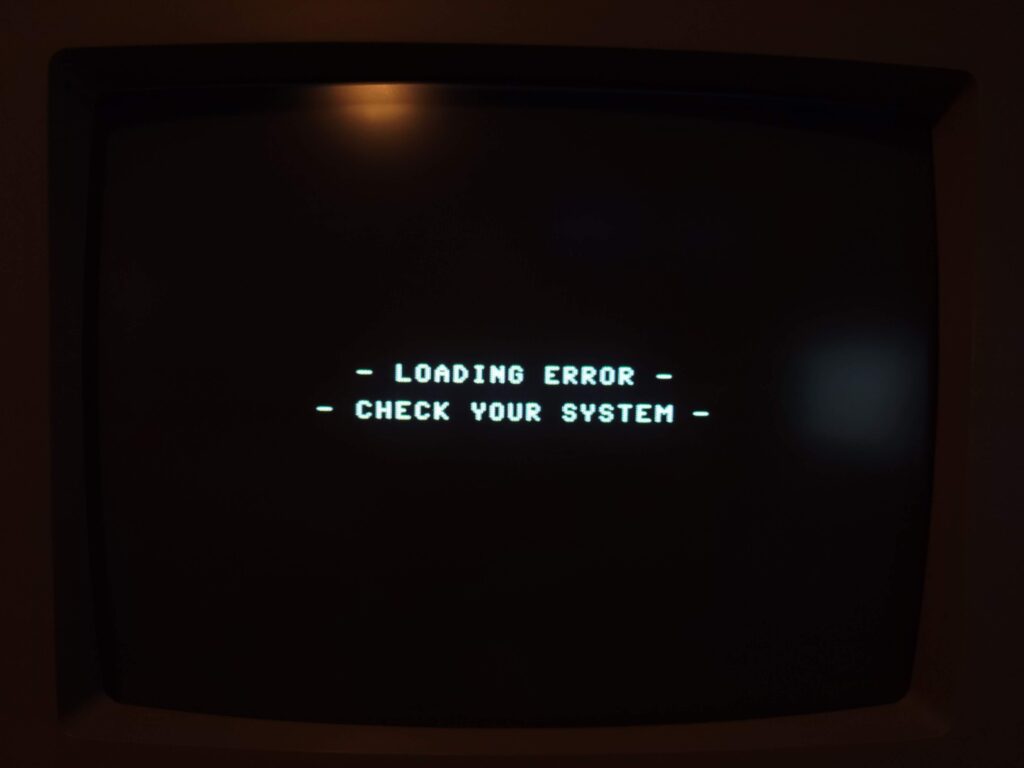
Load error

Load Error.


After about 20 minutes of trying different levels I finally found the sweet spot, which for me was a volume level of 6 (my player goes up to 10). I also saw an improvement by setting the Megabass feature to the medium setting (as opposed to being turned off). Of course every player is going to be different in this respect – the key thing is to experiment.


Sony Discman D-11

Setting my volume level to 6 seemed to give the best results.


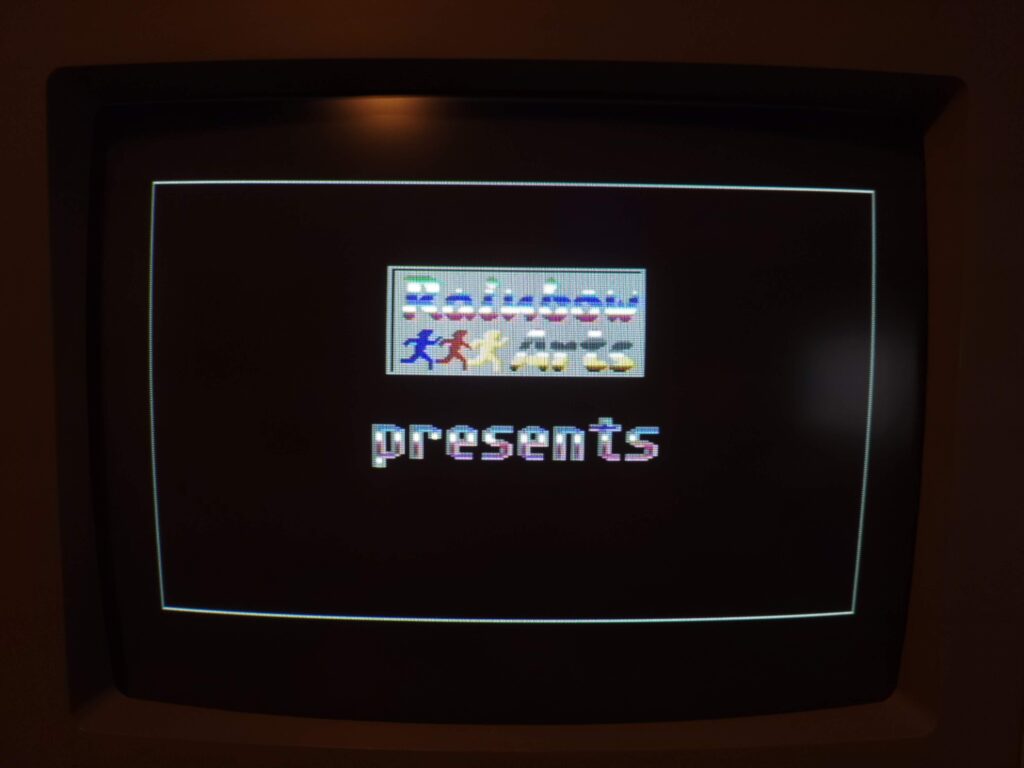
Now that I had the volume level set correctly I was finally able to get to the animated ‘Rainbow Arts’ Title Screen.


Rainbow Arts Title Screen.

Rainbow Arts Title Screen.


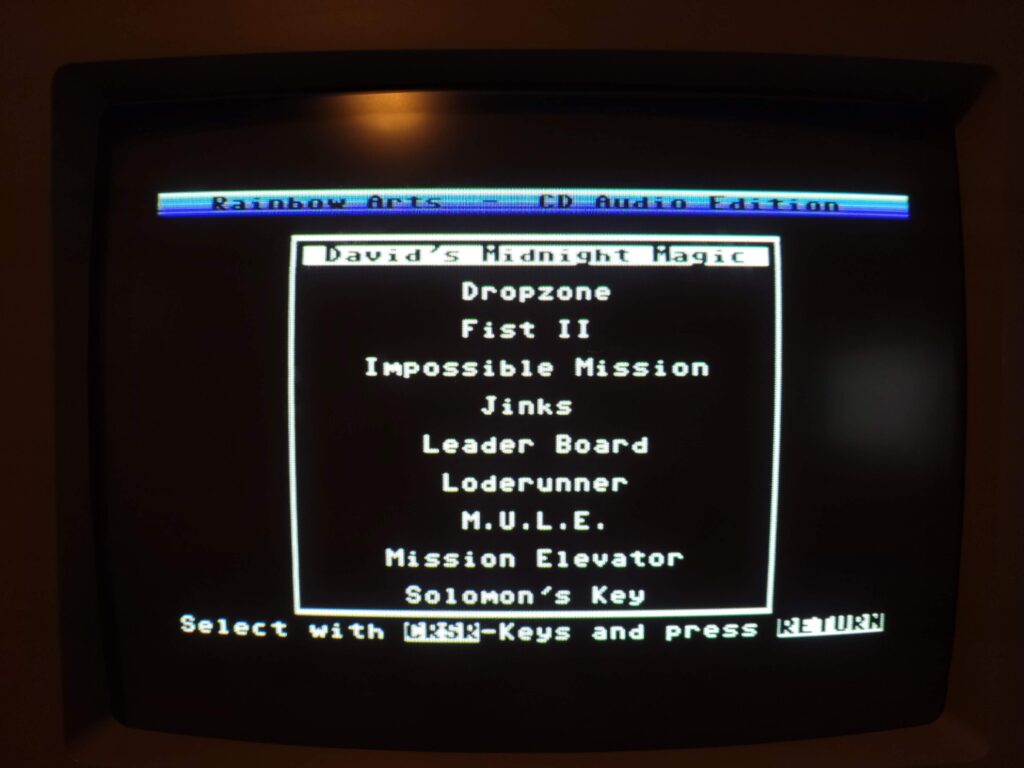
From here I could access each of the included 10 games via a simple menu screen.


Rainbow Arts Menu Screen.

Rainbow Arts Menu Screen.


To operate the menu it was simply a matter of selecting a game from the list with the cursor keys and then hitting RETURN.


Instructions for selecting the correct track on the CD.

Instructions for selecting the correct track on the CD.


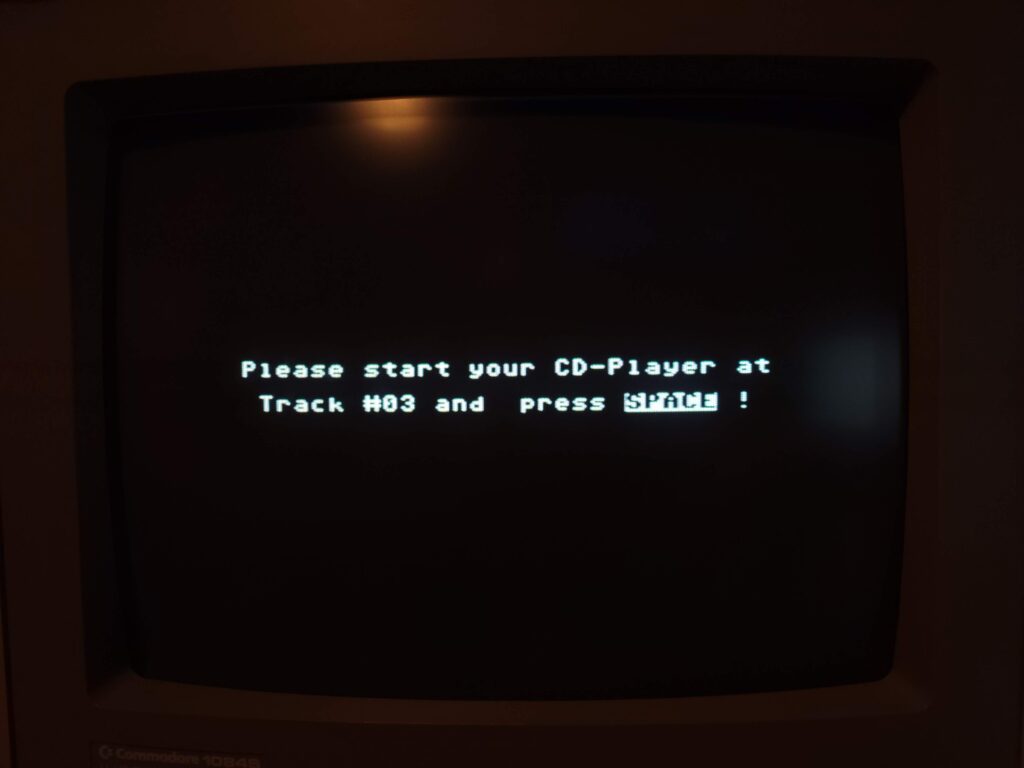
The program then tells you which track to select on your CD player before pressing SPACE to begin loading it.


C64 high speed loader

All programs utilise high speed loaders.


All the games utilise very efficient high-speed loaders so load in no time at all. Impossible Mission took about 35 seconds to load, Dropzone just 15 which is pretty impressive.


A Few of the Included Games

This slideshow requires JavaScript.


CD Contents

Here’s a complete rundown of the CD contents:

1. Start menu,

2. David’s Midnight Magic (Broderbund, flipper),

3. Dropzone (U.S.Gold, action),

4. Fist II – The Legend Continues (Melbourne House),

5. Impossible Mission (Epyx, action),

6-7. Jinks (Rainbow Arts),

8. Leaderboard Golf (Access, golf simulation),

9. Loderunner (Broderbund, jump&run),

10 & 11. M.U.L.E. (Electronic Arts),

12. Mission Elevator (Softgold, action),

13. Solomon’s Key (U.S. Gold),

14 to 20. Music pieces by Chris Hülsbeck,

21 to 33. Repetition of tracks 1 to 13.


Conclusion

This is a great little device once you’ve spent some time tweaking the sound levels. Being able to select which program to load by using the <</>> buttons on the CD player is far more convenient than using FF/RW on a Datasette so it’s shame there aren’t more compilation CD’s like this.

Although there’s only ten games on the CD there’s no reason why you can’t create your own CD compilations. I would think using something like TapWav to convert C64 .TAP files into digital WAVE files and then burning those to an audio CD would work. This is definitely something I’ll have a play around with when I have a spare moment in the future.

I had a lot of fun playing around with this little accessory and the included 10 games too. If you’d like to get hold of one for yourself then head on over to The Shareware PLUS Commodore 64 & 128 Blog and and grab one.

How to Build Your Own Cassette Tape Winder

I’ve always wanted a cassette tape winder so when I stumbled across this plan on Thingiverse I thought it would make a great little project for my 3D printer. Sure I could search on eBay and maybe pick up an old one but where’s the fun in that? So here’s a little guide to how I built my own cassette tape winder.

Computer Stuff

First off I had to download the zipped STL files from the Thingiverse site. (STL files contain 3D CAD objects that you can print).

Each component has it’s own STL file and there were 10 of them for this project. You can see them all listed in the folder screenshot below.


These are the components that you need to 3D print.


You cannot print STL files directly so I use a piece of free software called Cura to work with them. This software allows you to see the STL files as an interactive 3D model. It also processes STL files by ‘slicing’ them into layers that can then be saved as GCODE files and printed on a 3D printer. If you’ve never 3D printed something this might all sound very complicated but it really isn’t.


Build Your Own Cassette Tape Winder

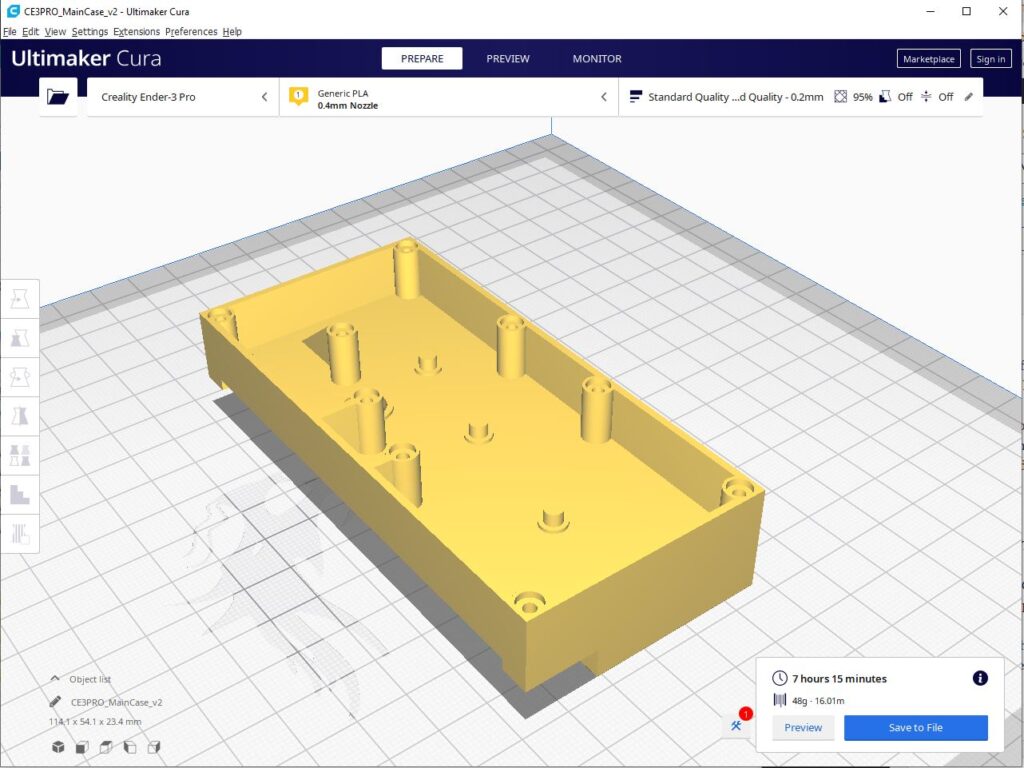
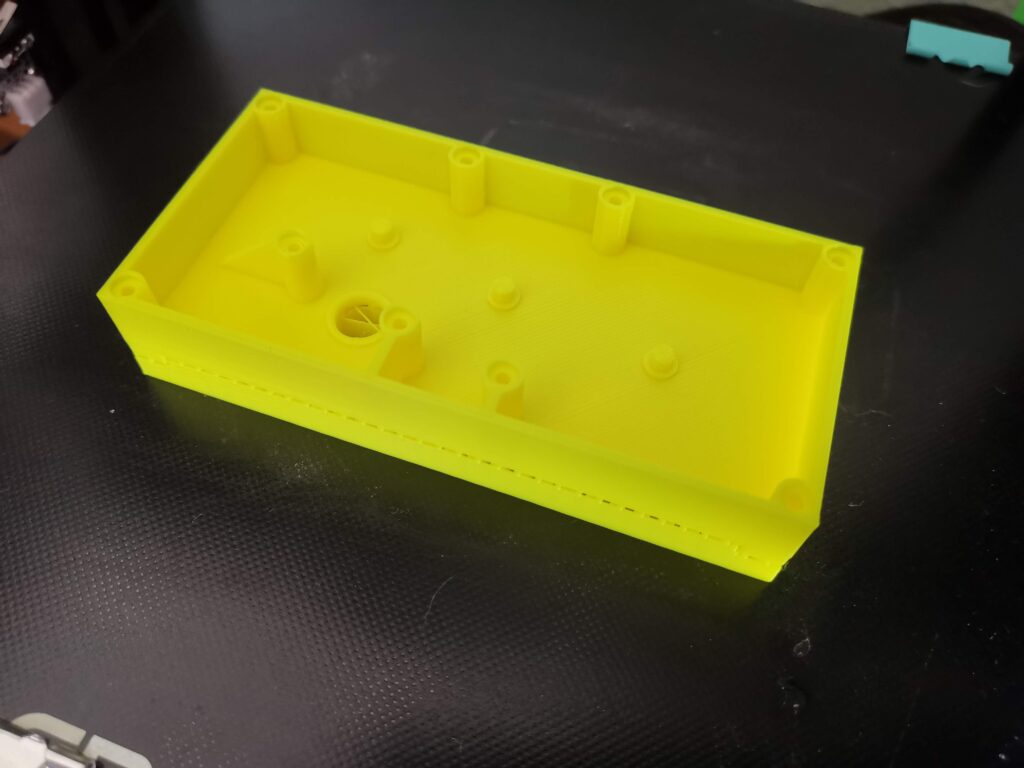
Winder case as viewed within Cura software.


The image above shows the main case for the winder in Cura. I have already sliced it and it shows an estimate of how long it will take to print, over 7 hours in this case. 3D printing is not a fast process!


Beginning the 3D Printing


Freshly printed winder case.


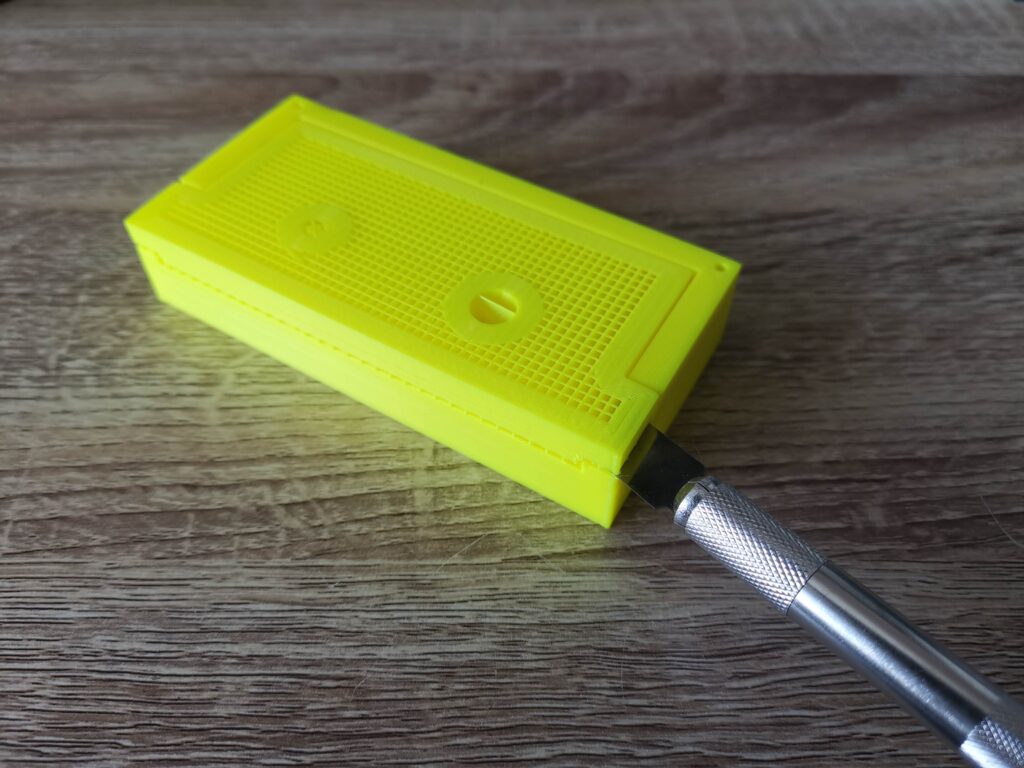
Above you can see the finished case print… but there’s some extra support material that will need to be removed from underneath it. 3D printers can’t print (over long distances at any rate) in thin air so they need to create a kind of scaffolding system (supports) in order to do so.


Removing the 3D printed support material.


Support material is designed to break away easily from the main print. In the above photo I used a sharp craft knife to break away the support material. It only took a couple of slices and then I was able to get my fingernail under it and simply pull it away in one piece.


View showing the support material removed.


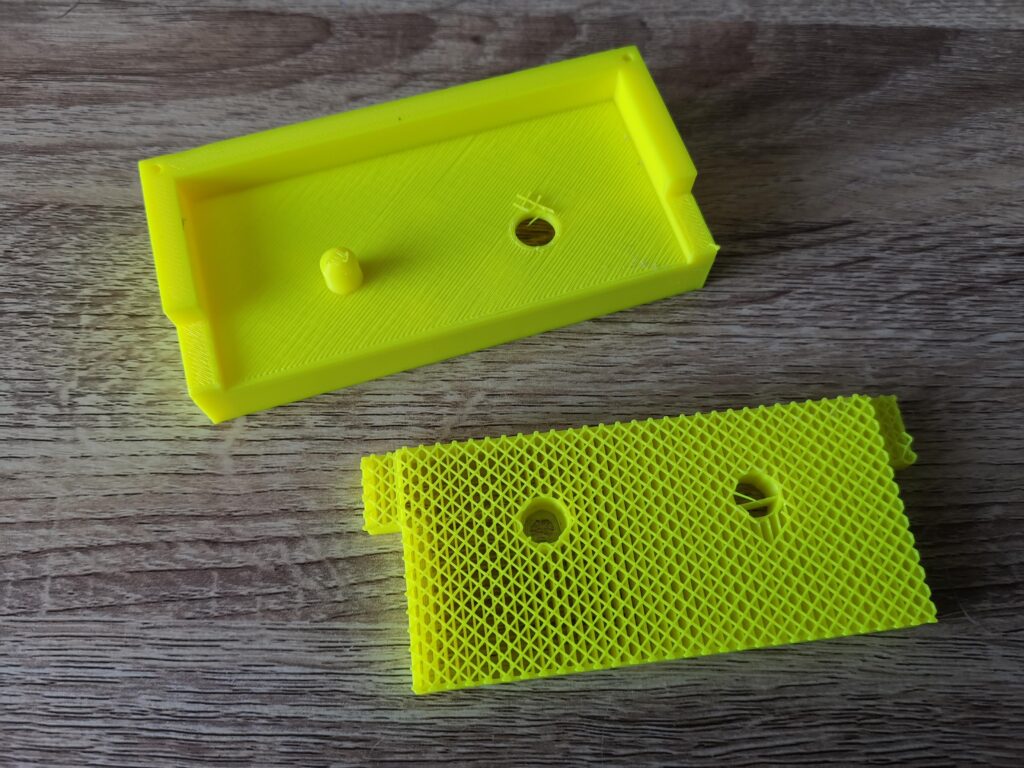
With the support material removed you can now see the winder start to take shape. In the above photo you can see the latticed support material too. It’s made this way to minimise plastic wastage and also allow it to be broken away easily. The fewer points of contact it has with the main build, the easier it is to break off.


Here the few little pieces of support material that were clinging on have been removed with a craft knife.


In the above photo I have cleared away the few little straggly bits of plastic left by the supports with my craft knife.


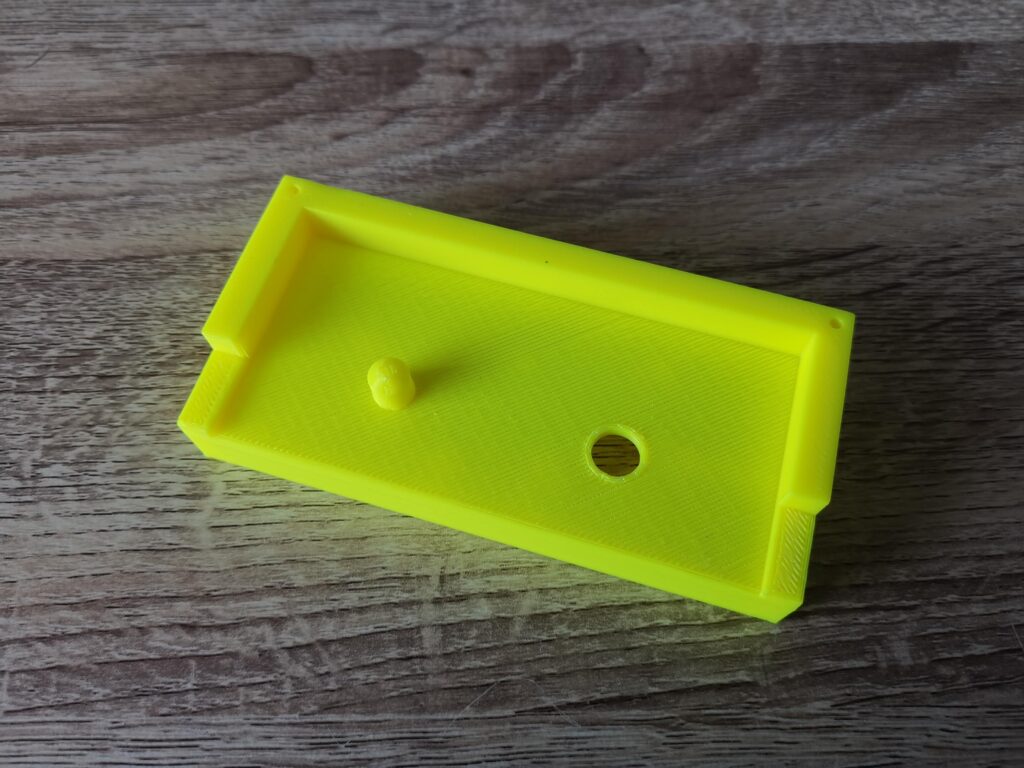
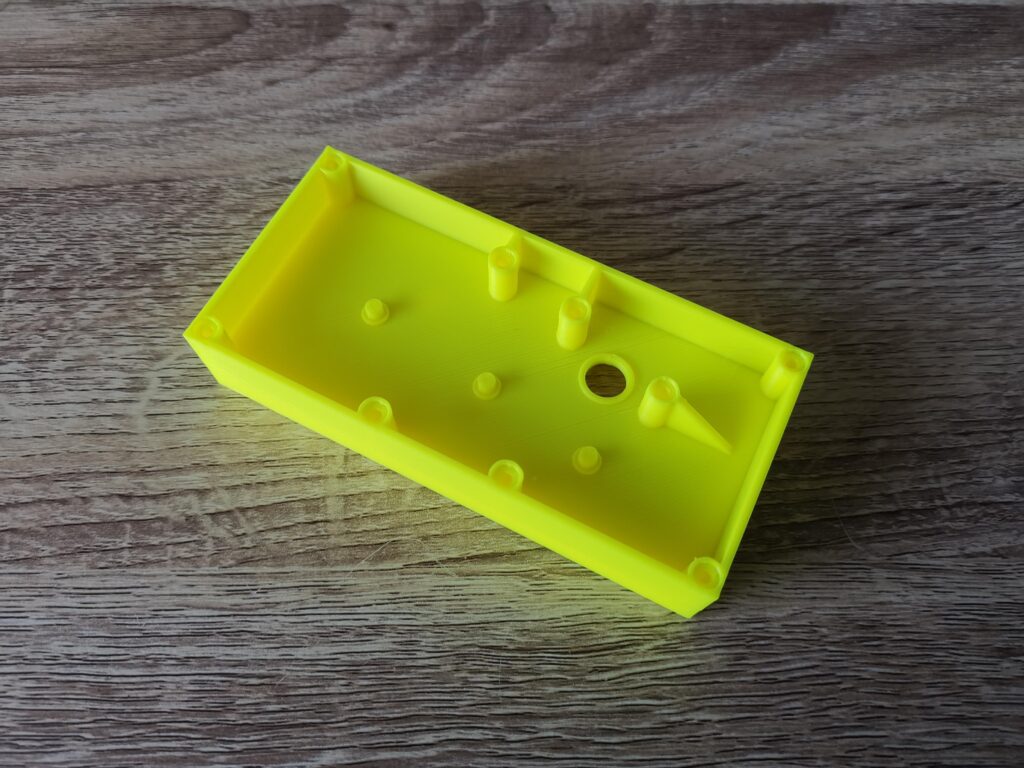
This is the case viewed from the other side.


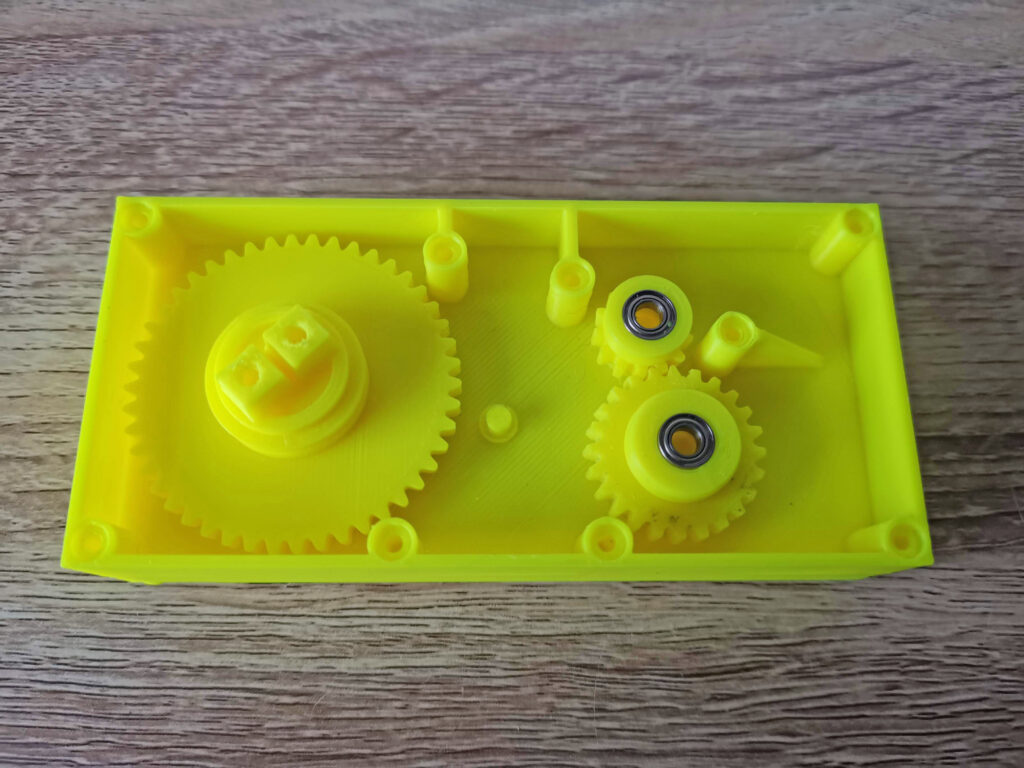
This is what the inside of the winder case looks like. There are 8 posts to support the case screws, a hole for the winder spool and 3 protrusions where the gears will sit.


Gathering the parts together


Build Your Own Cassette Tape Winder

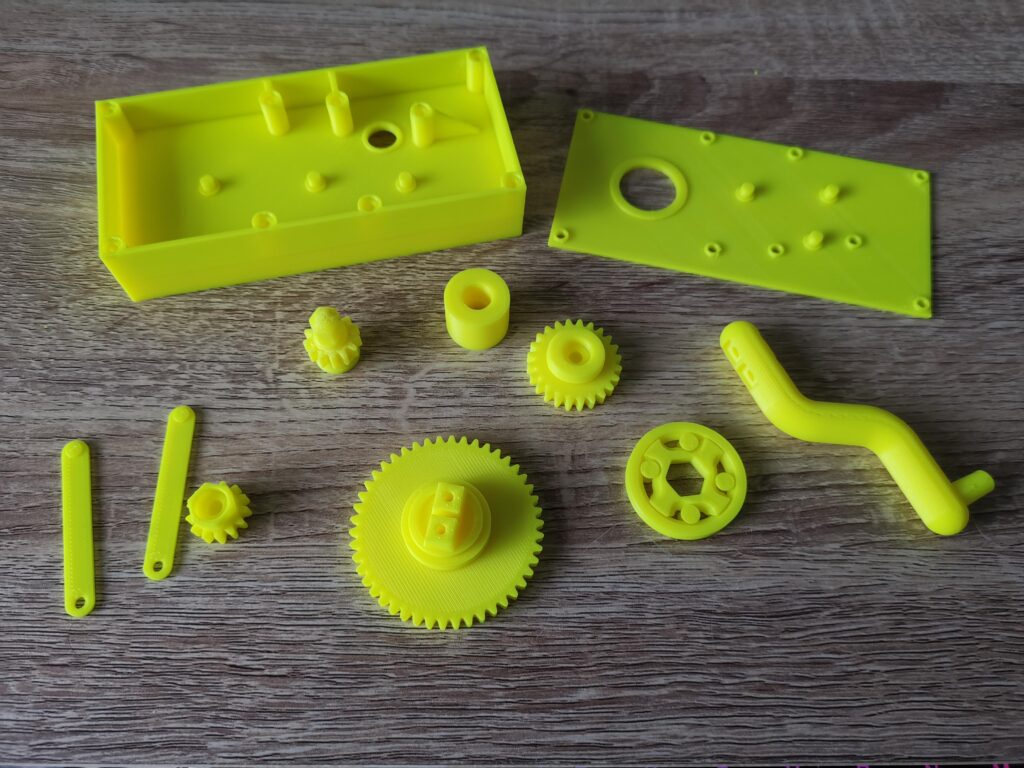
All the 3D printed components ready for assembly.


This photo shows all the parts of the winder fully printed a few days later. The instructions advise printing the cogs on rafts because they can be difficult to remove from the print bed. However I didn’t bother… I have glass bed and things pop off very easily once it cools down. It also means the finished prints are smooth and clean but of course YMMV. I did use supports for everything where the instructions recommended to do so and carefully removed them after printing.


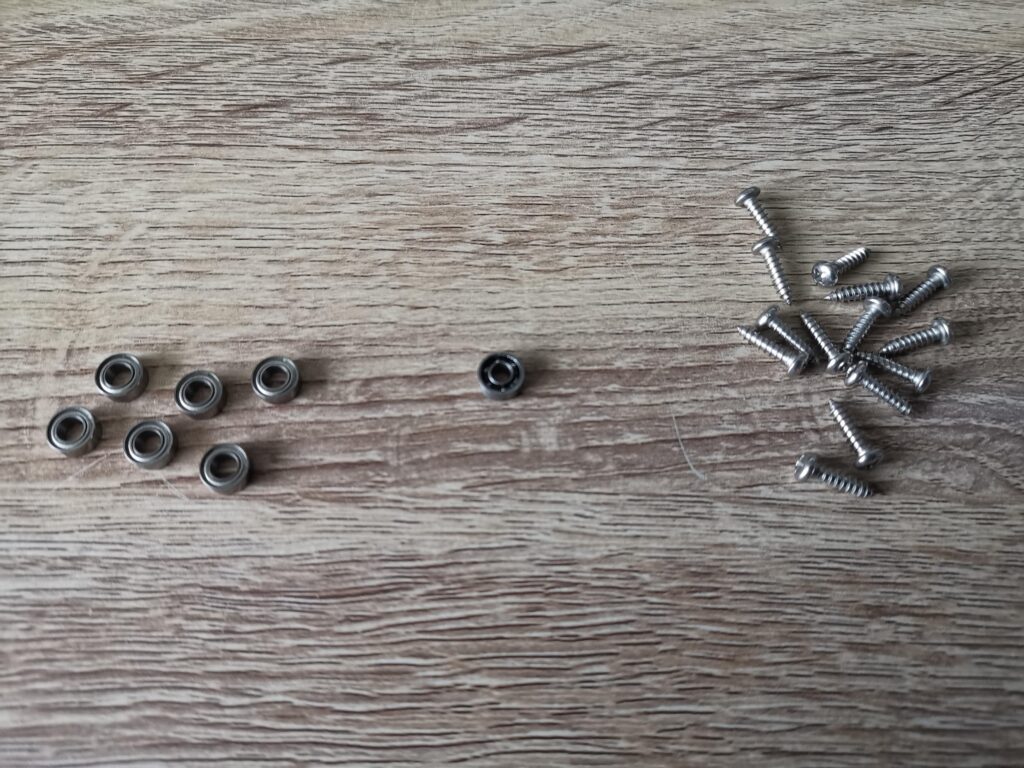
The bearings and screws needed.


What you will need

In addition to the 3D printed parts a few bits of hardware are also required. Some bearings, screws and a rubber belt. Here’s a rundown:

  • 6x  4x8x3 miniature ball bearings for the gear wheels – I used these.
  • 1x  3x8x3 miniature ball bearing (for the winder knob) – I used these.
  • 14x  3x12mm pan head self-tapping screws – I used these.
  • A 1mm square rubber belt approximately 55mm in diameter.
  • Philips screwdriver.
  • Craft Knife.
  • Side cutters (to help remove support material if necessary).
  • Silicone Grease (optional but recommended).
  • 3D printer!


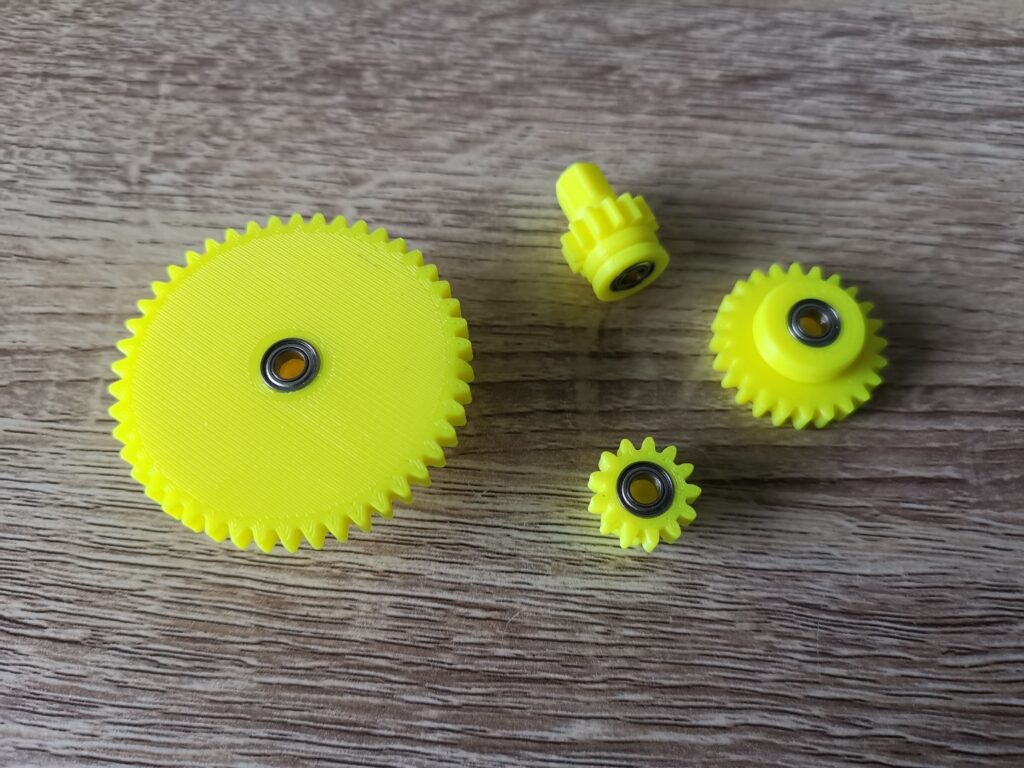
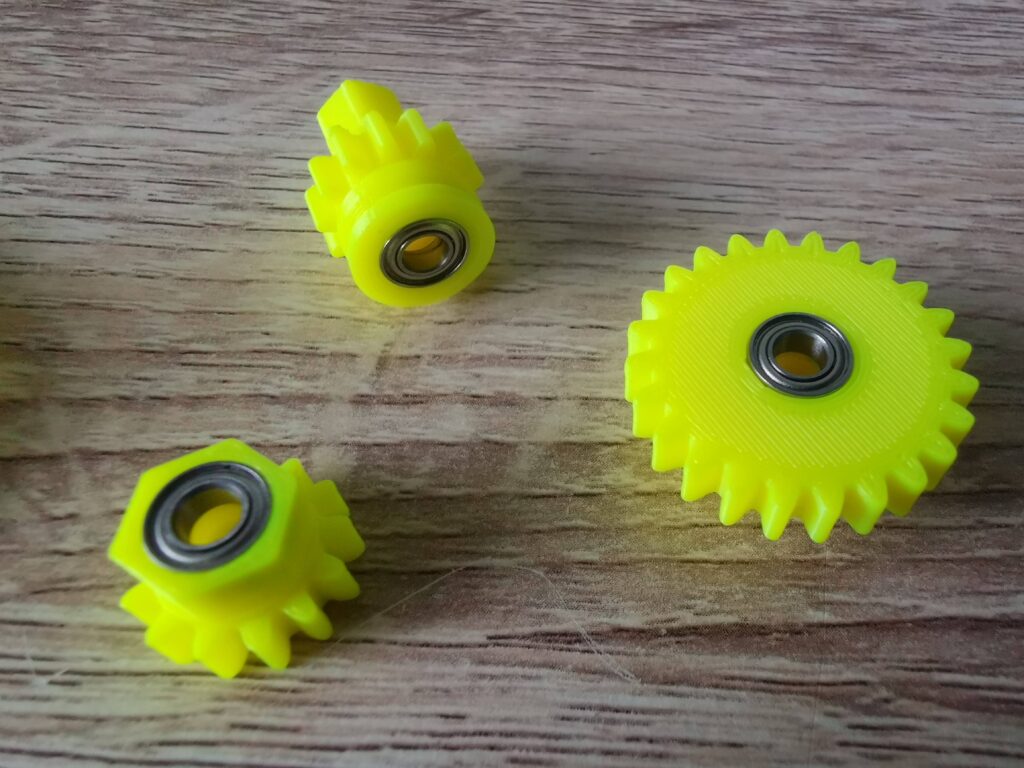
Gears with bearings fitted.


The next step was to fit the 6 bearings into the gear wheels. The two pulley cogs are fitted with two bearings, one each side whilst the driving gear and spool take just one.


Gears with bearings fitted.


The bearings were a snug fit but I didn’t have to force them in at all. Once fitted they remained in place by friction alone so there was no need to glue them in.


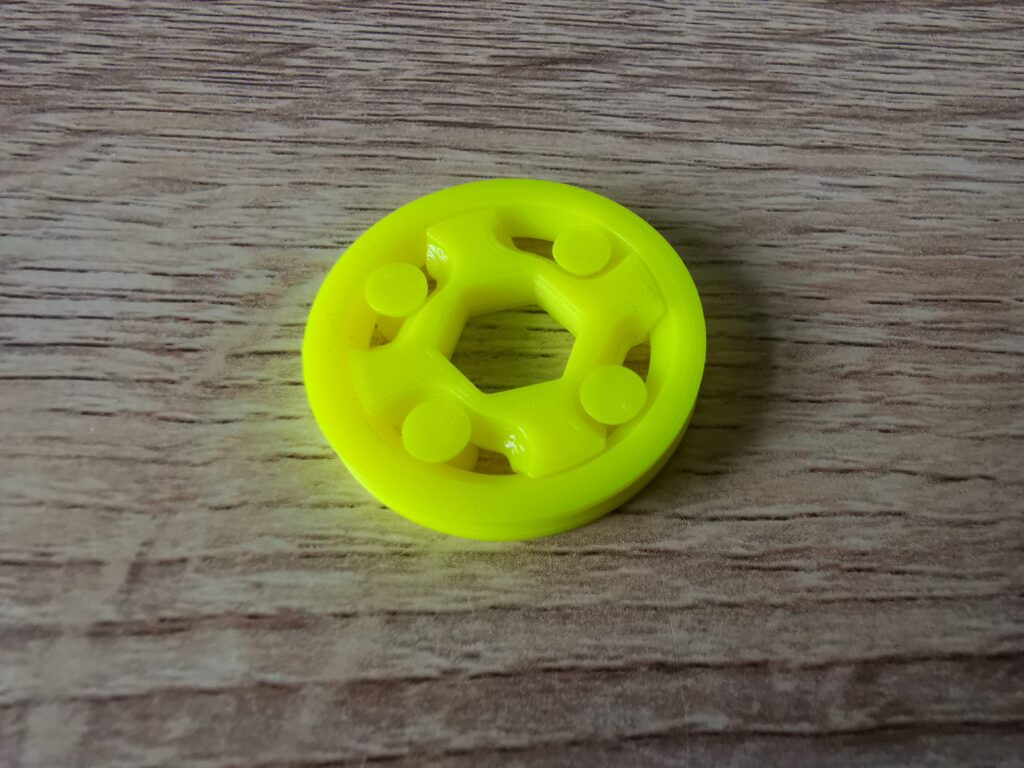
One-way clutch.


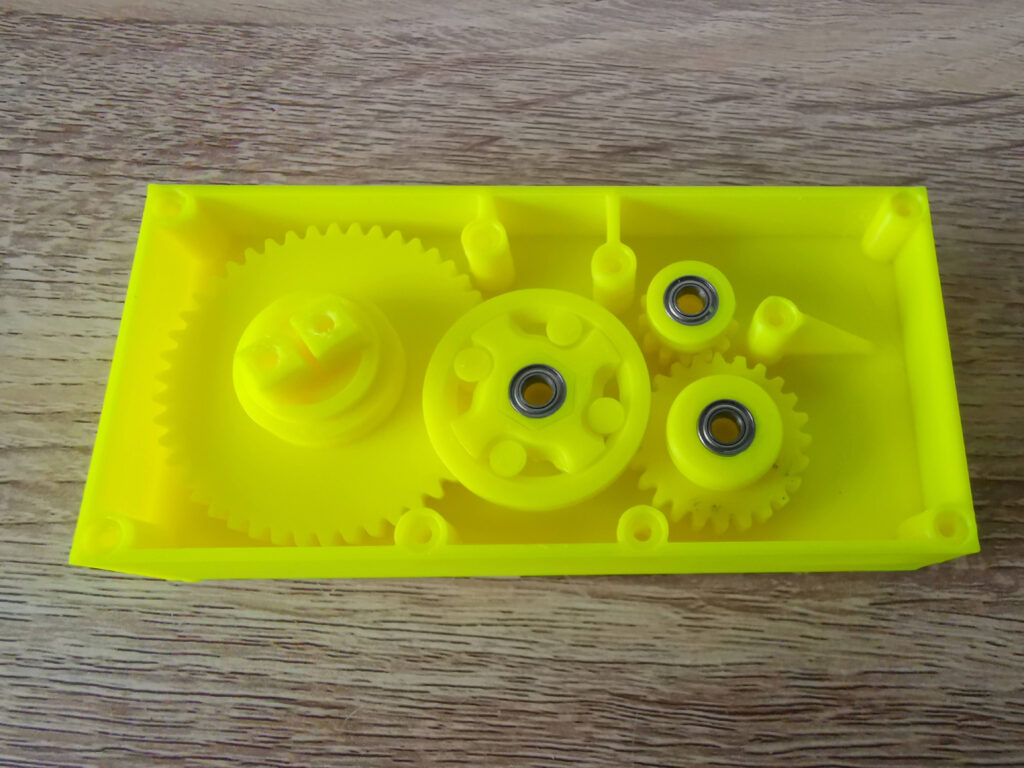
The winder incorporates an ingenious little one-way clutch mechanism that will only rotate in one direction. The benefit of this is it prevents you from accidentally winding a tape in the wrong direction causing it to unspool inside the case. Impressively it prints in situ too – there are 6 moving parts which are all printed as one complete mechanism together.


Putting it all Together


Start with these gears first.


Next came the exciting part – putting it all together. The driving gear, both pulley’s and spool went in first, making sure the bearings all seated correctly on the pegs.


Then add these. Note that pulley 1 and the clutch have already been assembled in this photo.


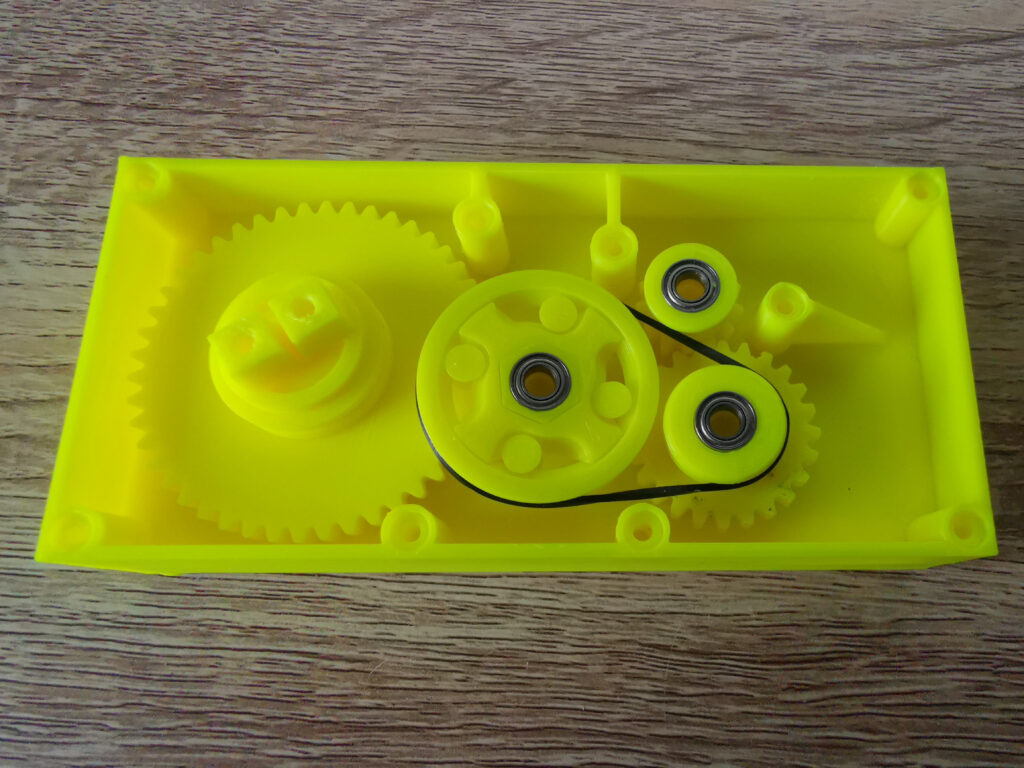
Next to go in was the one-way clutch which fitted onto the hexagonal shaft of pulley 1.  It can fit either way around but needs to installed so that it ‘sticks’ when turned anti-clockwise but free-wheels clockwise. The instructions said to glue this in position but I didn’t bother as its going nowhere once the lid is attached.


Build Your Own Cassette Tape Winder

The rubber belt is added last.


The belt went in next and simply needed stretching around the clutch and pulley 2. There was a fair amount of tension here with the clutch being pulled over to one side, however once the lid goes on and the pegs slot into the bearing top and bottom, it sorts itself out.


A minor issue…

I did have one issue at this point when putting everything together. There was too much friction with the spool and it wasn’t turning freely. I tried shaving/filing plastic from the cog teeth, adding a drop of oil to the bearing and adding a little silicone grease to the teeth but none of this really helped.

In the end I reprinted the part scaled down slightly to 98% which allowed the spool to spin freely. I also had to enlarge the bearing recess slightly with a Dremel so the bearing would still fit inside. Possibly if I’d persevered a little longer with the file I could have got the original part to work. However given how everything else fits together perfectly I figured the part needed re-designing slightly for a better fit. Regardless, I’m happy with my fix and how it now operates.

Before I screwed the back cover on I also added a tiny bit of silicone grease to the other gear wheels just to help keep them lubricated.


The Finished Winder


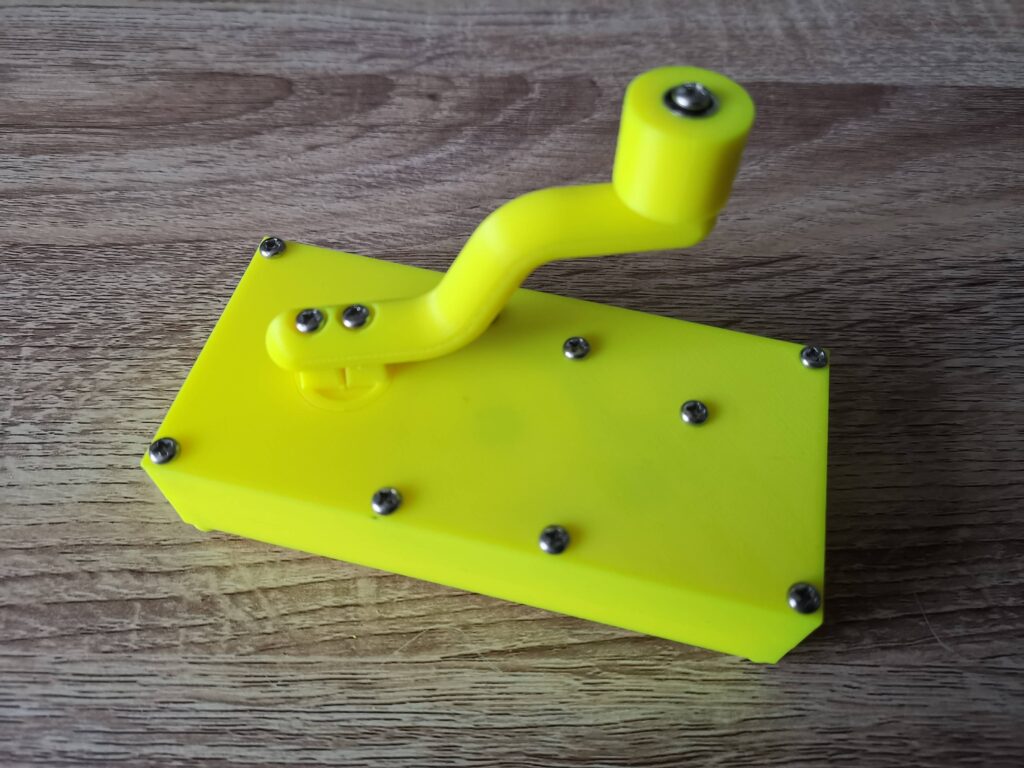
View of the back of the assembled winder.


Here’s the winder with the back screwed on and the handle and knob attached.  The knob also has a bearing inserted into it so that when it’s screwed to the handle it will still spin freely.

I had no issues screwing things together but the instructions did advise caution in case the plastic splits and suggested drilling out the holes further as a precaution. Again I didn’t bother as I felt my screws were a good fit for the holes but again YMMV.


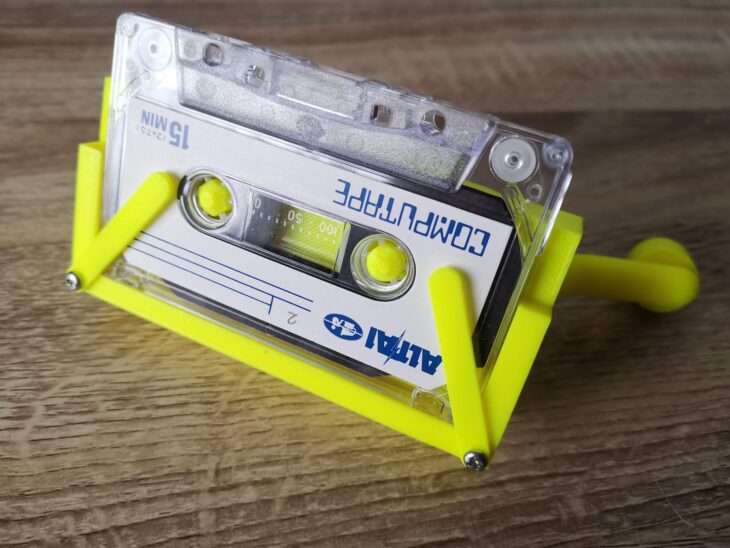
Front of Winder with retaining clips attached.


The two retainer clips attached to the front of the case using a couple more screws. The dimples are positioned such that they face the back of the winder.


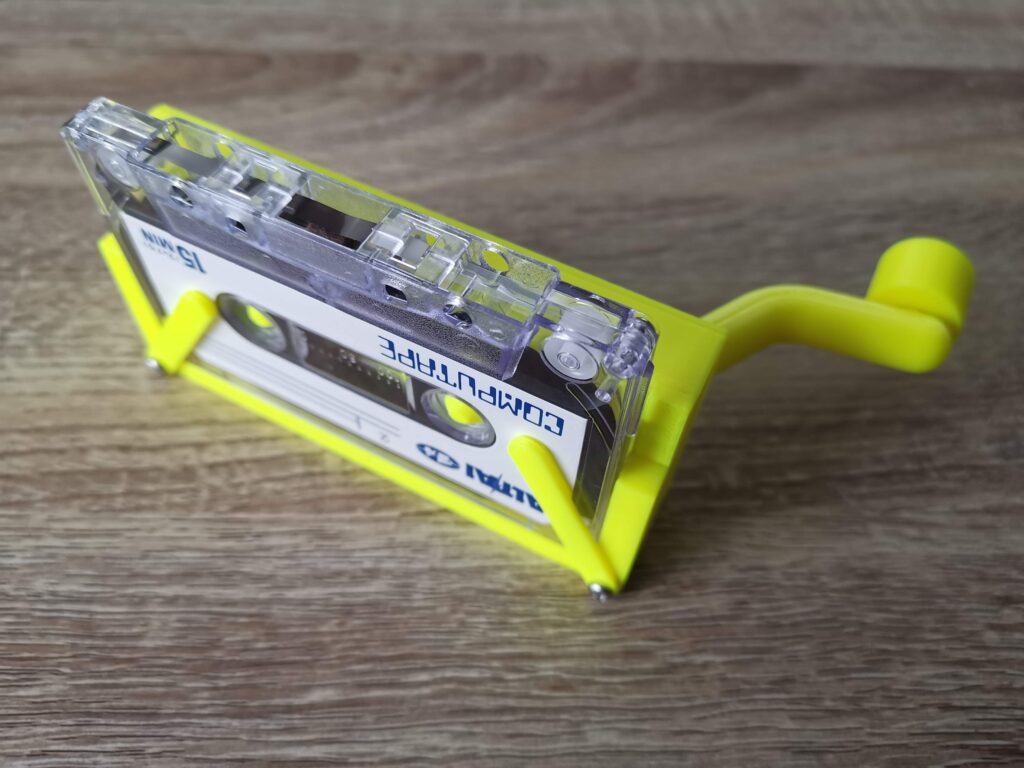
Tape held captive by retaining clips.


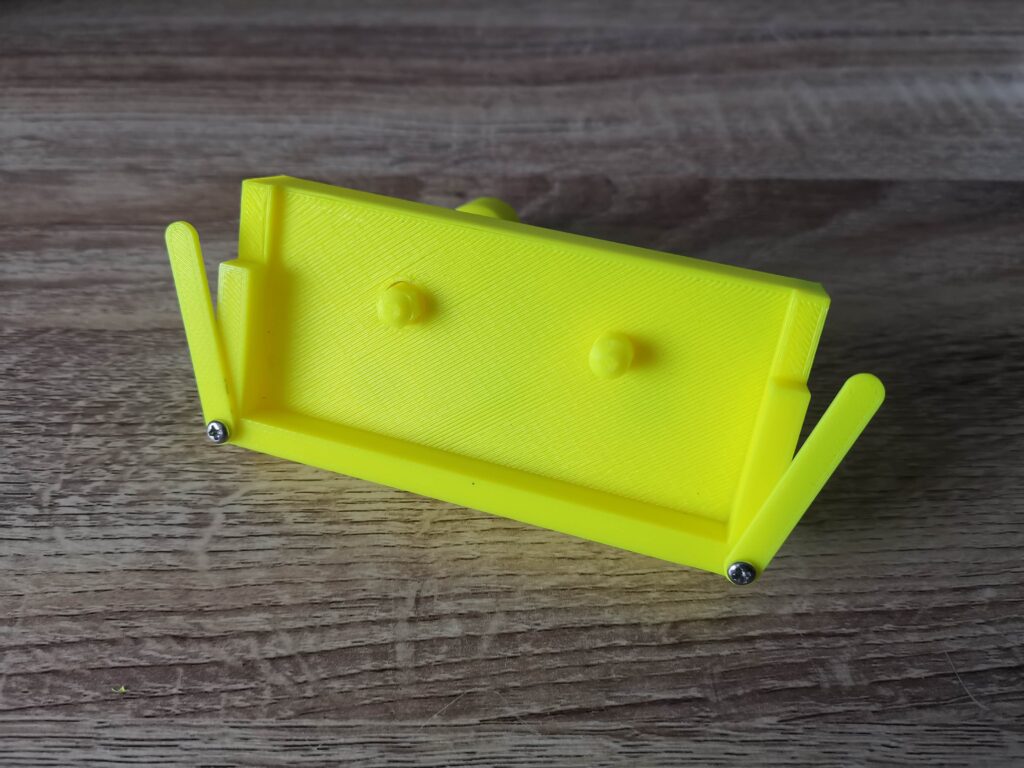
The screws need to be tightened just enough so that the clips can move with a little force but remain in any position. These are used to hold cassette tapes securely in place whilst winding.


Build Your Own Cassette Tape Winder

View of the winder looking down.


Video of winder in use

And here’s the finished winder. I have to say it works extremely well and will be a great help in minimising wear and tear to my various C2N Datasette’s, Walkman’s and tape decks. It’s fast too, I managed to rewind a C90 tape in around 30 seconds. The use of a belt helps to ensure that when reaching the end of a tape, any excess force results in the belt slipping rather than damaging the tape.


Audio Tape Cassette Storage – Solution/Review

audio tape cassette storage

My audio tape cassette storage problem has been bugging me for quite some time now. Over the years I’ve accumulated a lot of cassette tapes (both music and games) and that number is constantly increasing. I’ve been storing a lot of them in those old drawer units (the ones usually covered in tacky looking wood effect vinyl). Whilst this is an effective storage method I’ve always found them a bit of a pain to use and also my tapes are hidden away out of sight. I’ve also got loads of tapes stacked on top of each other on a shelf and this is far from ideal too. Forty year old tapes are not something I want to risk playing Jenga with!

EDIT (2024): I now produce my own cassette storage racks which you can check out here: Cassette Storage Racks.

All this leads me to the reason for posting this article. After searching around for a while for a better solution I finally found one I’m happy with so I thought I’d share it.


This is a link to the racks featured in this post.


The Solution

The audio tape cassette storage solution I found is a purpose made wooden rack that can hold 60 cassettes in their boxes. It’s manufactured by a company in Germany called ‘Protected’ and are available for sale on . Delivery took less than a week by DHL.


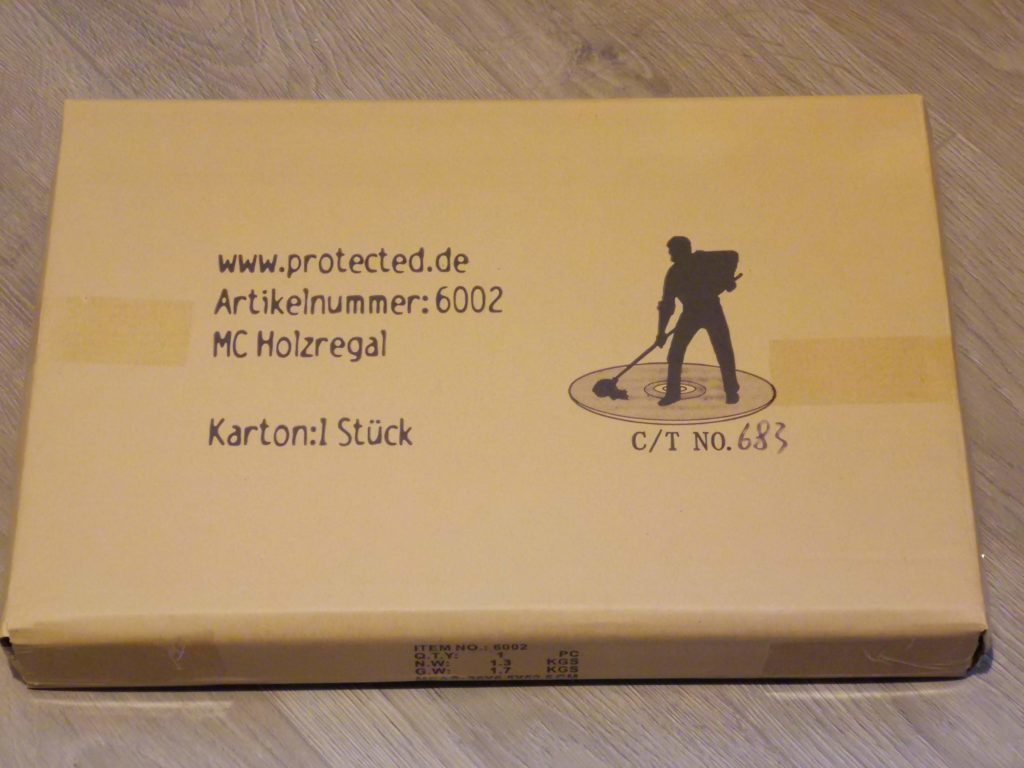
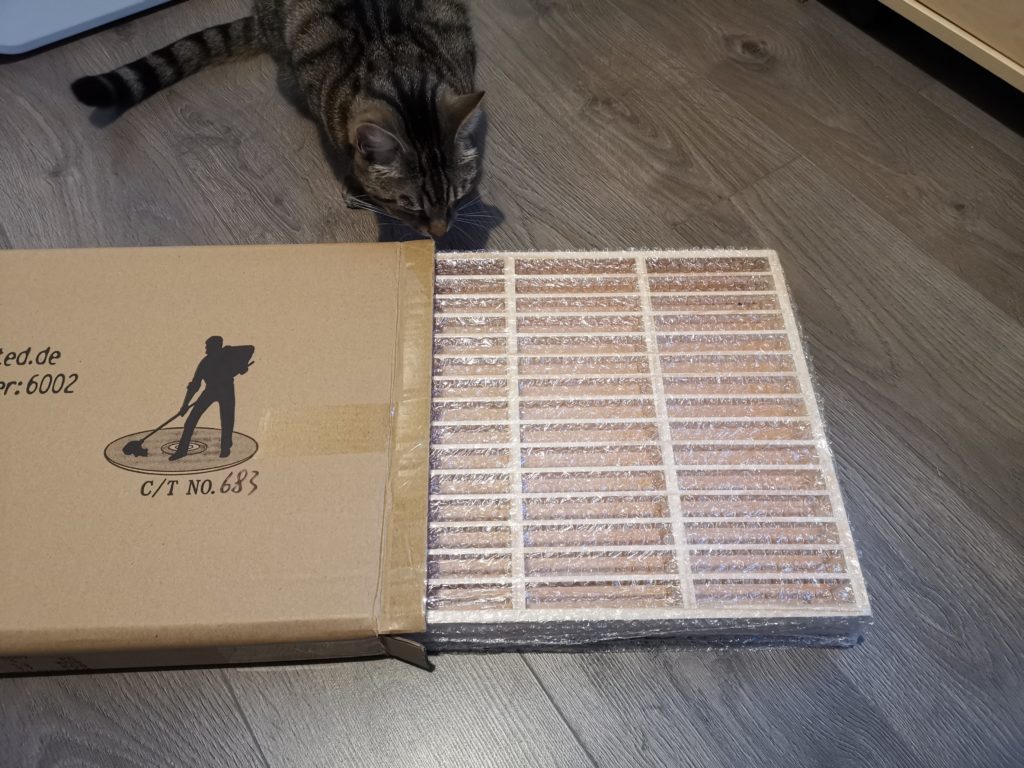
The packaging the racks arrived in.


The racks came individually packaged. Opening the cardboard box (carefully to avoid cutting into it) revealed the nicely bubble-wrapped rack inside.


audio tape cassette storage

My cat loves it when I open new parcels!


All three of mine arrived in great shape. I must admit I was a little wary about ordering at first as I wasn’t sure if these were getting knocked together in someone’s garden shed. There is only one (poor) photo on the Amazon website and precious little info provided. However I was very pleased to discover a high standard of both manufacture and finish.


audio tape cassette storage

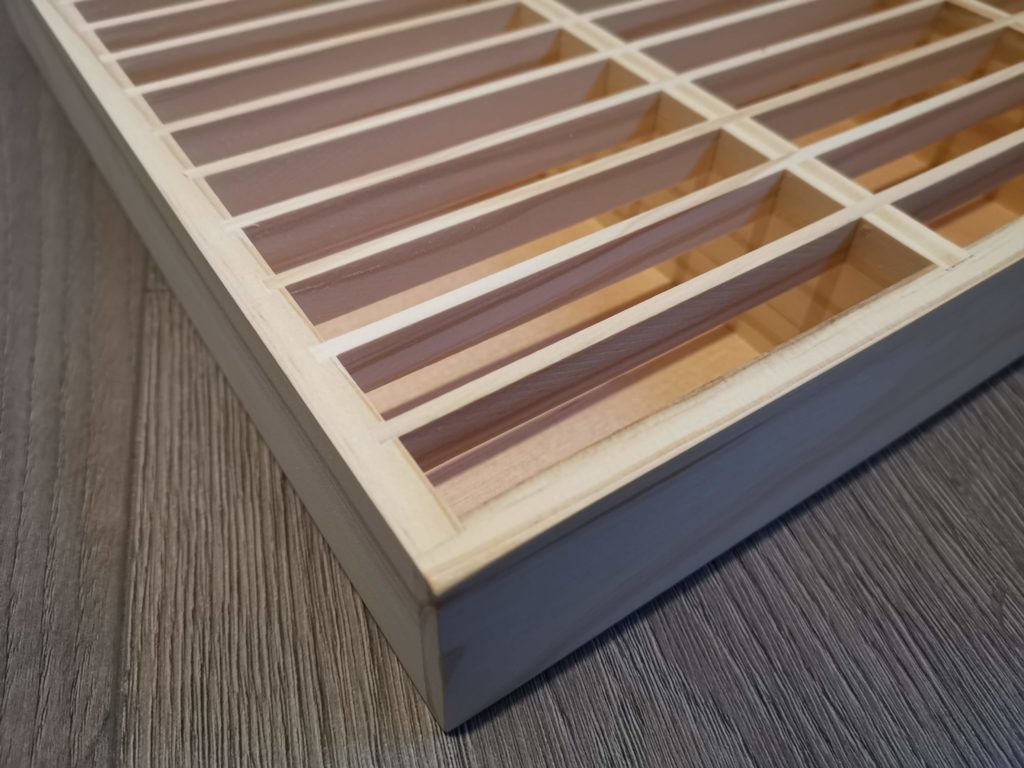
Nicely finished woodwork


A Closer Look

The racks are constructed from solid strips of pine wood and the back panel is made of plywood. All the strips of wood forming the slots are perfectly aligned and fit perfectly flush. There are no sharp edges or splinters to worry about as everything has been sanded smooth and edges rounded off. The back is a little rough but once in use you’re never going to see or touch it again.

There are 4 pre-drilled holes in each corner so you can wall mount the racks. Somewhat disappointingly plugs and screws are not provided. However this is not that big a deal and most people my age have probably got loads in a jam jar somewhere in their shed or garage. I would also recommend the use of a washer as the holes are quite big. Using a washer will also prevent you from driving a screw right through the thin plywood back panel.


width…


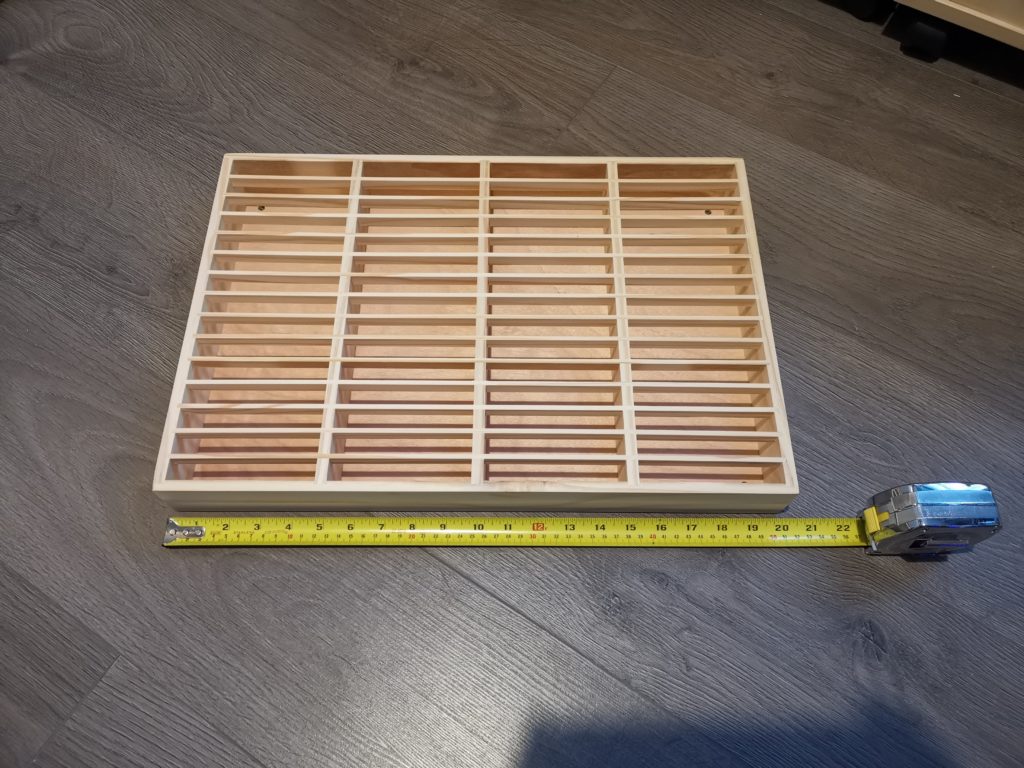
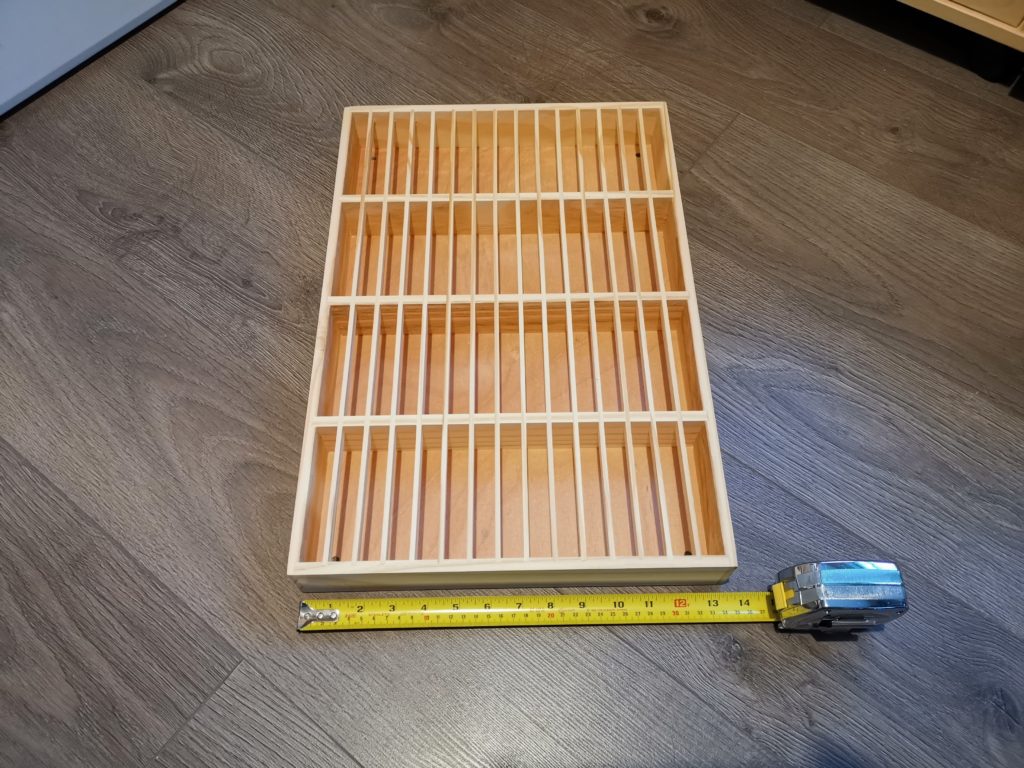
Size wise the racks are approximately 20″ (51cm) long and 13.5″ (34cm) tall.


height…


I opted for the natural pine finish but they also offer a white one too. I’ve not seen that in the flesh so can’t comment on the finish of it. I guess you could also either varnish or paint them to suite your colour scheme too. I’m quite happy to keep the bare wood finish for my setup though.


Closer look at the slot construction


The slots are perfectly sized and I’ve not found any cassettes that wouldn’t fit into the them.


audio tape cassette storage

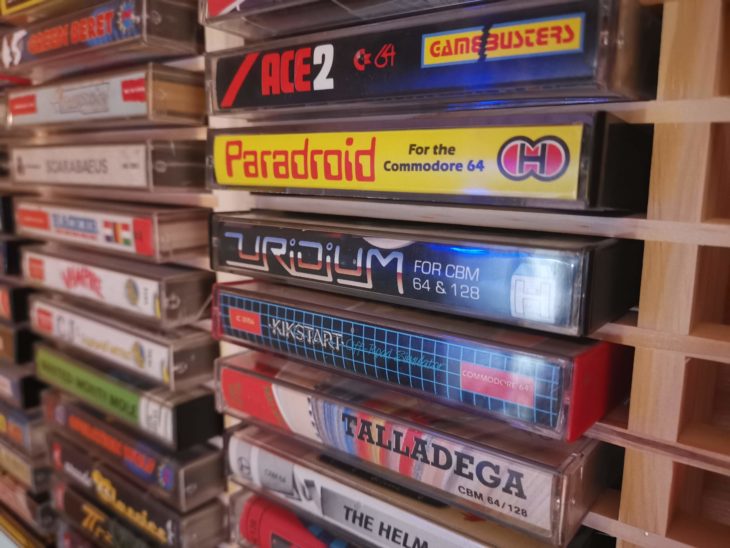
A selection of VIC20 games slotted in nicely


The rack is slightly shallower than a cassette is deep (2″ or 50mm) which means tapes stick out about 1/2″ (12mm). This allows you to easily get your fingers around them when you need to get them out.


audio tape cassette storage

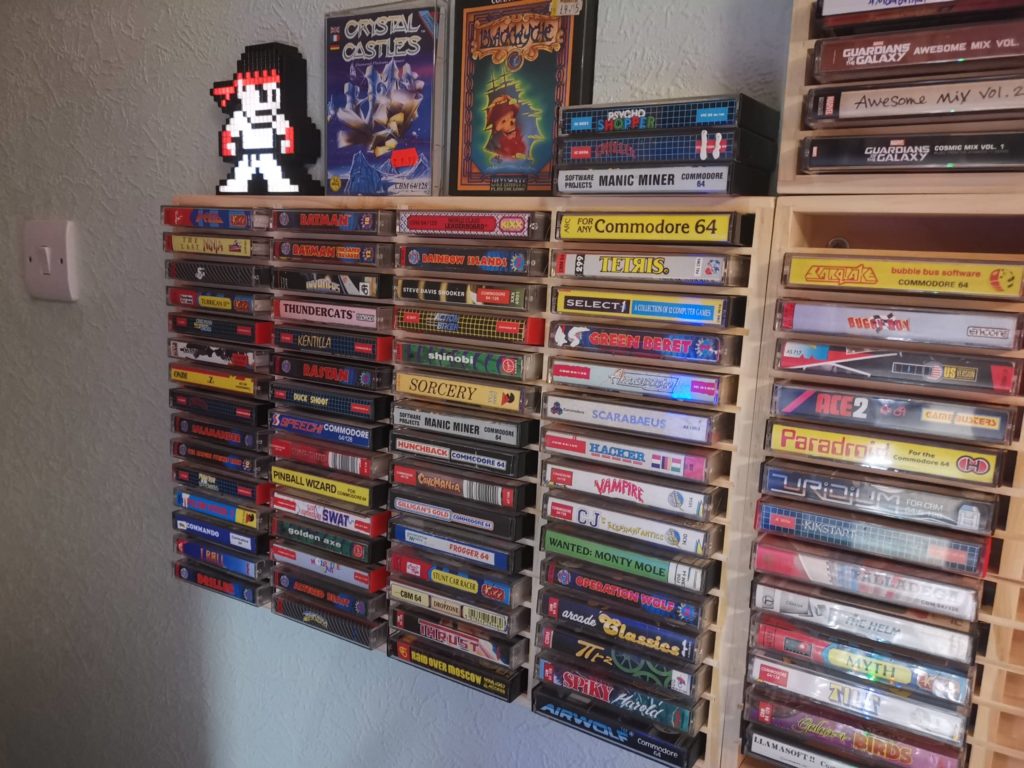
Top of rack makes for a useful display area.


You can even use the top of the rack as a small shelf for extra storage or display purposes. I’m still experimenting with what looks best but will probably settle for displaying double-cassette boxes or the odd big box game.


audio tape cassette storage

Racks filling up nicely…

Finishing Words

I have to say I really love these racks and I’m glad I’ve finally found a storage solution that fulfils my desire to display my stuff too. I filled my three racks straight away so have just ordered another three. With six racks I’ll have the capacity to store 360 tapes in total. That’ll allow me to store all the tapes I currently own and hopefully leave me with enough empty slots to accommodate future purchases, fingers crossed.

The racks are available from Amazon here:


Update: 1st April 2020

Fitted the extra three racks so as promised here’s a photo of the finished project. I still have a few empty slots left thankfully but how long for is anyone’s guess!


audio tape cassette storage

Finished project with enough space for 360 cassette tapes.


Hope you found this article useful!

Cassette Deck Maintenance: Demagnetising a Tape Head

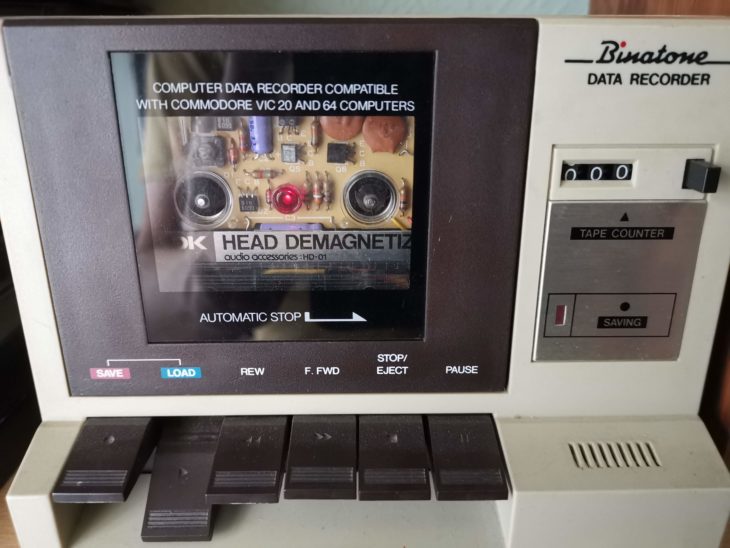
Binatone Data Recorder - Demagnetising Tape head

In addition to regular cleaning another vital part of keeping your cassette deck running smoothly is demagnetising the tape head. This applies to both computer cassette decks and Hi-Fi ones. Over time a residual magnetic field can build up on the head. Not only can this adversely affect playback (more noise and loss of high end response) but it can also degrade the quality of any tape passing over it.

A cassette tape is basically a strip of thin plastic coated with a ferrous material. Music (or data in the case of a computer tape) is recorded onto it by using an electro-magnet to magnetise the tape surface to varying degrees. A tape can be erased by placing a strong magnet near it so even a weakly magnetised head will, over time, slowly erase any recordings passing over it. The more you play a tape on a deck with a magnetised head, the greater the cumulative effect will be.

TDK HD-01 Tape Head Demagnetiser

This slideshow requires JavaScript.


So what can you do about it? Well thankfully there are a number of different ways you can demagnetise tape heads. Popular methods include a mains powered electro-magnetic wand and those cheap cleaning cassettes that contain a rotating magnet on a little disc. In the past I relied on an the latter; an old Maxell cleaner/demagnetising cassette. However just recently I stumbled across this TDK one advertised as ‘New Old Stock’. I’ve always trusted TDK as a brand, they make good quality products and know their stuff. It was a little on the expensive side due to me needing to pay shipping and import taxes from the US but I felt it was worth it.


This slideshow requires JavaScript.


Although the box it came in was very tatty, the contents were like new. Inside there was a small instruction manual and the demagnetiser itself. The device is powered by a small 1.5V lithium battery which should be good for 500 uses according to the instructions.

Naturally I had to install a new battery before I could get it to work. The rear of the instruction manual is stamped with the year 1978 so this little gadget is now over 40 years old! Thankfully it takes a standard size A76/LR44 button cell battery that is still readily available.


How does it work? – Demagnetising the tape heads

So how do you use it? Well it really couldn’t be any simpler. You basically pop it into your cassette player and press play! There’s a small plastic micro-switch above the play head that is activated by the motion of play head moving upwards when you press the play button. A red LED illuminates at the centre of the cassette to demonstrate that it’s working and that’s it, job done! When activated the circuitry inside the demagnetiser generates a pulse signal which demagnetises the play head in a matter of seconds.

This slideshow requires JavaScript.


There’s a little more to the process than that if you are using the device in a cassette deck that doesn’t have a mechanical play button. The device won’t work until the play button is pressed so if you have a deck that won’t allow you to press play whilst powered off then you need to take a few precautions. This is because of the strong signal it outputs which can damage amplifiers and headphones if you don’t make sure to fully turn down any volume controls first. My Hi-Fi has a fully electronic transport mechanism so I have to be careful when using it on that device for example.


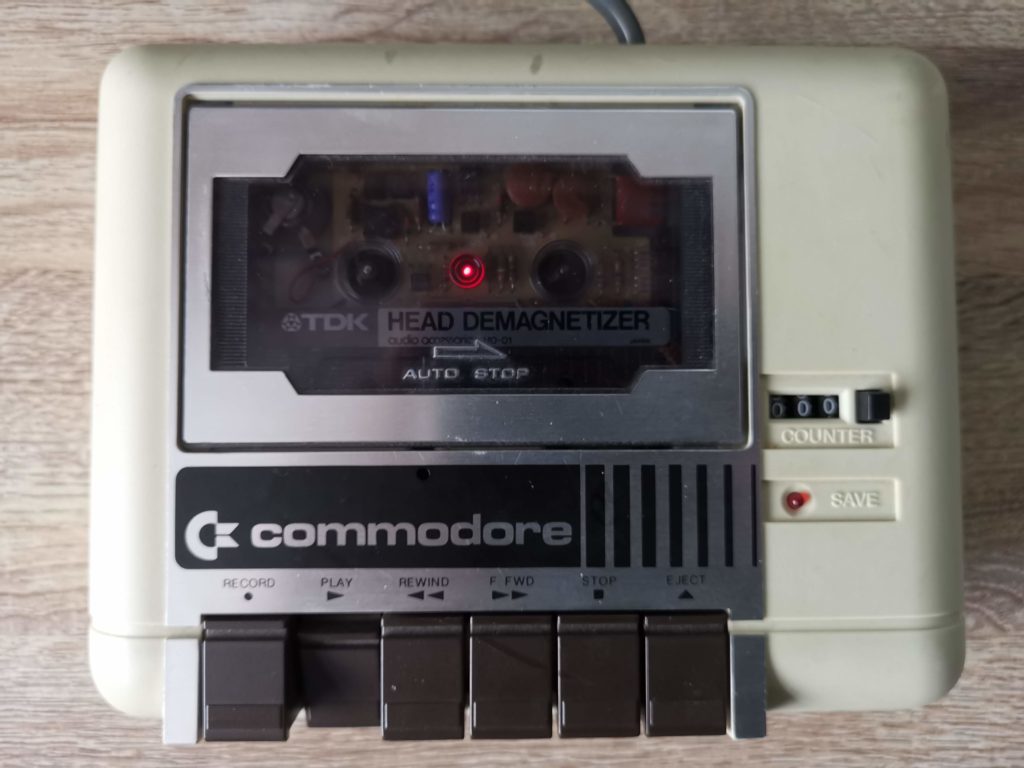
Commodore C2N - Demagnetising Tape head

Commodore C2N – Demagnetising the tape head in progress!


Thankfully most older devices have fully manual play buttons and need no such precautions. With devices like the Commodore C2N Datasette I can simply pop the cassette in, press play and the get the job done in seconds. I would imagine virtually all Walkmans would be equally simple to work with.

The manual recommends demagnetising your tape head every 30 hours of playing time. Therefore, how often you need to do this will depend on what sort of tapes you are playing and how often you play them. For my Hi-Fi deck regularly playing C60 and C90 tapes this could be as often as once a fortnight. For my computer decks playing relatively short C15 tapes much less frequently, once every 6 months would be more appropriate.

Despite the cost I think the device is totally worth my time and money. Given how precious some of my old cassette tapes and games are to me, anything I can do to help prolong their lifespan is worth doing in my book.

Retro Grooves 3, a MiniDisc release in 2019!

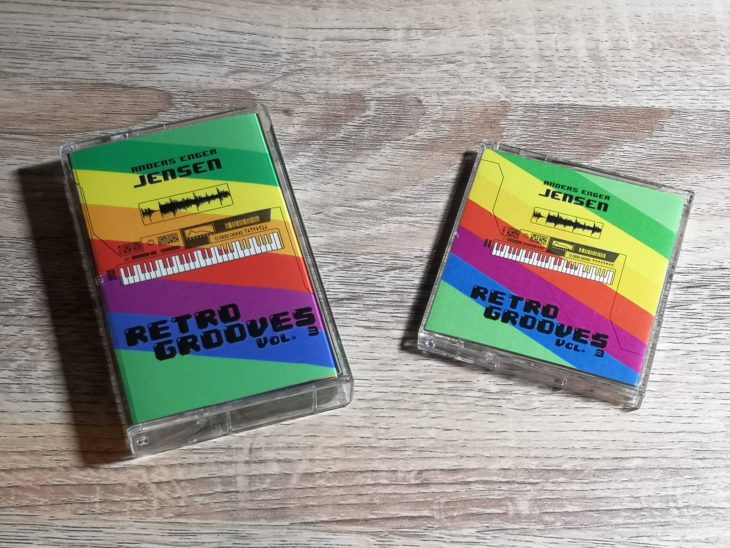
Retro Grooves MiniDisc

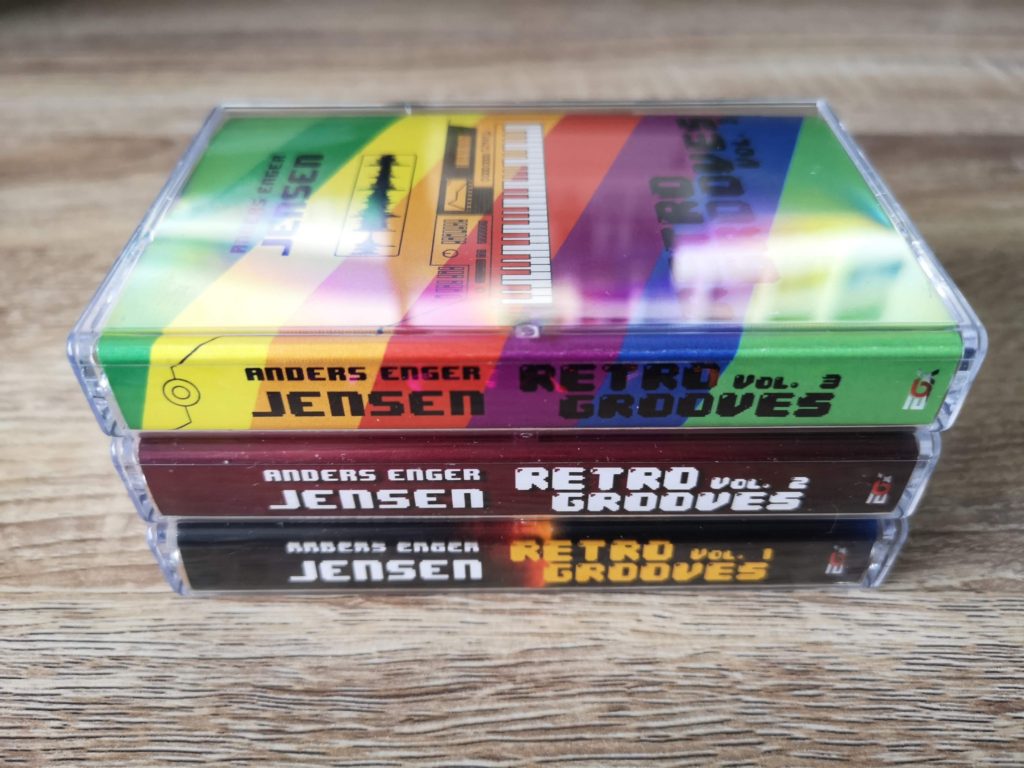
As a fan of Anders Enger Jensen’s other releases I’ve been looking forward to Retro Grooves 3 for quite some time now. What I was not expecting at all was for him to release this on MiniDisc! When he emailed me to let me know it was coming out on this format I just had to get it, as well as the cassette version!


This slideshow requires JavaScript.


Both versions are really professionally presented with full colour inlays that unfold to reveal a lot of interesting information about each track. This is something you just don’t get with digital music. I loved being able to listen to each track for the first time whilst browsing Anders’ notes about what inspired him or the processes involved in creating a particular track.


This slideshow requires JavaScript.


He’s certainly pulled out all the stops for the MiniDisc release, the artwork on the disc has been printed directly onto the case itself – no cheap stick-on labels here. This is certainly the only MiniDisc in my collection that has been printed this way and it looks amazing! The cassette release still looks good too, coming in a transparent green case with the album details printed on it in contrasting white.


This slideshow requires JavaScript.


A lossless digital download of the whole album is included with both the Cassette and MiniDisc formats. Additionally the digital download includes an extra 16 bonus tracks not included on either the tape or disc releases. Alternatively, if you don’t mind missing out on the physical formats completely you can opt to just buy the album digitally if you prefer.


Retro Grooves MiniDisc

The entire Retro Grooves cassette collection to date…


Verdict

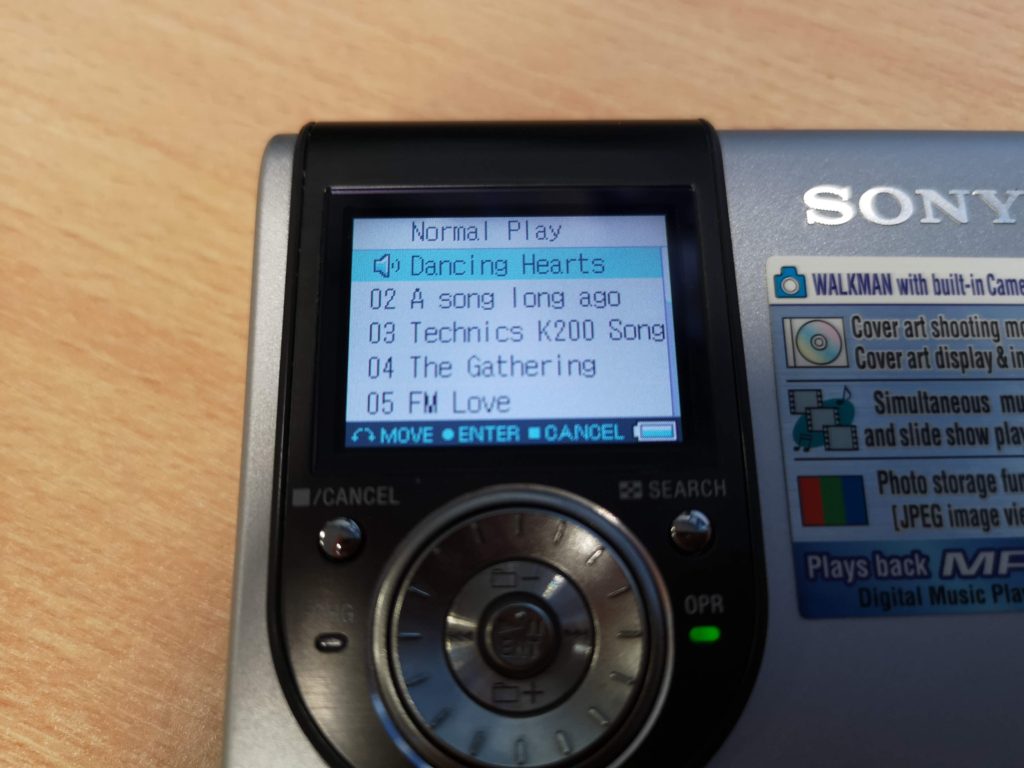
Regardless of which format you choose, if you enjoyed either of his previous Retro Groove albums, or even Troubled Hearts then I pretty much guarantee that you will also enjoy this. Anders’ signature style of upbeat ‘cheerful’ sounding synth music mixed with occasional samples is present and correct. My personal standout favourite track has to be ‘FM Love’ closely followed by ‘Isabella’s Dream’ which features some lovely harmonised female vocal samples.


Retro Grooves MiniDisc

MiniDisc version includes full track listings


There’s a couple of tracks with backing singers this time around that you may or may not enjoy depending on your taste. ‘Escape Your Fear’ sounds like it could have come straight from the Troubled Hearts album and I really enjoyed it. The other, entitled ‘Let’s Fly’, I didn’t like so much as the vocals are very processed and it just didn’t really click for me. It wasn’t bad enough that I’d want to skip it, but it’s definitely not something I’d want on repeat.

Anyway if you would like to get hold of a copy for yourself than head on over to EOX Studios website.

Replacing Grotty Game Library Cases

Replacing Game Library Cases

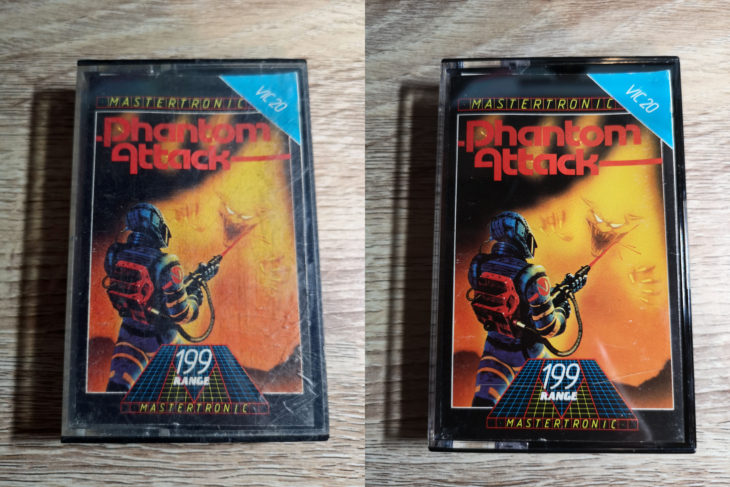
Replacing your game library cases is a very quick and easy method of rejuvenating some of your old cassette games. If yours are anything like some of mine then you may have several scratched up, chipped, broken or yellowed cases skulking around in your collection. The good news is that there are still companies out there supplying replacement cassette library cases. The company I use, based in the UK, is called Tapeline but there are probably others too.

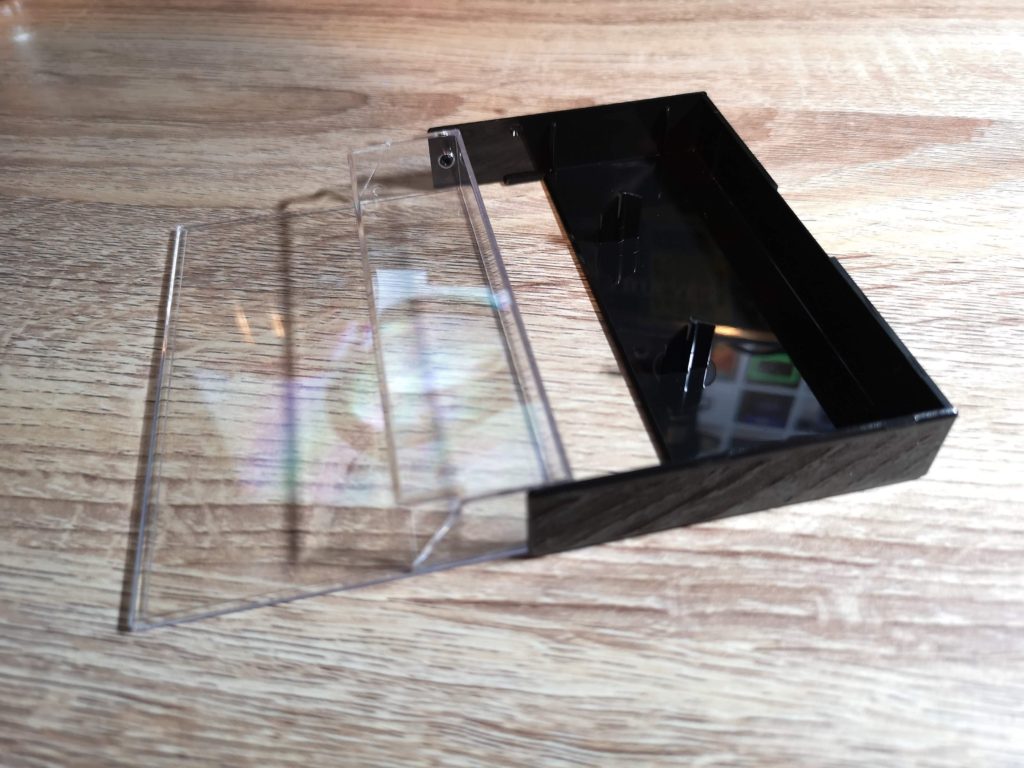
The ones I’m using here are just standard black library cases costing around 26p each at the time of writing. You can get a variety of different types and colours too, even double and triple cases should you need them.


Replacing Game Library Cases

Standard Black Library Case


Once the cases arrive it’s simply a matter of removing the cassette tape and paper ‘J’ card inlay from the old case and popping it inside a nice shiny new one. Here’s a few before and after photos to show the difference they can make. I’m sure you’ll agree that after replacing the game library cases the games look infinitely better, almost like new!


Replacing Game Library Cases

Before


Replacing Game Library Cases

After


Replacing Game Library Cases

Before


Replacing Game Library Cases

After


Replacing Game Library Cases

Before


Replacing Game Library Cases

After


Replacing Game Library Cases

Before


Replacing Game Library Cases

After

Fire Breath, Little Knight Arthur & Valkyrie Trilogy – Mini Reviews

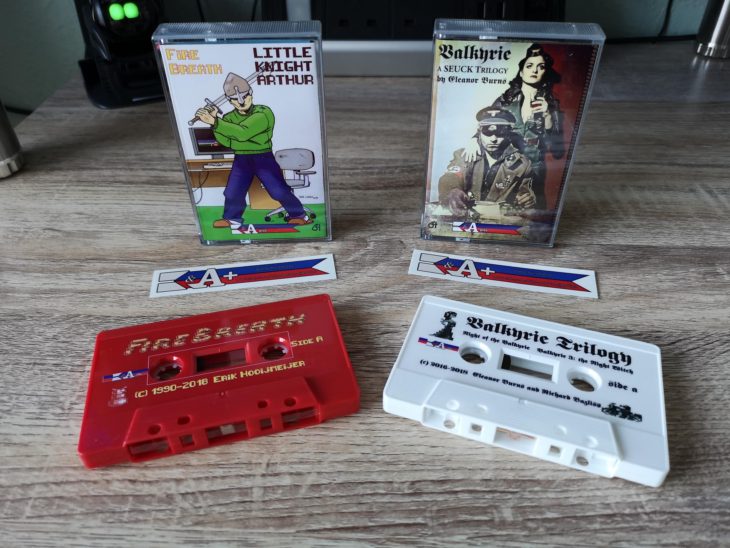
Fire Breath, Little Knight Arthur & Valkyrie Trilogy

This is a quick look at Fire Breath, Little Knight Arthur & Valkyrie Trilogy published by K&A+ Magazine for the Commodore 64. These are basically volumes #2 and #3 of a series. Volume #1 was ‘Single Button Games‘. All the games feature attractive loading screens and great music to entertain you whilst they (turbo)load.


Fire Breath


Fire Breath, Little Knight Arthur & Valkyrie Trilogy

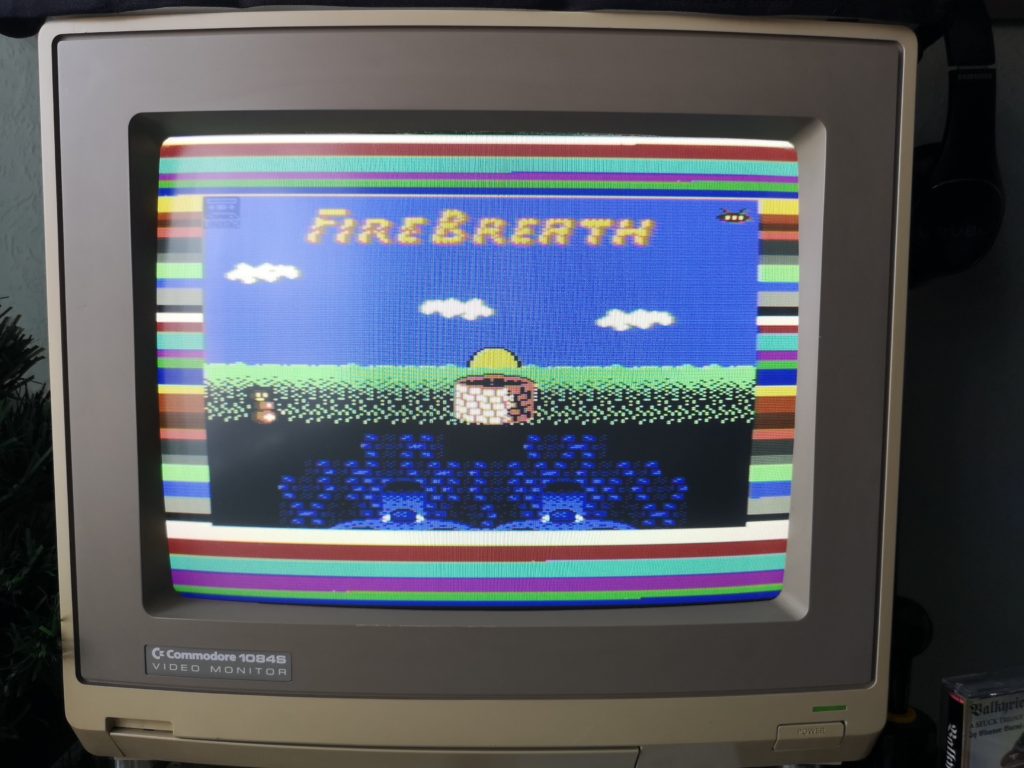
Fire Breath


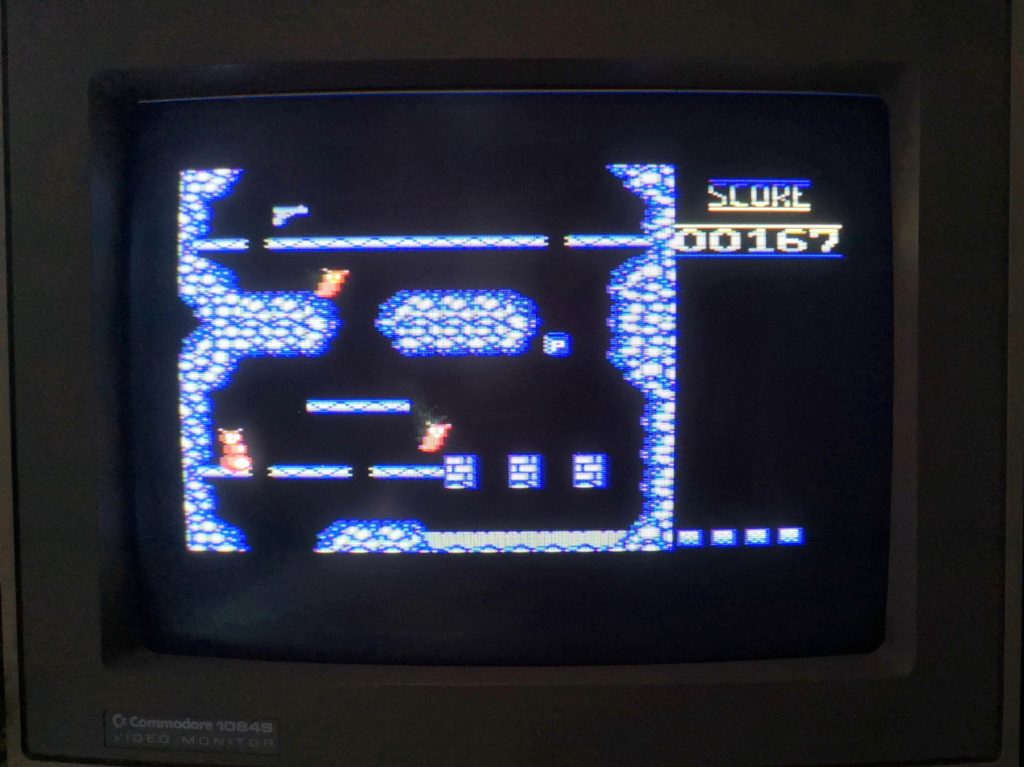
This is a charming little flip-screen platforming game where you control a fire breathing slug, making your way out of an underground warren of tunnels. You must avoid contact with any of the critters you meet along the way, preferably roasting them with your fiery breath and collecting points for doing so. There are power-ups to collect and rooms full of bonus items to discover. Kill all of the critters in each location to move onto the next. I found this to be a very relaxing and enjoyable little game.


Fire Breath, Little Knight Arthur & Valkyrie Trilogy

Fire Breath


Update: Since writing this I discovered the author’s website, ctrl-alt.dev.nl which provides a good history of how Fire Breath came into existence. Well worth a read.

Little Knight Arthur


Fire Breath, Little Knight Arthur & Valkyrie Trilogy

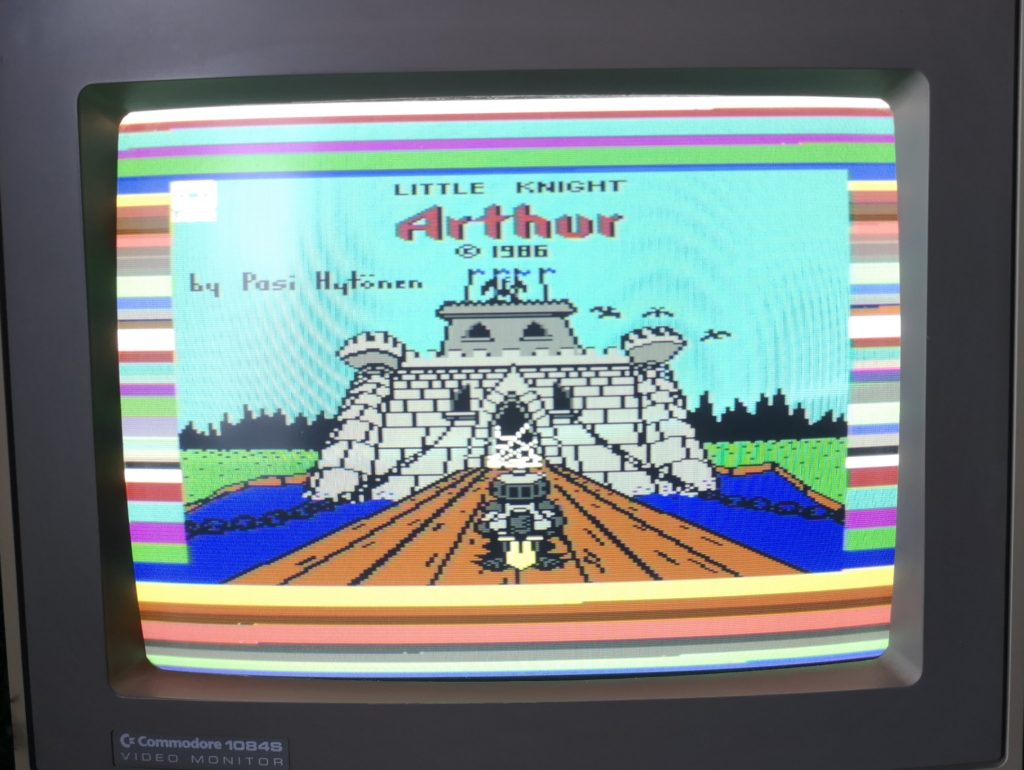
Little Knight Arthur


Little Knight Arthur appears to be a Monty Mole / Jet Set Willy style of platform game where you avoid monsters on your way to the exit. I say “appears” because I haven’t managed to get beyond the first screen yet. Either I really suck at this game or it is just brutally difficult. Or maybe both? Your character is quite a chunky little guy and there is virtually no room for error when trying to get past the monsters on the screen – their movement patterns seem to be random too so it’s really difficult to pick the correct moment to jump. The art style is great, very reminiscent of similar games from the period and the music playing throughout is pleasant enough but I just found the game frustratingly hard and gave up after a dozen or so attempts. When I’m feeling like a challenge I will definitely go back to this and try to reach the second screen!!!


Fire Breath, Little Knight Arthur & Valkyrie Trilogy

Little Knight Arthur


Valkyrie Trilogy


This slideshow requires JavaScript.


There are 3 games included here. Side A contains ‘Night of the Valkyrie’ and ‘Valkyrie 3 – The Night Witch’. Night of the Valkyrie is a vertically scrolling WWII game where your Valkyrie character has to kill waves of Nazis as you progress up each level before facing off against a boss at the end. Your character can move and shoot in all directions and thus play feels very similar to Commando – definitely a compliment!


Valkyrie 3 is again a vertically scrolling shooter but this time instead of playing the Valkyrie character on foot you are in a WWII biplane flying over the landscape similar to 1942. This was a refreshing change after the other two games following a similar style and I really enjoyed playing it.


Side B contains ‘Valkyrie 2 – The Templar’. I was quite pleasantly surprised to discover that this game actually features an intro sequence that loads as a separate entity before the main game. It features music, some really great character graphics and explains the plot of the game. Once this is over the main game loads. I liked the fact that this game offered me the choice to play with either music, sound FX or silence on the title screen. This is another vertically scrolling ‘kill all Nazi’s’ affair where you play the Valkyrie character on foot. This time however, you start out unarmed and must quickly find a weapon in order to progress.


"Fire

Password Protected End Sequence


When you complete each section of the trilogy you get a password and then an ending sequence will load off the tape. I have to confess this confused me initially as I was expecting the next program on side A to be Valkyrie 3. When the password prompt appeared I just assumed the game itself was password protected. So, if you want to skip ahead to Valkyrie 3 you will need to load the end sequence for Night of the Valkyrie and then reset your C64 and continue the loading process. Thanks to Lukasz for clearing that bit of confusion up for me!


This slideshow requires JavaScript.


Inside the inlay cover there is space provided for you to note tape counter numbers down for each game. This is actually pretty essential for this title. Here are the counter numbers I recorded on my system. Not sure if they’ll be the same for you (I use a Binatone Data Recorder).

Side A
Night of the Valkyrie
Game: 000
End: 055

Valkyrie 3: The Night Witch
Game: 097
End: 143

Side B
Valkyrie 2: The Templar
Intro: 000
Game: 049
End: 097


Worth a buy?


I’d definitely recommend Valkyrie Trilogy if you’re a fan of vertical shooters such as Commando – I’ve certainly had a lot of fun with it. Likewise Fire Breath was also very enjoyable but Little Knight Arthur just frustrated me due to it’s high difficulty. (I should point out that I’m not very patient these days!). Had these two not been bundled together I would recommend avoiding the latter but the inclusion of Fire Breath makes it a worthy purchase.

If you would like to find out more or get your own copies of the games then head on over to the K&A+ website. At the time of writing they don’t seem to be advertising them but I’m sure they’ll be added to the website soon enough.

C64 LCD Cassette Slideshow

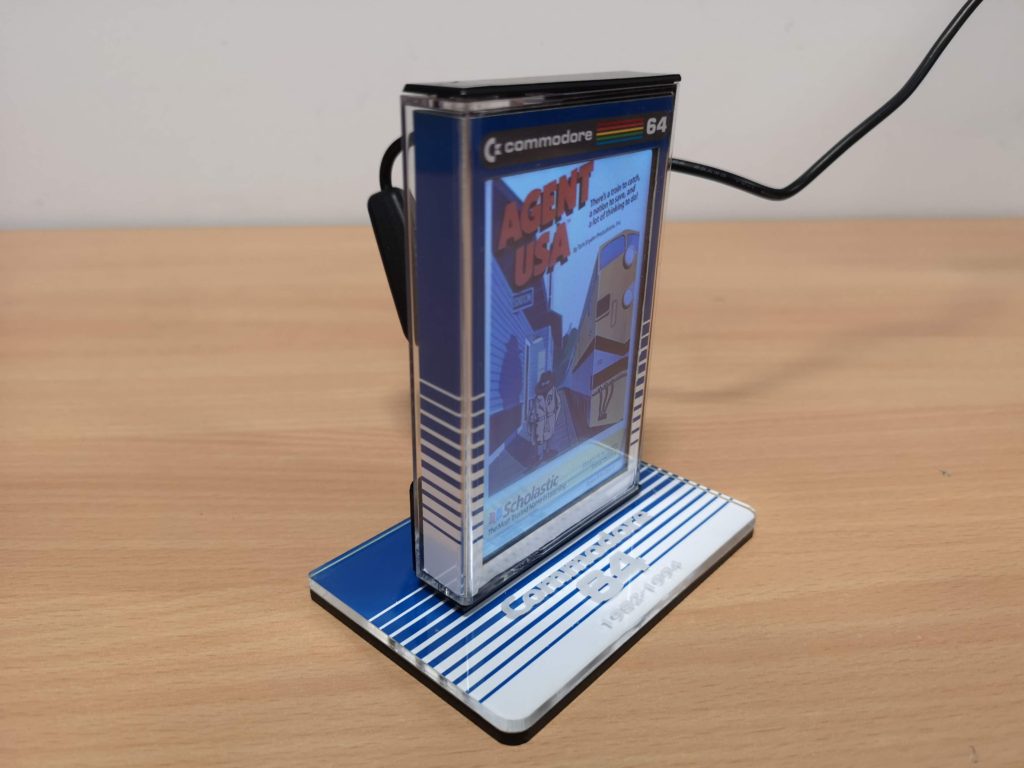
C64 LCD Cassette Slideshow

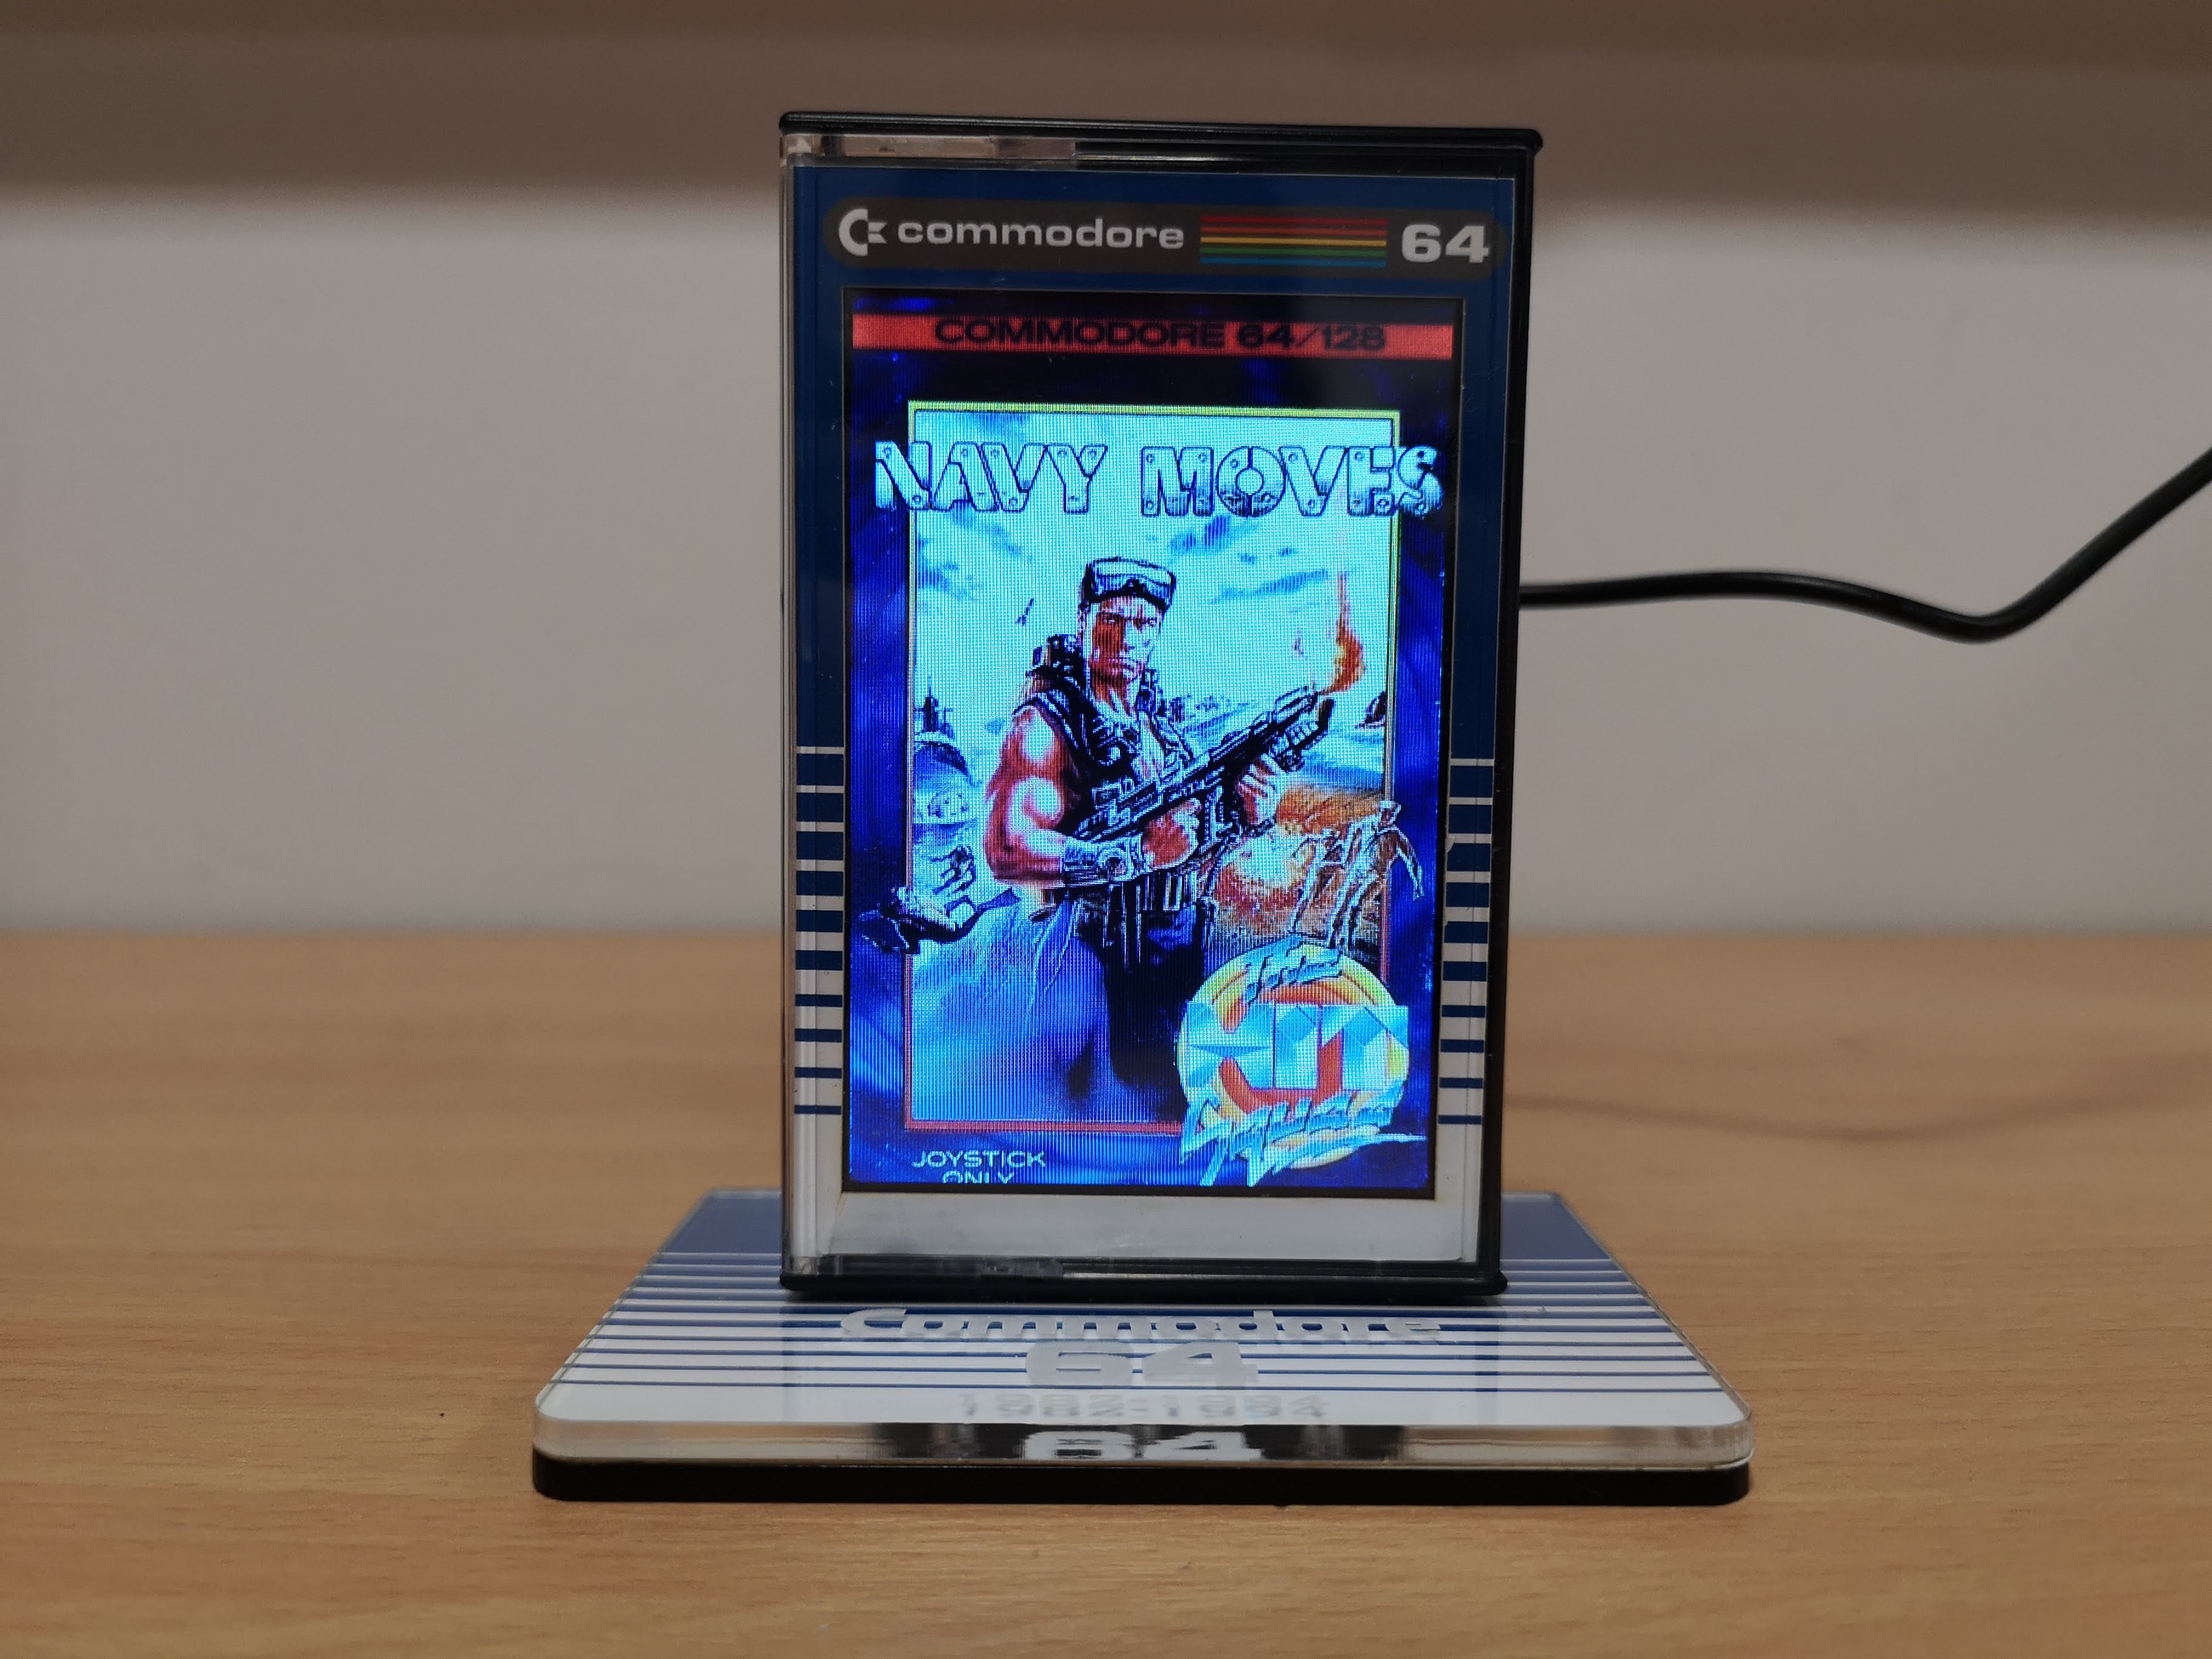
I saw this “C64 LCD Cassette Slideshow” whilst browsing through my twitter feed one night a few weeks ago. The moment it caught my eye I knew I had to have one for my man cave. Today it finally arrived and I’m over the moon with it so thought I’d share some photos and info about it.


C64 LCD Cassette Slideshow

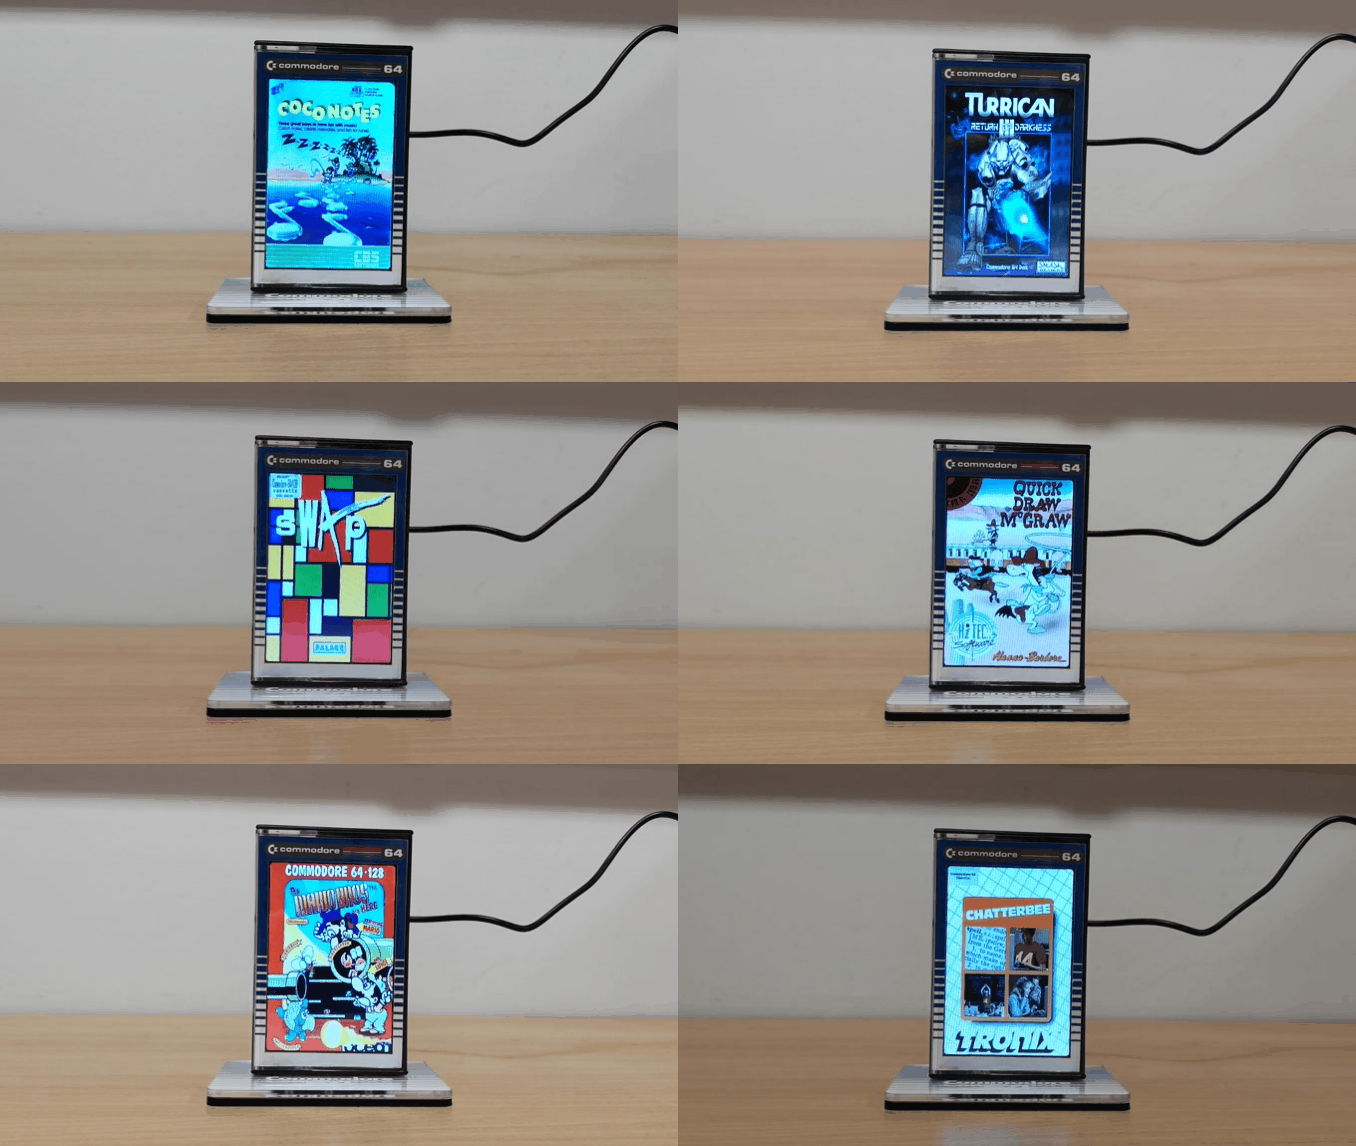
Slideshow in action – note the timings are greatly sped up in this GIF.


It’s made from a real cassette tape box and has a 4″ LCD panel mounted inside, framed by a Commodore styled inlay. I’m not entirely sure what is driving the screen (and I’m not going to risk breaking it by opening it up) but I suspect it’s probably a Raspberry Pi. The slideshow comes ready to go with ‘over 2500 images of nostalgic games’ according to its’ creator. Each image is on display for around 5 seconds before moving onto the next automatically (my animated GIF has sped up the timings greatly).


C64 LCD Cassette Slideshow

Side view


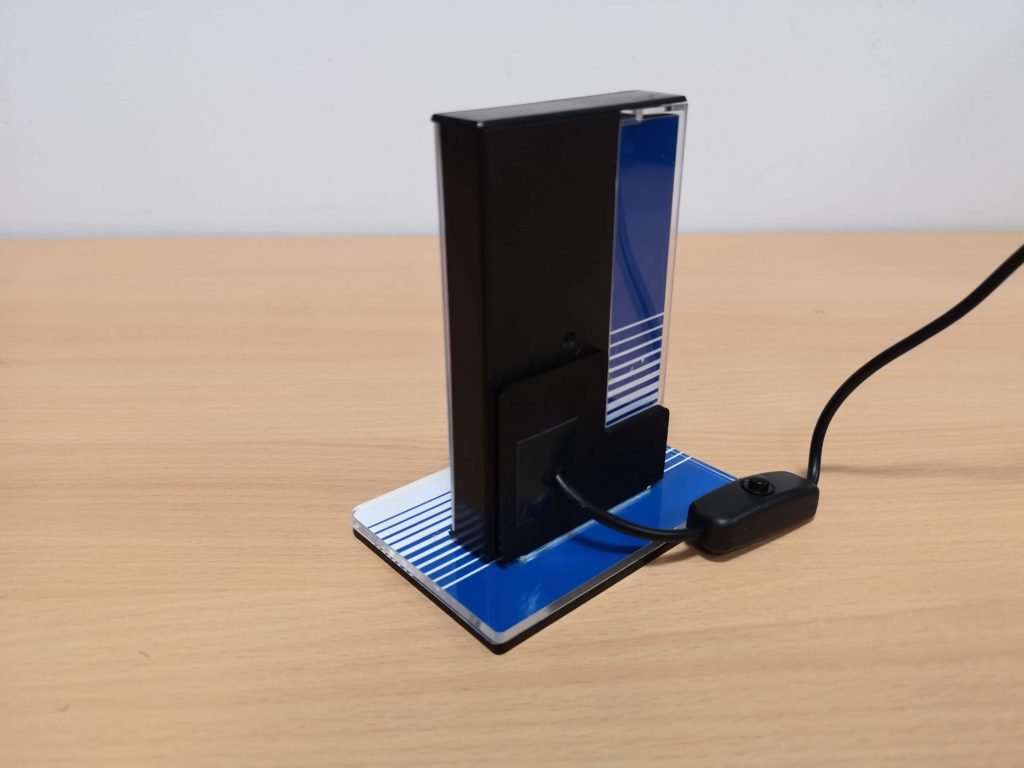
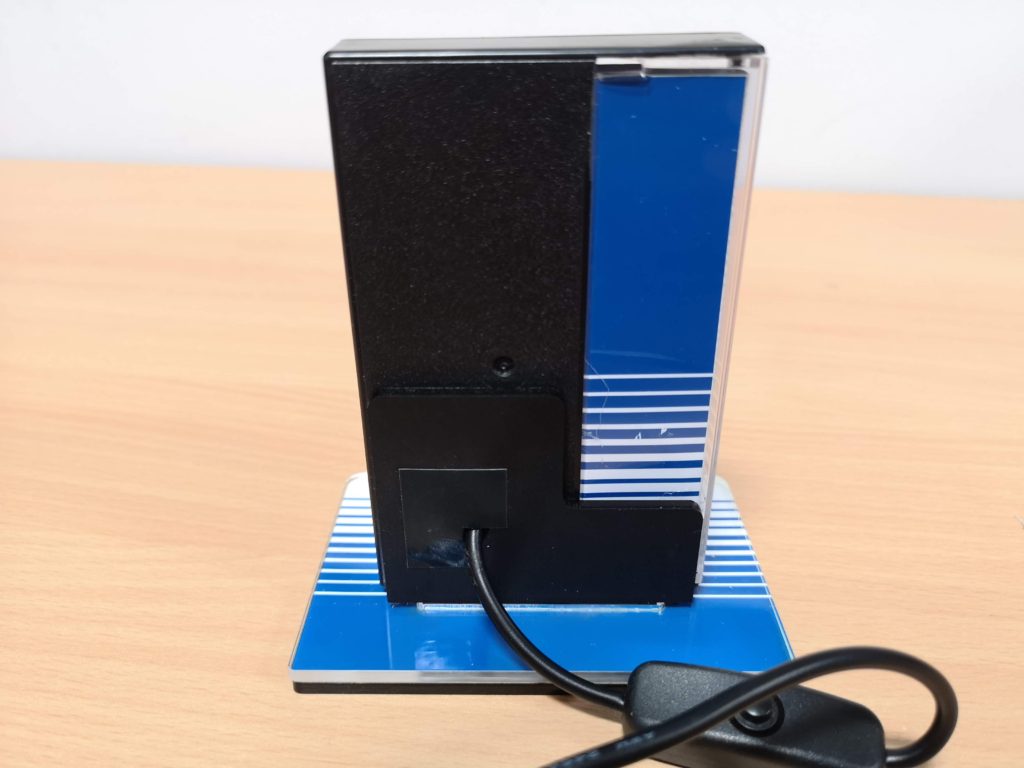
It’s mounted on a stylish Commodore themed perspex base that features the iconic Commodore blue and white stripes and the words ‘Commodore 64 1982-1994’. Around the back there is a decent length USB cable which provides power for the device. The cable is permanently attached and incorporates an inline power switch so it can be turned on and off without unplugging the cable which is a useful feature.


C64 LCD Cassette Slideshow

Rear view – note the inline power switch on the USB cable


The C64 LCD Cassette Slideshow is completely hand crafted to order but has been completed to a high standard. It would have been nice to have access to some sort of timer facility to have it automatically turn on and off at preset times but that probably would have added to the complexity and cost. At £80 for the 4″ version including postage it’s not a cheap item but I think it’s a very fair price for what I received. There is a 3.5″ version that is £5 cheaper but don’t know why anyone would choose that over the larger screen for the sake of saving a measly £5.


C64 LCD Cassette Slideshow

A closer look at the back of the device


EDIT (June 2021) – The sellers Etsy shop has now closed so it’s no longer possible to buy these.


Finally here’s a few more photos of some cassette covers…


This slideshow requires JavaScript.

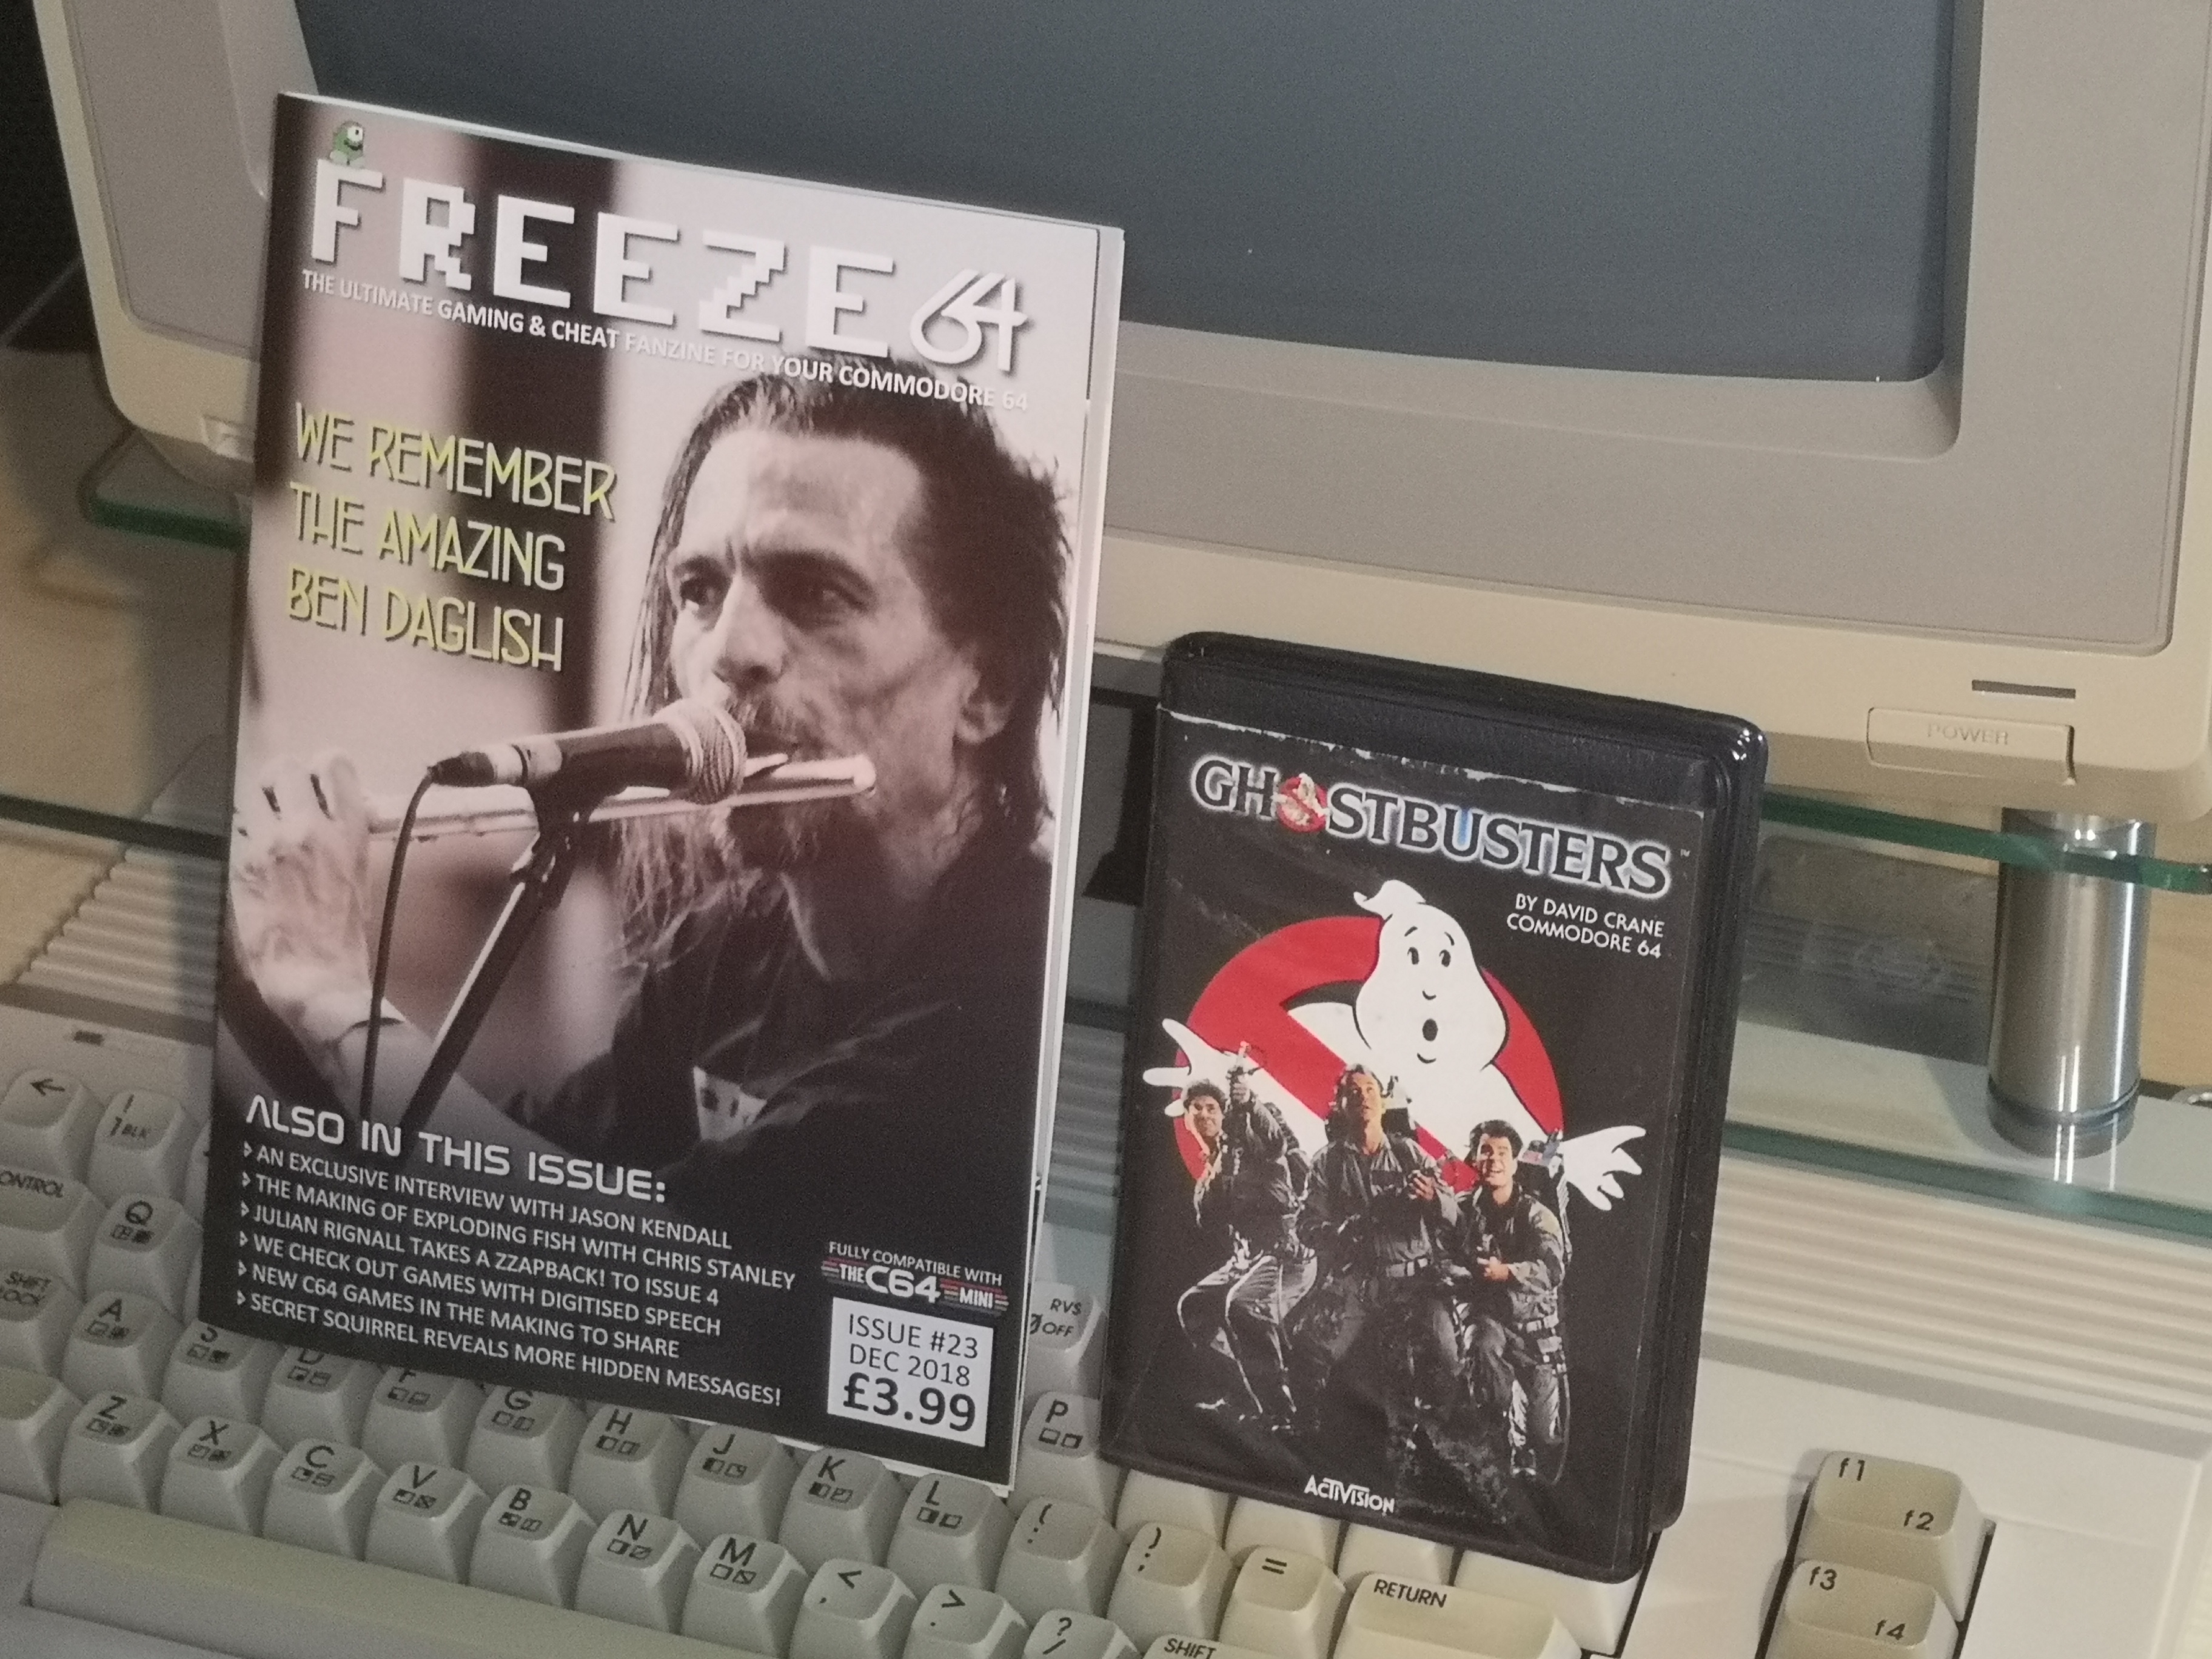
Freeze 64 Issue 23

Freeze64 Issue 23

The latest Freeze64 Issue 23 dropped through my letterbox yesterday. This one features a photo of the late Ben Daglish on the cover rather than the pixel game art that I’ve become so accustomed to. In case you are not aware he was a legend in the C64 music scene and composed some amazing music for many great games including The Last Ninja.

As always there’s plenty to read inside including my personal favourite, a ‘Talkies’ article looking at games that featured speech. I always used to love games with speech – it was just so cool to hear your 64 talk, no matter how scratchy or poor quality it may have been. The fact that they were able to do this with just a few kilobytes of memory still amazes me to this day!

Most of the regular features make a welcome return including Zzapback and a look at new and upcoming games in the Commodore 64 scene.

This fanzine/magazine continues to go from strength to strength and really deserves your support. If you would like to get hold of your very own copy of Freeze64 Issue 23 then take a look here.