Lyonsden Blog

Tag - hdmi

Commodore 64 Video over HDMI – a Solution

Commodore 64 Video over HDMI

Having recently picked up a 2nd-hand Toshiba LCD screen to use with my Vampire equipped Amiga I found myself in the position of needing to connect my trusty 35 year old Commodore 64 video over HDMI to a modern display.

The problem, and why I needed to use HDMI

Obviously I had already exhausted all the other options before going down the HDMI route. I tried a direct composite connection, composite and S-video over SCART and of course good old RF. I even tried a custom cable off eBay with a 300ohm resistor built in that other people have had some success with. None of these options worked. The best I could achieve over RF was a vertically rolling black and white image. All the other methods resulted in nothing – just a black screen. The annoying thing is when I plugged the 64 into my brand new Panasonic 4K TV I got a perfect picture with all the cables so clearly this was just an issue with the older Toshiba panel. For reference, in case anyone is reading this who has the same issue, my Toshiba TV’s model number is ’22DV714B’.

Now I do have a Commodore 1084S but with my current set-up there is simply no room for 2 screens – I needed a single screen that could handle everything. Native Amiga 500 screen modes, 720p screen modes from the Vampire output and of course the output from my C64C. One day when I get my man cave sorted I can have each machine with their own screen but until then this is my solution…

The Commodore 64 Video over HDMI solution

Clearly whatever video signal my 64 was outputting simply wasn’t compatible with my Toshiba screen. Determined to get it working I figured it would be worth trying to convert the signal into something that would work. I had a look on Amazon and settled on the device pictured below. It claimed to do exactly what I needed and was pretty cheap so it wouldn’t have been the end of the world if didn’t work.

Commodore 64 video over HDMI

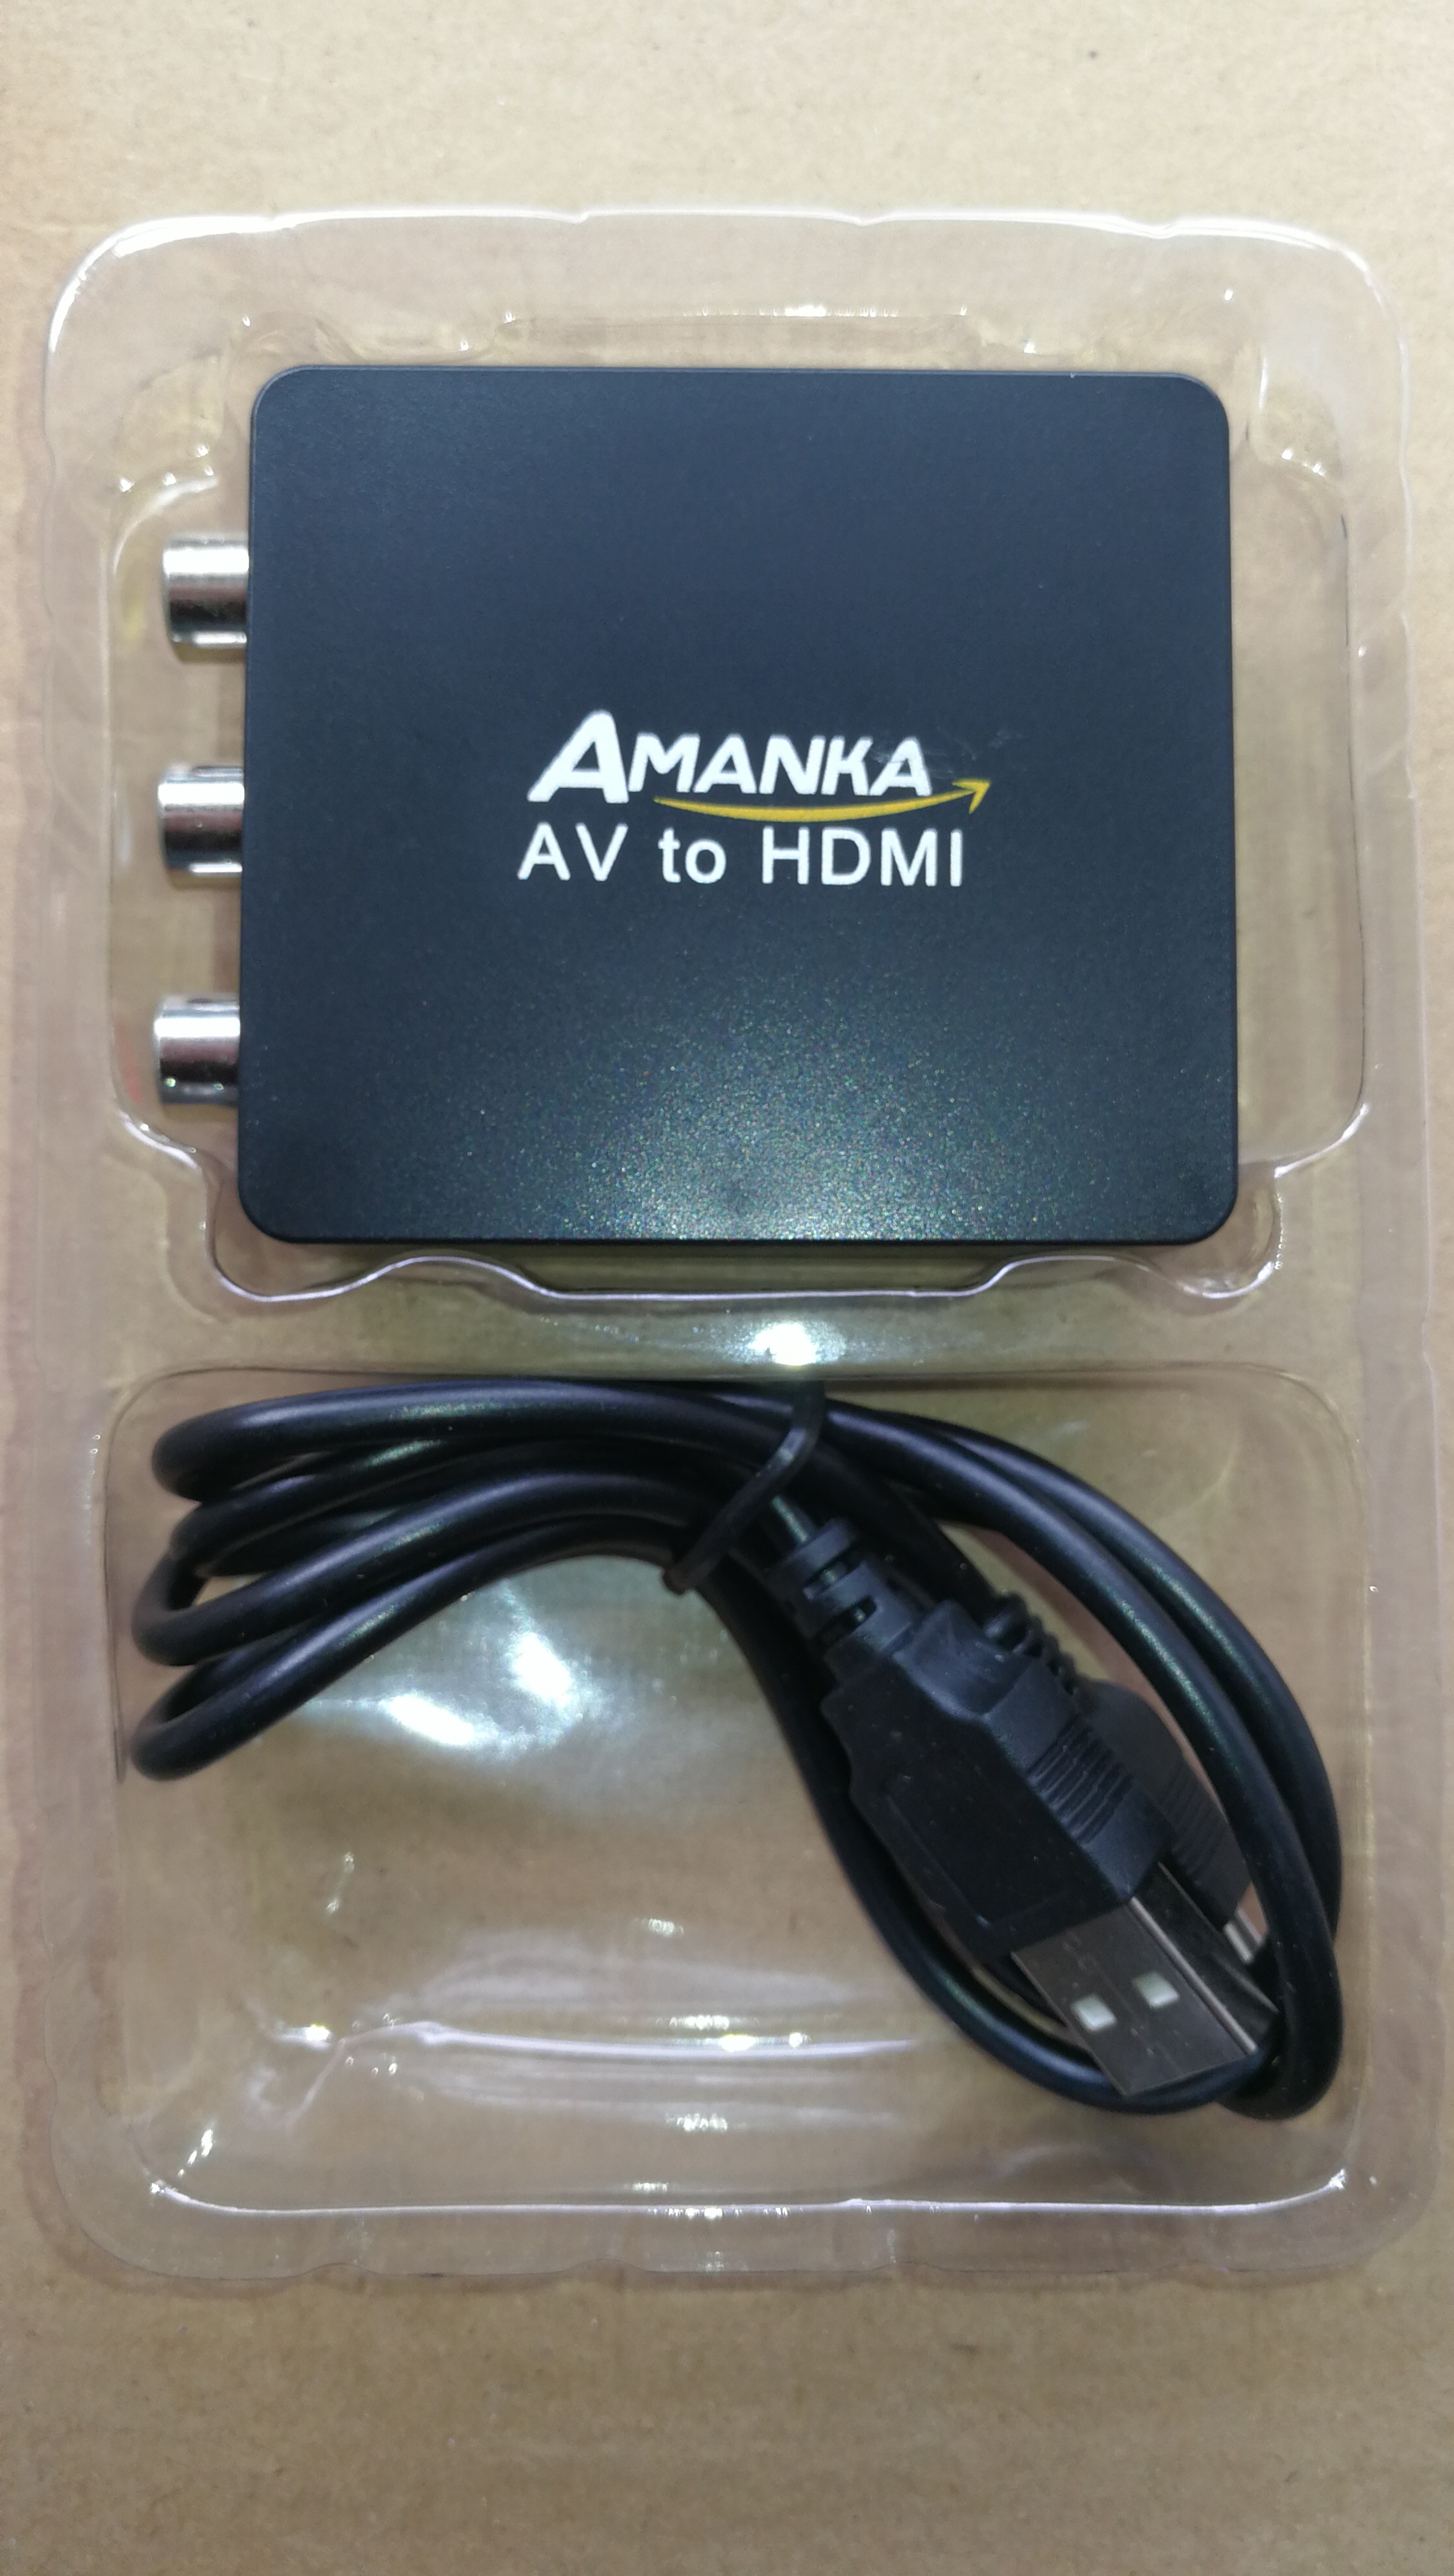
Amanka RCA Composite CVBS AV to HDMI Video Audio Converter box with the mini USB power lead.

The box itself is very small, about the size of a book of matches and it came with just a short mini USB cable and some simple instructions in the box.

Commodore 64 video over HDMI

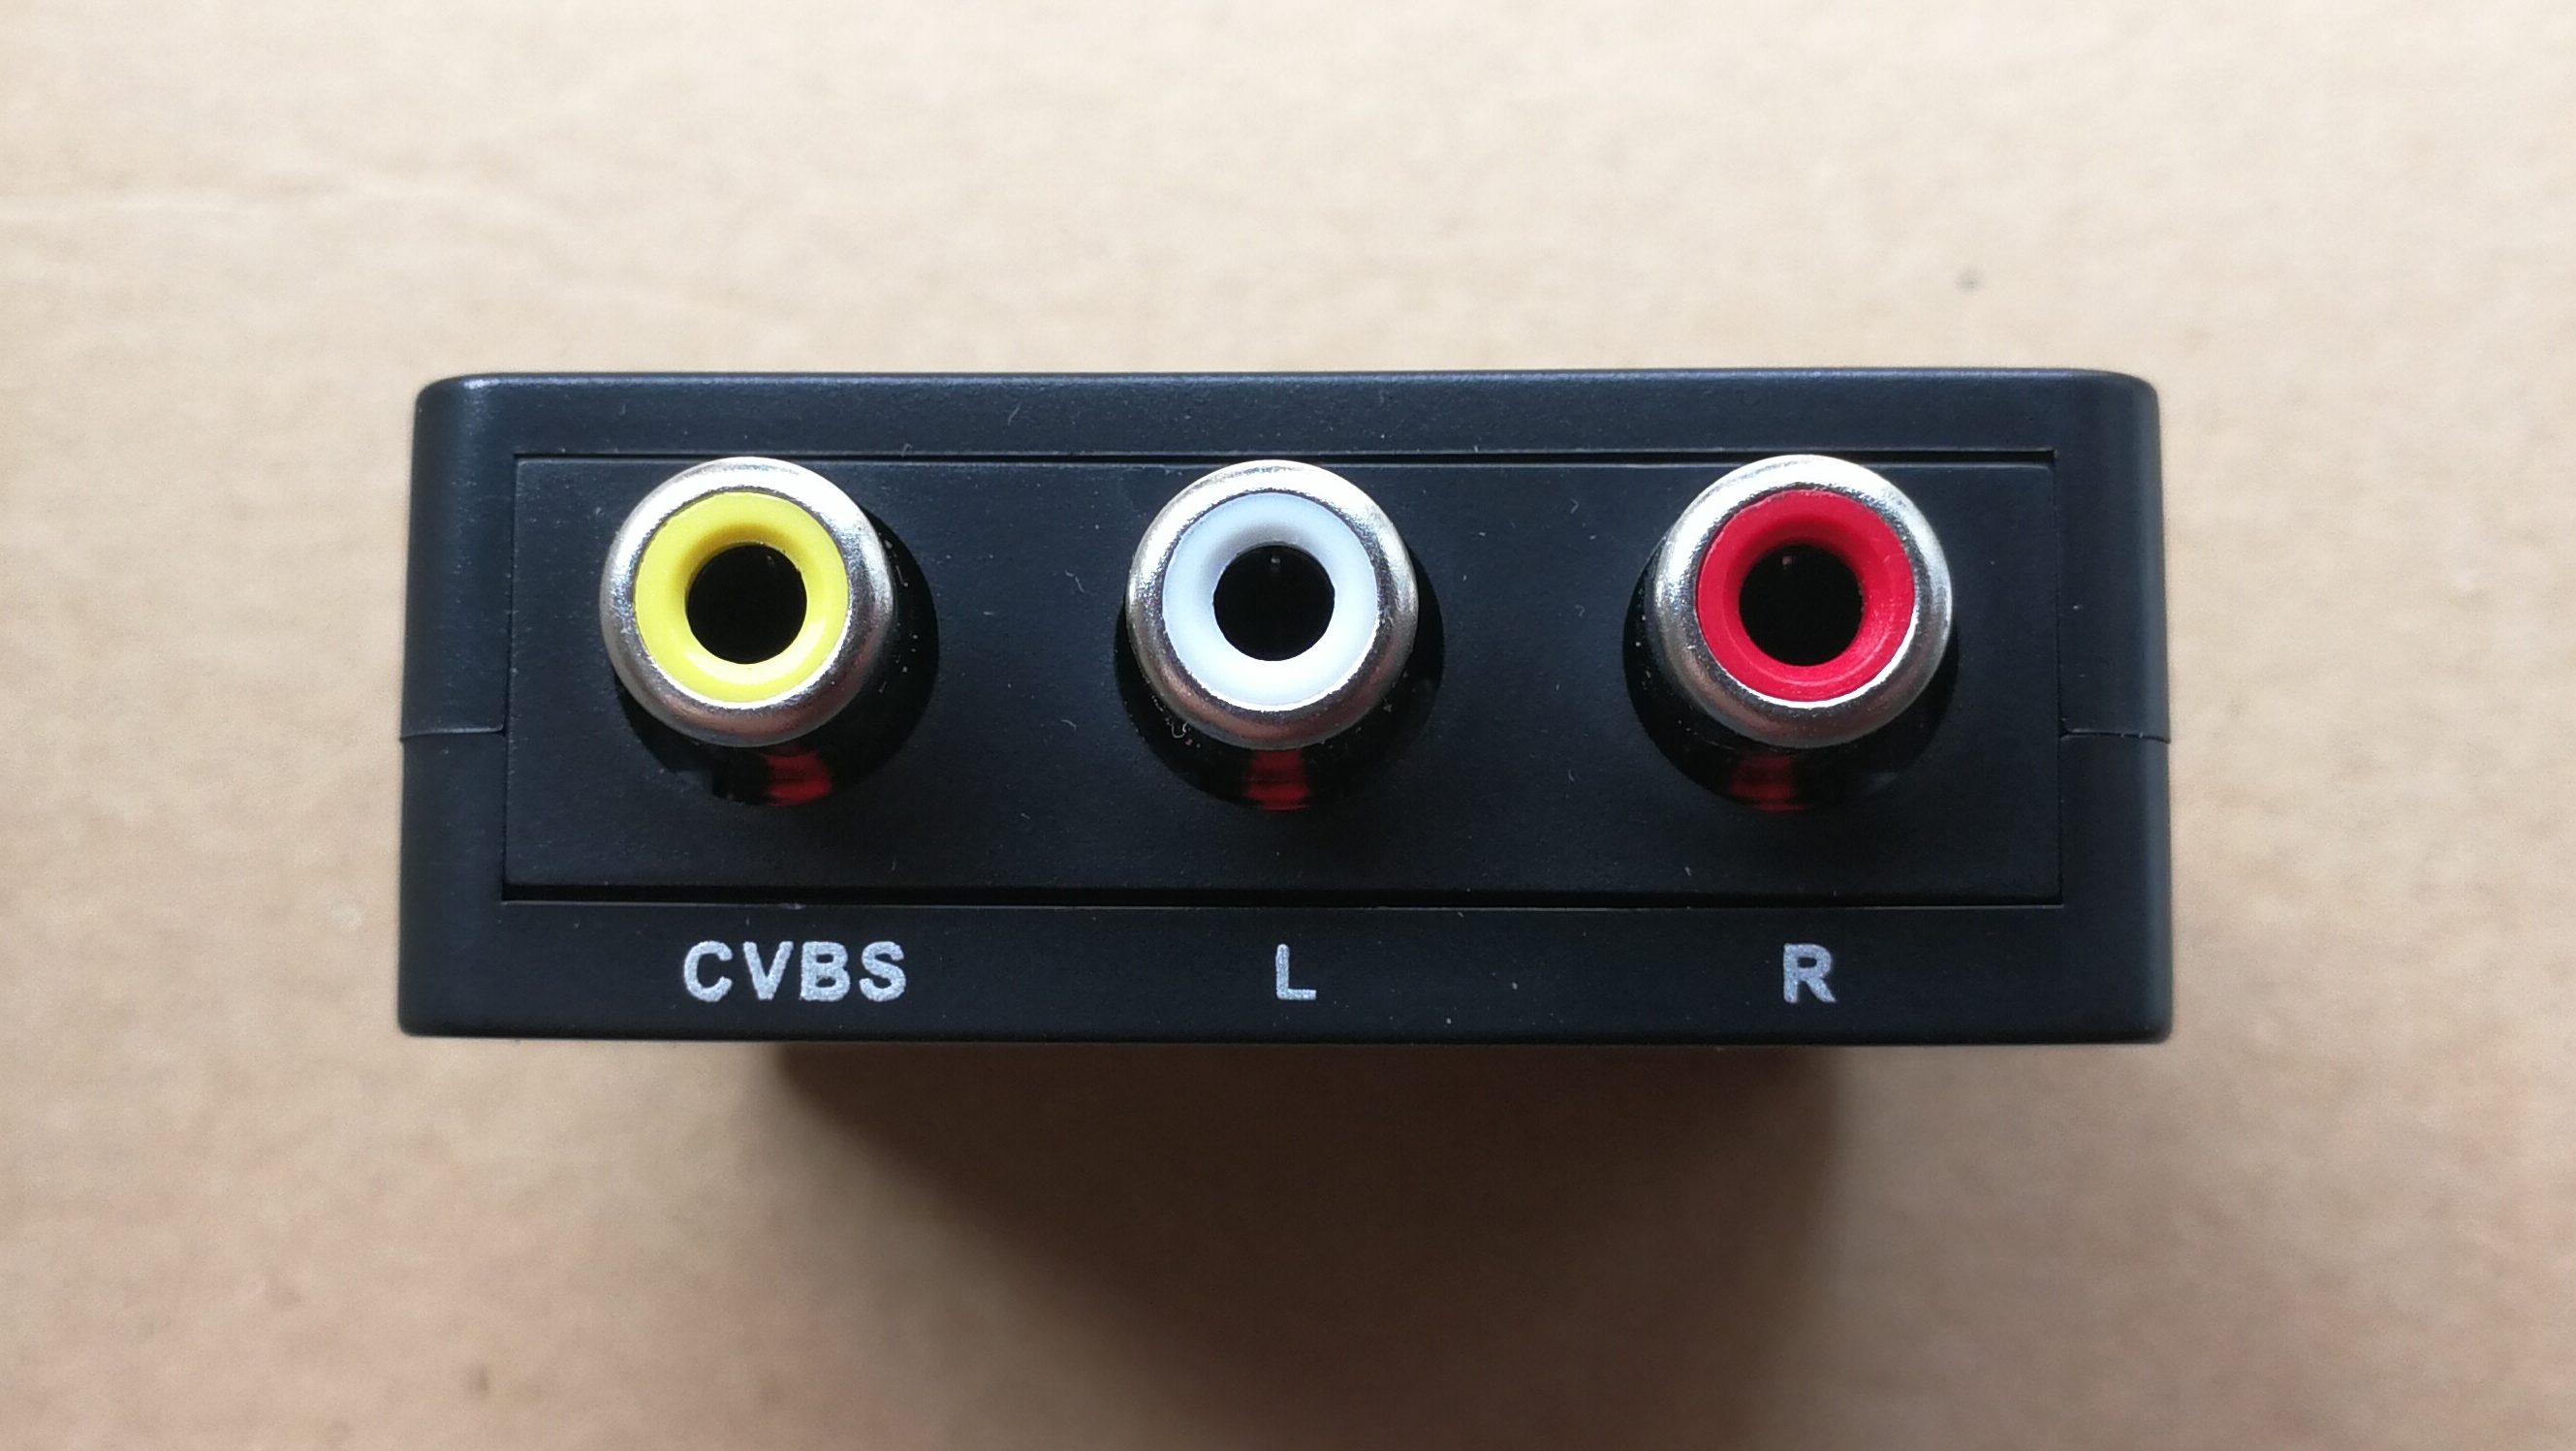
Amanka RCA Composite CVBS AV to HDMI Video Audio Converter – Composite and Left/Right Audio inputs

Commodore 64 video over HDMI

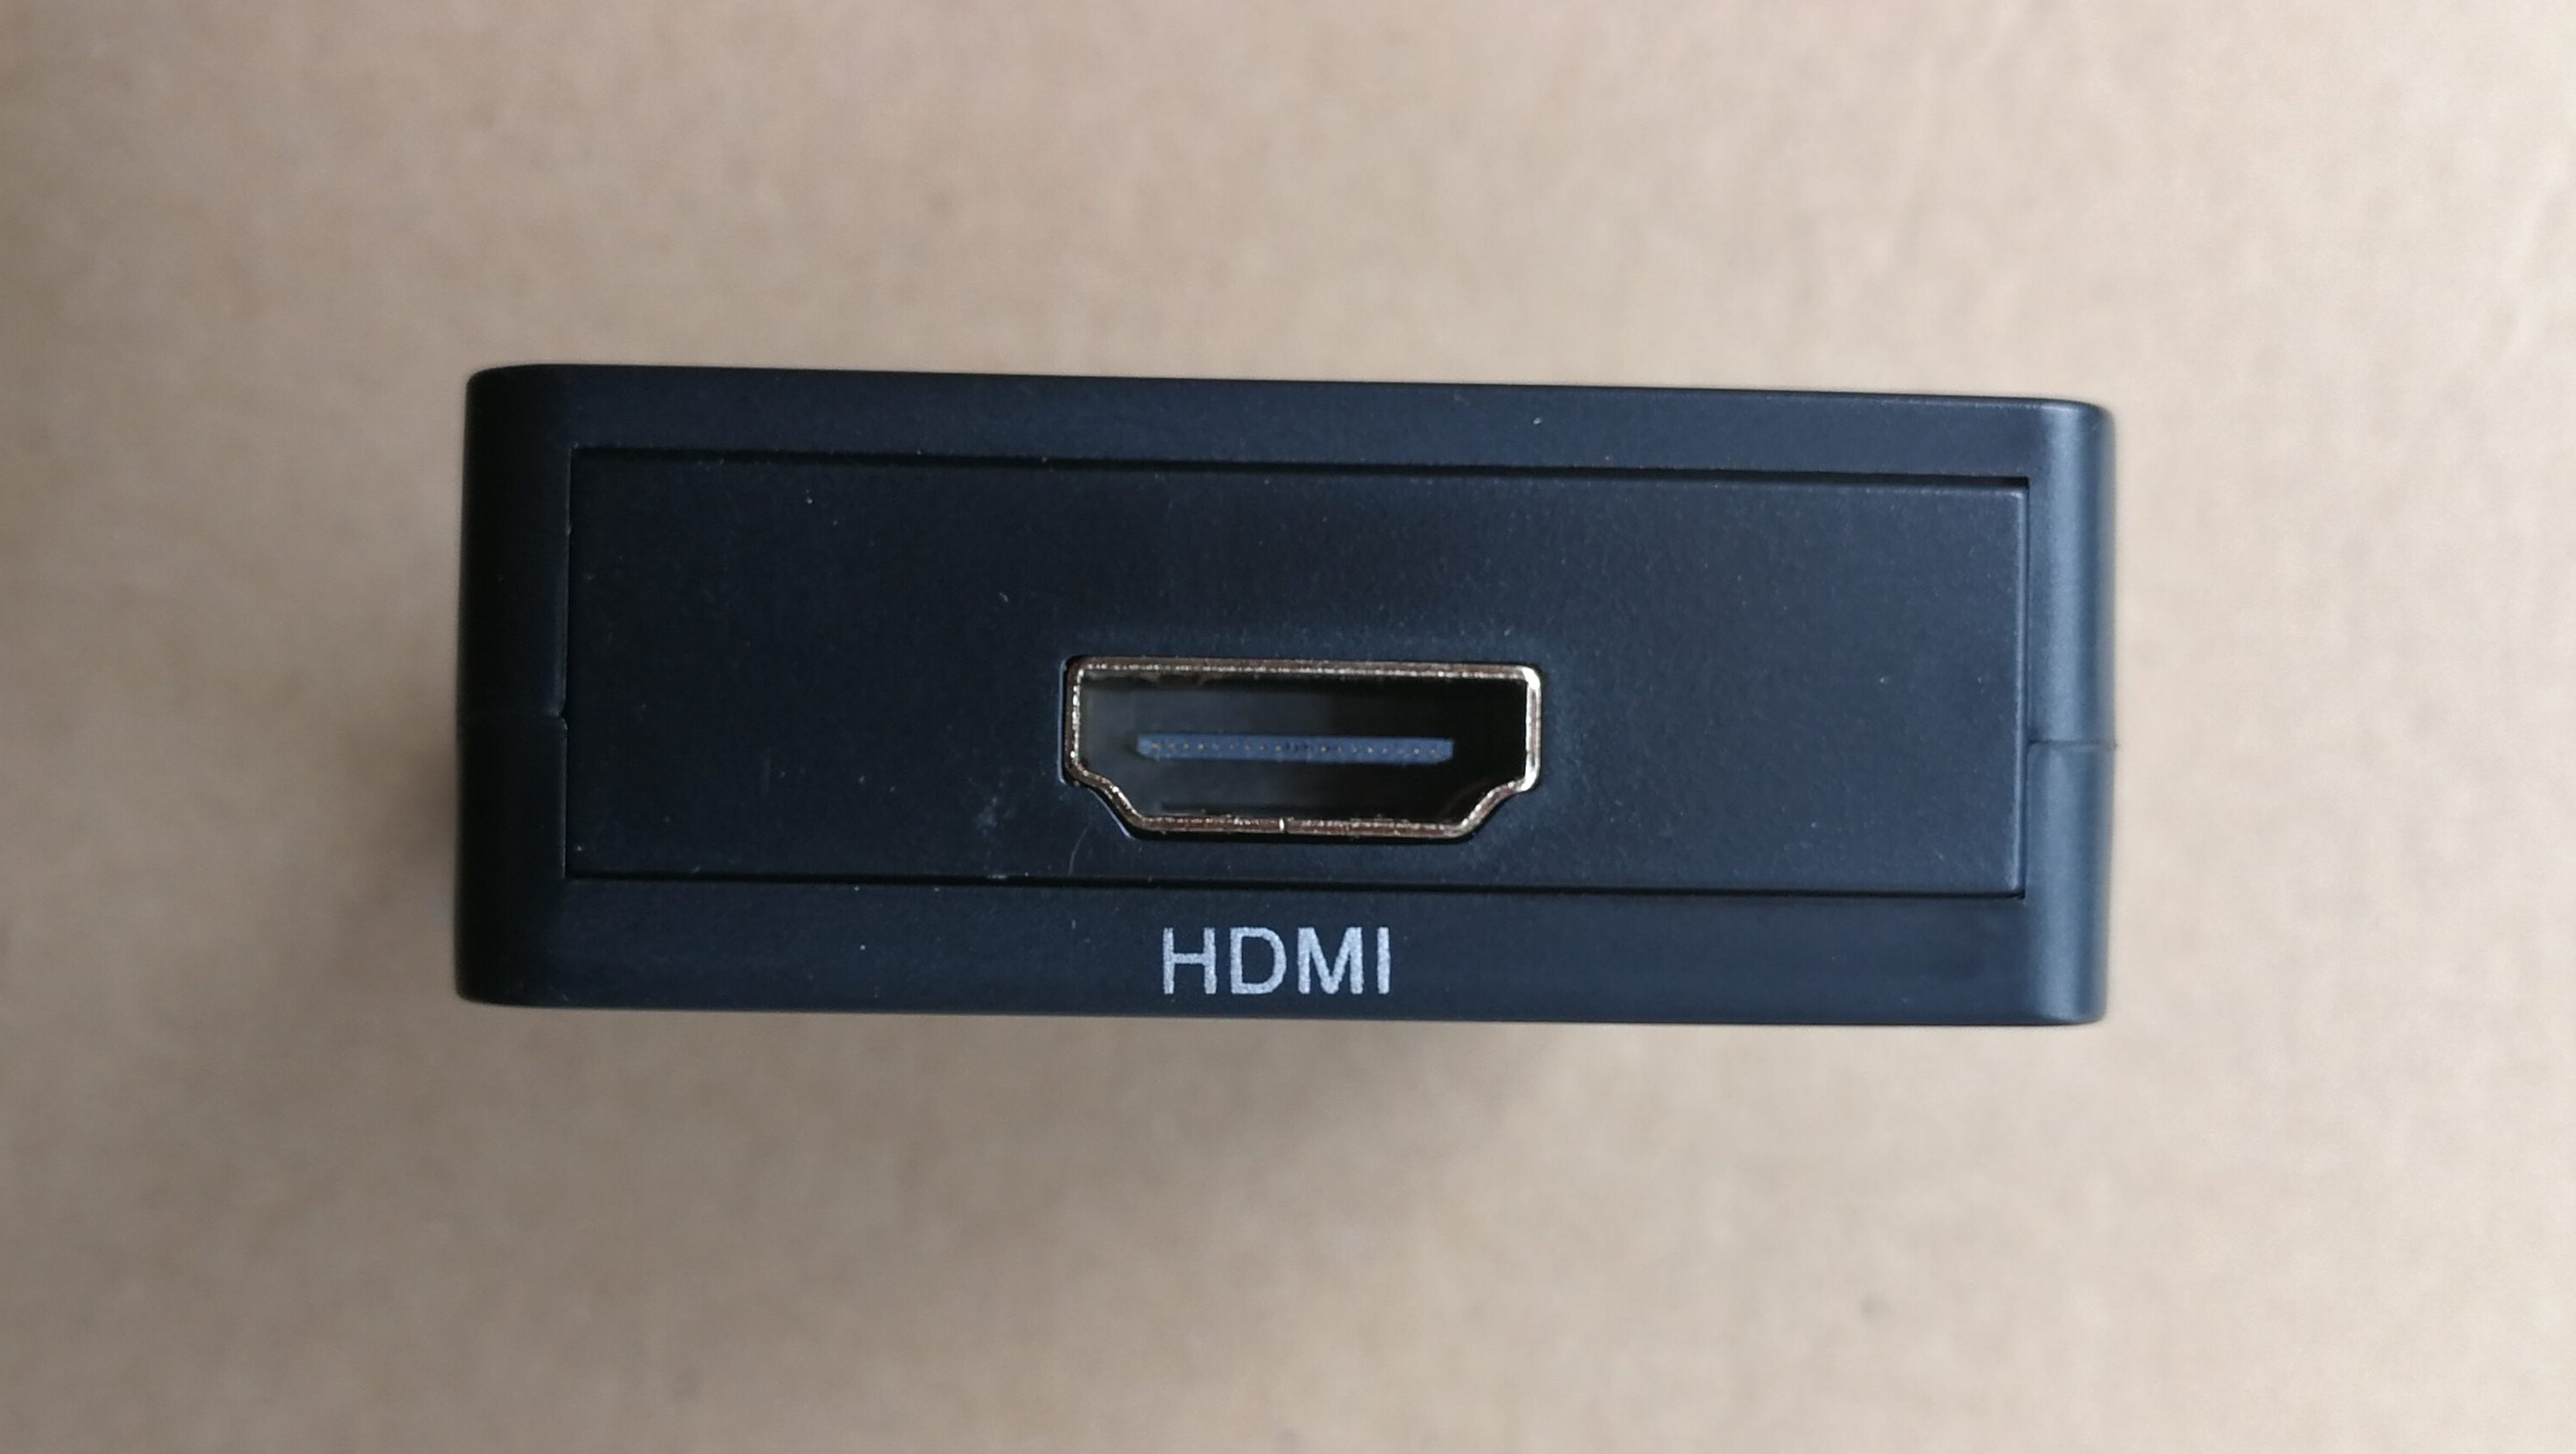
Amanka RCA Composite CVBS AV to HDMI Video Audio Converter – HDMI Out port

Commodore 64 video over HDMI

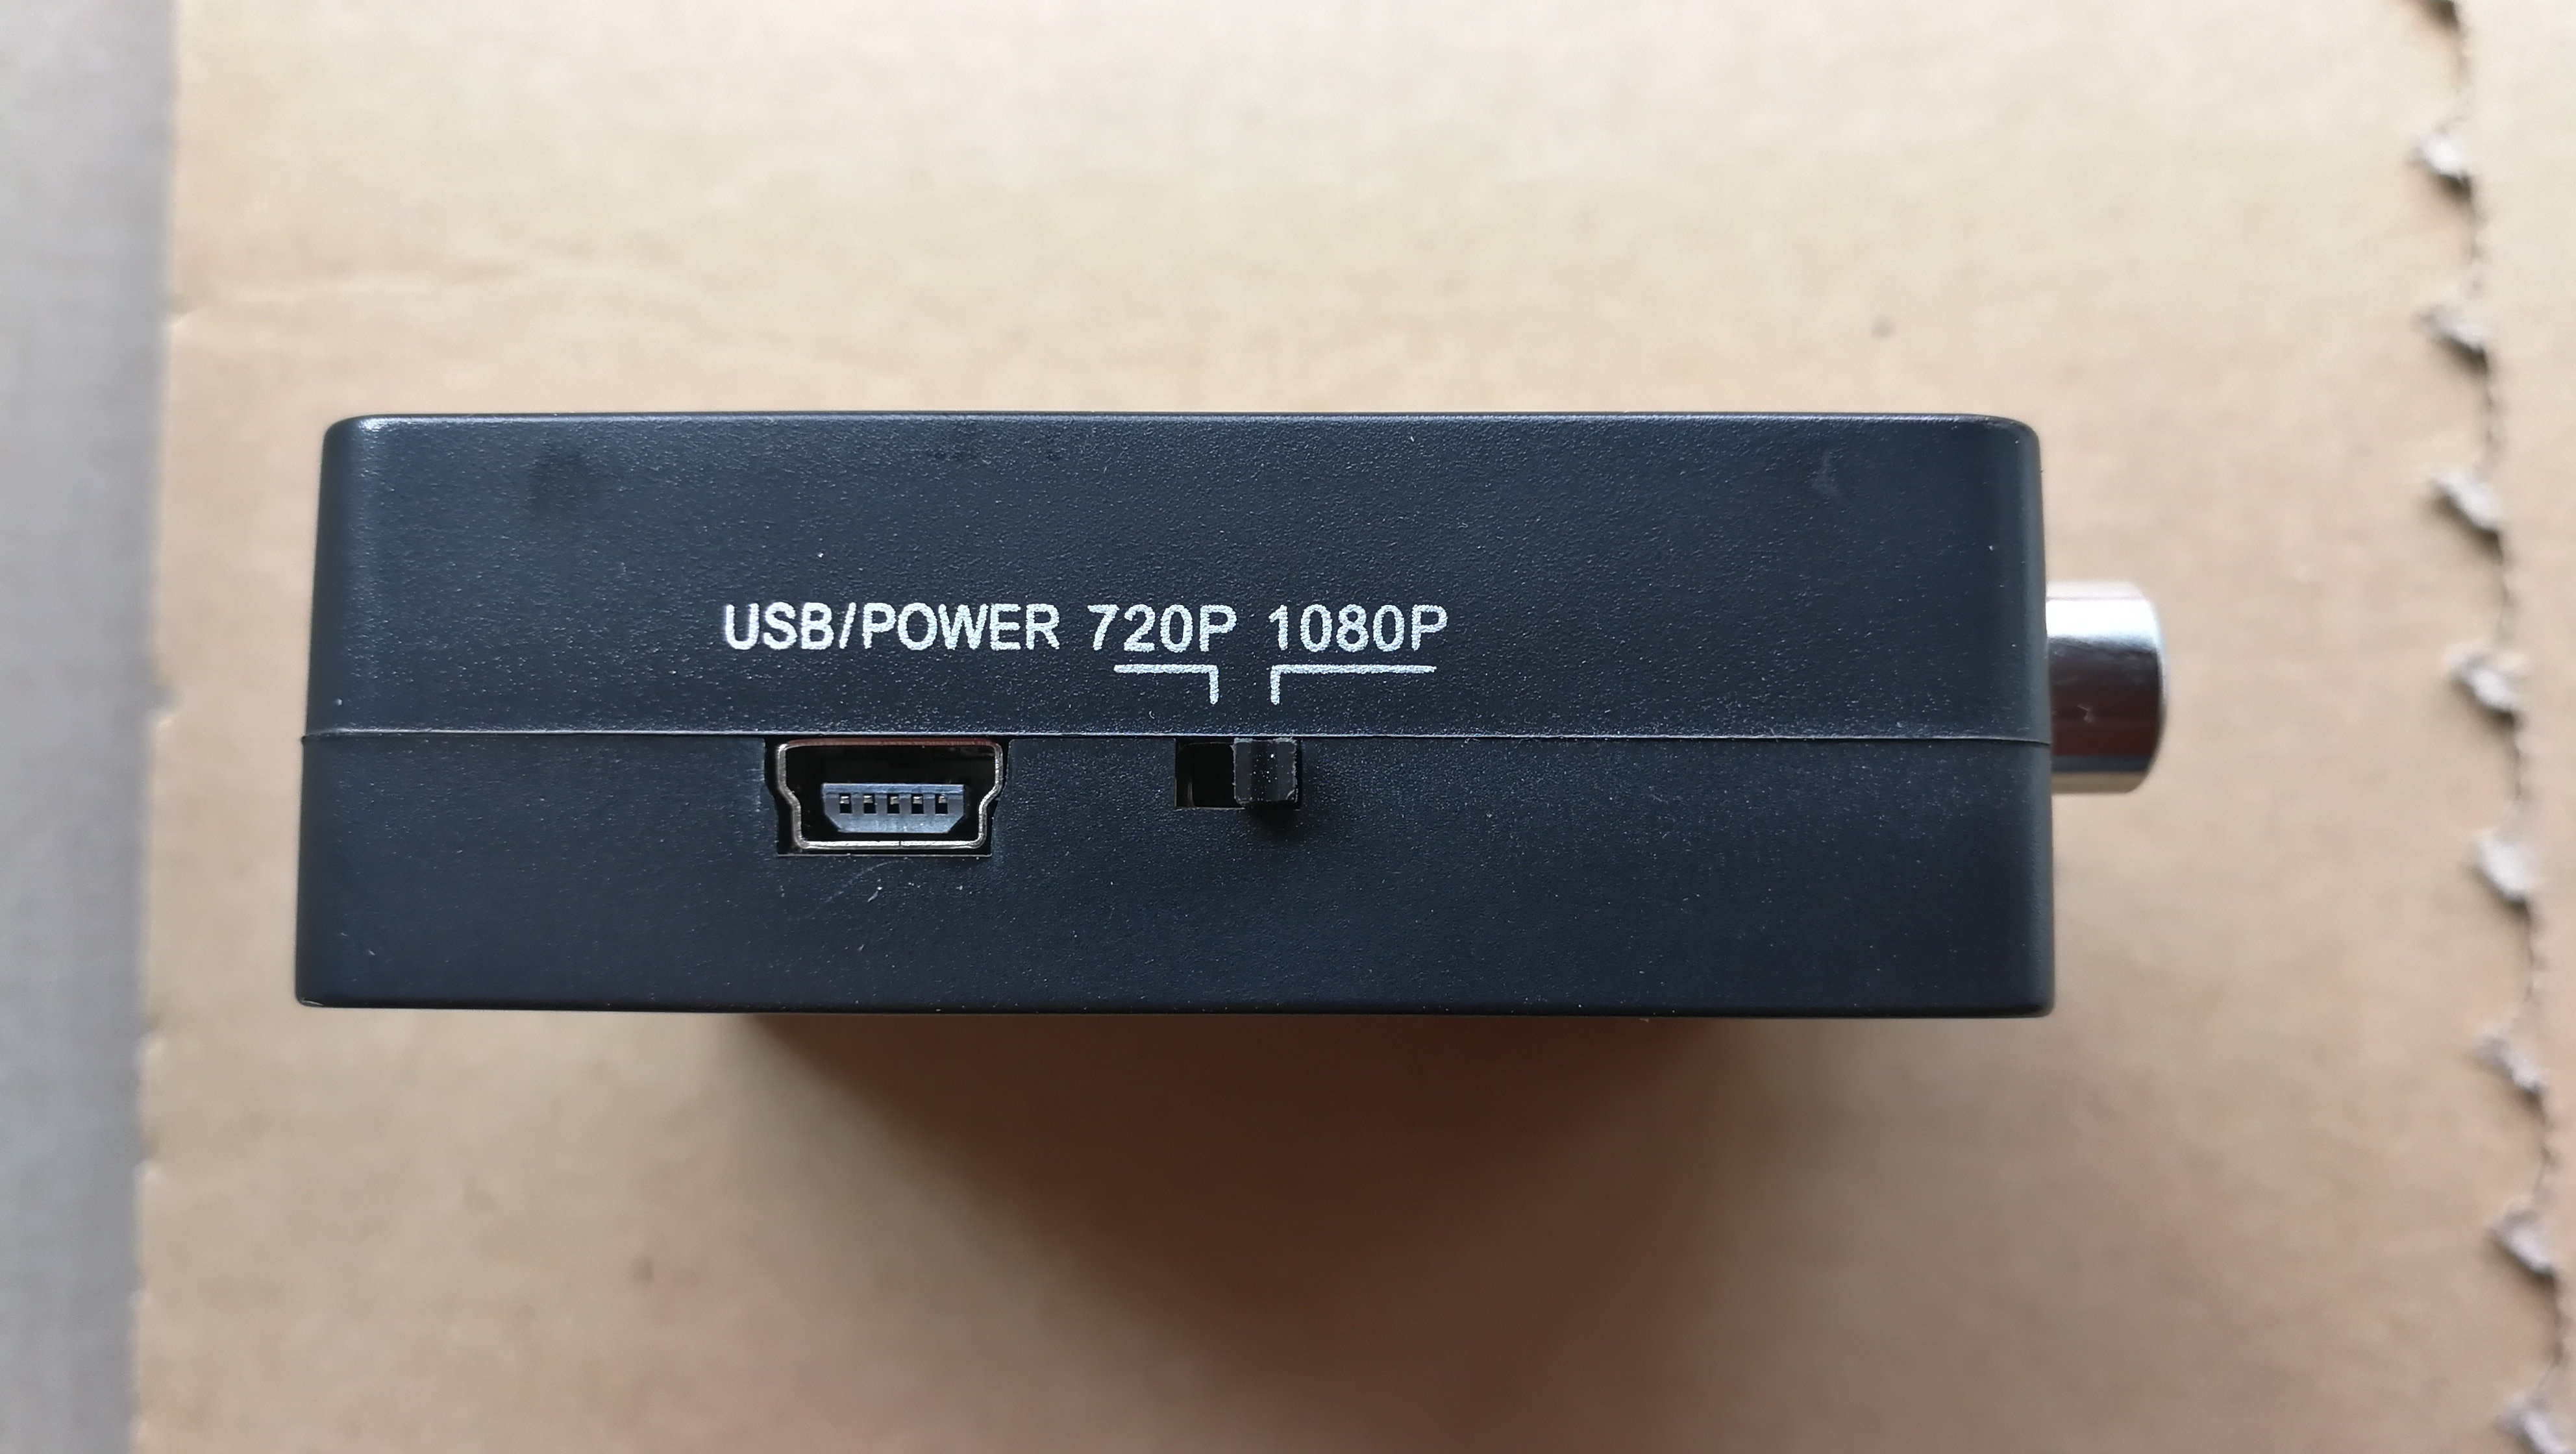
Amanka RCA Composite CVBS AV to HDMI Video Audio Converter – Mini USB socket for power and 720p/1080p output selector switch

Setting it all up

In addition to an HDMI cable and a USB charger (to plug the mini USB power cable into) you will also need a Commodore 64 Composite video cable like the one pictured on the left below. If you don’t already have one they are readily available on Amazon. Setting it up was really straightforward, I just needed to provide a 5v USB charger for the power lead and then hook up an HDMI cable and the composite video and audio connections from the C64 A/V port using the above type of cable.

Commodore 64 video over HDMI

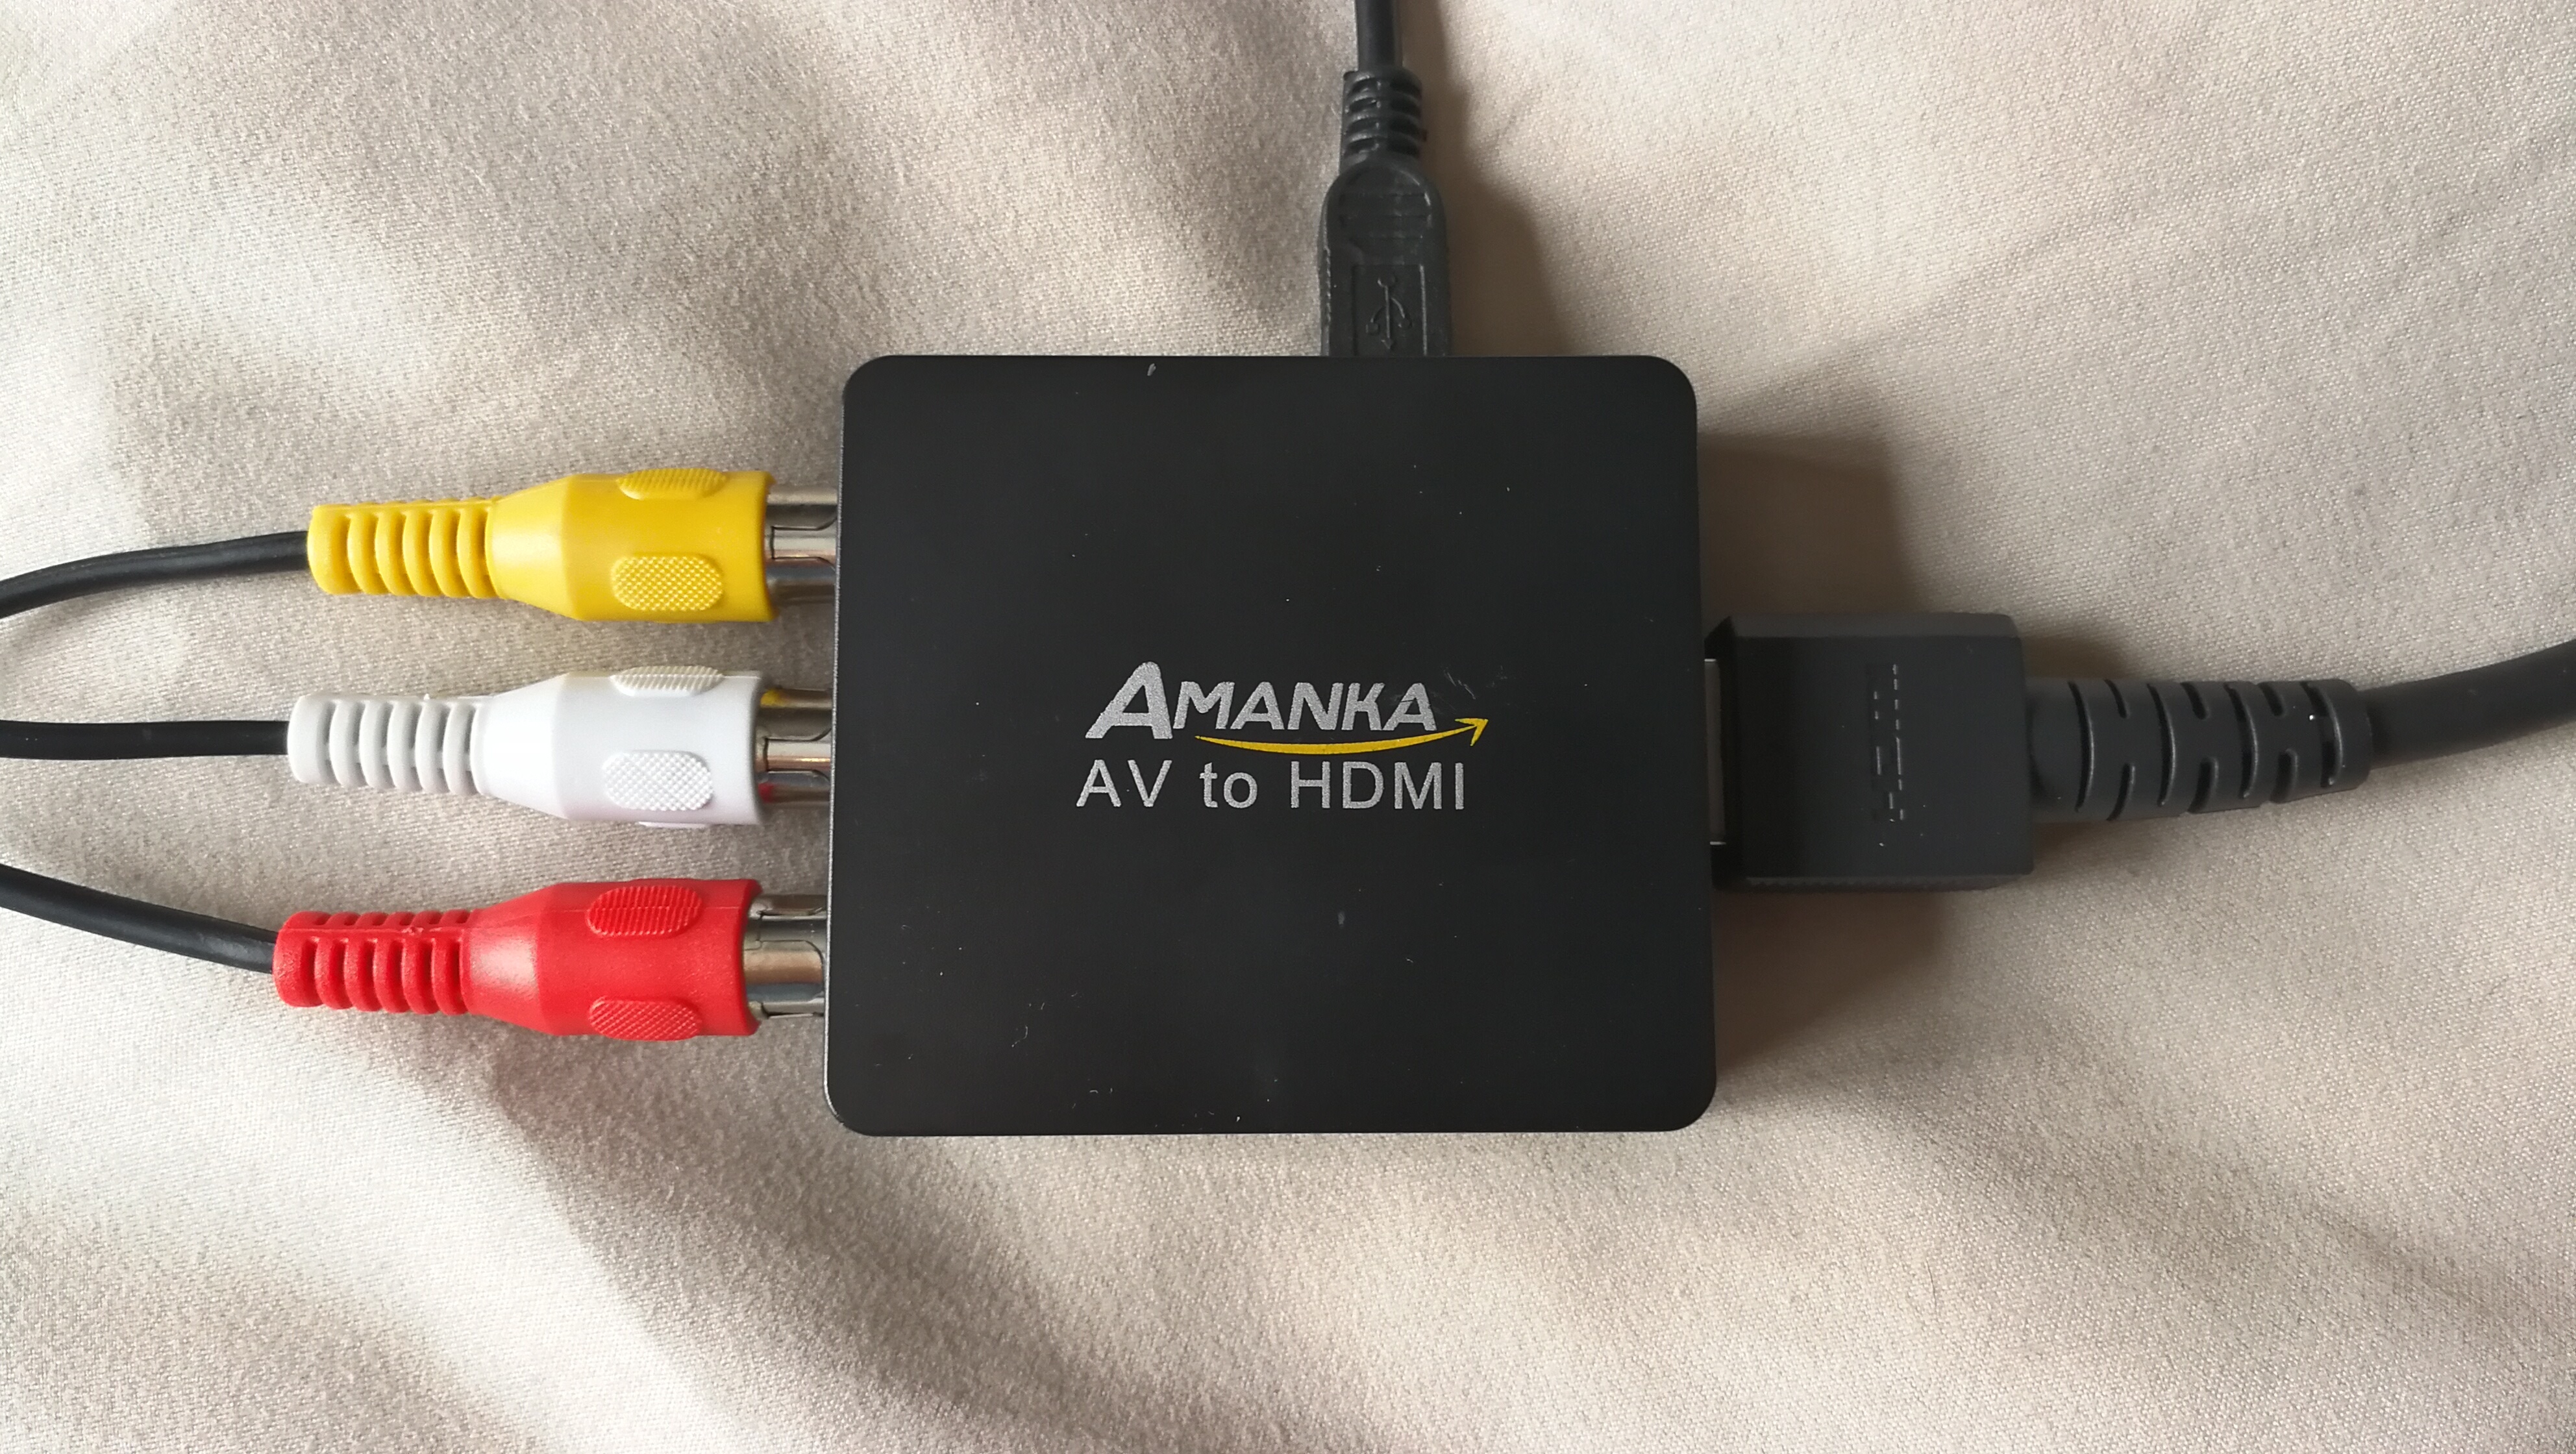
Amanka RCA Composite CVBS AV to HDMI Video Audio Converter – With power, composite video, audio and HDMI cables all connected

The Amanka box can output at both 720p and 1080p. My LCD is only 720p so I selected that option and then powered everything on. I have to admit I wasn’t overly optimistic about my chances of this working given the failure of everything else I’d already tried. However I was ecstatic when I saw that familiar blue “Commodore 64 Basic V2” screen again! The C64 sound is also passed through HDMI so it would seem to be a complete solution for both video and audio!

Commodore 64 Video over HDMI

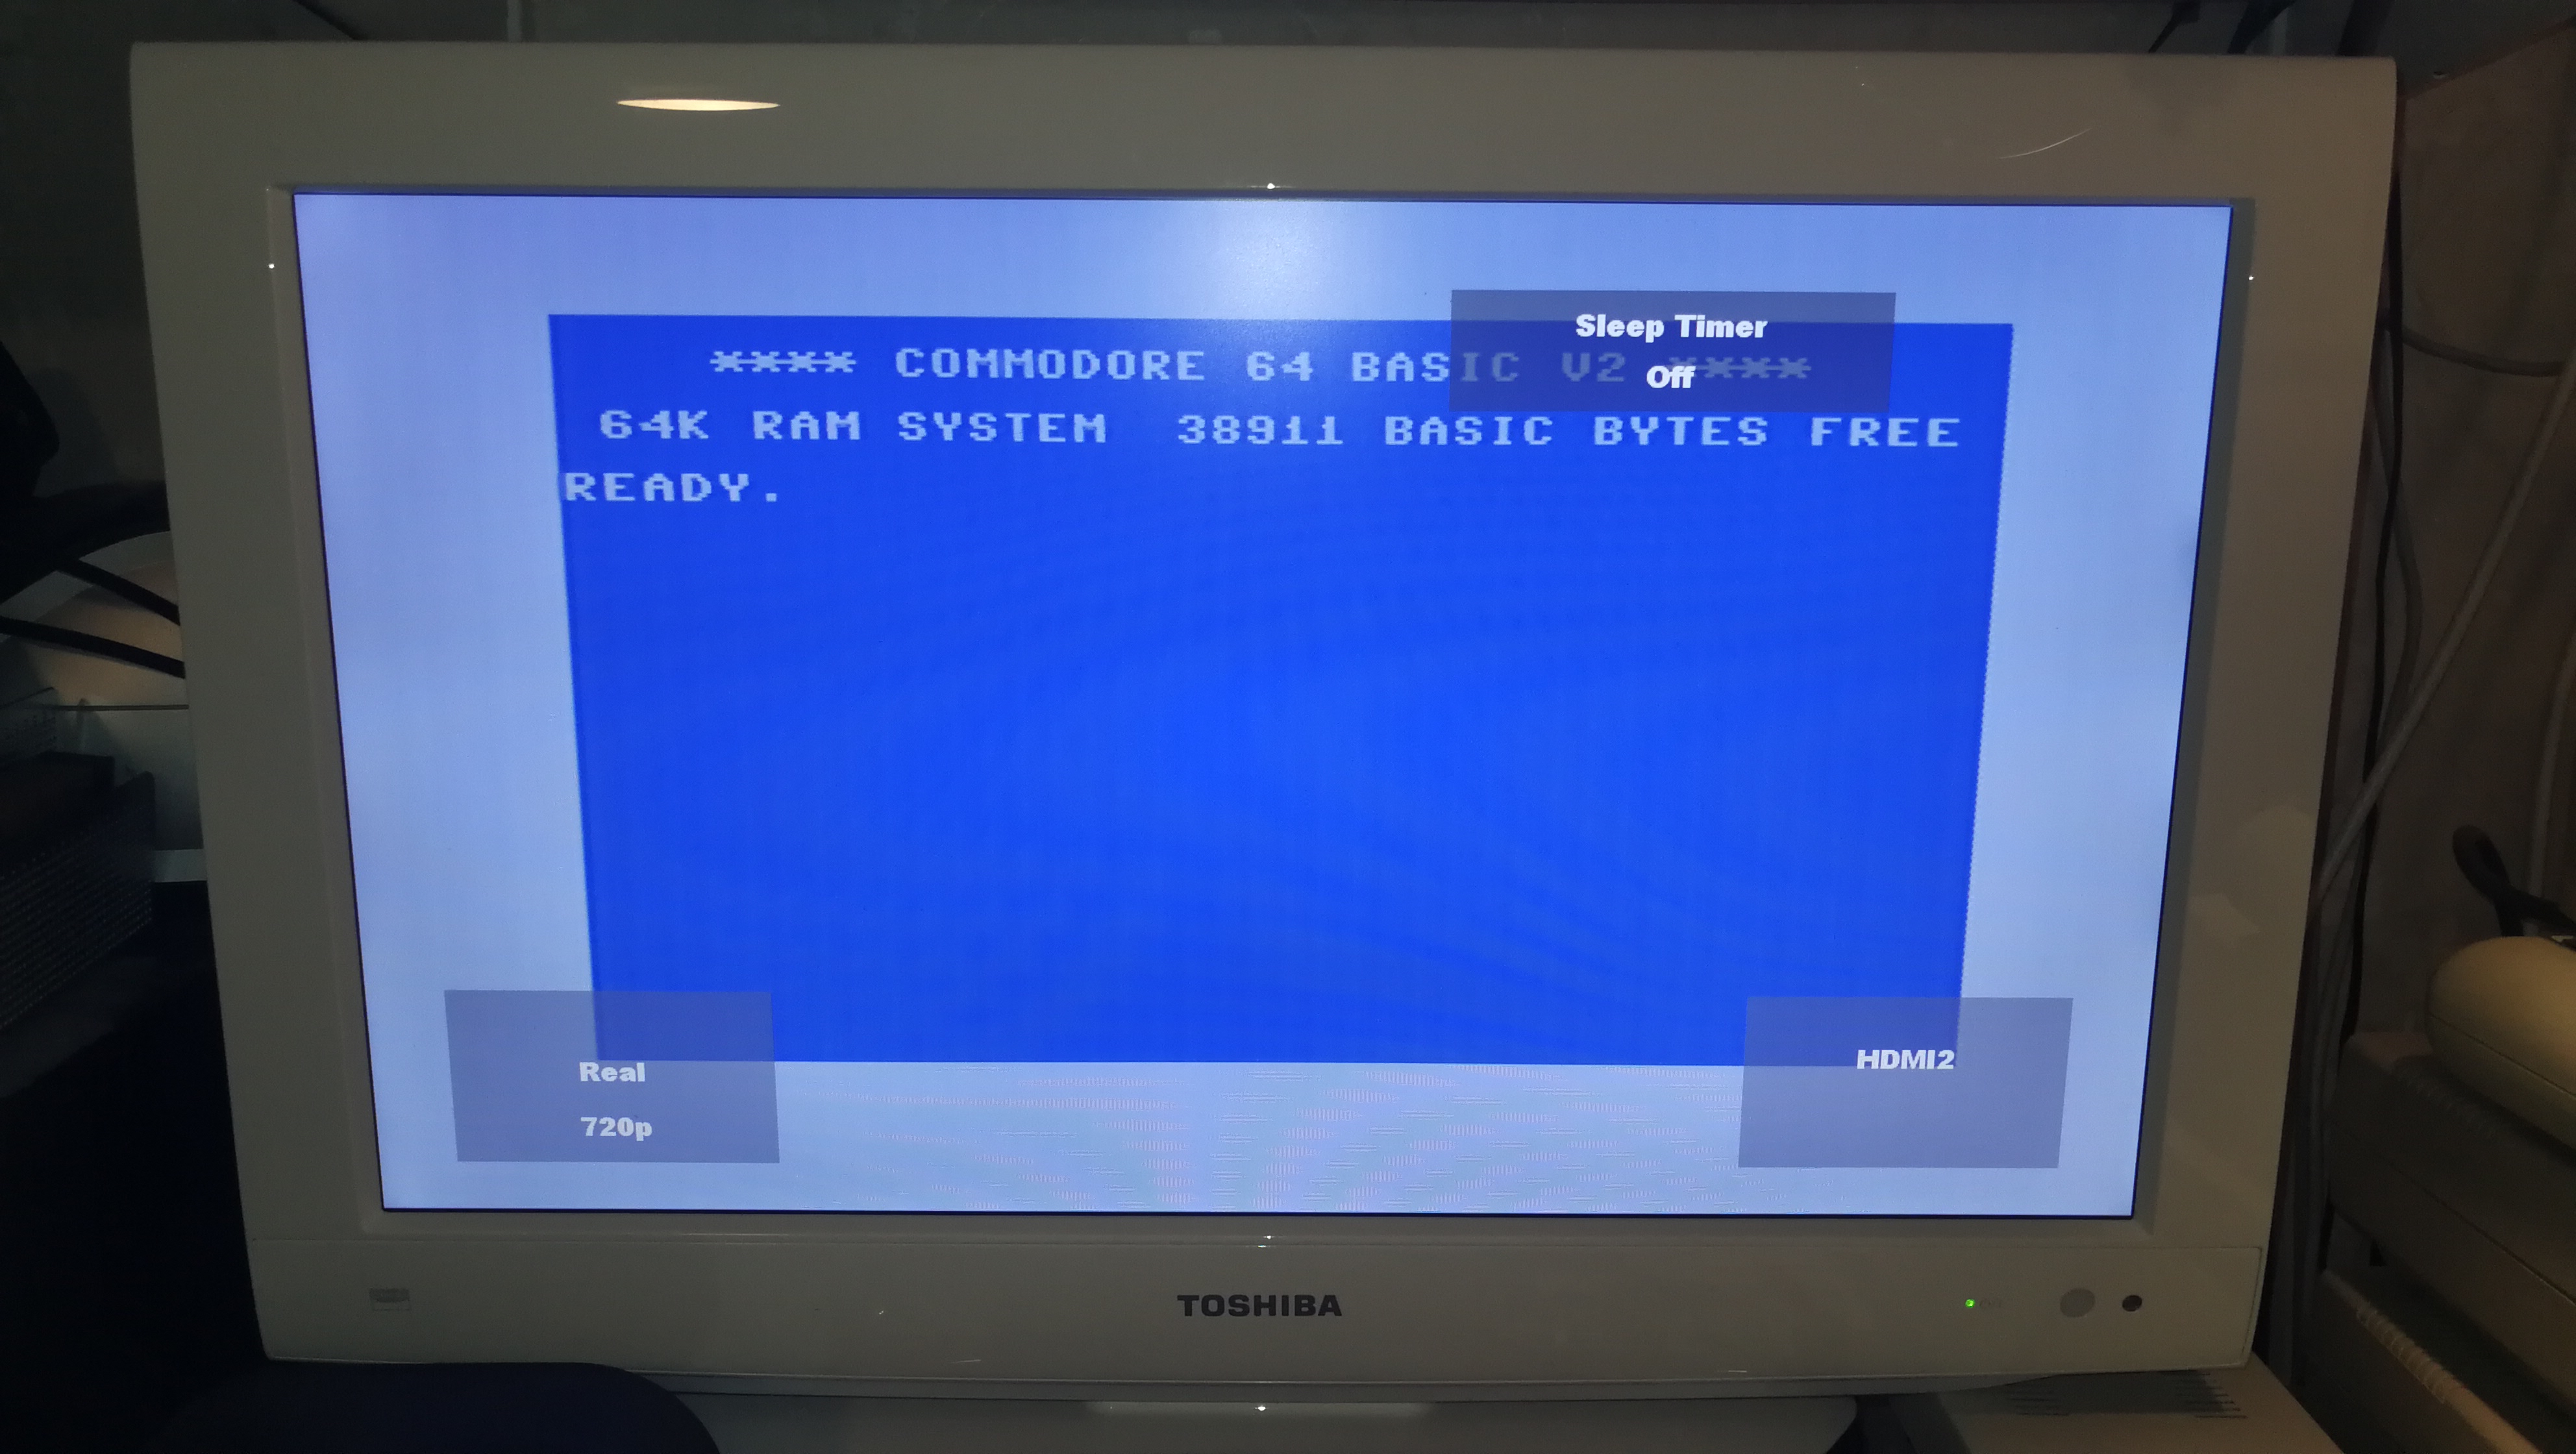
Success – Commodore 64 video over HDMI on my Toshiba 22DV714B LCD TV

So another success story – I would consider the Amanka device a permanent solution and am very pleased with both the cost and the end result.

There are are links to the exact box I bought in the article if you would like to make sure you get the same one that worked for me – I will get a few pennies to help pay for my hosting costs but you will pay the exact same price as you would if you went to Amazon to purchase one – win win! If you would like to know anything else about the above setup then just drop me a quick message and I’ll do my best to help you out.


Adding an SD Card Slot and HDMI port to an Amiga 500

SD Card Slot and HDMI port to an Amiga 500

So you may be aware that the Vampire V500 V2+ Card gives your vintage Amiga 500 both a MicroSD card slot and an HDMI port for hooking up to a modern display.  Trouble is the ports are on the board itself which is rather inconvenient if you don’t want to leave the top of your Amiga’s case off.  After doing a little research and searching around I discovered that you can get some nifty little extension cables for both ports which will allow you to ‘move’ them to the exterior of the Amiga’s case.  This post will explain how to add both an SD Card Slot and HDMI port to an Amiga 500 computer.

SD Card Slot and HDMI port to an Amiga 500

Location of the HDMI and MicroSD ports on the Vampire card. Not exactly easily accessible once the lid is back on!

Purchasing the right cables for the job

The HDMI cable was a little tricky to locate at first as there are just so many options. Once I got the search term correct I stumbled into the right cable for the job.  The cable I bought (below) was an Adafruit Panel mount HDMI Cable – 40 cm which you can pick up from Amazon.  It’s just the perfect length and almost seems tailor made for the Amiga!

SD Card Slot and HDMI port to an Amiga 500

40cm HDMI extension cable

The MicroSD slot extender was a much easier product to locate.  This Micro SD to SD Card Extension Cable I picked up from Amazon is perfect.  You will find that you can actually get both MicroSD to MicroSD and also MicroSD to SD extender cables.  I decided to chose the MicroSD to SD option as I thought it would allow a little extra flexibility in terms of what cards I can use with it.  With it I have a choice of using both regular SD cards or  MicroSD cards now with the use of a MicroSD adapter card.

SD Card Slot and HDMI port to an Amiga 500

MicroSD Extension Cable

Deciding where to locate the ports

I decided the HDMI port needed to be at the back of my A500 but that the SD card would be much more useful if it was located somewhere along the side.  There is quite a lot of free space underneath the floppy drive, ample to accommodate the HDMI socket.  However because the SD Card Slot is housed in quite a chunky plastic case there wasn’t room for it under the floppy, plus I already have my floppy boot selector switch there anyway.  So, I chose a spot that sits just under the keyboard where there is plenty of space and it’s also super convenient for me to pop cards in and out.

SD Card Slot and HDMI port to an Amiga 500

Final Cable Routes


SD Card Slot and HDMI port to an Amiga 500

HDMI Socket secured with hot glue. It ain’t pretty but it’s very secure.


SD Card Slot and HDMI port to an Amiga 500

Plenty of clearance around floppy drive


SD Card Slot and HDMI port to an Amiga 500

SD Card Slot Hot Glued in position

Creating the SD Card and HDMI cut-outs in the Amiga case and securing the new ports

The slots for both ports were cut out using a Dremel tool (if you have one you should know instinctively how to do this!). Take care to use a low speed otherwise you risk melting the plastic.  The ports themselves are held in place with some hot glue, perfect for this sort of project as it flows freely around things before setting hard.  I used a few blobs of hot glue to keep the SD extension ribbon cable out of harms way too as it’s quite fragile.  It could easily become trapped and get damaged by the A500 keyboard when it is replaced if it was left unchecked.

SD Card Slot and HDMI port to an Amiga 500

Top view of HDMI Socket with floppy drive back in place


SD Card HDMI Amiga

Finished HDMI Port


SD Card HDMI Amiga

Finished SD Card Slot with MicroSD adapter sticking out

End Result

I’m pretty pleased with the end result, with hindsight I probably should have tidied up the HDMI cut-out a little with a file as there are a few rough bits left… but it’s around the back of the case and out of sight so no biggie.  The HDMI port is rock solid and should have no problem with me plugging and unplugging a cable in and out.  Likewise the SD card slot is nice and secure and more than up to the task of dealing with regular card swaps.  Perhaps a version in white (or off-white LOL) would have been better but I just couldn’t find one for sale anywhere.

Improvements?

Only other thing I might do in future is add an RJ45 extender when the Apollo Vampire team make the Ethernet port expansion option a reality.  Although I already have Ethernet through the use of the fantastic little plipbox device this is currently hogging my parallel port so I cannot print without first unplugging it – hardly ideal.

Formatting the SD Card

Incidentally, if you’d like to know how to go about formatting your SD Card check out my post – How to Format an SD Card for Amiga to PC File Transfer.


Fitting an SD Card Slot and HDMI port to an Amiga 500.