Lyonsden Blog

Tag - audio

A C64 MP3 Player!

Given that the much more powerful 16-bit Amiga 500 is unable to play MP3’s you could be forgiven for thinking that the lowly 8-bit C64 has no chance. Well it’s time for a re-think because equipped with this nifty little C64 MP3 Player device your humble C64 can now play MP3 files without breaking a sweat!


C64 MP3

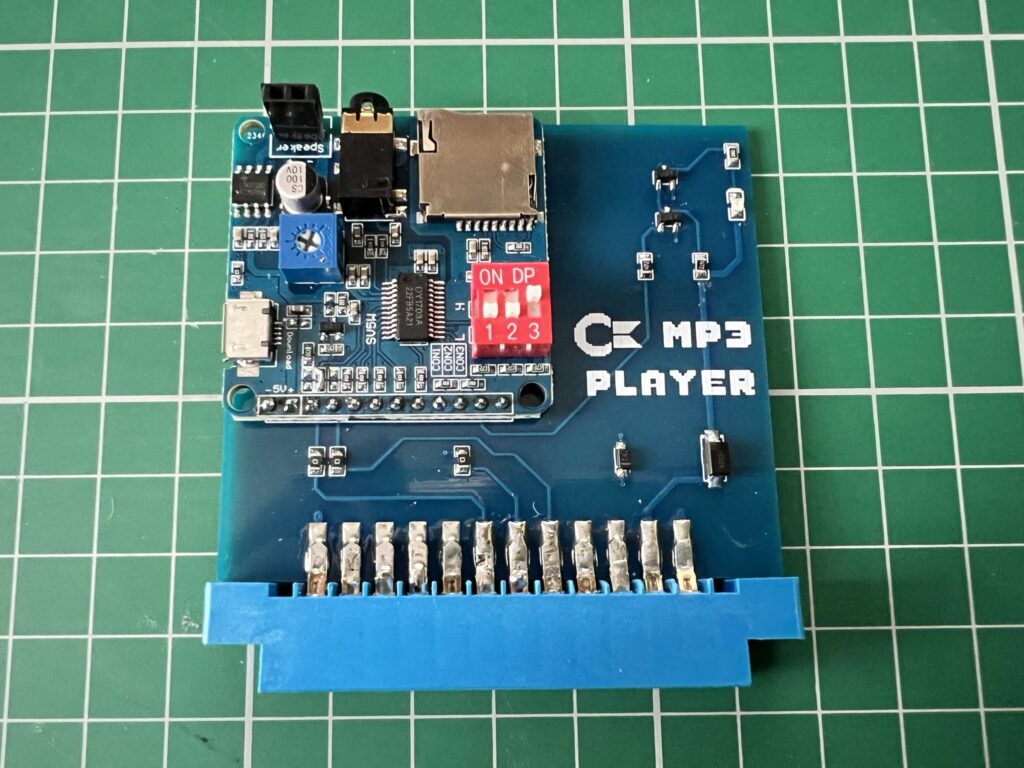
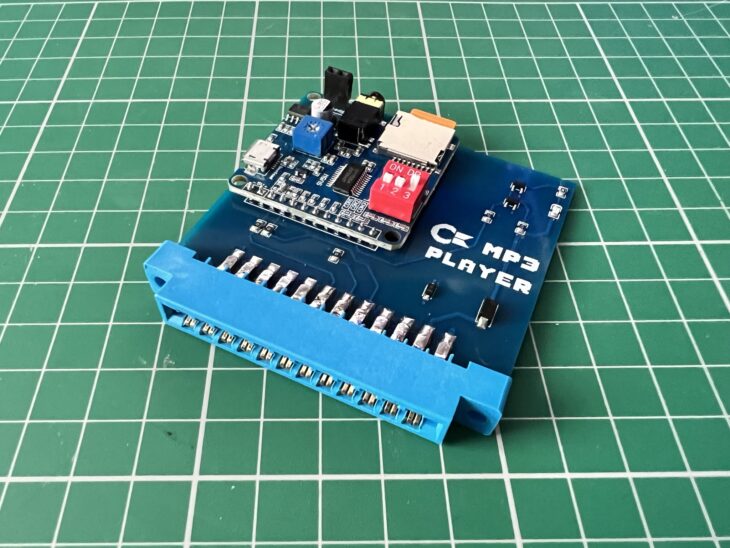
The C64 MP3 Player Top View.


This slick little device was designed and hand built by a chap called Pietro in Italy. It consists of a larger PCB, approximately 7cm x 7cm  in size with a smaller 4cm x 4cm Mp3 ‘daughterboard’ attached to it in one corner. It didn’t start out looking like this though. Pietro’s first prototype consisted of a bunch of wires and components soldered directly to a user port connector. Only once he knew it all worked did he set about designing the PCB to do the job in style.

The larger PCB links the power and control lines of the MP3 module to the corresponding connections of the C64’s user port. He also added a few extra components into the mix to enable an LED illuminate when the device is playing music.


C64 MP3

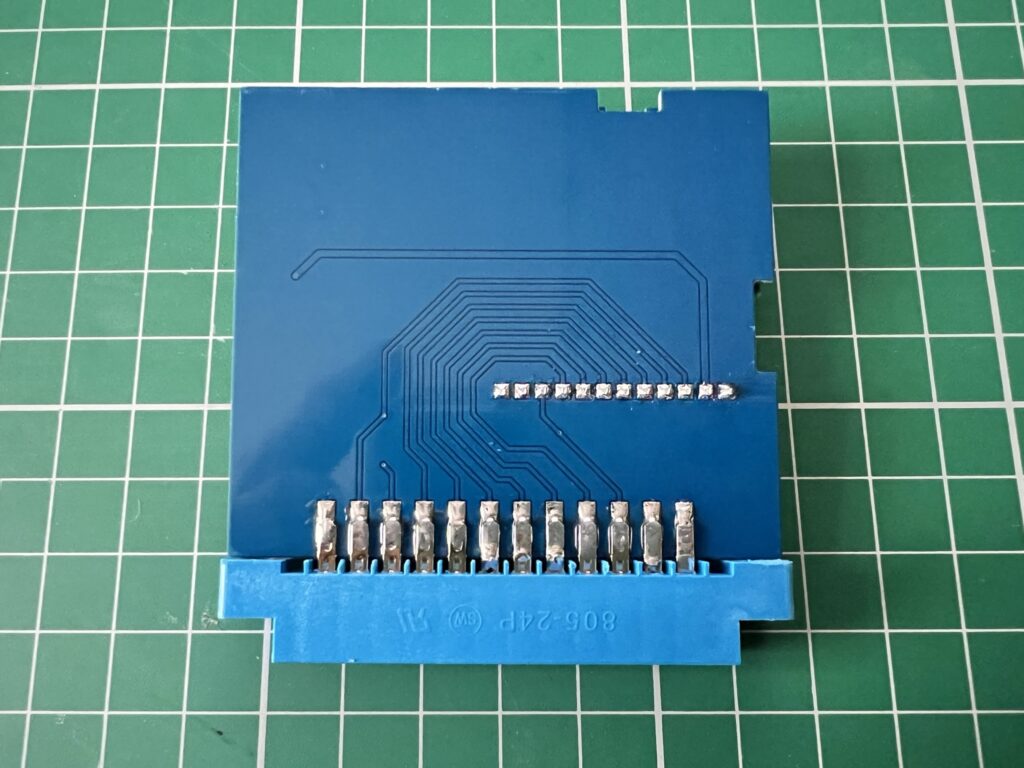
You can clearly see the tracks snaking around the board on the back of the device here.


Pietro tells me that it started out in life as an MP3 ‘voice playback’ module he picked up off AliExpress. Although the module was designed to be used with an Arduino device, after some tinkering he figured out which pins controlled things such as next/previous track, volume up/down etc. He then set about writing the software to control it in C using the CC64 compiler along with a bit of Assembly where speed was a factor.


C64 MP3

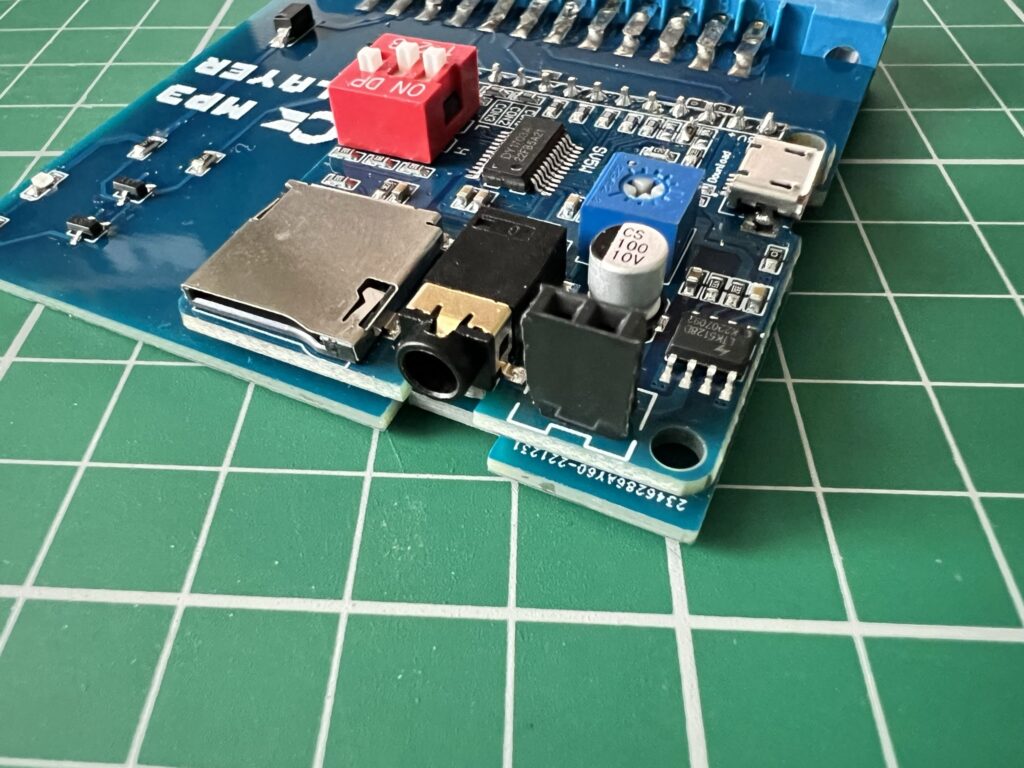
From left to right; MicroSD card slot, 3.5mm headphone jack and line out.


There’s a lot of connectivity packed onto that small daughterboard including a MicroSD card slot, 3.5mm headphone jack, line-out connection and also a Micro USB socket. You can control the output level of the line-out using a small potentiometer on the daughterboard.


C64 MP3

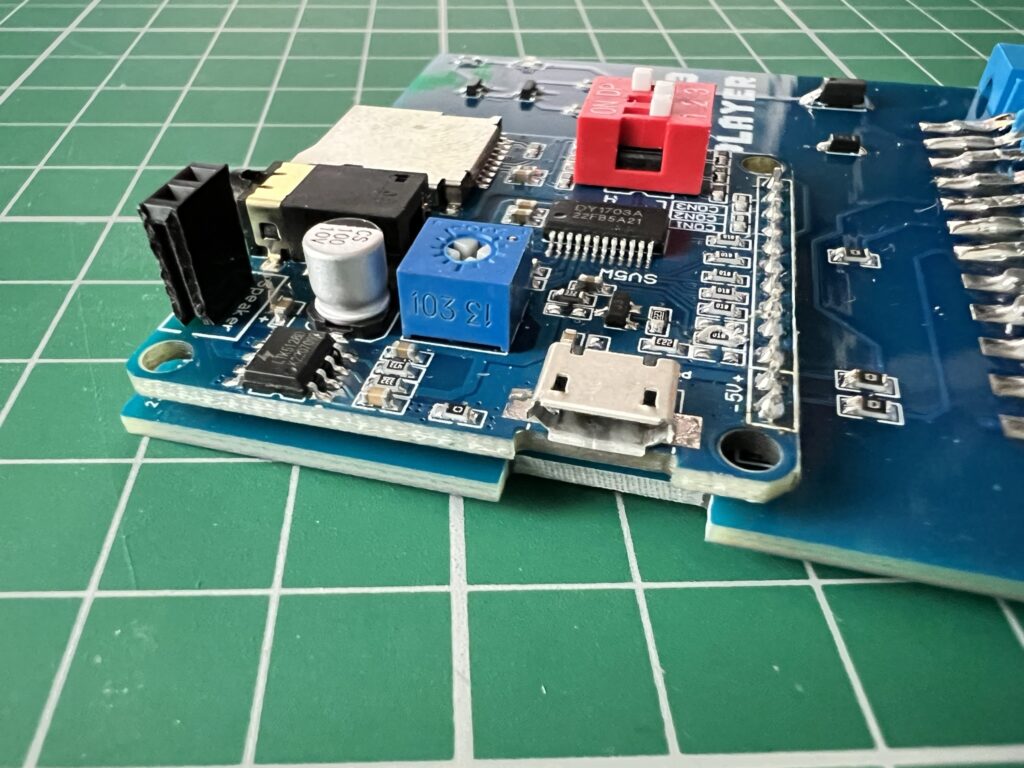
The blue cube in the centre is a potentiometer to control the line out level. Note also the Micro USB socket that allows connection to a PC.


The last thing of note to point out is the bright red DIP switch array. There are three little switches here that can be configured in different positions here according to which piece of software you want to use it with.


Lets Play Some MP3’s


The first thing to do is get some music onto a Micro SD card. It doesn’t seem to be fussy about what cards it will read so I just used a cheap one off Amazon and have had no issues with it.


C64 MP3

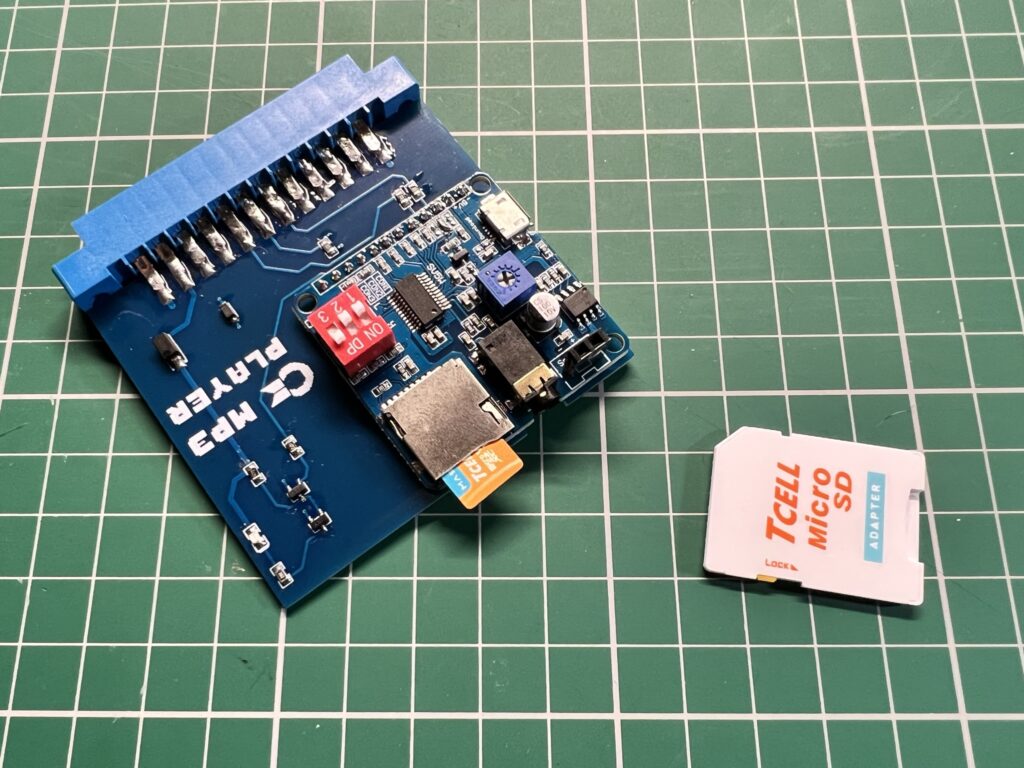
Micro SD card inserted.


To actually get music onto the device you can either pop the MicroSD card into a reader on your PC and copy it across, or alternatively, you can connect it via a Micro USB cable and it will appear on your PC as a mass storage device allowing you to copy music across that way. The device is able to play MP3’s at up to 320Kbps without issue and also lossless WAV files. However FLAC files appear to be unsupported so if you have a bunch of these you want to listen to then you’ll need to convert them over to MP3’s.


C64 MP3

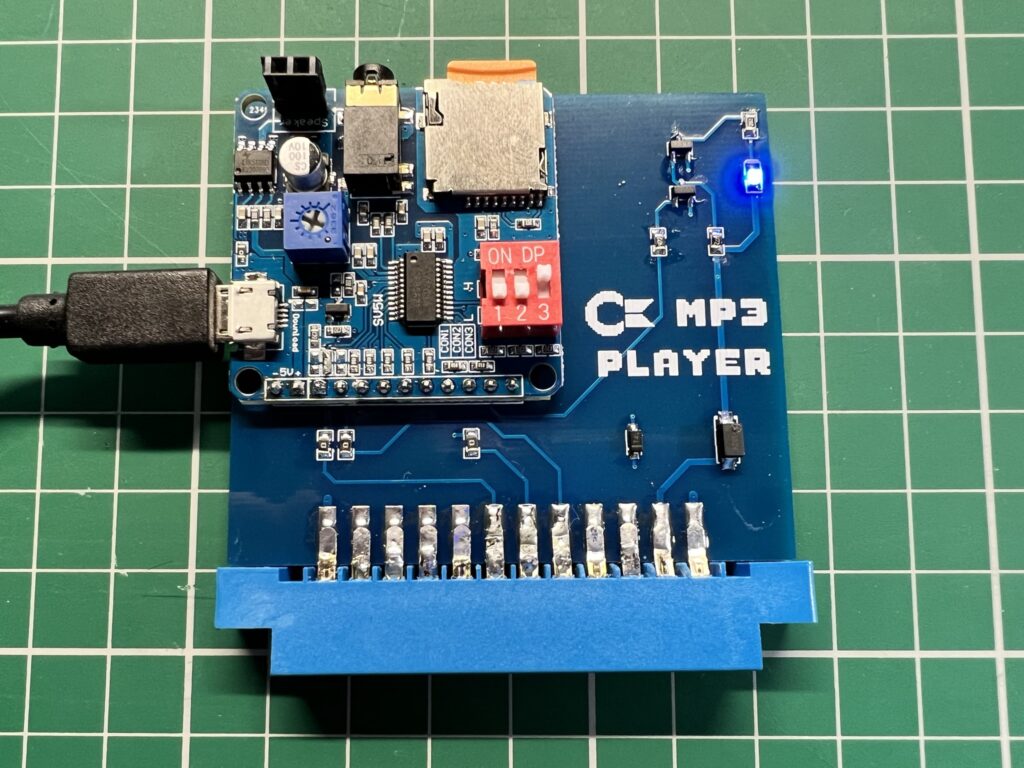
A blue LED will light up once the board is connected to a PC via USB cable.


Obviously the board must be plugged into the user port and connected to either an external powered speaker (my personal preference) via the 3.5mm headphone jack or a suitable amp via the line out but I didn’t have one available to test this side of things.


C64 MP3

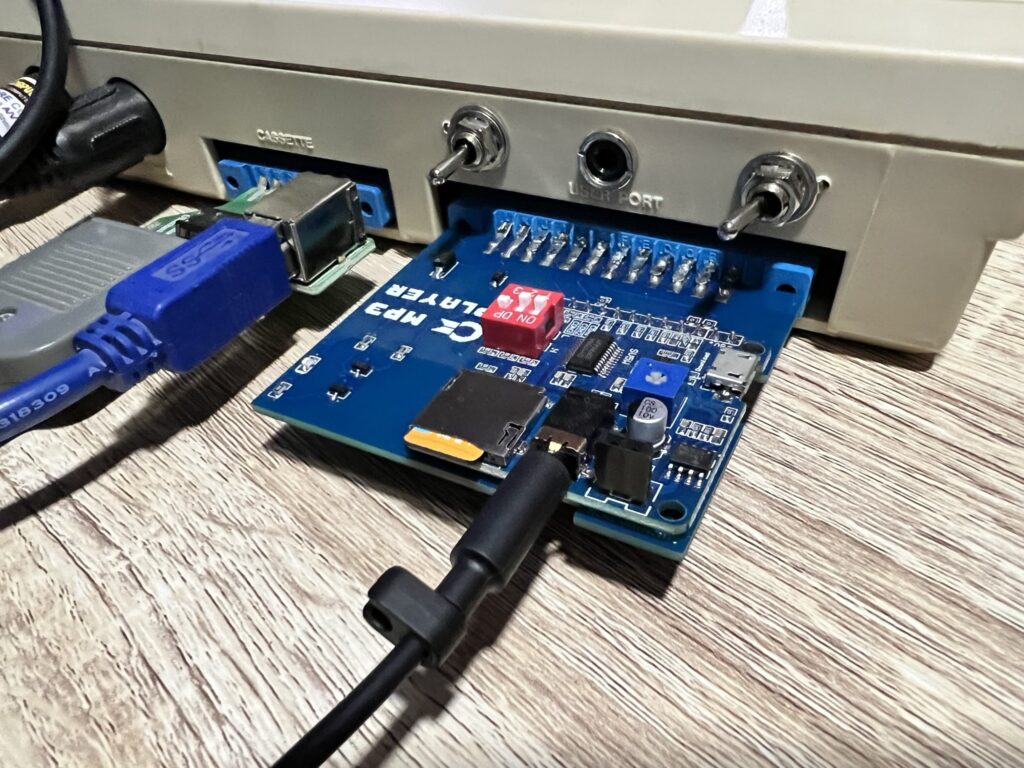
MP3 Player hooked up to the C64’s user port.


There’s a few different programs that Petro has written for the player. The “basic” program toggles the 8 pins to select a track number from 1 to 255 whereas the “one” version as he calls it uses the One-Line interface from which you can also change the volume, EQ setting and more. Naturally as the second one offers the most features it’s the version I opted to use.

Once the software has loaded (only takes a couple of seconds) you are presented with a screen reminding you about which mode the program is using and how to set the DIP switches. Assuming they’re in the correct position simply hit ‘return’ to continue. If the switches are set wrongly then you must do as it suggests and turn off the computer and move them into the correct positions before trying again.


C64 MP3 Player

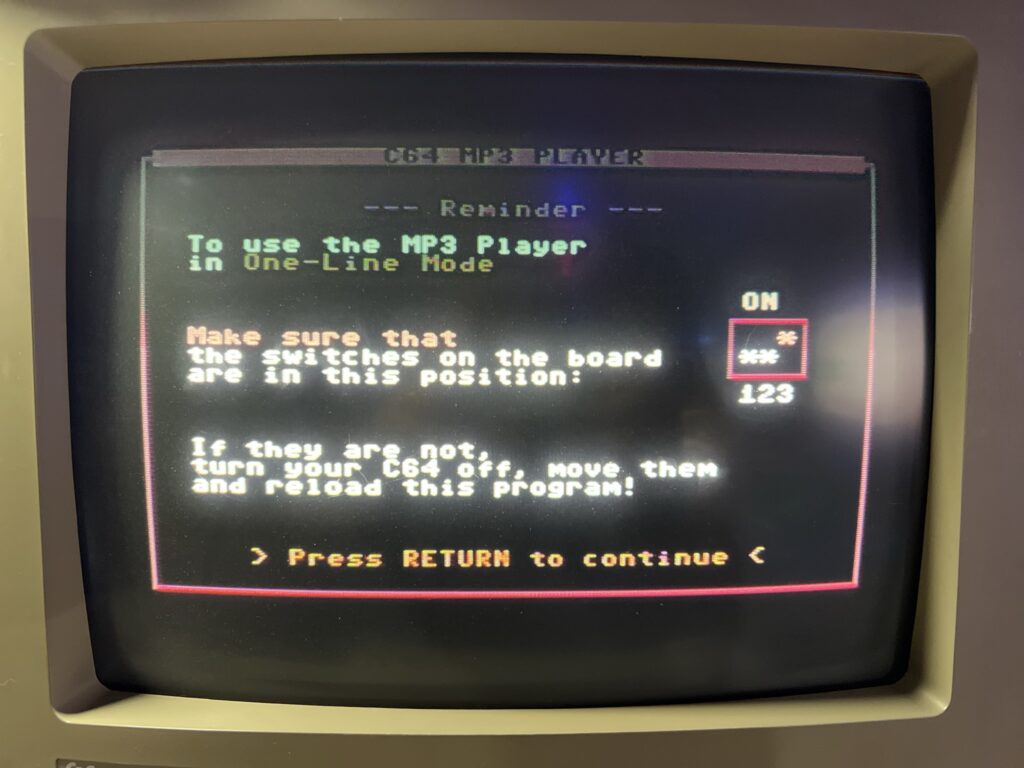
Checking the DIP switches are correctly set.


Sadly file/track names are not supported here so you must know the number of the track you want to play. If there was one feature I’d like to see in a future version, track names would be it!


C64 MP3 Player

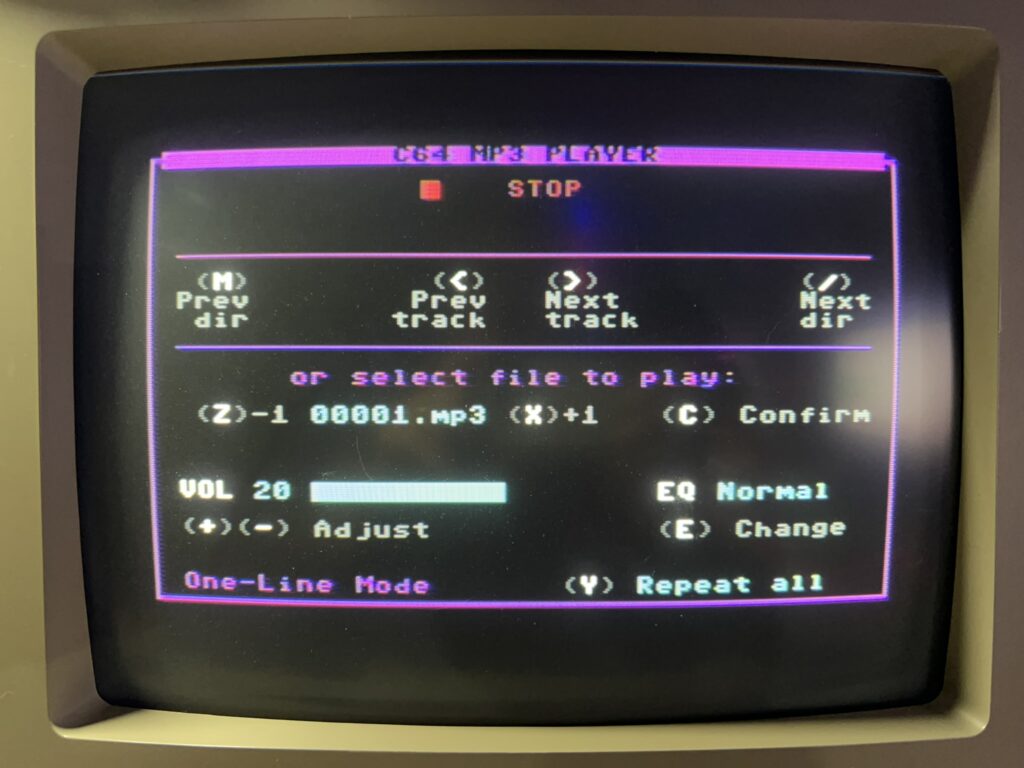
The MP3 Player Interface.


The main program screen provides pretty much all of the features you would expect from an MP3 player. You can start, pause and stop a track, skip back and forth and navigate through directories too as these are also supported. There’s a full repertoire of extra functions, such as repeating a single track, repeating all tracks or repeating everything within a directory.  Random track play is also supported in a similar way. If you know which track number you wish to play you can skip straight to it using the ‘select file’ option.

The player software also includes an Equalizer that really has a dramatic effect on the sound playback. The choices provided are; ‘Normal’, ‘Pop’, ‘Rock’, ‘Jazz’ and ‘Classic’. Finally you can control the volume in 30 increments using the +/- keys.


Final Thoughts and Availability

This really is an amazing and fun little device that adds yet another string to the C64’s already impressive entertainment bow. The quality of music playback is terrific and provided you keep a little printout of what files are on the card handy, navigating around your collection is fairly straightforward. The one caveat I must point out though is that you do need a powered speaker or headphones with a suitable pre-amp to listen to it. This is because the device itself lacks an amplifier of it’s own so although you can plug headphones directly into it, the sound you’ll experience is quiet and tinny.


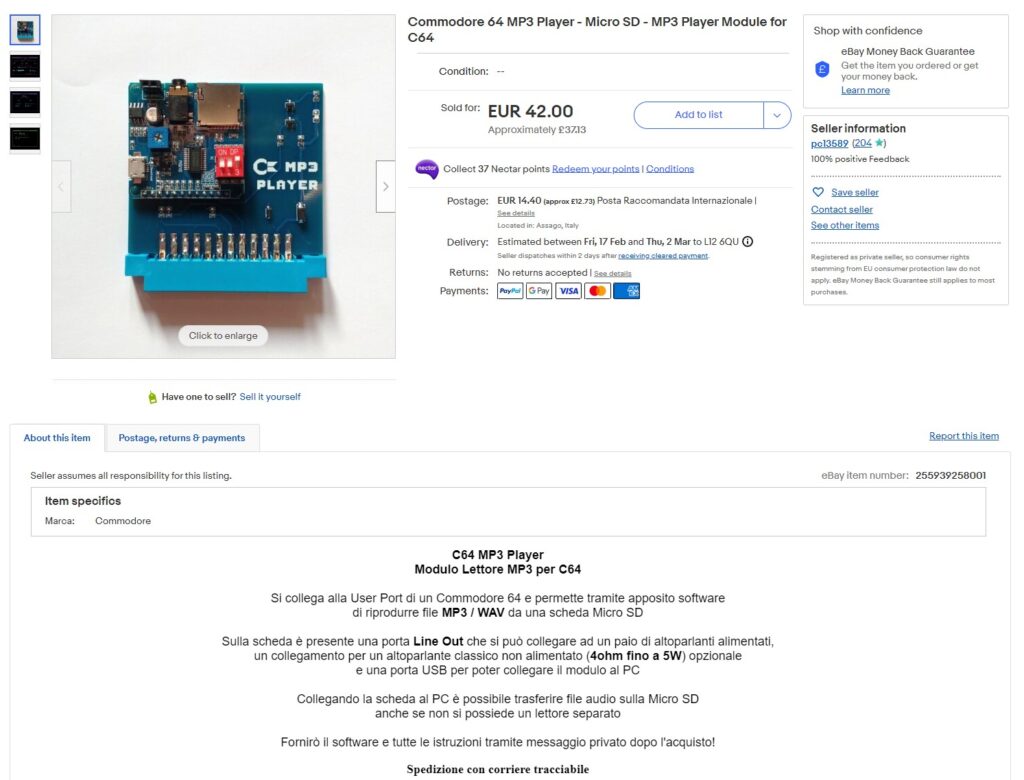
The Original eBay auction advert for the MP3 Player.


Unfortunately Pietro informed me he only made a handful of these devices for fun so doesn’t have any more of them available for sale right now. However he says he’s totally open to the idea of making more if the demand is there so if you fancy one of these for yourself get in touch with him over at his eBay store and let him know!

Adding Bluetooth Audio to a Range Rover Sport Mk1

Ranger Rover Sport Bluetooth Audio

If, like me, you were disappointed to discover that your beautiful, highly specc’d Range Rover Sport Mk1 did not come equipped with Bluetooth Audio then I have a solution for you that will cost less than £20. Once you’ve got hold of the kit the whole job should only take you about 5 minutes.


range-rover-sport-mk1

Mk1 Range Rover Sport


What you need to buy…

The first thing you need to purchase is a USB car charger adaptor for your rear cigarette lighter socket. The more slimline the better, I used this one which works really well. In fact I’ve got one of these in my front power socket too!

Next you need purchase yourself this little gadget from Amazon which is a bluetooth audio receiver and will convert your bluetooth audio back into good old analogue for your Range Rover sound system to play.

UPDATE: You may want to check out a new, alternative Bluetooth option I recently discovered at the end of this article as it offer a few advantages, albeit at extra cost.


Once the above gizmos have arrived follow the super-easy instructions below to enjoy wireless music playing in your car.


Bluetooth Adaptor

Bluetooth Adaptor connected to Aux rear aux socket


Installation…

First off you need to plug the USB adaptor into the rear passengers power socket (it hides underneath a flap on the centre armrest). Now plug the Bluetooth receiver into that USB adaptor . Finally you need to plug one end of the (supplied) auxiliary audio cable into the socket on the end of the Bluetooth adaptor. Plug the other end into the aux socket on the back of the centre armrest, located just to the left of the power socket. That’s it for the hardware side of things, the next step is configuring your phone.


Android Bluetooth Screen

Screenshot showing Bluetooth adaptor paired.


The next stage of the install requires your backside in the drivers seat and turning on the ignition. Get your phone out and go to the ‘Add Bluetooth devices’ part of the phone settings. I have tested this with both an Android Marshmallow Galaxy S7 and an Android Nougat Huawei Mate 9 with no issues, although the settings on all phones will probably look a little different. (UPDATE: Have also tested with Android Oreo and Pie and on two more devices; a Huawei P20 Pro and a Huawei Mate 20 X). I see no reason why this wouldn’t work for an iPhone/iPod but I don’t have access to any Apple stuff so can’t guarantee it. I’d be very surprised if you had an issue though.

Once you have got to the ‘add Bluetooth devices’ screen, make sure your bluetooth is turned on and wait for the device ‘BTR003’ to appear. This is the bluetooth adaptor – add it as a paired device (there is no pairing code) for ‘Media Audio’ ONLY and you should be good to go. Turn on your Range Rover sound system and select AUX as the input and play some music on your phone and it should come through loud and clear! I find the AUX input a little on the quiet side compared to the CD and Radio but you can easily compensate by turning the volume up on your phone and/or the sound system itself.

Every time you get in your car and turn on the ignition your phone will automatically pair with the bluetooth adaptor so you should never have to mess with the settings again – it’ll just work. Your phone will still work for bluetooth handsfree calling through the car phone as that uses a separate ‘Call Audio’ bluetooth connection.


Aux Input

Range Rover Stereo Aux Input


Have fun and if you find a better way to do this or have any questions please contact me!

I know it’s not a perfect solution as the adaptor does stick out a few cm and if you have kids in the back it may not last long… but as it’s just me and the wife in our car I’ve not had a problem so far…

UPDATE: May 2019

OK so I wrote this article a few years ago now and the above solution has continued to work well for me. I’ve changed phones a few times since then (I currently have a Huawei Mate 20 x) and it worked with each and every one of them. However recently I had my hyperactive grandson in the back and he managed to kick the bluetooth adaptor and snap it off so I needed to buy a new one. Happily Amazon still sell the exact same device I bought originally… however I also spotted one that looked like it would be even better so I thought I would give it a try. It’s not as cheap as the Justop device but in the grand scheme it’s not very expensive either.

It’s called the ‘Firefly’ and it is claimed to be ‘The Worlds Smallest Bluetooth Receiver’. Not sure about that claim but what I do like about it is that the aux cable is actually built into the device. Not only does this make the whole thing look at lot neater when installed but it doesn’t protrude as far out making it  less likely to be knocked by passengers. It comes in a range of different colours too (Black, Red & Gold) but I chose black to match the interior of my car.


This slideshow requires JavaScript.


When you first plug the Firefly Bluetooth Adaptor into the USB power adaptor in your car the tip will flash white signifying that it is in pairing mode. The setup process is exactly the same as described above for the Justop except you need to look out for ‘Tunai Firefly’ in your bluetooth devices. It should pair straight away once selected (no code is required) and the flashing white LED on the tip will become solid white to show that it has paired successfully.


Firefly Bluetooth Pairing

Here you can see the ‘Tunai Firefly’ paired with my Mate 20 X as a media audio device.


In use I have found the Firefly to perform superbly, just like the Justop. My phone pairs with it quickly and automatically every time I get in the car and it looks terrific too.


This slideshow requires JavaScript.


As you can see from the above photos, the Firefly Bluetooth adaptor is definitely a neater, more compact solution. Only time will tell if it proves to avoid damage better than the Justop device though. I also noticed one unexpected improvement over the Justop – the audio is louder! I no longer have to crank the volume up louder than usual which is a nice bonus.

Overall I think the Firefly Bluetooth adaptor is worth the extra money as it looks neater and more professional. It also doesn’t protrude into the back of the car as much and it seems to output audio at a higher volume. The Justop is still a great solution and is hard to beat for the price – it’s also more ‘expendable’ if it does get kicked due to it’s cheaper price.

Whichever option you choose, rest assured that both devices will do the job. I just thought I’d update the article with my new findings in case it proves useful for someone.